Introduction / Hook
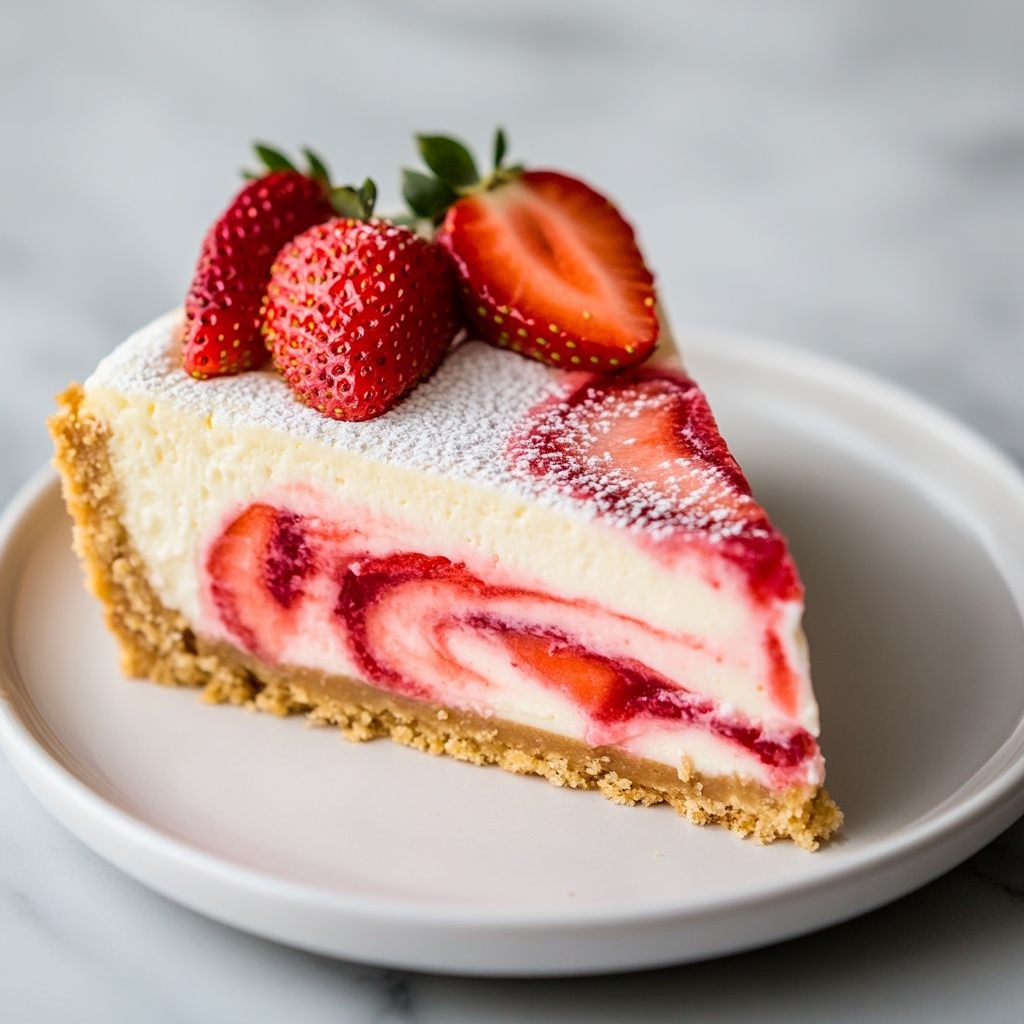
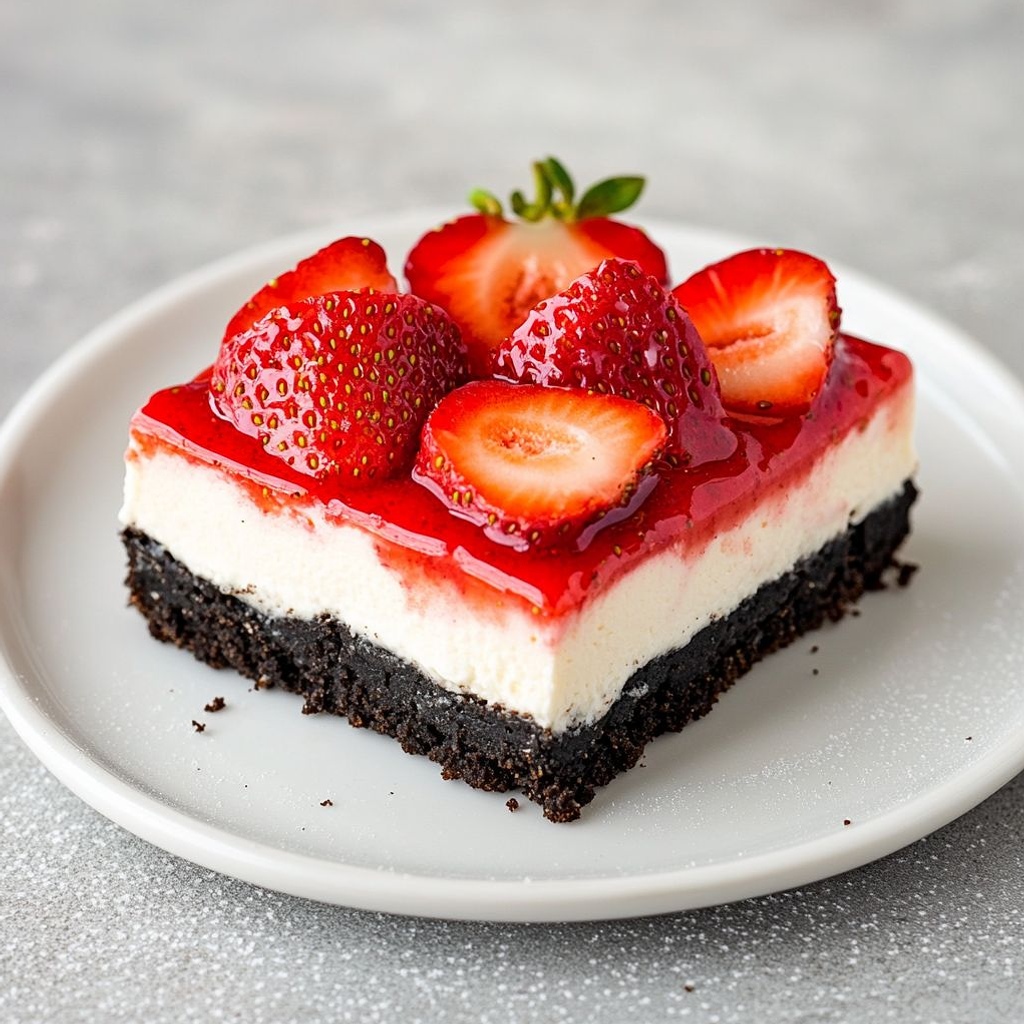
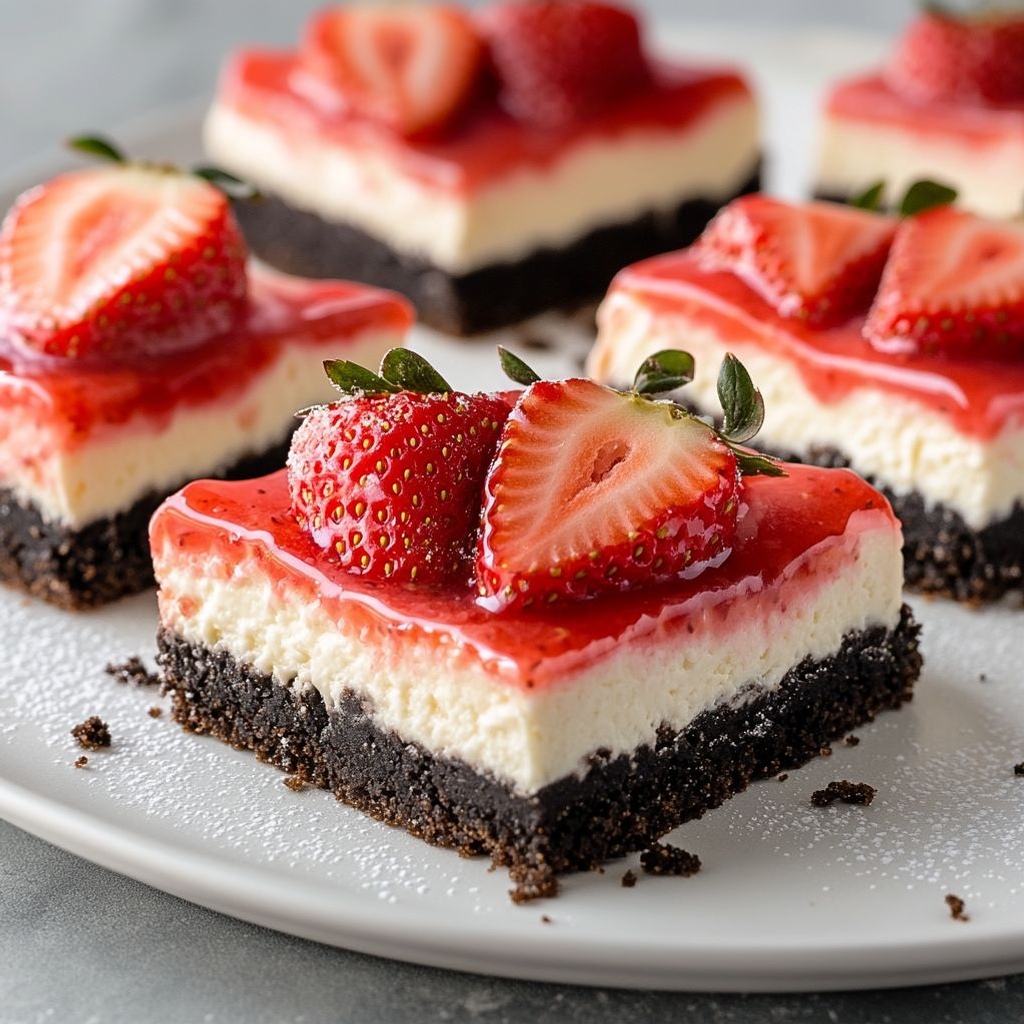
Immagina una dolce tentazione che si scioglie lentamente in bocca, dove la croccantezza scura dell’Oreo incontra la lucentezza cremosa di una cheesecake vellutata, e dove una vibrante freschezza di fragole danza all’aria aperta di un’estate italiana. Barrette cheesecake Oreo alle fragole è quel tipo di dessert che conquista subito: una presentazione elegante a barre che si tagliano facilmente, perfette per rinfrescare le serate, allietare i pranzi di festa o accompagnare un caffè al pomeriggio. Ogni morso è un viaggio sensoriale. La base, robusta e leggermente croccante, si presenta come una fonduta di cacao che mette in risalto la dolcezza lattiginosa del ripieno. Le fragole, fresche o ridotte in una salsa leggera, regalano un tocco fruttato che contrasta con la crema al formaggio, creando un equilibrio irresistibile tra comfort e sorpresa. Questo dessert è una dichiarazione di semplicità ed eleganza: non servono presentazioni elaborate, basta una teglia ben preparata, una finitura lucida e una nota di freschezza che rimane impressa nella memoria di chi assaggia.
Barrette cheesecake Oreo alle fragole non è solo una ricetta: è un piccolo momento di pura gioia condivisa. È un modo per celebrare la stagione delle fragole senza complicazioni, ma con una cura artigianale che fa sentire chi cucina come se stesse offrendo un abbraccio. La magia sta nella sincerità dei sapori: cioccolato e crema che si fondono, fragole che brillano, e una consistenza che convince anche i palati più esigenti. Se vuoi sorprendere amici e familiari con qualcosa di classico ma contemporaneo, questa è la scelta giusta. È una ricetta che parla di convivialità, di tavolate che si allungano, di risate che riempiono la casa, e di momenti in cui un dessert diventa ricordo. Quando prepari questa barretta, stai narrando una piccola storia di comfort food aggiornata per il presente, una storia che si racconta senza parlare troppo: basta assaggiarla.
The Story Behind the Dish
La combinazione di Oreo e fragole nasce dall’incontro tra due universi golosi: l’iconica dolcezza al cacao degli Oreo, amata in tutto il mondo, e la freschezza pungente delle fragole, simbolo di stagione e di convivialità nei paesi mediterranei. In molte cucine, i biscotti al cacao diventano la base di crostate, cheesecake e barre dessert che viaggiano tra tradizione e innovazione. L’idea di trasformare questa combinazione in “barrette” nasce dalla voglia di creare qualcosa di pratico da tagliare e servire in ogni occasione: una piccola porzione di torta, ma realizzata in formato da condividere, più comodo da trasportare e da gustare in movimento. Le barrette hanno una storia di viaggio: portano con sé la praticità delle merende fatte in casa ma con un tocco di eleganza, come se ogni fetta contenesse un piccolo segreto di festa.
In molte culture, la cheesecake è diventata un simbolo di hospitalità. Il formaggio morbido, la vaniglia, lo zucchero e una leggera nota di limone creano una crema che si abbina perfettamente a una base solida. Quando si aggiungono le fragole, si accende una memoria sensoriale: il profumo fruttato che invade la cucina, la luce rossa delle fragole tagliate e quel gusto aspro-dolce che equilibria la dolcezza della crema. Trasformare questo mix in barre rende il tutto ancora più accessibile: è possibile prepararlo in anticipo, conservarlo in frigo, e servire porzioni perfette che mantengono la loro forma e consistenza. È una storia di audacia moderata: non servono troppe stranezze culinarie, ma una chiara idea di sapore e texture che si completano a vicenda, giorno dopo giorno.
Nella tradizione italiana, i dessert spesso si raccontano come momenti di condivisione: una tavola imbandita, una famiglia riunita, una risata che nasce intorno a una fetta da gustare. Questa ricetta incarna quel sentimento, offrendo una versione moderna e accessibile di un classico americano. Non è una ricetta “alla lettera”: è un invito a personalizzare, a giocare con le fragole di stagione, a scegliere creme più o meno dense, a sperimentare con piccole varianti che regalano nuove sfumature. Così nasce Barrette cheesecake Oreo alle fragole: una piccola storia di gusto, pronta a essere scritta dal tuo palato, con la tua firma.
Why You’ll Love This Recipe
- Preparazione pratica: una base di Oreo croccante, una crema setosa e un soffio di fragola che completa il quadro, tutto in barre facilmente tagliabili.
- Versatilità: si presta a versioni no-bake o leggermente cotte, a seconda del tempo e della preferenza per la texture. Puoi adattarla alle stagioni e agli ingredienti disponibili.
- Bilancio di sapori: l’amaro-delicato del cacao delle Biscotti Oreo si confronta con la dolcezza cremosa del formaggio e la brillante acidità delle fragole, creando un equilibrio che soddisfa sia chi ama i profumi intensi sia chi cerca leggerezza.
- Texture coinvolgente: croccantezza iniziale, crema vellutata e un tocco di succo di fragola che rende ogni morso curioso e stimolante.
- Condivisione facilitata: le barre si preparano in anticipo, si conservano facilmente e si tagliano in porzioni uniformi, perfette per feste, pic-nic e merende da portare a scuola o in ufficio.
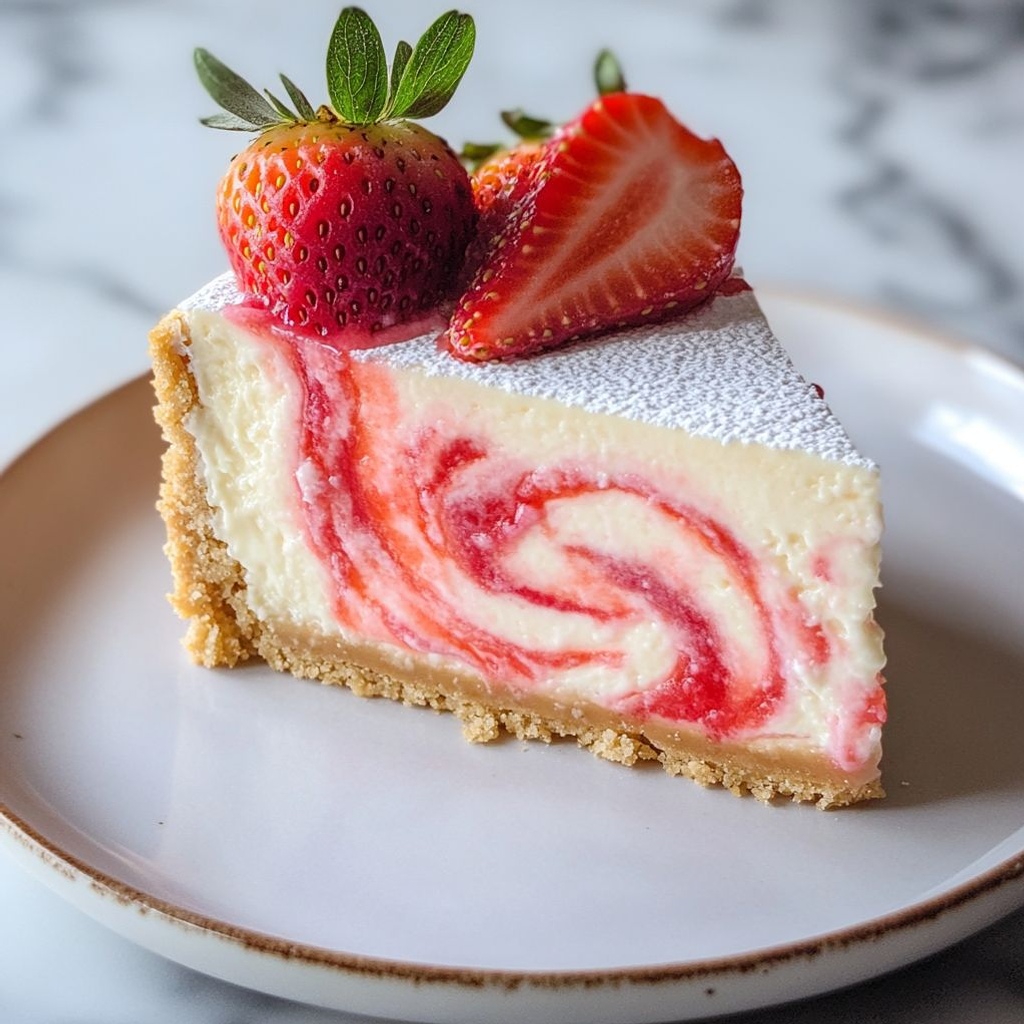
- Estetica invitante: la striatura di fragole e la lucentezza del rivestimento creano un dessert che è quasi troppo bello per essere mangiato, ma troppo buono per resistere.
- Adattabilità dietetica: è possibile realizzare versioni vegetariane o vegane con alternative al formaggio cremoso e al rivestimento, mantenendo sempre la sensazione di una barretta indulgente.
Flavor Profile & Texture
Il sapore di Barrette cheesecake Oreo alle fragole è una sinfonia ben bilanciata. La base di Oreo, con il suo sapore di cioccolato e burro, offre una nota di cacao ricca ma non troppo amara, che funge da fondazione stabile per tutto il resto. La crema al formaggio aggiunge una dolcezza morbida e una leggera acidità che pulisce il palato ad ogni morso, impedendo che la dolcezza diventi stucchevole. Le fragole, a seconda della stagione, possono essere sul campo o presentarsi come una delicata coulis: entrambe le varianti introducono una brillante freschezza, una leggera nota acida che equilibra la crema e lascia una sensazione di pulizia dopo ogni pezzo. Testurali giocose: la prima crunchera dell’Oreo, la seducente creaminess della crema e il succo delle fragole che si scioglie in bocca, creando un finale morbido ma mai svanito. Nel retrogusto, una lieve vaniglia e una traccia di limone donano una luminosità che invita al prossimo morso.
In termini di consistenze, la barretta offre una progressione: la crosta si rompe facilmente sotto la lama, rilasciando un profumo invitante; poi la crema si aggiusta, dando una densità vellutata che resta stabile una volta tagliata; infine, le fragole o la loro salsa lasciano una nota fresca e leggermente aspra che allontana la sonnolenza zuccherina tipica di dessert molto dolci.
Occasions & Pairings
Queste barrette sono perfette in molte occasioni. Una tavola di dessert per feste estive, un post pranzo domenicale in famiglia, una merenda elegante da servire a un tea party, o un dolce di fine cena per una cena tra amici. La loro forma a barre le rende facili da afferrare tra una chiacchiera e l’altra, senza dover utilizzare piatti e posate elaborate. Inoltre, si sposano con una serie di abbinamenti che valorizzano il profilo di sapore:
- Bevande: Moscato d’Asti leggero, spumante brut, rosé fruttato o un tè freddo al limone con una spruzzata di menta fresca.
- Contorni: una pallina di gelato alla vaniglia o alla crema, fragole fresche a fettine, una leggera spolverata di scorza di limone.
- Altri dessert: una nuvola di panna montata leggera o una quenelle di yogurt greco dolcificato leggermente per un contrasto fresco.
- Occasioni speciali: matrimoni, anniversari, o cene a tema estivo che richiedono un dessert che sia al tempo stesso chic e pratico.
Tips, Variations & Substitutions
La bellezza di Barrette cheesecake Oreo alle fragole risiede anche nella possibilità di personalizzazione. Ecco alcune idee utili per adattarla ai gusti, alle esigenze alimentari e alle occasioni:
Tips per la preparazione
- Premi la base di Oreo in modo uniforme sul fondo della teglia: una pressione costante aiuterà a ottenere una barretta che si taglia facilmente e resta compatta.
- Lascia raffreddare completamente la crema prima di versarla sulla base: una crema troppo calda può sciogliere la base e compromettere la consistenza finale.
- Per una finitura lucida, puoi preparare una gelatina di fragola da stendere sottilmente sulla superficie una volta rassata, creando un aspetto professionale e un ulteriore tocco di brillantezza.
Varianti senza glutine, vegane o light
- Gluten-free: usa Oreo senza glutine o altre marche di biscotti al cacao senza glutine per la base. Assicurati che la crema contenga burro o olio certificato senza glutine.
- Vegane: sostituisci il formaggio cremoso con una crema di anacardi o di caviale di cocco, e usa una versione vegana degli Oreo o un’alternativa di biscotti vegani. Per la dolcezza, scegli sciroppo d’agave o zucchero di canna non raffinato.
- Leggero: scegli una crema con una percentuale di grassi ridotta o sostituisci parte del formaggio con yogurt greco scremato, ottenendo una consistenza meno densa senza rinunciare al gusto.
Twist internazionali e regionali
- Twist agrumato: aggiungi scorza di limone o arancia all’impasto della crema per una nota agrumata fresca.
- Twist cacao: integra una piccola quantità di cioccolato fondente fuso nella crema per aumentare la profondità del sapore.
- Frutti di bosco: sostituisci parzialmente le fragole con lamponi o more per una variazione di colore e acidità.
Storage & Make-Ahead Ideas
Una delle grandi virtù delle barrette cheesecake è la loro praticità di conservazione. Preparale con anticipo e conserva correttamente per massimizzare gusto e consistenza:
- Conservazione: copri bene la teglia o taglia le barre e riponile in contenitori ermetici. Mantengono la loro consistenza per 3-5 giorni in frigorifero.
- Congelamento: puoi congelare le barre già tagliate, avvolgendole singolarmente in carta stagnola o pellicola, per 1-2 mesi. Per gustarle, lascia scongelare in frigorifero per diverse ore o durante la notte.
- Make-ahead: la preparazione può essere fatta 1 giorno prima. Se prepari la versione no-bake, lascia rassodare in frigorifero per almeno 4-6 ore o durante la notte per una consistenza più ferma. Se opti per una leggera cottura, lascia raffreddare completamente prima di tagliare e conservare in frigorifero.
Fun Facts & Trivia (Optional)
Una veloce curiosità per aggiungere un tocco di teatro al tuo piatto:
- Gli Oreo sono stati creati nel 1912 da Sam prone e put: l’uso del biscotto doppio con crema all’interno è diventato un classico globale, protagonista di ricette infinite, dalle torte ai milkshake, fino alle barrette come questa versione alle fragole.
- La fragola è uno dei simboli della estate e della convivialità: la sua forma, il profumo e la vivacità del colore la rendono un ingrediente perfetto per dessert che vogliono celebrare la stagione.
- Le barrette come formato “da portare” sono nate dall’esigenza di creare dessert facili da condividere, ma soprattutto facili da trasportare in picnic, pranzi all’aperto e cene tra amici.
- Questo tipo di dessert dimostra come una base semplice possa sostenere una crema cremosa e una nota di frutta in modo equilibrato, trasformando un piatto familiare in un’esperienza estetica e gustativa gratificante.
In conclusione, Barrette cheesecake Oreo alle fragole è una ricetta che celebra la semplicità raffinata: pochi ingredienti amati, lavorazione gentile e una presentazione che invita a tagliare, condividere e tornare per un altro pezzo. È la prova che la cucina non deve essere complicata per essere memorabile: a volte basta un biscotto al cacao, una crema vellutata, e la freschezza di fragole perfette per creare qualcosa di speciale, capace di trasformare una semplice merenda in un piccolo rituale di gioia quotidiana. Se stai cercando un dessert che sia al contempo confortante e moderno, familiare e sorprendente, questa barretta potrebbe diventare il tuo nuovo cavallo di battaglia, pronto a ripetersi nelle stagioni e a evolversi con i tuoi gusti, anno dopo anno.

Ingredients
- Barrette Cheesecake Oreo alle Fragole
- 24 Oreo cookies, crushed (filling removed) to about 2 cups
→ The cookies form a rich, chocolatey crust. Removing the cream filling prevents extra moisture and a soggy crust. Crush until fine, then mix with melted butter to create a cohesive, pressable base. Use a food processor for even texture or place cookies in a sealed bag and roll with a rolling pin. - 6 tablespoons unsalted butter, melted
→ Binds the crust together. Ensure the butter is fully melted and slightly cooled before mixing with the crumbs to avoid greasy lumps. Press the mixture firmly into the pan and bake for a few minutes or chill until set, depending on your recipe approach. - Filling
- 2 (8-ounce) blocks cream cheese, softened to room temperature (total 16 oz / 450 g)
→ The creamy base of the cheesecake layer. Softening is essential to achieve a smooth, lump-free mixture when beaten with sugar and eggs. If lumps remain, beat longer at medium speed and scrape the bowl. - 1 cup granulated sugar
→ Sweetens the filling and helps achieve a creamier texture when beaten with the cream cheese. If you prefer a less sweet version, reduce by 2–3 tablespoons, but note this can slightly affect the final texture and color. - 2 large eggs
→ Eggs help set the cheesecake during baking and contribute to a smooth, custard-like interior. Add one at a time to avoid curdling; mix until just combined to maintain a creamy texture without overwhipping which can cause cracks. - 1/2 cup sour cream
→ Adds moisture, tenderness, and a subtle tang that complements the creamy cheese and contrasts with the Oreo crust. For a lighter version, substitute plain Greek yogurt, but expect a slightly different mouthfeel and tang. - 1 teaspoon pure vanilla extract
→ Enhances the overall flavor with warm vanilla notes. Use high-quality vanilla extract for depth. If you have vanilla bean paste or seeds, you can add 1/2 teaspoon for extra aroma and specks. - 1 teaspoon fresh lemon juice or lemon zest
→ Provides brightness that cuts richness and pairs well with strawberry. Use juice sparingly to avoid overpowering the cheesecake; if using zest, grate finely and avoid the white pith. - Pinch of salt
→ Heightens sweetness and flavors, balancing the richness of cream cheese. A tiny pinch goes a long way; adjust to taste based on sweetener and fruit swirl. - Strawberry Swirl
- 1/2 cup strawberry puree
→ Adds a fruity pink swirl and strawberry aroma to the filling. Purée fresh strawberries until smooth, then strain if you prefer a seed-free texture. Gently swirl into the batter before baking to create attractive marbling. - 1 tablespoon granulated sugar (optional)
→ If your strawberries are not very ripe, a touch more sugar helps the puree taste fruity and vibrant. Taste the puree before adding sweetness and adjust accordingly. - 1 teaspoon lemon juice (optional)
→ A hint of lemon brightens the strawberry flavor and helps balance sweetness. Use sparingly to avoid overpowering the strawberry profile. - Fresh Strawberry Topping
- 1 cup fresh strawberries, hulled and diced
→ Provides a bright, juicy finish and color contrast when the bars are chilled and served. Dice evenly for a neat appearance; if desired, toss with a teaspoon of sugar and a squeeze of lemon juice to release juices before serving. - Optional Add-ins
- 1/4 cup mini chocolate chips (optional)
→ Small chocolate chips add pockets of sweetness and textural contrast. Fold into the batter at the end of mixing, being careful not to overmix; keep chips evenly distributed by lightly coating them in a teaspoon of flour before adding. - 1/4 cup chopped almonds or pistachios (optional)
→ Adds crunch and nuttiness to contrast the creamy layer. Toast the nuts briefly to intensify flavor, then sprinkle on top or fold gently into batter; use finely chopped pieces for even distribution. - Optional Garnish
- Powdered sugar, for dusting
→ Finishing touch that adds a delicate sweetness and professional look. Dust lightly just before serving to avoid clumping; you can also dust with a strawberry-themed edible shimmer for presentation. - Fresh mint leaves or lemon zest, for garnish
→ Adds a fresh aroma and color contrast to the plate. Mint pairs nicely with strawberry notes; a touch of zest brightens the dish when served.
Instructions
- Preheat your oven to 350°F (175°C) and line a 9×13-inch baking pan with parchment paper, leaving an overhang on the sides to lift the bars when finished.
→ This ensures even heat distribution, prevents sticking, and allows you to lift the entire cheesecake cleanly for neat slices. - Prepare the Oreo crust by crushing the cookies (filling removed) to about 2 cups and melting the butter until smooth; whisk the butter into the crumbs until evenly moistened. Press the mixture firmly across the bottom of the prepared pan in a uniform, compact layer.
→ A tight, cohesive crust provides structure and prevents crumbling when cutting, while the butter adds richness and helps the crust set. - Bake the crust for about 8 minutes at 350°F (175°C) or chill until set, then cool completely before filling.
→ Briefly baking sets the crust, minimizes sogginess from the filling, and cooling prevents warping or shifting under the batter. - In a large mixer bowl, beat the softened cream cheese and granulated sugar on medium speed until completely smooth, light, and free of lumps, usually 2–3 minutes; scrape the bowl halfway to ensure even texture.
→ Softened cream cheese blends smoothly with sugar to form a creamy, stable base for the cheesecake; scraping prevents stubborn lumps from remaining. - With the mixer on low, add the eggs one at a time, beating after each addition only until incorporated; avoid overmixing to prevent incorporate too much air and potential cracks.
→ Gentle incorporation preserves a velvety interior and minimizes cracking during baking and cooling. - Beat in the sour cream, vanilla extract, fresh lemon juice, and a pinch of salt on low speed until just combined; stop as soon as the mixture comes together.
→ Sour cream adds moisture and tenderness, vanilla enhances depth, lemon brightens the flavor, and salt balances sweetness. - Prepare the strawberry swirl by puréeing 1/2 cup fresh strawberries until smooth; if you prefer a silkier texture, strain the purée to remove seeds, then whisk in optional 1 teaspoon lemon juice and up to 1 tablespoon sugar, setting aside.
→ Strawberry purée provides color, aroma, and a fruity ribbon through the cheesecake; straining yields a smoother swirl. - If using optional add-ins, toss 1/4 cup mini chocolate chips or 1/4 cup chopped almonds/pistachios with 1 teaspoon all-purpose flour to coat lightly, then fold into the filling at the end to distribute evenly without sinking.
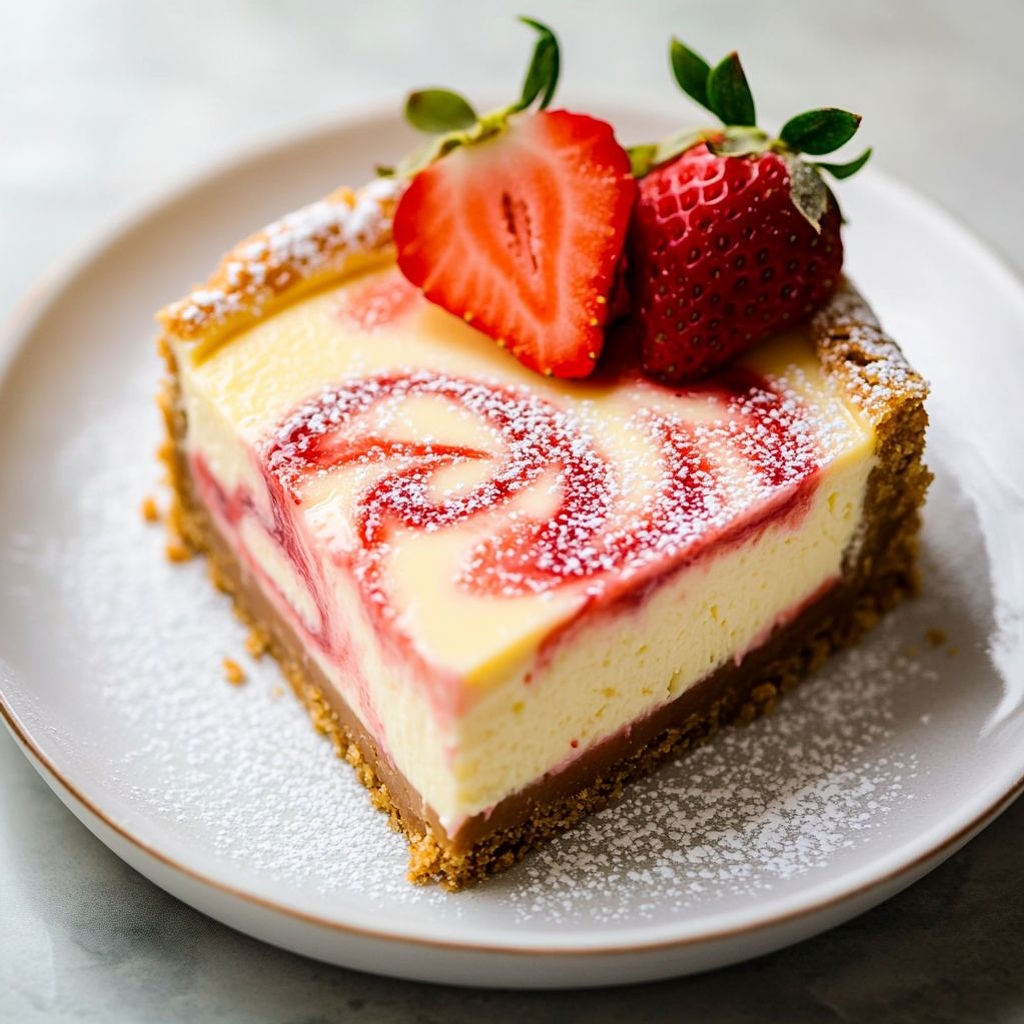
→ Coating prevents sinking and promotes even distribution of additions for texture and flavor balance. - Pour the cheesecake filling over the cooled crust in an even layer; drop spoonfuls of the strawberry purée onto the surface and gently swirl with a knife or skewer to create a marbled pattern without blending completely.
→ Marbling visual appeal and a balanced strawberry aroma; avoid over-swirl to keep distinct pink ribbons. - Bake the assembled cheesecake at 350°F (175°C) until the center is slightly jiggly and the edges are set, typically 45–55 minutes; if the top browns too quickly, tent loosely with foil to prevent scorching.
→ A gently set center yields a creamy interior after chilling; tenting preserves color and texture without drying the top. - Cool the cheesecake in the pan on a wire rack for 1 hour, then refrigerate for at least 4 hours or overnight until fully chilled and firm for clean slicing.
→ Chilling allows the proteins to fully resettle, enhances flavor, and makes cutting into neat bars easy. - Prepare the fresh strawberry topping by dicing 1 cup strawberries into uniform pieces and, if desired, tossing with 1 teaspoon sugar and a squeeze of lemon juice; let macerate for 10–15 minutes to release juices.
→ Maceration softens fruit and intensifies sweetness and brightness for a glossy topping. - Just before serving, dust the bars lightly with powdered sugar and garnish with fresh mint leaves or a hint of lemon zest for color and aroma; slice into neat bars using a warmed knife for clean edges.
→ Finishing touches elevate presentation and provide a fresh aroma that complements the strawberry cheesecake flavor.
Notes
These Barrette Cheesecake Oreo alle Fragole bars are a decadent dessert that layers a chocolate Oreo crust with a velvety strawberry cheesecake filling and a bright fresh-strawberry topping. For best results, bring ingredients to room temperature and beat the filling at low speed until smooth, adding eggs one at a time to avoid curdling. Gentle handling prevents cracks and airy pockets in the cheesecake.
Crust tips: Crush the Oreo cookies to about 2 cups (filling removed) and mix with 6 tablespoons melted butter until the mixture resembles wet sand. Press firmly into the prepared pan to create a dense, even crust. Bake for 8–10 minutes to set, or chill the crust until firm if you plan a no-bake finish.
Filling: In a bowl, beat 2 (8-ounce) blocks of cream cheese with 1 cup granulated sugar until smooth and fluffy. Add 2 large eggs, one at a time, mixing on low until just combined. Stir in 1/2 cup sour cream, 1 teaspoon vanilla extract, 1 teaspoon fresh lemon juice or zest, and a pinch of salt until the batter is glossy. Strawberry swirl: purée 1/2 cup strawberries until smooth, then swirl into the filling by dolloping and using a knife to create marbling. If you like, add 1 teaspoon lemon juice to the puree to brighten the flavor.
Assemble and bake: Pour the filling over the crust, then dollop the strawberry puree and swirl with a knife to create marbling. If using optional add-ins like mini chocolate chips or chopped almonds/pistachios, fold them in or sprinkle on top after halfway mixing to keep distribution even.
Fresh strawberry topping: Scatter 1 cup diced fresh strawberries on top of the filling after baking for a bright finish. If desired, macerate the berries with a teaspoon of sugar and a squeeze of lemon juice to release juices before serving.
Chill and serve: Bake at 325°F (163°C) until the center is just set and the edges are slightly puffed, about 40–50 minutes. Cool completely on a rack, then refrigerate at least 4 hours or overnight to let the bars firm up and flavors meld. Slice with a clean knife for neat portions and serve chilled.
Storage and variations: These bars keep well in the refrigerator for up to 5 days and freeze for 2–3 months—wrap individually or freeze as a whole. Gluten-free option: to make gluten-free Barrette bars, use gluten-free chocolate cookies for the crust (and verify any added ingredients are gluten-free). For a lighter version, you can substitute part of the cream cheese with Greek yogurt, though this may soften the texture and reduce tang.
Tips
- Crust tips: Crush Oreo cookies with the cream removed until fine for a dense, chocolatey base. Melted butter should be fully incorporated and slightly cooled before mixing with the crumbs to avoid greasy clumps. Press the crust firmly into the pan using the bottom of a glass or measuring cup for an even, compact layer. For a quicker setting, chill the crust in the fridge for 15–20 minutes; if you prefer a firmer bake-set, bake briefly before filling. Line the pan with parchment for easy removal if needed.
- Filling consistency tips: Let the cream cheese soften to room temperature to prevent lumps. Beat with sugar until smooth and creamy, then add eggs one at a time on medium speed to avoid curdling. Mix just until combined after the eggs; overmixing can introduce too much air and cause cracks. Stir in sour cream, vanilla, lemon juice or zest, and a pinch of salt until everything is evenly incorporated. If the batter looks a bit lumpy, a quick scrape of the bowl and a few more seconds of mixing will help achieve a silky texture.
- Strawberry swirl technique: Purée fresh strawberries until smooth and strain if you want a seed-free swirl. Taste the puree and add optional sugar only if needed. Gently dollop the swirl onto the batter and use a knife or skewer to create pretty marbling—don’t over-swirl, or the colors may blend too much and look muddy.
- Fresh strawberry topping tips: Dice strawberries into uniform pieces for a neat appearance. To deepen flavor, toss with a teaspoon of sugar and a squeeze of lemon juice and let stand briefly to draw out juices. Drain excess liquid before spooning over set bars to prevent a soggy topping; scatter just before serving for best texture.
- Optional add-ins: If using mini chocolate chips, toss them in a teaspoon of flour to help distribute evenly and prevent sinking. Toast chopped almonds or pistachios for a crunchier texture, then fold lightly into the batter or sprinkle on top. Keep add-ins to small amounts so they don’t overwhelm the creamy filling.
- Optional garnish tips: A light dusting of powdered sugar gives a professional finish; garnish with fresh mint leaves or a touch of lemon zest for color and aroma. For a festive look, consider a strawberry-themed edible shimmer or a few whole berries on the side when serving chilled.
- Make-ahead and storage tips: Chill the bars in the refrigerator for at least 4 hours (or overnight) to ensure clean cuts. Store leftovers covered in the fridge for up to 3–4 days. If freezing, wrap slices individually and freeze for up to 2–3 months; thaw in the refrigerator before serving to maintain texture.
FAQ
Che cosa sono le Barrette cheesecake Oreo alle fragole?
Sono barre dessert a base di biscotti Oreo croccanti e una crema di formaggio cremosa con fragole, tagliate a porzioni rettangolari perfette da offrire come dessert freddo o snack estivo.
Quali ingredienti servono?
Per circa 12–16 barrette:
- 200 g di Oreo
- 60 g di burro fuso
- 400 g di formaggio spalmabile tipo Philadelphia
- 100 g di zucchero a velo
- 200 ml di panna fresca da montare
- 180–200 g di fragole fresche (più alcune per guarnire)
- 1 cucchiaino di estratto di vaniglia
- un pizzico di sale
- facoltativo: 2 fogli di gelatina o agar-agar per una migliore presa
Quante porzioni rende?
Con una teglia rettangolare di circa 23 x 33 cm, otterrai circa 12–16 barrette, a seconda delle dimensioni con cui taglierai.
Come preparo la base delle barrette?
Procedura:
- Sminuzza finemente gli Oreo (con o senza crema) in una ciotola.
- Mescola i biscotti sbriciolati con il burro fuso finché il composto è umido e compatto.
- Stendi l’impasto sul fondo di una teglia rivestita con carta forno, premendo bene per ottenere uno strato uniforme di circa 1 cm di spessore.
- Metti in frigorifero per circa 15–20 minuti per rapprendere.
Come preparo la crema al formaggio e fragole?
Procedura:
- Frulla 180–200 g di fragole per ottenere una purea; passa al setaccio se vuoi una crema più liscia.
- In una ciotola, monta la panna fredda fino a renderla soffice.
- In un’altra ciotola, lavora il formaggio spalmabile con lo zucchero a velo, l’estratto di vaniglia e il pizzico di sale fino a ottenere una crema liscia.
- Incorpora delicatamente la panna montata alla crema di formaggio, poi aggiungi la purea di fragole. Se vuoi una consistenza più ferma, aggiungi 2 fogli di gelatina precedentemente ammollati e sciolti (opzionale).
- Aggiungi pezzetti di fragola fresca per una nota croccante, se preferisci.
Come si assembla e si raffredda?
Procedura:
- Versa la crema alle fragole sulla base di Oreo già rassodata, livellando la superficie.
- Copri con un foglio di carta forno, senza sigillare troppo, e metti in frigorifero per almeno 4–6 ore (meglio tutta la notte) per far prendere consistenza.
- Una volta rassodata, taglia in barre rettangolari della dimensione desiderata e decora con fragole fresche tagliate.
Come conservare le barrette?
Conservazione:
- In frigorifero, ben coperte, per 3–5 giorni.
- Si possono anche congelare per 1–2 mesi ben sigillate; lascia scongelare in frigo prima di servire e, se possibile, aggiungi una fetta di fragola fresca al momento di servire.
Quali varianti posso provare?
Idee e sostituzioni:
- Sostituisci le fragole con lamponi, pesche o mango per versioni diverse.
- Aggiungi scaglie di cioccolato fondente o bianco nell’impasto per un tocco extra di dolcezza.
- Per una versione senza lattosio, usa formaggio cremoso senza lattosio e panna vegetale.
- Per una base diversa, utilizza Oreo al cioccolato bianco o altre varianti di biscotti al cioccolato.
Posso prepararlo senza gelatina?
Sì. Se vuoi evitare la gelatina, lavora la crema con panna montata ferma e lascia raffreddare in frigorifero per ottenere una buona presa. Per una maggiore stabilità senza gelatina, puoi utilizzare 2 fogli di gelatina ammollati come descritto nella crema, oppure agar-agar seguendo le istruzioni sulla confezione.
Consigli utili per una presentazione perfetta?
Consigli:
- Usa una teglia con bordo lungo e rivestita con carta forno per facilitare lo stacco delle barrette.
- Raffreddare bene prima di tagliare per ottenere barre nette e facili da maneggiare.
- Guarnisci con fettine di fragola fresca o con piccoli ciuffi di panna montata per un tocco elegante.