Author

Ocean Nightleaf

Browsing

Shortbread cookies are the epitome of simplicity and indulgence, a timeless treat that has delighted sweet tooths for generations. Imagine biting into a perfectly crisp, buttery cookie that just seems to melt in your mouth, enveloping your taste buds in a wave of luxurious flavor. Whether enjoyed with a steaming cup of tea, served at festive gatherings, or gifted to loved ones, shortbread cookies have an enduring charm that resonates far and wide.

In this hands-on world of baking, finding a cookie recipe that guarantees perfect results every time can be a game changer, especially for those who might feel daunted by the kitchen. This fail-proof shortbread cookie recipe stands as a beacon of hope for novice bakers and seasoned pros alike, uniting deliciousness and ease in one delightful package. With just a handful of ingredients and a fuss-free method, you’ll be surprised at how quickly and effortlessly you can whip up a batch of these delightful delights.

The magic of shortbread lies in its simplicity. Traditionally, shortbread is made with just three ingredients: butter, sugar, and flour. This minimalistic approach shines a light on the quality of each element. Using rich, high-fat butter not only enhances the cookie’s flavor but also contributes to that phenomenally tender crumb that shortbread is known for. Meanwhile, the right kind of sugar balances the sweetness while ensuring the perfect texture. And when it comes to flour, the finest quality will yield the best results, resulting in cookies that are both crumbly and melt-in-your-mouth soft.

In addition to its flavor profile, what sets this fail-proof shortbread cookie recipe apart is the ease with which it can be customized. Perhaps you crave the aromatic warmth of vanilla, or the zesty brightness of lemon – or maybe chocolate is your vice. It’s all possible with this straightforward dough, where creativity can run wild. Add in flavor extracts, herbs, or even dips and decorations; the adaptable nature of this cookie means you can tailor it to suit any occasion and personal palate.

One of the reasons why shortbread cookies are so beloved is their versatility. They can transition seamlessly from the holiday cookie tray to a cozy afternoon snack with tea. Sprinkle on a touch of sea salt or sprinkle with powdered sugar for that perfect finishing touch. Pack them in a decorative tin and they become a thoughtful gift, or prepare them in larger batches for a cookie swap. The options truly are limitless, making them the ideal cookie for any occasion!

When baking, the atmosphere in your kitchen can elevate the experience significantly. The sound of flour cascading into a bowl, the sweet aroma of butter warming to room temperature, and the joy of getting your hands into the dough are sensory delights that make baking shortbread a truly enjoyable endeavor. There is an undeniable sense of accomplishment that accompanies the act of creating something from scratch, and this recipe allows you to explore that feeling effortlessly.

Achieving the perfect texture is critical when it comes to shortbread cookies. The right blend of chilling time and baking duration can significantly impact the final result, creating that ideal balance between crispness and crumbly softness. If you’re unsure about your baking skills or worried about your cookies turning out too hard or too soft, fear not! The fail-proof nature of this recipe ensures you will not only bake with confidence but also share in the delicious rewards of your hard work.

As you embark on this cookie-baking journey, remember that patience is key. Allowing the dough to chill before baking ensures flavors meld beautifully, resulting in a more sophisticated cookie that reveals its full potential. The anticipation of waiting for fresh cookies to come out of the oven is part of the fun, as the rich buttery scent begins to waft through your home. Your family and friends will be drawn into the kitchen, eager to taste the fruits of your labor.

Whether you’re baking solo to unwind, involving your children in some kitchen bonding time, or preparing for a festive gathering, these fail-proof shortbread cookies are sure to impress. This recipe not only serves as a gateway to the world of baking but also fosters memorable moments that you and your loved ones will cherish. You might just find that you’re inspired to make these cookies part of your family tradition, as they carry with them a sense of nostalgia and warmth.

Baking is as much about the journey as it is about the destination. In today’s fast-paced world, few things can replicate the joy of creating a homemade treat with your own hands. Each batch of fail-proof shortbread cookies serves as a testament to the age-old saying that the best things in life are simple – and what could be simpler than butter, sugar, and flour coming together to create wonderful moments? Bring out your mixing bowls, dust off that rolling pin, and prepare for a delightful time in the kitchen!

Once you immerse yourself in the step-by-step process of baking these cookies, you will soon discover how rewarding it can be. From measuring out ingredients to letting the dough chill, everything culminates in a satisfying feeling of accomplishment when you take the first bite of your homemade creation. The flavor profile of these cookies speaks for itself; they are rich, buttery, and incredibly comforting. You may find yourself wanting to make them not only for special occasions but also as a delightful treat during any ordinary day.

Imagine sitting on your sofa, a warm plate of fresh shortbread cookies at your side, as you cozy up with an engaging book or a movie that you love. Each bite takes you to a happier place, a moment of peace intertwined with sweetness that life often overlooks. Even those who are typically hesitant toward baking will find joy and ease in this classic recipe, making it a perfect starter for all who wish to explore the art of cookie making.

As you gaze fondly at these delightful shortbread cookies, you’ll not only be proud of your baking prowess, but you’ll also have a delicious and satisfying snack to enjoy. Over time, these fail-proof shortbread cookies may become a staple in your home, fondly remembered and revisited for their simplicity and flavor. Your culinary adventures await, so roll up your sleeves and get ready to create magic in your kitchen with this incredibly easy and memorable shortbread cookie recipe!

Ingredients

  • 1 cup unsalted butter softened
  • 1/2 cup granulated sugar
  • 2 cups all-purpose flour
  • 1/4 teaspoon salt
  • 1 teaspoon vanilla extract
  • 1/2 teaspoon almond extract optional
  • 1/4 cup powdered sugar for dusting optional

Instructions

  • Preheat your oven to 350°F (175°C) and line a baking sheet with parchment paper.
  • In a large mixing bowl, cream together the softened unsalted butter and granulated sugar until light and fluffy.
  • Add the vanilla extract and almond extract (if using) to the butter mixture and mix until well incorporated.
  • In a separate bowl, whisk together the all-purpose flour and salt.
  • Gradually add the dry ingredients to the butter mixture, mixing until just combined. Do not overmix.
  • Turn the dough out onto a lightly floured surface and shape it into a disk, then wrap it in plastic wrap and refrigerate for about 30 minutes.
  • Once chilled, roll the dough out to about 1/4 inch thickness and cut into desired shapes using cookie cutters.
  • Place the cut-out cookies onto the prepared baking sheet, spacing them about 1 inch apart.
  • Bake in the preheated oven for 12-15 minutes or until the edges are lightly golden.
  • Remove from the oven and allow the cookies to cool on the baking sheet for 5 minutes before transferring them to a wire rack to cool completely.
  • If desired, dust with powdered sugar before serving.

Notes

These fail-proof shortbread cookies are a classic treat that melt in your mouth. The combination of butter and sugar creates a rich flavor profile, while the subtle hints of vanilla and optional almond extract add depth. You can enjoy them plain, or for a special touch, dust them with powdered sugar once they have cooled. These cookies are incredibly versatile; feel free to add your favorite flavorings or mix-ins like citrus zest or chocolate chips. They can be stored in an airtight container for up to a week, making them perfect for keeping on hand for unexpected guests or a sweet treat to accompany your afternoon tea. To elevate your cookie experience, pair them with a hot beverage, such as tea or coffee.

Faq

What ingredients do I need for Fail-Proof Shortbread Cookies?

You will need butter, sugar, all-purpose flour, and a pinch of salt. Optionally, you can add vanilla extract for flavor.

How long do I need to cream the butter and sugar?

Cream the butter and sugar together for about 2-3 minutes until the mixture is light and fluffy.

Can I use salted butter for this recipe?

Yes, you can use salted butter, but omit the additional salt in the recipe for a balanced flavor.

What is the ideal temperature for baking shortbread cookies?

The ideal baking temperature is 325°F (163°C) to ensure the cookies cook evenly and develop a light golden color.

How thick should I roll out the dough?

Roll out the dough to about 1/4 inch thick to achieve the perfect texture—crispy edges and a tender center.

Can I freeze shortbread cookies for later use?

Yes, you can freeze the cookies after baking. Just make sure they are completely cooled and stored in an airtight container. They can last up to 3 months in the freezer.

What is the best way to store leftover cookies?

Store leftover shortbread cookies in an airtight container at room temperature for up to a week. For longer freshness, consider refrigerating them.

Can I add flavors or extras to my shortbread cookies?

Absolutely! You can add chocolate chips, nuts, dried fruits, or flavorings like almond or citrus zest to customize your cookies.

Easy Royal Icing Piping Tips

Welcome to the enchanting world of royal icing! If you’ve ever marveled at the intricate designs and delightful decorations that adorn sugar cookies, stunning cakes, or holiday treats, you’ve likely encountered royal icing. This versatile icing not only boasts a mesmerizing sheen but also provides the stability and precision needed for delicate piping and stunning embellishments. In this guide, we will embark on a delicious journey to explore easy royal icing piping tips that can transform even the simplest baked goods into breathtaking masterpieces. Whether you’re a novice or an experienced baker, these tips will elevate your skills and help you create edible art that will impress friends, family, and anyone fortunate enough to taste your creations.

Royal icing is primarily made from just three ingredients: egg whites (or meringue powder), powdered sugar, and water. This magical mixture dries to a hard finish, making it perfect for decorating cookies that can be stacked, packaged, and displayed without fear of smudging or ruining the design. It’s a favorite for cookie-decorating enthusiasts, but its applications extend far beyond cookies. Cakes, cupcakes, and even pie tops can benefit from the lovely lacework and dainty details that royal icing can provide. Imagine the possibility of piping intricate flowers, elegant scrolls, or even a personalized monogram—each design a testament to your creativity and skill!

One of the most thrilling aspects of working with royal icing is the chance to express oneself artistically through food. Colors, textures, and shapes come together to create stunning visual effects that can enhance any occasion. Picture a beautifully decorated Easter cookie with pastel colors, or a vibrant birthday cake with piped accents that reflect the celebratory spirit of the day. Each siphon of royal icing can narrate a story or set a theme, framing cherished moments with unforgettable treats. The only limit is your imagination!

Before diving into the steps and nuances of royal icing piping, let’s discuss the importance of preparation. To achieve stunning results with royal icing, having a well-prepared workstation is essential. Gathering your tools and materials in advance sets the tone for a smooth decorating process. The right piping bags, tips, and couplers will not only make it easier to execute designs but will also enable you to experiment with different techniques. Additionally, preparing a variety of colors allows you to unleash your creativity without interruption. Whether you want vibrant, bold colors or soft, subtle hues, using gel food coloring will help you maintain the icing’s consistency and texture.

Once your ingredients and tools are assembled, the real magic begins. Understanding the different consistencies of royal icing—stiff, medium, and flood—is fundamental to mastering the art of piping. Each type serves a particular purpose, with stiff icing being ideal for creating dimensional designs, while a flood consistency allows for smooth coverage. By learning how to adjust the icing’s thickness, you can unlock a whole new world of decorating possibilities. This knowledge becomes the foundation for practicing various piping techniques, from outlining and flooding, to writing and detailed embellishment.

Now, let’s talk piping tips! The tips you choose can greatly impact your designs. From fine, delicate lines to bold, chunky swirls, the size and shape of your piping tip play significant roles in the outcome of your work. Round tips are great for outlining and writing, while star tips are fantastic for creating texture and dimension. A petal tip can produce beautiful floral designs with ease. With each tip you try, you’ll hone your skills and discover which techniques you enjoy the most!

One captivating aspect of working with royal icing is the opportunity to experiment with various textures. You can create smooth surfaces, matte finishes, or even add sparkle with edible glitter or luster dust. These finishing touches can transform a simple design into a sensational treat that catches the eye. Moreover, applying different techniques, such as marbling or wet-on-wet decorating, offers endless possibilities for artistic expression. Every design becomes a unique work of art, and with practice, you can master techniques that allow you to express your personal style.

Don’t forget about the importance of patience. Royal icing requires time to dry, and sometimes the most intricate designs can take hours or even days to complete. Allowing each layer to dry properly ensures that you achieve a professional finish. This patience will pay off when you see the final result—cookies and cakes that are nothing short of breathtaking.

For those looking to make the process more enjoyable, decorating with friends or family can turn what may be perceived as tedious work into a joyful affair. Sharing laughter, ideas, and tips will not only enhance the experience but will foster a sense of camaraderie and creativity in the kitchen. Capitalizing on the collective energy can lead to unexpected ideas and designs, making the decorating process feel like a delightful celebration of creativity!

As you embark on your royal icing piping journey, remember that learning is part of the fun! Mistakes will inevitably happen, but each one is a stepping stone toward improvement. Embrace the learning process, and don’t be afraid to try new techniques or designs that challenge your skills. Each time you pipe a flower, write a word, or fill in a cookie, you’ll gain greater confidence in your abilities.

Last but not least, let’s not overlook the joy of giving. Beautifully decorated treats make for wonderful gifts. Imagine presenting homemade cookies adorned with meticulous designs to celebrate birthdays, holidays, or special occasions. Each bite encapsulates the time and effort you’ve poured into your creations, serving as a heartfelt gesture of love and gratitude. These treats not only taste good but also carry a story—a reflection of yourself and the care you’ve taken to create something special.

With these easy royal icing piping tips, you’ll be well on your way to creating stunning decorations that highlight your favorite baked goods. So, grab your piping bags, gather your supplies, and prepare to transform ordinary treats into extraordinary delights that will captivate both the eyes and the taste buds. After all, the art of baking is not just about making something delicious; it’s about creating an experience that can be shared and cherished for years to come!

Ingredients

  • 2 cups powdered sugar sifted
  • 1 large egg white or 2 tablespoons meringue powder
  • 1/2 teaspoon lemon juice or vinegar
  • Water as needed for consistency
  • Food coloring optional

Instructions

  • In a large mixing bowl, combine the sifted powdered sugar and the egg white or meringue powder.
  • Add the lemon juice or vinegar to the mixture for stability.
  • Using an electric mixer, beat the mixture on medium speed until it becomes glossy and forms stiff peaks. This should take about 5 to 7 minutes.
  • If the icing is too thick, add water a few drops at a time until the desired consistency is reached. For piping, you want the icing to hold its shape but still be smooth.
  • If you wish to color the icing, divide it into separate bowls and add a few drops of food coloring to each bowl, mixing until the color is uniform.
  • Transfer the royal icing into piping bags fitted with your desired piping tips.
  • Start decorating your cooled cookies or cake! Allow the icing to dry completely before stacking or storing.

Notes

This easy royal icing recipe is perfect for decorating cookies or cakes with intricate designs. The combination of powdered sugar and egg white (or meringue powder) creates a smooth and sturdy icing that holds its shape well when piped. If you’re using meringue powder, simply mix it with water to reconstitute it before combining with the other ingredients. Remember to sift the powdered sugar to avoid lumps for a silky finish. Adjust the consistency by adding small amounts of water as needed — thinner icing is great for flooding, while thicker icing is ideal for detailed piping.

Don’t forget to experiment with food coloring for vibrant designs that brighten up your baked goods. Store any leftover icing in an airtight container, as it can dry out quickly. If you plan to work with multiple colors, make sure to prepare your icing in batches to keep it fresh. Lastly, always clean your piping tips between colors to avoid muddy shades, and have fun creating beautiful designs!

Faq

What is royal icing?

Royal icing is a sweet icing made from whipped egg whites and powdered sugar, used for decorating cookies and cakes. It dries hard, making it ideal for intricate piping.

How do you make royal icing?

To make royal icing, combine egg whites or meringue powder with powdered sugar and a small amount of water. Beat the mixture until it reaches stiff peaks and is smooth.

What consistency should royal icing be for piping?

For piping details, royal icing should be at a medium consistency, which is thick enough to hold its shape but still fluid enough to flow from a piping bag. Add water gradually until you reach the desired consistency.

How can I color royal icing?

You can color royal icing using gel food coloring. Start by adding a small amount of color to the icing and mix until evenly distributed. Remember that gel colors are more concentrated than liquid dyes.

How long does royal icing take to dry?

Royal icing can take anywhere from 1 to 8 hours to dry, depending on humidity and the thickness of the application. For best results, let it dry overnight.

What tips should I use for piping royal icing?

Common piping tips for royal icing include round tips (for details and outlines), star tips (for borders), and leaf tips (for creating leaves). The size of the tip will depend on the intricacy of your design.

Can royal icing be stored?

Yes, royal icing can be stored in an airtight container at room temperature for up to two weeks. If stored longer, it might need to be re-whipped or adjusted with water before use.

What do I use to clean piping bags and tips?

To clean piping bags and tips, rinse them in warm water right after use. For stubborn residue, soak them in warm soapy water before scrubbing gently with a brush.

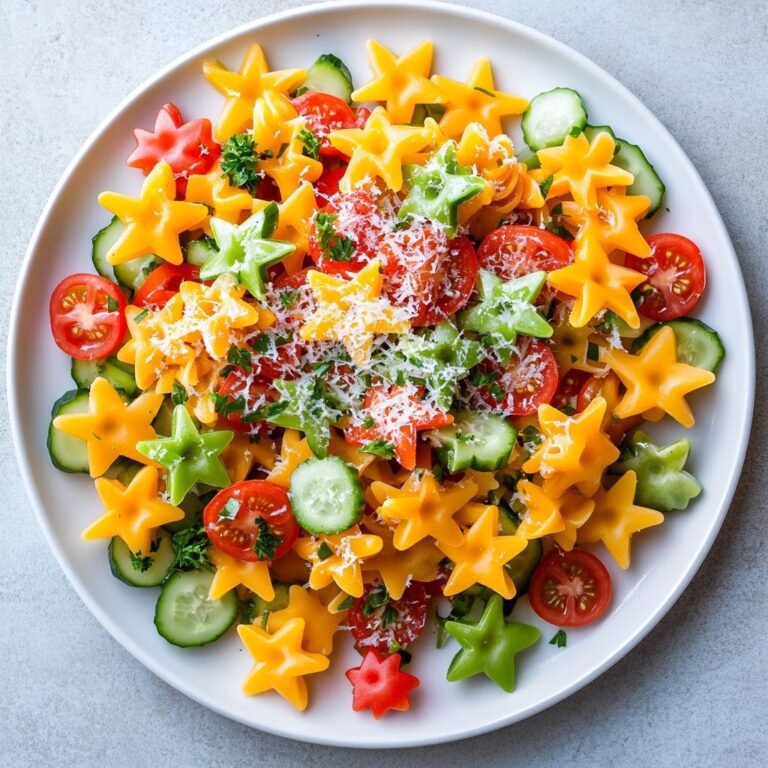
As the holiday season approaches, there’s a magical aura that envelops gatherings with friends and family, transforming ordinary meals into vibrant celebrations filled with love and laughter. This is where our poignant recipe for Festive Star Pasta Salad comes artfully into play. Picture a beautifully arranged dish brimming with fun and flavor—it’s not just a meal; it’s a colorful centerpiece that will elevate your festive table and delight the senses of everyone at your gathering!

This star-shaped pasta salad is designed with the spirit of celebration in mind. It’s not merely about combining ingredients; it’s about harmonizing colors, textures, and flavors to create a dish that appeals to the eyes as much as it does to the palate. Imagine spirals of al dente star-shaped pasta mingling with a medley of fresh vegetables, glistening cheese, and zesty dressing—a culinary symphony that captures the joy of the season.

But what truly makes this salad stand out isn’t just its delightful appearance. Each ingredient is carefully selected to bring together an explosion of flavors. The pasta, with its playful star shapes, provides a sturdy base, while vibrant cherry tomatoes add a pop of freshness, and crisp cucumbers bring a satisfying crunch. Not to mention the tangy olives and delectable feta cheese that layer the dish with richness. Each bite of this salad is a celebration, transporting you to a joyful space filled with holiday vibes and cherished memories.

Beyond its deliciousness, this Festive Star Pasta Salad is unfathomably versatile. It’s a dish that can easily transition from a festive gathering to an everyday meal. Whether served as the main attraction, a delightful accompaniment to grilled meats, or even as a go-to potluck contribution, it is sure to impress. You can modify it to fit dietary preferences or ingredient availability, making it a reliable go-to recipe year-round. If you wish, consider adding protein to transform it into a full meal; grilled chicken, shrimp, or chickpeas can all elevate this dish while keeping nutritional balances intact.

What’s more, the preparation of this salad is refreshingly simple. With busy holiday schedules, the last thing you need is a complicated recipe that takes hours to complete. This beauty comes together in just a few steps, allowing you to spend more time with your loved ones and less time in the kitchen. A quick boil of pasta, some chopping of vegetables, and a stir of your dressing is all it takes. You’ll appreciate how minimal effort yields a maximum reward— a gorgeous and scrumptious dish that could leave your guests asking for seconds and even thirds!

Let’s not forget the presentation! In a world where we eat with our eyes first, the aesthetic of your meals can truly make a memorable impression. When served in a large, vibrant bowl and garnished with fresh herbs like basil or parsley, your Festive Star Pasta Salad becomes an eye-catching masterpiece for everyone to admire. Adding some pomegranate seeds or even roasted nuts can add a sprinkle of charm and crunch, enhancing both taste and visual appeal. Allow yourself the joy of showcasing your culinary masterpiece, as it’s as much about the joy of giving as it is about the joy of sharing a delicious meal.

Unlike traditional pasta salads that can be heavy and leave you feeling weighed down, this salad champions freshness and vibrancy. Each ingredient plays its role in creating balance, with the dressing acting as the finishing touch that ties everything together. A light vinaigrette with lemon juice, olive oil, and herbs is the perfect complement to brighten the dish and enhance the natural flavors without overpowering them. With each forkful, you’re treated to a refreshing medley that mirrors the lively festive spirit, making it suitable for any occasion from Christmas luncheons to New Year’s gatherings.

Moreover, this recipe is an invitation to get creative. Feel free to add your signatures or tweak the flavors to suit your preferences! Want a hint of sweetness? Incorporate roasted sweet potatoes or diced apples. Craving a bit of heat? A dash of chili flakes or sliced jalapeños will do the trick. The Festive Star Pasta Salad welcomes your touch—after all, the holidays are about making special memories and custom flavors that highlight your unique culinary flair.

Just think of the memories this salad can create—serving it during festive gatherings will evoke warmth, laughter, and perhaps even nostalgia for meals shared in years past. It’s these moments spent around the table, sharing delightful food with loved ones, that build the fabric of our most cherished holiday traditions. Whether it’s a holiday dinner, a picnic in the park, or a simple weeknight meal, this salad has the ability to turn any meal into a festive celebration.

Get ready to make the Festive Star Pasta Salad your new go-to recipe as you embark on culinary adventures this season. With its wintry hues, refreshing tastes, and joyous charm, it captures everything good about the holiday spirit. Be prepared to spread the festive cheer and inspire friends and family to join you in savoring each delightful bite, as this salad embodies the togetherness and love that brings us all closer during the holidays.

Join us on this culinary journey, where savory ingredients converge into a delightful dish that is not only delicious but is also wrapped in the warmth of celebration and joy. This is more than just a salad; it’s an invitation to embrace the season, share hearty laughs, and savor those moments with dear ones that will leave lasting impressions and fill hearts with gratitude. Let the joy of the Festive Star Pasta Salad be the heart of your gathering!

Ingredients

  • 8 oz star-shaped pasta uncooked
  • 1 cup cherry tomatoes halved
  • 1 cup diced cucumber
  • 1/2 cup bell pepper diced
  • 1/4 cup red onion finely chopped
  • 1/2 cup black olives sliced
  • 1/2 cup feta cheese crumbled
  • 1/4 cup fresh parsley chopped
  • 1/4 cup olive oil
  • 2 tbsp red wine vinegar
  • 1 tsp dried oregano
  • Salt and pepper to taste

Instructions

  • In a large pot, bring salted water to a boil. Add the star-shaped pasta and cook according to package instructions until al dente. Drain and rinse under cold water to cool.
  • In a large mixing bowl, combine the halved cherry tomatoes, diced cucumber, diced bell pepper, finely chopped red onion, sliced black olives, crumbled feta cheese, and chopped fresh parsley.
  • In a small bowl or jar, whisk together the olive oil, red wine vinegar, dried oregano, and a pinch of salt and pepper to create the dressing.
  • Add the cooled pasta to the vegetable mixture in the large bowl.
  • Pour the dressing over the pasta salad and gently toss everything together until well combined.
  • Taste and adjust seasoning with additional salt and pepper if necessary.
  • Cover the bowl with plastic wrap and refrigerate for at least 30 minutes to let the flavors meld.
  • Before serving, give the salad a quick toss and garnish with extra parsley if desired.

Notes

This festive star pasta salad is a vibrant and refreshing dish that’s perfect for holiday gatherings or summer picnics. The star-shaped pasta adds a fun twist and makes it appealing to all ages. Feel free to customize the salad by adding your favorite vegetables or proteins, such as grilled chicken, chickpeas, or even roasted vegetables for added flavor and nutrition. The combination of feta cheese and olives brings a delightful Mediterranean flair, while the parsley adds freshness. This salad can be prepared a day in advance, allowing the flavors to meld together beautifully. For best results, serve chilled and toss right before serving to ensure the pasta remains coated and doesn’t absorb too much dressing. Enjoy this colorful salad as a main dish or a side, and don’t forget to adjust the seasoning to your taste!

Faq

What ingredients are used in Festive Star Pasta Salad?

The main ingredients include star-shaped pasta, cherry tomatoes, bell peppers, cucumbers, red onion, olives, feta cheese, and a vinaigrette dressing. Optional ingredients can include herbs and spices for added flavor.

How long does it take to prepare Festive Star Pasta Salad?

The preparation time is approximately 20 minutes, and if you opt to let it chill in the refrigerator, it can be prepared an hour in advance for better flavor.

Can I make Festive Star Pasta Salad ahead of time?

Yes, you can prepare the salad a day in advance. Just make sure to keep the vinaigrette separate until you’re ready to serve to maintain the freshness of the ingredients.

Is Festive Star Pasta Salad suitable for vegetarians?

Absolutely! The recipe is vegetarian-friendly. Just ensure that any additional ingredients or dressings you choose are also vegetarian.

Can I substitute the pasta with a gluten-free option?

Yes, you can use gluten-free star-shaped pasta or any other gluten-free pasta shapes. The salad will still be delicious and festive!

What dressing works best for Festive Star Pasta Salad?

A simple vinaigrette made with olive oil, vinegar (such as balsamic or red wine), salt, and pepper works best. You can also add lemon juice or mustard for extra flavor.

How can I add protein to Festive Star Pasta Salad?

To add protein, you can include grilled chicken, chickpeas, or even diced hard-boiled eggs for a heartier salad.

Is it possible to customize the vegetables in Festive Star Pasta Salad?

Yes! You can customize the vegetables based on your preferences or seasonal availability. Other great options include zucchini, spinach, or artichokes.

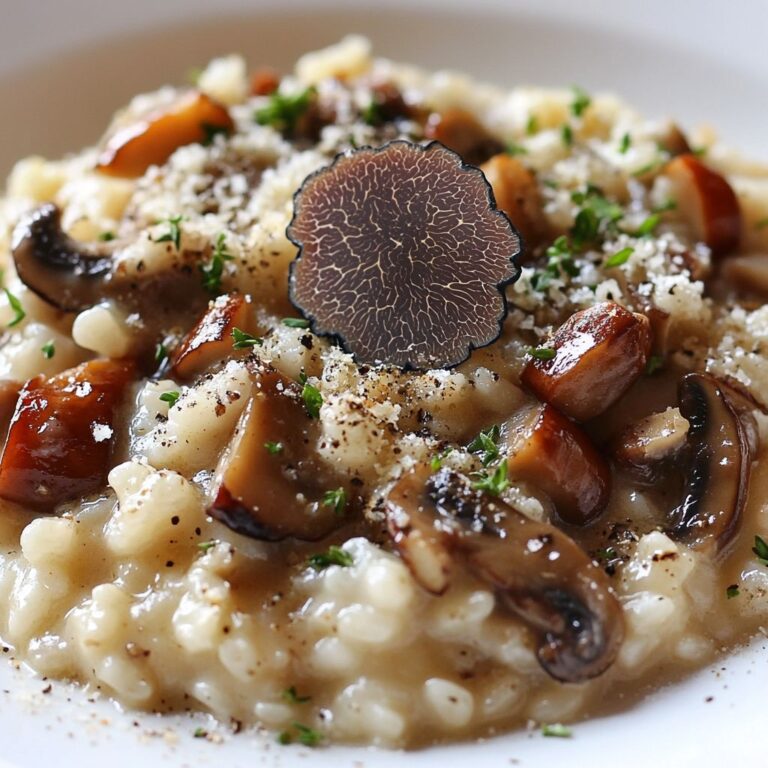
As the chill of winter settles in and a soft blanket of frost coats the landscape, there’s something undeniably comforting about a warm bowl of risotto. Enter the enchanting world of “Winter Wonderland Risotto,” a dish that not only embodies the essence of the season but also warms the soul. Picture yourself nestled in a cozy nook, a crackling fire nearby, while the aroma of herb-infused rice and wholesome ingredients envelops the air. This risotto is more than just a meal; it’s an experience, a seasonal celebration that captures the beauty and flavors of winter in every creamy bite.

This delightful dish takes you on a culinary journey inspired by the frosty beauty of winter wonderlands, featuring a medley of vibrant seasonal vegetables and aromatic herbs that tantalize the palate. You might wonder, how can a single dish encapsulate the experience of a winter wonderland? The answer lies in the careful selection of ingredients that bring out the best of the season. Think roasted butternut squash that caramelizes beautifully, hinting at sweet notes beneath its earthy exterior. Imagine adding tender Brussels sprouts, with their slight bitterness beautifully balanced by the creaminess of the risotto. The snow-white grains of Arborio rice absorb the flavors around them, transforming into a rich canvas that supports layers of taste and texture.

Risotto often conjures images of rustic Italian kitchens, where patience and stirring are paramount to achieve that silky, creamy consistency. Yet, in this recipe, we embrace the spirit of winter by infusing the risotto with an array of additional seasonal delights. From earthy mushrooms that add depth and umami, to bright and zingy hints of lemon zest that cut through the richness—every spoonful is an embodiment of nature’s winter offerings. This is not just any risotto; it is a dish that tells the tale of snow-capped trees, twinkling lights, and heartwarming gatherings around the dinner table. With every swirl of the spoon, you can almost feel the magic of winter unfolding around you.

The beauty of this Winter Wonderland Risotto lies not only in its ingredients but also in its versatility. This dish can stand as a sumptuous main course for a festive holiday gathering or as a hearty side dish to accompany roasted meats or a cozy stew. You can savor it alone on a chilly evening or share it with friends and family, making it a centerpiece of your winter dining experiences. It invites conversation, laughter, and warmth into your home—a perfect match for the season when the days grow shorter and the nights become cooler.

Moreover, this risotto is a wonderful way to embrace the seasonal bounty available during winter months. Fresh vegetables are often in abundance, and recipes like this allow you to experiment and get creative in your kitchen. You might choose to add a splash of white wine to elevate the dish’s sophistication or incorporate fresh herbs like rosemary and thyme that evoke the very essence of winter itself. As you stir, let your imagination roam; consider adding roasted garlic for a pungent kick or a touch of creamy goat cheese for tanginess. The only limits are your tastes and the treasures waiting for you at the farmer’s market or grocery store.

Engaging in the process of making this risotto can be as therapeutic as the dish itself—an opportunity to slow down and savor the moment. The rhythmic stir of the rice in the pot, the bubbling broth, and the soft hiss of cooking vegetables create a symphony in your kitchen, enticing your senses and setting the scene for a perfect winter meal. As you tend to the pot, you’ll find joy in the transformation of raw ingredients into a velvety, harmonious dish that feels very much like a warm embrace.

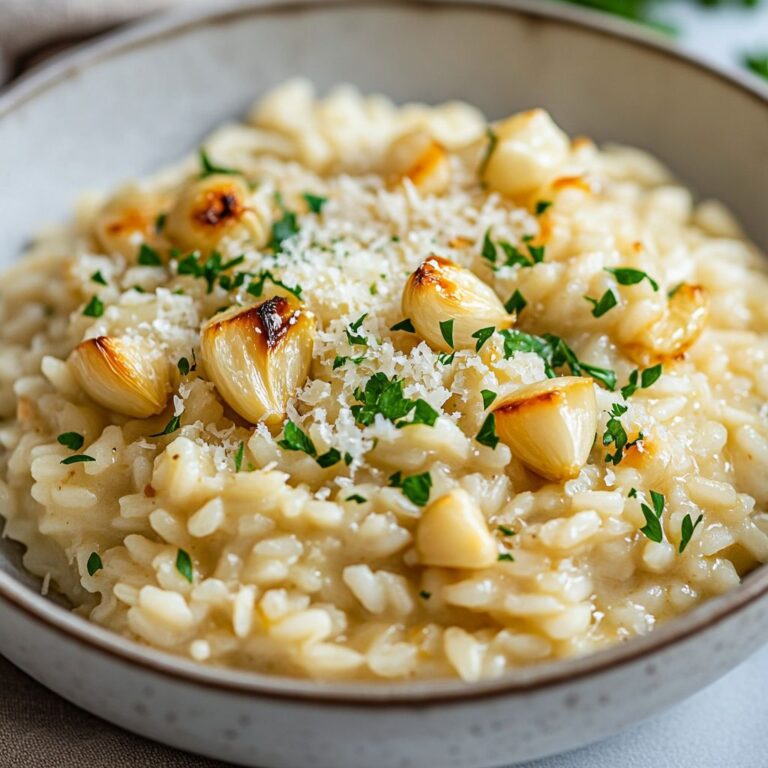
Let’s not overlook the visual appeal of the Winter Wonderland Risotto either. As you’re preparing this dish, consider the artistry involved in its presentation. A bowl filled with creamy, golden rice, interspersed with bright green Brussels sprouts and rich, brown mushrooms is a feast for the eyes. Make sure to finish with a sprinkle of fresh herbs or grated Parmesan as a final touch, creating a gorgeous contrast that begs to be devoured. Indeed, eating with the eyes first makes the experience even more pleasurable and sets the tone for what promises to be an unforgettable meal.

As you prepare to embark on this culinary adventure, remember that the true magic of this dish lies in its ability to foster connection and warmth during the cold winter months. Gather your loved ones around the table and let this Winter Wonderland Risotto serve as the centerpiece of your gathering. It invites nostalgia for shared meals, heartwarming conversations, and laughter that echoes through the house. In the end, this recipe isn’t just about the food; it’s about creating memories, nurturing relationships, and celebrating the beauty of winter.

Indeed, “Winter Wonderland Risotto” is more than a recipe; it’s a creation steeped in tradition and creativity, an opportunity to honor the ingredients that the season provides, and to express your love for cooking and sharing with others. So pull out your saucepan, gather your favorite ingredients, and prepare to be transported to a winter wonderland—one spoonful at a time. As the snowflakes dance outside, let this warm, rich risotto envelop you in its embrace, reminding you that even in the coldest months, joy and warmth can be found in our kitchens and gatherings.

Ingredients

  • 1 1/2 cups Arborio rice
  • 4 cups vegetable broth
  • 1 cup white wine
  • 1 medium onion finely chopped
  • 2 cloves garlic minced
  • 1 cup mushrooms sliced
  • 1 cup butternut squash peeled and diced
  • 1 cup kale chopped
  • 1/2 cup grated Parmesan cheese
  • 2 tbsp olive oil
  • 2 tbsp butter
  • Salt to taste
  • Pepper to taste
  • Fresh parsley chopped for garnish

Instructions

  • In a medium saucepan, heat the vegetable broth over low heat and keep it warm on the stove.
  • In a large skillet or heavy-bottomed pot, heat the olive oil and butter over medium heat.
  • Add the chopped onion and sauté for 2-3 minutes until it becomes translucent.
  • Stir in the minced garlic and cook for an additional minute until fragrant.
  • Add the sliced mushrooms and diced butternut squash, cooking for about 5-7 minutes, or until softened.
  • Add the Arborio rice to the skillet and stir to coat it with the oil and butter, cooking for about 2 minutes until the rice is slightly translucent.
  • Pour in the white wine and let it simmer, stirring frequently, until the wine is mostly absorbed.
  • Begin adding the warm vegetable broth, one ladle at a time, stirring constantly. Allow the broth to be nearly absorbed before adding the next ladle.
  • Continue this process until the rice is creamy and al dente, about 18-20 minutes total.
  • In the last 5 minutes of cooking, add the chopped kale and stir until wilted.
  • Once the rice is cooked to your desired consistency, remove the skillet from heat and stir in the grated Parmesan cheese.
  • Season with salt and pepper to taste.
  • Serve the risotto warm, garnished with fresh chopped parsley.

Notes

This Winter Wonderland Risotto is a cozy and nourishing dish, perfect for chilly evenings. The creamy Arborio rice absorbs the flavors of vegetable broth and white wine, creating a rich base that is enhanced by the earthy mushrooms and sweet butternut squash. Kale adds a lovely pop of color and nutrition, while Parmesan cheese brings a delightful umami finish. To get the perfect risotto, it’s important to stir continuously, allowing the rice to release its starches and achieve that signature creaminess. Feel free to personalize it by adding your favorite seasonal vegetables or herbs. For a finishing touch, garnish with freshly chopped parsley to add brightness to your dish. Serve warm for a comforting meal that warms both body and soul.

Faq

What ingredients do I need to make Winter Wonderland Risotto?

You’ll need Arborio rice, vegetable broth, white wine, onions, garlic, mushrooms, spinach, Parmesan cheese, butter, and seasonal vegetables like broccoli or asparagus.

How long does it take to prepare Winter Wonderland Risotto?

Preparation time is about 10 minutes, and cooking time is approximately 30 minutes, making the total time around 40 minutes.

Can I make Winter Wonderland Risotto vegan?

Yes, you can substitute the butter with olive oil and use nutritional yeast or vegan cheese instead of Parmesan to make it vegan-friendly.

Is it necessary to use Arborio rice for this risotto?

Arborio rice is ideal for risotto due to its high starch content, which gives the dish its creamy texture. Other short-grain rice can be used but may not yield the same results.

What is the best way to serve Winter Wonderland Risotto?

Serve it hot, garnished with grated Parmesan cheese, fresh herbs, or a drizzle of olive oil. Pair it with a light salad or roasted vegetables for a complete meal.

Can I prepare Winter Wonderland Risotto in advance?

Risotto is best enjoyed fresh, but you can prepare the broth and vegetables ahead of time. If you need to store it, keep it in the refrigerator for up to 2 days.

What variations can I try with Winter Wonderland Risotto?

You can customize the recipe by adding proteins like chicken, shrimp, or tofu, or vary the vegetables according to season. Experiment with different herbs and spices for added flavor.

How do I get the perfect creamy texture in my risotto?

To achieve a creamy texture, gradually add warm broth to the rice, stirring frequently. This helps release the starches from the rice, creating a rich, velvety consistency.

As the holiday season approaches, kitchens around the world come alive with the heartwarming aromas of traditional recipes, each one steeped in nostalgia and love. Among these cherished dishes, Holiday Sweet Potato Gnocchi shines brightly as a delightful alternative to typical holiday fare. Those golden-hued morsels—pillowy pockets made from sweet potatoes—are not only a feast for the eyes but also a celebration of festive flavors that evoke warmth, kindness, and the joy of gathering around the dinner table with loved ones. Whether you are looking to impress guests at a holiday dinner or searching for a dish that embodies the spirit of the season, this gnocchi is sure to capture hearts and palates alike.

At first glance, the vibrant color of sweet potatoes hints at their rich, naturally sweet flavor, which pairs wonderfully with a myriad of seasonal sauces and toppings. From a sage brown butter sauce drizzled artfully atop to a creamy Alfredo adorned with crispy sage, the versatility of this gnocchi allows home cooks and culinary adventurers to experiment and create memorable dishes that are as unique as they are delicious. Imagine a table filled with laughter, stories, and rich flavors as you unveil this spectacular dish—its presence commands attention, promising a comforting embrace of taste reminiscent of family traditions and cherished moments.

Making your own gnocchi from scratch is a labor of love but offers immense rewards. The process begins with the humble sweet potato, a vegetable that has held a revered spot in countless cultures for generations. Sweet potatoes are not only incredibly nutritious, packed with vitamins and minerals, but they also provide a naturally sweet foundation that can elevate any dish. By steaming or roasting the sweet potatoes before transforming them into gnocchi, you are ensuring the best possible flavor while keeping the dough tender and delightful.

Crafting the perfect gnocchi dough is an art form that many have mastered, and it begins with the delicate balance between texture and flavor. The addition of just the right amount of flour brings cohesion, allowing each piece to hold its shape while still being soft enough to melt in your mouth. As you mix and knead, you’ll feel a connection to generations past, those who have wielded their hands to create culinary wonders in their own kitchens. Each gentle squeeze and fold into the dough is infused with the warmth of family traditions passed down through the years.

The beauty of sweet potato gnocchi lies in its adaptability to various culinary styles and preferences. You can toss it in a variety of rich sauces, adding depth and excitement to a dish that can be served as a stand-alone main course or as a lavish side dish. Pair it with seasonal ingredients like Brussels sprouts, cranberries, or toasted pecans to create a medley of flavors that dance delightfully on the palate. Each bite transports you to a winter wonderland, where every forkful tells a story of togetherness, abundance, and gratitude.

As you prepare to create this unforgettable Holiday Sweet Potato Gnocchi, take a moment to consider the sensory elements at play. The vibrant orange hue influences not only your appetite but your overall mood as you cook. The sweet aroma that wafts up from the pot as you boil the gnocchi and the sound of sizzling butter as it bids for the perfect sauce contribute to a very tangible anticipation. Cooking this dish serves as an invitation to slow down amidst the holiday hustle and bustle, granting you the opportunity to appreciate every step of the culinary process and to share the joy of cooking with those you love.

In an age where food often takes center stage on social media platforms, gnocchi is a savory star that photographs beautifully, embodying the rustic charm that makes holiday meals unforgettable. Imagine a table set with an array of colorful dishes, flecks of green from herbs, and the pop of color from sweet potato gnocchi creating a feast for both the eyes and the stomach. Such is the allure of this dish, that it draws family and friends together, sharing the warmth of your kitchen like a cozy embrace on a winter’s evening.

Once you have meticulously crafted your gnocchi, the critical moment arrives—how to serve it. Allow your creativity to shine as you plate this dish: a sprinkle of crushed chili flakes for a hint of heat, a cascade of parmesan shavings, or perhaps a drizzle of balsamic reduction that highlights the earthiness of sweet potatoes. Each ingredient you choose can tell a little bit more of the story you want to share within your home, offering a moment of connection over something extraordinarily satisfying.

The magic of preparing Holiday Sweet Potato Gnocchi isn’t just in the cooking process; it’s also about creating memories. The kitchen has long been regarded as the heart of the home, a place where the most cherished moments happen. Invite your family to join the preparation process—each person can contribute by kneading the dough, rolling out the gnocchi, or creating a unique topping. These treasured moments foster a sense of belonging and share the essence of the holidays, transforming routine cooking into a festive celebration of life and togetherness.

When the recipe is complete, and everyone gathers around to indulge, the satisfaction of sharing this beautiful meal with others will be palpable. As you take your first bite, the flavor will transport you to a cozy, candle-lit night where laughter fills the air, and every morsel is a reminder of the love and care infused into the dish. The holidays are as much about the food as they are about connection, and what better way to experience that than with your very own Holiday Sweet Potato Gnocchi?

For all the food enthusiasts and holiday lovers alike, the beauty of this dish is not just contained within its delicious nature—it’s an experience worth sharing. Get ready to embrace the joy of cooking and the joy of sharing as the holiday spirit envelops you like a warm blanket. You are about to embark on a culinary adventure that will unite flavors and traditions as you serve up a plate of delightful Holiday Sweet Potato Gnocchi. It’s more than just a recipe; it’s an opportunity to create unforgettable memories this holiday season, one delicious bite at a time.

Ingredients

  • Sweet Potatoes, 2 large
  • All-Purpose Flour, 1 to 1.5 cups
  • Egg, 1 large
  • Salt, 1/2 tsp
  • Nutmeg, 1/4 tsp
  • Ground Black Pepper, to taste
  • Butter, 4 tbsp
  • Sage Leaves, fresh, for garnish
  • Parmesan Cheese, grated, for serving

Instructions

  • Start by boiling the sweet potatoes in a large pot of salted water until they are tender, about 30-40 minutes. Once cooked, drain and let them cool slightly.
  • While the sweet potatoes are cooling, prepare a clean working surface and have your flour ready.
  • Once the sweet potatoes are cool enough to handle, peel them and mash them in a large mixing bowl until smooth.
  • Add the egg, salt, nutmeg, and ground black pepper to the mashed sweet potatoes. Mix until combined.
  • Gradually add 1 cup of all-purpose flour to the sweet potato mixture, stirring gently. If the dough is too sticky, add more flour, a little at a time, until it is soft but not sticky.
  • Turn the dough out onto a well-floured surface and gently knead it a few times until it comes together as a smooth ball.
  • Divide the dough into four equal parts. Roll each part into a long rope, about 1/2-inch thick.
  • Cut the rope into small pieces, about 1-inch long, to form the gnocchi. Optionally, you can use a fork to create indentations on each piece for texture.
  • Bring a large pot of salted water to a boil. Gently drop the gnocchi into the boiling water, cooking in batches if necessary. Once they float to the surface, let them cook for an additional 1-2 minutes before removing them with a slotted spoon.
  • In a large skillet, melt the butter over medium heat. Add the cooked gnocchi and sauté for a few minutes until they are lightly browned and coated in the butter.
  • To serve, plate the gnocchi and garnish with fresh sage leaves and a sprinkle of grated Parmesan cheese.

Notes

These Holiday Sweet Potato Gnocchi are a delightful twist on traditional gnocchi, perfect for festive occasions. The sweet potatoes add a natural sweetness and vibrant color, making the dish not only delicious but visually appealing as well. To prepare, begin by roasting the sweet potatoes until tender, which enhances their flavor. Once cool, mash them and mix with flour, egg, salt, nutmeg, and pepper to form a soft dough.

When rolling out the dough, be mindful of the amount of flour used; it should be just enough to prevent sticking without making the gnocchi tough. Cut the dough into small pieces and shape them into little dumplings, which can be easily done using a fork to create the classic gnocchi ridges. Cooking them in boiling salted water until they float is a great indicator that they’re done and ready to be tossed in buttery sage sauce.

This dish is enhanced with melted butter and fresh sage leaves, which add a fragrant herbaceous note. Serving with freshly grated Parmesan cheese will elevate the flavors even more. These gnocchi can be made ahead of time and frozen; just make sure to arrange them on a baking sheet first before freezing to prevent clumping. They make a wonderful main course or side dish during the holiday season. Enjoy the warmth and comfort of this seasonal meal with friends and family!

Faq

What ingredients do I need to make Holiday Sweet Potato Gnocchi?

You will need sweet potatoes, all-purpose flour, eggs, salt, and a pinch of nutmeg. Optional ingredients include sage and butter for the sauce.

How do I prepare the sweet potatoes for gnocchi?

First, wash the sweet potatoes and pierce them with a fork. Bake them in the oven until tender, then allow them to cool before peeling and mashing.

Can I make the gnocchi in advance?

Yes, you can make the gnocchi in advance and freeze them. Just freeze them on a baking sheet until firm, then transfer to a freezer bag and store for up to three months.

How do I cook the gnocchi?

Boil a pot of salted water and cook the gnocchi until they float to the top, which usually takes about 2-3 minutes. Drain and toss with your favorite sauce.

What sauces pair well with sweet potato gnocchi?

Sweet potato gnocchi pairs well with sage brown butter, marinara sauce, or a creamy Alfredo sauce. You can also top it with pesto for a fresh flavor.

Can I substitute the all-purpose flour?

For a gluten-free option, you can use gluten-free all-purpose flour or almond flour, but the texture may vary slightly.

How do I know if my gnocchi are cooked properly?

The gnocchi are cooked when they float to the surface of the boiling water. Once they float, allow them to cook for an additional 30 seconds before removing them.

What can I serve with sweet potato gnocchi?

Sweet potato gnocchi can be served with sautéed greens, a crisp salad, or some roasted vegetables for a complete meal.

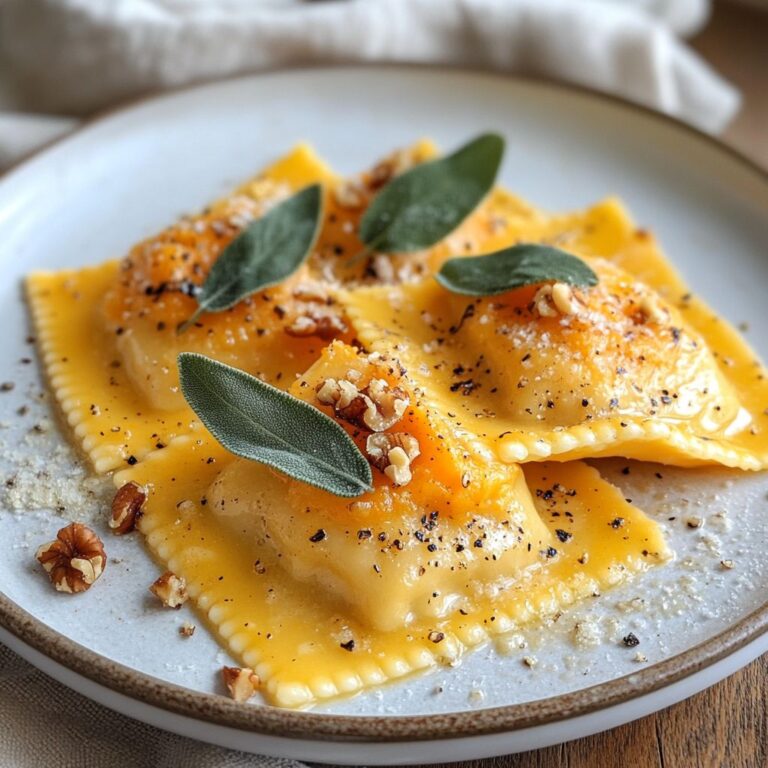
Imagine a chilly autumn evening, the first hints of frost in the air, as you gather in the warmth of your kitchen, the tantalizing smell of simmering sage butter fills the space. You’re about to embark on a culinary journey, transforming simple ingredients into a plate of homemade Pumpkin Ricotta Stuffed Ravioli. This dish isn’t just food; it’s a celebration of seasonal flavors and the art of cooking that brings people together. As golden leaves swirl outside, you’ll create an experience that’s rich in flavor and even richer in memories.

The beauty of pumpkin-filled ravioli is not just in its creamy, dreamy center but also in the texture of the handmade pasta that envelops it. Making your own pasta from scratch may feel daunting at first, but the satisfaction of rolling out the dough and cutting out perfect circles or squares filled with your delightful pumpkin and ricotta mixture is unparalleled. Each ravioli you form is a little pouch of joy that will burst with the warmth of fall flavors when it meets your palate. And together with the silky sage butter sauce, it creates a dish that’s as gorgeous to look at as it is to taste.

Pumpkin is the star of this dish, and when selecting your squash, consider the rich and nutty flavor of fresh pumpkin pureé. It adds a natural sweetness that pairs flawlessly with the creamy ricotta, giving a delightful contrast to the savory notes of the sage-infused butter sauce that brings everything together. You’ll find that cooking with pumpkin opens a world of culinary creativity. This dish propels you to embrace those seasonal ingredients, inviting you to experiment with their versatility—after all, pumpkin is not just for pies. The combination of flavors here strikes a beautiful balance—earthy and sweet, smooth and textured; this ravioli encompasses everything that makes comfort food so irresistible.

As you make your way through the process of preparing this dish, you’ll encounter memorable sensations. The tactile feedback of kneading the pasta dough, rolling it out until it’s paper thin, and the satisfying motion of cutting out your individual ravioli will bring out your inner chef. And don’t worry if they aren’t perfect; those little imperfections are what make them uniquely yours. Opt for a simple fork to seal the edges, or get creative with a decorative pasta cutter for added flair if you’re in the mood. After all, cooking is just as much about the experience and the love poured into it as it is about the final result.

As you prepare the butter sauce, the smell of melting butter infused with fresh sage will make your kitchen feel like a cozy Italian restaurant. The meeting of these ingredients creates a harmonious blend that envelops the ravioli in a luxurious sauce that sings of comfort and warmth. Just a sprinkle of fresh nutmeg elevates the flavors further, bringing a distinct depth that harmonizes beautifully with the pumpkin. This isn’t merely a topping; it’s an essential component that rounds out each bite.

For those keen on sharing or impressing at a dinner party, Pumpkin Ricotta Stuffed Ravioli is an ideal main course. It can be elegantly plated and garnished, transforming a humble dish into a stunning centerpiece. When served alongside a light salad of arugula drizzled with a balsamic reduction or paired with a nice glass of white wine, it becomes a testament to the notion that comfort food can be sophisticated. There’s something heartwarming about sitting around a table, surrounded by friends or family, relishing each bite and laughing over shared stories, capped off with a rich dish that resonates with the essence of fall.

Furthermore, this recipe presents an opportunity to explore various adaptations. Once you’ve mastered the basic filling, consider adding your favorite herbs or spices for a personal touch. A hint of cinnamon, a sprinkle of crushed red pepper flakes, or even a touch of garlic can kick up the flavor profile. Don’t shy away from experimenting! If you have leftover filling, consider using it in a baked ziti or stuffed peppers! Combine your ravioli with seasonal vegetables like roasted Brussels sprouts or sautéed spinach to further enhance this comforting dish and make it a wholesome meal ready to satisfy your hunger and warm your spirit.

The hands-on experience of making homemade ravioli encourages connection and creativity in the kitchen. While crafting each piece is wonderfully satisfying, this culinary exploration also brings a great opportunity to include loved ones in the process. Call in friends or family to join in on the fun—share laughter and stories while you roll out dough, shape ravioli, and prepare the sage butter together. Cooking as a team not only makes the process faster; it forges a bond and creates shared memories that will last for years to come.

Perfect for the festive season or a simple family dinner, Pumpkin Ricotta Stuffed Ravioli is more than just a meal—it’s a love letter to the season. Comforting, rich, and utterly scrumptious, it channels all the warmth and coziness fall brings. As you enjoy every pasta-filled bite, you will be reminded that food isn’t just about nourishment; it’s about nurturing relationships, celebrating flavors, and crafting experiences that will linger long after the last plate is cleared. Whether you’re savoring it alone as a moment of self-care or sharing it with loved ones, this dish promises to wrap you in a hug of autumn flavors that make your heart feel at home.

So roll up your sleeves, put on your apron, and prepare to impress with this Pumpkin Ricotta Stuffed Ravioli. It’s time to create a memorable dining experience filled with love, laughter, and delightful flavors that capture the spirit of the season, delivering not just a meal, but a comforting embrace on a plate that invites you to savor each moment. Enjoy not only the delicious results but the delightful journey of homemaking and culinary adventures, and let the warmth of your kitchen fill your heart with joy. Happy cooking!

Ingredients

Ingredients

  • Ravioli Dough
    • 2 cups all-purpose flour
    • 3 large eggs
    • 1/2 tsp salt
    • 1 tbsp olive oil
  • Pumpkin and Ricotta Filling
    • 1 cup canned pumpkin puree
    • 1 cup ricotta cheese
    • 1/4 cup grated Parmesan cheese
    • 1/2 tsp ground nutmeg
    • 1/2 tsp ground cinnamon
    • Salt and pepper to taste
  • Sauce
    • 4 tbsp unsalted butter
    • 2 cloves garlic minced
    • 1/4 cup fresh sage leaves
    • Salt and pepper to taste
    • Grated Parmesan cheese for serving

Instructions

  • In a large mixing bowl, combine the all-purpose flour and salt for the ravioli dough. Make a well in the center and add the eggs and olive oil.
  • Using a fork, gradually mix the flour into the wet ingredients until a dough begins to form.
  • Knead the dough on a lightly floured surface for about 5-7 minutes until smooth and elastic. Wrap in plastic wrap and let it rest for at least 30 minutes.
  • In a separate bowl, prepare the pumpkin and ricotta filling by combining the canned pumpkin puree, ricotta cheese, grated Parmesan cheese, ground nutmeg, ground cinnamon, and salt and pepper. Mix until well combined.
  • Roll out the rested ravioli dough on a lightly floured surface to a thin sheet, about 1/16 inch thick.
  • Using a round cutter or a glass, cut out circles of dough, about 3 inches in diameter.
  • Place a teaspoon of the pumpkin and ricotta filling in the center of half of the dough circles.
  • Moisten the edges of the filled circles with water, then place a second circle of dough on top and press the edges to seal securely.
  • Bring a large pot of salted water to a boil. Carefully drop the ravioli into the boiling water in batches and cook for 4-5 minutes or until they float to the surface and are tender.
  • While the ravioli are cooking, melt the unsalted butter in a skillet over medium heat. Add minced garlic and fresh sage leaves, cooking until the garlic is fragrant and the sage is crispy.
  • Once the ravioli are cooked, use a slotted spoon to transfer them directly to the skillet with the sage butter.
  • Gently toss the ravioli in the sauce to coat. Season with salt and pepper to taste.
  • Serve the ravioli hot, garnished with additional grated Parmesan cheese.

Notes

These pumpkin ricotta stuffed ravioli are a delightful twist on traditional pasta dishes, featuring a creamy and flavorful filling. The combination of pumpkin and ricotta creates a rich, velvety texture, enhanced by hints of nutmeg and cinnamon that evoke the warmth of autumn. Using fresh sage in the buttery sauce adds an aromatic touch that beautifully complements the ravioli.

When making the ravioli dough, ensure that it is well-kneaded for the right texture; this will help keep the pasta tender and easy to work with. Roll the dough thinly, as this allows for a better filling-to-dough ratio, leading to a less doughy bite. If you don’t have a pasta machine, a rolling pin will work perfectly as well.

For the filling, ensure the pumpkin puree is well-drained to avoid excess moisture that can make the filling too watery. You can also customize the filling by adding other spices such as cloves or ginger for an extra flavor kick. Feel free to experiment with herbs, or incorporate some sautéed spinach for added nutrition.

This dish is perfect for serving on special occasions or a family dinner. It pairs wonderfully with a simple side salad or a light vegetable dish. Lead with the sauce; melt the butter and sauté the garlic until fragrant, then toss in the crispy sage leaves just before serving for maximum flavor.

Finally, these ravioli can be made ahead and frozen before cooking. Just make sure to lay them in a single layer on a baking sheet until frozen solid, then transfer them to an airtight container. Cook from frozen when ready, but keep in mind it may take a minute or two longer. Enjoy your delicious homemade pumpkin ricotta ravioli!

Faq

What ingredients do I need to make Pumpkin Ricotta Stuffed Ravioli?

You will need fresh pasta sheets, pumpkin puree, ricotta cheese, grated Parmesan cheese, egg, salt, pepper, nutmeg, and flour for dusting.

Can I use store-bought pasta for this recipe?

Yes, you can use store-bought pasta sheets if you prefer. Fresh homemade pasta can add a special touch, but store-bought works well for convenience.

How do I prepare the filling for the ravioli?

In a bowl, combine the pumpkin puree, ricotta cheese, grated Parmesan, beaten egg, salt, pepper, and a pinch of nutmeg. Mix until well combined and smooth.

What is the best way to seal the ravioli?

To seal the ravioli, place a small spoonful of filling on one pasta sheet, brush the edges with water, and place another sheet on top. Press down around the filling to remove air and seal tightly.

How do I cook the pumpkin ricotta stuffed ravioli?

Bring a large pot of salted water to a boil. Add the ravioli and cook for about 3-4 minutes or until they float to the surface and are tender. Drain and serve immediately.

What sauce pairs well with pumpkin ricotta ravioli?

A sage brown butter sauce, a light marinara, or even a cream sauce can complement the flavors of pumpkin and ricotta beautifully.

Can I make the ravioli ahead of time?

Yes, you can prepare the ravioli ahead of time. Store them in the refrigerator for up to a day or freeze them for later use. Just ensure they are spaced out to prevent sticking.

What can I serve with pumpkin ricotta stuffed ravioli?

Consider serving a simple salad, garlic bread, or roasted vegetables on the side to balance the meal and add extra flavors.

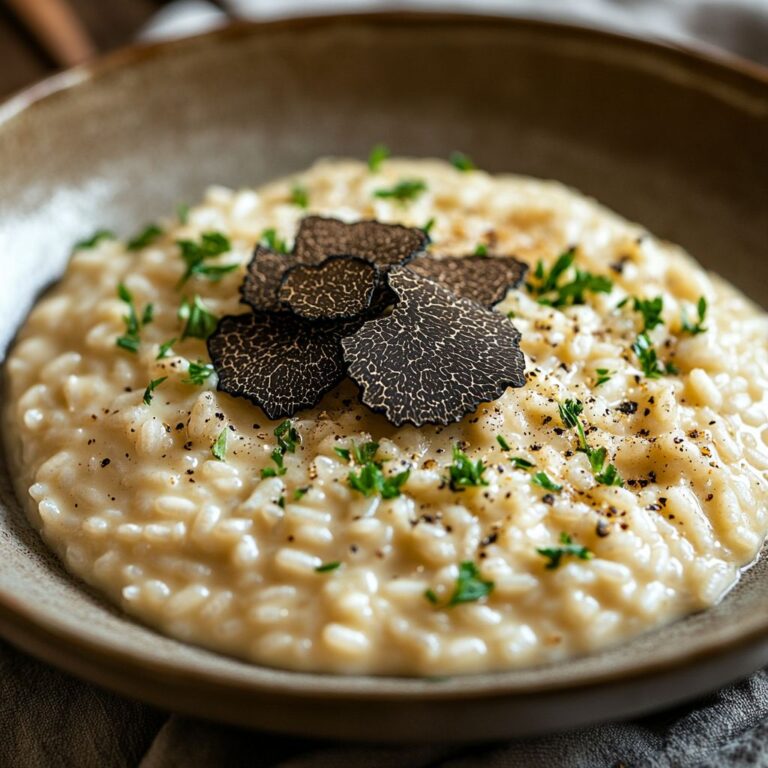
Indulge your senses with the luxurious flavors and velvety texture of Truffle Mascarpone Risotto—an exquisite dish that turns any meal into a celebration. Imagine a creamy, rich risotto infused with earthy truffle essence and complemented by the smoothness of mascarpone cheese, creating a balance of flavors that’s nothing short of divine. This dish is not just food; it’s an experience that invites you to slow down and savor each bite.

Risotto is an Italian staple that’s beloved around the globe, often cherished for its comforting qualities and versatile nature. The secret to achieving that perfect risotto lies in the technique of gradually adding broth while stirring patiently until the rice reaches a creamy and al dente consistency. The process might seem simple, yet it requires your full attention and devotion—a metaphor for how good food and memorable moments come from a place of care and slow, intentional actions.

Truffles, often regarded as the diamond of the culinary world, add a touch of sophistication that elevates this dish to gourmet status. Their unique aroma and flavor transform humble ingredients into something extraordinary, promising to enchant even the most discerning palates. When combined with the rich mascarpone cheese, which lends an irresistible creaminess, this risotto is guaranteed to impress dinner guests or provide yourself with a self-indulgent meal that celebrates the finer things in life.

As you embark on this culinary adventure, picture yourself in a cozy, rustic kitchen, with the aromas of sautéed onions and garlic wafting enticingly through the air. You’ll hear the gentle bubbling of the stock as it gradually absorbs into the rice, the sound creating a soothing backdrop as you whisk in the velvety mascarpone and sprinkle the luxurious truffle oil or grated truffles to finish. It’s a scene that invites warmth and comfort, perfect for a chilly evening or a special occasion with loved ones.

Moreover, Truffle Mascarpone Risotto is incredibly versatile. It can serve as a stunning main course for a vegetarian dinner or a rich side dish accompanying roasted meats or seafood. The dish’s elegance makes it a fitting centerpiece for a romantic date night, festive gatherings, or even a cozy night in. Pair it with a beautifully chilled glass of white wine, and you have a meal that sings in harmony, bringing together taste and atmosphere in the most delightful way.

What’s more, you can customize your Truffle Mascarpone Risotto to suit your culinary aspirations. Prefer a cheesy profile? Add more aged Parmesan for an even richer flavor. Want to introduce a pop of color and nutrition? Consider incorporating seasonal vegetables like asparagus or peas, which not only enhance the dish visually but also bring a delightful freshness that complements the earthiness of the truffles. The beauty of risotto lies in its adaptability; it’s an invitation to experiment and let your palate dictate the flavors you wish to explore.

This dish also opens the door to endless garnishing possibilities. Consider finishing your risotto with fresh herbs like chives, parsley, or microgreens for a burst of brightness. The addition of crispy shallots or sautéed mushrooms can add a delightful crunch, enhancing the textural experience while remaining entirely harmonious with the subtleness of the truffle and mascarpone. Each finishing touch contributes to a stunning presentation that could easily grace the pages of a culinary magazine.

Even if you think you’re not a skilled cook, fear not! This recipe is approachable for home chefs of all levels. The most important ingredient is patience, and as you stir slowly, you’ll not only gain culinary proficiency but also find joy and satisfaction in the process of creating something beautiful and delicious. With each stirring, you’re nurturing the ingredients, coaxing flavors, and building a comforting dish that embodies warmth and indulgence.

As we explore the steps to create this magnificent Truffle Mascarpone Risotto, remember that cooking is about more than just the final product—it’s also a journey, a way to connect with the ingredients, and the chance to express your creativity. So gather your essentials, take your time, and let the kitchen become your sanctuary. Engage your senses at each stage: the sight of the rice gently cooking, the sound of your stirring spoon gliding through the creamy mixture, and the most delightful aroma that fills your home and entices everyone within reach.

Before you begin, consider setting a beautiful table to enjoy your creation afterward. A charming ambiance can enhance the dining experience, making something as simple as a bowl of risotto feel like an extravagant event. Light a few candles, arrange some fresh flowers, and perhaps play some soft music in the background. These small touches turn a homemade meal into a special occasion and elevate your dining experience to new heights.

With all that said, let’s embark on the detailed preparation of Truffle Mascarpone Risotto. Prepare the ingredients with care, and have them close at hand, ensuring you can easily enjoy the art of cooking without interruptions. The process of crafting this risotto will not only result in a flavor-packed dish but also a delightful memory that you’ll cherish and perhaps recreate for years to come.

As you await the delightful outcome of your culinary endeavor, allow the anticipation to grow. When the time comes to serve, each wow-worthy spoonful will deliver a warm embrace of earthy notes and creamy comfort, promising to melt into your heart and soul. Whether it’s a weekday dinner or a momentous occasion, Truffle Mascarpone Risotto is the ultimate embodiment of comfort and luxury, leaving you and your guests longing for every last bite.

Ingredients

  • 1 1/2 cups Arborio rice
  • 4 cups low-sodium chicken or vegetable broth
  • 1 cup dry white wine
  • 1 medium onion finely chopped
  • 2 cloves garlic minced
  • 2 tablespoons olive oil
  • 2 tablespoons unsalted butter
  • 1 cup mascarpone cheese
  • 1/2 cup grated Parmesan cheese
  • 2 tablespoons truffle oil
  • Salt to taste
  • Freshly ground black pepper to taste
  • Fresh parsley chopped, for garnish

Instructions

  • In a medium saucepan, bring the low-sodium chicken or vegetable broth to a simmer over low heat. Keep it warm on the stove.
  • In a large skillet or saucepan, heat the olive oil and 1 tablespoon of the butter over medium heat.
  • Add the finely chopped onion and sauté for about 5 minutes, until it becomes translucent.
  • Stir in the minced garlic and cook for an additional minute, being careful not to burn it.
  • Add the Arborio rice to the pan and stir well to coat the rice in the oil, cooking for about 2 minutes until the edges of the rice become translucent.
  • Pour in the dry white wine and cook, stirring frequently, until the wine is mostly absorbed by the rice.
  • Begin adding the warm broth to the rice one ladleful at a time, stirring constantly and waiting until the liquid is absorbed before adding the next ladleful. Continue this process for about 18-20 minutes, or until the rice is al dente and creamy.
  • Once the rice is cooked to your desired consistency, remove the skillet from the heat.
  • Stir in the mascarpone cheese, the remaining tablespoon of butter, and the grated Parmesan cheese until everything is well combined and creamy.
  • Drizzle in the truffle oil and season with salt and freshly ground black pepper to taste. Adjust seasoning as needed.
  • Serve the risotto immediately, garnished with chopped fresh parsley for a touch of color and additional flavor.

Notes

Indulge in the creamy delight of Truffle Mascarpone Risotto, a rich and elegant dish perfect for any special occasion or a cozy night in. This risotto is made with Arborio rice, which gives it a beautiful creamy texture as it cooks slowly and absorbs the flavors of the broth and wine. The addition of mascarpone cheese enhances the creaminess, while the truffle oil adds a luxurious finish that elevates the entire dish.

Begin by heating your broth in a saucepan; it’s essential to keep it warm as you gradually add it to the rice, allowing the grains to absorb the liquid slowly. Sauté the onion and garlic until they are fragrant and translucent—the heart of the risotto. Stir in the Arborio rice, allowing it to toast slightly, which brings out its nutty flavor.

When adding the wine, choose a dry variety that you would enjoy drinking, as it significantly impacts the dish’s flavor. Wait until the wine is almost completely absorbed before adding the broth, one ladle at a time, stirring continuously. This process helps release the rice’s starch, creating a creamy texture without the need for cream.

Once the risotto reaches your desired al dente texture, fold in the mascarpone and Parmesan for a decadently creamy finish. Drizzle with truffle oil, season with salt and freshly ground black pepper, and garnish with fresh parsley for a pop of color. This dish pairs beautifully with a crisp green salad and a glass of white wine. Enjoy your sophisticated yet comforting meal!

Faq

What ingredients are needed to make Truffle Mascarpone Risotto?

The main ingredients include Arborio rice, mascarpone cheese, vegetable or chicken broth, truffle oil, onions, garlic, Parmesan cheese, white wine, and mushrooms. Optional garnishes include fresh herbs and more truffle oil.

How long does it take to prepare Truffle Mascarpone Risotto?

Preparation typically takes about 10-15 minutes, and the cooking time is around 20-25 minutes, so you can expect the whole process to take approximately 30-40 minutes.

Can I use a different type of cheese instead of mascarpone?

Yes, you can substitute mascarpone with other creamy cheeses like cream cheese or ricotta for a slightly different flavor and texture.

Is Truffle Mascarpone Risotto vegetarian?

Yes, this dish is vegetarian as it primarily consists of rice, cheese, and vegetables. Ensure the broth you use is vegetable-based to keep it vegetarian.

What type of mushrooms work best in this recipe?

Cremini or shiitake mushrooms are great choices as they add a rich flavor. However, you can use any mushrooms you like or have on hand.

Can I make this risotto in advance?

While risotto is best served fresh, you can prepare it in advance and reheat it. Add a splash of broth to restore its creamy texture when reheating.

What can I serve with Truffle Mascarpone Risotto?

This risotto pairs well with grilled vegetables, a side salad, or simply garnished with additional herbs and truffle oil. It can also be served as a side dish to meats like chicken or steak.

How do I store leftovers of Truffle Mascarpone Risotto?

Store any leftovers in an airtight container in the refrigerator for up to 3 days. When reheating, add a little broth or water to help regain its creaminess.

Imagine a joyous Christmas morning, the air filled with the sound of laughter and the aroma of freshly brewed coffee wafting through the house. Snowflakes gently blanket the world outside, while inside, warmth radiates from the kitchen as your loved ones gather around the table. What could elevate this cherished holiday experience? Enter the delectable dish known as Christmas Morning Macaroni. This is not just any macaroni; it is a delightful celebration of flavors that captures the spirit of the season, creating unforgettable memories with each spoonful.

This festive macaroni dish transforms the classic comfort food into a sumptuous feast, perfect for sharing with family and friends during the holiday season. It’s a beautiful union of creamy, cheesy goodness combined with a subtle hint of spice, all wrapped up in perfectly cooked pasta. Imagine golden-brown baked cheese bubbling on top, a crunchy breadcrumb crust, and savory aromas dancing in the air – this is the essence of Christmas Morning Macaroni. Let it take center stage on your breakfast or brunch table and watch as it draws everyone in with its delightful allure.

As you embark on this culinary adventure, you’ll discover that Christmas Morning Macaroni isn’t just about the ingredients; it’s a tribute to family traditions, gatherings, and the warmth of connectedness. Each ingredient tells a story: the pasta, representing unity; the cheese, signifying richness and delight; and the spices and herbs, sparking joy in the hearts of those you love. This dish embodies the spirit of the holiday season, reminding us to celebrate the simple moments with those who mean the most. It’s a lovely way to breathe new life into your Christmas morning rituals, bringing a touch of creativity to classic dishes.

Preparing Christmas Morning Macaroni can be a fun and engaging activity for the whole family. Imagine the kids helping out, measuring the pasta, stirring in the gooey cheese, or sprinkling the breadcrumbs on top. It’s a moment to create not just a meal but memories, building bonds over laughter and culinary exploration. As everyone gets involved, they’ll be laughing and sharing stories while anticipating the comfort of this heartwarming dish. Such moments become cherished traditions that are passed down through generations, showcasing the beauty of cooking together.

The recipe itself is incredibly versatile, allowing you to customize it according to your family’s preferences or dietary requirements. You can choose from an array of cheeses, mix in your favorite proteins, or add seasonal vegetables for a delightful twist. Whether you prefer a hint of nutmeg or a sprinkle of paprika, each variation reflects your personal touch, ensuring that your Christmas Morning Macaroni becomes a unique representation of your family’s tastes. Perhaps you’d like a smokier flavor with the addition of some crispy bacon or sausage, or a vegetarian version that bursts with fresh vegetables? The possibilities are endless, making this dish a canvas for creativity.

Moreover, consider the nutritional aspect of your creation. You can opt for whole grain pasta to add more fiber, or experiment with plant-based cheeses to cater to vegan family members. Adding spinach, diced bell peppers, or even butternut squash can elevate the dish while sneakily incorporating more vegetables into everyone’s diet. The beauty of Christmas Morning Macaroni lies not just in its delicious flavors, but also in its adaptability to support healthier feeding choices without sacrificing taste.

After carefully preparing this divine dish, what better way to present it on your Christmas table than a splendid display? The warm, golden perfection of the macaroni, topped with a garnish of fresh herbs or a sprinkling of red pepper flakes for a slight kick, will definitely be a feast for the eyes. Picture it: a beautiful casserole dish bubbling on the table, surrounded by warm bread, seasonal fruit, and perhaps a festive salad. Your gathering will be centered around the rich flavors and aromas of your macaroni, creating a Christmas atmosphere that people will remember long after the last bite has been eaten.

As you serve this treasure, encourage your guests to share their favorite holiday memories or traditions. Perhaps someone will talk about their grandmother’s special recipe or the unforgettable Christmas morning they experienced as a child. Food has an incredible ability to spark conversation and connection, turning an ordinary meal into an extraordinary experience. The warmth and happiness that radiates from sharing a home-cooked meal can often become the highlight of the day, more cherished than the gifts exchanged or the decorations displayed.

The beauty of Christmas Morning Macaroni also lies in its potential for leftover creativity. Should there be any remaining, envision crafting scrumptious macaroni cups or even turning it into a savory casserole for the next day’s brunch. This dish holds versatility that extends well into the heart of the holiday season, allowing you to relish these flavors well beyond Christmas Day. You can also freeze portions ahead of time, providing you with a convenient dish that can simply be reheated for a cozy family meal any day after the holidays.

All in all, Christmas Morning Macaroni is more than just a recipe; it’s about celebrating the spirit of unity, creativity, and love through food. As you gather your ingredients and prepare to whip up this delightful dish, remember that each step is steeped in the joy of the season. From the sounds of laughter echoing in the kitchen to the delicious aromas wafting through your home, the entire experience fosters a sense of belonging and togetherness that resonates throughout the holiday festivities.

No matter how you choose to prepare it, Christmas Morning Macaroni will surely become a cherished recipe in your household for years to come. It will be remembered in the same way one recalls the warmth of family gatherings, the bright twinkling lights, and the joyous sounds of laughter echoing through the halls. So, this Christmas morning, let’s take a moment to reminisce, create, and delight in the glorious taste of macaroni, all while making wonderful memories that bind our hearts together through food and love.

Ingredients

  • 12 ounces elbow macaroni
  • 3 cups shredded sharp cheddar cheese
  • 1 cup milk
  • 1/2 cup sour cream
  • 2 large eggs
  • 1/4 cup grated Parmesan cheese
  • 1/4 teaspoon ground black pepper
  • 1/2 teaspoon garlic powder
  • 1/2 teaspoon onion powder
  • 1/2 cup cooked and crumbled bacon
  • 1/2 cup chopped green onions
  • 1/2 teaspoon paprika
  • Salt to taste

Instructions

  • Preheat your oven to 350°F (175°C) and lightly grease a 9×13 inch baking dish.
  • In a large pot, bring salted water to a boil and cook the elbow macaroni according to package instructions until al dente. Drain and set aside.
  • In a mixing bowl, combine the shredded sharp cheddar cheese, milk, sour cream, eggs, grated Parmesan cheese, ground black pepper, garlic powder, onion powder, crumbled bacon, chopped green onions, paprika, and salt. Whisk together until well combined.
  • Add the cooked macaroni to the cheese mixture and stir until the pasta is evenly coated with the cheese sauce.
  • Pour the macaroni and cheese mixture into the greased baking dish, spreading it evenly.
  • Bake in the preheated oven for 25-30 minutes, or until the top is golden and bubbly.
  • Remove from the oven and let it cool for a few minutes before serving.

Notes

These Christmas Morning Macaroni are a delightful twist on traditional mac and cheese, perfect for holiday gatherings or a cozy breakfast. The combination of sharp cheddar and creamy sour cream creates a rich and flavorful dish that is sure to please. Feel free to customize this recipe by adding in other ingredients such as diced ham or vegetables like spinach or bell peppers for an extra festive touch. This dish can be prepared ahead of time and simply baked before serving, making it an excellent choice for busy mornings. Serve it warm, topped with additional green onions or a sprinkle of extra Parmesan for an added flavor boost. Enjoy this comforting dish alongside a fresh fruit salad or a side of toast for a complete meal.

Faq

What ingredients do I need for Christmas Morning Macaroni?

You will need macaroni, cheddar cheese, milk, eggs, breadcrumbs, butter, salt, pepper, and any additional spices or toppings you prefer, such as herbs or cooked bacon.

Can I use a different type of cheese?

Yes, you can substitute cheddar cheese with other cheeses like Gruyère, Monterey Jack, or a combination of your favorites for a unique flavor.

How long does it take to prepare Christmas Morning Macaroni?

The total preparation and cooking time is typically around 45 minutes to 1 hour, including baking time.

Can I make this recipe ahead of time?

Yes, you can prepare the macaroni ahead of time, assemble it, and store it in the refrigerator. Just bake it when you’re ready to serve.

Is this dish suitable for vegetarians?

Absolutely! This recipe is vegetarian-friendly as it primarily contains pasta, cheese, eggs, and milk.

What can I serve with Christmas Morning Macaroni?

You can serve it with a side salad, fresh fruit, or even some crispy bacon or sausage for a heartier meal.

How do I store leftovers?

Store any leftovers in an airtight container in the refrigerator for up to 3-4 days. You can reheat it in the oven or microwave.

Can I freeze Christmas Morning Macaroni?

Yes, you can freeze it. Just make sure it’s well covered in an airtight container. It can keep in the freezer for up to 2-3 months.

Santa’s Favorite Lasagna Rolls: A Delightful Holiday Feast

As the holiday season approaches, there’s a certain warmth that fills the air, a cozy embrace that comes with family gatherings, laughter, and the tantalizing aroma of delicious food wafting from the kitchen. Among the many culinary creations that grace our tables during this cherished time, one dish stands out as a beloved favorite: Santa’s Favorite Lasagna Rolls. This enchanting twist on traditional lasagna brings a festive flair that is sure to delight your taste buds and leave your guests raving long after the last bite has been savored.

Imagine a plate filled with beautifully rolled pasta, lovingly layered with a rich blend of creamy ricotta, savory ground meat, and earthy spinach, all enveloped in a luscious tomato sauce that sparkles like holiday lights. Each bite is a harmonious melding of flavor and texture that transports you to a winter wonderland, evoking memories of joy and celebration. Just the thought of it is enough to make your mouth water, but the real magic lies not only in the ingredients but also in the love and memories that come with preparing and sharing this dish.

Santa’s Favorite Lasagna Rolls are not just about satisfying your hunger; they are a feast for the soul. Whether you are hosting a holiday party or simply gathering with loved ones for a cozy dinner, these delectable rolls will surely uplift the spirits and create a sense of togetherness. From the first moment the warm rolls emerge from the oven, drizzled with melted cheese and bubbling with goodness, the excitement in the air is palpable. Everyone will want to gather around the table, eager to share stories, laughter, and this scrumptious dish that embodies the essence of the holiday season.

The beauty of this recipe lies in its versatility. You can customize the filling according to your preferences, whether you want to stick to a classic meat and cheese combination, go fully vegetarian with roasted vegetables, or even cater to dietary restrictions with gluten-free pasta or dairy-free options. Santa’s Favorite Lasagna Rolls can easily be adapted to fit any palate. Plus, they make for excellent leftovers—if there are any! Reheating a roll the next day will remind you of all the warmth of family gatherings, making every meal a celebration.

As you set out to prepare Santa’s Favorite Lasagna Rolls, you’ll find that it’s not just about assembling ingredients; it’s about creating an experience. Gather your friends or family in the kitchen for a cooking session that transforms the simple act of making dinner into a precious bonding moment. Roll the pasta sheets together, fill them with your delicious mixture, and watch in delight as they take shape. It’s a heartwarming reminder that cooking can be a communal experience, fueled by love, laughter, and the joy of creating something special together. Whether you’re a seasoned chef or a kitchen novice, this dish offers an accessible and rewarding challenge that will enhance your culinary repertoire.

To further elevate your festive table setting, consider pairing Santa’s Favorite Lasagna Rolls with a crisp, seasonal salad or some warm, crusty garlic bread. Your meal will not only be a feast for the palate but also a visual delight with the vibrant colors of fresh ingredients shining on the plate. Lush green basil, bright red tomato sauce, and the golden hues of melted cheese create a festive tableau that’s sure to impress your guests.

Every family has its own traditions, and incorporating a dish like Santa’s Favorite Lasagna Rolls can become a cherished part of your holiday rituals. Imagine the stories that will be shared over these rolls, the laughter echoing through the dining room, and the traditions being passed down through generations, all centered around this delightful creation. Food has a magical way of bringing people together, and this dish epitomizes that experience, reminding us of the importance of connection, love, and the joy of sharing meals together.

So what are you waiting for? Gather your ingredients, unleash your inner chef, and let your kitchen fill with the aromas that herald the festive season. Santa’s Favorite Lasagna Rolls will become more than just a meal; they’ll transform into a tradition that warms hearts and fills bellies, embodying the joy and spirit of the holidays. Whether you serve them for a quiet family dinner or a jubilant holiday feast with relatives and friends, this show-stopping dish will surely steal the show and earn a permanent place on your holiday menu.

With each layer and every roll, you capture the essence of the season—love, joy, and warmth. So roll up your sleeves, and let’s create a dish that is not only delicious but also ripe with memories waiting to be made. After all, there’s something undeniably magical about gathering around the dining table, sharing not just food but laughter, stories, and the spirit of togetherness that the holidays bring. Here’s to making memories one delicious roll at a time!

As we dive into the subsequent sections of this approachable recipe, remember that cooking is a journey, not a race. Take your time, enjoy the process, and don’t be afraid to get a little messy—because the best memories often come from those delightful moments in the kitchen. Embrace the spirit of the holidays with Santa’s Favorite Lasagna Rolls, and prepare for a wonderfully satisfying experience that will resonate well beyond the dinner table.

Let’s celebrate this holiday season with joy, togetherness, and a lot of delicious food! Your loved ones will thank you for sharing the love that is baked into every roll, making Santa’s Favorite Lasagna Rolls a centerpiece of your holiday festivities, and a beautiful addition to your family traditions. Happy cooking!

Ingredients

  • Lasagna Sheets
  • 15 oz ricotta cheese
  • 2 cups shredded mozzarella cheese
  • 1 cup grated Parmesan cheese
  • 1 large egg
  • 2 cups marinara sauce
  • 2 cups fresh spinach, chopped
  • 1 tsp dried oregano
  • 1 tsp garlic powder
  • 1/2 tsp salt
  • 1/4 tsp black pepper

Instructions

  • Preheat your oven to 375°F (190°C) and spread a thin layer of marinara sauce at the bottom of a 9×13 inch baking dish.
  • Bring a large pot of salted water to a boil. Cook the lasagna sheets according to package instructions until al dente, then drain and rinse with cold water to prevent sticking.
  • In a large mixing bowl, combine the ricotta cheese, 1 cup of shredded mozzarella cheese, grated Parmesan cheese, large egg, chopped fresh spinach, dried oregano, garlic powder, salt, and black pepper. Mix until well combined.
  • Take one lasagna sheet and spread a generous amount of the cheese and spinach mixture along one end. Roll the sheet tightly into a log and place it seam-side down in the baking dish. Repeat this process with the remaining lasagna sheets.
  • Once all the lasagna rolls are in the baking dish, pour the remaining marinara sauce evenly over the top of the rolls. Sprinkle the remaining 1 cup of shredded mozzarella cheese over the sauce.
  • Cover the baking dish with aluminum foil and bake in the preheated oven for 25 minutes.
  • After 25 minutes, remove the foil and bake for an additional 10-15 minutes, or until the cheese is bubbly and golden brown.
  • Remove the dish from the oven and allow it to cool for a few minutes before serving.

Notes

These Santa’s Favorite Lasagna Rolls are a delightful twist on traditional lasagna, perfect for a festive meal or family gathering. The use of ricotta cheese and mozzarella ensures a creamy and cheesy filling that pairs beautifully with the fresh spinach. You can easily adapt this recipe by adding your favorite vegetables or proteins, such as mushrooms, zucchini, or cooked ground meat. For added flavor, consider mixing in some fresh herbs, such as basil or parsley, into the cheese mixture. These rolls can be prepped ahead of time and refrigerated before baking, which makes them a convenient option for busy days. Serve these delicious rolls with a simple side salad or garlic bread for a complete meal. Leftovers can be stored in the fridge for a few days or frozen for future enjoyment, making them a great make-ahead dish!

Faq

What are the main ingredients in Santa’s Favorite Lasagna Rolls?

The main ingredients include lasagna noodles, ricotta cheese, mozzarella cheese, marinara sauce, parmesan cheese, spinach, and Italian seasoning.

How long does it take to prepare Santa’s Favorite Lasagna Rolls?

Preparation time is approximately 30 minutes, with an additional 30-40 minutes for baking, depending on your oven.

Can I make Santa’s Favorite Lasagna Rolls ahead of time?

Yes! You can assemble the lasagna rolls a day in advance and store them in the refrigerator. Just remember to cover them tightly with plastic wrap or foil.

Is it possible to freeze Santa’s Favorite Lasagna Rolls?

Absolutely! You can freeze the assembled rolls before baking. Just wrap them tightly and they can be stored in the freezer for up to 3 months.

What can I substitute for ricotta cheese?

You can substitute ricotta cheese with cottage cheese or a mixture of cream cheese and sour cream for a similar texture and flavor.

How can I make Santa’s Favorite Lasagna Rolls vegetarian?

This recipe is already vegetarian-friendly, but you can add more vegetables like mushrooms, zucchini, or bell peppers for added nutrition and flavor.

What is the best way to reheat leftover lasagna rolls?

The best way is to reheat them in the oven at 350°F (175°C) until heated through. You can cover them with foil to retain moisture.

Can I add meat to Santa’s Favorite Lasagna Rolls?

Yes, you can add cooked ground beef, Italian sausage, or any other meat of your choice to the ricotta filling for added flavor.

Imagine a dish that envelops you in warmth and comfort with each bite—introducing Roasted Garlic Risotto, a creamy and luxurious staple of Italian cuisine that promises to elevate your dining experience. This dish beautifully balances the rich, deep flavors of caramelized garlic with the silky texture of risotto, making it the perfect centerpiece for both elegant dinners and cozy family meals. Whether you’re a culinary novice or a seasoned chef, mastering the art of risotto can be one of the most rewarding achievements in your cooking journey.

Risotto, originating from Northern Italy, is much more than just a rice dish; it’s a celebration of patience and technique. The star of our recipe is Arborio rice, a short-grain variety renowned for its high starch content, which lends the risotto its creamy consistency. What sets our Roasted Garlic Risotto apart is the use of roasted garlic, an ingredient that transforms the flavor profile entirely. Roasting garlic mellows its sharpness and creates a sweet, nutty aroma that infuses the risotto with depth and character.

As with many traditional Italian dishes, the key to a superb risotto lies in the process. Unlike a typical rice dish where you may simply boil and serve, risotto requires a gentle hand and attentive stirring. The gradual addition of warm broth allows the grains to absorb liquid, releasing their starch and creating an enchanting creaminess that’s absolutely irresistible. As you stir, you’ll notice how the risotto begins to thicken, forming a luscious, velvety base that begs for toppings and pairings.

Before we delve into the specifics of cooking your Roasted Garlic Risotto, let’s discuss the importance of ingredient quality. Opt for fresh, organic ingredients whenever possible. The simplicity of this dish means that each component’s flavor stands out, so whether it’s the broth or the garlic, investing in high-quality products will result in a far superior dish. A good vegetable or chicken broth serves as the foundation for the risotto, providing the necessary moisture and flavor. Aim for homemade stock if you can, as it adds an additional layer of goodness and personalization to your meal.

The process of roasting garlic itself is remarkably simple and can be done in tandem with preparing your risotto. With just a head of garlic, a drizzle of olive oil, and a sprinkle of salt, you will create a heavenly condiment that will transform the ordinary into the extraordinary. Roasting the garlic until it’s golden brown allows its natural sugars to develop, resulting in a spreadable, caramel-like consistency that can also be stirred directly into the risotto for an unbeatable flavor kick.

When it comes to garnishing your Roasted Garlic Risotto, the possibilities are virtually endless. A sprinkle of fresh herbs like parsley or basil can add a vibrant note, while a handful of grated Parmigiano-Reggiano lends a delightful nuttiness and extra creaminess. A drizzle of high-quality extra virgin olive oil right before serving can enhance the dish’s rich flavors. You could even consider topping your risotto with sautéed vegetables, grilled chicken, or shrimp to turn this side dish into a hearty main course, tailoring it to your special preferences or dietary needs.

One of the great joys of Roasted Garlic Risotto is its versatility. It can easily be adapted to the seasons. In spring, consider adding asparagus or peas, while in autumn, sautéed mushrooms or butternut squash can provide a beautiful contrast to the garlic’s sweetness. This adaptability makes it not only a delightful dish to enjoy but also a canvas for culinary creativity.

If you’re preparing this dish for a romantic dinner or a special gathering, consider pairing it with a lovely white wine. A light Sauvignon Blanc or a crisp Pinot Grigio complements the rich flavors of the risotto beautifully. As you savor each bite accompanied by the perfect wine, you’ll elevate your dining experience from delightful to extraordinary, making it one to remember.

In addition to its incredible taste, Roasted Garlic Risotto offers a sense of accomplishment as you stir, savor, and serve. Typically associated with fine dining, creating your own risotto at home brings a touch of restaurant-quality finesse into your kitchen without the hefty price tag. Sharing a plate of homemade risotto with loved ones serves as a reminder of the joy of cooking together, sharing moments over food, and creating lasting memories around the table.

Furthermore, Roasted Garlic Risotto pairs wonderfully with a variety of delicious appetizers and side dishes. Imagine starting your meal with a refreshing Caprese salad, featuring ripe tomatoes and creamy mozzarella drizzled with balsamic reduction, before transitioning to the rich creaminess of the risotto. To round off your Italian-themed evening, serve it with a light dessert, perhaps a classic tiramisu or panna cotta, leaving your guests in awe of your culinary skills and dedication.

Although risotto requires attention and time, the rewarding experience culminates in an exquisite dish that pays homage to traditional Italian cooking. So, whether you’re crafting this dish for a special occasion or simply to indulge your taste buds, Roasted Garlic Risotto offers a unique combination of flavors and textures that will leave you craving more.

So grab your apron, gather your ingredients, and prepare to embark on a culinary adventure with our Roasted Garlic Risotto—the dish that embodies the essence of Italian cooking in your own kitchen. As you watch the rice slowly transform into an elegant meal filled with comforting warmth, you’ll realize that cooking is as much about the journey as it is about the destination. Every morsel will tell a story of patience, passion, and love for food, making your Roasted Garlic Risotto not just a meal, but an experience to cherish.

Ingredients

  • 1 cup Arborio rice
  • 4 cups vegetable broth
  • 1 head of garlic
  • 2 tablespoons olive oil
  • 1 medium onion finely chopped
  • 1/2 cup dry white wine
  • 1/2 cup grated Parmesan cheese
  • 2 tablespoons butter
  • Salt to taste
  • Pepper to taste
  • Fresh parsley chopped, for garnish

Instructions

  • Preheat your oven to 400°F (200°C).
  • Slice the top off the head of garlic, drizzle with a little olive oil, wrap it in aluminum foil, and roast in the preheated oven for about 30-35 minutes, or until the cloves are soft and caramelized.
  • While the garlic is roasting, heat the vegetable broth in a saucepan and keep it warm over low heat.
  • In a large skillet or pot, heat 2 tablespoons of olive oil over medium heat. Add the finely chopped onion and sauté until translucent, about 5-7 minutes.
  • Add the Arborio rice to the skillet, stirring for 1-2 minutes until the rice is lightly toasted and coated with the oil.
  • Pour in the dry white wine and stir until it has mostly evaporated.
  • Once the wine is absorbed, begin adding the warm vegetable broth one ladle at a time, stirring frequently. Wait until the broth is nearly absorbed before adding the next ladle.
  • Continue this process for about 18-20 minutes, or until the rice is creamy and cooked al dente.
  • Remove the roasted garlic from the oven and let it cool slightly before squeezing the soft cloves out of their skins and adding them to the risotto.
  • Stir in the grated Parmesan cheese and butter, mixing thoroughly until melted and well combined. Season with salt and pepper to taste.
  • Serve hot, garnished with chopped fresh parsley.

Notes

These roasted garlic risotto is a creamy and comforting dish that’s perfect for a cozy dinner. The slow-cooked Arborio rice absorbs the flavors of the roasted garlic, creating a rich and savory base. To roast the garlic, simply wrap the head in aluminum foil and bake it until soft and caramelized, then squeeze the cloves into the risotto for a deep, sweet flavor. This risotto pairs beautifully with a variety of proteins, such as grilled chicken or sautéed shrimp, but can also stand alone as a delectable vegetarian option. For an extra touch, finish each serving with a sprinkle of fresh parsley and a drizzle of olive oil. Make sure to stir the risotto continuously while adding broth gradually to achieve that classic creamy texture.

Faq

What is roasted garlic risotto?

Roasted garlic risotto is a creamy Italian rice dish made with arborio rice, broth, and roasted garlic, which adds a rich, sweet flavor to the dish.

How long does it take to make roasted garlic risotto?

It typically takes about 30 to 40 minutes to prepare and cook roasted garlic risotto, depending on your efficiency and the specific recipe.

What type of rice is best for risotto?

Arborio rice is the best choice for risotto because it has a high starch content that creates the creamy texture characteristic of this dish.

Can I use regular garlic instead of roasted garlic?

While you can use regular garlic, roasted garlic provides a sweeter, milder flavor and adds depth to the risotto. If you’re in a pinch, you can substitute but the flavor will differ.

Can I make risotto ahead of time?

Risotto is best enjoyed fresh, but you can make it ahead and reheat it. However, it may become slightly less creamy and you’ll need to add a bit of broth while reheating to restore its consistency.

What ingredients do I need for roasted garlic risotto?

You will need arborio rice, chicken or vegetable broth, roasted garlic, onions or shallots, white wine (optional), Parmesan cheese, olive oil or butter, and fresh herbs for garnishing.

Can I add other ingredients to my risotto?

Absolutely! You can add vegetables like spinach, peas, or mushrooms, as well as proteins like chicken, shrimp, or saffron to enhance the flavor and nutrition of the risotto.

What should I serve with roasted garlic risotto?

Roasted garlic risotto pairs well with a variety of dishes, including grilled meats, roasted vegetables, or a simple salad, making it a versatile side or main dish.