Introduction / Hook
There’s something irresistibly nostalgic about cookies that come from a simple slice and bake routine—the familiar tap of the spoon on the dough, the sigh of the warm oven, and the promise of a kitchen filled with the soft, buttery aroma of childhood. Slice and Bake Heart Cookies aren’t just a dessert; they’re a tactile celebration of love and tenderness made tangible in a few effortless steps. Imagine ruby-red hearts that hold a whisper of vanilla and a kiss of almond, their edges just-browned and centers perfectly tender. The joy of slicing neat, uniform shapes straight from a log, sliding them onto a sheet, and watching them puff and set into charming little hearts—this is comfort baked into every bite. And the best part? The process is as calming and satisfying as the cookies themselves, offering a hands-on experience that makes ordinary afternoons feel like a holiday ritual. In a world of whirlwind recipes, these cookies stand out because they marry simplicity with sentiment, creating something that looks as delightful as it tastes—and that you can proudly claim as your own small art project with a big emotional payoff.
The Story Behind the Dish
Slice and Bake cookies have a long, quiet charm that traces back to the earliest days of packaged dough and efficient home baking. The concept—rolling a log of dough, chilling it, and then slicing perfect rounds—emerged as a practical solution for busy households who still wanted cookies that looked and tasted homemade. Hearts, in particular, weave a narrative of affection, family gatherings, and shared memories: a plate passed around the table at Valentine’s Day, a tray of “I love you” messages for a partner, or cookies exchanged by neighbors during the holidays. The heart shape is universal—the symbol that instantly communicates warmth, care, and connection. In many families, making heart-shaped cookies is a tradition that signals “special care” and “together time,” whether you’re assembling them for a celebration, a school bake sale, or a quiet night when you want to remind someone you’re thinking of them. The slice-and-bake method itself is a reminder of classic, homey kitchen routines—no fancy equipment required, just a reliable dough, a steady hand, and a shared moment of anticipation as the cookies come to life in the oven. This recipe honors that heritage while inviting you to infuse it with your own flavors and personal touches.
Why You’ll Love This Recipe
- Effortless elegance: The slice-and-bake approach yields beautifully shaped hearts with minimal mess or fuss.
- Consistent results: Chilling the dough ensures clean, precise slices and evenly baked centers.
- Versatile flavor base: A simple vanilla-almond dough that you can customize with add-ins and swirls.
- Kid-friendly and family-friendly: A perfect project for kids to help with (and a wonderful activity for bonding).
- Portable and shareable: Bake a batch to bring to gatherings, package nicely as gifts, or brighten a friend’s day.
- Make-ahead magic: The dough logs can be prepared in advance, refrigerated, or frozen for future use.
- Perfect for celebrations: Hearts, by their nature, are festive and convey affection—ideal for Valentine’s Day, anniversaries, birthdays, or just because.
- Customizable for dietary needs: With simple substitutions, you can tailor the dough to be dairy-free, gluten-free, or even vegan without sacrificing the heart-warming flavor.
Flavor Profile & Texture
The dough for Slice and Bake Heart Cookies delivers a comforting, classic butter-forward flavor with a subtle lift from vanilla and almond. The aroma is where the magic starts—warm vanilla mingling with a faint almond bloom, a hint of toasty butter as the cookies begin to set at the edges. When you bite in, you’re met with a delicate snap at the outer edge that yields to a tender, melt-in-your-mouth center. The texture is a study in balance: crisp-edged cookies that stay soft and chewy in the middle, not crumbly, with a satin-like crumb that clings to the palate instead of drying out. If you add optional ingredients like finely chopped dark chocolate, a touch of citrus zest, or a pinch of sea salt, you’ll introduce layers of complexity that play beautifully against the underlying sweetness. The heart shape provides a poised, elegant silhouette that makes the cookies feel almost couture in their simplicity—like a boutique confection you could package with a ribbon for a thoughtful gift. In terms of mouthfeel, think of the perfect cookie companion: comforting, familiar, with a gentle crumb that dissolves nicely and leaves a lingering, buttery kiss on the tongue.
Occasions & Pairings
These Slice and Bake Heart Cookies are an ideal addition to a wide range of moments. They shine on special occasions and shine even brighter on ordinary days when you want to sprinkle a little sweetness into life. Consider these serving ideas and pairings:
- valentines and anniversaries: arrange them in a heart-shaped box or a simple, elegant tin with tissue paper and a handwritten note.
- Holiday gatherings: offer a tray of heart cookies as a warm welcome at the door or as a sweet end to a meal.
- Tea time or coffee breaks: pair with a lightly brewed black tea or a robust espresso for a comforting late-afternoon treat.
- Milk and hot chocolate pairings: the classic duo—these cookies love a glass of cold milk or a mug of rich cocoa.
- Giftable treats: wrap in cellophane with a ribbon and a personal message for birthdays, thank-yous, or “thinking of you” moments.
- Kid-friendly bake sale item: their simplistic shape and straightforward ingredients make them a hit with children and buyers alike.
Flavor pairings and serving suggestions can elevate the experience. A light dusting of powdered sugar adds a snowy, festive touch for winter celebrations. A drizzle of white chocolate or a subtle citrus glaze can transform the cookies into a more refined dessert for a dinner party. For those seeking a more grown-up profile, consider adding finely chopped toasted almonds or pecans to introduce a toasty, nutty note that plays beautifully with the vanilla and almond base. In terms of beverages, the cookies complement creamy lattes, chai, or a sparkling rosé during gatherings where dessert is meant to feel both comforting and celebratory.
Tips, Variations & Substitutions
One of the joys of slice-and-bake cookies is the room they leave for personalization. Here are practical ideas to tailor the recipe to your kitchen, dietary needs, or festive themes:
- Make-ahead dough: Shape the dough into two logs, wrap tightly, and refrigerate for up to 3 days. For longer storage, freeze the logs for up to 2 months. Thaw in the refrigerator before slicing.
- Flavor variations: Add 1/2 teaspoon almond extract for a more pronounced almond note, or swap a portion of the vanilla with lemon or orange zest for a bright citrus profile.
- Texture tweaks: For crisper cookies, bake a minute or two longer; for softer centers, reduce bake time by 1–2 minutes and consider a slightly higher oven temperature for a quicker set.
- Chocolate lovers: Fold in finely chopped dark or white chocolate (about 1/3 to 1/2 cup) or insert small chips in the cookie dough for pockets of melting sweetness.
- Nut-free option: Omit any nuts; the dough remains tender and flavorful with the same classic texture.
- Gluten-free approach: Use a gluten-free all-purpose flour blend that can be swapped 1:1 for regular flour. Some blends may require a touch more liquid or slightly longer chilling—follow package guidelines and adjust as needed.
- Vegan adaptation: Substitute plant-based butter with a dairy-free margarine or coconut oil solid, and use a flax egg or chia egg as a binder. Ensure that the chosen fat has a similar consistency to butter for best results.
- Decoration ideas: After baking and cooling, dip half of each heart in melted chocolate and sprinkle with crushed candy pearls or edible glitter for a more festive presentation.
- Flavor gradients: Create a marbled effect by rolling a second dough (for example, a cocoa dough) into a log and layering it with the vanilla-almond dough before chilling.
- Colorful twists for kids: Add a drop or two of food coloring to a portion of the dough to create pink or red hearts, then slice and bake as usual for a playful contrast.
Storage & Make-Ahead Ideas
Effortless prep and smart storage are the hallmarks of slice-and-bake cookies. Here are reliable strategies to keep their texture and flavor at peak:
- Raw dough logs: Keep logs wrapped tightly in plastic wrap, then place in a resealable bag. They can be refrigerated for up to 3 days or frozen for up to 2 months. Slice and bake directly from the freezer, adding an extra minute or two to the bake time if needed.
- Freshly baked cookies: Store cooled cookies in an airtight container at room temperature for up to 5 days. Layer with parchment between cookies to prevent sticking.
- Freezing baked cookies: Freeze baked cookies for up to 3 months. Thaw at room temperature and re-crisp in a 300°F (150°C) oven for 5–7 minutes if you like them extra fresh-tasting.
- Delivery ideas: Pack cookies in decorative tins or boxes with tissue paper. Include a small note about storage and reheating if you plan to gift them.
- Make-ahead party baking: Prepare and chill multiple dough logs in advance. On the day of your event, slice and bake in batches to keep the cookies fresh and warm for serving.
Fun Facts & Trivia (Optional)
Did you know that the heart has long symbolized love and warmth across cultures, making it a natural motif for sweet treats that feel like a hug you can share? Some culinary historians note that the first heart-shaped cookies and pastries became popular during festive times when families gathered to celebrate love and community—an edible token of togetherness. The slice-and-bake method itself is a nod to efficiency without sacrificing charm; the idea of rolling dough into a log and slicing it—almost like a pastry version of a romantic letter sealed with a ribbon—has a timeless appeal that resonates with home bakers of all ages. The heart shape also offers a playful opportunity to experiment with proportional precision in baking. Even the act of cutting identical shapes from a single dough log can become almost meditative, turning a simple kitchen task into a small, personal ceremony. In many cultures, dessert is not just a dish but a memory-making practice: the scent of vanilla and butter wafting through the house as loved ones gather, chat, and share stories around the bake. This recipe captures that sentiment with an easy, accessible method that invites everyone to participate and create something to savor together.
Conclusion / A Final Note
Slice and Bake Heart Cookies are a celebration of simplicity, affection, and the joy of sharing something homemade. They remind us that culinary magic doesn’t always require complex technique or extravagant ingredients—just a well-balanced dough, a little patience to chill, and a willingness to pour a bit of love into every cut. Whether you’re baking for a friend, a partner, a child, or yourself, these cookies offer a warm invitation to slow down, savor the moment, and let the kitchen become a stage for small, meaningful rituals. So roll your logs, chill them with care, and let the scent of vanilla and almond fill your home as you create a tray of heart-shaped delights that promise happiness with every bite. After all, in every heart cookie there’s a small story baked into the crust—the story of care, connection, and the simple joy of sharing something sweet.
Ingredients
Cookie Dough
– 1 cup unsalted butter, softened (2 sticks)
→ Butter provides richness, tenderness, and helps the dough hold together when baked. Soften to room temperature (about 65–70°F / 18–21°C) so it creams evenly with sugar, creating a light, airy crumb and helping the cookies slice cleanly. If your butter is too soft or melted, chill the dough briefly to restore structure before slicing.
– 1 cup granulated sugar
→ Sugar contributes sweetness and helps with the dough’s spread and texture. Cream it with the butter until pale and fluffy to trap air, which gives the cookies a tender, melt-in-your-mouth feel. If you prefer a softer cookie, you can substitute part of the sugar with powdered sugar for a silkier crumb, but keep overall sweetness balanced.
– 2 large eggs
→ Eggs act as binders and help set the dough, adding structure and moisture. At room temperature, eggs blend more smoothly into the butter-sugar mixture, resulting in an even dough. For richer flavor, you can use one whole egg plus one yolk, but adjust to maintain dough consistency.
– 2 teaspoons vanilla extract
→ Vanilla enhances the sweetness and depth of flavor; quality vanilla or paste yields a more pronounced aroma. For a stronger note, use the seeds from 1/2 a vanilla bean or a premium vanilla paste. Avoid artificial flavorings that can taste chemical in delicate cookie dough.
– 3 cups all-purpose flour
→ Flour provides the structure that holds the cookies together. Too little flour yields a crumbly cookie; too much makes them dry. Start with 3 cups and add a tablespoon at a time if the dough is too sticky. For a slightly sturdier cookie that slices cleanly, consider adding 1–2 tablespoons of cornstarch to the dough.
– 1/2 teaspoon baking powder
→ Baking powder gives a gentle lift, helping the dough hold its shape when sliced and baked, while keeping a light texture rather than a dense crumb. Ensure it’s fresh for consistent leavening; expired powder can result in flatter cookies.
– 1/4 teaspoon salt
→ Salt heightens sweetness and balances flavors, sharpening the overall taste of the cookie. If using salted butter, reduce added salt to prevent over-salting. Evenly distribute by whisking with the dry ingredients before mixing into the dough.
Optional Add-ins
– 1/2 cup chopped dried cranberries or cherries
→ Dried fruit adds chewy bursts of sweetness and a pop of color that complements heart-shaped cookies. Chop into small bite-sized pieces so every bite has fruit without tearing the dough. If using very dry fruit, rehydrate briefly in warm water or juice and pat dry to keep the dough from becoming gummy.
– 1/2 cup mini white chocolate chips
→ White chocolate provides creamy sweetness and contrast against the dough. They melt slightly during baking, creating sweet pockets of flavor. To keep chips evenly distributed, fold them in after the dough comes together and chill the dough before slicing.
Optional Icing and Filling
– 1 cup powdered sugar
→ The base for a simple royal-like icing or glaze; provides sweetness and a smooth, firm surface once set. Sift to remove lumps and whisk with liquid until smooth. Use small amounts of milk or lemon juice to achieve your desired consistency for drizzling or flooding on the cookies.
– 2–3 tablespoons milk or cream
→ Adds moisture and helps reach the right glaze consistency. Start with 2 tablespoons and add a little more as needed. For a tangy twist, substitute a splash of lemon juice or orange juice to brighten the icing and pair with edible pink coloring.
– 1 teaspoon lemon juice or clear vanilla extract (optional)
→ A touch of acidity or a secondary flavor depth that cuts sweetness and brightens the icing. Lemon juice pairs nicely with pink-trosted hearts; use clear vanilla if you want a more neutral icing color. Add gradually to avoid thinning the glaze too much.
– Pink or red gel food coloring (as needed)
→ Color adds a festive, heart-friendly appearance. Gel colors give vibrant hues with less moisture than liquid colors, helping the icing set correctly. Add a tiny amount at a time and whisk until you reach the desired shade to maintain glaze consistency for piping or flooding.
Chill and Bake
– 1–2 charcoal-free parchment sheets or silicone baking mats
→ Lining the baking sheets prevents sticking and promotes even browning and easy release of the slices after baking. If using parchment, you can reuse sheets for multiple batches; silicone mats are great for non-stick performance and consistent results across trays.
– 1 hour chilling (minimum) for dough, up to 24 hours refrigerated
→ Chilling solidifies the butter, helping the dough hold its heart shape when sliced and baked, and prevents excessive spreading. For best results, form a log with the dough, wrap tightly, and chill. Longer chilling improves flavor and makes slicing easier; allow dough to soften slightly at room temperature before slicing if cookies feel too firm.
Instructions
- Preheat your oven to 350°F (175°C) and line two baking sheets with charcoal-free parchment sheets or silicone baking mats to prevent sticking and promote even browning.
- → This ensures the cookies release cleanly after baking and reduces the risk of tearing when you lift slices from the sheet.
- In a large mixing bowl, cream the softened unsalted butter and granulated sugar together on medium speed until pale, fluffy, and fully emulsified, about 3–5 minutes, to trap air for a tender, melt-in-your-mouth crumb.
- → Creaming creates a light structure; avoid over-beating once the flour is added to prevent a dense, tough cookie.
- Beat in the eggs one at a time, ensuring each is fully incorporated before adding the next, then mix in the vanilla extract to distribute its aroma evenly throughout the dough.
- → Room-temperature eggs blend smoothly with the butter-sugar mixture, promoting uniform texture and preventing streaks; vanilla amplifies sweetness and depth of flavor.
- In a separate bowl, whisk together the all-purpose flour, baking powder, and salt until evenly combined to create a uniform dry base for the dough.
- → Even distribution of dry ingredients prevents pockets of baking powder or salt, which can cause uneven rise or an off taste in the finished cookies.
- Fold the dry ingredients into the wet mixture on low speed or by hand just until a cohesive dough forms, then fold in the optional add-ins: chopped dried cranberries or cherries and/or mini white chocolate chips, folding until evenly distributed.
- → Do not overwork the dough at this stage; minimal mixing preserves a tender crumb and ensures clean slicing later if you are shaping a log.
- Divide the dough if you are using add-ins, then shape it into a tight log or rectangle for easy slicing, wrap well, and refrigerate for 1 hour minimum or up to 24 hours to firm the butter and enhance slice stability.
- → Chilling solidifies the butter, helping the dough hold its heart shape during slicing and baking, and improves flavor development through slow maturation.
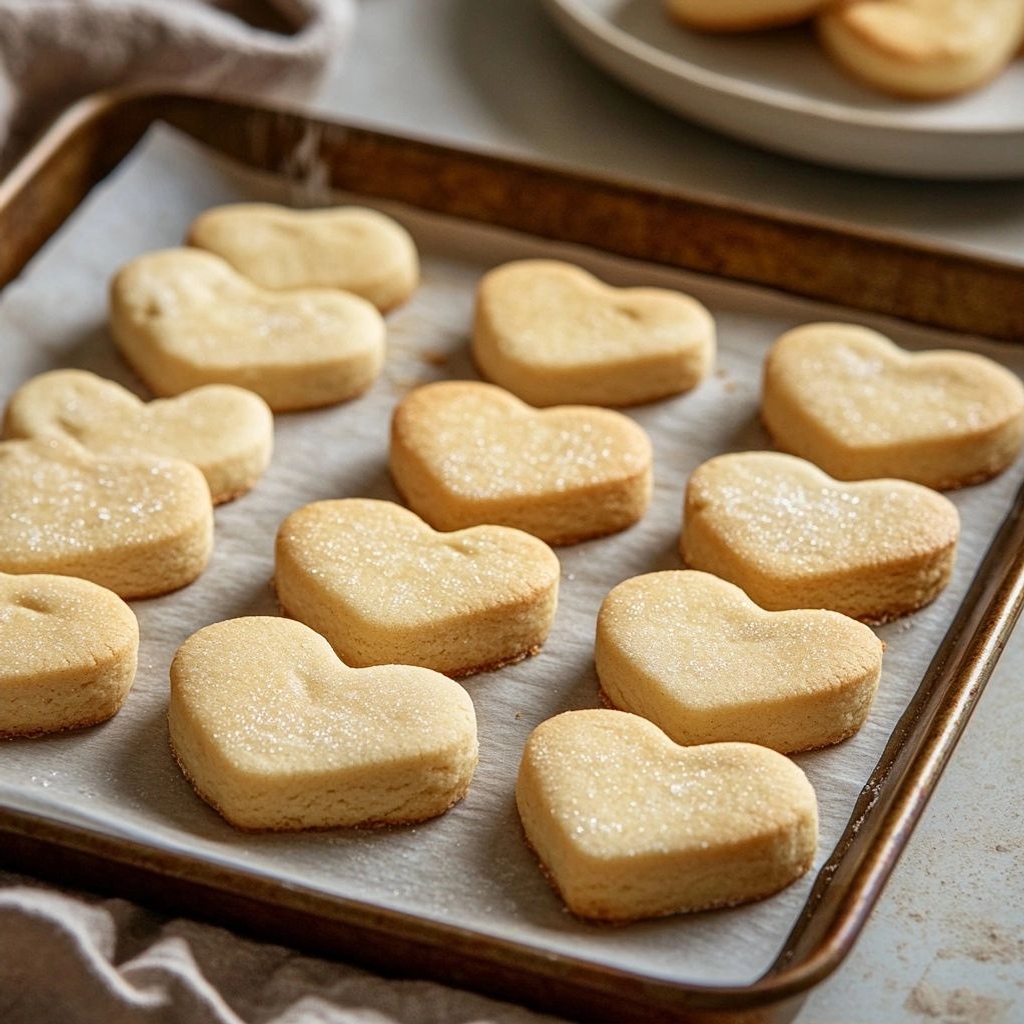
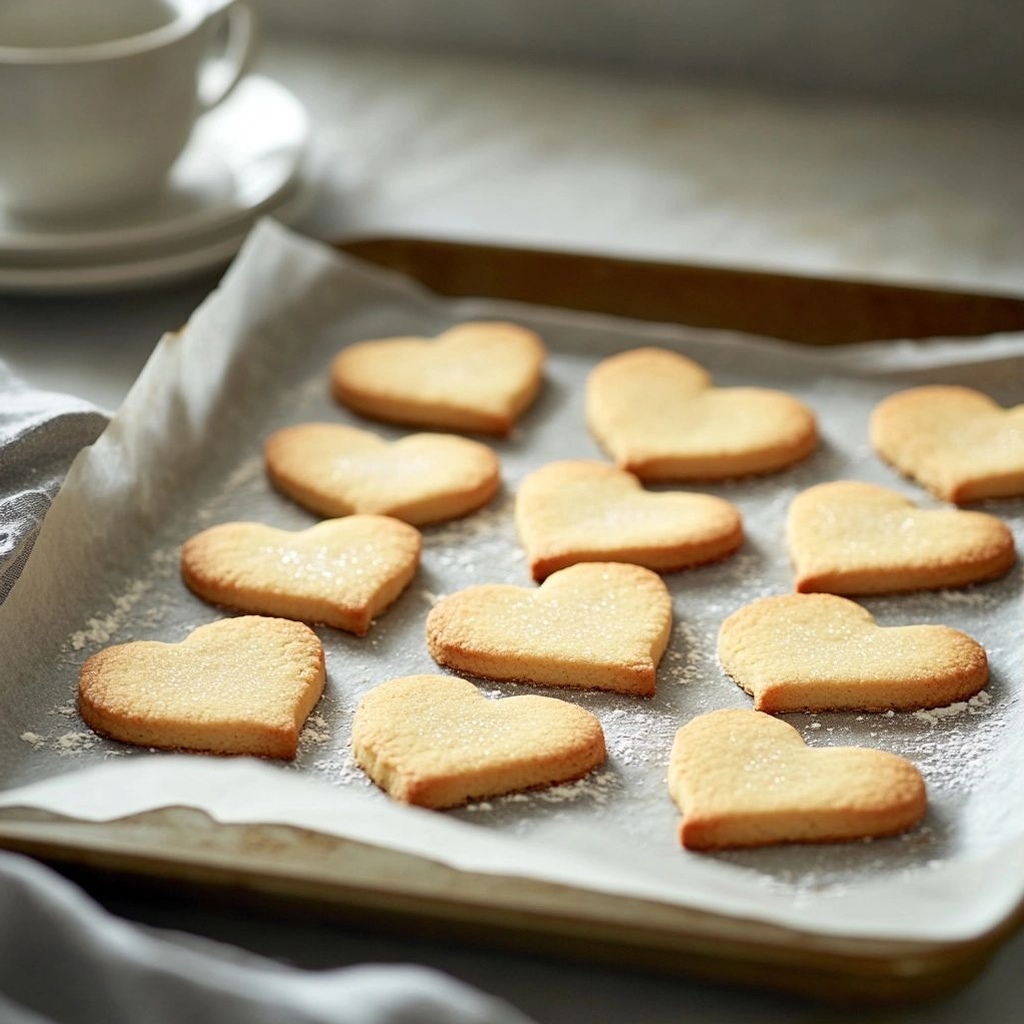
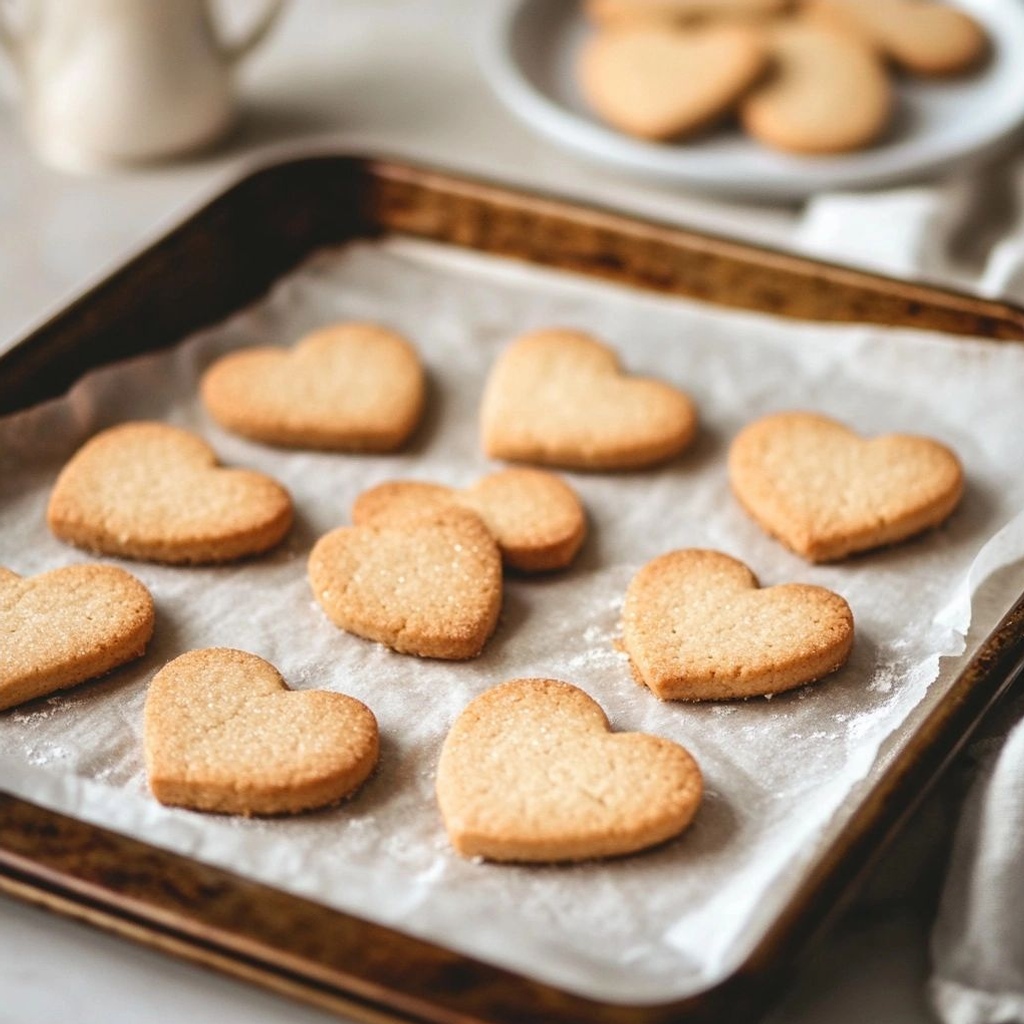
- Once chilled, remove the dough from the refrigerator and slice into even 1/4-inch (6 mm) thick rounds or hearts, keeping slices uniform to ensure even baking and color across all cookies.
- → Uniform slices bake evenly; if slices are uneven, some may spread too much while others remain pale in the center.
- Place the slices on the prepared baking sheets with at least 1 inch (2.5 cm) of space between them to allow for spreading and even browning, and bake for 8–12 minutes, rotating sheets halfway through if using multiple racks.
- → Edges should be lightly golden and centers set but not pale; accurate timing prevents underbaking or overbaking, which can affect texture and shape retention.
- Remove the sheets from the oven and allow the cookies to cool on the pans for 3–5 minutes before transferring to a wire rack to finish cooling completely.
- → Cooling on a rack prevents steam buildup, which could make the bottoms soft and prevent surface icing from setting properly.
- For icing, sift the powdered sugar into a bowl, then whisk in 2 tablespoons of milk or cream until smooth; add lemon juice or clear vanilla to taste, and adjust with additional milk a few drops at a time to reach a thick, pourable glaze.
- → Sifting removes lumps for a silky finish; a thick yet spreadable glaze gives a professional look and sets firmly as it dries on the cooled cookies.
- Tint the icing with pink or red gel coloring as needed, adding a tiny amount at a time and whisking until you achieve the desired heart-friendly hue without thinning the glaze too much.
- → Gel colors provide vibrant shade without introducing too much moisture, which could weaken the icing’s set and dull the finish.
- Optionally drizzle or flood the cooled cookies with the colored icing using a spoon or piping bag, allowing the glaze to set completely before stacking or storing.
Notes
These slice-and-bake heart cookies rely on a well-rested, butter-rich dough that slices cleanly and holds its shape when baked. Ensure butter is properly softened, eggs at room temperature, and the dough well chilled to minimize spreading during slicing. For clean edges, chill the logs thoroughly and slice with a sharp knife; wipe the blade between cuts. Customize with optional dried fruit and white chocolate, folding in after the dough comes together and chilling again before slicing. The cookies freeze well baked or unbaked; bake from chilled for best results, and store in an airtight container with parchment between layers. If you plan to decorate, prepare a simple glaze with powdered sugar and milk, and add lemon juice or clear vanilla to brighten icing; color with gel paste for vibrant heart shades.
Tips
Tips for Slice and Bake Heart Cookies
- Temperature matters: Soften butter to room temperature to ensure a smooth emulsion with sugar. If the dough feels greasy or the butter started to melt, refrigerate briefly to firm up before slicing.
- Cream properly: Beat butter and sugar until light and fluffy. This traps air and yields a tender, delicate cookie crumb. Overmixing after adding eggs can toughen the dough, so add eggs one at a time and mix just until combined.
- Egg guidance: Using room-temperature eggs helps them blend evenly. If your eggs are cold, whisk them first in a separate bowl before adding to the butter-sugar mixture to avoid curdling.
- Flavor layering: For a stronger vanilla note, scrape the seeds from half a vanilla bean or use vanilla paste. If you prefer a neutral base, use clear vanilla to avoid browning the dough during chilling.
- Flour and structure: Start with 3 cups flour and add 1 tablespoon at a time if the dough is sticky. For a sturdier sliceable cookie, consider adding 1–2 tablespoons of cornstarch to the dough.
- Leavening: Fresh baking powder ensures the dough holds shape when baked. If your cookies spread too much, recheck the freshness of your powder and avoid overmixing once dry ingredients are added.
- Salt balance: 1/4 teaspoon salt is a flavor enhancer, especially with unsalted butter. If using salted butter, omit or reduce salt to avoid over-seasoning.
- Optional add-ins: Chop dried cranberries or cherries into small pieces to ensure even distribution; if fruit is very dry, rehydrate briefly and pat dry to prevent gummy dough. Fold in white chocolate chips after dough comes together and chill before slicing for even distribution.
- Chilling helps shape: Chill dough for at least 1 hour or up to 24 hours to solidify the butter and prevent excessive spreading. Form a log, wrap tightly, and chill for clean, even slices.
- Shaping for slicing: If you’re new to log-shaping, loosely wrap the dough in parchment and twist to form a tight cylinder. Chill until firm, then slice straight into rounds with a sharp, clean knife for neat heart shapes.
- Spacing and baking: Use parchment or silicone mats to prevent sticking and promote even browning. Bake until the edges are just set; they may look soft but will firm as they cool on the sheet.
- Icing prep: Sift powdered sugar to remove lumps and whisk with milk or cream gradually. Add lemon juice or clear vanilla sparingly to adjust acidity and flavor without thinning the glaze too much.
- Color technique: Use gel food coloring for vibrant pink or red icing. Add color in small amounts, testing until you reach the desired shade, to avoid altering the glaze consistency.
FAQ
What are Slice and Bake Heart Cookies?
Slice and Bake Heart Cookies are a classic rolled sugar cookie dough shaped into a log, chilled, and then sliced into rounds to bake. The heart shape is achieved by using a red or pink dough or by using a small heart cutter for the cutouts after slicing.
What ingredients do I need?
Typical ingredients include butter, granulated sugar, eggs, vanilla extract, all-purpose flour, a pinch of salt, and baking powder. For color and flavor variations you can add red or pink food coloring, almond extract, or mini chocolate chips. Optional royal icing for decorating after baking.
How do I shape the dough into a slice-and-bake log?
Prepare two colored doughs (one plain, one pink/red) if you want a marbled heart look. Roll each dough into a log about 2-2.5 inches in diameter. Wrap tightly in plastic wrap and chill until firm, usually 1–2 hours or overnight. Slice to reveal the layered heart pattern as you bake.
How long should I chill the dough?
Chill the dough logs until firm, typically 1–2 hours in the fridge. For easier slicing, you can freeze the logs for 30–60 minutes, which helps slices hold their shape during baking.
What baking temperature and time should I use?
Preheat to 350°F (175°C). Slice the logs into 1/4-inch to 1/3-inch thick rounds and place on a parchment-lined baking sheet. Bake for 9–12 minutes, until the edges are lightly golden. Keep an eye on them to prevent overbrowning.
Why did my cookies spread too much?
Spread can occur if the dough is too warm, too much butter, or if the flour wasn’t measured correctly. Chill the dough longer, refrigerate the sliced rounds before baking, and ensure you use cold butter and not melted butter.
Can I make these ahead and freeze the dough?
Yes. Shape the dough into logs, wrap tightly in plastic wrap, and freeze. They can be frozen for up to 2-3 months. Thaw in the fridge overnight before slicing and baking. You can also freeze sliced rounds on a tray before transferring to a bag for longer storage.
How should I store baked cookies?
Store in an airtight container at room temperature for up to 5 days. Layer with parchment between cookies to prevent sticking. Freeze baked cookies for up to 1 month for longer storage.
Can I decorate these cookies?
Yes. Once cooled, you can pipe royal icing, drizzle with melted chocolate, or dust with powdered sugar. If you want a glossy finish, brush a light coat of glaze or icing. For a simple look, a sprinkle of edible sugar crystals works well.
What substitutions work well in this recipe?
You can substitute part of the all-purpose flour with almond flour for a nutty flavor, or use a dairy-free butter substitute for a vegan version (note: some adjustments may be needed for texture). Replacing sugar with a mix of white and brown sugar can yield a chewier result. For color, use gel food coloring to avoid thinning the dough.