Introduction / Hook
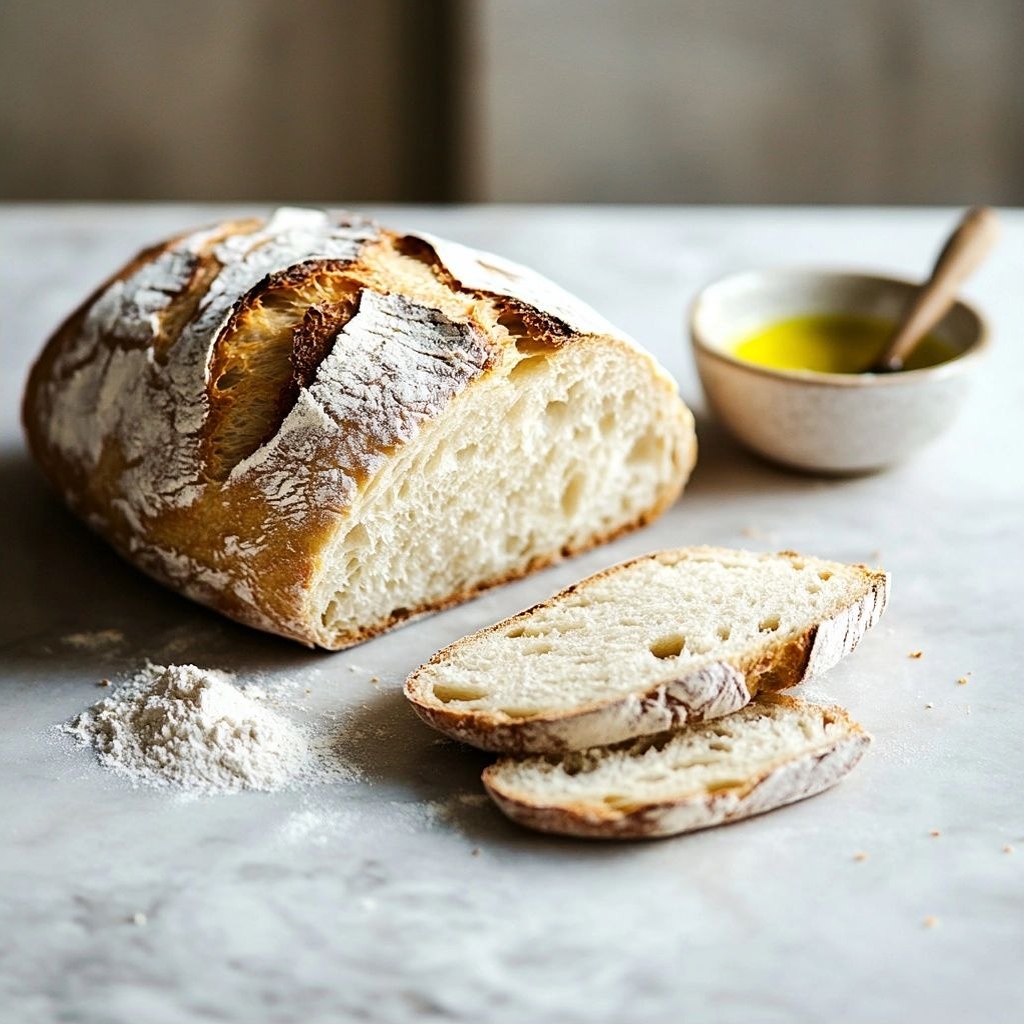
There’s something wonderfully comforting about bread that comes together without the fuss of yeast, kneading, or long fermentation. Homemade rustic no yeast bread is a warm, fragrant invitation to gather around the kitchen, to watch flour dust drift in the air like soft snowfall, and to bite into a crust that crackles with character. In a world of speed and shortcuts, this bread reminds us that the simplest ingredients—flour, water, salt, and a dash of science—can yield something utterly soulful. The aroma alone is enough to coax hungry mouths from their seats: a toasty perfume of toasted grain, malt, and a hint of malted sweetness, with a crust that bears the marks of a well-loved pan and a crumb that sighs with tenderness. This bread is not just sustenance; it’s a ritual, a memory in the making, and a canvas for your own kitchen storytelling.
The Story Behind the Dish
Every culture has its own version of quick breads and rustic loaves born out of necessity and improvisation. Long before the era of instant yeast and factory-baked loaves, home bakers experimented with what was on hand—flour, water, salt, and perhaps a bit of leaven from yesterday’s batter or a pinch of baking soda. The result was bread that could be mixed, shaped, and baked in a single afternoon, turning a simple meal into something that felt like a celebration. The no-yeast bread idea taps into that heritage, embracing techniques that rely on chemical leavening or air to lift the dough just enough to give it personality without extended rising times. The exact lineage of this particular no-yeast method can be traced to countless kitchens where families sought comforting nourishment on weeknights, in cabins by the coast, or around a bubbling stove on a cold afternoon. It’s a testament to the ingenuity of home cooks who prioritized flavor and texture over complexity, turning humble staples into something memorable. In many traditions, bread is more than nourishment; it is a symbol of hospitality, a sign that there is room at the table for everyone. This rustic loaf embodies that spirit: a bread that says, “Sit, relax, and savor this moment.”
Why You’ll Love This Recipe
- Quick and forgiving: No long proofing or special equipment required. Mix, shape, bake, and enjoy—all in a matter of hours.
- Low-effort artisan appeal: The crust browns deeply, the crumb stays tender, and the loaf looks like a slice of countryside bakery wonder—without the pretentiousness.
- Versatile flavor base: A simple canvas that welcomes butter, olive oil, herbs, or even grated cheese—adaptable to your mood and pantry.
- Economical and pantry-friendly: Uses everyday ingredients you likely already have, making it perfect for weeknight dinners or lazy weekend treats.
- Comforting texture: A sturdy exterior, a soft, approachable interior, and a satisfying chew that makes it ideal for scooping up soups and stews.
- Kid-friendly and crowd-pleasing: Simple flavor profile that appeals to a wide range of palates, with room for customizing toppings or add-ins.
Flavor Profile & Texture
This rustic no yeast bread achieves its charm through balance and contrast. The flavor begins with a gentle toasty sweetness—fruitiness from the flour itself, a whisper of malt, and the salt accentuating every note. Depending on the flour you choose, you’ll notice nuanced undertones: whole wheat brings nutty depth and a slightly earthy finish, while white or bread flour offers a cleaner, more neutral backdrop that lets the crust shine. When you bite through the crust, you’ll hear a satisfying crackle that echoes the bread’s hearty exterior. The crust often carries a hint of caramelization, a ridge of darker, almost toffee-like edges that offer a slight bitterness to counterbalance the mild sweetness inside. Inside, the crumb is tender but not fluffy—sufficiently sturdy to hold a thick smear of butter or a spoonful of soup without collapsing, yet soft enough to melt in your mouth. The texture is a nod to rustic bread making: a homely, imperfect, human loaf that invites you to pause, breathe in the warm aroma, and savor the moment. If you choose to add ingredients—sesame seeds, rosemary, cracked black pepper, or grated cheese—you’ll introduce extra layers of aroma and texture: nutty, herbal, or savory pops that punctuate the bread with delightful surprises.
Occasions & Pairings
This bread is versatile enough to star at a weeknight supper or elevate a weekend feast. Here are some ideas to celebrate its charm:
- Weeknight dinners: A bowl of hearty soup (tomato-basil, lentil, or creamy mushroom) with a slice of freshly buttered bread makes a comforting, quick meal.
- Brunch or breakfast: Toast thick slices, drizzle with olive oil and a sprinkle of flaky salt, or top with avocado and a poached egg for a satisfying morning bite.
- Cheese boards: Complement soft cheeses like brie or camembert, or pair with sharp cheeses for a rustic, satisfying pairing.
- Herbal or garlic variations: Brush the hot loaf with melted butter infused with garlic and fresh herbs for a quick, fragrant twist.
- Soup and stews: The sturdy crumb holds up well when dipped into thick soups, stews, and chowders, soaking up flavor without disintegrating.
Suggested Pairings
- Butters: cultured butter, garlic herb butter, or honey-butter for a touch of sweetness.
- Oils and condiments: extra-virgin olive oil for dipping, aged balsamic for a touch of acidity, or a dollop of olive tapenade.
- Savory toppings: grated aged cheese, chili flakes, or a sprinkling of sea salt and fresh herbs.
- Accompaniments: hearty soups like bean or lentil, stews, roasted vegetables, or simple salads that benefit from a sturdy slice.
Tips, Variations & Substitutions
Here are practical ideas to customize and perfect this no-yeast bread, including dietary twists and regional flavors:
- Flour options: Use a mix of all-purpose and whole wheat for a rustic crumb and richer flavor. For a softer crumb, increase all-purpose proportion or swap in bread flour.
- Leavening alternatives: If you want a lighter loaf, you can add a small amount of baking powder (about 1 teaspoon per 2 cups of flour) to mimic lift, though the texture will be slightly different from a true fermented loaf. Baking soda with an acid (like yogurt or buttermilk) can also yield a tender crumb.
- Herb and flavor boosts: Fold in minced rosemary, thyme, or sage; add grated lemon zest for brightness; or mix in grated cheese (parmesan or cheddar) for a savory crust.
- Cheesy crust variation: Sprinkle shredded cheese on top before baking to create a golden, cracker-like crust with melted, bubbly cheese.
- Spice twists: A pinch of smoked paprika, cumin, or garlic powder in the dough can add warmth and complexity.
- Gluten-free adaptation: Use a gluten-free all-purpose flour blend with a binding agent (like xanthan gum) and consider adjusting the hydration to keep the dough workable and the crumb cohesive.
- Vegan-friendly: This bread is naturally dairy-free if you skip butter finishes. Brush with olive oil and a light sprinkle of sea salt for a delicious finish.
- Stuffed variations: Create a pressed-stuff loaf by layering a thin sheet of dough with a cheese-and-herb filling before shaping, yielding a delightful surprise in every slice.
- Regional twists: In Mediterranean-inspired versions, incorporate olive oil, olives, and sun-dried tomatoes; in a Northern European style, add caraway seeds and malt for a toasty note.
Storage & Make-Ahead Ideas
To keep your rustic no yeast bread fresh and tasty, consider these storage and preparation tips:
- At room temperature: Store in a bread bag or wrap tightly in a clean towel for up to 2–3 days. The crust remains satisfying, though the crumb may soften slightly as it rests.
- Reheating: Re-crisp the crust by warming slices in a 350°F (175°C) oven for about 5–7 minutes, or toast slices lightly in a skillet for a quick finish.
- Make ahead: Prepare the dough and shape it, then refrigerate for up to 24 hours before baking. The chilling period can deepen flavor and give the crust more character. Bring to room temperature briefly before baking if you refrigerate; this helps with even cooking.
- Freezing options: Freeze baked loaf slices or the entire loaf once cooled. Thaw at room temperature and reheat gently to restore some of the crust’s crispness. You can freeze unbaked dough formed into a loaf and bake from frozen, adding a few extra minutes to the bake time.
- Leftovers: Use leftover bread for croutons, bread pudding, or a rustic French toast. The sturdy crumb holds up well to soaking and crisping, making it a flexible ingredient for future meals.
Fun Facts & Trivia (Optional)
Delve into small curiosities that connect this bread to broader culinary tales. No-yeast quick breads exist in many cultures, each with its own name and technique. Some regions rely on bicarbonate-based leavening to achieve lift, while others use steam or a touch of baking powder for a lift that resembles traditional bread without requiring a long rise. The crust-to-crumb ratio plays a significant role in perceived quality: a thick, deeply browned crust often signals a bread that carries both savoriness and sweetness in equal measure, a hallmark of rustic loaves that have aged gracefully on the kitchen shelf. The practice of baking bread in a hot, dry environment—whether a baking stone, Dutch oven preheated pan, or a heavy cast-iron skillet—translates to a crust that crackles with purpose and invites you to pull apart the loaf with your fingers. And of course, bread’s role in hospitality is universal: breaking bread together is one of the most timeless acts of sharing a meal, a small ritual that binds people and creates a sense of home wherever you are.
Ingredient-agnostic Mindset: Accessibility and Joy
A crucial aspect of homemade rustic no yeast bread is its accessibility. You don’t need special equipment or hard-to-find ingredients to produce a loaf that looks and feels special. It’s an invitation to experiment with what you have—whether that’s swapping in brown rice flour for a nuttier bite, adding a handful of seeds for texture, or finishing with a glossy glaze of olive oil and coarse salt. The joy lies in the process as much as the final result: measuring, mixing, feeling the dough come together, shaping it with care, and watching the loaf transform in the oven. The kitchen becomes a studio, and each bake tells a new story of flavor and texture. If you’re cooking for a family, this bread is a forgiving companion that invites participation: kids can help with mixing or shaping, and everyone can contribute toppings or spice variations that suit their tastes. The result is not merely bread; it’s a tradition being created in real time, one slice at a time.
Closing Thoughts
Homemade rustic no yeast bread is more than a quick fix; it’s a celebration of simplicity, patience, and everyday magic. It proves that bread—the soul of the table—can emerge from humble beginnings with a little warmth, curiosity, and care. Whether you’re seeking a cozy loaf for a weeknight dinner or a standout addition to a weekend gathering, this no-yeast bread offers a satisfying balance of crusty exterior and gentle, comforting crumb. It’s a bread that invites you to slow down, savor the moment, and share what you create with those you love. As you slice into the loaf, you’ll taste not only flour and salt, but the spirit of home—the kind of bread that tastes like a story you want to tell again and again. Welcome this crusty companion into your kitchen, and let it become a reliable friend that somehow makes the everyday extraordinary.
Ingredients
- 2 cups all-purpose flour
→ This is the main structure for a no-yeast rustic loaf. All-purpose flour provides a balanced gluten content that yields a sturdy but tender crumb when combined with yogurt or milk and a leavening acid. If you prefer a heartier loaf, you can substitute 1 cup of whole-wheat or spelt flour, but keep at least 1 cup of all-purpose flour to ensure a light enough crumb. Sift lightly to remove any lumps for even mixing. - 1 cup whole wheat flour
→ Whole wheat adds fiber, nuttiness, and moisture. It requires careful handling because bran can tighten the dough; consider increasing hydration slightly or adding an extra tablespoon of liquid if the dough feels dry. A common ratio is to mix with all-purpose flour to achieve a balanced texture. Let the dough rest briefly if the bran slows gluten development. - 1 tablespoon baking powder
→ Baking powder provides lift in a no-yeast bread by releasing carbon dioxide when wet and heated, creating a light crumb without a long fermentation. Use fresh baking powder for maximum leavening. If your baking powder is older, you may notice a denser loaf, so replace it if it has been sitting for more than six months. - 1/2 teaspoon baking soda
→ Baking soda reacts with acidic ingredients to help the dough rise and become tender. It also helps brown the crust. Ensure your yogurt or buttermilk provides enough acidity; if not, add a splash of lemon juice or vinegar to balance. Dissolve the soda evenly by whisking into the liquid components before mixing with the dry ingredients. - 1 teaspoon fine salt
→ Salt controls fermentation (even in no-yeast recipes), strengthens dough, and enhances flavor. Add gradually and dissolve in the liquids to ensure even distribution. If you’re using salted butter, reduce the added salt by half a pinch to avoid an overly salty loaf. - 3/4 cup plain yogurt (full-fat or Greek)
→ Yogurt provides moisture, tenderness, and acidity to activate baking soda. Use plain yogurt without added flavors. For dairy-free options, substitute with unsweetened soy or almond yogurt, but you may need to slightly adjust liquids to keep the dough cohesive. If using Greek yogurt, you can thin it with a small amount of water for the right consistency. - 1/4 to 1/2 cup warm water or milk
→ This hydrates the dough and helps dissolve leavening agents. Start with 1/4 cup and add more as needed to form a shaggy dough that holds together without being sticky. Use warm liquid to activate baking soda and achieve a quicker rise in the absence of yeast. If using dairy-free yogurt, you may need a bit more liquid to reach the right consistency. - 2 tablespoons olive oil (or melted butter)
→ Fat adds richness, helps tenderize the crumb, and contributes to a softer crust. Use extra-virgin olive oil for a fruity note, or neutral oil if you prefer a milder flavor. Lightly warm the oil before whisking to evenly distribute it through the dough. - 1 tablespoon honey or maple syrup (optional)
→ A touch of sweetness enhances browning and rounds out the tang of the yogurt. This is optional and can be omitted for a more savory loaf. If using, whisk the sweetener with the liquids before combining with dry ingredients to ensure even distribution. - 1 tablespoon white or black sesame seeds (optional)
→ Seeds add a toasty crunch and visual appeal to the crust. Toast them lightly in a dry pan for extra nuttiness before sprinkling on top. If including, press lightly into the dough’s surface just before baking so they adhere well. - 1 tablespoon chopped fresh herbs (e.g., rosemary or thyme, optional)
→ Fresh herbs bring aroma and savory depth to rustic bread. If using, fold them into the dough gently after mixed, distributing evenly to ensure a flavorful slice in every bite. Dried herbs can be used if fresh aren’t available, but use about one-third the amount and rehydrate briefly in warm water. - 1 tablespoon flaxseeds or chia seeds (optional)
→ Adds omega-3 fats, fiber, and a subtle crunch while helping to bind the dough when hydrated. If using, you can mix them directly into the flour or sprinkle on top. For best texture, grind flaxseeds slightly if you prefer a smoother crumb. - Olive oil or cooking spray for the pan
→ A light coating prevents sticking and helps develop a crisp crust. Use a neutral oil on the pan or brush a thin layer of olive oil to ensure easy release after baking. If using parchment, you can skip the oil, but a light coating still helps achieve a glossy crust.
Instructions
- Preheat your oven to 425°F (220°C) and lightly oil a 9×5-inch loaf pan or line it with parchment to prevent sticking and ensure easy release after baking.
→ A hot oven activates the baking powder and baking soda promptly, producing lift and a crisp crust, while proper pan prep prevents the loaf from tearing or sticking during unmolding. - Sift or whisk the 2 cups all-purpose flour with the 1 cup whole wheat flour, the 1 tablespoon baking powder, and the 1/2 teaspoon baking soda until evenly combined.
→ Sifting ensures even distribution of leavening agents and breaks up any lumps, giving the dough a uniform crumb and preventing dense pockets. - Whisk the 1 teaspoon fine salt into the dry mixture to ensure every bite is seasoned and to regulate fermentation-like activity by distributing salt evenly.
→ Even salt distribution prevents salty hotspots and helps strengthen the dough structure for a steadier rise and crumb. - In a separate bowl, whisk together the 3/4 cup plain yogurt, the 1/4 to 1/2 cup warm water or milk, the 2 tablespoons olive oil, and the 1 tablespoon honey or maple syrup if using, until completely smooth.
→ Combining liquids separately ensures the yogurt remains emulsified and prevents segregation, while warm liquid helps activate the leavening agents for a light crumb. - Pour the liquid mixture into the center of the dry ingredients and stir with a wooden spoon or silicone spatula until a shaggy dough forms.
→ A shaggy dough indicates enough moisture to hydrate the flour without overworking gluten, which keeps the loaf tender and rustic. - Turn the dough out onto a lightly floured surface and knead gently for 1 to 2 minutes just until it comes together and develops a cohesive mass.
→ Gentle kneading develops just enough gluten to hold shape without making the crumb tough; over-kneading can make the loaf dense, especially without yeast. - If using optional add-ins, fold in the 1 tablespoon chopped fresh herbs, 1 tablespoon sesame seeds, and 1 tablespoon flaxseeds or chia seeds by folding them in with your fingertips until evenly dispersed.
→ Folding distributes flavorings and seeds without crushing them, preserving texture and ensuring visible specks in each slice. - Shape the dough into a rough loaf by lightly patting it into a rectangular log and place it into the prepared loaf pan, or transfer to a parchment-lined baking sheet for a rustic free-form loaf.
→ Shaping determines the loaf’s final height and crumb; a uniform shape promotes even baking and consistent crust color. - Brush the top lightly with a small amount of olive oil or spray with cooking spray and, if desired, sprinkle a few extra sesame seeds or a pinch of flour for pattern and crust texture.
→ A light coating aids browning and keeps the top from drying out, while seeds or flour create an appealing crust and crust adhesion for toppings. - Let the dough rest for 10 to 15 minutes at room temperature to allow hydration and surface tension to relax, which helps the loaf rise evenly in the hot oven.
→ Resting relaxes the gluten network slightly, reducing tearing and creating a smoother, more uniform loaf when baked. - Place the loaf in the preheated oven and bake for 25 to 35 minutes, or until the crust is deep golden brown and a tester inserted into the center comes out with a few moist crumbs attached.
→ The combination of heat and leavening yields a crisp crust and a tender interior; testing with a toothpick or thermometer confirms doneness without guessing. - If the loaf develops too quickly on the outside, tent it loosely with aluminum foil halfway through baking to prevent excessive browning while the interior finishes cooking.
→ Foil shielding protects the crust from burning while allowing the inside to reach proper temperature and moisture balance. - Remove the loaf from the oven and let it rest in the pan for 10 minutes, then transfer to a wire rack to cool completely before slicing to set the crumb and avoid crumbling.
→ Resting allows steam to redistribute, which stabilizes the crumb and prevents the loaf from tearing when sliced hot. - Slice with a serrated knife once cooled for clean, even cuts that reveal a rustic, open crumb and a glossy crust.
→ A long, gentle slice prevents tearing and preserves the loaf’s structure, while the crust remains intact and flavorful.
Notes
This homemade rustic no-yeast bread relies on baking powder and yogurt acidity to lift and tenderize the crumb, delivering a crusty exterior and a hearty, sliceable interior. The blend of all-purpose and whole wheat flour creates a balanced texture with extra fiber and a nutty aroma. You can personalize it with sesame seeds, fresh herbs, or flaxseeds for added flavor and crunch. Use warm liquid to activate the leavening and help the dough come together into a shaggy, cohesive mass without overworking it. If you prefer a lighter crumb, mix until just combined and avoid over-kneading; a gentle hand preserves softness in the interior.
Tips for best results:
- Make sure your baking powder is fresh for maximum lift. If it’s older, the loaf may be denser.
- Whisk the baking soda into the yogurt and liquids thoroughly to ensure even leavening and browning.
- Let the dough rest briefly after mixing to hydrate the flour and relax the gluten, which improves tenderness.
- Preheat a baking surface—an inverted baking sheet, a cast-iron skillet, or a Dutch oven bottom—to achieve a crisp crust. If using a Dutch oven, preheat with the lid on for a steamy start.
- Lightly toast sesame seeds before pressing them onto the dough for deeper nutty flavor and better adhesion.
- Brush the finished loaf with a light coat of olive oil for a glossy crust and extra moisture.
- Let the loaf cool completely before slicing to maintain a tidy crumb and prevent crumbling.
- Store leftovers wrapped in a clean towel or breathable bag at room temperature for 2–3 days; freeze for longer storage and reheat gently to refresh the crust.
Tips
- Water temperature matters: use warm liquids (about 100–110°F/38–43°C) to help dissolve baking soda and hydrate the flours, but avoid hot water that could curdle yogurt proteins.
- Measure accurately: with no yeast, precise ratios are important for structure. Use a kitchen scale if possible or level spoons for flour and liquids to maintain consistent hydration.
- Mixing order helps: whisk dry ingredients (flours, baking powder, baking soda, salt) first, then whisk liquids (yogurt, warm water/milk, oil, honey). Pour liquids into the center of the dry mix and fold gently until just combined to avoid a dense crumb.
- Handle dough lightly: overworking gluten in a no-yeast loaf can make it tough. Mix until just cohesive, then let it rest for 10–15 minutes to hydrate the flour and relax the dough.
- Hydration tuning: if the dough feels dry or crumbly, gradually add a tablespoon of liquid at a time. If too sticky, rest for a few minutes and dust with a little flour while shaping.
- Fat choice flavor: olive oil adds moisture and a subtle fruity note; melted butter adds richness. If you want a milder taste, use a neutral oil. Warm the fat slightly to distribute evenly.
- Leavening balance: ensure fresh baking powder for lift; if your powder is old, your loaf may be denser. If you’re using extra yogurt for moisture, you can slightly reduce added liquid to maintain cohesion.
- Herbs and seeds: fresh herbs give a bright aroma; fold them in after initial mixing to distribute evenly. Toast sesame seeds before adding for deeper nuttiness, and press them gently onto the dough surface so they stick.
- Sweetness and browning: honey or maple syrup helps with browning and a hint of sweetness. If you prefer a savory loaf, omit the sweetener but keep the yogurt acidity to activate the soda.
- Shaping and resting: lightly shape the dough into a rounded loaf on a floured surface, then rest 10 minutes before scoring or baking to encourage a better crust and even rise.
- Crust and pan prep: oil the pan or line with parchment for easy release; a light oil coating helps achieve a glossy crust and prevents sticking, especially when using a loaf pan.
- Flavor variations: for a tangier bite, increase yogurt slightly or add a spoon of sour cream. For a nuttier flavor, substitute up to 1 cup of whole-wheat or spelt flour, keeping at least 1 cup of all-purpose flour to maintain a tender crumb.
FAQ
What is Homemade Rustic No Yeast Bread?
It’s a dense, crusty loaf made without any yeast. It uses baking powder or baking soda as a leavening agent and relies on a long resting/steam bake method to develop flavor and texture similar to traditional rustic breads.
What ingredients do I need?
Common pantry ingredients include: all-purpose or whole-wheat flour, baking powder or baking soda, salt, water or buttermilk, and optional add-ins like seeds, oats, herbs, or cheese. Some recipes also use yogurt or sour cream for moisture.
Can I use whole wheat or gluten-free flour?
Yes, you can adapt with whole wheat, einkorn, or a gluten-free blend. Note that gluten-free dough behaves differently and may require extra liquid or binding agents (like xanthan gum) and shorter bake times. Start with a tested gluten-free no-yeast recipe if possible.
How does no-yeast rise occur without yeast?
Rising is achieved with chemical leaveners like baking powder or baking soda. A bit of acid (like yogurt or buttermilk) can enhance rise and tenderness. Resting the dough briefly helps hydration and gluten development where present.
What equipment do I need?
Basic mixing bowl, a sturdy spoon or spatula, a baking sheet or cast-iron skillet, parchment paper, and an oven-safe dish or dutch oven to trap steam for a crisper crust.
How long does it take from start to finish?
Typically about 1 to 1.5 hours total: 10–15 minutes to mix, 15–30 minutes of resting, shaping, and a 25–40 minute bake. Some recipes benefit from a longer rest for hydration, up to 1 hour.
Why is the crust sometimes very thick or crunchy?
Thicker crust comes from a hot oven and steam. Preheating the baking surface, using a cast-iron pan, and adding steam (a pan of water or covered bake) help develop a crisp crust. Removing steam early can soften the crust if desired.
How should I shape and score the loaf?
Shape into a rough oval or round loaf about 8–10 inches in diameter. Scoring shallow cuts (1/4 inch) allows controlled expansion and helps crust form nicely. Use a sharp knife or lame for clean slashes.
How do I store leftovers?
Cool completely, then store in a paper bag or bread box for 1–2 days. For longer storage, wrap tightly and freeze. Rewarm in a warm oven or toaster for that fresh-baked feel.
Can I customize with mix-ins?
Yes. Try seeds (sunflower, sesame), oats, chopped olives, shredded cheese, dried herbs, garlic, or caramelized onions. Add mix-ins to the dry ingredients before combining the wet to ensure even distribution.