Introduction / Hook
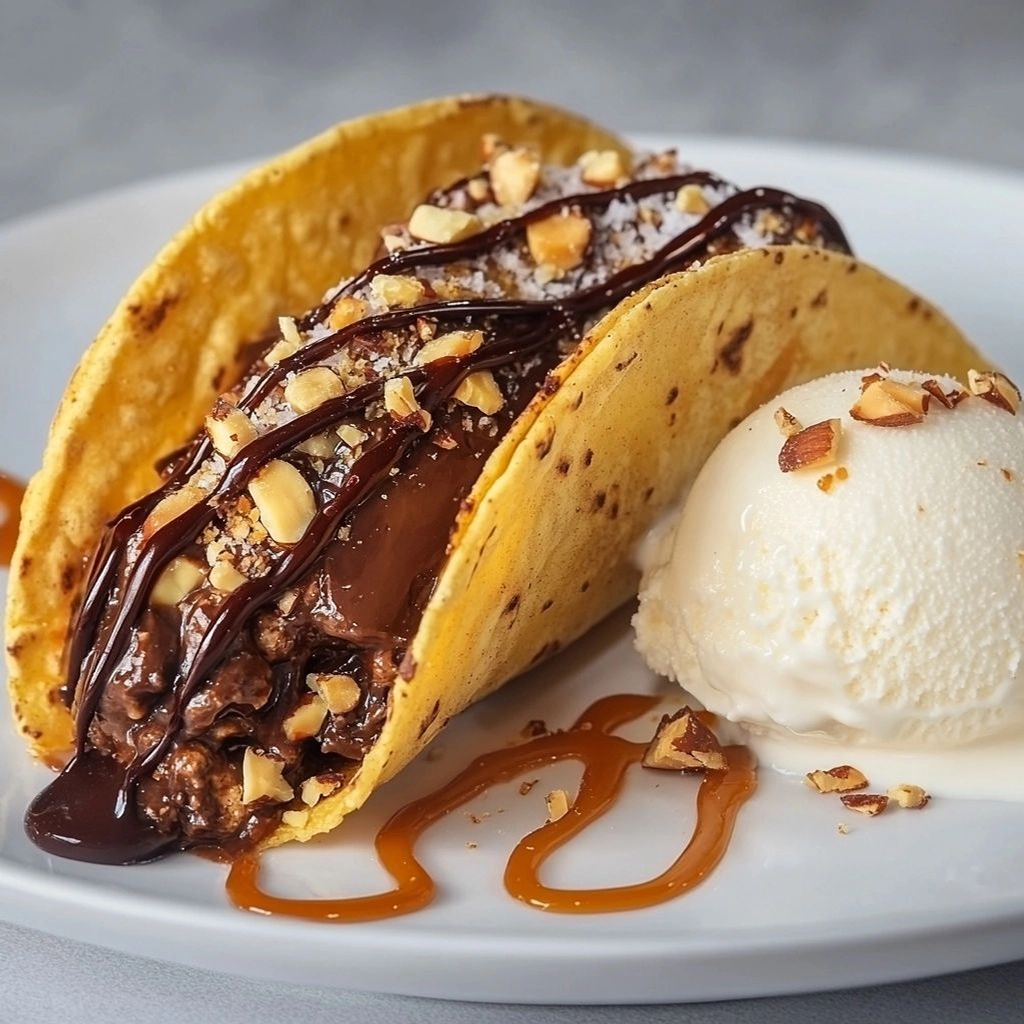
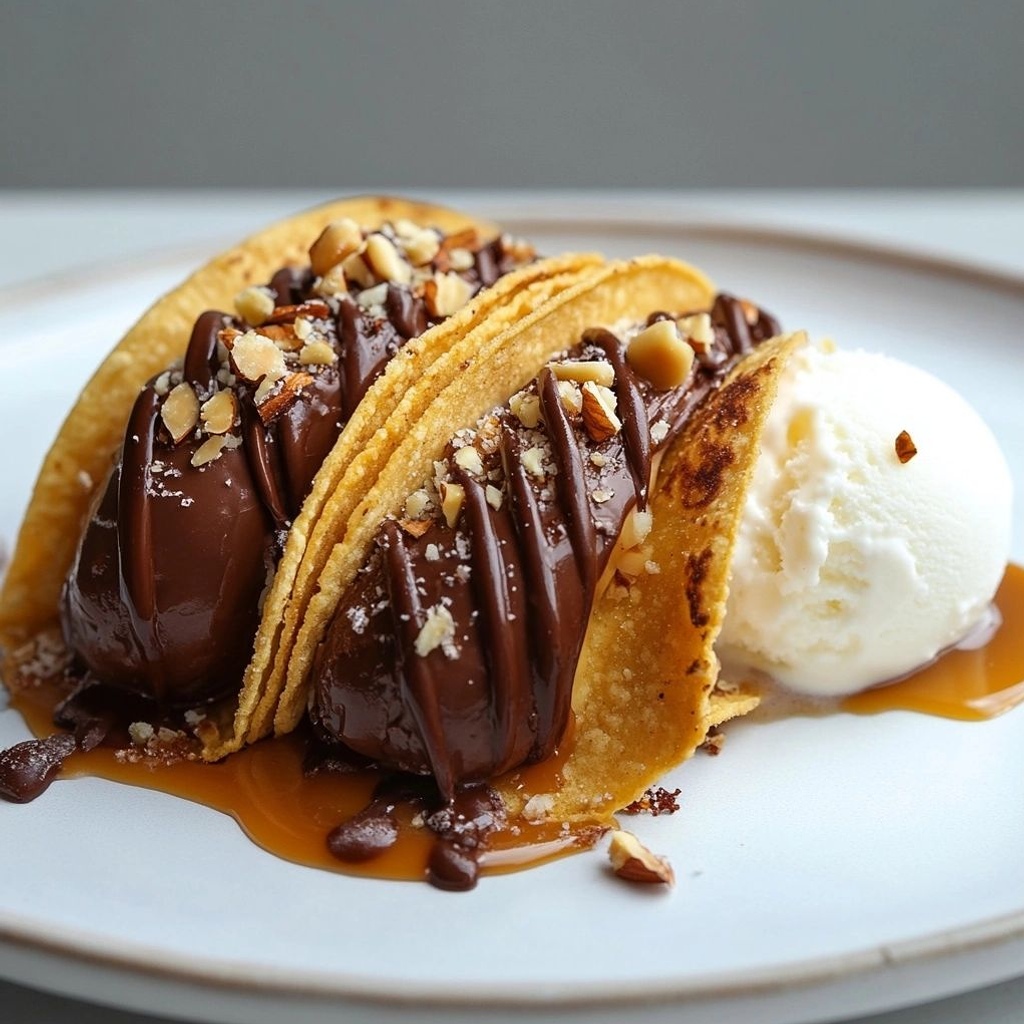
Imagine a midnight kitchen ritual that combines the crunch of a perfect wafer shell with the decadence of a rich chocolate kiss. Crispy Homemade Choco Tacos are not just a dessert; they are a celebration of textures and temperatures, a playful nod to nostalgia, and a sweet invitation to slow down and savor. Picture a warm, shell-like tortilla or wafer envelope that shatters gently at the first bite, releasing a scoop of velvety ice cream that stays cold and creamy inside. Then, a glossy chocolate glaze seals the deal, meeting a cascade of toppings—crushed nuts, delicate cookie crumbs, caramel ribbons, a dusting of sea salt—every element chosen to play a different note in a symphony of dessert delight. This is the kind of treat that makes the whole family gather around the counter, trading stories and licking spoons, the air fragrant with cocoa, vanilla, and the faintest hint of vanilla bean. It’s comfort with a playful twist, simplicity with a touch of indulgence, and a dessert that looks as spectacular as it tastes, even when you’ve whipped it up in generous moments of late-night craving.
What makes Crispy Homemade Choco Tacos especially compelling is the way they transform a beloved, familiar concept into a customizable, make-at-home experience. You don’t need a fancy ice cream maker or exotic ingredients to achieve that legendary balance of crisp shell, creamy center, and glossy finish. With a few pantry staples and a little technique, you can craft a tray of tacos that rival any street-side treat—and perhaps outshine them in the comfort of your own kitchen. The magic is in the contrast: the crack of the shell against the silkiness of the ice cream, the cool interior meeting a hot, gleaming chocolate shell, and the final flourish of toppings that bring texture and personality to every bite. Whether you’re planning a family dessert, a romantic night in, or a playful dessert station for a party, these choco tacos adapt to your mood and your guests’ tastes. Embrace the aroma of toasted wafers, the sheen of melted chocolate, and the satisfying crunch that promises more delicious bites than you can count.
The Story Behind the Dish
The choco taco has roots that wander through the golden era of street food and the timeless appeal of handheld desserts. It’s a concept that felt both familiar and novel: take a shell, fill it with something cold and luscious, top it with a gloss of chocolate, and finish with a smattering of goodies that make each bite a tiny celebration. The idea resonates with cultures that adore ice cream wrapped in edible wrappers, from Latin American street stalls to modern dessert bars that experiment with form and texture. The homemade version elevates this story by inviting you into the kitchen with a mission: to recreate something iconic in a homey, accessible way, while allowing room for personal spin. The tortilla-shell crusts can be envisioned as a tribute to the versatility of corn-based treats, a nod to playful fairground snacks, and a wink to the global love affair with chocolate. The final chocolate glaze becomes a bridge between nostalgia and contemporary indulgence, a glossy reminder that even simple ingredients can transform into something magical when treated with care and imagination.
There’s a quiet storytelling element in assembling these at home. Each shell is a small canvas: you can toast it slightly for extra flavor, brush it with a whisper of coconut oil for sheen, or sprinkle a pinch of cinnamon to evoke cozy, dessert-night warmth. The ice cream—whether classic vanilla, chocolate, or a more adventurous flavor like espresso or mint—speaks to your current mood, while the toppings become characters in the narrative: the crunch of roasted almonds tells a story of grown-up texture, the sweetness of caramel adds a romantic interlude, and sea salt offers a playful twist that keeps the palate alert. In a world that moves fast, this dish invites you to slow down, choose a story, and share it through a dessert that’s both familiar and exciting in its execution.
Why You’ll Love This Recipe
- Accessible and fun: No special equipment required, just a little patience and a willingness to experiment with toppings and fillings.
- Customizable: Swap flavors, switch shells, or try dairy-free or vegan options with plant-based milks and sorbets.
- Texture magic: The crisp shell, the smooth ice cream, and the glossy chocolate coating deliver a satisfying contrast in every bite.
- Make-ahead versatility: Prepare shells in advance, keep scoops ready in the freezer, and finish with chocolate glaze when guests arrive.
- Party-friendly and shareable: Create a dessert station with toppings for a playful, interactive experience.
- Comforting nostalgia, elevated presentation: A familiar concept reimagined with seasonal flavors or premium finishes that still feels like a treat from childhood.
Flavor Profile & Texture
The flavor journey begins with the shell—a toasty, subtly sweet, slightly salty bite that carries the fragrance of caramelized corn and the warmth of toasting. When you bite through, the ice cream centers the palate with its creamy, cool sorcery, delivering a counterpoint to the shell’s crispness. The chocolate glaze, gleaming like a lacquered surface, adds depth and a touch of bittersweet luxury that anchors the sweetness of the ice cream. The toppings are where the dish truly sings: crushed nuts bring toasty, earthy notes with a satisfying crunch; cookie crumbs add a familiar, comforting sweetness; a drizzle of caramel or fudge can layer in extra richness; a tiny sprinkle of flaky sea salt renews the senses and elevates the chocolate. The overall texture is a carefully choreographed dance—crunch, cream, glide—keeping the experience dynamic from bite to bite. Aromas of cocoa, vanilla, and toasty shell mingle in the air, inviting you to lean in and savor each moment.
Flavor-wise, the combination is versatile enough to work with many preferences. A classic vanilla bean ice cream paired with a dark chocolate shell delivers an elegant, almost timeless flavor profile. A strawberry sorbet center can lend a fruity brightness, while a coffee or mocha ice cream turns the treat into dessert that harmonizes with post-dinner indulgence. For dairy-free versions, coconut milk or almond milk-based ice creams provide a creamy texture without compromising flavor, and dark chocolate glaze remains rich and satisfying. The salt finish, if used, is a masterstroke that heightens the chocolate’s intensity and cleanly brightens every bite. The result is a dessert that’s simultaneously comforting, exciting, and visually appealing—an edible centerpiece that’s as pleasing to the eyes as it is to the palate.
Occasions & Pairings
Crispy Homemade Choco Tacos shine in a variety of settings. They’re ideal for weeknight dessert moments when you crave something special without spending hours in the kitchen. They’re equally at home at weekend gatherings, birthday parties, and informal celebrations, where guests can assemble their own shell-and-scoop creations as a playful activity. For holidays, they offer a chic alternative to more traditional sweets, especially when you tailor the toppings to the season—candied cranberries and white chocolate for winter celebrations, or pistachio crumbs and orange zest for a springtime twist.
Pairing suggestions to elevate the experience:
- Drinks: A cold glass of milk, a cup of rich espresso, or a sparkling dessert wine can complement the chocolate and ice cream beautifully.
- Side dishes: A light fruit compote or fresh berries on the side can balance the richness with a palate-cleansing brightness.
- Dessert companions: Consider a small plate of seasonal fruit, a simple shortbread, or a delicate tuile cookie to echo the crisp texture of the shell.
Tips, Variations & Substitutions
Here are practical ideas to customize Crispy Homemade Choco Tacos while keeping the process approachable:
- Shell variations: Use pre-made waffle cones or tortilla-like shells brushed with a touch of oil and toasted for extra crispness. For a gluten-free version, select gluten-free tortilla shells or wafer sheets and toast until crisp.
- Ice cream options: Vanilla, chocolate, coffee, or mint work well as centers. For dairy-free, try coconut milk-based ice creams or almond-based ice creams with compatible flavors.
- Glaze choices: A simple melted dark chocolate ganache or a glossy chocolate shell (melted chocolate + light oil) both yield a beautiful finish. Add a teaspoon of espresso powder to the glaze for a mocha accent.
- Toppings: Pistachio crumbs, toasted coconut, chopped hazelnuts, crushed cookies, caramel drizzle, flaky sea salt, or a dusting of chili salt for a smoky kick—all welcome variations.
- Flavor twists: Add a swirl of peanut butter, strawberry jam, or marshmallow fluff to the ice cream before filling for a playful surprise. Infuse the shells with a hint of cinnamon or cardamom for warmth.
- Vegan and allergen-friendly: Use plant-based ice cream and dairy-free chocolate. Check labels for potential cross-contamination if you have severe allergies.
- Seasonal spins: In autumn, add roasted pumpkin seeds and a drizzle of honey; in winter, mix in peppermint pieces and crushed candy cane for a festive touch.
Storage & Make-Ahead Ideas
To preserve the integrity of Crispy Homemade Choco Tacos, here are practical storage tips and make-ahead strategies:
- Shells: Store crispy shells in an airtight container at room temperature for up to 3-5 days. If you’ve toasted them, keep them in a cool, dry place to maintain maximum crispness.
- Ice cream: Scoop-ready ice cream can be frozen in a shallow, lined tray for speed. Return to the freezer in a tightly sealed container to avoid freezer burn.
- Assemble-to-serve: For entertaining, position shells on a tray with labeled toppings, and place scooped ice cream in a chilled container nearby. Guests can assemble their own tacos as desired, keeping the shells crisp and the ice cream perfectly cold.
- Make-ahead finish: If you want to pre-glaze and top, you can dip shells in the chocolate glaze and add toppings in advance, but keep the shells stored separately from the ice cream until serving to maintain crunch.
- Freezer-friendly approach: Freeze filled choco tacos on a parchment-lined tray until firm, then wrap individually. They can be stored for up to 1 month. Let them soften for a few minutes at room temperature before serving for the best texture.
Fun Facts & Trivia (Optional)
Did you know that handheld desserts with a chocolate-coated exterior have delighted food lovers for decades? The playful concept of a shell wrapped around a cold center speaks to both convenience and indulgence—two traits that have kept such treats in rotation from carnival booths to modern dessert bars. Chocolate, known for its ability to pair with a wide range of flavors, has a long history of transformation—from raw cacao nibs to glossy glaze that shines on every bite. The choco taco, in its many iterations, is a perfect example of how a simple idea can become a staple through thoughtful execution. And the best part? You can craft this iconic treat with everyday ingredients, turning a casual evening into a memorable culinary moment. If you’ve ever watched a child’s face light up when confronted with a chocolatey, crunchy, cold treasure within a crisp shell, you’ve witnessed the essence of this dessert—the magic of a nostalgic favorite made fresh, personal, and irresistibly delicious.
Conclusion / Invitation to Create
Now that you have the blueprint for Crispy Homemade Choco Tacos, it’s time to bring the idea to life in your own kitchen. Let your imagination roam freely: experiment with different shells, ice cream flavors, and finishing touches. Invite family or friends to join you in a little dessert project that feels like a celebration of small pleasures—the crack of the shell, the cool kiss of ice cream, the glossy gleam of chocolate, and the sparkling array of toppings that turn every bite into a tiny fireworks show on the palate. Whether you’re chasing a cozy night in or an edible centerpiece for a festive gathering, these choco tacos offer a playful, satisfying, and deeply rewarding experience. So gather your ingredients, preheat nothing, and let the magic begin. Your Crispy Homemade Choco Tacos await—crispy on the outside, dreamy on the inside, and wonderfully customizable to suit every mood and moment.
Ingredients
- Taco Shells
→ Crisp shells are the foundation of a classic Choco Taco. Use small corn tortillas that you will fry until golden and structurally strong enough to hold ice cream without cracking. If you prefer a lighter option, bake them in oil at a shallow depth or use store-bought mini taco shells designed for freezing and ice cream applications. Store shells in an airtight container to maintain maximum crunch until assembly. - 6 small corn tortillas (6–7 inches) or 12 mini tortillas
→ Fresh tortillas are pliable enough to shape but will crisp nicely when fried. If using larger tortillas, cut them into rounds and form into curved shells. For a cleaner finish, pat dry before frying to reduce spatter and ensure even browning. - 2 cups vegetable oil (for frying)
→ Enough oil to shallow-fry the tortillas so they become crisp and hold their shape. Heat to 350°F (175°C) before adding tortillas, and monitor closely to prevent burning. Use a thermometer and avoid overcrowding for uniform texture. After frying, drain on paper towels and let cool completely on a rack to stay crisp. - Vanilla ice cream (softened for scooping) 3 cups
→ The ice cream provides the creamy interior. Use a high-quality vanilla for depth of flavor. Soften just until scoopable (not melted) to enable shaping into a log that fits inside the tortilla shell. If freezing hard, scoop and shape in alternating quick freezes to achieve clean, uniform logs. - Chocolate coating
→ A glossy, hard chocolate shell seals the ice cream and adds the classic finish. Use 1 cup semi-sweet chocolate chips or chopped chocolate with 1–2 tablespoons coconut oil or cocoa butter to thin and give a smooth, snap-worthy coating. Melt gently over a double boiler or in short bursts in the microwave, stirring between heats to prevent scorching. Tempering is optional but yields a crisper, shinier finish. - 1 tablespoon coconut oil or neutral-taste oil (to thin chocolate)
→ A small amount of oil helps the chocolate coat evenly and prevents it from seizing as it cools. Use refined coconut oil for a neutral aroma or a light vegetable oil if coconut flavor is not desired. Add gradually to achieve a smooth, pourable consistency. - Crushed roasted peanuts or chopped peanuts (for coating and topping) 1/2 cup
→ The peanut crunch is iconic to Choco Tacos. Choose roasted, unsalted peanuts for a clean flavor that complements the chocolate. Finely chop to small pieces to distribute evenly around the ice cream edge; lightly toast if you prefer a stronger peanut aroma. If allergies are a concern, substitute with crushed almonds or toasted coconut flakes. - Optional toppings: whipped cream, chocolate drizzle, or cacao nibs
→ These add moisture, richness, and visual appeal. Whipped cream should be slightly chilled and piped onto the shell just before serving to avoid sogginess. A light chocolate drizzle over the finished shell enhances sweetness balance. Cacao nibs provide a subtle chocolatey crunch without sweetness. - Salt (a pinch, to finish)
→ A final pinch of flaky or fine salt enhances chocolate and peanut flavors, creating a more balanced finish. Don’t overdo it; a light touch helps intensify sweetness while keeping the profile savory-sumptuous.
Instructions
- Preheat your oil to 350°F (175°C) and set up a deep skillet or wide pot with a thermometer, ensuring you can monitor temperature precisely to avoid under- or over-crisping the shells.
→ Accurate temperature ensures the tortillas crisp evenly without absorbing excess oil, which keeps them sturdy enough to hold ice cream without becoming greasy. - Line a cooling rack with parchment or a clean towel beside the fryer and have tongs ready, so you can drain and shape the shells immediately after frying for best structural integrity.
→ Quick drainage and shaping prevent sogginess and help the shells set in the curved form while still hot. - Cut larger tortillas into rounds if needed and pat them completely dry with a towel before frying, so surface moisture does not cause splatter and uneven browning.
→ Dry surfaces fry more evenly and reduce oil spatter, resulting in a cleaner, more uniform shell core. - Fry the tortilla pieces in small batches, turning once with tongs until each side is golden and crisp, then lift from oil and drain on the rack for at least 2 minutes to remove surface oil.
→ Controlled batches prevent crowding, which can lower oil temperature and yield flabby shells that fail to hold ice cream. - Shape the hot shells by bending them over a small, clean metal form or the edge of a rolling pin to create the traditional curved taco shape while they are still pliable, letting them set on the rack until firm.
→ Forming while hot ensures structural strength and a smooth, curved interior for the ice cream log. - Chill the shells briefly in the freezer for 5–7 minutes to set their shape completely and reduce risk of cracking when filling with ice cream.
→ A firm shell supports the ice cream exterior and makes dipping into chocolate more controlled. - Soften the vanilla ice cream on the counter for 8–10 minutes or in a 30-second bursts in the microwave at low power until scoopable, then scoop and roll into logs that fit inside the shells, laying them on parchment and returning to freezer to firm for 15–20 minutes.
→ Softening aids clean shaping; freezing the logs ensures clean insertion and prevents cracking when assembling. - Melt the chocolate coating gently using a double boiler or in short 15–20 second bursts in the microwave, stirring between heats, and whisk in 1 tablespoon coconut oil or cocoa butter until the mixture is glossy and pourable; keep it warm but not hot.
→ A smooth, temperate coating dries with a crisp snap and a glossy finish; oil prevents seizing and helps even coating. - Remove the ice cream logs from the freezer and insert each into a cooled tortilla shell, pressing gently to secure while leaving a visible ice cream edge, then return the assembled shells to the freezer for 5–10 minutes to re-firm the exterior.
→ Proper insertion creates a neat transition between shell and ice cream and avoids oozing when coated with chocolate. - Dip each filled shell into the tempered chocolate or drizzle generously over the top, allowing excess to drip back into the bowl and place the coated shells on a wire rack to set; flip if needed to ensure an even shell of chocolate.
→ A uniform coating ensures a clean snap and protects the ice cream from rapid melting during serving. - Immediately roll the chocolate-coated edges in crushed roasted peanuts or chopped peanuts to form a crunchy seam, and press gently so the nuts adhere well as the chocolate sets.
→ Peanut coating provides iconic texture and flavor, while pressing ensures full adhesion for a neat finish. - Decorate with optional toppings: pipe a small amount of whipped cream on the shell, drizzle a thin line of extra chocolate, or sprinkle cacao nibs as desired, applying toppings just before serving to avoid sogginess.
→ Toppings add moisture, richness, and visual appeal; timing prevents soggy shells and preserves texture. - Finish with a light pinch of flaky or fine salt over the chocolate surface to enhance sweetness and peanut flavors, then serve immediately or refrigerate briefly to maintain crispness until ready to present.
→ The salt heightens chocolate and peanut nuances, balancing sweetness without overpowering the dessert.
Notes
These crispy homemade choco tacos are a fun night dessert featuring crisp shells, creamy vanilla ice cream, and a glossy chocolate coating with a peanut crunch. You can customize them by swapping the peanuts for almonds or toasted coconut, or by using store-bought mini shells for quicker assembly. Keep shells crisp by draining thoroughly after frying and storing in an airtight container until ready to fill. Soften the ice cream just enough for scooping and shaping into logs that fit inside the shells; if your ice cream is too soft, refreeze briefly between steps. For a smoother, snap-worthy chocolate shell, melt with 1 tablespoon coconut oil or cocoa butter and temper if you like a professional finish. Weigh down on the toppings with whipped cream, a light chocolate drizzle, or cacao nibs to add texture and balance sweetness. A pinch of salt at the end enhances the chocolate and peanut flavors. These tacos are best served immediately after assembly for maximum crunch, but you can freeze assembled tacos on a parchment-lined tray for future treats, wrapped to prevent moisture loss. Always check for nut allergies and use certified gluten-free ingredients if needed.

Tips
Tips for Crispy Homemade Choco Tacos
- Shell shaping and crispness: Use small corn tortillas and shape them one at a time while the oil is hot. Fry just until bronzed and firm enough to hold ice cream without tearing. For a cleaner finish, use a tortilla press or fold them over a clean dowel to form a curved shell as they fry. Pat dry before frying to remove surface moisture that can cause splatter or uneven browning.
- Oil temperature and safety: Maintain the oil around 350°F (175°C). Use a candy or deep-fry thermometer for accuracy. Fry in small batches to prevent temperature drops that lead to greasy shells. Let the oil return to temperature between batches.
- Ice cream handling: Soften the vanilla ice cream just until scoopable, then shape into logs that fit inside the tortilla shells. Use quick, steady motions and a spiked ice cream scoop or a butter knife to form uniform logs. Freeze the logs briefly on a sheet pan before assembling if your ice cream is very soft.
- Chocolate coating technique: Melt chocolate gently using a double boiler or microwave in short bursts, stirring often. Add 1–2 tablespoons coconut oil or cocoa butter to thin and create a smooth, glossy shell. If tempering, cool the mixture to the proper working temperature for a crisper finish. Dip the frozen ice cream logs into the chocolate, swirl to coat, and return to a rack to set.
- Coating consistency and thinning agents: Start with 1 tablespoon oil and add more sparingly to reach a thin, pourable consistency. Too much oil will make the shell too soft; too little can cause seize and cracking. Work quickly to keep a smooth film around the ice cream.
- Peanut coating and texture: Finely chop peanuts for even coverage around the ice cream edge. Lightly toast if you want a deeper aroma. Toss with a pinch of salt to balance sweetness. For allergies or dietary restrictions, substitute with finely chopped almonds or toasted coconut flakes to achieve a similar crunch and depth of flavor.
- Assembling the dessert: Pipe or dollop a small amount of whipped cream on the inside of one shell before adding the ice cream log for extra moisture and contrast. Roll the coated ice cream log in the chopped peanuts while the chocolate is still tacky to ensure the coating sticks well. Place on a parchment-lined tray and chill until firm before serving to maintain structure.
- Storage and make-ahead tips: Freeze assembled Choco Tacos on a lined tray until solid, then transfer to an airtight container or freezer bag. They can be stored for up to 1–2 months. Let them soften slightly at room temperature for about 5–10 minutes before eating for easier biting and a creamier interior.
- Optional toppings and serving: Add a light drizzle of chocolate, cacao nibs, or a dollop of whipped cream just before serving to avoid sogginess. Salted chocolate drizzle or a tiny pinch of flaky sea salt over the top enhances the chocolate-peanut balance without overpowering the flavors.
- Flavor variations: For a twist, swap vanilla ice cream for coffee or chocolate ice cream, or add a ribbon of caramel or peanut butter between the ice cream log and the shell for extra richness. If you prefer a lighter finish, bake shells lightly in oil at shallow depth instead of deep frying.
FAQ
What is a Crispy Homemade Choco Taco?
A Crispy Homemade Choco Taco is a dessert made by shaping crisp tortilla-like shells, filling them with ice cream or a creamy filling, and dipping the ends in melted chocolate and toppings for a bite-sized, taco-inspired treat.
What ingredients do I need for the crispy shells?
Common shells are made from small flour or corn tortillas brushed with a little oil or butter, sprinkled with sugar, and baked or fried until crisp. Some recipes use pre-made waffle cones or shells for extra crunch.
How do I shape the shells into a taco form?
Cut small tortillas into curved shapes and bake on a muffin tin or fry in a shallow pan to help them hold a curved, taco-like shape as they crisp. You can also bend warm tortillas over a rolling pin to form a gentle arc before hardening.
What filling options work best?
Traditional vanilla ice cream works great. For a softer bite, use softened ice cream that you scoop into the shells. Alternatives include frozen yogurt, sorbet, or a creamy cheesecake filling. You can also mix in chocolate chips or crushed cookies for texture.
How do I dip the ends in chocolate and toppings?
Melt chocolate with a splash of oil or butter for a smooth coating. Dip the exposed ends of the frozen shells into the melted chocolate, then roll in chopped nuts, sprinkles, crushed cookies, or coconut. Place on parchment to set.
Can I make these ahead of time?
Yes. Freeze the filled shells on a tray, then wrap tightly. For best texture, freeze the shells separately, fill close to serving time, dip in chocolate, and serve immediately.
Tips for keeping the shells crispy
Avoid humid environments. Store shells in an airtight container with a desiccant or a paper towel to absorb moisture. If they soften, re-crisp them briefly in a hot oven (about 350°F/175°C for 3-5 minutes).
Are dairy-free or vegan versions possible?
Yes. Use dairy-free ice cream or frozen dessert, plant-based butter for frying or brushing, and dairy-free chocolate for dipping. Check chocolate labels to ensure no milk ingredients are present.
What equipment helps to make this easier?
Cookie cutters or a small bowl to shape shells, a muffin tin or silicone mini muffin cups for shaping, a shallow pan for frying, a double boiler or microwave-safe bowl for melting chocolate, and parchment paper for setting.