Introduction / Hook
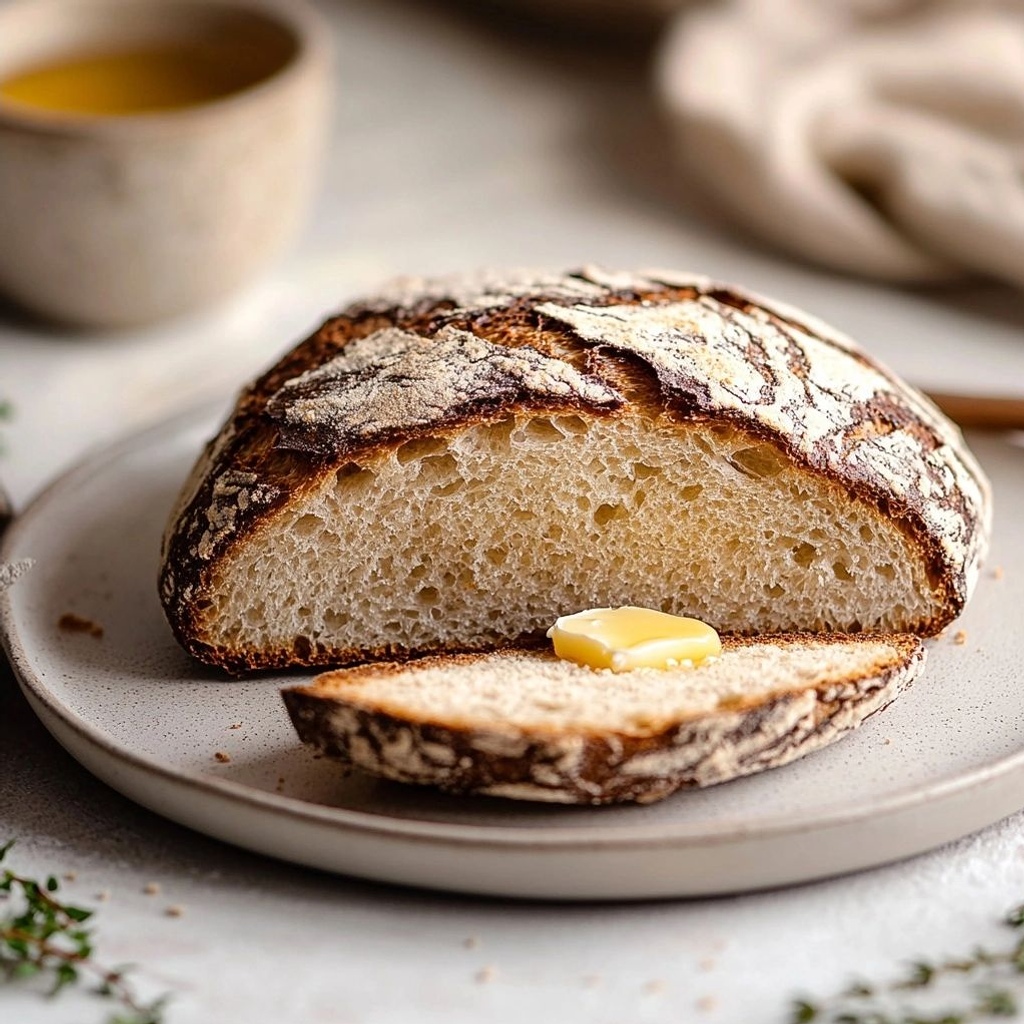
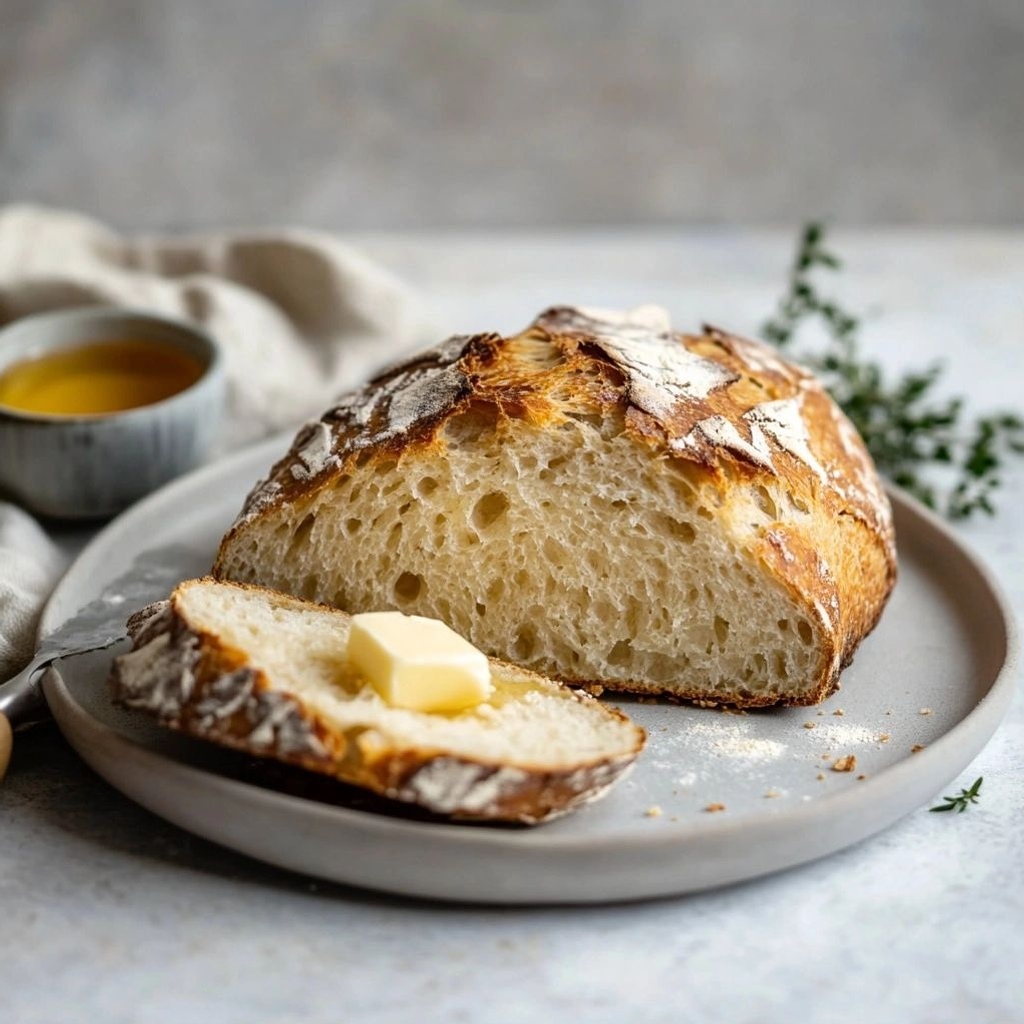
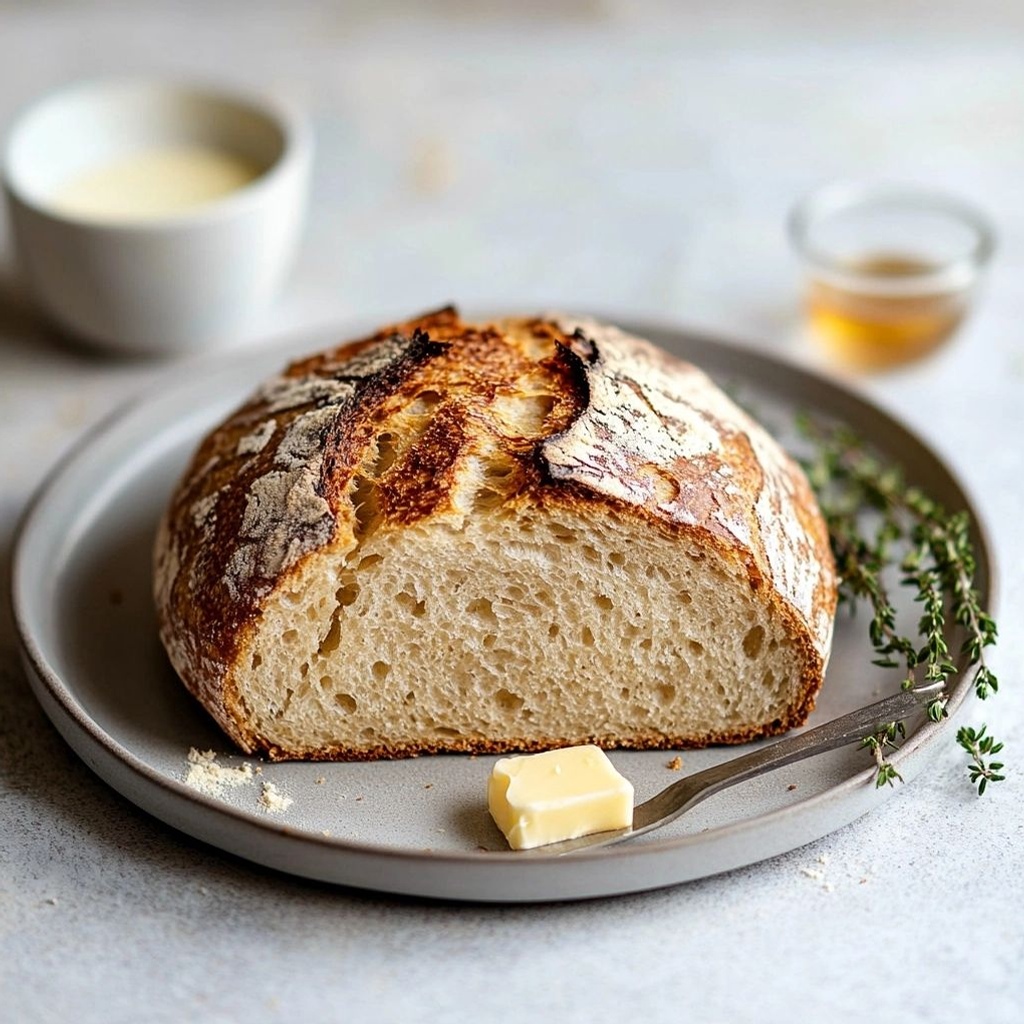
There’s something undeniably comforting about bread that’s warm from the oven, its crust crackling with a rustic kiss and a crumb that yields to a gentle press of your finger. This Homemade Rustic No Yeast Bread Recipe is the kind of loaf you reach for on a quiet Sunday, when the kitchen fills with the welcoming scent of toasty flour, caramelized edges, and a whisper of sweetness from the grains. It’s a bread that embraces simplicity without sacrificing flavor, a bake-it-anytime treasure that doesn’t rely on yeast or long fermentation. Picture a loaf with a sturdy, heartwarming texture, a crust that shivers with golden imperfection, and a soft, comforting interior that’s perfect for slathering with butter, dunking into a steaming bowl of soup, or pairing with a bright herby olive oil. This is bread that welcomes you to bake with what you have, turning pantry staples into something deeply satisfying and memorable.
The Story Behind the Dish
No-yeast bread has a storied place in many kitchens around the world, a symbol of resilience and ingenuity. It’s the bread you reach for when you want the smell of bread wafting through your home without the wait. In humble pantries and bustling homes alike, quick breads, soda breads, and soda-style loaves have long served as dependable, comforting staples. The concept is simple and beautiful: flour, liquid, and a leavening mechanism that doesn’t rely on hours of fermentation. Some traditions use baking soda or baking powder, while others rely on steam and heat to coax a hearty rise. The result is a loaf that’s easy to make, highly adaptable, and deeply satisfying. This particular rustic no-yeast bread recipe echoes that timeless practicality while inviting a touch of personal flair—crisp edges, a tender crumb, and a flavor profile that nods to the rustic loaves baked in wood-fired ovens centuries ago, yet tailored for modern kitchens. As you combine a few pantry staples, you’re participating in a culinary lineage that values resourcefulness, warmth, and the simple joy of bread breaking apart into generous chunks for sharing.
Why You’ll Love This Recipe
- Quick and approachable: No yeast means no rising time—this loaf comes together in a fraction of the time of traditional breads.
- Versatile texture: A sturdy crust with a soft, inviting crumb that’s perfect for dipping, slicing, or tearing apart into rustic chunks.
- Budget-friendly: Uses everyday ingredients you likely already have on hand, making it a practical kitchen staple.
- Customizable: The base recipe invites a variety of mix-ins and flavors—herbs, cheese, olives, seeds, or a touch of sweetness from honey or maple syrup.
- Family-friendly: Mildly seasoned, it pairs well with soups, stews, salads, and comforting old-fashioned meals.
- Perfect for beginners: A forgiving dough that’s forgiving of tweaks and substitutions while still yielding a satisfying loaf.
- Make-ahead flexibility: Great for meal prep—bakes beautifully fresh or can be saved for later use with proper storage.
Flavor Profile & Texture
This rustic no-yeast bread delivers a symphony of sensory notes that make every bite satisfying. The crust, deeply caramelized at the edges, provides a toasty, almost nutty aroma with a crisp snap when you break through it. Beneath that crust lies a crumb that’s hearty yet tender—substantial enough to hold up to hearty toppings but soft enough to tear apart with your hands. The flavor is gently malty, with a natural sweetness from the flour and any optional additions you choose to fold in. If you’ve added olive oil to the dough, you’ll notice a subtle fruity note that enriches the overall profile. Freshly baked bread like this tastes almost rustic-sweet, with a whisper of toasty, roasted grain that lingers on the palate. Texture-wise, you’ll enjoy a balance between a robust exterior and a comforting interior that isn’t airy or overly dense. It’s the kind of bread that makes butter feel essential on contact, gliding across the surface and melting into little pools of richness.
The aroma is equally memorable. As the loaf bakes, the kitchen fills with the scent of crust caramelization and warm flour, a nostalgic signal that comfort is near. When cooled slightly, the bread’s surface reveals a tapestry of color—from amber highlights to deeper caramel tones—inviting you to slice thick wedges or hearty rounds. The crumb—soft with hints of nutty flavor and a touch of spring—offers a satisfying chew, a testament to the bread’s rustic character. If you add seeds, grains, or herbs, you’ll notice pops of texture and scent—sesame seeds crackling lightly, poppy seeds adding tiny specks of sweetness, or dried herbs releasing their green, fragrant perfume as you bite through the crust. This is bread designed to be enjoyed in bites that reveal new notes with each chew.
Occasions & Pairings
This loaf shines in many settings, from weeknight dinners to weekend gatherings. Its versatility makes it a wonderful companion to a wide range of dishes and beverages.
- Weeknight comfort foods: Pair with soups like tomato basil, creamy mushroom, or a hearty vegetable stew. The bread is perfect for sopping up brothy sauces and pan juices.
- Breakfast and brunch: Toast thickly and slather with butter, jam, honey, or ricotta with a drizzle of olive oil and sea salt for a simple, satisfying morning treat.
- Cheese boards and dips: Serve alongside a selection of cheeses, olives, hummus, or whipped feta for a rustic keep-it-simple spread.
- Sandwich versatility: Use as a sturdy base for pan-fried sandwiches, grilled cheese, or leftover roasted vegetables tucked into a warm slice.
- Holiday and family gatherings: A reliable, crowd-pleasing bread that can be part of a bread basket, used for bruschetta, crostini, or as a center-stage side to a roasted chicken or pot roast.
Suggested pairings to enhance the bread’s natural flavors include high-quality extra-virgin olive oil with a pinch of flaky salt, a simple herb butter, or a sun-dried tomato and garlic spread. If you’re serving it with soups or stews, consider a bright green salad with a tangy vinaigrette to cut through the richness and balance the meal. For a heartier option, serve with a bowl of creamy roasted pepper soup or a seasonal vegetable chowder. A glass of crisp white wine or a light-bodied red can complement the bread without overpowering its gentle flavors.
Tips, Variations & Substitutions
How you customize this bread can turn a dependable staple into a signature loaf. Here are ideas to tailor the recipe to your taste, dietary needs, or what you have on hand.
- Herbs and aromatics: Fold in chopped fresh rosemary, thyme, or sage, or add minced garlic to the dough for extra aroma and depth. A pinch of dried oregano or marjoram can offer a Mediterranean flair.
- Cheesy crust: Sprinkle grated parmesan, asiago, or cheddar on top before baking to create a cheesy crust that caramelizes beautifully.
- Seed and nut crunch: Mix in sesame seeds, flaxseeds, sunflower seeds, or chopped walnuts for texture and a toasty aroma.
- Olive oil variations: Use extra-virgin olive oil for a fruity note, or a neutral oil like canola or avocado oil if you prefer a more neutral flavor.
- Flour choices: A mix of white and whole-wheat flour yields a denser, more rustic crumb with added bran flavor. For a lighter crumb, use a higher proportion of all-purpose flour.
- Sweet touches (optional): A small drizzle of honey or maple syrup in the dough can introduce a gentle sweetness that pairs well with butter or mild cheeses. For a hint of warmth, a pinch of cinnamon can work nicely in sweeter renditions.
- Gluten-free adaptation: Replace the wheat flour with a gluten-free all-purpose blend and consider adding a binding agent like xanthan gum if your blend lacks it. You may need to adjust liquid quantities to achieve the right dough consistency.
- Vegan option: Ensure any dairy in the recipe is replaced with plant-based ingredients like almond milk or oat milk and dairy-free butter or olive oil for a vegan friendly loaf.
- Low-sodium version: Use low-sodium broth or water and limit added salt, then rely on herbs and seeds for flavor.
- Regional twists: Add sun-dried tomatoes and olives for a Mediterranean vibe, or mix in curry powder and chopped fresh cilantro for a warm, Indian-inspired note.
Storage & Make-Ahead Ideas
Proper storage helps preserve the bread’s texture and flavor, ensuring it remains delicious for days after baking. Here are reliable approaches to keep your loaf fresh and ready for use.
- Room temperature: Once completely cooled, store the bread in a clean kitchen towel or in a bread box for up to 2–3 days. The crust will soften as it sits, which some people love for sandwiches, while others prefer to re-crisp it in the oven.
- Freezing: Slice the bread and freeze in airtight bags or wrap tightly in plastic and foil. Thaw at room temperature or toast slices directly from the freezer for a quick breakfast or snack.
- Reheating tips: Reheat whole loaf or slices in a preheated 350°F (175°C) oven for 10–15 minutes to restore crust crispness and warmth. For a faster approach, reheat in a toaster oven or on a skillet on low heat with a light brush of oil.
- Make-ahead plan: If you’re hosting a gathering, you can mix and shape the dough the day before and refrigerate it. Bring it to room temperature before baking, allowing it to rest and rise slightly as it warms, then bake as directed for a fresh loaf with minimal last-minute effort.
Fun Facts & Trivia (Optional)
There’s a quiet charm in the humble no-yeast loaf that has delighted bakers for generations. Here are a few tidbits that highlight the broader context of this comforting bread.
- Speakeasy origins of quick breads: During times of yeast shortages or scarcity, home cooks relied on chemical leaveners like baking powder and baking soda to create their own quick, satisfying breads—an enduring reminder of culinary improvisation in kitchens worldwide.
- Crust science: The crust’s caramelization is a result of the Maillard reaction, which occurs when amino acids and sugars react under heat, creating complex flavors and the brown, slightly toasted surface we crave in rustic loaves.
- Regional variations: Similar no-yeast breads appear in many cultures, be it soda breads of Ireland and Britain, or flatbreads leavened with natural yeasts in other parts of the world, each brings a distinctive texture and local flavor profile to the table.
- Rooted in resourcefulness: No-yeast or quick breads reflect the spirit of making do with what’s on hand, turning pantry staples into nourishing meals with warmth and care.
Ingredients
-
Bread Base
– 3 cups all-purpose flour (or a mix of 2 cups all-purpose and 1 cup whole wheat for a rustic crumb)
→ Provides the main structure and chewy bite of the bread. All-purpose flour gives a reliable gluten framework, while adding whole wheat increases density and adds a nutty flavor. If using whole wheat, expect a denser crumb and slightly darker crust; you can adjust by adding 1/4 cup extra water if needed and allowing the dough to rest briefly.
– 1 1/2 cups warm water (about 110°F / 43°C)
→ Hydrates the flour to form a workable dough and activates the leavening system. Warm water helps the dough come together smoothly and contributes to a better texture. If using cool water, the dough may be slower to come together and bake time could be longer.
– 2 tablespoons olive oil (extra-virgin preferred)
→ Adds moisture, tenderness, and a subtle fruitiness to the crumb. Oil helps keep the bread soft after baking and improves shelf life. If you prefer a lighter crumb, reduce slightly or substitute with lighter-tixed oil.
– 2 tablespoons honey or maple syrup (optional for a touch of sweetness and browning)
→ Provides a mild sweetness that enhances crust color and flavor. It also aids in browning during baking. For a vegan or dairy-free version, keep or omit as desired; you can replace with 1 tablespoon of brown sugar for more caramel notes.
– 1 tablespoon baking powder
→ The primary leavening agent in no-yeast bread, creating a light, biscuit-like rise. Ensure the powder is fresh and evenly distributed by whisking with the flour before adding liquids. If you prefer a crisper crust, bake at a slightly higher temperature for the first 5–10 minutes.
– 1 teaspoon salt
→ Enhances flavor and tightens gluten strands just enough to improve crumb structure. Salt also helps control the rate of fermentation and contributes to overall balance in taste. If using salted butter in other steps, consider reducing added salt by 1/4 teaspoon.
– 1 tablespoon apple cider vinegar or white vinegar
→ Reacts with baking powder to create extra lift and a lighter crumb, and helps improve tenderness in no-yeast doughs. The acidity also brightens flavor. If you don’t have vinegar, you can omit but expect a slightly denser crumb.
Flavorings and Convenience
– 2 cloves garlic, minced or 1 teaspoon garlic powder
→ Adds aromatic depth and savory notes that pair well with rustic bread. Fresh minced garlic provides a more pronounced aroma and moisture if used in a yeast-free dough; garlic powder yields a milder, even flavor distribution. If using fresh garlic, sauté briefly in olive oil to mellow sharpness before mixing into the dough.
– 1 teaspoon dried herbs (rosemary, thyme, or oregano)
→ Imparts an herbal fragrance that complements a rustic loaf. For best results, crush dried herbs between your fingers to awaken oils before adding. Fresh herbs can be used in the same amount but may require a touch more moisture.
– 1 tablespoon sugar or honey (additional)
→ Encourages browning of the crust through the Maillard reaction and can balance savory notes if using strong herbs. If omitting, crust color may be lighter; you can compensate by increasing oven temperature slightly for the final minutes of bake.
Optional Add-ins
– 1/4 cup chopped olives or sun-dried tomatoes
→ Introduces bursts of briny or concentrated sweetness that transform the loaf into a Mediterranean-style bread. Chop into small uniform pieces to distribute evenly; pat dry if using sun-dried tomatoes packed in oil to avoid soggy dough.
– 2 tablespoons flaxseeds or sesame seeds (for topping or inside)
→ Adds crunch, nutty flavor, and additional nutrition like omega-3 fats. If using flaxseeds, you can grind them first to help with binding. Sesame seeds give a toasty crust; press into the dough surface before baking for even coverage.
– 2 tablespoons chopped fresh herbs (parsley, chives)
→ Brightens flavor with a fresh, vibrant note. Add after kneading or folding to preserve color and aroma; if using dried herbs, reduce to 1/2 teaspoon to prevent overpowering the loaf.
Toppings and Finishes
– Coarse sea salt for sprinkling
→ Finishing salt adds a crunchy, savory pop on the crust. Lightly sprinkle just before baking to create attractive crystals on top; too much can taste saltier after baking, so err on the side of a light touch.
– 1 tablespoon olive oil for brushing
→ Helps achieve a glossy, golden crust and seals in moisture at the surface. Brush the loaf immediately before baking for an even sheen; reapply halfway if baking longer than 35 minutes for a deeper crust color.
Instructions
- Preheat your oven to 400°F (200°C) and line a baking sheet with parchment paper or lightly oil a silicone mat to prevent sticking.
→ A hot, well-prepared surface ensures even baking and an attractive crust without the loaf adhering to the pan. - In a large mixing bowl, whisk together the bread base flour, baking powder, and salt until uniformly combined.
→ Even distribution of leavening and salt guarantees consistent rise and flavor throughout the loaf; whisking also aerates the dry mix for a lighter texture. - Combine the warm water, olive oil, and honey or maple syrup in a separate bowl, stirring to dissolve the sweetener and emulsify the oil.
→ Warm liquid helps the fats emulsify and hydrates the dry ingredients more efficiently, contributing to a cohesive dough. - Pour the liquid mixture into the dry ingredients and stir with a wooden spoon or spatula until a shaggy, cohesive dough forms.
→ The goal is a moist, workable dough without overworking; this creates a tender crumb while preserving structure from the baking powder. - Add the minced garlic (or garlic powder) and the dried herbs to the dough, folding them in evenly with gentle motion.
→ Even distribution of aromatics ensures each slice delivers consistent savory notes rather than concentrated pockets of flavor. - If using optional add-ins like olives or sun-dried tomatoes, fold them in now in small pieces until dispersed but not overmixed.
→ Uniform chunks prevent tearing the dough and ensure every bite has balanced intensity of add-ins. - Lightly flour a clean work surface and turn the dough out; knead gently for 1–2 minutes just to bring it together into a smooth, rounded ball.
→ Brief kneading tightens the surface for a better oven spring and helps the dough hold its shape during baking without overdeveloping gluten, which can make the loaf dense. - Place the dough on the prepared baking sheet and shape it into a rustic round or oval loaf, about 1.5 inches (4 cm) thick.
→ A uniform thickness ensures even cooking; a rustic shape also allows for natural expansion and a crustier exterior. - Brush the surface with a light coat of olive oil and sprinkle coarse sea salt on top for a finishing crust.
→ Oil creates a shiny, crisp crust while salt enhances flavor and provides a pleasant savory counterpoint to the bread. - Using a sharp knife or scoring tool, make one shallow slash across the top of the dough.
→ Scoring directs expansion during baking and prevents random cracking, yielding an appealing, store-bought look. - Transfer the loaf to the middle rack of the oven and bake for 22–28 minutes, rotating the pan halfway for even browning.
→ Even heat exposure ensures uniform crust color and crumb texture; rotation prevents one side from baking faster than the other. - When the crust is deep golden and the loaf sounds hollow when tapped on the bottom, remove it from the oven and brush the top with a second light coating of olive oil if you desire a richer sheen.
→ The visual cue and tapping test confirm doneness; a second oil coat adds moisture and a glossy finish without compromising crust integrity. - Let the bread rest on a wire rack for at least 15–20 minutes before slicing to allow the internal starches to set and the crumb to finish settling.
→ Resting helps retain moisture within the crumb, making slices cleaner and preventing gummy interiors immediately after baking. - Slice and serve warm or at room temperature with butter, olive oil, or your favorite accompaniments; store any leftovers wrapped in a clean towel or airtight container for up to 3 days.
→ Proper cooling and storage preserve crust texture and crumb moisture, ensuring the bread remains enjoyable beyond the initial bake.
Notes
These rustic no-yeast bread muffins are a versatile, pantry-friendly loaf that relies on baking powder and acid to create lift instead of traditional yeast. Start by whisking flour, baking powder, salt, and any dried herbs together to ensure even distribution before adding liquids. Use warm water and olive oil to hydrate the flour for a soft, cohesive dough that you can quickly press into a loaf shape. The apple cider vinegar (or white vinegar) reacts with the baking powder to boost rise and tenderness, giving a biscuit-like crumb with a pleasantly chewy crust. If you want a slightly sweeter crust or richer flavor, a splash of honey or maple syrup in the dough will help browning and aroma, but it’s optional for a more savory loaf. For extra depth, sautéed fresh garlic in olive oil or chopped herbs can be folded in after initial mixing, then gently kneaded or pressed into shape to distribute aroma evenly.
Shape and bake with a light touch: press the dough into a round or oval loaf on a parchment-lined sheet or in a loaf pan, brush with olive oil, and scatter a pinch of coarse sea salt on top. If you’re aiming for a crisper crust, bake at a slightly higher temperature for the first 5–10 minutes, then reduce to finish baking. Bake time will vary with thickness and pan type, but expect a firm crust and a hollow-sounding bottom when done. Let the loaf cool on a rack before slicing to set the crumb.
Flavor and texture ideas: fold in 1/4 cup chopped olives or sun-dried tomatoes for a Mediterranean twist, or sprinkle flaxseeds or sesame seeds on top for extra crunch and nutrition. Fresh herbs like parsley or chives brighten the crumb; if using dried herbs, reduce to a pinch to prevent overpowering the loaf. Want more chew? Use a mix of all-purpose and whole wheat flour for a rustic crumb, but be mindful that whole wheat will yield a denser slice.
Storage and serving: this bread freezes well—slice once cooled, wrap tightly, and freeze. Reheat slices in a toaster or warm briefly in the oven to revive softness. It pairs beautifully with olive oil, butter, creamy cheeses, or hearty soups and stews. If you prefer a milder flavor, omit garlic and adjust herbs to suit your taste. Always ensure your baking powder is fresh for optimal rise and crumb quality.
Tips
- Hydration and texture: If you find the dough too sticky, add flour a tablespoon at a time and rest for 5 minutes to let the starches hydrate before adding more. Conversely, if it feels stiff, splash in a teaspoon of water at a time until it comes together into a shaggy but workable dough.
- Mixing technique for no-yeast rise: Since this uses baking powder instead of yeast, whisk the flour, baking powder, and salt thoroughly together first so the leavening is evenly distributed. Then whisk in warm water and oil just until a cohesive dough forms—overmixing can make the crumb tougher.
- Crust color and browning: For deeper color, increase the sugar or honey by another teaspoon and bake the first 5–10 minutes at a higher temperature (about 425°F/220°C) before reducing to the recommended bake temperature. Keep an eye to prevent burning if your oven runs hot.
- Aromatics and flavor balance: If using fresh herbs or garlic, sauté garlic in the olive oil for 1–2 minutes to soften sharpness and bloom the flavors before adding to the dough. Fresh herbs should be folded in after the initial mix to preserve brightness.
- Optional add-ins distribution: To ensure olives or sun-dried tomatoes are evenly dispersed, pat dry any oily additions and toss them with a small pinch of flour before folding into the dough. This helps prevent sinking to the bottom.
- Texture tips with whole wheat: Substituting with whole wheat adds nuttiness and density. If you notice the crumb is too dense, compensate with 1–2 extra tablespoons of water and a 5–10 minute resting period after mixing to hydrate the bran.
- Creaminess and moisture: If you prefer a softer crumb, keep the dough slightly wetter and brush with oil before baking. If you want a crisper crust, bake with a light dusting of flour on top or place a shallow pan of water in the oven to create steam only in the early minutes, then remove it.
- Salt management: If you’ve used salted butter or strong cheeses in toppings, cut the added salt by 1/4 teaspoon to avoid an overly salty loaf. Taste the dough after mixing and adjust accordingly.
- Storage and freshness: Once cooled, wrap completely in cloth or parchment, then store in a breathable container. The bread will stay freshest for 2–3 days; for longer, slice and freeze, then toast slices directly from frozen for best texture.
- Serving ideas: This rustic loaf pairs beautifully with olive oil and vinegar dip, roasted garlic, or a spread of herbed butter. It also makes a great base for bruschetta or a hearty open-faced sandwich.
- Troubleshooting: If the bread comes out denser than expected, ensure your baking powder is fresh (tested by fizzing in hot water). If it’s old, replace it for a lighter rise. If crust is pale, increase oven temperature by 10–15°C for the first 5 minutes, then proceed as directed.
FAQ
What is “Homemade Rustic No Yeast Bread”?
A crusty, hearty loaf made without yeast, using simple leavening options like baking powder or baking soda along with an overnight or long-resting hydrations to develop flavor and texture. It’s easy, comforting, and requires minimal ingredients.
What ingredients do I typically need?
Common base ingredients include all-purpose or whole-wheat flour, baking powder or baking soda, salt, and water. Optional additions: olive oil, yogurt or buttermilk for tenderness, seeds, herbs, or a little sugar/honey for browning.
What equipment do I need?
A sturdy bowl for mixing, a spoon or spatula, a baking sheet or loaf pan, and an oven-safe dish (like a Dutch oven or a heavy skillet) for a crispy crust. A parchment paper helps with transfer if using a bake sheet.
How do I achieve a crusty exterior without yeast?
Use a hot oven (450°F/230°C or as your recipe calls for), preheated stone or Dutch oven if possible, and steam during the first 15–20 minutes (place a tray of water in the oven or keep a pan of water inside). A hot pan and moisture encourage a crisp crust.
What’s the difference between using baking powder vs. baking soda in this bread?
Baking powder gives a lighter rise and is easier to manage in no-yeast recipes. If you use baking soda, you’ll typically need an acidic ingredient (like yogurt, sour cream, or lemon juice) to activate it. Both yield a sturdy loaf; adjust leavening based on your recipe.
Can I make this dough ahead or refrigerate it?
Yes. You can mix the dough and let it rest in the fridge for several hours or overnight to develop flavor. Bring it to room temperature before baking. Some recipes call for an overnight rest to hydrate the flour fully.
What texture should I expect inside?
You’ll typically get a dense, tender crumb with artisan character. It won’t be as airy as yeast bread, but it should be hearty, with a chewy crust and a soft interior depending on hydration and leavening method.
How do I prevent a dense loaf?
Ensure proper hydration (not too dry), don’t overmix (just combine ingredients until blended), and bake with adequate heat and steam. If the dough feels too stiff, add a little more water. Conversely, if too loose, add a tablespoon at a time of flour.
Any tips for flavor variations?
Add-ins like chopped olives, roasted garlic, sun-dried tomatoes, herbs (rosemary, thyme), seeds (sesame, sesame and flax), or grated cheese can elevate flavor. Toasting seeds before adding helps release aroma.
How should I store leftovers?
Wrap tightly in a clean towel or store in an airtight container at room temperature for 1–2 days. For longer storage, freeze slices or the whole loaf wrapped well, then reheat in a toaster or oven to refresh crust.