Introduction / Hook
Imagine a silky, decadent sweetness that whispers of caramel while staying gloriously simple to make. In just three minutes, you can conjure a homemade “milkmaid” vibe—rich, velvety, and perfect for all those dream desserts you’ve been eyeing. This isn’t just a shortcut; it’s a tiny revolution for busy kitchens, a moment where convenience and comfort collide in a warm, creamy hug. The aroma alone should coax memories from the pan: butter melting into milk, the soft glint of sugar turning to a glossy sheen, and the sense that you’ve captured something timeless—speed meets indulgence. Whether you’re topping hot beverages, filling a quick pastry, or drizzling over a stack of pancakes, this quick milkmaid-inspired creation elevates everyday sweets to something memorable. Welcome to a method that respects your time while delivering a texture and taste that feels like a small luxury, crafted with the care of a slow simmer but the speed of a modern miracle.
The Story Behind the Dish
Milkmaid condensed milk has a storied place in kitchens around the world, a symbol of thrift, warmth, and culinary cross-pollination. The concept of concentrating milk dates back to early dairy traditions when households sought to preserve milk for longer and create a treasury of sweetness without daily churns. Condensed milk, especially the sweetened variety, became a pantry staple during times when fresh produce wasn’t always guaranteed, turning simple ingredients into creamy, dreamy desserts with minimal effort. Over the decades, home cooks and pastry enthusiasts embraced the convenience without sacrificing flavor, discovering that condensed milk could act as a bridge—connecting Indian desserts, Latin-inspired sweets, Southeast Asian treats, and European comfort foods—into a single, versatile ingredient that sings in both classic recipes and modern twists. The idea of a “3-minute milkmaid” nods to this legacy while reimagining it for the time-pressed cook: a playful homage to tradition wrapped in a few simple steps that don’t skip taste. It’s a reminder that some culinary classics don’t demand hours to become unforgettable; they just need a moment of ingenuity, a friendly rhythm in the kitchen, and a dash of courage to try something new with familiar flavors.
Why You’ll Love This Recipe
- Speed without compromise: a rich, creamy dairy element ready in minutes, perfect for quick desserts, coffee enrichments, or drizzle over fresh fruit.
- Versatility at your fingertips: a sweet, luscious base that pairs beautifully with chocolate, vanilla, citrus, and tropical notes.
- Comforting texture: a smooth, glossy finish reminiscent of classic dulce de leche, but with a lighter, more approachable finish suitable for a wide range of uses.
- Beginner-friendly method: straightforward steps that require only a few pantry staples and minimal attention, making it approachable for cooks of all levels.
- Budget-conscious delight: you can achieve a premium feel with simple ingredients, turning everyday pantry staples into a time-saving treasure.
Flavor Profile & Texture
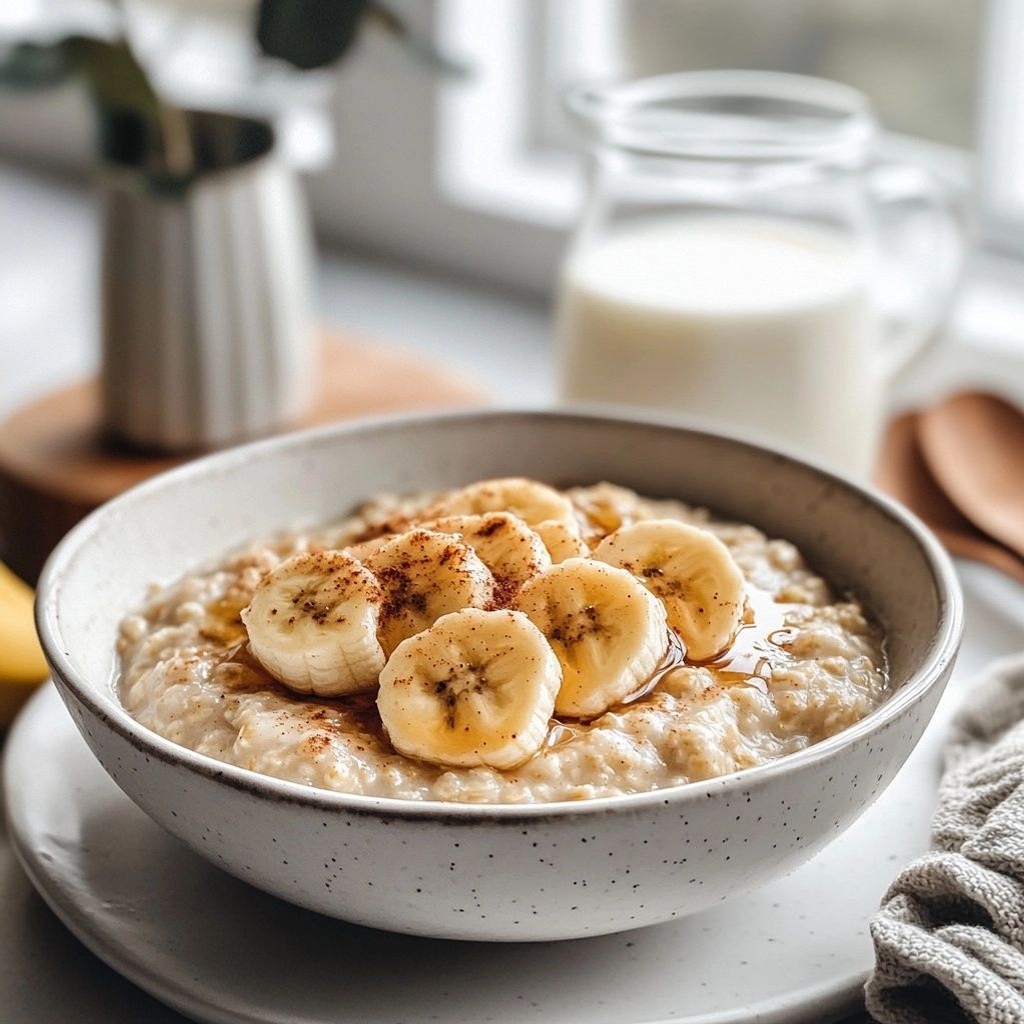
The resulting product is a study in balance: a gentle sweetness that never overpowers, a dairy richness that coats the palate, and a depth that hints at caramelized notes without being cloying. Think of it as a velvety glaze that holds its shape on a spoon, with a rain-gloss sheen that shimmers when light catches it. The flavor leans toward caramel and dulce de leche tones, with a subtle toffee-like finish that reveals itself as it lingers. In terms of texture, you should expect a thick, luscious pour—smooth yet substantial enough to cling to a spoon or to ribbon off the edge of a warm mug. It’s the kind of mouthfeel that makes you ready for a second, then a third helping of whatever you’re pairing it with—while still keeping the ability to drizzle lightly for a refined finish. The aroma is comforting and warm: a soft dairy scent mingled with caramelized sugar and a whisper of vanilla, inviting you to take a moment to inhale its cozy perfume before tasting.
Occasions & Pairings
This quick milkmaid-inspired creation shines in a variety of settings and with a spectrum of pairings. Consider these ideas to weave it into your week or your celebrations:
- Weeknight indulgence: stirred into hot cocoa or coffee for a café-quality beverage at home.
- Dessert boost: layered over vanilla ice cream, spooned across warm bread pudding, or swirled into cheesecakes for extra richness.
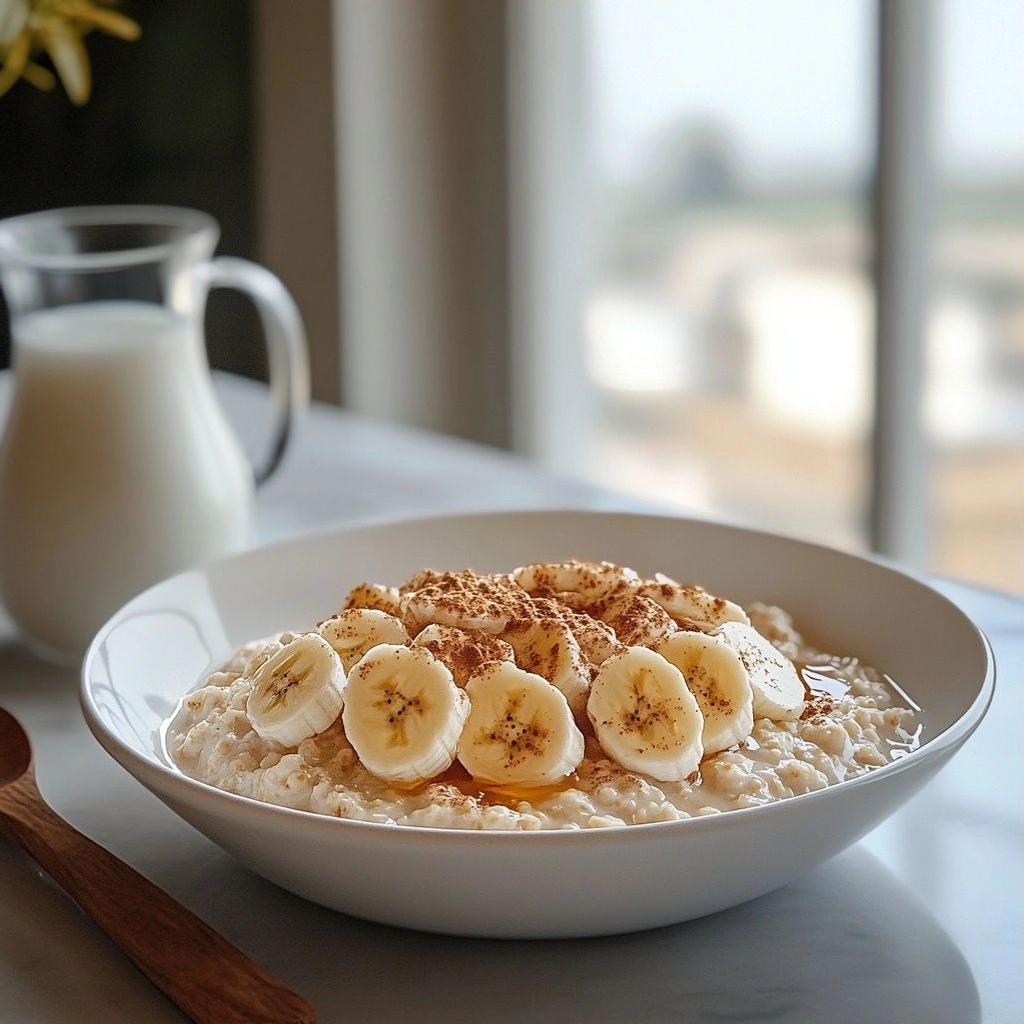
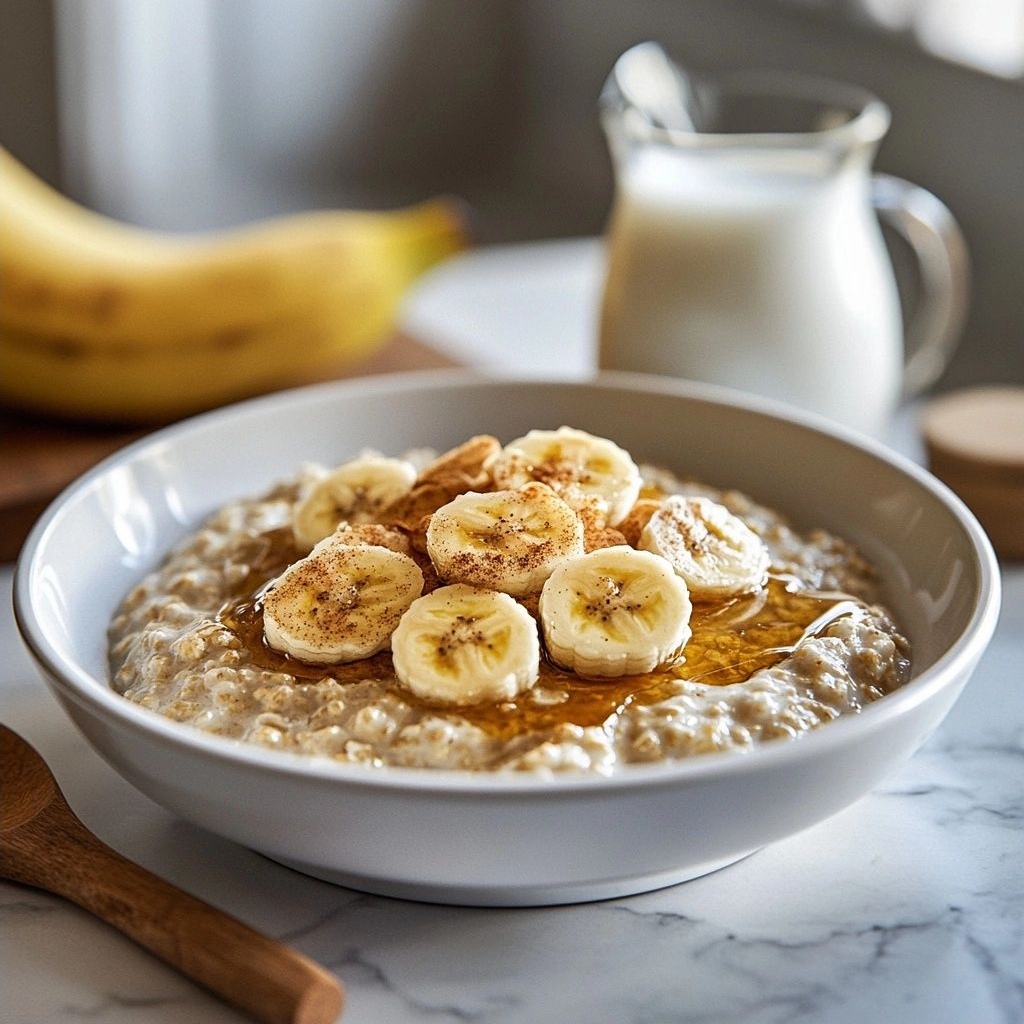
- Bright breakfast: a drizzle over fluffy pancakes, waffles, or French toast to elevate a humble morning into something special.
- Party-ready sauce: a glossy topping for fruit takes or tarts, lending a professional finish without complex technique.
- Giftable treat: jar a portion with a pretty ribbon for a thoughtful, homemade present that’s both practical and indulgent.
Pairings to consider include:
- Dark chocolate or cocoa powder for a decadent beverage or dessert.
- Ripe peaches, roasted apples, or grilled bananas for a fruit-forward finish.
- Crushed cookies, shortbread, or biscotti to offer a textural contrast.
- Vanilla, cinnamon, or a hint of sea salt to draw out the caramel notes.
- Whipped cream or yogurt as a contrasting light topping on richer desserts.
Tips, Variations & Substitutions
Here are practical ideas to tailor this quick milkmaid concept to your pantry, dietary needs, and flavor preferences:
- Milk choices: Use whole milk for a richer result, or plant-based milks (like coconut or cashew) with a touch of neutral oil to mimic the fat content if you’re dairy-free. The result will be slightly lighter but still delicious.
- Sweetness control: Adjust the sweetness to taste. If you’re making this for someone who prefers less sugar, start with a smaller amount and add a touch more near the end if needed.
- Flavor boosters: A splash of vanilla extract, a pinch of sea salt, or a whisper of orange zest can transform the profile, giving it a more complex, dessert-ready character.
- Dusting of texture: For a rustic finish, whisk in a small amount of butter at the end to create a glossy, thick sheen and a hint of dairy aroma.
- Vegan option: Use a plant-based condensed-milk-style base made from coconut milk with a touch of coconut sugar; keep in mind that the flavor will skew tropical and rich.
- Regional twists: Add ground cardamom for an Indian-inspired depth, or a touch of espresso powder for a mocha twist that cuts sweetness with a roasted edge.
- Health-conscious tweaks: For a lighter version, use one part condensed-style base to three parts milk, then finish with a thin ribbon of this base to preserve the silky texture without heaviness.
Storage & Make-Ahead Ideas
The beauty of this quick-draft approach is its flexibility in the pantry. Here are practical ways to store and use it beyond immediate craving points:
- Short-term storage: Transfer to a clean jar or sealed container and refrigerate for up to a week. Reheat gently on the stove or in the microwave, stirring until smooth.
- Make-ahead for parties: Prepare a larger batch and portion into small jars. Keep refrigerated and drizzle over desserts or coffee as needed in the days following the event.
- Freezing tips: Freeze in small, airtight portions for up to three months. Thaw in the fridge overnight and warm gently before use.
- Reheating guidance: When reheating, do so slowly to preserve the emulsion. A splash of milk or cream can help restore creaminess if it thickens a bit after storage.
- Flavor revival: If the texture thickens in storage, whisk in a little warm milk to loosen and reincorporate the gloss before serving.
Fun Facts & Trivia (Optional)
Delve into some tasty tidbits that shed light on why condensed milk holds such a beloved place in global kitchens:
- Sweetened condensed milk was a lifesaver for sailors and explorers who needed shelf-stable, energy-dense sustenance during long voyages.
- Historically, many cultures used condensed milk as a base for fudge-like confections and creamy desserts long before modern dairy processing made it widely accessible.
- Condensed milk’s success lies in its stable emulsion: fat, sugar, and milk solids combine into a glossy, pourable texture that resists separation, a feature that makes it ideal for quick magic in the kitchen.
- In some regions, condensed milk is warmed with spices to create comforting beverages during chilly evenings, turning a simple pantry staple into a festive treat.
Frequently Asked Questions (FAQ)
If you’re wondering how to get the most out of your three-minute milkmaid-inspired creation, here are quick tips to ensure success:
- Will it taste like traditional condensed milk? It will evoke the same sweetness and dairy richness with a fast, simplified technique. The exact flavor depends on the milk choice and any flavorings you add.
- Can I customize the sweetness? Yes. Start with a base level of sweetness and adjust after whisking or warming. It’s easier to add more sugar than to fix an overly sweet mixture.
- Is this safe for kids? When prepared with standard dairy or child-friendly sweeteners, it’s generally suitable for children, but always consider dietary restrictions and allergies.
- Can I use it in place of regular condensed milk in recipes? In many cases, yes, especially for topping and glaze applications. For baked goods that rely on the exact texture of condensed milk, test a small batch first to ensure the result aligns with the recipe’s expectations.
Conclusion
Fast yet luxurious, this 3-minute milkmaid-inspired approach invites you to reimagine pantry magic. It’s a tiny culinary trick that rewards curiosity with creamy richness and a sense of accomplishment that comes from turning simple ingredients into something that feels indulgent and special. The beauty lies in its adaptability: you can keep it clean and classic, or tilt it toward bold flavors and creative pairings. By embracing the speed without sacrificing the essence of what makes condensed milk beloved—its silky texture, caramel warmth, and universal appeal—you’ll find yourself reaching for this quick trick again and again. So next time you crave a dessert-ready gloss, a café-like drizzle, or a comforting topping that whispers of home and holiday kitchens, you’ll know there’s a quick, dependable friend waiting in your fridge. In three minutes, you unlock a world of possibilities that honors tradition while celebrating modern convenience. And that, in the end, is the heart of this recipe: a small, delightful shortcut that tastes like it spent hours in the making, even though it took just minutes to conjure.
Ingredients
- 2 cups whole milk
→ This is the primary liquid and base for the “milkmaid” (sweetened condensed milk) you’ll be creating. Whole milk provides the richest texture and flavor; lower-fat milks will yield a thinner result. Do not substitute skim milk if you want a true condensed-milk-like consistency. Heat gently to avoid scorching, then reduce to a thick, syrupy consistency. - 3/4 cup granulated sugar
→ Sugar is the key sweetener and also helps to preserve the thick, syrupy body as the mixture reduces. It should be added to dissolve completely; stir continuously as the milk reduces to avoid crystallization or scorching. Adjust to taste if you prefer a sweeter or milder finish. - 2 tablespoons unsalted butter
→ Butter adds richness and a smooth, glossy finish to the condensed milk. For best results, add butter after the mixture has reduced slightly and is warm, then whisk until fully integrated. Salted butter will alter the flavor, so use unsalted and adjust salt separately if needed. - 1/8 teaspoon fine sea salt
→ A small amount of salt enhances the sweetness and rounds out the overall flavor. It also helps balance the richness of the butter and milk. If using salted butter, reduce or omit this salt by taste. Dissolve the salt completely for an even texture. - 1 teaspoon vanilla extract (optional)
→ Vanilla adds a warm, aromatic note that mimics store-bought condensed milk flavors. Use pure vanilla extract rather than artificial to achieve a more nuanced profile. Add it near the end of cooking after removing the mixture from direct heat to preserve aroma. If avoiding vanilla, the recipe will still be rich but less fragrant.
Instructions
- Warm the milk gently in a heavy-bottomed saucepan over low heat until it just begins to bubble around the edges.
→ Heating slowly prevents scorching, proteins from scorching or forming unpleasant flavors, and sets a stable base for a smooth, syrupy reduction. - Reduce the heat to a gentle simmer and continue to cook, stirring frequently with a silicone spatula to prevent sticking.
→ Slow simmering concentrates the milk without boiling over, and constant stirring ensures even heat distribution and prevents skin formation on the surface. - Gradually sprinkle in the granulated sugar while stirring, allowing it to dissolve completely before the mixture thickens.
→ Fully dissolving sugar avoids gritty texture and helps create a cohesive, glossy condensed-milk-like consistency as the liquid reduces. - Continue to simmer the milk-sugar mixture until it reduces by about one third and reaches a pale, creamy color with a thick, syrupy coat on the back of a spoon.
→ This reduction concentrates sweetness and flavor while developing the characteristic viscous body of homemade condensed milk; use a clean spoon to test coating thickness. - Remove the pan from heat and whisk in the unsalted butter in small pieces until completely melted and incorporated.
→ Adding butter off heat prevents separation, yields a silkier texture, and contributes a rich, glossy finish that mimics commercial evaporated milk reduction into condensed milk. - Sprinkle in the fine sea salt and whisk until the salt fully dissolves and is evenly dispersed.
→ A small amount of salt enhances sweetness and rounds the flavor; dissolving ensures even texture without graininess. - If using vanilla, stir in the vanilla extract now and whisk for another 15 to 20 seconds to integrate its aroma without losing volatile notes.
→ Adding vanilla at this stage preserves its aromatic quality; heat can diminish fragrance, so off-heat incorporation preserves flavor integrity. - Return the mixture to a low heat if it has cooled excessively, and simmer briefly while stirring to renew a smooth, cohesive consistency.
→ A gentle reheat helps achieve a uniform thickness and prevents separation, ensuring a stable product when cooled. - Let the condensed milk cool completely in the pan, then transfer to a clean jar or container and refrigerate until chilled.
→ Cooling slowly helps the mixture set more evenly and prevents condensation from forming on the surface; chilling deepens flavor and thickens further for storage. - Store the homemade milkmaid in a sealed container in the refrigerator for up to 1 week or freeze in small portions for longer use.
→ Proper storage maintains texture and prevents spoilage; freezing in portions allows for easy portioning in future recipes.
Notes
These quick Homemade milkmaid in 3 minutes are a silky, rich condensed milk made from whole milk and sugar. You can customize them by adjusting the vanilla or adding a pinch of cardamom or cinnamon for a warm, fragrant note. This method yields a thick, syrupy texture when you simmer gently and whisk continuously so the sugar fully dissolves and the mixture stays glossy. They store well in a jar in the fridge for up to a week and can be used in coffee, desserts, or as a drizzle over fruits and toast. For a dairy-free alternative, experiment with coconut milk or cashew milk plus sugar and a touch of coconut oil—note that the flavor and texture will differ from dairy milkmaid. Always heat gently to avoid scorching, add butter after the mixture has reduced and warmed, and dissolve the salt completely for a smooth, balanced finish. If you’re avoiding vanilla, you’ll still get a rich condensed-milk-like base, just without the extra warm aroma.
Tips
Tips for Perfect Homemade Milkmaid (Condensed Milk) in 3 Minutes
- Use a heavy-bottomed, wide saucepan to distribute heat evenly. A thick base helps prevent scorching and allows steady evaporation.
- Cook on low to medium-low heat. Gentle simmering (not a rolling boil) keeps the milk from scorching and reduces the chance of burnt flavors.
- Stir constantly at the start and then frequently as the mixture thickens. This prevents sticking to the bottom and helps dissolve sugar evenly for a smooth finish.
- Monitor the reduction visually. The mixture should thicken to a syrupy, pale-cream color and coat the back of a spoon. If it looks curdled or separated, remove from heat and whisk vigorously to smooth.
- Heat control tip: if you see scorching specks, lift the pan from direct heat for a moment and stir; consider lowering the heat a notch and continuing to cook slowly.
- Whisk in the butter off the heat. Add the butter when the mixture is warm but not boiling hot, then whisk until fully integrated for a glossy, rich finish.
- Ensure the sugar dissolves completely by fully whisking as it dissolves. Undissolved sugar can crystallize as the mixture cools, leading to a gritty texture.
- Salt is small but important. If you’re using salted butter, reduce or omit the extra salt and taste before finalizing the recipe.
- Vanilla extract adds aroma. Add it after removing the pan from direct heat to preserve the fragrance; if you prefer a dairy-forward taste, you can skip it.
- Let it cool slightly before transferring. It thickens as it cools, so plan for slight overthickness if you’ll use it immediately in recipes that require some volume.
- Storage: refrigerate in an airtight container. It will thicken further in the fridge; rewarm gently over low heat or in short bursts in the microwave, stirring until smooth.
- Flavor and texture variations: for richer depth, you can substitute a small amount of evaporated milk in place of part of the milk, but this may alter the final thickness.
- Safety note: always use clean utensils and storage containers to avoid contamination, especially if you’re preserving the milkmaid for later use.
FAQ
What is “milkmaid” and what does the 3-minute quick method mean?
Milkmaid refers to sweetened condensed milk. The “3-minute quick method” uses a kitchen shortcut to make a creamy, thick sweet milk quickly using simple ingredients and common appliances, typically a blender or microwave, rather than slow simmering for hours.
What ingredients do I need?
Common ingredients include: powdered milk (or regular milk), sugar, water, and butter or oil as a fat component. Some methods use only milk powder and water with sugar, while others add a touch of vanilla for flavor. Always check the exact recipe you’re following for ratios.
What equipment is required?
Primary options: a high-speed blender, a microwave-safe bowl, and a whisk; or a small saucepan for stovetop. Some quick variants use a microwave-safe jar or cup with a lid. A spatula and measuring spoons help with accuracy.
Can I make it with dairy-free milk?
Yes. Use a dairy-free milk alternative (like coconut milk, almond milk, or soy milk) in the same ratio. For a closer texture to condensed milk, use a blend with higher fat content (e.g., coconut milk) or add a small amount of dairy-free butter or oil if the recipe permits.
Is this safe and how long does it last?
When prepared with clean utensils and stored in a clean, airtight container in the refrigerator, it typically lasts up to 1 week. Do not leave it at room temperature for extended periods. If you notice a sour smell or mold, discard.
How do I store and reuse leftovers?
Transfer to a glass jar or airtight container. Chill in the fridge and use within about 5–7 days. For longer storage, you can portion it and freeze for up to 1 month, though texture may change slightly after thawing.
What are common substitutions?
Replace sugar with a sugar substitute suitable for dairy, or adjust to taste. If the recipe uses powdered milk, you can substitute with full-fat liquid milk but expect a different texture. Some methods use condensed milk powder plus water instead of liquid milk.
What flavor variations can I try?
Try vanilla extract, a pinch of salt, cardamom, or a hint of nutmeg. You can also add a small amount of cocoa powder or coffee for a flavored version. If using coconut milk, a touch of shredded coconut can enhance aroma.
What are common troubleshooting tips?
If the mixture isn’t thick enough, add a touch more powdered milk or reduce liquid slightly, then blend again. If the texture becomes grainy, re-blend longer or add a tiny amount of butter/oil to smooth it. Avoid overheating if using a microwave by doing short pulses and stirring in between.
Is there a vegan alternative that mimics condensed milk?
Yes. A vegan mimic can be made with coconut milk or cashew-based cream plus sugar and a bit of oil to achieve creaminess. Blending or simmering until thickened can help reach a comparable consistency. Some recipes use sweetened coconut cream for a similar result.