Introduction / Hook
Imagine a cozy tea-time ritual compressed into a single, sizzling moment: a warm, fluffy vanilla and chocolate cake that rises like a tiny cloud inside your sandwich maker. In the time it takes to brew a perfect cup of tea, you can transform simple pantry staples into a decadent, kid-approved treat that feels indulgent yet effortless. This 5 Mins Tea Time Cake in a Sandwich Maker is the kind of recipe that makes your kitchen smell like a bakery even before you bite into it. It’s the comforting hug you crave on busy weekdays, the quick dessert you can proudly serve to guests with zero special equipment, and the playful snack that invites smiles from both the little ones and the grown-ups who secretly love a good chocolate surge. Get ready to celebrate the magic of speed, simplicity, and the timeless joy of cake and tea coming together in a warm, fragrant embrace.
The Story Behind the Dish
Fast-forward to the era of small appliances and clever hacks, where everyday gadgets become culinary partners. The concept of using a sandwich maker to bake cake isn’t brand-new, but it’s a clever riff on the classic tea-time tradition—the ritual of savoring something sweet with a hot beverage in the afternoon. In many homes around the world, tea time is about balance: a little sweetness to lift the mood, a touch of warmth to comfort the senses, and a moment of pause amid the day’s bustle. This particular cake borrows from that spirit and elevates it with two beloved flavors—vanilla and chocolate—that harmonize in a moist, tender crumb. The idea is simple: a well-greased, preheated sandwich maker can act like a compact oven, delivering even heat in minutes, while a batter inspired by a spotless vanilla base with chocolate swirls delivers depth and a surprising cocoa kiss in every bite. The result is not only delicious but also a nod to culinary ingenuity—how a familiar gadget can become a tool for creativity, turning a quick snack into a small, celebratory moment.
Why You’ll Love This Recipe
- Speed and ease: ready in five minutes, with minimal cleanup and no need for an oven.
- Versatility: a base batter that can be customized with your favorite add-ins and flavors.
- Comforting texture: a moist, soft crumb with a delicate balance of vanilla sweetness and chocolate richness.
- Kid-friendly and crowd-pleasing: simple ingredients and familiar flavors make it a hit for all ages.
- Low maintenance, high delight: perfect for busy mornings, afternoon tea breaks, or last-minute dessert cravings.
- Creative presentation: the idea of cake in a sandwich maker invites playful plating and serving ideas.
Flavor Profile & Texture
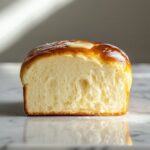
The cake presents a gentle vanilla aroma that forms the mellow backbone of the batter, immediately accompanied by ribbons or pockets of melted chocolate that melt into the crumb as it bakes. When you cut into the finished cake, you’ll encounter a tender, springy interior that yields slightly under a light press, similar to a rich sponge or a moist mug cake. The chocolate swirls provide bursts of cocoa flavor with a smooth, not overly sweet finish, ensuring the dessert remains balanced and elegant. The exterior, grilled to a soft golden brown, delivers a whisper of caramelized edge that contrasts pleasantly with the soft interior. The overall experience is cozy and intimate—like a small, personal cake you’d share with a confidant over tea. The texture is important here: you want enough bite to keep things interesting, but enough moisture to feel indulgent rather than dense. The aroma—warm butter, vanilla, and cocoa—paints a sensory invitation that lures you toward the plate before the first bite.
Occasions & Pairings
Though described as a 5-minute tea time cake, its charm scales for different moments throughout the week. Here are ideas to maximize its appeal:
- Weekday tea breaks: a rapid, soothing ritual that raises the bar for a quick snack.
- After-school treats: a small, satisfying dessert that doesn’t require an oven or lengthy prep.
- Weekend brunch companion: pair with a dollop of whipped cream or vanilla ice cream for a deconstructed dessert.
- Book club or chatty gatherings: cut into bite-sized squares and serve with coffee, chai, or a glass of cold milk.
- Celebrations on the fly: dust with powdered sugar, cocoa, or a light drizzle of chocolate syrup for a celebratory look.
Pairing ideas to elevate the experience:
- Drinks: hot tea blends (chai, earl grey, or mint) or a creamy latte complement the cake beautifully.
- Side dishes: a handful of fresh berries, a few toasted nuts for crunch, or a small fruit compote can brighten the dish.
- Dessert variations: a scoop of vanilla ice cream or a dollop of whipped cream adds a creamy contrast to the warm cake.
Tips, Variations & Substitutions
One of the delights of this recipe is its adaptability. Here are practical ideas to customize and optimize, whether you’re vegan, gluten-free, or just chasing a slightly different flavor profile:
- Texture tweaks: if you want a fudgier center, add a tablespoon of melted dark chocolate to the batter or reduce the baking time by a tiny amount.
- Vanilla intensification: use a high-quality vanilla extract or paste to deepen the aroma. A touch of almond extract can add a subtle, complementary note without overpowering the vanilla.
- Chocolate variations: swap milk chocolate chips for dark chocolate chunks for a more intense cocoa experience, or swirl in a teaspoon of espresso powder for a mocha vibe.
- Vegan options: use plant-based butter or oil and non-dairy milk. Ensure your chocolate is dairy-free if you’re aiming for a vegan version. A flax egg or chia egg can substitute for eggs if needed, though it might slightly alter texture.
- Gluten-free options: replace all-purpose flour with a certified gluten-free blend that contains xanthan gum for structure, or use a nut flour alternative with a gluten-free mix for better texture.
- Healthy-ish twists: swap part of the refined sugar for coconut sugar or a touch of honey for a different sweetness profile, bearing in mind moisture changes.
- Flavor twists: a pinch of cinnamon, a zest of orange, or a splash of orange juice can lift the batter with a surprising brightness that pairs well with chocolate.
- Texture helpers: adding a tablespoon of yogurt or sour cream can enhance tenderness and moisture without complicating the method.
Storage & Make-Ahead Ideas
The beauty of this cake lies in its simplicity, which also translates into flexible storage and make-ahead strategies. Here are practical guidelines to keep the cake fresh and ready for your next tea time:
- Storage: once cooled, wrap the cake tightly in plastic wrap or store in an airtight container at room temperature for up to 2 days. For longer storage, refrigerate for up to 5 days, or freeze individual slices for up to 2 months.
- Fridge tips: if kept in the fridge, gently reheat slices in the sandwich maker or a quick microwave burst to revive that just-baked warmth.
- Make-ahead options: you can prepare the batter in advance and keep it in the fridge for up to 24 hours before baking. Give it a quick stir and ensure it’s well mixed before pouring into the sandwich maker.
- Freezer-friendly: bake a batch, cool completely, slice, and freeze between parchment paper. Reheat slices individually in the sandwich maker for a near-fresh experience.
Fun Facts & Trivia (Optional)
Did you know that quick-bake methods like this one echo a long-standing tradition of improvisational cooking? Home cooks around the world have turned everyday appliances into culinary experiments, especially in kitchens with limited resources or time. The concept of “baking” in a sandwich maker—often seen as a savory appliance used for grilled cheese or panini—transforms into a delightful dessert vehicle, proving that creativity often travels through the simplest routes. Vanilla, one of the most beloved flavors in the culinary world, has a storied history rooted in trade routes and delicate pollination by hand in bourbon vanilla orchards. When combined with chocolate, a flavor pairing that has delighted palates since the early days of cocoa, you get a synergy that feels timeless yet modern. The tiny cake you whip up in minutes captures a microcosm of cross-cultural flavors and the joyful notion that dessert can be both fast and extraordinary.
Kitchen Science Corner
Behind the scenes, a few simple science principles are at play. The sandwich maker provides a constant, even heat, creating a compact, even crumb. The batter’s fat content helps tenderize the gluten network, producing a soft, springy texture. The sugar not only sweetens but also assists with browning, contributing to that desirable golden crust. The leavening agents, usually a small amount of baking powder, release gas as they react with moisture and heat, lifting the batter and giving it a light, airy feel inside. The vanilla and chocolate components contribute aroma compounds that are volatile and become more pronounced as the cake bakes. The end result is a compact cake with a crusty, slightly crisp edge and a moist, melt-in-your-mouth interior—a delightful contrast that makes every bite feel celebratory.
How to Plate & Serve
Presentation can elevate a simple five-minute cake into a moment of ceremony. Here are some ideas to plate and serve it with finesse while keeping the spirit of speed intact:
- Slice into neat rectangles or squares and dust with a fine veil of powdered sugar for a clean, elegant look.
- Top with a dollop of whipped cream or a scoop of vanilla ice cream for contrast in temperature and texture.
- Drizzle a thin ribbon of chocolate sauce or caramel over the top to add a glossy finish without overpowering the flavors.
- Accent with fresh berries or a few mint leaves to introduce brightness and color.
- Serve with a warm cup of tea or coffee to echo the traditional tea-time pairing and keep the moment intimate.
Closing Thoughts
In a world that often values elaborate techniques and long ingredient lists, this 5 Mins Tea Time Cake in a Sandwich Maker is a refreshing reminder that deliciousness can be quick, accessible, and deeply satisfying. It invites you to slow down just enough to savor the aroma, the first warm bite, and the comforting feeling of dessert made with ease. Whether you’re feeding a family after a busy afternoon, hosting a last-minute coffee date, or simply treating yourself to a moment of kitchen joy, this cake fits the scene with grace. It’s not just a recipe; it’s a tiny ceremony—a celebration of speed, flavor, and the sweet, simple pleasures that can brighten any ordinary day. So next time you crave something sweet with your tea, reach for your sandwich maker, reach for your favorite mix—or your own favorite combo of vanilla and chocolate—and let the magic happen in minutes. Your senses will thank you, and your friends or family will marvel at how something so delightful came together so quickly.
Ingredients
- 5 Mins Tea Time Cake Base
– 1 cup all-purpose flour (gluten-free if needed, or use 1 cup gluten-free all-purpose flour)
→ Provides the structure and body of the cake. All-purpose flour forms a tender crumb when combined with small amounts of liquid and fat. If using gluten-free flour, consider a blend designed for baking to avoid a dense texture. - 2 tablespoons unsweetened cocoa powder
→ Adds rich chocolate flavor and color. Sift with the dry ingredients to prevent lumps and ensure an even distribution of cocoa throughout the batter. Use natural or Dutch-processed cocoa depending on your preference; natural will be more acidic and may react a bit differently with baking powder. - 2 tablespoons granulated sugar
→ Provides sweetness and helps balance the bitterness of cocoa. Adjust to taste if you prefer a lighter or richer sweetness. For a deeper flavor, you can substitute part of the sugar with brown sugar. - 1 teaspoon baking powder
→ Leavening agent that helps the batter rise in the sandwich maker, giving a light, cake-like texture. Ensure the baking powder is fresh for最佳 rising. If you use self-raising flour, skip this. - 1/4 teaspoon salt
→ Enhances overall flavor and heightens the sweetness of the chocolate. Salt also strengthens the crumb structure when combined with the fat and liquid components. - 1/2 cup milk (dairy or plant-based)
→ Provides moisture and activates the batter; dairy milk yields a richer crumb, while plant-based milks keep it dairy-free. If using a very thick plant milk, you can warm it slightly to blend better with the batter. - 1 large egg
→ Acts as a binder and helps with structure and moisture. Use room-temperature eggs for better integration with the batter. If avoiding eggs, substitute with 1/4 cup applesauce or 1 tablespoon flaxseed meal mixed with 3 tablespoons water as an egg replacer. - 2 tablespoons neutral oil (such as vegetable or canola) or melted butter
→ Adds moisture and tenderness to the crumb. Oil yields a softer, more moist cake, while melted butter adds a richer flavor. Use fresh oil or butter, and avoid overheating if using butter to prevent a greasy texture. - 1/2 teaspoon vanilla extract
→ Depth of flavor that brightens the chocolate notes. For a more pronounced vanilla aroma, use a pure vanilla bean scrape or a high-quality extract. Avoid artificial vanilla if you want a purer flavor. - Optional: 1/4 cup chocolate chips or chopped dark chocolate
→ Extra chocolate pockets create bursts of cocoa goodness in every bite. If using chips, fold them gently into the batter after mixing to prevent sinking. For even distribution, toss chips in a small amount of flour before adding.
- Optional Add-ins
– 1/4 cup chopped nuts (e.g., walnuts or almonds)
→ Adds crunch and a toasty contrast to the soft cake. Toast nuts lightly in a dry pan before adding to bring out flavor and aroma. Chop into small, even pieces to distribute evenly. - Optional: 1–2 tablespoons instant coffee granules dissolved in 1 tablespoon hot water
→ Enhances the chocolate flavor with a subtle coffee note. Use sparingly to avoid overpowering the chocolate. Dissolve completely before adding to the batter.
- To Finish / Toppings
– Powdered sugar for dusting
→ A light dusting adds a touch of sweetness and a decorative finish once the cake is cooked. Sift lightly to avoid clumps or heavy coverage on the top.
Instructions
- Preheat your sandwich maker to a medium-high heat setting and lightly grease the plates or spray with non-stick cooking spray, allowing about 5 minutes for the surfaces to reach optimal temperature so the batter cooks evenly and releases cleanly.
→ A properly heated surface prevents batter from sticking and ensures a uniform rise with a light crust on the outside. - Sift together the dry ingredients: all-purpose flour, cocoa powder, baking powder, and salt, then whisk to break up lumps and create an aerated, uniform base for even rising.
→ Sifting distributes the leavening agent and cocoa evenly, preventing dense pockets and chocolate streaks in the cake. - Whisk the wet ingredients: milk, egg, oil or melted butter, and vanilla extract in a separate bowl until the mixture is smooth and homogenous, about 30 seconds of vigorous whisking.
→ This ensures the fat and liquid are fully integrated, which yields a tender crumb and prevents separation later in the batter. - Pour the wet mixture into the dry mixture and stir gently with a spatula until just combined, stopping as soon as you see no large pockets of flour to avoid activating gluten too much for a tender cake.
→ Over-mixing develops gluten that can make the cake tougher; a few streaks of flour are perfectly acceptable for a soft texture. - If using chocolate chips or chopped chocolate, fold them in now with a light hand to distribute evenly without sinking, optionally tossing them in a teaspoon of flour beforehand to help suspension.
→ This step creates pleasant pockets of chocolate and prevents chips from settling at the bottom during cooking. - If adding optional nuts or instant coffee dissolved in hot water, fold them in after the chips, ensuring the chocolate aroma remains prominent without overpowering the batter.
→ Nuts add texture and flavor; coffee enhances the chocolate note when used sparingly and evenly distributed. - Spoon the batter into the preheated sandwich maker, filling each cavity about two-thirds full to allow room for expansion without overflow, and smooth the top with a spatula for even cooking.
→ Filling too full risks batter spilling and uneven cooking; two-thirds ensures a domed, cake-like top. - Close the sandwich maker and cook for 4 to 6 minutes, depending on your machine’s power and the thickness of batter, until the surface is set, a toothpick inserted in the center comes out clean or with a few moist crumbs, and the exterior has a light, even crust.
→ This timing yields a cake that is fully cooked through but still tender inside; test with a skewer for doneness rather than relying solely on time. - Carefully remove the cake portions from the sandwich maker, allow them to cool on a rack for 5 minutes, which helps set the crumb and makes handling easier without collapsing the interior.
→ Resting shortens the steam pressure and seals the surface, improving texture and aiding slicing if desired. - Dust with powdered sugar just before serving for a delicate sweetness and an appealing finish, using a light, even sprinkle to avoid clumps and create a professional look.
→ A dusting adds a subtle sweetness and visual appeal without altering the flavor balance of the rich chocolate cake.
Notes
“These 5 Mins Tea Time Cake in a Sandwich Maker prove you can bake a moist chocolate-vanilla cake in minutes using just a sandwich maker or toaster. Use gluten-free flour and gluten-free baking powder if needed to keep it friendly for gluten intolerance. Preheat the sandwich maker, lightly grease the plates, and fill about 3/4 of the mold with batter to prevent overflow. Mix dry and wet ingredients separately, then combine just until smooth; optional add-ins like chocolate chips or chopped nuts can be folded in after the batter comes together. For extra chocolate flavor, you can dissolve 1–2 tablespoons of instant coffee in hot water and add to the batter. Cook for 4–6 minutes until a skewer comes out clean and the top springs back. Let cool briefly before removing; dust with powdered sugar or drizzle with a little melted chocolate, and serve with a scoop of vanilla yogurt or ice cream if desired. Store leftovers in an airtight container for 2–3 days, or freeze individual portions for quick future treats. Always ensure your ingredients are fresh and that the sandwich maker is cleaned between batches to avoid flavor transfer.”
Tips
Expert tips for making the 5 Mins Tea Time Cake in a Sandwich Maker
- Preheat the sandwich maker for 3–5 minutes with the plates clean and lightly greased. A hot, well-prepared surface helps set the crust quickly and prevents sticking.
- Grease or oil the plates lightly, or spray with a non-stick cooking spray. If using butter, brush a thin coat to avoid greasy crumbs and ensure tender edges.
- Fill the batter to about 3/4 of the way up each pocket. Overfilling can cause batter to spill and undercooked centers.
- For even texture, sift the cocoa with the flour and baking powder. This prevents lumps and distributes the leavening more uniformly for a uniform rise.
- Use room-temperature egg and milk to help the batter emulsify and coat the dry ingredients evenly. If your milk is cold, warm it slightly to body temperature before mixing.
- Mix dry ingredients first, then whisk in wet ingredients just until combined. Do not overmix to avoid a dense crumb.
- Optional add-ins like chocolate chips should be folded in gently at the end. Toss chips in a teaspoon of flour before adding to help distribute evenly and prevent sinking.
- Close the sandwich maker firmly and bake for about 4–6 minutes. Start checking at around 4 minutes; the cake should be set and a light golden crust formed. Timing can vary with different models and thickness of batter.
- Let the cakes rest for 1–2 minutes after removing from the maker. They continue to set as they cool, which helps slice cleanly.
- To prevent dry results, avoid letting the batter sit after mixing. Bake promptly or refrigerate the batter for up to 24 hours and bake fresh when ready.
- Variations: for a lighter crumb, replace part of the milk with sour cream or yogurt. To boost chocolate intensity, increase cocoa to 2–3 tablespoons or add a tablespoon of melted dark chocolate to the wet mix.
- Safety note: unplug and allow the sandwich maker to cool completely before cleaning. Wipe any stray batter with a damp cloth—never immerse the appliance in water.
FAQ
What is the 5 Mins Tea Time Cake in Sandwich Maker?
A quick and easy sponge cake made in a sandwich maker or toaster, perfect for a quick tea-time treat. It blends vanilla and chocolate flavors in a single, simple batter that cooks in minutes.
What ingredients do I need?
A basic batter uses common pantry items: all-purpose flour, sugar, baking powder, salt, milk, oil or melted butter, an egg (optional for extra richness), vanilla extract, and cocoa powder for the chocolate variant. Optional mix-ins like nuts or chocolate chips can be added.
Can I make this without a sandwich maker or toaster?
Yes. You can bake a similar cake in a small toaster oven or regular oven. For a toaster oven, use the same batter and bake at 350°F (175°C) for about 8–12 minutes, watching closely. In a regular oven, bake at 350°F (175°C) for 12–15 minutes in a small dish until a toothpick comes out clean.
How do I cook it in a sandwich maker or toaster?
Grease the sandwich maker plates lightly or use a non-stick spray. Pour batter evenly, close the lid, and cook for about 4–5 minutes on medium heat, checking doneness. Cooking times vary by device; the center should spring back when touched and a skewer should come out clean.
Can I make both vanilla and chocolate flavors in the same batch?
Yes. Divide the batter and add cocoa powder to one portion for chocolate flavor, while keeping the other portion vanilla. You can swirl them together for a marble effect or bake separately.
What are tips to prevent sticking and ensure a moist crumb?
Grease the plates well or line with a thin layer of parchment. Do not overfill the batter; fill to about 2/3 full. Use warm (not hot) batter, and avoid overmixing. A touch of yogurt or milk can improve moisture if the batter seems thick.
How do I customize sweetness and flavor?
Adjust sugar to taste. For a richer flavor, replace some milk with yogurt or add a splash of coffee for a mocha twist. Add vanilla extract, cinnamon, or a pinch of cardamom for aroma. You can fold in chocolate chips, chopped nuts, or dried fruit.
Is this recipe suitable for kids and beginners?
Absolutely. It uses simple ingredients and minimal equipment, making it kid-friendly. Always supervise children when using hot appliances like sandwich makers.
How should I store leftovers?
Store cooled cake slices in an airtight container at room temperature for 1–2 days, or refrigerate for up to 4 days. Reheat briefly in the toaster oven or microwave before serving for a softer texture. Freeze for longer storage.
What toppings pair well with this cake?
Whipped cream, a drizzle of chocolate or caramel sauce, fresh fruit, or a sprinkle of powdered sugar. You can also spread a thin layer of jam or nut butter for extra flavor.