Author

Ocean Nightleaf

Browsing

Introduction

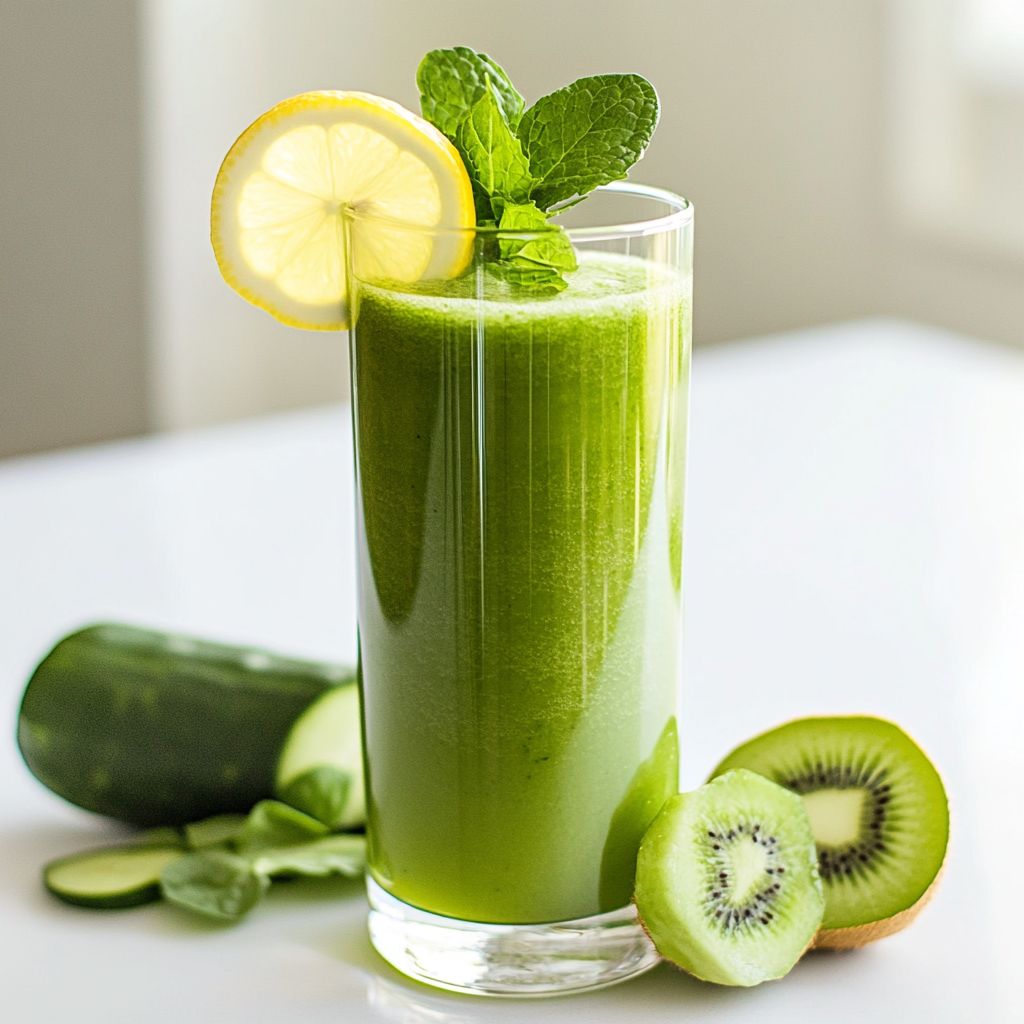
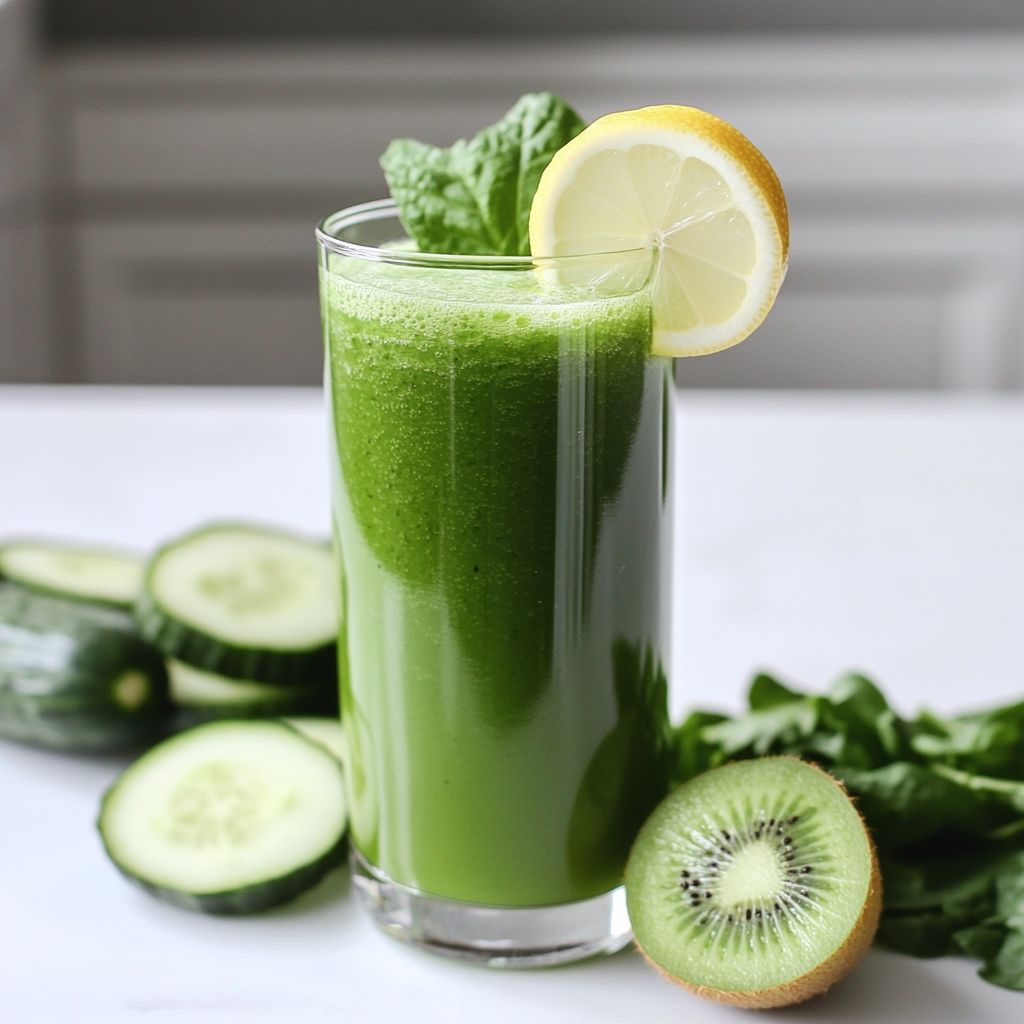
Imagine waking up on a crisp winter morning, the air tinged with excitement and the gentle scent of pine dancing around the house. As the festive season rolls in, the indulgence in rich, decadent treats is inevitable. But somewhere amidst the gingerbread cookies, turkey gravies, and eggnog, there’s a refreshing, revitalizing oasis waiting to cleanse and renew your senses: the Fresh Green Christmas Detox Juice. This invigorating blend is like a cool breeze on a snowy day, offering a burst of freshness with every sip. Packed with vibrant greens and subtle hints of holiday cheer, this juice is more than just a beverage—it’s an experience.

The Story Behind the Dish

Detox juices have been a part of various cultures for centuries, with their roots tracing back to ancient civilizations that utilized plant-based infusions to rejuvenate and energize. Over time, as global awareness of wellness and nutrition grew, detox juices evolved to become an essential part of health-conscious lifestyles. The Fresh Green Christmas Detox Juice pays homage to these age-old traditions while embracing the spirit of Christmas. This juice reflects a bridge between the celebratory opulence of the holidays and the simplicity of nature’s gifts, offering a moment of balance in an otherwise indulgent season.

While the specific recipe for this detox delight is a modern creation, the notion of using pure, verdant ingredients to promote well-being is deeply rooted in practices from around the world. From ancient Egypt to modern-day wellness hubs, the idea of renewing oneself through natural, unprocessed foods is a universal pursuit shared by cultures regardless of geography or era.

Why You’ll Love This Recipe

  • Refreshing Soother: Perfect for when you’ve had one too many Christmas cookies, it’s a revitalizing solution that soothes both body and soul.
  • Nutrient-Packed: This juice is bursting with vitamins, antioxidants, and essential minerals, making it a powerhouse of nutrition in every glass.
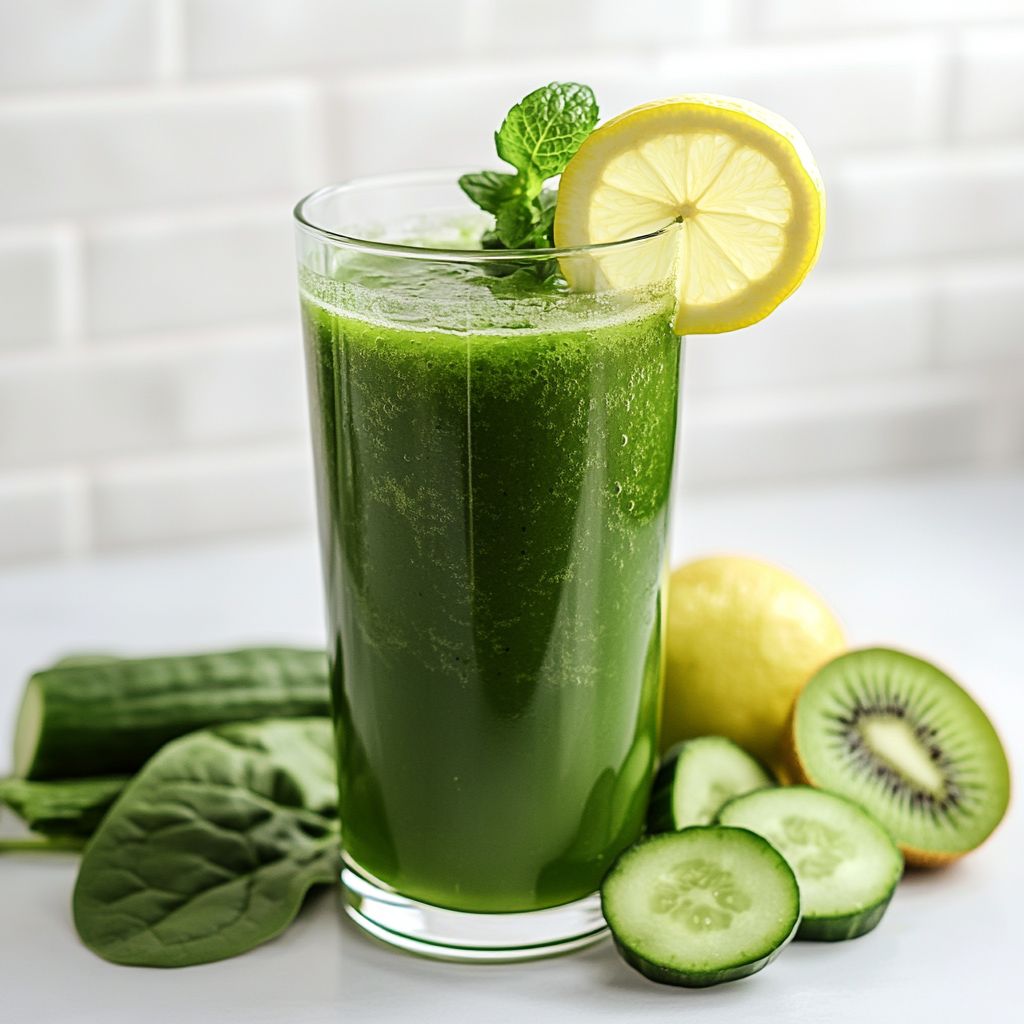
  • Colorful and Festive: The vibrant green hue adds a beautiful splash of color to your holiday table, perfectly complementing the traditional reds and whites of Christmas.
  • Quick and Simple: With natural ingredients and minimal preparation, it fits seamlessly into even the busiest of holiday schedules.
  • Low-Calorie Delight: This drink gives you all the flavor and satisfaction without the guilt, helping you maintain balance during the festive indulgence.

Flavor Profile & Texture

The Fresh Green Christmas Detox Juice is an exquisite symphony of flavors. Imagine the crispness of fresh spinach, kale, or cucumbers, combined with the subtle sweetness of ripe green apples or pears. A hint of ginger adds a warming spice reminiscent of Christmas, while a splash of citrus—perhaps lemon or lime—brings a zesty brightness that awakens your senses.

The texture is gently pulpy, a refreshing break from creamy holiday drinks. It’s smooth enough to be easily sipped from your favorite glass, yet it retains an essence of wholesome earthiness that speaks to the purity of its ingredients. This is a drink designed to enliven the palate while balancing the more indulgent flavors of the holiday season.

Occasions & Pairings

While this juice is apt for any time you wish to feel rejuvenated, it particularly shines during the holiday season. Serve it at a Christmas brunch as a healthy alternative amidst heavier dishes, or offer it as a refreshing welcome drink for holiday parties. It’s also ideal for a post-Christmas dinner digestif, cleansing the palate and aiding digestion after hearty meals.

For pairings, consider light, crisp salads or festive fruit platters that echo the juice’s fresh flavors. It can also be paired with simple, herb-infused chicken dishes or seafood for those looking to maintain a lighter menu during the holidays. For beverages, this juice can be complemented by warm, spiced teas or a lightly sparkling water to cleanse the palate further.

Tips, Variations & Substitutions

One of the best aspects of this detox juice is its flexibility. Here are some ideas to mix it up:

  • Greens: Swap out or combine the greens based on availability or taste preference—use chard, arugula, or even dandelion greens for distinct flavors.
  • Fruits: For a slightly sweeter juice, incorporate pineapple or kiwi, which also adds a tropical twist to your drink.
  • Spices: A dash of cinnamon or nutmeg can give a deeper, more aromatic dimension, reminiscent of classic holiday aromas.
  • Herbs: Mint or basil can introduce a refreshing herbal note, making the juice even more invigorating.
  • Dietary Needs: For an extra nutrient boost, add protein powder or spirulina. Adjust the citrus levels for those with sensitivities to acidic foods.

Storage & Make-Ahead Ideas

This juice is at its prime when fresh, capturing the peak of its flavors and nutrients. However, should you wish to prepare it ahead of time, here are some handy tips:

Store your juice in an airtight glass container or a mason jar to minimize oxidation. Keeping it in the fridge for up to 48 hours will ensure it stays fresh while providing maximum nutrient retention. For longer storage, consider freezing the juice in portions; just remember to leave room in your container for expansion. Once thawed, give it a good shake or stir to reincorporate any naturally separated layers.

For an easier holiday prep, gather and prepare your ingredients beforehand, storing pre-washed and chopped produce in the fridge. This will make juicing on the day a fast and seamless part of your routine.

Fun Facts & Trivia

Did you know that green juices, like our festive detox version, have been dubbed “liquid sunshine”? The name reflects their ability to capture chlorophyll and other plant goodness in a way that mirrors capturing sunlight itself, providing a boost of vitamins and minerals in liquid form.

Additionally, drinking juice made from fresh vegetables and fruits has long been associated with detoxifying rituals, as the vitamins and natural enzymes are believed to help the body cleanse and restore balance especially important after periods of indulgence, such as the holidays.

And finally, despite the belief that detox juices are a modern-day trend, ancient records reveal that Egyptians and Romans were known for fermenting herbs and plants into potent beverages thought to enliven the mind and spirit—a testament to their timeless allure.

Ingredients

  • Fresh Green Christmas Detox Juice
  • Base Ingredients
    • 4 cups kale leaves (stems removed)
      → Kale serves as the nutrient-dense base of the juice, providing a rich source of vitamins K, A, and C while also promoting detoxification. Make sure to remove the tough stems for a smoother juice. Wash the leaves thoroughly to remove any dirt.
    • 2 medium green apples (cored and chopped)
      → Green apples add a crisp tartness to balance the earthiness of the kale. It’s best to use firm apples for juicing to ensure a higher juice yield. Core them to eliminate bitterness from the seeds and chop them into quarters for easier juicing.
    • 1 cucumber (peeled and chopped)
      → Cucumber not only adds hydration but also contributes a refreshing flavor that lightens the juice. Peeling the cucumber can reduce its slightly bitter taste, ensuring a more pleasant drinking experience. Cut it into chunks to facilitate juicing.
    • 1 lemon (peeled and juiced)
      → Lemon juice adds a bright acidity that enhances the overall flavor profile and brings freshness to the juice. Use a fresh lemon for the best taste, and juice it to capture all the tangy goodness while discarding any seeds.
    • 1-inch piece of ginger (peeled)
      → Ginger adds a spicy kick and possesses anti-inflammatory properties, making the juice a great detox option. Peel the ginger to release its pungent oil and chop it into smaller pieces to help it blend seamlessly with the other ingredients.
  • Optional Add-ins
    • 1 tablespoon chia seeds (optional)
      → Chia seeds are packed with protein, fiber, and Omega-3 fatty acids. Adding them helps thicken the juice, making it more filling and nutritious. Soaking them in water for about 10-15 minutes before adding to the juice can help them absorb moisture for a better texture.
    • 1 tablespoon honey or agave nectar (optional)
      → Sweeteners like honey or agave can be added if you prefer a sweeter juice. Opt for raw honey for added health benefits and use it sparingly to avoid overpowering the natural flavors of the fruits and vegetables.
  • Preparation Tips
    • Ice cubes (optional)
      → Adding ice cubes to the juice after blending can make it more refreshing, especially if served during the warm holiday season. Blend ice cubes with the juice for a slushier consistency, ensuring the flavors are not diluted too much.

Instructions

  • Thoroughly wash the kale leaves under cold running water.

    → This step removes any residual dirt, pesticides, or impurities from the leaves, ensuring a clean and safe base for your juice.
  • Remove the tough stems from the kale leaves.

    → Stems can impart a bitter flavor and a gritty texture, so stripping the leaves from the stems will result in a smoother juice.
  • Chop the kale leaves into smaller pieces.

    → This makes it easier for your juicer to process the leaves, enhancing juice extraction and reducing wear on the juicing machine.
  • Core the green apples and chop them into quarters.

    → Removing the core and seeds prevents any bitter notes in your juice. Quartering them helps expose more surface area to the juicer for better extraction of juice.
  • Peel the cucumber and chop it into chunks.

    → Peeling removes any bitterness from the skin, leading to a fresher taste, while cutting it into manageable pieces aids the juicing process.
  • Peel the lemon and juice it completely, discarding any seeds.

    → This maximizes the vibrant acidic flavor of the lemon and avoids bitterness from the seeds, ensuring a harmonious balance in your juice.
  • Peel the ginger and chop it into smaller pieces.

    → Chopping releases the essential oils and flavors, allowing it to blend more effectively with the other ingredients, thus enhancing the overall taste of the juice.
  • Add all the prepared ingredients to your juicer.

    → Layer the ingredients as desired, but starting with leafy greens like kale can help the juicer pull juice from the denser ingredients following it.
  • Juice all the ingredients until you achieve a smooth consistency.

    → Keep the juicer running for sufficient time to ensure all nutrients are extracted, and check the consistency to see if any pulp remains, as you may want to strain it out for a smoother juice.
  • If desired, add the optional chia seeds after juicing.

    → Soaking them beforehand softens the seeds, allowing them to integrate better into the juice, adding a nutritious thickness without clumping.
  • Stir in honey or agave nectar if using.

    → Mix well to ensure the sweetener evenly disperses throughout the juice, enhancing the flavor without overwhelming the natural taste of the ingredients.
  • Optionally blend in ice cubes for a chilled beverage.

    → This creates a refreshing slushy texture, ideal for warming seasons, but blending carefully ensures flavor concentration is maintained.
  • Pour the juice into serving glasses immediately for optimal freshness.

    → Serving immediately preserves the vibrant flavors and nutrients of the juice, providing the best possible taste and health benefits.
  • Enjoy your Fresh Green Christmas Detox Juice!

    → This refreshing, nutrient-packed beverage will invigorate you and support your health goals, making it a fantastic addition to your holiday festivities.

Notes

These Fresh Green Christmas Detox Juice is a refreshing and nutrient-packed way to celebrate the season while giving your body a detox boost. Kale forms the foundation of this juice, providing essential vitamins and minerals while supporting overall health. The combination of green apples and cucumber adds a delightful crispness and hydration, making it enjoyable to drink.

Ginger enhances the flavor with a spicy undertone and promotes digestion, and the optional chia seeds enrich the juice with additional nutrients and a thicker texture, making it more filling. Sweeteners like honey or agave nectar can be adjusted to suit your taste preferences while still keeping the juice healthy.

To fully enjoy this drink, consider serving it chilled, especially during warm days. Ice cubes can be added or blended in for a slush-like texture. Customize the juice even more by adding your favorite superfoods or seasonal spices. Always opt for fresh and organic ingredients when possible to maximize health benefits. Enjoy this detox juice as part of a wholesome breakfast or a revitalizing afternoon pick-me-up!

Tips

  • Choose Fresh Ingredients:
    For the best flavor and nutritional value, always opt for fresh, organic ingredients. Check for vibrant colors and crisp textures when selecting your kale, apples, and cucumber.
  • Juicing Tools:
    If you have a juicer, that’s great! If not, a high-speed blender will work. If using a blender, you may want to strain the juice through a fine mesh sieve or cheesecloth to remove the pulp for a smoother consistency.
  • Prep Work:
    Before juicing, ensure all fruits and vegetables are thoroughly washed to remove any pesticides or dirt. Chop them into appropriate sizes to make the juicing process easier.
  • Add Water for Blending:
    If using a blender, you might need to add a little water or coconut water to help blend the ingredients smoothly. Just a splash will do, as you’ll want to keep the juice dense.
  • Experiment with Flavor:
    If you like a bit of heat, consider adding more ginger, or if you prefer a smoother taste, reduce the ginger. Taste as you go to achieve your preferred flavor balance.
  • Chill Before Serving:
    Chilling the ingredients before juicing can enhance the refreshing quality of the drink. Consider keeping your kale, apples, and cucumber in the fridge prior to preparation.
  • Storage Tips:
    Fresh juice is best consumed immediately, but if you need to store it, keep it in an airtight container in the fridge for up to 24 hours to preserve its nutrients and flavor.
  • Garnishing Ideas:
    Enhance presentation and flavor by garnishing your juice with a slice of lemon on the rim or a few sprigs of mint. This adds a touch of festive flair perfect for the holiday season.

FAQ

What are the main ingredients in Fresh Green Christmas Detox Juice?

The main ingredients are kale, spinach, cucumber, green apple, lemon, and ginger.

Is Fresh Green Christmas Detox Juice suitable for detoxing?

Yes, it is designed to help detoxify the body due to its nutrient-rich ingredients that support liver function and digestion.

Can I add other ingredients to the juice?

Absolutely! Feel free to add ingredients like celery, parsley, or mint for added flavor and nutrients.

How long can I store Fresh Green Christmas Detox Juice?

It is best consumed fresh but can be stored in the refrigerator for up to 48 hours in an airtight container.

What are the health benefits of the ingredients?

Kale and spinach are high in vitamins A, C, and K, while cucumber hydrates and lemon aids digestion. Ginger adds anti-inflammatory properties.

Is this juice vegan-friendly?

Yes, Fresh Green Christmas Detox Juice is entirely plant-based and suitable for vegans.

Can I use a blender instead of a juicer?

Yes, you can use a blender; however, it will result in a thicker juice, which you may want to strain to achieve a smoother consistency.

How many servings does this recipe make?

This recipe typically makes about 2 servings, depending on portion sizes.

Introduction: A Slice of Holiday Bliss

As the holiday season sneaks upon us, the familiar lure of comforting aromas wafts through the cool, crisp air, creating an enchanting tapestry of nostalgia and anticipation. At the heart of this sensory symphony lies a timeless classic whose golden crust and creamy interior promise happiness with every bite—the Healthy Holiday Sweet Potato Pie. Imagine a pie so decadently delicious that it invokes the warmth of a roaring fire and the jubilant laughter of loved ones gathered in celebration, all the while maintaining a lightness that allows you to savor each delightful mouthful guilt-free. Dive into this recipe as we explore how to transform a traditional favorite into a modern marvel that aligns with a health-conscious lifestyle, without sacrificing taste or indulgence.

The Story Behind the Dish: A Journey Through Time

The sweet potato pie has a rich history that travels through centuries, tracing its roots back to the culinary traditions of West Africa. Enslaved Africans brought the sweet potato—native to the Americas—into Southern U.S. kitchens, adapting recipes from the familiar yam dishes of their homeland. Over time, the sweet potato pie became a beloved staple of Southern cuisine, gracing tables of both modest family gatherings and grand holiday feasts.

In many African American households, sweet potato pie holds a cherished place as a symbol of resilience and tradition, often passed down through generations as a family heirloom. While traditionally made with sugar, butter, and a medley of spices, our modern rendition embraces the beloved flavors with a wholesome twist, ensuring that everyone at the table can relish in its storied legacy, from health enthusiasts to classic pie purists.

Why You’ll Love This Recipe

  • Nutrient-Rich Delight: Packed with vitamins and antioxidants, sweet potatoes serve as a nutritious base for this delightful dessert.
  • Guilt-Free Indulgence: By utilizing healthier ingredient substitutions, such as natural sweeteners and whole grain crusts, this pie offers all the indulgence with none of the regret.
  • Simple Elegance: Despite its complex flavors, this recipe is straightforward and streamlined, making it accessible to bakers of all levels.
  • Versatile Wonder: Whether served at a festive holiday gathering or a cozy fall evening, this pie perfectly complements any occasion.

Flavor Profile & Texture: A Harmonious Symphony

The Healthy Holiday Sweet Potato Pie is a masterclass in balance, where each ingredient melds seamlessly to create a taste profile that is both comforting and captivating. The earthy sweetness of the pureed sweet potatoes crafts a luscious base, heightened by the natural caramelization that occurs during baking. Notes of cinnamon, nutmeg, and ginger dance atop the palate, lending a warming spice that evokes the charming allure of autumn and winter.

The texture is silky smooth and airy, yet sufficiently rich to satisfy cravings for a more opulent treat. The tender, crumbly whole-grain crust cradles the filling, adding a delightful contrast and depth of flavor. Each bite is an experience, an ode to indulgence that leaves you wanting more.

Occasions & Pairings: Perfect for Any Table

Ideal for holiday celebrations, this pie shines brightest when surrounded by the joyful chatter of loved ones and the convivial spirit of the season. It holds its own on a dessert table overflowing with festive confections or wrapped in a cozy evening shared with family around the fireplace.

Pair it with:

  • Sides: Citrus-infused whipped cream, or a scoop of plain Greek yogurt for a touch of tang.
  • Drinks: A warming spiced chai, an earthy green tea, or for a festive touch, a mulled wine.
  • Dessert companions: Dark chocolate shavings or candied pecans to complement the natural sweetness.

Tips, Variations & Substitutions: Tailor to Your Tastes

While this pie celebrates tradition, there are countless ways to tailor it to fit your dietary needs or personal palate:

  • Vegan Option: Swap out dairy for coconut milk or almond milk and replace eggs with flax eggs for a plant-based version.
  • Low-Sugar Variant: Use maple syrup or honey as a sweetener and reduce quantities according to taste.
  • Spice Exploration: For those with an adventurous spirit, experiment with cardamom or allspice to evoke different dimensions of warmth.
  • Regional Twist: Add a touch of bourbon or vanilla extract to elevate the flavor profile with a subtle hint of richness.

Storage & Make-Ahead Ideas: Relishing Leftovers

The beauty of this sweet potato pie lies in its ability to retain flavor and freshness, making it perfect for advance preparation and storage.

  • Storage: Store any leftovers in an airtight container in the refrigerator for up to a week. Each day, the flavors meld further, enhancing the dessert’s richness.
  • Freezing: Wrap the pie tightly in plastic wrap, followed by aluminum foil, and freeze for up to three months. To enjoy, thaw overnight in the refrigerator and reheat gently in the oven.
  • Make-Ahead: Prepare the pie up to two days in advance. Bind the flavors by refrigerating and allow it to reach room temperature before serving.

Fun Facts & Trivia

Did you know? The sweet potato is not just delicious but highly nutritious and diverse in color and texture. Varieties range from white to deep orange, each with its own unique flavor. Historically, sweet potatoes have been called “yams” in the United States, though true yams are actually a different species native to Africa.

Moreover, sweet potatoes were an integral part of space missions — they were grown during the NASA sweet potato project as a reliable food source in controlled environments. This remarkable root vegetable is a testament to resilience and versatility, traits mirrored by the enduring appeal of this Healthy Holiday Sweet Potato Pie.

With its intertwined chapters of history, tradition, and health, this pie is more than just a dessert; it is a celebration of life’s simple pleasures, a culinary bridge between the past and the future. As you carve into your slice, savor the shared joy and the artistry of flavors that have traveled through time to enhance your holiday gathering with grace and warmth.

Ingredients

  • Sweet Potato Filling
    → Sweet potatoes are the main ingredient for the pie filling, providing a creamy texture and natural sweetness. They should be cooked until soft, either by boiling or baking, and then mashed to create a smooth consistency. For the best flavor, use orange-fleshed sweet potatoes, which are sweeter and have a richer taste.
  • 1 cup almond milk (or any plant-based milk)
    → Almond milk adds moisture to the pie filling while keeping it dairy-free. Use unsweetened almond milk for better control over sweetness. Bring it to room temperature before mixing to help it blend more easily with the other ingredients.
  • 3/4 cup maple syrup
    → Maple syrup serves as a natural sweetener, enhancing the flavor of the sweet potatoes without overpowering them. Use pure maple syrup rather than imitation for a deeper flavor. Adjust the amount based on your preference for sweetness; you can reduce it for less sweetness or add a bit more if desired.
  • 1 teaspoon vanilla extract
    → Vanilla extract enhances the overall flavor profile of the pie filling. Use pure vanilla extract for the best taste; artificial extracts may alter the flavor. Add it to the mixture just before blending to ensure even distribution.
  • 1/2 teaspoon ground cinnamon
    → Ground cinnamon adds warmth and a touch of spice to the filling. Use fresh, high-quality cinnamon for the best flavor. You can also increase or decrease the amount depending on your preference for spice. Adding it directly to the filling helps to distribute its flavor evenly.
  • 1/4 teaspoon ground nutmeg
    → Nutmeg complements the sweetness of the sweet potatoes with its warm, slightly nutty flavor. Use freshly grated nutmeg if possible for a more robust taste. Adding just a pinch can elevate the overall flavor of the pie without overwhelming it.
  • 1 tablespoon cornstarch (or arrowroot powder)
    → Cornstarch acts as a thickening agent, helping to set the pie filling as it bakes. Mix it with a small amount of the almond milk first to create a slurry, preventing clumps, before adding it to the sweet potato mixture to ensure a smooth texture.
  • Pie Crust
    → A pre-made or homemade crust serves as the base for the pie, holding all of the filling in place. If using a store-bought crust, choose one that is whole grain or made with healthier fats. If making your own, consider using whole wheat flour or almond flour for a nutritious option. Pre-baking the crust for a few minutes can prevent it from becoming soggy once the filling is added.

Instructions

  • Prepare the sweet potatoes by first peeling them and cutting them into evenly sized chunks, about 1 inch thick.

    → This ensures that they cook uniformly, avoiding undercooked or mushy pieces. Even size is key for consistent texture and flavor in the filling.
  • Boil or bake the sweet potato chunks until they are fork-tender, approximately 15-20 minutes for boiling or 45-60 minutes at 400°F (200°C) for baking.

    → Cooking the sweet potatoes until tender allows you to easily mash them into a smooth filling. If boiling, ensure they are not overcooked to the point of falling apart, as this can introduce excess water.
  • Once cooked, drain (if boiling) and allow the sweet potatoes to cool slightly before mashing them using a potato masher or a food processor until completely smooth.

    → Mashing while still warm helps to achieve a creamy consistency without any lumps. If using a food processor, pulse until smooth but avoid over-processing to prevent a gummy texture.
  • Preheat your oven to 350°F (175°C) and prepare a pie dish by greasing it lightly or using a non-stick spray.

    → Preheating the oven ensures even baking from the start, while greasing the dish helps prevent sticking and makes serving easier.
  • In a large mixing bowl, combine the mashed sweet potatoes with 1 cup of almond milk, 3/4 cup of maple syrup, 1 teaspoon of vanilla extract, 1/2 teaspoon of ground cinnamon, and 1/4 teaspoon of ground nutmeg.

    → This mixture creates a harmonious blend of flavors; adding them to the sweet potatoes allows for a more even distribution when mixing.
  • In a small bowl, make a slurry by mixing 1 tablespoon of cornstarch with a few tablespoons of the almond milk taken from the main bowl until smooth and lump-free.

    → This technique prevents clumping of the cornstarch when added to the warm sweet potato mixture. It ensures a smooth filling that sets well as it bakes.
  • Add the cornstarch slurry into the sweet potato mixture and stir well to combine all ingredients thoroughly.

    → Mixing well helps activate the thickening properties of the cornstarch, ensuring your filling will have the desired texture once baked.
  • Pour the finalized sweet potato filling into the prepared pie crust, smoothing the top with a spatula for an even surface.

    → An even surface allows for consistent baking and gives your pie a beautiful presentation once it’s turned out of the dish.
  • Bake the pie in the preheated oven for 45-50 minutes, or until the filling is set and a toothpick inserted into the center comes out clean.

    → Baking long enough will allow the filling to firm up, while checking for doneness with a toothpick is a reliable method to ensure it’s cooked perfectly.
  • Once baked, remove the pie from the oven and let it cool at room temperature for at least 30 minutes before serving.

    → Cooling allows the filling to set further, making it easier to slice and serve, and helps enhance the flavors as they meld together.
  • Optional: Serve the pie with a dollop of whipped coconut cream or a scoop of your favorite dairy-free ice cream for added richness.

    → This addition brings extra texture and flavor that pairs beautifully with the sweet potato filling, making it a delightful treat for the holidays.

Notes

These Healthy Holiday Sweet Potato Pie offer a delightful alternative to traditional pies, packed with nutrients and flavors that celebrate the season. The sweet potato filling provides a creamy, naturally sweet base that is complemented beautifully by the warm spices of cinnamon and nutmeg. For the best texture, ensure your sweet potatoes are cooked until soft and thoroughly mashed. Opt for orange-fleshed sweet potatoes for their superior sweetness.

When preparing the filling, almond milk adds moisture without any dairy, making this pie friendly for vegan diets. Bringing the almond milk to room temperature first will help it blend smoothly. The use of pure maple syrup not only enhances the flavor but also keeps the pie naturally sweetened; adjust it to suit your taste preferences. Vanilla extract is crucial for rounding out the flavors, so make sure to use pure for the best results.

Cinnamon and nutmeg provide warmth and depth, and you can adjust their amounts according to your spice preference. Make sure to mix the cornstarch with the almond milk to avoid clumps—this will help your pie filling set perfectly. For the crust, whether you opt for a pre-made option or make your own, consider a healthier variety that will keep the pie nutritious. Pre-baking the crust is an important step to avoid a soggy bottom. Enjoy this pie as a comforting dessert that captures the essence of the holidays while remaining healthy!

Tips

Cooking Tips for Healthy Holiday Sweet Potato Pie

  • Choosing Sweet Potatoes: Opt for orange-fleshed sweet potatoes, as they offer a sweeter and richer flavor. If possible, select medium-sized potatoes that are firm and free from blemishes for the best texture and taste.
  • Preparing the Filling: Whether you boil or bake the sweet potatoes, ensure they are fully cooked and soft enough to mash. If boiling, cut them into equal-sized chunks to ensure even cooking. For baking, scrub them clean, poke a few holes with a fork, and wrap in foil for moisture.
  • Mixing Ingredients: To achieve a lump-free filling, use a food processor or blender for mashing sweet potatoes. Combine all wet ingredients first before gradually adding the dry ones to maintain a smooth consistency.
  • Adjusting Sweetness: Taste the filling before you pour it into the crust. If you prefer a sweeter pie, you can add more maple syrup gradually, tasting as you go, to achieve your desired level of sweetness.
  • Spice Level Control: When adding spices like cinnamon and nutmeg, start with the recommended amount. You can always add more if you prefer a stronger flavor, but it’s easier to increase than to decrease spice levels.
  • Thickening the Filling: When mixing cornstarch, ensure that it is well blended with the almond milk before adding it to the sweet potato mixture. This step is crucial in preventing any lumps from forming in your filling.
  • Pie Crust Tips: If you’re using a store-bought crust, choose one that doesn’t contain preservatives for a healthier option. If making your own, let the dough chill before rolling to make it easier to handle, and remember to prick the crust with a fork before pre-baking to avoid bubbling.
  • Baking Time: Keep an eye on the pie while baking. The filling should be set and slightly puffed, and the crust should be golden brown. If the crust edges start to over-brown, cover them with foil to prevent burning.
  • Cooling: After baking, allow the pie to cool at room temperature for at least a couple of hours before slicing. This helps the filling set properly and makes for cleaner slices.

FAQ

What are the main ingredients in Healthy Holiday Sweet Potato Pie?

The main ingredients include sweet potatoes, almond flour, maple syrup, coconut milk, cinnamon, nutmeg, vanilla extract, and optionally pecans or walnuts for topping.

Is this recipe gluten-free?

Yes, this Healthy Holiday Sweet Potato Pie can be made gluten-free by using almond flour for the crust instead of regular flour.

How can I make this pie vegan?

This pie is naturally vegan if you use plant-based milk like coconut or almond milk and avoid using eggs. The sweet potato acts as a binder.

Can I use canned sweet potatoes instead of fresh?

Yes, you can use canned sweet potatoes as a convenient alternative. Just ensure they are unsweetened, and drain any excess liquid before using.

How long can I store leftovers?

Leftover Healthy Holiday Sweet Potato Pie can be stored in the refrigerator for up to 4-5 days. Make sure it’s covered properly to maintain freshness.

Can I freeze this pie?

Absolutely! This pie can be frozen for up to 2-3 months. To freeze, wrap it tightly in plastic wrap and then in aluminum foil before placing it in the freezer.

What can I substitute for maple syrup in this recipe?

You can substitute maple syrup with honey, agave nectar, or any other liquid sweetener to achieve a similar sweetness, although it will not be vegan if using honey.

Do I need to pre-bake the crust?

Yes, it is recommended to pre-bake the almond flour crust for about 10 minutes before adding the sweet potato filling to ensure it is crispy and fully cooked.

Introduction to the Christmas Pomegranate Yogurt Bowl

Imagine waking up on a crisp Christmas morning, the air filled with the comforting aroma of cinnamon and nutmeg from the kitchen, promising the festivities ahead. Amongst the joyous hustle, a vibrant Christmas Pomegranate Yogurt Bowl awaits, offering a perfect blend of creamy smoothness, refreshing tartness, and delightful sweetness — a harmonious symphony for the senses. This dish captures the essence of the holidays in a single bowl, making it a special treat worth savoring and sharing with loved ones. Let the succulent seeds of pomegranate burst with flavor in your mouth, while the rich yogurt provides a soothing and cool contrast. Elegant yet simple, this bowl is more than just a breakfast favorite; it’s an edible masterpiece of color and flavor that will make your Christmas morning truly unforgettable.

The Story Behind the Christmas Pomegranate Yogurt Bowl

Pomegranates have a rich and ancient history that spans millennia, often associated with prosperity, abundance, and celebration, making them an ideal centerpiece for holiday dishes. This fruit, one of the oldest known to mankind, finds mentions in Greek mythology and the Quran, symbolizing fertility and life itself. During Christmas, a time when families gather to celebrate the blessings of the past year, pomegranates carry forward their legacy of joy and abundance. By incorporating them into this yogurt bowl, you are not just serving a meal; you are honoring a tradition of festive culinary ingenuity.

Cultural Significance and Anecdotes

The pomegranate is revered across different cultures and religions, often appearing in art, literature, and ceremonial traditions. In ancient Greece, it was believed to have sprung from the blood of Adonis, enhancing its mystique and allure. Meanwhile, in Persian culture, pomegranates are said to hold the secrets of immortality. This Christmas Pomegranate Yogurt Bowl embraces this legacy, threading stories and myths into a modern-day feast for the senses, offering a unique way to connect with the past in every delicious spoonful.

Why You’ll Love This Recipe

  • Festive Flair: The ruby red pomegranate seeds resemble tiny jewels, adding a splash of holiday cheer to your breakfast table.
  • Health-conscious: Packed with antioxidants, vitamins, and probiotics, this yogurt bowl is as nutritious as it is delicious, perfect for the health-focused holiday-goer.
  • Quick and Easy: In the whirl of seasonal activities, this dish comes together in minutes, leaving you ample time to enjoy the Christmas magic.
  • Versatile: Whether it’s breakfast or a mid-day treat, this bowl adapts beautifully, fitting every occasion with ease.
  • Customizable: Tailor it to your taste with various toppings, making it a personalized delight for each family member.

Flavor Profile & Texture

This delightful concoction marries the smooth richness of yogurt with the bright, tangy notes of fresh pomegranate. Each spoonful provides a textured contrast of creamy yogurt, crunchy granola, and the satisfying pop of pomegranate jewels. Touches of honey or maple syrup introduce a balanced sweetness, while a sprinkle of cinnamon or nutmeg provides a warm, spicy undertone, offering a comforting embrace in each bite. Whether you’re dining alone or sharing the experience, each serving is sure to leave an indelible imprint of Christmas cheer on your palate.

Occasions & Pairings

The Christmas Pomegranate Yogurt Bowl is designed for festive mornings but easily transitions into any special brunch or holiday gathering. Serve it alongside freshly baked scones or croissants for a luxurious breakfast spread. Pair with a glass of sparkling apple cider or a warm cup of spiced chai to enhance the holiday ambiance. If hosting a holiday brunch, consider serving it with smoked salmon bagels or a quiche for a well-rounded, elegant menu.

Tips, Variations & Substitutions

Creative Twists

  • Add a Nutty Crunch: Consider topping the bowl with a mix of toasted nuts such as almonds or pistachios for extra flavor and crunch.
  • Experiment with Spices: Incorporate seasonal spices like vanilla or cardamom for a fragrant twist.
  • Boost with Seeds: Sprinkle chia seeds or flaxseeds for added nutrients and a delightful texture.

Dietary Alternatives

  • Vegan Version: Swap traditional yogurt for coconut or almond milk yogurt to make this dish vegan-friendly.
  • Gluten-Free: Use gluten-free granola to cater to gluten sensitivities without compromising on taste or texture.

Storage & Make-Ahead Ideas

This Christmas Pomegranate Yogurt Bowl lends itself well to advance preparation, allowing you to focus on enjoying the festivities. Pre-assemble the dry components, such as granola and seeds, in airtight containers. Refrigerate the pomegranate seeds separately, providing freshness when it’s time to serve. The yogurt can be mixed with any desired spices or sweeteners and kept chilled. On the morning of serving, simply layer the ingredients, dollop with yogurt, and top generously with pomegranate seeds for a fuss-free yet spectacular dish.

Leftovers are rarely an issue as this bowl tends to disappear quickly, but if needed, it can be stored with each component separated to maintain the texture and freshness.

Fun Facts & Trivia (Optional)

Did you know that pomegranates have been cultivated since ancient times and were even found in the tombs of Egyptian royalty? As a symbol of good fortune and fertility, pomegranates have a long-standing association with celebratory events, which continues to this day. Moreover, the tedious but rewarding process of deseeding pomegranates is sometimes compared to meditation, providing a moment of peace amidst the holiday chaos.

Incorporating this superfruit into your Christmas routine not only adds a burst of flavor but also an intriguing conversation starter bound to spark interest and appreciation among your guests. With this recipe, you are not merely serving a meal; you’re inviting history, tradition, and a sense of global culinary connection to your Christmas table.

Ingredients

  • Pomegranate Seeds
    → Fresh pomegranate seeds are the star ingredient that adds a burst of flavor and vibrant color to the yogurt bowl. To seed a pomegranate, cut it in half and gently tap the skin with a wooden spoon to release the seeds, or you can score the sections and pry them out. Opt for juicy, plump seeds for the best texture and sweetness.
  • Plain Greek Yogurt
    → Plain Greek yogurt provides a creamy base that is high in protein and calcium. It should be full-fat or reduced-fat for a richer texture. Use chilled yogurt for a refreshing bowl, and feel free to mix some vanilla extract into the yogurt for extra flavor.
  • Honey or Maple Syrup
    → Honey or maple syrup is optional but adds a natural sweetness to balance the tanginess of the yogurt. If using honey, ensure it is raw and preferably local for the best flavor. You can drizzle it directly over the yogurt or stir it in for even distribution.
  • Granola
    → Granola adds a delightful crunch and makes the yogurt bowl more filling. Choose a granola that is not overly sweet to maintain balance with the pomegranate and yogurt. You can sprinkle it on top just before serving to keep it crunchy.
  • Chopped Nuts (e.g., almonds or walnuts)
    → Chopped nuts provide healthy fats, protein, and an extra crunch that complements the other ingredients perfectly. Toast them lightly in a dry skillet for a few minutes to enhance their flavor, but be sure to keep a close eye on them to prevent burning.
  • Fresh Mint Leaves
    → Fresh mint leaves offer a refreshing aroma and flavor contrast to the dish. Tear the leaves gently by hand to release their oils, and use whole leaves as a garnish on top of the yogurt for an attractive presentation and enhanced taste.
  • Citrus Zest (e.g., orange or lime)
    → Citrus zest brightens the flavors in the yogurt bowl and adds a subtle zing. Use a microplane to finely grate the zest from a clean, organic citrus fruit. Avoid the white pith, as it can be bitter. Just a small amount will go a long way in elevating the overall taste.

Instructions

  • Prepare your ingredients by gathering all items on your countertop and measuring them out.

    → This organization will streamline your process, ensuring that you don’t miss any ingredients while preparing your Christmas Pomegranate Yogurt Bowl.
  • Seed the pomegranate by cutting it in half and gently tapping the skin with a wooden spoon.

    → This technique allows you to extract the seeds with minimal mess; the wooden spoon transfers just the right amount of impact to release the seeds without damaging them.
  • Place the plain Greek yogurt into a serving bowl, ensuring it’s chilled for the best texture and enjoyment.

    → Cold yogurt not only enhances the refreshing nature of this dish but also provides a creamy base that complements the toppings beautifully.
  • If desired, drizzle honey or maple syrup over the yogurt.

    → This will naturally sweeten the yogurt and balance its tang. Drizzling directly over the surface allows you to control the amount for your desired sweetness.
  • Top the yogurt with the freshly seeded pomegranate seeds evenly across the surface.

    → Distributing the seeds evenly ensures that every bite has a burst of flavor and color, making the presentation visually appealing and delicious.
  • Sprinkle granola atop the yogurt just before serving for added crunch.

    → Adding granola right before serving preserves its texture; this ensures it stays crispy and does not become soggy from the yogurt.
  • Chop your choice of nuts, such as almonds or walnuts, and lightly toast them in a dry skillet over medium heat.

    → Toasting enhances their flavor and aroma significantly; stir frequently to avoid burning, as nuts can quickly go from toasted to charred.
  • Sprinkle the toasted nuts over the yogurt bowl for an added crunch.

    → This step adds texture and healthy fats, making your yogurt bowl more satisfying.
  • Tear fresh mint leaves gently by hand and use them as a garnish on top.

    → Tearing rather than cutting helps release essential oils into the dish, enhancing the overall flavor profile and creating an aromatic experience.
  • Use a microplane to finely grate the zest of your chosen citrus fruit (e.g., orange or lime) and sprinkle it over the bowl.

    → This adds a fragrant punch and balances the sweetness; only the outer layer should be used to avoid bitterness from the pith.
  • Serve the Christmas Pomegranate Yogurt Bowl immediately and enjoy!

    → Serving right away allows you to relish the freshness of the ingredients and maintain the crunchiness of the granola and nuts.

Notes

These Christmas Pomegranate Yogurt Bowls are a festive and nutritious way to start your day or enjoy as a light snack. The combination of tart pomegranate seeds and creamy Greek yogurt creates a delicious flavor balance, enhanced by the optional sweetness of honey or maple syrup. For added texture and crunch, sprinkle a generous layer of granola on top, and consider adding some toasted chopped nuts for an extra boost of protein and healthy fats.

When preparing, make sure to use fresh, juicy pomegranate seeds, as they are the highlight of this dish. If you’re feeling adventurous, customize your yogurt bowl with different nuts, seeds, or even a dollop of nut butter for added richness. The fresh mint leaves provide a lovely aroma and a pop of color, making the dish visually appealing. You can also experiment with the citrus zest; it brings a lovely brightness that ties all the flavors together.

For serving, prepare the yogurt bowl right before you’re ready to enjoy it to keep the granola crunchy. This dish is not only perfect for breakfast or brunch but also makes a delightful dessert or a festive treat at holiday gatherings. Enjoy it fresh, and don’t hesitate to share with family and friends!

Tips

Cooking Tips for Your Christmas Pomegranate Yogurt Bowl

  • Selecting Pomegranates: Choose pomegranates that feel heavy for their size, as this indicates juiciness. Look for shiny, unblemished skin and avoid any that feel lightweight.
  • Preparing Yogurt: Using cold Greek yogurt not only enhances the refreshing quality of your bowl but also allows the toppings to stay crisp. If you prefer a sweeter yogurt, mix in a teaspoon of vanilla extract or a sprinkle of cinnamon for extra warmth.
  • Sweetener Options: If you opt for honey, try warming it slightly to make it easier to drizzle. For those using maple syrup, remember that grade A syrup is lighter in flavor while grade B offers a richer taste that pairs superbly with yogurt.
  • Granola Tips: If you want to make your own granola, consider adding spices such as cinnamon or nutmeg to the oats for an extra festive touch. Allow it to cool completely before adding it to the yogurt to maintain that desired crunch.
  • Toasting Nuts: For toasted nuts, aim for a golden brown hue, stirring often to avoid burning. A pinch of salt can also enhance their flavor, making them an excellent topping for your yogurt bowl.
  • Mint Preparation: Use fresh mint for the best flavor; dried mint will not provide the same aromatic quality. Tear the leaves right before serving to ensure they retain their vibrant color and fragrance.
  • Citrus Zest Application: When zesting, make sure to rotate the fruit to get only the colorful outer layer and avoid the bitter white pith underneath. Experiment with different citrus, such as grapefruit or lemon, for varied flavor profiles.
  • Presentation: Layer your yogurt, pomegranate seeds, and toppings in a glass bowl or jar for an impressive presentation. Not only does this look beautiful, but it also entices others to enjoy your creation!

FAQ

What ingredients are needed for the Christmas Pomegranate Yogurt Bowl?

The main ingredients include Greek yogurt, pomegranate seeds, honey, granola, and seasonal fruits such as oranges and mint for garnish.

Can I use a different type of yogurt?

Yes, you can substitute Greek yogurt with any type of yogurt you prefer, such as dairy-free or regular yogurt, but the consistency may vary.

Is this recipe suitable for a vegan diet?

To make it vegan, use a plant-based yogurt and substitute honey with maple syrup or agave nectar.

How can I make this recipe more festive?

You can add additional toppings such as chopped nuts, chocolate shavings, or edible flowers for a more decorative and festive touch.

Can I prepare this recipe in advance?

While the yogurt bowl is best served fresh, you can prepare the ingredients ahead of time and assemble it just before serving.

What health benefits does the Christmas Pomegranate Yogurt Bowl offer?

This dish is high in protein from the yogurt, packed with antioxidants from the pomegranate, and provides fiber from the granola and fruits.

How many servings does this recipe make?

This recipe typically serves 2 to 4 people, depending on portion sizes.

Can I include other fruits in the bowl?

Absolutely! Feel free to add your favorite seasonal fruits such as berries, bananas, or kiwi for added flavor and nutrition.

Introduction / Hook

Welcome to a culinary journey brimming with warmth and flavor — introducing the Holiday Roasted Sweet Potato Wedges! Imagine golden-brown wedges with crispy edges, a soft and fluffy interior, and a perfectly melded sweetness that dances on your palate with every bite. These delightful wedges are a celebration of flavors, blending natural sweetness with a symphony of spices that evoke the spirit of the holiday season. Whether it’s the aroma that wafts through the kitchen as they roast to perfection or the vibrant colors that captivate on the dinner table, these sweet potato wedges are a treat for the senses, sure to become a cherished holiday tradition.

The Story Behind the Dish

The beloved sweet potato has a storied history that dates back thousands of years. Originating in Central and South America, this versatile root vegetable has since traveled the globe, becoming a staple in diverse culinary traditions. Its natural sweetness and nutritional prowess made it a valuable commodity, especially during the holiday season when families gather and food takes center stage. The concept of roasting these vibrant tubers into wedges brings out their inherent earthy sweetness, a technique popularized in modern kitchens around the world. From simple beginnings, these roasted sweet potato wedges have evolved into a festive dish that conjures feelings of comfort and celebration, especially during the holidays.

Why You’ll Love This Recipe

  • Easy to Make: Simple preparation steps with minimal ingredients, perfect for both novice and experienced cooks.
  • Nutritious and Delicious: Packed with vitamins, fiber, and antioxidants, sweet potatoes are a healthy choice, without compromising on flavor.
  • Versatile: Can be served as a side dish, appetizer, or even a light snack.
  • Perfect for the Holidays: The combination of warm spices makes it an ideal addition to any holiday spread.
  • Vegan and Gluten-Free: Accommodates a variety of dietary preferences and restrictions, making it a crowd-pleaser.

Flavor Profile & Texture

The Holiday Roasted Sweet Potato Wedges are a delightful marriage of flavors and textures. The initial crispness achieved through careful roasting gives way to a tender, melt-in-your-mouth interior. Each bite offers a subtle caramelization, enhancing the natural sugars of the sweet potato. This pairs seamlessly with the fragrant spices used to season the wedges — think cinnamon, nutmeg, and cloves, creating a harmonious balance that is both savory and slightly sweet. The addition of fresh herbs adds a burst of aroma and color, making these wedges as visually appealing as they are tasty.

Occasions & Pairings

These sumptuous wedges are versatile enough to fit any occasion, yet special enough to take center stage during the holiday season. Serve them at Thanksgiving dinners, alongside roasted turkey and cranberry sauce, or as a Christmas side dish to complement ham or beef roasts. They’re equally suitable for casual get-togethers, potlucks, or New Year’s Eve celebrations, where they can be paired with a variety of dips and sauces. Consider pairing these wedges with light white wines or sparkling water infused with citrus for a refreshing contrast that highlights their flavors.

Tips, Variations & Substitutions

Customization is key to making these sweet potato wedges your own. Here are some creative ideas to explore:

  • Spice it Up: For a bit of heat, add a pinch of cayenne pepper or chili powder.
  • Sweeten the Deal: Drizzle with honey or maple syrup before serving for an extra touch of sweetness.
  • Herbal Variations: Experiment with different herbs such as rosemary, thyme, or sage for a unique flavor twist.
  • Dietary Substitutions: Use coconut oil instead of olive oil for a subtle tropical note or try a balsamic glaze for a tangy complement.

Storage & Make-Ahead Ideas

To make these wedges ahead of time, you can prep the sweet potatoes by cutting them into wedges and placing them in cold water for up to a day in advance. This helps to retain their freshness and can even make them crisper upon roasting. Once roasted, they can be stored in an airtight container in the refrigerator for up to three days. To reheat, simply place them back in the oven at a moderate temperature until crisp and warmed through. If you wish to freeze them, refrain from adding any fresh herbs until after they’ve been reheated to maintain freshness and flavor.

Fun Facts & Trivia

Did you know that sweet potatoes are often confused with yams, even though they belong to different botanical families? Sweet potatoes are richer in nutrients and sweeter than yams. Additionally, they have long been associated with good luck and prosperity in various cultures, particularly in African and Caribbean cuisine where they are integral to celebratory dishes. Their versatility and nutritional benefits continue to make them a beloved ingredient worldwide, proving that these humble tubers are much more than a side dish — they’re a taste of history, culture, and comfort all rolled into one.

Ingredients

  • Sweet Potatoes
    → Sweet potatoes provide the main base for this dish. They should be of medium size and evenly shaped for even cooking. Choose sweet potatoes that are firm and free from blemishes or soft spots. To prepare, scrub them clean under running water, peel if desired, and cut into wedges of uniform thickness to ensure they roast evenly.
  • Olive Oil
    → Olive oil is used to coat the sweet potatoes, enhancing their natural sweetness while helping them to crisp up during roasting. Use extra virgin olive oil for the best flavor. Drizzle the oil over the sweet potato wedges before roasting, ensuring they are evenly coated without being overly greasy.
  • Ground Cinnamon
    → Ground cinnamon adds a warm, fragrant flavor that enhances the sweetness of the sweet potatoes. Use fresh ground cinnamon for maximum flavor. Sprinkle it evenly over the wedges after coating them with olive oil to ensure an even distribution of flavor.
  • Ground Nutmeg
    → Ground nutmeg complements the cinnamon and adds a warm, nutty note to the dish. Use fresh ground nutmeg if possible for the best results. Add a small pinch to the sweet potato wedges before roasting, as its strong flavor should be balanced carefully with the cinnamon.
  • Salt
    → Salt enhances the overall flavor of the dish, balancing the sweetness of the sweet potatoes and spices. Use sea salt or kosher salt for better texture and flavor control. Sprinkle it evenly over the wedges, adjusting to personal taste but ensuring each piece is seasoned adequately.
  • Pepper
    → Freshly ground black pepper adds a subtle heat and depth to the flavor profile of the roasted sweet potatoes. Use the finest grind for better distribution. Season to taste, remembering that a little goes a long way; you want to enhance the dish without overpowering the sweet flavors.
  • Fresh Rosemary (optional)
    → Fresh rosemary provides a fragrant herbal note that pairs wonderfully with sweet potatoes. Use only fresh, not dried, rosemary to ensure an impactful flavor. Roughly chop the leaves and sprinkle over the wedges before roasting. Be mindful not to add too much, as it can be quite potent.

Instructions

  • Preheat your oven to 425°F (220°C) and prepare a large baking sheet by lining it with parchment paper or a silicone baking mat.

    → Preheating the oven ensures that the sweet potatoes start roasting immediately, which helps achieve a crispy exterior and soft interior. Using parchment paper or a silicone mat prevents sticking and makes cleanup easier.
  • Wash and scrub the sweet potatoes under running water thoroughly to remove any dirt or residue.

    → Cleaning the sweet potatoes is crucial as it removes any contaminants from the surface. You can use a vegetable brush if available to ensure a clean finish, especially if you plan to keep the skins on.
  • Peel the sweet potatoes if desired, then cut them into wedges of uniform thickness, about 1-inch wide, and place them in a large mixing bowl.

    → Cutting the sweet potatoes into uniform wedges ensures even cooking; uneven pieces may result in some being overcooked while others are undercooked. If you choose to leave the skins on, make sure they are firm and clean for texture.
  • Drizzle approximately 2-3 tablespoons of extra virgin olive oil over the sweet potato wedges in the mixing bowl.

    → Olive oil not only helps in achieving a crispy texture but also enhances the flavor of the sweet potatoes. Ensure to coat each wedge evenly by tossing with your hands or a spoon to prevent any from being too greasy.
  • Season the sweet potatoes with 1 teaspoon of ground cinnamon, ½ teaspoon of ground nutmeg, 1 teaspoon of salt, and ¼ teaspoon of freshly ground black pepper.

    → These spices and seasonings elevate the dish, with cinnamon and nutmeg enhancing the sweetness, while salt and pepper balance flavors. Make sure to sprinkle them evenly over the wedges to ensure every bite is flavorful.
  • If using fresh rosemary, rinse a few sprigs under cold water and pat dry, then finely chop and add to the bowl, tossing with the wedges.

    → Fresh herbs like rosemary can bring vibrancy and contrast to the sweet flavors. Be cautious with the amount you use, as rosemary has a strong flavor that can easily overpower the dish.
  • Spread the seasoned sweet potato wedges in a single layer on the prepared baking sheet, making sure they aren’t overcrowded.

    → Spacing the wedges properly allows for even roasting and caramelization. If the wedges are too close, they will steam instead of roast, resulting in a softer texture rather than the desired crispiness.
  • Place the baking sheet in the preheated oven and roast the sweet potatoes for 25-30 minutes, flipping them halfway through cooking.

    → Flipping the wedges allows them to brown evenly on both sides. Keep an eye on them towards the end of cooking; roasting time can vary depending on the thickness of the wedges and the oven’s temperature accuracy.
  • Check for doneness by piercing a thick wedge with a fork; it should be tender and easily fall apart.

    → Testing for tenderness ensures that the sweet potatoes are fully cooked through. If they still feel firm, return them to the oven for a few more minutes and check again.
  • Once cooked, remove the baking sheet from the oven and let the sweet potato wedges cool slightly before serving.

    → Allowing them to cool for a few minutes helps them set and can enhance flavors as they rest. Serve warm as a side dish, garnished with additional fresh rosemary if desired.

Notes

These Holiday Roasted Sweet Potato Wedges are a delicious side dish that perfectly captures the essence of festive flavors. The natural sweetness of sweet potatoes is elevated with aromatic spices such as cinnamon and nutmeg, making them a delightful addition to your holiday table. For best results, ensure that your sweet potatoes are cut into uniform wedges to guarantee even cooking. The olive oil not only helps the wedges to crisp up but also enhances their flavor, so make sure they are well-coated.

This dish can be easily customized depending on your taste preferences. If you love herbs, feel free to experiment with other fresh herbs like thyme or sage along with or instead of rosemary. For a bit of zest, a squeeze of lemon or a sprinkle of orange zest after roasting can add a refreshing touch. These wedges are not just limited to holiday meals; they can be enjoyed year-round and make a fantastic addition to salads, bowls, or as a healthy snack.

To serve, consider adding a sprinkle of feta cheese or a drizzle of balsamic glaze for an extra layer of flavor. Leftovers can be stored in an airtight container in the fridge and reheated in the oven to maintain their crispness. Just remember to adjust the seasoning to your preference before serving. Enjoy your festive cooking!

Tips

Cooking Tips for Holiday Roasted Sweet Potato Wedges

  • Choosing Sweet Potatoes: Opt for medium-sized, evenly shaped sweet potatoes to guarantee consistent cooking. Look for firm ones without blemishes or soft spots to ensure the best texture and flavor.
  • Uniform Cutting: Cut the sweet potatoes into wedges of equal thickness, about 1 inch wide, to promote even roasting. This prevents some pieces from cooking too quickly while others remain undercooked.
  • Coating with Olive Oil: Use a generous yet measured amount of extra virgin olive oil to coat the wedges. Toss them in a bowl to ensure each piece is coated evenly, promoting a crispy exterior during roasting.
  • Spice Balance: When adding ground cinnamon and nutmeg, start with smaller amounts and adjust to taste. The warm spices should complement the sweet potatoes without overpowering their natural sweetness.
  • Even Seasoning: To achieve well-seasoned wedges, sprinkle the salt and pepper evenly across the potatoes. Toss them again to spread out the seasoning evenly and enhance the overall flavor profile.
  • Using Fresh Rosemary: If adding rosemary, finely chop the leaves and sprinkle them over the wedges. Remember, it’s potent, so a little goes a long way. It’s best to taste as you go, ensuring the herb complements but does not overwhelm.
  • Roasting Temperature: Preheat your oven to 425°F (220°C) for optimal roasting. A high temperature helps caramelize the sugars in the sweet potatoes, resulting in a deliciously crispy exterior.
  • Flip for Even Cooking: Halfway through the roasting time, use a spatula to flip the sweet potato wedges. This ensures they cook evenly and develop a golden-brown crust on all sides.
  • Serving Suggestions: These roasted sweet potato wedges make a fantastic side dish for holiday meals or a healthy snack. Consider serving them with a dipping sauce like garlic aioli or a sweet chili sauce for extra flavor.

FAQ

What ingredients do I need for Holiday Roasted Sweet Potato Wedges?

You will need sweet potatoes, olive oil, salt, pepper, paprika, garlic powder, and optional herbs like rosemary or thyme for added flavor.

How do I prepare the sweet potatoes?

Start by preheating your oven to 425°F (220°C). Wash and peel the sweet potatoes, then cut them into wedges. Toss the wedges in olive oil with your desired seasonings.

How long should I roast the sweet potato wedges?

Roast the sweet potato wedges for about 25-30 minutes, flipping them halfway through to ensure they are evenly cooked and golden brown.

Can I make these sweet potato wedges ahead of time?

Yes, you can prepare the sweet potato wedges ahead of time and store them in the refrigerator. Reheat them in the oven before serving for best results.

What are some serving suggestions for roasted sweet potato wedges?

They pair well with dipping sauces like ranch, garlic aioli, or even a spicy salsa. You can also serve them alongside proteins like grilled chicken or fish.

Are there any variations of this recipe?

Yes! You can experiment with different spices such as cumin or chili powder, or add toppings like Parmesan cheese, fresh herbs, or a drizzle of balsamic glaze after roasting.

Can I use other types of potatoes instead of sweet potatoes?

While sweet potatoes are recommended for their flavor and sweetness, you can substitute regular potatoes or even other root vegetables, but adjust the cooking time accordingly.

Is this recipe suitable for a vegan diet?

Yes, the Holiday Roasted Sweet Potato Wedges are 100% vegan as they contain no animal products. They are a delicious and healthy choice for everyone.

Introduction: A Bowl of Comfort

Imagine coming home on a brisk, chilly evening, the scent of warm, inviting soup filling the air. Your senses are immediately captivated by the earthy, savory aromas wafting through the room. This is Slow-Simmered Chicken & Barley Soup, a comforting staple that wraps you in warmth and ease with each spoonful. Its rich, hearty flavors beckon you to sit back and indulge in a culinary embrace that only a classic, meticulously prepared soup can offer. Crafted with love and patience, this dish is uniquely special, simultaneously soothing and satisfying to the body and soul.

What sets this soup apart is the depth of flavor achieved through the slow-simmering process, ensuring every ingredient has mingled perfectly, creating a harmony of taste that’s both complex and refreshing. Whether you’re a seasoned home cook or a budding kitchen enthusiast, this dish promises to bring a smile to your face and warmth to your heart. Read on, and discover why this soup is more than just a meal; it’s an experience.

The Story Behind the Dish

The history of chicken and barley soup is as rich and layered as the flavors within the dish itself. Barley, one of the oldest cultivated grains, has played a significant role in culinary traditions across civilizations, from ancient Mesopotamia to the hearty cuisines of Eastern Europe. Known for its nutty flavor and chewy texture, barley was a staple in the diets of many cultures and served the dual purpose of nutrition and energy sustenance. Paired with chicken, which gained popularity due to its accessible and adaptable nature, the combination quickly became favored for its balance of proteins, carbs, and flavors.

In many families, this soup has been a testament to tradition, a recipe passed down through generations with each family adding its own unique touch. Some might add a pinch of regional spices, while others focus on local vegetables to enrich the broth. Regardless of the nuances, each version tells a story of comfort, nourishment, and the communal act of sharing a lovingly prepared meal.

Why You’ll Love This Recipe

  • Hearty and Satisfying: The perfect balance of tender chicken, wholesome barley, and fresh vegetables creates a soup that’s both filling and nourishing.
  • Flavorful Broth: Slow simmering brings out the profound flavors in the broth, delivering a rich and satisfying experience with every spoonful.
  • Nutritious: Packed with protein and fiber, this soup is a healthy choice that doesn’t sacrifice taste for nutrition.
  • Easy to Make: With simple, straightforward steps, this recipe is accessible to cooks of all skill levels.
  • Adaptable: Enjoy the freedom to tweak the recipe to fit your dietary needs or flavor preferences.
  • Perfect for Meal Prep: Make a large batch, and enjoy it throughout the week; it tastes even better the next day!

Flavor Profile & Texture

The magic of this slow-simmered soup lies in its depth of flavor and varied textures, satisfying a broad range of palates. Each mouthful offers a burst of complex flavors, beautifully orchestrated through the interplay of earthy barley, tender chicken, and a medley of fresh vegetables. The slow cooking process allows the flavors to meld together, creating a broth that’s both velvety and rich, with subtle notes of herbs and spices enhancing the overall experience.

Texture-wise, the barley offers a delightful chewiness that perfectly complements the softness of the cooked vegetables and the succulent pieces of chicken. The contrast in textures enhances each bite, making the soup feel substantial and well-rounded.

Occasions & Pairings

This soup is the epitome of versatility, making it suitable for various occasions and pairable with a range of dishes. It’s perfect for a cozy night in, complementing the serene ambiance with its warmth. Serving this as a starter at a small dinner party or during a family gathering is sure to impress guests while also offering comfort.

Consider pairing it with:

  • Crusty Bread: A thick slice of rustic bread, ideal for dipping, complements the soup’s flavors and adds to the enjoyment.
  • Light Salads: A crisp, refreshing side salad with a light vinaigrette can balance the warmth and richness of the soup.
  • Wine: A light, dry white wine like Sauvignon Blanc enhances the soup’s savory notes, while a medium red like Pinot Noir amplifies its heartiness.

Tips, Variations & Substitutions

One of the joys of homemade soup is its adaptability. Here are some tips and variations to tailor this recipe to your liking:

  • Vegetarian Variation: Swap the chicken for chickpeas or tofu, and use vegetable broth to make a delicious vegetarian version.
  • Spice it Up: Add a pinch of cayenne pepper or red chili flakes for a subtle, warming kick.
  • Herbal Twist: Experiment with different herbs such as dill, thyme, or rosemary to infuse new flavors into the broth.
  • Lower Carb Option: Substitute barley with cauliflower rice for those who are carb-conscious or gluten-free.

Storage & Make-Ahead Ideas

This soup not only improves in flavor over time but also stores exceptionally well, making it a fantastic choice for meal planning.

  • Refrigeration: Store in an airtight container for up to four days. Reheat gently on the stove, stirring occasionally, to ensure even warming.
  • Freezing: This soup is highly freezer-friendly. Allow the soup to cool completely before portioning it into freezer-safe containers or bags. It can be stored for up to three months. Thaw overnight in the refrigerator before reheating.
  • Make-Ahead: Prepare the soup ahead of time for a hassle-free meal. Simply reheat and serve, ensuring a quick and delicious dinner at a moment’s notice.

Fun Facts & Trivia

Did you know that barley, one of the key ingredients in this soup, was a key component in the diets of Roman gladiators? It was considered food for strength and almost sacred in its symbolic connection to stamina and resilience. Similarly, chicken, one of the world’s most popular proteins, has a history dating back thousands of years; it was even domesticated back to Southeast Asia around 7,000-10,000 years ago!

Savor each moment with this Slow-Simmered Chicken & Barley Soup, and you’ll be partaking in a tradition that nourishes both the body and soul, one spoonful at a time. Dive into the experience, and let every flavorful drop remind you of the blessings of food and warmth. Enjoy the process of crafting this delightful dish, and share the love of good food and good company. Bon appétit!

Ingredients

  • Chicken
    → Boneless, skinless chicken thighs or breasts are preferred for this recipe as they remain tender during the long simmering process. Cut the chicken into bite-sized pieces to ensure even cooking. If using whole pieces of chicken, be mindful to remove the skin and bones before serving for a smoother texture in the soup. Aim for high-quality, fresh chicken for the best flavor and texture.
  • Barley
    → Pearled barley works best in this soup as it cooks faster and adds a unique, nutty flavor to the broth. Rinse the barley under cold water before adding it to the soup to remove any dust and to help with the cooking process. Using a ratio of about 1/2 cup of barley per 4 cups of broth will yield a hearty texture.
  • Vegetables
    → A mix of diced onions, carrots, and celery is essential for the flavor base of the soup, commonly known as mirepoix. Chop the vegetables into uniform, small pieces for even cooking. Sauté them first to bring out their natural sweetness and deepen the overall flavor of the soup.
  • Garlic
    → Fresh garlic cloves, minced or chopped, add aromatic flavor to the soup. Use 2-3 cloves depending on your preference for garlic. For the best results, add the garlic towards the end of the sautéing process to prevent it from burning, which can result in a bitter taste.
  • Chicken Broth
    → Use low-sodium chicken broth to control the salt levels in the dish. Homemade broth is ideal if available; otherwise, choose a high-quality store-bought option. The broth serves as the main liquid, infusing the soup with rich chicken flavor and helping to tenderize the barley as it cooks.
  • Herbs
    → Fresh thyme and parsley enhance the flavor profile of the soup. Use a few sprigs of fresh thyme and a handful of chopped parsley for garnish before serving. Fresh herbs should be added towards the end of cooking for their bright flavor, while dried herbs can be added earlier in the cooking process for a more mellow taste.
  • Salt and Pepper
    → These basic seasonings are crucial for enhancing the overall flavor of the soup. Add salt gradually, tasting as you go to avoid over-seasoning, and freshly ground black pepper for a hint of spice. Always season to taste just before serving to ensure the flavors are balanced.
  • Lemon Juice (optional)
    → A splash of fresh lemon juice brightens the dish and enhances the flavors of the other ingredients. Squeeze in juice from half a lemon just before serving for a refreshing lift. Use fresh lemons for the best taste, as bottled lemon juice can lack in flavor.

Instructions

  • Begin by preparing the chicken by cutting it into bite-sized pieces.

    → This helps ensure that the chicken cooks evenly throughout the soup and allows for easier bites. Use a sharp knife for clean cuts, and remember to wash your hands and the cutting board thoroughly after handling raw chicken to prevent cross-contamination.
  • Rinse the pearled barley under cold water in a fine mesh strainer.

    → This step removes any dust and helps the barley cook more evenly. Make sure to swish the barley around gently to ensure a thorough rinse, and drain it well before adding it to the soup.
  • Dice the onions, carrots, and celery into uniform, small pieces.

    → This is known as mirepoix, which forms the flavor base of the soup. Aim for a consistent size—about 1/4 inch—so that all the vegetables cook at the same rate, adding a harmonious texture to the finished soup.
  • Heat a large stockpot over medium heat and add a couple of tablespoons of olive oil.

    → Heating the oil before adding the vegetables allows for even sautéing and helps to prevent sticking. Once the oil shimmers, it’s ready for the vegetables.
  • Add the diced onions, carrots, and celery to the heated oil and sauté for about 5-7 minutes.

    → Stir the mixture occasionally until the vegetables become tender and the onions turn translucent. This process caramelizes the natural sugars, enhancing the overall flavor of the soup.
  • Mince 2-3 garlic cloves and add them to the pot in the last minute of sautéing.

    → Adding garlic towards the end prevents it from burning, which can impart a bitter flavor. Stir constantly for around 1 minute until fragrant, which indicates that it is ready to bloom and release its essential oils.
  • After the garlic is fragrant, add the chicken pieces to the pot and season with salt and pepper.

    → This will help to season the chicken as it cooks. Sauté for about 5 minutes until the chicken is no longer pink, stirring occasionally to cook all sides evenly.
  • Pour in 4 cups of low-sodium chicken broth.

    → This broth serves as the main liquid for the soup and provides essential flavor. Be sure to scrape any browned bits off the bottom of the pot, as they add depth to the soup.
  • Add the rinsed barley to the pot and bring the mixture to a gentle boil.

    → Stir the barley into the broth to incorporate it well. A gentle boil ensures that the soup starts the cooking process properly, activating the barley to release its starches for a thicker consistency.
  • Once boiling, reduce the heat to low, cover the pot, and let the soup simmer for 30-40 minutes.

    → Simmering allows the flavors to meld together and the barley to cook through. Stir occasionally, and keep an eye on the consistency; add more broth or water if it becomes too thick.
  • During the last 5 minutes of cooking, add fresh thyme and parsley to the pot.

    → Fresh herbs added at the end of the cooking time retain their vibrant flavor and increase the freshness of the soup. Stir gently to combine them throughout the soup.
  • Before serving, taste the soup and adjust the seasoning with additional salt and freshly cracked black pepper as needed.

    → Balancing the seasoning at this stage ensures a well-flavored dish. Remember that flavors can evolve as they sit, so taste again if you need to.
  • If desired, squeeze in the juice of half a fresh lemon just before serving.

    → This adds a bright, refreshing note that enhances all the flavors within the soup. Always opt for fresh lemon juice for a superior taste.
  • Serve the soup hot in bowls and garnish with additional chopped parsley, if desired.

    → Serving the soup immediately ensures that it is enjoyed at its best temperature and freshness. This final touch not only adds flavor but also enhances the presentation.

Notes

  • Slow-simmered chicken and barley soup is a comforting and nutritious dish that can be enjoyed year-round. The long cooking time allows the flavors to meld beautifully while making the chicken tender and the barley delightfully chewy.
  • This soup is versatile; feel free to incorporate seasonal vegetables such as peas or spinach for added color and nutrition. If you’re looking to add some heat, consider including a pinch of red pepper flakes during cooking.
  • If you prefer a thicker soup, reduce the amount of broth used or allow it to simmer longer, uncovered, to let some of the liquid evaporate. Conversely, if you like a brothier soup, simply add more chicken broth or water until the desired consistency is reached.
  • This recipe is perfect for meal prep, as the soup keeps well in the refrigerator for several days. It can also be frozen for longer storage, making it an ideal dish to prepare in batches. Just be sure to leave some room in your container, as soups expand when frozen.
  • Serving suggestions include crusty bread or a side salad to balance the meal. For an elegant touch, top each bowl with a sprinkle of fresh herbs and a dash of freshly ground black pepper just before serving.

Tips

Cooking Tips for Slow-Simmered Chicken & Barley Soup

  • Perfecting the Chicken: When cutting the chicken into bite-sized pieces, try to keep them uniform to ensure they cook evenly. If you prefer a richer flavor, consider browning the chicken pieces in the pot before adding the vegetables. This will provide a deeper flavor to your soup.
  • Handling Barley: Rinse the pearled barley under cold water thoroughly to get rid of any excess starch, which can make the soup cloudy. It also helps the barley cook more evenly. If you’re short on time, you can soak the barley in water for a couple of hours before adding it to the soup to speed up the cooking process.
  • Vegetable Sauté: Sauté the mirepoix (onions, carrots, and celery) in olive oil on medium heat until they start to soften, about 5-7 minutes. This step builds an aromatic base for your soup. Consider adding a pinch of salt during sautéing to draw out moisture from the vegetables, enhancing their flavor.
  • Aromatic Garlic: To ensure the garlic maintains its fresh flavor, add it to the pot just 1-2 minutes before you add the broth and other ingredients. Stir it frequently to prevent burning. If you enjoy a stronger garlic flavor, feel free to toss in extra minced garlic, adjusting it to your taste.
  • Choosing Your Broth: If you’re making homemade broth, consider simmering it longer with herbs and spices for a deeper flavor. When using store-bought, taste it first and adjust seasoning as needed since some broths can be saltier than others. Always remember that the quality of your broth greatly influences the overall dish.
  • Herb Timing: Fresh herbs should be added at the end of cooking to retain their vibrant flavors and nutrients. If you do want to use dried herbs, add them during the simmering phase to allow their flavors to infuse into the broth. Consider tying thyme sprigs with kitchen twine for easy removal after cooking.
  • Seasoning Gradually: It’s better to add salt in small amounts throughout the cooking process rather than all at once. This allows you to fine-tune the seasoning. Be cautious with the last addition of salt, especially if using salty broth or salted ingredients.
  • Enhancing with Lemon: While optional, the addition of lemon juice at the end really brightens the flavors. If you prefer a more pronounced zing, you can also zest the lemon before juicing it, adding a layer of citrus fragrance to your soup.
  • Storage Tips: If you have leftovers, store the soup in an airtight container in the refrigerator. The barley will absorb some broth as it sits, so you may need to add a little water or broth when reheating to loosen the soup. This preparation freezes well, but for optimal texture, consider freezing it without the barley and adding it during reheating.

FAQ

What ingredients do I need for Slow-Simmered Chicken & Barley Soup?

The main ingredients include chicken (breast or thighs), pearl barley, carrots, celery, onion, garlic, chicken broth, herbs (such as thyme and bay leaf), and salt and pepper. You can also add vegetables like peas or corn if desired.

How long does it take to prepare Slow-Simmered Chicken & Barley Soup?

The preparation time is approximately 15-20 minutes, and the soup simmers for about 1.5 to 2 hours to ensure the flavors meld beautifully.

Can I use leftover chicken in this recipe?

Yes, leftover cooked chicken is a great option! Just add it in during the last 30 minutes of simmering to heat through.

Is this soup gluten-free?

No, traditional pearl barley contains gluten. However, you can substitute it with gluten-free grains like quinoa or rice if needed.

Can I make Slow-Simmered Chicken & Barley Soup in a slow cooker?

Absolutely! To make it in a slow cooker, combine all the ingredients and cook on low for 6-8 hours or on high for 3-4 hours until the chicken and barley are tender.

What can I serve with this soup?

This soup pairs well with crusty bread, crackers, or a light salad for a well-rounded meal.

How do I store leftovers of the soup?

Cool the soup completely, then store it in an airtight container in the refrigerator for up to 4 days. You can also freeze it for up to 3 months. Reheat before serving.

Can I adjust the seasonings to my taste?

Yes! Feel free to adjust the herbs and spices according to your preference. Adding a dash of lemon juice or some hot sauce can also enhance the flavor.

Introduction to a Comforting Culinary Delight

Welcome to a world of vibrant flavors and comforting aromas with our Spiced Sweet Potato and Coconut Stew. Imagine a dish that tantalizes your senses with the earthiness of sweet potatoes, the smooth richness of coconut milk, and an intricate blend of exotic spices. This stew envelops you in warmth with every comforting bite, perfect for cold winter evenings or as a delightful feature at your dinner table any time of the year. The harmonious balance of flavors is sure to make this recipe a staple in your kitchen. Dive into the silky, aromatic depths of this tantalizing stew and ignite your taste buds with its tropical allure.

The Story Behind the Dish

The Spiced Sweet Potato and Coconut Stew takes its roots from a fusion of African and Caribbean culinary traditions where sweet potatoes are a staple and coconut milk is commonly used to add a creamy texture to many dishes. Known for their affinity for spices, these cultures have long embraced the natural sweetness of sweet potatoes, using them in stews that are both hearty and flavorful. The lush, creamy texture of coconut milk complements the earthy sweetness of the potatoes beautifully, creating a dish that’s as nourishing as it is comforting.

This particular stew reflects centuries of influence from the spice trade, where warm spices like cumin, ginger, and coriander began traveling across oceans, infusing traditional dishes with layers of new flavors. It’s a testament to cultural blend and innovation in cooking, offering a historical journey that continues to evolve in kitchens around the world.

Why You’ll Love This Recipe

  • Warming and Hearty: Perfect for cozying up on a chilly day, this stew offers warmth in every spoonful.
  • Rich in Flavor: A blend of spices creates a medley that’s full of depth and zest.
  • Nutrient-Dense: It’s packed with vitamins and minerals, making it as healthy as it is delicious.
  • Versatile: Enjoy it as a meal on its own, or pair it with other dishes for a vibrant feast.
  • Simple to Make: With easy steps and just one pot, it’s ideal for both novice cooks and busy weeknights.

Flavor Profile & Texture

The flavor profile of the Spiced Sweet Potato and Coconut Stew is an exquisite tapestry of tastes. It starts with the natural sweetness of sweet potatoes, which are mellow and comforting. This sweetness is elevated by the aromatic coconut milk, creating a rich and velvety consistency. The symphony of spices adds warmth, depth, and complexity to the stew. Expect notes of ginger’s gentle heat, the earthiness of cumin, and a fragrant touch of coriander. A hint of sea salt ties all these elements together, enhancing each component without overwhelming their natural flavors. The texture is a beautiful contrast between the smooth creaminess of the broth and the tender bite of chunky sweet potatoes. Every taste and texture works in harmony, inviting you to savor each rich and exotic note.

Occasions & Pairings

Our Spiced Sweet Potato and Coconut Stew is versatile enough to be served on numerous occasions. It shines as a heartening meal on a cold winter’s night but can also be a stunning centerpiece at a festive family gathering. Because of its rich, exotic flavors, it pairs wonderfully with a variety of sides. Pair it with warm, crusty bread to soak up the aromatic broth, or with fluffy jasmine rice to savor its creamy sauce in each grain. For drink pairings, consider a crisp white wine or a refreshing iced tea infused with mint and lemon to balance the stew’s richness.

Tips, Variations & Substitutions

This stew is flexible enough to accommodate various dietary preferences and creative modifications:

  • Vegan and Vegetarian: This stew is naturally vegan. For additional protein, consider adding chickpeas or lentils.
  • Gluten-Free: Ensure that all spices are certified gluten-free.
  • Spice Variations: Experiment with different spice combinations. Try adding turmeric for a golden hue or smoked paprika for a hint of heat.
  • Extra Vegetables: Kale or spinach can add a burst of green and an extra health boost.

Storage & Make-Ahead Ideas

Spiced Sweet Potato and Coconut Stew is perfect for meal prep enthusiasts and those who love having meals ready in advance. It can be made ahead and stored in the refrigerator for up to 5 days, allowing flavors to further meld and deepen. For longer storage, you can freeze it for up to 3 months. When reheating, gently warm it on the stove over medium heat, stirring occasionally to restore its creamy consistency. Avoid overheating to preserve the optimal texture of the sweet potatoes. Easily portable and ready to heat and serve, this stew is the ideal make-ahead meal.

Fun Facts & Trivia

Did you know that sweet potatoes are not only rich in vitamins and fiber but are also considered one of the oldest vegetables known to humankind, with archeological evidence suggesting cultivation as far back as 750 BC? Moreover, coconut trees, the second prominent ingredient in this stew, are known as the “tree of life” in many cultures due to the numerous nutritional and practical uses of the tree’s various parts. Understanding these elements adds a fascinating context to the humble stew, showcasing the remarkable journey of its ingredients throughout history.

Crafting this simple yet elegant Spiced Sweet Potato and Coconut Stew is not just about creating a dish but experiencing a culinary journey enriched with history and flavors from around the globe. Enjoy every spoonful as you savor its global heritage and delightful comforting warmth!

Ingredients

  • Stew Base
    • 2 medium sweet potatoes (peeled and diced)
      → Sweet potatoes add a natural sweetness and creaminess to the stew, making it hearty and filling. Ensure that they are peeled and cut into even-sized cubes to promote even cooking and tenderness throughout the dish.
    • 1 onion (diced)
      → Onions provide a foundational flavor that enhances the overall profile of the stew. Dice them finely to ensure they cook down quickly and meld seamlessly into the stew base, offering sweetness and depth.
    • 3 cloves garlic (minced)
      → Garlic infuses the stew with a fragrant aroma and subtle heat. Mince the garlic to release its essential oils, allowing its potent flavor to develop as it cooks. Avoid burning the garlic by adding it at the right moment during cooking.
    • 1 can (14 ounces) coconut milk
      → Coconut milk brings a rich and creamy texture to the stew, balancing the spices and sweet potatoes’ sweetness. Use full-fat coconut milk for the best flavor and creaminess. Shake the can well before opening to ensure it’s mixed properly.
    • 4 cups vegetable broth
      → Vegetable broth serves as the cooking liquid, providing depth and savory flavor to the stew. Use low-sodium broth to control the saltiness of the dish, and ensure it’s heated before adding to the pot to speed up the cooking process.
  • Spices
    • 1 teaspoon ground cumin
      → Ground cumin adds an earthy, warm flavor to the stew, enhancing the sweetness of the sweet potatoes. Toasting the cumin briefly in the pot before adding other ingredients can help bring out its flavor more deeply.
    • 1 teaspoon ground coriander
      → Ground coriander adds a light, citrusy note to the stew that complements the earthiness of the cumin. Ensure it’s fresh and aromatic; if possible, buy whole seeds and grind them just before use for the best flavor.
    • 1/2 teaspoon ground cinnamon
      → Cinnamon adds warmth and sweetness, enhancing the overall savory profile of the stew. Use Ceylon cinnamon for a more delicate and complex flavor. Add it early in the cooking process to allow its aroma to infuse the stew.
    • 1/4 teaspoon cayenne pepper (adjust to taste)
      → Cayenne pepper provides a spicy kick that contrasts beautifully with the sweet potatoes and coconut milk. Adjust the quantity to cater to your spice tolerance, and blend it well with other spices before adding to the pot to ensure even flavor distribution.
  • Add-ins
    • 1 cup canned chickpeas (drained and rinsed)
      → Chickpeas add protein and a hearty texture to the stew, making it more filling. Choose low-sodium canned chickpeas for convenience, and rinse them well under cold water to remove any excess sodium and improve taste.
    • 2 cups fresh spinach (roughly chopped)
      → Fresh spinach provides a nutrient boost and bright color to the stew. Add it towards the end of cooking to retain its vibrant color and freshness; it wilts down quickly but should not overcook, maintaining its nutrients.
    • 1 bell pepper (diced, optional)
      → Bell peppers add a sweet crunch and additional nutrients. Choose any color for visual appeal, and remove the seeds and stem before dicing. Add them at the same time as the onion for optimal cooking.
  • Garnish
    • Fresh cilantro (for garnish)
      → Fresh cilantro adds a burst of freshness and a bright flavor contrast to the rich stew. Chop the leaves just before serving to retain their aromatic oils and vibrant color, and sprinkle them over each bowl for a beautiful presentation.
    • Lime wedges (for serving)
      → Lime wedges provide a zesty finish that elevates the flavors of the stew. Squeeze fresh lime juice over the stew just before eating to enhance the overall taste and freshness of the dish.

Instructions

  • Begin by preparing your ingredients: peel and dice the sweet potatoes, onion, and bell pepper (if using).

    → This preparation step ensures that all vegetables are ready to go when you start cooking, allowing for a more fluid cooking process and preventing any of the ingredients from cooking unevenly.
  • Heat a large pot or Dutch oven over medium heat and add 2 tablespoons of cooking oil (like olive or coconut oil).

    → The cooking oil creates a non-stick surface and allows the vegetables to sauté evenly. Ensure the pot is hot enough to sizzle a drop of water to confirm it’s at the right temperature before adding the oil.
  • Add the diced onion to the pot, stirring occasionally until it becomes translucent, about 5-7 minutes.

    → Cooking the onions until translucent mellows their sharp flavor and allows them to contribute sweetness to the stew. Stirring prevents burning and helps cook them evenly.
  • Stir in the minced garlic and diced bell pepper (if using), and sauté for an additional 2-3 minutes until fragrant.

    → Adding garlic at this stage allows it to soften and release its flavor without burning, which can lead to bitterness in the dish. Cook until you can smell the aromatic garlic, but do not let it brown.
  • In a separate small skillet, toast the ground cumin, coriander, cinnamon, and cayenne pepper over low heat for about 2 minutes, stirring frequently until they release their aroma.

    → Toasting spices before adding them to the stew enhances their flavors and makes them more aromatic, deepening the overall taste profile of the stew.
  • Add the diced sweet potatoes to the pot and pour in the toasted spices from the skillet, mixing well to coat the sweet potatoes.

    → This coating allows the sweet potatoes to absorb the spices’ flavors as they cook, ensuring every bite is delicious. Stir thoroughly to ensure the sweet potatoes are evenly seasoned.
  • Add the can of coconut milk and the heated vegetable broth to the pot, stirring to combine all ingredients.

    → The coconut milk will enrich the stew and add creaminess, while the vegetable broth provides depth of flavor. Combining them with the other ingredients ensures consistent flavor throughout the stew.
  • Bring the stew to a gentle boil, then reduce the heat to low and cover the pot, allowing it to simmer for about 20-25 minutes until the sweet potatoes are tender.

    → Simmering allows the flavors to meld and develop while cooking the sweet potatoes through. To check for doneness, pierce a piece with a fork; it should be soft but still hold its shape.
  • Once the sweet potatoes are tender, stir in the drained and rinsed chickpeas and chopped spinach, cooking for an additional 5-7 minutes until the spinach is wilted and vibrant green.

    → This step incorporates additional protein and vegetables, enhancing the stew’s nutrition and texture. Adding the spinach at the end ensures it maintains its bright color and nutrients.
  • Remove the pot from heat and let the stew sit for a few minutes to allow flavors to settle.

    → Allowing the stew to rest can improve the flavor balance as the ingredients continue to meld together slightly off the heat.
  • Serve the stew warm in bowls, garnishing each with freshly chopped cilantro and lime wedges on the side.

    → Garnishing with cilantro adds a fresh, vibrant touch and enhances the visual appeal, while lime wedges allow for a zesty finish that brightens the dish’s overall flavor when squeezed over the top.

Notes

This Spiced Sweet Potato and Coconut Stew is a comforting and hearty dish, perfect for a cozy dinner. The combination of sweet potatoes and coconut milk creates a creamy base that is both satisfying and nourishing. Feel free to customize the stew by adding your favorite vegetables or proteins. Leftovers taste even better the next day, as the flavors continue to meld. Serve it with crusty bread or over rice for a complete meal. If you prefer a thicker consistency, let it simmer uncovered for a bit longer, allowing some of the liquid to evaporate. Don’t forget to adjust the spice levels according to your taste and enjoy the aromatic experience of this delicious stew!

Tips

Cooking Tips for Spiced Sweet Potato and Coconut Stew

  • Prep Ingredients in Advance – To make the cooking process smoother, prepare all your ingredients ahead of time. Dice, mince, and rinse as necessary so you can focus on cooking without interruption.
  • Control the Heat – When cooking onions and garlic, keep the heat on medium to avoid burning them. Stir frequently to ensure even cooking and to release their natural sweetness.
  • Layer Flavors – When adding spices, consider adding them in layers at different stages of cooking. This technique helps enhance the overall flavor profile. Start with toasting the spices before adding the vegetables for deeper flavor.
  • Adjust Thickness – If the stew is too thick, you can thin it out by adding more vegetable broth or water. Conversely, if it’s too thin, let it simmer uncovered for a bit to help it thicken.
  • Taste as You Go – Always taste your stew while it’s cooking. Adjust seasoning as needed, whether it’s salt, pepper, or more spices, to make sure it suits your palate.
  • Timing for Add-ins – Add sweet potatoes and chickpeas early on since they need time to cook through, but add spinach and bell peppers later to keep them fresh and vibrant.
  • Let it Rest – If you have time, let the stew sit for about 15-20 minutes after cooking. This allows the flavors to meld together even more, resulting in a tastier dish.
  • Garnish Generously – When serving, don’t skimp on garnishes like cilantro and lime. They add a fresh element that brightens the hearty flavors of the stew.
  • Store Leftovers Wisely – If you have leftovers, store them in an airtight container in the refrigerator. The stew can taste even better the next day as the flavors continue to develop.

FAQ

What ingredients are needed for the Spiced Sweet Potato and Coconut Stew?

The main ingredients include sweet potatoes, coconut milk, vegetable broth, onion, garlic, ginger, and a mix of spices such as cumin, coriander, turmeric, and chili powder. You may also add vegetables like spinach or kale for extra nutrition.

How long does it take to prepare and cook the stew?

Preparation time is approximately 15 minutes, and cooking time is around 30-40 minutes. Overall, you can have this stew ready in about 1 hour.

Can I use other vegetables in this stew?

Yes! In addition to sweet potatoes, you can add various vegetables like carrots, bell peppers, or peas. Just keep in mind that different vegetables may require different cooking times.

Is this recipe suitable for vegans?

Absolutely! The Spiced Sweet Potato and Coconut Stew is entirely vegan as it contains no animal products. It’s a great plant-based meal option.

Can I make this stew ahead of time?

Yes, you can prepare the stew ahead of time. It actually tastes even better the next day as the flavors meld together. Just store it in an airtight container in the fridge and reheat before serving.

How can I make the stew spicier?

If you prefer a spicier stew, you can add more chili powder or include diced fresh chilies such as jalapeños or serranos. Adjusting the spice levels according to your taste is always a good idea!

What can I serve with this stew?

This stew pairs well with a variety of sides such as rice, quinoa, or crusty bread. You can also garnish it with fresh cilantro or lime for added flavor.

How do I store leftover stew?

Store any leftover stew in an airtight container in the refrigerator for up to 4-5 days. You can also freeze it for up to 3 months, but it’s best to let it cool completely before freezing.

Introduction: Warm and Wholesome Moroccan Lentil & Vegetable Bowl

Embark on a culinary journey with the Moroccan Lentil & Vegetable Bowl, where each bite is an explosion of vibrant flavors and aromatic spices. Imagine the comfort of tender lentils complemented by a medley of seasonal vegetables seasoned with exotic Moroccan spices, bringing warmth and heartiness to your table. Whether it’s the irresistible aroma wafting through your kitchen or the vibrant colors that catch your eye, this dish is a feast for the senses. Easy to prepare yet rich in complexity, it promises a satisfying and nourishing experience that can be enjoyed by all.

The Story Behind the Dish

The Moroccan Lentil & Vegetable Bowl is a nod to the heart of Moroccan cuisine, where simplicity meets bold flavors. Lentils, a staple in Moroccan kitchens, have been cultivated and cherished for centuries due to their nutritional benefits and ability to absorb spices beautifully. This dish encapsulates the rich tapestry of Moroccan culinary history, influenced by Berber, Arab, and Mediterranean flavors. It’s a warm embrace from North Africa, inviting you to partake in the joyous celebration of spices that define Moroccan culture.

Moroccan Culinary Heritage

Morrocco’s cuisine is a reflection of its diverse cultural influences, from the indigenous Berbers to the Sufi mystics, each leaving their aromatic mark. The use of spices such as cumin, coriander, cinnamon, and ginger transforms simple ingredients into complex flavor profiles that can transport your taste buds to a different world. This dish is not just about the ingredients; it’s about the centuries-old tradition of gathering around the table to share food and stories.

Why You’ll Love This Recipe

  • Healthy yet Delicious: Packed with protein and fiber-rich lentils, this bowl is both nourishing and satisfying.
  • Vegan-Friendly: Entirely plant-based, making it perfect for those following a vegan lifestyle.
  • Flavorful Spice Mix: The spices used are not just for heat, but for creating depth of flavor, making each bite a delight.
  • Versatile Meal: Enjoy as a main course or a side, suitable for any meal of the day.
  • Easy Preparation: No elaborate techniques required, just simple cooking with robust results.

Flavor Profile & Texture

Prepare yourself for a taste adventure as this dish brings together an exquisite blend of flavors: the earthiness of lentils, the sweetness of caramelized onions, the gentle heat from spices, and the freshness of seasonal vegetables. The texture is equally inviting, with creamy lentils merging with the tender crunch of vegetables, offering a delightful contrast in every mouthful. It’s this perfect harmony of flavors and textures that makes the Moroccan Lentil & Vegetable Bowl a standout dish.

The Spice Symphony

The essence of the Moroccan Lentil & Vegetable Bowl lies in its carefully crafted spice blend. Cumin adds a warm, nutty element while coriander brings a hint of citrus. The subtle cinnamon whisper and a dash of ginger provide warmth, and paprika gives a gentle smokiness, creating a symphony of flavors that linger lovingly on your palate.

Occasions & Pairings

This Moroccan Lentil & Vegetable Bowl is the epitome of flexibility. Perfect for a family weeknight dinner or a potluck weekend gathering, its appeal is universal. Serve it alone as a wholesome meal or with crusty bread to soak up the delicious juices. Pair it with a crisp glass of white wine or a refreshing mint tea to enhance the flavors and create a well-rounded gastronomic experience.

Enhancing the Experience

For a complete Moroccan feast, pair this bowl with a side of couscous or a fresh salad, such as a cucumber and tomato salad drizzled with lemon juice. Finish with a light dessert like an orange blossom panna cotta or fresh seasonal fruits for a truly exotic affair.

Tips, Variations & Substitutions

This dish offers ample room for creativity and customization. Here are a few tips and variations to suit various tastes and dietary needs:

  • Spice Adjustments: Control the spice level to your taste; add chili powder for extra heat or omit entirely for a milder dish.
  • Protein Boost: Try adding chickpeas or tofu for an additional protein hit.
  • Herb Variations: Experiment with herbs like cilantro or parsley for a fresh finish.
  • Seasonal Swaps: Depending on what’s available, zucchini, eggplant, or bell peppers can be used instead of the recommended vegetables.
  • Dietary Alternatives: Substitute with cauliflower rice for a low-carb option or add nut-based creams for extra richness.

Storage & Make-Ahead Ideas

The Moroccan Lentil & Vegetable Bowl is as practical as it is delicious. Here are some storage and make-ahead ideas:

  • Storing Leftovers: Allow the dish to cool to room temperature before storing in an airtight container in the refrigerator for up to 3 days.
  • Freezing Tips: This bowl freezes well for up to a month. Portion it out and store in freezer-safe containers.
  • Reheating: Reheat gently on the stove with a splash of water to maintain moisture and flavor.
  • Make-Ahead Approach: Prepare the lentils and spice mix a day in advance to save time on the day of serving. Combine with fresh vegetables on the day for the best taste.

Fun Facts & Trivia

Did you know that Morocco was one of the first countries to cultivate lentils around 8000 BC? As a result, lentils have become a cultural and nutritional mainstay across various Moroccan dishes. Additionally, the spice trade routes that ran through Morocco have left a lasting impact, making it a melting pot of diverse flavors from African and Mediterranean cuisines. These historical threads come together beautifully in the Moroccan Lentil & Vegetable Bowl, offering not just a meal, but a story on your plate.

In conclusion, the Moroccan Lentil & Vegetable Bowl is more than just a recipe. It is a journey through flavors, cultures, and time, encapsulated in a single dish. Whether you’re seeking comfort, nourishment, or a taste of something exotic, this dish promises to deliver an unforgettable culinary experience. So, don your apron and allow yourself to be transported to the vibrant markets and fragrant kitchens of Morocco with every bite.

Ingredients

  • Lentils
    → Lentils serve as the primary source of protein and fiber in this bowl, adding a hearty texture. Use green or brown lentils as they hold their shape well during cooking. Rinse them thoroughly before cooking to remove any debris or dirt and to ensure even cooking.
  • Vegetable Broth
    → Vegetable broth provides a flavorful base for cooking the lentils and vegetables, enhancing the overall taste of the dish. Opt for low-sodium varieties to control the saltiness. Warm the broth before adding lentils to expedite the cooking process and ensure consistent flavor absorption.
  • Olive Oil
    → Olive oil is used for sautéing vegetables, adding richness and healthy fats to the dish. Use extra virgin olive oil for the best flavor, and make sure to heat it gently to avoid burning, which can create bitterness.
  • Onion
    → Onion adds a foundational sweetness and depth of flavor. Dice the onion finely to ensure it cooks evenly and blends into the dish. Sauté until translucent to bring out its natural sugars and sweetness.
  • Garlic
    → Garlic infuses the dish with aromatic flavor. Mince the garlic finely to maximize its flavor release, and add it to the pan after the onion has softened, cooking briefly to prevent burning, which can make it taste bitter.
  • Carrot
    → Chopped carrots provide sweetness and color, contributing to the overall nutrient profile of the bowl. Cut them into small, even pieces to ensure they cook at the same rate as the other vegetables, and opt for fresh, firm carrots for the best texture.
  • Zucchini
    → Zucchini adds moisture and a tender texture. Dice it into uniform pieces, as smaller pieces cook faster and blend seamlessly into the dish. Choose smaller zucchini for a sweeter flavor and less seediness.
  • Bell Pepper
    → Bell pepper adds crunch and a vibrant color to the bowl. Any color may be used, but red, yellow, or orange varieties provide additional sweetness. Dice them evenly and add them during the final minutes of cooking to maintain their crispness.
  • Spices (Cumin, Coriander, Paprika)
    → These spices contribute to the dish’s warm, earthy flavor profile. Use ground spices for easy incorporation; toast them briefly in the olive oil before adding the other ingredients to release their essential oils and intensify their flavors. Adjust the quantities according to your taste preference.
  • Chickpeas (canned or cooked)
    → Chickpeas provide additional protein and a creamy texture. If using canned chickpeas, drain and rinse them to remove excess sodium. If cooking from dry, soak them overnight to ensure even cooking. Add them toward the end of cooking to warm through without losing their shape.
  • Lemon Juice
    → Lemon juice adds a refreshing acidity that brightens the flavors in the dish. Squeeze fresh lemon juice over the bowl just before serving, and taste for seasoning; adding it early in the cooking process may diminish its bright flavor.

Instructions

  • Rinse the lentils under cold running water in a fine-mesh sieve to remove any dirt or debris.

    → This step is important as it cleans the lentils, ensuring you won’t find impurities in your dish…
  • In a medium saucepan, combine the rinsed lentils and 4 cups of vegetable broth. Bring to a gentle boil over medium-high heat.

    → Starting the lentils in cold broth allows them to gradually heat up, promoting even cooking and preventing them from breaking apart…
  • Once boiling, reduce the heat to low, cover the saucepan, and simmer for about 25-30 minutes until the lentils are tender but not mushy.

    → Properly simmering the lentils allows them to absorb flavor from the broth while maintaining their shape; check for doneness by tasting a few…
  • While the lentils are cooking, prepare the vegetables by dicing the onion, mincing the garlic, and chopping the carrot, zucchini, and bell pepper into even-sized pieces.

    → Ensuring uniform sizes in your vegetable prep allows them to cook evenly and enhances the visual appeal of the dish…
  • In a large skillet, heat 2 tablespoons of extra virgin olive oil over medium heat until shimmering but not smoking.

    → This helps to impart a subtle flavor to the vegetables and avoids burning, which can add bitterness to the dish…
  • Add the diced onion to the skillet and sauté for about 5-7 minutes until it becomes translucent and slightly golden.

    → Cooking the onion until translucent draws out its natural sweetness, forming a flavorful base for the rest of the vegetables…
  • Add the minced garlic and cook for an additional 30 seconds, stirring continuously to prevent burning.

    → Garlic cooks quickly; stirring ensures even cooking and prevents the garlic from turning bitter…
  • Stir in the chopped carrots, zucchini, and bell pepper to the skillet. Sauté for about 5-7 minutes until the vegetables are tender yet still crisp.

    → Adding the vegetables in this order allows firmer vegetables like carrots to soften before the more delicate zucchini and bell pepper…
  • Sprinkle in the ground spices (cumin, coriander, and paprika) and stir to coat the vegetables evenly, cooking for 1-2 minutes until the spices are fragrant.

    → Toasting the spices in olive oil releases their natural oils, intensifying their flavors and contributing depth to the dish…
  • Add the cooked lentils along with any remaining broth from the saucepan to the skillet with sautéed vegetables. Stir to combine and allow to cook for another 5 minutes to meld the flavors.

    → This step ensures all ingredients are well mixed and the dish heats through, thoroughly blending the flavors…
  • Gently fold in the drained and rinsed chickpeas, allowing them to warm through for about 2-3 minutes.

    → Adding the chickpeas at this stage prevents them from overcooking and helps retain their texture in the dish…
  • Taste the mixture and adjust seasoning as needed, potentially adding salt or pepper to suit your preferences.

    → Tasting allows for balancing flavors, ensuring every ingredient shines through while meeting your palate’s requirements…
  • Remove the skillet from heat and drizzle fresh lemon juice over the lentil and vegetable bowl just before serving.

    → The acidity from the lemon juice brightens the overall flavor, adding a fresh note that complements the earthy lentils…
  • Serve the Moroccan lentil and vegetable bowl warm, garnished with fresh herbs or additional lemon wedges if desired.

    → Presentation matters; serving it warm with a garnish elevates the dining experience, making it visually appealing…

Notes

These Moroccan Lentil & Vegetable Bowls are a hearty and nutritious meal, brimming with flavor and colorful ingredients. The combination of lentils and chickpeas offers a robust source of protein and fiber, making this dish not only filling but also satisfying. Feel free to customize the vegetables based on your preference or what’s in season; options like sweet potatoes or spinach can make delightful additions.

This dish can be served warm or cold, making it versatile for meal prep or quick lunches. For an additional layer of flavor, consider garnishing with fresh herbs like cilantro or parsley, or a dollop of yogurt or tahini. These lentil bowls also offer excellent leftovers; they store well in the fridge for a few days and can be reheated as necessary. If you’d like to add more depth, a sprinkle of feta cheese can enhance the overall taste profile and complement the flavors beautifully.

Always remember to adjust your spice levels according to your palate, and don’t hesitate to experiment with different spices or herbs to make this recipe your own. Enjoy the vibrant, comforting flavors of this Moroccan-inspired dish!

Tips

Cooking Tips for Moroccan Lentil & Vegetable Bowl

  • Preparation of Lentils: Always rinse your lentils thoroughly under cold water before cooking. This not only removes any impurities but also helps to reduce cooking time. Consider cooking a larger batch and storing leftovers for quick meals throughout the week.
  • Choosing Vegetable Broth: For an extra flavor boost, consider making your own vegetable broth using scraps of vegetables. This way, you can control the ingredients and ensure a fresher taste in your dish.
  • Sautéing Tips: When sautéing your vegetables, start with the ones that take longer to cook (like carrots and onions) and then layer in the quicker-cooking ones (like zucchini and bell peppers). This method ensures that all ingredients are perfectly cooked.
  • Enhancing Flavor: To deepen the flavor of your dish, sprinkle a pinch of salt on the vegetables right after you sauté them. This helps to draw out moisture and intensify their sweetness.
  • Mincing Garlic: Use the flat side of a knife to crush garlic cloves before mincing. This process releases more aromatic oils and enhances the garlic’s flavor in your dish.
  • Spice Toasting: Never skip the step of toasting spices. Heat them in a bit of olive oil until fragrant before adding to the dish. This simple technique amplifies their flavors and aromatic qualities tremendously.
  • Adjusting Spice Levels: Taste your dish as you go. Adjust the spices gradually; you can always add more but cannot take them out once incorporated.
  • Adding Chickpeas: If you’re using canned chickpeas, you can add them towards the last 5-10 minutes of cooking to warm them through. For dry chickpeas, make sure they are fully cooked and tender before adding them to the mix.
  • Lemon Juice Timing: To maintain the freshness of the lemon juice flavor, always add it just before serving. This will enhance the overall taste and provide a vibrant finish to your dish.
  • Garnishing Ideas: Consider topping your bowl with fresh herbs such as parsley or cilantro, and a dollop of yogurt for creaminess. This not only adds flavor but also enhances the presentation of your dish.

FAQ

What are the main ingredients in the Moroccan Lentil & Vegetable Bowl?

The main ingredients include lentils, assorted vegetables (such as carrots, bell peppers, and zucchini), spices (like cumin and coriander), vegetable broth, and fresh herbs.

Is this recipe suitable for vegans?

Yes, the Moroccan Lentil & Vegetable Bowl is entirely plant-based and suitable for vegans.

How long does it take to prepare this dish?

Preparation time is approximately 10-15 minutes, with an additional cooking time of 25-30 minutes.

Can I use canned lentils instead of dried lentils?

Yes, you can use canned lentils for convenience. Just be sure to rinse and drain them before adding them to the dish to reduce sodium levels.

How spicy is the Moroccan Lentil & Vegetable Bowl?

The spice level can be adjusted based on your preference. The recipe typically includes mild spices, but you can add chili powder or cayenne pepper for extra heat.

What can I serve with the Moroccan Lentil & Vegetable Bowl?

This dish can be served with couscous, quinoa, or flatbread on the side for a heartier meal.

Can I add protein to this dish?

Yes, you can add additional protein such as chickpeas, tofu, or grilled chicken if desired.

How should I store leftovers?

Store leftovers in an airtight container in the refrigerator for up to 4 days. Reheat gently on the stovetop or in the microwave before serving.

Introduction to Hearty Chickpea & Spinach Stew

Imagine a chilly evening, the wind whispering through the trees, and the comforting aroma of a rich and savory stew wafting through your kitchen. The Hearty Chickpea & Spinach Stew is the quintessential dish that embodies warmth in a bowl. Overflowing with wholesome chickpeas, vibrant spinach, and a symphony of spices, this stew is perfect for those who crave nourishment and flavor. Every spoonful delivers a delightful fusion of creamy textures and earthy tones, making it a truly unforgettable culinary experience. This stew not only satisfies your hunger but also nourishes your soul, making it a perfect meal to enjoy with loved ones around the dinner table.

The Story Behind the Dish

The origin of the Hearty Chickpea & Spinach Stew is deeply intertwined with the rich culinary traditions of the Mediterranean and the Middle East, regions known for their simple yet flavorful dishes. Chickpeas, also known as garbanzo beans, have been cultivated in these areas for thousands of years, representing a staple in their diet due to their versatility and nutritional richness. Spinach, meanwhile, offers a subtle bitterness balancing the sweetness of the chickpeas, and was introduced to Middle Eastern kitchens from Persian lands. This combination reflects a harmonious blend of flavors that travel across borders, signifying unity through food.

Historically, chickpea stew was a dish prepared to meet the needs of families seeking sustenance and energy. Gradually, it evolved as a platform for showcasing regional spices and seasonal vegetables, adapting to the local palate and available produce. This dish bears testimony to the adaptive nature of culinary practices, where ingredients tell stories of trade, travel, and terrain.

Why You’ll Love This Recipe

  • Simplicity & Speed: This stew is straightforward to prepare, requiring minimal effort while delivering maximum flavor.
  • Nutritious: Packed with protein from chickpeas, iron from spinach, and vitamins from other fresh ingredients, it’s a powerhouse of health benefits.
  • Comfort Food: The warm, soothing flavors make it a perfect comfort meal for any day.
  • Versatility: It can be served as a main dish or a hearty side. It’s also adaptable to many dietary preferences.
  • Budget-Friendly: Using inexpensive, everyday ingredients, it’s cost-effective and perfect for those who love flavorful dishes without breaking the bank.

Flavor Profile & Texture

The Hearty Chickpea & Spinach Stew delivers a delightful blend of textures and flavors. The chickpeas provide a creamy texture with a mild, nutty taste that absorbs the aromatic spices beautifully. Spinach adds a fresh, slightly earthy taste and soft texture, making the dish nutrient-rich and vibrant. The stew’s complex aromatic base, typically infused with garlic, cumin, and coriander, enhances its warmth and depth. Every mouthful is a wonderful mix of savory, tangy, and slightly spicy notes that invigorate the palate while providing a wholesome experience.

Occasions & Pairings

Perfect for any occasion, this stew shines during cool autumn evenings and winter nights. It’s an ideal choice for family dinners, cozy weekend meals, or even as a delightful starter for a festive gathering. Pair it with crusty bread or a loaf of garlic naan to sop up the rich broth, or serve it over a bed of fluffy rice or quinoa for a complete meal. Complement your dish with a glass of robust red wine, such as a Rioja or a Chianti, to enhance the flavors further. For dessert, consider a light citrus sorbet to cleanse the palate and provide a refreshing end to your meal.

Tips, Variations & Substitutions

Creative Customizations

The beauty of the Hearty Chickpea & Spinach Stew lies in its versatility. Here are some creative ways to customize your stew:

  • Vegetarian/Vegan: This recipe is inherently vegetarian and can easily be vegan by using vegetable broth.
  • Protein Boost: Add tofu or tempeh for an extra protein boost without altering the stew’s central flavors.
  • Herbal Infusion: Add herbs like rosemary or thyme for an earthy twist.
  • Spice Level: Adjust the heat with more cayenne pepper or swap in hot chili flakes for a spicier kick.

Dietary Alternatives

If you have dietary considerations or want to mix it up, consider these alternatives:

  • Low-Sodium: Use low-sodium broth and check seasoning to suit your needs.
  • Gluten-Free: Naturally gluten-free, ensure all spices and broth are certified gluten-free if needed.

Storage & Make-Ahead Ideas

This stew is perfect for making ahead and only gets better with time as the flavors meld. Store leftovers in an airtight container in the refrigerator for up to four days. When ready to eat, gently reheat it on the stovetop over low heat, stirring occasionally. For a quick meal prep option, portion the stew into individual containers for easy grab-and-go lunches throughout the week.

You can also freeze the stew for up to three months. To do so, allow the stew to cool completely, then transfer it into freezer-safe bags or containers, leaving some space for expansion. Remember to label with the date. To serve, let it thaw overnight in the refrigerator before reheating gently on the stove.

Fun Facts & Trivia

Did you know that chickpeas are one of the earliest legumes cultivated by humans? They were grown in 7000 BCE and have since become a global culinary staple. Not only are they delicious, but chickpeas also played a role in ancient folklore, where they were believed to have aphrodisiac properties. Spinach, on the other hand, gained its reputation as a superfood long before Popeye’s time. Known in the 16th century as the “Spanish vegetable,” it was much revered by the French nobility and Italian painters, often depicted in their works as a symbol of vitality and life.

This Hearty Chickpea & Spinach Stew is more than a meal; it’s a journey through time and taste, where every ingredient tells a story, every bite takes you somewhere magical, and every bowl fulfills more than just hunger. Enjoy this recipe with your heart open and a kitchen full of love.

Ingredients

  • Base Ingredients
    • 2 cups canned chickpeas (drained and rinsed)
      → Canned chickpeas provide the main source of protein and substance in this stew. Ensure they are well-drained and rinsed to remove excess sodium and any canning liquid, which can affect the taste. Alternatively, you can soak and cook dried chickpeas for a more traditional approach, but canned is convenient and quick.
    • 4 cups fresh spinach (roughly chopped)
      → Fresh spinach adds vibrant color, nutrients, and a mild earthy flavor to the dish. Use young, tender leaves for the best texture. It should be washed thoroughly to remove any grit and dirt. Add it towards the end of cooking to prevent overcooking, preserving its bright green color and tender texture.
    • 1 medium onion (diced)
      → Onion serves as the aromatic base for the stew, providing sweetness and depth of flavor as it cooks down. Dice it into small, even pieces for uniform cooking. Sautéing the onion until it’s translucent before adding other ingredients enhances its natural sweetness and flavors.
    • 3 cloves garlic (minced)
      → Garlic is essential for adding a robust flavor to the stew. Mince it finely to release its oils and ensure it infuses the dish well. Be careful not to burn the garlic as it can turn bitter. Adding it after the onions have softened helps to develop its full flavor.
    • 1 tablespoon olive oil
      → Olive oil is used for sautéing the onions and garlic, imparting flavor and aiding in the cooking process. Use good quality extra virgin olive oil for the best flavor. Heat it in a pot over medium heat before adding your aromatics to prevent sticking.
  • Broth and Seasoning
    • 4 cups vegetable broth
      → Vegetable broth serves as the stew’s liquid base, providing moisture and enhancing the overall flavor profile. Use low-sodium broth if you are managing salt intake. If making your own, simmer vegetable scraps, herbs, and spices for a few hours to extract deep flavors.
    • 1 teaspoon ground cumin
      → Ground cumin adds a warm, earthy flavor and is a key spice in this stew. Ensure it is fresh for the most potent flavor. If possible, toast whole cumin seeds briefly before grinding them to release an even deeper aroma.
    • 1 teaspoon smoked paprika
      → Smoked paprika brings a hint of smokiness and depth that complements the other ingredients beautifully. Look for high-quality, sweet-smoked paprika rather than the spicy variety to maintain the stew’s balance.
    • Salt and pepper to taste
      → Salt enhances all flavor profiles in the stew, while pepper adds a subtle kick. Adjust according to your taste preference, but remember to add a little initially and adjust later as the flavors develop during cooking.
  • Optional Add-ins
    • 1 can diced tomatoes (14 ounces) (optional)
      → Diced tomatoes introduce acidity and a rich, tangy flavor, creating a heartier base for the stew. Choose low-sodium varieties if desired. Add them early in the cooking process to allow their flavors to permeate the dish.
    • 1 medium carrot (diced) (optional)
      → Carrots add a subtle sweetness and texture to the stew. Dice them into small, uniform pieces to ensure they cook evenly. Sauté them with the onions for added depth of flavor and a slight caramelization.
    • 1 teaspoon red pepper flakes (optional)
      → Red pepper flakes give the stew a mild heat and spice. Adjust the amount based on your heat preference. Start with a smaller amount and add more as needed to avoid overpowering the other delicate flavors.

Instructions

  • Gather all your ingredients and prep your workspace.

    → Having everything at hand helps streamline the cooking process. Wash, chop, and measure your ingredients before you start cooking. This will ensure you can focus on cooking without interruptions.
  • Heat 1 tablespoon of olive oil in a large pot over medium heat.

    → Pour the olive oil into the pot and allow it to heat up until it shimmers. This temperature ensures that the onions will sauté evenly and develop a rich, sweet flavor without burning.
  • Add the diced onion to the pot and sauté it for about 5-7 minutes.

    → Stir the onion occasionally until it becomes translucent and soft. This process releases the sugars in the onion, enhancing the stew’s depth of flavor. Make sure the heat is not too high, as you want to cook the onion gently.
  • Stir in the minced garlic and sauté for an additional 1-2 minutes.

    → Add the minced garlic to the pot and stir constantly. Garlic cooks quickly and can burn easily, so keep a close eye on it. The garlic should become fragrant, indicating it’s ready without turning too brown.
  • If using, add the diced carrots to the pot and sauté for another 3-4 minutes.

    → This step is important for softening the carrots and allowing them to blend their flavors into the onion and garlic base. Make sure the carrot pieces are uniform in size for even cooking.
  • Optional: Add the can of diced tomatoes, along with their juices, if using.

    → The tomatoes will provide acidity and moisture, helping to create a rich stew base. Allow the mixture to cook for a couple of minutes so the tomatoes heat through and release their flavors.
  • Pour in the 4 cups of vegetable broth.

    → Carefully add the broth to the pot, scraping any browned bits stuck to the bottom. These bits contain concentrated flavors that will enhance the stew. Allow the mixture to come to a gentle simmer after adding the broth.
  • Add the drained and rinsed chickpeas to the pot.

    → Incorporate the chickpeas, which are the heart of the stew, providing protein and substance. Stir them gently to combine with the liquid and other vegetables, ensuring they are evenly distributed in the stew.
  • Incorporate the ground cumin and smoked paprika into the mixture.

    → Sprinkling in the spices at this stage allows their flavors to infuse the broth fully. Stir well to distribute the spices evenly throughout the stew for balanced flavor in each bite.
  • Season with salt and pepper to taste.

    → Start with about 1 teaspoon of salt and a few cracks of pepper, as these will enhance the overall flavor without overpowering it. You can adjust the seasoning later once the stew has thickened and flavors have developed.
  • Bring the stew to a simmer, then reduce heat to low and cover the pot.

    → Once simmering, reduce the heat to low to maintain a gentle simmer. Covering the pot helps the flavors meld together and the stew to thicken. Allow it to cook for about 20-30 minutes, stirring occasionally.
  • Add the roughly chopped fresh spinach in the last 5 minutes of cooking.

    → Adding spinach at the end preserves its bright color and nutrients. Simply fold it into the stew until it wilts but remains vibrant, about 2-3 minutes.
  • Taste the stew and adjust seasoning as needed before serving.

    → This is your opportunity to fine-tune the flavors. If it requires more salt, a dash of pepper, or even an extra pinch of cumin, don’t hesitate to make adjustments to suit your palate.
  • Serve the stew warm, garnished with a sprinkle of fresh herbs if desired.

    → Ladle the stew into bowls, and if you like, top with fresh herbs such as parsley or cilantro for an extra layer of freshness. Pair it with crusty bread or serve it over rice to make the dish more filling.

Notes

This hearty chickpea and spinach stew is a comforting dish packed with nutrients and flavor. It’s not only easy to prepare but also a great way to incorporate legumes and leafy greens into your diet. To enhance the flavors, be sure to sauté the onions until they’re translucent before adding the garlic. This caramelization will create a rich base that will shine through the stew.

The addition of vegetable broth ensures a delicious depth, but feel free to adjust the seasoning as it cooks. You can always add more salt or pepper as needed. If you opt for the canned tomatoes, adding them earlier allows their flavor to meld beautifully with the other ingredients. For those who enjoy a kick, sprinkle in some red pepper flakes, starting with a small amount to not overpower the stew’s flavors.

This stew is also very versatile; consider adding diced carrots for extra texture and sweetness or experimenting with the spices according to your preference. Feel free to serve it over cooked grains like quinoa or brown rice to make it even heartier. Leftovers of this stew can be stored in the refrigerator for a few days or frozen for later use, making it a practical option for meal prepping. Enjoy with a slice of crusty bread to soak up the delightful broth!

Tips

Cooking Tips for Hearty Chickpea & Spinach Stew

  • Prep your ingredients first: Before you start cooking, take the time to chop, dice, and measure out all of your ingredients. This will make the cooking process smoother and help you avoid burning the aromatics.
  • Layer your flavors: Start by sautéing the onions first until they are translucent, then add the garlic. Following this method helps to build a flavor foundation for your stew. Remember to stir frequently to avoid burning the garlic.
  • Cooking the spinach: Spinach wilts quickly, so add it in the last few minutes of cooking. This will help maintain its vibrant color and nutritional value while ensuring it’s tender but not overcooked.
  • Texture considerations: If you prefer a thicker stew, consider mashing a portion of the chickpeas with a fork or potato masher before adding them to the broth. This will give the stew a creamier consistency.
  • Season in layers: Since flavors develop as they cook, add a pinch of salt and pepper at the beginning and adjust to taste towards the end of cooking. This will help you achieve a balanced flavor profile.
  • Don’t rush the simmer: Allow the stew to simmer for at least 20-30 minutes. This time will help the ingredients meld together for a richer flavor. If you have time, letting it simmer longer will enhance the taste even more.
  • Enhance with herbs: For added brightness, consider stirring in a handful of fresh herbs, such as parsley or cilantro, right before serving. They will add freshness that complements the depth of flavor in the stew.
  • Serve with accompaniments: Pair this stew with crusty bread, cooked grains like quinoa or rice, or a dollop of yogurt or sour cream for a creamy contrast. These sides will enhance the meal and round it out.

FAQ

What ingredients are needed for the Hearty Chickpea & Spinach Stew?

The main ingredients for the Hearty Chickpea & Spinach Stew include canned chickpeas, fresh spinach, diced tomatoes, onion, garlic, vegetable broth, olive oil, and spices such as cumin and paprika.

How long does it take to prepare the Hearty Chickpea & Spinach Stew?

Preparation time is approximately 10 minutes, with an additional 20 to 30 minutes of cooking time, making the total time around 40 minutes.

Can I use dried chickpeas instead of canned?

Yes, you can use dried chickpeas. Make sure to soak them overnight and cook them until tender before adding them to the stew.

Is this stew suitable for vegans?

Absolutely! The Hearty Chickpea & Spinach Stew is entirely plant-based and suitable for vegans.

What can I serve with the Hearty Chickpea & Spinach Stew?

This stew pairs well with crusty bread, rice, or quinoa for a complete meal.

Can I freeze leftover stew?

Yes, you can freeze the stew! Allow it to cool, then transfer it to an airtight container. It can be frozen for up to three months.

What are some variations I can try with this recipe?

You can add other vegetables like carrots or bell peppers, try different spices such as curry powder, or even add coconut milk for a creamier texture.

How can I store the Hearty Chickpea & Spinach Stew?

Store any leftovers in an airtight container in the refrigerator for up to 4 days. Reheat thoroughly before serving.

Introduction to Creamy Roasted Cauliflower Soup

Imagine a soup that envelops your senses with its rich, velvety texture and a flavor profile that dances effortlessly between subtlety and depth. This is exactly what the Creamy Roasted Cauliflower Soup delivers. With every spoonful, you experience the warmth of roasted cauliflower, the silkiness of a creamy broth, and the gentle whispers of spices that elevate this dish into a luxurious dining experience. Whether you’re a long-time lover of hearty soups or seeking a new culinary adventure, this dish promises to captivate your taste buds and leave you longing for another bowl.

The Story Behind Creamy Roasted Cauliflower Soup

Cauliflower has long held a place in the culinary traditions across the globe, cherished for its versatility and nutritional benefits. The simple brassica dates back to around the 6th century B.C. when it was first cultivated in the eastern Mediterranean. Its journey through history has seen it transform from a staple in humble peasant meals to the star of gourmet kitchen tables worldwide. The creamy roasted cauliflower soup has its roots in ancient times where soups were considered both a meal and a form of medicine, used to invigorate the spirit and heal the body.

Throughout various cuisines, roasting has been a preferred method to coax out the natural sweetness and complexity of flavors from vegetables, and cauliflower is no exception. The roasting process caramelizes the surface of the cauliflower, imparting a nutty essence that is unmatched. The origins of melding roasted cauliflower into a silky soup likely stem from the necessity to utilize every part of the vegetable, creating a comforting and resourceful dish. Today, this soup serves not only as a nod to these historical practices but also as a contemporary culinary delight.

Why You’ll Love This Recipe

  • Nutritious and Delicious: Packed with vitamins and minerals, cauliflower is a powerhouse of nutrients. Combined with a creamy broth, this soup is both nourishing and indulgent.
  • Simplicity Meets Sophistication: The recipe requires minimal ingredients, emphasizing the natural flavors of cauliflower while showcasing culinary elegance.
  • Comfort in a Bowl: Ideal for chilly evenings or when you need a comforting dish that feels like a warm hug.
  • Versatile and Adaptable: Suitable for various dietary preferences with easy adaptations for vegan or dairy-free versions.

Flavor Profile & Texture

The flavor of creamy roasted cauliflower soup is both nuanced and pronounced. Roasting the cauliflower developes a rich depth, bringing out nutty, slightly sweet notes that make each bite a flavorful journey. The creaminess of the soup provides an indulgent, almost luxurious mouthfeel, while subtle spices enhance the savory quality without overwhelming the palate. The texture is smooth and velvety, a testament to the careful blending and quality ingredients used in its preparation.

Occasions & Pairings

This soup is versatile enough to fit perfectly into various dining settings. Enjoy it as a warming starter during a festive holiday dinner, or serve it as a light main course on a weeknight. The inherent elegance of the dish allows it to be an excellent choice for dinner parties where you wish to impress, yet its homey qualities make it suitable for a quiet, comforting meal on a lazy Sunday.

When it comes to pairings, consider some freshly baked crusty bread or a simple green salad to complement the rich flavors of the soup. To elevate the meal, pair with a chilled glass of Chardonnay or a light-bodied red wine like Pinot Noir, both of which complement the soup’s creamy and savory undertones.

Tips, Variations & Substitutions

This soup can be customized in numerous ways:

  • Make it Vegan: Substitute dairy elements with coconut milk or almond cream to suit a vegan diet without compromising on creaminess.
  • Add a Twist: Experiment with added spices like turmeric or nutmeg for a warmth and a hint of exotic flavor.
  • Extra Veggies: Enhance the nutritional profile with additions like roasted garlic or parsnips for added depth.
  • Garnishing Ideas: Top with crispy sage, a drizzle of truffle oil, or a sprinkle of toasted pine nuts to add a contrasting texture.

Storage & Make-Ahead Ideas

Creamy roasted cauliflower soup is perfect for make-ahead meals and stores beautifully. If making in advance, you can prepare the soup and let it cool completely before transferring it into an airtight container. It will keep in the refrigerator for up to 4 days, making it an excellent option for meal prepping. For longer storage, consider freezing the soup in portions. Just remember to leave about an inch of space at the top of the container to account for expansion.

When you’re ready to enjoy, thaw the soup in the refrigerator overnight and then warm gently on the stovetop over low heat, stirring occasionally. Add a splash of milk or broth to loosen the consistency if needed. This soup is also fantastic for batch cooking — double the recipe to keep some in the freezer for a later date.

Fun Facts & Trivia

Did you know that cauliflower comes in various colors, each with its own unique nutrient composition? Orange cauliflowers are rich in beta carotene, while purple varieties contain anthocyanins, both powerful antioxidants. Interestingly, California produces about 90% of the cauliflower grown in the United States, dominating the market with its favorable growing conditions.

In culinary circles, roasted cauliflower has been likened to truffles concerning its umami-rich flavor profile, sometimes leading to it being dubbed the “poor man’s truffle.” This reputation further uplifts the humble cauliflower as it transforms through roasting into an unexpected culinary star, especially when made into this irresistible soup.

Ingredients

  • Roasted Cauliflower Base
    • 1 large head of cauliflower (cut into florets)
      → The main ingredient of the soup, cauliflower adds a creamy texture when blended. It should be cut into even florets to ensure even roasting, which enhances its natural sweetness and flavor. Choose a cauliflower head that is firm and has tightly packed florets for the best results.
    • 2 tablespoons olive oil
      → Olive oil coats the cauliflower to help it roast to a golden brown, adding depth of flavor. Use extra virgin olive oil for its superior taste and health benefits. Drizzle it over the cauliflower and toss for an even coating before roasting.
    • 1 teaspoon salt
      → Salt is essential for enhancing the natural flavors of the cauliflower. Use kosher or sea salt for a more rounded flavor profile. Be sure to sprinkle it evenly over the cauliflower to ensure all pieces are seasoned properly before roasting.
    • 1/2 teaspoon black pepper
      → Black pepper adds a subtle heat and complexity to the soup. Use freshly ground black pepper for the most robust flavor. Adjust the amount based on your preference for spice.
  • Soup Base
    • 1 medium onion (chopped)
      → The onion serves as a flavor base, adding sweetness and depth to the soup when sautéed. Chop the onion into even pieces to ensure they cook uniformly. Choose a yellow onion for its balance of sweetness and savory flavor.
    • 2 cloves garlic (minced)
      → Garlic provides aromatic richness and a punch of flavor. Mince the cloves finely to release their oils and flavor more effectively. Fresh garlic is preferred over pre-minced for the best taste.
    • 4 cups vegetable broth
      → Vegetable broth is the liquid base of the soup, providing moisture and flavor. Use low-sodium broth to control the saltiness of the final dish. If homemade is available, it offers the freshest taste; otherwise, store-bought broth works well too.
    • 1 cup coconut milk (canned, full-fat)
      → Coconut milk adds creaminess and richness to the soup, balancing the flavors without dairy. Use full-fat coconut milk for the best texture and flavor. Shake the can well before opening to ensure the cream is combined. If you prefer a lighter version, light coconut milk can be used, but may alter the creaminess slightly.
    • 1 teaspoon cumin
      → Cumin adds an earthy, warm flavor that enriches the soup. Use ground cumin for ease, and toast it briefly in the pot before adding liquids to enhance its flavor. Be cautious not to burn it, as it can become bitter.
    • 1/2 teaspoon smoked paprika
      → Smoked paprika gives the soup a subtle smokiness and additional depth of flavor. Use high-quality paprika for the best results. Adjust the amount based on your preference for smokiness.
  • Toppings (optional)
    • Fresh parsley or chives (chopped, for garnish)
      → Fresh herbs add a pop of color and freshness to the finished soup. Chop them finely and sprinkle on top just before serving. Use parsley or chives depending on your flavor preference; both complement the cauliflower beautifully.
    • Croutons (for added texture)
      → Croutons provide a crunchy contrast to the creamy soup. Use store-bought or homemade croutons that are toasted until golden brown. Season them with herbs and spices to enhance their flavor, and add them just before serving to keep them crispy.

Instructions

  • Preheat your oven to 425°F (220°C) to prepare for roasting the cauliflower.

    → A higher roasting temperature caramelizes the sugars in the cauliflower, resulting in a deeper flavor and golden-brown color. Ensure your oven is fully preheated for even cooking.
  • Line a baking sheet with parchment paper or a silicone mat to prevent sticking.

    → This step not only allows for easier cleanup but also helps in even roasting as it promotes circulation around the florets.
  • Cut the large head of cauliflower into even-sized florets, ensuring they are about 1-2 inches in size.

    → Uniform florets ensure that they roast at the same rate, avoiding some pieces being overcooked while others remain raw.
  • In a large mixing bowl, combine the cauliflower florets, olive oil, salt, and black pepper.

    → Tossing these ingredients helps to ensure each floret is thoroughly coated with oil and seasoning, which is crucial for achieving maximum flavor during roasting.
  • Spread the seasoned florets evenly on the prepared baking sheet in a single layer.

    → Avoid overcrowding the pan as this will lead to steaming instead of roasting, which can result in a less desirable texture and flavor.
  • Roast the cauliflower in the preheated oven for 25-30 minutes, or until golden brown and tender.

    → Turning the florets halfway through cooking ensures they brown evenly. Check for doneness by piercing a floret with a fork; it should be soft yet have a slight bite.
  • While the cauliflower is roasting, heat a large pot over medium heat and add a tablespoon of olive oil.

    → Heating the pot first prevents the vegetables from sticking and helps to develop their flavors efficiently. Use medium heat to avoid browning too quickly.
  • Add the chopped onion to the pot and sauté for 5-7 minutes, or until translucent and softened.

    → Stir occasionally to prevent burning, as caramelizing the onions will enhance the sweetness and depth of the soup.
  • Add the minced garlic and sauté for an additional 1-2 minutes until fragrant.

    → Garlic cooks quickly; overcooking can lead to bitterness, so watch it closely. Stir to prevent sticking and allow the garlic to release its oils.
  • Once the cauliflower is roasted, add it to the pot with the sautéed onion and garlic.

    → This incorporates the roasted flavor into the soup base, enhancing the overall taste profile.
  • Pour in the vegetable broth and bring the mixture to a gentle simmer over medium heat.

    → Adding broth creates the soup’s liquid foundation and allows the flavors to meld together. Stir occasionally to help mix the ingredients.
  • Once simmering, add the coconut milk, cumin, and smoked paprika to the pot.

    → The coconut milk adds creaminess, while spices enrich the flavor. Stir well to combine everything before simmering for an additional 5-10 minutes, which allows the spices to infuse into the broth.
  • Using an immersion blender, blend the soup until smooth and creamy, or transfer it in batches to a countertop blender.

    → Be cautious of the hot liquid if using a countertop blender; allow it to cool slightly and remove the center cap of the lid. Blend until the texture is velvety with no lumps.
  • Taste the soup and adjust seasoning with more salt or pepper as needed before serving.

    → This final tasting ensures that the flavors are balanced and that the soup meets your preferences.
  • Serve the soup hot, garnished with chopped parsley or chives and sprinkle croutons on top just before serving for added texture.

    → Fresh herbs add a bright note while croutons give a satisfying crunch, enhancing the overall eating experience. Serve immediately to enjoy the best texture.

Notes

Creating a creamy roasted cauliflower soup is a delightful way to enjoy a wholesome and comforting dish. This recipe emphasizes the natural sweetness of roasted cauliflower, combined with a rich soup base for a velvety texture. Here are some helpful notes to guide you through the process:

Begin by roasting the cauliflower until it achieves a golden brown color, which will amplify its sweetness and flavor. Make sure to cut the cauliflower into even florets so that they roast uniformly. Toss the florets in extra virgin olive oil, salt, and freshly ground black pepper for enhanced taste.

As you prepare the soup base, start by sautéing the chopped onions until they are translucent to develop their natural sweetness. Add minced garlic for an aromatic punch; fresh garlic is best to maximize flavor. Incorporate the vegetable broth to create a rich liquid foundation for the soup.

The magic of this soup lies in the addition of full-fat coconut milk, which offers creaminess without using dairy. Be sure to shake the can of coconut milk well before opening to mix the cream and liquid thoroughly.

Cumin and smoked paprika bring depth and warmth to the dish. Toasting the cumin in the soup pot briefly before adding liquids enhances its flavor, so keep a close eye to ensure it doesn’t burn.

For the finishing touches, consider garnishing your soup with freshly chopped parsley or chives for a burst of color and freshness. Croutons are a fantastic optional topping, adding a satisfying crunch to contrast with the creamy texture of the soup. If using croutons, add them just before serving to maintain their crispness.

This creamy roasted cauliflower soup can be made ahead of time and stored in the fridge or freezer for a quick meal option later on. Enjoy it as a light dinner or alongside a salad or sandwich for a more filling meal.

Tips

Tips for Making Creamy Roasted Cauliflower Soup

  • Choosing the Cauliflower: Select a fresh cauliflower with firm, tightly packed florets. Smaller, evenly sized florets roast more evenly and create a smoother soup.
  • Roasting Technique: Spread the cauliflower florets in a single layer on the baking sheet to ensure they roast evenly. Avoid overcrowding, as this can lead to steaming rather than roasting.
  • Flavor Enhancements: For added flavor, consider roasting the cauliflower with a sprinkle of garlic powder or a squeeze of lemon juice before blending into the soup.
  • Casting a Broth: If using store-bought vegetable broth, opt for a low-sodium variety to better control the final seasoning of the soup. You can also consider using homemade broth for the freshest flavor.
  • Balancing Coconut Milk: For a balanced flavor, mix the coconut milk into the soup gradually, tasting as you go to ensure the creaminess complements the spices perfectly.
  • Blending Tips: For a smooth soup, use an immersion blender directly in the pot, or carefully transfer the soup to a standard blender in batches. Allow some steam to escape to prevent pressure buildup.
  • Adjusting Thickness: If the soup is too thick, add additional vegetable broth or water a little at a time until you reach your desired consistency.
  • Seasoning Earlier: Season the soup as it simmers to allow time for the flavors to meld. Taste frequently to adjust salt, pepper, and spices as needed.
  • Garnishing Ideas: Beyond parsley or chives, consider topping with a drizzle of olive oil or a sprinkle of chili flakes for extra color and flavor.
  • Storage Tips: The soup can be refrigerated for up to 3 days or frozen for up to 3 months. Store in airtight containers, and allow to cool completely before refrigerating or freezing.

FAQ

What ingredients do I need to make Creamy Roasted Cauliflower Soup?

You will need cauliflower, onion, garlic, vegetable broth, heavy cream (or a non-dairy alternative), olive oil, salt, pepper, and optional toppings such as croutons or fresh herbs.

Can I make this soup vegan?

Yes! You can substitute the heavy cream with a non-dairy milk or cream such as coconut milk or cashew cream to make it vegan.

How long does it take to prepare the soup?

The total time for preparing and cooking Creamy Roasted Cauliflower Soup is approximately 45 minutes to 1 hour.

Is it necessary to roast the cauliflower?

Roasting the cauliflower adds depth and enhances the flavor of the soup, but you can also steam the cauliflower if you’re short on time.

Can I add other vegetables to the soup?

Absolutely! You can add vegetables like carrots, potatoes, or celery for added flavor and nutrition.

How should I store leftover soup?

Store leftover soup in an airtight container in the refrigerator for up to 4 days. It can also be frozen for up to 3 months.

What is the best way to reheat the soup?

Reheat the soup on the stove over medium heat, stirring occasionally, until warmed through. You can also use a microwave, heating in short intervals and stirring in between.

What can I serve with Creamy Roasted Cauliflower Soup?

This soup pairs well with crusty bread, a fresh salad, or grilled cheese sandwiches for a complete meal.

Introduction: A Delightful Symphony of Flavors

Few dishes can encapsulate the essence of fine dining and simplicity as beautifully as our One-Pan Lemon Butter Salmon with Veggies. Imagine the tender, flaky salmon, its bright pink hue enhanced by an elegant shimmer of lemon butter glaze, paired harmoniously with a vibrant medley of vegetables. This recipe is more than a meal; it’s an immersive experience for the senses. The zesty aroma of lemon intertwines with the rich, nutty notes of butter, creating an inviting atmosphere that stirs up warmth and comfort. This dish is a quick escape to a gourmet restaurant, crafted effortlessly in your own kitchen.

The Story Behind the Dish

The roots of our One-Pan Lemon Butter Salmon with Veggies delve into the simplicity of home cooking, inspired by the coastal culinary traditions of the Mediterranean, where fresh seafood and crisp vegetables take center stage. Salmon, a staple in Northern European and American coastal cuisines, is beloved for its rich omega-3 fatty acids and delicate flavor. Combined with zesty lemon and wholesome veggies, this recipe exemplifies the beauty of combining minimal ingredients to craft something extraordinary, connecting culinary traditions across borders in a harmonious symphony.

Historically, the paring of lemon with fish has been a time-honored technique. Mediterranean fishermen were among the first to enhance their catch with citrus, a natural antioxidant, and preservative. The buttery richness added a layer of indulgence, signifying prosperity. This dish honors that tradition, offering a slice of historical luxury with a modern, fresh twist.

Why You’ll Love This Recipe

  • Effortlessly Elegant: Despite its gourmet appearance, this dish requires minimal effort and is prepared using only one pan, simplifying cleanup without compromising on flavor.
  • Health-Forward: Packed with nutrients from fresh vegetables and heart-friendly omega-3 fatty acids from the salmon, it’s a wholesome choice for any meal.
  • Versatile: Ideal for a cozy dinner, a quick weeknight meal, or impressing guests over a casual gathering. Its sophistication is suitable for all occasions.
  • Balanced Flavors: The harmony between the savory butter, the bright citrus, and the subtly sweet vegetables creates a dish that’s vibrant, balanced, and utterly satisfying.

Flavor Profile & Texture

The first bite of this dish is a testament to culinary harmony. The salmon offers a rich, buttery texture that melts in your mouth, beautifully contrasted by the crisp-tender veggies that burst with freshness. The lemon provides a zesty, tangy flavor that cuts through the richness of the butter, elevating the natural sweetness of the salmon. Combined, they create a balanced profile, wherein no one flavor overpowers the others. Instead, they dance together, offering a complex yet comforting dining experience that lingers on the palate long after the final bite.

Occasions & Pairings

This dish fits seamlessly into any dining scenario. Serve it during busy weeknights when time is of the essence but flavor is still a priority. It’s also a show-stopping centerpiece for family gatherings, dinner parties, or even romantic dates, where its simple elegance can truly shine. Pair this dish with a crisp Chardonnay or a delicate Pinot Grigio to complement its citrus notes, or offer a side of wild rice or quinoa salad for added satisfaction. For dessert, a light, lemon sorbet is the perfect finale, keeping the palate fresh and invigorated.

Tips, Variations & Substitutions

  • Substitute & Customize: If salmon is unavailable or not preferred, try using other flaky white fish like cod or halibut. The recipe readily adapts to a wide variety of proteins.
  • Vegetable Variety: Feel free to experiment with seasonal vegetables. Asparagus, bell peppers, and cherry tomatoes make fantastic additions and add layers of color and nutrition.
  • Flavor Enhancements: Consider adding a sprinkle of fresh dill or a pinch of cayenne pepper for an extra kick. A hint of garlic can enrich the butter sauce, providing aromatic depth.
  • Make It Vegan: For a plant-based variation, replace salmon with hearty vegetables like portobello mushrooms or a chickpea patty, and use vegan butter.

Storage & Make-Ahead Ideas

One of the enticing aspects of this dish is its make-ahead capability. The salmon and vegetables can be prepped and seasoned a day prior, allowing the flavors to deepen and meld in the refrigerator. Once cooked, the dish can be stored in an airtight container in the fridge for up to three days. To reheat, place the dish in a preheated oven or a hot pan to maintain the crispy texture of the veggies and the juiciness of the salmon.

For longer storage, freeze portions in freezer-safe containers, ensuring they are completely cooled before freezing. To reheat, thaw overnight in the refrigerator and warm gently in the oven to preserve texture and flavor.

Fun Facts & Trivia

Did you know that salmon’s pink color comes from its diet, primarily consisting of krill and shrimp, which are packed with carotenoids, a type of antioxidant? This vibrant hue is not only beautiful but also signifies the presence of these beneficial nutrients.

Lemon and fish combinations date back to ancient Rome, where fish was a prized delicacy, often adorned with lemons and herbs. The tradition holds strong today, exemplified in dishes like this, where the refreshing zest of lemon continues to enliven the palate.

Interestingly, in certain cultures, serving fish is a sign of prosperity and wealth, making this dish a symbolically lucky choice for celebrations and special occasions.

Your culinary adventure awaits with this One-Pan Lemon Butter Salmon with Veggies, where each bite transports you to the tranquil shores of the Mediterranean — a dish rooted in tradition but modern in its simplicity and grace.

Ingredients

  • Lemon Butter Sauce
    – 1/4 cup unsalted butter
    → Unsalted butter provides a rich, creamy base for the sauce, helping to balance the flavors of the lemon and salmon. It should be melted gently to prevent browning, which can create a nutty flavor that may not complement this dish.
    – 1 lemon (juiced and zested)
    → Use fresh lemons for both juice and zest, as bottled lemon juice lacks the bright flavor and aromatics. The zest contains essential oils that enhance the lemon flavor in the sauce. Ensure to zest gently avoiding the bitter white pith underneath the skin.
    – 2 tablespoons honey
    → Honey acts as a natural sweetener that balances the acidity of the lemon while adding a subtle floral note. If you want a deeper flavor, consider using raw or wildflower honey. Measure while it’s at room temperature for easier pouring and mixing.
  • Salmon
    – 4 salmon fillets (about 6 ounces each)
    → Choose fresh, high-quality salmon fillets with a bright pink color and a clean ocean smell. Remove any pin bones before cooking for a better eating experience. Allow salmon to sit at room temperature for about 15 minutes before cooking to ensure even cooking.
    – Salt and pepper (to taste)
    → Use kosher salt for seasoning as it dissolves well and enhances the natural flavors of the salmon and veggies. Freshly cracked black pepper adds aroma and a slight heat. Season generously for the best flavor.
  • Veggies
    – 2 cups asparagus (trimmed and cut into 2-inch pieces)
    → Asparagus brings a vibrant green color and a slight crunch to the dish. Trim the woody ends and cut them into equal pieces for even cooking. Blanching in boiling water for a minute before adding to the pan can help them maintain their bright color.
    – 1 cup cherry tomatoes (halved)
    → Cherry tomatoes offer a sweet burst of juiciness when cooked. Look for ones that are plump and shiny. Halving them allows the juices to mingle with the lemon butter sauce for added flavor.
    – 1 bell pepper (sliced)
    → A bell pepper adds vibrant color and sweetness to the meal. Choose a ripe one (red, yellow, or orange for sweetness), and slice into strips. Ensure even sizing to promote uniform cooking and tenderness.
  • Garnish
    – Fresh parsley (chopped, for garnish)
    → Chopped fresh parsley provides a pop of color and fresh flavor that brightens up the dish. Always use fresh parsley rather than dried, as fresh herbs have a more pronounced taste. Roughly chop to release the oils without over-chopping into tiny pieces.
    – Lemon wedges (for serving)
    → Serve with lemon wedges for an extra burst of brightness. Squeeze them over the finished plate just before eating to awaken the flavors. Choose juicy lemons, and cut them into wedges just prior to serving for the best freshness.

Instructions

  • Begin by preheating your oven to 400°F (200°C) to ensure it reaches the desired temperature by the time your dish is assembled.

    → Preheating is crucial for even cooking, allowing the salmon to bake perfectly from the start while helping the veggies to roast properly without becoming soggy.
  • In a small saucepan over low heat, combine 1/4 cup of unsalted butter, the juice and zest of 1 lemon, and 2 tablespoons of honey. Stir gently until the butter is fully melted and the ingredients are well mixed.

    → This slow melting process prevents the butter from browning, leading to a smoother sauce that enhances the dish’s flavors. Mixing the ingredients ensures each component is well-distributed, creating a balanced lemon butter sauce.
  • Next, prepare your salmon fillets by checking for pin bones and removing them with tweezers if necessary. Pat the fillets dry with a paper towel to remove excess moisture, which will help achieve a better sear later.

    → Removing pin bones enhances the dining experience, while drying the fillets ensures they roast rather than steam, leading to a more appealing texture.
  • Generously season both sides of the salmon fillets with kosher salt and freshly cracked black pepper.

    → Adequate seasoning is essential for bringing out the natural flavors of the fish and veggies. The kosher salt dissolves easily and enhances the dish while the black pepper adds a hint of spice.
  • Take a large rimmed baking sheet and arrange the prepared asparagus, cherry tomatoes, and sliced bell pepper on one side of the pan. Drizzle with olive oil, then season with salt and pepper.

    → Spacing out the vegetables allows for proper heat circulation, ensuring they roast evenly. Drizzling with olive oil enhances their natural sweetness and helps prevent sticking.
  • Add the salmon fillets to the baking sheet alongside the vegetables, skin-side down. Pour the lemon butter sauce over the fillets and veggies.

    → Adding the sauce at this stage allows the flavors to infuse into the salmon and veggies as they cook. Positioning the skin-side down provides a barrier that helps keep the fillet moist.
  • Place the baking sheet in the preheated oven and bake for 12-15 minutes, or until the salmon flakes easily with a fork and the vegetables are tender.

    → Baking at this temperature cooks the salmon through while allowing the vegetables to caramelize slightly, which enhances their flavor. Checking for flakiness is a reliable gauge for doneness.
  • Once cooked, remove the baking sheet from the oven. Let it rest for a few minutes to allow the juices to redistribute before serving.

    → Resting the dish is important for maximizing the moisture and flavor in the salmon, preventing it from drying out when served.
  • While resting, roughly chop fresh parsley for garnish and cut lemon wedges for serving.

    → Keeping the parsley pieces a bit larger helps maintain their flavor and aroma. Fresh lemon wedges add an additional bright touch when served, enhancing the citrus notes.
  • Serve the salmon and veggies on a platter or individual plates, garnishing with the chopped parsley and placing lemon wedges alongside.

    → The final presentation not only makes the dish visually appealing but also adds an aromatic component, creating an inviting meal that encourages a squeeze of lemon for freshness.

Notes

These One-Pan Lemon Butter Salmon with Veggies are a delightful and healthy meal that combines the richness of salmon with the freshness of seasonal vegetables, all elevated by a zesty lemon butter sauce. The butter should be melted gently to create a smooth sauce without browning. When preparing the veggies, consider blanching the asparagus to retain their vibrant color and crunch.

For the salmon, selecting high-quality fillets will enhance the overall taste and presentation of the dish. It’s crucial to season the salmon and veggies with an ample amount of kosher salt and freshly cracked black pepper to bring out their natural flavors.

When served, sprinkle chopped fresh parsley over the dish to add a fresh note and vibrant color, and don’t forget the lemon wedges! A squeeze of fresh lemon just before eating enhances the overall flavor profile and brightness.

Lastly, this dish is perfect for a quick weeknight dinner yet elegant enough for entertaining. Leftovers can be reheated, but the dish is best enjoyed fresh. Consider pairing it with a side of quinoa or brown rice for a complete meal, or serve on its own for a lighter option.

Tips

Cooking Tips for One-Pan Lemon Butter Salmon with Veggies

  • Melt the butter slowly: When preparing the lemon butter sauce, melt the butter over low heat. This prevents it from browning and allows it to maintain a creamy texture that will beautifully bind with the lemon and honey.
  • Room temperature salmon: Letting the salmon sit at room temperature for about 15 minutes before cooking helps it cook more evenly, reducing the risk of it being undercooked in the center.
  • Season generously: Don’t hold back on the salt and pepper when seasoning the salmon and veggies. This enhances the overall flavor profile, making the dish more enjoyable.
  • Cook veggies al dente: When cooking the asparagus, cherry tomatoes, and bell pepper, aim for them to remain slightly crisp (al dente). This not only preserves their nutrients but also adds a great texture to the dish.
  • Monitored cooking time: Keep an eye on the salmon while it’s cooking, as it can overcook quickly. A good indicator is when the salmon changes from a translucent to an opaque pink and flakes easily with a fork.
  • Fresh herbs make a difference: Always opt for fresh parsley over dried. The vibrant flavor and aroma of fresh herbs enhance the taste of the dish significantly.
  • Use one pan wisely: To prevent overcrowding the pan, cook the salmon and veggies in batches if necessary. This ensures everything cooks evenly and retains its crispiness.
  • Final squeeze of lemon: Just before serving, squeeze fresh lemon juice over the dish for an extra burst of acidity that will brighten up the rich flavors of the butter and salmon.

FAQ

What ingredients do I need for One-Pan Lemon Butter Salmon with Veggies?

You will need salmon fillets, butter, lemon, garlic, asparagus, cherry tomatoes, salt, pepper, and optionally, fresh herbs like parsley or dill.

How long does it take to prepare this dish?

The preparation time is approximately 10 minutes, and the cooking time is around 15-20 minutes, making the total time about 30 minutes.

Can I use frozen salmon for this recipe?

Yes, you can use frozen salmon. Just ensure it’s fully thawed before cooking to achieve even cooking and proper texture.

What type of salmon is best for this recipe?

Wild-caught salmon (like sockeye or coho) is recommended for its flavor and health benefits, but you can also use farmed salmon if preferred.

Can I add other vegetables to the recipe?

Absolutely! You can customize the recipe by adding other vegetables such as bell peppers, zucchini, or broccoli according to your taste.

Is this recipe suitable for meal prep?

Yes, One-Pan Lemon Butter Salmon with Veggies can be made in advance and stored in the refrigerator for up to 3 days. Just reheat before serving.

What can I serve with this dish?

This dish pairs well with rice, quinoa, or a fresh green salad for a complete meal.

How can I store leftovers?

Store leftovers in an airtight container in the refrigerator for up to 3 days. To reheat, gently warm in the oven or microwave until heated through.