Introduction / Hook
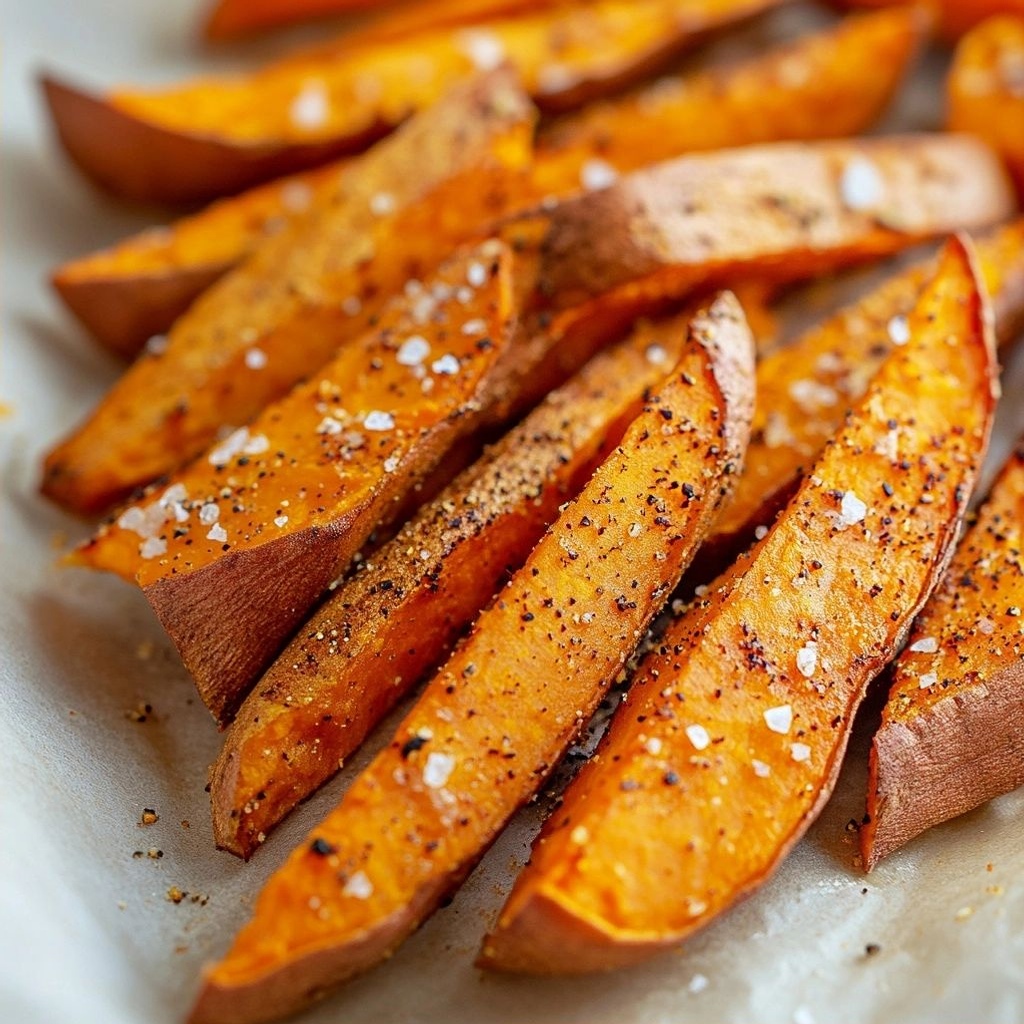
Imagine a tray of vibrant orange batons, crisp at the edges and yielding to a melt-in-your-mouth tenderness inside. The scent fills your kitchen with a warm, caramelized sweetness that hints at sunset and comfort. You bite into a perfectly seasoned fry that isn’t greasy or heavy but has a delicate, satisfying crunch that shatters softly with every mouthful. That is the magic of Ultimate Crispy Oven Baked Sweet Potato Fries—a simple, weeknight favorite elevated into a symphony of textures and flavors. This dish doesn’t demand a lot of effort, but it rewards you with a chef-quality result: a crisp exterior that clings to lightly seasoned flecks of salt and paprika, while the inner potato stays fluffy and orange, like a sunny invitation to cozy dining. The aroma alone is enough to bring everyone to the table, hands already reaching for a handful. It’s the kind of snack or side that makes a weeknight feel festive, a crowd-pleaser that can stand up to bold dips, zippy sauces, and creamy yogurt-based toppings alike. If you’ve ever wished for fries that are both healthy and irresistibly tasty, this recipe answers that longing with panache and practicality.
The Story Behind the Dish
Sweet potatoes have long held a cherished place in kitchens around the world, celebrated for their natural sweetness, sturdy texture, and nutritional density. From the Caribbean shores to the Pacific Northwest, cooks have embraced these tubers as a canvas for both humble comfort and inventive flavor. The idea of roasting or baking sweet potato sticks to achieve a crisp exterior isn’t new, but the modern approach—an oven-baked method that yields maximum crunch with minimal oil—reflects a contemporary shift toward lighter, home-friendly versions of classic fried dishes.
Historically, sweet potatoes were a staple in many culinary traditions because they store well and adapt to a variety of culinary styles. In North America, they became a symbol of warmth and hospitality, appearing on family tables during holidays and casual gatherings alike. The evolution of “fries” from the traditional white potato to the sweet potato variant mirrors a broader trend: honoring the intrinsic sweetness of the ingredient while using heat, salt, and a touch of spice to bring out that contrast between crisp exterior and tender interior. The exact origin stories of fries are playful and murky—many cultures claim invention in their own kitchens—but the shared love for crisp, golden batons is universal. This particular version, baked to perfection rather than fried, nods to both comfort-food nostalgia and contemporary wellness-minded cooking, offering a satisfying experience without the heaviness of deep-frying. It’s a dish that grows out of home cooking wisdom—the kind of recipe passed down in whispers or notes, then perfected through small, personal tweaks—yet it remains accessible enough for any kitchen to master.
Why You’ll Love This Recipe
- Extremely approachable: Minimal equipment, minimal cleanup, maximum flavor.
- Healthier than deep-fried fries: Much less oil, but a remarkable crunch that rivals the best takeout sides.
- Versatile seasoning: The base sweetness of sweet potatoes plays beautifully with a wide range of spices, from smoky paprika to zesty chili lime.
- Kid-friendly and crowd-pleasing: Naturally sweet, easy to dip, and forgiving for varied tastes.
- Quick to prepare: A smart weeknight side that feels special without requiring hours in the kitchen.
- Pairing powerhouse: This fry elevates burgers, grilled chicken, fish, salads, and even bowls with a playful, textural contrast.
- Customizable for dietary needs: Gluten-free, vegetarian, and easily adaptable to dairy-free lifestyles with simple dip swaps.
Flavor Profile & Texture
The flavor profile of these fries dances between sweet and savory, with a whisper of earthiness from the potato and a gentle kiss of salt that amplifies the natural sugars. Depending on your seasoning, you can coax a warm, smoky edge or a bright, herby finish. The exterior is the star here: a crisp, crackly crust that resists softening under the weight of toppings and dips. When you bite in, you encounter a tender interior that holds its shape without collapsing, a perfect contrast that makes each bite feel substantial yet light. The garlic powder, paprika, and a pinch of pepper offer depth and warmth, while a delicate drizzle of olive oil or a spritz of high-heat oil ensures the starches caramelize beautifully. Dips and sauces—creamy yogurt-herb, zesty lime mayo, smoky chipotle aioli, or a simple ketchup—accentuate the natural sweetness and bring brightness to the plate. The texture is the hero; every chew delivers that satisfying snap, followed by a soft, fluffy center that glows with subtle potato sweetness. The aroma—the roasting sugars meeting the heat—makes the kitchen feel like a cozy bistro, inviting you to linger at the table with friends and family as the fries disappear fast.
Texture Details
– Exterior: ultra-crisp edges with a delicate, not greasy, finish.
– Interior: tender, fluffy, and pleasantly creamy with a mellow sweetness.
Occasions & Pairings
This dish shines in multiple settings and seasons. Here are some ideas to plan around:
- Weeknight dinners: A quick, satisfying side that pairs with roasted chicken, salmon, or plant-based mains.
- Casual gatherings: Serve alongside burgers, hot dogs, or grilled veggies for a laid-back, crowd-pleasing spread.
- Game days and movie nights: A portable, shareable snack that works well with a lineup of dipping sauces.
- Holiday sides: Swap standard potatoes for these fries to bring a splash of color and texture to the table.
- Kids’ meals: A fun, finger-friendly treat that hides extra veggies if you add a pinch of garlic powder or a savory dip.
Suggested pairings include:
– Dips: herbed yogurt, garlic aioli, chipotle mayo, or a tangy sriracha ketchup.
– Sauces: honey mustard, avocado crema, or a light lemon-tahini drizzle for a bright finish.
– Sides: a crisp green salad with citrus vinaigrette, roasted broccoli, or a handful of smoky roasted chickpeas for texture contrast.
Tips, Variations & Substitutions
Here are practical tips to tailor the recipe to your pantry, dietary needs, or flavor mood:
- Oil choice: Use a light olive oil or avocado oil for a robust flavor that still yields crisp fries. A spray bottle helps minimize oil usage while evenly coating.
- Coating method: A light toss with cornstarch or arrowroot starch helps create a crispier exterior by absorbing surface moisture and facilitating even browning.
- Seasoning ideas: Classic salt and pepper with paprika; garlic powder and onion powder for savory depth; chili powder and cumin for a smoky kick; or cinnamon and a touch of nutmeg for a sweet-savory twist (great with maple dipping sauce).
- Herbs and aromatics: Fresh thyme, rosemary, or a pinch of dried oregano can be added for herbal brightness. Toss the fries with minced garlic halfway through for a fragrant finish.
- Par-cooking option: For extra tenderness inside, par-cook the batons for 3-4 minutes before air-frying or baking to an even more uniform texture (note: this may alter cooking time).
- Make it cheesy: A light dusting of nutritional yeast or parmesan (if you’re not dairy-free) adds a savory, umami layer that complements the sweetness.
- Diet-friendly twists: For vegan or dairy-free adaptations, pair with a cashew-yogurt herb dip or a tahini-lemon sauce. For gluten-free diners, this dish is naturally gluten-free; ensure your spices are certified gluten-free if needed.
- Regional twists: A hint of za’atar or sumac can bring a Middle Eastern brightness; a pinch of paprika and cumin nods to a Southwestern profile.
- Texture tweaks: For extra crunch, slide the baking sheet into a hot oven and avoid overcrowding. A cooling rack set over the sheet helps air circulate for crispy edges.
Storage & Make-Ahead Ideas
Leftovers are not the enemy here; they can be transformed into a next-day snack or a bed for bowls. Here are guidelines to keep things fresh and tasty:
- Storage: Let the fries cool completely, then store in an airtight container in the refrigerator for up to 3 days.
- Reheating: To restore crispness, rewarm on a lined baking sheet in a hot oven (425°F / 220°C) for 5-8 minutes, or until crisp. A brief blast under the broiler can recreate that crackly crust—watch closely to avoid burning.
- Freezing: Cut and freeze the raw batons on a parchment-lined tray, then transfer to a freezer bag. Bake from frozen, adding a few extra minutes to the cooking time. Note that freezing may slightly alter texture, but the flavor remains vibrant.
- Make-ahead: If you’re planning a gathering, you can wash, cut, and store the raw batons in water (in the fridge) for up to 24 hours to prevent browning. Dry thoroughly before tossing with oil and seasonings for crisp results.
Fun Facts & Trivia (Optional)
– Sweet potatoes, unlike white potatoes, come in a spectrum of colors—from orange and purple to white—and each brings its own subtle flavor and nutrient profile. The orange-fleshed varieties are particularly rich in beta-carotene, which the body converts to vitamin A.
– The term “fries” has countless origin stories around the world, with claims from Belgium, France, and even the Andean regions. The concept remains universal: something delicious, sliced into finger-friendly shapes, and cooked until brilliantly crisp.
– Baking, rather than frying, is a modern trend born from both health-conscious cooking and the desire for simpler kitchen techniques. It allows cooks to achieve that iconic crisp exterior with far less oil, while still delivering the same satisfying bite you crave from a fry.
– The word “fries” can imply a range of cooking styles—from thick-cut steak fries to slender shoestrings. The sweet potato version offers a versatile middle ground: substantial enough to pair with hearty dips, yet elegant enough to serve at casual gatherings or weeknight dinners.
Chef’s Notes & Final Recommendations
Achieving the ultimate crispy veneer starts with the basics: dry the potato batons well, coat them evenly with a light film of oil, and ensure they have room on the baking sheet for air to circulate. Crowding is the silent enemy of crispiness. If you’re baking, consider using two shallow pans instead of one crowded sheet so the air moves freely around each fry, producing a consistently crisp finish. If you’re air-frying, shake the basket halfway through to expose all surfaces to direct heat for an even, all-around crispness. When it comes to dipping sauces, you can keep things simple or go bold. A cool yogurt-herb dip offers a refreshing counterpoint to the natural sweetness of the potatoes, while a smoky chipotle mayo provides a fiery partner that cuts through the starch with a zingy bite. The potential pairings are endless, and the dish invites you to improvise with your favorite pantry staples.
As you prepare this dish, bring a sense of play to the kitchen. Let the sweet potato slices be your canvas and the seasonings your palette. A sprinkle here, a swipe of a dip there, and before you know it, you’ve crafted a tray of golden, crisp, irresistible fries that feel both comforting and exciting—an everyday luxury that makes any table feel a little more special. Enjoy the process as much as the result; the aroma rising from the oven is a small daily miracle, signaling that supper is about to become a memorable moment rather than merely a routine mealtime. With a few tweaks, you can tailor this recipe to suit your mood, the seasons, or the dietary needs of your guests, all while keeping that signature crisp-on-the-outside, soft-on-the-inside texture that defines the perfect baked sweet potato fry.
Ingredients
- 3 large sweet potatoes (peeled and cut into 1/4-inch thick fries)
→ The sweet potatoes are the star of the dish. Cutting them into uniform batons ensures even cooking and crisp edges. Peeling is optional if you prefer the skin on for extra texture; rinse and pat dry before cutting. Soaking the cut fries in cold water for 15–30 minutes helps remove surface starch, which aids in achieving a crisp exterior once baked. Pat dry thoroughly to prevent soggy fries. - 2 tablespoons cornstarch (or arrowroot powder)
→ Coating the cut fries with a light dusting of starch creates a crisp barrier on the surface, promoting a crunchy exterior during baking without adding excess fat. Toss the dry fries in the starch until evenly coated, tapping off excess. For a gluten-free option, cornstarch is naturally GF. - 2–3 tablespoons olive oil (or melted refined coconut oil)
→ The oil helps with browning and crisping, and also carries the seasoning onto the fries. Use just enough to lightly coat the fries—about 1 teaspoon per potato. For lower fat, you can reduce the oil, but expect a softer texture. Toss the fries until evenly coated, then spread in a single layer on the baking sheet. - 1 teaspoon sea salt (plus more to taste)
→ Salt enhances the natural sweetness of the potatoes and balances flavors. Sprinkle after tossing with oil and starch so it adheres well. If using coarse sea salt, crush lightly for a more even distribution. - 1/2 teaspoon black pepper (freshly ground)
→ Adds a subtle bite that complements the sweetness of the potatoes. Grind just before use for maximum aroma and flavor release. - 1 teaspoon smoked paprika
→ Provides a warm, smoky depth that elevates ordinary fries. If you prefer milder flavor, use sweet paprika or omit. For extra smokiness, you can add a pinch of chipotle powder. - 1/2 teaspoon garlic powder
→ Garlic powder contributes savory aromatics without risking burnt fresh garlic during roasting. Ensure even distribution by mixing with the other dry seasonings before tossing with oil and fries. - 1/4 teaspoon cayenne pepper (optional)
→ Adds a gentle heat for a spicy kick. Increase or omit based on heat tolerance. Mix evenly into the spice blend to ensure consistent distribution in each bite.
- Optional Dipping Sauce: Garlic Herb Yogurt Dip (or vegan yogurt alternative)
→ A cool, tangy contrast to the hot, crisp fries. Mix 1/2 cup yogurt with 1 small minced garlic clove, 1 teaspoon lemon juice, 1 tablespoon chopped fresh parsley, and a pinch of salt and pepper. For dairy-free, use plain plant-based yogurt. Let it sit 5–10 minutes to meld flavors before serving.
- Fresh parsley or dill garnish (optional)
→ A quick green finish that adds color and a fresh aroma. Finely chop and sprinkle over the hot fries right before serving. This helps provide a visual contrast and a hint of herbal brightness that complements the smoky spices.
Instructions
- Preheat your oven to 425°F (220°C) and line a large baking sheet with parchment paper or generously grease it to prevent sticking.
→ A hot oven and a nonstick surface ensure the fries crisp up rather than steam and become soggy. Parchment helps with easy cleanup and prevents scorching. - Rinse and peel the sweet potatoes, then cut them into uniform 1/4-inch thick fries, aiming for consistent width to guarantee even cooking.
→ Uniform batons ensure all pieces reach the same level of doneness simultaneously and develop crisp edges evenly. - Soak the cut fries in cold water for 15–30 minutes, then drain thoroughly and pat dry with clean towels or paper towels to remove surface starch.
→ Removing surface starch aids in browning and crisping; extra moisture can steam the fries instead of crisping them. - Pat the fries completely dry again after soaking to ensure the cornstarch adheres properly; any moisture will create soggy spots.
→ A dry surface is essential for an even light dusting of starch and a crisp exterior. - Toss the dried fries with 2 tablespoons of cornstarch until evenly coated, tapping off any excess starch for a thin, uniform layer.
→ The starch acts as a crisping barrier, helping the exterior become crunchy without adding fat. - Drizzle 2–3 tablespoons olive oil over the coated fries and toss to distribute the oil evenly, ensuring all surfaces are lightly coated without pooling.
→ A light coating of oil promotes browning, carries the seasonings, and prevents the starch from clumping. - Sprinkle 1 teaspoon sea salt, 1/2 teaspoon black pepper, 1 teaspoon smoked paprika, 1/2 teaspoon garlic powder, and 1/4 teaspoon cayenne (if using) over the fries; toss again until the seasoning is evenly distributed.
→ Seasonings should evenly adhere to the oiled surface; mixing them with the fries before spreading ensures consistent flavor in every bite. - Spread the seasoned fries in a single, even layer on the prepared baking sheet, leaving at least 1/2 inch of space between pieces for air circulation.
→ Crowding traps steam and yields limp fries; a single layer promotes rapid, even browning. - Bake the fries for 15–20 minutes, then flip each fry with a spatula and rotate the sheet to promote uniform browning; continue baking for another 10–15 minutes until edges are deeply golden and crisp.
→ Flipping ensures an even crust on all sides and prevents sticking; rotating the sheet compensates for hot spots in the oven. - Remove the fries from the oven when they are deeply caramelized at the edges and easily pierced with a fork, then season with an additional pinch of salt if needed.
→ Final adjustment balances sweetness and saltiness, while crisp edges indicate proper doneness without burning. - Transfer the hot fries to a platter or serving dish and garnish with finely chopped fresh parsley or dill if desired for color and aroma.
→ A bright herb finish provides visual appeal and a fresh counterpoint to the smoky spices. - Prepare Optional Garlic Herb Yogurt Dip: in a small bowl, whisk 1/2 cup yogurt with 1 minced garlic clove, 1 teaspoon lemon juice, 1 tablespoon chopped fresh parsley, and a pinch of salt and pepper; let it sit 5–10 minutes to meld flavors, then serve alongside the fries.
→ The cool, tangy dip contrasts with the hot, crisp fries and enhances the overall balance of flavors on the plate. - Serve the ultimate crispy oven baked sweet potato fries immediately with the dipping sauce and garnish for the best texture; re-crisping leftovers is possible by a brief return to the 425°F oven for 5–7 minutes.
→ Fries are best eaten fresh for maximum crunch; dousing with sauce or reproofing ensures remnants regain crispness rather than turning soft.
Notes
These crispy oven-baked sweet potato fries are naturally gluten-free and rely on a quick starch coating and hot roasting to achieve a bakery-crisp exterior with tender centers. Start by cutting 3 large sweet potatoes into uniform 1/4-inch batons to ensure even cooking and edge crispness; soaking in cold water for 15–30 minutes helps remove surface starch and promotes browning, then pat dry thoroughly. Lightly dust with cornstarch or arrowroot to form a crisp barrier, and toss with just enough olive oil (or melted refined coconut oil) to lightly coat each fry so seasoning adheres well. Sprinkle evenly with sea salt, black pepper, smoked paprika, garlic powder, and a pinch of cayenne if you like a kick; mix the spices with the starch first for even distribution. Arrange the fries in a single layer on a parchment-lined baking sheet to prevent steaming, and bake at a hot temperature until edges blister and centers are tender, flipping once for even color. Finish with a final salt sprinkle while hot. Optional dipping sauce—Garlic Herb Yogurt or a plant-based yogurt—provides a cool contrast to the smoky fries; let it sit 5–10 minutes to meld flavors before serving. Garnish with fresh parsley or dill for color and brightness. You can customize by using sweet paprika for milder flavor or adding chipotle powder for extra smokiness, and adjust oil quantity to influence texture from extra crispy to soft from a lighter bake. Leftovers re-crisp well in the oven; store cooled fries in an airtight container for up to 2 days. When choosing ingredients, ensure your cornstarch (or arrowroot) and any seasonings are gluten-free if you have gluten intolerance.
Tips
Tips for Perfect Crispy Oven-Baked Sweet Potato Fries
- Uniform cut matters: Aim for 1/4-inch thick fries and try to keep them evenly sized so they cook at the same rate and develop consistent crisp edges.
- Starch step for crispiness: Soaking the cut fries in cold water for 15–30 minutes helps remove surface starch. This is key to achieving ultra-crispy exterior once baked. Pat completely dry before coating.
- Dry coat distribution: After drying, toss the fries with cornstarch (or arrowroot) until evenly coated. A light dusting creates a crisp barrier without making the fries gummy.
- Oil balance matters: Use just enough oil to lightly coat the fries—about 1 teaspoon per potato. Too much oil can lead to soggy fries; too little may reduce browning. Toss well to coat all surfaces before spreading on the sheet.
- Seasoning layering: Add salt and spices after the oil and starch coat is applied so they adhere. If using coarse sea salt, crush lightly for even coverage.
- Flavor harmony: Freshly ground black pepper and smoked paprika add depth. For a milder profile, use sweet paprika or reduce the paprika. A touch of garlic powder ensures savory aroma without risking burnt garlic.
- Even heat and airflow: Arrange fries in a single, uncrowded layer on a parchment-lined baking sheet. Overcrowding steams rather than roasts, leading to soggy edges.
- Mid-bake flip for even crispness: Bake in a preheated oven and flip the fries halfway through to promote even browning on all sides.
- Temperature and time tips: A hot oven (around 425°F/220°C) typically yields the best crispiness. Start checking at 25 minutes; total time usually 25–35 minutes, depending on thickness and oven performance.
- Optional dairy-free dipping: Pair with a Garlic Herb Yogurt Dip or plant-based yogurt. Let the dip rest 5–10 minutes to meld flavors before serving.
- Fresh finish: A light garnish of chopped parsley or dill right before serving adds color and a bright aroma that complements smoky spices.
- Make-ahead and storage: Cooked fries can be reheated on a sheet in a hot oven for a few minutes to refresh crispness. Store leftovers in an airtight container and reheat to crisp them up.
FAQ
What makes these Sweet Potato Fries extra crispy?
Coating the fries with a light starch (like cornstarch or arrowroot), patting them dry, and baking at a high temperature helps create a crisp exterior while keeping the inside fluffy.
How should I cut the sweet potatoes for even frying?
Cut into uniform sticks about 1/4 to 1/2 inch thick. Try to keep them similar in size for even cooking.
Should I peel the sweet potatoes?
Peeling is optional. The skins are edible and nutritious; you can leave them on for more texture and bite.
Why do I soak or rinse the cut fries?
Soaking in cold water (about 30 minutes to 1 hour) helps remove surface starch, which promotes crisper fries once baked.
What temperature and how long do I bake them?
Bake at 425°F (220°C) for 20–25 minutes, flipping halfway, until edges are golden and crisp.
Do I need to use oil, and how much?
Yes. Toss the fries with 1–2 tablespoons of oil per large sweet potato batch to help with browning and crisping. Use enough to lightly coat each fry.
Should I use any starch or seasoning for extra crispness?
Yes. Lightly toss with 1–2 teaspoons of cornstarch, arrowroot, or tapioca starch along with seasonings to boost crispness; seasonings can include salt, paprika, garlic powder, and pepper.
What dipping sauces pair well with these fries?
Try garlic aioli, chili-lime mayo, ketchup, sriracha mayo, honey mustard, or a tangy yogurt dip for balanced flavor.
Can I make these in an air fryer or on a grill instead?
Yes. In an air fryer, cook at 400–425°F (200–220°C) for 12–18 minutes, shaking halfway. Grilling can work with a light oil and indirect heat, but crispness may vary.
How should I store leftovers and reheat?
Store cooled fries in an airtight container up to 2–3 days in the fridge. Reheat in a 400°F (200°C) oven or toaster oven for 5–8 minutes to regain crunch; avoid microwaving.