Introduction / Hook
There’s something irresistibly magical about sugar cookies that transcends the ordinary treat aisle and enters the realm of holiday tradition. Sugar cookies decorated for holidays are not just morsels of joy; they are edible postcards, tiny canvases that capture the warmth of family gatherings, the twinkle of twinkling lights, and the sparkle of anticipation that arrives with each shared plate. Imagine the soft crack of a freshly baked cookie as your teeth meet a perfectly buttery crumb, followed by a whisper of vanilla, a gentle sweetness that sits comfortably on the palate, and then the crowning celebration of festive icing—glints of red and green, snowflake swirls, and intricate piping that looks almost too beautiful to eat. Decorating sugar cookies for holidays is a ritual that invites creativity, patience, and a touch of whimsy, turning a simple baked good into a memory-making activity for kids, friends, and grandparents alike. From the aroma wafting through the kitchen to the satisfying snap of a well-chilled royal icing, this dish invites you to slow down, savor the moment, and savor the moment again with every bite.
The Story Behind the Dish
Sugar cookies have a deep-rooted history that stretches back centuries, with variations appearing across cultures and continents. They emerged from a lineage of simple, butter-rich cookies that used sugar to brighten the flavor and sugar-powered holidays to create tradition. In many households, holiday sugar cookies are a yearly ritual that signals the countdown to celebrations—baking together on a snowy afternoon, rolling out dough until it yields to the lightest of flour-dusted records, and tracing out shapes that echo the season’s imagery: stars, trees, bells, candy canes, and gingerbread people. The decorating aspect is where the dish becomes a living tradition. Royal icing, with its ability to harden into a glassy shell, transforms cookies from soft snacks into durable ornaments that can be shared, mailed, or hung on a tree as edible garlands in a pinch. The practice of decorating these cookies isn’t just about aesthetics; it’s a way to tell stories. Each color, each pattern, and each texture can evoke a memory—perhaps a grandmother’s favorite red-and-green color scheme, the icy blue that mirrors a winter morning, or the playful polka-dots that remind you of childhood craft days. Across households, the ritual evolves: some use cookie cutters that recall cherished motifs, others improvise with freehand piping that becomes a signature style. Yet the heart remains the same: a baked, decorated sugar cookie is a tiny, edible celebration that invites everyone to pause, admire, and share a smile.
Why You’ll Love This Recipe
- Versatile and forgiving: a classic base that adapts to any holiday color scheme or flavor twist.
- Endlessly decorative: sturdy enough to hold shapes, yet tender enough to bite through with ease.
- Bakery-quality results at home: with proper chilling and royal icing, you achieve crisp edges and glossy finishes that rival store-bought treats.
- Family-friendly activity: a perfect project for kids and adults to bond over cookie cutters, colors, and designs.
- Make-ahead friendly: dough can be chilled in advance and rolled when you’re ready to bake, making holiday prep smoother.
- Great for gifting: once decorated, these cookies can be packaged in cellophane bags or tins with a festive ribbon for beautifully thoughtful presents.
- Customizable: swap in citrus zest, almond extract, or real vanilla for different aroma profiles; decorate with glazes, sprinkles, or starlight sugar for a dazzling finish.
In short, sugar cookies decorated for holidays are more than a dessert—they’re an experience. They bring people together, celebrate the season, and offer a canvas for personal expression that tastes as good as it looks.
Flavor Profile & Texture
The base cookie is a comforting blend of butter, sugar, and vanilla, delivering a rich, lightly caramelized sweetness with a melt-in-your-mouth crumb. The texture is the hallmark of impeccable holiday sugar cookies: crisp edges that yield to a tender, almost chewy center, depending on bake time. The flavor is clean and versatile, not overshadowed by heavy spices, which makes it an ideal canvas for the icing and decorations that crown each cookie.
Decorating icing introduces another layer of sensory delight. Royal icing, made from egg whites or motted meringue powder and confectioners’ sugar, dries to a glossy, smooth finish that hardens into a delicate shell. This shell provides a satisfying snap when broken, while the icing’s sweetness remains balanced by a faint vanilla or almond nuance, depending on your flavor choices. When color is added, these cookies transform from dessert into edible art—vibrant reds, emerald greens, snowy whites, and shimmering accents that catch the light. The contrast between the crisp cookie and the glossy, sometimes matte, icing creates a pleasing textural dichotomy that makes each bite a little celebration in itself.
Texture and flavor pairings also invite experimentation. A thin layer of lemon zest in the dough provides a subtle citrus brightness that lifts the sugar’s sweetness. If you prefer a deeper flavor, a pinch of salt in the dough enhances sweetness perception and gives the cookie a more refined bite. When paired with a glass of milk, hot cocoa, or a creamy coffee, the cookie’s sweetness rounds out into a comforting, nostalgic experience that fits perfectly into winter holiday menus.
Occasions & Pairings
Holiday sugar cookies are most at home during festive weekends, family cookie-baking sessions, Christmas Eve dessert tables, Hanukkah celebrations, New Year gatherings, and any moment when you want to share joy through edible art. They’re also ideal for cookie exchanges, classroom parties, and office celebrations, offering a universally loved treat that appeals to both kids and adults.
Pairings to consider:
- Drinks: warm beverages like hot chocolate, chai lattes, or peppermint mochas complement the cookies’ vanilla-sugar profile nicely. For a more adult twist, pair with a spiced mulled wine or a robust coffee.
- Side dishes: lightly spiced nut mixes, citrus zest-scented cranberry sauce, or a simple fruit compote can provide contrast in flavor and texture on a holiday dessert tray.
- Desserts: a small assortment on a dessert board with these cookies works well—think dark chocolate truffles, almond crescents, or a creamy vanilla pudding to balance the sweetness.
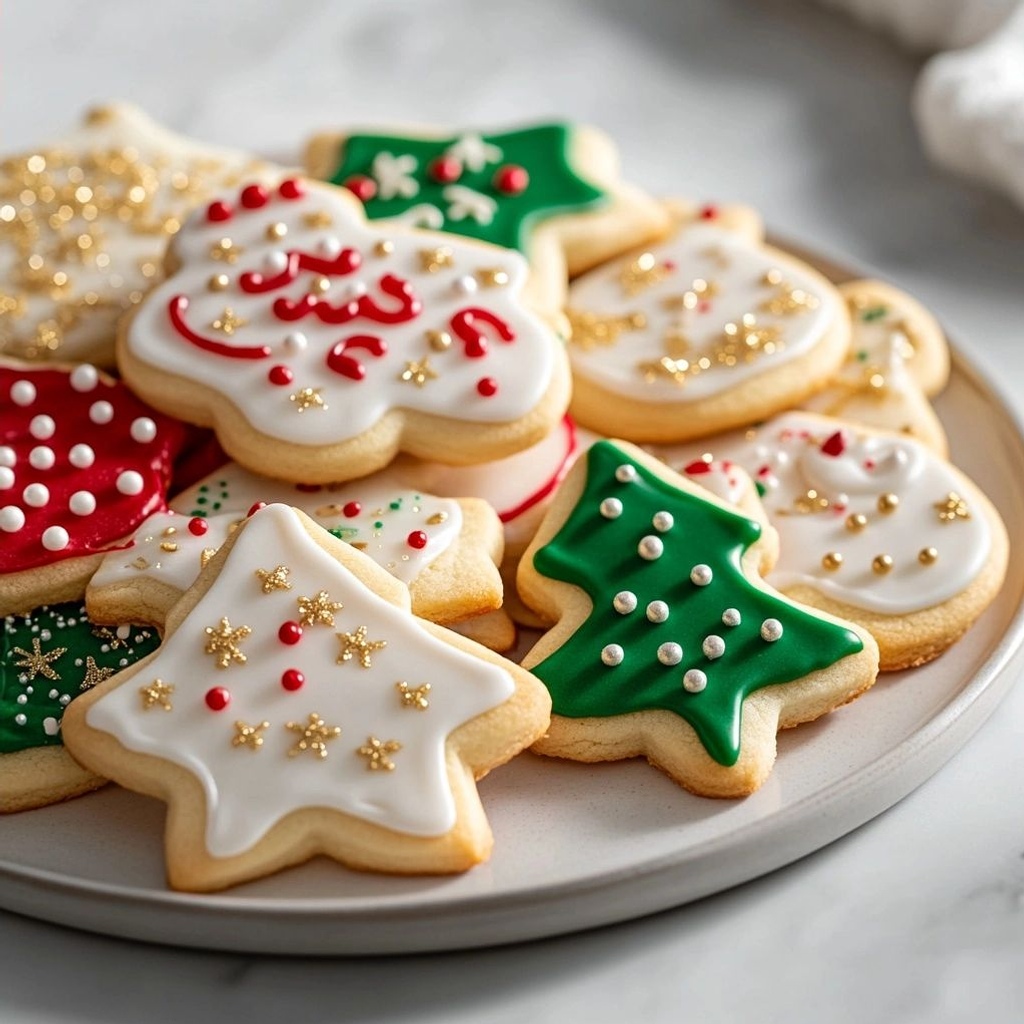
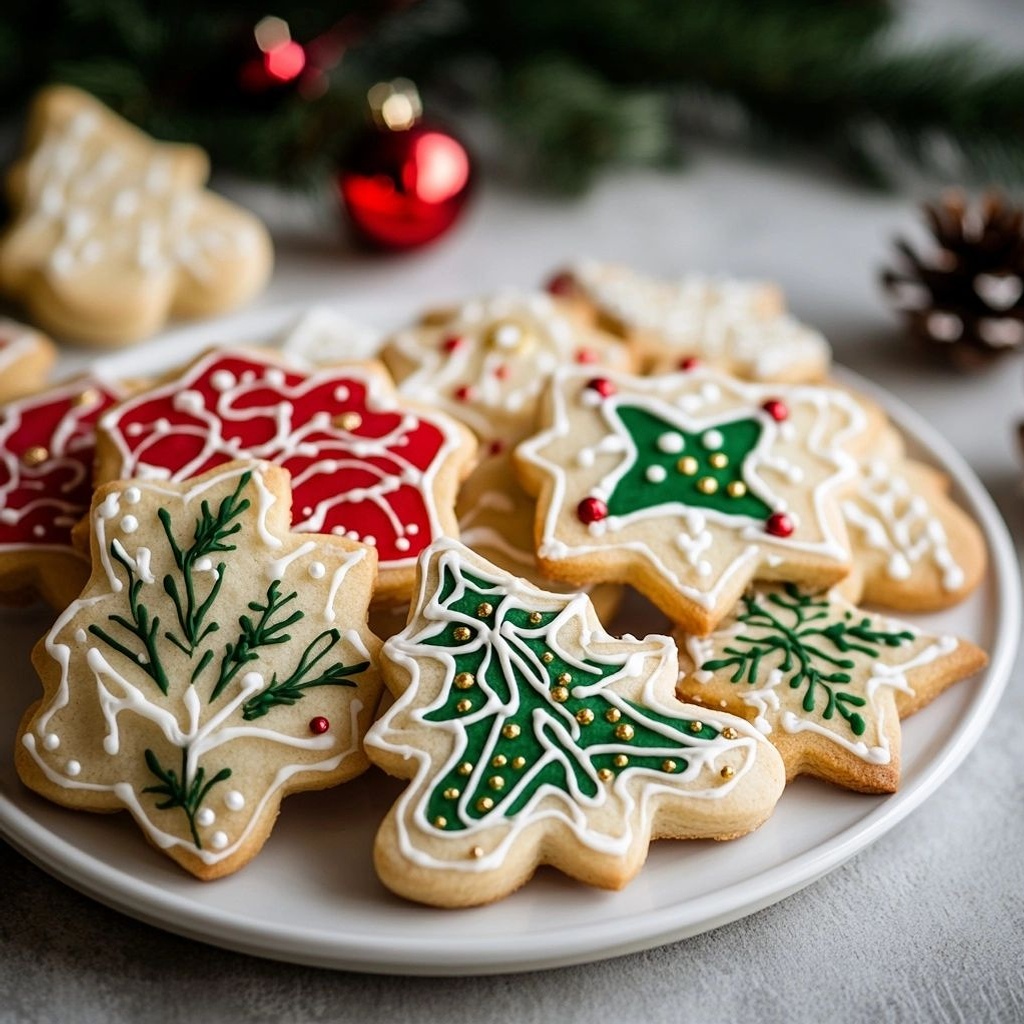
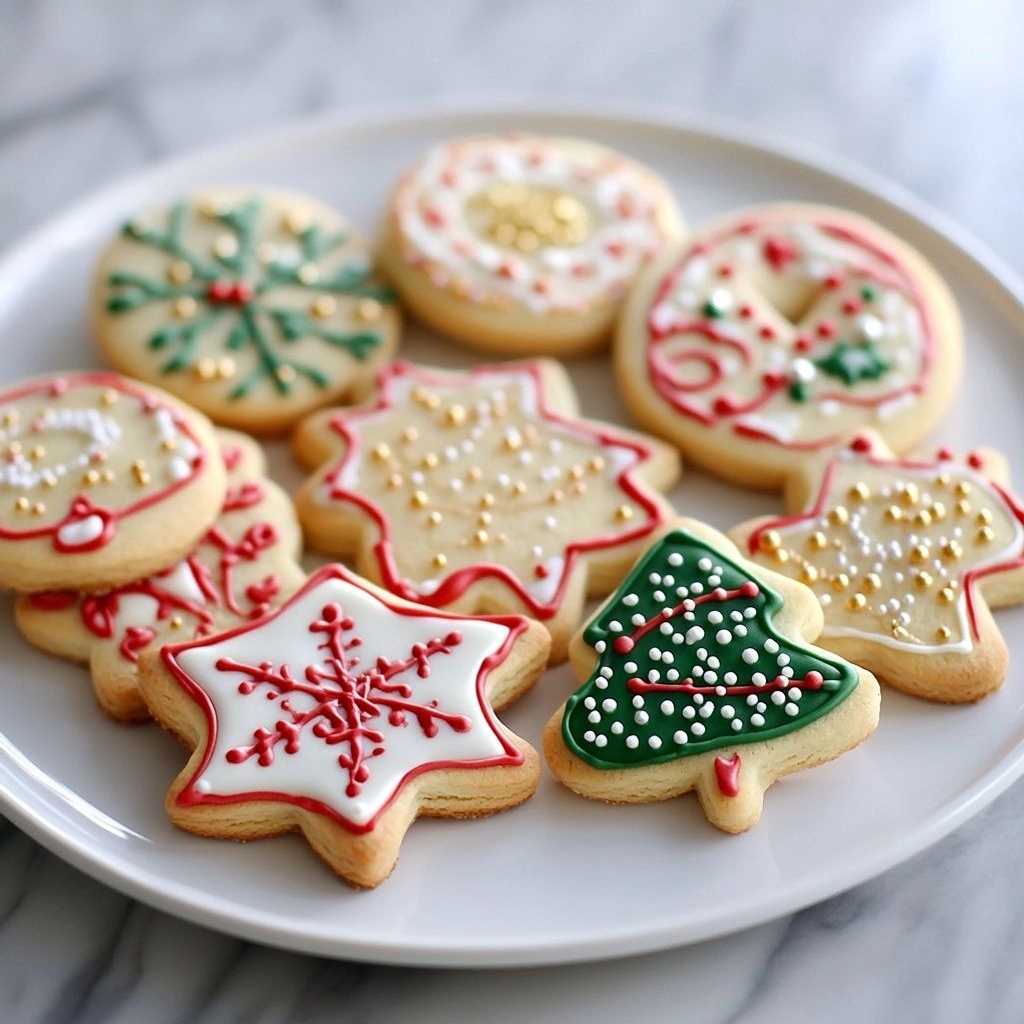
Decorative elements align with various holidays. For Christmas, use red and green royal icing, snowflake patterns, and tree shapes. For Hanukkah, blues and whites with simple geometric motifs echo the season. For New Year’s Eve, add gold accents and star shapes to evoke celebration and sparkle. Regardless of the occasion, these cookies can be tailored to suit your theme while delivering the classic holiday charm that people expect from a festive treat.
Tips, Variations & Substitutions
Here are practical tips to elevate your sugar cookies decorated for holidays, along with creative variations to suit dietary needs and regional twists:
- Chill the dough well: chilling helps the cookies hold their shapes when baked. Wrap dough in plastic wrap and refrigerate for at least 1 hour, or overnight for even more flavor development.
- Roll-out tips: lightly flour your surface or use parchment paper to prevent sticking. Roll to an even thickness (about 1/4 inch) for consistent baking.
- Cut shapes: use a variety of holiday-themed cutters for visual interest. Re-roll scraps to maximize yield, but avoid overworking the dough to prevent toughness.
- Royal icing basics: if you’re avoiding raw eggs, use meringue powder-based royal icing or a clean royal icing mix. For a softer, glossy glaze, you can also use a glaze made from powdered sugar and a small amount of milk or water, though it won’t dry as hard.
- Color and decoration: start with a pale base color and build shading with additional colors. Edible glitter, sugar pearls, or nonpareils add texture and sparkle without overpowering the flavor.
- Flavor variations: add a pinch of almond extract for a nutty undertone, a dash of lemon or orange zest for brightness, or cardamom for a warmth that pairs wonderfully with vanilla.
- Diet-friendly options: for dairy-free, use a plant-based butter substitute that mimics the fat content of regular butter. For gluten-free, use a blend designed for cookies that contains xanthan gum to maintain structure. For vegan, ensure the royal icing uses a plant-based meringue powder or a vegan royal icing recipe.
- Regional twists: in a festive Southern style, add a touch of cinnamon and nutmeg to the dough for a cozy spice profile. In a citrus-forward version, infuse the dough with orange zest and a touch of citrus extract.
Technical tips to avoid common pitfalls:
- Do not overwork the dough; it makes cookies tough. Mix until just combined, then chill.
- Use parchment paper or silicone mats to prevent sticking and for easy rolling and cleanup.
- Store colored icing in airtight containers and room-temperature stable colors in separate, labeled jars to prevent color bleed and cross-contamination of flavors.
Storage & Make-Ahead Ideas
Holiday sugar cookies are excellent for planning ahead, and a little foresight makes the decorating day much smoother:
- Dough storage: wrap dough tightly in plastic wrap or a resealable bag and store in the refrigerator for up to 3 days. For longer storage, freeze the dough for up to 2 months. Thaw in the fridge before rolling and cutting.
- Baked cookies: once baked and completely cooled, store in airtight containers with parchment between layers to prevent sticking. They’ll stay fresh for up to 1 week at room temperature, or up to 2 weeks in the refrigerator in an airtight container.
- Decorated cookies: decorated cookies can be stored in a single layer in an airtight container, with parchment between layers. Avoid stacking when freshly decorated; allow the icing to set fully, which may take several hours or overnight depending on humidity.
- Make-ahead decorating: prepare and color several bowls of royal icing in advance. Keep covered with a damp cloth or plastic wrap to prevent drying. When you’re ready to decorate, set up a decorating station with different piping tips, squeeze bottles, and a steady surface.
- Gift-ready prep: decorate cookies up to a week in advance (if the icing is fully dried) and package them with a festive bow or place them in clear treat boxes. They make delightful, shareable gifts during the holiday season.
Helpful routine for a busy holiday schedule: bake a large batch of cookies in one go, let them cool completely, then freeze them. When you’re ready to decorate, thaw briefly and proceed with icing and decoration. This approach spreads workload over time and ensures you always have a tray ready for a party or surprise visit.
Fun Facts & Trivia (Optional)
Delightful tidbits to sprinkle into conversations while you bake or decorate:
- Royal icing’s ability to harden comes from sugar crystallization and drying, which creates a delicate, glass-like shell that preserves color and shape even after multiple hours at room temperature.
- Cookie cutters became popular in the 19th century as households began to embrace decorative baking, turning cookies into holiday art pieces that families could exchange and display.
- In some cultures, sugar cookies are shaped into symbols of luck, prosperity, and happiness—stars for guidance, bells for celebration, and trees for life and growth.
- The term “cookie” itself originates from the Dutch word “koekje,” meaning little cake, reflecting the idea that these treats are small, sweet, and meant to be shared.
- Color symbolism varies by holiday and culture, but in many Western traditions, green represents renewal and life, red denotes warmth and love, and white conveys purity or winter calm—hence the classic green-and-red or white-on-green combinations for Christmas.
These little touches of history and meaning add depth to the simple act of making sugar cookies decorated for holidays, reminding us that food is a bridge between generations and a storyteller of seasons.
Ingredients
- Cookie Dough
– 3 cups all-purpose flour (plus extra for dusting)
→ This forms the structure of the cookies. Measuring flour correctly by scooping and leveling prevents dense or hard cookies. If you chill the dough before rolling, it will be easier to handle and will hold shapes better during baking. - Cookie Dough
– 1 cup unsalted butter, softened to room temperature
→ Butter provides tenderness, flavor, and the creamy base for the dough. Use unsalted to control salt balance. Soften to the point where it yields to pressure but does not appear oily; this helps the dough come together evenly and cut cleanly. - Cookie Dough
– 1 cup granulated sugar
→ Sugar contributes sweetness and helps with spread and browning. Cream it with butter until light and fluffy to introduce air and create a slightly tender crumb in the cookies. For a crisper edge, slightly chill the dough before baking. - Cookie Dough
– 1 large egg
→ Eggs bind the dough and add moisture and cohesion. Use room-temperature egg to ensure even incorporation and a smoother dough; if the dough seems dry, you can add a teaspoon of water or milk from the edges. - Cookie Dough
– 1 teaspoon vanilla extract
→ Vanilla enhances the overall sweetness and aroma of the cookies. Using pure vanilla extract yields a richer flavor; for a holiday profile, you can blend with a pinch of almond extract (optional) for a subtle, festive note, but keep it light to avoid overpowering the cookies. - Cookie Dough
– 1/2 teaspoon almond extract (optional)
→ Provides a warm, nutty aroma often associated with classic sugar cookies. Use sparingly, as it can dominate the flavor if overused. If avoiding nuts, omit entirely. - Cookie Dough
– 1/2 teaspoon baking powder
→ Creates a little lift to help the cookies stay soft rather than flat and tough. Ensure it is evenly distributed by whisking with the flour before combining with the wet ingredients. - Cookie Dough
– 1/4 teaspoon salt
→ Balances sweetness and enhances flavor. If using salted butter, reduce or omit this salt slightly. Salt also tightens the crumb and supports even browning. - Royal Icing
– 4 cups powdered sugar, sifted
→ The foundation of the royal icing provides a smooth, strong, and glossy surface for decorating. Sifting removes lumps for a clean, pipe-able consistency. If the mixture is too stiff, add small amounts of water or lemon juice to reach the desired thickness. - Royal Icing
– 2 tablespoons meringue powder (or 2 large egg whites)
→ Meringue powder stabilizes the icing, allowing it to set firm when dry and preventing weeping or running. If using egg whites, ensure they are pasteurized if you prefer. Beat until stiff peaks form for piping details, then thin with water to achieve flood consistency. - Royal Icing
– 6 tablespoons water (adjust as needed)
→ Water controls the icing consistency. Start with this amount and add gradually to reach the stiff peak for piping or flood consistency for smooth coverage. Too much water can cause a runny glaze; too little makes it difficult to spread or pipe. - Royal Icing
– 1 teaspoon lemon juice or clear extract (optional)
→ Adds a touch of acidity to help the icing set and prevents overly sweet flavors. Lemon juice provides brightness; if you want a pure white, avoid colored extracts. Adjust acidity to taste and desired finishing effect. - Optional Decorations
– Assorted holiday sprinkles, nonpareils, or edible glitter (as desired)
→ Decorative elements add festive color and texture after the icing has set. Choose sprinkles that will hold up on dry icing; sprinkle while icing is slightly tacky for better adhesion. If layering multiple colors, allow each color to dry before adding the next to prevent bleeding. - Optional Decorations
– Food-safe glitter or sanding sugar (in holiday colors)
→ Provides sparkle and dimension to finished cookies. Use sparingly to avoid overpowering the cookie’s flavor. For best adhesion, apply to wet or slightly damp icing rather than completely dry icing.
Instructions
- Preheat your oven to 350°F (175°C) and position racks in the middle of the oven; line two large baking sheets with parchment paper or silicone baking mats to prevent sticking and promote even heat transfer during baking.
- Sift the all-purpose flour with the baking powder and salt into a medium bowl to ensure an even distribution of leavening and flavor-enhancing salt; whisk briefly to aerate and mix evenly, which will help prevent dense cookies.
- Cream the unsalted butter and granulated sugar together in a large mixing bowl using a paddle attachment on medium speed until the mixture is pale, fluffy, and light to the touch; this traps air for a tender crumb and helps the cookies hold their shape during baking.
- Add the room-temperature egg and the vanilla extract (plus the optional almond extract if using) to the creamed butter and sugar; beat on medium speed until fully incorporated and glossy, which ensures a smooth, cohesive dough that emulsifies properly and bakes evenly.
- Gradually add the dry ingredient mixture to the wet ingredients in two additions, mixing on low speed just until the dough comes together; overmixing can develop gluten and make the cookies tough, so stop as soon as you see no dry pockets.
- Divide the dough into two equal portions, wrap each in plastic wrap, and refrigerate for at least 45 minutes or up to 2 hours to firm the dough; chilling makes it easier to roll and helps cookies retain intricate holiday shapes without spreading too much.
- Lightly flour a clean work surface and roll one portion of the dough to a thickness of about 1/4 inch (6 mm); keep the remaining dough chilled to prevent softening, and rotate the dough surface as needed to maintain an even thickness for uniform baking.
- Dip cookie cutters in a small amount of flour or dust with a light veil of flour, then cut shapes with firm, decisive presses and clean releases; avoid twisting the cutter, which can distort shapes and cause uneven edges that bake unevenly.
- Place cut cookies onto the prepared baking sheets at least 1 inch apart to provide space for slight spreading and to prevent edges from merging; if the dough has warmed, briefly re-chill on the sheet for 5–10 minutes to firm before baking.
- Bake the cookies in the preheated oven for 8–11 minutes, rotating the sheet halfway through; remove when the edges are just beginning to color and the centers are soft to the touch, which yields a tender, airy center with a slightly crisp edge.
- Allow the cookies to cool on the baking sheets for 2–3 minutes before transferring to a wire rack to cool completely; this step finishes the setting of the edges and prevents breakage from transferring while hot.
- While the cookies cool, sift the powdered sugar for the royal icing into a clean bowl and whisk in the meringue powder (or beat egg whites if using) and water; start with 4 cups of sugar and adjust gradually to achieve a stiff summit for piping, then thin with additional water for flood consistency as needed.
- Add lemon juice or a clear extract to the royal icing if desired; this small amount of acidity helps the icing set and brightens flavor without altering color significantly; whisk until fully integrated and glossy.
- Cover any unused royal icing with plastic wrap directly on the surface to prevent a skin from forming and store at room temperature or refrigerate as appropriate; this preserves consistency and prevents air from drying out the icing.
- Prepare a thin flood mixture by thinning a portion of royal icing with small amounts of water until it flows in a ribbon off the spatula and smooths evenly when spooned; this texture is ideal for filling large areas with clean, smooth coverage on the cookie surface.
- Transfer colored icing to separate piping bags fitted with small round tips for detailed work; snip the tip to the desired width and practice a few test lines on parchment to ensure the flow is steady and not too thick or too thin.
- Outline each cookie with a steady, continuous line using the thicker royal icing; allow the edge to set briefly before flooding the interior with the thinner consistency to achieve a smooth, glossy surface that dries hard for stability of the decorations.
- Fill the interior of the outlined cookies with the flood icing using small strokes or a back-and-forth motion, guiding the icing to the edges and letting it settle into corners without lifting; use a toothpick to gently coax air bubbles to the surface and pop them for a flawless finish.
- Decorate with the assorted holiday sprinkles, nonpareils, edible glitter, or sanding sugar while the icing is still slightly tacky; apply in thin layers and allow each color to set before adding the next to prevent bleeding and to maintain crisp, clean lines.
- Allow the finished cookies to air-dry at room temperature for several hours or overnight until the royal icing is completely hard to the touch; this ensures durability for stacking or gifting and prevents smearing during handling.
- Store the decorated cookies in an airtight container between layers of parchment or waxed paper; keep in a cool, dry place to maintain icing integrity and prevent condensation or softening, which can dull the decorations.
Notes
These classic holiday sugar cookies are crisp on the edges and soft in the center, with a smooth, glossy royal icing that sets for beautiful, durable decorations. Start with well-chilled dough and precise rolling to hold shapes and maintain clean edges for intricate holiday designs.
- Dough handling and chilling – Chill the dough for at least 1 hour (or overnight) to reduce spreading and improve shape retention. When ready to roll, dust your work surface lightly with flour and roll to an even 1/4 inch thickness. If the dough resists, rest it for 5–10 minutes; re-roll as needed. Keeping the dough cold helps it hold sharp edges when cut into festive shapes.
- Cutting and shapes – Use sharp cookie cutters for clean lines. Dip cutters in flour before each cut to prevent sticking. Transfer shapes carefully to a parchment-lined sheet; chill again for 15 minutes before baking to minimize distortion.
- Baking and texture – Bake at 350°F (175°C) until the edges are just turning golden and centers are set, typically 8–12 minutes depending on size. Do not overbake, or cookies will be hard. If they puff at first, gently press them back into shape with the back of a spatula while warm on the sheet.
- Cooling – Cool cookies completely on a rack before icing. This ensures the royal icing adheres properly and dries glossy.
- Royal icing basics – Sift powdered sugar to avoid lumps, then whisk in meringue powder (or beat in egg whites) until stiff peaks form for piping. Add water gradually to reach the stiff peak for details or flood consistency for a smooth blanket of color. Use lemon juice or a small amount of clear extract sparingly to brighten flavor without altering white color.
- Color and consistency – Split icing into small bowls and add gel food colors as desired. For piping fine lines, use a stiff peak royal icing; for flooding larger areas, thin to a flood consistency. Practice a quick test on a cooled cookie before decorating the whole batch.
- Decoration timing – Let piped details set fully before layering other colors. If you’re adding multiple layers, allow each color to dry to a matte finish to prevent bleeding. Apply edible decorations while icing is still slightly tacky for best adhesion.
- Tips for even coverage – Use a small spatula or knife to spread flood icing evenly; touch up thin spots by dabbing with the tip of a clean toothpick. For a smooth surface, avoid air bubbles by brushing icing gently with a clean dry brush after flooding.
- Storage and make-ahead – Store baked cookies in an airtight container at room temperature for up to 1 week or freeze baked cookies for up to 3 months. Royal icing can be stored in an airtight container in the fridge for up to 1 week; bring to room temperature and re-whisk before use. Unfrosted cookies can be decorated days later if kept in a cool, dry place.
- Decoration ideas – Use assorted holiday sprinkles, nonpareils, edible glitter, or sanding sugar for festive touches. Apply to slightly tacky icing, in layers, allowing each color to dry. For a snowy look, dust with a light shimmer of edible glitter or pearl dust once icing is dry.
- Flavor variations – Add a pinch of almond extract for a classic holiday scent, or replace a portion of the vanilla with orange or peppermint extract for a seasonal twist. If using almond extract, keep it subtle to avoid overpowering the cookie flavor.
Tips
- Chill the dough before rolling: Wrap the chilled dough in plastic and refrigerate for at least 30 minutes to 1 hour. This helps the cookies hold their holiday shapes during baking and reduces spreading for crisp, clean edges.
- Roll to an even thickness: Use a rolling pin with guide rings or place the dough between two parchment sheets and roll to about 1/4 inch thickness. Consistent thickness ensures uniform baking and decorative surface for icing.
- Dusting for handling: Lightly flour your work surface and rolling pin, then dust off excess flour before cutting. Too much flour can dry the dough and cause dry edges; a thin coat keeps cookies tender.
- Chill cut cookies before baking: Place cut-outs on a sheet pan and chill for 10–15 minutes before baking to prevent spreading and to maintain sharp edges for decorating.
- Correct butter temperature: Use softened butter at room temperature, not melted. It blends evenly with sugar to create a tender crumb and prevents greasy patches that can blur icing.
- Cream sugar and butter well: Beat the butter and sugar until light and fluffy (3–4 minutes). This introduces air, yielding a tender, delicate texture that takes icing nicely.
- Egg temperature matters: Use a room-temperature egg to ensure even incorporation and a smooth dough. If the dough feels dry, add a teaspoon of water or milk from the edges and mix just until cohesive.
- Accurate flour measurement: Spoon flour into the cup and level off with a knife, rather than scooping directly. This prevents over-measuring and results in cookies that aren’t too dense.
- Evenly distribute leavening: Whisk the flour with baking powder and salt before mixing with wet ingredients to ensure the leavening is evenly dispersed for uniform rise and soft centers.
- Balance flavor with extracts: Use pure vanilla for depth; a small amount of almond (optional) adds a classic holiday note. If using almond extract, keep it restrained to avoid overpowering the cookies.
- Royal icing basics: Sift powdered sugar to eliminate lumps and achieve a smooth, glossy base for decorating. Start with the recommended water amount and add gradually to reach stiff peak or flood consistency as needed.
- Stability with meringue powder: If using meringue powder, whip until stiff peaks form for stable piping. If using egg whites, pasteurization is advised for safety, especially when decorating with edible imagery.
- Seal color and flow: For piping, use stiff peak royal icing; for flooding, thin the same icing with a little water until it flows slowly. Allow icing to set between layers to prevent color bleed when layering decorations.
- Acidic brightness: A small amount of lemon juice or a clear extract helps the icing set and brightens the finish. Adjust acidity to taste and desired whiteness; avoid colored extracts if a pristine white look is desired.
- Decorations timing: Add sprinkles or edible glitter while the icing is still tacky, not fully dry, to ensure good adhesion. For multi-color designs, let each color dry completely before applying the next to prevent color bleed.
- Storage and freshness: Once iced, let cookies dry completely at room temperature before stacking. Store in an airtight container with parchment between layers to prevent sticking and maintain shine.
FAQ
What ingredients do I need for sugar cookies decorated for holidays?
Basic dough typically includes flour, sugar, butter, eggs, vanilla, baking powder or baking soda, and a pinch of salt. For royal icing or buttercream decorations, you’ll also need powdered sugar, meringue powder or egg whites (for royal icing), cream of tartar (optional), milk or water, and food coloring. For holiday flavors, consider lemon zest, almond extract, or cinnamon.
Should I chill the dough before rolling?
Yes. Chilling 1–2 hours (or overnight) makes the dough easier to roll, prevents spreading, and helps cookies maintain their shape for decorated designs. If you’re short on time, you can chill in the freezer for 15–30 minutes.
How do I roll and cut the cookies without sticking?
Lightly flour the work surface and roll out to about 1/4 inch thickness. If sticking occurs, dust with a small amount of flour or roll between parchment sheets. Chill the cut shapes 10–15 minutes before baking to help them hold their shape.
What’s the best icing for holiday decorations?
Royal icing (a mixture of powdered sugar, meringue powder or egg whites, and a tiny amount of water or lemon juice) dries hard and is great for detailed decorations. Alternatives include royal buttercream or simple glaze (powdered sugar mixed with liquid). For a shiny finish, you can use a thin sugar glaze on top.
How do I color the icing safely?
Use food-grade gel or paste colors; they color more intensely with less liquid than liquid food coloring. Add in small amounts and mix until you reach the desired shade. For multiple colors, divide the icing into bowls before coloring.
How long do decorated sugar cookies stay fresh?
Unfrosted cookies stored in an airtight container at room temperature stay fresh 1–2 weeks. Royal-iced cookies should be stored in a single layer or separated with parchment to prevent sticking, and can last up to 1 week at room temperature or longer in the fridge or freezer. Freeze decorated cookies for extended storage.
Can I bake the cookies ahead of decorating?
Yes. Bake and cool the cookies, then store in an airtight container. Decorate later. Plain baked cookies can be kept at room temperature for several days; freeze cookies for longer storage and decorate after thawing.
How can I avoid spreading while baking?
Chill the cut-out shapes before baking, don’t overwork the dough, and use parchment on the baking sheet. Bake at the recommended temperature and avoid over-baking, which can cause shapes to blur. For very intricate designs, consider using sugar cutouts or stencils.
What are some holiday decoration ideas for sugar cookies?
Classic: red and green royal icing with white accents; snowflakes with white icing; peppermint stripes; holly leaves with green and red. For other holidays, switch color palettes and shapes (e.g., green trees and red bows for Christmas, pumpkins and black/orange for Halloween, pastels for Easter). Edible glitter or sprinkled sugar can add sparkle.