Introduction / Hook
Imagine a bite-sized crescent of chocolatey bliss, wrapped around a cool, creamy center, with a crisp shell that snaps and a touch of magic that makes every mouthful feel like a celebration. Homemade Choco Tacos are not just a snack; they’re a portable party you can carry in your lunch bag, a nostalgic treat that wows kids and grown-ups alike, and a canvas for creativity that invites you to customize flavors, textures, and toppings to your heart’s content. In this guide to crafting easy snacking magic, you’ll discover how to replicate that beloved street-food charm at home with simple ingredients, straightforward steps, and a dash of homemade love. The beauty of this treat lies in its versatility: use traditional dark chocolate and vanilla cream, or mix in cinnamon, espresso, or mint for a twist that turns every bite into a tiny holiday. Picture a tray of perfectly shaped taco shells, each cradling a dreamy filling, then enrobed in a glossy chocolate coating that hardens into a satisfying shell of delight. It’s snack time elevated, made approachable, and entirely customizable to fit the pace of your day. Pull up a chair, gather a few pantry staples, and prepare to create a batch that tastes like a beloved memory, with the added satisfaction of knowing you made it yourself, from scratch, with care.
The Story Behind the Dish
Choco Tacos—those wonderfully indulgent, handheld desserts—tell a story that blends nostalgia with innovation. The concept of a soft-shell, ice-cream-filled taco has roots in a culture that loves playful, convenient desserts without sacrificing flavor. In street-food traditions around the world, there’s a recurring theme: imagine a familiar format (taco, cone, pastry) reimagined with a sweet twist. The Choco Taco gained popularity in the late 20th century as a clever fusion of chocolate, vanilla cream, and a crunchy outer shell, all compact enough to be enjoyed on the go. What makes this homemade version feel special is the sense of ownership you bring to the process. You’re not just following a recipe; you’re inviting a story into your kitchen—one that stretches back to summer fairs, family gatherings, and the era when snacks were crafted with the simplest of tools and the happiest of intentions. Making Choco Tacos at home lets you revisit that sense of childlike wonder, while also letting you tailor the experience to your own tastes, dietary needs, and available ingredients. It’s a culinary bridge between memory and invention, a way to honor tradition while adding your personal signature to every bite.
Why You’ll Love This Recipe
- Simple, forgiving technique: With easy-to-find ingredients and flexible steps, you’ll be dipping, coating, and filling in no time.
- Customization-friendly: From flavor infusions to shell textures, you can tailor each batch to your preferences or dietary needs.
- Kid-friendly and crowd-pleasing: A playful treat that works beautifully for family snacks, birthday parties, or movie nights.
- Make-ahead and portable: Perfect for meal prep or school/work lunches, as they travel well and can be stored for later enjoyment.
- Budget-conscious indulgence: You can achieve a premium feel without breaking the bank by using pantry staples and smarter choices for toppings.
- Texture balance galore: A crisp shell, a creamy center, and a glossy chocolate coating create a satisfying contrast in every bite.
Flavor Profile & Texture
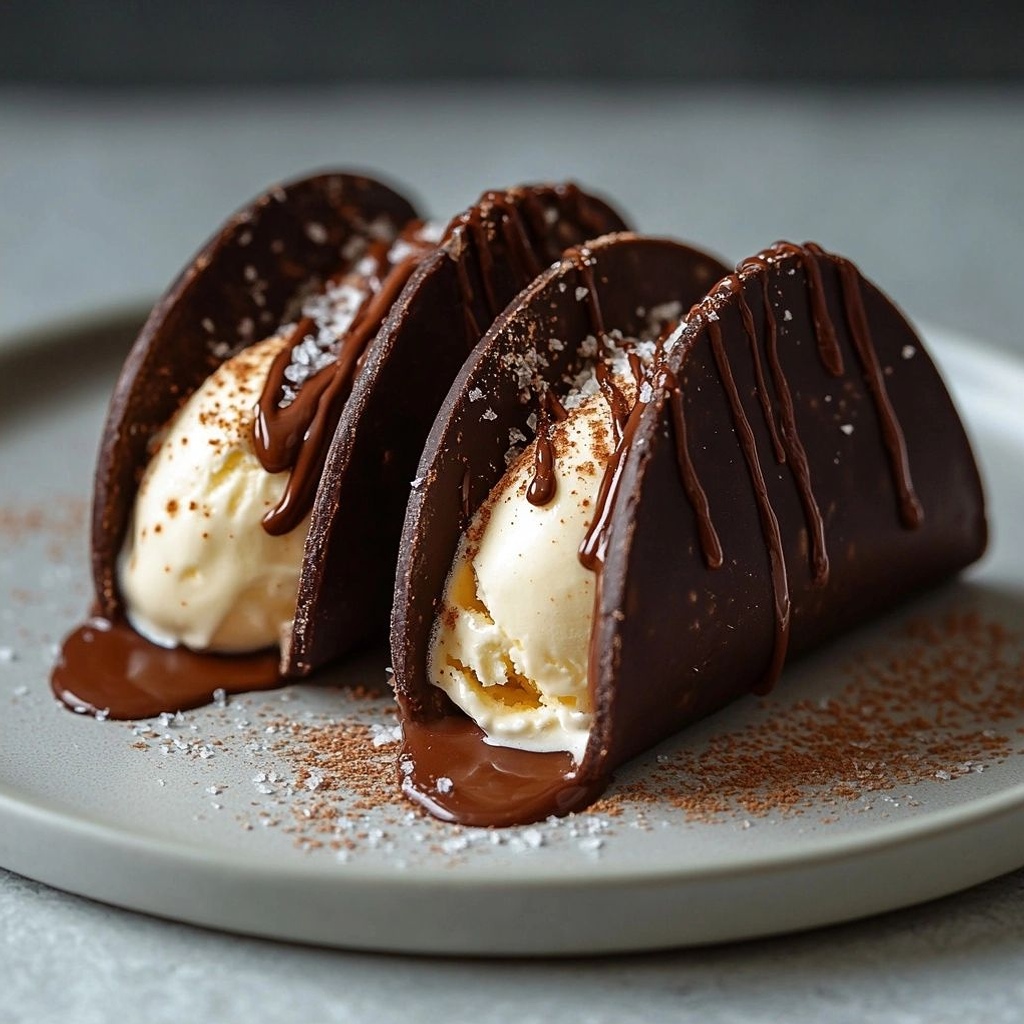
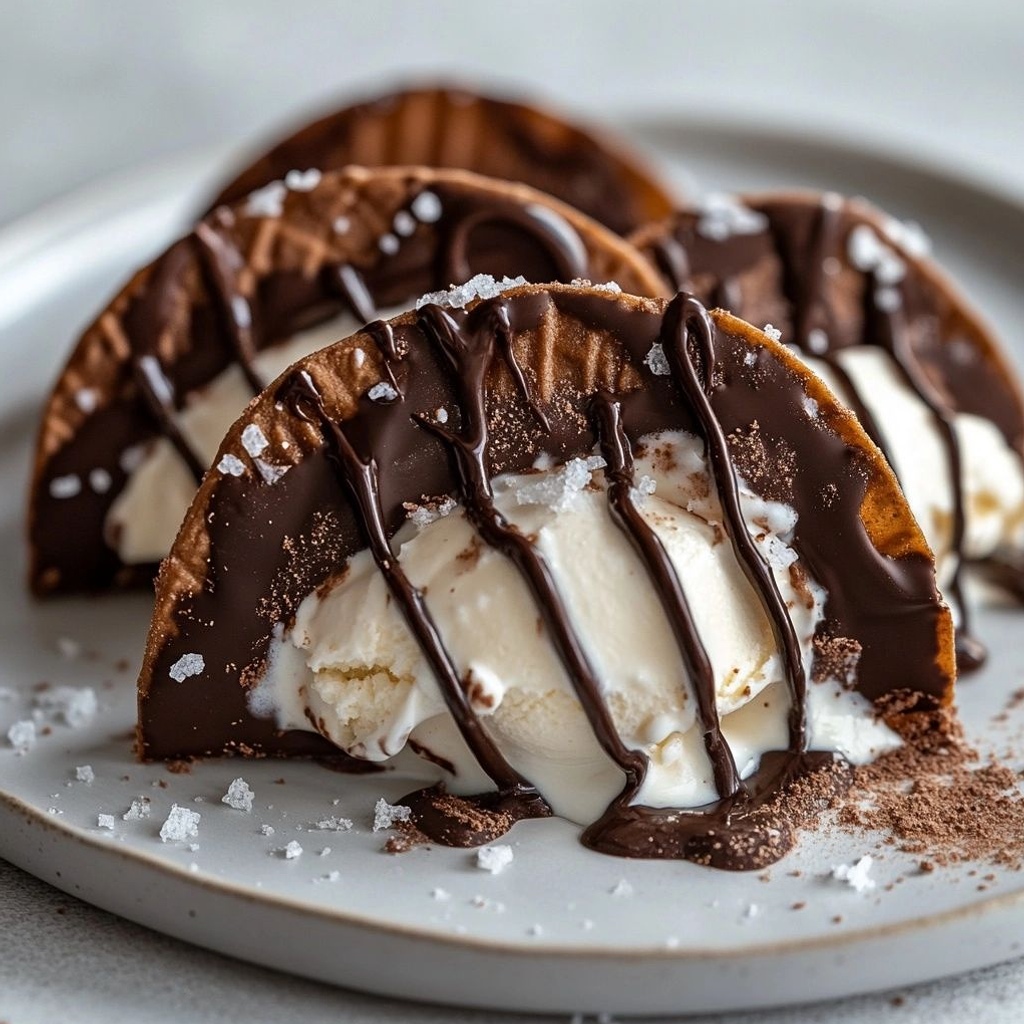
This homemade iteration balances several textures and a chorus of flavors that work in harmony. The shell offers a light crunch that snaps under your teeth, providing a satisfying contrast to the smooth, cool filling inside. The core is typically a mellow vanilla cream or a soft, whipped center that tastes like a vanilla-tinged dream with just a hint of sweetness. The outer chocolate coating brings a deep, glossy richness that gradually melts on the tongue, releasing a silky chocolate aroma that lingers pleasantly. If you opt for a salt-kissed or chili-infused chocolate, the sweetness of the filling plays off a subtle heat or savoriness, which can transform the snack into a more adult, nuanced treat. The shell itself can be made from crisp wafer shells or a homemade brownie-like shell, depending on your mood. Some home cooks prefer a slightly roasted almond or hazelnut flavor in the shell, which adds another layer of depth and a whisper of nuttiness to the overall experience. When these elements come together, the result is a multi-sensory snack: the shell’s initial crunch, the cool cream’s wave of vanilla, and the chocolate’s glossy finish that coats the lips with a gentle, fragrant sweetness. This combination is inherently comforting, yet exciting enough to feel like a special treat rather than a routine bite.
Occasions & Pairings
Homemade Choco Tacos shine in many scenarios. They’re ideal for informal gatherings, weekend movie nights, and festive celebrations where the goal is to deliver a show-stopping treat without complicated equipment. They pair beautifully with a range of beverages and sides, from a light, coffee-forward dessert wine to a simple glass of chilled milk or a cultured yogurt-strewn parfait for a light balance. For a more elaborate spread, you can present them with a small platter of fresh berries, a dusting of cocoa powder, or a few chopped nuts and sea salt to invite guests to customize their own bite. Consider seasonal pairings to amplify the experience: a hint of warm spices such as cinnamon or cardamom in the cream complements autumnal flavors; a drop of espresso or coffee liqueur in the center works wonders for a post-dinner snack; mint or peppermint zest adds a festive lift for winter celebrations. If you’re serving a crowd, make a larger batch and offer toppings like crushed pretzels for a salty crunch, toasted coconut for tropical notes, or a drizzle of caramel to create a decadent, dessert-bar vibe. For children, a sprinkle of colored sugar or edible glitter can transform the tacos into a party-ready treat that’s as visually appealing as it is tasty.
Tips, Variations & Substitutions
Here are practical ideas to customize and optimize your Choco Tacos, whether you’re cooking for dietary needs or simply chasing a new flavor discovery:
- Use traditional crisp wafer shells for a classic texture, or make a homemade shell from thin baked cookies or even waffle cones cut into rounds and shaped to form a shell. For a dairy-free version, consider using coconut oil-based coatings and plant-based creams.
- filling options: Go beyond vanilla. Try a whipped coconut cream for a dairy-free option, or incorporate lemon zest, orange blossom water, or espresso powder to create different flavor profiles. A swirl of peanut butter or hazelnut spread can transform the filling into a decadent praline-inspired center.
- chocolate coating: Dark chocolate yields a bold, sophisticated finish, while milk chocolate gives a sweeter, more nostalgic vibe. White chocolate can be used for a contrasting look and an extra touch of sweetness; consider mixing in a pinch of sea salt for balance.
- texture twists: Add finely chopped toasted nuts, crisp rice, or cacao nibs to the filling for a delightful crunch. A thin layer of crushed cookies or biscuit crumbs between the shell and filling can create a fun, cookie-crumble surprise.
- diet-friendly adaptations: For vegan versions, substitute dairy milk with almond, oat, or coconut milk and use plant-based cream. Gluten-free shells can be achieved with gluten-free wafers or rice-based shells. For lower sugar, opt for sugar-free chocolate and sweeten the filling with natural sweeteners like mashed ripe bananas or a drizzle of maple syrup in moderation.
- regional twists: In a Mexican-inspired version, add a hint of chile powder or cinnamon to the chocolate coating or the filling, echoing traditional flavors with a playful twist. Asian-inspired flavors might incorporate a touch of sesame or matcha into the cream for an earthy, aromatic note.
Storage & Make-Ahead Ideas
To maximize freshness and convenience, think about how these treats hold up when you’re stacking, packing, and serving them. The key is to minimize moisture exposure and maintain the integrity of the shell and coating.
- make-ahead: Assemble the shells and filling a day ahead, but coat with chocolate only shortly before serving to preserve the shell’s crispness. If your kitchen runs warm, consider chilling the filled tacos briefly before dipping in chocolate to ensure a tidy, glossy finish.
- storage: Store uncoated shells in an airtight container at room temperature away from heat. Keep filled, uncoated tacos in a fridge-safe container for up to three days. If you’ve already dipped the shells in chocolate, better to keep them in a cool, dry place and consume within 1–2 days for optimal texture.
- freezing: Both the shells and the filling freeze reasonably well, but the texture may be affected after thawing. For the best results, freeze assembled but uncoated tacos and dip in chocolate when ready to serve, allowing them to set completely in a cool environment.
- reheating: Avoid re-heating the shell; instead, refresh the texture by placing the filled tacos in a brief, cool-down window or by crisping the shells in a low-temperature oven before re-dipping in chocolate.
Fun Facts & Trivia (Optional)
Did you know that the concept of combining a crispy shell with a creamy center has roots in many global snack traditions? The idea of taking a familiar handheld format and turning it into a dessert is a recurring motif in street foods across continents. Chocolate, in particular, has a long history as a gateway flavor: its ability to pair with almost every other ingredient—from vanilla and caramel to sea salt and chili—makes it a universal favorite. When you bite into a choco taco, you’re tasting not just a snack, but a tiny, portable piece of culinary history that invites experimentation and personal interpretation. The playful nature of this treat is why it remains a staple at birthdays, fairs, and family gatherings, reminding us that dessert can be both inventive and comforting at the same time.
Flavor Pairings & Tasting Notes
For those who enjoy exploring flavors, here are suggested pairings and tasting notes to guide your next batch or tasting session. If you’re using a dark chocolate coating, the bold cocoa notes will emphasize the cream’s sweetness, so you might balance it with a touch of vanilla, a hint of espresso, or a whisper of sea salt. A milk chocolate coating leans toward a nostalgic profile, pairing beautifully with a simple vanilla cream or a cinnamon-infused center. White chocolate offers a creamy, fruity sweetness that can be complemented by citrus zest or a berry reduction folded into the filling. A spiced version with cinnamon, nutmeg, or chili adds warmth and depth, echoing cozy, autumnal flavors. For texture-focused tasters, the addition of toasted nuts or crisp wafer layers introduces a contrasting crunch that enhances the overall experience. The key is finding your preferred balance between the shell, filling, and coating so that each bite delivers a harmonious chorus of tastes and textures.
Accessibility & Audience Considerations
These homemade choco tacos are accessible to cooks of all levels. The technique can be as simple as dipping and filling, or you can take it further by shaping shells from alternative materials or layering flavors for a more elaborate presentation. For families with dietary restrictions, the flexible nature of the recipe makes it easy to adapt without sacrificing the charm of the finished product. If you’re cooking for kids, consider playful toppings, vibrant colors, or a milder chocolate flavor to ensure broad appeal. If you’re cooking for friends and colleagues who prefer dairy-free options, you can craft a cohesive menu by offering both dairy-based and dairy-free versions side by side, highlighting the differences and celebrating the similarities in texture and flavor.
Conclusion: A Snack That Sparkles with Possibility
Homemade Choco Tacos for easy snacking are more than a treat; they’re a celebration of simple ingredients transformed into something delightful, shareable, and memorable. The beauty of this concept lies in its flexibility: you can honor tradition with classic flavors or push boundaries with inventive fillings and coatings. The process invites you to experiment—whether you’re whisking a vanilla cream with a hint of citrus, dusting the shell with cocoa powder for an earthy aroma, or finishing with a glossy chocolate shell that gleams like a tiny piece of edible jewelry. As you embark on your own kitchen journey to recreate this beloved snack, you’ll find that the act of making them is almost as enjoyable as eating them. It’s a ritual of nostalgia, a craft of sweetness, and a doorway to culinary creativity that can be shared with friends and family or cherished as a personal indulgence. So gather your ingredients, preheat your imagination, and prepare to craft a dozen choco tacos that carry the warmth of home, the joy of experimentation, and the timeless pleasure of a treat well earned.
Ingredients
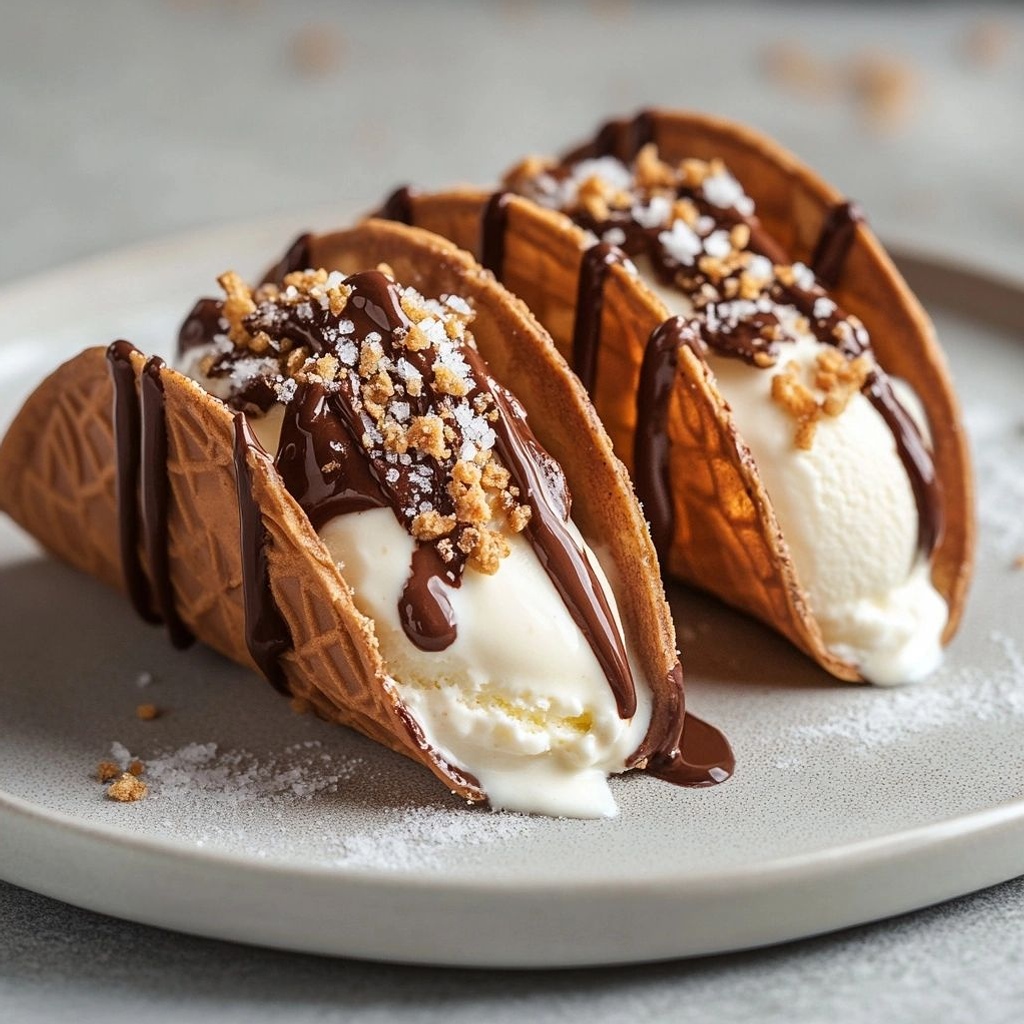
- Choco Taco Shells – 6 store-bought waffle cone shells, pre-warmed to pliable state for easier filling
→ These shells provide the classic taco shape and crunchy texture. Use store-bought shells for a quick assembly, or bake your own light waffle cones if you prefer a fresher, homemade flavor. Warm gently just until flexible to prevent cracking when folding around the ice cream. If using homemade cones, ensure they are completely cooled and crisp before filling to avoid sogginess. - Ice Cream Filling – 1 pint vanilla ice cream, softened slightly but still scoopable
→ The ice cream acts as the creamy, sweet center of the choco taco. Let it sit at room temperature for 5–10 minutes or scoop and leave at room temp briefly to achieve a soft but scoopable consistency. Too soft and it will leak; too hard and it won’t fill evenly. Consider using vanilla for a classic flavor, or chocolate for a richer profile if you prefer a monochrome treat. - Chocolate Shell Coating – 1 1/2 cups semisweet chocolate chips, 2 tablespoons coconut oil (or light vegetable oil), pinch of salt
→ This glossy chocolate coating hardens into a crisp shell around the ice cream, delivering a satisfying snap with each bite. Melt the chips with the oil until smooth; a tiny pinch of salt enhances the chocolate’s depth. For best results, spread a thin, even layer around the rim of the filled shells or dip the filled shells halfway for a classic look. Keep the coated tacos refrigerated until firm to prevent melted centers. - Optional Crunch Add-ins – 1/4 cup crushed roasted peanuts or chopped tempered brittle (optional)
→ Adds a contrasting crunchy texture and nutty flavor. If using peanuts, roast lightly and crush to small pieces so they distribute evenly in each bite. For brittle, crush into small shards to provide intense crunch without overpowering the ice cream sweetness. - Optional Mix-ins – 1/4 cup mini chocolate chips or candy pieces (optional)
→ Extra chocolate bits create bursts of sweetness throughout the ice cream filling. Gently fold them into the softened ice cream just before filling, or sprinkle on top of the chocolate-coated shells for added texture and visual appeal. Choose whether to keep them in the center or throughout the shell for different mouthfeel experiences. - Toppings (optional) – Sea salt flakes or rainbow sprinkles, to finish (optional)
→ A light pinch of flaky sea salt enhances the chocolate flavor, while rainbow sprinkles add a fun, nostalgic appearance. Use sparingly to avoid overpowering the chocolate and ice cream balance. If using sprinkles, add them just after coating to prevent them from sinking into the chocolate as it sets.
Instructions
- Preheat your workspace by lining a tray with parchment or a silicone mat and set your six warmed waffle cone shells within easy reach to prevent sticking or cracking during filling.
→ Keeping a prepared surface helps you assemble quickly and avoids rupturing pliable shells when you transfer the ice cream filling. - Softened the vanilla ice cream slightly at room temperature for 5–10 minutes until scoopable but still cold, then transfer to a piping bag or a large, tall bowl for controlled filling.
→ Softened ice cream fills evenly without needing excessive force, reducing air pockets and leaking at the edges. - Melt the semisweet chocolate chips with the coconut oil or light vegetable oil over a gentle heat until smooth, then whisk in a pinch of salt; let the coating cool for a minute until glossy and pourable.
→ The oil smooths the chocolate for a glossy shell that adheres well and sets with a crisp snap; salt enhances depth without overpowering sweetness. - Add optional mix-ins by gently folding mini chocolate chips or candy pieces into the softened ice cream just until distributed, then scoop or pipe a generous portion into the center of each warm shell, shaping into a rounded oval that reaches near the top edge.
→ Uniform distribution of mix-ins and proper filling height prevent uneven coating and ensure balanced bites. - If using optional crunch add-ins, sprinkle crushed roasted peanuts or tempered brittle inside the shells before filling, pressing lightly to create an even bed without creating gaps at the rim.
→ Crunch pieces provide texture contrast and prevent a soggy bottom by introducing varied densities in the filling. - Dip or spoon a thin, even layer of the prepared chocolate coating around the rim of each filled shell or dip the filled shells halfway into the chocolate, rotating to cover all exposed surfaces, then shake off excess and place coated tacos onto the prepared tray.
→ A thin coating around the rim helps seal the shell to the ice cream and creates the classic choco taco look with a satisfying snap when bitten. - Refrigerate the assembled tacos on the tray for 15–20 minutes or until the chocolate coating is firm to the touch, then transfer to a freezer-safe tray and chill for at least 1 hour for maximum snap and to prevent melted centers.
→ Chilling solidifies the chocolate quickly and preserves the interior texture, ensuring clean removal when serving. - If using optional toppings, lightly dust sea salt flakes or scatter rainbow sprinkles over the freshly coated shells just after dipping to avoid sinking into soft chocolate as it sets, pressing them lightly for adhesion.
→ Finishing touches enhance visual appeal and balance sweetness with a touch of salt or festive color. - Serve directly from the freezer for best texture, and store any leftovers in a freezer-safe container with parchment between layers to prevent sticking, for up to 2 weeks.
→ Freezing maintains the crisp chocolate shell and prevent ice cream from becoming icy or mobile during storage.
Notes
These homemade choco tacos are a fast, crowd-pleasing treat that come together with minimal fuss using store-bought waffle cone shells and scoopable ice cream. The glossy chocolate shell adds a crisp bite, while optional crunch add-ins and mix-ins let you tailor sweetness and texture. For best results, work with shells warmed to pliable state, let the ice cream soften only slightly, and refrigerate the coated tacos until the chocolate shell hardens. Freeze leftovers flat to prevent sticking.
- Warm the shells just until flexible to prevent cracking when folding around the ice cream.
- Let the ice cream sit at room temperature for 5–10 minutes for a soft but scoopable texture—avoid over-softening to prevent leaks.
- Mully coat the shells in a thin, even layer of chocolate for a clean snap; refrigerate briefly to set.
- Customize with optional crunch add-ins or mix-ins to vary texture and flavor inside each taco.
- Keep finished choco tacos refrigerated until serving to maintain crisp chocolate coating; they can be frozen for longer storage.
Tips
- Tip: Soften ice cream gently. If you soften it too much, it can become soupy and leak through the shells. Let it sit at room temperature for 5–10 minutes, then scoop and return to the freezer briefly if you’ve pre-scooped too early. This keeps each taco neat and easy to fill.
- Tip: Choose your filling method. For a classic look, fill the shells by half-dipping the shell in melted chocolate to create a boundary, then pipe or scoop ice cream in. For a smoother shell coating, fill, freeze briefly until the ice cream firms up, then dip or drizzle the remaining chocolate over the top.
- Tip: Prevent sogginess. If using store-bought shells, ensure they are at room temperature and pliable but not soft. After filling, freeze the assembled tacos briefly (15–20 minutes) before coating with chocolate to lock in moisture and help the shell stay crisp.
- Tip: Melt chocolate evenly. Use a double boiler or a microwave in short bursts (15–20 seconds), stirring between each, until smooth. Adding coconut oil helps achieve a glossy, crisp coating and makes the coating easier to thinly spread around the filling.
- Tip: Coat technique. For a classic look, dip half of each filled shell into the chocolate or spread a thin, even layer around the rim. A thin layer around the rim helps prevent the ice cream from seeping out while maintaining a tidy shell edge.
- Tip: Add crunch strategically. If using optional peanuts or brittle, incorporate them into the ice cream just before filling or press a few pieces into the coating while it’s still tacky but not fully set. This ensures crunch in every bite without breaking the shell.
- Tip: Mix-ins with care. If folding mini chocolate chips or candy pieces into the ice cream, do so gently to avoid over-softening the mixture. Chilled mix-ins should still be firm when folded to keep their shape after freezing.
- Tip: Topping considerations. Sea salt flakes enhance chocolate flavor but use sparingly. If adding sprinkles, apply immediately after coating to prevent sinking as the chocolate sets. Consider a light drizzle of white chocolate for contrast and visual appeal.
- Tip: Storage and stability. Keep completed Choco Tacos refrigerated until ready to serve. For longer storage, freeze individually on a baking sheet before transferring to an airtight container to prevent them from sticking together.
- Tip: Flavor alternatives. Swap vanilla ice cream for chocolate or coffee for a deeper flavor profile, or mix in swirling ribbons of caramel or fudge into the ice cream just before filling for a marbled effect.
FAQ
What are Homemade Choco Tacos and why are they great for easy snacking?
Homemade Choco Tacos are a playful, scoop-and-roll treat made with crispy chocolate shells, creamy filling, and a drizzle of chocolate. They’re easy to customize, quick to assemble, and perfect for a fun snack or dessert.
What ingredients do I need to make the shells?
For the shells, you typically need a waffle cone or soft taco shell, melted chocolate or chocolate coating, and a thin, crisp base like a baked waffle cone bowl. Optional: oil or butter for smooth melting, and a pinch of salt.
What ingredients are needed for the filling?
A simple filling is vanilla ice cream or whipped cream-based mixture. For a dairy-free option, use coconut milk ice cream or whipped coconut cream. You can also mix in dulce de leche, peanut butter, or cocoa powder for flavor.
Do I need an ice cream maker?
No. You can use store-bought ice cream scooped into the shells, or make a quick whipped cream-based filling. If you want a firmer filling, let ice cream soften slightly before scooping, then refreeze briefly after filling.
How do I assemble the Choco Tacos?
1) Prepare the shells by melting chocolate and dipping the rim or entire shell. 2) Fill the shell with a scoop of ice cream or whipped cream mixture. 3) Drizzle extra melted chocolate on top and freeze for 15–30 minutes to set. 4) Serve immediately or store briefly in the freezer.
Can I make these ahead of time?
Yes. Assemble and freeze for up to 1–2 hours for best stability. For longer storage, wrap individually in parchment or plastic and store in the freezer for up to 2 weeks.
What flavors or variations work well?
Try chocolate and peanut butter, mint chocolate, caramel swirl, or fruit sorbets. Add crushed nuts, sprinkles, or a pinch of sea salt on the shell for extra texture. Dairy-free options include coconut- or almond-based fillings.
What are some troubleshooting tips?
If the shells crack, gently re-melt the coating and re-dip. If the filling melts too quickly, briefly freeze the scooped ice cream before filling. To prevent soggy shells, don’t fill too far in advance and keep them cold until serving.
How should I store leftovers?
Store assembled Choco Tacos in the freezer in an airtight container or wrapped individually. Unassembled shells with filling can be kept chilled for a few hours; assemble just before serving for best results.
Are there any nutrition or dietary considerations?
Nutrition varies by ingredients. If you’re watching sugar or dairy, opt for dark chocolate, light or non-dairy fillings, and smaller portions. For gluten-free options, ensure shells and any toppings are gluten-free certified.