Introduction / Hook
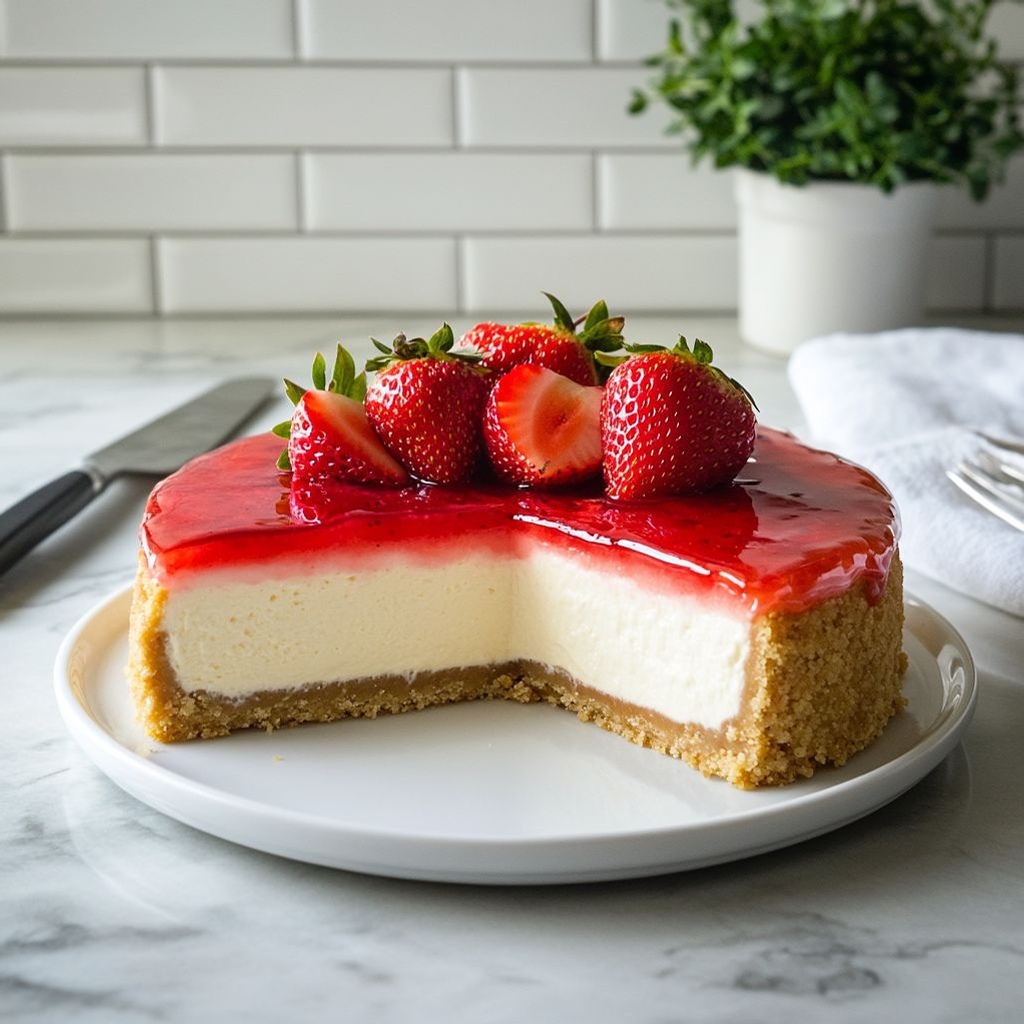
There’s a moment of quiet elation when you slice into a perfectly set strawberry cheesecake: the knife glides through a seductively velvety filling, leaving a clean, gleaming line that hints at the dreaminess inside. The first bite is a chorus of textures and memories—creamy, tangy, and luxuriously rich, with a whisper of citrus and vanilla that lingers on the tongue. Strawberry cheesecake is a dessert that feels like a celebration both grand and intimate—a centerpiece for special occasions and a simple, irresistible indulgence that turns ordinary nights into something a little magical. Picture sun-warmed berries bursting with sweetness, a crust that crunches just enough to cradle the lush filling, and a cool, creamy veil that makes every mouthful feel like a hug. It’s the kind of dessert that smells like late-summer mornings and feels like a memory you want to keep returning to—soft, bright, and endlessly comforting.
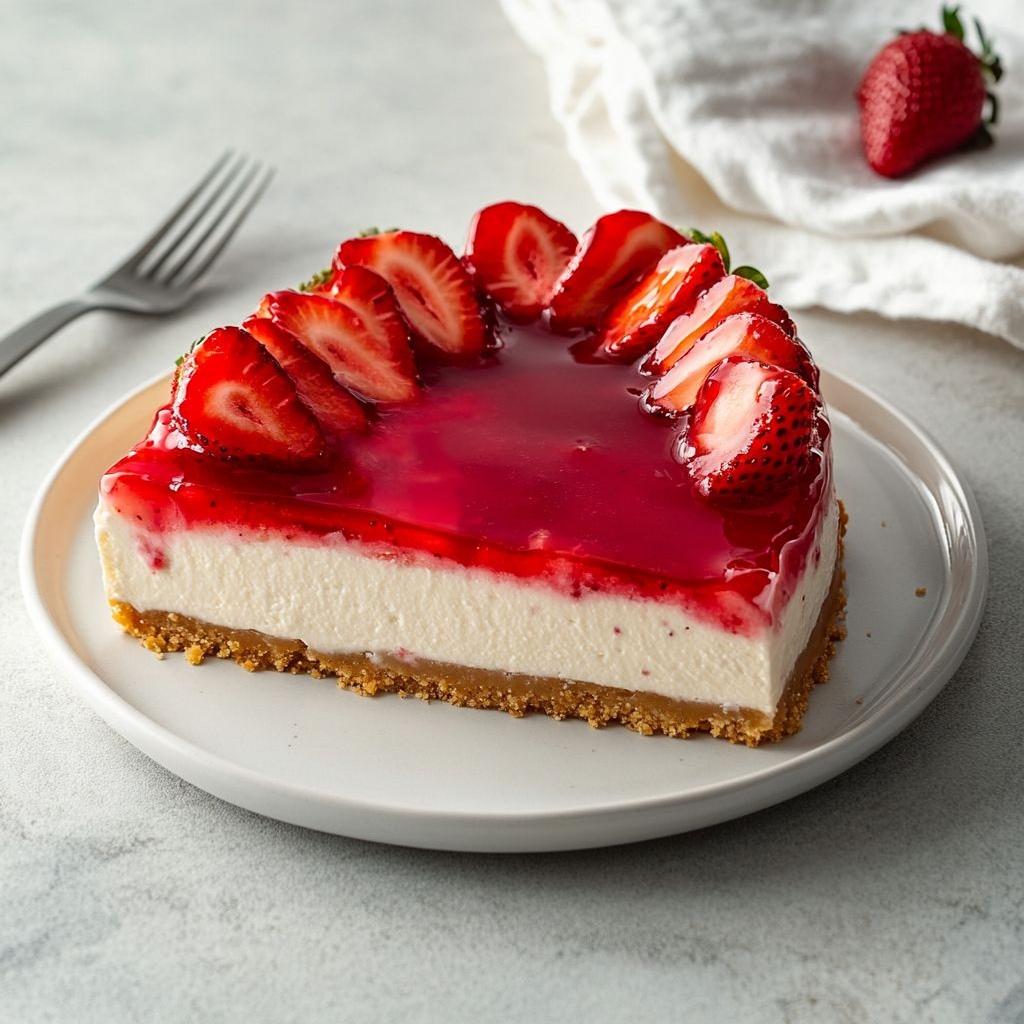
This is more than a dessert; it’s a small ceremony of contrasts coming together in harmony. The smooth, luxurious center plays off a slightly crunchy, biscuit-like base. The flavor is a balanced duet: mellow dairy-rich creaminess with a tang that keeps the sweetness honest, and berries that lend a sunlit acidity and a forest-fresh fragrance. The strawberry topping or ripened slices on top complete the picture, providing a glossy, ruby-red crown that invites the first glance and the first bite. Whether you’re serving it as a finale to a casual weeknight dinner or presenting it as the hero at a celebration, strawberry cheesecake has a way of making moments a little more memorable.
The Story Behind the Dish
Cheesecake, in its many forms, is a dish with a storied past that spans continents and centuries. The earliest known cheesecake recipes come from ancient civilizations, where simple, creamy cheese was often blended with flour and honey to create a hearty dessert or a nourishing treat. Over time, different cultures added their own twists—crumbly crusts, delicate flavorings, and toppings that reflected local fruits and seasonal abundance. The idea of marrying a rich, whipped filling with a crumb or biscuit crust traveled across Europe and beyond, evolving with each region’s preferences and ingredients.
When Americans began to experiment with cream cheese in earnest, the cheesecake world shifted in a bold new direction. The 19th and 20th centuries brought innovations in technique and texture, culminating in the iconic New York-style cheesecake. This celebrated version embraces a denser, creamier filling that clings to the crust with a silken pull, a result of high-fat dairy and careful tempering. The crust itself often carries the subtle warmth of butter and a touch of sweetness, a foundation sturdy enough to support the indulgent filling. It’s no surprise that this style became a touchstone in American dessert culture, a recipe that home cooks locked into their repertoires with love and pride.
Strawberries, with their riot of fragrance and color, became a natural and beloved companion for cheesecake. The bright, aromatic berries echo the vanilla and citrus notes in the filling, while their natural acidity helps cut through the richness, brightening the overall impression. Over the decades, strawberry-topped or strawberry-swirl variations found a comfortable home in bakeries, diners, and family kitchens alike. The combination—creaminess, tang, and a garden-fresh fruit finish—captures a balance that feels timeless: something decadent and comforting that still awakens the senses with freshness and sparkle. Today, strawberry cheesecake stands as a modern classic, flexible enough for no-fuss family dinners or elegant, candlelit celebrations, and it continues to invite creativity in presentation, texture, and subtle flavor notes.
Beyond the kitchen, the dish has become a canvas for personal stories and seasonal memories. It appears in childhood favorites, as a grandmother’s signature dessert, and as a showpiece at graduations, anniversaries, and summertime gatherings. The story of strawberry cheesecake is, in many kitchens, a story of sharing: a slice passed around the table, a chorus of happy murmurs, a moment when everyone leans in a little closer, savoring the creamy harmony and the bright red crown on top. The dish invites you to slow down, appreciate the craft, and celebrate sweetness in a way that’s both comforting and a touch celebratory—a rare combination that keeps inviting us back for more.
Why You’ll Love This Recipe
- Uncomplicated elegance: the dessert feels special without requiring elaborate techniques or long hours in the kitchen.
- Luxurious texture: a creamy, smooth filling that glides across the palate, contrasted with a satisfying, tender crumb crust.
- Bright balance: the fruitiness of strawberries and a hint of citrus lift the richness, making every bite lively and refreshing.
- Versatile serving: perfect for birthdays, holidays, or a relaxed weekend treat, and adaptable to many settings.
- Make-ahead friendly: can be prepared in advance and kept chilled for an effortless finish to any gathering.
- Family-friendly appeal: a dessert that both kids and adults enjoy, with a universal comfort-factor that appeals across generations.
- Showcase for seasonal produce: the recipe welcomes fresh strawberries at their peak and invites you to experiment with preserves or a glistening strawberry glaze if you wish.
- Customizable style: lends itself to variations—from lighter, no-bake approaches to richer, more decadent versions—so you can tailor it to your mood and dietary needs.
Flavor Profile & Texture
At its core, this dessert is a dialogue between lush creaminess and tangy brightness. The filling carries a smooth, satiny mouthfeel that seems to melt on contact, often infused with a whisper of vanilla and a touch of citrus zest to sharpen the finish. That brightness is essential; without it, the richness can feel indulgent to a fault. The vanilla acts as a soft, warm cocoon, coaxing the dairy sweetness into a comforting embrace while the citrus notes offer a fleeting, crisp lift that keeps the palate engaged from first bite to last.
The crust provides a counterpoint: a crumbly, tender base that anchors the filling with a sturdy, cookie-like texture. It’s not merely a receptacle; it contributes aroma and a gentle crunch that resonates with the filling’s silkiness. When the crust meets the filling, you get layers of experience—first the crisp bite of the crust, then the register of creamy depth, and finally the fruit’s fragrant finish riding on top or folded through the filling itself.
The strawberry element—whether layered as a glossy crown, sliced into ribbons, or folded into a swirl—adds a fruity chorus to the piece. Fresh strawberries lend a bright, aromatic sweetness with a slight tartness that cuts through the dairy richness, while a strawberry glaze can amplify the fruitiness and create a glossy, appealing finish. The overall flavor remains balanced: not cloying, but warmly indulgent, with the fruit reminding you that summer can be captured in a bite and carried into every season through dessert.
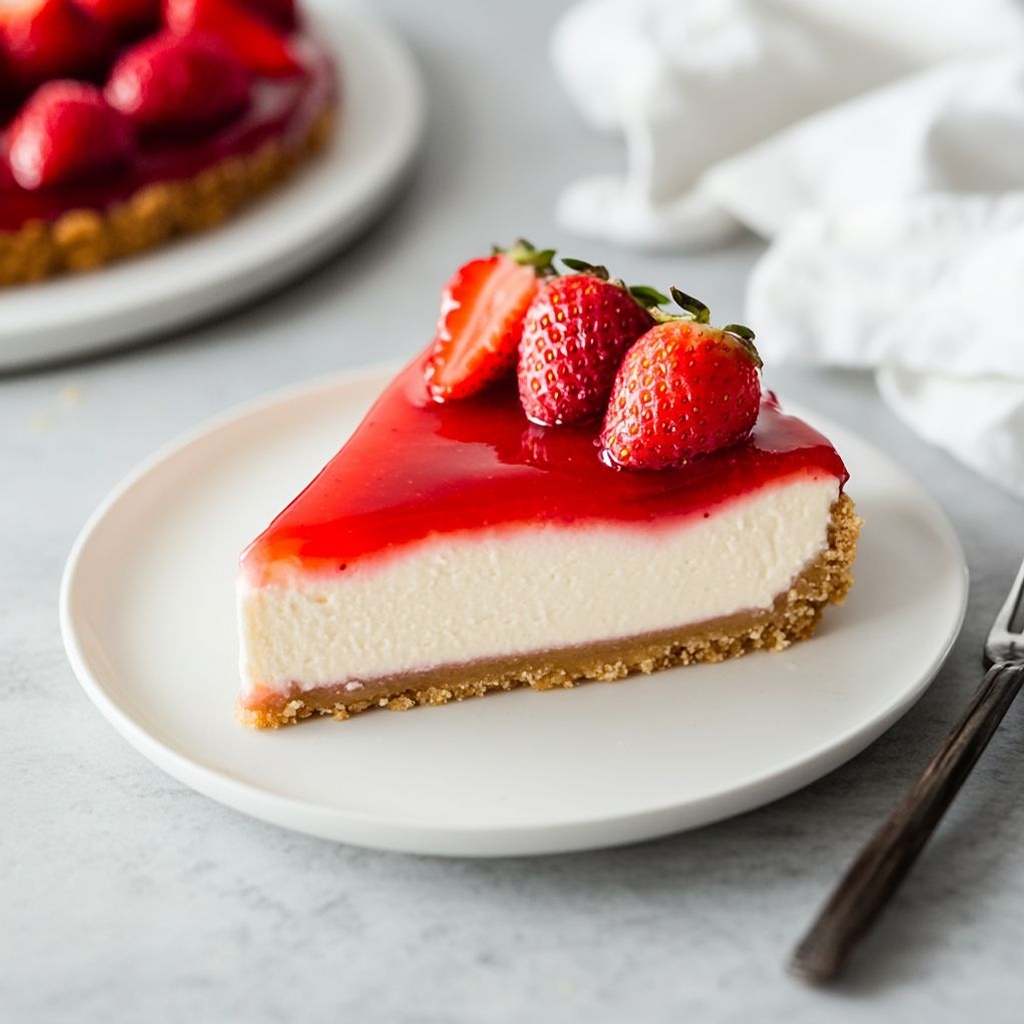
In texture terms, think of the contrast between a soft, indulgent core and a lightly resilient crust, punctuated by the crispness of fresh fruit or the gleam of a shine-y topping. The experience is multi-layered but cohesive: a single slice invites you to savor the interplay of textures as much as the harmony of flavors. It’s the kind of dessert that makes you close your eyes for a moment, then smile as you realize you’ve found a small source of joy that’s both comforting and celebratory at once.
Occasions & Pairings
This strawberry cheesecake shines in a lamp-lit dinner, a sunny garden party, or a casual weekend gathering. It’s equally at home at a formal celebration or the centerpiece of a weekend brunch. Its universal appeal makes it a reliable option when you want to treat guests to something classic yet indulgent, without requiring a lot of kitchen theatrics. The dessert’s versatility is one of its strongest attractions: you can tailor its presentation to fit the moment, from a minimalist, elegant slice to a show-stopping tiered display for a special occasion.
Pairing ideas enhance the experience without stealing the spotlight from the cheesecake itself. For beverages, consider a light, effervescent choice such as a sparkling wine or a crisp champagne to refresh the palate between bites. A cup of good coffee or a fragrant herbal tea can also be perfect companions, especially when the dessert is served after a dense meal. For those with a more indulgent sensibility, a dessert wine or a fortified sip can echo the richness and add a gentle warmth. If you’re entertaining with a seasonal theme, citrusy spritzers or berry-forward punches can complement the fruit profile while keeping the dessert as the star of the show.
As for accompaniments, light whipped toppings, delicate mint leaves, or a few fresh strawberry slices can provide a visual flourish and a fresh bite alongside the creamy slice. A simple lemon or vanilla cream can offer a complementary note without overpowering the main flavors. If you like contrasting textures, a side of almond biscotti or crisp wafer cookies offers a pleasing crunch that elevates the dessert experience without complicating the palate.
Tips, Variations & Substitutions
Tips
- Chill thoroughly: Give the cheesecake ample time to set in the refrigerator to ensure clean slices and a stable texture that holds well when plated.
- Room-temperature creaminess: Let the filling come to a comfortable temperature before serving so each bite feels wonderfully silky.
- Gentle handling: When assembling and smoothing, use slow, light strokes to maintain a smooth surface without creating air pockets.
- Even topping: If you decorate with fruit, arrange slices or ribbons evenly to create an appealing, balanced presentation.
- Flavor depth: A subtle touch of citrus zest in the filling can brighten the richness and add a lift that lingers on the palate.
Variations
- No-bake variation: Create a cooler, lighter version that sets in the refrigerator without baking. This is ideal for warmer climates or when you want a quick, refreshing finish to a meal.
- Fruit-forward variation: Swap or layer in other seasonal berries or stone fruits to reflect what’s ripe and abundant—think raspberries, blueberries, or peach slices for a different perfume and color.
- Rustic swirl: Fold a gentle swirl of fruit puree or chopped berries into the filling before setting to create a marbled appearance and a hint of fruity burst in each bite.
- Vegan adaptation: Use plant-based cream alternatives and a dairy-free crust to achieve a similar texture and indulgence for guests with dietary preferences.
- Citrus kiss: Introduce a bolder citrus note, such as a touch more zest or a hint of lime, to brighten the richness and add an extra dimension of aroma.
Substitutions
- Texture-focused changes: If you prefer a slightly lighter feel, consider a crust made from finely crushed cookies paired with a small amount of fat to maintain crumb structure without heaviness.
- Flavor-focused changes: For a more pronounced vanilla profile, lean into a generous vanilla note in the filling and pair with a complementary berry topping.
- Diet-friendly tweaks: For those avoiding dairy, explore non-dairy cream alternatives and a crust made from nut or seed-based components to maintain richness and cohesion.
Storage & Make-Ahead Ideas
One of the real strengths of strawberry cheesecake is its amenability to advance preparation. When you give the dessert ample time to chill and settle, flavors meld and the texture becomes thoroughly luxurious. If you’re planning ahead, consider the following ideas to maximize flavor and convenience.
- Make-ahead chilling: Prepare the entire dessert and refrigerate it for several hours or overnight. The filling firms up, and the flavors mellow into a cohesive, refined profile.
- Freezing option: This dessert can often be frozen for longer storage. If you choose to freeze, wrap it well to prevent freezer burn and allow extra time for thawing in the refrigerator before serving to preserve texture.
- Slice only as needed: For entertaining, you can portion the cheesecake into individual slices ahead of time, then cover and store. This makes plating seamless and portions perfectly uniform.
- Stability tips: If the topping is glossy or heavily fruit-forward, you can apply it after the dessert has set if you want to avoid moisture seeping into the crust during storage. Alternatively, keep the topping separate and add it just before serving for the freshest appearance.
Overall, storage and make-ahead options add to the appeal of strawberry cheesecake. It’s a dessert that invites thoughtful timing and careful planning, yet remains forgiving enough to accommodate spontaneous gatherings. The result is a dish that can feel like an intimate, handcrafted treat or a polished, show-stopping finale—depending on how you plan it, but always delivering consistency, comfort, and joy in every bite.
Fun Facts & Trivia (Optional)
- Contrary to popular lore, strawberry cheesecake does not have a strict single origin; its appeal spans multiple cultures, each adding its own textures and fruit accents to create distinct regional favorites.
- Strawberries are among the only fruits that wear their seeds on the outside. In cheesecake form, this natural beauty pairs beautifully with the smooth filling—the seeds add a delicate visual texture and a hint of briny sweetness as you bite through.
- In many households, strawberry cheesecake has become a symbol of celebration—birthday rituals, family reunions, and summer gatherings often feature this dessert as a nostalgic centerpiece that signals warmth and togetherness.
- The color red in desserts often signals festivity and appetite stimulation, which is why a glossy strawberry topping tends to be so visually appealing and inviting on a cheesecake plate.
- There are countless regional twists around the world that reimagine the cheesecake’s crust, topping, and flavor balance, proving that the concept of a creamy, indulgent dessert crowned with fruit is wonderfully universal.
Ingredients
Crust
- 1 1/2 cups graham cracker crumbs (or digestive biscuits, finely crushed)
→ The crust forms the sturdy base and flavor foundation of the cheesecake. Crush crackers into fine, uniform crumbs (batches left slightly coarse can result in a crumbly crust). Mix with the granulated sugar and melted butter until the texture resembles wet sand, then press firmly into a 9-inch (23 cm) springform pan, building an even layer about 1/4 inch (0.6 cm) thick on the bottom and up the sides. Bake for 8–10 minutes at 350°F (175°C) to set the crust and remove raw floury taste, then cool completely before filling to prevent sogginess. For a gluten-free version, use gluten-free graham crackers or finely crush gluten-free cookies. - 1/4 cup granulated sugar
→ Sugar in the crust helps balance the richness of the cheese and gives the crust a touch of sweetness that pairs with the filling. It also aids in binding the crumbs when mixed with the melted butter. If you’re using a very sweet crust or a pre-sweetened cookie base, you can reduce this amount slightly. Combine with crumbs and butter before pressing into the pan to ensure even sweetness throughout the crust. - 4 tablespoons unsalted butter, melted
→ The melted butter binds the crumb mixture into a cohesive crust and adds a rich, fatty flavor. Use unsalted butter so you can control the salt level in the crust. Let the butter cool slightly before mixing with the crumbs to prevent over-wetting the crust; press firmly into the pan and bake as directed to help the crust crisp up and hold its shape when slicing.
Cheesecake Filling
- 4 (8-ounce) packages cream cheese, softened to room temperature
→ The cream cheese provides the velvety, dense body of the cheesecake. Softening to room temperature ensures a silky, lump-free batter; cold cheese will trap fat and sugar, resulting in a grainy texture. For best results, cut blocks into smaller pieces and allow to sit 30–60 minutes, or warm gently in short bursts in a microwave, stirring between intervals. Use full-fat cream cheese for the classic rich mouthfeel; reduced-fat versions will yield a lighter, less creamy texture. - 1 cup granulated sugar
→ Sugar sweetens the filling and helps balance the tang of the cream cheese. Add gradually while beating the cheese until the mixture is smooth and homogenous. Overly sweetening can dull the tang, while under-sweetening may leave the cake tasting sharp; adjust to taste if needed. - 1/4 cup sour cream
→ Sour cream adds moisture, tang, and a touch of creaminess that helps keep the filling soft and prevents it from becoming overly dense. It also helps create a creamy, luxurious texture that remains stable during baking. If you don’t have sour cream, you can substitute an equal amount of heavy cream plus a teaspoon of lemon juice, but the flavor and texture will be slightly different. - 2 teaspoons vanilla extract
→ Vanilla enhances the overall flavor and rounds out the tang of the cheese. Use pure vanilla extract for the best aroma; a lower-quality or artificial vanilla can leave the filling tasting flat or chemically aftertastes. If you have vanilla bean, you can scrape the seeds from one bean and add them for a more intense vanilla note. - 4 large eggs, room temperature
→ Eggs provide structure and help the filling set without becoming dry. Add eggs one at a time on medium-low speed to avoid incorporating too much air, which can cause cracks. Temperature matters: cold eggs can shock the batter and cause curdling; room-temperature eggs mix in smoothly, contributing to a uniform texture. - 1/4 cup heavy cream (optional)
→ Adds extra richness and a silkier mouthfeel to the filling. If you skip this, the cake will still set well with the standard cream cheese, sugar, and sour cream combination, but the texture may be a touch denser. If using, add after the cream cheese and sugar are well blended, mixing gently to combine. - 1 tablespoon lemon juice (optional)
→ A touch of brightness that lifts the richness of the cheese and prevents the filling from tasting too heavy. Use sparingly; too much lemon juice can thin the batter and affect setting, so add gradually and taste. If you’re using lemon juice, you may want to slightly reduce the sour cream to maintain balance.
Strawberry Topping
- 2 cups fresh strawberries, hulled and sliced
→ Fresh strawberries provide vibrant color and natural sweetness for the topping. Hull the berries to remove the green cap and slice evenly so they release juice uniformly as they macerate. Rinse gently and pat dry; choose ripe, fragrant berries for best flavor. If using frozen berries, thaw completely and drain excess liquid; pat dry to avoid a watery topping. - 1/4 cup granulated sugar
→ Coats the strawberries to draw out juices and create a glossy, syrupy topping as the fruit macerates. The sugar helps soften the berries and balance acidity, producing a bright, luscious sheen. Let the mixture sit 15–30 minutes at room temperature to develop the juices. - 1 tablespoon lemon juice (optional)
→ Adds a lively acidity that brightens the fruit flavor and helps balance the richness of the cheesecake. If using, pair with a touch of vanilla to complement the dessert’s overall aroma. Be careful not to add too much, or the topping may taste shrill or thin. - 1 teaspoon vanilla extract (optional)
→ A light vanilla note mingles with the strawberry flavor, adding warmth and depth to the topping. Use pure vanilla for best aroma; this is especially noticeable when dealing with fruit toppings that sit on the creamy cheesecake.
Instructions
- Preheat your oven to 350°F (175°C) and prepare a 9-inch (23 cm) springform pan by lining the bottom with parchment and lightly greasing the sides to prevent sticking and to ensure clean, even slices later.
→ A properly preheated oven and a well-prepared pan create an even bake, prevent the crust from tearing when unmolding, and help the crust set without puffing or shrinking. - Combine the crust ingredients by whisking 1 1/2 cups graham cracker crumbs (or digestive biscuits, finely crushed), 1/4 cup granulated sugar, and 4 tablespoons melted unsalted butter in a medium bowl until the mixture resembles wet sand and holds its shape when pressed.
→ Thoroughly mixing with even moisture ensures the crust binds uniformly, so it supports the filling and slices cleanly without crumbling. - Press the crumb mixture firmly into the bottom and slightly up the sides of the prepared springform pan using the flat bottom of a measuring cup or the back of a spoon to create an even layer about 1/4 inch (0.6 cm) thick; chill for 10 minutes to set the shape.
→ A tightly packed crust prevents a soggy bottom and provides a sturdy grip for the filling as it bakes and cools. - Bake the crust in the preheated oven for 8–10 minutes until it is set and just starting to turn a light golden color, then remove and cool completely on a rack before filling.
→ Baking sets the butter and crumbs, creating a crisp shell that won’t crumble when sliced and prevents raw floury taste in the finished cheesecake. - Beat 4 (8-ounce) packages cream cheese, softened to room temperature, in a large mixer bowl on medium-low speed until completely smooth and free of lumps, scraping down the bowl as needed.
→ Softened cheese blends evenly, yielding a velvety filling without graininess; avoid high speed to prevent incorporating air that can cause cracks. - Beat in 1 cup granulated sugar gradually until the mixture is light and fluffy and the sugar is fully integrated, then stop to avoid over-aerating the batter.
→ Gradual addition prevents a gritty texture and helps the filling set firmly while remaining creamy. - Blend in 1/4 cup sour cream and 2 teaspoons vanilla extract, mixing until just combined and smooth, then scrape the sides and bottom of the bowl to ensure even texture.
→ Sour cream adds moisture and tang for a luscious, balanced cheesecake; vanilla enhances depth of flavor and aroma. - If using lemon juice, mix in 1 tablespoon at this stage in small increments, tasting as you go to preserve balance between brightness and richness.
→ A touch of lemon lifts the filling’s richness without making it tart; adding gradually prevents thinning the batter too much. - With the mixer on low, add 4 large eggs one at a time, waiting until each egg is fully incorporated before adding the next, and stopping short of overmixing to avoid air pockets that could crack the surface.
→ Eggs provide structure; adding them slowly at low speed minimizes separate layers and keeps the batter creamy and uniform. - If using 1/4 cup heavy cream, fold it in gently after the eggs are incorporated to enrich the batter and improve silkiness; mix until just combined.
→ Heavy cream relaxes the density slightly, yielding a more decadent mouthfeel without sacrificing stability during baking. - Pour the filling onto the cooled crust, giving the pan a few taps on the counter to remove air bubbles, then smooth the surface with a spatula for an even top.
→ Eliminating air pockets prevents cracks and ensures an even, professional-looking finish when sliced. - Wrap the outer pan with two layers of heavy-duty foil and place the springform pan into a larger roasting dish; pour hot water into the roasting dish until it comes halfway up the sides of the springform to create a gentle water bath, then bake at 325°F (165°C) for 60–70 minutes until the center gently jiggles and the edges are set.
→ The water bath provides consistent heat and prevents the cheesecake from cracking or drying out, producing a creamy, custard-like center. - Turn off the oven, leave the cheesecake inside with the door cracked slightly, and let it cool gradually for about 1 hour to ease the transition from hot to ambient temperature and reduce the risk of cracking.
→ Slow cooling minimizes thermal shock and helps set the center evenly for a smooth texture. - Remove the cheesecake from the water bath, peel off the foil, and refrigerate the cake, still in the pan, for at least 4 hours or overnight to fully set and develop flavor.
→ Chilling solidifies the filling and makes slicing clean; overnight chilling develops a deeper, more cohesive flavor profile. - Macerate the strawberry topping by combining 2 cups hulled and sliced fresh strawberries with 1/4 cup granulated sugar in a bowl and letting them sit for 15–30 minutes at room temperature, tossing occasionally to draw out juices.
→ Maceration enhances sweetness and creates a glossy, syrupy glaze that compliments the creamy cheesecake and adds vibrant color. - Just before serving, optionally add 1 tablespoon lemon juice and 1 teaspoon vanilla extract to the macerated strawberries, then mix gently to balance brightness and aroma; adjust to taste.
→ A small amount of acid and vanilla intensifies strawberry perfume and complements the richness of the filling without overpowering it. - Release the cheesecake from the springform pan by running a knife around the inner edge, then transfer to a serving plate, spoon or spoon-glaze the strawberry topping over the surface, and slice with a clean, warm knife for neat portions.
→ Releasing the ring cleanly prevents tearing the edges; a warmed knife yields cleaner cuts and showcases the smooth, creamy interior.
Notes
These strawberry cheesecake notes help you achieve a creamy, balanced filling with a crisp crust and glossy berry topping. For a gluten-free crust, substitute gluten-free graham crackers or finely crushed gluten-free cookies, and press the mixture firmly into a 9-inch springform pan. Bake the crust for 8–10 minutes at 350°F (175°C) to set it and banish raw floury taste, then cool completely before filling to prevent sogginess. Make sure all dairy ingredients are at room temperature before mixing to avoid a lumpy batter, and soften the cream cheese fully for a smooth, luxurious texture. To prevent cracks, bake the cheesecake gently at around 325–350°F (160–175°C) and consider using a water bath: wrap the outside of the pan with heavy-duty foil, place it in a larger pan with hot water, and bake until the center is just-set with a slight jiggle. Do not overmix the filling once the eggs are added to avoid air pockets; mix on low speed and add eggs one at a time. Let the cake cool gradually in the oven with the door ajar, then chill for at least 4 hours or overnight for clean slicing. The strawberry topping is best prepared near serving time or the day before: macerate sliced berries with sugar and a splash of lemon juice for 15–30 minutes to draw out juices, then finish with vanilla for added depth. For a brighter note, you can fold a little finely grated lemon zest into the filling or add optional lemon juice to the topping in small increments. Serve cheesecake with extra fresh berries, a light berry glaze, or a dollop of whipped cream. Leftovers keep refrigerated for up to 4–5 days, or you can freeze individual slices for longer storage. Always keep dairy refrigerated and use full-fat cream cheese for the classic, rich texture.
Tips
Tips for Strawberry Cheesecake
Crust tips
- Aim for fine, uniform crumbs. If some batches are slightly coarse, press them together firmly and bake to help set the texture evenly.
- Press the crust firmly into the pan using the flat bottom of a measuring cup or a glass to create a smooth, even layer about 1/4 inch thick. This helps prevent gaps and sogginess later.
- Use unsalted butter and allow it to cool slightly before mixing with the crumbs so the crust doesn’t become too wet.
- Bake the crust for 8–10 minutes at 350°F (175°C) to set the base and reduce raw floury taste. Let it cool completely before filling to keep the cheesecake from sliding or puffing.
- For gluten-free desserts, use gluten-free graham crackers or finely crushed gluten-free biscuits; crumbs should still pack well for a sturdy crust.
Cheesecake filling tips
- Softening the cream cheese to room temperature is essential for a silky, lump-free filling. Cut into pieces and let stand 30–60 minutes, or warm gently in short bursts.
- Beat the sugar with the cream cheese gradually to keep the mixture smooth. Scrape the bowl often to avoid uneven specks of sugar.
- Sour cream adds moisture and tang; if you don’t have it, substitute with an equal amount of heavy cream plus a teaspoon of lemon juice, though flavor and texture will shift slightly.
- Use pure vanilla extract for the best aroma. If you have a vanilla bean, scrape seeds for a more intense vanilla note.
- Add eggs one at a time on medium-low speed to avoid incorporating too much air, which can cause cracks. Room-temperature eggs mix in smoothly and help the filling set evenly.
- If using heavy cream, add it after the cheese and sugar are well blended for extra silkiness. If you skip it, the filling will still set, but may be a touch denser.
- Lemon juice adds brightness; add a little at a time and taste. If you use lemon juice, you may want to slightly reduce the sour cream to maintain balance and texture.
- For a crack-free surface, consider baking the cheesecake in a water bath (wrap the pan tightly with foil and place it in a larger pan full of hot water). This keeps temperatures even and helps prevent cracks.
Strawberry topping tips
- Choose ripe, fragrant strawberries for the best flavor. Hull and slice evenly so they macerate consistently and release juice evenly.
- Fresh or thawed strawberries both work; if using frozen berries, fully thaw and pat dry to avoid a watery topping.
- Coat the berries with granulated sugar and let them macerate for 15–30 minutes at room temperature to draw out juices and create a glossy syrup.
- A splash of lemon juice brightens the topping; add gradually and taste to avoid overpowering the fruit. Pair with a touch of vanilla to echo the cheesecake’s aroma.
- A light vanilla note can complement the strawberry topping; using vanilla extract enhances aroma, especially since the topping sits on the creamy cheesecake.
- Let the topping come together after macerating and spoon it over the cooled cheesecake. If you prefer a thicker topping, macerate longer or reduce some of the released juice before serving.
FAQ
Strawberry Cheesecake – Frequently Asked Questions
What ingredients do I need for a classic strawberry cheesecake?
A classic strawberry cheesecake uses three parts: a crust, a creamy filling, and a strawberry topping. For the crust: graham crackers or digestive biscuits crushed with melted butter and a little sugar. For the filling: softened cream cheese, granulated sugar, vanilla extract, and eggs (plus optional sour cream or heavy cream for extra richness). For the topping: fresh strawberries with a little sugar and lemon juice, simmered to a glaze or served fresh. You can also make a gluten-free version using gluten-free cookies or alternatives.
Can I make strawberry cheesecake without baking it?
Yes. A no-bake strawberry cheesecake uses a crust and a stabilized filling (often cream cheese with powdered sugar and whipped cream or condensed milk), set in the fridge with gelatin or a pinch of starch to help it set. The result is a creamy, chilled cheesecake with a fresh strawberry topping. Crust can be the same or a graham cracker substitute.
What are the steps to make a classic baked strawberry cheesecake?
1) Preheat oven and prepare a springform pan. 2) Make the crust by mixing crushed cookies with melted butter and pressing into the pan; chill to set. 3) Beat cream cheese with sugar and vanilla until smooth; beat in eggs one at a time; optionally mix in sour cream or heavy cream. 4) Pour filling over crust and bake in a water bath until the center is just set. 5) Cool gradually on a rack, then chill in the fridge for several hours or overnight. 6) Prepare strawberry topping and spoon over slices just before serving.
How can I prevent the cheesecake from cracking?
To reduce cracking: bake in a water bath, bake at a moderate temperature, avoid overmixing after adding eggs, and cool gradually in the oven with the door ajar. Do not open the oven too early. If cracks appear after cooling, you can cover with the strawberry topping or a glaze.
How long should I bake and chill the cheesecake?
Bake at about 325–350°F (160–175°C) for 55–70 minutes, until the edges are set and the center still wobbles slightly. Turn off the oven and let it sit with the door slightly open for about an hour, then cool on a rack. Chill in the fridge for at least 4 hours, ideally overnight, before slicing and serving.
How do I make the strawberry topping?
Wash and slice fresh strawberries. For a quick glaze, simmer 2 cups sliced berries with 2–3 tablespoons sugar and 1 teaspoon lemon juice until the mixture thickens into a glossy sauce, about 5–10 minutes. Let it cool before spooning over the cheesecake. You can also macerate berries with sugar and then top with the juices after chilling.
Can I freeze strawberry cheesecake?
Yes. Freeze whole cheesecake or individual slices. Wrap tightly in plastic wrap and foil, or seal in an airtight container. Freeze for up to 2–3 months. Thaw overnight in the fridge for best texture, then add fresh strawberry topping if desired.
Are there gluten-free or low-sugar options?
Gluten-free: use gluten-free cookies for the crust, or substitute with almond flour or gluten-free oats. Low-sugar: reduce added sugar in the filling and topping, or use a sugar substitute; add extra vanilla or a small amount of fruit puree for sweetness. You can also make the crust from crushed nuts and a little butter for a gluten-free base.
How can I tell when the cheesecake is done?
For baked versions, the center should be slightly jiggly but not liquid. The edges should be set and the top may have a slight golden tinge. If you have a thermometer, aim for a center temperature around 150–155°F (65–68°C). Remove from the oven and cool gradually to prevent cracking, then chill before serving.