Introduction / Hook
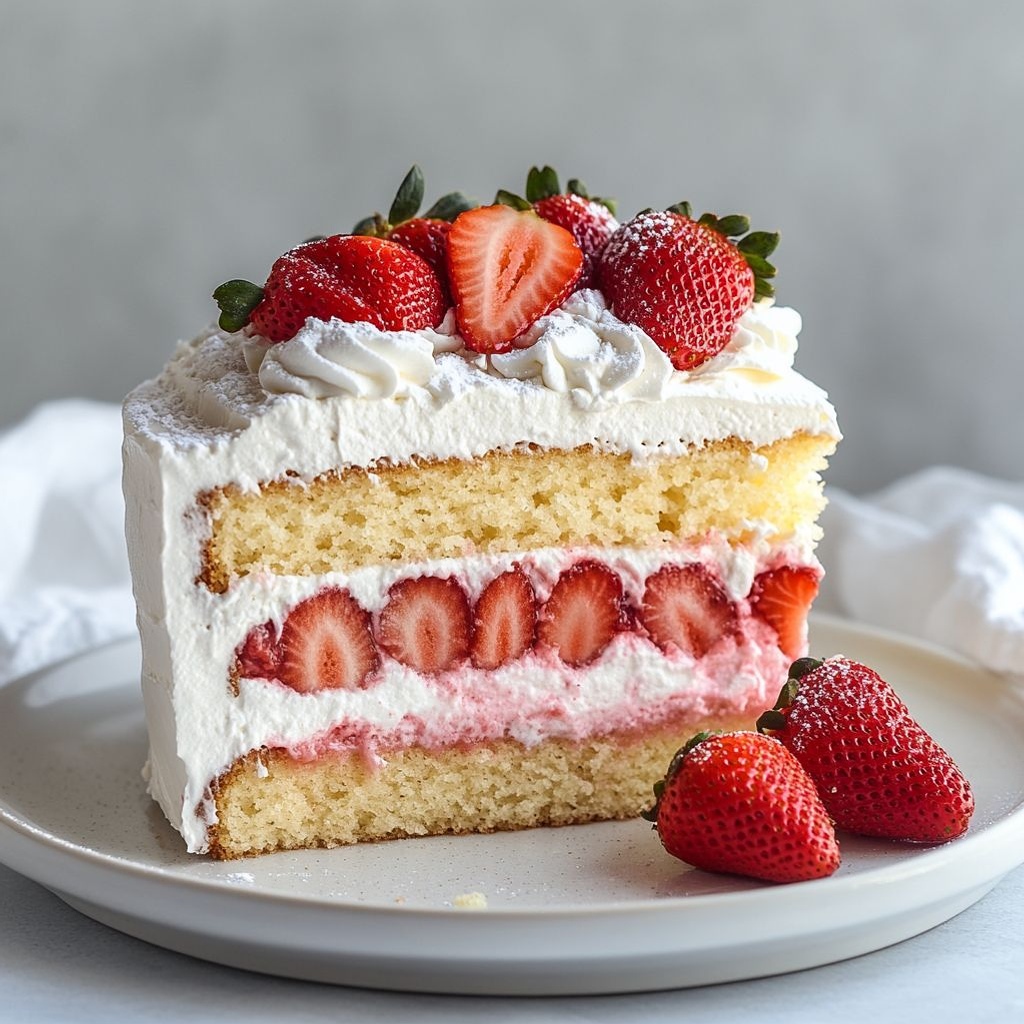
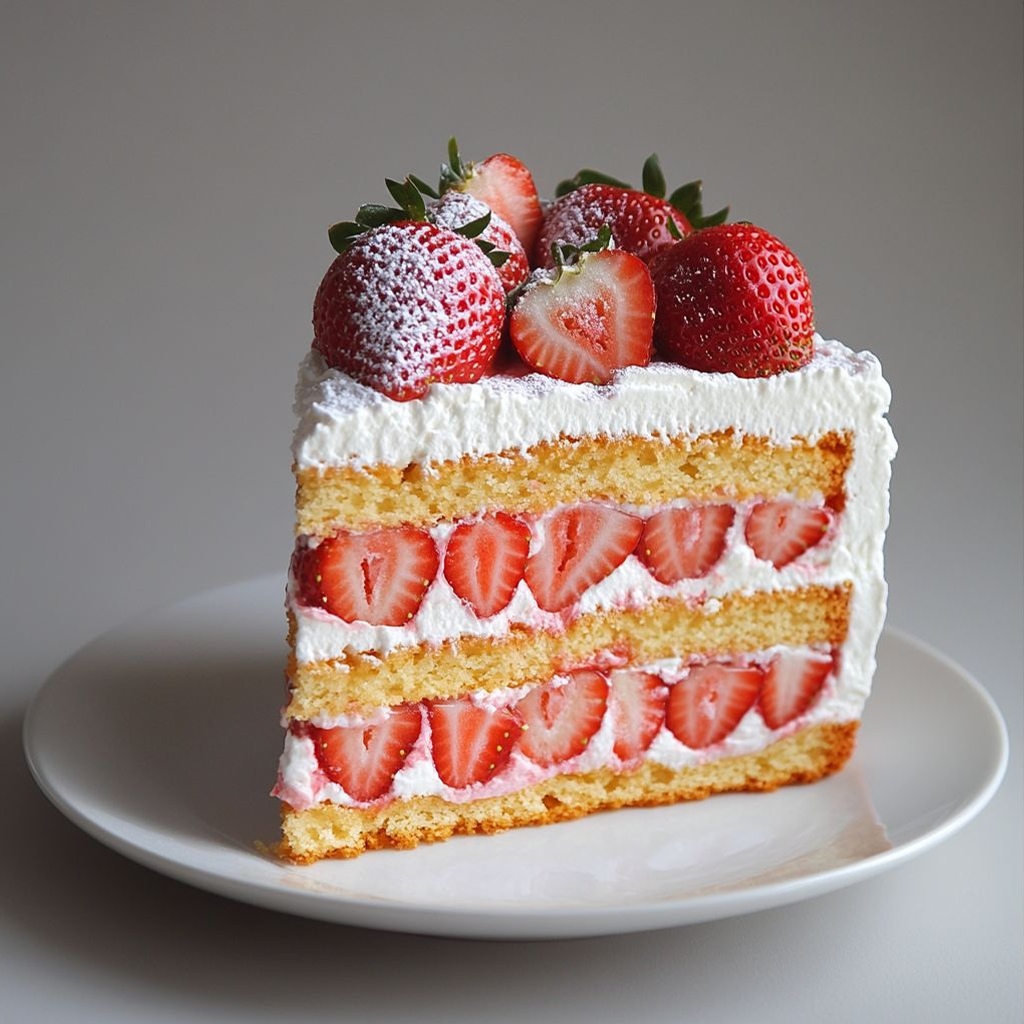
Imagine a soft, sun-warmed sponge embracing a cloud of velvety cream, crowned with jewels of ruby-red strawberries that burst with bright summer sweetness in every bite. Torta fragole e panna is the kind of dessert that makes a kitchen feel like a tiny, festive bakery—a cake that looks elegant enough for a celebration, yet humble enough to be whipped together for a casual weekend treat. The aroma alone can transport you to a sunny Italian villa: vanilla whispers from the sponge, the cool breeze of fresh cream, and the playful tang of bright berries that echo the orchard in full bloom. This cake isn’t just a dessert; it’s a celebration of seasonal fruit and the comforting creamily good moments we share with family and friends. It’s a cake that invites you to slow down, slice a piece, and savor the glow of summer in every mouthful.
What makes Torta fragole e panna especially appealing is its balance: tender sponge that soaks up a hint of sweetness, a generous bed of whipped cream that adds airiness without heaviness, and the strawberries that provide both vivid color and a refreshing, zippy finish. It’s a dessert that feels fancy enough for guests yet approachable enough to make on a weekday night when you crave something special. The textures dance together—soft, airy, creamy, and juicy—creating a harmony that lingers long after the last bite. And because strawberries are at their best in their peak season, this cake becomes a celebration of that fleeting time when everything tastes like sunshine and possibility.
With every slice you’ll notice how the flavors evolve: the first bite is gently sweet, almost dessert-chef elegant; the middle reveals a lush creaminess that glides across the palate; and the finish is bright and clean, a kiss of fruit that lingers without cloying sweetness. It’s a cake that pairs beautifully with a cup of espresso or a flute of something sparkling, making it equally at home on a leisurely Sunday morning brunch or a festive evening gathering. If you’ve ever wanted to bake something that feels both timeless and modern, comforting and refined, Torta fragole e panna offers that delightful paradox in one. Allow this dessert to become a new go-to, one that turns any ordinary moment into something worth remembering.
The Story Behind the Dish
The name itself—Torta fragole e panna—speaks of two beloved, simple ingredients that have traveled the world with centuries of affection: fresh strawberries and whipped cream. In Italian kitchens, desserts that celebrate fruit in their purest form are a testament to seasonality, farmers’ markets, and the everyday joy of gathering around a table with loved ones. This cake embodies that philosophy: a light, airy sponge built to cradle and showcase ripe berries, with whipped cream acting as a suave, creamy counterpoint rather than a heavy layer of richness. It’s the kind of dessert that could have its roots in a small, sunlit kitchen in Tuscany, where seasonal fruit is treated with reverence and every layer is crafted to highlight natural sweetness rather than overwhelm it.
There’s a charming lineage to this cake’s spirit. In many Italian homes, birthdays, anniversaries, and Sunday gatherings call for cakes that are elegant yet unfussy—cakes that feel personal, not intimidating. A strawberry-topped cake like this one is a modern nod to the classic “dolce della casa,” a dessert passed down from one generation to the next, often revised with a contemporary touch. The beauty of Torta fragole e panna lies in its adaptability: you can celebrate with a standard, classic version or infuse it with regional flair—adding a touch of liqueur for depth, a hint of lemon zest for brightness, or swapping in a softer sponge to achieve an even lighter bite. The result remains the same—a dessert that invites conversation, smiles, and that satisfying, “I need another slice” feeling.
Historically, whipped cream has long held a place in celebratory Italian desserts, where dairy, fresh fruit, and a touch of vanilla or citrus come together harmoniously. This cake sits comfortably within that tradition, offering a modern articulation of a timeless concept: a simple sponge cake that becomes special through the company of fruit and cream. The strawberries, often at their best during late spring and early summer, give the cake a seasonal heartbeat, turning every gathering into a small festival of color and aroma. Whether you’re recreating a Sunday ritual or presenting a dessert for guests with diverse tastes, this cake communicates warmth, hospitality, and a little bit of culinary poetry in every slice.
Why You’ll Love This Recipe
- Quick to assemble with a light, airy texture that feels indulgent without being heavy.
- Celebrates seasonal strawberries in a way that enhances their natural sweetness and tang.
- Versatile for a range of occasions—from everyday weeknights to special celebrations.
- Visually striking with its pink-tinged cream and ruby fruit, making it a crowd-pleasing centerpiece.
- Captures a balance of textures: delicate sponge, lush cream, and juicy strawberry bites.
- Adaptable to dietary needs with simple substitutions (vegan, gluten-free, etc.) without sacrificing charm.
- Delightful aroma that fills the kitchen as it comes together, creating anticipation and joy.
- Pairs beautifully with coffee, sparkling wine, or a light, citrusy dessert wine to elevate the experience.
Flavor Profile & Texture
The flavor profile of Torta fragole e panna is a study in balance and contrast. The sponge cake offers a gentle sweetness, with a soft, almost pillow-like crumb that yields easily under a fork. Its mild vanilla undertone acts as a blank canvas, allowing the strawberries and cream to take center stage. When you bite into the cake, the first sensation is the fresh fruit’s bright orchard aroma and the crisp note of the berries’ natural acidity. That acidity brightens the palate, cleansing the sweetness just enough to keep the cake lively rather than cloying.
The whipped cream is the cake’s creamy backbone: light, airy, and luxurious, it coats the tongue in a smooth, cool veil that contrasts beautifully with the slightly bouncy sponge. The cream’s tenderness enhances the strawberries’ juiciness, so each mouthful offers a chorus of textures: soft cake, cloud-like cream, and bursts of strawberry juice. The strawberries themselves contribute both color and flavor—risking that familiar “summer fruit” note without overpowering the other components, ensuring each bite remains balanced and refreshing. If you desire a touch of tang, a whisper of lemon zest or a splash of vanilla can be introduced to the cream to brighten the overall profile. The end result is a cake that feels elegant and refined, yet incredibly comforting and familiar—like a warm embrace from a beloved family recipe.
In terms of mouthfeel, expect a tender crumb that dissolves gently on the tongue, followed by the cool, creamy texture that lingers pleasantly. The strawberries contribute a slight juiciness that prevents the cake from tasting dry, ensuring that every slice remains vibrant and juicy. The overall harmony makes this dessert particularly well-suited to warm days when something cool and refreshing is a welcome respite, and to festive evenings when a dessert should feel celebratory without being fussy.
Occasions & Pairings
This strawberry and cream cake is a versatile guest at many occasions. It shines on birthday tables as a breezy alternative to a heavier celebration cake. It’s equally comfortable at a weekend brunch, a bridal shower, a casual anniversary dinner, or a backyard summer party where a light, elegant dessert can be served with sparkling beverages and lots of smiles. Its simple charm makes it approachable for home cooks, yet its presentation still feels special enough to impress guests who value both taste and aesthetics.
Pairing ideas to enhance the experience:
- Drinks: Prosecco or a sparkling rosé for a celebratory feel; a bright, chilled Moscato for a fruity finish; or black coffee for a sophisticated contrast.
- Side options: a dollop of extra whipped cream on the side for those who love it, or a light dusting of powdered sugar for a delicate finish.
- Complementary desserts: a tangy citrus sorbet or a light vanilla custard can provide a refreshing counterpoint if you’re serving multiple desserts.
- Garnishes: a few mint leaves for a color pop, or a delicate drizzle of strawberry coulis to intensify the fruitiness.
Seasonal notes can also guide your serving: in peak strawberry season, keep the fruit as fresh and vibrant as possible for maximal flavor; in off-season times, you can use high-quality preserved or frozen berries as a reminder of summer, while ensuring the cream remains the star of the show.
Tips, Variations & Substitutions
Vegan & Dairy-Free Options
To make a vegan-friendly version, swap the sponge with a plant-based recipe that yields a light, airy crumb; use coconut cream or almond-based whipped cream, lightly sweetened, in place of dairy cream. For the strawberries, ensure they’re fresh and ripe, as their natural sweetness will carry much of the cake. If you want to maintain a similar mouthfeel to traditional whipped cream, consider whipping chilled coconut cream with a touch of vanilla and a pinch of sugar until fluffy. The aroma and texture will still be irresistibly creamy, while accommodating dietary choices.
Gluten-Free & Nut-Free Options
A gluten-free version can be achieved with almond flour or a certified gluten-free cake mix designed for a light crumble. If you’re avoiding nuts, choose a gluten-free base that doesn’t rely on nut flours, and ensure your whipped cream and fruit remain free from nut-based additives. The aim is to preserve the cake’s tenderness and the whipped-cream-and-berries balance while staying mindful of dietary needs.
Regional Twists
Cornflower-tinged vanilla sponge with a kiss of lemon zest can brighten the cake in a distinctly Mediterranean manner. A splash of Limoncello or a few drops of orange blossom water in the whipped cream adds a fragrant, citrus-forward twist that complements the berries beautifully. For a classic Italian touch, layer a light dusting of fine sugar between layers or brush the sponge with a mild syrup that uses a hint of vanilla or citrus to create subtle depth without heavy sweetness.
Make-Ahead & Make-Ahead Storage
To streamline entertaining, you can bake the sponge a day or two in advance and store it wrapped in a clean kitchen towel or parchment in a cool place. Whip the cream and refrigerate it, and slice the strawberries closer to serving time to keep them fresh and bright. When you’re ready to assemble, you can stack the layers, spread the cream, and decorate with fresh berries just before serving. If you plan to assemble ahead, consider constructing the cake a few hours before serving and chilling it in the refrigerator so the flavors mingle while maintaining the cake’s structure.
Storage & Make-Ahead Ideas
Leftovers can be kept in the refrigerator for a couple of days, though the best experience is often enjoyed within 24 hours of assembly when the sponge remains soft and the cream at its freshest. Cover the cake loosely to protect it from absorbing other odors in the fridge, and keep it chilled until ready to serve. If you need to freeze portions, wrap individual slices tightly in plastic wrap and place in an airtight container; this can preserve texture and flavor for a few weeks, though the slightly soft sponge may become more dense upon thawing. Thaw slowly in the refrigerator and reassemble with a fresh topping of whipped cream and berries if desired to restore vibrancy.
For events or large gatherings, consider preparing the cake in a rectangular or square pan and serving it in party-sized slices. This approach can also make it easier to transport and portion for guests, while still delivering the same delightful experience.
Fun Facts & Trivia (Optional)
- Strawberries are one of the few fruits that contain seeds on the outside, and they pack a surprising amount of aroma and flavor into every bite.
- Whipped cream’s history as a dessert topping stretches back centuries, and it remains a timeless partner for fruit-based desserts around the world.
- In Italian culture, desserts that highlight fresh fruit are often prepared with care to emphasize simplicity, balance, and the celebration of seasonal produce.
- Fruit-forward cakes like this one are perfect for hot days because they rely on creamy textures and cold components to provide a refreshing finish without heaviness.
- Regional variations of this concept exist across Europe, where different berries, creams, and flavorings are used to tailor the dessert to local tastes and availability.

Ingredients
Cake Base
- 2 cups all-purpose flour (240 g)
→ The flour provides the cake’s structure and crumb. Sift before measuring to avoid dense pockets and ensure a light, even rise. For a lighter crumb, you can substitute part of the flour with cake flour or use a 1:1 gluten-free blend if needed, but keep the leavening amount consistent to prevent heavy texture. - 1 1/2 cups granulated sugar (300 g)
→ Sugar sweetens the batter and helps tenderize the gluten, contributing to a soft, cake-like crumb. Creaming sugar with butter (if your method uses this) adds air for volume. If you prefer a less sweet cake, reduce by up to 1/4 cup, keeping flavor balanced with the strawberries and whipped cream. - 1/2 cup unsalted butter, softened (115 g)
→ Butter adds moisture, flavor, and tenderness. Cream it with sugar (if your method includes creaming) to incorporate air for a lighter texture. If you must substitute, you can use neutral oil (1/2 cup) but expect a slightly different crumb and mouthfeel. - 3 large eggs, room temperature
→ Eggs provide structure, moisture, and richness. Room-temperature eggs blend more evenly with the batter and help achieve a smoother emulsion for a tender crumb. If using cold eggs, gently warm in warm water for a few minutes before beating. - 3/4 cup milk, room temperature (180 ml)
→ Milk hydrates the dry ingredients and activates the leavening; whole milk yields a richer crumb, while skim or non-dairy alternatives will yield a lighter finish. Keep at room temperature to maintain emulsification during mixing. - 2 tsp baking powder
→ The primary leavening for lift and a soft rise. Use fresh baking powder for best results; whisk with the dry ingredients to distribute evenly and avoid dense patches in the batter. - 1/2 tsp salt
→ Enhances overall flavor and tightens crumb, balancing sweetness and the strawberries’ acidity. If using salted butter, adjust or omit additional salt accordingly to avoid oversalting. - 2 tsp vanilla extract
→ Adds depth and aroma to the cake. Use pure vanilla extract for the most robust flavor; if you have vanilla paste, you can substitute half of the extract for a more intense vanilla character with visible vanilla specks. - 1 tablespoon unsalted butter, melted (for greasing the pan)
→ A thin film of melted butter helps the batter release cleanly from the pan. Brush the entire interior and, if desired, line with parchment paper to ensure easy removal and even browning.
Strawberry Layer
- 2 cups fresh strawberries, hulled and sliced (about 300 g)
→ Use ripe, fragrant berries for the best flavor; slice evenly to ensure uniform layering. Strawberries contribute sweetness, brightness, and juiciness to the filling and topping. If you prefer a more pronounced strawberry syrup, macerate with sugar and lemon juice, then drain before layering to avoid soggy crumbs. - 2 tablespoons granulated sugar
→ Used to macerate the strawberries, drawing out juices and creating a glossy syrup that enriches the filling. If berries are very ripe and juicy, you can reduce this to 1 tablespoon or omit entirely, depending on sweetness preference. - 1 teaspoon lemon juice
→ Brightens the strawberry flavor and helps preserve color; use freshly squeezed juice for the best brightness. Combine with sugar to macerate the berries for 15 minutes, then gently pat dry if you want firmer slices in the layers.
Whipped Cream
- 2 cups heavy cream, chilled (480 ml)
→ The whipped cream forms the creamy filling and topping. Chilling the cream, bowl, and beaters helps achieve stable, fluffy peaks. Beat just until you reach the desired peak (soft for filling, stiff for frosting) to avoid overbeating into butter. - 3-4 tablespoons powdered sugar
→ Adds sweetness and helps stabilize the whipped cream, reducing graininess and melt-in-the-mouth softness. Sift the powdered sugar before adding to prevent lumps. Adjust to taste, especially if your berries are very sweet or if you prefer a less sweet cake. - 1 teaspoon vanilla extract
→ Provides aroma and depth to the whipped cream. Use pure vanilla extract for best flavor; if you have vanilla bean paste, you can add a small amount for a richer vanilla presence and visible vanilla specks.
Toppings
- Extra strawberries, sliced (about 1 cup / 150 g)
→ For decorating the top and between layers. Uniform slices create a tidy, bakery-style finish. Arrange in a decorative pattern or fan along the edge for a professional look. - Powdered sugar, for dusting (optional)
→ Finishing touch to mimic bakery presentation. Dust lightly just before serving to keep the delicate surface intact and prevent dissolving into the whipped cream too soon. - Fresh mint leaves (optional)
→ A few small leaves add color contrast and a hint of fresh aroma. Rinse and pat dry; place sparingly around the cake or atop the strawberries for a vibrant finish.
Instructions
- Preheat your oven to 350°F (175°C) and prepare a 9-inch (23 cm) round cake pan by brushing the interior with the melted butter and lining the bottom with parchment paper, then dusting with a light coating of flour or using non-stick spray.
→ This creates a neutral, non-stick surface for clean release and even browning across the cake. - Sift together the dry ingredients: 2 cups all-purpose flour, 2 teaspoons baking powder, and 1/2 teaspoon salt, then whisk to ensure even distribution.
→ Sifting removes lumps and distributes leavening evenly, which prevents dense patches and promotes a uniform rise. - Cream the 1/2 cup (115 g) softened unsalted butter with the 1 1/2 cups (300 g) granulated sugar on medium-high speed until pale, fluffy, and the mixture holds slight trails, about 3–4 minutes.
→ Creaming incorporates air into the batter, contributing to a light, tender crumb and better volume as the cake bakes. - Add the 3 large eggs, one at a time, beating well after each addition to create a smooth emulsion, then mix in 2 teaspoons vanilla extract.
→ Adding eggs individually helps maintain a stable emulsion, preventing curdling and ensuring an even texture with rich flavor from the vanilla. - Add the dry ingredients in three additions interleaved with the 3/4 cup (180 ml) milk in two additions: begin with one-third of the flour, then half the milk, then another third of flour, the remaining milk, and finish with the last third of flour, mixing just until each addition is incorporated.
→ Alternating dry and wet ingredients prevents overmixing, minimizes gluten development, and yields a tender crumb. - Pour the batter into the prepared pan and smooth the surface with a spatula, then tap the pan firmly on the counter a few times to release any trapped air bubbles.
→ Leveling ensures even baking and tapping releases air pockets that can create holes or unevenness in the crumb. - Bake in the preheated oven for about 30–35 minutes, rotating the pan halfway through, until a toothpick inserted into the center comes out with a few moist crumbs and the top is lightly golden.
→ The toothpick test confirms doneness without overbaking, while rotation promotes even browning on all sides. - Cool the cake in the pan for 10 minutes, then invert onto a wire rack to cool completely before assembling.
→ Allowing the cake to cool fully sets the crumb and prevents the layers from sliding or tearing during ganache-like filling assembly. - Meanwhile, macerate the 2 cups fresh strawberries (hulled and sliced) with 2 tablespoons granulated sugar and 1 teaspoon lemon juice for 15 minutes, stirring gently once or twice, then pat the berries dry to remove excess juice.
→ Maceration draws out bright juice and intensifies strawberry flavor; patting dry prevents soggy layers and helps maintain structural integrity in the filling. - Chill a large mixing bowl and whisk or a stand mixer attachment in the freezer for 10 minutes, then whip the 2 cups heavy cream with 3–4 tablespoons powdered sugar and 1 teaspoon vanilla extract to stiff peaks; chill the whisk or beaters briefly if needed to maintain stability.
→ Cold equipment helps achieve stable, airy peaks quickly, ensuring the cream holds shape for filling and topping without weeping. - Carefully level the cooled cake with a serrated knife if domed, then cut it horizontally into two even layers using a gentle sawing motion and keeping the knife perpendicular to the work surface.
→ A level cut ensures a clean, professional-looking sandwich layer and an even distribution of filling. - Place the bottom cake layer on a serving plate, spread an even layer of whipped cream over the surface, then spoon and spread the macerated strawberries in a uniform layer on top.
→ The cream provides moisture and acts as a binding layer for the strawberry filling, while the strawberry layer adds brightness and juiciness between the cake layers. - Top the strawberry layer with the second cake layer, pressing lightly to secure, and apply a generous coat of whipped cream over the top and around the sides to create a smooth, velvety finish.
→ A thorough crumb coat and final smoothing create a bakery-finish appearance and help the cake hold its shape when sliced. - Decorate the top with the extra sliced strawberries arranged in a pattern, dust lightly with powdered sugar if desired, and garnish with fresh mint leaves for color and aroma.
→ Fresh fruit and mint elevate presentation, offer a contrast of color, and provide a refreshing aroma that complements the cream and cake. - Chill the assembled cake for at least 30 minutes before slicing to set the layers and improve neatness when serving.
→ A short chill helps the whipped cream stabilize, making clean slices easier and reducing the risk of filling from oozing out. - Slice and serve portions with an additional small spoon of whipped cream on the side if desired, and refrigerate any leftovers in an airtight container for up to 2 days.
→ Chilled slices hold their shape longer, and refrigeration preserves the whipped cream and strawberry flavors without drying the cake.
Notes
These strawberry and cream cake layers are a classic dessert featuring a tender vanilla sponge, juicy macerated strawberries, and light whipped cream. You can customize them by using a 1:1 gluten-free flour blend in place of all-purpose flour (adding a touch of cornstarch can help mimic cake flour for a lighter crumb) and making sure your baking powder is fresh and gluten-free if needed. For a lighter crumb, substitute half the butter with neutral oil, though the texture will be a touch denser. Add a teaspoon of lemon zest to the batter for a bright citrus note that pairs beautifully with the berries. Macerate the strawberries with sugar and lemon juice as directed, then drain before layering to avoid soggy crumbs. Chill the whipped cream well and whip to stiff peaks for clean, sliceable layers; stabilizers such as a tiny amount of cream of tartar or a pinch of gelatin are optional if you’re making ahead. Assemble with cake base, strawberry filling, and whipped cream, finishing with extra strawberries on top and a dusting of powdered sugar or fresh mint. The cake is best served chilled and will keep for 2–3 days in the fridge; it can be frozen in portions after assembly for longer storage. If you have dairy restrictions, substitute whipped cream with coconut cream and use a dairy-free butter substitute. Always choose gluten-free ingredients if you have a gluten intolerance.
Tips
Tips for the Cake Base
- Measure flour by weight when possible. Sift the flour first, then measure to ensure a light, even crumb. If you don’t have cake flour, you can replace part of the all-purpose flour with cake flour or a 1:1 gluten-free blend, but keep the same leavening amount to avoid a dense texture.
- Room-temperature ingredients mix more evenly. Take the eggs and milk out about 30 minutes before you start. If you’re short on time, warm the eggs in warm water for a few minutes, then dry them before adding to the batter.
- For a tender crumb, cream butter and sugar until light and fluffy (if your method uses creaming). Scrape the bowl often to incorporate air and prevent dense pockets.
- Fresh leavening matters. Use fresh baking powder and whisk it with the dry ingredients so the lift is even. Old powder can lead to a cake that doesn’t rise well.
- Balance flavor with vanilla and a touch of salt. Pure vanilla extract deepens the crumb, and a pinch of salt enhances sweetness and fruit brightness. If using salted butter, taste before adding extra salt.
- Pan prep matters. Grease the pan and dust with flour or line the bottom with parchment for easy release. A thin film of melted butter followed by parchment ensures clean edges and even browning.
- A gentle bake yields better texture. Bake until a toothpick comes out clean with a few moist crumbs; if the top browns too quickly, tent with foil to prevent over-browning while the center finishes cooking.
- Cool properly before filling. Let the cake cool in the pan for 10–15 minutes, then transfer to a rack to cool completely. A fully cooled base prevents the whipped cream from melting and the strawberry layer from sliding.
Tips for the Strawberry Layer
- Choose ripe, fragrant berries for maximum flavor. Uniformly slice to ensure even layering and texture in every bite.
- Macerate with care. Macerating strawberries with sugar and lemon juice enhances sweetness and creates a glossy syrup. Drain gently to avoid making the layers soggy.
- Brighten with lemon juice, but don’t overdo it. Fresh lemon juice highlights strawberry flavor and helps preserve color during assembly.
- Consistency matters for layering. If liquid is too runny, pat the berries dry with a clean towel before spreading to keep the layers distinct.
- Consider a syrup alternative. If you prefer a stronger strawberry presence, reduce the sugar by 1 tablespoon and reserve extra macerated juice to brush lightly on the top of the cake just before serving for a subtle glaze.
Tips for the Whipped Cream
- Chill everything. Chill the heavy cream, bowl, and beaters for at least 15–20 minutes before whipping to help achieve stable, fluffy peaks.
- Whip to the right stiffness. For filling, soft to medium peaks are ideal; for frosting or a clean top, aim for stiff peaks. Stop whipping as soon as the desired texture forms to avoid overbeating into butter.
- Balance sweetness. Add 3–4 tablespoons of powdered sugar and 1 teaspoon vanilla, then taste and adjust. Sift the powdered sugar to prevent lumps and graininess.
- Stabilize if you’ll assemble in advance. If you’re making ahead, you can stabilize the whipped cream with a small amount of gelatin (1 teaspoon gelatin dissolved in 2 tablespoons hot water, cooled) folded in after whipping, or use a pinch of cream of tartar and chill well.
- Keep it cold during assembly. Refrigerate the whipped cream while you prepare the other components to help it hold its shape when spreading and layering.
- Flavor variety. If desired, swap a portion of the vanilla for a touch of almond extract or add a hint of citrus zest for a bright note that complements strawberries.
Tips for Assembly and Presentation
- Layer thoughtfully. Start with the cake base, spread a smooth, even layer of whipped cream, then add the strawberry layer. Repeat with a final whipped-cream topping if desired.
- Keep layers even. Use an offset spatula to level each layer and prevent bulging or uneven slices. A clean edge makes for a bakery-like finish.
- Chill between steps. If you’re making ahead, refrigerate the assembled cake for at least 1–2 hours to help the layers set and easier to slice.
- Slice like a pro. Clean cuts come from a warmed knife. Dip a sharp knife in hot water, wipe dry, and slice, wiping the blade between cuts for crisp edges.
- Garnish wisely. Decorate with extra strawberry slices and mint leaves just before serving. A light dusting of powdered sugar adds a delicate bakery touch without dissolving into the whipped cream too quickly.
Substitutions and Variations
- Gluten-free option. Use a 1:1 gluten-free flour blend that includes xanthan or another binder, and keep leavening the same. You may notice a slightly different crumb—let it cool fully before filling to relax the structure.
- Dairy-free version. For the cake, substitute a neutral oil (instead of butter) and consider a dairy-free milk. Whipped cream can be replaced with canned coconut cream whipped with a bit of sugar and vanilla, kept very cold.
- Fruit variations. Swap strawberries for other berries or stone fruits in season, but adjust maceration and sugar to taste since sweetness and juiciness vary by fruit.
- Sweetness control. If berries are very ripe, you can reduce the sugar in the macerating stage and balance with the whipped cream sweetness.
Troubleshooting Quick Fixes
- Dense cake batter. Ensure you measured flour correctly, didn’t overmix after adding dry ingredients, and used fresh baking powder. Consider a quick test bake of one cupcake to check rise before baking the whole cake.
- Juicy, soggy layers. Drain macerated berries well and pat dry. If juices still pool, gently brush the top of the base with a light glaze of whipped cream to seal before adding the berry layer.
- Whipped cream losing shape. Keep everything cold, avoid overwhipping, and consider stabilizing if you’ll assemble far in advance.
- Cracks on top. This often indicates oven temperature too high or overbaking. Tent with foil and lower oven temperature slightly if needed.
FAQ
Domande frequenti – Torta fragole e panna
Quali sono gli ingredienti principali per una torta fragole e panna classica?
Ingredienti tipici: pan di Spagna soffice, panna fresca da montare, fragole fresche, zucchero a velo e vaniglia. Puoi aggiungere un poco di succo di limone per esaltare la frutta. Opzionalmente si utilizza una piccola quantità di gelatina alimentare per stabilizzare la panna se la torta deve restare ferma a temperatura ambiente per qualche ora.
Come preparo la base di pan di Spagna?
Sbatti le uova con lo zucchero finché diventano chiare e spumose, aggiungi la farina setacciata e un pizzico di sale, mescola delicatamente. Versa l’impasto in una teglia imburrata e inforna a 170–180°C per circa 20–25 minuti. Lascia raffreddare completamente prima di tagliare in strati.
Come si prepara la crema di panna (chantilly)?
Montare la panna fredda con zucchero a velo e un pizzico di vaniglia fino a ottenere una consistenza ferma. Se vuoi una crema più stabile, aggiungi qualche cucchiaio di mascarpone o formaggio cremoso. Per una versione senza panna, puoi usare crema pasticcera leggera o crema yogurt (verifica che si mantenga bene in frigorifero).
Come si assemblano gli strati della torta?
Taglia il pan di Spagna in 2 o 3 strati sottili. Bagna ogni strato con pochissimo sciroppo di fragola o limone (opzionale). Spalma uno strato di crema tra gli strati e distribuisci pezzetti di fragola fresca. Ripeti fino a riempire i strati, poi copri l’intera torta con la crema rimasta e decora con fragole.
Posso preparare la torta in anticipo?
Sì. Puoi preparare i pan di Spagna e la crema in anticipo e conservarli in frigorifero. Assemblare e decorare poco prima di servire è consigliato per mantene la freschezza delle fragole. Se vuoi, puoi anche congelare i pan di Spagna già cotti, una volta raffreddati.
Come conservare la torta fragole e panna?
Conserva la torta in frigorifero, coperta o in contenitore ermetico, preferibilmente entro 2-3 giorni. Evita di esporla a temperature troppo alte per non far sciogliere la panna. Le fragole tendono a rilasciare liquido se restano a lungo tagliate in superficie, quindi è meglio decorare poco prima di servire.
Quali varianti posso provare?
Varianti comuni includono: crema al mascarpone al posto della panna, crema diplomate, o una crema al cioccolato. Puoi anche aggiungere uno strato di gelatina di fragola tra gli strati o completare con una glassa lucida. Per una versione leggera, riduci lo zucchero o usa una crema di yogurt.
Come rendere la torta adatta a persone con allergie o intolleranze?
Allergie/Glutine: usa pan di Spagna senza glutine. Lattosio/intolleranza: monta panna vegetale (soia, cocco) al posto della panna fresca. Vegana: usa pan di Spagna vegano (senza uova) e crema vegetale. Sempre controlla le etichette degli ingredienti per evitare tracce di allergeni.
Quali strumenti sono utili per prepararla?
Stampo rotondo o quadrato per torta, fruste elettriche o planetaria, spatola per farcire, coltello affilato per tagliare i pan di Spagna, ciotole, eventuale pennello da cucina per lo sciroppo di bagna, e un supporto/torta per decorare.
Quali errori comuni evitare?
Pan di Spagna troppo asciutto o secco può compromettere la morbidezza. Evita di bagnare eccessivamente gli strati, che rendono la torta molle. Taglia strati uniformi per evitare dislivelli e assicurati che la panna sia ben fredda quando monti. Asciuga le fragole se lente a rilasciare liquido per evitare scivolamenti della crema.