Introduction / Hook
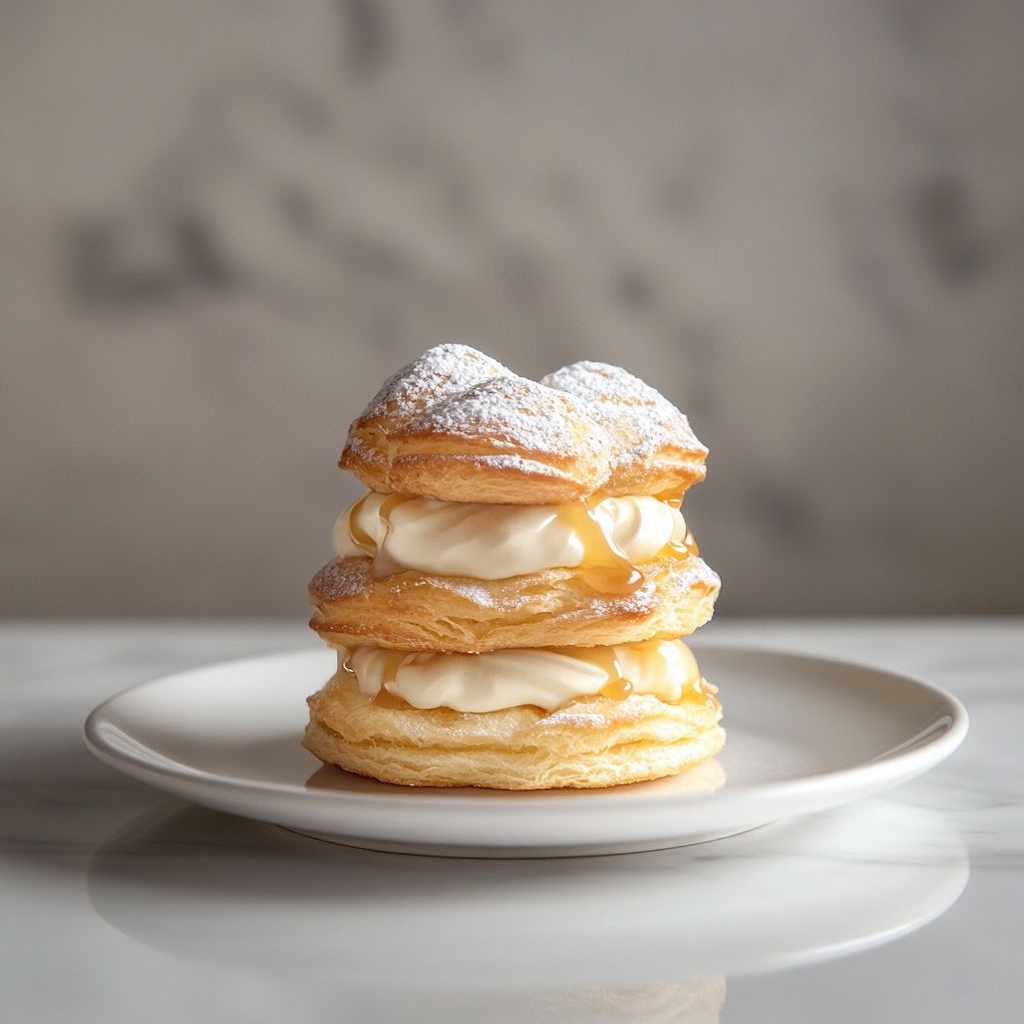
Picture a delicate cloud of pastry that gleams with a whisper of gloss, perched atop a velvet-soft bed of custard-like cream, and crowned with a light dusting of powdered sweetness. Cream puff cake isn’t just a dessert; it’s an experience that dances on the palate and lingers in the memory. It begins with the crackle of a perfect crust giving way to a sigh of tender crumb, followed by a creamy, creamy center that melts as it meets your tongue. The aroma alone has a way of turning an ordinary afternoon into a small celebration—like stepping into a bakery at dawn, where the day’s first batch is still warm and the air carries a hint of vanilla and toasted sugar. This dessert is for dreamers who believe that dessert should be an event, not merely a finish to a meal. It’s for gatherings that crave a showstopper with a storytelling quality—an edible centerpiece that looks as elegant as it tastes.
What makes cream puff cake especially captivating is how it marries two classic textures into one, seamless bite. The exterior offers that quintessential choux-crack—airy, blistered, and delicate—while the interior reveals a luscious, creamy milieu that feels indulgent yet surprisingly light. There’s a chorus of sensations in every mouthful: the initial snap of the outer shell, the soft cushion of the filling, the faint vanilla warmth, and a clean finish that invites the next bite. It’s a dessert that invites conversation, admiration, and perhaps a gentle sigh of contentment—proof that dessert can be both theatre and solace at the same time.
In the cinematic arc of a dinner party, cream puff cake plays the role of the quiet hero that appears just as the room begins to hum with conversation. It doesn’t shout for attention; it earns it with its elegant silhouette and its capacity to be both refined enough for a formal finale and forgiving enough for a casual weekend gathering. The beauty of this dessert lies not just in its taste, but in the way it can be adapted to suit different moods, seasons, and tables. Whether served as a towering showpiece for a special occasion or sliced into intimate portions for a cozy weeknight treat, cream puff cake offers a culinary moment that feels luxurious without being pretentious.
As you prepare to read on about the origins, the variations, and the best ways to present this dessert, you’ll notice a thread that runs through every version: balance. The sweet with the subtle, the light with the lush, the simple with the sophisticated. Cream puff cake invites you to savor the journey as much as the destination, elevating everyday desserts into something that feels newly invented each time you slice through its airy layers.
The Story Behind the Dish
Origins of the Cream Puff and the Birth of a Cake
To understand cream puff cake, you first meet its ingredients in spirit: choux pastry, the venerable French creation that has delighted bakers for centuries. Choux is a genius of restraint and technique, relying on a simple assembly of flour, water, butter, and eggs to create a dough that puffs into lightness with oven heat. When baked, the dough leaves a hollow interior perfect for filling with creams, mousses, or custards. The name “choux” itself evokes a lightness of being, a delicate puff that seems to float just above the plate.
The idea of pairing airy pastry with a generous filling is equally grounded in European patisserie, where the most memorable desserts trade on contrast: crisp exteriors giving way to creamy centers. Cream puff cake unifies two beloved forms—the classic cream puff and the celebratory cake—into a single, spectacular creation. It’s a hybrid that respects the discipline of precise pastry technique while inviting playful variation, as bakers across regions adapt the filling to local tastes and seasonal ingredients. In many ways, this dessert embodies the spirit of culinary evolution: a homage to tradition that remains deliciously open to reinterpretation.
Historically, puffed pastries appeared in various forms across Europe, evolving as bakers experimented with doughs and fillings. The cream-filled version became especially iconic because it offered a practical elegance: an impressive, crowd-pleasing treat that could be scaled up for gatherings or pared down for intimate dinners. The cake variation—where the lightness of a puffed shell is harnessed within a multi-layered or tiered presentation—emerged as an indulgent centerpiece, ideal for birthdays, holidays, and milestone celebrations. The result is a dessert that tells a story with its silhouette: a rounded, almost sculptural form that invites the eye as much as the palate.
In modern kitchens, cream puff cake is often a love letter to technique and texture. Bakers who approach it with curiosity discover that the magic lies in controlling moisture, air, and sweetness so that the outer crust remains crisp while the interior stays supple and creamy. Whether you’re recreating a family recipe passed down through generations or exploring a contemporary riff that adds a twist like citrus zest, espresso glaze, or a seasonal berry compote, the dessert remains a canvas—one that invites both tradition and invention to share the stage.
Why You’ll Love This Recipe
Benefits at a Glance
- Impressive presentation with minimal staging. Cream puff cake looks sophisticated on a dessert stand or a family-style platter, yet it’s approachable enough for home bakers with advanced basic skills.
- Versatility that adapts to seasons and tastes. The filling can be classic vanilla, chocolate, citrus, or a rich pastry cream with a hint of liqueur for an adult twist, making it suitable for any celebration or weeknight indulgence.
- Texture contrast that delights. The outer shell offers a crisp, delicate bite, then yields to a lush, creamy interior that feels luxurious without being heavy.
- Make-ahead friendly for entertaining. With proper planning, components can be prepared in advance and assembled closer to serving, freeing you to mingle with guests rather than being tethered to the kitchen.
- Elegance with simplicity. You don’t need complex equipment or theatrical skills to achieve a dessert that looks refined and tastes unforgettable.
- Every bite tells a story. The dessert invites conversation about technique, history, and regional twists, turning your table into a small culinary salon.
- Comforting yet festive. It strikes a balance between cozy familiarity and celebratory luxury, making it a smart choice for holidays, birthdays, or any time you want to mark the moment with something special.
Flavor Profile & Texture
Imagine a crust that crackles softly as you cut through it, releasing a whisper of steam that hints at the tender interior to come. The shell—characteristic of the choux family—delivers a light, airy bite with a faint caramelized note from the oven’s heat. Its thinness allows the accompanying cream to shine without overwhelming the palate, creating a delicate textural dialogue between crisp exterior and velvety center.
The filling is where the dessert becomes irresistibly comforting. It tends to lean toward a smooth, luscious texture that coats the palate with a gentle embrace. The flavor is lush but not cloying, often enriched by vanilla, a touch of sugar, and a whisper of dairy fat that lends fullness without heaviness. When a citrus or berry component is woven in, it introduces a bright counterpoint—acidity that cleanses the sweetness and awakens the senses without overpowering the pastry’s inherent delicacy.
In the best iterations, there’s a subtle interplay of sweetness levels. The shell’s mild savoriness—owing to the eggs and pastry butter—provides a savory-edge that balances the sweet cream, creating a chorus rather than a solo. The overall sensation evolves with temperature: a just-warmed slice offers more body and richness, while a cooler slice highlights the shell’s crispness and the filling’s silkiness. Aromas of vanilla, almond (if used in the shell), and a whisper of caramelization from baking join the tasting notes, making each bite a small, multi-sensory celebration.
Occasions & Pairings
When to Serve and What to Pair
Ceremonial celebrations and intimate evenings alike benefit from the grace of cream puff cake. It shines as a finale for a formal dinner, a showpiece at a milestone party, or a centerpiece for a Sunday family gathering. Its visual impact makes it a natural candidate for birthday desserts, wedding receptions, or holiday menus where you want something that reads as thoughtfully crafted without requiring a banquet kitchen to produce.
Pairing ideas to complement and elevate the dessert include:
- Fresh fruit accents such as berries or citrus segments that offer brightness and color contrast.
- A light dusting of citrus zest or a delicate glaze to add a glimmering finish and a fragrant lift.
- A sparkling beverage or dessert wine that mirrors the dessert’s elegance without overwhelming its delicate balance.
- Complementary textures from a simple almond tuile or pistachio brittle for crunch that plays with the cream’s creaminess.
- Seasonal twists like a warm berry compote for autumn or a mango-passion fruit profile for a tropical-inspired variation.
Tips, Variations & Substitutions
Creative Approaches to Personalize the Dessert
- Vegan adaptation: Explore dairy-free fillings and shells that rely on plant-based fats and emulsions while preserving the lightness of the pastry. The key is to maintain the airiness of the shell and a creamy, dairy-free center that remains smooth and indulgent.
- Gluten-free approach: Use a gluten-free flour blend that behaves similarly to wheat for the shell, focusing on achieving the same puff and crispness without compromising texture.
- Flavors within the filling: Introduce subtle notes like vanilla bean, espresso, citrus zest, or almond extract to tailor the cream to your preference. A light liqueur can add warmth and depth for adult gatherings.
- Shell texture variations: Adjust the baking temperature and time to influence the blistered surface and internal dryness. A slightly drier interior can balance exceptionally well with a rich filling.
- Seasonal twists: For a summery version, fold in seasonal fruit purées or swirl in a ribbon of berry coulis within the filling for a marbled effect and a burst of brightness in every bite.
- Texture-forward variants: Add a delicate crunch by incorporating toasted nuts or crisped sugar shards as a topping or interlayer, creating a satisfying contrast with the smooth filling.
- Decorative presentation: Build the dessert into a towering confection for events or slice into individual portions for elegant plated desserts. A thin glaze or a light dusting of confectioners’ sugar can finish the look beautifully.
- Make-ahead strategies: Prepare the shell in advance and fill closer to serving time, or assemble complete mini portions a day ahead and keep refrigerated until service to maintain freshness and form.
Storage & Make-Ahead Ideas
Storage approaches depend on how you assemble the dessert. If you’ve prepared shells ahead of time, keep them in a dry, airtight container to preserve crispness. Fillings are best stored separately and assembled near serving time to retain the shell’s delicate texture. For smaller, individual portions, you can refrigerate assembled pieces for a day or two, though the shell may soften slightly with time. If you need to keep everything longer, a gentle freezing method can preserve the components; thaw slowly in the refrigerator to maintain texture before the final assembly. Reheating is gentle and short—enough to awaken aromas and soften the filling without making the shell soggy.
Make-ahead strategies can favor hosting ease. You might prepare a base shell batch a day or two in advance and store in a cool, dry place. The filling can be whisked and stabilized in advance so that the final dessert comes together with minimal effort. For elaborate gatherings, consider preparing a stand or tiered display in advance and performing the final touches, such as a light dusting of sugar or a drizzle of glaze, just before guests arrive. This approach allows you to focus on connection and conversation rather than being tethered to the oven while everyone awaits the grand reveal.
Fun Facts & Trivia (Optional)
Did you know that choux pastry is believed to have originated as a practical solution for cooks who needed a dough that could be cooked in the same pot as the filling? Its resilience and versatility made it a beloved staple in pastry kitchens across Europe. The name “cream puff” evokes the airy nature of the finished product, a dessert that seems to puff up with the energy of air and the warmth of the oven, only to reveal a hidden treasure inside. Across cultures, variations have flourished: some traditions emphasize rich custards; others highlight whipped creams with delicate flavorings. The result is a family of desserts that share a common ancestry but celebrate distinct regional personalities.
From a culinary perspective, cream puff cake illustrates a fundamental principle: texture is as important as flavor. The play between crisp outer layers and creamy interiors exemplifies how technique shapes enjoyment. Even within the same recipe, small adjustments—like the intensity of the glaze, the balance of sweetness, or the aromatics used—can transform the experience from comforting nostalgia to refined elegance. In any case, the dessert invites a careful, mindful tasting that rewards curiosity and patience, turning a simple plate into a sensory meditation.
Ingredients
Cream Puff Cake
Choux Base
– 1 cup water (240 ml)
→ Water is the primary liquid that steams away during baking to push the dough upward and create the signature hollow choux shells. It helps dissolve the butter as the dough comes together, forming a cohesive paste when flour is added. Use cold to room-temperature water for consistent texture; if you use milk instead, the shells will be richer but denser. Ensure the mixture comes to a boil briefly before adding the flour for best puff.
– 1/2 cup unsalted butter (115 g)
→ Butter provides fat for tenderness and flavor, and it helps create a smooth, cohesive dough as it melts into the water. Melt the butter completely with the water before introducing the flour to ensure even distribution. Use unsalted butter to control the salt level in the dough, essential for proper rise.
– 1/4 teaspoon salt
→ Salt enhances the dough flavor and helps strengthen the structure as the shells bake. Fine-grain salt mixes more evenly into the warm liquid, preventing uneven pockets. Do not omit entirely if you want the choux to have depth of flavor.
– 1 tablespoon granulated sugar (optional)
→ A touch of sugar aids browning and a slight sweet balance typical of cream puffs. If you prefer a more neutral pastry, you can omit it. When included, it contributes to a light, golden crust during baking.
– 1 cup all-purpose flour (120 g)
→ The flour provides the starch and structure that, when hydrated and heated, forms the sturdy walls of the choux shells. Sift the flour before adding it to the hot mixture to prevent lumps and to ensure even absorption. Add the flour all at once after boiling the water mixture, then stir vigorously to evaporate excess moisture and create a cohesive dough.
– 4 large eggs, room temperature
→ Eggs supply structure, moisture, and lift. They are added one at a time to achieve a thick, shiny, pipeable dough that holds its shape when baked. If the dough looks too thick after adding the first few eggs, you can beat in small increments until it just loosens to a glossy ribbon that slowly cascades off a spoon. Do not overmix once the eggs are added, or the shells may not puff properly.
Pastry Cream Filling
– 2 cups whole milk
→ The milk forms the base of the classic crème pâtissière, providing richness and body to the filling. For best results, warm the milk gently (not boiling) with half of the sugar and the vanilla to infuse flavor before combining with the yolks. If you prefer a lighter texture, you can use 1.5 cups milk and 0.5 cup cream, but traditional cream puffs use milk for a stable custard.
– 1/2 cup granulated sugar
→ Sugar sweetens the custard and helps create a smooth, silky texture during cooking. Adjust to taste, but avoid over-sweetening which can mask the vanilla and custard notes. Whisk with the yolks until pale and slightly thickened before tempering with hot milk for a smooth custard.
– 4 large egg yolks
→ Egg yolks provide richness and form the custard’s thickening base. They also contribute to the creamy, glossy mouthfeel of the pastry cream. To prevent curdling, temper the yolks by gradually whisking in hot milk before returning everything to the stove for thickening. For best texture, strain the mixture to remove any cooked bits.
– 3 tablespoons cornstarch (or 25 g)
→ Cornstarch is the primary thickening agent that gives the pastry cream its smooth, custard-like consistency without mushrooms or lumps. Sift to remove clumps and whisk with a small amount of cold milk to make a slurry before adding to the hot milk. If you prefer a lighter texture, you can use 2 tablespoons, but expect a softer filling.
– 1 teaspoon vanilla extract or 1/2 vanilla bean (scraped)
→ Vanilla provides depth and aroma that defines pastry cream. Using a real vanilla bean will give a stronger, more fragrant custard; if using extract, add at the end of cooking to preserve aroma. For best flavor, allow the custard to cool with the vanilla in it, then strain before filling the puffs.
– 2 tablespoons unsalted butter (optional)
→ Butter added at the end while the custard is hot yields a silky, glossy finish and extra richness. Remove from heat before incorporating to avoid glare or separation. If you skip this, the filling will still be delicious but slightly less luscious.
– Pinch of salt
→ A tiny salt balance amplifies sweetness and enhances the custard’s overall flavor. It also helps suppress any eggy taste. A pinch is sufficient; avoid adding more than a pinch unless you’re aiming for a more pronounced savory note.
Optional Whipped Cream Filling
– 1 cup heavy cream
→ Light, airy filling that contrasts with the rich custard. Whip until soft to stiff peaks to create a stable cream that holds its shape when layered. Chill the bowl and whisk to maximize volume and stability. If you want only a light filling, you can skip the custard and use this alone.
– 2 tablespoons powdered sugar
→ Powdered sugar dissolves quickly and provides a smooth sweetness without graininess. Adjust to taste; sift the sugar if you see any lumps. For a less sweet version, reduce the sugar by a tablespoon or two.
– 1/2 teaspoon vanilla extract
→ Adds a pleasant aroma that brightens the whipped cream. A little goes a long way; using vanilla paste can intensify flavor and give little specks of vanilla in the cream for a more classic look.
Optional Toppings and Finishes
– Powdered sugar for dusting
→ Finishes the cake with a delicate sweetness and a clean, classic appearance. Dust just before serving to prevent moisture from dissolving the light snow-like topping. For a more rustic look, you can skip this or dust with cocoa powder instead.
– Chocolate glaze (optional)
– 3/4 cup semisweet chocolate chips or chopped chocolate
→ Provides a rich, glossy finish that anchors the puffs and adds a decadent chocolate contrast. Use chopped chocolate for a smoother glaze, or chips for convenience. Melt gently to avoid scorching and whisk until smooth.
– 2 tablespoons unsalted butter
→ The fat helps create a silky, shiny glaze that clings to the chilled puffs. Add butter after melting the chocolate to emulsify the glaze for a velvety finish. Do not overheat once butter is added, or the glaze may break.
– 2 tablespoons heavy cream or milk
→ Adds fluidity to the glaze, ensuring a pourable consistency that coats the shells evenly. Increase by a tablespoon if you want a thicker glaze; use less if you prefer a thinner coat. Keep glaze warm but not scorching hot to avoid melting the puffs.
Instructions
- Preheat your oven to 425°F (220°C) and line two baking sheets with parchment paper or silicone mats, spacing for puffing.
→ A hot oven creates steam-driven rise in choux; parchment prevents sticking and allows easy removal of the delicate shells after baking. - Combine the choux base ingredients in a heavy saucepan: water (1 cup), unsalted butter (1/2 cup), salt (1/4 teaspoon), and optional sugar (1 tablespoon); place over medium-high heat and bring to a vigorous boil.
→ The butter must melt completely and the liquid must reach a full boil to gelatinize the starch when the flour is added, forming a smooth, cohesive dough. - Remove from heat and add the all-purpose flour (1 cup) in one shot; stir vigorously with a wooden spoon until the dough pulls away from the sides and forms a smooth ball, then return the pan to low heat and cook, stirring, for 1-2 minutes to dry out excess moisture.
→ Drying the dough is essential for structure that will hold the eggs and create hollow shells that can be filled later. - Transfer the dough to a warm bowl and let it cool for 5 minutes; then beat in the eggs one at a time (4 large eggs, room temperature), fully incorporating each egg before adding the next; the dough should become thick, glossy, and pipeable; if it seems too stiff after the first few eggs, add a teaspoon of water at a time until the correct consistency is reached.
→ Adding eggs gradually prevents overbinding and ensures the dough traps air for lift; the dough should flow slowly off a spoon in a thick ribbon. - Fit a piping bag with a large round tip and pipe approximately 3-inch (7.5 cm) rounds on the prepared sheets, spacing rounds about 2 inches (5 cm) apart; gently smooth any peaks with a damp fingertip to encourage uniform shapes.
→ Uniform discs bake evenly and stack neatly as a cream puff cake; spacing prevents shells from merging into one another as they puff. - Bake the shells at 425°F (220°C) for 15-20 minutes until deeply puffed and golden; avoid opening the oven early to prevent deflation; then reduce the oven temperature to 375°F (190°C) and bake for an additional 10-15 minutes until the shells are dry inside and sound hollow when tapped.
→ The initial high heat activates steam for rapid expansion; lowering the heat dries the shells through and prevents sogginess or collapsing due to moisture. - Turn off the oven, crack the door slightly, and let the shells dry in the warm oven for 10-15 minutes; then remove and transfer to a wire rack to cool completely before filling.
→ Drying in the oven reduces internal moisture that can soften the shells; cooling completely makes filling easier and prevents tearing. - Make the pastry cream: warm the whole milk (2 cups) with half of the sugar (1/2 cup) and vanilla (1 teaspoon extract or 1/2 vanilla bean, scraped) in a saucepan until steaming; do not let it boil.
→ Heating the milk with vanilla infuses flavor throughout the custard and ensures even thickening when combined with the yolk mixture. - Whisk egg yolks (4 large) with the remaining sugar (1/2 cup) until pale and slightly thickened, then whisk in cornstarch (3 tablespoons) to create a smooth paste with no lumps.
→ Whipping in sugar and cornstarch prepares the yolks for even thickening and prevents eggs from curdling when hot milk is added. - Gradually temper the yolks by whisking about a cup of hot milk into them, then whisk the warmed yolk mixture back into the pot with the remaining milk and cook over medium heat, whisking constantly, until the mixture thickens to a custard that just comes to a boil; cook 1-2 minutes more, then remove from heat and stir in unsalted butter (2 tablespoons) and a pinch of salt, if using.
→ Tempering prevents curdling; continuing to cook activates the cornstarch thickener and yields a glossy pastry cream. - Strain the pastry cream through a fine-mesh sieve into a clean bowl, cover with plastic wrap directly on the surface to prevent a skin, and cool completely in the refrigerator until it is thick but pipeable.
→ Straining removes any cooked bits and chilling helps achieve a stable filling that holds its shape in the puffs. - Optional: whisk the whipped cream filling (if using) by chilling a mixing bowl and beaters, then whipping heavy cream (1 cup) with powdered sugar (2 tablespoons) and vanilla (1/2 teaspoon) to soft or stiff peaks as desired; refrigerate until ready to fill.
→ Whipped cream provides a lighter contrast to the rich pastry cream and should be used promptly to prevent collapse. - Fit a piping bag with a small round or slit tip and fill with pastry cream; for each choux round, poke a small hole in the base with a skewer or the tip of a small knife and pipe pastry cream into the cavity until it feels full but not oozing; reserve some cream for the cake assembly.
→ Filling through the base ensures even distribution inside the hollow shell and prevents tearing the delicate pastry. - If using whipped cream filling, pipe a layer of whipped cream over the pastry cream or fold it into a portioned amount to create alternating layers as you build the cake; keep the filled shells chilled while assembling.
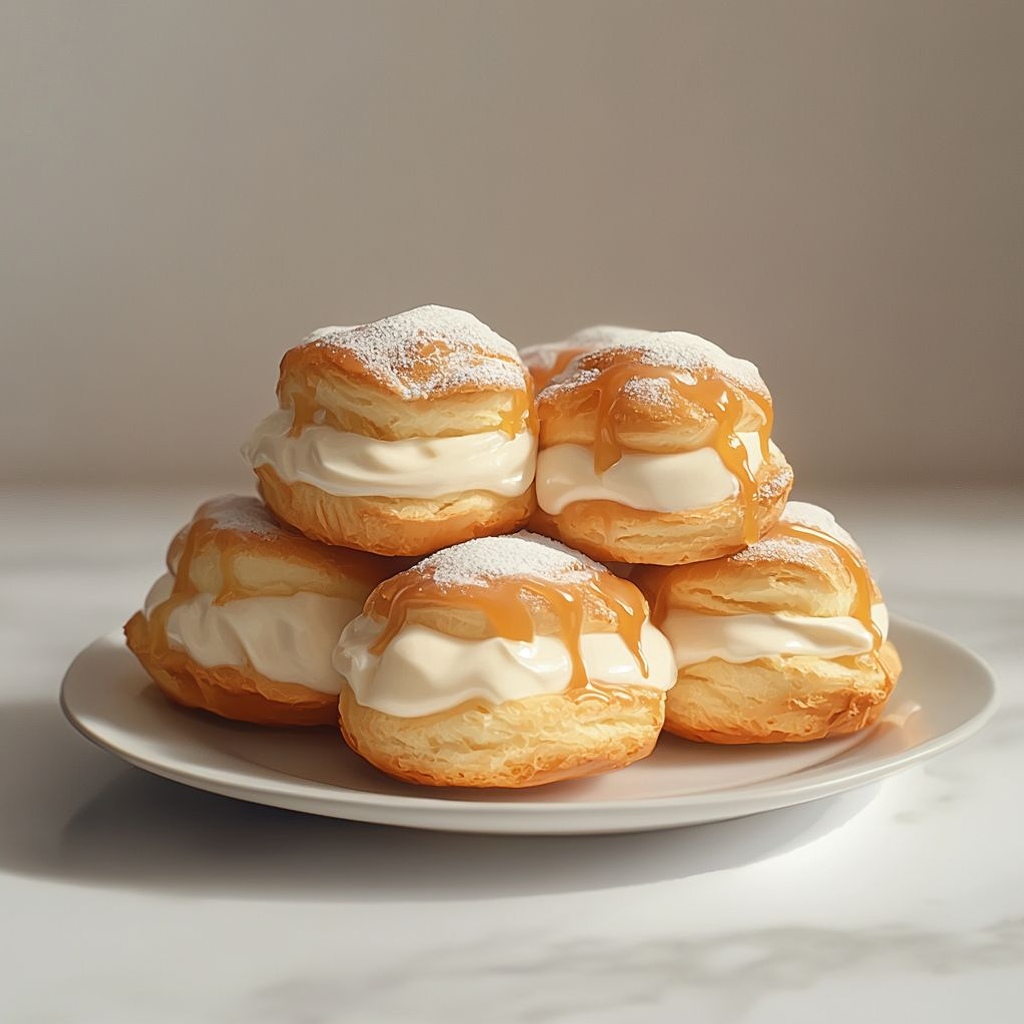
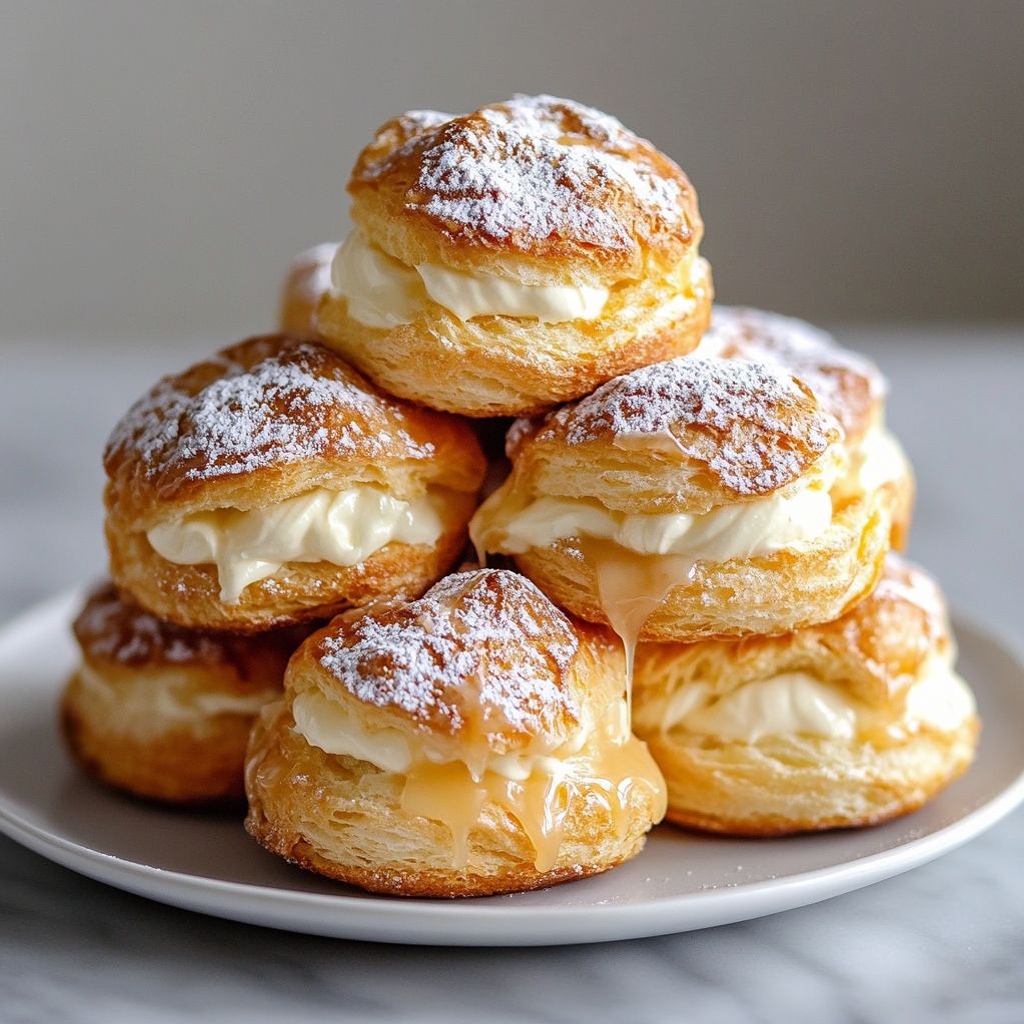
→ Layering with whipped cream adds lightness and a creamy texture that complements the custard without overpowering it. - Assemble the cream puff cake by placing a filled disc on a serving plate, then stacking additional filled discs on top, pressing gently to compact; trim any domed tops to create a flat cake surface for neat slicing.
→ Uniform discs create a stable, visually appealing cake; trimming ensures clean edges for neat slicing. - If desired, prepare a chocolate glaze by melting semisweet chocolate chips with butter and heavy cream until glossy; pour gently over the top of the assembled cake, tilting to coat evenly, and let it set at room temperature or refrigerate briefly.
→ A glossy glaze adds flavor contrast and a professional finish; avoid overheating the glaze after adding butter to prevent separation. - Dust the finished cake with powdered sugar just before serving; refrigerate the cake until ready to slice, then cut with a hot, sharp knife, wiping the blade between cuts for clean slices.
→ Powdered sugar gives a delicate finish without weighing down the cake; a sharp blade yields clean slices and preserves the layers.
Notes
This cream puff cake is a dramatic dessert that pairs airy choux pastry with silky pastry cream and optional whipped cream, finished with a glossy chocolate glaze or a light dusting of powdered sugar. You can customize it by using vanilla, citrus, or coffee-flavored pastry creams, layering the components for contrast, or swapping in whipped cream for a lighter filling between the shells. To accommodate gluten-free diets, substitute a proven gluten-free all-purpose flour blend for the regular flour and add an extra tablespoon or two of cornstarch to help mimic the structure; always check that your flavorings and chocolate glaze are certified gluten-free. For best results, bake the choux shells until they are deeply puffed and golden, then resist opening the oven during the first 15–20 minutes to avoid collapse. The pastry cream should be thick and cooled before filling; whisk in the butter off the heat for extra silkiness and strain if desired to remove any cooked bits. If you prefer a lighter filling, whip cream with a touch of vanilla and fold it gently into the custard or fill half the shells with custard and half with whipped cream for contrast. The assembled cake benefits from a chill of at least 2 hours (or overnight) so the filling sets and the flavors meld; unfilled shells can be prepared and frozen for up to 2 months, then filled just before serving. To finish, glaze with the chocolate glaze for a rich, glossy surface or dust with powdered sugar for a classic finish; serve with berries or a small dollop of whipped cream for elegance. Always ensure your flour, vanilla, and chocolate are fresh and gluten-free if needed, and measure ingredients accurately for reliable puff and a smooth custard.
Tips
Choux pastry tips
- Use a precise mise en place: measure water, butter, salt, sugar, flour, and eggs before you start. Have your eggs at room temperature to encourage a smooth, cohesive dough that will rise well.
- Heat the water and butter together until the mixture boils briefly, then add the flour all at once. Stir vigorously over heat until the dough pulls away from the sides and forms a cohesive ball that looks matte and dry. This creates the hollow shells that puff properly.
- After the flour is incorporated, continue cooking the dough for 1–2 minutes to drive off excess moisture. This drying step is crucial for a strong structure.
- Cool the dough slightly before adding eggs. Add eggs one at a time, mixing well after each addition. The dough should be thick, shiny, and pipeable; if it looks too stiff after the first few eggs, whisk in small increments until it reaches a glossy ribbon that slowly falls from a spatula.
- Pipe or scoop the dough evenly on the baking sheet. For uniform puff, keep shells roughly the same size and distance between them. If you see any cracks, it usually means the dough was too dry or not evenly mixed.
- Bake in a hot oven until the puffs are deeply golden and firm to the touch, then reduce the heat and let them dry out inside the oven. Do not rush the bake by opening the door early; sudden drops in heat can cause collapse.
- When the puffs are golden and risen, prop the oven door open slightly for a few minutes to vent steam, then remove to a rack to cool completely. Poking a small hole in each shell after baking helps prevent sogginess from trapped moisture.
Pastry cream filling tips
- Warm the milk with half the sugar and the vanilla to infuse flavor. Do not boil. This helps the custard set with a smooth texture.
- Whisk yolks with the remaining sugar until pale and slightly thickened, then whisk in the cornstarch to make a smooth slurry. Gradually temper the yolks with hot milk to avoid curdling.
- Return the custard to the stove and cook over medium heat, whisking constantly until it thickens to a coating consistency. Do not let it boil. If lumps form, strain the custard while hot for a silkier texture.
- Once thickened, remove from heat and whisk in the butter (if using) and vanilla (or vanilla bean). A pinch of salt enhances flavor and prevents any eggy taste. Press plastic wrap directly onto the surface to prevent a skin from forming and chill until cold before filling.
- For the best texture, chill the pastry cream thoroughly (at least 2 hours or overnight). It should be thick and scoopable but not runny when filling the puffs.
Optional whipped cream filling tips
- Chill the mixing bowl and beaters before whipping the cream. Cold equipment helps achieve stable peaks.
- Whip the heavy cream with the powdered sugar and vanilla to soft or stiff peaks, depending on how firm you want the filling. For a lighter contrast to the rich custard, use softly whipped cream or fold into the pastry cream in a light mousse-like texture.
- If you want extra stability, whisk in a small amount of stabilized whipped cream (or a pinch of cream of tartar) toward the end.
Assembly and finishing tips
- Cool the choux shells completely before filling to avoid melting the filling. Use a piping bag with a small round or star tip to fill through the side or from the bottom of each puff.
- When layering puff with pastry cream, alternate fillings (pastry cream and whipped cream) for texture and flavor contrasts.
- Dust with powdered sugar just before serving to maintain a light crisp shell and prevent the sugar from dissolving on contact with moisture.
Toppings, finishes, and glaze tips
- Chocolate glaze: Melt chocolate with butter and a splash of cream or milk over low heat, whisking until smooth. Keep the glaze warm but not hot to prevent softening the shells. Drizzle or dip the tops for a glossy finish.
- For a smoother glaze, strain it after melting to remove any unmelted bits. If the glaze thickens, whisk in a little warm cream to reach desired consistency.
- Glazes and fillings are best used on the day of assembly. If making ahead, keep shells unfilled in a dry, airtight container and fill just before serving.
Storage and troubleshooting tips
- Unfilled choux shells store well, tightly closed, at room temperature for 1–2 days or frozen for up to 1 month. Thaw and re-crisp in a low oven before filling.
- Filled cream puffs are best chilled and consumed within 1–2 days. Keep refrigerated and cover to prevent drying out.
- If the shells don’t puff properly (they’re dense or flat), check oven temperature (too cool or the oven heated unevenly), ensure you dried the dough sufficiently, and avoid opening the oven during the initial bake.
- If the pastry cream thickens too much while cooling, whisk in a splash of milk or cream to loosen to a creamy consistency just before filling.
FAQ
What is Cream Puff Cake?
A Cream Puff Cake is a dessert built from light choux pastry puffs stacked or layered with creamy fillings, typically pastry cream and whipped cream, and finished with a glaze or dusting of sugar.
What are the main components of this cake?
The main parts are:
- Choux pastry puffs (the cake layers)
- Pastry cream or custard filling
- Whipped cream or stabilized whipped cream
- Optional glaze (chocolate, caramel, or a simple sugar glaze)
Do I need special equipment?
Basic equipment works well: a piping bag or two, a large baking sheet lined with parchment, a mixer or whisk, a saucepan for the pastry cream, and a cooling rack. A small round cutter can help shape uniform puffs if desired.
How do I make the choux pastry for the cake?
Key steps:
- Preheat oven to about 375°F (190°C). Line baking sheets with parchment.
- Heat 1 cup water with 4 tbsp butter and a pinch of salt until butter melts and mixture boils.
- Stir in 1 cup all-purpose flour all at once; cook, stirring, until the dough pulls away from the sides and forms a smooth ball.
- Cool 5–10 minutes, then beat in eggs one at a time until glossy and smooth.
- Pipe small mounds or drop spoonfuls onto the sheets. Bake until puffed and dry inside, about 20–25 minutes, without opening the oven early.
How do I bake and dry the cream puffs properly?
Important tips: bake on parchment, avoid crowding, and don’t open the oven during the first half of baking to prevent collapsing. If puffs look pale or soft in the middle, they may need a few extra minutes and a cool, dry environment to finish drying.
How do I make the fillings?
Two classic fillings:
- Pastry cream: 2 cups milk, 1–2 tsp vanilla, 4 egg yolks, 1/2 cup sugar, 3–4 tbsp cornstarch. Cook milk with vanilla; whisk yolks, sugar, and cornstarch; temper with hot milk, then cook until thick. Chill before use.
- Whipped cream: 1–2 cups cold heavy cream, 2–3 tbsp sugar, 1 tsp vanilla; whip to soft or stiff peaks depending on preference.
You can also fold lightly whipped cream into pastry cream for a lighter filling.
How do I assemble the Cream Puff Cake?
Assembly idea:
- Slice cooled puffs in half like little sandwich buns.
- Fill the bottom half with pastry cream, top with a dollop of whipped cream, then place the top half back on.
- Stack several filled puffs in a layered arrangement on a platter or use a tall cake ring to form a stacked “cake.”
- Finish with a whipped cream layer on top and chocolate or caramel glaze if desired. Chill well before serving.
How should I store and serve the cake?
Store, well covered, in the refrigerator. Best within 2–3 days for freshness. Serve cold; the pastry cream holds together best when chilled. If making ahead, you can assemble the puffs and fillings, then refrigerate assembled cake just before serving.
Can I make this ahead or freeze it?
Yes, you can bake and cool the choux shells in advance and freeze them in an airtight container. Thaw and fill just before serving. Pastry cream can also be made a day ahead; keep it chilled. Freezing a fully assembled cake is not ideal as textures may change.
Can this be made dairy-free or gluten-free?
Dairy-free: use dairy-free butter and plant-based milk in the pastry cream, and top with dairy-free whipped cream or coconut cream. For the filling, dairy-free whipped cream works well (coconut or almond-based). Gluten-free: use a gluten-free flour blend in the choux pastry and pastry cream; note that results can vary, as choux behavior changes with different flours.
Are there common problems and how do I fix them?
Common issues and fixes:
- Puffs collapse after baking: ensure the dough is fully dry before eggs, bake at a steady temperature, and avoid opening the door too soon.
- Pastry cream is runny: cook longer or whisk more vigorously to activate the starch; chill thoroughly before filling.
- Puffs are hard or hollow: oven may be too hot; reduce heat slightly next time and bake longer to dry out.
- Puffs are too small: pipe or scoop larger mounds, or increase the hydration just a touch by adjusting flour slightly.
Can I add flavors or variations to the Cream Puff Cake?
Yes. Flavor ideas include:
- Flavor the pastry cream with vanilla, lemon zest, or liqueur.
- Fold a fruit puree (strawberry, passion fruit) into the whipped cream for a fruity layer.
- Add cocoa powder or espresso to the choux dough for a chocolate or coffee-ch flavored version.
Is there a quick chocolate version of this cake?
Yes. Add 1–2 tablespoons of cocoa powder to the choux dough and the pastry cream for a chocolate twist, and finish with a chocolate glaze or ganache on top. You can also layer with chocolate pastry cream and chocolate whipped cream for a richer dessert.