Author

Ocean Nightleaf

Browsing

Introduction / Hook

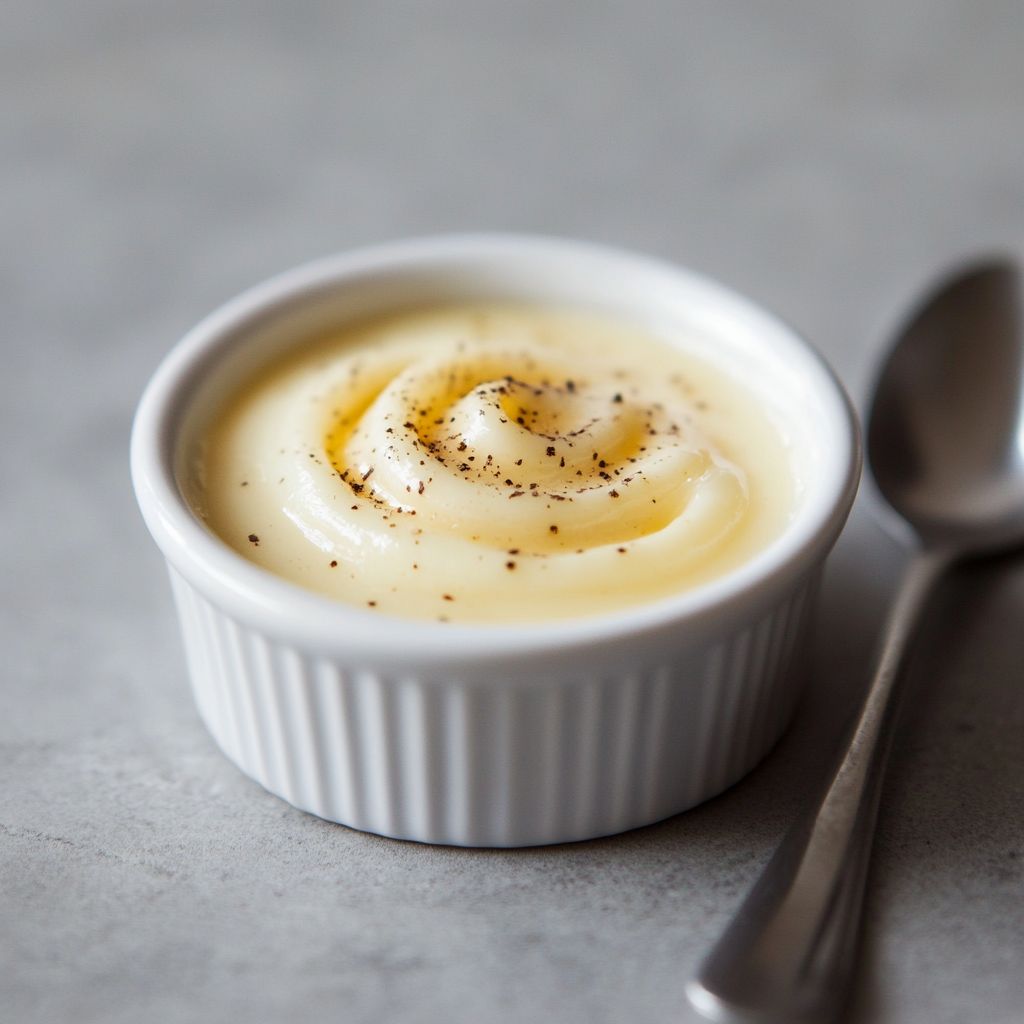
Close your eyes and picture a quiet morning kitchen, the first light brushing over a porcelain bowl as steam curls into the air. There’s a gentle sweetness in the room—the soft scent of vanilla, a whisper of cream, and a warmth that makes the day feel possible before you’ve even taken a bite. This is Danish Custard: a timeless, comforting creation that feels like a hug in a dessert spoon. It’s not flashy or loud; it’s the kind of thing you reach for when you want something familiar, yet thoughtfully elevated. The texture is whisper-soft, almost quivering with a velvet finish that coats your tongue and lingers in the memory long after the last spoonful. The flavor is pure and refined—delicately sweet, with the quiet depth of eggs, the serene roundness of dairy, and a true note of vanilla that seems to bloom as it cools. In a world full of quick-fix treats, Danish Custard invites you to slow down, savor the moment, and reconnect with the simple luxury of a dessert that speaks softly but carries a lot of character.

Imagine pairing it with the brightness of fresh berries, a drizzle of a fruit compote, or a cloud of a lightly sweetened cream. The dish rewards patience: the longer you let it rest, the more the flavors settle into a harmonious balance, like a song that reveals new verses with every listen. Its elegance lies not in extravagance but in restraint—an elegant balance of texture, aroma, and a whisper of sweetness that makes it suitable for both intimate weeknights and more festive gatherings. If you’ve ever wished for a dessert that feels both classic and modern, comforting and refined, Danish Custard delivers that dual magic: it comforts the heart while captivating the palate with a refined, almost architectural beauty. This introduction is just the opening note to a longer, richer conversation about a classic that deserves a place in your weekly repertoire and a dear spot at holiday tables alike.

Beyond its surface charm, Danish Custard embodies a philosophy of cooking that resonates across kitchens: integrity of ingredients prepared with care, an aroma that invites conversation, and a texture that invites lingering bites. It is, in many homes, the quiet centerpiece of a dessert course—simple to master, yet endlessly capable of adaptation. The first spoonful often carries you back to childhood kitchens, to the grandmother’s stove where the air was tinged with stories and the crackle of a hot pan. Yet it has a modern soul as well, able to shimmer with citrus zest, a hint of spice, or a modern dairy-free twist without losing its essential character. Whether you’re a longtime custard aficionado or a curious newcomer, Danish Custard offers a gateway to a dessert that feels both timeless and intimately personal.

The Story Behind the Dish

Custard has traveled through history with a quiet confidence, appearing in varied forms across many cultures. It’s a dessert that grew from the practical culinary needs of early kitchens—soft, nourishing, and capable of turning humble ingredients into something elegant. In Denmark, a country known for its hygge—the art of creating coziness—dessert traditions often celebrate comfort and balance. Danish Custard sits at the intersection of this philosophy: it is a refined yet approachable dish that can be dressed up for a celebration or kept rustic for a family supper. The idea of a smooth, pourable custard—slightly set, with a sheen that catches the light—has deep roots in European dessert lore, where flavors were coaxed into tenderness with careful heat, gentle stirring, and patience. The Danish approach to custard often leans toward simplicity married to quality: the best milk you can find, eggs that have a bright yolk, a trace of vanilla or citrus, and a method that respects the delicate structure of the mixture.

As with many beloved desserts, this custard has a social dimension. It’s the kind of dish that passes from hand to hand at family gatherings, afternoon tea, or intimate dinner parties, inviting conversation and comforting everyone at the table. While there are regional variations—the French crème anglaise with its lusciously thin texture, or the British syllabubs that mingle froth with egg and wine—Danish Custard holds its own by balancing a gentle firmness with a cloud-like mouthfeel. It’s the kind of dessert that can stand alone with a simple garnish or be crowned with seasonal fruit, a caramel drizzle, or a handful of pistachios for a touch of green and crunch. The story of Danish Custard is, in essence, a story about accessibility meeting refinement: a classic technique, executed with care, that invites everybody to experience a moment of quiet sweetness.

For cooks and bakers, the dish also represents a training ground for technique. The art of custard lies in tempering, heat control, and timing—knowing when to pull the mixture from the heat so it thickens without curdling. It’s a small mastery, but it yields a texture that feels almost magical: smooth, glossy, and spoon-able with grace. This dish invites you to embrace that craftsmanship, to observe how tiny adjustments in temperature, resting time, or even the choice of milk can create a noticeably different finish. In this sense, Danish Custard is not just a dessert; it’s a culinary practice—a ritual of patience, precision, and a sensorial payoff that makes every tasting feel meaningful and complete.

Why You’ll Love This Recipe

  • Silky, spoonable texture that glides across the palate and rewards slow, mindful tasting.
  • Versatility in presentation—serve warm for a cozy finish, or chill for a refined, elegant feel.
  • Elegant simplicity that pairs beautifully with seasonal fruit, a dusting of spices, or a drizzle of fruit compote.
  • Low-key luxury that suits both weeknights and special occasions without demanding a long, complex process.
  • Customizable to dietary needs with thoughtful substitutions while preserving the dish’s delicate balance.
  • A comforting dish rooted in tradition yet open to modern interpretations and twists.
  • Built-in make-ahead potential: you can prepare the base ahead of time and finish with toppings when ready to serve.

Flavor Profile & Texture

The flavor of Danish Custard is a study in understatement. The dominant note is a warm, true vanilla that lingers in a soft, almost floral way without shouting. This vanilla is the fragrance that invites you to lean in; it is the first whisper of sweetness that never drops into cloying territory. If you listen closely as you taste, you may notice a gentle dairy roundness—think of a well-balanced milkiness that carries the custard smoothly, with a faint, comforting richness. There’s a delicate nutty undertone from the eggs, a subtle silkiness that coats the tongue without heaviness, and a faint gloss of natural sweetness that feels like a whisper rather than a shout.

Texture-wise, this custard sits between a thick pouring custard and a soft set pudding. It should hold its shape enough to hold a delicate drizzle but remain pliant enough to yield to a spoon with a satin-smooth finish. When served warm, it presents as a luxuriously silky liquid with a slight waver of steam that hints at its freshly made nature. When cooled, it becomes more structured, yet never stiff or brittle—more like a satin curtain than a sheet of glass. The contrast of textures is a quiet celebration: the custard itself is creamy and soft, while toppings or accompaniments—like a tart berry compote, crisp cookies, or a handful of toasted nuts—introduce a satisfying bite and a bright counterpoint to the mellow base. Aromatically, the base is enriched by aromatics such as vanilla, a hint of citrus zest, or a whisper of spice, depending on the mood and season. The overall impression is one of balance: a dessert that is neither too simple nor too complicated, but rather exquisitely measured to satisfy without overwhelming the senses.

Occasions & Pairings

Where does Danish Custard shine? It fits a broad spectrum of moments, from everyday comfort to celebratory menus. Here are a few ideas on when to offer this dessert and how to present it with confidence:

  • Weeknight comfort: A quiet, satisfying end to a simple dinner, perhaps with berries and a light dusting of citrus zest.
  • Special occasions: A refined finish to a candlelit meal, plated in small, elegant portions with ornate toppings like edible flowers or a caramel ribbon.
  • Brunch pairing: A spoonful alongside a flaky pastry or as a cool counterpoint to a warm, crispy cookie for a brunch dessert twist.
  • Holiday tables: A versatile canvas for seasonal flavors—orange blossom water in winter, lemon zest in spring, or a autumn kiss of nutmeg and cinnamon.
  • Afternoon tea or coffee companion: A delicate indulgence that pairs beautifully with a cup of tea or a robust coffee, providing a gentle sweetness that doesn’t overwhelm.

Pairings to consider—both with flavor and texture—include:

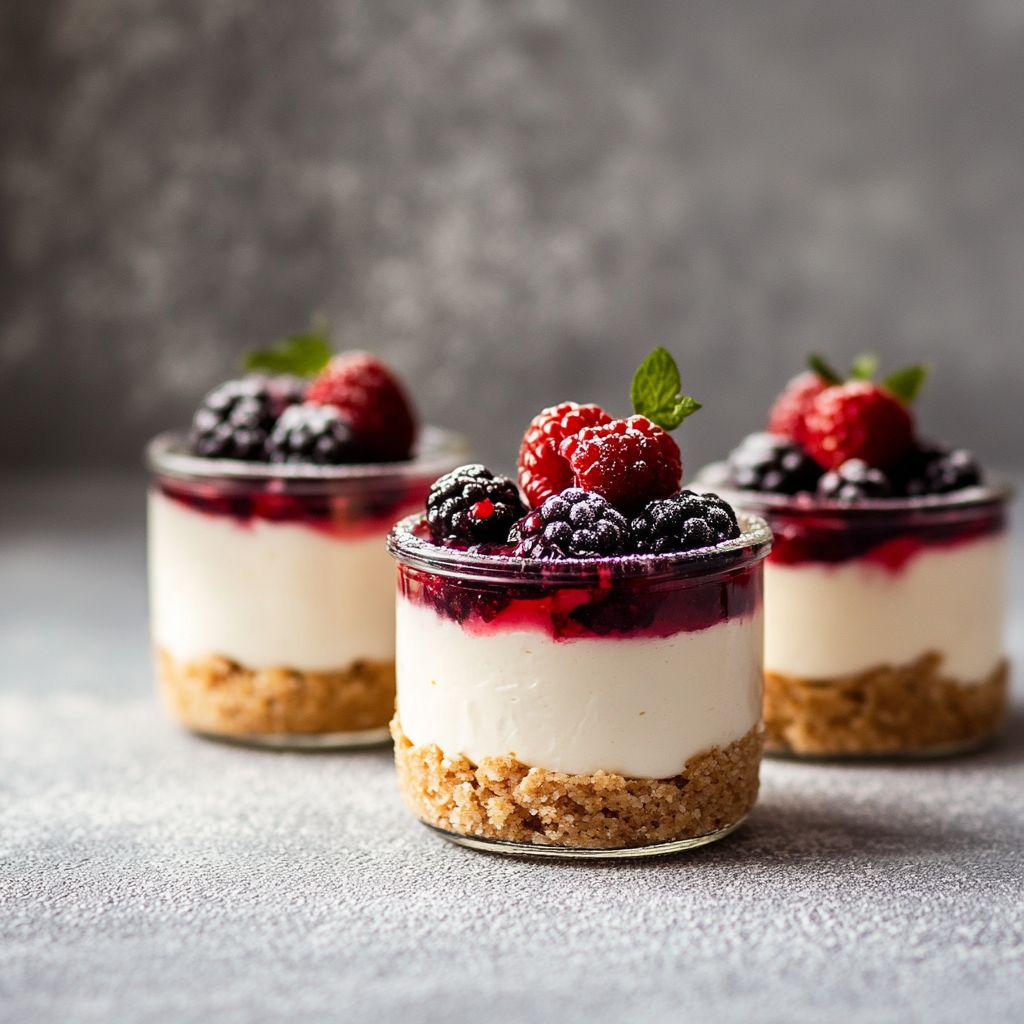
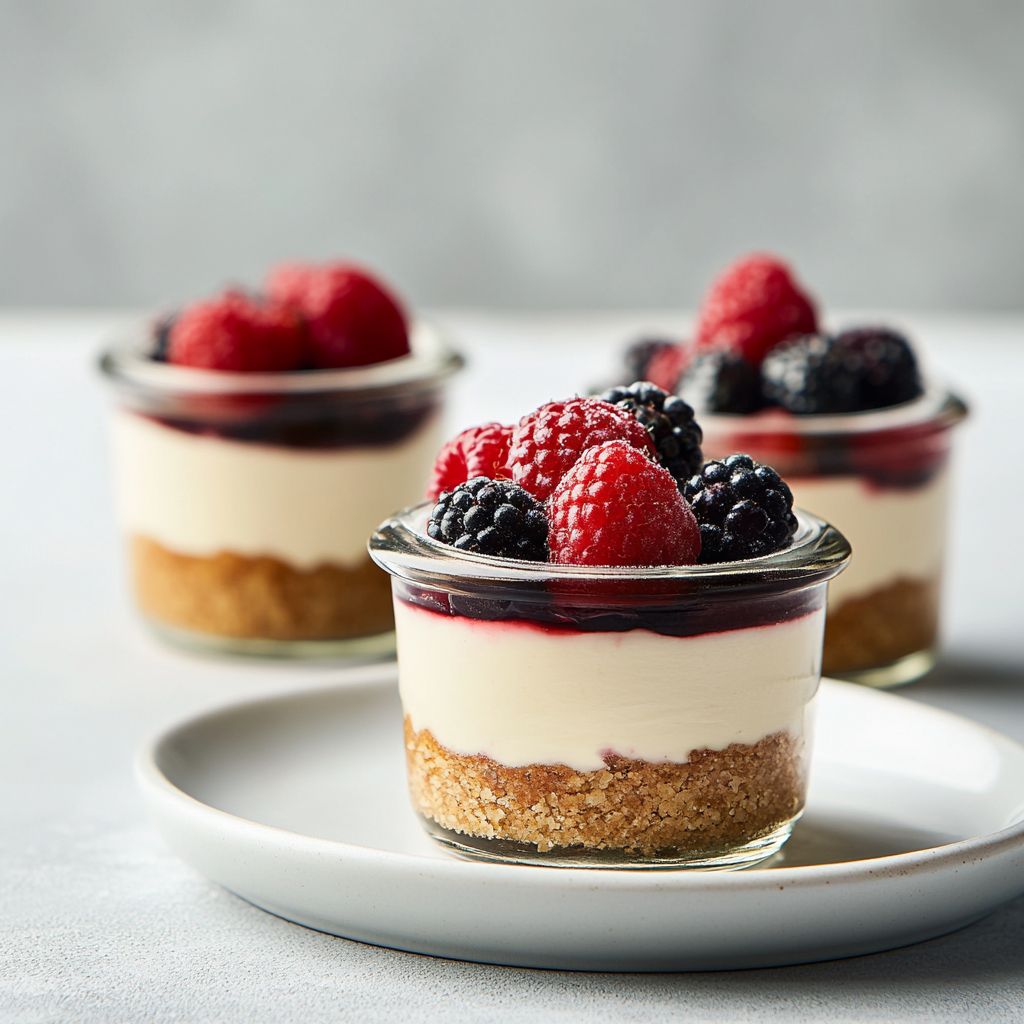
  • Fresh berries (strawberries, blueberries, raspberries) that provide a bright acidity to contrast the custard’s creaminess.
  • Fruit compotes made from apples, pears, or stone fruits, offering a chewy-sweet finish and a burst of color.
  • Crunchy toppings like almond biscotti, pistachio shards, or toasted hazelnuts to introduce texture and a nutty note.
  • A light dusting of citrus zest, nutmeg, or cinnamon for warmth and fragrance.
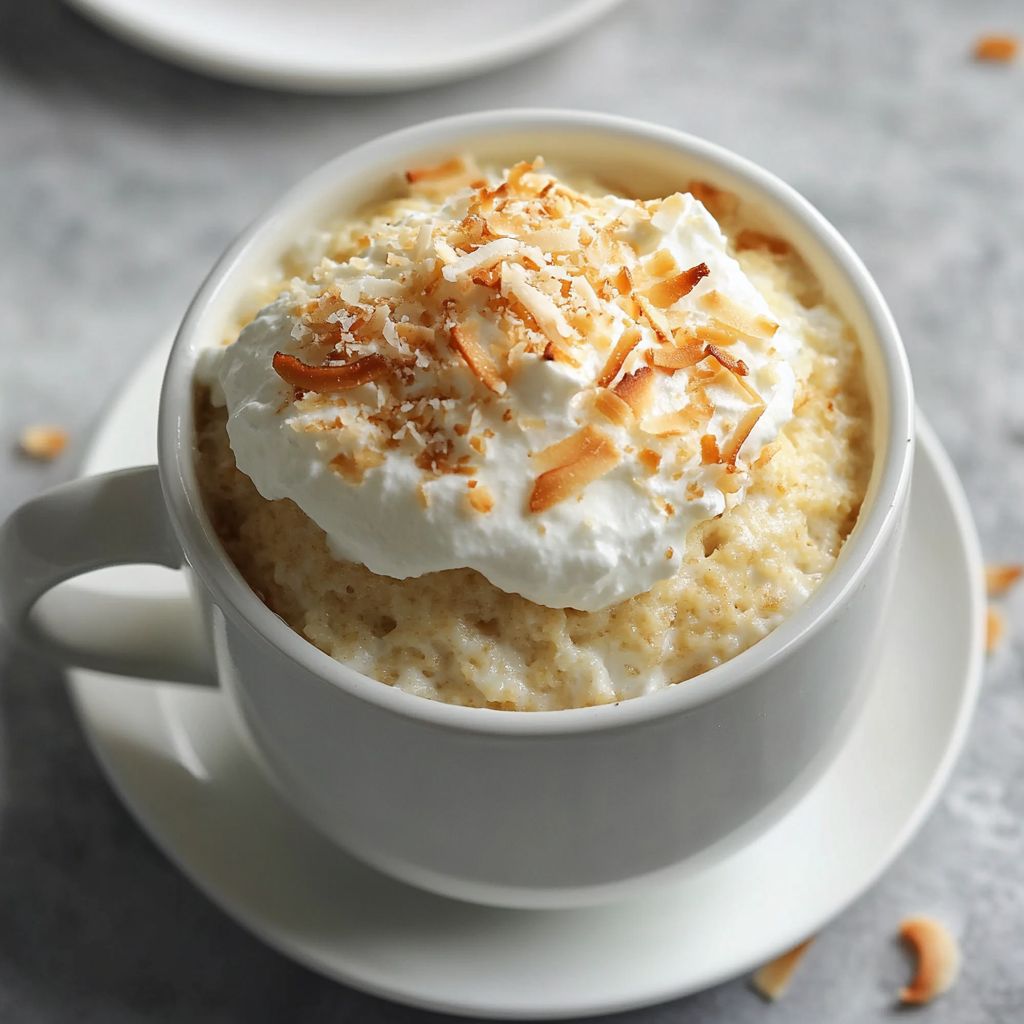
  • A dollop of lightly whipped cream or a ribbon of whipped mascarpone for a touch of airiness and richness.
  • A small glass of dessert wine, such as late harvest or Moscato, to elevate the experience without overpowering the delicate flavors.

Tips, Variations & Substitutions

Tips for Perfect Texture

  • Heat control is everything. Use gentle, steady heat and stir constantly to keep the custard smooth and prevent curdling.
  • Tempering matters. If you’re incorporating eggs into a warm base, add a small amount of the hot mixture to the eggs first, whisking constantly to bring the temperature up gradually and avoid shocking the yolks.
  • Remove from heat at the right moment. The custard should thicken to coat the back of a spoon but still have a slight jiggle. It will continue to set as it cools.
  • Rest matters. Allowing the custard to rest after cooking helps the flavors meld and the texture settle into a more luxurious mouthfeel.

Variations

  • Vanilla bean enhancement: Use an entire vanilla bean (split and scraped) for a more intense vanilla aroma and visible flecks.
  • Citrus lift: Add a whisper of lemon or orange zest to brighten the custard with a fresh, aromatic note.
  • Spice route: A pinch of ground cardamom, nutmeg, or cinnamon adds warmth and depth, especially in cooler months.
  • Floral hints: A drop of lemon blossom, orange blossom, or rosewater can transform the custard into a delicate, fragrant variation.
  • Chocolate moment: A thin swirl of dark chocolate or a cacao dusting on top for a subtle chocolate-custard fusion.
  • Fruit-forward version: Layer with a bright fruit compote or puree for a playful, dessert-tinish dessert.

Substitutions

  • Egg-free version: Use a plant-based milk (almond, soy, or oat) with a touch of cornstarch or arrowroot to achieve a similar set and mouthfeel. A vegan custard can still be silky and luxurious with the right balance of starch and fat.
  • Dairy-free option: Coconut milk or cashew cream can provide a rich base; keep an eye on sweetness balance, as coconut can accentuate sweetness differently than dairy.
  • Low-sugar approach: Choose a natural sweetener or reduce sweetness slightly, then rely on the toppings (fresh fruit or a tangy coulis) to round out the flavors.
  • Gluten-free considerations: The custard itself is naturally gluten-free; pair with gluten-free cookies or a crisp, gluten-free praline if desired.

Storage & Make-Ahead Ideas

One of the charming aspects of Danish Custard is its adaptability for advance planning. You can do a lot in advance without losing the essence of the dish.

Make-ahead: Prepare the custard base and chill it in a closed container. When you’re ready to serve, rewarm gently or serve chilled, depending on your preference. If you’re planning to serve with fruit, you can prepare the fruit components in advance and assemble just before presenting the dessert.

Storage: Refrigerate any leftovers in a covered container. The custard will generally stay good for 2 to 3 days in the fridge. If the texture begins to feel a touch too firm after refrigeration, a gentle reheat can bring back the silkiness. Avoid freezing custard if possible, as freezing and thawing can alter the texture in ways that some find unappealing—the smooth, luxurious mouthfeel is best enjoyed fresh or within a couple of days of chilling.

Reheating tip: Warm the custard slowly over low heat or in short intervals in the microwave at a low power setting, stirring gently. The goal is to restore the gloss and loosen any set points without scorching or curdling. If you’re pairing with a fruit or sauce, consider warming those components separately so you can control the temperature of every element and keep the custard at the ideal state.

Make-ahead ideas for serving occasions: You can prepare a larger batch and portion into elegant serving dishes. Chill them and cover tightly. Right before serving, garnish with a bright component—fresh fruit, a citrus zest, or a few toasted nuts—to add a chef-crafted finish without a lot of last-minute effort.

Fun Facts & Trivia (Optional)

Delving into the playful corners of dessert history reveals that custards have long been a vehicle for culinary experimentation and regional expression. Here are a few tidbits that add flavor to the story of Danish Custard:

  • The word custard likely traces to old culinary terms that describe a custard-like mixture thickened with eggs and heated gently. Across Europe, cooks experimented with milk, cream, eggs, and sugar, leading to a dazzling variety of custard-based dishes—from pouring custards to baked, set versions.
  • Vanilla, often considered a luxury ingredient centuries ago, remains a hallmark of refined custards. Its fragrant warmth can transform a simple mixture into something that feels special and celebratory, which is part of why vanilla is so closely associated with classic custards worldwide.
  • In some Danish households, custards and custard-like desserts are tied to hyggeligt moments—simple, cozy times spent with family or close friends. The ritual of preparing something creamy and comforting aligns beautifully with a culture that prizes warmth, connection, and everyday joy.
  • Custards have a remarkable ability to be both delicate and forgiving. They can be the stage for subtle flavor experiments or restrained enough to let a single topping shine. That flexibility makes custard a favorite among home cooks who enjoy personalizing dessert without getting overwhelmed by complexity.
  • Seasonal life can color custard. In winter, a hint of spice or citrus can lend a toasty warmth; in summer, bright fruit and a light floral note can carry a refreshing brightness that feels light and uplifting.

In the end, Danish Custard is more than a dessert. It’s a quiet celebration of texture, aroma, and balance—an invitation to slow down, savor the moment, and share something beautiful with people you care about. It’s both a nod to cherished traditions and a canvas for your culinary creativity. Whether you’re serving it as a refined finish to a dinner party or a warm, comforting end to a weeknight meal, this custard brings a sense of grace to the table—an edible reminder that some of the best pleasures in life come from simple, thoughtfully prepared things.

Ingredients

Danish Pastry Dough

    – 4 cups all-purpose flour (plus extra for rolling)
    → This is the base structure of the laminated Danish pastry dough. Keep the flour cold and handle as little as possible to maintain tenderness and maximize flakiness. Sift before measuring to ensure accurate hydration.

    – 1 cup cold unsalted butter (for laminating)
    → Butter is layered into the dough to create the signature flaky, multi-layered texture. Keep butter very cold and cut into 1/2-inch slabs; chill the dough between folds if it becomes warm to maintain distinct lamination. Do not overwork the dough to avoid melting the butter into the layers.

    – 1/2 cup granulated sugar
    → Adds a touch of sweetness and helps with browning; use fine sugar for even distribution. Sugar also slightly briskly tenderizes the dough by interfering with gluten formation.

    – 2 1/4 teaspoons active dry yeast (1 packet)
    → Provides lift for the dough. Proof the yeast in 1/4 cup warm milk with a pinch of sugar until foamy, about 5–10 minutes. If it doesn’t foam, discard and start with fresh yeast. Proper proof ensures a light, airy pastry.

    – 1 1/2 cups cold milk
    → Hydrates the dough gradually; using cold milk slows fermentation and helps maintain lamination. For richer flavor, use whole milk; you can substitute part with cream if you prefer.

    – 1 large egg
    → Adds richness and helps bind the dough. Use at room temperature for even distribution and to promote smooth lamination between folds.

    – 1 teaspoon salt
    → Balances sweetness and strengthens flavor; distributes evenly with the flour to ensure uniform seasoning. Salt also moderates gluten development for a tender crumb.

    – 1 teaspoon vanilla extract (optional)
    → Subtle aroma that complements the custard filling. If using, choose pure vanilla; for deeper flavor, use vanilla bean seeds.

    – 1 tablespoon white vinegar or lemon juice (optional)
    → A small amount of acid helps keep dough tender by slightly weakening gluten, aiding flakiness. This is optional; omit if you prefer a more straightforward dough.

Danish Custard Filling

    – 2 cups whole milk
    → The base of the custard; heat until steaming to dissolve sugar and set the stage for a smooth, creamy filling. Avoid boiling. For richer texture, increase the milk-to-cream ratio as desired.

    – 1 cup heavy cream (optional)
    → Increases richness and silkiness. If you skip cream, use a bit more milk to maintain creamy texture without making the custard too thick.

    – 6 large egg yolks
    → Primary thickener and flavor carrier; whisk well and temper with hot milk to prevent scrambling. Strain after cooking for an ultra-smooth custard.

    – 2/3 cup granulated sugar
    → Provides sweetness and helps the custard set with a soft, silky texture. Whisk thoroughly to dissolve completely and prevent graininess.

    – 3 tablespoons cornstarch (or 2 tablespoons all-purpose flour)
    → Thickening agent that yields a smooth, glossy finish. Make a slurry with a small amount of the hot milk before adding to the pot, then cook until thickened and the raw starch taste disappears.

    – 2 teaspoons vanilla extract (or 1 vanilla bean)
    → Essential vanilla aroma; if using a bean, simmer the milk with the bean and seeds, then remove before finishing. Extract provides convenience but may be slightly less intense than bean seeds.

    – 1/4 teaspoon salt
    → Enhances sweetness and depth of flavor, balancing the richness. Dissolve in the hot custard to avoid gritty texture.

    – 2 tablespoons unsalted butter (off the heat)
    → Stir in off the heat for a glossy, luxurious finish; adds sheen and silkiness. Whisk until fully melted and smooth, then strain if you seek the smoothest texture possible.

    – Optional: 1/2 teaspoon ground nutmeg or 1 teaspoon lemon zest
    → A hint of warmth (nutmeg) or brightness (citrus) can complement vanilla; use sparingly so as not to overpower the custard.

Egg Wash

    – 1 large egg + 1 tablespoon water for egg wash
    → Gives a glossy, golden finish to baked pastries. Beat the wash well and brush lightly over the dough just before baking. For darker color, add a pinch of turmeric or paprika to the wash; for a lighter finish, simply use water.

Finish and Glaze (Optional)

    – Powdered sugar glaze: 1 cup powdered sugar + 2-3 tablespoons milk or lemon juice; 1/2 teaspoon vanilla extract (optional)
    → Drizzled over cooled pastries for a sweet, glossy finish. Adjust thickness with more liquid for a runnier glaze or less for a thicker coating. Lemon juice adds brightness that pairs well with vanilla custard.

    – Apricot glaze (optional): 1/4 cup apricot jam blended with 1 tablespoon water
    → Provides a subtle fruity sheen; heat gently to loosen, then brush onto cooled pastries for a glossy finish without overpowering the custard.

Instructions

  • Proof the yeast in 1/4 cup warm milk with a pinch of sugar until foamy, about 5–10 minutes; this activates the yeast and ensures a light, airy laminated dough.
    → If the mixture does not foam, discard and start with fresh yeast to avoid dense pastry.
  • Whisk together the dry ingredients: 4 cups all-purpose flour, 1/2 cup granulated sugar, and 1 teaspoon salt in a large bowl or stand mixer to ensure even distribution and to prevent pockets of salt or sugar that could stunt fermentation.
    → Even distribution promotes uniform texture and controlled gluten development during mixing.
  • Combine the wet ingredients: 1 1/2 cups cold milk, 1 large egg, 1 teaspoon vanilla extract (optional), and 1 tablespoon white vinegar or lemon juice (optional) in a separate bowl, ensuring the liquids stay cold to aid lamination.
    → Cold liquids help keep the butter solid during lamination, which is essential for defined layers and flakiness.
  • Mix the starter with the dry and wet ingredients to form a soft, slightly tacky dough; knead briefly or mix on low until just combined, then cover and refrigerate 1–2 hours to relax gluten and keep the butter from melting during lamination.
    → A relaxed dough yields clean folds and prevents tearing during sheet rolling.
  • Prepare the butter for laminating by cutting 1 cup cold unsalted butter into 1/2-inch slabs; arrange on a sheet of parchment and chill until firm but pliable, ensuring even thickness for uniform lamination.
    → Cold, uniform butter provides distinct, well-separated layers when rolled and folded.
  • Roll the dough into a rectangle about 1/4 inch thick on a lightly floured surface; place the butter slabs on two-thirds of the dough, leaving a margin of dough at the edges, then fold the uncovered third over the butter and seal the edges to enclose the butter completely.
    → Enclosing the butter creates a “pack” that will yield multiple, laminated layers when rolled and folded, producing flakiness.
  • Roll the dough with the enclosed butter to about 1/4 inch thickness and perform the first turn by folding the dough into a three-quarter book fold (one third over the center, then the remaining third over that), chill for 30–60 minutes to re-solidify butter and lock in layers.
    → Chilling slows butter leakage and preserves lamination for even rise during baking.
  • Rotate the dough 90 degrees, roll again to 1/4 inch, and perform a second turn in the same three-quarter fold, then chill again for 30–60 minutes; this builds additional lamination and a tender crumb.
    → Repeated turns create the classic multi-layer structure that characterizes Danish pastry.
  • Rotate a final time, roll to 1/4 inch thickness, and perform a third turn; chill the dough for at least 1 hour or overnight to allow gluten to relax and butter to re-firm.
    → Multiple turns maximize lamination; adequate chilling prevents butter from melting into the dough.
  • Shape and rest the laminated dough: roll to a large rectangle (about 12×16 inches), trim rough edges, then chill 20–30 minutes to make cutting and filling precise.
    → A cold, flat sheet ensures clean edges and uniform pockets for the custard filling.
  • Prepare the Danish Custard filling: heat 2 cups whole milk (and 1 cup heavy cream if using) just to steaming; in a separate bowl whisk 6 large egg yolks with 2/3 cup granulated sugar and 3 tablespoons cornstarch (or 2 tablespoons all-purpose flour) until pale and smooth.
    → Scant heating of dairy helps dissolve sugar and set up a smooth custard; whisking yolks with starch prevents curdling.
  • Temper the yolk mixture by whisking in a slow stream of the hot milk, then return the entire mixture to a clean pot and cook over medium heat, whisking constantly until thick and glossy (a gentle simmer that thickens but does not stick).
    → Tempering prevents scrambled eggs and yields a silky custard that holds its shape when cooled.
  • Off the heat, whisk in 2 teaspoons vanilla extract, 1/4 teaspoon salt, and 2 tablespoons unsalted butter until melted and glossy, then strain through a fine-mesh sieve into a clean bowl, press a plastic wrap directly on the surface, and chill until cold and set but still scoopable.
    → The butter adds shine and silkiness; straining removes any lumps for a ultra-smooth finish.
  • When the custard is cold and thick, pipe or spoon 1–2 tablespoons into the center of each pastry rectangle cut from the laminated dough, leaving a clean border around the edges to seal; this prevents leakage during baking.
    → A well-contained filling maintains shape and prevents soggy edges while the pastry bakes.
  • Seal the pastries by folding the long sides over the custard and pressing firmly to enclose; place seam-side down on parchment-lined baking sheets and brush lightly with egg wash (beat 1 large egg with 1 tablespoon water).
    → Sealing and an even wash promote a uniform golden crust and prevent custard from oozing out at the seams.
  • Bake in a preheated oven at 375°F (190°C) for 20–25 minutes, rotating the pans halfway if using multiple racks, until the pastries are deep golden and puffed; cool on a rack to set the custard completely.
    → Proper baking develops structure and a crisp exterior; cooling prevents the custard from scalding when touched.
  • Finish with a glaze if desired: whisk 1 cup powdered sugar with 2–3 tablespoons milk or lemon juice and 1/2 teaspoon vanilla; drizzle over cooled pastries for a sweet, glossy finish, or brush with a warmed apricot glaze for a subtle fruit sheen.
    → The glaze adds sweetness and a polished appearance; adjust thickness to desired consistency.
  • Serve Danish Custard pastries at room temperature or slightly warm for a creamier custard center, and store leftovers covered in the refrigerator for up to 2 days, gently re-crisping in a low oven before serving.
    → Proper storage preserves the delicate laminations and keeps the custard from drying out.

Notes

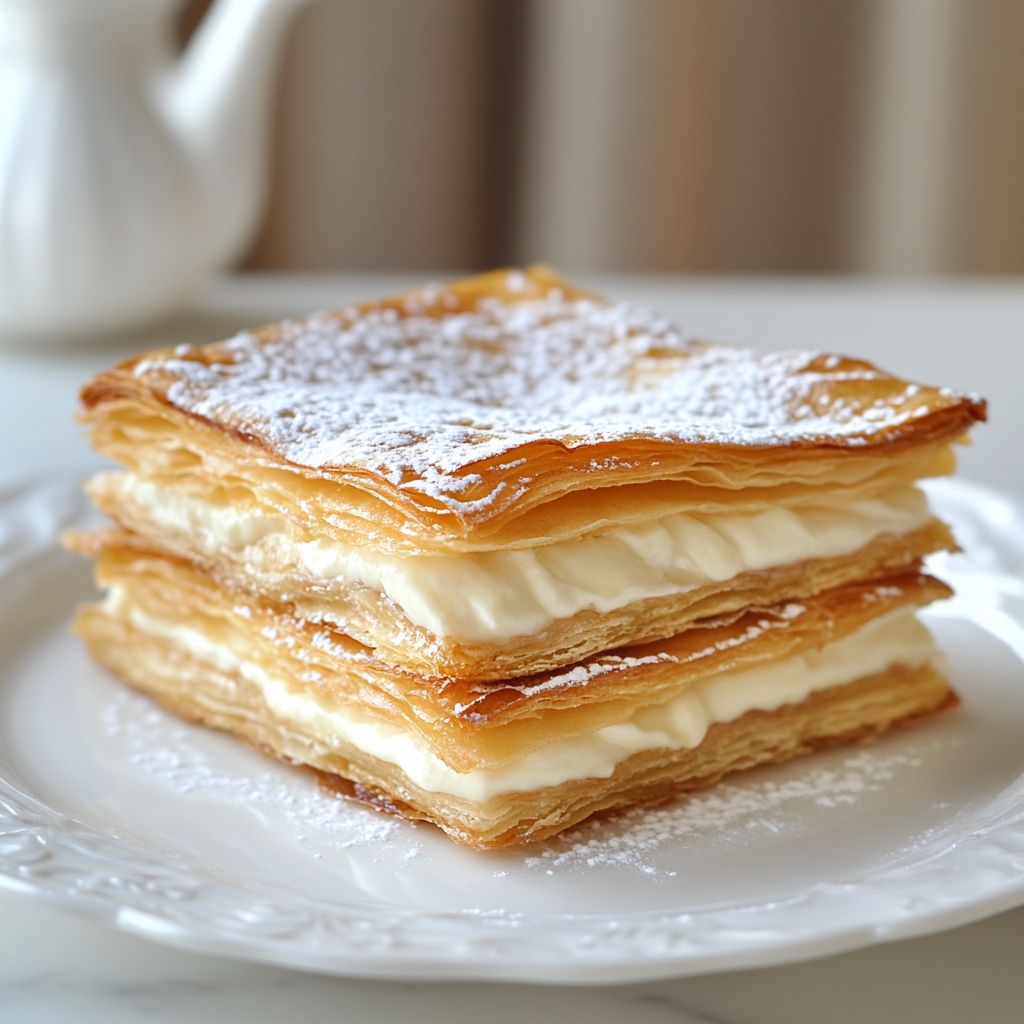
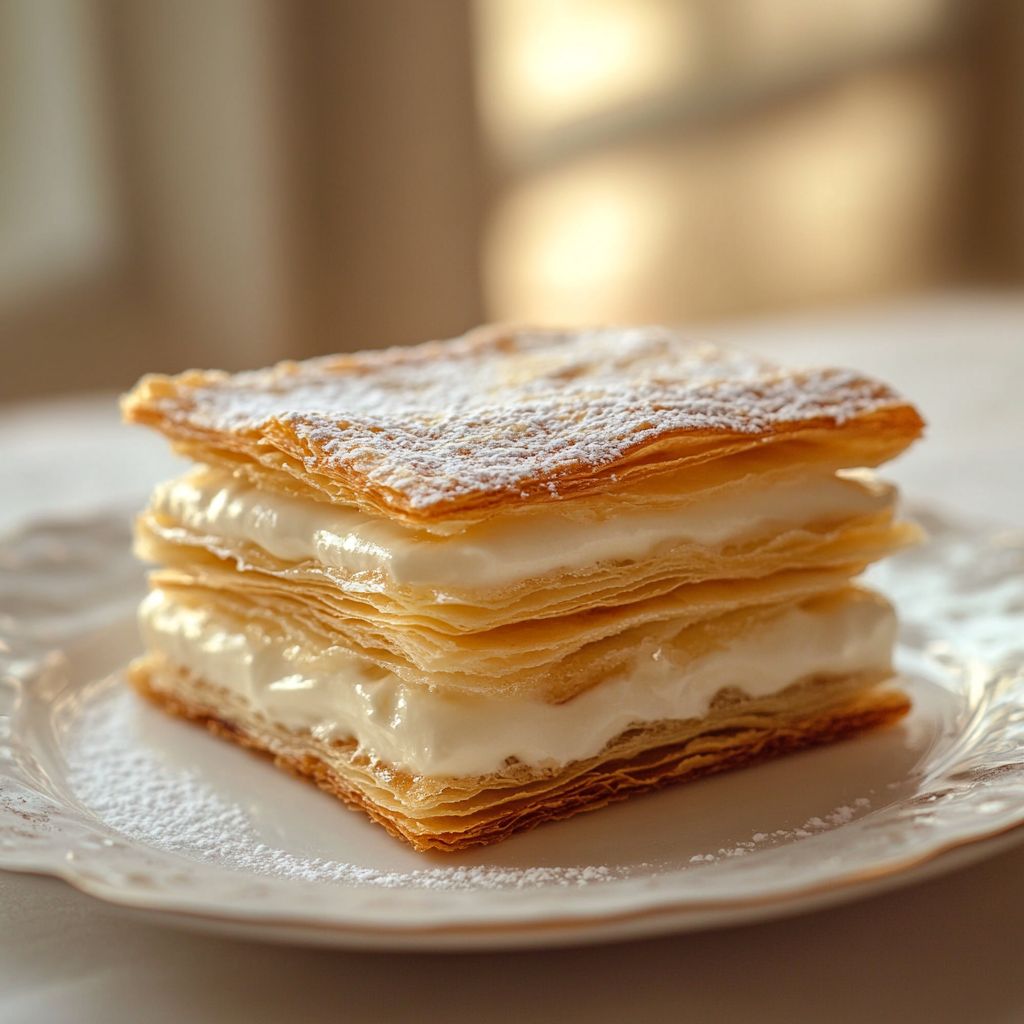
“These Danish custard pastries are a beloved laminated treat, where crisp, buttery layers encase a silky vanilla custard. To achieve the signature flakiness, keep the dough and butter extremely cold, handle it as little as possible, and chill the dough between folds. Proof the yeast in 1/4 cup warm milk with a pinch of sugar until foamy, then whisk it into the dough with the remaining cold milk, egg, salt, and vanilla. Roll the dough into a cool, even rectangle, place the cold butter slab on one half, fold, and perform several cold folds (book folds) to create many layers; chill between folds to maintain lamination. After the final roll, cut into shapes and refrigerate formed pastries for 15–30 minutes before baking to set the layers. Bake in a hot oven (around 375–400°F / 190–200°C) until deeply golden and puffed, about 15–20 minutes, brushing with an egg wash to enhance color. For the custard, heat 2 cups of whole milk (and 1 cup optional heavy cream) just to steaming; whisk 6 egg yolks with 2/3 cup sugar and 3 tablespoons cornstarch, then temper with hot milk, cook until thick and glossy, strain for extra smoothness, then off the heat stir in 2 tablespoons butter and 2 teaspoons vanilla (and a pinch of salt); optional nutmeg or lemon zest can be added sparingly for warmth or brightness. Let the custard cool slightly before filling the cooled pastries, or pipe into the centers after baking. Finish with a glaze: a powdered sugar glaze or a light apricot glaze to add shine without overpowering the custard. If desired, refrigerate baked pastries to firm the fillings and flavors; they are best eaten within 2–3 days and can be frozen either baked or unbaked for longer storage. Always use fresh ingredients and purify vanilla for the strongest aroma; for dairy-free versions, you can experiment with plant-based milks and thickeners, though the texture will differ from the classic version.”

Tips

Tips and Techniques for Danish Custard

  • Keep everything cold during lamination. The cold butter creates distinct, flaky layers. Chill the dough between folds for at least 20–30 minutes, and work on a cold surface. If the butter begins to smear, wrap the dough and refrigerate a bit longer before continuing.
  • Work the dough as little as possible. Overworking can smear the butter into the layers, reducing flakiness. Use quick, confident folds and a light touch when rolling to maintain separation between layers.
  • Laminate with a purposefully simple fold schedule. A classic approach is 3 turns (folds) with chilling between each turn. This builds laminated structure without overdeveloping gluten.
  • Dust the surface lightly, not heavily. Excess flour inhibits lamination and can dull the pastry. If the dough sticks, wrap and refrigerate rather than adding more flour.
  • Proof the yeast properly. If the mixture in 1/4 cup warm milk doesn’t foam after 5–10 minutes, discard and start with fresh yeast. A strong proof ensures light, airy pastries.
  • Roll to an even thickness and shape. Aim for a uniform sheet so all pastries bake evenly. If edges begin to curl, chill briefly, then continue rolling to restore a square sheet.
  • Temper the custard yolks carefully. Warm the milk gently and whisk hot milk into the yolks slowly to avoid scrambling. Strain the finished custard for ultra-smooth texture.
  • Thicken the custard correctly. If using cornstarch, mix it into a slurry with a little hot milk before adding to the pot. Cook until the custard thickens and the raw starch taste disappears; avoid boiling after thickening.
  • Finish the custard with butter off the heat. Whisk in 2 tablespoons of butter after removing from the stove to achieve a glossy, silky finish. Straining after adding butter helps remove any small lumps.
  • Season wisely. Optional nutmeg or lemon zest adds warmth or brightness, but use sparingly so it doesn’t overpower vanilla custard.
  • Temper and strain the custard before filling. If you plan to fill baked pastries, strain the custard to remove any cooked bits or clumps for a velvety texture.
  • Egg wash technique matters. Beat the egg with 1 tablespoon water and brush lightly over the dough just before baking. A light wash gives a glossy, golden finish; too much wash or pooling can prevent browning.
  • Avoid soggy bottoms. Bake pastries on a well-preheated rack and use parchment or a silicone mat. If the base looks pale, increase oven time slightly and rotate the sheet for even color.
  • Glazes should wait until pastries are fully cool. A powdered sugar glaze or apricot glaze adds shine without making the pastry soggy. Adjust thickness with more sugar or liquid as needed.
  • Make-ahead and storage. You can chill rolled dough overnight for convenience. Baked Danish custard pastries keep well in the refrigerator for a few days; reheat gently to preserve tenderness. Unbaked dough can be frozen for longer storage; bake from frozen when ready.

FAQ

What is Danish custard?

Danish custard is a creamy filling used in many Danish pastries. It’s typically a sweet, vanilla-flavored custard made from milk or cream, eggs, and sugar. It can be cooked until just thick and spoonable and then cooled before using as a filling between pastry layers or swirled into tarts.

How is Danish custard different from pastry cream or crème anglaise?

Crème pâtissière (pastry cream) is thickened with starch and holds its shape when cooled, ideal for tarts. Crème anglaise is a pourable sauce. Danish custard is usually richer and silkier, often used as a thick but spreadable filling in pastries; some recipes are closer to a lightly thickened dessert custard rather than a firm pastry cream.

What ingredients do I need for a basic Danish custard?

A simple stovetop Danish custard typically uses: 2 cups whole milk or half‑and‑half, 3–4 large egg yolks, 1/4 cup sugar, 1–2 tablespoons cornstarch (for extra thickness), 1 teaspoon vanilla extract, a pinch of salt. Optional: 1–2 tablespoons unsalted butter for richness. For a lighter version, omit the cornstarch and use only eggs.

How do I make a basic Danish custard on the stove?

Whisk eggs (yolks) with sugar and cornstarch in a bowl. Warm milk with vanilla and salt in a saucepan until steaming (do not boil). Slowly whisk hot milk into the egg mixture (tempering). Return to the saucepan and cook over low heat, whisking constantly, until thickened and coats the back of a spoon. Remove from heat, whisk in butter if using, then cool before using.

How can I prevent curdling or splitting the custard?

Use moderate heat and temper eggs slowly with warm milk. Whisk constantly and do not boil. Strain the custard to remove lumps, then chill. If the custard thickens too much, whisk in a little warm milk to loosen. If using cornstarch, dissolve thoroughly in a small amount of cold milk before adding to the hot mixture.

Can I make Danish custard ahead of time?

Yes. Refrigerate the cooled custard in an airtight container for up to 3–4 days. Stir well before using. If the custard becomes too thick after chilling, whisk in a small amount of warm milk to loosen. Do not freeze custard with dairy, as texture can change; pastry creams with eggs often separate when frozen.

Is Danish custard dairy-free or vegan?

Traditional Danish custard uses dairy and eggs. For dairy-free or vegan versions, use plant milk (almond, soy, coconut) and a thickener such as cornstarch or agar, plus a vegan egg substitute or blended silken tofu. Note that the texture and flavor will differ from classic dairy custard.

What flavors can I add to Danish custard?

Vanilla is classic, but you can add lemon zest or juice, orange zest, almond extract, coffee or espresso, or a splash of liqueur. If using citrus, add zest during heating or stir in after cooling. You can also swirl in melted chocolate or caramel for variety.

How do I use Danish custard in Danish pastries?

Cool the custard until it thickens slightly, then spread or pipe between layers of rolled pastry dough before shaping and baking, or use as a filling for cream horns, turnovers, or cookies. Some bakers glaze the tops after baking with a light sugar glaze.

Can Danish custard be baked instead of cooked on the stove?

Yes. You can bake a baked custard (like a flan) with eggs and dairy in a shallow dish. It will be set by baking rather than thickened on the stove and has a different texture—more jiggle and smoothness. For Danish pastries, stovetop custard is more common, but baked custards work for other desserts.

What temperature should Danish custard reach for safety?

Egg-based custards are typically heated to about 170–175°F (77–80°C) to ensure the yolks set and the custard is safe to eat. Use a thermometer for accuracy. Do not rely on color alone.

Introduction / Hook

Step into a kitchen that smells like autumn: the air perfumed with cinnamon, warm vanilla, and the bright orchard glow of apples. No Sugar Apple Cider Donuts invite you to taste a classic treat without the extra sugar that often lingers on the palate. These donuts deliver a soft, tender crumb that melts in your mouth, a delicate kiss of spice, and a sunshine-bright apple cider sweetness that comes from the fruit itself and the cider you use—as natural and comforting as a hug from a cozy sweater. Picture biting into a freshly baked donut that feels indulgent in the best possible way, yet somehow light enough to enjoy with a morning coffee or a mug of hot cider. The magic lies in balancing depth and brightness: orchard-fresh apple notes, a whisper of fall spices, and a texture that stays moist without weighing you down. This is more than a donut; it’s a small ritual that invites you to slow down, savor, and celebrate the harvest season in every bite.

No Sugar Apple Cider Donuts are built for moments when you crave something comforting and familiar, but you want to keep things a touch more mindful. They honor the generosity of the harvest—apples that sweeten naturally, cider that brings a crisp orchard sharpness, and spices that evoke crackling fireplaces and pumpkin patches. The experience is sensory from the first inhale—the warm, toasty aroma that rises as the donuts bake, to the final satisfying bite that leaves a gentle glow rather than a heavy aftertaste. It’s the kind of treat you can share with family and friends, knowing that the joy comes from simplicity, balance, and the subtle power of fruit-forward sweetness. Whether you’re baking for a weekend brunch, a seasonal gathering, or a quiet morning at home, these donuts offer a comforting, thoughtful indulgence that warms the heart as much as the belly.

The Story Behind the Dish

Apple cider donuts have long held a special place in autumn traditions across many parts of the United States, especially in regions where cider pressing is a seasonal ritual. In towns where orchards line the hills and farmstands glow with baskets of russet and gold, the donut becomes more than dessert; it’s a memory stitched into the fabric of harvest time. The original versions—often rolled in sugar or dusted with cinnamon—were beloved for their crisp exteriors and fluffy interiors, a testament to the joy of celebrating the season with something both comforting and celebratory. Over the years, home bakers and professional kitchens alike began exploring ways to keep the comforting nostalgia while making the indulgence a touch lighter or more inclusive for different dietary preferences. The idea behind No Sugar Apple Cider Donuts is to honor that heritage while adapting to contemporary cravings for more natural sweetness and balanced flavors. The result is a pastry that nods to its roots but speaks to today’s kitchen.

In this tale, the apple is more than an ingredient—it’s a symbol of the orchard’s generosity. Apples are picked at peak flavor, their sugars are complex and nuanced, and when pressed into cider they yield a bright tang that complements the spices perfectly. The kitchen becomes a small workshop where memory and science meet: the Maillard reaction on the crust promises a kiss of caramel, while the inside remains tender and moist, a canvas for the orchard’s fruit-forward sweetness to shine through. The no-sugar concept isn’t about denying sweetness; it’s about letting the natural sweetness of ripe fruit, the gentle caramelization during baking, and the warm spices do most of the work, so the diner experiences a clean, balanced finish rather than an overt sugar crash. This approach resonates with families looking for comforting treats that fit a mindful lifestyle, as well as bakers who love a challenge and a dash of culinary storytelling in their kitchen adventures.

Why You’ll Love This Recipe

  • Balanced sweetness that relies on natural fruit flavors rather than refined sugar, making every bite feel bright and lively rather than cloying.
  • Soft, springy crumb with a delicate crumb structure that stays tender even after cooling—perfect for a breakfast treat or a mid-afternoon pick-me-up.
  • A fragrant aroma that fills the house as they bake, turning ordinary mornings into a cozy celebration of harvest flavors.
  • Family-friendly and inclusive, appealing to kids and adults who crave a comforting treat without a heavy sugar load.
  • Versatile for different dietary needs. The concept can accommodate variations to suit gluten-free or vegan preferences without sacrificing flavor or texture.
  • Simple pantry-friendly approach that embraces the season’s produce, encouraging a less-processed, more natural sweetening approach.
  • Great make-ahead potential. The donuts hold their tenderness well, making them a reliable option for weekend gatherings or weekday mornings.
  • Pairs beautifully with warm beverages—coffee, tea, or a spiced cider—creating an inviting sensory experience from first bite to last.

Flavor Profile & Texture

From the first bite, No Sugar Apple Cider Donuts reveal a balance of bright fruitiness and cozy warmth. The apple cider brings a crisp acidity that lifts the richness of the donut’s crumb, creating an orchard-fresh backdrop for the spices. Think cinnamon’s familiar comfort wrapped around a core of apple sweetness that is present but not overpowering. There’s a whisper of vanilla, which smooths the edges and adds a hint of bakery-lab magic to the batter, while a touch of allspice or nutmeg can enhance the fall character without tipping into heavy nostalgia. The aromas are intoxicating—apple, cinnamon, vanilla, and a toasty note from the bake—like stepping into a sunlit kitchen on a cool autumn morning.

Texture wise, these donuts present a tender, cake-like interior with a slight density that keeps them satisfying. The exterior offers a gentle crust, a result of careful baking that encourages a light browning and a soft, not overly sugary, finish. What sets them apart is the restraint: the sweetness is governed by the natural sugars within the fruit and cider, so you taste the orchard and the spice more than any confectionery sweetness. This creates a harmonious contrast between the fruity, tangy notes and the warmth of the spices. The result is a donut that feels indulgent yet balanced, giving you a comforting sense of fullness without heaviness. If you ever crave that nostalgic donut moment, these deliver it in spades while keeping your palate refreshed and rejuvenated—an ideal balance for autumn daylight and crisp morning air.

Occasions & Pairings

These No Sugar Apple Cider Donuts shine in autumnal moments but are versatile enough for year-round enjoyment. Consider them for:

  • Weekend breakfasts that feel like a special occasion without requiring a long cleanup or a heavy sugar load.
  • Brunch menus that want to offer a lighter, fruit-forward pastry alongside richer savory dishes.
  • Autumn gatherings, harvest festivals, or potlucks where a comforting, crowd-pleasing treat fits seamlessly with seasonal flavors.
  • Cozy evenings by the fireplace, paired with a warm cup of cider, a latte, or a chai for a comforting nightcap.

Pairing ideas: a hot cup of coffee or tea that carries notes of cinnamon and vanilla; a glass of apple cider or a spiced tea blend to echo the donuts’ flavors; a simple yogurt or a light custard to offer a creamy contrast that lets the donuts remain the star. For celebrations, you can present them with a dusting of rustic spices or a light drizzle of a glaze that complements the natural sweetness without adding substantial sugar. The beauty of these donuts lies in their adaptability: they can anchor a fall-themed dessert table or simply elevate a quiet weekend morning with a touch of orchard-inspired luxury.

Tips, Variations & Substitutions

  • Keep the sweetness natural: embrace the fruit’s own sugars and the cider’s brightness. If you want a touch more sweetness without refined sugar, explore ultra-ripe fruit influences or a small amount of naturally sweeteners that align with your dietary preferences, keeping in mind that the goal is to preserve balance rather than overshadow the fruit’s character.
  • Texture considerations: if you’re aiming for a lighter crumb, allow the batter to rest briefly or consider gentle folding techniques to maintain airiness. Avoid over-mixing, which can toughen the crumb.
  • Dietary adaptations without sacrificing flavor: the concept translates well to different dietary needs. For a gluten-free approach, seek alternatives that mimic the tenderness of gluten without introducing heavy flavors. For a vegan version, choose plant-based substitutes that preserve moisture and provide a similar crumb. In all cases, aim to keep the batter cohesive and soft rather than wet or crumbly.
  • Flavor twists: while staying true to the core apple-cider-spice profile, you can explore complementary notes such as a touch of citrus zest (orange or lemon) for brightness, a hint of almond aroma for warmth, or a pinch of clove for a deeper spice profile. These tweaks can help you tailor the donuts to seasonal menus or personal preferences.
  • Regional twists: in places where cider is a year-round staple, you can swap in regional apple varieties or local spice blends to reflect local harvests. The essence remains the same—fruity sweetness balanced with autumn spices, delivered in a soft, comforting donut.
  • Avoiding over-sweetness in toppings: if you choose to add a glaze or finishing touch, keep it light and complementary. A thin glaze that enhances the donut’s natural flavors rather than masking them works best for the no-sugar philosophy.
  • Make-ahead ideas: these donuts can be prepared ahead of time for gatherings. Store them in a single layer at room temperature for a day or two, or freeze them after baking and reheat gently when ready to serve to preserve tenderness and aroma.

Storage & Make-Ahead Ideas

To preserve the tenderness and aroma of No Sugar Apple Cider Donuts, proper storage is key. If you’re keeping them for a short period, store them in an airtight container at room temperature, ideally in a single layer to prevent sticking or crushing the surface. For longer storage, you can freeze baked donuts. Wrap each donut individually to protect against freezer burn and maintain moisture. Reheat gently in a warm oven or toaster oven to restore that just-baked softness, and if you’d like, finish with a light glaze before serving for an extra touch of sweetness that remains true to the “no sugar” concept by relying on fruit-driven sweetness and a touch of spice. When making ahead for a brunch or party, consider baking the donuts a day in advance and refreshing them with a brief reheat and a soft glaze right before guests arrive. The key is to maintain moisture and prevent drying, so avoid overbaking and keep storage conditions moderate to preserve the delicate texture.

Fun Facts & Trivia (Optional)

Did you know that apple cider has a long history as a seasonal staple in many parts of the world? In colonial America, cider was a common beverage long before the widespread availability of bottled drinks, and orchards thrived in the Northeast, where generations learned to press, ferment, and enjoy the fruit’s juice in a variety of ways. Apple cider donuts themselves became a beloved autumn treat in farmstands and fairs, where the aroma of frying or baking donuts would draw crowds like a welcoming beacon on crisp mornings. The fragrance of cinnamon and warm spices often evokes images of harvest festivals, corn mazes, and family gatherings. The “no sugar” approach taps into a modern sensibility: celebrate the essence of seasonal produce while steering toward lighter, kinder indulgence. It’s a bridge between nostalgia and contemporary mindful eating, a reminder that comforting flavors can be enjoyed with balance and intention.

From a culinary standpoint, donuts are a study in texture: a moist crumb with a delicate crust, achieved through careful temperature control and gentle mixing. The choice of apple cider—not just as a flavor but as a leavening and moisture agent—adds a layer of complexity. The flavors of the orchard in bloom—apple, pear, or even quince when in season—can all offer nuance to this base concept, inviting bakers to adapt the dish to their local landscape. As autumn advances, these donuts become more than a pastry; they become a small celebration of the land’s bounty, a nod to family recipes passed down through generations, and a modern reinterpretation that invites everyone to enjoy seasonal sweetness without excess.

In folklore and culinary lore, autumn is a time of gathering, sharing stories, and savoring simple pleasures. No Sugar Apple Cider Donuts are a compact embodiment of that ethos: a treat that tastes like a memory in the making, a reminder that sweetness can be graceful, and a reminder to slow down and relish the moment with those you love. Whether you’re chasing a quiet morning breeze or hosting a bustling brunch, these donuts offer a story in every bite—one that begins in the orchard and ends with a satisfied smile.

Ingredients

Donut Base

  • 2 cups all-purpose flour
    → Provides the main structure and crumb of the donuts. For a lighter, more tender crumb, sift the flour first and measure by lightly spooning into the cup before leveling; if gluten-free is desired, substitute with a 1:1 gluten-free blend and consider adding 1/2 teaspoon xanthan gum per cup if your blend doesn’t include it.
  • 1 1/2 teaspoons baking powder
    → Leavening that helps the batter rise during baking, giving the donuts a soft, airy center. Keep baking powder fresh by storing in a cool, dry place; test freshness by a small pinch in warm water if you’re unsure.
  • 1/2 teaspoon baking soda
    → Additional leavening that works with the acids in applesauce and cider to produce a light crumb. Ensure even distribution by whisking with the dry ingredients; avoid overmixing once the wet ingredients are added to preserve tenderness.
  • 1/4 teaspoon fine salt
    → Enhances flavor balance and helps control perceived sweetness. Use fine salt for uniform distribution; mix with dry ingredients to ensure even seasoning throughout the batter.
  • 1 teaspoon ground cinnamon
    → Imparts warm, classic spice flavor that pairs with apple. For a stronger aroma, toast the spice lightly in a dry pan for a few seconds before adding to the dry mix, and use freshly ground cinnamon if possible.
  • 1/4 teaspoon ground nutmeg
    → Adds subtle warmth and depth to the apple-cider flavor. Nutmeg is potent, so measure carefully; omit if you prefer a milder spice profile.
  • 2 large eggs (at room temperature)
    → Provide structure, moisture, and help bind the batter for a sturdy yet tender crumb. Room-temperature eggs blend more smoothly with the fats and liquids; if they’re cold, warm them gently in warm water for a few minutes. Do not overbeat after adding dry ingredients to avoid toughness.
  • 1/2 cup unsweetened applesauce
    → Adds moisture and natural sweetness without refined sugar, contributing to a tender crumb and helping to bind the batter. Use smooth applesauce for a uniform texture; for more apple flavor, choose a slightly chunkier version and fold gently at the end.
  • 1/2 cup milk (dairy or plant-based)
    → Hydrates the dry ingredients to form a pourable batter and aids in releasing donuts from the pan. Use unsweetened varieties to maintain the no-sugar intent; choose a milk that complements the flavor you prefer (dairy for richness, almond or oat for dairy-free options).
  • 1/4 cup melted unsalted butter or neutral oil
    → Provides moisture and tenderness by coating flour particles to limit gluten development. Melted butter adds a rich flavor; neutral oil yields a lighter crumb. Whisk the fat with the wet ingredients to ensure even distribution.
  • 1 teaspoon vanilla extract
    → Enhances overall flavor and rounds the apple-cinnamon notes. Use pure vanilla for the best aroma; if you like a stronger vanilla presence, you can increase to 1 1/2 teaspoons, but avoid overpowering the spices.
  • 1/2 cup apple cider
    → Delivers apple-forward aroma and a touch of natural sweetness; complements the applesauce and spices. If your cider is very tart, you can balance with a touch more applesauce or a splash of vanilla; for a more intense cider flavor, reduce the cider to concentrate it before measuring.

Optional Add-ins

  • 1/2 cup finely chopped apples
    → Adds bursts of apple flavor and moisture throughout the donuts. Toss the apples in a teaspoon of flour before folding to prevent sinking and to distribute pieces evenly. For juicier apples, pat dry with a paper towel before adding to batter.
  • 1/4 cup chopped walnuts or pecans (optional)
    → Introduces a pleasant crunch and nutty note. Toast the nuts lightly in a dry skillet to enhance aroma before chopping and folding into the batter; omit if nut-free is required.

No-Sugar Glaze (optional)

  • 1/2 cup powdered erythritol
    → Creates a sugar-free glaze that coats the donuts without adding refined sugar. For best results, ensure donuts are completely cooled before glazing, and sift the powder to remove lumps. If the glaze is too thick, thin with a little citrus juice or dairy-free milk.
  • 2-3 tablespoons lemon juice or dairy-free milk
    → Use lemon juice for a bright, tangy glaze; dairy-free milk yields a creamier glaze. Add gradually to reach a pourable, but not runny, consistency that coats the donuts evenly without pooling. If using lemon juice, balance with a touch of vanilla to offset acidity.

Instructions

  • Preheat your oven to 350°F (175°C) and grease a donut pan (6- or 12-cavity) or line with nonstick liners; this ensures the batter releases cleanly and maintains the smooth shape of the donuts.
    → Proper greasing prevents sticking and helps donuts release intact after baking, preserving the delicate crumb.
  • Whisk and sift together the dry ingredients: all-purpose flour, baking powder, baking soda, fine salt, ground cinnamon, and ground nutmeg; sifting aerates the flour and distributes leaveners and spices evenly for a light, tender crumb.
    → Sifting removes lumps and ensures even leavening and spice distribution throughout the batter.
  • In a separate large bowl, whisk the wet ingredients: eggs at room temperature, unsweetened applesauce, milk, melted butter or neutral oil, vanilla extract, and apple cider until smooth and fully incorporated; if eggs are cold, warm them gently in warm water for a few minutes to reach room temperature.
    → Proper emulsification yields a uniform batter with even moisture and prevents streaks of fat or egg.
  • Pour the wet mixture into the dry ingredients and stir with a spatula or wooden spoon until just combined; stop as soon as the flour disappears and a few small lumps remain to avoid developing gluten and making the donuts tough.
    → Overmixing creates a denser, tougher crumb; mixing only until moistened preserves tenderness and a light texture.
  • If using optional add-ins, fold in finely chopped apples (tossed first in a teaspoon of flour to prevent sinking) and chopped walnuts or pecans; add these after the batter has come together and fold gently to distribute without deflating air pockets.
    → Floured apples distribute evenly and resist sinking; toasted nuts add aroma and crunch.
  • Spoon or pipe the batter into the prepared donut pan cavities, filling each about 1/2 to 2/3 full for a balanced dome; avoid overfilling to prevent overflow and uneven rising, and use a small spatula to level the batter for uniform appearance.
    → Even portions ensure uniform bake and shape; 2/3 full yields a gentle dome without overflow.
  • Bake in the preheated oven for 12 to 14 minutes, rotating the pan halfway if your oven has hot spots; test doneness by inserting a toothpick or skewer into the center of a donut—if it comes out with a few moist crumbs (not wet batter), they are done.
    → Rotating promotes even browning and a consistently tender crumb; proper doneness prevents underbaking or drying out.
  • Remove the donuts from the oven and allow them to rest in the pan for about 5 minutes, then transfer to a wire rack to cool completely before glazing or storing; this sets the structure and prevents steam from softening the glaze.
    → Cooling on a rack prevents condensation and keeps any glaze from becoming soggy.
  • Prepare the glaze if desired by whisking powdered erythritol with lemon juice or dairy-free milk to a smooth, pourable consistency; start with 2 tablespoons of liquid and add in small increments until the glaze coats the donuts without pooling.
    → Sifting the erythritol helps achieve a glossy, smooth glaze; controlling moisture yields a coating that clings evenly.
  • Dip the cooled donuts into the glaze or drizzle evenly over the tops using a steady motion; allow the glaze to set for about 10 to 15 minutes, applying additional thin coats if a thicker glaze is desired.
    → A thin, even coating sets faster and prevents pooling, while multiple light coats build a more pronounced glaze without becoming sticky.
  • Store unglazed donuts in an airtight container at room temperature for up to 2 days, or freeze unfrosted donuts for longer storage; glazed donuts keep best for up to 1 day at room temperature, or wrap securely and refrigerate for up to 3 days.
    → Proper storage maintains moisture and prevents staling or texture changes that dull the flavor.

Notes

These no-sugar apple cider donuts are tender, warmly spiced, and naturally sweetened by ripe apples and apple cider, with no refined sugar added. You can customize them by folding in finely chopped apples or toasted nuts for texture and extra flavor. They freeze well and make a great grab-and-go treat or dessert with coffee or tea. For a dairy-free option, use your favorite plant-based milk and an equal amount of melted coconut oil or neutral oil; if you’d like a glaze, use a sugar-free glaze made from powdered erythritol whisked with lemon juice or dairy-free milk. Always ensure your flour is gluten-free if you have gluten intolerance, and choose a 1:1 gluten-free blend if you need a gluten-free version (consider adding 1/2 teaspoon xanthan gum per cup if your blend doesn’t include it).

Preheat oven to 350°F (175°C) and generously grease a donut pan or use silicone molds. In a bowl, whisk together the dry ingredients: flour, baking powder, baking soda, fine salt, ground cinnamon, and ground nutmeg. In a separate bowl, whisk the wet ingredients: eggs, unsweetened applesauce, milk, melted butter or neutral oil, vanilla, and apple cider. Pour the wet mixture into the dry and stir just until combined; avoid overmixing to keep the crumb tender. If you’re using add-ins, fold in the apples and/or nuts now. Spoon batter into the prepared pan about two-thirds full. Bake 12–15 minutes, until a toothpick inserted into a donut comes out with a few moist crumbs. Let the donuts cool in the pan for 5 minutes, then transfer to a rack to cool completely before glazing or dusting with cinnamon sugar.

For a no-sugar glaze, whisk 1/2 cup powdered erythritol with 2–3 tablespoons lemon juice or dairy-free milk until smooth. Drizzle over cooled donuts and let the glaze set. Store leftovers in an airtight container at room temperature for 2–3 days, or freeze baked donuts for up to 2 months; rewarm in a 350°F oven for 5–8 minutes to refresh tenderness. If you prefer a dairy-free version, swap the butter for a neutral oil and use plant-based milk. When using gluten-free flour blends, add 1/2 teaspoon xanthan gum per cup if your blend does not already contain it to help mimic gluten’s structure.

Tips

Tips for Perfect No Sugar Apple Cider Donuts

  • Prepare the dry ingredients first: sift the flour and whisk it with baking powder, baking soda, salt, cinnamon, and nutmeg. This ensures an even distribution of leaveners and spices for a lighter crumb.
  • Use room-temperature ingredients when possible. Eggs, milk, applesauce, and cider mix more smoothly and evenly, yielding a more cohesive batter with less risk of lumps.
  • Fresh leavening matters: check that your baking powder is active (a small pinch in warm water should fizz). If it’s older, replace it for optimal lift; likewise, whisk baking soda with the dry ingredients to ensure even distribution.
  • Avoid overmixing: once you add the wet ingredients to the dry, mix just until the flour disappears. Overmixing develops gluten and can make the donuts dense and chewy.
  • Balance the fats: melted butter provides a rich flavor, while neutral oil yields a lighter crumb. Whisk fat into the wet ingredients to help create a tender, cohesive batter.
  • Apple pieces and chunkier texture: if you include optional finely chopped apples, toss them in a teaspoon of flour before folding to prevent sinking, and pat dry if they release a lot of moisture.
  • Glaze guidance: to keep things sugar-free, sift the erythritol and add lemon juice or dairy-free milk gradually until you reach a pourable, coatable consistency. Fully cool the donuts before glazing to prevent sliding.
  • Donut pan prep: thoroughly grease or spray the pan to minimize sticking. If your batter is thick, let it rest 5–10 minutes to relax the batter before spooning or piping into the molds.
  • Flavor layering: the combination of cider, applesauce, and spices is key. If your cider is very tart, a touch more applesauce or a hint of vanilla can round the flavor without adding sugar.
  • Adaptations for dietary needs: for gluten-free baking, use a 1:1 GF flour blend with 1/2 teaspoon xanthan gum per cup if the blend lacks it, and ensure all ingredients (cider, applesauce) are certified GF. For dairy-free, use plant-based milk and oil or melted dairy-free butter.
  • Storage and freshness: bake ahead and store cooled donuts in an airtight container for up to 2–3 days at room temperature, or freeze unfrosted donuts for longer storage. Reheat briefly to restore tenderness.
  • Optional glaze variations: add a splash of vanilla or a pinch of citrus zest to the glaze for a bright finish, but keep portions modest to preserve the no-sugar concept.

Quick Troubleshooting

  • If donuts are dense: double-check your leaveners are fresh, don’t overmix, and don’t overbake. A short rest of the batter before baking can help.
  • If the glaze won’t coating evenly: ensure donuts are completely cooled, and adjust the glaze thickness with a little dairy-free milk or citrus juice in small increments.

FAQ

What makes these No Sugar Apple Cider Donuts “no sugar”?

They are made without refined sugar. The sweetness comes from unsweetened apple cider and ripe apples, with optional sugar-free sweeteners like erythritol or monk fruit if you want extra sweetness. If you skip all sweeteners, the donuts will still have warm apple flavor from the spices and fruit.

Are these donuts baked or fried?

They are designed to be baked for a lighter, simpler process. Bake in a donut pan at about 350°F (175°C) for 10–12 minutes. You can also adapt for an air fryer at 350°F for 6–8 minutes. Frying is possible with neutral oil, but that adds fat and calories.

Can I make these gluten-free?

Yes. Use a 1:1 gluten-free all-purpose flour blend (preferably with xanthan gum). You can also substitute with almond or coconut flour, but you’ll need to adjust the moisture and eggs. Check the blend’s guidance for best results.

Can I make these dairy-free or vegan?

Absolutely. Use plant-based milk (almond, soy, oat, etc.) and replace butter with a neutral oil (like canola) or melted coconut oil. For eggs, use a flax egg (1 tablespoon ground flaxseed + 3 tablespoons water per egg) or applesauce (¼ cup per egg). The batter should remain pourable but not overly loose.

How do I sweeten without sugar?

Options include sugar-free sweeteners such as erythritol, xylitol, monk fruit, or stevia blends. Erythritol and monk fruit often substitute 1:1 with sugar, while stevia blends require much smaller amounts. You can also rely on the natural sweetness from apples and applesauce.

What are the basic ingredients?

Common ingredients include: flour (regular or gluten-free blend), baking powder, cinnamon, salt, unsweetened applesauce, unsweetened apple cider, eggs (or vegan substitute), non-dairy milk, and a neutral oil. Optional vanilla extract, diced apples, and a sugar-free sweetener can be added for extra flavor. Toppings or glaze ideas follow below.

How do I store and reheat leftovers?

Store baked donuts in an airtight container at room temperature for 1–2 days, or refrigerate up to 1 week. Reheat in a 325–350°F oven for 5–7 minutes, or briefly in the microwave (about 15–20 seconds) to warm through.

Can I freeze the donuts?

Yes. Cool completely, freeze in a single layer on a baking sheet, then transfer to a freezer bag or container. They keep for 2–3 months. Thaw at room temperature and reheat as above.

Can I customize flavors or toppings?

Definitely. Add diced apples or chopped nuts to the batter. For toppings, use a cinnamon-sugar mix made with a sugar-free sweetener, or drizzle a glaze made from a sugar-free powdered sugar substitute with a little milk and vanilla. Ground nutmeg or allspice can add extra warmth as well.

Introduction / Hook

Imagine a warm, comforting treat that fits in the palm of your hand, ready in minutes, and powered by simple staples you likely already have in your kitchen. The Vanilla Coconut Cottage Cheese Mug Cake is more than a dessert—it’s a tiny moment of indulgence that feels luxurious without demanding a long list of ingredients or a marathon of steps. The moment you lift a spoon to that first bite, you’re met with a delicate vanilla perfume, a whisper of coconut that conjures tropical sunshine, and a creamy center that tames sweetness with a tangy, satisfying tang. It’s the kind of recipe that makes you pause, take a breath, and appreciate how good a simple idea can taste when you treat it with a little care. In just a few minutes, a humble mug becomes a stage for flavor, texture, and mood-boosting comfort. It’s speed, it’s charm, and it’s that rare bite that feels both wholesome and crave-able—all in one delectable package.

The beauty of this mug cake lies in its balance. The cottage cheese provides a velvety, protein-rich base that keeps the crumb light rather than heavy, while vanilla lends warmth and depth. Coconut contributes a sunny aroma and a delicate crunch, especially if you let a tiny bit of toasty bits greet your palate. The result is not just sweetness; it’s a layered experience: creamy, fragrant, slightly tropical, with a tender crumb that melts on contact. Whether you’re craving a quick breakfast that tastes like a treat, a post-workout pick-me-up, or a comforting late-night bite, this cake adapts to your rhythm. It invites curious experimentation—swap in a citrus zest for brightness, fold in dark chocolate for a cozy contrast, or top with fresh fruit for a lively finish. And because it’s mug-sized, you can tailor portions to match your mood, your schedule, or your appetite without waste or guilt.

The Story Behind the Dish

There’s a quiet delight in mug cakes—the art of delivering a dessert-worthy moment with the simplest of tools. The concept grew out of late-night kitchen improvisations and the modern desire for quick, portion-controlled treats that don’t compel you to fire up the oven. Cottage cheese, with its soft curds and mild tang, emerged as a surprising hero in these tiny culinary rituals. Its high protein content helps create a creamy texture that feels indulgent yet lighter than heavier dessert bases, making it a favored ingredient in quick desserts and smoothies alike. Vanilla, with its warm, comforting aroma, has a timeless ability to evoke memories—grandmother’s kitchen, a perfect Sunday breakfast, or a lazy afternoon spent with a book. Coconut brings a bright, sun-kissed note that hints at beaches and vacation moments, even when you’re tucked into a quiet evening at home.

As a family, as a solo cook, or as a busy student juggling routines, the mug cake concept travels well across cultures. It’s not tied to a single tradition; rather, it’s a modern kitchen adaptation that respects the love of good taste without demanding an entire afternoon to prepare. The Vanilla Coconut Cottage Cheese Mug Cake captures that spirit: a small, intimate treat that travels with you from morning to night, adaptable to your pantry and your cravings. A story emerges in the aroma while it bakes—one of resourcefulness and joy—that makes every bite feel like a little celebration of everyday life.

Over time, cooks have learned to pair this mug cake with a spectrum of accompaniments, from a splash of warm coffee to a dusting of cinnamon or a handful of fresh fruit. The story behind the dish is as much about the moment as it is about the ingredients: a brisk morning ritual that becomes a noon-time pick-me-up, a post-workout reward, or a dessert that feels both satisfying and light. It’s a dish that invites personal touches and stories—every variation telling a small anecdote about who you are at the moment you savor it. And because it’s built on pantry-friendly staples—vanilla, coconut, cottage cheese—it travels easily from kitchen to kitchen, offering a reliable, comforting, and surprisingly sophisticated bite wherever you are.

Why You’ll Love This Recipe

  • Quick and convenient: a full-flavored treat in minutes, ideal for busy mornings or late-night cravings.
  • Protein-rich base: cottage cheese adds creaminess and a gentle protein boost without heaviness.
  • Versatile flavor platform: vanilla and coconut pair beautifully with a wide range of toppings and mix-ins.
  • Low-fuss indulgence: the portion-controlled mug keeps servings reasonable while still delivering satisfaction.
  • Gluten-free and adaptable: naturally aligns with gluten-free diets and welcomes substitutions for dairy-free or vegan preferences.
  • Wholesome comfort: the aroma and texture evoke cozy, comforting moments that feel like a treat without guilt.
  • Beginner-friendly concept: a simple, forgiving base that shines with small creative touches.
  • Child-friendly appeal: gentle flavors and creamy texture make it a winner for picky eaters or lunchbox snacks.

Flavor Profile & Texture

The flavor journey of this mug cake begins with a warm, enveloping vanilla note. It isn’t harsh or overpowering; it’s the aroma of vanilla tucked into a cozy bakery corner, inviting you to take a first bite. The coconut contributes a delicate tropical brightness that lifts the profile without dominating, delivering faint toasty hints that recall coconut macaroons and sunny climates. The cottage cheese provides a subtle tang that steadies the sweetness and adds a lush creaminess—think velvet-soft interior with a slightly airy crumb instead of a dense, heavy bite. In the mouth, you’ll encounter a gentle contrast: a tender, almost custard-like center that yields to a light, cake-like exterior. If you’ve ever bitten into a dessert that melts on contact while staying distinctly flavorful, you’ll recognize the joy here. The texture is key: not dry, not overly dense, but with a delicate spring that makes each mouthful feel rewarding and substantial despite the small portion.

Even without extra adornments, the base presents a satisfying balance between richness and brightness. When you add toppings or mix-ins—think a whisper of citrus zest, a sprinkle of cinnamon, or a few dark chocolate shards—the flavor expands into a layered, nearly festive experience. The interplay between the mellow tang of cottage cheese, the vanilla’s warmth, and the coconut’s light sparkle creates a comforting profile that can lean comforting-homemade or playful-experimental, depending on your mood. In short, it’s a small cake that feels big on personality: creamy, aromatic, and wonderfully crumb-tender, with enough character to keep every bite interesting yet familiar enough to feel like “home” in a mug.

Occasions & Pairings

This mug cake is at home in a spectrum of moments. It’s ideal for busy weekdays when time is tight but you still want something satisfying and not a junk-food feel. It’s equally welcome as a weekend treat that doesn’t derail your routine, and it can be a gentle dessert after a simple weeknight dinner. Because the flavors are light and flexible, it works for breakfast-adjacent moments too—think a cozy morning bite that still feels like a little luxury as you rise and greet the day.

Pairing ideas to elevate the experience:

  • Morning coffee or a cup of tea: the warm notes of vanilla and coconut complement a robust brew or a fragrant chai.
  • Fresh fruit: slices of mango, pineapple, berries, or kiwi offer bright contrast and a burst of acidity to balance the creamy base.
  • Whipped cream or yogurt dollop: a light crown adds extra creaminess and a gentle tang.
  • A dusting of spices: cinnamon, nutmeg, or a pinch of cardamom can shift the mood toward cozy or tropical.
  • Chocolate accents: a few dark-chocolate shavings or chips introduce a delightful contrast and depth.
  • Small indulges: a drizzle of honey or maple syrup can amp up sweetness if desired, without overpowering the core flavors.

For celebrations or brunches, present the mug cake on a small plate with a decorative drizzle or a delicate garnish. It can also be portioned into mini mugs for a crowd, letting everyone choose their preferred embellishments. It’s the kind of dish that adapts to the moment—whether you’re offering a quick bite before a meeting, treating yourself after a workout, or winding down with a dessert that won’t derail your goals.

Tips, Variations & Substitutions

  • Flavor twists: swap a portion of the vanilla with almond extract for a nutty, fragrant lift. A splash of coconut extract can intensify the tropical vibe without adding bulk.
  • Texture tweaks: for extra creaminess, blend the cottage cheese until it’s ultra-smooth before combining with the other elements. If you prefer a lighter crumb, whisk the mixture a little more to introduce air.
  • Fruit and zest: a tiny amount of citrus zest (orange or lemon) can brighten the profile and cut sweetness nicely. Fresh fruit toppings can add a fresh, juicy contrast.
  • Chocolate option: a handful of mini chocolate chips or cacao nibs folded into the batter creates pockets of rich, melted goodness that play beautifully with vanilla and coconut.
  • Dairy-free adaptations: for a dairy-free version, use a dairy-free yogurt or blended firm silken tofu in place of cottage cheese, and consider a plant-based milk that you enjoy. The texture will shift slightly, but the result remains satisfying.
  • Low-sugar or sugar-free approach: use a natural sweetener like a touch of maple syrup or a zero-calorie sweetener to suit your preference, and balance with a touch more vanilla or citrus zest to maintain aroma and flavor depth.
  • Gluten-free considerations: the base is generally gluten-free, but always check any added ingredients. If you’re adding mix-ins like oats, choose certified gluten-free oats to stay fully compliant.
  • Make-ahead variations: you can prepare a batch of the dry flavor base in small jars for quick future use, then just add cottage cheese and a little liquid to bring it together when you’re ready to bake or warm.
  • Portion control: the mug concept naturally supports portion control, but you can scale up to a mini-mcone or a larger dessert if needed by adjusting the ratio of ingredients and using a bigger cup or ramekin.

Storage & Make-Ahead Ideas

Because this treat centers on a friendly, easily assembled batter-like base, there are comfortable ways to plan ahead. If you want to keep a batch ready to go for busy mornings, consider these ideas:

  • Make-ahead dry mix: combine the dry flavor components in a jar or container and store in the pantry. When you’re ready, you simply add cottage cheese and any additional liquid or flavor boosters for quick assembly.
  • Refrigerating prepared batter: you can prepare a batter-equivalent ahead of time and refrigerate for a short window, typically up to a day. Allow it to come closer to room temperature before finishing, as this can help with texture when you eventually heat it.
  • Freezing portions: portion the base into small freezer-safe containers or silicone molds. Thaw in the refrigerator overnight and warm gently before enjoying. Freezing works well for occasional cravings and reduces waste when you have extra ingredients.
  • Storage suggestions after baking: single servings can be stored in the refrigerator for a couple of days, covered, and reheated gently to preserve the soft texture. Avoid long storage in the freezer, as the texture can transform more than you’d expect for this delicate cake.

When you’re ready to enjoy, bring the prepared element to a comfortable temperature, then savor the aroma as it rises to the occasion. The simplicity of this dish makes it ideal for quick re-creations, weekend experiments, or emergency dessert cravings that still feel special. The mug cake’s portability means you can savor it wherever you are—at home, in a dorm, or in a small kitchen turned into a cozy cafe for a moment.

Fun Facts & Trivia (Optional)

– Vanilla is one of the most beloved flavoring agents in the world, with a long history that spans ancient civilisations and modern kitchens alike. Its warmth can instantly conjure feelings of comfort and nostalgia.

– Coconut adds not only flavor but a sunny aroma that can boost mood and transport you to tropical locales, even if you’re just in a rain-soaked city apartment.

– Cottage cheese has a unique protein profile and a gentle tanginess that makes it a surprisingly versatile base for both savory and sweet dishes, especially when you’re aiming for lighter, protein-rich desserts or snacks.

– Mug cakes surged in popularity as a playful, fast way to enjoy a personalized treat. They celebrate the magic of single-serving desserts that don’t require oven preheating or multi-step preparation, aligning perfectly with busy lives and spontaneous cravings.

– The combination of vanilla, coconut, and cottage cheese is a learnable, approachable gateway to more adventurous flavor pairings—great for cooks who want to experiment with texture and aroma without committing to a longer recipe.

Ingredients

Mug Cake Base

  • – 1/4 cup cottage cheese, blended until smooth
    → Cottage cheese provides moisture and protein to the batter, helping create a soft, tender crumb and adding creaminess without heavy fat. For best results, blend the cottage cheese in a blender or with a whisk until very smooth to avoid lumps; use full-fat if you can for richer texture; drain any excess whey if it’s very watery to prevent a too-runny batter.
  • – 1 large egg, lightly whisked
    → Eggs act as the primary binder and structure-builder in this quick mug cake, helping the batter set into a light, cake-like texture. Lightly whisk the egg to emulsify with the cottage cheese; room-temperature eggs mix more evenly. If you want a fluffier crumb, whisk the whites separately and fold in lightly.
  • – 2 tablespoons unsweetened coconut flour
    → Coconut flour is highly absorbent and yields a soft, cake-like crumb. It requires moisture and eggs to behave; 2 tablespoons is a restrained amount to avoid a dense result. If substituting with almond flour, use about 3 tablespoons. Sift to remove lumps and, if batter seems too thick, add a splash of milk in small increments.
  • – 1 tablespoon granulated sugar (or 1 tablespoon maple syrup)
    → Sugar sweetens the cake and helps with browning and moisture balance in the quick microwave bake. If you swap in maple syrup or honey, reduce the liquid slightly and whisk longer to ensure even dispersion; adjust sweetness to taste.
  • – 1/2 teaspoon baking powder
    → Baking powder provides lift for a light, tender crumb in the microwave. Ensure it’s fresh for maximum effectiveness. Do not substitute with baking soda without adjusting acidity in the batter.
  • – 1/2 teaspoon pure vanilla extract
    → Vanilla adds aroma and depth to the batter. Use high-quality pure vanilla extract for best flavor; if you have vanilla paste, you can substitute with 1/4 teaspoon paste for an intensified vanilla experience.
  • – Pinch of salt
    → A small pinch enhances sweetness and helps coconut and vanilla flavors pop. Even a tiny amount makes a noticeable difference in balance; skip only if you’re using salted ingredients and prefer a cleaner-salt profile.
  • – 2 tablespoons shredded unsweetened coconut
    → Adds texture and a pronounced coconut note throughout the cake. You can toast the coconut lightly in a dry pan to boost aroma before mixing. If you prefer, reserve some to sprinkle on top after cooking for contrast in texture.
  • – 1-2 tablespoons unsweetened almond milk (optional, to loosen batter)
    → Depending on the absorbency of the coconut flour and the moisture in the cottage cheese, the batter may be quite thick. Add 1 tablespoon at a time until it reaches a thick, spoonable consistency. Use unsweetened to control sweetness and avoid thinning the batter too much.

Optional Add-ins

  • – 1 tablespoon mini chocolate chips (optional)
    → Chocolate chips add pockets of sweetness and a touch of indulgence. Fold them in after the batter is mixed, so they distribute evenly without sinking completely. For a lighter chocolate flavor, choose milk chocolate chips; for a richer bite, go with dark chocolate.
  • – 1 tablespoon toasted coconut flakes (optional)
    → Toasted coconut adds a crunchy contrast and a deeper coconut aroma. Toast briefly in a dry skillet until fragrant, then fold into the batter or sprinkle on top after microwaving for extra texture and aroma.

Instructions

  • Blend cottage cheese until completely smooth, using a blender on high for 30–45 seconds or whisk vigorously with a whisk until there are no lumps; drain any excess whey if the mixture seems watery to prevent a too-runny batter.
    → Smooth cottage cheese creates a creamy, uniform base and avoids a grainy texture; draining whey concentrates the proteins for better structure in a quick microwave cake.
  • Whisk one large egg in a small bowl until fully combined and lightly foamy to help with emulsification and structure.
    → A lightly foamy egg distributes more evenly through the batter, aiding a light, cake-like crumb rather than a dense result.
  • Stir in 1/2 teaspoon pure vanilla extract into the cottage cheese and egg mixture until evenly incorporated.
    → Vanilla enhances aroma and depth, creating a more rounded coconut flavor profile as the cake cooks.
  • In a separate small bowl, whisk together 2 tablespoons unsweetened coconut flour, 1 tablespoon granulated sugar (or 1 tablespoon maple syrup, noting that maple syrup adds liquid), 1/2 teaspoon baking powder, and 1/2 teaspoon salt; sift to break up any lumps.
    → Coconut flour is highly absorbent, so proper distribution of leavening and sugar is essential for a light, tender crumb; sifting prevents dense pockets that can undermine rise.
  • Pour the wet mixture from step 2 into the bowl of dry ingredients from step 4 and stir with a spatula just until the batter comes together and no streaks of flour remain; avoid overmixing to keep the crumb tender and airy.
    → Mixing until just combined ensures the coconut flour hydrates without developing a tough texture; overmixing can lead to a gummy bite in microwave-baked goods.
  • Fold in 2 tablespoons shredded unsweetened coconut, distributing evenly; if you like, toast the coconut lightly in a dry skillet for 1–2 minutes to boost aroma before folding.
    → Toasting amplifies coconut fragrance and adds a subtle depth of flavor that contrasts with the creamy base.
  • If desired, fold in 1 tablespoon mini chocolate chips, ensuring they are evenly dispersed without sinking; avoid excessive stirring to keep chips from clumping.
    → Chocolate chips create pockets of sweetness and texture without overpowering the coconut notes.
  • If the batter seems very thick, whisk in 1–2 tablespoons unsweetened almond milk, adding a little at a time until the batter is thick but spoonable; do not over-wet the batter.
    → Almond milk adds just enough moisture to hydrate the coconut flour without thinning the batter too much, preserving structure for microwaving.
  • Lightly grease or spray a microwave-safe mug with cooking spray or oil to prevent sticking and ensure easy removal after cooking.
    → Proper coating prevents a fragile cake from tearing when you unmold or scoop it out, and makes cleanup easier.
  • Spoon the batter into the mug, filling it to about halfway to leave room for the cake to rise in the microwave.
    → Filling only halfway prevents overflow and ensures a tall, domed center rather than a flat disk.
  • Microwave on high power for 1 minute 30 seconds to 2 minutes, depending on your microwave wattage; start checking at 1:30 and test for doneness with a gentle press—the top should be set and a toothpick inserted near the center should come out with a few moist crumbs.
    → Microwave ovens vary; testing and short intervals prevent overcooking, which can make the cake dry, while undercooking leaves a gummy center.
  • Carefully remove the mug from the microwave and let it rest for 1 minute to finish cooking through carryover heat and to set the crumb for clean slicing or scooping.
    → Resting allows the moisture to redistribute, yielding a uniform, tender crumb and easier handling.
  • Optionally top with 1 tablespoon toasted coconut flakes or a light sprinkle of shredded coconut, then serve warm; if desired, add a dollop of extra cottage cheese or a drizzle of vanilla for contrast.
    → Finishing with toasted coconut enhances aroma and texture, while extra dollop or vanilla intensifies the creamy, vanilla-coconut profile.
  • Store any leftovers in a covered container in the refrigerator and reheat briefly in the microwave in 15–20 second bursts, testing for warmth to preserve moisture and texture.
    → Freshness and texture are best when reheated gently to avoid drying out the crumb.

Notes

These vanilla coconut cottage cheese mug cakes are quick, protein-rich treats that come together in minutes with just a blender or whisk and a short microwave bake. For the smoothest batter, blend the cottage cheese until completely lump-free and whisk the egg with vanilla to distribute aroma. Because coconut flour is very absorbent, the batter will be naturally thick; if it looks too stiff, whisk in 1 tablespoon at a time of unsweetened almond milk until it reaches a thick, spoonable consistency. Use fresh baking powder for a light, tender crumb, and keep in mind that substitution with baking soda requires acidity adjustments. A pinch of salt enhances sweetness and makes the vanilla and coconut pop. The shredded coconut adds texture and tropical notes—toast it briefly in a dry skillet to boost aroma, then fold into the batter or sprinkle on top after microwaving. If you prefer a sweeter result, you can swap the sugar for maple syrup, but reduce the added liquid slightly and whisk longer to ensure even incorporation. Optional add-ins: fold in 1 tablespoon mini chocolate chips after batter is mixed, or sprinkle extra toasted coconut on top for crunch. Microwave times vary by wattage—start with 60-70 seconds on high for a typical 1000–1100W microwave, check doneness, and nudge with 10–15 second bursts until the center is set; let rest 1–2 minutes before eating. This mug cake is delicious warmed with a dollop of yogurt or a drizzle of nut butter. Store any leftovers in the fridge for up to 2 days and reheat briefly. Always ensure your ingredients are gluten-free if you have gluten intolerance.

Tips

Tips for Perfect Vanilla Coconut Cottage Cheese Mug Cake

  • Blending cottage cheese until completely smooth is essential. Lumps can create a dense, uneven crumb. If you don’t have a blender, whisk vigorously or push through a fine-mesh sieve after mashing to smooth out the texture.
  • Fresh, full-fat cottage cheese yields the richest, creamier results. If using lower-fat varieties, you may notice a lighter crumb; consider a touch more coconut milk or a splash more milk to compensate for moisture differences.
  • Fresh baking powder is crucial for lift in the microwave. If the powder is older or clumped, the cake may turn out dense. Sift the powder with the dry ingredients to ensure even distribution.
  • Microwave times vary with wattage. Start at 60–70 seconds on a 800–1000W microwave. If the center is still jiggly, microwave in 10–15 second bursts until set. Avoid overheating, which can make the cake dry or tough.
  • To keep the top from drying out, avoid overcooking. If you notice a dry or crusty top, try reducing the cook time by 10–15 seconds next time, or cover the mug loosely with a microwave-safe plate to trap moisture.
  • Tip for fluffier texture: whisk the egg well and, for extra height, fold in lightly whisked egg whites or whip the eggs separately and combine at the end. This adds air and a cake-like crumb.
  • Moisture balance is key with coconut flour. If the batter seems too thick, add 1 tablespoon of unsweetened almond milk at a time until it reaches a thick, spoonable consistency. Avoid adding too much liquid, which can make the mug cake gummy.
  • Toast the shredded coconut briefly in a dry skillet until fragrant to deepen the coconut aroma before mixing. You can also reserve a portion to sprinkle on top after microwaving for textural contrast.
  • If using optional add-ins: fold in mini chocolate chips after the batter is mixed to prevent sinking. For a lighter chocolate flavor, use milk chocolate chips; for a richer bite, use dark chips.
  • Toasted coconut flakes on top after cooking add an appealing crunch and aroma. A light sprinkle of extra vanilla or a drizzle of maple syrup over the top can amplify flavor just before serving.
  • Storage and reheating: mug cakes are best fresh. If needed, store the batter (unbaked) in the fridge for up to 24 hours, or refrigerate leftovers and reheat in 10–15 second bursts to avoid drying out.
  • Flavor variations: for a deeper vanilla, use 1/4 teaspoon vanilla paste or a pinch of vanilla bean seeds. A pinch of cinnamon can complement the coconut nicely if you’re in the mood for a warm note.

FAQ

What is Vanilla Coconut Cottage Cheese Mug Cake?

A quick, single-serving mug cake you bake in the microwave using cottage cheese, vanilla, coconut and a few pantry staples. It’s protein-packed, naturally sweetened, and ready in minutes.

What ingredients do I need?
  • 1/2 cup cottage cheese (low-fat or full-fat)
  • 1 large egg
  • 1–2 tablespoons sweetener (granulated sugar, maple syrup, honey, or your preferred sugar substitute)
  • 1/2 teaspoon vanilla extract
  • 1–2 tablespoons shredded coconut or 2 tablespoons coconut flour
  • Pinch of salt
  • Optional: 1/4 teaspoon baking powder for extra rise
How do I make it (step-by-step)?
  1. Blend or mash cottage cheese until smooth.
  2. Whisk in egg, vanilla, sweetener, salt and baking powder until well combined.
  3. Stir in shredded coconut or coconut flour.
  4. Grease a microwave-safe mug and pour batter inside.
  5. Microwave on high for 1–2 minutes, checking after 1 minute and then in 15–20 second increments until set but soft in the middle.
  6. Let cool briefly, then enjoy.
How long does it take to cook in the microwave?

Typically 1–2 minutes on high in a standard 1000W microwave. Every microwave varies, so start at 1 minute and add 15–20 second increments until just set.

Can I make a dairy-free or vegan version?

Yes. Replace cottage cheese with silken tofu or a dairy-free yogurt, and use a vegan egg substitute (such as a flax egg) if needed. For best texture, blend the tofu until smooth and adjust with a little extra coconut flour if the batter is too loose.

What are good substitutions or variations?

Try these variations: add chocolate chips or cocoa powder for a chocolate twist; swap in almond flour or more coconut flour for different textures; add cinnamon or nutmeg; top with fresh berries, shredded coconut, or a drizzle of maple syrup after baking.

How should I store leftovers?

Store in an airtight container in the fridge for 2–3 days. Reheat in the microwave in 15–20 second bursts until warm. The texture is best fresh, but it will reheat okay for a quick snack.

How can I prevent it from overflowing or being rubbery?

Use a mug with extra headroom (at least 12 oz). Do not overfill. Blend cottage cheese until completely smooth to avoid lumps. Do not over-mix the batter, and if it looks very loose, add a touch more coconut flour or a pinch more baking powder.

Is this recipe high in protein?

Yes. The cottage cheese and egg provide protein, roughly 14–16 g per serving depending on the exact brands and amounts used. This makes it a satisfying, protein-forward snack or dessert.

Serving suggestions

Top with a dollop of yogurt or whipped cream, a drizzle of almond butter or maple syrup, and a handful of fresh berries or toasted coconut for extra flavor and texture.

Introduction / Hook

Imagine peeling back the lid of a small glass jar and revealing a cloud of silky, lemon-kissed cheesecake tucked inside, layered with a crumbly, oat-tinged crust, and a glossy ribbon of berry compote catching the light. Picture biting into it and feeling how the first spoonful dissolves on your tongue—creamy, bright, and just the right amount of tang—followed by a subtle nutty crunch from the crust. Now imagine this same indulgence, but crafted with protein-rich cottage cheese to fuel your day rather than slow you down. Protein Cottage Cheesecake Jars are the kind of dessert that fits neatly into a busy schedule: prepared in advance, portion-controlled, and satisfying enough to double as a post-workout treat, a midday pick-me-up, or a weekend brunch centerpiece. The magic lies in balance—creamy dairy, gentle sweetness, a whisper of vanilla, and a chorus of fresh fruit or a swipe of chocolate almond butter—so you get indulgence without guilt, energy without crash, and comfort without heaviness.

This dessert invites you into a world where healthful ingredients harmonize with comforting nostalgia. The cottage cheese base offers creaminess without the heaviness of traditional cheesecake, while a light touch of yogurt or cream cheese can smooth the texture even further. The jars themselves are not just cute; they are practical. They travel easily, stack neatly in the fridge, and make portion control feel effortless. In a culture that often swings between “too healthy to enjoy” and “too indulgent to feel good afterward,” these jars sit in the sweet spot: dessert-as-sensible, dessert-as-nourishment, dessert-as-a small celebration. Every element is designed to be accessible—no exotic ingredients required, but room for you to improvise and make it your own. If you’re a busy caregiver, a student, an athlete in the middle of training, or simply someone who loves a bright, satisfying finish to a meal, you’ve found a recipe that respects your schedule while rewarding your senses.

Beyond the jar: think about the aroma that fills your kitchen as you swirl in vanilla, citrus zest, or a hint of cinnamon. Consider the way you can customize textures—from a smoother, spoon-friendly cream to a more chewy, almost-fudge-like layer. And once you’ve tasted the base, you’ll discover how the topping can pivot the entire experience: citrusy brightness, seasonal berries, roasted nuts for crunch, or a swirl of dark chocolate for decadence. It’s a dessert that invites curiosity, creativity, and a little bit of play in the kitchen, without demanding advanced technique or long, costly ingredients. The result is a dessert that feels special enough for guests and practical enough to share with the ones you love most—perfect for weeknights and weekend breakfasts alike.

The Story Behind the Dish

The idea of a cheesecake that travels in a jar is rooted in the modern appetite for portable, protein-forward desserts. Cottage cheese has long been a pantry staple in many households—priced accessibly, high in protein, and pleasantly adaptable. In a world where time is precious and wellness is personal, cooks began looking for ways to preserve the creamy texture of cheesecake without the richness that weighs you down. Cottage cheese, with its curd-like bite and mild tang, became a natural hero for this mission. It’s a humble ingredient that invites transformation: whipped to silk, blended with a splash of yogurt for extra creaminess, folded with a touch of vanilla and citrus, and set not in a heavy cake pan but in individual jars that encourage mindful portions.

The jar trend itself has a backstory in the “meal prep” movement, where food that is pre-portioned, visually appealing, and easy to grab wins hearts and calendars. Layering textures became as important as layering flavors—creating a narrative you can see on the jar lid and taste with every spoonful. The approach also speaks to a wholesome philosophy: desserts don’t have to be a luxury you regret after, they can be an everyday pleasure that fits your health goals. In many ways, Protein Cottage Cheesecake Jars are a tribute to that shift—dessert as a kind of nourishment, a celebration of simple ingredients, and a flexible canvas for seasonal produce and personal preferences.

There’s a touch of nostalgia too. Cheesecake evokes birthdays, family gatherings, and late-night conversations with friends. By presenting cheesecake in small jars, this recipe preserves that sense of warmth while updating it for contemporary kitchens. The jars make it easy to share, easy to portion, and easy to rotate through flavors—from lemon-blueberry to chocolate-strawberry to a rich cocoa-nut version—so you can keep the idea fresh while staying anchored to the core concept: a protein-rich, creamy cheesecake that travels with you and still feels like a special treat.

Why You’ll Love This Recipe

  • High-protein dessert: The cottage cheese base contributes a substantial protein boost, making this a more satisfying end to a meal or a post-workout treat than traditional cheesecake.
  • Portable and portion-controlled: Individual jars mean no carving and no leftovers begging to be eaten later; perfect for lunch boxes or on-the-go snacking.
  • Versatile and forgiving: The base works with many flavor profiles, from citrusy brightness to deep chocolate richness, and can be customized for dairy-free or gluten-free diets.
  • Make-ahead convenience: These jars are ideal for meal-prep Sundays or busy weeks—set, chill, and you’re done for several days.
  • Balanced sweetness: A gentle sweetness level keeps the dish accessible, while you can dial up or down with toppings and fruit choices.
  • Kid-friendly and crowd-pleasing: Creamy textures and familiar flavors appeal to younger palates while still exciting adults with nuanced notes like vanilla, lemon zest, or almond.
  • Visual appeal: The glass jars turn dessert into a presentation—layered textures, vibrant fruit coulis, and a glossy top layer that invites a close look and a big spoonful.
  • Healthy comfort with room for indulgence: You don’t have to sacrifice comfort for health; this recipe strikes a harmonious balance between nourishment and pleasure.

Flavor Profile & Texture

The flavor of Protein Cottage Cheesecake Jars starts with a gentle tang from cottage cheese, complemented by the creamy smoothness of yogurt and a whisper of vanilla. The lemon zest or a splash of citrus offers a bright lift that cuts through the richness, leaving a clean, refreshing finish on the palate. When you bite through the crust layer—made from oats, a touch of butter or dairy-free butter alternative, and perhaps a pinch of cinnamon—you get a welcome warmth and a comforting nutty note that lingers. The contrast between a slightly chewy or crumbly crust and a velvety cheesecake center creates a satisfying textural dynamic that keeps you reaching for another jar.

Texture is everything in this dessert. The cottage cheese needs to be blended or whirred until silky, so there is no gritty mouthfeel. If a lighter texture is desired, a few tablespoons of strained yogurt or a cream cheese alternative can be folded in to smoothness. The top layer can range from a crisp gloss of berry compote to a matte, almost satin finish of pureed fruit, to a delicate drizzle of dark chocolate or almond butter. In every version, you experience a gentle balance: the tang of dairy meets mellow sweetness, the citrus fragrance awakens the senses, and the crumb provides a satisfying bite that anchors the dessert in a familiar, comforting way.

From a nutritional perspective, this dessert favors steady energy over quick spikes. The protein helps with satiety, the natural sweetness from fruit or maple syrup can be moderated to fit your macro goals, and the oats contribute fiber that supports digestion. The result is a dessert that you can savor slowly, rather than inhale in one rapid rush, which is a rare and welcome quality in today’s fast-paced food culture.

Occasions & Pairings

These jars are versatile enough to appear in several settings, transforming a simple dessert into a charming centerpiece or a practical snack. They shine as:

  • Post-workout treats that help rebuild and refresh after a session, thanks to their protein content and satisfying texture.
  • Meal-prep options for weekday breakfasts or afternoon cravings, offering a tasty start to the day or a mid-day energy lift.
  • Party pleasers at potlucks, brunches, or kid-friendly gatherings—easy to transport, easy to serve, and easy to adapt to guest preferences.
  • Vacation-friendly snacks for beach days or road trips, because they’re portable and can be kept in a cooler for hours.

Pairings can elevate the experience. Consider these ideas to complement the jars:

  • Drinks: a lightly brewed coffee, an espresso, or a cold sparkler to balance the dairy richness and enhance the citrus notes.
  • Side dishes: a simple almond-crusted muffin, a light fruit salad, or a handful of roasted nuts to introduce a crunchy counterpoint.
  • Dessert pairings: a small square of dark chocolate, a dollop of whipped coconut cream, or a spoonful of berry compote to mirror the jar’s flavors.
  • Seasonal twists: summer berries for brightness, autumn apples with cinnamon, or citrusy tang with grapefruit or mandarin segments.

Flavor Profile & Texture (Deep Dive)

In practice, you’ll often begin with a base that is both familiar and comforting: a cheesecake that feels like a reward, yet lighter in body. The cottage cheese is the star here—its texture, when blended smooth, mirrors the creaminess of traditional cheesecakes but with a personality that is a touch airy and bright. The vanilla brings warmth, while a hint of citrus—zest from lemon or orange—adds a zing that prevents the dish from feeling too rich. If you prefer a more decadent chocolatey vibe, you can fold in cocoa powder or use a chocolate-flavored protein powder to transform the flavor profile without losing the integrity of the jar format.

The crust, composed of oats, perhaps a little ground nuts, and a binding element such as a small amount of honey or maple syrup, provides a gentle crunch. This contrast is critical: a purely soft filling can feel indulgent, but the crust’s texture introduces structure and a subtle, toasty depth. When you top the jars with a berry compote, you invite sweetness that doesn’t overwhelm; the fruit’s natural acidity brightens the entire experience, and those glossy red or purple tones are visually irresistible. If you opt for a fresh fruit topping, you’ll notice the crisp bite of berries and a burst of juiciness that makes each spoonful feel like a celebration.

Texture mastery also shines in the mouthfeel of the finished product. A properly blended cottage cheese base should be luxuriously smooth, almost like a light cheesecake mousse. If you notice a slight graininess, a quick blitz in the blender or food processor can remedy it. The final structure should hold without being overly stiff, allowing a gentle melt as you scoop. The top layer, whether glossy with jam or lightly set with a fruit puree, should have a slight sheen that hints at the serenity within. In all its forms, the flavor journey is upward: from the mild tang of the dairy, through the warm vanilla and the citrus’s spark, to the fruity brightness on top, and finally to the satisfying finish of the crust’s toasty crunch.

Tips, Variations & Substitutions

  • For a dairy-free version: swap regular cottage cheese for a dairy-free alternative designed for texture, such as blended silken tofu with almond milk ricotta or a plant-based cream cheese spread. Use a dairy-free yogurt and vanilla extract to maintain creaminess.
  • Protein powder options: whey protein, casein, or plant-based blends all work. If the texture becomes too thick with plant-based powders, loosen with a splash of milk (or non-dairy milk) and a touch of lemon juice to maintain brightness.
  • Crust variations: mix rolled oats with crushed almonds or walnuts, a spoonful of nut butter, and a pinch of salt. Use ghee, butter, or a dairy-free butter substitute to bind; you can also press in a little chopped nuts for extra crunch.
  • Flavor twists: lemon zest with blueberries; orange zest with dark chocolate shavings; cocoa and raspberry; or vanilla with roasted pecans and a drizzle of maple syrup.
  • Low-sugar approach: use unsweetened yogurt and berries; rely on the natural sweetness of fruit. If you need a sugar substitute, choose a mild option like monk fruit or stevia, but test to avoid an aftertaste.
  • Gluten-free: ensure your crust mix uses certified gluten-free oats and check any add-ins for gluten-free labeling if you’re serving someone with celiac disease.
  • Mini versions: scale down to smaller jars for precise portions or larger jars for a more indulgent dessert; the concept stays the same.
  • Vary the protein density: if you want a lighter dessert, use a bit less cottage cheese and add in extra yogurt; for a denser cheesecake, add a touch more cream cheese or a small amount of cream.

Storage & Make-Ahead Ideas

The beauty of these jars lies in their make-ahead practicality. After assembling, chill them thoroughly to allow the flavors to meld and the layers to set. When stored properly, they stay fresh and tasty for several days, making them excellent for meal-prep routines or for hosting guests with minimal last-minute effort.

Storage tips:

  • Refrigerate in the jars with lids tightly closed for up to 3–5 days. Keep toppings separate or add them just before serving to preserve texture and color, especially for citrus and berry toppings that may discolor over time.
  • Freezing: you can freeze the base (without toppings) for up to 1 month. Thaw in the fridge overnight and reassemble with fresh toppings if desired. Note that freezing may slightly alter the texture of dairy-based fillings, so plan accordingly if you crave a perfectly smooth finish after thawing.
  • Make-ahead strategy: prepare the crusts and fillings separately, then assemble the jars a day ahead. This approach ensures the crust remains crisp and the filling retains maximum creaminess.
  • Transportability: for trips, use jars with tight-sealing lids and place a small, insulated bag in your tote to keep them cool during transit.

Fun Facts & Trivia

– Cottage cheese, once a humble, time-honored pantry staple, has a long history dating back to early 20th-century dairy culture, where simple, high-protein foods were valued for their versatility and minimal processing. Its resurgence in modern wellness cooking highlights a sustainable loop: a straightforward ingredient becoming a star in nutrition-forward, crave-able recipes.

– The jar dessert trend has roots in both practicality and aesthetic appeal. Mason jars and similar vessels made it easy to transport, layer, and present food in an organized, gallery-worthy way. It’s the same logic that makes parfaits and overnight oats so popular, but cheesecake in a jar adds a decadent twist that remains unmatched in convenience.

– Protein-forward desserts challenge the stereotype that sweets must be heavy or unhealthy. By balancing dairy, protein, and fruit, you can satisfy cravings while supporting muscle repair and satiety—an appealing concept for athletes, students, and busy professionals alike.

– The flexibility of this concept invites regional twists. In coastal regions, you might see coconut-lime flavors with shredded coconut and pineapple; in farm country, apples with cinnamon and a crumbly oat topping can carry a rustic charm; in urban kitchens, you might find espresso-chocolate combinations that pair perfectly with a morning cup of coffee.

Closing Thoughts

Protein Cottage Cheesecake Jars offer more than a dessert; they offer a small ritual of self-care that fits into the rhythm of daily life. They invite you to slow down just enough to savor a moment of creamy satisfaction, then jump back into your day with a pep of protein and a burst of citrus brightness. They celebrate the idea that nourishing food can also be delightful, portable, and visually appealing. Whether you’re preparing a batch for the week, sharing jars with friends, or treating yourself after a workout, these jars deliver a balanced, comforting, and irresistibly tasty experience. So gather your jars, pull out your favorite toppings, and let the creamy mornings begin—one spoonful at a time.

Ingredients

    – Crust
    – 1 cup crushed gluten-free graham crackers (about 130 g)
    → The crust forms the base for the jars, providing a gentle sweetness and a light, crumbly texture. Use fine crumbs so the layer presses evenly into the jars. If you’re avoiding gluten, ensure crackers are certified gluten-free and crush to a consistent, sand-like texture. Melted butter is mixed in to bind the crumbs, helping the crust hold together when the jars are chilled.
    – 2 tablespoons unsalted butter, melted
    → Binds the crust crumbs into a cohesive, pressable base that holds its shape when filled and refrigerated. Use it warm so it blends smoothly with the crumbs, and press the mixture firmly into the bottom of each jar for an even layer. For dairy-free options, substitute with melted coconut oil in the same amount, noting it may add a subtle coconut note.

    – Filling
    – 1 cup well-drained cottage cheese, blended until smooth (about 240 g)
    → The star of this cheesecake, providing protein and a creamy body. Drain well to remove excess whey, then blend until silky smooth to avoid graininess. If your blender leaves tiny lumps, press the puree through a fine sieve after blending for an ultra-smooth texture that pipes or scoops easily into jars.
    – 8 oz cream cheese, softened to room temperature (about 225 g)
    → Adds richness, stability, and a velvety mouthfeel that supports the lighter cottage cheese. Soften fully to prevent lumps and blend with cottage cheese until homogeneous. If dairy-free, use an equal amount of dairy-free cream cheese as a substitute with the same softening step.
    – 1/2 cup plain Greek yogurt (about 120 g)
    → Contributes tang and extra creaminess while lightening the density of the filling. Use thick, strained yogurt for best results; avoid runny varieties. If you’re avoiding dairy, substitute with an equal amount of thick coconut yogurt or omit entirely and compensate with extra cottage cheese and protein powder.
    – 1 scoop vanilla protein powder (about 30 g) (whey or plant-based)
    → Increases protein content and adds a pleasant vanilla note. Choose a smooth-blending powder to minimize grittiness; if your powder is unflavored or already sweet, you may adjust sugar or vanilla accordingly. If you don’t use protein powder, increase cottage cheese to maintain filling volume.
    – 1/3 cup granulated sugar (adjust to taste)
    → Provides sweetness to balance tangy dairy; the exact amount can be reduced if your protein powder is sweet or if you prefer a less sweet dessert. For lower sugar, consider 2–3 tablespoons and rely on the vanilla and fruit topping for sweetness.
    – 1 teaspoon vanilla extract
    → Central flavor that ties all dairy elements together. Use pure vanilla extract for the richest aroma; if desired, substitute with vanilla bean paste (increase by 1/2 teaspoon and scrape seeds from one vanilla bean).
    – 1 tablespoon lemon juice
    → Brightens the filling and helps cut the richness of the dairy. Freshly squeezed lemon juice yields the freshest flavor; you can also add lemon zest (see below) for more aroma without adding extra liquid.
    – 1 teaspoon lemon zest (optional but recommended)
    → Adds a fresh, citrusy aroma that complements the vanilla and dairy without overpowering the cheesecake. Grate only the yellow part of the lemon to avoid bitterness from the white pith. If you don’t have a lemon, substitute with a small drop of orange zest for a milder citrus note.
    – Pinch of fine sea salt
    → Enhances sweetness and depth of flavor, balancing the richness of the dairy. If your cottage cheese is particularly salty, you may reduce or omit this pinch to taste.
    – 2–3 tablespoons milk (any kind; dairy or non-dairy) as needed to loosen the filling
    → Use gradually to achieve a silky, pipe-able consistency without making the mixture runny. Add milk a little at a time and blend until you reach a thick, spoonable texture that fills the jars smoothly.

    – Optional Add-ins
    – 2 tablespoons mini dark chocolate chips (optional)
    → A few chocolate chips add pleasant pockets of sweetness and richness. Fold in gently at the end to distribute evenly without sinking. Use mini chips to prevent heavy areas that could cause cracking on chilling.
    – 1 tablespoon chia seeds (optional)
    → For a slight crunch and a subtle thickening as the seeds hydrate. If using chia, let the filling rest for 5–10 minutes after mixing so the seeds swell before filling the jars. Note that this will thicken the filling slightly; adjust milk accordingly.
    – 1/4 cup chopped almonds or walnuts (optional)
    → Adds a toasty crunch and nutty depth. Toast the nuts lightly before chopping to bring out flavor, and chop finely so they distribute evenly and don’t puncture the smooth filling.

    – Toppings
    – 1/2 cup fresh berries (blueberries, strawberries, raspberries, or a mix) for topping
    → Fresh fruit provides brightness, moisture, and color on top. Rinse and pat dry, then arrange on the surface just before serving. If berries are particularly juicy, you can macerate with a teaspoon of sugar and a splash of lemon juice for a glossy finish, then spoon over the jars.
    – 2 tablespoons berry compote or sauce (optional)
    → A glossy layer that intensifies berry flavor and sweetness. Simmer berries with a splash of water and a touch of sweetener until saucy; cool completely before drizzling on top to avoid soggy crust.
    – Fresh mint leaves for garnish (optional)
    → A hint of color and aroma to finish. Tear or finely chop just before serving to release essential oils, and place a leaf atop each jar for a clean, fresh presentation.

Instructions

  • Chill the glass jars and mixing tools in the refrigerator for about 10 minutes before assembly to ensure the crust and filling set evenly and don’t warm too quickly.
    → Cold surfaces help the crust set firmly and keep the filling silky as you layer it into the jars, preventing bubbling or sliding while piping.
  • Crush gluten-free graham crackers to a uniform fine crumb measuring 1 cup (about 130 g) using a food processor or by sealing in a zip-top bag and crushing with a rolling pin until no large bits remain.
    → Fine crumbs press evenly into the jar bottoms for a cohesive base; coarse crumbs can create gaps and crumble later.
  • Melt 2 tablespoons unsalted butter gently until completely liquid, then whisk it into the 1 cup crumb mixture until the texture resembles wet sand and holds its shape when pressed.
    → The melted butter binds the crust so it maintains structure when chilled and filled; ensure the butter is warm but not hot to avoid hardening crumb pieces.
  • Divide the crumb-butter mixture evenly among the bottom of each jar and press firmly with the back of a spoon or a small flat-bottomed tamper to create a compact, even crust layer about 2–3 mm thick.
    → A uniform crust base yields consistent bites and prevents air pockets that could cause cracking or crumbling later.
  • Refrigerate the jars with the crust for 8–10 minutes to set the butter and firm the base.
    → A brief chill helps the crust lock into place so the filling can sit atop without shifting or leaking into the jar edges.
  • Drain 1 cup cottage cheese well in a fine-mesh sieve over a bowl, pressing with the back of a spoon to remove as much whey as possible, then let it drain for 5–10 minutes.
    → Removing excess moisture prevents a runny filling and yields a smoother, silkier texture that pipes cleanly into the jars.
  • Blend the drained cottage cheese until completely smooth using a blender or food processor; if any tiny lumps remain, pass the puree through a fine sieve to achieve ultra-smoothness.
    → A velvety base avoids gritty mouthfeel and ensures the filling holds its shape when chilled.
  • Allow the 8 oz cream cheese (about 225 g) to come to room temperature, then beat it with the cottage cheese until homogeneous and creamy, scraping the bowl as needed for even texture.
    → Room-temperature cream cheese blends more easily with cottage cheese, producing a stable, lush filling without lumps.
  • Add 1 cup plain Greek yogurt, 1 scoop vanilla protein powder, 1/3 cup granulated sugar, 1 teaspoon vanilla extract, 1 tablespoon lemon juice, and optional 1 teaspoon lemon zest and a pinch of fine sea salt; blend until the mixture is uniformly smooth and glossy.
    → Yogurt adds tang and creaminess; protein powder boosts nutrition and helps stiffen the filling; vanilla and citrus lift the overall aroma and balance the richness. Scrape the sides periodically to maintain even texture.
  • With the blender running on low or by folding with a spatula, gradually stream in 2–3 tablespoons milk, adding a little at a time until the filling reaches a thick, pipeable consistency that holds a gentle peak when tested with a spoon. Stop before the mixture becomes pourable.
    → Proper moisture yields a filling that pipes cleanly and fills the jars smoothly without slumping during chilling.
  • If using add-ins, fold in 2 tablespoons mini dark chocolate chips, or 1 tablespoon chia seeds (let the mixture rest 5–10 minutes to hydrate if used), or 1/4 cup chopped almonds or walnuts; distribute evenly by gentle folding to avoid deflating air bubbles.
    → Add-ins provide texture and flavor without destabilizing the filling; resting chia seeds ensures they hydrate properly for the desired bite.
  • Spoon or pipe a generous layer of filling over the crust in each jar, leaving about 1/4 inch (6 mm) of headspace; tap the jars lightly on the counter to release any trapped air and smooth the tops with the back of a spoon.
    → Proper portioning and air removal prevent pockets that can cause cracking and ensure a neat, uniform presentation.
  • Wipe rims clean and refrigerate the assembled jars, uncovered or loosely covered, for at least 2–4 hours or overnight to allow the filling to set fully and flavors to meld.
    → Chilling firming the filling improves texture and makes serving cleaner; overnight chilling intensifies vanilla and citrus notes.
  • Before serving, rinse and pat dry 1/2 cup fresh berries; if desired, macerate with 1 teaspoon sugar and a splash of lemon juice for 10 minutes to create a glossy topping.
    → Berries add brightness, moisture, and color; maceration enhances sweetness and juiciness for a more alluring finish.
  • Top each jar with fresh berries and, if using, 2 tablespoons berry compote or sauce; finish with a fresh mint leaf for aroma and a polished presentation.
    → The toppings provide contrast in texture, moisture, and color, elevating the overall dessert and giving a vibrant, restaurant-style finish.
  • Store any un-topped jars in the refrigerator and consume within 2–3 days for best texture and flavor.
    → Dairy-based desserts can soften or dull in flavor over time; shorter storage preserves the creamy structure and bright taste.

Notes

These Protein Cottage Cheesecake Jars are a creamy, protein-packed dessert you can customize with your favorite toppings and mix-ins. For a sturdy, even crust, crush gluten-free graham crackers to a fine sand-like texture and mix with melted butter; press firmly into the bottom of each jar and chill briefly so the base sets before filling. To achieve a ultra-smooth filling, drain the cottage cheese well and blend until silky; if any small lumps remain, push the purée through a fine sieve. Beat softened cream cheese with thick Greek yogurt, vanilla protein powder, sugar, vanilla extract, lemon juice, and optional lemon zest, plus a pinch of salt, then blend in milk a little at a time until the mixture is thick and pipeable. If you need a dairy-free version, substitute dairy-free cream cheese and yogurt and use a plant-based milk; you may also increase cottage cheese by a little to maintain creaminess. If your protein powder is sweet, reduce added sugar to 2–3 tablespoons and rely on the lemon and vanilla for balance. Fold in any optional add-ins like mini chocolate chips, chia seeds, or chopped almonds or walnuts, distributing evenly so they don’t sink or puncture the filling. To assemble, spoon or pipe the filling over the set crust in each jar, then refrigerate for at least 2–4 hours or overnight until firm. Top with fresh berries or a quick berry compote and, if desired, a mint leaf for color. These jars store well in the fridge for up to 4 days and can be frozen for longer storage; thaw in the fridge before serving. Always ensure your ingredients (crackers, cream cheese, yogurt, and protein powder) are certified gluten-free if you have gluten intolerance.

Tips

Tips for Perfect Protein Cottage Cheesecake Jars

Crust tips

  • Crush crackers to a fine, sand-like texture for an even, cohesive crust. Use a food processor or place them in a resealable bag and crush with a rolling pin for uniform crumbs.
  • Toast gluten-free crackers lightly if you want a deeper flavor, but avoid browning too much to prevent bitterness. Ensure gluten-free labeling if avoiding gluten.
  • Mix melted butter with the crumbs until the mixture resembles damp sand. Press firmly into the bottom of each jar using the back of a spoon or a flat-bottomed glass for an even, compact base. Chill briefly before filling to help it set.
  • For dairy-free options, substitute melted coconut oil in equal amounts. Note that coconut oil can add a subtle coconut note to the crust.

Filling tips

  • Drain cottage cheese very well to remove whey. For a silkier texture, blend until completely smooth, then pass through a fine sieve if any small lumps remain.
  • Softened cream cheese blends best when at room temperature. If using dairy-free cream cheese, ensure it’s truly soft and blends smoothly with cottage cheese.
  • Choose thick, strained Greek yogurt for extra creaminess and tang without adding too much moisture. If dairy-free, use thick coconut yogurt or adjust with additional cottage cheese.
  • Use a smooth-blending vanilla protein powder and fold in gradually to avoid grittiness. If you skip the powder, increase cottage cheese volume or adjust with a bit more yogurt.
  • Taste and adjust sweetness before filling jars. If your protein powder is sweet, reduce sugar; if not, balance with a touch more vanilla or a hint of lemon.
  • Add lemon juice to brighten the filling; lemon zest is optional but recommended for a fresh aroma. Grate only the yellow zest to avoid bitterness from the pith.
  • Whisk in a pinch of fine sea salt to enhance flavors, especially if your dairy products are very mild.
  • To achieve a scoopable, pipe-able texture, add milk gradually while blending. Stop as soon as the filling loosens enough to fill jars smoothly but isn’t runny.

Optional add-ins tips

  • Mini chocolate chips add pockets of sweetness; fold them in at the end to prevent sinking and ensure even distribution.
  • Chia seeds provide a subtle crunch and thicken the filling as they hydrate. If using chia, let the mixture rest 5–10 minutes before filling to allow hydration; you may need a touch more milk.
  • Toast chopped almonds or walnuts to bring out nutty depth; chop finely so they distribute evenly and don’t puncture the smooth filling.

Topping tips

  • Fresh berries add brightness and moisture. Rinse and pat dry. If berries are very juicy, macerate briefly with a pinch of sugar and a splash of lemon juice for a glossy finish, then spoon on top.
  • Berry compote or sauce intensifies berry flavor; cool completely before drizzling to avoid soggy crust.
  • Fresh mint leaves provide color and aroma; tear leaves just before serving to release essential oils and place on each jar.

Makes-ahead and storage

  • Prepare the crust ahead and press into jars; store in the fridge until ready to fill.
  • The filling can be made a day or two ahead; refrigerate, then portion into jars when ready to fill. Chill the filled jars for at least 2–4 hours or overnight for best setting.
  • For longer storage, freeze filled jars un-topped; thaw in the fridge and add toppings after thawing if desired.

Equipment and technique tips

  • Fill jars with a piping bag for clean, even layers, or use a sturdy spoon and smooth the top with the back of a spoon.
  • Use jars of similar size to ensure even crust depth and uniform servings.
  • Chill the completed jars thoroughly—2–4 hours minimum, but overnight yields the neatest slices.
  • Label jars with date and flavor notes if making multiple batches or gifts.

FAQ

Protein Cottage Cheesecake Jars — FAQ

Answers to common questions about making Protein Cottage Cheesecake Jars.

What are Protein Cottage Cheesecake Jars?

They’re individual, no-bake cheesecake fillings (often layered) stored in small jars. The filling combines cottage cheese, Greek yogurt, and protein powder for a creamy, high-protein dessert or breakfast. A crust is optional for extra texture, and the jars are ready to chill and enjoy.

What ingredients do I need?

Core filling: cottage cheese, plain Greek yogurt, protein powder (vanilla works best), a sweetener of choice (maple syrup, honey, or a sugar substitute), vanilla extract, and a pinch of salt if desired. Optional crust: crushed graham crackers or rolled oats with a little melted butter or nut butter. Toppings ideas: fresh berries, cocoa powder, melted chocolate, or a drizzle of nut butter.

Do I need a crust, and what can I use?

The crust is optional. For a quick crust, mix crushed graham crackers with a little melted butter and a pinch of salt, then press into the jar bottoms. You can also use crushed oats with a bit of nut butter or almond flour for a gluten-free crust. Dairy-free or vegan options can use shredded coconut or vegan crackers as a crust substitute.

How do I assemble and set them?

1) Blend the cottage cheese, Greek yogurt, protein powder, sweetener, vanilla, and salt until smooth. 2) Taste and adjust sweetness. 3) Layer or spoon filling into jars (add crust at the bottom if using). 4) Chill in the fridge for at least 2 hours, preferably overnight, to set and thicken.

How long do they last in the fridge?

Stored in an airtight jar in the fridge, they typically keep for up to 4 days. If you added fresh fruit on top, consume within 2 days for best texture and flavor.

Can I freeze Protein Cottage Cheesecake Jars?

Freezing is possible, but may change texture. Freeze in freezer-safe jars for 1–2 months. Thaw overnight in the fridge and gently stir or re-whip before serving. Crust integrity may be affected after freezing.

What protein powder works best?

Vanilla-flavored powders typically give the most versatile flavor. You can use whey, casein, or plant-based proteins. Plant-based blends may require a touch more sweetener. Aim for about 20–25 g protein per serving; adjust sweetness if your powder is very sweet or very bland.

How can I customize flavors and toppings?

Try these ideas: swirl in cocoa powder or caramel sauce; add lemon zest or cinnamon for warmth; fold in peanut butter or almond butter; top with fresh berries, sliced banana, or a drizzle of melted dark chocolate. You can also layer fruit compote between fillings for variety.

Are these suitable for different diets?

They’re dairy-based, so not vegan unless you substitute plant-based yogurt and protein powder. They can be gluten-free if you use gluten-free crust options. Check labels if you have lactose intolerance or dairy allergies. You can tailor sweetness and ingredients to fit your needs.

Yield and how to scale the recipe?

Using standard jar sizes (about 4 oz per jar), the base recipe yields roughly 4–6 jars. To scale up or down, multiply or divide all ingredients proportionally to fit the number of jars you want to make.

Introduction / Hook

Imagine a delicate tower that melts on your tongue, each crisp, paper-thin layer of pastry giving way to a silken cloud of vanilla cream. A whisper of sweetness coats the palate, while a glossy crown of glaze catches the light like a miniature jewel, inviting your eyes to feast before your tongue takes its turn. Mille feuille—the thousand leaves—lives up to its name with an elegance that feels almost ceremonial, as if you’re unwrapping a tiny edible bouquet of texture, aroma, and memory. This is not just a dessert; it is a sensorial ceremony that turns any moment into a celebration. The first bite promises a crisp snap, the second dissolves into lush cream, and with each subsequent bite you discover new nuances—hints of vanilla, a kiss of butter, a whisper of citrus zest in the cream, and a faint caramel glow from the glaze. The experience is both intimate and grand, simple in its components yet sophisticated in its execution, designed for those who savor the artistry of pastry in a way that feels timeless and yet approachable.

There is something irresistibly tactile about Mille Feuille. It speaks to the hands that roll the dough, the patience that waits as layers rise and stack, and the heart that shares a slice with someone you love. It is a dessert that invites conversation: “Do you like the crackle when you bite through the top layer?” “Would you like the pastry more layered or more creamy in the middle?” The questions themselves become part of the ritual, as communal as tea or coffee on a quiet afternoon. And yet, beneath its refined appearance lies a friendly soul: a dessert that can be perfected with a few mindful techniques and a few high-quality ingredients, but also forgiving enough to adapt to what you have on hand. Mille Feuille is a culinary invitation to slow down, to savor, and to celebrate craft in its most approachable form.

The Story Behind the Dish

The Mille Feuille is a cornerstone of classic French patisserie, a pastry that embodies the French reverence for technique, balance, and elegance. Its name—thousand leaves—captures the essence of the dish: countless, nearly imperceptible layers of puff pastry stacked with a lush filling, and finished with a polished glaze or a dusting of sugar that glows with refinement. The pastry layers themselves, delicate and crisp, reveal the hand of the baker in every bite, their lamination technique a quiet testament to patience and precision. While the exact moment of its invention remains shrouded in pastry lore, the Mille Feuille has been a beloved fixture in Parisian patisseries since at least the 19th century, with regional varieties and adaptations blossoming across France and beyond.

The origin of the dish is often tied to the long, ritualized craft of puff pastry, a marvel of lamination that folds butter into dough dozens of times, creating thousands of ultra-thin sheets that puff into a heavenly crunch when baked. In many histories, the Mille Feuille evolved from earlier mille-feuilles or napolitains that featured similar concepts—layers of pastry with creams and toppings—adapted to emphasize elegance and proportion. In some accounts, the “Napoléon” moniker is used in certain markets for a Mille Feuille, especially in more traditional Parisian patisseries, weaving a subtle thread of history with cultural memory. The pastry has traveled with explorers, artists, and families, turning into a canvas for regional flavors: vanilla creams that whisper of Tahitian beans, citrus zests brightening the middle, candied fruits, or even chocolate and coffee variations that honor global palates while preserving the essential architecture of the dessert.

Beyond Europe, Mille Feuille has found a home in many kitchens as a canvas for storytelling. Home bakers tend to adapt the recipe to seasonal fruits, local dairy, and personal preferences, while pastry chefs push the boundaries with intricate glazes, complementary textures, and modern pastry techniques. The dish thus becomes less a rigid formula and more a tradition—one that invites you to respect the layers, honor the cream, and finish with polish. The history is as much about technique as it is about taste: the crack of the pastry, the velvet smoothness of the cream, the gleaming glaze that makes the dessert sing on the plate. When you prepare Mille Feuille, you’re participating in a lineage of pastry artistry, a dialogue between centuries of bakers who have passed down the craft through practice, patience, and shared meals.

Why You’ll Love This Recipe

There are several compelling reasons Mille Feuille remains a beloved choice for both bakers and guests. Embracing this dessert is like inviting a classic conversation to the table—familiar enough to comfort, yet full of opportunities to personalize. Here are the reasons this recipe finds a spot on many tables again and again:

  • Timeless elegance, with approachable technique: The concept is simple—layers of puff pastry with a creamy filling—but the result feels extraordinarily refined. Master the lamination a little and you’ll impress with minimal fuss.
  • Textural harmony: The interplay of crisp pastry and velvety cream creates a symphony of textures that keeps each bite dynamic, never dull. The top glaze adds a final gloss that makes the whole plate glow.
  • Versatility and adaptability: The dessert can be tailored to your palate or occasion—vanilla-forward pastry cream for classicists, citrus or almond notes for a twist, or even a chocolate kiss for chocoholics. The base structure remains recognizably Mille Feuille, no matter how you switch the character.
  • Make-ahead friendly: With careful handling, components can be prepared ahead and brought together when you’re ready to serve. This makes it a smart choice for parties, birthdays, or holiday gatherings.
  • Show-stopping presentation with minimal effort: The vertical stacking and glossy finish on the top layer offer dramatic impact on the plate, making it perfect for celebrating milestones or special dinners without requiring flamboyant技巧.
  • Comforting yet refined: It straddles the line between homey pastry and dessert-showpiece, offering warmth and familiarity alongside a polished, restaurant-worthy finish.
  • Skill-building opportunity: Working with puff pastry teaches you control in rolling, folding, chilling, and timing—skills that translate into many other pâtisserie projects.

Whether you’re baking for a quiet weekend with loved ones or planning to dazzle guests at a formal dinner, Mille Feuille offers a balanced, rewarding experience. It invites you to slow down and savor not only the flavors but the process—the way layers accumulate, the patience required for perfect lamination, and the joy of presenting a dessert that feels greater than the sum of its parts.

Flavor Profile & Texture

The Mille Feuille is a study in contrast and cohesion. Its flavor profile centers on buttery, lightly crisp pastry that holds its shape yet yields to a creamy, smooth filling. The pastry cream—often a vanilla bean-forward custard—brings a comforting sweetness, a gentle aroma of vanilla, and a lush mouthfeel that lingers pleasantly. The top glaze, whether a delicate fondant, a clear sugar glaze, or a subtle fruit glaze, adds a sheen and a hint of sweetness that ties the layers together visually and gastronomically. When well executed, each bite unveils a progression: a hair-thin crack of pastry, a rush of cream, a cool sweetness, and a finish that persists with a clean, finish-worthy aftertaste.

Key sensory notes you’ll likely notice include:

  • Butter and pastry aroma: The dough exhales a warm, toasty scent of butter that becomes more pronounced as the sheets bake to a pale gold.
  • Silky vanilla: The custard’s hallmark is a velvety vanilla profile. Real vanilla beans or high-quality extract lend creamy depth and a lingering perfume that whispers of orchards and creamy desserts from grand patisseries.
  • Subtle citrus or almond accents (optional): A touch of lemon zest or orange zest can brighten the cream, while a hint of almond paste or extract adds a delicate, almost marzipan-like character that pairs beautifully with the pastry’s richness.
  • Glossy finish: The glaze on top catches the light, while a fine dusting of powdered sugar or a whisper of cocoa can introduce a second flavor layer that plays nicely against the sweet cream.
  • Texture gradient: First bite yields a crisp snap; the middle reveals pillowy cream; the finish leaves a soft, slightly caramelized aftertaste from the pastry’s edges and the glaze’s edge.

texture-wise, the ideal Mille Feuille balances crisp pastry layers with a creamy, airy filling, and a glaze that is not too thick or cloying. Too much glaze can overwhelm the delicate pastry, while too little can leave the dessert feeling dry. The best versions achieve a quiet luxury: pastry that shatters at the touch, cream that glides across the tongue, and a finish that invites another bite without being overwhelming.

Occasions & Pairings

Mille Feuille shines across a spectrum of settings, from intimate dinners to grand celebrations. Its refined appearance makes it a natural centerpiece for holiday menus, milestone birthdays, anniversaries, and festive weekend lunches. It can also be a glamorous yet approachable dessert for a dinner party where guests arrive hungry but your kitchen is buzzing with other dishes. If you’re serving it as a finale, allow for a moment of pause—the dessert deserves to be admired before it’s devoured.

Pairings enhance the experience without stealing the show from the pastry itself. Consider these options:

  • Beverages: A bright sparkling wine, a semi-sweet Champagne, or a late-harvest dessert wine (like Sauternes) can echo the pastry’s sweetness while cleansing the palate between bites. For non-alcoholic pairings, a vanilla-infused tea, a light chamomile, or an almond milk latte can complement the flavors without overwhelming them.
  • Fruit companions: Fresh berries (strawberries, raspberries, or a berry compote) or a light citrus segment can provide a fresh counterpoint that brightens the cream’s richness. A few raspberries tucked between the layers in a plated version also add color and a tart note that sings against the vanilla.
  • Side dishes: A simple, lightly dressed green salad with citrus vinaigrette offers a clean contrast and helps balance a meal featuring Mille Feuille as the final course. For more indulgent occasions, a small portion of dark chocolate or a coffee mousse can heighten the dessert’s chocolatey or roasted notes if you experiment with variations.
  • Seasonal twists: In summer, incorporate fresh stone fruit slices between layers for a juicy burst; in autumn, a hint of cinnamon or cardamom in the cream can evoke cozy, comforting flavors; in winter, a coffee-kavored glaze can complement the cold air and festive meals.

Tips, Variations & Substitutions

While the Mille Feuille’s essence remains the same, there are many avenues to customize it according to dietary needs, ingredient availability, or personal taste. Here are practical ideas to experiment with while preserving the spirit of the dish:

  • Glaze variations: Opt for a classic white fondant glaze for a pristine, traditional look. If you prefer a glossier finish, a thin sugar glaze made with a touch of lemon juice can add brightness. Chocolate glaze is a dramatic alternative, especially when paired with a coffee or vanilla cream. For a fruit-forward finish, brush a light fruit glaze (raspberry, passion fruit, or apricot) across the top for a glossy, tangy finish.
  • Make-ahead architecture: You can bake and chill the puff pastry sheets in advance, and prepare the pastry cream a day ahead. Store each component separately, then assemble shortly before serving. This helps you manage a busy schedule without sacrificing the crispness of the pastry.
  • Vegan and dairy-free options: Use dairy-free puff pastry (check labels for butter content) and a dairy-free pastry cream made from almond milk or coconut cream with a cornstarch-thickened base. Vanilla bean paste or extract remains central for the depth that the dish requires. A light almond or cashew cream can offer a similar mouthfeel when properly set and chilled.
  • Gluten-free adaptation: Choose a certified gluten-free puff pastry or make a gluten-free lamination using alternate flours that hold together well. The texture might shift slightly, but with careful rolling and chilling, you can achieve a delicate crispness that mirrors the traditional experience.
  • Flavor twists: Introduce citrus zest (lemon, orange, or blood orange) into the pastry cream for a bright lift. A touch of liqueur (Grand Marnier, Kirsch, or rum) can deepen the aroma if you enjoy a more complex profile. For chocolate lovers, a thin layer of white or dark chocolate between pastry sheets creates a delicious contrast with the vanilla cream.
  • Regional variations: In some regions, the top layer is glazed with a light almond glaze or a fondant tinted with subtle color to reflect seasonal palettes. A pistachio paste layered with the cream offers a nutty variation that remains faithful to the multi-layer concept.

Storage & Make-Ahead Ideas

To preserve texture and taste, treat Mille Feuille with care when storing and assembling. Here are practical guidelines to maintain quality:

  • Component storage: Keep baked puff pastry sheets in a cool, dry place in an airtight container. Pastry cream should be refrigerated in a covered container. The top glaze should be added just before serving to avoid softening the pastry’s surface.
  • Make-ahead strategy: Bake and cool the pastry sheets in advance, then freeze them flatted between parchment sheets. Thaw at room temperature before assembling. Prepare the pastry cream a day ahead and chill thoroughly. Assemble the Mille Feuille a few hours before serving to ensure the layers set, but avoid assembling too far ahead, as moisture can soften the pastry.
  • Leftovers: Leftover slices can be stored in the refrigerator for up to 1–2 days, ideally covered to prevent the pastry from picking up fridge odors. For best texture, reassemble just before serving or refresh the pastry sheets in a 350°F (175°C) oven for a few minutes to restore crispness, then proceed with re-glazing and cream if needed.
  • Freezing tips: Whole Mille Feuille is best served fresh, but you can freeze pre-baked pastry sheets and cream separately. When thawing, gently reassemble and apply a fresh glaze for a polished finish. Avoid freezing the assembled structure, as the pastry texture will degrade.

Fun Facts & Trivia (Optional)

Beyond its refined presentation, Mille Feuille carries a few delightful tidbits that pastry lovers often enjoy sharing:

  • Thousand leaves, many names: While Mille Feuille translates literally to “thousand leaves,” in different regions you may see it listed as Napoléon, mille-feuille, or vanilla cream layers—each name hinting at a slightly different emphasis on texture or presentation.
  • Lamination magic: The hallmark of good Mille Feuille is the lamination technique—folding and rolling dough to create ultra-thin sheets that puff into delicate layers. The artistry lies in achieving consistent thickness and even spacing between layers, a task that rewards patience and practice.
  • A pastry legend’s tension: The dessert sits at an intersection of tradition and innovation. While many chefs honor classic lamination, others push the boundaries with new fillings, glazes, or layer configurations, proving that heritage can gracefully coexist with experimentation.
  • Visual feast: The top glaze isn’t merely decorative; it protects the creamy interior, seals in moisture, and gives the final plated dessert an alluring sheen that makes it a focal point on the dessert cart or table.
  • Across the globe: The Mille Feuille has inspired countless adaptations worldwide, from custard mille-feuilles in Spain to chocolate-and-cream riffs in Japan. Each region adds its own accent while honoring the structure’s elegant core.

In the end, Mille Feuille is more than a dessert; it is a crafted experience that invites you to appreciate the layering of skill, patience, and taste. It celebrates versatility—whether you stick to the classical route with vanilla cream and a white glaze or breathe new life into the concept with seasonal fruits, bold flavors, or modern techniques. No matter how you choose to present it, Mille Feuille remains a testament to the enduring appeal of pastry art: precise, indulgent, and deeply satisfying to the senses.

Ingredients

Mille Feuille

Puff Pastry
– 3 sheets puff pastry (store-bought, thawed)
→ Mille-feuille relies on ultra-thin, flaky layers created by laminated puff pastry. Use three sheets cut to the same rectangle size as your final pastry blocks. Keep the sheets cold and work quickly to prevent the butter from melting before baking. Prick the dough with a fork before baking (docking) to control puffing; bake until evenly golden and crisp. Allow to cool completely before assembly to maintain crisp layers.
– Egg wash (1 large egg, beaten with 1 tablespoon water)
→ The egg wash gives a glossy, golden finish on baked puff pastry and helps the layers detach cleanly. Brush lightly on the top surfaces only to avoid soggy edges. If the sheets puff unevenly, you can gently press down the center after a short bake to level, but ensure they are completely cool before assembling.

Pastry Cream
– Whole milk (2 cups)
→ The base liquid for crème pâtissière. Heat gently until steaming (not boiling) and temper with the yolks to create a smooth, silky custard. Full-fat milk yields a richer texture; reduce fat for a lighter version, but expect a thinner result. Do not boil once the yolks are tempered.
– Egg yolks (4 large)
→ Provide the custard’s body and creaminess. Whisk with sugar to create a pale, thick ribbon, then slowly temper with hot milk to prevent scrambling. Strain if any lumps form for an ultra-smooth finish.
– Granulated sugar (1/2 cup)
→ Sweetens and helps achieve a smooth custard texture when beaten with the yolks. For the smoothest result, use superfine sugar so it dissolves quickly during mixing. Fully dissolve before tempering the yolks to avoid gritty custard.
– Cornstarch (1/4 cup)
→ Primary thickener that gives the pastry cream its firm set when cold. Make a slurry with a small amount of cold milk before adding to the hot mixture to prevent lumps. Cook until the mixture just comes to a boil and thickens, then remove from heat.
– Pinch of salt
→ Enhances vanilla and overall flavor, balancing sweetness. A small amount improves depth; skip if you are avoiding salt altogether.
– Unsalted butter (2 tablespoons)
→ Enriches the custard and adds a velvety sheen. Stir in off the heat, in small pieces, until melted and smooth. For an extra glossy finish, press plastic wrap directly on the surface to prevent a skin from forming while it cools.
– Vanilla extract (1 teaspoon)
→ Classic crème pâtissière flavor. Use pure vanilla extract or vanilla bean paste for maximum aroma. If using vanilla bean, infuse the milk with the scraped seeds and pod during heating, then strain before tempering the yolks.

Top Finishes
– Powdered sugar (for dusting)
→ Finishing touch that adds a delicate sweetness and a clean, professional look to the sliced mille-feuille. Sift the sugar lightly over the top after the pastry is fully assembled and chilled to avoid clumping and to keep the layers crisp. Avoid heavy dusting that could mask the clean edges of the pastry.
– Fondant glaze (optional)
→ Traditional smooth, glossy top finish for a classic mille-feuille. Make a pourable fondant by whisking 1 cup confectioners’ sugar with 1–2 tablespoons water and a touch of lemon juice if desired. Adjust thickness with more sugar or water as needed. Apply to a completely cooled pastry and allow to set before slicing.
– Chocolate glaze (optional)
→ A rich, dramatic finish alternative to fondant. Melt 100 g dark chocolate with 1–2 tablespoons unsalted butter (and 1 teaspoon corn syrup if you want extra shine). Drizzle or spread in an even, thin layer over the top and let set at room temperature. For a mirror shine, keep glaze slightly warm when applying and ensure the pastry is cold; tempering the chocolate slightly can improve gloss and texture.

Instructions

  • Thaw three puff pastry sheets completely and trim them to uniform rectangle shapes that match your final pastry blocks; keep the sheets cold during trimming to preserve the laminated butter layers and ensure even, crisp layers after baking.
    → Uniform rectangles ensure the final blocks stack neatly and slicing yields clean, professional portions; cold sheets prevent butter from smearing during handling.
  • Dock and prepare the sheets for baking by placing them on parchment-lined baking sheets and pricking the surface with a fork at 1/2-inch intervals to control puffing; this guides steam and yields a flat, crisp base rather than irregular domes.
    → Docking maintains even thickness and flat tops, which is essential for a visually pristine mille-feuille and easy stacking later.
  • Preheat your oven to 400°F (200°C) and brush the top surfaces of the chilled pastry with a light egg wash before baking to promote a glossy, golden finish; bake until evenly golden and crisp, about 12 to 15 minutes, rotating halfway for uniform browning.
    → The high heat rapidly sets the lamination, producing crisp layers; rotating ensures equal color development and prevents scorching on one side.
  • Cool the baked puff pastry sheets completely on a wire rack until they reach room temperature; this stabilizes the layers and prevents moisture from the cream softening the pastry during assembly.
    → Complete cooling preserves crisp edges and allows clean slicing later without sogginess.
  • Prepare the pastry cream by heating whole milk just to steaming; while warming, whisk egg yolks with granulated sugar until pale and thick, then whisk in cornstarch and a pinch of salt to form a smooth paste; this builds a sturdy custard base.
    → Whisking yolks with sugar creates volume and body, while cornstarch thickens without curdling, setting up a stable filling.
  • Make a cold slurry by dissolving a small amount of cold milk with the cornstarch, then whisk it into the hot milk in a steady, thin stream; cook while whisking until the mixture just comes to a boil and thickens, then remove from heat to avoid scorching.
    → The slurry prevents lumps and ensures a glossy, fully thickened custard that coats the back of a spoon.
  • Off the heat, whisk in 2 tablespoons unsalted butter pieces until melted and smooth, then add vanilla extract and a pinch of salt; strain the pastry cream into a clean bowl and press plastic wrap directly on the surface to prevent a skin from forming; refrigerate until fully cold and very thick.
    → Butter enriches the texture and gloss of the crème pâtissière; straining removes any lumps and sealing the surface prevents skin formation during chilling.
  • Trim the cooled puff pastry sheets again if necessary to ensure identical dimensions, then align them precisely on a flat work surface so the edges are square and even; this creates a neat, professional base for the layers when assembled.
    → Precise trimming and alignment guarantee uniform slices and a tidy finish.
  • Spread a thin, even layer of pastry cream on the bottom sheet with an offset spatula, leaving a small border to prevent overflow; avoid overfilling to keep the layers crisp and to allow clean slicing later.
    → A restrained layer prevents cream from seeping into the edges, preserving the distinct lamination and presentation.
  • Top with the second puff pastry sheet and gently press to seat it, then spread a second, even layer of pastry cream over this sheet; align edges carefully before placing the final sheet on top to complete the triple-layer structure.
    → Proper layering maintains the classic mille-feuille proportions and ensures visible, defined cream between each pastry layer.
  • Trim the outer edges to create a perfectly rectangular mille-feuille, wrap loosely, and refrigerate the assembled stack for 1–2 hours or until the layers are firm and the cream is set; this makes slicing clean and helps the layers hold their shape.
    → Chilling solidifies the structure so cuts reveal distinct layers and the pastry stays crisp rather than collapsing.
  • Slice the chilled stack into evenly sized rectangles with a sharp serrated knife, wiping the blade after each cut to prevent dragging cream and to maintain crisp, clean edges; use a gentle sawing motion to avoid squashing the layers.
    → Clean cuts showcase the lamination and cream between each layer for a professional presentation.
  • Dust the top surface of the slices with a light veil of powdered sugar for a refined finish and subtle sweetness; sift just enough to coat without hiding the precise edges of the pastry.
    → Powdered sugar adds a delicate, aesthetic contrast and helps balance the richness of the filling.
  • Optionally apply fondant glaze by whisking 1 cup confectioners’ sugar with 1–2 tablespoons water and a touch of lemon juice to a pourable consistency; pour or brush a thin, even coat over the top, then allow to set at room temperature before serving.
    → Fondant provides a classic, glossy finish that complements the crisp layers and smooth pastry cream.
  • Alternatively, prepare a chocolate glaze by melting 100 g dark chocolate with 1–2 tablespoons unsalted butter (and a teaspoon of corn syrup for extra shine), then drizzle or spread a thin, even layer across the top and let it set at room temperature for a glossy, dramatic finish.
    → Chocolate glaze offers a rich, sophisticated contrast to the light pastry and creamy filling, with a satisfying snap once set.

Notes

These mille-feuille are classic French pastries built from ultra-thin puff pastry sheets layered with a silky pastry cream. To achieve crisp, flaky layers, keep the dough cold and work quickly; cut all sheets to the same rectangle size as your final pastry blocks and dock (prick) before baking to control puffing. Bake until evenly golden and crisp, then cool completely before assembly to preserve the layers.

  • Puff pastry handling: Use three sheets cut to the same rectangle size as your final blocks. Keep everything cold; docking helps control puffing; bake until golden and crisp; cool completely before assembly to maintain crisp layers.
  • Egg wash: The egg wash gives a glossy finish and helps the layers detach cleanly. Brush lightly on the top surfaces only to avoid soggy edges; if sheets puff unevenly, gently press the center after a short bake and ensure they are completely cool before assembling.
  • Pastry cream: Heat the milk just until steaming; whisk yolks with sugar and cornstarch, then temper with hot milk. Return to the heat and cook until the mixture just boils and thickens; strain for smoothness; off the heat, whisk in butter and vanilla. Chill until cold and set.
  • Assembly: Place one rectangle on a serving board, spread a thin layer of pastry cream, add the second rectangle, repeat, and finish with the third. Chill to set, then slice with a sharp knife, wiping the blade between cuts for clean edges.
  • Finishes: Dust with powdered sugar for a classic look, or apply fondant glaze or a chocolate glaze for a richer finish. Ensure glazes are set before slicing to keep layers crisp.
  • Make-ahead and storage: The assembled mille-feuille can be refrigerated for a day, but crispness may soften. Keep covered to prevent moisture; for best texture, assemble and chill shortly before serving.
  • Variations and serving tips: For aroma, infuse the milk with vanilla pod seeds; add a touch of citrus zest to pastry cream; garnish with fresh berries or a light dusting of cocoa or edible petals. Use a sharp knife and wipe the blade after each slice for perfect presentation.

Tips

  • Puff Pastry handling tips:
    – Keep the three puff pastry sheets as cold as possible before assembling. If they feel soft, refrigerate for 10–15 minutes or briefly return to the freezer for a quick chill.
    – Work quickly when cutting and layering to prevent butter from melting into the dough and affecting the lamination. Use a sharp knife or a pastry ruler for clean, even cuts that match the final block size.
    – Dock the dough (prick with a fork) before baking to control puffing and prevent large air pockets. Bake until evenly golden and crisp; if any sheet puffs unevenly, gently press down the center after a short initial bake and return to the oven until fully cooled.
    – Bake on parchment or a silicone mat and cool completely on a rack to maintain crisp, separate layers. Stacking warm sheets can trap steam and make them soggy.
    – For extra neat edges, trim any uneven sides after baking so all three layers align perfectly in the final mille-feuille blocks.
  • Pastry Cream tips:
    – Heat the milk gently to steaming (do not boil) and temper the yolks gradually to avoid scrambling. A classic method is to whisk yolks with sugar, then ladle hot milk in a thin stream while whisking constantly.
    – Cook the custard until it just thickens and reaches a gentle boil, then remove from heat immediately. Overcooking can cause a grainy texture.
    – Strain the pastry cream through a fine sieve to catch any lumps for ultra-smooth filling.
    – Off the heat, whisk in butter in small pieces until melted and glossy. If you want a sheen, press plastic wrap directly on the surface to prevent a skin from forming as it cools.
    – For vanilla intensity, infuse the milk with vanilla seeds and pod during heating, then strain before tempering the yolks. If using extract, add it after cooking.
  • Assembly and chilling tips:
    – Ensure all components are completely cooled before assembly to keep layers crisp and prevent the custard from becoming runny.
    – Trim the pastry sheets to uniform rectangles to create clean, even layers when stacked.
    – Spread pastry cream evenly with a spatula, keeping thickness consistent but not overfilled to avoid squashing the layers.
    – Alternate the pastry sheets to maintain the three-layer structure, and chill the assembled blocks thoroughly (at least 1–2 hours, preferably longer) so the layers set and slices cleanly.
    – Slice with a sharp, warmed knife or a hot blade for neat, straight edges without dragging the cream.
  • Finishes and presentation tips:
    – Dust with a light veil of powdered sugar just before serving to maintain crispness of the top layer.
    – If using fondant, ensure the pastry is completely cooled; apply in a thin, even layer and let set before slicing for a glossy finish.
    – For a chocolate glaze, tempering the glaze slightly helps achieve a glossy, mirror-like look and prevents dull spots. Apply to a cool pastry and let set at room temperature.
    – For best visual appeal, refrigerate the assembled mille-feuille after final assembly and before slicing to help the cream firm and the layers stay crisp.
  • Tips for variations and troubleshooting:
    – If the pastry seems soggy at the edges, bake the sheets a little longer or finish the baking on a wire rack to maximize air circulation.
    – To reduce richness, you can use a lighter milk or a small amount of cornstarch in the custard, but be mindful it may affect texture.
    – For a fruit-laden version, layer fresh berries or a thin fruit purée between pastry layers, but keep fruit away from the outer glaze to avoid sogginess.
    – If the blocks crack during slicing, chill longer and ensure the knife is hot; clean the knife between slices for cleaner cuts.

FAQ

What is mille-feuille?

Mille‑feuille, also known as Napoleon, is a classic French pastry built from alternating sheets of flaky puff pastry and creamy filling, typically crème pâtissière (vanilla pastry cream). It is usually finished with a glaze or fondant and decorative stripes on top.

What are the main components of a traditional mille-feuille?

The traditional version uses three parts: puff pastry sheets (usually two or three layers), pastry cream (crème pâtissière) as the filling, and a glaze on top (often fondant or a light icing). Some renditions add chocolate or berry glazes for variation.

Can I make puff pastry from scratch for mille-feuille?

You can, but it requires time and technique to laminate butter into dough through multiple folds. Most home cooks use store-bought puff pastry for reliability and speed. If making from scratch, roll out, chill between folds, and bake until deeply crisp and golden.

How is the pastry cream (crème pâtissière) prepared?

Whisk together eggs, sugar, and a bit of cornstarch or flour. Heat milk with a vanilla pod or vanilla paste, then temper the hot milk into the eggs, return to the stove, and cook until thick and smooth. Cool completely and cover with plastic wrap to prevent a skin from forming.

How do you assemble mille-feuille to stay crisp?

Bake the puff pastry until very crisp and cool it completely. Spread a layer of cooled pastry cream on one sheet, top with another puff pastry sheet, and repeat. Chill the assembled pastry and apply the top glaze just before serving to help maintain crispness.

Can I use store-bought puff pastry?

Yes. Choose all-butter puff pastry if possible. Thaw as directed, roll to the desired thickness, and bake on parchment-lined sheets until puffed and golden. Let the sheets cool fully before filling to avoid soggy layers.

What are some popular variations of mille-feuille?

Common variations include vanilla pastry cream with almond frangipane, chocolate pastry cream, pistachio cream, or fruit fillings like berries. Toppings may be white fondant with chocolate stripes, a glossy chocolate glaze, or a simple powdered sugar dusting. You can also add a fruit layer between the pastry sheets for a lighter version.

How long does mille-feuille keep and how should I store it?

Best enjoyed fresh the same day. If needed, refrigerate covered for up to 1–2 days, but the pastry may lose crispness over time. Keep assembled mille-feuille refrigerated; if storing unfilled pastry sheets, keep them in a cool, dry place and assemble just before serving.

How should I plate and serve mille-feuille?

Slice with a sharp knife or dental floss for clean cuts. Serve chilled or lightly cooled, with a dusting of powdered sugar or fresh berries on the side. For an elegant presentation, drizzle a small amount of glaze or chocolate in a decorative pattern on top before slicing.

Introduction / Hook

Imagine waking up to a brunch that feels indulgent yet comforting, a dish that sounds like a treat but behaves like a cozy morning companion. Stuffed Cream Cheese French Toast is that irresistible paradox—a golden, custardy slice of happiness with a silky pocket of cream cheese tucked inside. The moment you bite in, the exterior gives way to a soft, custard-kissed interior, while the cream cheese center melts into a subtle tang that keeps every mouthful balanced and swoon-worthy. The scent alone is enough to coax sleepy heads from beneath the covers: a warm perfume of vanilla, cinnamon, and toasty bread that drifts through the house like a friendly invitation. This is not just breakfast; it’s a small celebration you can carry to the table with a smile. Comfort food with a twist, pure and simple, yet deeply memorable. Whether you’re feeding a weekend crowd, planning a special family brunch, or treating yourself to something special on a slow Sunday, this stuffed French toast elevates the humble slice into something that feels celebratory and just a little luxurious.

What makes it so special is the harmony of textures and flavors—the crackle of a lightly crisped edge giving way to a soft, custardy interior, the cream cheese providing a creamy, slightly tangy surprise in the middle, and a whisper of vanilla and warmth that lingers on the palate. It’s a recipe that invites playfulness: you can customize the filling, the add-ins, and the finish to suit your mood or the season. It’s as much about the ritual—the dipping, the assembly, the sweet steam rising from the pan—as it is about the final bite. And because it’s stuffed, you get that extra moment of anticipation with every slice: a little hidden treasure waiting to be discovered in the center, a soft surprise that makes even the most ordinary morning feel a touch more magical.

The Story Behind the Dish

French toast, in its most archetypal form, traces its roots to the concept of reviving stale bread—what the ancients might have called a practical miracle. The term “pain perdu” appears in old French cookbooks as a way to rescue bread that would otherwise be wasted, transforming it into something comforting and irresistible. Across centuries and continents, toast transformed from a method of sustenance to a ritual of indulgence, with cooks adding their own twists, spices, and textures to suit local palates. The idea of stuffing bread to elevate it even further is a natural extension of that impulse: who wouldn’t crave a little surprise inside a beloved dish?

This iteration—Stuffed Cream Cheese French Toast—speaks to the modern brunch table that cherishes both decadence and approachability. The cream cheese filling nods toward cheesecake-inspired richness, while the eggs and milk-based custard retain the classic French toast ethos: a humble, bread-based cradle for flavors that feel like a celebration. It’s a fusion of tradition and whimsy, a dish that travels easily from a quiet family morning to a lively weekend brunch with friends. The concept is simple, but the memory it carries is lasting: the memory of a kitchen awash in warm light, the sizzle of butter in a skillet, and the first bite that seems to linger just a moment longer than you expect. This is the kind of dish that earns a place in your rotation, not through flash alone, but through the feeling it leaves behind—a soft, satisfied sigh and a promise to return to its comforting magic time and again.

There’s a subtle narrative in the texture and aroma, too. The outer crust forms a temptingly crisp shell—a gentle caramelization that crackles against the tender interior. Inside, the bread becomes custardy and plush, a stage for the creamy centerpiece that spreads across the tongue in a cloud of smooth richness. The aroma carries traces of vanilla, cinnamon, and a hint of sweetness from the bread, with a whisper of tang from the cream cheese that keeps the sweetness from tipping too far into sugary territory. It’s the kind of dish that makes you pause, savor, and relish the moment before you dive back into the next bite, as if each slice is a small, edible love letter to slow mornings and shared conversations.

Why You’ll Love This Recipe

  • Decadent comfort, without fuss. A luxurious flavor profile that feels special enough for celebrations, yet simple enough for a weekend morning.
  • Minimal equipment, maximal impact. A single skillet and a bowl are enough for a crowd-pleasing brunch centerpiece.
  • Customizable to your mood or season. The cream cheese filling is a perfect canvas for flavored swirls, fruit additions, or a hint of citrus zest.
  • Make-ahead potential. You can prep elements in advance and assemble when you’re ready to cook, saving you time when guests arrive.
  • Kid-friendly and crowd-friendly. The flavors are familiar and comforting, while the stuffed center sparks curiosity and delight.
  • Versatility in sweetness and texture. The toast delivers a satisfying crisp edge, while the center remains creamy and indulgent, offering a contrast that keeps every bite interesting.

Flavor Profile & Texture

The first bite is a study in balance. There’s a delicate sweetness that arrives on the palate, not cloying, but gently honeyed by the natural sugars in the bread and a soft, vanilla-kissed custard. The stuffed center—the creamy cream cheese—adds a subtle tang that mirrors a cheesecake-like note, lending depth and a luxurious mouthfeel. The cinnamon and vanilla in the custard create a warm, cozy perfume that fills the room, inviting conversation and lingering taste memories. The exterior offers just the right amount of bite: a light caramelized crust that crackles under teeth and yields to a plush interior that seems to melt away, delivering a silky, almost cloud-like finish.

Texture-wise, you get an appealing spectrum: a crisp, caramelized edge that gives way to a custardy interior, with the cream cheese working as a soft, luscious core. Depending on how you cook it, you might notice a slightly firmer center that showcases the melted cream cheese more distinctly, or a more evenly creamy texture if the heat is gentler. The interplay between the bread’s chew, the custard’s softness, and the filling’s smoothness creates a multi-sensory experience—one that’s satisfying from the first bite to the last. Pairs well with a bright fruit accompaniment or a drizzle of real maple syrup, and even a light dusting of powdered sugar can feel like a final, delicate kiss on top of a well-loved dessert-for-breakfast.

In terms of balance, the dish achieves harmony by tempering sweetness with tang. The cream cheese center isn’t overwhelmingly sweet; it brings a whisper of tang and a velvety mouthfeel that keeps the overall flavor elegant rather than overly sugary. The spice notes—often cinnamon and a hint of nutmeg or cardamom in some variations—hug the bread, enhancing the warmth without overpowering the cream cheese nuance. The result is a flavor profile that feels familiar enough to comfort, but refined enough to feel special—precisely the vibe that makes this stuffed French toast perfect for celebrations, anniversaries, or a quintessential Sunday morning.

Occasions & Pairings

Stuffed Cream Cheese French Toast shines in moments that call for a little extra warmth and a lot of smiles. It’s ideal for:

  • Weekend brunches with family or friends
  • Birthday breakfasts or celebratory mornings
  • Holiday gatherings where a comforting, crowd-pleasing dish is on the table
  • Sleeps-over with loved ones where a special breakfast signals the start of a cozy day

Pairing ideas to elevate the experience without changing the core dish:

  • Fresh fruit compotes or bright berry sauces to cut through richness
  • A light dusting of powdered sugar or a drizzle of pure maple syrup
  • Whipped cream or a dollop of yogurt for contrast and balance
  • Bright citrus segments or a zest of orange to lift flavors
  • A simple side of crisp bacon or ham for a savory counterbalance, should you crave a fuller brunch plate
  • A cup of strong coffee, a vanilla or caramel latte, or a small glass of fresh orange juice for a complete morning ensemble

Tips, Variations & Substitutions

Make it your flavor canvas

While the classic stuffed French toast is delightful as written, you can tailor the experience to your pantry, dietary needs, or mood. Here are ideas to get creative without straying too far from the essence of the dish:

  • Flavorful fillings. In place of standard cream cheese, consider mascarpone for extra creaminess, ricotta for a lighter texture, or a mixture of cream cheese with a touch of lemon zest for a citrusy twist. A swirl of vanilla bean paste in the filling intensifies the perfume and depth.
  • Fruit-forward variations. Add a layer of berry preserves or a quick reduction of berries to the outer surface, allowing pockets of fruity sweetness to peek through the custard.
  • Chocolate option. A hint of cocoa powder whisked into the custard or a delicate chocolate swirled cream cheese center can transform this into a dessert-for-breakfast sensation.
  • Citrus lift. A touch of orange or lemon zest in the custard, or a bright citrus glaze on top after cooking, brings a lively brightness that echoes spring mornings.
  • Herby surprise. A pinch of finely chopped fresh basil or mint can offer an unexpected, refreshing note that pairs surprisingly well with the creaminess.

Dietary friendly twists

  • Gluten-free: Use a sturdy gluten-free bread that can hold up to soaking without becoming mushy. The rest of the concept stays the same, and you’ll still enjoy a plush interior with a creamy center.
  • Vegan version: Use a plant-based cream cheese alternative and a dairy-free milk blend. Ensure the bread you choose is vegan, and consider using an egg replacer or aquafaba to mimic the custard’s binding if needed.
  • Low-sugar approach: Reduce optional toppings and omit syrups; rely on the natural sweetness of ripe fruit or a light dusting of powdered sugar to keep flavors approachable.

bread & texture tweaks

  • Bread choice: Brioche or challah yields a softer, richer result; sturdier breads like French bouillettes or thick-cut whole-grain loaves offer a heartier bite. If using day-old bread, you’ll benefit from a slower soak that prevents sogginess.
  • Texture control: For a crisper crust, cook a touch longer on medium heat; for a more custardy center, reduce heat slightly and give it a bit more time on the skillet, covering briefly to trap steam if needed.

Storage & Make-Ahead Ideas

Planning ahead makes this dish especially friendly for entertaining. Here are practical ways to save time and keep the experience peak:

  • Make-ahead filling: Prepare the cream cheese filling (or its alternative) the day before and refrigerate in an airtight container. When you’re ready, spoon into pockets in the bread and cook as usual. This can shave minutes off a brunch rush.
  • Prepped bread: Slice bread and lay flat on a tray, covered, up to a day ahead. Refrigeration helps the slices hold their shape for stuffing and cooking.
  • Storing leftovers: Refrigerate cooked slices in an airtight container for up to 2–3 days. Reheat gently in an oven or toaster oven to restore some crispness to the exterior. Avoid microwaving if you want to preserve texture.
  • Freezing tips: Freeze assembled, cooked slices in a single layer first, then seal in an airtight container. Reheat in the oven, low-and-slow, until heated through and the crust regains its crisp edge.

Fun Facts & Trivia (Optional)

Delightful tidbits that deepen the appreciation for this dish and its cousins around the world:

  • The concept of rescuing stale bread with a custard-like soak is a universal kitchen hack that appears in many cultures under various names, from pain perdu in France to tostada de pan francés in some Latin American traditions.
  • Cream cheese has a storied history in the United States, with early cream cheese innovations dating to the 19th century. Its creamy, tangy character is what gives stuffed French toast its signature contrast against the bread’s sweetness and warmth.
  • Brunch culture—a term that blends breakfast and lunch into a social ritual—rose to prominence in the 19th and 20th centuries and reached a modern peak through late 20th-century comfort-food movements. A dish like Stuffed Cream Cheese French Toast embodies that evolution: familiar breakfast elements elevated for special occasions and shared moments.
  • Texture contrasts in cooking have long been celebrated in gastronomy. The combination of a crisp-edged exterior with a soft, custardy interior is a classic technique to create a memorable mouthfeel that satisfies many senses at once.

Ingredients

Stuffed Cream Cheese French Toast
Bread

  • 4 thick-sliced brioche or challah bread slices (about 1 inch thick, sturdy enough to hold the cream cheese filling)
    → The bread is the vessel for the stuffed center. Thick-cut, slightly stale bread soaks up the custard without falling apart. If you only have fresh bread, toast lightly to dry it out a bit before assembling.

Cream Cheese Filling

  • 8 oz (1 cup) cream cheese, softened to room temperature
    → The creamy, tangy center for the stuffed toast. Softening ensures a smooth, spreadable mixture that blends well with sugar and vanilla. If the cream cheese is still firm, give it a few minutes at room temperature or whisk with a splash of milk to loosen.
  • 2 tablespoons granulated sugar
    → Sweetens the filling and helps achieve a balanced, creamy texture. For an ultra-smooth finish, you can substitute with 2 tablespoons powdered sugar, which blends more easily and yields a silkier filling.
  • 1/2 teaspoon vanilla extract
    → Adds warm, aromatic depth to the filling. Use pure vanilla for best aroma; if possible, avoid imitation vanilla for a more robust flavor.
  • 1/2 teaspoon lemon zest or orange zest (optional)
    → Provides a bright citrus note that cuts richness and brightens the flavor profile. Zest finely and avoid the white pith.
  • Pinch of salt (optional)
    → Enhances sweetness and depth; omit if using salted cream cheese.
  • 2 tablespoons fruit jam or preserves (optional)
    → Swirl into the cream cheese for fruity contrast that pairs well with cinnamon and vanilla. If using, soften the jam slightly to mix easily with the filling.

Egg Custard (Dip)

  • 2 large eggs
    → The eggs set the custard coating and help bind the stuffed toast as it cooks, creating a cohesive, custardy exterior. For richer flavor, whisk in a tablespoon of cream or milk with the eggs.
  • 3/4 cup whole milk or half-and-half
    → Provides moisture to the bread and forms a creamy, custard-like coating. Half-and-half yields a richer texture; use dairy-free milk with a splash of dairy-free butter substitute if needed.
  • 1 teaspoon vanilla extract
    → Layer of aroma in the custard that complements cinnamon and the cream cheese filling. Use good-quality vanilla for best results.
  • 1/2 teaspoon ground cinnamon
    → Adds warmth and depth to the custard, harmonizing with the filling and bread. For a stronger spice note, increase to 3/4 teaspoon.
  • Pinch of salt
    → Enhances sweetness and helps flavors pop in the custard.

Coating & Flavor Enhancers (optional)

  • 1 tablespoon granulated sugar (optional)
    → If you want a light cinnamon-sugar crust on the outside, dust the dipped bread with a mixture of sugar and cinnamon before frying for a subtle crunch and aroma.
  • 1/2 teaspoon ground cinnamon (optional)
    → Part of the optional cinnamon-sugar outside coating or sprinkled over finished toast for extra warmth.

Cooking Fat

  • 2 tablespoons unsalted butter, for frying
    → Provides rich flavor and helps achieve a golden crust without sticking. Cook on medium heat to prevent burning; if dairy-free, substitute with neutral oil and a little dairy-free butter substitute.

Serving & Toppings

  • Pure maple syrup, for serving (about 1/4 cup)
    → A classic pairing that adds sweetness and moisture as you pour over the warm toast. Warm the syrup for easier pouring and to keep the toast from cooling too quickly.
  • Powdered sugar for dusting (optional)
    → A light, snowy finish that adds a touch more sweetness. Sift finely to avoid clumps.
  • Fresh berries or sliced fruit (optional)
    → Adds brightness and contrast to the richness. Choose strawberries, blueberries, raspberries, or a mix; rinse and pat dry before serving.

Instructions

  • Soften the cream cheese to room temperature and beat it with the granulated sugar, vanilla extract, citrus zest (optional), and a pinch of salt until the mixture is smooth, light, and fluffy.
    → Softening prevents lumps and ensures a spreadable filling that mixes evenly with the custard later, producing a uniform creamy center in every bite.
  • If using jam, fold or swirl 2 tablespoons of fruit jam into the cream cheese filling until evenly distributed; allow the jam to soften slightly so it blends rather than remaining chunky.
    → Integrates fruity aroma throughout the filling without creating pockets that could burst during cooking.
  • Assemble two stuffed sandwiches by spreading the prepared cream cheese filling on two slices of bread and topping with the remaining slices to form two complete, sealed slabs; press the edges lightly to prevent filling from leaking during frying.
    → Creating a tight seal keeps the filling contained and helps the bread maintain its structure while cooking.
  • Whisk the eggs, milk or half-and-half, vanilla extract, ground cinnamon, and a pinch of salt in a wide, shallow dish until the mixture is fully integrated and lightly frothy.
    → This custard forms a cohesive coating that sets into a creamy outer layer without separating, ensuring a silky texture when fried.
  • Optionally mix 1 tablespoon granulated sugar with 1/2 teaspoon ground cinnamon in a small bowl to create a light cinnamon-sugar coating for the exterior if desired.
    → The cinnamon-sugar crust adds aroma, a subtle crunch, and a hint of sweetness that complements the filling.
  • Dip each stuffed bread sandwich into the custard, turning to coat all sides; allow it to soak for about 20-30 seconds per side, then lift and let excess custard drip back into the dish.
    → Soaking ensures the bread absorbs enough custard to stay moist and tender inside while forming a custardy exterior during frying.
  • Place a large skillet over medium heat and add 2 tablespoons unsalted butter, allowing it to melt and foam; swirl the pan to coat evenly and monitor to prevent browning too quickly.
    → The butter provides rich flavor, helps achieve a golden crust, and prevents sticking; foaming indicates the right temperature to begin frying.
  • Carefully lay each soaked sandwich into the hot skillet and cook undisturbed for 2-3 minutes until the underside is deep golden and crisp.
    → A proper crust forms when the surface caramelizes, sealing in the filling and creating a texture contrast with the creamy interior.
  • Flip the sandwiches and cook the other side for 2-4 minutes until golden brown and the custard is set through the center; press lightly with a spatula to ensure even browning and interior heat.
    → Even browning ensures consistent texture and prevents soggy centers by promoting thorough cooking.
  • If using the optional cinnamon-sugar exterior, sprinkle the mixture on the outer surfaces of the toast after flipping or during the last minute of cooking and allow it to toast briefly to set a delicate crust.
    → The sugar caramelizes against the hot pan, creating aroma and a subtle crunch without overpowering the filling.
  • Transfer finished stuffed French toast to a warm oven (about 200°F/95°C) on a baking sheet to keep warm while you complete the remaining slices.
    → Holding the hot pieces briefly ensures even serving temperature and prevents crowding from cooling too quickly.
  • Serve the stuffed cream cheese French toast with warm maple syrup (about 1/4 cup per serving) and optional dusting of powdered sugar, plated with fresh berries or sliced fruit for brightness.
    → Maple syrup adds moisture and sweetness that complements the cream cheese filling, while berries provide acidity and contrast to the richness.

Notes

These stuffed cream cheese French toast are a rich, indulgent brunch option featuring thick-sliced brioche or challah filled with a creamy cream cheese center and coated in a lightly cinnamon-sweet custard. You can customize them by adding a swirl of fruit jam, a touch of citrus zest, or a dusting of cinnamon-sugar for extra warmth. For best results, use bread that is a bit stale or lightly toast fresh slices to help them soak up the custard without falling apart. Softened cream cheese blended with sugar, vanilla, and citrus zest creates a smooth, spreadable filling that pairs beautifully with the cinnamon and bread.

Tips and technique: ensure the custard is balanced—eggs, milk, vanilla, and cinnamon—so the coating is creamy rather than gummy. When assembling, spread the cream cheese mixture evenly between slices and seal with another slice, pressing gently to keep the filling inside. Dip the assembled sandwiches in the custard, allowing a brief soak so the bread absorbs the flavors without becoming soggy, then fry in butter over medium heat until deeply golden and the filling is warmed through. For dairy-free versions, use a neutral oil for frying and a plant-based cream cheese with a splash of dairy-free milk in the custard.

Make-ahead and storage: the stuffed sandwiches can be assembled and refrigerated for a few hours before cooking, or cooked and cooled to reheat later. Leftovers refrigerate well for 2–3 days and can be reheated in a skillet or oven. If you want to prepare in advance for a crowd, assemble the filling and bread up to the point of dipping, refrigerate, then finish frying and serving just before brunch. Serve with pure maple syrup, fresh berries, or sliced fruit, and consider a light dusting of powdered sugar for an extra touch of sweetness.

Tips

Tips for Perfect Stuffed Cream Cheese French Toast

  • Bread choice and prep: Use 4 thick-sliced brioche or challah slices about 1 inch thick. If the bread is fresh, toast lightly or dry out slightly to help it soak up the custard without falling apart. Slightly stale bread yields the best texture.
  • Keep the filling smooth: Soften the 8 oz cream cheese to room temperature and beat until silky. If it’s still a bit firm, whisk in a splash of milk or beat longer to remove lumps so the center fills evenly.
  • Flavor balance in the filling: Use 2 tablespoons sugar and 1/2 teaspoon vanilla to create a creamy, balanced center. If you like a silkier texture, substitute 2 tablespoons powdered sugar for a smoother finish.
  • Optional citrus brightness: Add 1/2 teaspoon lemon zest or orange zest to the cream cheese filling for a bright note. Zest finely and avoid the white pith for best aroma.
  • Salt considerations: A pinch of salt enhances the filling’s sweetness. Omit only if your cream cheese is salted.
  • Jam swirl tip: If using 2 tablespoons of jam, soften it slightly and swirl into the cream cheese rather than fully mixing. This creates pockets of fruity contrast without leaking too much during frying.
  • Custard depth: For the dip, whisk 2 large eggs with 3/4 cup whole milk or half-and-half. For richer texture, whisk in a tablespoon of cream or extra milk.
  • Vanilla in the custard: Add 1 teaspoon vanilla extract to the custard for aroma that complements the cream cheese filling. Use pure vanilla if possible.
  • Cinnamon and salt in custard: Include 1/2 teaspoon ground cinnamon and a pinch of salt to deepen flavor and balance sweetness.
  • Optional dairy-free option: If you’re dairy-free, use a neutral oil plus a dairy-free butter substitute for frying, and substitute dairy with plant-based milk in the custard as needed.
  • Coating idea for a subtle crust: If you like a light cinnamon-sugar crust, dust dipped bread with 1 tablespoon granulated sugar and 1/2 teaspoon cinnamon before frying.
  • Frying fat and temperature: Use 2 tablespoons unsalted butter for frying on medium heat to achieve a rich, golden crust without burning. If needed, swap in neutral oil and a dairy-free butter substitute.
  • Dipping technique: Dip each stuffed slice into the custard briefly—about 20–30 seconds per side—so the bread absorbs flavor without becoming overly soggy. Let any excess drip off before frying.
  • Cooking time and care: Fry the stuffed toast 3–4 minutes per side until golden and set. Adjust heat to avoid burning the butter while ensuring the center is warmed through.
  • Serving ideas: Serve with warm pure maple syrup (about 1/4 cup) and a dusting of powdered sugar if desired. Garnish with fresh berries or sliced fruit for brightness and a counterpoint to richness.
  • Make-ahead and leftovers: Assemble the cream cheese filling in advance and refrigerate bread assembled with filling for up to 24 hours. Dip and cook just before serving for best texture. Store leftovers in the fridge and rewarm in a 350°F oven for a few minutes to refresh the crust.

FAQ

What is Stuffed Cream Cheese French Toast?

Stuffed Cream Cheese French Toast is a breakfast treat where thick slices of bread are sandwiched with a creamy, sweet cream cheese filling, then dipped in an eggy custard and cooked until golden. It’s typically served with maple syrup, fresh fruit, or a dusting of powdered sugar.

What ingredients do I need?

Core components include:

  • Thick-cut bread (brioche or challah recommended)
  • Cream cheese, softened
  • Sugar (granulated or to taste)
  • Vanilla extract
  • Optional lemon zest for brightness
  • Eggs
  • Milk or cream
  • Cinnamon
  • Pinch of salt
  • Butter or oil for cooking
  • Suggested toppings: maple syrup, powdered sugar, fresh fruit
How do I assemble the stuffed toast?

Steps:

  1. Mix the cream cheese with a little sugar and vanilla to make a smooth filling. Optional: add lemon zest.
  2. Spread a layer of filling on one slice of bread, then top with a second slice to make a sandwich. Repeat for remaining slices.
  3. Chill the assembled sandwiches for 15–30 minutes to help set the filling.
  4. Whisk eggs, milk (or cream), vanilla, cinnamon, and a pinch of salt to make the custard.
  5. Dip each sandwich in the custard, turning to coat on all sides. Let excess drip off.
  6. Cook on a buttered skillet over medium heat until golden on both sides, or bake in a preheated 350°F (175°C) oven until set and golden.
How can I prevent the filling from leaking?

Tips to keep filling inside:

  • Use thick-cut bread and bread that’s a day or two old for better structure.
  • Chill the assembled sandwiches before dipping to help set the filling.
  • Avoid oversoaking; dip briefly and let excess custard drip off.
  • Press edges gently to seal, and consider trimming crusts if they seep too easily.
Can I make this ahead of time?

Yes. You can:

  • Assemble the sandwiches, wrap, and refrigerate up to 24 hours before cooking. Then dip in custard and cook as directed.
  • Alternatively, mix the custard in advance and refrigerate; soak bread shortly before cooking.
What cooking method should I use?

Two common methods:

  • Pan-fry: Cook in a buttered skillet over medium heat, about 2–3 minutes per side until golden and the filling is warm.
  • Bake: Place on a lined sheet pan and bake at 350°F (175°C) for 25–35 minutes, turning once for even browning.
How long does it take to cook?

Pan-frying usually takes about 6–8 minutes total per batch. Baking typically takes 25–35 minutes. Plan for a bit more time if cooking in large batches.

Can I make dairy-free or gluten-free versions?

Yes. Options include:

  • Use dairy-free cream cheese and plant-based milk (almond, soy, oat) for the custard.
  • Use gluten-free bread if needed.
  • For extra richness, use dairy-free butter for cooking.
What toppings and flavor variations work well?

Try these suggestions:

  • Maple syrup or honey, fresh berries, sliced bananas
  • Powdered sugar, a dusting of cinnamon
  • Add-ins: chocolate chips, fruit jam swirled into the cream cheese filling, or citrus zest in the custard
How should I store leftovers?

Store refrigerated in an airtight container for 2–3 days. Reheat in a skillet over medium heat or in a 350°F (175°C) oven until warmed through. For longer storage, freeze cooked portions or assemble and freeze unbaked sandwiches to cook later.

Introduction / Hook

Imagine a cozy, bubbling casserole that fills the kitchen with the comforting scent of roasted garlic, herbs, and velvety sauce—the kind of dish that makes the day’s stresses drift away the moment you lift the lid. Best Rotisserie Chicken Casserole is not just a weeknight saver; it’s a celebration of simplicity and flavor. It starts with a clever shortcut—succulent rotisserie chicken—turned into a creamy, sunlit filling that mingles with tender vegetables, a kiss of tangy brightness, and a crusty golden top that adds the perfect textural contrast. The result is a dish that tastes like you spent hours in the kitchen, yet it practically cooks itself, leaving you plenty of time to gather around the table, share stories, and savor every comforting spoonful. From the first bite, you’ll notice the way the sauce wraps around the chicken, the gentle sweetness from caramelized onions and roasted vegetables, and the herbaceous lift that keeps the flavors lively without ever overpowering the comforting base you crave on a busy night.

This casserole is a culinary hug—a dish you can assemble in minutes, bake while you set the table, and watch disappear as if by magic. It’s the kind of recipe that adapts to your pantry, your family’s preferences, and the seasons. The creaminess is balanced by a subtle tang, the textures range from silky to savory to crisp, and the aroma alone is enough to spark a smile even before the first forkful arrives. If you’ve ever wished for a one-dish wonder that feels luxurious yet accessible, this is your moment. Welcome to a dish that proves comfort food doesn’t have to be complicated to be unforgettable.

Beyond its irresistible flavor, this casserole celebrates the beauty of leftovers and quick creativity. It’s a dish you can trust to deliver consistent, crowd-pleasing results, whether you’re feeding a family of four on a busy weekday or staging a casual gathering with friends. The secret lies in balancing brightness with richness, texture with tenderness, and nutrition with indulgence—so every bite feels like a quick, nourishing treat.

The Story Behind the Dish

Rotisserie chicken has long been the unsung hero of home cooking. Its mass-produced, slow-roasted magic gave hungry households a shortcut to deep flavor without turning the kitchen into a culinary laboratory. The idea of turning that flavorful, ready-made centerpiece into a creamy casserole is a natural evolution—an homage to the idea that good ingredients, treated well, can become something greater with a few thoughtful additions. This dish borrows the idea of “one-pot comfort” from classic casseroles, but it elevates it with modern touches: a light, dairy-forward sauce, roasted vegetables for sweetness, and fresh herbs that wake up the palate without overpowering the chicken’s natural succulence.

Historically, casseroles have always been about gathering people together—distant relatives at a holiday table, neighbors sharing a meal, or a family reclaiming a hectic week with something comforting and reliable. The rotisserie chicken represents the pragmatic, communal kitchen—easy to find, quick to pull apart, and generous enough to stretch into a satisfying, shareable dish. This particular version, while rooted in those traditional sensibilities, embraces contemporary flavors and textures: onions caramelized to a gentle brown, a whisper of citrus tang, a hint of spice for warmth, and a finish that stays creamy without weighing you down. It’s a tribute to the way a few humble ingredients, treated with care, can yield something that tastes both like home and a wholesome, modern meal.

One might say the dish embodies the democratization of flavor—the idea that you don’t need a long list of fancy ingredients to create something memorable. You just need balance, faith in your pantry staples, and a little patience as the sauce thickens and the topping browns. With rotisserie chicken at its foundation, this casserole invites cooks of all levels to lean into confidence: pull the chicken from the bone, stir in a few complementary ingredients, let the oven do the magic, and then share a dish that makes ordinary weeknights feel special.

Why You’ll Love This Recipe

  • Super quick to assemble: harness the convenience of rotisserie chicken to cut down on prep time while still delivering restaurant-worthy flavor.
  • Creamy, comforting sauce: a luscious combination that coats every piece of chicken and vegetable without becoming heavy.
  • Versatile pantry-friendliness: designed to adapt to what you have on hand—vegetables, herbs, and pantry staples can be swapped with ease.
  • Family-friendly and crowd-pleasing: familiar flavors that appeal to kids and adults alike, making it ideal for weeknights or potlucks.
  • Make-ahead-friendly: you can assemble ahead and bake later, which is perfect for meal-prep Sunday meals or last-minute entertaining.
  • Balanced texture: a creamy interior, tender chicken, and a lightly crisped top provide a satisfying mouthfeel from start to finish.
  • One-dish simplicity: minimal pans mean less cleanup and more time enjoying the meal with loved ones.
  • Leftover-friendly: the casserole stores beautifully in the fridge and often tastes even better as flavors meld overnight.

Flavor Profile & Texture

The flavor profile of Best Rotisserie Chicken Casserole centers on comfort without dullness. The chicken provides a succulent, juicy base, its natural richness brightened by a touch of citrus or lemon zest and a chorus of aromatic herbs—thyme, parsley, and perhaps a hint of marjoram. The sauce brings creaminess with a gentle tang, often from a dose of sour cream, yogurt, or cream cheese that melts smoothly into the broth or stock. Onions, garlic, and sometimes roasted garlic contribute sweetness and depth, while a handful of vegetables—such as bell peppers, mushrooms, or zucchini—offer color, texture, and a caramelized edge that complements the mellow chicken.

Texture-wise, you’ll notice a satisfying contrast: a soft, enveloping interior from the creamy sauce, tender bites of shredded rotisserie chicken, and a lightly crisped top that adds a delicate crunch when you scoop through. If you choose a crumb topping or a sprinkle of cheese, you get a toasty, golden cap that crackles slightly as you fork into it, enhancing the sensory experience without stealing the dish’s comforting essence. The herbs provide a fresh lift, making the dish feel bright and well-balanced rather than heavy—a crucial detail that turns an everyday casserole into something that feels celebratory.

In terms of regional or personal twists, the seasoning can swing toward coastal brightness with lemon and dill, or lean into hearth-wom desires with smoky paprika and a touch of cream cheese for extra richness. The carrot-and-pepper color palette brings visual appeal, while the savory-sweet onion base keeps the flavors accessible and deeply satisfying. The result is a dish that tastes familiar yet thoughtfully layered, inviting you to savor each bite and notice the way different components interact—the chicken’s savoriness, the creamy tang, the savor of roasted vegetables, and the final kiss of warmth from a baked finish.

Occasions & Pairings

Best Rotisserie Chicken Casserole shines in a wide range of occasions, from casual weeknights to leisurely weekend gatherings. It is equally at home on a busy weeknight when time is tight and on a Sunday table where guests linger over seconds. The dish’s adaptable nature makes it ideal for potlucks and family dinners alike, offering something comforting and familiar that anyone can enjoy. It’s a reliable choice when you want to feed a crowd without spending hours in the kitchen, and it scales easily whether you’re hosting a small dinner or a larger gathering.

Pairings can elevate the meal further. Consider serving with:

  • A bright green salad with a tangy vinaigrette to cut through the richness and add freshness.
  • Roasted or sautéed greens—spinach, kale, or Swiss chard—for color and nutrition.
  • Crusty bread or warm biscuits for soaking up the luscious sauce.
  • A light white wine like Sauvignon Blanc or unoaked Chardonnay, or a sparkling water with a squeeze of citrus for non-alcoholic options.
  • Classic side dishes such as roasted potatoes, glazed carrots, or a simple wild rice pilaf to add texture and substance.

For holiday table setups or special occasions, you can dress the casserole up with a final garnishing flourish: a sprinkle of fresh herbs, a drizzle of olive oil, or a delicate grating of parmesan. It remains inviting, not overpowering, so it blends seamlessly into a celebratory menu while still feeling like home-cooked comfort.

Tips, Variations & Substitutions

Tips for Best Results

  • Choose a rotisserie chicken with a light, even color and juicy meat. Shred the meat while it’s still warm to avoid stringy texture and ensure it mixes smoothly into the sauce.
  • Pre-cook any hard vegetables (like carrots or broccoli) only slightly if you’re using dense produce. You want them tender but not mushy when the dish comes out of the oven.
  • Balance the sauce with a touch of acidity if your pan needs brightness. A splash of lemon juice or a dollop of yogurt can brighten the overall flavor without overpowering the creaminess.
  • For a crispier topping, you can mix breadcrumbs with a little melted butter and grated cheese, then sprinkle on top in the last 8–10 minutes of baking.
  • Let the casserole rest for 5–10 minutes after removing from the oven. This helps the sauce set and makes serving easier.

Variations

  • Vegetable-forward version:swap in extra vegetables like roasted peppers, zucchini, and mushrooms for a colorful, hearty texture.
  • Lemon-herb lift: intensify brightness with extra lemon zest and a handful of chopped parsley at the end.
  • Cheesy crust: finish with a mix of mozzarella and parmesan for a golden, bubbly top that melts into the sauce.
  • Italian-inspired: add sun-dried tomatoes, artichoke hearts, and a splash of white wine plus Italian herbs to give a Mediterranean aroma.
  • Herb-forward: emphasize thyme, oregano, and chives for a garden-fresh note that pairs beautifully with chicken.

Substitutions & Dietary Tweaks

  • Gluten-free: use gluten-free cream soup or a roux-based sauce with cornstarch or gluten-free flour to achieve the same creamy texture.
  • Vegetarian/vegan option: replace chicken with cubed roasted cauliflower or chickpeas and use a plant-based cream alternative with nutritional yeast for a cheese-like depth.
  • Low-fat: swap heavy cream for a lighter milk-cream blend and reduce cheese to keep the dish lighter while preserving creaminess.
  • Low-sodium: opt for low-sodium broth and rinse any canned ingredients well to control salt levels.
  • Spice-forward: add a pinch of chili flakes or a dash of smoked paprika for a warm, aromatic kick if you like a little heat.

Storage & Make-Ahead Ideas

This casserole is wonderfully forgiving when it comes to make-ahead and storage. You can assemble it the day before and refrigerate overnight, then bake it when you’re ready to serve. The flavors will continue to meld as it rests, producing an even richer taste. If you plan to freeze, freeze the assembled unbaked dish (covered tightly) for up to 2–3 months. Thaw in the fridge overnight before baking. After baking, store any leftovers in an airtight container for up to 3–4 days in the refrigerator. Reheat gently on the stovetop or in a low oven, adding a splash of broth or milk to loosen the sauce if it thickens too much during storage.

Make-ahead ideas to maximize weeknight efficiency:

  • Shred chicken and chop vegetables ahead of time and store in separate containers for quick assembly.
  • Prepare the sauce base in advance and refrigerate; combine with chicken and vegetables just before baking.
  • Create a two-dish plan: bake a batch now, freeze a second assembled casserole for later to simplify future dinners.

Fun Facts & Trivia (Optional)

Rotisserie chicken has a long history rooted in communal kitchens and neighborhood delis, where ready-to-eat meals offered practical, flavorful solutions for busy families. The concept of casseroles as a one-dish comfort staple grew from late-19th and early-20th century American kitchens, evolving into an enduring symbol of togetherness and home-cooked nourishment. In modern kitchens, the rotisserie chicken shortcut has become a cross-cultural favorite, enabling home cooks to unlock layered flavors with minimal effort. Casseroles themselves have a soft place in many traditions: they travel well, feed many, and often carry a memory—whether it’s a grandmother’s touch, a friend’s homey flavor, or a new twist born from necessity and creativity.

From a culinary science perspective, this dish showcases how a creamy emulsion can carry tender protein and vegetables without overwhelming them. The interplay of dairy, herbs, and gentle acidity creates a stable, luscious sauce that coats every component. And the topping—whether crumb, cheese, or a simple brush of butter—adds a textural contrast that makes each mouthful exciting. The result is a modern comfort classic with roots in the convenience-driven kitchen, proving that the best flavor often hides in the simplest choices thoughtfully combined.

Ingredients

Main Ingredients

  • – Rotisserie chicken, skin removed and shredded (about 3 cups)
    → Purpose: provides the main protein and deep, roasted flavor without roasting a chicken from scratch. Preparation: remove skin and bones, then shred into bite-sized pieces (roughly 1/2-inch). Tip: use leftover rotisserie chicken for convenience; dark meat stays moist and flavorful.
  • – Egg noodles, dried (12 oz / 340 g), cooked until al dente
    → Purpose: forms the starchy backbone that soaks up the creamy sauce. Preparation: cook in salted water to just-al dente, drain well and rinse briefly to stop cooking; this prevents mushy noodles after baking.
  • – Yellow onion, finely chopped (1 medium)
    → Purpose: builds the savory base and sweetness. Preparation: sauté in a little butter or oil until translucent and lightly golden for maximum flavor.
  • – Garlic cloves, minced (2 cloves)
    → Purpose: aromatic depth that amplifies the overall savoriness. Preparation: mince finely and add with onions so the aroma blooms without burning the garlic.
  • – Frozen peas (1 cup)
    → Purpose: color, sweetness, and tenderness. Preparation: thaw completely and drain well to avoid extra moisture in the bake; you can substitute with fresh peas if available.
  • – Carrots, diced (1 cup)
    → Purpose: adds sweetness, color, and texture. Preparation: dice evenly and pre-cook briefly (steam or microwave) if you prefer softer carrots in the casserole.
  • – Chicken broth (1 cup)
    → Purpose: adds moisture and helps achieve a creamy, not overly thick sauce. Preparation: warm before mixing to prevent a cold liquid from shocking the mixture; use low-sodium broth to control salt.

Creamy Sauce Base

  • – Cream of chicken soup (10.5 oz can, condensed)
    → Purpose: the creamy binder that keeps everything cohesive. Preparation: do not dilute; stir the condensed soup into the mix and loosen with liquid as needed. If avoiding canned soup, you can substitute with a quick homemade bechamel (but that adds steps).
  • – Milk (1 cup)
    → Purpose: thin the condensed soup to the right pourable consistency and add richness. Preparation: use whole or 2% milk for best texture; warm slightly before mixing to prevent separation.
  • – Cream cheese, softened (8 oz) optional
    → Purpose: extra silkiness and body to the sauce. Preparation: whisk in at the end until completely smooth; to lighten, use 4 oz instead of 8 oz.
  • – Sour cream or Greek yogurt (1/2 cup) optional
    → Purpose: adds tang and extra creaminess. Preparation: whisk in with the sauce mixture; use full-fat for best texture and avoid curdling by tempering with a little hot sauce first if adding directly.
  • – Salt (1/2 teaspoon)
    → Seasoning base; Preparation: start with 1/2 tsp and adjust after tasting, considering salt from the soup and broth.
  • – Black pepper, freshly ground (1/4 teaspoon)
    → Adds a subtle bite; Preparation: grind just before mixing to maximize aroma and freshness.
  • – Paprika (1/2 teaspoon)
    → Adds color and a mild, smoky sweetness. Preparation: sweet paprika is mild and vibrant; smoked paprika will introduce a deeper warmth if you like.
  • – Dried thyme (1/2 teaspoon) or other herbs (e.g., parsley)
    → Provides an earthy, aromatic note. Preparation: crush between fingers or in palms to release oils before adding to the mixture.
  • – Red pepper flakes (pinch) optional
    → For a touch of heat; Preparation: add sparingly and taste as you go to avoid overpowering the dish.

Cheese and Toppings

  • – Cheddar cheese, shredded (2 cups)
    → Purpose: melts into the sauce to create a rich, cheesy casserole. Preparation: use sharp or extra-sharp cheddar for more pronounced flavor; fold half into the base and reserve half for topping; grate fresh for best melt.
  • – Breadcrumbs or crushed crackers for topping (1/2 cup)
    → Purpose: produces a crisp, golden crust on top. Preparation: toss with melted butter (1 tablespoon) for extra browning and flavor; sprinkle evenly over the casserole before baking.
  • – Butter, melted (1 tablespoon)
    → Used to moisten and brown the topping; Preparation: drizzle evenly over breading to encourage a crisp crust.
  • – Fresh parsley or chives, chopped for garnish (2 tablespoons) optional
    → Adds a bright, fresh finish and color. Preparation: finely chop and sprinkle after baking to preserve color and aroma.

Optional Add-ins

  • – Mushrooms, sliced (1 cup) optional
    → Adds earthiness and moisture. Preparation: sauté in a little butter or oil until browned to remove moisture; fold into casserole after sautéing to prevent soggy texture.
  • – Red bell pepper, diced (1 cup) optional
    → Adds sweetness and vibrant color. Preparation: sauté with onion until tender or add raw if you like a crisper bite.
  • – Broccoli florets, small pieces (1 cup) optional
    → Brings green color and crunch. Preparation: blanch briefly or steam until just tender; fold in near the end of baking to avoid overcooking.
  • – Corn kernels (1 cup) optional
    → Gentle sweetness and texture variation. Preparation: use fresh, canned, or thawed frozen corn; pat dry to minimize extra moisture in the bake.

Instructions

  • Preheat your oven to 350°F (175°C) and grease a 9×13-inch baking dish or line it with parchment for easy release.
    → This ensures even baking and prevents the casserole from sticking, allowing clean portions.
  • Cook the egg noodles in a large pot of salted water until just al dente, then drain well and rinse briefly to stop the cooking process.
    → Al dente noodles retain bite after baking and won’t become mushy in the hot casserole.
  • Shred the rotisserie chicken into bite-sized pieces (about 3 cups) and remove any skin or cartilage, placing the pieces in a large mixing bowl.
    → Evenly shredded chicken distributes flavor throughout the casserole and yields consistent bites.
  • In a large skillet, melt 2 tablespoons of butter over medium heat and add finely chopped yellow onion; sauté until translucent and lightly golden, about 5 to 7 minutes.
    → Cooking the onion unlocks sweetness and depth, forming the savory base of the dish.
  • Add minced garlic to the skillet and cook for 30 to 60 seconds, stirring continuously to bloom the aroma without burning.
    → Garlic develops its fragrance quickly; prolonged heat can turn it bitter, so short, steady cooking is key.
  • Thaw the frozen peas completely and drain them well, patting dry to remove surface moisture.
    → Fully thawed, dry peas distribute evenly and prevent extra moisture from diluting the sauce.
  • Dice carrots into uniform ¼-inch pieces and, if desired, pre-cook briefly by steaming or microwaving until just tender, then drain.
    → Even-sized pieces cook evenly in the bake, and pre-cooking avoids a crunchy texture inside the creamy casserole.
  • Warm the chicken broth in a small saucepan until steaming, then keep it warm over low heat for easy blending into the sauce.
    → Warm liquid blends smoothly with the sauce, preventing a cold shock that could curdle or slow emulsification.
  • In a large bowl, whisk the cream of chicken soup with the milk until smooth and fully combined, creating a cohesive creamy base.
    → This creates a stable binder that coats the ingredients evenly without separating during baking.
  • If using cream cheese, beat it into the soup mixture until completely smooth; otherwise, proceed with the soup and milk as is.
    → Cream cheese adds silkiness and body to the sauce; if omitted, the sauce relies on the soup and dairy for creaminess.
  • Whisk in sour cream or Greek yogurt (1/2 cup) into the mixture, tempering with a spoonful of warm broth if adding directly to prevent curdling.
    → The dairy adds tang and extra richness, while tempering preserves a silky texture.
  • Season the sauce with salt (1/2 teaspoon), freshly ground black pepper (1/4 teaspoon), paprika (1/2 teaspoon), and dried thyme (1/2 teaspoon); stir to evenly distribute the spices. Add a pinch of red pepper flakes if you want a touch of heat.
    → Balanced seasoning ensures depth of flavor throughout; thyme or parsley adds earthy aroma that complements chicken.
  • Fold the shredded chicken, cooked noodles, thawed peas, and diced carrots into the sauce until evenly coated, using a wide spatula and gentle motions to avoid breaking the noodles.
    → Even coating guarantees every bite is creamy and flavorful without mushy bits or dry patches.
  • Stir in half of the cheddar cheese into the casserole base to melt into the sauce, reserving the other half for topping.
    → Incorporating cheese into the sauce enriches the texture; reserving some for topping creates a melted, bubbly crust.
  • Spread the mixture evenly in the prepared baking dish and smooth the surface with a spatula to ensure uniform bake.
    → A level surface promotes even heat distribution and consistent doneness across servings.
  • In a small bowl, toss breadcrumbs or crushed crackers with the melted butter until evenly coated, then sprinkle over the casserole to form a crisp crust.
    → The butter-coated crumbs brown beautifully and add a contrasting texture to the creamy interior.
  • Sprinkle the remaining cheddar cheese over the top for a final cheesy crust that browns nicely as it bakes.
    → Extra cheese on top creates a glossy, appetizing finish and enhances the melt and browning.
  • Bake in the preheated oven at 350°F (175°C) for 25 to 30 minutes, until the edges are bubbling and the top is golden; rotate the dish halfway through if your oven has hot spots.
    → Proper bake time ensures the casserole is hot throughout, the sauce thickens, and the crust achieves a crisp, golden color.
  • Allow the casserole to rest for 10 minutes after removing from the oven to let the sauce re-thicken and for easier slicing.
    → Resting helps the filling set so portions hold their shape when served.
  • Garnish with freshly chopped parsley or chives and serve while warm to provide a bright contrast and fresh aroma that complements the creamy richness.
    → Fresh herbs elevate color and aroma, balancing the dish’s richness with a light, herbal note.

Notes

This creamy rotisserie chicken casserole comes together with shredded chicken, al dente egg noodles, and a rich, savory sauce for a comforting weeknight dinner. A base of sautéed onion and garlic, peas, and tender carrots mingles with a silky binder to create a hearty dish, while cheddar melts into every bite for extra cheesy richness.

Make it your own by adding optional add-ins such as mushrooms, red bell pepper, broccoli, or corn for color and texture. You can swap in cooked turkey or ham if you have leftovers. For a lighter version, use part-skim milk and reduce the cheese, or swap cream cheese and sour cream/Greek yogurt for a tangy, creamy variation. If you need a gluten-free option, substitute gluten-free egg noodles and ensure the cream soup and broth are gluten-free, or prepare a quick homemade bechamel as the base. This casserole can be assembled ahead—mix the filling, cover, and refrigerate up to 24 hours; bake from cold, adding a few extra minutes if needed. It also freezes well—freeze baked leftovers or assemble unbaked in a freezer-safe dish for a ready-to-bake meal later.

To finish, bake until bubbling and the top is golden. For a crisper crust, toss breadcrumbs with melted butter and sprinkle over the top before baking. Let the casserole rest for about 10 minutes before serving to allow the sauce to thicken, then garnish with chopped parsley or chives for a fresh finish. Serve with a simple green salad or steamed vegetables to balance the richness.

Tips

Prep and ingredient handling

  • Shred the rotisserie chicken by pulling apart with two forks to create even bite-sized pieces, removing any remaining bones or cartilage for a silky final texture.
  • Cook the egg noodles to just-al dente, then drain thoroughly and rinse briefly to stop the cooking; this prevents mushy noodles after the bake.
  • Finely chop onions and sauté until translucent and lightly golden to develop a deep, savory base; add minced garlic in the last minute or two so it blooms without burning.
  • Thaw frozen peas completely and drain well to avoid extra moisture; substitute with fresh peas if available for brighter color and flavor.
  • Dice carrots evenly and pre-cook briefly if you prefer softer carrots; this ensures even texture throughout the casserole.
  • Warm chicken broth before mixing to prevent a cold liquid from shocking the mixture; using low-sodium broth helps control final salt levels.

Sauce, seasoning, and dairy balance

  • Do not dilute the condensed cream of chicken soup; whisk it directly into the mixture and loosen with warm liquid as needed to reach a creamy yet spoonable consistency.
  • Warm milk before adding to the sauce to prevent separation; whole or 2% milk yields the richest texture.
  • If using cream cheese, whisk it in at the end until completely smooth for extra silkiness; for a lighter version, use 4 oz instead of 8 oz.
  • Sour cream or Greek yogurt adds tang and extra creaminess; whisk in with the sauce and temper if adding directly to hot mixture to avoid curdling.
  • Season gradually: start with 1/2 teaspoon salt and 1/4 teaspoon black pepper, then adjust after tasting once the cheese and soup are mixed in.
  • Paprika adds color and mild sweetness; use sweet paprika for a bright, gentle flavor, or smoked paprika for a deeper, smoky note.
  • Crush dried thyme between your fingers before adding to release essential oils; consider a small amount of parsley or other herbs for a fresh aroma.
  • A pinch of red pepper flakes is optional for a subtle heat; add sparingly and taste as you go.

Noodles and texture

  • Fold the cooked noodles into the sauce while they’re still warm to help them absorb flavors without becoming mushy.
  • If the mixture seems too thick, thin with a splash of warmed broth or milk; if too thin, bake uncovered a bit longer to reduce.
  • For a creamier finish, gently fold in half of the shredded cheddar into the base before topping with the remainder.

Cheese and topping strategy

  • Use sharp or extra-sharp cheddar for a more pronounced cheesy bite; grate fresh for better melt and flavor.
  • Reserve half of the shredded cheddar for the top; this creates a beautiful, bubbly crust when baked.
  • Breadcrumbs or crushed crackers should be tossed with melted butter to ensure even browning; sprinkle evenly across the top to avoid clumps.
  • Finish with a light scatter of freshly chopped parsley or chives after baking to add color and a fresh aroma.

Optional add-ins and substitutions

  • Mushrooms: sauté until browned to remove moisture, then fold in to add earthiness without sogginess.
  • Red bell pepper: dice and sauté with onion for sweetness and color; you can also add raw for crisper bites if you prefer.
  • Broccoli florets: blanch briefly and fold in near the end to preserve bright color and crunch.
  • Corn kernels: use fresh, canned, or thawed frozen corn; pat dry to minimize extra moisture in the bake.

Baking, finishing, and serving

  • Cover the dish with foil for the first portion of baking to prevent the top from browning too quickly; remove the foil for the last 15 minutes to brown the topping nicely.
  • Bake at a moderate temperature until the center is hot and bubbly and the cheese on top is melted and starting to golden; test with a thermometer if you’re unsure (about 165°F/74°C).
  • If you like extra creaminess, whisk a small spoon of sour cream or yogurt into a portion of the sauce before folding it into the casserole for a silkier finish.

Make-ahead, storage, and reheating

  • You can assemble the casserole up to 24 hours ahead; cover tightly and refrigerate, then bake longer (about 25–35 minutes extra) to heat through.
  • Leftovers refrigerate well for 3–4 days; reheat gently in the oven covered, or in a skillet with a splash of broth to re-moisten.
  • For freezing, consider freezing the assembled but unbaked casserole in a freezer-safe dish; bake from frozen, adding 20–30 minutes to the bake time and ensuring it’s heated through.

FAQ

What is Best Rotisserie Chicken Casserole?

Best Rotisserie Chicken Casserole is a creamy, comforting bake that uses shredded rotisserie chicken, tender pasta (or rice), veggies, and a rich cheese sauce. It’s a hands-off weeknight favorite that tastes like it came from a family kitchen, but with minimal effort.

What ingredients do I need?

Common ingredients include:

  • Shredded rotisserie chicken
  • Pasta (elbow macaroni, penne, or shells) or cooked rice
  • Chopped vegetables (peas, corn, bell peppers, or broccoli)
  • Cream soup (cream of chicken or mushroom) or a homemade white sauce
  • Milk or half-and-half
  • Cheese (shredded cheddar, mozzarella, or a mix)
  • Seasonings (garlic, onion, paprika, salt, pepper, herbs)
  • Optional add-ins (bacon, mushrooms, jalapeños)
Can I use leftover rotisserie chicken?

Yes. Shredded leftover chicken works perfectly and saves time. If you have skin-on chicken, you can remove the skin before shredding to keep the casserole lighter.

Can I customize this recipe for gluten-free or dairy-free diets?

Yes. Use gluten-free pasta and dairy-free cream soups or a homemade dairy-free roux. For dairy-free, replace milk/cream with almond or oat milk and use a dairy-free cheese substitute or omit cheese. For gluten-free, ensure all ingredients (including soup or sauces) are certified gluten-free.

How do I assemble and bake the casserole?

Cook pasta until al dente (if using pasta). Mix chicken, vegetables, cooked pasta, and sauce. Pour into a greased baking dish, top with cheese, and bake at 350°F (175°C) for 25–35 minutes until bubbling and golden.

Make-ahead and storage tips

Assemble the casserole without baking, refrigerate up to 1 day before baking. You can also bake ahead and reheat in the oven at 350°F (175°C) until warmed through. Store leftovers in an airtight container for 3–4 days.

Is this dish freezer-friendly?

Yes. Freeze unbaked assembled casserole tightly wrapped and in a freezer-safe container for up to 2–3 months. Thaw overnight in the fridge before baking, then bake a bit longer to heat through. You can also freeze baked leftovers.

How many servings does it yield and how can I portion it?

Typically serves 6–8. Slice into equal portions for even serving sizes. If you need more, double the recipe and bake in a larger dish, increasing bake time as needed.

What variations or add-ins work well?

Try sautéed mushrooms, chopped spinach, broccoli florets, crumbled bacon, sun-dried tomatoes, or a pinch of hot sauce for a kick. Fresh herbs like parsley or chives brighten the dish at the end. You can also swap in cooked quinoa or cauliflower rice for lower carbs.

Introduction / Hook

Imagine a breakfast that feels like a warm embrace: a bagel with a glossy, resonant crust that gives way to a tender, chewy interior. Steam rises as you slice through, releasing a soft perfume of toasty grains and a faint tang that hints at the dairy that makes them uniquely moist. This is the magic of cottage cheese bagels—bagels that marry traditional bakery chew with the light, creamy moisture of cottage cheese, creating a bite that is at once hearty and comforting.

These bagels are more than just a breakfast staple; they’re a small revolution for anyone who loves a bagel that stays soft longer, carries flavor with a gentle tang, and feels satisfyingly filling without being heavy. In every bite you’ll hear the story of a recipe that celebrates texture—chewy, elastic crumb balanced by a delicate crumb structure—while embracing the modern desire for protein-rich, pantry-friendly foods. They toast beautifully, split open with a soft sigh, and hold toppings without collapsing into sogginess. If you crave a morning ritual that feels both cozy and a little indulgent, cottage cheese bagels deliver that welcoming, nostalgic aroma with a contemporary twist.

Beyond the senses, these bagels offer a practical elegance: they’re versatile enough for leisurely weekend brunches, quick weekday breakfasts, or a comforting lunch with a smear of cream cheese and your favorite savory toppers. They invite creativity—savory herbs, sesame seeds, or poppy seeds catching a light roast; a hint of garlic or onion tucked into the dough; or a splash of olive oil brushed on the hot crust for an extra kiss of richness. They’re a reminder that a simple bake can be both indulgent and nourishing, a treat you can feel good about sharing with family and friends.

The Story Behind the Dish

Bagels have a storied past that travels from Eastern European bakeries to bustling American breakfast tables. The chewy rings, boiled to set their starches before they’re baked to a glossy brown, became a symbol of communal mornings in many urban neighborhoods. The version you’re reading today is a nod to that tradition, but with a modern, dairy-forward twist: cottage cheese plays a starring role in the dough, infusing moisture and a gentle tang that complements the classic bagel’s reserve.

The idea isn’t entirely new—home cooks have long experimented with dairy additions to bread dough to achieve a more tender crumb and a richer mouthfeel. Cottage cheese, with its curds and whey, brings a light, milky brightness that can feel almost magical when folded into a dough that needs to stretch and rise. In many kitchens, this kind of adaptation grows from a simple instinct: you want a bread that isn’t dense, that carries a little extra protein, and that stays fresh longer than the usual bagel. The resulting bagels honor the old-world technique of boiling and baking, while embracing a modern pantry staple that makes the dough feel more forgiving and moist. The end product is a bridge—between the timeless charm of a bagel and the bright, contemporary appeal of a dairy-forward loaf.

Personal anecdotes often pop up in conversations about these bagels. A home cook might tell you that a batch changed their weekend mornings: the first bite carried a cloud of warmth that reminded them of Sundays at their grandmother’s table, yet the texture felt refreshingly contemporary, sturdy enough for a hearty topping but tender enough to bite through with ease. Another friend might share how these bagels became a weekday hero, soft enough to toast lightly and still taste like a special treat, making breakfast feel like a little celebration even on busy days. The story is not just about a recipe; it’s about the comfort of a familiar shape reimagined with a gentle, dairy-driven brightness.

Why You’ll Love This Recipe

  • Protein-rich and comforting: cottage cheese brings a nourishing boost without sacrificing the familiar chew and structure of a classic bagel.
  • Moist, tender crumb: the dairy component helps create a softer interior that stays moist longer than traditional bagels.
  • Versatile and forgiving: adaptable to a range of flavorings, toppings, and pairings, from classic schmears to inventive toppings.
  • Great for make-ahead planning: you can prepare a batch, freeze or refrigerate, and toast to reawaken the aroma and texture.
  • Family-friendly and crowd-pleasing: a bake that appeals to kids and adults alike, perfect for weekend breakfasts or casual gatherings.
  • Simple pantry-friendly concept: you can tailor the flavor profile using what you have on hand, without losing the core texture that makes these special.

Flavor Profile & Texture

The first thing you notice when you bite into a cottage cheese bagel is the contrast—the crust offers a subtle snap and a deep, toasty aroma, while the crumb inside stays wonderfully soft and springy. The dairy element lends a mild tang and a gentle sweetness that pairs beautifully with a touch of malt, honey, or a simple savory smear. The texture is what truly defines these bagels: an outer crust that resists tearing, a hollow-sounding crack when you slice into it, and a ropey, elastic center that breathes as you bite.

In flavor terms, think of a balanced profile where the dairy notes don’t overpower the grains but rather lift them. There’s a quiet richness that comes with cottage cheese, a slight brightness from the natural acidity of cultured dairy, and a toasty warmth from the baking process. The resulting taste is versatile—savory enough to pair with smoked fish or tangy cream cheese, yet gentle enough to work with fruits and sweeter toppings if you’re in the mood for a brunch-with-dessert vibe. The aroma is inviting: a warm, bakery-like scent that wraps around you as the bagels emerge from the oven, a smell that says, “morning is here, and it’s going to be good.”

Texture-wise, the interior is pleasantly airy and resilient. It’s not a bread that collapses when you tear into it; instead, it offers a springy bite that returns with a bit of give. The crust, while glossy and crisp from the boil, softens ever so slightly as it cools, preserving that characteristic chew that defines a well-made bagel. The combination of moisture from the dairy and the starch’s natural structure creates a bagel that remains enjoyable from the moment you slice it to the last bite later in the day.

Occasions & Pairings

These cottage cheese bagels shine in a range of settings, from casual weekday mornings to leisurely weekend gatherings. Their flexibility makes them a practical choice for meal planning, school lunches, or a brunch spread that invites guests to experiment with toppings.

  • Weekday breakfast: toast lightly and top with herbed cream cheese, tomato slices, and a sprinkle of salt and pepper for a quick, satisfying start to the day.
  • Brunch centerpiece: serve with a trio of toppings—savory smoked salmon with capers, a bright herb-spread, and a sweet fruit compote—to create a balanced tasting station.
  • Lunch-friendly option: slice and fill with eggs, avocado, crisp lettuce, or your favorite lean protein for a portable lunch that travels well.
  • Special occasions: pair with sparkling beverages, a light salad course, or a cheese board to offer a twist on the classic bagel-and-smear combo.

Flavor partners are vast. Cream cheese remains a classic companion, but you can go in many directions: a tangy chive and feta blend, a smoky hummus spread, roasted peppers, or a creamy avocado mash. For savory lovers, a smear of garlicky herb cream cheese or a dollop of tangy yogurt-based sauce can complement the dough’s delicate tang. If you’re leaning into a sweeter angle, a touch of honey or berry preserves on a lightly toasted bagel can be a surprisingly harmonious contrast to the subtle dairy notes.

Tips, Variations & Substitutions

The beauty of cottage cheese bagels lies in their adaptability. Here are ideas to tailor the texture, flavor, and dietary needs without straying from the core concept.

  • Texture tweaks: for an extra-chewy bite, use bread- or high-gluten-style dough base and allow for a longer, cooler rising period. The extra time helps develop the gluten network for a more pronounced chew while preserving moisture from the dairy.
  • Flavor twists: fold in finely chopped fresh herbs, mild garlic powder, or finely grated onion in the dough for aromatic notes. Top with sesame seeds, poppy seeds, or a mix of seeds for added fragrance and crunch.
  • Whole grain warmth: substitute a portion of the base grain with whole wheat or spelt for a nuttier flavor and a heartier texture, while keeping the soft crumb thanks to the cottage cheese’s moisture.
  • Gluten-free option: for gluten-free lovers, use a 1:1 gluten-free flour blend designed for yeast breads, and add a small amount of binding agent (such as xanthan gum) as recommended by your GF flour blend’s guidance. Be prepared for a slightly different rise and texture, but the dairy moisture will still help keep the crumb appealing.
  • Vegan-friendly approach: for those avoiding dairy, substitute with a plant-based yogurt or yogurt alternative and a plant-based cheese that melts well. Add a touch of a mild acidic element (like lemon juice) to mimic the brightness cottage cheese would normally contribute, and consider a flax egg or other vegan binder if needed for structure. Note that the flavor and texture will shift slightly, but a careful balance can yield a satisfying result.
  • Herb and spice variations: experiment with dill, chives, or tarragon for a fresh, garden-inspired aroma; a pinch of smoked paprika or cumin can give a subtle smokiness that works wonderfully with eggs or avocado toppings.
  • Sweet edge: for a brunch twist, consider a light cinnamon-sugar finish on the crust and a dollop of ricotta or cream cheese with fruit preserves as a topping—this playful contrast can be delightful for a weekend treat.

A few practical notes: keep the dough hydrated enough to stay supple—if you’re experimenting with gluten-free or alternative flours, you may need to adjust moisture levels to prevent a dry crumb. Let doughs rest if they feel tight; warmth can help a dough relax and rise better, but a cool overnight rest can deepen flavor and improve texture. Finally, when shaping, aim for evenly sized portions so all bagels bake at the same rate, producing uniform texture and crust.

Storage & Make-Ahead Ideas

One of the joys of bagels is their versatility for make-ahead planning. Once baked and completely cooled, store them in an airtight container or zip-top bag at room temperature for a couple of days. If you’re preparing ahead, you can freeze individual bagels; wrap them well to prevent freezer burn, and freeze for up to a few months. When you’re ready to enjoy, simply rewarm them in a toaster, oven, or skillet to revive the crust’s gloss and restore some of that comforting snap.

A smart approach is to portion your bagels into singles or halves before freezing. This makes it easy to grab just what you need for a quick breakfast or lunch. For week-ahead planning, you can also freeze partially baked bagels for a faster finish—this preserves moisture and gives you a fresh-baked experience in a fraction of the time.

If you’re refrigerating leftovers, allow the bagels to cool fully, then place them in an airtight container. Reheat slowly to prevent drying out; a light toast or warm oven reawakens their soft interior and crusty exterior. For a crisper crust after toasting, brush a touch of water on the surface just before the final warm-up to help steam and heat evenly.

Fun Facts & Trivia

  • The technique of boiling bagels before baking is what gives them their characteristic chewy texture. The boiling starches set, creating a tight, glossy crust that holds up to toppings and spreads.
  • Bagels have a storied history in Jewish immigrant communities in North America, where they became a staple for early morning breakfasts in bustling markets and delis before becoming a worldwide icon.
  • Cottage cheese, a versatile dairy product, has a long-standing place in savory and sweet dishes. Its mild tang and creamy texture make it a natural ally for bread and doughs that crave moisture without heaviness.
  • All-in-one idea: the cottage cheese bagel is an example of how a single pantry staple can redefine a classic—proof that tradition and innovation can happily coexist in the same kitchen.

Ingredients

Bagel Dough

    – 2 1/2 cups bread flour (plus extra for kneading)
    → Chewy bagel texture relies on high-gluten flour; bread flour provides the protein needed to form a strong gluten network. Start with 2 1/2 cups and add a tablespoon or two more if the dough feels dry or stiff. Dust the counter lightly with flour to prevent sticking during kneading, but avoid adding too much flour to keep the dough hydrated.
    – 1 cup well-drained cottage cheese, pureed until very smooth
    → Cottage cheese provides moisture and a slight tang while adding protein; blending into a smooth puree eliminates lumps and ensures even distribution through the dough. Drain well if there is excess whey; too much liquid will weaken the dough structure. If you prefer a heavier cheese flavor, use full-fat cottage cheese.
    – 2 large eggs, divided: 1 for dough, 1 for egg wash (see notes)
    → Eggs enrich the dough, contributing tenderness and structure. Use one egg folded into the dough to bind and moisture the crumb; reserve the second egg for an optional glossy egg wash if you want a shiny crust. Bring eggs to room temperature for easier mixing and to avoid crusty spots in the dough.
    – 1 teaspoon instant yeast
    → Instant yeast is convenient and speeds up rise because it can be mixed directly with dry ingredients. If you only have active dry yeast, use 2 1/4 teaspoons and proof in 1/4 cup warm water with a pinch of sugar for 5–10 minutes before adding to the dough.
    – 2 teaspoons granulated sugar
    → Sugar feeds the yeast and helps browning while baking; it also balances the tang from cottage cheese. If you prefer a savory profile, you can reduce to 1 teaspoon or replace with honey or maple syrup, adjusting the liquid slightly to maintain dough hydration.
    – 1 teaspoon salt
    → Salt strengthens gluten and enhances flavor; distribute evenly in the dry ingredients for consistent seasoning. If your cottage cheese is salted, you may want to reduce this to 1/2 teaspoon.
    – 1 tablespoon olive oil (optional)
    → Oil improves dough softness and extensibility, helping with shaping and preventing sticking. If omitted, you may need a touch more water and flour during kneading; the crust may be slightly crisper but still tasty.
    – 1/4 to 1/3 cup warm water (as needed)
    → The cottage cheese influences hydration; start with 1/4 cup and add a little at a time until the dough comes together into a smooth, slightly tacky ball. Use warm water if the dough seems sluggish to come together, but avoid hot water that could kill the yeast.

Boiling & Finish

    – 2 quarts water for boiling
    → Boiling the shaped dough before baking creates the signature chewy crust by gelatinizing surface starches. Keep at a gentle simmer, not a rolling boil, to prevent bagels from deforming. The boil time is usually 1–2 minutes per side; adjust based on thickness and color desired.
    – 1 tablespoon barley malt syrup or 1 teaspoon sugar (for boil)
    → Malt syrup gives characteristic bagel color and shine; if you don’t have malt syrup, a touch of sugar in the boil promotes browning. You can skip if you want a more neutral crust, but the color might be lighter.
    – 1 tablespoon cornmeal or semolina for dusting (optional)
    → Dusting the boiling surface or the baking sheet helps prevent sticking and adds subtle texture. Not essential, but helpful for release and crust texture.

Egg Wash & Toppings

    – 1 large egg for egg wash, beaten with 1 tablespoon water (optional)
    → The egg wash gives bagels a glossy, golden crust when brushed on after boiling and before baking. Ensure the surface is dry before applying wash to avoid pooling. If you’re vegan, skip the wash or use a plant-based alternative.
    – 1 tablespoon sesame seeds
    → Adds a nutty aroma and crunch; press seeds into the surface after applying the wash so they adhere well. Toast seeds lightly beforehand to deepen flavor if desired.
    – 1 tablespoon poppy seeds
    → Classic appearance and a mild, nutty note. Use sparingly to maintain balance with the cheese base; press onto the surface after washing for best adhesion.
    – 1 tablespoon Everything bagel seasoning (optional)
    → A ready-made mix of sesame, poppy seeds, dried garlic, dried onion, and salt; adds bold savory flavor. Apply lightly so it complements rather than overpowers the cheese flavor. Check salt content to avoid over-salting.
    – 1 teaspoon dried onion flakes (optional)
    → Adds savory aroma; rehydrate briefly in a pinch of warm water before applying to help them stick and release their flavor.
    – 1 teaspoon dried garlic flakes (optional)
    → Provides a warm, savory note; rehydrate slightly before applying for better adhesion and aroma. Use sparingly to avoid overpowering the dough.

Instructions

  • Measure and whisk the dry ingredients: 2 1/2 cups bread flour, 1 teaspoon instant yeast, 2 teaspoons granulated sugar, and 1 teaspoon salt in a large mixing bowl until evenly distributed and free of clumps.
    → Even dispersion of salt and sugar ensures uniform fermentation and flavor; whisking minimizes dry pockets that could hinder gluten development.
  • Puree cottage cheese until very smooth: in a blender or food processor, blend 1 cup well-drained cottage cheese until completely smooth; if needed, press through a fine sieve to remove any remaining lumps, then drain any extra whey until the puree resembles thick yogurt.
    → A smooth puree distributes moisture evenly and prevents pinpoint pockets of moisture that can weaken the dough’s structure.
  • Beat one large egg and whisk it into the cottage cheese puree; add 1 tablespoon olive oil (if using) and begin adding warm water 1/4 cup at a time until the mixture is thick but pourable.
    → The egg provides moisture and helps bind the crumb; warming ensures better emulsification and a tender crumb. Add water gradually to avoid a overly wet dough.
  • Combine the wet mixture with the dry ingredients and mix until a shaggy dough forms; use a spatula or stand mixer on low speed to prevent flour dust from escaping; scrape down as needed.
    → This initial combination coats flour with moisture and begins gluten development without tearing the dough.
  • Turn the dough out onto a lightly floured surface and knead for 8 to 10 minutes until the dough is smooth, elastic, and just slightly tacky; perform the windowpane test by stretching a small piece between your fingers until it becomes translucent without tearing.
    → Kneading develops the gluten network that gives bagels their chew; the windowpane test confirms sufficient gluten strength for a sturdy crust and interior.
  • Oil a clean bowl, place the kneaded dough inside, cover with plastic wrap or a damp towel, and let it rise in a warm spot until doubled in size, about 60 to 90 minutes; avoid drafts and ensure the surface remains moist enough to prevent a skin from forming.
    → Environmental control yields consistent rise and prevents a crusty surface that would impede expansion during boiling and baking.
  • Gently punch the dough down to release gas, transfer to a lightly floured surface, and divide into 8 equal portions; if you prefer uniform sizing, weigh each piece to about 110 grams.
    → Even portions ensure uniform bagel size for even cooking and predictable yield.
  • Shape each portion into a tight ball, then use your thumb or a smooth cupped hand to poke a hole in the center and gently stretch to form a ring about 1 1/2 to 2 inches in diameter; pinch the seam to seal completely to prevent the hole from closing during boiling.
    → A well-sealed center ring prevents loss of the bagel’s shape and ensures a classic bagel hole that remains visible after boiling and baking.
  • Place shaped bagels on a parchment-lined baking sheet dusted with a little cornmeal or semolina, cover loosely, and allow a second proof 20 to 30 minutes; they should puff slightly but not double.
    → The second proof gives surface tension and helps bagels retain their chewy crust after boiling.
  • Meanwhile, preheat a wide pot of water to a gentle simmer over medium heat and add 1 tablespoon barley malt syrup or 1 teaspoon sugar to the water; this creates the characteristic bagel crust color and flavor.
    → Malt syrup or sugar in the boil helps with browning and gives that desirable chewy exterior; do not skip if you want traditional color.
  • Once the bagels are ready to boil, slide them into the simmering water a few at a time using a slotted spoon, boil for 1 to 2 minutes per side, turning halfway; keep the water at a gentle simmer to avoid deforming the rings.
    → Boiling gelatinizes surface starches, creating the crusty chew that defines bagels; time affects crust thickness.
  • Carefully lift bagels out of the water with a slotted spoon and drain on a clean towel for about 30 seconds, then transfer to the prepared sheet; you can re-briefly dry the tops if they’re too wet to improve adhesion of toppings.
    → Removing surface moisture prevents toppings from sliding off and helps the bagel surface crisp during baking.
  • Brush the tops with the second egg mixed with 1 tablespoon water to form an even, glossy surface, then apply toppings: sesame seeds, poppy seeds, or Everything bagel seasoning; lightly press toppings to help them adhere while the egg wash is still tacky. Optional: rehydrate dried onion or garlic flakes briefly in a drop of warm water before applying.
    → The egg wash promotes a shiny finish and gives toppings something to cling to; pressing ensures even coverage and flavor distribution.
  • Preheat the oven to 425°F (218°C) and bake the bagels on the sheet for 15 to 20 minutes, rotating the sheet halfway for even browning, until the crust is deeply golden and the interior sounds hollow when tapped.
    → A high initial heat helps set the crust quickly for chew and a uniform crumb; rotation ensures even color and texture across all bagels.
  • Transfer the bagels to a wire rack and let cool at least 15 to 20 minutes before slicing to allow the crumb to finish setting, which improves chew and prevents crumbles.
    → Cooling unlocks moisture and stabilizes the structure; slicing too soon yields gummy crumbs.
  • Store leftovers, if any, in an airtight container at room temperature for up to 2 days or freeze once cooled, then reheat in a toaster or under a hot oven to restore crust crispness.
    → Proper storage preserves texture and flavor; freezing slows staling and toasting revives the chew.

Notes

These cottage cheese bagels are tender and chewy with a mild tang from the smooth cottage cheese blended into the dough. Purée the cottage cheese until completely smooth and drain well to keep the dough from getting too loose; too much liquid will weaken structure. Start with 2 1/2 cups bread flour for a strong gluten network and only add more by the tablespoon if the dough feels dry or stiff. One egg folded into the dough helps bind moisture and tenderness, while the second egg is reserved for a glossy wash if you want a shiny crust. If the dough seems slow to come together, warm the water slightly and mix in gradually, aiming for a smooth, slightly tacky ball for easy shaping.

For a classic bagel finish, boil the shaped rounds in 2 quarts of gently simmering water with a tablespoon of barley malt syrup or a teaspoon of sugar to promote browning; 1–2 minutes per side gives a chewy, fully set crust. After boiling, brush with the optional egg wash for a glossy surface and press on toppings such as sesame seeds, poppy seeds, or Everything bagel seasoning; press firmly so they cling through baking. A light dusting of cornmeal or semolina on the counter or baking sheet aids release and adds a subtle crunch to the bottom crust. If you’re including onion or garlic flakes, rehydrate them briefly before applying so they stick and release aroma.

To store and customize, cool completely before freezing; bagels can be frozen once baked or shaped and par-boiled for faster weeknight baking. Rewarm from frozen in a toaster or oven. Fresh bagels last 2–3 days at room temperature in a loosely closed bag; freeze for longer storage. For variations, stir in chopped herbs or minced roasted garlic into the dough, reduce or increase sugar to taste, or swap the olive oil for extra water if you prefer a crisper crust. Always check your cottage cheese’s salt level; if it’s salty, reduce the added salt in the dough to keep the flavor balanced.

Tips

Hydration and dough texture

Because cottage cheese adds moisture, start with the 1/4 cup warm water and add more in small increments until the dough comes together as a smooth, slightly tacky ball. If the dough feels dry or stiff, drizzle in a little more water or a splash of olive oil to improve extensibility. Kneading should develop a strong gluten network; use the windowpane test (stretch a small piece until it becomes translucent) to gauge readiness.

Mixing and kneading technique

Whether by hand or with a stand mixer, mix until the dough is cohesive and elastic, not crumbly. If using a mixer, knead on medium speed for 6–8 minutes. If by hand, give the dough 10–12 minutes of steady kneading, dusting lightly with flour only as needed to prevent sticking.

Yeast and fermentation tips

Instant yeast is convenient, but if you only have active dry yeast, proof it in warm water (about 105–110°F/40–43°C) with a pinch of sugar for 5–10 minutes before adding to the dough. For richer flavor, consider a brief cold fermentation: after the first rise, refrigerate the dough 8–12 hours, then bring to room temperature before shaping.

Handling cottage cheese

Puree the cottage cheese until completely smooth to avoid lumps that can create uneven crumb. If the cottage cheese brand is very watery, drain excess whey well; too much liquid weakens dough structure. For a lighter texture, use a part-skim cottage cheese; for a richer crumb, full-fat works well.

Shaping the bagels

Divide the dough evenly and roll each piece into a tight ball before poking a hole with your finger to form a ring. Gently stretch the hole to about 1–2 inches in diameter to prevent shrinking during boiling and baking. If the dough resists shaping, let it rest 10–15 minutes covered; this relaxes the gluten and makes shaping easier.

Boiling the bagels

Keep the boil at a gentle simmer and boil each bagel 1–2 minutes per side for a chewy crust. Do not overcrowd the pot. After boiling, lift the bagels with a slotted spoon and let excess water drain briefly on a rack or parchment before applying toppings and baking.

Toppings and adhesion

Apply toppings after boiling and while the surface is still damp from the brief drain, but before the bagels go into the oven. If using an egg wash, brush lightly to avoid pooling. For seeds, press gently to help them adhere; to maximize flavor, toast sesame or poppy seeds briefly in a dry skillet before use.

Egg wash and crust color

The egg wash provides a glossy, golden crust; if you prefer a lighter finish, skip the wash or use just the egg white for a shinier surface. Bring the egg to room temperature to ensure an even wash and to prevent streaking on the crust.

Baking temperature and time guidance

Preheat the oven to 425°F (220°C). Bake the bagels until deep golden brown, typically 12–15 minutes, rotating halfway for even color. If you’re using a convection oven, you may shorten bake time slightly and monitor closely to prevent over-browning.

Flavor variations and substitutions

For a milder cheese flavor, use part-skim cottage cheese; for a richer crumb, use full-fat cottage cheese. If you want a savory punch, add a pinch of garlic or onion powder to the dough or try Everything bagel seasoning as a topping. You can also experiment with honey or maple syrup in the dough for a subtle sweetness balanced by the tang of cottage cheese.

Make-ahead, storage, and freezing

Bagels can be baked ahead and frozen once cooled. Cool completely, wrap tightly, and freeze for up to 1 month. Reheat directly from frozen in a 350°F (175°C) oven for 8–10 minutes or toast to restore crust crispness. For best texture, store leftovers in an airtight container for 1–2 days at room temperature.

FAQ

Cottage Cheese Bagels – FAQ

What are cottage cheese bagels?

They are soft, chewy bagels enriched with cottage cheese. The cheese adds moisture, tenderness, and extra protein, giving a slightly creamy crumb and a subtle tang.

Do these bagels require yeast?

Yes. Yeast helps the dough rise and creates the characteristic chewy texture. Use active dry yeast or instant yeast; if using instant, you can reduce rising times accordingly.

What ingredients are in cottage cheese bagels?

Common ingredients include flour (all-purpose or bread flour), cottage cheese (well-drained or blended into the dough), water, yeast, salt, and sometimes a bit of sugar or honey. Optional additions include eggs for richness or a splash of milk for extra tenderness.

Should I blend or drain the cottage cheese?

For a smooth dough, blend the cottage cheese until silky. If you prefer a chunkier crumb, mash it or stir in small curds. If the cottage cheese is very wet, drain some of the liquid to avoid a sticky dough.

How do I shape and boil cottage cheese bagels?

Shape dough into round portions and poke a hole in the center to form a ring. Boil in gently simmering water (optionally with a little sugar or malt) for 1–2 minutes per side to set the crust, then bake until golden.

What toppings work well?

Popular toppings include sesame seeds, poppy seeds, everything bagel seasoning, minced onion or garlic, or plain. Add toppings immediately after boiling and press them lightly to help adhesion before baking.

Can I freeze the dough or baked bagels?

You can freeze shaped, unbaked dough rounds after the final rise, or freeze fully baked and cooled bagels. Wrap tightly and store in the freezer. Reheat by baking or toasting from frozen, or thaw first.

How long does it take to make cottage cheese bagels?

Active steps typically take about 1.5–2 hours, including mixing, kneading, rising, shaping, boiling, and baking. Total time, with rising, is usually around 2–3 hours depending on your dough and kitchen temperature.

Can I make them healthier or lower in carbs?

To adjust nutrition, try using a portion of whole wheat or a mix of whole wheat and white flour, which adds fiber and flavor. Reducing cheese slightly and adding extra protein like flax or chia can change texture, so you may need to adjust hydration. For lower-carb options, substituting part of the flour with almond or coconut flour will require changes to the liquid and rising times.

How do I store leftover bagels?

Store cooled bagels at room temperature in an airtight container for 2–3 days. For longer storage, freeze. Reheat by toasting or warming in a 350°F (175°C) oven for a few minutes.

Can I make dairy-free or vegan version?

For a dairy-free or vegan version, substitute the cottage cheese with a plant-based alternative such as blended silken tofu with a little non-dairy yogurt or a dairy-free ricotta substitute. Expect some differences in texture and moisture; you may need to adjust flour and liquid amounts accordingly. Lactose-free cottage cheese can be used if preferred.

Introduction / Hook

Imagine a breakfast that fits in your hand, yet feels like a celebration on a plate. The Irresistible Breakfast Crunchwrap is a symphony of textures and flavors designed to wake up your senses the moment you slice into it. Picture a warm tortilla cradle, its edges toasted to a delicate, honey-gold crisp, holding a cozy cloud of fluffy eggs and melty cheese. Inside, you’ll find pockets of savory richness—crisp potatoes or hash browns, sizzled breakfast meats or their vegetarian counterparts, and a bright, zippy kiss of salsa or crema that keeps every bite lively. On the outside, a crackling crunch gives way to a soft, steamy core, so every mouthful delivers a chorus of contrasts: hot and cool, salty and tangy, creamy and crunchy. It’s the kind of breakfast that makes mornings feel like a little celebration, a portable brunch you can savor on the go, yet still feel indulgently comforting at home.

The Story Behind the Dish

The idea for a breakfast that echoes the beloved Crunchwrap format—a handheld, all-in-one wrap with layers of texture—sprung from playful kitchen experiments and a love for weekend brunch traditions. It’s a marriage of two comforting breakfast motifs: the grab-and-go practicality of a burrito and the irresistible texture of a crispy tortilla edge. The concept nods to the way cultures around the world layer morning flavors—from the egg-and-cheese comfort of a classic American breakfast sandwich to the earthier, savory notes of a well-seasoned hash brown patty. The “crunch” in this dish isn’t merely about sound; it’s about the gentle toasting of each layer, the way a tortilla’s surface develops a kissed, caramelized sheen, and the way cheese melts into the nooks of egg and potato to form a cohesive bite that feels like a cozy hug in edible form. The origin story isn’t tied to a single place or tradition; instead, it’s a culinary memory shared by families who value speed without sacrificing savor, who want something substantial enough to anchor a morning, yet playful enough to brighten even the dreariest weekday. It’s a dish born from the desire to turn ordinary mornings into something worth waking up for, a portable feast that travels well, reheats beautifully, and invites experimentation with flavors you love. Think of it as a modern breakfast heirloom—versatile, forgiving, and endlessly adaptable to the pantry you keep and the cravings you wake up with.

Why You’ll Love This Recipe

  • One-hand, on-the-go friendly: Perfect for busy mornings, campus dorms, or weekend road trips.
  • Comforting yet exciting: A cozy egg-and-cheese core wrapped in a crisp, toasty shell with a bright finishing note of salsa or crema.
  • Customizable to fit any diet: Swap in plant-based proteins or cheese substitutes, or keep it veggie-forward with a hearty veggie scramble.
  • Make-ahead friendly: Assemble in advance and cook when you’re ready, or prepare components ahead to speed up week-day mornings.
  • Visual appeal: The layered structure is as photogenic as it is delicious—perfect for weekend brunch menus or a shareable breakfast board.
  • Balances flavors with texture: Creamy interior contrasts with a crunchy exterior; smoky, tangy, and savory notes mingle in every bite.

Flavor Profile & Texture

The Irresistible Breakfast Crunchwrap is a celebration of contrasts that somehow coexist in perfect harmony. The outer shell delivers a satisfying crackle and a toasty aroma, a signal that the experience inside will be both comforting and exciting. Within that shell, a soft, cloud-like interior of eggs provides a gentle, airline-soft texture that melts into the mouth. Cheese acts as a creamy bridge, weaving its rich, dairy-sweet notes through the other components and helping to fuse disparate flavors into a single, cohesive bite. Potatoes or hash browns introduce a toasty, roasted earthiness with a subtle starchiness that yields to a crisp edge on the pan or griddle. If meat is included, you’ll experience smoky, savory notes—bacon, sausage, or their plant-based equivalents—that bring a sun-warmed savor to the mix. For brightness, salsa, pico de gallo, or a dollop of tangy crema punctuate the center, delivering acidity, freshness, and a slight heat that lingers pleasantly without overpowering the other elements. The balance of salt from the cheese and cured meat (when used) with the zing of fresh herbs or green onions creates a layered profile that keeps the palate engaged from first bite to last. The texture journey—crunch, cream, melt, and a whisper of crispness in the finish—turns a simple breakfast into an event worth savoring, whether you’re sharing with family around a sunlit kitchen table or enjoying a quiet, solitary morning. This dish thrives on its ability to morph with your mood and pantry: it can feel indulgent with rich cheese and savory proteins, or bright and lighter with extra vegetables and a lighter cheese choice, all while preserving that signature crunch.

Occasions & Pairings

This breakfast wrap shines in many scenarios, making it a versatile addition to your culinary repertoire. It’s ideal for weekend brunch gatherings where guests arrive hungry after a leisurely morning, as it scales up easily to serve a crowd with a few extra wraps on hand. It also fits perfectly into weekday routines when you need a comforting, satisfying breakfast that travels well—think home-to-work mornings, road trips, or early-morning school runs. For special occasions, it can be plated with style as a centerpiece of a brunch spread, alongside a fresh fruit salad, yogurt parfaits, and a bowl of roasted tomatoes for color and aroma. When it comes to pairings, consider beverages and sides that complement the dish’s warmth and heft: a strong, hot cup of coffee with a touch of cream; a glass of fresh orange juice or a lightly sparkling beverage to cut through the richness; and a side of orchard-fresh fruit to add brightness and balance. If you’d like a more layered pairing, serve with a lightly dressed greens salad to introduce acidity and contrast, or with a simple avocado crema on the side to echo the dish’s creamy notes. For those hosting a brunch bar, offer a few sauce options—green salsa, pico de gallo, or a smoky chipotle crema—to allow guests to customize each wrap to their taste. The dish also adapts beautifully to seasonal ingredients: in colder months, heartier fillings like roasted peppers and onions or a sausage substitute bring warmth; in spring and summer, crisp herbs, fresh tomatoes, and a lighter cheese choice can lift the dish into a bright, sun-kissed mood.

Tips, Variations & Substitutions

Tips for the Best Crunchwrap Experience

While you don’t need a recipe card to enjoy this dish, a few mindful tweaks can elevate every bite. Start with a tortilla that’s sturdy enough to hold the fillings yet pliable enough to wrap without tearing. If your tortilla buckles under pressure, warm it gently to restore elasticity. Use a light touch with fillings to maintain that signature layer structure—you don’t want a soggy interior or a crowded wrap that won’t seal. For a crisp outer shell, toast or pan-sear the wrap briefly on a hot surface, letting the edges seal naturally as the tortilla browns. A gentle press during the finishing stage helps the wrap compact into a neat, manageable package with a visibly crisp edge. If you’ll be reheating leftovers, re-crisp the exterior in a skillet or air fryer to recapture that initial crunch and aroma.

Variations & Substitutions

The beauty of this dish lies in its adaptability. Here are ways to tailor it to your preferences or dietary needs:

  • Vegetarian: Swap in a hearty plant-based protein option or extra veggies, and use a cheese blend that melts well. A scramble made from tofu or chickpea flour can mimic the texture of eggs for lacto-vegetarian options.
  • Vegan: Use a vegan cheese that melts smoothly, a tofu or chickpea scramble, and a vegan crema or cashew-based dressing for creaminess. Choose vegan tortillas and a plant-based sausage or mushroom hash for depth.
  • Gluten-free: Opt for certified gluten-free tortillas (corn tortillas work beautifully) and ensure any added sauces are gluten-free. The crunch and layers remain just as delicious.
  • Low-carb or keto-friendly: Use large lettuce leaves or low-carb tortillas and keep the fillings high-protein with turkey or sausage substitutes, extra eggs, and cheese, while trimming starchy potatoes. A lighter salsa can preserve brightness without adding sugar.
  • Regional twists: Add a hint of smokiness with chipotle peppers in adobo, incorporate Mediterranean notes with feta and sautéed spinach, or bring Mexican-American comfort with chorizo and poblano peppers for a bolder finish.
  • Kid-friendly tweaks: Mild cheese blends, plain scrambled eggs, and a gentle salsa or a dollop of sour cream on the side can make this a hit with younger tasters who prefer familiar flavors.

Flavor Adjustments

If you crave more brightness, fold in fresh cilantro, a squeeze of lime, or a touch of pickled onions. For a richer bite, add a kiss of crema or sour cream within the center. For spiciness, a dash of jalapeño or a drizzle of hot sauce can wake up the palate without overpowering the other flavors. If you love a deeper egg flavor, a pinch of paprika or smoked paprika can deliver a gentle smoke that complements the cheese and any meat you’ve included. If you’d like a more rustic texture, leave some of the potato chunks a bit chunkier—these little pockets of starchy bite add contrast to the creamy egg and melted cheese.

Storage & Make-Ahead Ideas

One of the strengths of the Irresistible Breakfast Crunchwrap is its flexibility for make-ahead planning. You can assemble the wraps and refrigerate them for a day or two before cooking, ensuring you wake up to a quick, ready-to-cook breakfast option. If you anticipate needing to reheat, consider cooking the outer shell first to set it in a way that it can re-crisp nicely when reheated. Leftovers store well in an airtight container in the refrigerator for up to 2–3 days, though the texture is at its best soon after cooking. For longer storage, you can freeze assembled, uncooked wraps—wrap each tightly in plastic wrap and place in a freezer-safe bag. When you’re ready to enjoy, thaw overnight in the fridge, then cook as you would fresh, ensuring the exterior achieves that satisfying crunch. Reheating options include a hot skillet to restore crispness, an air fryer for a fast, even finish, or a 350°F oven if you’re reheating multiple wraps at once. If you’re planning a brunch binge, line up a few assembled wraps, refrigerate, and call them up as you need them. A crisp outside and a piping-hot interior can be achieved with a quick reheat, allowing you to serve a steady stream of comforting bites without sacrificing texture or flavor.

Fun Facts & Trivia (Optional)

Here are a few bite-sized tidbits that add a little extra flavor to the lore of this dish. The concept of a hand-held, multi-layered wrap with a crisp outer edge draws inspiration from popular fast-casual formats that celebrate portability and speed without sacrificing taste. The name and structure evoke the nostalgia of crunchy layers and melty centers, blending the best of breakfast burritos, quesadillas, and pan-fried discs into a single, shareable experience. The approach to make-ahead and versatile fillings reflects contemporary home cooking’s love affair with meal-prep-friendly breakfasts—foods that can be cooked, stored, and enjoyed with minimal fuss while still feeling indulgent and special. In many households, the “wrap” is a symbol of togetherness—a simple, familiar way to bring people around the table for a morning feast that travels well and leaves everyone satisfied. And if you’ve ever watched the crisp edge of a tortilla transform under a hot skillet into a honey-gold shell, you’ve witnessed a small daily miracle that this dish celebrates with gusto.

Ingredients

Irresistible Breakfast Crunchwrap
Crunchwrap Base

  • – 6 large flour tortillas (10-inch burrito-size)
    → These shells form the outer wrapper of the Crunchwrap, containing all fillings and giving the signature foldable, handheld structure. Warm them briefly to make them pliable (about 20-30 seconds per side) to prevent tearing when folding and to help them seal nicely when toasted. If you prefer a gluten-free option, substitute with certified gluten-free large tortillas; handle carefully as gluten-free wraps can be more delicate and prone to cracking.
  • – 1 cup shredded cheddar cheese (or Mexican blend)
    → The cheese melts into the eggs and hash browns, acting as a binding and flavor anchor that helps hold the filling together when the wrap is heated. For best melt, shred just before use rather than using pre-shredded blends containing anti-caking agents.
  • – 2 cups frozen hash browns (shredded), thawed and patted dry
    → Provides a crispy potato layer that contrasts with the soft eggs and cheese. Thaw completely and pat dry to minimize extra moisture; cook hash browns until they are lightly golden and crisp to maximize texture inside the wrap.
  • – 1 tablespoon vegetable oil
    → Used to lightly grease the pan for hash browns and to help toast the tortilla edges for a crisp shell. Use a neutral oil with a high smoke point; add just enough to lightly coat the pan.

Egg and Protein Filling

  • – 6 large eggs
    → Primary protein source and a natural binder that helps hold the filling together inside the wrap. Whisk eggs with a splash of milk and a pinch of salt before cooking for soft, tender curds; scramble gently until just set for a creamy interior.
  • – 1/4 cup milk (optional)
    → Lightens and softens the scrambled eggs, yielding a creamier texture. Use dairy or a non-dairy alternative; omit if you prefer firmer eggs, but the wrap will be less creamy.
  • – 8 oz breakfast sausage crumbles (or 6 slices bacon, cooked and crumbled)
    → Adds savory depth, fat, and protein. Pre-cook until browned and crumbly; drain excess fat to avoid soggy layers and to keep the wrap cohesive when folded and toasted.

Condiments and Fresh Toppings

  • – 1/2 cup pico de gallo or salsa
    → Brightness, acidity, and moisture that cut through richness. If your salsa is very watery, drain a bit before adding to prevent soggy layers; fresh pico or chunky salsa yields better texture than overly smooth sauces.
  • – 1/4 cup sour cream
    → Creamy coolness that counterbalances heat and adds moisture. Use as a drizzle inside the wrap or serve on the side for dipping; keep refrigerated until ready to use.
  • – 1 ripe avocado, sliced or mashed into guacamole
    → Provides rich creaminess and a silky counterpoint to savory fillings. Choose a ripe-but-firm avocado; slice just before serving to prevent browning or mash with a pinch of salt and lime juice for quick guacamole. Add inside the wrap for creamy layers or serve on top after cooking.

Seasonings and Finishing

  • – 1/2 teaspoon salt
    → Flavor amplifier across eggs, meat, and potatoes; adjust to taste. Sprinkle into eggs while cooking for even distribution or season hash browns as they cook.
  • – 1/4 teaspoon black pepper
    → Adds mild heat and depth; freshly ground pepper yields more aroma and bite; adjust according to preference.
  • – 1/2 teaspoon garlic powder
    → Subtle savory depth that complements all fillings; sprinkle into eggs, hash browns, or sausage for an aromatically balanced profile.
  • – 1/2 teaspoon chili powder or paprika (optional)
    → Introduces a hint of smokiness or heat; adjust to taste for preferred spice level; can be mixed into eggs or sprinkled on hash browns.
  • – Cooking spray or 1 tablespoon butter for crisping
    → Enables a crisp, golden shell when toasting the Crunchwrap; butter adds richer flavor, while spray or light oil keeps it lean. Apply evenly to the pan and tortilla edges before toasting.

Optional Add-ins

  • – 1/2 cup chopped fresh cilantro (optional)
    → Adds bright herbal brightness and color. Finely chop and sprinkle inside layers or on top after cooking for fresh aroma. If using, add at the end to preserve the herb’s brightness.
  • – 1 small jalapeño, thinly sliced (optional)
    → Provides extra heat and crunch. Remove seeds for milder spice; add into the eggs or between layers for a kick without overpowering the other flavors.

Instructions

  • Prepare hash browns by ensuring they are fully thawed and patted dry before cooking to achieve maximum crispness; spread the thawed shreds in a single layer in a lightly oiled pan and press them flat with a spatula to promote even browning; cook until lightly golden and crisp, then transfer to a paper towel-lined plate to drain excess oil and moisture.
    → Dry hash browns crisp up better and don’t release extra moisture inside the wrap, which helps the overall texture stay contrasty and prevents sogginess.
  • Heat a large nonstick skillet over medium heat and add 1 tablespoon vegetable oil to coat the surface; swirl the oil to create a thin, uniform coating that prevents sticking and encourages even browning of the hash browns.
    → A properly greased pan ensures the potatoes sear rather than steam, giving you a crisp layer that anchors the fillings.
  • Cook the hash browns until they are lightly golden and crisp, then remove them from the pan and set aside on a clean plate; allow the pan to return to medium heat before adding the sausage to maintain steady browning.
    → A crisp base layer provides texture contrast inside the wrap and helps distribute moisture evenly across bites.
  • Sauté the breakfast sausage crumbles in the same skillet over medium heat until browned and crumbly; break up any larger pieces with a spatula for uniform texture; drain excess fat on a paper towel-lined plate and set aside.
    → Browning enhances savory depth and the fat released can make the fillings taste richer, but draining prevents soggy layers inside the wrap.
  • Whisk the six large eggs with 1/4 cup milk and 1/2 teaspoon salt until the yolks and whites are fully combined and the mixture looks uniform; this creates a smoother, more cohesive scramble that folds neatly with the other components.
    → The milk lightens the eggs for a creamier texture, while salt ensures even seasoning throughout the scramble.
  • Scramble the eggs in a lightly oiled or buttered nonstick skillet over medium-low heat, stirring gently with a silicone spatula until just set and slightly creamy; remove from heat while still slightly undercooked to carry carryover heat into the wrap; let them rest briefly.
    → Soft, tender curds hold together with the other fillings and don’t become rubbery when heated again inside the Crunchwrap.
  • Drain any excess liquid from the pico de gallo or salsa to prevent watery leakage; transfer to a small bowl and set aside ready to layer inside the wrap.
    → Excess liquid can make the tortilla soggy and weaken the seal; draining preserves crisp edges and clean layering.
  • Prepare the avocado by slicing it into thick wedges or mashing it with a pinch of salt and a squeeze of lime juice for quick guacamole; if mashing, keep it slightly chunky to maintain texture inside the wrap.
    → Creamy avocado or guacamole adds luxurious richness and helps balance the heat and saltiness of the eggs and sausage.
  • Warm the six large flour tortillas individually in a dry skillet or in the microwave for 20–30 seconds per side until pliable; this makes them easier to fold without tearing and helps them seal when toasted.
    → Warming reduces resistance in the dough and prevents cracks during folding, which preserves the structure of the Crunchwrap.
  • On each tortilla, begin building the filling: dot a thin layer of shredded cheddar cheese in the center to act as a glue, then distribute a base of hash browns, followed by the scrambled eggs, browned sausage, another layer of cheese, pico de gallo, a dollop of sour cream, and slices or scoops of avocado; aim for balanced distribution so every bite contains all components.
    → The cheese melts into the eggs and potatoes, binding the stack together and creating a cohesive, delicious core inside the outer wrap.
  • Fold the outer tortilla to form a compact hexagonal shape: bring the bottom edge over the filling, fold in the sides toward the center in a pleated pattern, and continue folding until the tortilla forms a tight, stable bundle; if needed, dampen the edge with a little water to help seal. Place the seam-side down to prepare for toasting.
    → A secure fold prevents leaking during cooking and creates the characteristic Crunchwrap silhouette that holds its fillings in place.
  • Toast the assembled Crunchwrap in a lightly greased skillet over medium heat, pressing gently with a spatula to ensure full contact and even browning; cook 3–4 minutes until the bottom is deeply golden and the cheese begins to melt, then flip carefully and cook the other side 2–3 minutes until the exterior is crisp and evenly browned.
    → Even toasting crispifies the tortilla, melts the cheese inside, and locks the fillings together so the wrap holds its shape when eaten.
  • Transfer finished Crunchwraps to a warm oven rack or sheet at 200°F (90°C) to keep them hot and intact while you complete the remaining batches; this also prevents the first wraps from cooling and ensures consistent serving temperature.
    → Keeping hot wraps together ensures each bite remains hot and melded, especially when making multiple at once for gatherings.
  • Optionally garnish or serve with extra pico, sour cream, and guacamole on the side for dipping or topping; this allows guests to customize heat and moisture at the table and adds brightness to contrast the richness inside each bite.
    → Fresh toppings refresh the palate and add dynamic texture and flavor to the dish, elevating the overall experience.
  • If using optional add-ins, finely chop fresh cilantro and, if desired, thinly slice a jalapeño; sprinkle cilantro inside the layers or on top after cooking for a fresh aroma, and distribute jalapeño slices between layers or on top for a controlled kick; adjust quantity to taste.
    → Cilantro and jalapeño introduce brightness and heat, enhancing the dish without overpowering the core components.

Notes

These Irresistible Breakfast Crunchwraps bring together crispy hash browns, fluffy scrambled eggs, savory sausage, melty cheese, and fresh toppings all wrapped in a warm tortilla for a handheld breakfast that’s hearty, flavorful, and ready to eat on the go. For best results, keep fillings balanced so the wrap folds neatly and seals well, and toast until the edges are golden and crisp.

  • Tortilla prep: Warm the flour tortillas briefly (about 20–30 seconds per side) to make them pliable and easy to fold. If you’re making gluten-free, substitute with certified gluten-free large tortillas and handle them gently to avoid tearing.
  • Hash browns: Thaw the frozen hash browns completely and pat dry to remove excess moisture. Cook until lightly golden and crisp to create a satisfying contrast with the soft eggs inside.
  • Oil and pan readiness: Lightly grease the pan with a neutral vegetable oil (or use a small amount of butter for richer flavor). This helps toast the tortilla edges and creates a crisp shell without sticking.
  • Eggs: Whisk 6 large eggs with a splash of milk and a pinch of salt before cooking. Scramble gently over medium heat until just set for creamy, tender curds that bind the filling together inside the wrap.
  • Sausage: Pre-cook the sausage crumbles (or bacon) until browned and crumbly, then drain excess fat. This prevents soggy layers and keeps the wrap cohesive as it toasts.
  • Cheese: Shred cheddar or your preferred Mexican blend just before use for maximum melt. The cheese acts as a binding agent and adds a luscious, creamy layer to every bite.
  • Layering strategy: For a balanced bite, layer hash browns first, then eggs, then sausage, and finally cheese. Add pico de gallo and avocado toward the center to prevent pooling liquids at the edges.
  • Aroma and heat: Season the eggs and hash browns with salt, black pepper, garlic powder, and a hint of chili powder or paprika if you like a touch of smokiness. Adjust spice to taste before folding.
  • Finishing toast: To achieve a crisp, golden shell, toast the assembled crunchwrap in a hot, lightly oiled skillet or griddle. Press gently and cook until the tortilla is crisp and the cheese inside is fully melted. Flip carefully to toast both sides evenly.
  • Make-ahead and storage: Assemble the crunchwraps, then wrap individually in plastic or foil. Refrigerate for up to 1 day. They can be frozen before cooking and reheated in a skillet or toaster oven; reheat until the center is hot and the edges are crisp.
  • Gluten-free option: If you need a gluten-free version, ensure you use certified gluten-free tortillas and check all fillings (salsas, sausage, and any spice blends) for gluten-containing ingredients to avoid cross-contamination.
  • Serving suggestions: Serve with extra pico de gallo, a dollop of sour cream, or a drizzle of fresh lime juice and hot sauce for extra brightness. A side of fresh fruit can balance the richness nicely.
  • Variations: Personalize with extra veggies (bell peppers, onions), swap chorizo for sausage, or use pepper jack cheese for a spicier kick. Fresh cilantro can be sprinkled in at the end for color and aroma.

Tips

Tips for Perfect Irresistible Breakfast Crunchwrap

  • Prep all components in advance: thaw hash browns completely, have pico de gallo or salsa drained if watery, and keep sour cream and avocado ready for assembly or serving on the side.
  • Warm tortillas properly: heat each tortilla briefly (about 20–30 seconds per side) until pliable. This prevents tearing when folding and helps them seal more neatly when toasted.
  • Hash browns readiness: pat thawed hash browns very dry with paper towels to minimize moisture. Cook until lightly golden and crisp to create a distinct potato layer inside the wrap.
  • Egg texture tips: whisk eggs with a splash of milk and a pinch of salt, then scramble gently over medium-low heat until just set. Remove from heat a touch early—the residual heat will finish cooking the eggs inside the wrap.
  • Sausage handling: pre-cook sausage crumbles until browned and crumbly, then drain excess fat. This prevents greasy layers and helps the wrap stay cohesive when folded and toasted.
  • Cheese strategy: shred cheddar or Mexican blend fresh just before use. Layer cheese so it melts into the eggs and hash browns, acting as a binder to hold fillings together.
  • Moisture management for fillings: drain pico de gallo or salsa well to reduce moisture inside the wrap. Avoid adding wet sauces directly to the center to prevent soggy shells.
  • Avocado decisions: add sliced avocado or quick guacamole inside the wrap for creaminess, or serve on the side. If preparing ahead, drizzle with a little lime juice to slow browning.
  • Seasoning balance: season eggs with salt as they cook and add garlic powder for depth. A touch of chili powder or paprika can introduce a smoky note—adjust to taste without overpowering the other fillings.
  • Assembly technique: keep the inner stack compact and evenly layered. Fold the outer edges toward the center, then seal the tortilla edge with a light dab of water or the eggs to help it stick.
  • Toasting for crunch: use a lightly greased pan or butter for crisping. Toast over medium-low heat, pressing gently with a spatula and rotating to brown all sides to a golden shell while the center stays gooey.
  • Avoid soggy outcomes: if the tortilla starts to get soggy, finish toasting in a hot skillet or a panini press to restore crispness rather than microwaving.
  • Rest and slice: let the Crunchwrap rest 1–2 minutes after toasting before cutting. Use a sharp serrated knife and wipe it between slices for clean wedges.
  • Make-ahead and storage: assembled but unheated wraps can be refrigerated up to 24 hours. For longer storage, freeze assembled but unbrowned wraps on a baking sheet, then transfer to a bag; reheat in a skillet or oven for best texture (microwave is quicker but softer).
  • Variations to try: swap in bacon or chorizo for the sausage, add sautéed peppers and onions, or use a lighter cheese blend. Gluten-free option can be achieved with certified gluten-free large tortillas—handle with extra care as GF wraps can crack more easily.

FAQ

Irresistible Breakfast Crunchwrap – FAQ

What is an Irresistible Breakfast Crunchwrap?

A large flour tortilla filled with fluffy scrambled eggs, melted cheese, crispy hash browns, and your favorite breakfast fillings (bacon, sausage, or peppers), then wrapped and grilled to a golden, crunchy shell. It’s portable, hearty, and perfect for a weekend brunch or quick weekday breakfast.

What ingredients do I need?

You’ll need a few staples to build the crunchwrap:

  • Flour tortillas (burrito-size works best)
  • Eggs, scrambled
  • Shredded cheese (cheddar, Monterey Jack, or a blend)
  • Cooked hash browns or shredded potatoes
  • Preferred breakfast proteins (bacon, sausage, or chorizo)
  • Salsa or pico de gallo
  • Optional toppings: avocado, sour cream, hot sauce
  • Salt, pepper, and a little oil for cooking
Can I customize fillings for dietary needs?

Yes. Use dairy-free cheese and plant-based proteins for dairy- or meat-free versions. Use gluten-free tortillas if needed. For a lighter option, skip hash browns or use baked potatoes. You can also add sautéed peppers and onions for extra veggies.

How do I assemble the crunchwrap so it stays intact?

Center the fillings on the tortilla, leaving a margin to fold. Add a second tortilla on top if you like, then fold the bottom and sides in. If your fillings are juicy, pat them dry first. For extra security, wrap the finished crunchwrap in foil or use a light egg wash to help it hold together.

What cooking method yields the best crisp?

Pan-sear in a lightly oiled skillet over medium heat, pressing gently with a spatula. Cook 2–4 minutes per side, until the outside is golden and the cheese is melty. If you prefer, finish in a preheated 400°F (200°C) oven for 6–8 minutes to ensure even heating.

How do I store and reheat leftovers?

Cool completely, then refrigerate in an airtight container for up to 2 days. Reheat in a skillet over medium heat, turning to crisp both sides, or warm in a toaster oven. For quick reheating, microwave in 30–45 seconds, then finish in a skillet to regain crispiness.

How many servings does this make?

Depends on tortilla size. A standard burrito-size wrap yields 2–3 servings. If you’re feeding a crowd, multiply ingredients and cook in batches.

Can I make it ahead or freeze?

Assembled but uncooked crunchwraps can be refrigerated for up to 24 hours. For longer storage, freeze unassembled ingredients separately, then assemble and cook from frozen (add a few extra minutes). Cooked crunchwraps freeze well; reheat from frozen in the oven until hot.

Tips for faster prep?

Use pre-scrambled eggs or leftovers, pre-cooked hash browns, and pre-grated cheese. Have all fillings ready before assembly. Toast tortillas lightly to make them more pliable and easier to seal. You can also cook multiple at once in a large skillet or on a griddle.

Introduction / Hook

Imagine a moment of pure chocolate bliss that also gives your body a nod of appreciation. A donut that feels indulgent the way a bakery classic does, yet sneaks in a protein boost so you can power through your day without the post-snack slump. Picture a tender, moist crumb that yields to a soft, fudgy bite, the cocoa aroma curling around you like a warm hug. This is Chocolate Protein Donuts—the kind of treat that turns breakfast into a small celebration, a post-workout reward that actually supports your goals, and a snack that satisfies both the sweet tooth and the energy need you didn’t know you had until you tasted it. The beauty lies in the balance: a rich chocolate profile that tastes like dessert, paired with a thoughtful protein punch that helps with recovery, muscle maintenance, and steady hunger control. No guilt, just pleasure, texture, and aroma dancing together in one compact, handheld package.

These donuts are designed to feel special, yet be approachable enough for a busy morning, a relaxed weekend, or a simple “me time” moment. The crust sports a delicate crumble with a glossy, faint sheen from a light glaze or dusting of cocoa, while the interior stays improbably soft and springy—almost mousse-like in its tenderness. And because they’re built around protein, they won’t vanish in a single bite of nostalgia; you’ll savor each mouthful with the awareness that you’re fueling your body in a kind, nourishing way. If you’ve ever wanted dessert that behaves like a wholesome snack, this is your invitation to enjoy chocolate donuts with a modern twist—without compromise.

The Story Behind the Dish

The chocolate donut has a long and storied life in coffee shops, diners, and morning routines across the globe. It’s a symbol of small daily celebrations—an opening act to a day that might be demanding, complicated, or wonderfully ordinary. But as nutrition science and mindful eating became more mainstream, the donut began to shed its old identity as a purely decadent indulgence and embraced a new role: a treat that respects protein needs, time constraints, and dietary preferences. The idea of a “protein donut” feels almost like a modern legend—a pastry that still delivers the comforting ritual of biting into something soft and chocolaty, yet supports muscle repair after a workout, helps curb hunger until the next meal, and can fit into various dietary patterns when tweaked thoughtfully.

For many home cooks, the journey to a perfect chocolate protein donut began as a playful experiment after a gym session, a Sunday morning craving, or a desire to replace mass-market packaged snacks with something that tastes like care. Friends swapped tweaks: swapping in a plant-based protein for dairy-based options, using a blend of almond flour and oats for texture, or adding a touch of espresso powder to make the chocolate sing. The result is a recipe that carries with it the memory of kitchen counter brainstorms, late-night test bakes, and the satisfying moment when a batch of batter transforms into a tray of donuts that look almost too good to be true—and taste even better than they appear.

In many ways, these donuts echo a broader movement: baking that respects nourishment as a pleasure, not a sacrifice. They celebrate the intersection where comfort food meets fitness-conscious cooking, where you can savor a donut and still feel aligned with your wellness goals. The story isn’t about deprivation; it’s about smart, flavorful improvisation—taking a beloved classic and reimagining it with protein, balanced macros, and modern ingredients so that every bite feels like a small victory.

Why You’ll Love This Recipe

  • Protein-forward indulgence: Each donut provides a meaningful protein contribution, helping with satiety and muscle support while you satisfy your chocolate cravings.
  • Soft, cake-like crumb: The interior is light and fluffy, with a barely chewy crumb that melts in your mouth, then gives way to a delicate finish.
  • Rich chocolate flavor: A deep cocoa presence with just enough sweetness to feel comforting, not overpowering. It tastes like a proper chocolate treat, not a reduced-sugar afterthought.
  • Versatile sweetness: The glaze or finishing dust can be customized from simple powdered sugar to a glossy ganache, or kept light with a dusting of cocoa for a more refined finish.
  • Customizable to fit you: Whether you’re dairy-free, gluten-free, vegan, or keeping refined sugars low, there are flexible paths to make these donuts work for your dietary needs.
  • Kid-friendly and adult-approved: The flavor is broadly appealing, making it easy to share with the whole family or pack into lunchboxes as a wholesome treat.
  • Make-ahead friendly: These donuts can be prepared in advance and refreshed with a quick reheat or a light glaze, making weekday mornings easier.
  • Perfect for occasions: From weekend breakfasts to post-workout snacks, these donuts scale well for gatherings, brunches, or cookie-swap events—just plate them with a flourish.

What sets this recipe apart is the careful balance between indulgence and practicality. It’s not about erasing the joy of chocolate; it’s about elevating the experience with smart ingredients that honor flavor as much as function. The result is a donut that doesn’t tell you “you can’t have dessert”; instead, it whispers, “this is dessert that loves you back.”

Flavor Profile & Texture

The chocolate notes hit first, a warm, comforting embrace of cacao that feels almost brownie-like in its depth. There’s a gentle sweetness that never shouts, allowing the cocoa to lead the dance. If you’ve ever nursed a post-workout craving for something that tastes like a treat yet carries a protein uplift, you’re in the right territory. Depending on the exact ingredients you choose, undertones of vanilla, a hint of espresso, or a whisper of almond can subtly peek through, enhancing the chocolate without masking it.

The texture is where the magic happens. The donuts are designed to strike a balance between moist and airy: a crumb that’s just dense enough to feel substantial in your hand, yet soft enough to yield with a single bite. A glaze adds a velvety surface that gives way to a tender center, while a light dusting of cocoa or cinnamon can provide a finishing bitterness or warmth to bridge flavors. The protein base often contributes a slightly nutty or creamy undertone, depending on whether whey, casein, or plant-based powders are used. This subtle complexity is part of the charm: the dessert-like gratification without the heaviness or dryness that can sometimes accompany baked goods rich in protein powders.

Another savor-worthy aspect is texture harmony. The exterior can develop a gentle crust—especially if baked at a higher temperature for a brief period or finished with a glaze—while the interior remains plush and fragrant. The result is a satisfying contrast of surfaces: a slightly crisp edge with a luxuriously soft center that invites you to slow down and savor the experience. The aroma alone—the blend of melted chocolate, toasty protein, and a hint of vanilla—draws people to the kitchen, creating an anticipatory moment that tastes even better than it smells when you finally take that first bite.

Occasions & Pairings

Chocolate Protein Donuts shine in a wide range of moments. They are ideal for a weekend morning ritual when you want something a little special but not extravagant. They also fit neatly into post-workout recovery routines, providing a comforting treat that complements a balanced protein intake. On busy weekdays, they can serve as a reliable grab-and-go option that won’t derail your nutrition goals. And because they pair so well with coffee and dairy-free milks, they’re a natural companion for early-morning commutes, study sessions, or weekend catch-ups with friends.

Pairing ideas to elevate your experience:

  • Hot coffee or a velvety latte: The bitterness of coffee highlights the chocolate while balancing sweetness.
  • Cold almond, soy, or oat milk: A dairy-free pairing that keeps the texture light and refreshing.
  • Fresh berries or a light fruit compote: Adds brightness and a tang that cuts through the richness.
  • Greek yogurt or a dollop of whipped cream: Creates a contrast of acidity and creaminess that complements the donut’s softness.
  • Nuts and seeds: A sprinkle of chopped almonds, walnuts, or chia seeds adds crunch and a toasty note.
  • A touch of espresso powder or cinnamon: For an additional warm layer that deepens flavor complexity.

If you’re serving them at a brunch, arrange the donuts with a small bowl of dark chocolate drizzle or a light cocoa powder dusting so guests can customize their bite. For a post-workout snack, pair them with a protein shake or smoothie to further support recovery while keeping energy levels steady.

Tips, Variations & Substitutions

Vegan & Plant-Based Options

Turn these donuts into a plant-powered treat by using a vegan protein powder (peas, hemp, or rice) and a dairy-free milk. Opt for a neutral oil like avocado or light coconut oil, and consider replacing eggs with a flax egg (1 tablespoon ground flaxseed mixed with 3 tablespoons water per egg). To maintain a tender crumb, you may add a bit of unsweetened applesauce or mashed banana as a natural binder and moisture booster.

Gluten-Free & Dairy-Free

For gluten-free variations, use almond flour or a certified gluten-free baking mix as the base. Combine with a small amount of tapioca starch or arrowroot for improved structure. Dairy-free options are seamless with the vegan adjustments above, plus ensuring the glaze uses dairy-free options (such as coconut butter or cashew-based glazes) if you choose a glaze.

Flavor Variations

Make it your own with simple flavor twists. Consider stirring a tablespoon of instant espresso or strong brewed coffee into the batter for a mocha profile. Add a teaspoon of orange zest and a pinch of chili powder to evoke a spicy-chocolate note. Fold in dark chocolate chips for extra pockets of melty goodness. For a nutty dimension, incorporate finely chopped toasted hazelnuts or almonds into the batter or as a topping. If you prefer vanilla to shine, reduce the cocoa slightly and use a good-quality vanilla extract to elevate aroma.

Texture Tweaks

To achieve a lighter crumb, blend part of the dry ingredients with a portion of the wet ingredients until just combined, then rest briefly before baking. If you want a crisper edge, consider a short, high-temperature bake before finishing at a lower temperature to set the interior. A glaze with a small amount of coconut milk can provide a glossy finish while keeping the texture smooth rather than sticky.

Low-Sugar & Healthier Sweeteners

Swap in a natural sweetener blend (such as coconut sugar or a monk fruit–erythritol mix) to reduce refined sugar while maintaining a satisfying sweetness. If you’re strict about sugar, you can rely on protein’s natural sweetness with just a touch of sweetness from your protein powder or a minimal glaze with powdered sugar substitute. Remember that certain protein powders contribute sweetness on their own, so you may want to tailor the sugar level accordingly.

Regional Twists

Explore regional flavors that align with chocolate and donuts. A pinch of cardamom brings a Middle Eastern warmth; cinnamon evokes cozy nostalgia; or a touch of cardamom and pistachio makes a Middle Eastern-inspired version. In Latin American style, incorporate a hint of ancho chili powder and cinnamon for a smoky, warming chocolate donut. These variations keep the core concept intact while giving you a passport to new flavor adventures.

Storage & Make-Ahead Ideas

Chocolate Protein Donuts store well in the right conditions, which makes them a practical addition to your weekly meal plan. Freshness matters for both texture and flavor, but with proper care, you can enjoy them for several days or even longer when frozen. Here are practical tips to keep your donuts at their best:

  • Room temperature: Store in an airtight container for up to 2 days. Keep them away from direct sunlight and heat to prevent the glaze from melting or the crust from becoming soft.
  • Refrigeration: If you’re holding them longer than 2 days, refrigerate for up to 5 days. Allow to come to room temperature before serving for optimal texture and aroma.
  • Make-ahead: You can bake a batch in advance and freeze them. Wrap each donut individually in plastic wrap, then place in a freezer-safe bag. Thaw at room temperature or warm gently in a low oven or toaster oven for a few minutes to restore softness.
  • Freezing glaze separately: If you plan to glaze later, freeze the donuts without glaze and add the finishing glaze after thawing to preserve a glossy, appealing surface.
  • Reheating: A quick warm-up in a 350°F (175°C) oven for 5–7 minutes or a 20–15 second zap in a microwave (in short bursts) can refresh texture. Avoid overheating to preserve moistness and prevent dryness.

These strategies ensure you can enjoy Chocolate Protein Donuts as a ready-to-go option without compromising on texture or flavor. They also make it simple to plan ahead for busy weeks, special occasions, or weekend brunches where you want something polished without long prep times.

Fun Facts & Trivia (Optional)

– The donut originated in Europe but found a legendary home in the United States, where coffee shops and bakeries helped redefine it as a morning staple. Meanwhile, the modern protein donut trend blends traditional pastry love with nutrition science, a nod to the evolving palate of health-conscious eaters.

– Chocolate, in its many forms, has a long history dating back to ancient civilizations in Central and South America. The cacao bean was once considered a sacred plant, used in rituals and believed to offer mood-enhancing properties. Today, we celebrate that legacy with indulgent, comforting chocolate in a format that also supports active lifestyles.

– Protein powders come in many forms—whey, casein, soy, pea, rice, and more. Each type interacts with baked goods differently, affecting texture and moisture. The key is to balance the protein with other ingredients to maintain a tender crumb and avoid a dry finish.

– The balance between dessert-like flavor and functional nutrition is a growing trend in home kitchens. It reflects a shift toward mindful indulgence: savoring treats that align with personal wellness goals while still delivering joy, memory, and comfort.

In the end, Chocolate Protein Donuts aren’t just a snack; they’re a small ritual that invites you to pause, savor, and nourish yourself with intention. Whether you’re fueling a morning workout, celebrating small victories, or simply indulging in a beloved flavor, these donuts offer a sophisticated balance of taste, texture, and nourishment that feels both indulgent and smart.

Ingredients

Donut Base

  • 1 cup oat flour (certified gluten-free)
    → Oat flour provides the dry base and structure in this gluten-free protein donut batter. It blends with the protein powder to create a tender crumb. If you don’t have oat flour, grind rolled oats in a high-speed blender until powdery, then measure. Sift with the cocoa powder to prevent lumps. Store any leftovers in an airtight container for later use.
  • 1/2 cup vanilla-flavored or chocolate protein powder (whey, pea, or soy)
    → Protein powder boosts the donuts’ protein content and helps with structure and moisture balance. Use unflavored or chocolate-flavored protein to complement cocoa. Whisk the protein with the dry ingredients to prevent clumps; if the batter becomes too thick, add a splash more milk.
  • 1/4 cup unsweetened cocoa powder
    → Provides rich chocolate flavor and deep color. Sift with the dry ingredients to break up lumps. Dutch-processed cocoa yields a smoother, mellower chocolate note; natural cocoa will give a slightly more acidic edge and deeper color.
  • 1 teaspoon baking powder
    → Leavening to lift the donuts and create a light crumb. Use fresh baking powder for best rise; avoid overmixing once the wet and dry ingredients come together to prevent toughness.
  • 1/4 teaspoon baking soda
    → Works with the yogurt and/or milk to brighten the crumb and help with rise under the heat of baking. If you omit yogurt entirely, you can drop the baking soda or rely on baking powder for lift.
  • 1/4 teaspoon salt
    → Elevates sweetness and flavors; salt also helps control sweetness. If you are using salted oil or butter, reduce a pinch accordingly.
  • 3/4 cup unsweetened almond milk (or dairy milk)
    → Hydrates the dry ingredients and creates a pourable batter that can be piped or spooned into donut molds. Start with 3/4 cup and add 1–2 tablespoons more if the batter seems thick. Use room-temperature milk for better emulsification.
  • 1 large egg
    → Acts as a binder and contributes structure and moisture. For a vegan version, substitute with 1/4 cup unsweetened applesauce plus 1 tablespoon ground flaxseed mixed with 3 tablespoons water (let sit 5 minutes) to replace the egg. If using a flaxseed egg, reduce the milk slightly to maintain batter thickness.
  • 1/4 cup plain Greek yogurt (2% or fuller)
    → Adds moisture, tenderness, and a bit of tang that balances cocoa. Yogurt also contributes protein and helps keep the donuts moist as they cool. If you’re dairy-free, substitute with an equal amount of coconut yogurt or another dairy-free yogurt.
  • 2 tablespoons melted coconut oil (or neutral oil)
    → Provides fat for tenderness and flavor; melted and cooled slightly helps the batter combine smoothly. If you don’t have coconut oil, use light olive oil or avocado oil, but avoid extra-virgin olive oil as it can impart stronger flavor.
  • 2 tablespoons pure maple syrup (or honey)
    → Adds sweetness and moisture; maple syrup also helps keep the batter from drying out in the oven. If you use honey, reduce slightly or adjust with a touch more milk to keep batter from being too thick. You can swap with granulated sugar but would need to adjust liquid quantities.
  • 1 teaspoon vanilla extract
    → Enhances overall chocolate flavor; use pure vanilla for best aroma. If you only have vanilla bean paste, you can use 1 teaspoon paste; adjust sweetness as needed because paste can contain more concentrated flavoring.
  • 1/4 cup mashed ripe banana (optional)
    → Adds natural sweetness, moisture, and a slight fruity note. Use very ripe bananas with dark spots for maximum sweetness and moisture. If you skip the banana, you may want to add 1–2 tablespoons more yogurt or milk to maintain moisture and texture.

Optional Add-ins

  • 1/4 cup dark chocolate chips (optional)
    → Extra chocolate pockets enhance the donut experience. Fold chips in gently to avoid sinking; chips may cause the batter to be heavier. Toss chips with a teaspoon of flour before adding to help distribute evenly.
  • 2 tablespoons chopped walnuts or pecans (optional)
    → Adds crunch and a toasty, nutty flavor. Toast the nuts lightly in a dry skillet for 2–3 minutes before chopping to heighten aroma. Fold in at the end to prevent sinking.
  • 1 tablespoon espresso powder (optional)
    → Intensifies the chocolate flavor and gives a mocha note without adding liquid. Dissolve in a teaspoon of hot water or mix with the dry ingredients to avoid clumps. Adjust to taste; start with 1/2 tablespoon if you’re sensitive to coffee flavor.

Glaze (optional)

  • 1/2 cup dark chocolate chips
    → Creates a glossy glaze when melted with a little oil. Melt slowly with 1 tablespoon coconut oil until smooth; spoon or drizzle over cooled donuts. If the glaze is too thick, whisk in a teaspoon or two of milk until you reach a pourable consistency.
  • 1 tablespoon coconut oil
    → Helps the glaze set with a shiny finish and adds a subtle richness. Use refined coconut oil if you don’t want a coconut aroma; keep glaze warm but not hot so it doesn’t melt the donuts.
  • 1 teaspoon maple syrup (optional)
    → Adds a touch more sweetness to the glaze. Stir into the melted chocolate and coconut oil for a balanced glaze; adjust to taste.

Instructions

  • Preheat your oven to 350°F (175°C) and lightly grease a donut pan or line a 12-c cup muffin tin with paper liners.
    → This ensures the donuts release cleanly and retain their shape during baking, preventing sticking and tearing as they cool.
  • Sift and whisk the dry base ingredients together in a medium bowl: 1 cup oat flour, 1/2 cup protein powder, 1/4 cup unsweetened cocoa powder, 1 teaspoon baking powder, 1/4 teaspoon baking soda, and 1/4 teaspoon salt.
    → Sifting breaks up lumps and guarantees even distribution of leavening for a light, tender crumb; whisking prevents clumps that can create uneven pockets of flavor.
  • In a separate large bowl, whisk the wet ingredients: 3/4 cup unsweetened almond milk, 1 large egg, 1/4 cup plain Greek yogurt, 2 tablespoons melted coconut oil (cooled), 2 tablespoons maple syrup, and 1 teaspoon vanilla extract, adding 1/4 cup mashed ripe banana if using.
    → Bringing all liquids to a similar temperature improves emulsification and moisture distribution; banana adds natural sweetness and moisture that enhances tenderness.
  • Optionally dissolve 1 tablespoon espresso powder in 1 teaspoon hot water and whisk into the wet ingredients to intensify the chocolate flavor without adding liquid breadth.
    → Dissolving the espresso ensures even dispersion and prevents grainy pockets; use sparingly to avoid a coffee-forward finish unless you want a mocha note.
  • Pour the wet ingredients into the dry ingredients and fold until just combined; do not overmix so the batter stays tender, and if it seems very thick, whisk in 1–2 extra tablespoons of milk until it pours slowly but still holds its shape.
    → Overmixing gluten-free batters can create a dense crumb; a gently blended batter yields a light, cake-like texture.
  • If using optional add-ins, fold in 1/4 cup dark chocolate chips or 2 tablespoons chopped nuts after the batter comes together, tossing chips with a teaspoon of the dry mix to prevent sinking.
    → Add-ins should be distributed evenly without weighing the batter down; tossing with flour helps them stay suspended during baking.
  • Spoon or pipe the batter into the prepared donut cavities about 2/3 full, using a small cookie scoop or a piping bag for uniform portioning and even rising.
    → Filling to two-thirds prevents overflow and ensures a classic donut ring with a uniform top.
  • Bake for 12–15 minutes at 350°F (175°C) until the edges are set and a toothpick inserted into the center comes out with a few moist crumbs; rotate the pan halfway through for even browning if your oven has hot spots.
    → Proper baking time yields a tender crumb without dryness; rotation mitigates heat distribution irregularities.
  • Cool the donuts in the pan for 5–7 minutes, then transfer to a wire rack to cool completely before glazing to prevent the glaze from sliding off and to set the surface for a glossy finish.
    → Resting allows the structure to set and moisture to redistribute, producing a stable base for glaze adherence.
  • Prepare the glaze by melting 1/2 cup dark chocolate chips with 1 tablespoon coconut oil over low heat, stirring until smooth, and remove from heat just as it becomes glossy.
    → Gentle, slow melting prevents scorching and yields a shiny, even glaze that clings to the donuts.
  • Drizzle or spoon the warm glaze over the cooled donuts in a thin, even layer; if the glaze thickens, whisk in 1–2 teaspoons of milk to achieve a pourable consistency.
    → A proper glaze consistency ensures a smooth coating that sets without dripping excessively.
  • Optionally whisk in 1 teaspoon maple syrup into the melted glaze for a touch more sweetness and a balanced finish, then drizzle as desired and allow it to set.
    → The maple adds depth and aroma that complements the cocoa without overpowering the chocolate flavor.
  • Let the glaze set at room temperature for 20–30 minutes (or refrigerate briefly to speed the process) before stacking or serving.
    → A set glaze locks in moisture and provides a glossy, crack-resistant surface that stays intact during handling.
  • Store any leftovers in an airtight container at room temperature for up to 2 days, or refrigerate for up to 5 days; for longer storage, freeze and rewarm gently in a 300°F (150°C) oven for 5–7 minutes.
    → Proper storage maintains softness and prevents the donuts from drying out, while gentle reheating revives moisture and texture.

Notes

These Chocolate Protein Donuts are a gluten-free, protein-packed treat that deliver a tender crumb and rich cocoa flavor thanks to oat flour, protein powder, and unsweetened cocoa. You can customize them with add-ins like dark chocolate chips or chopped nuts for texture, or intensify the mocha note with espresso powder. For a dairy-free version, swap yogurt and milk for plant-based alternatives and use a flax egg instead of the egg; if you skip the banana, compensate with a touch more yogurt or milk to maintain moisture. The batter comes together by whisking the dry ingredients (oat flour, protein powder, cocoa, baking powder, baking soda, salt) separately from the wet ingredients (egg, yogurt, milk, melted coconut oil, maple syrup, vanilla, and mashed banana if using), then combining until just moistened; if the batter is too thick, add 1–2 tablespoons more milk and avoid overmixing to keep the donuts tender. Bake in donut molds at 350°F (175°C) for about 12–14 minutes, or until a toothpick comes out with a few moist crumbs; let cool completely before glazing or dipping. The glaze is optional but a glossy finish is easy: melt 1/2 cup dark chocolate chips with 1 tablespoon coconut oil, whisk until smooth, and drizzle over cooled donuts; for a thinner glaze, whisk in a splash of milk and/or a teaspoon of maple syrup. These donuts freeze well for make-ahead breakfasts or snacks; store leftovers in an airtight container or wrap individually, and rewarm briefly in a low oven or microwave. To maximize success, use certified gluten-free oats and baking powder if you have gluten intolerance, and keep your add-ins light so the donut remains soft rather than dense.

Tips

Tips for perfect Chocolate Protein Donuts

  • Prep first: Grease a donut pan thoroughly or use a nonstick spray, and set out all ingredients to avoid overmixing later.
  • Dry-to-wet balance: Whisk the dry ingredients (especially the protein powder and cocoa) together first, then mix with the wet components. This helps prevent clumps and ensures an even crumb.
  • Measure accuracy: Since this recipe relies on GF oat flour and protein powder, precise measurements matter more than with wheat flour. If you grind oats yourself, sift them with the cocoa to break up any lumps.
  • Consistency check: Start with the stated milk amount and add 1–2 tablespoons more only if the batter looks thick and stiff. If it’s too loose, whisk in a little more oat flour.
  • Don’t overmix: Mix until just combined after adding wet to dry. Overmixing can develop gluten-free batters too much, leading to a tougher texture.
  • Room-temperature ingredients: Use room-temperature milk and yogurt for better emulsification and a smoother batter.
  • Vegan option: If making vegan, replace the egg with 1/4 cup unsweetened applesauce plus 1 tablespoon ground flaxseed mixed with 3 tablespoons water. Reduce milk slightly to keep the batter thickness right.
  • Banana note: If using mashed banana, make sure it’s ripe and very soft to maximize moisture and sweetness. If skipped, you may need a touch more yogurt or milk to keep the batter hydrated.
  • Optional add-ins—chips: Toss dark chocolate chips with a teaspoon of flour before folding in to keep them from sinking.
  • Nut texture: Toast chopped walnuts or pecans lightly in a dry skillet (2–3 minutes) to heighten aroma, then fold in at the end to prevent sinking.
  • Espresso boost: Dissolve espresso powder in a teaspoon of hot water before adding it to the dry ingredients to avoid gritty clumps and achieve a balanced mocha note.
  • Glaze preparation: When making the glaze, melt dark chocolate chips with 1 tablespoon coconut oil slowly. If it’s too thick, whisk in a splash of milk until pourable and glossy.
  • Glaze alternatives: For dairy-free glaze, use dairy-free chocolate chips and a neutral oil; ensure the glaze isn’t too hot when dipping to avoid melting the donuts.
  • Storage and freshness: Cool donuts completely before storing. Keep in an airtight container at room temperature for 2–3 days, or refrigerate up to 5 days; rewarm briefly in the microwave (8–12 seconds) for a fresh texture.
  • Freeze for later: Baked donuts freeze well; wrap individually and freeze up to 2–3 months. Thaw at room temp and warm briefly to restore softness.
  • Taste and balance: If you want a deeper flavor, a pinch of salt can balance the sweetness; adjust if using salted oil or butter to avoid oversalting.
  • GF safety: Use clean utensils and bowls to prevent gluten exposure if you’re baking for someone with celiac disease or strong gluten sensitivity.

FAQ

What are Chocolate Protein Donuts?

Chocolate Protein Donuts are a healthier take on classic donuts. They’re baked (not fried), higher in protein thanks to protein powder, and feature a rich chocolate flavor. They’re soft, a bit chewy, and make a satisfying post-workout or snack option.

What ingredients do I need?

Typical ingredients include:

  • 2/3 cup (about 70 g) oat flour or almond flour
  • 1/2 cup (45 g) chocolate or vanilla protein powder (whey or plant-based)
  • 2 tablespoons unsweetened cocoa powder
  • 1 ripe banana or 1/2 cup unsweetened applesauce
  • 2 eggs or 2 flax eggs (for vegan)
  • 1/4 to 1/2 cup milk or dairy-free milk
  • 1 teaspoon baking powder
  • 1/4 to 1/3 cup sweetener (honey, maple syrup, or sugar)
  • 1 teaspoon vanilla extract
  • Pinch of salt
  • Optional: 1–2 tablespoons yogurt or dairy-free yogurt for moisture
How many donuts does this recipe yield?

Typically 6 standard-size donuts in a 6-cavity donut pan. If you’re using mini donuts, you’ll get about 12–18 mini donuts depending on size.

Are these baked or fried?

These donuts are baked. Bake in a preheated oven at about 350°F (175°C) for 12–15 minutes, or until a toothpick inserted comes out clean with a few crumbs.

Can I make them dairy-free or gluten-free?

Yes. For dairy-free: use dairy-free milk (almond, soy, oat) and dairy-free yogurt if used. For gluten-free: use certified gluten-free oats or flour blends. If you use oat flour, make sure it’s labeled gluten-free if you have a gluten intolerance. You can also use almond flour for a denser texture.

What protein powders work best?

Whey, casein, or plant-based proteins all work. Chocolate or vanilla flavors tend to blend well with cocoa. Plant-based powders may require a touch more liquid or a splash more yogurt/milk. If your powder is very chunky or gritty, add an extra tablespoon or two of milk to smooth the batter.

How do I prevent them from being dry or crumbly?

Tips to keep them moist:

  • Avoid overbaking—check doneness at the 12-minute mark.
  • Use mashed banana or yogurt to add moisture (or both).
  • Include a bit of healthy fat, like melted nut butter or a tablespoon of olive oil.
  • Let the batter rest a few minutes to hydrate the dry ingredients before baking.
How should I store and reheat the donuts?

Store in an airtight container at room temperature for up to 2–3 days. For longer storage, refrigerate for up to a week or freeze individual donuts for 1–2 months. Reheat in the microwave for about 15–20 seconds or warm in a 325°F (165°C) oven for 5–7 minutes.

Can I make these vegan or lower in sugar?

Yes. To make vegan, use flax or chia eggs in place of eggs, plant-based milk, and a vegan protein powder. To reduce sugar, use a sugar substitute or reduce sweetener to 2–3 tablespoons and rely on ripe banana for sweetness. You can also add a drizzle of sugar-free chocolate glaze for flavor without extra sugar.

Can I customize flavors or toppings?

Absolutely. Try these ideas:

  • Swirl in peanut butter or almond butter before baking, or drizzle on top after baking
  • Fold in dark chocolate chips or chopped nuts
  • Add a pinch of cinnamon or espresso powder for a mocha flavor
  • Top with a light chocolate glaze or yogurt glaze