Author

Ocean Nightleaf

Browsing

Introduction / Hook

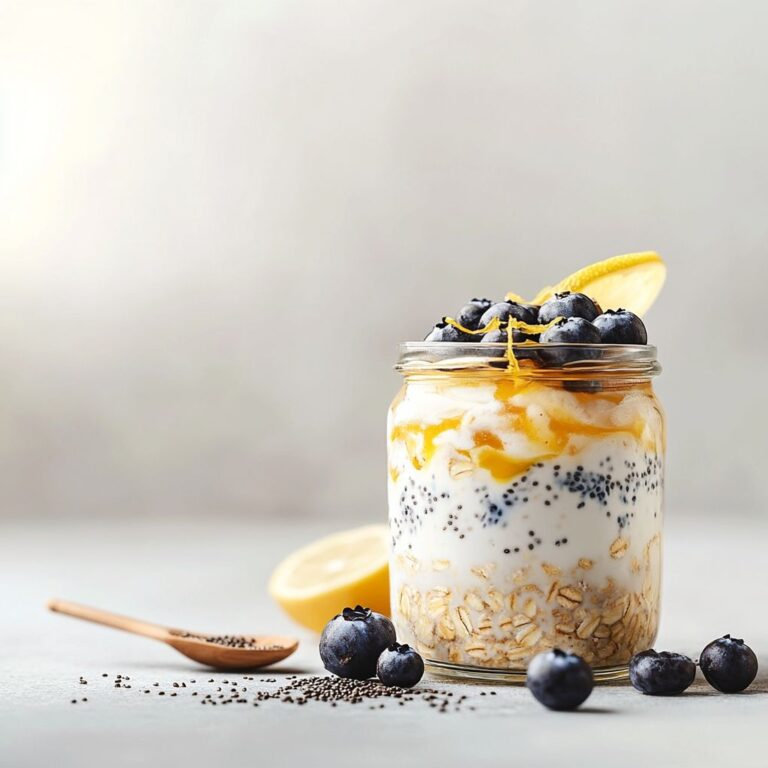
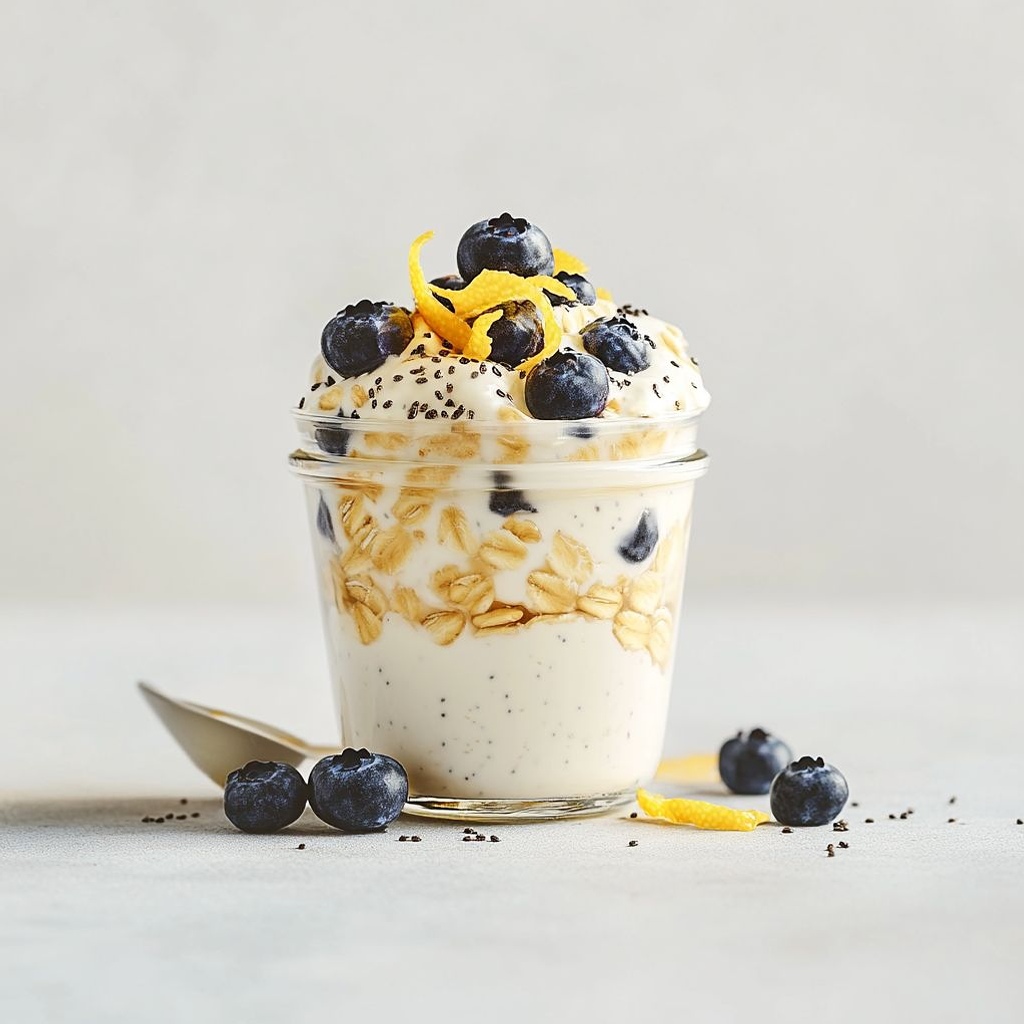
Imagine waking up to the zesty aroma of fresh lemon, the soft whisper of oats soaking overnight, and the promise of a day that begins with something both bright and comforting. Lemon Blueberry Overnight Oats is that delightful contradiction made real: a breakfast that feels indulgent yet light, sophisticated enough for a brunch table and simple enough for a rushed weekday morning. The lemon threads through every spoonful, a sunlit tang that lifts the palate without overpowering the gentle sweetness of blueberries. Each bite is a balance of creamy texture, juicy bursts from the berries, and a subtle crunch from optional nuts or seeds. It’s the kind of breakfast that makes you savor the first inhale before you even taste, as if the jar itself has bottled a little morning sunshine. Whether you’re fueling a busy day, prepping meals for the week, or sharing a Saturday ritual with family, this recipe delivers warmth, brightness, and a touch of elegance in every bite.

The Story Behind the Dish

Overnight oats didn’t emerge from a single moment of invention so much as a movement—the growing desire to simplify mornings, to start the day with something nourishing that doesn’t require standing over a hot stove. The concept of soaking oats to soften their bite goes back to traditional porridges around the world, but the modern overnight version entered kitchens as a grab-and-go solution for people who valued both convenience and texture. The pairing of lemon and blueberry, in particular, is a celebration of summer: a bright, aromatic citrus note paired with the deep, jammy sweetness of blueberries. It’s no accident that this duo appears in so many breakfast and dessert traditions around the Atlantic world—both flavors feel timeless and universal, yet when combined in a jar, they feel freshly modern.

One small anecdote from home cooks and food bloggers: a grandmother’s recipe book would hint at lemon zest in many dishes to awaken the senses, while a favorite summer brunch might feature berries that taste like little sunbursts. When you bring these ideas together—overnight oats for ease, lemon for brightness, blueberries for moisture and sweetness—you create a breakfast that travels well from counter to backpack, from fridge to desk, without losing its charm. The result is a recipe that honors slow mornings and the joyful bursts of summer fruit, while remaining a practical workhorse for your weekly routine.

Why You’ll Love This Recipe

  • Quick and hands-off: assemble the night before, grab and go in the morning.
  • Bright, balanced flavor: citrusy lemon notes lift the oats, while blueberries add sweetness and juicy pockets of tang.
  • Creamy yet light: a touch of yogurt or dairy-free yogurt creates a luscious texture without heaviness.
  • Customizable: easily adaptable for dairy-free, gluten-free, vegan, or low-sugar diets; swap toppings and add-ins to suit your palate.
  • Portion-controlled and kid-friendly: perfect for busy families who want a nutritious start without a fuss.
  • Meal-prep friendly: makes-ahead breakfasts that don’t disappoint when you’re short on time.
  • Perfect canvas for toppings: almonds, shredded coconut, chia seeds, mint leaves, or a drizzle of honey all shine here.

Flavor Profile & Texture

The flavor of Lemon Blueberry Overnight Oats is an inviting study in contrasts that come together harmoniously. The lemon provides a crisp, sunny brightness—its zest releasing an aromatic oils that sparkles with the oats, while a whisper of lemon juice adds a clean acidity that keeps the dish from tasting heavy. Blueberries contribute soft, jammy sweetness and a gentle fruity tartness that echoes the lemon without clashing. If you choose to add yogurt, you’ll get a velvety, creamy mouthfeel that glides over the tongue, like a mellow lullaby after the zing of citrus. The texture is a satisfying medley: the oats retain a tender bite, the berries pop with juicy bursts, and the optional seeds or nuts introduce pleasant crunch and nutty depth.

Texture variations are easy to achieve. Soaked oats can become silkier with extra time, especially if you add a spoonful of yogurt or a splash of milk. If you like a more substantial bite, fold in chopped almonds or walnuts. For a more spoonable, dessert-like experience, a swirl of Greek yogurt or a dollop of ricotta can add richness. A light sprinkle of vanilla can intensify the aroma, while a pinch of cinnamon or cardamom introduces warm, comforting complexity. The lemon’s acidity also plays well with a touch of sweetness—honey, maple syrup, or agave can be used judiciously to tailor the balance to your preference.

Occasions & Pairings

This recipe shines in a variety of contexts, each benefiting from the bright, adaptable character of its flavors.

  • Weekday breakfasts: a grab-and-go option that still feels special.
  • Brunch gatherings: serve in small glass jars with a sprig of mint and a lemon twist for a sunlit presentation.
  • Post-workout fueling: the oats provide slow-release carbohydrates, while the yogurt offers protein for recovery.
  • Meal-prep Sunday: divide into jars for the week, customizing with toppings as you go.
  • Light summer desserts: a cool, portion-controlled treat that doesn’t feel heavy.

Pairing ideas to elevate the experience:

  • Yogurt options: a dollop of plain Greek yogurt for extra creaminess, or a dairy-free yogurt (coconut, almond) for a vegan approach.
  • Fresh herb or citrus: a thin lemon ribbon or a mint leaf as a fresh garnish; a tiny sprig of thyme can add an unusual, refreshing note.
  • Crunchy accents: sliced almonds, pistachios, or toasted oats for texture contrast.
  • Flavor partners: a drizzle of honey or maple syrup, a pinch of vanilla, or a pinch of sea salt to intensify the sweetness and balance.

Tips, Variations & Substitutions

Here is a toolkit to customize this recipe to your pantry, dietary needs, and flavor preferences. Don’t be afraid to experiment—this base welcomes creativity as easily as it welcomes a spoon.

Make it dairy-free or vegan

  • Use plant-based yogurt such as almond, coconut, or soy, and substitute dairy milk with almond, oat, or coconut milk.
  • Choose a vegan sweetener like maple syrup or agave to taste, and add a pinch of vanilla for richness.

Gluten-free and nutritious twists

  • Ensure your oats are certified gluten-free if you have celiac or gluten sensitivity.
  • Add chia seeds or ground flax for an extra omega-3 boost and a slightly thicker texture.

Flavor variations

  • Berry medley: swap blueberries for raspberries, blackberries, or a mix of berries for a different tart-sweet profile.
  • Citrus variations: swap lemon for orange or a small amount of zested lime for a tangier bite, or blend citrus zest (lemon + orange) for a layered aroma.
  • Herbal lift: add a tiny pinch of fresh grated ginger or a few fresh mint leaves for a refreshing twist.
  • Spice it up: a pinch of cinnamon, cardamom, or nutmeg can warm the oats and complement the citrus.

Texture and topping ideas

  • Stir in a spoonful of Greek yogurt or coconut yogurt at serving for extra creaminess.
  • Top with toasted nuts, seeds, or a crunchy granola topping for contrast.
  • Fold in a handful of quick oats or a tablespoon of shredded coconut for an added dimension.

Portion and preparation tips

  • For a milder lemon notes, reduce the lemon zest by half; for a bolder citrus punch, increase zest slightly and add a teaspoon of lemon juice.
  • Prepare in jars or bowls that seal tightly to preserve the fresh aroma of the citrus and the fruity fragrance of the berries.
  • Let the oats soak at least 4 hours, but overnight is ideal—the longer soak lets the flavors mingle and the oats soften to a luxurious texture.

Storage & Make-Ahead Ideas

One of the most appealing aspects of overnight oats is their storage and resilience. This recipe holds up beautifully in the refrigerator for several days, making it perfect for meal prep and busy weeks. Here are practical guidelines to keep your Lemon Blueberry Overnight Oats tasting fresh and delicious:

  • Storage duration: In a sealed container or individual jars, the oats will typically stay good for 3 to 5 days in the fridge. The lemon aroma may fade slightly after day 3, so if you plan to keep them longer, consider adding lemon zest to taste just before serving.
  • Container choice: glass jars with airtight lids are ideal, as they minimize odor transfer and maintain texture. Mason jars are particularly popular for their visual appeal and easy stacking.
  • Make-ahead approach: if you’re prepping a week’s worth, portion into individual jars at the outset and keep them refrigerated. In the morning, you can grab a jar and add fresh toppings to revive textures and brightness.
  • Freezing: while oats themselves freeze well, the texture of overnight oats can change slightly upon thawing. If you want to freeze, consider freezing the oats without the dairy portion (yogurt or milk) and add them after thawing—top with fresh berries to brighten the dish again. For best texture, freeze leftovers in small portions and thaw in the fridge overnight before serving.
  • Reheating: overnight oats are typically served cold or at room temperature. If you prefer warm oats, gently reheat with a splash of milk to restore creaminess, then finish with a cold, fresh topping to maintain contrast.

Fun Facts & Trivia (Optional)

Delving into the little-known tidbits behind this seemingly simple dish can deepen appreciation and inspire kitchen experimentation.

  • Blueberries are one of the few natural food sources that are native to North America, and they’ve been celebrated in rituals and dishes for centuries—from Native American sachets to modern morning bowls. Their deep blue color comes from anthocyanins, a type of antioxidant that gives them their distinctive hue and potential healthful properties.
  • Lemon zest carries essential oils that release aromatic compounds when grated. These oils are volatile and intense, which is why a tiny amount of zest makes a big impact.
  • Overnight oats model a classic idea in fermentation and soaking: acid and moisture soften grains while infusing them with flavors. It’s a modern convenience that nods to age-old techniques of mashing and steeping to extract flavor.
  • As a versatile canvas, overnight oats invite regional twists. In some places, people fold in yogurt, in others, they replace dairy with coconut milk; some regions add nuts for crunch, while others rely on seeds and spices for texture and aroma.
  • This particular lemon-blueberry pairing is reminiscent of early summer markets and Sunday brunch rituals, where the scent of citrus mingles with the blue glow of fresh berries—the kind of scene that makes you almost hear the clink of glasses and the soft chatter of a kitchen full of friends and family.
Ingredients

Overnight Oats Base

  • 1 cup old-fashioned rolled oats (certified gluten-free)
    → The oats form the backbone of the overnight oats, soaking up the liquid to soften to a creamy, hearty texture. Use old-fashioned rolled oats rather than quick-cook oats for a better chew and structure. If you require gluten-free, select certified gluten-free oats to avoid gluten contamination. Do not use steel-cut oats here, as they will not soften at the same rate in a typical overnight soak.
  • 1 cup unsweetened milk of choice
    → Provides the liquid needed to hydrate the oats and create a creamy base. Dairy milk yields a richer texture, while plant-based milks keep things lighter and can alter mouthfeel. Always choose unsweetened to avoid hidden sugars; if you prefer, adjust sweetness with maple syrup or lemon zest for brightness.
  • 1/4 cup plain yogurt (optional)
    → Adds creaminess, tang, and extra richness. If using dairy-free, select a plain unsweetened yogurt alternative. The amount can be reduced or omitted if you want a dairy-free option with less thickness; mixing yogurt with the oats helps them set into a custard-like texture after chilling.
  • 1 tablespoon chia seeds (optional)
    → Acts as a natural thickener and helps the mixture reach a creamier, more cohesive texture as it sits. They also provide gentle binding and extra fiber. If you hate the gel texture, omit or reduce; ensure you add enough liquid to prevent clumping.
  • 2 tablespoons pure maple syrup or honey (adjust to taste)
    → Sweetens the oats to your preference. Maple syrup is vegan; honey is not. Start with two tablespoons and adjust after chilling, since flavors may mellow when cold. You can also swap with mashed banana for natural sweetness.
  • Pinch of salt
    → Enhances flavor and balances sweetness, especially when using unsweetened milks. A small pinch helps lemon and berry flavors pop. Do not skip if you are using very unsweetened components.

Lemon & Berry Flavor

  • 1 tablespoon lemon zest (finely grated)
    → Delivers a bright, fragrant citrus aroma that accentuates the lemon in the dish. Zest only the yellow outer layer; avoid the bitter white pith. Zest first for maximum fragrance and to protect your fingers from burning citrus oils; you can also add extra zest as a finishing touch.
  • 2 tablespoons freshly squeezed lemon juice
    → Provides tangy brightness that cuts through the richness of the oats and heightens blueberry flavor. Fresh juice tastes better and more vibrant than bottled; strain out pulp if you dislike texture.
  • 1/2 cup fresh blueberries or 1/2 cup frozen blueberries (do not thaw)
    → Blueberries introduce juicy sweetness and vivid color. Fresh berries are ideal, but frozen blueberries work in a pinch; if using frozen, fold them in gently to minimize color bleed and avoid turning the whole mixture purple.

Toppings

  • 2 tablespoons chopped almonds or walnuts (optional)
    → Adds a crunchy contrast and nutty flavor. Toast the nuts lightly in a dry skillet to heighten aroma, then chop finely for even distribution. Store any leftovers in an airtight container to maintain crunchiness.
  • 1 tablespoon shredded coconut (optional)
    → Provides a light tropical note and additional texture. Use unsweetened coconut to avoid extra sweetness; sprinkle on just before serving to preserve texture and prevent sogginess.
  • Extra blueberries for topping (optional)
    → A garnish that adds color and fresh pop. If using frozen extra berries, thaw and pat dry to avoid adding too much juice to the oats; arrange on top right before serving for best appearance.
  • Pure maple syrup or honey for finishing (optional)
    → A final drizzle enhances sweetness and gloss. Use maple syrup for a vegan finish; drizzle sparingly to avoid making the oats soggy.

Instructions

  • In a large mixing bowl, combine 1 cup old-fashioned rolled oats (certified gluten-free), 1 cup unsweetened milk of your choice, 1/4 cup plain yogurt (optional), 1 tablespoon chia seeds (optional), 2 tablespoons pure maple syrup or honey, and a pinch of salt.
    → This base creates the creamy, hydrated texture of overnight oats. Using certified gluten-free oats prevents gluten contamination for sensitive diets, unsweetened milk keeps flavors clean, yogurt adds richness if desired, chia seeds help thicken and bind, and a touch of salt enhances the lemon and berry flavors.
  • Zest the lemon with a microplane or fine grater, grating only the yellow outer layer directly over the bowl.
    → Zesting releases essential citrus oils that provide bright aroma and fresh lemon notes; avoid the white pith, which is bitter and can overwhelm the mixture.
  • Squeeze the lemon to yield 2 tablespoons of juice, straining through a fine sieve into the bowl to remove pulp and seeds.
    → Fresh lemon juice delivers vibrant acidity that lifts the oats and berries; straining keeps the texture smooth and prevent gritty bits in every spoonful.
  • Gently fold in 1/2 cup fresh blueberries or 1/2 cup frozen blueberries (do not thaw) so they distribute evenly without bursting and causing excessive color bleed.
    → Folding preserves berry integrity and color; if using frozen berries, fold slowly to minimize purple staining of the oats and maintain consistent texture.
  • Stir the mixture thoroughly with a spatula, scraping the sides and bottom of the bowl to ensure every oat is moistened and the ingredients are evenly dispersed.
    → Even hydration prevents dry pockets, ensures consistent creaminess, and guarantees the maple-sweetened base flavors meld through the oats.
  • Taste the base and adjust sweetness or acidity if needed, adding more maple syrup or lemon juice in small increments after considering that flavors may mellow slightly after chilling.
    → Balancing now ensures the finished oats are sweet and bright; chilling can mute some flavors, so a final taste check is prudent.
  • Portion the mixture evenly into 2 to 4 jars or airtight containers, smoothing the tops and leaving a little headspace for expansion.
    → Dividing into individual portions makes morning access convenient and helps maintain texture by preventing cross-contamination of flavors in the fridge.
  • Seal each container and refrigerate for at least 6 hours or overnight to allow the oats to fully hydrate and the flavors to meld.
    → The cold soak softens the oats into a creamy custard-like texture; overnight maceration intensifies lemon and berry notes for a balanced breakfast.
  • In the morning, give the oats a brisk stir; if the mixture is too thick, whisk in a splash of milk until you reach a creamy, spoonable consistency.
    → Overnight oats can thicken significantly; a quick rehydration restores desirable viscosity and ensures the oats are easy to scoop.
  • Toast the almonds or walnuts in a dry skillet over medium heat until fragrant and lightly browned, then cool and chop finely for even distribution.
    → Toasting deepens the nutty aroma and flavor; finely chopped nuts distribute well for a crunchy contrast in every bite.
  • Sprinkle the toasted nuts over each portion, followed by shredded coconut for texture and a subtle tropical note.
    → Crunch and a delicate coconut aroma enhance mouthfeel; adding coconut just before serving preserves some crispness and prevents sogginess.
  • Top with extra blueberries for a fresh, vibrant finish and drizzle with pure maple syrup or honey if desired.
    → Additional berries provide a pop of color and juice; a light finishing drizzle elevates gloss and sweetness without making the oats soggy.
Notes

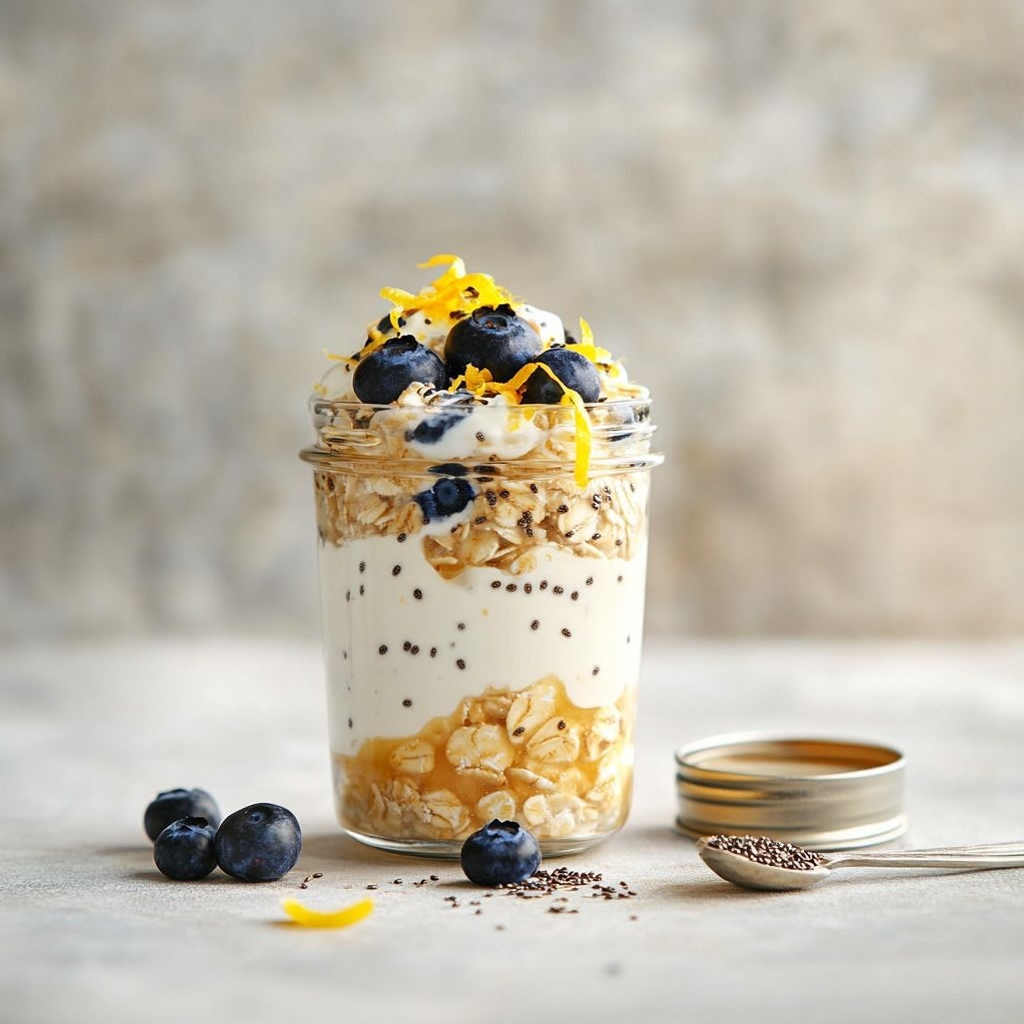
These gluten-free lemon blueberry overnight oats are naturally brightened by lemon zest and juice, with juicy blueberries for a tangy-sweet bite that stays creamy after chilling. Use certified gluten-free oats and unsweetened milk for a light, naturally sweet base; add plain yogurt for extra creaminess (dairy or dairy-free yogurt works). For a thicker texture, whisk in 1 tablespoon chia seeds and refrigerate—they help bind the oats into a custard-like consistency. Customize with toppings and mix-ins: toast almonds or walnuts for crunch, shredded coconut for a tropical note, extra blueberries on top, and a light drizzle of pure maple syrup or honey if you like additional sweetness. These oats can be prepared the night before and keep in the fridge for up to 3–4 days; you can freeze individual portions for longer storage and thaw in the fridge before serving. If using frozen berries, fold them in gently to minimize color bleed, and adjust lemon zest or juice to taste after chilling. Always ensure your oats and any toppings are certified gluten-free if you have gluten intolerance.
Tips

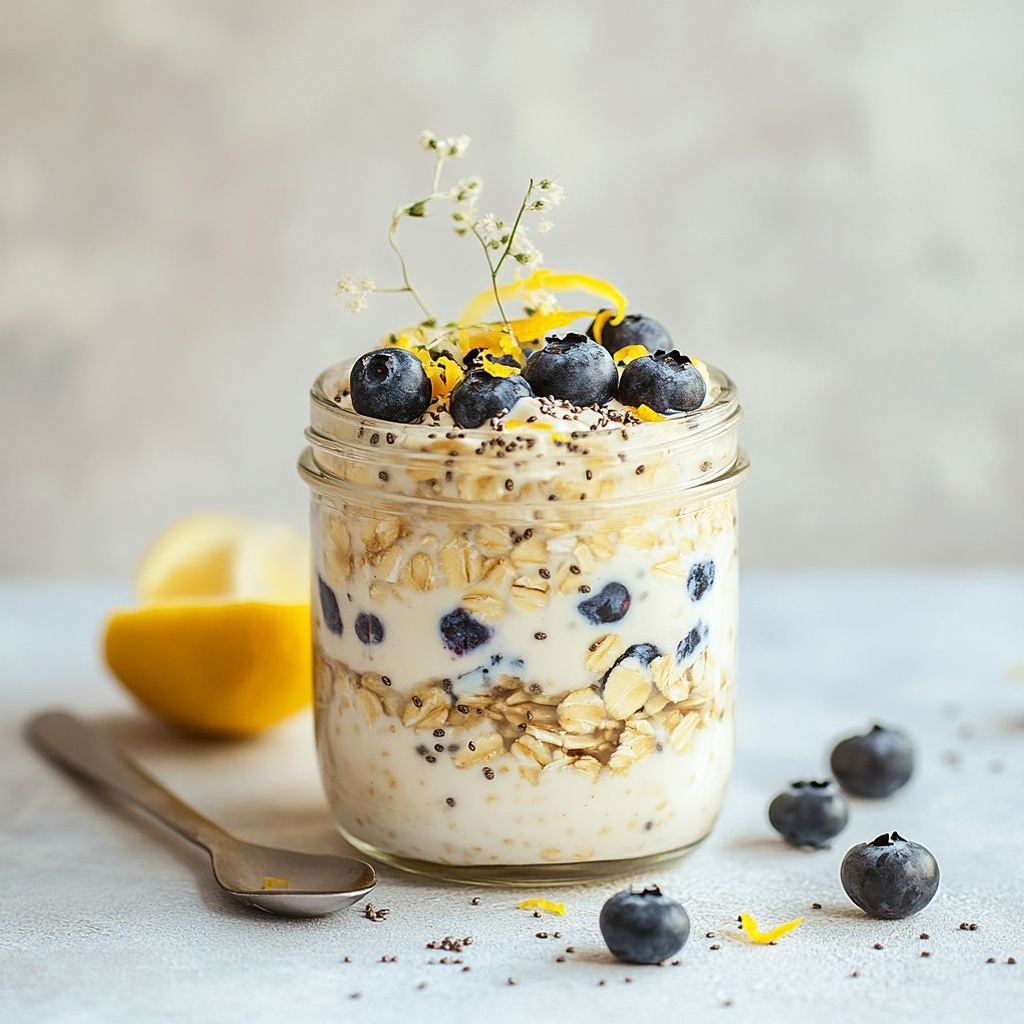
Tips for Perfect Lemon Blueberry Overnight Oats

  • Stick with old-fashioned rolled oats (certified gluten-free if needed) and keep them in the 1:1 ratio with liquid. Avoid steel-cut oats here, as they won’t soften evenly during an overnight soak.
  • If you’re dairy-free or watching calories, use unsweetened plant milk and a dairy-free yogurt alternative. You may find the oats a touch thinner without dairy; compensate with a bit more yogurt or a tablespoon of chia seeds.
  • Chia seeds are optional but help thicken and bind the mixture overnight. If you skip them, you may need an extra tablespoon of yogurt or a little extra oats to maintain creaminess.
  • Sweeten to taste after the oats have chilled. Start with 2 tablespoons of maple syrup or honey, then adjust after chilling since flavors mellow when cold. For a vegan swap, maple syrup is ideal.
  • A small pinch of salt brightens the lemon and berry flavors, especially when using unsweetened milk. Don’t skip if your milks are very low in sweetness.
  • To maximize lemon aroma, zest the lemon first and fold the zest into the mixture. You can add extra zest as a finishing touch right before serving for a stronger citrus kick.
  • Fresh lemon juice adds tang; add 2 tablespoons now or after the mixture has thickened to taste. If you’re sensitive to acidity, start with 1 tablespoon and adjust later.
  • Blueberries bring juice and color. Fresh berries are best, but frozen blueberries work well if you fold them in gently to minimize color bleed. Do not thaw frozen berries before adding.
  • For texture contrast, toast nuts (almonds or walnuts) in a dry skillet until fragrant, then chop finely and sprinkle on top just before serving for extra crunch.
  • Shredded coconut adds a light tropical note. Use unsweetened coconut and add it just before serving to preserve texture and avoid sogginess.
  • As a topping, extra blueberries, a light drizzle of maple syrup, and a dollop of yogurt mimic a balanced dessert-like finish. Serve cold or gently rewarm for a comforting warm breakfast.
  • Make-ahead prep: portion the mixture into jars, refrigerate for at least 4 hours or overnight. It will keep well in the fridge for 3–4 days; give it a quick stir before serving and adjust consistency with a splash more milk if needed.
  • Storage and safety: keep leftovers tightly covered in the fridge. Do not leave prepared oats at room temperature for more than 2 hours to maintain freshness and safety.
  • Flavor variations: add a splash of vanilla extract or a pinch of cinnamon for warmth. Swap in your favorite berries (strawberries, raspberries) for a different citrus-berry profile.

FAQ

What is Lemon Blueberry Overnight Oats?

A make-ahead breakfast where rolled oats soak in milk (dairy or non-dairy) with lemon zest and juice and blueberries. Optional yogurt and sweetener add creaminess and sweetness. The mixture sits in the fridge overnight and is ready to eat in the morning.

What are the basic ingredients and typical ratios?

Per serving: 1/2 cup rolled oats, 1/2 cup milk (dairy or non-dairy), optional 1/4 cup yogurt for extra creaminess, 1–2 teaspoons lemon zest, 1 tablespoon lemon juice, 1/2 cup blueberries, and sweetener to taste (maple syrup or honey). Optional 1–2 teaspoons chia seeds for thickness. Mix in a jar or bowl and refrigerate overnight.

Can I make a dairy-free version?

Yes. Use dairy-free milk (such as almond, soy, oat, or coconut) and omit dairy yogurt or substitute with a dairy-free yogurt. The lemon and blueberries keep the bright flavor regardless of milk choice.

Can I skip yogurt or chia seeds?

Yes. Skipping yogurt will reduce creaminess; you can compensate with a bit more milk or a dairy-free yogurt. Skipping chia seeds will still yield tasty overnight oats; chia simply adds thickness, so you can add a little extra oats or milk if you prefer.

Do I need to soak overnight?

Overnight soaking (about 6–8 hours) lets oats soften and flavors meld. You can shorten to 4 hours, but overnight yields the best texture. For quick prep, refrigerate at least a few hours.

How should I store this and how long will it keep?

Store in a sealed jar or container in the refrigerator. It keeps well for 3–4 days. Blueberries may bleed color into the oats over time, but that’s normal and still tasty. Stir before eating.

Can I warm it up or should I eat it cold?

Leftovers can be eaten cold straight from the fridge, or gently warmed in the microwave for 15–30 seconds (stir and check). If you warm it, a quick extra drizzle of lemon juice or a little zest brightens the flavor.

Can I customize with toppings and mix-ins?

Absolutely. Try toppings like extra lemon zest, fresh or thawed blueberries, chopped nuts (almonds, pecans), shredded coconut, additional chia seeds, granola, or a drizzle of maple syrup. For a richer option, stir in a splash of vanilla or vanilla yogurt.

How can I make it extra lemony or more blueberry-forward?

To boost lemon flavor, increase zest to 1–2 teaspoons and add a little more lemon juice (taste as you go). For a stronger blueberry presence, add extra fresh or frozen blueberries or a quick blueberry puree swirl. Use fresh lemon juice and zest for the brightest flavor, and a pinch of salt can enhance the brightness.
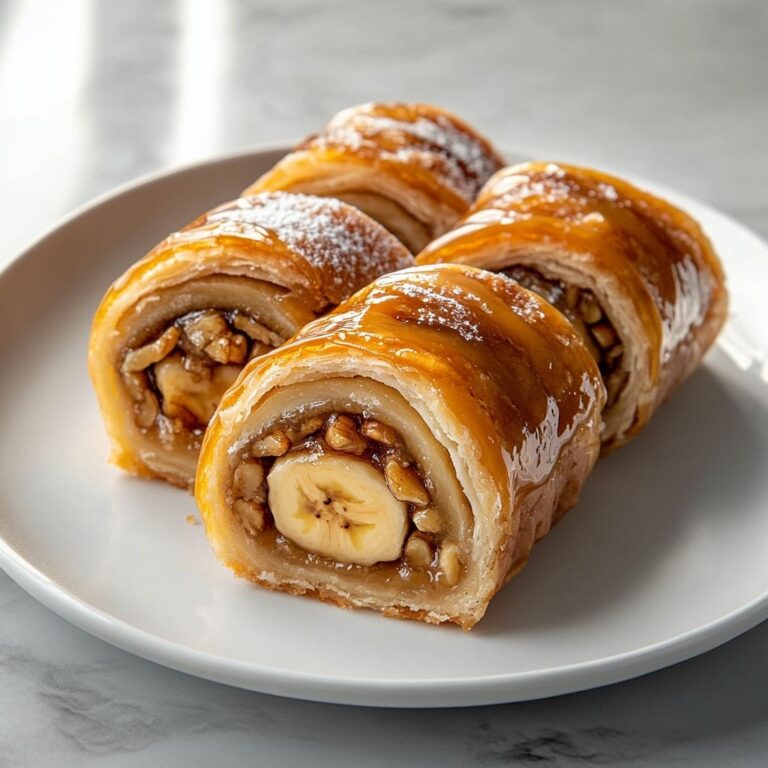
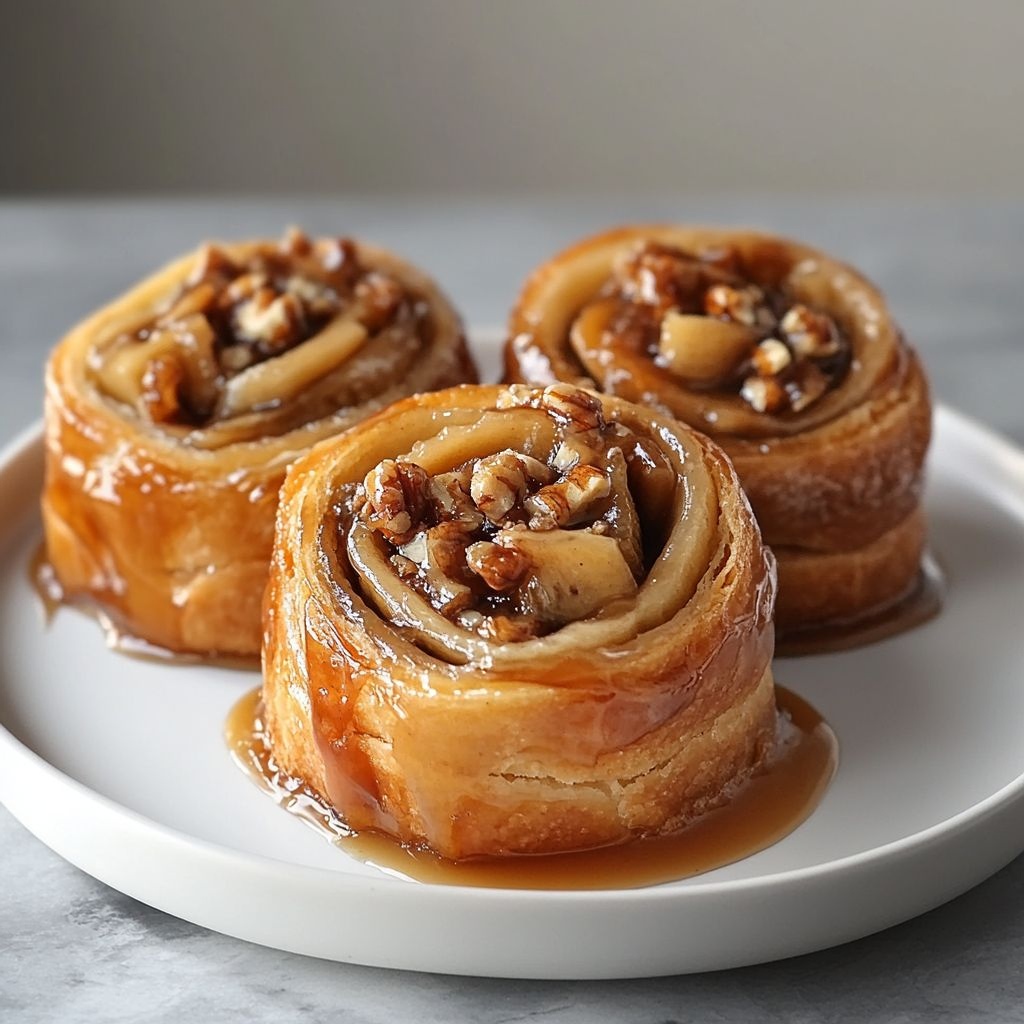
Introduction / Hook

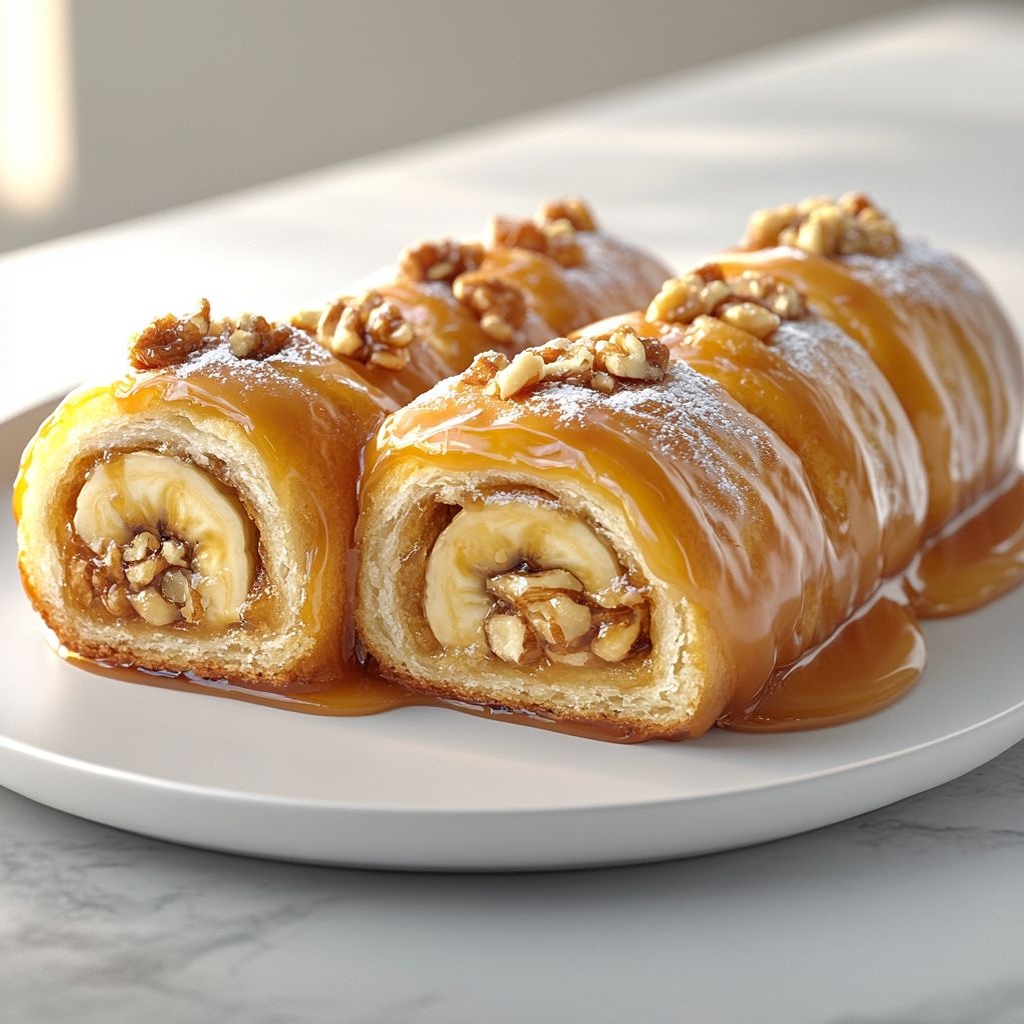
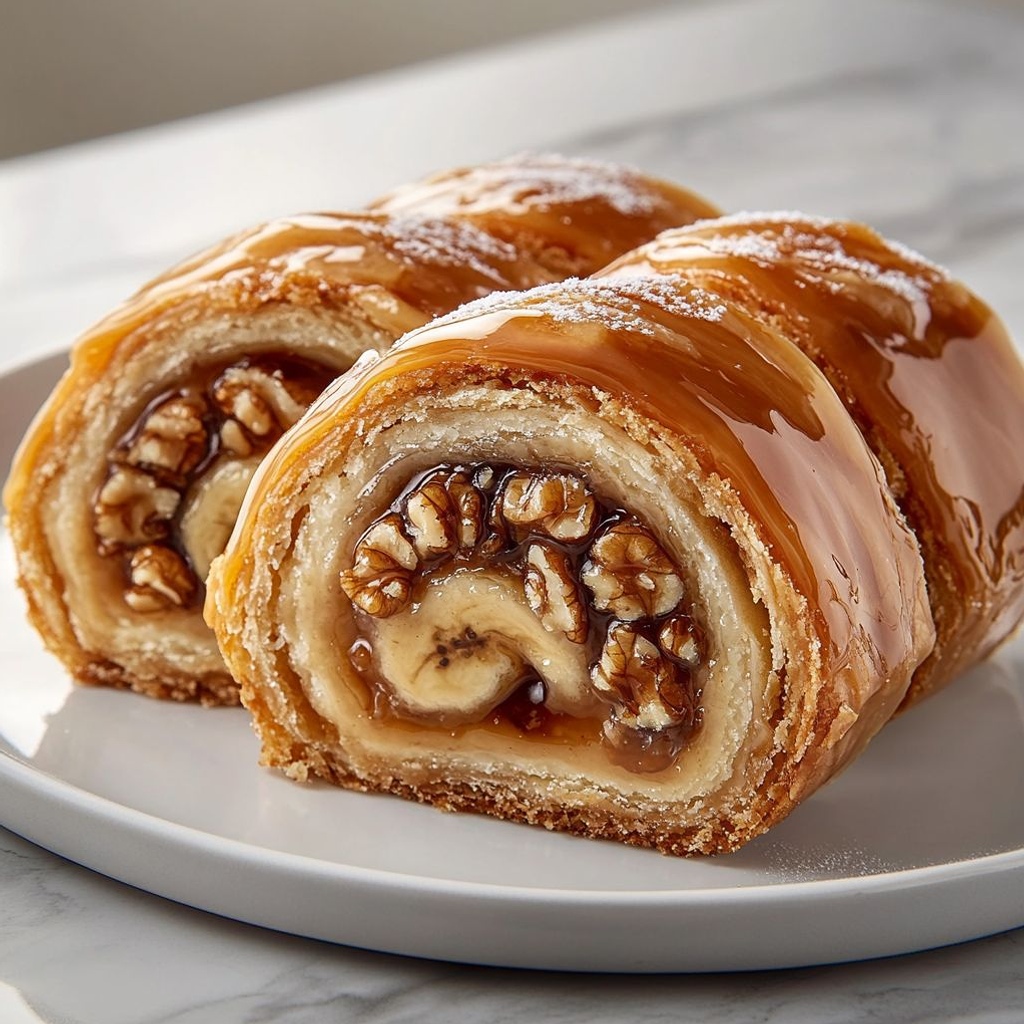
Imagine waking to the scent of caramel gently perfuming the air, a hint of warm vanilla curling around the room, and the sweet, mellow kiss of ripe bananas melting into a soft, pillow-like roll. Caramel Banana Nut Rolls are the kind of breakfast or weekend brunch that feels like a celebration in the kitchen—a timeless comfort with a modern twist. This is not just a pastry; it’s a morsel of nostalgia, a little hug you can smell before you even take a bite. The idea is simple and irresistible: tender, fluffy dough embracing ribbons of caramelized banana, crowned with a lively crunch from toasted nuts, and finished with a delicate drizzle that echoes the salted-sweet magic we crave in desserts. The contrast between the melt-in-your-mouth interior and the satisfyingly crisp edges creates a texture you’ll want to chase with every mouthful. It’s the kind of dish that makes ordinary mornings feel special and makes weekend indulgence feel earned, rather than indulgent for indulgence’s sake.

As you prepare these rolls, you’ll notice how the sweetness of caramel and banana plays off the nutty depth of roasted pecans or walnuts. There’s a gentle warmth to the flavor profile—subtle hints of vanilla, a whisper of cinnamon, and a pinch of salt that keeps every bite balanced rather than cloying. The aroma is almost hypnotic: the sugars begin their slow caramelization, the bananas soften and mingle with the dough, and the nuts release their toasty perfume. By the time the rolls emerge from the oven, the kitchen becomes a stage for a small, comforting miracle—a batch of rolls that look as if they came from a favorite bakery, yet feel like a treasured family recipe you’ve carried in your heart for years.

The Story Behind the Dish

Origins and Inspirations

Banana-forward desserts have deep roots in many culinary traditions—from tropical fruit desserts in Caribbean kitchens to comforting banana breads in North American homes. Caramel, with its long, slow dance of sweetness, has a universal appeal that never tires. Caramel Banana Nut Rolls bring these threads together in a way that feels both familiar and newly exciting. The idea grew from a simple observation: ripe bananas, when heated, surrender their starches and sugars in a way that enhances moisture and sweetness without overpowering other flavors. The result is a symphony in which the soft fruit acts as a natural binding agent for a richer dough, while the caramel provides a glossy, decadent glaze that invites the next bite.

Culinary imagination often takes its best detours in the realm of pastry, where the line between bread and dessert blurs into a pleasure you can savor at any time of day. Rolls are the perfect vessel for this, offering a sturdy, comforting base that holds up to bold fillings and decadent toppings. The addition of toasted nuts introduces a much-loved crunch—an audible reminder that texture matters as much as flavor. In many families, a morning bake like this becomes a small tradition, a ritual of letting the oven do its work while conversation flows and the first cups of coffee steam on the counter. Caramel Banana Nut Rolls capture that feeling—a blend of homey familiarity and indulgent sweetness that makes every morning feel a little brighter, every kitchen a little warmer.

Personal Anecdote

There’s a memory behind every bake like this—the kind of moment that lingers. For me, it’s the Sunday morning when the kitchen filled with the scent of caramel and roasted nuts while the rain tapped softly on the windows. We shared stories, the kids clinging to the edges of their plates as the rolls vanished one by one, each bite drawing a chorus of approving murmurs. It wasn’t about fancy ingredients or towering layers; it was about comfort, generosity, and the quiet joy of a treat that tasted like a hug. That memory became a blueprint for these rolls: a recipe that could travel from a cozy family kitchen to a crowd-pleasing brunch without sacrificing warmth or personality. It’s the kind of dish you make when you want to slow down, gather friends and family, and savor something that feels both luxurious and utterly approachable.

Why You’ll Love This Recipe

  • Indulgent yet approachable: A bakery-worthy result with a comforting, homey appeal that’s easy to recreate in a busy kitchen.
  • Two-layer flavor harmony: The gentle sweetness of caramel and banana pairs beautifully with the toasty, nutty crunch—balanced by a hint of vanilla and spice.
  • Texture contrast galore: Fluffy, tender internal crumb wrapped around a chewy, caramel-tinged filling, finished with a satisfying crust and a glossy caramel drizzle.
  • Family-friendly as a brunch staple: Sweet enough to feel special but not so sugary that it can’t be enjoyed with a mug of coffee or a glass of milk.
  • Flexible and forgiving: Works with a range of nuts and optional mix-ins, so you can tailor it to what you have on hand or what your guests love.
  • Make-ahead potential: Great for weekend planning—you can prep components or assemble rolls in advance for a smoother bake time on the day you crave them.
  • Kid- and crowd-pleaser: The familiar flavors of banana and caramel, accented by the welcome crunch of nuts, make it a hit with both children and adults.
  • Goes beyond breakfast: Equally suited as a dessert or a show-stopping teatime treat, sharing plates and stories around a warm pan of rolls.

Flavor Profile & Texture

The essence of Caramel Banana Nut Rolls lies in the careful interplay of sweetness, fruitiness, and warmth. The banana provides a mellow, tropical sweetness that becomes almost custard-like when warmed, lending moisture and a delicate fruitiness that never cloys. Caramel, with its classic butter-rich depth, brings a glossy, luxurious note that echoes across each bite, a reminder of dessert-level decadence without needing anything extra. The nuts contribute a roasted, earthy contrast—a savory-laced bite that cuts through the sweetness and adds a robust counterpoint to the soft, airy crumb.

As you bite into a roll, the initial impression is soft bread with a gentle sweetness that reads like a bakery’s best-kept secret. The filling swirls with the banana’s richness and caramel’s caramelized edge, creating ribbons of flavor that are both familiar and indulgent. The nuts deliver a crunch that punctuates the chew, adding texture and a hint of toasty bitterness that rounds out the overall profile. A light dusting of salt—whether in the dough, the filling, or the glaze—pulls the flavors into sharper focus, making the sweetness feel more vibrant and multi-dimensional rather than one-note.

Texture-wise, you’ll experience a tender, almost cloud-like interior, achieved through a soft, enriched dough that rises to a gentle, springy crumb. The outer crust offers a slight caramelized edge, a delicate crust that yields to the softness beneath. The caramel glaze or drizzle (where it’s used) adds a luminous gloss and a final pocket of sweetness that lingers on the palate. The banana’s natural moisture keeps every layer cohesive, so even the most generously filled roll remains balanced and easy to eat in one bite. It’s a symphony of textures—from the initial bite to the lingering finish—that makes this dish feel both comforting and adventurous at once.

Occasions & Pairings

Caramel Banana Nut Rolls shine in a variety of settings, from weekend family mornings to festive holiday gatherings. They’re equally wonderful as a sit-down brunch centerpiece or a casual, make-ahead treat that you can share with neighbors or coworkers. Consider them for special occasions when you want something a little elevated but not fussy—Mother’s Day breakfasts, birthdays, or a thoughtful weekend surprise for someone recovering from a tough week. They also work beautifully as a dessert option after a light supper or as a tempting late-afternoon tea-time bite.

Pairings that elevate the experience:

  • Beverages: A strong cup of coffee, a chai latte, or a glass of cold milk all complement the rolls’ sweetness and cut through the richness of the caramel. For something more indulgent, a small glass of creamy dessert wine or a dark roast coffee with chocolate notes can echo the roasted-nut tones.
  • Side dishes: A fresh fruit salad with citrus notes, a dollop of lightly sweetened yogurt, or a spoonful of lightly salted ricotta can balance the dessert-like quality with brightness and tang.
  • Dessert companions: A light vanilla or cinnamon crème fraîche, a scoop of vanilla bean ice cream, or a delicate fruit compote make for an elegant trio that feels celebratory without being heavy.
  • Seasonal twists: In cooler months, a hint of warm spices such as cinnamon, cardamom, or nutmeg can accent the rolls’ flavor profile; in warmer months, a splash of citrus zest can brighten the banana and caramel balance.

Tips, Variations & Substitutions

Here are ideas to tailor Caramel Banana Nut Rolls to your pantry, dietary needs, or guest preferences while keeping the spirit of the dish intact.

General Tips

  • Choose ripe, naturally sweet bananas; they mash easily and intensify the banana flavor without adding tartness.
  • Toast the nuts until fragrant for maximum aroma and crunch; a light chop ensures every bite delivers a crisp texture.
  • Balance the sweetness with a touch of salt in the glaze or sprinkle a pinch of flaky sea salt on top after baking for contrast.
  • Allow dough to rest and rise in a warm, draft-free spot to achieve a soft, airy crumb—patience yields the best texture.
  • Fresh fruit can be layered in the filling for added brightness; a hint of citrus zest in the filling can brighten the overall profile.

Vegan Version

For a vegan adaptation, substitute plant-based dough ingredients where needed and use a dairy-free caramel or a maple-syrup-based glaze. The bananas’ natural sweetness will help maintain moisture, and the nuts add enough richness to keep the rolls satisfying without dairy.

Gluten-Free Version

A gluten-free flour blend with a little extra binding agent can yield a soft, tender crumb that mimics the classic texture. Consider adding a small amount of xanthan gum (if your blend doesn’t include it) to replicate the elasticity of gluten and achieve a roll that still holds together well during slicing and serving.

Low-Sugar or Healthier Twist

Reduce caramel quantity or swap in a lighter caramel drizzle made from a sugar-reduced syrup. You can also use mashed banana in the filling to provide moisture and sweetness without relying solely on added sugars. Pair with a higher-protein yogurt or a dairy-free yogurt for a more balanced brunch plate.

Regional Twists

  • Caribbean-inspired: Add a pinch of nutmeg and a touch of coconut with shredded coconut sprinkled on top after baking for a tropical aroma and texture.
  • Nut-forward variation: Swap in pecans for walnuts and dust with crushed toffee bits just before serving for a crunchy, sweet-savory finish.
  • Citrus accent: A hint of orange or lime zest in the dough or filling can lift the flavors and add an unexpected brightness to the caramel and banana.

Storage & Make-Ahead Ideas

These rolls are wonderfully forgiving when it comes to planning ahead. You can prepare components in advance or assemble the full rolls and refrigerate them for later baking. Here are practical strategies to maximize your time and maintain texture and flavor:

  • Make-ahead dough: Prepare the enriched dough, shape into rolls, and refrigerate for up to 12-24 hours before baking. When you’re ready to bake, allow the rolls to come to room temperature and complete their rise before sliding them into the oven.
  • Assembled and refrigerated: Assemble the rolls with the filling, wrap tightly, and refrigerate. Bake directly from the fridge, adding a few extra minutes to the bake time.
  • Leftovers: Store cooled rolls in an airtight container at room temperature for up to 2 days. For longer storage, freeze individual rolls or slices; reheat gently in a low oven or microwave until warm and soft, then rewarm the glaze to restore gloss and stickiness.
  • Glaze preparation: If you prefer, you can keep the glaze separate and apply just before serving to maintain a bright, glossy finish and prevent sogginess.

Fun Facts & Trivia (Optional)

  • Bananas are a natural moisture boost in baking; when heated, their sugars caramelize subtly, contributing to a richer flavor without needing extra sugar.
  • Caramel is the result of sugar undergoing a controlled browning process; the glossy sheen on these rolls is a telltale sign of properly caramelized sugars that cling to the surface.
  • Leftover caramelized banana bits in the bottom of the pan can be scraped up and used as a syrupy topping for pancakes or stirred into yogurt for a quick dessert hack.
  • Toast levels matter: lightly toasting the nuts just until aromatic makes a dramatic difference in flavor intensity and the overall sensory experience of the dish.
  • Roll breads have a long culinary history across various cultures; the method of rolling a sweet filling within a yeasted dough is a tradition that echoes both pastry technique and comfort-food craftsmanship.

Ingredients

Dough Base

  • 3 1/2 cups all-purpose flour (or bread flour)
    → This flour provides the gluten structure that gives the rolls their rise, chew, and soft crumb. Use all-purpose for a balanced texture or bread flour for a chewier bite. To measure accurately, lightly spoon the flour into the measuring cup and level off; sifting can help if the air is dry. You’ll knead this dough later to develop the gluten until smooth and elastic.
  • 1/4 cup granulated sugar
    → Adds a touch of sweetness and helps feed the yeast just enough to promote a gentle rise. It also aids browning during baking. Dissolve it into the warm milk or mix with the dry ingredients so it distributes evenly.
  • 2 1/4 tsp active dry yeast
    → The leavening agent that makes the dough rise into fluffy rolls. Proof the yeast in the warm milk with a pinch of sugar until it’s foamy; this confirms the yeast is alive. Keep the liquid around 105–110°F (40–43°C); hotter temperatures can kill the yeast.
  • 1/2 tsp fine salt
    → Enhances flavor and helps control the fermentation process while strengthening the gluten network. Distribute evenly with the flour to avoid direct contact with the yeast.
  • 3/4 cup warm milk (about 110°F/43°C)
    → Hydrates the dough and activates the yeast. Whole or 2% milk yields a richer crumb; dairy-free milk can be used if needed. Ensure the milk is warm, not hot, to keep the yeast happy.
  • 2 large eggs, room temperature
    → Provide structure, richness, and moisture. Room-temperature eggs emulsify more effectively, giving a smoother dough. Lightly whisk the eggs into the warm milk before adding to the dry mix.
  • 1/3 cup unsalted butter, melted and cooled
    → Adds tenderness and flavor; fat shortens gluten strands for a softer crumb. Stir it in after the eggs to keep the yeast alive, and ensure it’s cooled so it won’t cook the eggs or kill the yeast.
  • 1 tsp vanilla extract (optional)
    → Adds warmth and depth to the dough’s aroma, pairing nicely with banana and caramel. If you’re keeping the dough simple, you can omit it.
Banana Caramel Swirl Filling

  • 2 medium ripe bananas, mashed
    → Provides natural sweetness, moisture, and banana flavor. Use bananas with generous brown spots for maximum sweetness. Mash until smooth but still a touch chunky to create a nice swirl when rolled.
  • 1/2 cup caramel sauce
    → Forms the luscious caramel swirl throughout the rolls. Use store-bought for convenience or homemade for a deeper flavor. If homemade, allow it to cool to a thick, spreadable consistency so it won’t ooze excessively into the dough.
  • 1/2 cup light brown sugar
    → Adds moisture-retaining sweetness and a caramelly note that pairs with the banana. Combine with the melted butter to create a glossy, ribbon-like filling when spread over the dough. Taste and adjust to your sweetness preference.
  • 2 tbsp unsalted butter, melted
    → Enriches the filling and helps the sugar distribute evenly. Let it cool slightly before mixing with the banana to prevent the filling from becoming too runny.
  • 1/2 tsp ground cinnamon
    → Warm spice that complements banana and caramel. Optional, but it enhances aroma and depth; omit if you prefer a pure banana-caramel flavor.
  • pinch of salt
    → Balances sweetness and intensifies flavors, especially the caramel. Use a tiny pinch if your caramel is already salty or if you used salted butter.
  • 1/2 cup chopped walnuts (optional)
    → Adds crunch and a toasty nutty contrast. Toast the nuts lightly in a dry skillet for extra aroma before chopping and folding into the filling or sprinkling on top for extra texture.
Cream Cheese Glaze

  • 4 oz cream cheese, softened
    → Provides a tangy, creamy layer that balances the sweetness of the caramel and banana. Soften at room temperature to ensure a silky, lump-free glaze or filling when whisked with the butter.
  • 2 tbsp unsalted butter, softened
    → Helps create a luxurious, smooth glaze with the cream cheese. Keeping it soft ensures the glaze comes together easily and remains spreadable rather than crusting.
  • 1 cup powdered sugar
    → Sweetens and thickens the glaze to a pourable yet spoonable consistency. Sift before use to prevent lumps. Add more sugar if you want a thicker glaze or a splash of milk to loosen it.
  • 1-2 tbsp milk (or heavy cream)
    → Adjusts glaze consistency. Start with 1 tablespoon and add more as needed to reach a pourable, glossy finish that will coat the rolls without dripping excessively.
  • 1/2 tsp vanilla extract
    → Subtle vanilla depth that enhances the glaze’s flavor. Optional, but recommended for a richer finish.
Finish & Garnish

  • Additional caramel sauce for drizzling
    → Finishes the rolls with a glossy caramel drizzle after baking. Rewarm to a pourable consistency if needed. This not only adds sweetness but also an appealing sheen.
  • 1/4 cup chopped walnuts or pecans (optional)
    → Extra crunch and nutty color on top. Toast the nuts lightly before sprinkling for peak aroma and flavor. Chop finely so they distribute evenly and don’t overpower each bite.
  • Powdered sugar for dusting (optional)
    → A delicate finishing touch that adds a bakery-fresh look. Dust lightly after the glaze sets for a pretty presentation. Not essential, but aesthetically pleasing.

Instructions

  • Proof the yeast in 3/4 cup warm milk with a pinch of granulated sugar until foamy, about 5–10 minutes, at 105–110°F (40–43°C).
    → This confirms the yeast is alive and active; the warm liquid awakens the cells so they will produce gas for leavening. If no foam forms, discard and restart with fresh yeast and properly tempering the milk.
  • Whisk together 3 1/2 cups all-purpose flour, 1/4 cup granulated sugar, and 1/2 teaspoon fine salt in a large mixing bowl until evenly distributed so the dough rises uniformly and seasoned flavor is balanced.
    → Even distribution of dry ingredients prevents pockets of sweetness or saltiness that could unbalance the dough and affect gluten development.
  • Stir the proofed yeast mixture (the foamy milk and yeast) into the dry ingredients along with 2 large eggs whisked with 1/3 cup melted and cooled unsalted butter and optional 1 teaspoon vanilla until a shaggy dough forms.
    → Bringing the liquids to the flour engages gluten formation; the eggs add structure and richness, while the butter tenderizes the crumb.
  • Turn the dough onto a lightly floured surface and knead for 8–10 minutes until smooth and elastic, performing the windowpane test by stretching a small piece until it becomes thin and translucent without tearing.
    → Kneading develops gluten strength for a soft yet structured crumb; a successful windowpane confirms adequate gluten development.
  • Place the dough in a lightly oiled bowl, turn to coat, cover with plastic wrap or a damp towel, and let rise in a warm, draft-free spot until doubled, about 60–90 minutes depending on temperature.
    → This first fermentation builds flavor and lightness; avoid over-proofing which can cause a collapsed structure during baking.
  • While the dough rises, prepare the Banana Caramel Swirl filling by mashing 2 ripe bananas until smooth with small lumps, then whisk in 1/2 cup caramel sauce and 1/2 cup light brown sugar until evenly combined.
    → The mixture should be thick and spreadable so it swirls evenly without soaking into the dough; the banana provides moisture and flavor while caramel adds depth.
  • Whisk in 2 tablespoons melted unsalted butter, 1/2 teaspoon ground cinnamon, and a pinch of salt; until smooth, then fold in 1/2 cup chopped walnuts if using, ensuring even distribution.
    → Butter emulsifies with the filling to keep it glossy and cohesive; cinnamon enhances aroma and complements the banana and caramel; walnuts add crunch when evenly dispersed.
  • Once the dough has risen, lightly punch it down and roll it on a floured surface into a rectangle about 12 by 18 inches (30 by 45 cm) and roughly 1/4 inch (6 mm) thick.
    → Rolling to uniform thickness ensures even baking and uniform slices; a neat rectangle makes it easier to spread the filling evenly and roll tightly.
  • Spread the banana caramel filling in an even layer over the dough, leaving a 1/2 inch (1 cm) border along the far edge to seal the roll; an even layer prevents gaps and ensures consistent layers in each spiral.
    → A uniform spread prevents dense pockets and allows a clean, defined swirl in every roll.
  • Optionally sprinkle half of the toasted walnuts across the filling at this stage, then drizzle any extra caramel lightly across the surface to create a ribbon of sweetness; reserve the remaining nuts for topping.
    → The nuts add texture and flavor contrast; toasty warmth enhances aroma and overall depth of the filling.
  • Beginning with the long edge, tightly roll the dough into a log, pressing firmly to seal the seam; a tight roll maintains shape during proofing and baking and reduces uneven gaps between layers.
    → A snug roll yields clean, uniform spirals and prevents the filling from leaking out during slicing.
  • Using a sharp serrated knife or unflavored kitchen floss, cut the log into 12 evenly thick rolls about 1 1/4 to 1 1/2 inches thick, cleaning the cut with a gentle back-and-forth motion for precise slices.
    → Even slices ensure uniform baking and a consistent caramel-to-banana-to-dough ratio in every bite.
  • Grease and/or line a 9×13 inch (23×33 cm) baking dish with parchment, then arrange the rolls cut-side up in the dish with about 1 inch (2.5 cm) of space between them; you may divide among two loaf pans if preferred.
    → Spacing allows expansion without sticking, and choosing pan size affects bake time and crumb texture.
  • Cover the pan(s) loosely and let the rolls undergo a second rise until puffy and nearly doubled, about 30–45 minutes; a gentle rise ensures a soft, airy crumb and prevents over-proofing from causing collapse in the oven.
    → This final rise develops volume and a lighter texture once baked.
  • Preheat your oven to 350°F (175°C) and place the rack in the middle; preheating ensures even heat distribution for uniform browning and proper setting of the filling.
    → Consistent oven temperature is essential for predictable bake time and a cohesive roll structure.
  • Bake the rolls for 25–30 minutes, rotating the pan halfway if your oven has hot spots, until the tops are deeply golden and an instant-read thermometer reads about 190°F (88°C) in the center.
    → A golden crust and correct internal temperature indicate fully set, moist, and tender rolls; rotation helps prevent uneven browning.
  • Meanwhile, prepare the Cream Cheese Glaze by beating 4 oz (115 g) softened cream cheese with 2 tablespoons softened unsalted butter until smooth, then beat in 1 cup powdered sugar until light and fluffy.
    → Softening the dairy ensures a lump-free glaze; creaming lightens the texture so it spreads evenly over warm rolls.
  • Beat in 1–2 tablespoons milk (or heavy cream) and 1/2 teaspoon vanilla until the glaze reaches a pourable, glossy consistency; adjust with more sugar or milk as needed for your preferred thickness.
    → A glaze that is too thick will not coat evenly; loosen with a touch more liquid to achieve a bakery-finish shimmer on the rolls.
  • When the rolls come out of the oven, allow them to rest 5–10 minutes so the filling sets slightly, then spread the cream cheese glaze over the tops while they are still warm to help it melt and cling.
    → The warmth helps the glaze glaze evenly and creates a luscious, glossy surface rather than a gritty, crumbly finish.
  • If desired, drizzle additional caramel sauce over the glazed rolls for extra shine and sweetness, and garnish with the remaining toasted walnuts; finish with a light dusting of powdered sugar for an bakery-style presentation.
    → The extra caramel and nuts provide visual appeal, added texture, and a final flavor boost that enhances the overall indulgence.
  • Serve the Caramel Banana Nut Rolls warm or at room temperature, cutting with a clean serrated knife to reveal distinct spirals; store leftovers in an airtight container for up to 2 days and gently rewarm before serving.
    → Freshly cut sections show off the swirl; proper storage preserves moisture and the soft crumb, while gentle rewarming revives the textures and aroma.

Notes

These caramel banana nut rolls are a rich, comforting pastry that feature ripe bananas, a glossy caramel swirl, and toasty walnuts tucked into a soft, fluffy crumb. For best rise and texture, proof the yeast in warm milk (about 105–110°F / 40–43°C) with a pinch of sugar until foamy, then whisk the eggs into the warm milk before combining with the dry ingredients; knead the dough until smooth and elastic, about 8–10 minutes, and let it rise until doubled. Roll the dough into a rectangle, spread the banana filling evenly, drizzle with caramel, and sprinkle with brown sugar, cinnamon, and a pinch of salt; then roll tightly lengthwise and cut into even rolls. Place the slices seam-side down in a greased pan and let them rise again until puffy before baking at 350°F (175°C) until golden and the caramel is bubbling, about 25–30 minutes. Make the cream cheese glaze by beating softened cream cheese with butter, powdered sugar, milk, and vanilla until smooth, then drizzle generously over warm rolls so it melts into the swirls. Finish with extra caramel drizzle and chopped nuts if desired, and dust with powdered sugar for a bakery-style finish. These rolls freeze well once cooled and reheat beautifully for a cozy weekend breakfast or dessert; serve warm with a scoop of vanilla ice cream or a dollop of whipped cream for an extra indulgent treat. If you have gluten sensitivity, substitute a certified gluten-free all-purpose flour blend and check that your yeast and flavorings are gluten-free to ensure a safe bake.

Tips

General dough and preparation tips

  • Measure flour by scooping gently into the cup and leveling off. For best consistency, weigh flour (about 125 g per cup for all-purpose) to ensure the dough isn’t too stiff or too slack.
  • Keep liquids warm, not hot: aim for 105–110°F (40–43°C) when blooming the yeast. Water or milk that’s too hot can kill the yeast and prevent rising.
  • Proof the yeast in the warm liquid with a pinch of sugar until it’s foamy. If it doesn’t foam within 5–10 minutes, start with fresh yeast.
  • Use cooled melted butter and room-temperature eggs to prevent shocking the yeast and to help the dough come together smoothly.
  • When kneading by hand, stretch and fold the dough until it’s smooth and elastic and passes the windowpane test (you can nearly see light through a thin membrane).
  • Cover dough well for rising: a lightly oiled plastic wrap or a damp towel helps prevent a dry crust forming on the outside.
  • If your kitchen is cool, let the dough rise in a slightly warm, draft-free place; you can place the bowl in a turned-off warm oven or near a warm, not hot, radiator.
  • After the first rise, punch down gently and proceed to roll the dough into a rectangle. Keep it even in thickness for uniform cooking.
Shaping, filling, and layering tips

  • Roll the dough into a rectangle about 12×18 inches for even rolls. The closer you get to a uniform thickness, the more evenly the filling bakes.
  • Spread the banana filling in a thin, even layer, leaving a small margin along the edges to keep filling from squeezing out when you roll.
  • When mixing the banana mixture, let the melted butter cool slightly so it won’t melt the bananas into a puddle or make the mixture too runny.
  • If the caramel swirl is very thick, loosen with a teaspoon of cream or milk so it glides evenly without oozing too much into the dough.
  • To prevent the filling from leaking, chill the rolled dough for 15–20 minutes before slicing; this helps set the swirls and makes clean cuts.
  • Cut rolls with a sharp knife or unflavored dental floss for clean, even slices. Wipe the blade between cuts to keep edges neat.
  • Space rolls evenly on the pan so they have room to expand without sticking together.
Baking and finish tips

  • Bake at about 350°F (175°C) until the tops are golden and the centers are set. If the tops brown too quickly, tent with foil for the last 5–10 minutes.
  • Check for doneness by inserting a toothpick in the center; it should come out clean or with a few moist crumbs.
  • For a glossy glaze, let the rolls cool slightly before drizzling with additional caramel or the cream cheese glaze to prevent running off the edges.
  • If your glaze is too thick, whisk in a little milk or cream a teaspoon at a time until you reach a pourable consistency. If too thin, add more powdered sugar a tablespoon at a time.
Cream cheese glaze and finish tips

  • Soften the cream cheese and butter thoroughly at room temperature for a silky glaze without lumps. Whisk until completely smooth before adding powdered sugar.
  • Sift powdered sugar to avoid gritty lumps. Start with 1 cup and add more to reach your desired thickness.
  • Adjust glaze consistency with milk or cream. A thinner glaze will drizzle; a thicker glaze will hold its shape better on top of the rolls.
  • Chill the glaze briefly if you’re adding it while rolls are still warm; a warm glaze can melt into the filling.
Finish, garnish, and storage tips

  • Finish with an additional caramel drizzle for a premium look and extra sweetness. Re-warm caramel to a pourable state if it thickens in the fridge.
  • Toast optional nuts (walnuts or pecans) lightly before sprinkling on top for aroma and crunch. Chop finely so they distribute evenly.
  • Dust with powdered sugar just before serving for a bakery-fresh presentation.
  • Store baked rolls in an airtight container at room temperature for up to 2 days, or refrigerate for up to 5 days. Reheat gently in the oven or microwave before serving for best texture.
  • For make-ahead or freezing: freeze unglazed rolls after cutting and placing in the pan. Thaw and bake as directed, adding a few minutes to bake time. You can also freeze baked rolls and reheat covered in foil to preserve moisture.

FAQ

What are Caramel Banana Nut Rolls?

Caramel Banana Nut Rolls are soft, enriched yeast rolls filled with a caramel-banana-nut mixture. They are rolled up, sliced into individual portions, baked until golden, and finished with extra caramel drizzle. Perfect for breakfast, brunch, or a sweet treat.

What ingredients do I need to make Caramel Banana Nut Rolls?

Typical ingredients include:

  • Dough: all-purpose flour, active dry yeast, milk (or plant-based milk), unsalted butter, eggs, sugar, and a pinch of salt.
  • Filling: ripe bananas, brown sugar, cinnamon, melted butter, and chopped nuts (walnuts or pecans).
  • Caramel sauce: brown sugar, butter, and heavy cream or coconut cream (plus a pinch of salt).
  • Optional toppings: powdered sugar or extra caramel for drizzling.
Can I make this dairy-free or gluten-free?

Yes. Here are common substitutions:

  • Dairy-free: use plant-based milk (almond, soy, or oat) and dairy-free butter or coconut oil. For the caramel, use coconut cream or coconut milk with dairy-free butter.
  • Gluten-free: use a 1-to-1 gluten-free flour blend formulated for yeast doughs (note that texture may differ slightly).

Tip: gluten-free doughs can be stickier; add a little extra flour or GF flour blend as needed and allow for a longer rise in a warm spot.

Can I prepare Caramel Banana Nut Rolls in advance?

Yes. You can:

  • Make the dough and refrigerate it overnight after the first rise, then roll, fill, slice, and bake the next day.
  • Assemble the rolls up to the point of slicing, cover tightly, and refrigerate for several hours or overnight; bake when ready.

Allow extra baking time if the dough is cold from the fridge.

How do I make the caramel for filling and topping?

Basic stovetop caramel method:

  • Combine brown sugar and butter in a saucepan over medium heat, stirring until melted and smooth.
  • Slowly whisk in cream (or coconut cream) until you reach a pourable consistency. Add a pinch of salt if desired.
  • Let it cool slightly before spreading onto the rolled dough or drizzle over baked rolls.

Note: Be careful with hot sugar; avoid burning and keep children away during caramel preparation.

What pan and oven settings should I use?

Use a greased 9×13-inch baking pan. Preheat oven to 350°F (175°C). After shaping, let the rolls proof until puffy (usually 20–40 minutes, depending on room temperature), then bake for about 25–35 minutes until golden brown and cooked through.

How do I assemble and bake the rolls?

General steps:

  • Roll the dough into a rectangle; brush with melted butter.
  • Spread a layer of caramel, then layer sliced bananas and chopped nuts.
  • Roll tightly along the short edge, pinch seam closed, and slice into individual rolls.
  • Arrange the slices in the prepared pan; cover and let rise if time allows, then bake until golden.
  • Drizzle with extra caramel or dust with powdered sugar before serving.
How do I know when the rolls are done?

Look for a deep golden brown color on top and near the edges. The filling should be set, and a toothpick inserted into a roll should come out clean (not wet). The internal temperature of the center should be around 190–200°F (88–93°C) if you’re checking with a thermometer.

How should I store leftovers?

Let the rolls cool completely, then store in an airtight container at room temperature for up to 2 days. For longer storage, refrigerate for up to 4 days. Reheat gently in the microwave or oven before serving to restore softness.

Can I freeze the rolls?

Yes. You can:

  • Freeze unbaked rolls after slicing in the pan, tightly covered, for up to 2–3 months. Thaw and let rise before baking as directed.
  • Freeze baked rolls in an airtight container for up to 2–3 months. Reheat in the oven to refresh texture.
What variations can I try?

Try these ideas to customize the rolls:

  • Swap pecans for walnuts or almonds, or omit nuts for nut allergy.
  • Add chocolate chips or a thin layer of cream cheese filling for extra richness.
  • Replace bananas with sliced apples or pears and add a pinch of nutmeg.
  • Finish with a thick caramel glaze or a maple-cashew drizzle for a different flavor profile.

Introduction / Hook

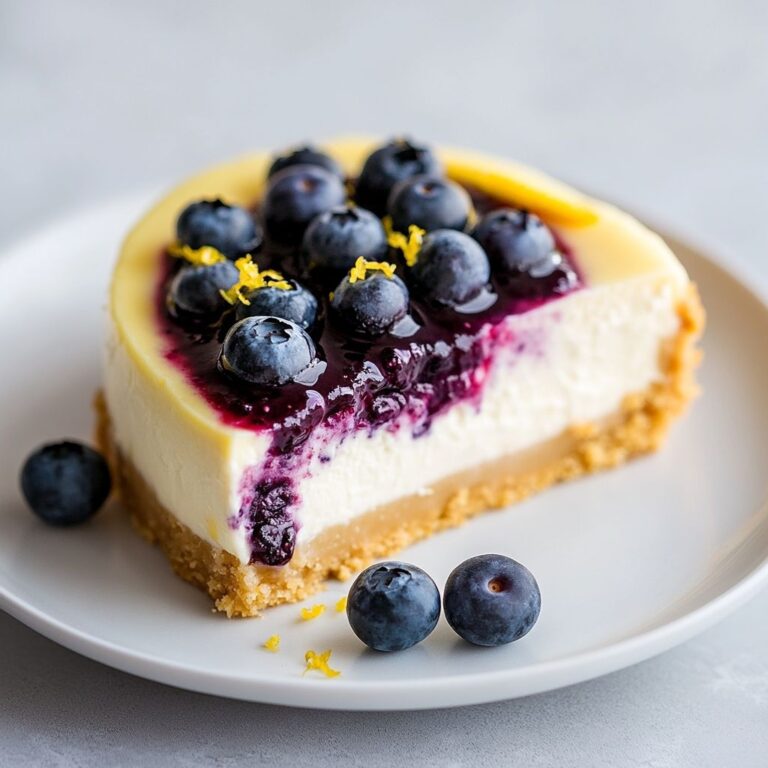
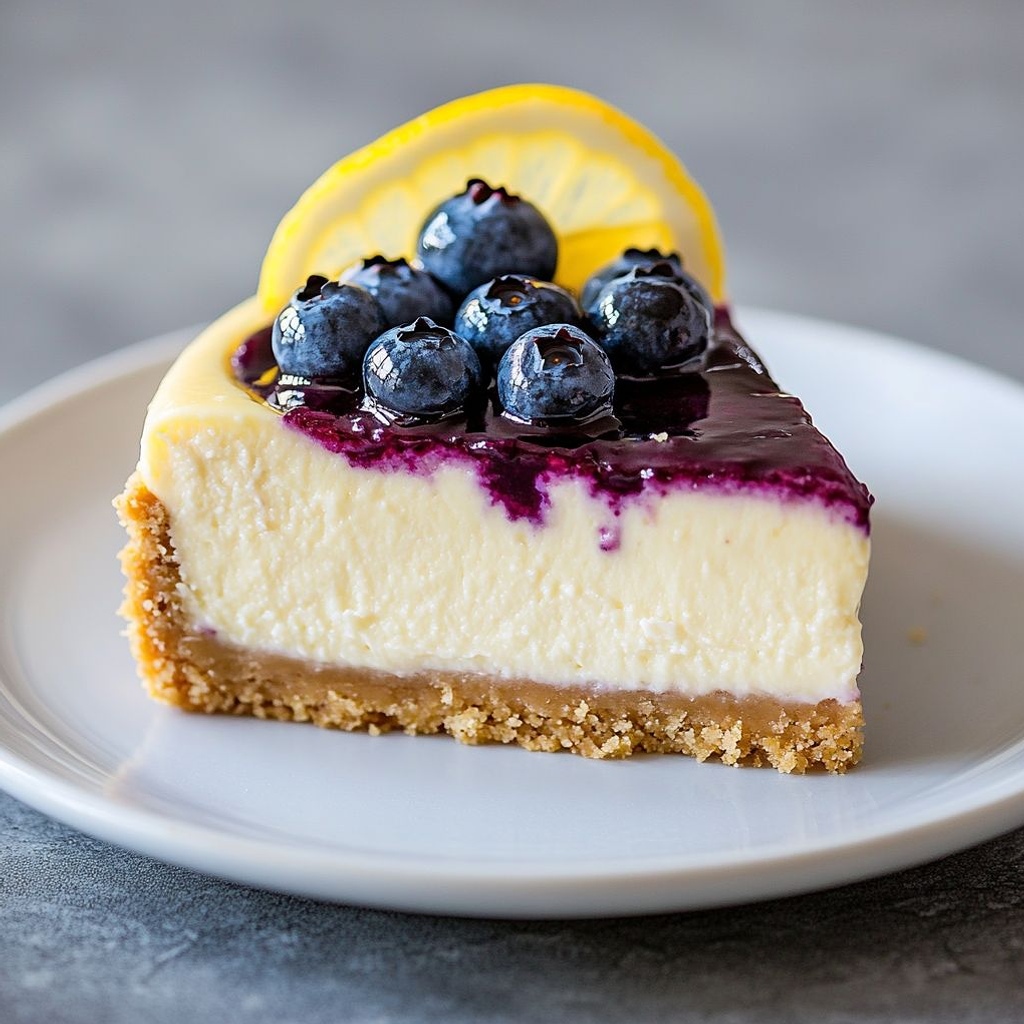
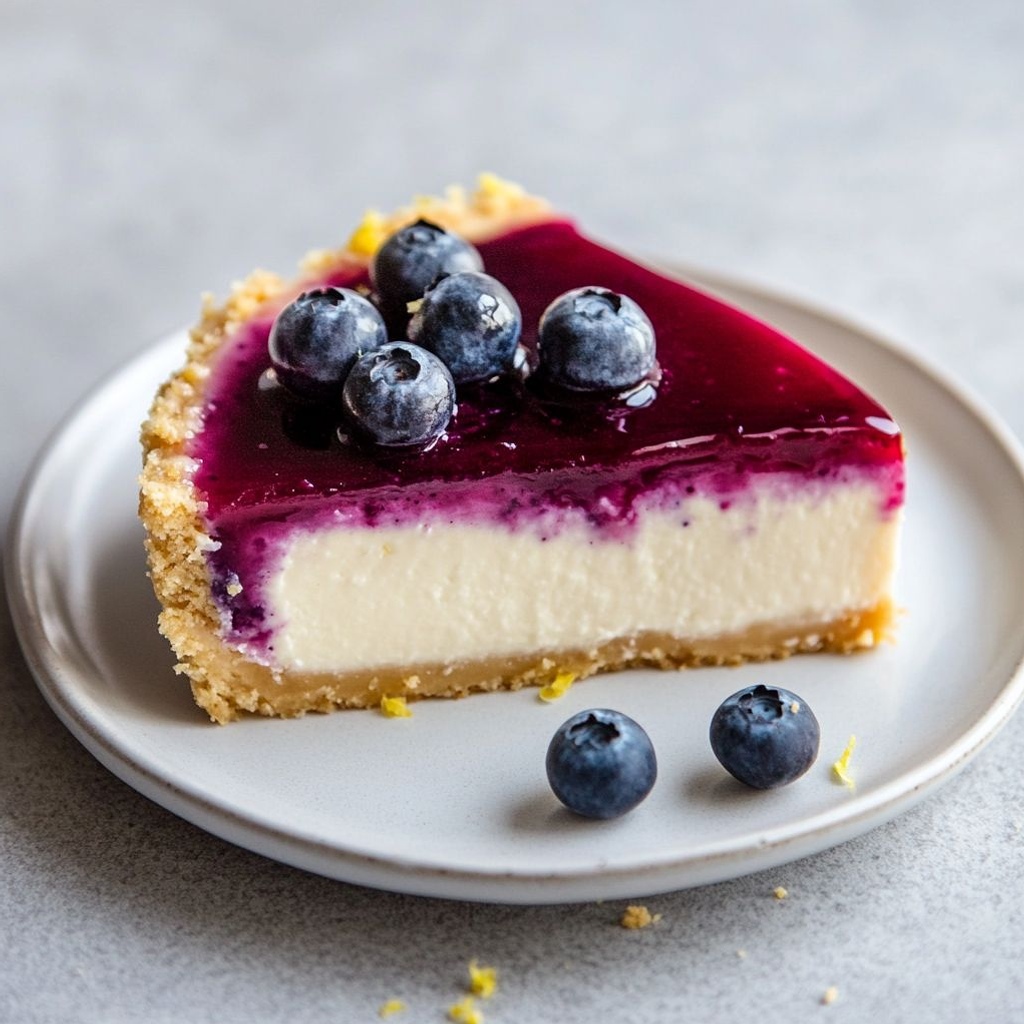
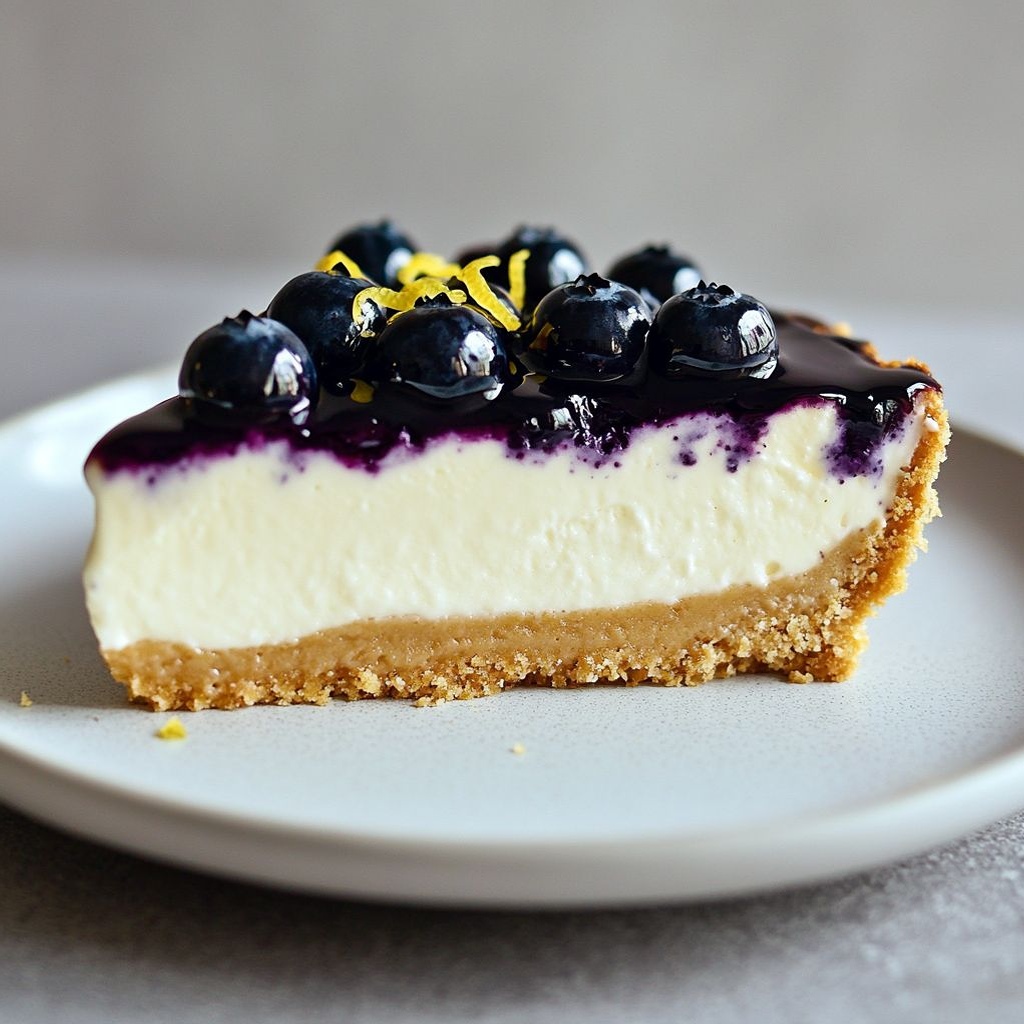
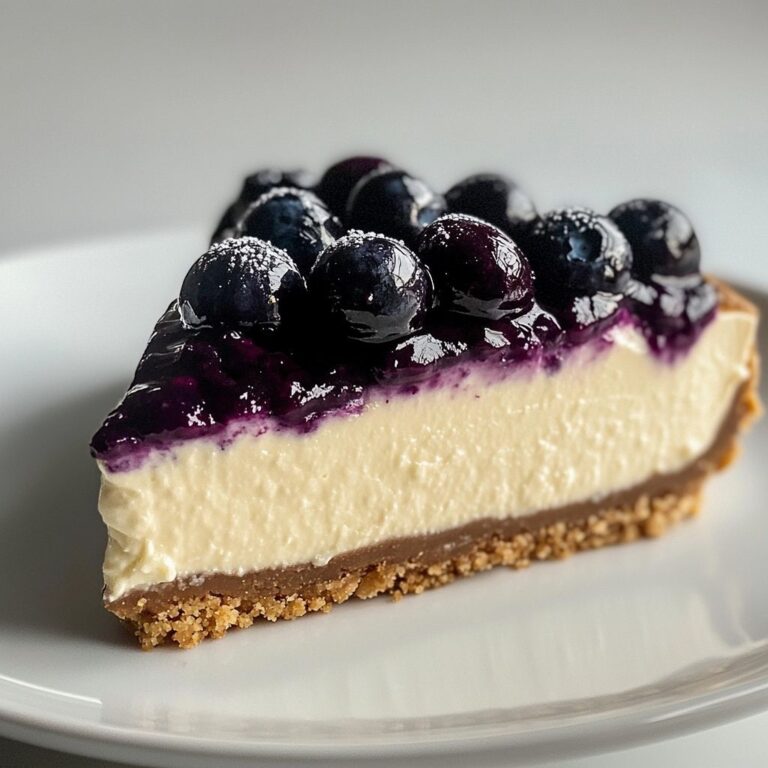
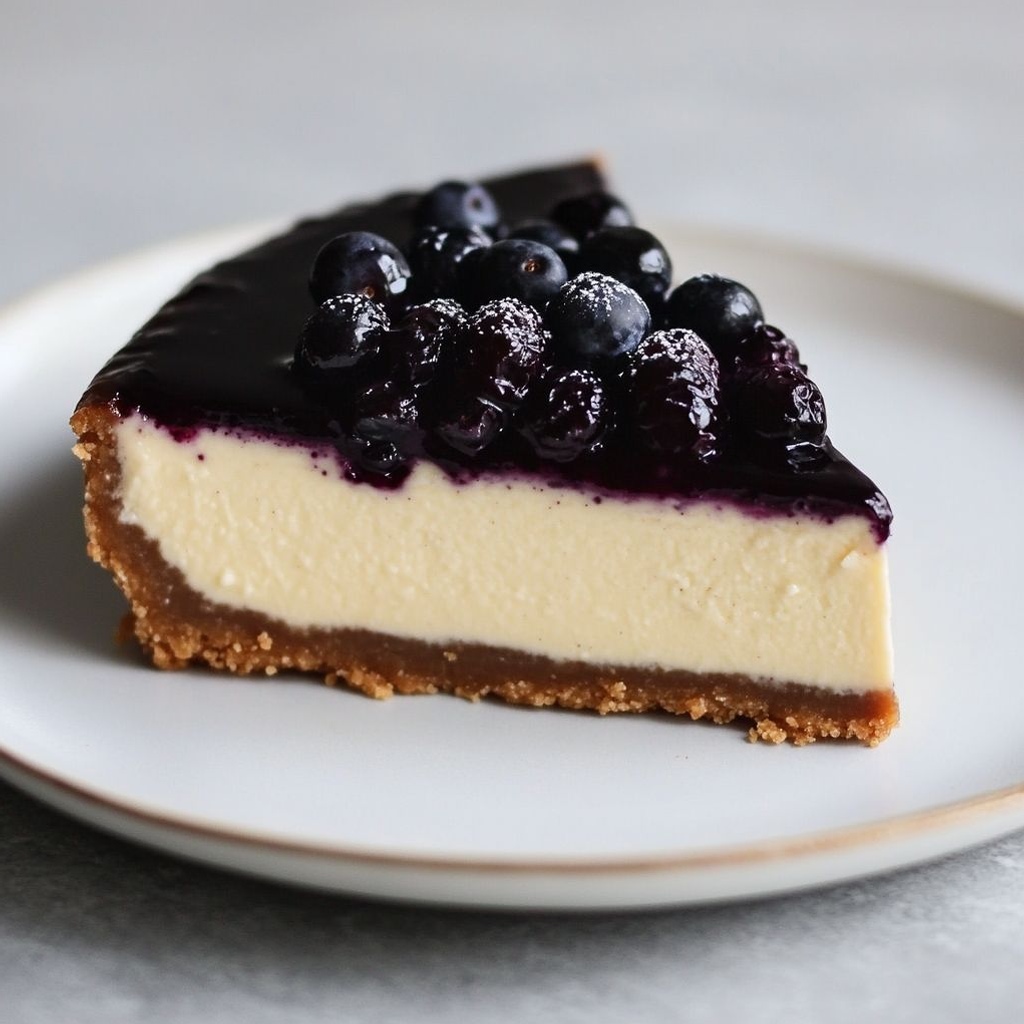
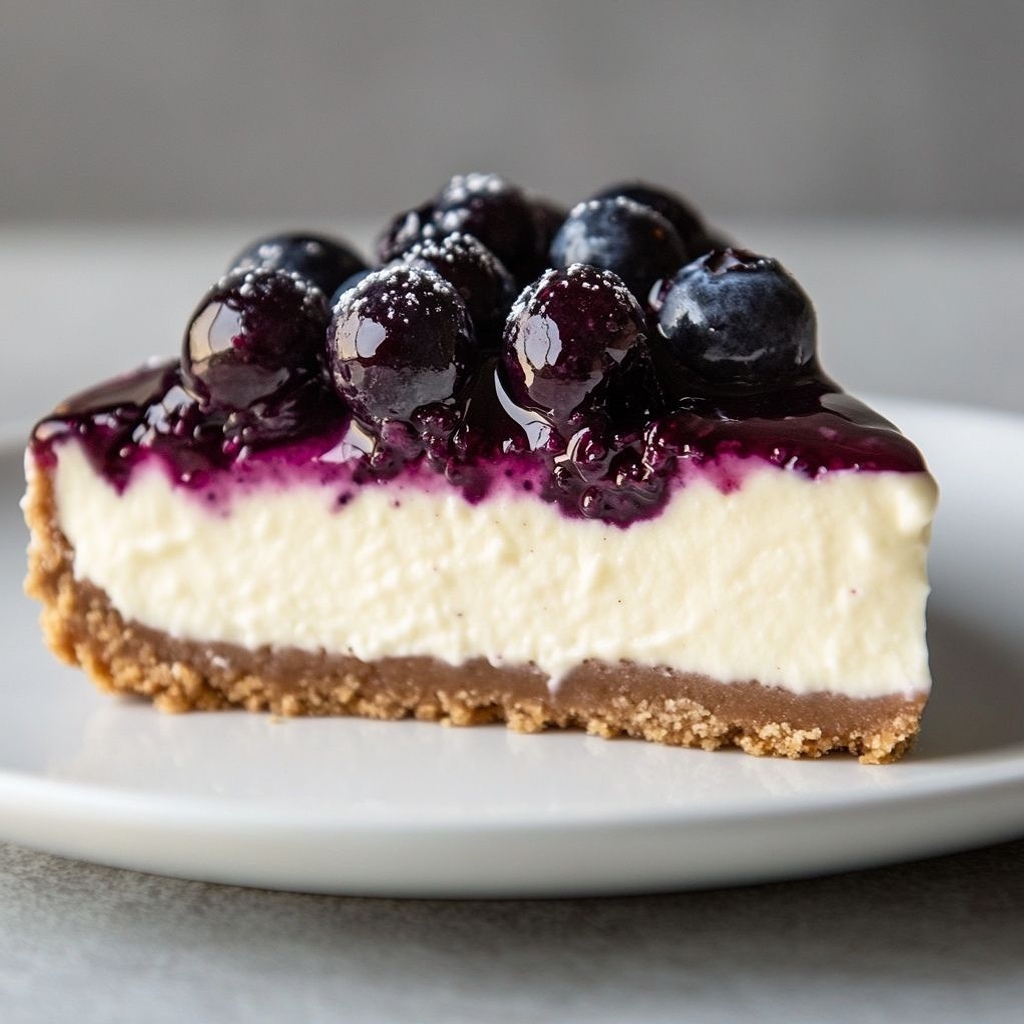
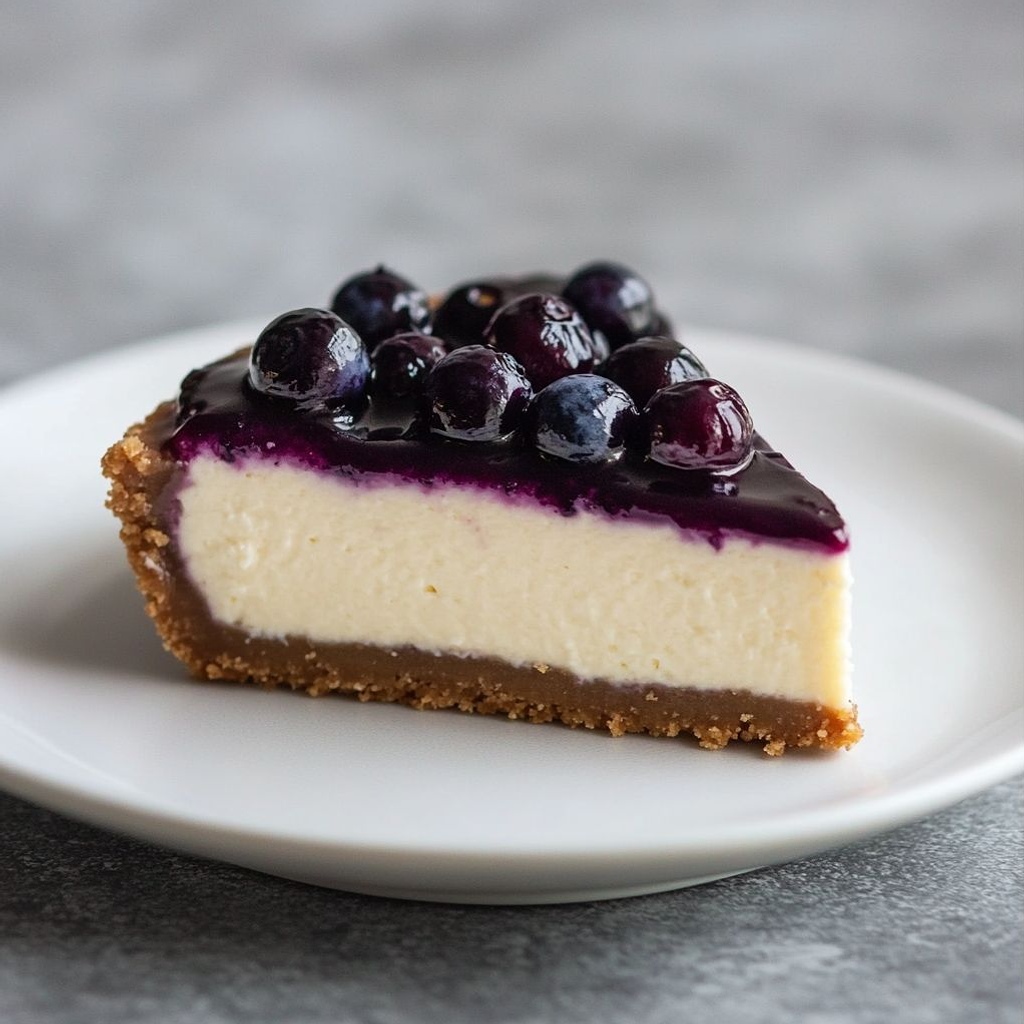
Close your eyes and imagine a sunny afternoon where the air tastes faintly of citrus and berries—the moment you cut into a slice of Blueberry Lemonade Cheesecake, the world seems to pause just long enough for you to savor it. A silky, cloud-like cheesecake meets a bright lemonade kiss in every bite, while pockets of blueberry jam burst with juiciness and a whisper of citrus zests dances on your tongue. The crust provides a gentle crunch, toasted just enough to offer a warm, toasty note that anchors the dessert without competing with the creamy center. This isn’t just a cheesecake; it’s a celebration of summer condensed into a single, elegant slice. It invites conversation, it encourages sharing, and it earns a special place at brunches, family gatherings, and celebratory moments that call for something that feels both nostalgic and modern all at once. The aroma alone—lemon zest, vanilla, and blueberry—is enough to draw people to the table, where anticipation grows with every forkful. If you’re searching for a show-stopping dessert that remains approachable, this Blueberry Lemonade Cheesecake offers a pristine balance between decadent luxury and bright, refreshing charm.

At its core, this cheesecake captures two beloved summer favorites—lemonade and blueberries—and unites them in a velvety, luxuriously tangy filling that’s lightly sweetened to let the fruit flavors shine. The blueberry compote or swirl adds a jewel-toned, glossy ribbon that threads through the creamy filling like a summer afternoon stream weaving through a park. The result is a dessert that feels fancy enough for a dinner party, yet simple enough to pull off for a casual weekend get-together. It’s the kind of dessert that invites a second slice without hesitation, a culinary hug that makes mouths smile and conversations linger a little longer. And while the name promises a bright lemon zest and blueberry landscape, the technique behind it—creamy, stable texture with a lightly crumbly crust—ensures you’re rewarded with consistent, professional-level results every single time.

Beyond its delightful flavor, this cheesecake is a study in balance. The citrus brightness cuts through the richness of the cream cheese, preventing the dessert from tipping into cloying sweetness. The blueberries bring midnight-purple depth and a natural sweetness that feels almost floral, tempered by a tart punch of lemon. When you take a bite, you’ll notice the interplay of textures: a crisp crust that yields under pressure, a satiny filling that glides across the palate, and a glossy blueberry swirl that provides a pleasing contrast and a pop of color that makes the dish irresistible to photograph and even more irresistible to taste. The dish is versatile enough to fit a broad array of occasions—from a summer backyard barbecue to a refined dessert course at a formal dinner—yet it remains accessible enough for a novice baker to tackle with confidence. It’s the kind of recipe that makes people say, “I could make that,” while feeling luxurious enough to earn its place on a special-occasion menu.

As you begin to envision serving this cheesecake, consider the rituals that accompany it: chilling it until the surface is just set, slicing with a clean, steady motion, and presenting each wedge with a swirl of blueberry sauce and a whisper of lemon zest. The aroma alone can spark memories—the scent of fresh zest, the subtle sweetness of vanilla, and the unmistakable brightness of citrus—before a single bite is taken. This is not merely a dessert; it’s a sensorial experience designed to linger in the memory long after the last bite is gone. Whether you’re feeding a family gathered around a holiday table or offering a gracious dessert to guests who arrive bearing stories as sweet as the cake, Blueberry Lemonade Cheesecake serves as a delicious ambassador that speaks of warmth, hospitality, and the simple joy of great food shared together.

The Story Behind the Dish

Every great dessert has a memory that guides its creation, and Blueberry Lemonade Cheesecake is the product of sunny afternoons, berry-picking escapades, and a kitchen that thrums with the mingled scents of lemon and summer fruit. The idea began with a lemonade stand on a neighborhood corner where a child’s laughter meets the clink of ice in tall glasses. The lemonade was bright—fields of lemon zest and the glitter of sugar crystals—yet something more was missing: a creamy counterpoint that could turn a simple glass into a memory. Years later, that same zest and berry energy found its way into a cheesecake, a classic that has always felt universal, adaptable, and deeply nostalgic.

In a family kitchen legend, a favorite aunt would blend a lemonade glaze into a cheesecake’s smooth filling, teasing out the tang with a gentle sweetness that never overwhelmed the dairy richness. It wasn’t about masking flavors; it was about harmonizing two beloved summer icons—the tart, refreshing lemon and the luscious, indulgent cheesecake—with the bold sweetness of blueberries that grow in late-season abundance. The fusion felt inevitable: a nod to the lemony brightness of lemonade and the aromatic depth of blueberry in one luscious slice. The crust, often a simple graham or biscuit base, provides the anchor—crisp, golden, and sturdy enough to hold the treasure within without stealing the show.

Today, this dish is a tribute to those memories: a dessert that invites sharing, a recipe that welcomes culinary improvisation, and a celebration of seasonal fruit in its purest, most vibrant form. The blueberry swirl is not merely a garnish but a central thread in the tapestry of flavor—poured in ribbons through the velvety filling, creating fleeting pockets of fruity tartness that greet the palate just as the lemon’s citrus kiss lingers on the tongue. The story is as much about the ingredients as it is about the people who gather to enjoy them: grandparents who taught the magic of a well-balanced dessert, friends who swapped stories over a chilled slice on a warm afternoon, and new cooks who discovered the confidence that comes with a cheesecake that sets up perfectly.

In many homes, desserts become heirlooms in their own right, and this cheesecake aspires to that status. It’s a dessert that begs to be shared, photographed, and talked about—the kind of dish that earns a place in conversation and an encore on the plate. By combining the citrus-forward brightness of lemonade with the lush, fruit-forward charm of blueberries, this cheesecake embodies a narrative of summer’s peak: long days, cool drinks, and a table set with the best of seasonal produce. The final dish carries with it the warmth of those memories and a promise that every serving might become the seed of a new story to tell around a table crowded with friends and family.

Why You’ll Love This Recipe

  • Bright, balanced flavor: tangy lemon and sweet-tart blueberries play off the creamy, vanilla-forward cheesecake filling for a refreshing yet indulgent finish.
  • Elegant presentation: the deep purple-blue swirls against a pale, sunshine-yellow filling create a striking, irresistible slice that photographs beautifully.
  • Versatile for occasions: casual weeknights, weekend gatherings, or celebratory dinners; it elevates any dessert table without feeling fussy.
  • Audience-friendly: approachable for home cooks with a range of skill levels, thanks to a forgiving texture and straightforward flavor profile that doesn’t rely on gimmicks.
  • Make-ahead-friendly: the cheesecake sets in the fridge, allowing you to prepare it in advance and simply serve when guests arrive.
  • Texture drama without effort: a crisp crust beneath a luxuriously smooth filling, punctuated by ribbons of blueberry, providing a contrast that delights with every bite.
  • Customizable sweetness: you can tune the lemon and blueberry intensity with zest and juice balance or slow-simmered berry reductions for deeper color and flavor.
  • Kid- and dessert-table friendly: the familiar cheesecake base with bright fruit accents makes it a crowd-pleaser for family dinners and celebrations alike.

Flavor Profile & Texture

Flavor starts with the tang of lemon—sharp enough to wake the palate but tempered by subtle sweetness and a whisper of vanilla that rounds the edge. The lemon’s brightness is essential; it prevents the cheesecake from feeling heavy and ensures the fruit notes read as crisp, clean, and refreshing. The blueberries lend depth: they provide a mellow sweetness that’s almost chocolaty in its quiet, sun-ripened richness, offset by a gentle tartness that brightens the pastry. When the two intersect within the creamy filling, you experience a layered flavor experience: an initial citrus snap, a mid-palate lull of soft, velvety cheesecake, and a final, lasting berry note that lingers, inviting another bite.

Texture-wise, expect a harmonious triad. The crust offers a sturdy, crumbly bite that gives way to the smooth, almost satin-like filling. The blueberry swirl—whether stirred through or layered—adds pockets of juicy juice and a glossy sheen that glints through the pale filling. The filling itself should feel airy and lush, yet substantial enough to sit up in clean slices. The balance is key: too heavy a crust would overwhelm the lemon’s lift; too much sweetness would mute the lemon’s crisp edge. Done well, the cheesecake remains light enough to feel celebratory rather than dense, while still delivering the lush experience of classic cheesecake. Aromatics—vanilla, cream cheese, lemon zest—coalesce into a fragrance that makes the kitchen feel like a patisserie, even as you slice the final wedge for serving. The ritual of garnishing with a light dusting of lemon zest or a few fresh blueberries can elevate the impression even further, turning a simple dessert into a visual and olfactory celebration.

Occasions & Pairings

This cheesecake is at home on a long table outdoors when summer heat lingers, but it’s equally comfortable inside a warmly lit dining room during any season. It’s a dessert that travels well for potlucks, picnics, and family reunions because it can be prepared in advance and served chilled, ensuring easy logistics and a clean presentation. It’s a playful finale for a brunch menu—the lemon echoes coffee-conversations in the morning, while the blueberries echo summer afternoons. It also makes a refined course for a festive dinner, where a bright, modern dessert can balance a heavier main course without feeling out of place.

Pairing ideas to consider:

  • Beverages: a glass of sparkling water with a twist of lemon, a light Prosecco, or a simple iced tea spiked with a touch of citrus would complement the dessert beautifully.
  • Side accompaniments: a dollop of vanilla whipped cream or a spoonful of fresh blueberry compote can enhance the fruit presence and add extra richness.
  • Additional fruits: orange segments or a light raspberry coulis can be served alongside for color variety and a deeper tangy interplay.
  • Dessert pairings: a pistachio biscotti or lemon almond biscotti offers a crunchy counterpoint; a delicate almond florentine can add textural contrast without overwhelming the flavors.

Tips, Variations & Substitutions

General tips

  • Chill time matters: give the cheesecake ample time to set in the refrigerator; this helps the flavors settle and makes the slicing clean and neat.
  • Room-temperature dairy: let the cream cheese and any dairy component sit at room temperature briefly before filling to ensure a smooth, lump-free texture.
  • Balance the zest: lemon zest carries fragrance, but a heavy hand can overwhelm the filling. A light, even zesting will maximize brightness without bitterness.

Variations

  • No-bake option: use a creamy, chilled filling with a firm set from gelatin or agar-agar for a lighter, yet stable texture. It will still deliver bright lemon and blueberry notes.
  • Fruit-forward twist: swap in raspberries or blackberries to introduce a slightly different acid-sugar balance while preserving the overall concept.
  • Vegan substitute: use a vegan cream cheese alternative and coconut cream or cashew cream for the filling, and a graham or almond crust to suit dairy-free needs.
  • Gluten-free crust: use gluten-free biscuits or ground almonds mixed with a touch of butter or coconut oil for the crust, ensuring a satisfying crunch.
  • Low-sugar approach: reduce added sugar in the filling and rely on the natural sweetness of fruit, paired with a bit of vanilla and lemon zest to maintain balance.
  • Herbal accents: a small amount of fresh basil or mint can brighten the lemon and counterpoint the blueberry’s sweetness for a refreshing, garden-inspired version.

Substitutions

  • Crust: swap graham crackers for almond flour or digestive biscuits for a nuttier flavor; use butter substitutes if needed.
  • Sweetness: replace some sugar with maple syrup or honey for a deeper, more complex sweetness; adjust lemon juice to keep the bright acidity balanced.
  • Filling base: if avoiding dairy, consider a cashew-based cream cheese substitute with a touch of coconut cream for richness.

Storage & Make-Ahead Ideas

One of the greatest strengths of this cheesecake is its amenability to advance preparation. Because it rests and sets in the refrigerator, you can build the base and filling ahead of time, assemble the final touches on the day you plan to serve, and let the flavors fully develop. Here are practical tips to maximize make-ahead efficiency without compromising texture or flavor:

  • Make-ahead strategy: prepare the crust and the cheesecake filling a day or two in advance, then combine the layers and chill until ready to serve. If you prefer a dramatic blueberry swirl, you can add it just before serving to preserve vibrant color and glossy appearance.
  • Storage: store the assembled cheesecake, covered, in the refrigerator for up to 3–4 days. For longer storage, freeze slices or the entire cake, then thaw in the refrigerator before serving. Freezing can preserve texture when properly wrapped to prevent freezer burn.
  • Reheating/softening: cheesecake should be served cold or at slightly cool room temperature for best texture. If it’s too firm after refrigerating, let it stand at room temperature for 15–20 minutes before slicing to regain a silky feel.
  • Make-at-once vs. staged: if you’re hosting a party, you can bake the crust and prepare the filling components a day ahead, then assemble and chill just before serving to ensure optimal texture and presentation.

Fun Facts & Trivia (Optional)

Did you know that blueberries are one of the few fruits native to North America and have long been celebrated for their vibrant color, antioxidant properties, and versatile culinary use? They pair particularly well with lemon because their natural acidity balances tartness, and their sweetness grows as they ripen in the sun. Lemons, on the other hand, trace their citrus lineage back to Asia, with a bright, fragrant zest that creates a sensory bridge between sweet and tart in many beloved desserts. The combination of lemon and blueberry in desserts is a timeless classic, echoing many regional desserts across North America and Europe that highlight berries when they’re at their peak. The color story—sunlit lemon yellow and midnight-lapis-blue—also plays a role in the dessert’s appeal. It’s an aesthetic that signals freshness, celebration, and an approachable approach to sophisticated flavors. The idea of combining fruit and dairy in a chilled dessert is a nod to both nature’s bounty and culinary science: the acidity of lemon helps to balance the creaminess of the cheese, while blueberries contribute a structural softness that remains distinct within the smooth filling. These little trivia tidbits come together to remind us that a seemingly simple dessert can be a tapestry of history, geography, and sensory delight.

Another fun note: cheesecakes have many regional interpretations, from light, no-bake variants to denser, baked formulations. The addition of a lemonade element is a modern twist that reflects the rising popularity of citrus-forward desserts and the desire for brightness in creamy sweets. It’s a reminder that traditional favorites can be reimagined with contemporary touches without losing their essence—comfort, togetherness, and a sense of delight with every bite. Whether you present this Blueberry Lemonade Cheesecake on a cake stand with a gleam of condensation, or serve it from a rustic platter with a handful of fresh berries, you’re connecting with a long lineage of desserts designed to be shared, admired, and enjoyed in good company.

Ingredients

  • Crust
    • 1 1/2 cups graham cracker crumbs (or gluten-free graham crackers), finely crushed

      → The crust base forms the sturdy foundation of the cheesecake. Finely crush the crackers to a sandy texture so the butter can bind evenly and bake into a compact, even layer. If using gluten-free crackers, ensure there are no large pieces to prevent gaps in the crust.
    • 5 tablespoons unsalted butter, melted

      → Butter acts as the binder that holds the crust together and adds rich flavor. Melt completely and let cool slightly before mixing with the crumbs so the crust doesn’t clump or smoosh when pressed into the pan.
    • 2 tablespoons granulated sugar

      → A touch of sweetness helps balance the butter and crust flavor. If your crackers are already sweetened, you can reduce or omit this, but a little sugar aids browning and flavor.
    • Pinch of salt

      → A small salt pinches enhances overall flavor and helps counterbalance the sweetness from the filling and fruit additions.
  • Filling
    • 4 (8-ounce) packages cream cheese, softened to room temperature

      → The creamy base of the cheesecake; room-temperature cream cheese yields a smooth batter with no lumps. Use full-fat variety for a richer texture and stable structure as it bakes and chills.
    • 1 1/2 cups granulated sugar

      → Provides the main sweetness and helps create a silky, dense filling. Beat with the cream cheese until smooth, then gradually add other ingredients to avoid cracks and air pockets.
    • 1/2 cup sour cream, room temperature

      → Adds tang and extra creaminess to the filling, helping to keep it moist and sedate cracking during baking. Ensure it’s not cold to prevent curdling; mix in gradually.
    • 1/2 cup heavy cream

      → Contributes richness and a lighter, silkier texture to the cheesecake. Use heavy cream rather than lighter dairy to maintain a luscious mouthfeel after chilling.
    • 4 large eggs, room temperature

      → Provide the structure that sets the cheesecake as it bakes. Add eggs one at a time, mixing just until incorporated to minimize air bubbles and prevent cracking.
    • 2 tablespoons fresh lemon juice

      → Brightens the flavor with a lemonade-inspired tang that complements the blueberries. Use freshly squeezed juice for the cleanest citrus note; avoid bottled juice if possible.
    • 2 teaspoons lemon zest (from about 2 lemons)

      → Adds an aromatic lemon perfume to the filling and helps balance richness. Zest before juicing to ensure you capture flavorful essential oils; avoid including the white pith.
    • 1 teaspoon pure vanilla extract

      → Depth and warmth that rounds the citrus brightness; high-quality vanilla elevates the overall flavor.
    • 1/4 teaspoon salt

      → Enhances sweetness and accentuates the lemon and cream cheese flavors.
  • Lemonade Swirl (optional)
    • 1/4 cup fresh lemon juice

      → Creates a bright, marbled lemon ribbon within the cheesecake. Swirl by adding a few spoonfuls of the lemon mixture after the filling has been poured, then use a knife to create marbled patterns.
    • 2 tablespoons granulated sugar

      → Slightly sweetens the swirl to mimic lemonade flavor without overpowering the overall filling. Adjust to taste.
    • 1 teaspoon lemon zest

      → Intensifies lemon aroma in the swirl; adds zest without adding extra liquid.
  • Blueberry Sauce/Swirl (optional)
    • 1 cup fresh or frozen blueberries

      → Provides a vibrant blue-purple ribbon and bursts of berry flavor. If using frozen, thaw and drain well to avoid extra moisture in the batter.
    • 2 tablespoons granulated sugar

      → Sweetens the berries lightly; adjust based on the sweetness of the berries and your taste.
    • 1 teaspoon lemon juice

      → Brightens the berry flavor and helps prevent the sauce from tasting flat.
    • 1 teaspoon cornstarch (optional)

      → Helps thicken the sauce into a glossy swirl; mix with a little cold water to make a slurry before adding to the blueberries.
    • 1 tablespoon water (if using cornstarch)

      → Used to activate the cornstarch slurry for proper thickening.
  • Toppings
    • Fresh blueberries for topping

      → Adds a fresh, juicy contrast on top of the finished cheesecake. Rinse gently and pat dry to prevent extra moisture from seeping into the crust.
    • Powdered sugar for dusting (optional)

      → A light, snowy finish that enhances presentation. Sift evenly to avoid clumps and ensure a delicate decorative touch.

Instructions

  • Preheat your oven to 325°F (163°C) and grease a 9-inch springform pan, or line the bottom with parchment and lightly grease the sides.

    → This prepares a non-stick surface so the crust and cheesecake release cleanly after chilling, and parchment helps prevent the crust from sticking to the pan bottom.
  • Combine the crust crumbs, sugar, and salt in a medium bowl, then pour in the melted butter and mix until the mixture resembles wet sand.

    → The butter binds the crumbs into a cohesive, compact crust that bakes evenly and resists crumbling when sliced.
  • Transfer the crumb mixture to the prepared pan and press it evenly over the bottom and up the sides using the flat bottom of a measuring cup or small glass until it feels firm and level.

    → An even press prevents thin spots that could crack or crumble and ensures a uniform baking surface for the filling.
  • Bake the crust for 8–10 minutes or until the edges are lightly golden and fragrant, then remove from the oven and let cool completely on a rack.

    → Par-baking sets the crust, reduces moisture transfer from the filling, and creates a contrast between a crisp crust and creamy interior.
  • If using a water bath, wrap the outside of the springform pan tightly in heavy-duty foil to prevent leaks and place it in a larger baking dish. Fill the outer dish with hot water to come halfway up the sides of the cheesecake pan.

    → The water bath provides gentle, even heat and helps minimize cracks by stabilizing temperature and humidity during baking.
  • In a stand mixer or large mixing bowl, beat the softened cream cheese and granulated sugar on medium-high speed until the mixture is smooth, creamy, and free of lumps, about 2–3 minutes.

    → Properly beating until silky ensures a velvety filling without graininess and prepares the batter to emulsify with the dairy and eggs.
  • Beat in the sour cream until just combined, stopping to scrape the bowl as needed.

    → Sour cream adds tang and extra creaminess while helping to keep the cheesecake moist; overmixing can tighten the texture.
  • Pour in the heavy cream and mix on low speed until fully incorporated and smooth.

    → The cream lightens the batter and contributes to a rich, silky mouthfeel once chilled; mixing on low prevents incorporating excess air.
  • With the mixer running on low, add the eggs one at a time, mixing just until each is incorporated before adding the next.

    → Adding eggs individually minimizes air pockets and reduces the risk of cracks as the cake bakes and cools.
  • Stir in the fresh lemon juice, lemon zest, vanilla extract, and salt, mixing until the batter is well combined and uniform.

    → The lemon components provide brightness and aroma; zest oils should be evenly distributed without including bitter white pith.
  • If making the Lemonade Swirl, whisk 1/4 cup lemon juice, 2 tablespoons sugar, and 1 teaspoon lemon zest in a small bowl and set aside.

    → This concentrated citrus mixture creates bright ribbons that contrast with the creamy batter for visual appeal and flavor.
  • If making the Blueberry Sauce/Swirl, in a small saucepan combine blueberries, 2 tablespoons sugar, and 1 teaspoon lemon juice; cook over medium heat until the berries release juice and the mixture thickens slightly.

    → This creates a glossy, flavorful swirl; if you want a thicker sauce, whisk a slurry of 1 teaspoon cornstarch with 1 tablespoon water into the simmering blueberries and cook until glossy, then cool before using.
  • Pour the filling over the cooled crust, smoothing the top with a spatula and ensuring it reaches the very edges of the pan.

    → A level, edge-to-edge layer prevents uneven baking and ensures clean slices with uniform texture across the cheesecake.
  • Drizzle or spoon the Lemonade Swirl over the filling in a few random ribbons, then use a clean knife or skewer to gently swirl from center to edge to create marble patterns.

    → Gentle marbling yields an attractive presentation and distributes lemon flavor without completely mixing into the batter.
  • Drop spoonfuls of the Blueberry Sauce/Swirl onto the surface and swirl with a knife to create a marbled pattern once or twice, avoiding over-mixing.

    → The blueberry ribbons add color and fruity bursts of flavor; keep the pattern distinct enough to showcase both the lemon and berry elements.
  • Bake the cheesecake (in the water bath) at 325°F (163°C) until the center is barely set and still slightly jiggly, about 60–70 minutes; avoid overbaking to prevent cracks.

    → The gentle jiggle indicates doneness; residual heat will continue to set the center as it cools, yielding a creamy interior.
  • Turn off the oven, crack the door, and let the cheesecake rest in the oven for 1 hour to gradually come to room temperature.

    → Slow cooling minimizes cracks by preventing a sudden temperature shock and helps the filling set evenly.
  • Carefully remove the pan from the water bath and refrigerate, still wrapped, for at least 4 hours or preferably overnight until fully set.

    → Chilling solidifies the filling for clean slicing and enhances flavor and texture as it relaxes and firms up.
  • Once chilled, run a knife between the cheesecake and the pan rim, release the springform ring, and transfer the cake to a serving plate if desired.

    → This step ensures clean edges and a neat presentation without damaging the delicate surface of the cheesecake.
  • Top with fresh blueberries and a light dusting of powdered sugar just before serving for a vibrant, professional finish.

    → Fresh berries provide a juicy contrast to the creamy filling, and a touch of powdered sugar adds a delicate, decorative sweetness without weighing the surface.
  • Slice with a hot, clean knife by wiping between cuts and wiping after each slice for pristine portions; serve chilled for best texture.

    → Wiping the blade reduces brownie-like sticking and yields smooth, even slices that showcase the marbling and color contrasts.

Notes

These blueberry lemonade cheesecake notes will help you achieve a silky, tangy dessert with a crisp crust and vibrant swirls. Keep the crust intact by finely crushing the crackers and pressing evenly into the pan; bake briefly or chill to set before filling. Let all filling ingredients come to room temperature so they combine smoothly; whip cream cheese and sugar on medium speed until smooth, then beat in sour cream, heavy cream, lemon juice and zest, vanilla and salt. Add eggs one at a time on low speed just until incorporated to minimize cracks. For the lemonade swirl, whisk 1/4 cup lemon juice with 2 tablespoons sugar and 1 teaspoon zest; drop into the filling and swirl with a knife after pouring. For the blueberry sauce, simmer 1 cup berries with 2 tablespoons sugar and 1 teaspoon lemon juice until saucy, optionally thicken with a cornstarch slurry. Bake the cheesecake in a water bath at 325°F (163°C) until the center is just set with a slight jiggle; the edges should be set. Cool gradually at room temperature, then refrigerate at least 4 hours or overnight for clean slices. Before serving, top with fresh blueberries and a light dusting of powdered sugar if desired. If you prefer a gluten-free crust, use gluten-free crackers; verify that the graham crackers are certified gluten-free. You can freeze the baked cheesecake in slices for up to 2 months; thaw in the fridge before serving. Finally, remember to wrap the pan tightly during cooling and to avoid overbaking, which can cause cracks and dry edges.

Tips

Tips for Blueberry Lemonade Cheesecake

Crust tips

Filling tips

Lemonade Swirl tips (optional)

Blueberry sauce/swirl tips

Toppings and serving tips

FAQ

What is Blueberry Lemonade Cheesecake?

A creamy cheesecake that combines tart lemon flavors with a blueberry swirl or topping. It typically sits on a graham cracker crust and features a bright lemon filling with a ribbon of blueberry puree or sauce, finished with fresh berries or extra blueberry topping.

Is this a baked cheesecake or no-bake cheesecake?

Traditionally, Blueberry Lemonade Cheesecake is baked to set the filling and create a smooth, custard-like texture. There is also a no-bake version that uses gelatin or a similar setting agent. Check your specific recipe, but the classic version is baked with a water bath to prevent cracks.

What pan size and crust are recommended?

Use a 9-inch (23 cm) springform pan. A classic crust is made from graham cracker crumbs, melted butter, and a bit of sugar pressed firmly into the bottom and slightly up the sides. Optional: swap in digestive biscuits or add finely chopped almonds for extra texture.

What ingredients are in the lemon filling?

Common ingredients include softened cream cheese, granulated sugar, eggs, lemon juice, lemon zest, vanilla extract, and a splash of sour cream or heavy cream for richness. Some recipes add a pinch of salt to balance the sweetness.

How do I create the blueberry lemonade swirl?

Make a blueberry puree by cooking blueberries with a little sugar and lemon juice until soft, then mashing or blending until smooth. Swirl a portion of this puree (and a touch of lemonade or lemon juice) into the cheesecake batter just before baking or after partial baking, using a knife or skewer to create ribbons.

How long does it take to bake and chill the cheesecake?

Typical bake time is about 50–60 minutes at 325°F (165°C), until the center is just set with a slight wobble. After baking, run a knife around the edge, cool gradually, then refrigerate for at least 4 hours, preferably overnight, before slicing. If making a no-bake version, chilling should be at least 6–8 hours.

How can I prevent cracks in the top?

Tips to avoid cracks include: baking in a water bath, baking at a low temperature, avoiding overmixing the filling, trimming excess air from the batter, and not overbaking. Let the cheesecake cool gradually with the oven door slightly open for the first hour after baking.

Can I make this ahead and freeze it?

Yes. Bake and cool completely, then wrap tightly (in plastic wrap and foil) and refrigerate for up to 2–3 days before serving. For longer storage, freeze whole cheesecake or individual slices for up to 2–3 months. Thaw overnight in the fridge before serving.

How can I adapt this recipe for gluten-free or dairy-free diets?

Gluten-free: use gluten-free graham crackers or biscuits for the crust. Dairy-free: substitute dairy-free cream cheese (and optional dairy-free sour cream/creamer) and use a dairy-free butter alternative in the crust. For a vegan version, replace eggs with a vegan binding agent (like flax eggs) and use vegan cream cheese, while keeping the lemon and blueberry flavors.

What toppings or finishing touches pair well with this cheesecake?

Great options include fresh blueberries, lemon zest or curls, a light blueberry compote, a drizzle of blueberry lemonade sauce, whipped cream (or coconut whipped cream for dairy-free), and a few mint leaves for color and aroma.

Introduction / Hook

Imagine a little pocket of comfort you can hold in your hand: a golden, butter-kissed crust that gives way to a warm, velvety melt of cheese and tender, savory slices of ham. The scent wafts through the kitchen like a familiar lullaby—toasty bread caramelizing at the edges, cheese sighing into a silky pull, and a whisper of salty ham tying everything together. This is not just a sandwich; it’s a warm embrace on a plate, a simple pleasure that somehow makes the world feel a touch brighter. Easy Ham & Cheese Toastie isn’t about fuss or ceremony. It’s about knowing that the best meals can be quick, comforting, and satisfying—yet still feel like a treat. In a busy day, this toastie is your shortcut to a moment of joy: crisp on the outside, gooey on the inside, and perfectly balanced between simple nostalgia and modern ease.

From the first bite, you’ll notice how the bread’s exterior crackles ever so slightly under the heat, a caramelized edge that adds a whisper of sweetness. Then the cheese—melted into luxurious strings—releases a gentle, buttery aroma, while the ham lends a smoky, meaty depth that lingers on the palate. It’s the kind of bite that makes you smile because it’s predictably delicious, yet somehow feels indulgent enough to deserve a little quiet celebration. And the beauty is in its adaptability: it’s a comforting classic that can be dressed up with a few clever twists or kept wonderfully simple for a weekday lunch. The Easy Ham & Cheese Toastie is where everyday cooking meets small, heartwarming thrills.

This description invites you to slow down for a moment and savor the sensory magic of a well-made toastie. It’s not merely about melting cheese; it’s about the alchemy of toasting bread to a perfect crust, the way butter sizzles as it meets heat, and the harmony between ham’s savoriness and cheese’s creaminess. It’s a dish that travels well in memory—you’ll recall the first bite for days, and you’ll want to recreate that feeling as often as possible. Whether you’re cooking for family, lunchbox-ready for kids, or treating yourself to a quick, satisfying bite, this toastie brings a sense of coziness that’s universally understood.

The Story Behind the Dish

Toasties—and their many regional cousins—have a long, affectionate history that mirrors the way people eat with speed and heart. The concept of bread paired with cheese and something savory has existed in various cultures for centuries, but the modern, grill-toasted version really found its voice in the late 19th and early 20th centuries. In many kitchens around the world, the toasted sandwich became a practical answer to a busy day: a way to turn humble ingredients into something comforting, nourishing, and delicious in minutes.

In Britain and Australia, the term “toastie” evokes a particular image: thick slices of bread, buttered on the outside, pressed with a filling of melted cheese and other beloved additions like ham. The toasting method—whether in a dedicated press, on a stove, or in a toaster oven—creates that characteristic crust that crackles beneath a soft, molten interior. The aroma is instantly nostalgic: toasted bread mingling with savory cheese and a hint of salty meat, all signaling “home” in the most delicious way.

Across the Atlantic, the grilled cheese sandwich became a quintessential American staple, evolving through layers of cheese choices and bread textures. While this Easy Ham & Cheese Toastie nods to those traditions, it also embodies a more universal approach: take everyday pantry staples and transform them into something comforting, shareable, and easy to tailor to your taste. The story isn’t just about ingredients; it’s about how we come together around a hot, satisfying meal, how a quick lunch can feel like a small celebration, and how simple techniques can unlock deeply satisfying flavors.

There’s something wonderfully democratic about the toastie. It doesn’t require restaurant-grade ingredients or complicated equipment. It invites creativity: a few swirls of mustard or a handful of fresh greens can turn a humble sandwich into something that feels a little more personal, a little more you. The ham & cheese toastie has traveled with families, friends, and solo cooks, becoming a shared memory of busy days, cozy kitchens, and the simple pleasure of taking a moment to savor something warm and delicious.

Why You’ll Love This Recipe

This section isn’t a step-by-step guide; it’s a celebration of why the concept works so beautifully in everyday life. Here are the reasons this humble toastie endears itself to both beginners and seasoned home cooks alike.

  • Quick and effortless. In minutes, you can go from pantry to plate, making it a reliable option for a speedy lunch, after-school snack, or a light dinner.
  • Budget-friendly. Ham slices and cheese are often among the most economical ingredients, and a little goes a long way when wrapped in toasty bread.
  • Comforting and nostalgic. This toastie taps into cozy memories of family kitchens, rainy-day comfort meals, and the universal appeal of melted cheese.
  • Terrific for kids and adults alike. The balance of savory ham and creamy cheese appeals to a broad audience, making it a crowd-pleaser for lunchboxes and gatherings.
  • Highly customizable. The base idea welcomes personal twists—different breads, cheeses, or add-ins—without losing its core charm.
  • Low-effort, high-reward improvisation. A quick tweak or two—like a dab of mustard, a slice of tomato, or a handful of greens—can elevate the toastie without complicating your workflow.

Accessibility and Everyday Use

One of the most appealing aspects of an Easy Ham & Cheese Toastie is its accessibility. You don’t need fancy equipment to achieve a delicious result: a sturdy pan or grill, a spatula, and a little patience as the bread browns and the cheese melts. That simplicity is exactly what makes this dish so versatile. It’s equally at home as a quick solo lunch, a comforting family dinner, or a shared snack during movie night. The flavors are familiar and comforting, but the dish invites you to craft it in your own image—whether you’re feeding picky eaters, cooking for a crowd, or testing a few creative variations to see what sticks.

Flavor Profile & Texture

The flavor profile of the Easy Ham & Cheese Toastie is a symphony of contrasts that work in concert. The bread provides a toasty foundation with a light, almost caramel-like sweetness from the browning. The crust is crisp and resilient, offering a satisfying bite that gives way to a chewy interior—an ideal cradle for the melty cheese. The cheese itself is the heartbeat of the sandwich: when heated, it shrouds the ham in a silky sheath, pulling into irresistible, elongated strings that invite you to pull apart the sandwich rather than bite through it.

Ham contributes a savory depth, a gentle smokiness or saltiness depending on the cut, which rounds out the richness of the cheese. The combination is balanced rather than overpowering: the salt and fat from the ham are tempered by the mild sweetness of the bread and the creamy, tangy notes from the cheese. The optional accents—perhaps a thin smear of Dijon mustard, a few slices of pickle, or a fresh sprinkle of herbs—can tilt the flavor profile toward sharper, brighter, or tangier notes, enhancing the overall aroma as the toastie rests briefly after toasting.

Texturally, think of a tapestry of contrasts. The outside is crisp, almost snappy, with a buttery aroma that lingers in the air. The interior offers a soft, molten heart that melts away with each bite, stretching just enough to be playful without becoming a soggy mess. The ham’s delicate chew adds a meaty density that prevents the sandwich from feeling too light, while the cheese binds everything together in a creamy, cohesive mouthfeel. If you like a little crunch, you can experiment with a thicker slice of bread or a higher-heat-toasting method to push the outer crust to a deeper bronze.

Occasions & Pairings

This humble toastie shines in a range of situations, from everyday lunches to casual entertaining. Here are some practical and delightful pairings that elevate the experience.

  • Weekday lunch: A simple, nourishing option that can be whipped up in minutes and enjoyed with a light side salad or crisp vegetable sticks.
  • Kid-friendly snack: The familiar combo of ham and cheese makes it a go-to, with room for colorful add-ins like sliced tomato or cucumber for extra freshness.
  • Snack for movie night: A couple of toasties alongside a bowl of soup or a few pickles makes for an easy, comforting spread.
  • Weekend brunch or casual dinner: Pair with a tomato soup, a fresh green salad, or a crisp coleslaw for a satisfying, balanced meal.
  • Picnic or packed lunch: Toasted and cooled, it travels well. Wrap in parchment or place in a lunch box with a little fruit for a complete mini-meal.

When it comes to drinks, a light beer, a sparkling water with a squeeze of lemon, or a warm cup of tea can complement the warm, salty-sweet flavors of the toastie. For a more indulgent pairing, a creamy tomato soup or a smooth velouté can turn a simple lunch into a comforting duo that feels like a small feast.

Tips, Variations & Substitutions

The beauty of this dish lies in its flexibility. Here are ideas to tailor the Easy Ham & Cheese Toastie to your preferences, dietary needs, or whatever you have in the fridge.

  • Bread options: Classic white or whole wheat for a traditional feel; sourdough for extra tang and a sturdier crust; rye or olive bread for a richer, more robust bite; gluten-free bread if needed.
  • Cheese combinations: The classic cheddar melts beautifully and delivers a sharp bite; Gruyère, Swiss, or mozzarella create a silkier melt; a sprinkle of Parmesan mixed with mozzarella adds a nutty kick. Don’t be afraid to mix and match based on what you love.
  • Ham choices: Use sliced deli ham for convenience, or combine with thicker-cut deli roast ham for more texture. Leftover roasted ham also works wonderfully.
  • Flavor boosters: A smear of Dijon or whole-grain mustard, a few pickle slices, or a sprinkle of fresh herbs (chives, parsley) brighten the sandwich. A dash of hot sauce or a whisper of caramelized onions can push it into bolder territory.
  • Vegetarian and vegan twists: For a vegetarian version, swap ham for thinly sliced mushrooms or roasted peppers and add extra-cheesy or dairy-free cheese substitutes. For a vegan version, use vegan cheese that melts well and a plant-based butter alternative to achieve the crisp crust.
  • Low-carb or gluten-free adaptations: Use low-carb bread or gluten-free bread; ensure the cheese and any add-ins are compatible with your dietary goals. The method remains the same—the key is a hot, evenly heated surface to melt the cheese without drying the bread.
  • Regional twists: Fold in regional flavors—anchovy fillets on a spark of olive oil for a Mediterranean vibe, or a handful of shredded ham and gruyère with a sprinkle of smoked paprika for a Spanish-inspired touch.

Make it Your Own

If you’re hosting a small gathering, consider offering a “build-your-own-toastie” station with a selection of breads, cheeses, and add-ins. Guests can assemble their own combinations and press them to their liking. This not only creates a fun interactive experience but also allows everyone to tailor the toastie to their taste in real time. The core technique—pressing a sandwich until the exterior is golden and crisp and the interior gooey—remains the same, but the possibilities expand as far as your imagination and fridge empties will take you.

Storage & Make-Ahead Ideas

Leftovers, if you’re lucky enough to have them, deserve a respectful, practical plan. The goal is to retain the toastie’s crisp exterior and melty interior when you’re ready to enjoy it again.

  • Storing assembled, uncooked: If you want to prep ahead, you can assemble the sandwich with the bread, ham, and cheese and refrigerate it for several hours or up to a day. Keep it wrapped or in a sealed container to prevent the bread from drying out. When you’re ready to cook, transfer directly to the pan while still cold, and press until heated through and the crust browns.
  • Storing cooked toasties: Cooked toasties can be cooled completely, then stored in the refrigerator for up to 2 days. Reheat gently in a skillet over low to medium heat, covered with a lid to help the cheese re-melt, or use a toaster oven to restore the crisp crust.
  • Freezing: Freezing cooked toasties is not ideal because the texture of the bread and cheese can become crumbly or rubbery upon thawing. If you must freeze leftovers, do so unassembled: freeze slices of bread and portions of cheese separately, then reassemble and toast when ready. If you’ve already toasted and want to reheat, it’s better to re-crisp it in a pan or oven rather than trying to re-toast from frozen.
  • Make-ahead strategies: For a quick weeknight option, keep sliced ham and cheese pre-portioned in the fridge. When hunger strikes, grab two slices of bread, fill, and grill. This approach minimizes steps while maintaining a satisfying result.

Fun Facts & Trivia (Optional)

– The term “toastie” is particularly popular in Australia and the United Kingdom, where toast presses and panini grills are common kitchen staples. The name captures that sense of an toasty, comforting bite that’s easy to share.
– Cheese pulls, in many cultures, are a sign of a well-melted dream—the longer the string, the more satisfying the bite. The texture of a perfect melt is something many have chased in kitchens around the world, and the ham & cheese combo is a reliable, nostalgic path to that sensation.
– Leftover ham, which might seem ordinary, can be repurposed beautifully in a toastie. It’s a gentle reminder that “wasting” food is unnecessary when you can reimagine everyday ingredients into something gratifying.

In sum, the Easy Ham & Cheese Toastie is more than a quick snack; it’s a versatile, universally adored classic that invites you to savor the moment. It celebrates the beauty of simple ingredients treated with a touch of technique: buttered bread browned to a perfect crust, ham that contributes savory depth, and cheese that melts into an indulgent, creamy core. Whether you’re feeding a crowd, a family, or just yourself, this toastie has that rare quality of being both effortless and deeply satisfying. Embrace the warmth, the aroma, and the comforting satisfaction of a sandwich that doesn’t pretend to be fancy but delivers pure, dependable comfort with every bite.

Ingredients

Toastie Base

    – 2 slices thick-cut sandwich bread (white, whole wheat, or sourdough)
    → The bread forms the structural base of the toastie. Choose a sturdy slice so it holds up to the fillings during grilling and yields a satisfying, crisp exterior. For best results, select bread with a slight density (like sourdough or whole-grain) to avoid sogginess. If you’re dairy-free, use a plant-based bread and skip butter or substitute with olive oil for the exterior crisp.
    – 2 tsp unsalted butter, softened
    → Butter is applied to the outer faces to promote browning and create a flaky, flavorful crust. Softened butter spreads evenly without tearing the bread. Using unsalted butter helps you control the sandwich’s salt level; if you prefer, you can substitute with olive oil for a dairy-free option, but expect a slightly different crust color and texture.

Fillings

    – 3 thin slices cooked ham (about 90 g)
    → Ham provides the protein and savory backbone of the toastie. Opt for pre-cooked, thin slices so the ham heats quickly and layers evenly without bulk. Pat the slices dry if they’re very moist from packaging to prevent sogginess. If your ham is salty, balance with milder cheese and avoid adding extra salt elsewhere.
    – 2 slices cheese (cheddar or Swiss; about 60–70 g)
    → Cheese acts as the melt-and-glue that binds the sandwich together and adds creamy richness. Choose a cheese that melts smoothly: cheddar yields a stronger, tangy flavor; Swiss or Gruyère gives a milder, creamier melt. If you’re using two cheeses, you can layer them for a balanced bite. For best results, bring cheese to room temperature for 10–15 minutes before assembling to ensure an even, rapid melt during grilling.

Spreads & Seasonings

    – 1 tsp Dijon mustard (optional)
    → Mustard provides a bright, tangy counterpoint to the ham’s savoriness. Spread a thin layer on the interior side of the bread or mix into the butter for a subtle flavor boost. Grainy Dijon will add texture, while yellow mustard offers a milder, sweeter tang. If avoiding dairy, this mustard can stand alone to lift the overall profile.
    – 1 tsp mayonnaise (optional)
    → Mayonnaise adds moisture and a gentle tang that can help keep the fillings from drying out while promoting a richer melt. If used, spread a light coat on the bread’s interior or mix with Dijon for a creamy contrast. For a lighter approach, omit mayo and rely on butter on the exterior for browning and flavor.
    – Pinch of salt (optional, to taste)
    → Depending on the saltiness of your ham and cheese, you may want a small pinch to bring out the flavors. Use sparingly, as the fillings themselves can be salty. This is easiest to adjust after assembling and just before grilling.
    – Freshly ground black pepper (optional, to taste)
    → A touch of pepper adds subtle warmth and helps punctuate the savory notes. It’s optional and can be skipped if you prefer a milder profile; grind fresh just before serving for the best aroma.

Optional Add-ins

    – 2 tomato slices (optional)
    → Tomato adds brightness and moisture but can release extra liquid during grilling. If you include them, choose firm, ripe slices and pat them dry briefly to minimize sogginess. Layer them away from the outer bread for even heat and melt.
    – 1 dill pickle spear, thinly sliced (optional)
    → Pickle adds a crisp tart note and crunch that contrasts with the creamy cheese. Slice very thinly so the flavor disperses evenly with each bite. Ensure the pickle is well-drained to avoid adding extra moisture.
    – 2–3 fresh spinach leaves (optional)
    → Spinach introduces a fresh, green element and a light leafy texture. Use dry leaves to prevent moisture buildup; if you prefer, lightly wilt the spinach before adding to the sandwich to reduce wilting during grilling. Keep portions modest to avoid overpowering the ham and cheese.

Instructions

  • Gather and organize the ingredients at your workstation, placing the 2 slices of bread, softened unsalted butter, ham, cheese, and any optional condiments and add-ins within easy reach to maintain a smooth workflow.
    → Keeping everything within reach avoids chasing ingredients mid-cook and ensures consistent layering and timing for even melting.
  • Preheat a heavy skillet or cast-iron pan over medium heat until a drop of water sizzles on the surface, then lightly grease with a thin layer of butter or neutral oil to prevent sticking and promote crisper browning.
    → Moderate heat provides a steady, even sear without scorching, while a light fat reduces sticking and helps achieve a uniform crust.
  • Spread 1 tsp Dijon mustard on the interior face of each bread slice (optional), ensuring an even, thin coat that won’t pool or squeeze out during grilling.
    → Mustard adds bright tang that balances the savoriness; a thin, even layer avoids over-concentration in any one bite.
  • Butter the outer faces of both bread slices with 1 tsp softened unsalted butter per slice, and spread it evenly from edge to edge to promote uniform browning and a flaky crust as the sandwich cooks.
    → Even thickness prevents pale spots and ensures consistent color and texture; soft butter spreads smoothly without tearing the bread.
  • Pat the ham slices dry with a clean towel to remove surface moisture, then arrange 3 thin slices on one bread slice, followed by 2 slices cheese on top or beneath the ham for even melt and binding.
    → Dry ham reduces sogginess, and layering cheese where it can melt into the ham creates a cohesive filling that holds together when sliced.
  • If using optional add-ins, layer tomato slices, dill pickle, or spinach on top of the cheese in a single even layer, patting dry any moisture to minimize puddling during grilling.
    → Moisture management prevents the crust from steaming and helps the cheese seal the filling for a crisp exterior.
  • Top with the second bread slice, buttered side facing outward, and press gently with the palm to compact the fillings slightly for even melting and to reduce air pockets.
    → Light compression promotes uniform contact with the hot surface, leading to a more consistent melt and crust.
  • Carefully place the assembled toastie in the preheated skillet and cook undisturbed for 2–4 minutes on the first side until the bottom is deeply golden and the cheese begins to melt; adjust the heat if needed to avoid burning.
    → A steady sear drives browning and sets the structure, while enough heat allows the cheese to start melting without scorching the bread.
  • Flip the toastie with a wide spatula and cook for another 2–3 minutes on the second side until the exterior is golden brown and the cheese is fully melted inside; if the bread browns too quickly, lower the heat slightly and finish with gentle heat.
    → Proper flipping ensures an even crust on both sides and thorough interior melt without overcooking the exterior.
  • Transfer the toastie to a cutting board and let it rest for 1–2 minutes to allow the cheese to set slightly, which makes slicing cleaner and prevents the filling from oozing.
    → Resting helps the molten cheese firm a touch so slices maintain shape and reduce hot, molten spillovers.
  • Slice the sandwich diagonally into two halves to maximize visibility of the melted interior and serve immediately with your preferred accompaniment; if desired, pair with a light salad or pickles for contrast.
    → Diagonal cuts reveal the interior and make handling easier while showcasing the melty cheese and ham inside.

Notes

These ham & cheese toasties are a quick, comforting lunch option built on sturdy bread to stay crisp as the cheese melts. You can customize them by swapping the ham for turkey or chicken, or by trying different cheeses such as cheddar for bite or Gruyère for a creamier melt. If you’re dairy-free, use plant-based butter and cheese and consider olive oil on the exterior for a crisp finish. Grill in a hot skillet or a panini press, cooking over medium-low heat until the bread is golden and the cheese is fully melted, flipping once if you’re using a skillet. If you add tomato slices or spinach, pat dry to minimize sogginess and keep portions balanced. These toasties are best eaten fresh but can be stored in the fridge for 1–2 days; reheat in a skillet or toaster oven to regain crispness. They pair nicely with a simple green salad or a bowl of soup. For gluten intolerance, choose gluten-free bread and ensure any added spreads (like mustard) are gluten-free; you can also skip butter and use olive oil for the exterior for a dairy-free version.

Tips

  • Choose sturdy bread: For a crisp, reliable toastie, use thick-cut slices with some density such as sourdough, whole grain, or a hearty white. These stand up to the fillings and grilling without getting soggy. If you’re dairy-free, use a plant-based bread and substitute butter with olive oil for the exterior.
  • Use softened butter (or a dairy-free alternative) on the outside: Softened butter spreads evenly and promotes an even, golden crust. If you prefer a dairy-free option, olive oil brushed on the outer faces will still brown nicely—just expect a slightly different crust color and texture.
  • Layer cheese against the bread for a better melt: Place cheese directly next to the bread, then add ham on top (or vice versa). If using two cheeses, you can place one against each slice to help bind the sandwich and achieve an even melt. Bring cheese to room temperature for 10–15 minutes before assembling.
  • Prepare ham gently: Use thin, pre-cooked slices and pat dry if they’re damp from packaging. This prevents extra moisture from seeping into the bread and helps the crust crisp up.
  • Mind the moisture from add-ins: If using tomato, tomato slices can release liquid during grilling. Pat dry thoroughly and consider placing them in the middle rather than at the edges to minimize sogginess. For pickles and spinach, pat dry well before adding.
  • Balance fillings to avoid overpowering salt: Ham and cheese can be naturally salty. If unsure, lean toward milder cheese or a lighter ham and avoid adding extra salt. A pinch of pepper can brighten the flavors without masking them.
  • Optional add-ins with care: For tomato, pickle, or spinach, place them away from the outer bread so the crust seals nicely and heat distributes evenly. Spinach should be dry; lightly wilted spinach can reduce wilting during grilling.
  • Pick your condiments thoughtfully: A thin layer of Dijon on the interior or mixed into the butter can add brightness without making the filling soggy. Mayonnaise can provide moisture and a creamier melt, but you can omit it if you prefer a lighter sandwich.
  • Master the grill: Cook on medium heat in a nonstick skillet or grill pan with the buttered sides facing out. Press with a spatula or a grill press to ensure even contact, then cook about 2–3 minutes per side until the bread is deeply golden and the cheese is melted. If needed, cover the pan briefly to trap heat and help the cheese melt faster.
  • Manage heat to avoid burning: If the bread browns too quickly before the cheese melts, lower the heat and give it a little extra time. A slower, steady melt yields a creamier interior and a crispier crust.
  • Rest, slice, and serve: Let the toastie rest for 1–2 minutes after cooking to allow the cheese to set slightly. Slice diagonally for a classic presentation and to keep the filling from sliding out.
  • Quick dairy-free and flavor tweaks: For a dairy-free version, brush the outside with olive oil and use a dairy-free cheese that melts well. If you want extra brightness, a tiny smear of mustard inside can complement the ham nicely.

FAQ

What is an Easy Ham & Cheese Toastie?

A simple, comforting toasted sandwich made with sliced ham and melted cheese between slices of bread. It’s quick to make and perfect for a quick lunch or snack.

What ingredients do I need?

Basic: bread (sliced), cooked ham, cheese slices, butter or oil for frying. Optional extras: tomato slices, mustard or mayo, pickles, or lettuce.

What type of bread should I use?

Any bread you like: white, whole wheat, sourdough, or baguette slices. For a crisper crust, use bread that’s not too fresh; day-old slices work well.

What cheese works best for melting?

Cheeses with good meltability give the best results. Try cheddar, Swiss, Gruyère, mozzarella, or a pepper jack blend. Use an even layer for even melting.

Can I use different meats or add-ins?

Yes. You can swap or add ham with turkey, chicken, or prosciutto. For extra flavor, add a thin slice of tomato, a little mustard, or a handful of spinach. Avoid overly wet fillings which can soggy the bread.

How do I cook it on the stove?

1) Butter one side of each bread slice. 2) Heat a skillet over medium heat. 3) Layer ham and cheese between the unbuttered sides, then top with the buttered sides facing out. 4) Cook 2–3 minutes per side, pressing gently, until the bread is golden brown and the cheese is melted. 5) Let rest 1 minute before serving.

Can I use a toaster oven, air fryer, or grill pan?

Yes. In a toaster oven or air fryer, assemble the sandwich as above and cook at 375–400°F (190–200°C) for 6–8 minutes, flipping halfway. A grill pan on the stove gives similar results with good grill marks.

How long does it take to cook?

Typically 6–8 minutes total on a stove or 6–8 minutes in a toaster oven, depending on thickness of bread and fillings. Keep an eye on it to prevent burning.

How can I customize or spice it up?

Experiment with extras: add tomato slices, a dollop of mayonnaise or mustard, pickles, caramelized onions, or a handful of spinach. You can also try different cheeses, or use a butter-masted bread for extra flavor.

Introduction / Hook

Imagine a dish that wraps you in a warm, savory hug the moment the lid lifts. French Onion Chicken Rice takes the timeless comfort of caramelized onions and the heartiness of a well-savored rice dish and folds them into a single, satisfying plate. The kitchen fills with the scent of onions bronzing to a deep, amber sweetness, a chorus of thyme and garlic mingling with the natural richness of chicken stock, and the gentle fragrance of rice that promises a soft, tender bite. It’s the kind of meal that makes weeknights feel special without demanding hours at the stove. The beauty lies in how simple ingredients come alive through technique—low, slow caramelization that unlocks the onions’ sweetness, then a confident simmer that makes the whole pan taste like a well-loved, family-made classic.

In every bite, you’ll notice a balance of comfort and sophistication: the onion’s savory sweetness cutting through the savory depth of the cooking liquid; the chicken lending gentle protein that doesn’t overpower the dish; and the rice acting as a blank canvas that soaks up the flavor without becoming mush. There’s a subtle crust forming around the edges—part toasted, part creamy—where flavor concentrates and the aroma intensifies. It’s the kind of dish you want to share with your favorite people, a plate that invites conversation and a little lingering at the table. And because it’s versatile, you can tailor it to your mood, your pantry, and the season without losing that signature French onion charm.

What makes French Onion Chicken Rice special is how it translates a cherished concept—French onion soup’s depth and sweetness—into a complete, plated experience. You get the same onion-driven sweetness, the same comforting warmth, and the same sense of nourishment, but in a form that feels fresh and modern. It’s a dish that respects tradition while making room for your personal twists, substitutions, and favorite pantry staples. If you’re new to this flavor profile, you’ll be surprised by how quickly it becomes a go-to, not just for a special night but for weeknights when timing is tight and cravings are loud.

The Story Behind the Dish

Every kitchen has its own origin story, and French Onion Chicken Rice is the product of many small inspirations converging into one comforting dish. The idea begins with the timeless allure of caramelized onions—the slow, patient browning that releases a mellow sweetness and a touch of burnt-sugar complexity. This kitchen alchemy is a universal language; it speaks of home, of Sunday dinners, and of the simple joy of a well-loved pot doing the work for you while you focus on the company around the table.

From there, the dish reaches outward, drawing on two culinary traditions that treat starch with tenderness and respect. Rice—humble, versatile, and hungry for flavor—serves as a practical canvas, soaking up the savory-sweet sauce and carrying it with a soft, comforting bite. The chicken adds a reliable protein that keeps the dish hearty yet approachable, ensuring that every spoonful feels substantial without being heavy. The result is a fusion of flavors reminiscent of a Sunday roast and a rustic French onion soup, reimagined as a complete, one-pan meal that delivers both depth and ease.

Locally, this dish has whispered through kitchens as a favorite weeknight rescue: a recipe that looks impressive without demanding a complicated routine, something you can improvise with pantry staples and still feel like you mastered something elegant. It’s the kind of dish that becomes a memory of laughter at the table, the sizzle of a hot pan, and the aroma of browned onions that lingers long after the last bite has disappeared. In many households, it’s a celebration of how simple ingredients, treated with intention, can transform into something deeply comforting and universally pleasing.

Why You’ll Love This Recipe

  • One-pan practicality with big, layered flavor: a dish that feels special but is forgiving enough for busy days.
  • Deep, caramelized onion sweetness that anchors the meal and sings through every bite.
  • Balanced richness from the cooking liquid that keeps the chicken juicy and the rice perfectly flavored.
  • Versatile base that adapts to what you have on hand—different cuts of chicken, various rice varieties, or vegetarian substitutions.
  • Comfort-food appeal without heaviness—filling, satisfying, and easy to customize for dietary needs.
  • Great for family dinners, potlucks, or casual gatherings where you want a crowd-pleaser that isn’t fussy to make.
  • Low maintenance technique that teaches patience in the kitchen—the payoff is a deeply flavorful dish with a gentle golden crust around the edges.
  • Excellent foundation for experimentation: add mushrooms for earthiness, finish with a splash of wine or citrus for brightness, or top with a sprinkle of herbs for color.

Flavor Profile & Texture

At the core of this dish is the onion, caramelized to a rich amber that carries with it a whisper of sweetness and a trace of savory depth. The slow browning unlocks a nuanced flavor profile—less sharpness, more rounded, almost molasses-like notes that pair beautifully with the natural savor of chicken. The chicken itself yields a tender bite, its flavor gently amplified by the aromatic base and a simmering bath that keeps it moist and succulent.

The rice acts as a generous canvas: light and fluffy with each grain distinct, yet united by the sauce that clings in a gentle, almost creamy way. The starch from the rice creates a comforting body, helping to bind the dish into a coherent mouthful rather than a collection of separate components. You’ll notice a subtle savoriness that anchors the sweetness of the onions, a balance that keeps every bite from tipping too far into either direction. If you enjoy depth, you may detect a hint of herbs—thyme or bay, and possibly garlic—lending an herbal lift that makes the dish feel bright and polished rather than plain or flat.

Texture-wise, there’s a pleasing contrast: the edges of the rice and, if present, a light crust where the liquid reduces and the surface caramelizes, offering a delicate crunch against the tender interior. The chicken pieces remain juicy, with their fibers softened by gentle braising in the shared cooking liquid. The overall mouthfeel is comforting and cohesive—like a well-worn sweater you reach for when you crave familiarity, but with enough aromatics and brightness to keep it from feeling dull. The aroma is a big part of the experience: the scent of onions gradually releasing their sweetness, mingled with garlicky warmth and a touch of herbal perfume, invites you to linger at the stove and savor the moment before the first bite.

Occasions & Pairings

This dish shines at many occasions, from weeknight dinners that deserve a touch of celebration to casual gatherings where you want something that feels special without adding stress. Serve it as a comforting centerpiece on a chilly night, or as a satisfying weeknight option when you’re feeding a crowd with diverse tastes. It also lends itself to easy entertaining—pair it with a simple green salad, a bright citrusy side, or roasted vegetables that add color and texture to the plates.

Pairing ideas to elevate the experience:

  • Greens with a light vinaigrette or a crisp cucumber salad to contrast the softness of the dish.
  • Roasted or steamed green beans, asparagus, or Brussels sprouts for color and crunch.
  • A crusty loaf of bread or a warm baguette to scoop up every last bit of the flavorful sauce.
  • Wine options: a dry white such as Sauvignon Blanc or Chardonnay, which can lift the sweetness of the onions and brighten the overall balance; or a light, fruit-forward red if you prefer.
  • Non-alcoholic pairing: apple cider, pear spritz, or a sparkling water with a splash of lemon for a refreshing contrast.

Tips, Variations & Substitutions

One of the joys of a dish like French Onion Chicken Rice is how forgiving it can be while still delivering a signature flavor. Here are ideas to tailor the dish to your preferences, dietary needs, or pantry situation.

  • Protein variations: swap chicken for turkey cutlets, bone-in chicken thighs for deeper flavor, or use chickpeas/tofu for a vegetarian version. If you prefer, you can even add mushrooms for an extra earthy note that complements the onion sweetness.
  • Rice options: white rice is classic, but brown rice or a mixed-grain blend adds nutty flavor and extra texture. If you’re using a long-grain variety, you’ll maintain a lighter, fluffier texture; for a stickier result, short-grain can work well.
  • Broth and dairy: use a rich chicken or vegetable broth; a splash of cream or a dollop of yogurt at the end can add gentle tang and silkiness if you like a creamier finish. For a lighter version, reduce or omit dairy; the dish will stay flavorful with the onion’s natural sweetness intact.
  • Herbal notes: thyme is a natural fit, but bay leaves, a pinch of rosemary, or a few sprigs of parsley added toward the end can brighten the dish. Fresh herbs on top right before serving add vibrant color and aroma.
  • Gluten-free adaptability: ensure broths or stock are gluten-free if you need to avoid gluten; most simple stocks are naturally gluten-free, but it’s worth checking labels if sensitivities require it.
  • Alcohol-free boost: if you like a slight wine-like brightness, use a tablespoon of white wine vinegar or a splash of white grape juice during cooking. It adds acidity that cuts through the richness.
  • Texture variation: for a crispier top, finish under a hot broiler for a minute or two, watching carefully to prevent burning, until the top gains a delicate edge of caramelization.
  • Make-ahead-friendly: cook the onions a day in advance to deepen their flavor; assemble with the rice and chicken closer to serving time to preserve texture, or gently reheat in a covered pan with a splash of broth.

Storage & Make-Ahead Ideas

This dish travels well in flavors and in practicality. It stores nicely, reheats evenly, and is forgiving enough to be prepared ahead when you’re entertaining or simply planning for busy days.

  • Storage: refrigerate leftovers in airtight containers for up to 3–4 days. The flavors often deepen with time, making the dish tastier the day after.
  • Freezing: while rice can sometimes become a touch firm after freezing and thawing, you can freeze individual portions for a quick future lunch. Reheat gently with a little added broth or water to loosen the texture.
  • Reheating tips: rewarm in a covered pan over low to medium heat, stirring occasionally, until heated through. A splash of broth or water helps restore moisture and prevents sticking.
  • Make-ahead strategy: caramelize onions up to the point of adding any liquids the day before, refrigerate, and then finish with the remaining steps when you’re ready to serve. This can dramatically cut down on weeknight time while preserving that onion-rich flavor.

Fun Facts & Trivia (Optional)

  • Caramelized onions are a culinary technique that dates back centuries and appears in many classic dishes around the world. The science behind caramelization is simple: sugars break down and brown when heated, creating complex, sweet-savory flavors without added sugar.
  • Rice, in many cuisines, is a universal comfort starch because it soaks up sauces and blends with other flavors without overpowering them. Its adaptability makes it an ideal companion for onion-forward dishes that require a soft, comforting base.
  • French onion soup itself is a historic staple in French cuisine, with roots tracing back to ancient times and evolving into a beloved, iconic dish in the 18th and 19th centuries. Translating its essence into a chicken rice dish is a contemporary homage to that tradition, preserving the spirit while making it accessible and family-friendly.
  • Herbs like thyme and bay leaves are not just aromatic; they have a long history in cuisine as aroma-enhancers that elevate the perception of the dish’s depth. The way herbs bloom in the steam of a hot pan is a small, joyful moment for cooks of all levels.
  • One-pan meals have become popular for their efficiency and reduced cleanup. This concept taps into that practicality while delivering a dish that feels special enough for a sit-down dinner, all in the comfort of a single pot or pan.

Ingredients

Onions and Aromatics
  • 2 large yellow onions, thinly sliced
    → Onions are the flavor foundation of this dish. They will be slowly caramelized in fat to create a deep, savory sweetness that concentrates in the pan and imbues the chicken and rice with rich flavor. For best results, slice them evenly so they brown uniformly, and cook over medium-low heat with the butter (and a touch of oil) until they are deeply golden and jammy. A light pinch of salt helps draw out moisture and speeds browning; if they begin to steam rather than caramelize, turn the heat down and give them more time.
  • 2 tablespoons unsalted butter
    → Butter provides richness and helps the onions develop a silky, caramelized texture. Using unsalted butter lets you control the dish’s final salt level. Melt the butter with the onions (and a little oil) to coat them evenly and prevent scorching; avoid rushing the browning by keeping the heat steady and low.
  • 1 tablespoon extra-virgin olive oil
    → Olive oil raises the pan’s thermal ceiling and contributes a subtle fruitiness that complements the onions and chicken. It also helps prevent the butter from burning during caramelization. Use it in combination with the butter for even browning and to facilitate later searing of the chicken.
  • 2 cloves garlic, minced
    → Garlic adds aromatic depth and complexity. Mince finely so it distributes evenly and releases its fragrance without clumping. Add after the onions have started to soften to avoid burning; sauté just until fragrant, about 30 seconds, then proceed with the recipe.
  • 1 pinch granulated sugar (optional)
    → A touch of sugar can encourage faster browning and deeper caramelization, especially if onions are not very sweet. Use sparingly; if your onions are already sweet and browning well, you can omit this.
Chicken
  • 4 boneless skinless chicken thighs (about 1.5–2 lb)
    → Searing the chicken adds color, flavor, and a bit of texture that contrasts nicely with the tender rice. Pat the thighs dry before cooking to ensure they brown rather than steam. Sear them on a hot pan until golden on both sides, then nestle them back into the pan as the rice cooks to finish cooking through in the flavorful liquids.
  • Salt, to taste
    → Season the chicken with salt to ensure even flavor distribution and to help form a savory crust during searing. Salt the surface just before searing; you can adjust later when simmering with the rice if needed.
  • Freshly ground black pepper, to taste
    → Adds savory heat and aroma. Grind fresh for maximum aroma and bite. Season generously on the chicken edges for balanced flavor throughout the dish.
  • 1 tablespoon olive oil (for searing the chicken)
    → Used to achieve an even, golden crust on the chicken after patting dry. If your pan has a thin coating of fat from the butter used for onions, you may still need a small amount of oil to prevent sticking and ensure proper browning.
Rice and Liquids
  • 1 1/2 cups long-grain white rice, rinsed until the water runs clear
    → Rinsing removes excess surface starch, helping the grains stay fluffy and separate as they cook with the broth. For best texture, option to soak 10–15 minutes and drain well; drain thoroughly to avoid adding extra moisture that could make the dish gummy.
  • 3 cups chicken broth (low-sodium preferred)
    → The cooking liquid that flavors the rice and braises the chicken. Using low-sodium broth lets you control the final salt level more precisely; warm it before adding to the pan to avoid cooling the pan temperature and slowing simmering.
  • 1/2 cup dry white wine (optional)
    → Deglazes the pan, lifts the browned bits, and adds acidity and depth to the dish. Allow it to simmer and reduce by about half to concentrate the flavors before adding the rice and broth. If you prefer not to cook with alcohol, omit and substitute an equal amount of broth.
  • 1/2 teaspoon dried thyme or 2 teaspoons fresh thyme leaves
    → Provides classic French aromatics that pair with caramelized onions and chicken. If using dried thyme, crush it between fingers to release essential oils; for fresh thyme, strip the leaves from the stems and scatter them through the cooking liquid. Remove any woody stems before serving if using fresh thyme.
  • 1 bay leaf (optional)
    → Adds a subtle, perfumed note that complements the onion-sweetness and chicken. Remove the bay leaf before serving to avoid imparting a bitter taste if it remains in the dish.
Finish and Toppings
  • 1/2 cup grated Gruyère cheese or Swiss cheese (optional)
    → A melted cheese topping creates a creamy, gratin-like finish reminiscent of French onion soup’s cheesy crust. Sprinkle over the dish during the final minutes of cooking and, if you like a browned top, place under a broiler for 1–2 minutes until melted and lightly golden. If avoiding dairy, you can skip this entirely.
  • 2 tablespoons chopped fresh parsley
    → Provides a fresh, verdant finish and a pop of color that brightens the rich flavors. Add at the very end to preserve its vibrant green appearance and aromatic oils.
  • 1 tablespoon lemon juice or lemon zest (optional)
    → A small amount of acidity helps balance the sweetness from the caramelized onions and rounds out the dish. Add to taste after cooking, or whisk into a finishing sauce if you prefer a lighter, brighter note.
Optional Add-ins
  • 1 cup frozen peas, thawed (optional)
    → Peas add color and a touch of sweetness. Stir in during the last 5–7 minutes of cooking to heat through without losing vibrant green color.
  • 1 cup sliced mushrooms (optional)
    → Mushrooms contribute earthiness and umami. Sauté with the onions or before searing the chicken to render moisture and brown nicely; ensure they cook until their moisture evaporates and they brown for maximum flavor.
  • 1 tablespoon chopped fresh chives (optional)
    → A mild onion character that works nicely as a finishing touch. Sprinkle just before serving for a delicate herbal note and attractive presentation.

Instructions

  • Warm a large, heavy skillet over medium-low heat and melt 2 tablespoons unsalted butter with 1 tablespoon extra-virgin olive oil until the foam subsides and the fat shimmers.
    → This fat combination prevents the butter from scorching while giving the onions a rich, even caramelization that forms the dish’s flavor foundation.
  • Add 2 large yellow onions, thinly sliced, to the pan, season with a pinch of salt, and spread them into an even layer.
    → Salt draws out moisture to start browning and keeping the onions in a single layer promotes uniform caramelization instead of steaming.
  • Cook the onions slowly, stirring only every 7–9 minutes, until they are deeply caramelized, amber in color, and jammy, about 30–40 minutes.
    → Slow, patient browning concentrates their natural sugars for sweet depth; if the onions begin to steam, lower the heat and give them more time to develop flavor.
  • Add 2 cloves minced garlic to the onions once they have softened and started to brown; cook for about 30 seconds until fragrant, then immediately proceed.
    → Garlic releases aroma quickly but can burn if added too early; a brief sauté ensures a rounded aromatics without bitterness.
  • Pat 4 boneless skinless chicken thighs dry with paper towels and season generously on all sides with salt and freshly ground black pepper.
    → Drying the surface aids a crisp, golden sear; even seasoning ensures the chicken tastes savory throughout the braise.
  • Heat 1 tablespoon olive oil in the same pan and sear the chicken thighs in batches until golden on both sides, about 4–5 minutes per side, then transfer them to a plate to rest.
    → A proper sear locks in juices and develops color that adds complexity to the finished dish; resting prevents juices from running out when you braise.
  • Return the chicken to the pan, nestling the pieces among the onions, and add 1 1/2 cups rinsed long-grain white rice; toast the rice with the aromatics for 1–2 minutes until the edges look translucent and fragrant.
    → Light toasting wakes the rice starch, adds nutty notes, and helps prevent the grains from becoming gluey as they cook in the braise.
  • Deglaze with 1/2 cup dry white wine, scraping up the browned bits with a wooden spoon, then simmer until the wine reduces by about half and intensifies in flavor.
    → The fondful sweetness and acidity from the wine deepen the sauce; reducing concentrates those flavors so they don’t water down the dish.
  • Stir in 3 cups warm chicken broth, 1/2 teaspoon dried thyme (or 2 teaspoons fresh thyme leaves), and 1 bay leaf; bring the liquid to a gentle simmer, taking care to avoid a boil that could toughen the chicken.
    → Warm broth preserves the pan’s temperature for steady braising, thyme imparts classic herbal notes, and the bay leaf adds subtle aroma; remove the leaf before serving to avoid bitterness.
  • Cover the pan, reduce heat to low, and simmer gently for 20–25 minutes, or until the rice is tender and the chicken thighs reach an internal temperature of 165°F (74°C).
    → A low, steady simmer ensures even cooking and a cohesive meld of flavors; check near the end to prevent overcooking and starchy mush.
  • Remove the pan from heat and let it rest, covered, for 5 minutes to finish cooking and to allow the rice to firm slightly; taste and adjust salt as needed.
    → Resting stabilizes texture and concentrates flavors, while a final salt check ensures balanced seasoning after the braise.
  • If using peas, add 1 cup thawed frozen peas to the pan during the last 5–7 minutes of cooking to heat through while maintaining their bright color.
    → Peas introduce color and a touch of sweetness; adding them late preserves their texture and vibrant green.
  • If using mushrooms, separately sauté 1 cup sliced mushrooms in a small amount of butter until browned and their moisture evaporates, then fold into the braise at the end for depth and umami.
    → Browning mushrooms concentrates flavor and avoids a soggy texture; folding in at the end ensures they stay meaty and flavorful.
  • Sprinkle 1/2 cup grated Gruyère cheese over the hot dish (optional) and, if you desire a gratin-like top, preheat your oven to broil and broil on high for 1–2 minutes until melted and lightly golden.
    → The cheese adds a creamy, caramelized crust reminiscent of French onion soup; watch closely to prevent burning.
  • Finish with 2 tablespoons chopped fresh parsley and, if desired, 1 tablespoon lemon juice or zest to brighten the richness; toss gently to combine and adjust seasoning as needed.
    → Fresh herbs lift the dish’s appearance and aroma, while a touch of acidity balances the sweetness from the onions.
  • Serve the French Onion Chicken Rice hot, spooning the braised rice and chicken onto plates with generous spoonfuls of sauce and onions on top for a cohesive, comforting presentation.
    → This ensures the textures—tender chicken, fluffy rice, and glossy onion sauce—are enjoyed together in every bite.

Notes

This French Onion Chicken Rice is a cozy, one-pan dish in which slowly caramelized onions create a deep, savory sweetness that braises chicken thighs to tender perfection while the rice soaks up the rich flavors. You can customize it by adding peas, sautéed mushrooms, or chopped fresh chives for color and freshness, and you can finish with a Gruyère or Swiss cheese topping for a creamy, gratin-like finish; for a dairy-free version simply skip the cheese or use a dairy-free alternative. The dish shines when prepared in stages: caramelize the onions with butter and a splash of olive oil, pat the chicken dry and sear until golden, deglaze with dry white wine and reduce, then stir in rinsed rice and hot broth and simmer until the rice is tender and the chicken is cooked through. Thyme and a bay leaf give classic French aromatics; remove the bay leaf before serving. For brightness, finish with lemon juice or zest and scatter chopped parsley. Always use low-sodium broth and, if using wine, allow it to reduce by half to concentrate flavors; if you avoid alcohol, substitute with extra broth and a touch more lemon.

Tips

Tips for Caramelizing Onions
  • Do not rush the onions. Cook them over medium-low heat, stirring occasionally, until they are deeply golden and jammy—this can take 25–30 minutes. If they start to steam or stiffen, lower the heat and give them more time.
  • Season with a light pinch of salt early to draw out moisture and promote browning. Taste near the end and adjust salt as needed to balance the dish.
  • Keep the onions in an even layer and scrape up any browned fond from the pan as you go; this helps build a richer flavor base for the dish.
  • For extra depth, deglaze briefly with a splash of the chicken broth or wine after they brown, then stir the liquid back into the onions to incorporate the browned bits.
  • Garlic should be added after the onions soften; sauté about 20–30 seconds until fragrant to avoid burning, which can introduce bitterness.
  • If you like a deeper caramelization, a tiny pinch of granulated sugar can help—but use it sparingly to avoid oversweetening the onions.
Tips for Searing the Chicken
  • Pat the chicken thighs dry thoroughly to promote a golden crust; season with salt and pepper just before searing to maximize surface flavor.
  • Do not overcrowd the pan. If necessary, sear the chicken in batches so each piece browns evenly instead of steaming.
  • Use a tablespoon of olive oil in the pan to help achieve an even, deeply golden crust on the thighs.
  • Sear until well colored on both sides (about 3–4 minutes per side, depending on thickness), then nestle the browned thighs back into the pan with the onions to finish cooking in the flavorful liquids.
  • If the pan is dry during searing, add a splash more oil to prevent sticking and promote clean browning. Scrape up any fond to incorporate into the sauce later.
Tips for Rice and Liquids
  • Rinse the rice until the water runs clear to remove surface starch; this helps keep the grains fluffy and separated as they cook.
  • Warm the chicken broth before adding so you don’t drop the pan temperature and slow the simmer.
  • Deglazing with wine (optional) adds acidity and depth; simmer until reduced by about half to concentrate the flavors before adding the rice.
  • Maintain the proper rice-to-liquid ratio: 1.5 cups rice to about 3.5 cups total liquid (broth plus wine). Do not stir too vigorously once the rice is in the pan; a gentle stir to distribute will do, then cover and simmer.
  • When using dried thyme, crush it between your fingers to release essential oils; and if you used a bay leaf, remove it before serving to avoid a bitter aftertaste.
Tips for Finish and Toppings
  • Cheese topping (Gruyère or Swiss) adds a creamy, gratin-like finish. Add it in the final minutes of cooking and, if you like extra color, broil briefly (1–2 minutes) until melted and lightly golden.
  • Chopped parsley provides brightness and color. Add it off the heat to preserve its vibrant green and fresh aroma.
  • A small amount of lemon juice or zest can balance the sweetness from the onions; add to taste after cooking or whisk into a finishing sauce if you prefer a brighter note.
Tips for Optional Add-ins
  • Frozen peas: Thaw and stir in during the last 5–7 minutes of cooking so they heat through without losing their bright color.
  • Mushrooms: Sauté separately until browned to maximize umami before adding to the dish, or sauté with the onions to render moisture and deepen flavor.
  • Fresh chives: Scatter over the finished dish for a mild onion note and a delicate finish; add just before serving.

FAQ

What is French Onion Chicken Rice?

A comforting one‑pan dish that blends tender chicken with deeply caramelized onions and fluffy rice cooked in seasoned stock, capturing the savory, slightly sweet flavors of French onion soup.

What ingredients do I need?

Core ingredients:

  • Chicken thighs (bone-in or boneless) or breasts
  • Yellow onions
  • Garlic
  • Olive oil and butter (or dairy-free alternatives)
  • Rice (long-grain or basmati, uncooked)
  • Chicken stock or broth
  • White wine (optional)
  • Fresh thyme and a bay leaf
  • Salt and pepper
  • Optional: grated Gruyère or Parmesan for topping
  • Optional add-ins: mushrooms, peas, carrots
Can I substitute rice types?

Yes. Royal options include basmati or long-grain rice. If using brown rice, allow extra cooking time and more liquid. Risotto rice can be used for a creamier texture, but adjust liquid and cooking time accordingly.

How do I caramelize the onions properly?

Slice onions thinly. Cook slowly in a mix of olive oil and a small knob of butter over medium-low heat, stirring often. After 15–20 minutes, sprinkle a pinch of salt and optional sugar to help browning. Continue cooking until onions are deeply golden and sweet, about 25–35 minutes total.

What are the basic cooking steps?

1) Sear the chicken until browned. 2) Remove and set aside. 3) Caramelize onions. 4) Add garlic and deglaze with white wine (if using). 5) Return chicken, stir in rice, and pour in stock. 6) Add thyme and bay leaf. 7) Simmer, covered, until rice is tender and chicken is cooked through. 8) Optional: finish with cheese and a quick broil for a bubbly top.

Can I use chicken breast or thighs?

Both work. Chicken thighs stay juicier and more forgiving if simmered, while chicken breasts cook faster but can dry out. If using breasts, consider keeping them slightly undercooked and letting residual heat finish cooking off the stove.

Is this dish dairy-free or gluten-free?

Glassware-free: Yes for gluten-free if you use gluten-free stock and ensure no gluten-containing additives. Dairy-free: Yes if you skip butter or cheese and use dairy-free butter/oil. You can still get a rich flavor from the caramelized onions and stock.

How long does it take and how many servings does it yield?

Approximate total time: 60–75 minutes. Servings: about 4–6, depending on portion size and whether you include cheese topping.

Can I make this ahead or freeze it?

Yes. You can prepare and refrigerate for up to 1 day before cooking, or fully cook and refrigerate for 2–3 days. It freezes well after cooking—cool completely, transfer to an airtight container, and freeze for up to 2–3 months. Thaw before reheating.

How should I store and reheat leftovers?

Store in an airtight container in the fridge for 3–4 days. Reheat gently on the stove or in the microwave, adding a splash of stock if it looks dry. For a crisper top, re-broil briefly with cheese (if using) after reheating.

What should I serve this with or garnish?

Serve as is or with a simple side salad or crusty bread. Garnish with chopped parsley or extra thyme. If you added cheese, a light grating on top just before serving enhances the dish’s richness.

Introduction / Hook

Imagine a tray of gleaming, sun-gold discs that shimmer like tiny suns on a dessert plate. Each one is a petite dream: delicate, silky custard crowned with a lacquer of caramel that sighs with a whisper of vanilla the moment you bite. The promise of a perfect bite sits in the air—soft jiggle, creamy richness, a caramel kiss that’s just a touch bitter and wonderfully toasty. Mini Flan Bites are not merely a dessert; they are a moment of celebration you can hold in your hand, a classy little treat that transforms everyday moments into something memorable. The first scent that reaches you is a warm bouquet of vanilla and dairy, mellowed by caramel that has deepened to a bronzed amber. As you lean in, the aroma settles into your memory—comfort, nostalgia, and a hint of distant summer markets where caramelized sugar dusts the air like a friendly invitation. These bites bridge the gap between a classical custard and contemporary party dessert, offering the elegance of tradition with the practicality of modern entertaining.

What makes Mini Flan Bites especially enchanting is their accessibility. They take the grand, siren call of a traditional flan—its glossy caramel cradle and custard’s satin texture—and condense it into something you can share with a crowd, a family, or a friend who drops by with a sweet craving. There’s no need to fear a big, heavy pudding; instead, you have dozens of dainty morsels that are easy to portion, easy to plate, and dazzling to the eye. As you serve them, you watch eyes lighten, conversations slow to a contented hum, and the room fill with the kind of quiet delight that only a well-made dessert can inspire. This is the charm of miniaturization done with care: more surface for aroma, more delightful bite sizes for conversation, and more opportunities to tailor the experience to different tastes without sacrificing soul or flavor.

In this guide, you’ll discover not just the joy of the bite itself but the story, the endless adaptability, and the way this humble dessert can elevate a weeknight dinner into a celebration and a special occasion into something warmly familiar. You’ll learn why these bites feel both sophisticated and comforting, how their texture achieves that elusive balance between wobbly elegance and sturdy bite, and how small touches—a fleck of citrus zest, a whisper of spice, a dusting of flaky sea salt—can unlock a cascade of flavors that delight the senses. Whether you’re hosting a party, planning a holiday dessert table, or simply craving a charming finish to a comforting meal, Mini Flan Bites offer a universal appeal: a familiar, beloved custard reimagined in miniature form to fit the moments of today.

The Story Behind the Dish

Flan is a dessert with a long, winding road that stretches across continents and centuries. Its essence—an indulgent custard, gently baked and resting in a pool of caramel—speaks to a tradition that many cultures have claimed as their own. The roots lie in old world kitchens where milk, eggs, and sugar came together beneath gentle heat, forming a custard that set with a tender wobble and carried a sweetness that felt both celebratory and homey. Over time, flan traveled with merchants, travelers, and kitchen hands, taking on local notes and layers of meaning in every region it touched. In Spain and much of Europe, flan is often paired with a simple caramel crown, a symbol of how a few pantry staples can become something glorious. In Latin America, the dish blossomed into comforting, festive versions that appear at birthdays, weddings, and family gatherings, each region adding its own twist—richer dairy, condensed milk for a creamier mouthfeel, or a kiss of citrus and spice for brightness.

When I first encountered Mini Flan Bites, they reminded me of a favorite memory from a sunlit kitchen in a bustling market. A grandmother, with a smile as warm as the caramel coating she drizzled over the set custards, handed me a plate of small, glossy discs and whispered that a good flan should sing softly—never shout, always invite. The bite-size format captured the essence of a grand classic in a playful, accessible form. It was as if the tradition stepped onto a smaller stage, inviting a larger audience to join in the tasting. Since then, I have watched flan’s story evolve in home kitchens and bakery cases alike: the same smooth custard, the same caramel glow, now embraced by modern plating, portable portions, and crowd-friendly presentation. Mini Flan Bites honor that lineage while inviting new generations to discover and reshape the familiar into something instantly shareable and enduringly comforting.

The beauty of this dessert lies not only in its history but in its adaptability. A traditional flan can be a holiday centerpiece or a casual weeknight finale; the mini version amplifies that versatility by gifting you a dozen or more individualized portions. It becomes easy to tailor the experience for dietary needs, for a theme, or for the mood of the moment. A touch of citrus or spice can transport the flavor toward a sunrise in Sicily, a summer night in Oaxaca, or a cozy winter lounge in Madrid. The story behind Mini Flan Bites is, in essence, the story of dessert as a shared ritual—an invitation to gather, indulge, and savor a moment that is equal parts memory and invention.

Why You’ll Love This Recipe

  • Effortless elegance: A classic dessert reimagined into charming, bite-sized portions that look as refined as they taste.
  • Make-ahead magic: These bites set beautifully in advance, freeing you to enjoy the company of guests rather than time tethered to the oven.
  • Shareable and crowd-pleasing: A platter of small, uniform bites makes for easy serving and encourages sampling, conversation, and a festive atmosphere.
  • Versatile sweetness: The caramel and vanilla backbone provides a balanced, not cloying sweetness that complements a wide range of pairings and toppings.
  • Kid-friendly yet sophisticated: A dessert that delights both younger palates and seasoned dessert lovers, bridging generations at the table.
  • Adaptable to dietary needs: Works well in dairy-friendly versions and invites dairy-free or vegan adaptations with simple substitutions.
  • Texture that delights: The signature jiggle of flan—silky, custardy, and impossibly smooth—meets the satisfying bite of a firm, set base.

Flavor Profile & Texture

Mini Flan Bites deliver a harmonious balance of flavors and textures that feel both comforting and refined. The custard base brings a creamy, milky richness that speaks of vanilla, eggs, and a gentle hum of sweetness. It’s a flavor that rests in the palate—soft, warm, and inviting—like a whispered invitation to linger at the end of a meal. The caramel layer, which forms a glossy, amber cradle around the custard, adds a toasty, slightly bitter counterpoint that makes the sweetness more dynamic rather than cloying. This contrast is key: the caramel’s edge keeps the finish bright and lively, while the custard’s creaminess carries you through to a satisfyingly long aftertaste of vanilla and caramel. The texture is where the magic truly happens. Each bite reveals a tiny jiggle—an elegant reminder that these are individual desserts, not a single slab—but never so fragile that they crumble or fall apart. The custard remains tender and delicate, yielding to the second bite with the same gentle wobble and melt-in-your-mouth ease. If you close your eyes and inhale, you’ll catch hints beyond vanilla: a whisper of citrus zest, a touch of warm spice, and a subtle, almost caramel-toffee finish that lingers softly on the tongue. The mouthfeel is luxurious yet approachable, a rare combination that makes these bites feel celebratory without feeling heavy.

Texturally, the bite presents a contrast that pleases the senses: the outer caramel layer gives a slight snap before giving way to the creamy center; the interior holds a structured silkiness that doesn’t slide off the spoon, a result of careful balance between dairy, eggs, and heat. The overall experience is one of balance—an elegant, refined dessert that remains approachable enough to enjoy at a casual weeknight table or a formal holiday spread. In tasting terms, think of it as a gentle crescendo: a glossy caramel opening, a custard core that glides across the tongue, and a finish that glows with warm vanilla, a nudge of caramel, and a whisper of citrus or spice if you choose to add it. This is the essence of Mini Flan Bites: a small package that delivers a big, memorable impact.

Occasions & Pairings

  • Occasions: Perfect for holiday dessert tables, dinner parties, bridal or baby showers, tapas-style gatherings, and celebratory brunches. They also shine as a refined finish to a weeknight meal when you want something special but not overly fussy.
  • Pairings: Pair with coffee or a dark roast to echo the caramel notes; a glass of dessert wine, such as Moscato d’Asti or a late-harvest Riesling, can elevate the sweetness with a touch of acidity; a fresh berry garnish provides brightness and color; and a light dusting of flaky sea salt can offer a playful contrast that makes the flavors pop.
  • Platters & presentation: Arrange on a clean tray with a few garnishes—shaved citrus zest, a drizzle of caramel, or a light dusting of cocoa powder—to create a visual invitation that matches the flavor.

Tips, Variations & Substitutions

Vegan & Dairy-Free Variations

  • Explore plant-based bases: a rich coconut milk or almond-cecan dairy alternative can stand in for traditional dairy. The key is to maintain enough fat to yield a luxurious mouthfeel, so look for full-fat options and consider a touch of cashew cream for extra creaminess.
  • Egg substitutes and texture: for a vegan version, some cooks use a combination of plant-based milks with a thickener such as agar-agar or cornstarch to emulate the custard’s gentle set. The result is different from a traditional egg-based custard, but it can still deliver a luscious, satisfying bite.
  • Caramel handling: the caramel glaze remains the star—if you’re vegan, the same caramel technique works with sugar alone, yielding that satisfyingly brittle-smooth surface and deep color that speaks of toasty sweetness.

Flavor Twists

  • Citrus brightening: add a hint of zest—orange, lemon, or lime—to lift the vanilla and cut through the richness with a clean, aromatic fragrance.
  • Spice notes: a pinch of cinnamon, cardamom, or a vanilla bean infusion can create a warm, comforting profile that evokes holidays or cozy evenings.
  • Coffee or chocolate whispers: a light espresso note or a dusting of cocoa powder can add depth and sophistication for adult gatherings.
  • Nougat or nutty accents: a subtle almond or hazelnut essence or a dusting of finely chopped toasted nuts can introduce a pleasing textural contrast and an earthy aroma.

Regional Twists

  • Latin Americas: drape with dulce de leche or cajeta for a deeper caramel experience; pair with a dash of cinnamon for warmth.
  • Filipino influence: leche flan variants often lean into condensed milk and a thicker custard, producing a richer, creamier bite with a characteristic sweetness and silkiness that are beloved in Filipino celebrations.
  • Mediterranean notes: a hint of orange blossom water or rose water can transport the flavor toward fragrant, sun-drenched shores with a floral lift.

Make-Ahead & Storage Tips

  • Make ahead: because these bites set beautifully, you can prepare them a day in advance. Keep them covered and refrigerated, allowing flavors to meld and the texture to firm slightly for easier slicing and plating.
  • Storage: store refrigerated, ideally in a single layer on a tray or in a shallow container to prevent sticking. They will stay at their best for several days; however, for optimal texture, enjoy within 2–3 days of setting.
  • Freezing: generally not recommended for custard-based bites, as freezing can alter texture and make the custard grainy upon thawing. If you must freeze, do so with caution and expect some change in the mouthfeel.

Storage & Make-Ahead Ideas

One of the most appealing aspects of Mini Flan Bites is their make-ahead friendliness. The set custard holds its shape and flavor beautifully when prepared in advance, allowing you to plate and present at the last moment with the elegance of a freshly made dessert. For best results, consider these guidelines:

  • Chill thoroughly: once set, keep the bites covered and refrigerated. The chill helps the custard maintain its structure and the caramel’s glossy finish.
  • Ahead planning: you can scale the preparation to your event by making the custard base and caramel a day or two ahead, then simply portion into ready-to-serve bites when you’re ready to entertain.
  • Serving temperature: while room-temperature desserts have a certain charm, slightly chilled bites hold their form better and often accentuate the custard’s silkiness and caramel’s depth.
  • Reheating: avoid reheating in the oven if possible; instead, bring to a comfortable coolness if you’ve prepared ahead, and serve from the refrigerator to preserve texture.

Fun Facts & Trivia (Optional)

  • Leche flan is a beloved Filipino adaptation that often uses condensed milk to enrich the custard, resulting in a luxuriously creamy texture and a distinctively rich flavor.
  • Flan’s caramel crown is as iconic as the custard itself. The caramel is created by heating sugar until it reaches a deep amber color, then pouring it into molds before adding the custard. The result is a glistening moat around a tender center when inverted onto a plate.
  • Many cultures celebrate flan at festive gatherings—birthdays, weddings, and family reunions—because its simple ingredients can become a symbol of sharing and togetherness.
  • The term “flan” has traveled across languages and borders, but its heart remains the same: a humble custard treated with care, transformed into something memorable and joyous.
  • In modern kitchens, miniaturized desserts like Mini Flan Bites are part of a broader trend toward elegant, approachable desserts that invite guests to sample multiple flavors without committing to a full portion.
  • Texture perfection matters: achieving the ideal wobble is a playful test for chefs and home cooks alike. The target is a custard that yields softly but holds its shape, delivering a sensation of luxury with every mouthful.
  • Caramelization is not just about sweetness; it’s about flavor development. The longer sugar caramelizes, the deeper its flavor becomes, offering a toasty counterpoint that makes the overall dessert more complex and satisfying.

Ingredients

    Caramel Base
    – 1/2 cup granulated sugar
    → The sugar will melt to form the caramel layer that coats the bottom of each mini flan cup. Heat evenly over medium-low heat without stirring; once edges melt, gently swirl the pan to distribute and stop when the syrup is a deep amber color. Remove from heat promptly to prevent scorching; pour into cups and swirl to coat the bottom before the custard is added.
    – 2 tablespoons water
    → Water helps control caramelization, reduces crystallization, and yields a smoother glaze. Add water to the sugar before heating or swirl the pan gently after it starts to melt; if the caramel thickens too much, warm the pan slightly to re-liquify it. Do not stir vigorously to avoid sugar crystallization.

    Custard Filling
    – 2 large eggs
    → Eggs provide structure and help the custard set with a creamy, wobbly texture. Use eggs at room temperature for even mixing; whisk just until blended to avoid incorporating air that could cause bubbles. For ultra-smooth bites, strain the custard after mixing to remove chalazae and small lumps.
    – 1 cup whole milk
    → The milk forms the body of the custard; whole milk yields a richer, silkier finish. Heat the milk gently until steaming (do not boil) and gradually whisk into the eggs to temper. If using a lighter dairy, results will be lighter and may require adjusting sugar or a touch of cream for richness.
    – 1/4 cup granulated sugar
    → Sweetness for the custard; dissolve the sugar in the warm milk to prevent graininess and ensure even sweetness. You can adjust to taste, but keep a moderate amount to avoid masking the caramel. For deeper flavor, you could substitute a portion with brown sugar, keeping in mind it may tint the custard.
    – 1/2 teaspoon vanilla extract
    → Vanilla amplifies the custard’s aroma and rounds the sweetness. Use pure vanilla extract for best flavor; if you have a vanilla bean, infuse the milk with the seeds and pod, then remove the pod before whisking with eggs. For a dairy-free option, almond extract could be used sparingly, but it will change the profile.
    – Pinch of salt
    → A pinch of salt enhances sweetness and balance, helping to emphasize vanilla and caramel notes. If you already used salted caramel later, adjust accordingly to maintain harmony in the final bite.

    Optional Toppings
    – Fresh berries (optional)
    → Berries offer a bright contrast, acidity, and color against the creamy custard. Rinse gently and pat dry, slice or leave whole as desired, and add just before serving to maintain texture. If making ahead, keep berries refrigerated separately or add right before serving to preserve freshness.
    – Whipped cream (optional)
    → A light crown of whipped cream adds richness and a creamy counterpoint to the smooth flan. Chill the bowl and beaters, whip to soft peaks, and dollop sparingly. For a lighter option, use lightly sweetened whipped cream or coconut cream.
    – Toasted almond slivers (optional)
    → A subtle crunch and nutty aroma that complements the custard. Toast sliced almonds in a dry skillet over medium heat until lightly golden and fragrant, then sprinkle a small amount on top. Avoid over-toasting to prevent bitterness; add just before serving to retain crunch.

Instructions

  • Prepare the caramel base by combining 1/2 cup granulated sugar with 2 tablespoons water in a small heavy-bottom saucepan and cook over medium-low heat without stirring; as the edges begin to melt, swirl the pan gently to distribute melted sugar and prevent crystallization, then continue cooking until the syrup is a deep amber color and fragrant; remove from heat immediately to avoid scorching and pour a thin, even layer into each mini flan cup, tilting or rotating the cups to coat the bottom completely; allow the caramel to harden into a glossy shell before proceeding.
    → The caramel provides the flavor foundation and a slick release surface for unmolding; even coating prevents weak spots that can crack or stick.
  • Preheat your oven to 325°F (165°C) and set up a shallow baking dish or roasting pan; arrange the caramel-coated mini cups in a single layer and pour hot tap water into the dish until it reaches halfway up the sides of the cups to create a bain-marie; this gentle steam ensures even cooking and prevents the custard from curdling or cracking.
    → The water bath stabilizes heat and moisture, producing a uniformly creamy texture across all bites.
  • Whisk the custard filling by beating 2 large eggs with 1/4 cup granulated sugar, a pinch of salt, and 1/2 teaspoon vanilla extract in a medium bowl until just combined and smooth; avoid vigorous whisking to minimize air incorporation that can create bubbles in the final set.
    → Eggs provide structure and creaminess; gentler mixing yields a silkier custard with a uniform surface.
  • Heat 1 cup whole milk in a small saucepan over medium heat until it just begins to steam (do not let it boil); this gentle heat will temper the eggs later and prevent curdling while infusing the custard with dairy richness.
    → Steaming milk creates a smooth, stable base that blends evenly with the eggs for a refined texture.
  • Temper the eggs by slowly pouring a small amount of the hot milk into the egg mixture while whisking constantly, then continue in a thin stream until the mixture is warm and cohesive; finally whisk in the remaining milk to integrate completely; this gradual temperature increase prevents scrambling and ensures a homogeneous custard.
    → Proper tempering preserves the custard’s integrity during baking and yields a silky mouthfeel.
  • Strain the mixture through a fine-mesh sieve into a measuring cup or pitcher to remove chalazae and any small lumps; this step delivers ultra-smooth custards that set evenly in the mini cups.
    → Straining eliminates textural irregularities and results in a glossy, uniform finish for each bite.
  • Divide the strained custard evenly among the caramel-lined mini cups, filling each about two-thirds full to leave space for expansion and to ensure a level top after setting; avoid overfilling to prevent spillage into the water bath.
    → Consistent portions ensure uniform baking and a neat final presentation.
  • Bake the custards in the water bath until centers are just set but still slightly wobbly (approximately 22–28 minutes, depending on cup size); test by gently jiggling the pan—the centers should tremble fractionally and not appear liquid, then remove from oven if they show a slight jiggle.
    → Gentle heat yields a tender, custard-y texture without curdling or cracking.
  • Carefully lift the pan from the water bath and cool the cups on a rack at room temperature for 20–30 minutes, then refrigerate for at least 2 hours to fully set and develop flavor; chilling also makes unmolding cleaner and easier.
    → Proper cooling and chilling firm the custard and improve sliceability and presentation.
  • Unmold the chilled flan bites by tightening around the edges with a small knife or by gently squeezing silicone cups to loosen, then invert onto serving plates to reveal the caramel top; if using paper-lined metal cups, tap firmly or run a knife around the edge to release; ensure the caramel shade remains glossy for an appealing crown.
    → A clean release and visible caramel top enhance both appearance and texture of each bite.
  • Garnish with optional toppings just before serving: rinse fresh berries, pat dry, and arrange a few on top or around each bite; if desired, pipe or dollop whipped cream sparingly and scatter a few toasted almond slivers for crunch; avoid adding toppings too early to prevent sogginess.
    → Toppings provide contrast in flavor, color, and texture that elevates the overall experience.
  • Store any leftovers covered in the refrigerator and best consumed within 2–3 days; keep them chilled until ready to serve and bring to near-cold room temperature for about 15 minutes for optimal texture and flavor before enjoying.
    → Proper storage maintains the custard’s delicate structure and prevents caramel from becoming tacky or overly hard.

Notes

These mini flan bites are silky, custardy, and perfectly portioned for dessert or a refined finish to a meal. The bottom caramel glaze coats each cup with a glossy, deep-sugar note that contrasts beautifully with the creamy custard. You can customize them by infusing the milk with citrus zest or a pinch of cinnamon, or by topping with fresh berries, a dollop of lightly sweetened whipped cream, or toasted almond slivers for crunch. They store well in the fridge for up to 3-4 days and can be made a day ahead; cover tightly to prevent absorption of fridge odors. For a dairy-free option, substitute full-fat coconut milk for the milk and, if needed, add a teaspoon of cornstarch to help the custard set. If you have trouble unmolding, silicone mini cups release the caramel more easily than metal ramekins; for metal cups, run a quick warm towel around the exterior or dip rims in hot water to loosen. Always ensure your vanilla extract and any flavorings are gluten-free if you have gluten intolerance.

Tips

Tips for Mini Flan Bites

Caramel Base tips

  • Use a heavy-bottom, light-colored pan so you can watch the caramel color develop evenly and avoid scorching.
  • Control caramelization by adding 2 tablespoons water to the sugar before heating, or gently swirl the pan after the sugar just begins to melt; avoid vigorous stirring to prevent crystallization.
  • Cook until the syrup turns a deep amber color, then remove from heat promptly to prevent bitter notes; pour a thin layer into each mini cup and swirl to coat the bottom before adding custard.
  • Work quickly when pouring caramel, as it sets fast. Have cups ready and lightly oil or spray them to help release the custard later.

Custard Filling tips

  • Use eggs at room temperature for smoother emulsification; whisk only until blended to minimize air bubbles, which can cause a wobbly or bubbly texture.
  • Warm the milk to steaming (do not boil) and gradually whisk into the eggs to temper, then combine with the other ingredients for a silky custard.
  • Dissolve the 1/4 cup sugar in the warm milk to prevent graininess; you can adjust sweetness to taste but keep a balanced level against the caramel.
  • Use pure vanilla extract for the best aroma; if you have a vanilla bean, infuse the milk with the seeds and pod, then remove the pod before mixing with the eggs.
  • Add a pinch of salt to enhance sweetness and vanilla—this helps balance the caramel notes if the caramel is very sweet.
  • For ultra-smooth custard, strain the mixture through a fine-mesh sieve into a bowl before pouring into cups to remove chalazae and small lumps.
  • Pour custard evenly into the cups and tap the filled cups gently to release any air bubbles before baking.

Cooking and setting tips

  • Bake the flan bites in a shallow water bath at about 325°F (165°C) until just set with a slight jiggle; avoid overbaking to prevent a rubbery texture.
  • Let the bites cool to room temperature, then refrigerate for at least 2–3 hours (or overnight) to ensure clean unmolding and a firm yet creamy texture.
  • To unmold, run a warm towel around the outside of the cups or dip the bases briefly in warm water, then invert onto serving plates.

Optional toppings tips

  • Fresh berries add bright acidity; rinse, pat dry, and add just before serving to maintain texture and color.
  • Whipped cream provides a light, creamy contrast; whip cold cream to soft peaks and dollop sparingly, or use lightly sweetened whipped cream or coconut cream for a dairy-free option.
  • Toasted almond slivers give a subtle crunch and aroma; toast sliced almonds in a dry skillet over medium heat until lightly golden, then sprinkle on top just before serving to preserve crunch.

FAQ

What are Mini Flan Bites?

Mini Flan Bites are bite-sized versions of classic flan — silky caramel custard set in small molds and served chilled. They’re perfect for parties, lunchboxes, or as a make-ahead dessert.

What ingredients do I need?
Can I make them ahead?

Yes. Bake the flan bites, cool completely, and refrigerate in an airtight container for up to 3–4 days. They can be unmolded and served chilled or at room temperature. Freezing is not recommended as texture may suffer.

How do I caramelize the sugar to line the molds?

In a small saucepan, combine sugar and water. Cook over medium heat without stirring; gently swirl the pan occasionally until the sugar turns a deep amber color. Immediately pour or spoon a thin layer into each mold to coat the bottom (and sides if you like). Let the caramel set briefly before filling.

What is the baking method and time?

Preheat oven to 325°F (165°C). Place the caramel-lined molds in a larger baking dish and pour hot water into the dish so it reaches halfway up the sides (a water bath). Fill molds with the custard, then bake for about 18–22 minutes, or until the centers are just barely set. Remove from the water bath, cool to room temperature, then refrigerate at least 2 hours (or overnight) before unmolding.

How do I unmold and serve?

Loosen the edges with a thin knife or spatula. Invert each mold onto a plate and give a gentle tap or shake to release the flan. If needed, spoon a bit of the remaining caramel onto the bite. Serve chilled or at room temperature, optionally with berries or a pinch of flaky sea salt.

Can I make dairy-free or vegan versions?

Yes, you can adapt with dairy-free milk options. Use full-fat coconut milk (or almond/oat milk) in place of dairy, and use a dairy-free condensed milk substitute or homemade condensed coconut milk. The texture may vary, and sugar content might need adjustment. Note: Traditional flan relies on eggs for structure; a fully vegan version would require an egg-free custard recipe and may require additional thickeners.

How should I store and reheat leftovers?

Store leftovers in an airtight container in the refrigerator for up to 3–4 days. Reheat briefly in the microwave if you like, or enjoy cold. Do not refreeze once thawed.

What flavor variations or toppings can I try?

Try adding citrus zest (lemon, orange, or lime) to the custard, a pinch of cinnamon or nutmeg in the caramel, or a splash of vanilla bean paste. Finish with extra caramel drizzle, a pinch of flaky sea salt, or fresh berries for color and contrast.

Introduction / Hook

Imagine a loaf that arrives at your table with the warm hug of a bustling street kitchen, its crust crackling softly as you break into a cloud-soft interior. The scent rises like a chorus of toasty grains, a whisper of olive oil and a hint of earth from the flour, inviting you to slow down and savor. Easy No Yeast Turkish Bread is the kind of bread you reach for when you want something homemade, comforting, and utterly doable in a busy week—no long rising times, no special yeast rituals, just a quick swoop of mix-and-mend that yields a bread as versatile as a blank canvas. It’s the kind of recipe that makes you think: I could have this on the table in under an hour, and it still tastes like a claim to tradition—like a little piece of Anatolian warmth carried straight to your kitchen.

There’s magic in this no-yeast method: a dough that comes together with friendly ease, a pan-dozen trick that creates a tender interior and a gently blistered exterior, and flavors that sing of the Mediterranean with every bite. It’s not trying to imitate a perfectly risen loaf; it’s celebrating the practical, the comforting, and the social joy of bread-sharing. Slice it open while it’s still steaming, smear it with a savory spread, or tuck it around a bowl of steaming soup—this Turkish-inspired flatbread is a trustworthy companion for any meal. And because it’s so adaptable, you can tweak it to suit your pantry, your preferences, and your schedule without losing that signature character that makes Turkish flatbreads so beloved around the world.

If you’ve ever wanted to bring a taste of a bustling market, a family kitchen, or a cozy afternoon with friends into your own home, this is your invitation. The bread is forgiving, the technique is approachable, and the result is a warm, fragrant, absolutely crave-worthy loaf that’s perfect for weeknights, weekend breakfasts, or a lively mezze spread. The first bite offers a delicate chew, a whisper of olive oil, and a soft crumb that seems to melt with a gentle sigh. The second bite brings a tiny, satisfying crackle from the crust and a more pronounced toasty note. It’s a bread that tastes like a memory you haven’t yet created—a door open to new meals, new pairings, and new conversations around the table.

The Story Behind the Dish

Flatbreads have traveled through centuries and continents, weaving themselves into the fabric of countless cuisines. In Turkey, breads like lavaş, bazlama, and pide have long been part of daily life, perfuming kitchens with the aroma of grain and the gentle heat of a seasoned pan. No-yeast versions are modern harmonies borrowed from the ancient practice of making quick breads—where a leavening agent other than yeast and a handful of pantry staples create tender dough in a fraction of the time. This Easy No Yeast Turkish Bread sits at the crossroads of tradition and practicality: it honors the spirit of Turkish flatbreads—soft crumb, inviting aroma, versatile shape—while offering a shortcut that fits contemporary schedules.

A family story often accompanies such bread. Imagine a grandmother gathering dough in a sunlit kitchen, the skillet warming over a steady flame, a chorus of relatives chatting about daily life, plans for the week, the latest harvest from the garden. The dough comes together swiftly, and as it hits the hot pan, it blooms into a loaf that’s eaten with hands, shared with laughter, and saved for later indulgence. The ritual of bread-making—kneading, shaping, shaping again, and cooking—becomes a conversation across generations, a small ceremony that marks the passage of time with warmth and nourishment. This no-yeast version distills that sentiment into a modern, accessible format: a nod to heritage, a practical solution for busy days, and a table-friendly accompaniment that welcomes a thousand toppings and fillings.

Throughout the ages, flatbreads have served as the ultimate transportable meal. They wrap around pieces of grilled meat, cradle a mound of vegetables, or simply scoop up a spoonful of vibrant, herb-laden dips. The Turkish tradition valorizies bread not as a side but as a partner—an inviting surface for sauces and stews, a vehicle for flavors, and a comforting anchor for gatherings. By embracing a no-yeast approach, this recipe preserves the essence of that philosophy: bread that is unpretentious, generous, and always ready to share with friends and family.

Why You’ll Love This Recipe

  • Fast and forgiving: a dough that comes together quickly without yeast and rises in flavor rather than volume, making it ideal for weeknights and last-minute meals.
  • No-yeast convenience: you skip the long wait times and still enjoy a soft, tender crumb with a lightly blistered crust, reminiscent of classic Turkish flatbreads.
  • Versatile canvas: the bread adapts to countless toppings, fillings, dips, and spreads—perfect for mezze, wraps, soups, stews, or breakfast tables.
  • One-pan or skillet-friendly: you can cook it on the stovetop for speed or finish in a hot oven for a more even bake and a golden crust.
  • Kid-friendly and shareable: a simple, approachable bread that appeals to all ages and invites hands-on dining experiences.
  • Customizable to dietary needs: easily adaptable for vegetarian, dairy-free, or vegan preferences with small ingredient swaps and additions.
  • Great for meal prep: bake a batch ahead of time, freeze, and reheat as needed for quick lunches or sides.
  • A comforting anchor for soups and stews: its sturdy yet tender texture makes it perfect for dipping, scooping, and wiping clean bowls.
  • Flavor-friendly pantry science: the technique relies on gentle warmth, careful resting time (short, not long), and a touch of oil or fat to enrich the crumb.
  • Economical and accessible: uses simple pantry staples, with room to experiment by adding seeds, herbs, or spices for different twists.

Subsection: Accessibility Meets Flavor

Because this bread doesn’t depend on yeast, it demystifies bread-making for beginners while still rewarding experienced cooks with a deeply satisfying result. The texture strikes a balance between crumbly-soft and satisfyingly chewy, and the aroma carries a comforting, rustic charm that makes you want to share a warm, buttery bite with someone special. It’s the kind of dish that makes a kitchen feel welcoming, a table feel abundant, and a meal feel complete without fuss or drama.

Flavor Profile & Texture

The character of this Easy No Yeast Turkish Bread comes from a harmonious blend of aroma, texture, and subtle tang. The exterior presents a delicate crust that hints at toasting and a light, almost caramelized edge where the heat kisses the surface. Biting through, you’ll discover a tender, airy crumb that’s surprisingly soft for a quick bread, with a gentle chew that invites you to savor every bite. The flavor is gentle and comforting—nutty from the grain, slightly sweet from the dough’s natural sugars, and nuanced by the chosen fats or toppings that finish the loaf. It’s not a heavy bread; it’s a breathable, easygoing style that pairs beautifully with everything from a bright herb dressing to a hearty, rustic salsa.

A distinctive note is the way the bread absorbs and carries flavors. Because it’s built to be a vehicle for dipping and topping, the crust’s surface is ideal for picking up oils, herbs, and lightly toasted seeds, while the interior remains soft enough to cradle sauces and spreads. The balance of soft crumb and crisp edges makes every mouthful a satisfying, multi-textured experience: a gentle, bread-tinged chew that yields to a cloud-like center, with a hint of olive oil or fat (if you use it) perfume that lingers pleasantly on the palate. It’s a bread that doesn’t shout its presence; it quietly elevates the dishes you pair with it, letting the toppings, dips, and fillings take the spotlight.

If you’re curious about what makes it so inviting, consider the interplay of warmth and tenderness. The no-yeast approach often uses a gentle chemical leavener or baking chemistry to create lift without hours of waiting. This means you enjoy a bread with a light, accessible structure that still carries a satisfying bite. And because the dough rests briefly rather than rising overnight, you get a fresh, aromatic loaf with the comforting taste of a traditional flatbread but the convenience of modern weeknight cooking. In short, you get a bread that feels familiar, comforting, and downright delicious from the very first bite, with room to tailor the experience to your taste buds and pantry.

Texture-wise, think of it as a dialogue between two personalities: the crust that gives you a toast-like snap and the crumb that remains soft, breathable, and gently pliant. The crust’s slight blistered patches are not just visually appealing; they deliver a subtle roasted note that enhances the overall flavor without overpowering the gentle graininess at the center. It’s a bread that invites you to tear, share, and top, making every serving a little celebration of home cooking.

Occasions & Pairings

This Turkish-inspired flatbread is a versatile companion for many meals and moments. Its speed and adaptability make it an ideal choice for weeknights when you want something comforting without spending hours in the kitchen. It also shines during leisurely weekend gatherings, where a warm basket of bread alongside a spread of dips and toppings becomes the centerpiece of a relaxed mezze-style setup. Here are some ideas for when to bake it and how to pair it:

  • Weeknight dinners: serve alongside a warm bowl of soup or a hearty stew, letting the bread soak up the broth with each bite.
  • Mezze boards: slice into generous wedges and arrange with a selection of dips, olives, pickles, and roasted vegetables for a dynamic spread.
  • Breakfast or brunch: cut into wedges and top with whipped yogurt, herbs, or a runny egg for a satisfying morning bite.
  • Sandwich base: use as a soft wrap for grilled vegetables, feta or goat cheese, and greens for a quick yet satisfying lunch.
  • Pizza night, Turkish-style: brush with a light herb oil, top with cheese and vegetables, and bake until just bubbling for a rustic quick pizza.
  • Holiday sides: a warm loaf can accompany roasted meats, stews, or holiday sides, adding that comforting, bread-dipping element to the table.

Pairing ideas to elevate the flavor experience without needing a long ingredient list:

  • Dips and spreads: cucumber-dill yogurt, smoky eggplant spread, whipped herb butter, or lemon-garlic chickpea dip.
  • Salad companions: a bright tomato-cucumber salad with herbs and a light vinaigrette, or a roasted pepper salad with herbs and olive oil.
  • Beet or carrot ribbons with tangy yogurt drizzle, olive oil, and chopped herbs provide a vibrant contrast to the bread’s gentle crumb.
  • Tea, coffee, or a light, citrusy beverage can round out a casual brunch or gathering with a comforting, balanced finish.

Ttips, Variations & Substitutions

One of the delights of a no-yeast Turkish bread is how adaptable it can be to your pantry, tastes, and dietary needs. Here are practical ideas to customize and elevate the bread without losing its essential character:

  • Flour variations: experiment with whole wheat, spelt, or a portion of rye for a heartier crumb and a deeper toasty flavor. Each flour brings its own aroma and texture, so you may notice a slightly denser crumb with whole grains that still remains pleasantly soft.
  • Herbs and seeds: fold in minced fresh herbs or sprinkle seeds on the surface for added aroma and texture. Dill, parsley, thyme, sesame, or nigella seeds each offer a unique fragrance and bite.
  • Fat and flavor: a light brushing of olive oil or a flavored oil after baking can enrich the crust and add a glossy finish. If you prefer a dairy-free option, skip butter and opt for a quality olive oil or a plant-based fat.
  • Vegan and dairy-free adaptations: use a dairy-free yogurt or a plant-based yogurt if your diet requires it, and choose a neutral or fruity oil that complements the flavor without overpowering it.
  • Spice-rub or garlic finish: gently warm a little minced garlic in oil and brush onto the hot bread for a quick, aromatic finish that echoes the flavors of garlic naan or other regional flatbreads.
  • Aromatics in dough: while keeping the no-yeast approach, you can infuse a hint of citrus zest or ground coriander into the dough for a subtle, bright note that shines when paired with olive oil and herbs.
  • Texture tweaks: for a slightly crisper crust, finish the bread in a hot oven for a few minutes after skillet cooking, or briefly broil the top to encourage surface blistering and color.
  • Gluten-free option: explore a gluten-free all-purpose blend designed for bread and combine with a binding agent and a dairy-free yogurt to approximate the soft interior. Expect a slightly different crumb, but it remains enjoyable and versatile for pairing with dips.
  • Regional twists: pair with a smoky pepper spread, a tangy tomato relish, or a herb-garlic yogurt dip to echo various Turkish and Mediterranean flavors in a single meal.

Storage & Make-Ahead Ideas

Here are practical strategies to keep your Easy No Yeast Turkish Bread fresh, delicious, and ready for future meals:

  • Storage of leftovers: once completely cooled, store in an airtight container or a resealable bag at room temperature for up to 2 days. If you live in a humid climate, consider refrigerating to extend freshness and crispness.
  • Reheating for quick service: rewarm slices on a dry skillet over medium heat until the crust returns its gentle crunch, or warm in a low oven for a few minutes to refresh the interior and awaken the aroma.
  • Make-ahead dough handling: portion the dough and store uncooked portions in the refrigerator for up to a day or two; this lets you thaw and cook with minimal planning when you’re ready to serve.
  • Freezing options: freeze fully baked slices or the entire baked loaf once cooled. Thaw at room temperature and reheat in a hot skillet or oven to restore texture. For dough pre-portioning, you can freeze raw portions and bake them directly after thawing.
  • Meal-prep friendly: bake a batch, then refrigerate in portioned bags. Each day you can reheat a portion to accompany different toppings, turning the bread into a versatile daily star.

Fun Facts & Trivia (Optional)

Delightful little tidbits that celebrate the charm of Turkish bread and its global influence:

  • Flatbreads are among the oldest known forms of bread, with regional variations across the Middle East, the Mediterranean, and Central Asia reflecting a long tradition of shared meals and communal cooking.
  • In Turkish cuisine, bread is often considered a daily staple that accompanies nearly every meal, much like rice in other cultures. It’s common to tear bread by hand and use it to scoop up sauces, dips, and stews—a tactile, social experience.
  • Many Turkish flatbreads are traditionally cooked on a convex griddle called a tava or on a hot stone, which gives the crust a distinctive blistered pattern and a warm, slightly smoky aroma. The no-yeast version here captures that same essence with accessible home equipment.
  • No-yeast breads aren’t a newer invention; they reflect practical techniques used in kitchens where time, ingredients, or yeast supply might be limited. This recipe adapts that ingenuity into a modern, convenient format that still honors the comforting spirit of a freshly baked flatbread.
  • Pairing this bread with a bright, tangy dip, toasted vegetables, or a hearty soup creates a timeless trio that evokes family dinners, street-side gatherings, and the generosity of shared meals.

With this Easy No Yeast Turkish Bread, you’re not just baking bread—you’re inviting warmth, conversation, and a comforting, familiar scent into your home. It’s a dish that respects tradition while embracing the convenience and creativity of today, offering a flexible canvas for your taste and your table. Whether you’re feeding a hungry family, testing a new weeknight idea, or simply craving something that feels both nostalgic and fresh, this bread helps you arrive at a satisfying moment in under an hour. So preheat your space, gather a few simple ingredients (the kind that live in most pantries), and let the aroma do the rest—the table is set, and your Turkish-inspired flatbread awaits.

Ingredients

Turkish Bread Dough

  • 3 cups all-purpose flour (plus extra for dusting)
    → The flour provides the base structure for the bread. It forms the gluten network that gives the dough its chew and shape; dusting the surface with flour as you knead helps prevent sticking and allows for smooth shaping. If you want a slightly lighter crumb, you can replace part of the all-purpose flour with bread flour, but keep total flour around 3 cups. Handle dough gently to maintain tenderness.
  • 2 teaspoons baking powder
    → Leavening without yeast; reacts with the wet ingredients to create lift and a soft, bread-like crumb. Sift with the dry ingredients to ensure even distribution and avoid lumps, and mix only until just combined after adding liquids to prevent a tough texture.
  • 1 teaspoon salt
    → Enhances flavor and helps tighten the gluten just enough for better crumb. Disperse evenly in the dry mix so every bite is seasoned; do not skip, as it balances the natural mildness of the dough. If using salted yogurt or olive oil, you may want to slightly reduce this amount.
  • 1 tablespoon granulated sugar
    → Encourages browning and a touch of sweetness that complements the savory toppings. It also helps with moisture retention in the crumb. If you prefer a savory loaf, you can omit or reduce sugar.
  • 1 cup warm water
    → Hydrates the flour and activates the baking powder, starting the rise process without yeast. Ensure water is warm but not hot (about 110°F/43°C). If the dough seems dry, add water a tablespoon at a time until it comes together; if too sticky, add small increments of flour.
  • 1/2 cup plain yogurt (room temperature)
    → Adds moisture, tenderness, and a slight tang; the yogurt’s acidity can help with light leavening in combination with baking powder. Whisk the yogurt smooth and measure at room temperature; if very thick, whisk in a splash of water or milk to loosen before mixing.
  • 2 tablespoons extra-virgin olive oil
    → Provides richness and helps keep the dough soft by lubricating gluten strands, contributing to a tender crumb and easier handling. Use good-quality olive oil for flavor. You can reserve a small amount for brushing the dough surface before baking to enhance crust texture and color.

Optional Add-ins

  • 1 teaspoon dried oregano (optional)
    → Adds a fragrant herbal note that pairs well with olive oil and sesame. Disperse evenly by whisking into the dry ingredients so every portion gets flavor; crush between your fingertips to release essential oils before adding.
  • 1 clove garlic, minced (optional)
    → Introduces savory depth; fold into the dough after initial mixing to spread evenly. Use finely minced garlic to avoid large chunks; use fresh garlic for the strongest aroma. If you bake at high heat, minimize garlic amount to prevent overpowering notes.

Toppings

  • 1 tablespoon sesame seeds (optional)
    → Traditional topping that adds crunch and a toasty, nutty flavor. To help seeds adhere, brush the dough surface with a little olive oil or water before pressing seeds on; lightly press to ensure even coverage. You can toast the seeds briefly in a dry pan for extra aroma, then cool before using.
  • 1 tablespoon nigella seeds (optional)
    → Classic Turkish flavor accent with a peppery, onion-like note. Sprinkle on top just before baking and press gently so they stick during rise and bake; replace with sesame if unavailable.
  • 1 large egg, beaten with 1 tablespoon water for egg wash (optional)
    → Creates a glossy, golden crust and attractive color. Brush the loaf with this wash right before baking; if you prefer a vegan option, use olive oil or plant-based milk as a wash. Ensure a light, even coat to avoid pooling at the seams.

Instructions

  • “Preheat your oven to 425°F (220°C) and line a large baking sheet with parchment paper or lightly grease it with a neutral oil.”

    → This ensures the bread bakes evenly, releases cleanly from the sheet, and yields a crisp crust without sticking.
  • “In a large bowl, whisk together 3 cups all-purpose flour, 2 teaspoons baking powder, 1 teaspoon salt, 1 tablespoon granulated sugar, and 1 teaspoon dried oregano (if using) until evenly distributed.”

    → Even distribution of leavening and seasonings prevents hotspots of salt or oregano and ensures a uniform crumb throughout the loaf; whisking also lightens the flour to prevent dense pockets.
  • “In a separate bowl, whisk 1 cup warm water (about 110°F/43°C) with 1/2 cup plain yogurt until smooth.”

    → The warm liquid activates the baking powder and hydrates the flour to begin developing a tender, bread-like crumb with a slight tang from the yogurt.
  • “Pour the wet mixture into the dry ingredients and stir with a fork or spatula just until the dough comes together.”

    → Mix only until combined to avoid overdeveloping gluten; a few streaks of flour remaining are fine, as they will hydrate during resting and baking.
  • “If using minced garlic (optional), fold it into the dough now by sprinkling evenly over the surface and gently folding a few times to distribute without breaking the dough.”

    → Even distribution of garlic ensures a balanced aroma in every bite and prevents large garlic pockets that can burn or dominate the loaf during baking.
  • “Turn the dough onto a lightly floured surface and knead gently for 6 to 8 turns until it forms a cohesive, slightly tacky ball.”

    → Gentle kneading tightens the crumb without overworking; stop when the dough holds together and feels smooth to the touch.
  • “Let the dough rest for 10 minutes, covered or in a clean bowl, to relax the gluten and make shaping easier.”

    → Resting hydrates the flour fully and decreases elasticity, which helps the dough expand pleasantly in the oven and prevents it from tearing when shaped.
  • “Pat the dough into a rough oval about 1/2 inch (1.25 cm) thick on the prepared sheet or a lightly floured surface, then transfer to the parchment-lined baking sheet.”

    → A uniform thickness promotes even baking and a tender, chewy center; shaping on parchment minimizes sticking and simplifies transfer to the oven.
  • “Prepare an optional egg wash by beating 1 large egg with 1 tablespoon water until smooth.”

    → The egg wash creates a glossy, golden crust and helps toppings adhere if you choose to use them.
  • “If using toppings, lightly brush the dough surface with a thin coat of olive oil or water, then evenly sprinkle sesame seeds and/or nigella seeds and press them gently so they stick.”

    → Oil or water helps seeds adhere during rise and bake; pressing seeds ensures even coverage and prevents them from flaking off.
  • “Just before baking, brush the surface with the egg wash (if using) in an even, thin layer.”

    → A light wash yields a attractive sheen without pooling, and helps seeds or toppings adhere as the loaf bakes.
  • “Bake in the preheated oven for 12 to 15 minutes, or until the loaf is deeply golden around the edges and the surface springs back when gently pressed.”

    → The color and spring indicate doneness; baking powder-based breads set quickly, so monitor for a crisp crust without overbaking.
  • “Transfer the bread to a rack and let it cool for 10 minutes before slicing.”

    → Cooling allows the crumb to finish setting, making clean slices and preventing a gummy interior.

Notes

These easy no-yeast Turkish bread comes together quickly with baking powder and yogurt, yielding a tender, bread-like crumb and a lightly blistered crust when baked hot. Hydrate the flour with warm water (about 110°F/43°C) and whisk the yogurt until smooth to help even mixing. Handle the dough gently and avoid overworking to keep it tender; dust the work surface with a little flour to prevent sticking as you shape into rounds or ovals. You can customize with 1 teaspoon dried oregano or 1 clove minced garlic folded into the dough for savory depth; toppings of sesame or nigella seeds pressed on before baking provide a traditional aroma and crunch. For a glossy crust, brush with an egg wash (or olive oil for vegan) just before baking; bake in a hot oven (around 425°F/220°C) until puffed and golden, about 12-15 minutes depending on thickness. Let rest briefly before slicing so the crumb sets.

To store, keep cooled bread wrapped at room temperature for 2-3 days or freeze sections for longer storage; reheat in a warm oven or skillet to refresh the crust. If you need a gluten-free version, substitute a certified gluten-free all-purpose flour blend and check that your baking powder is gluten-free; note that the texture may differ from wheat-based dough and you may need to adjust with extra yogurt or water. This bread pairs beautifully with olive oil, yogurt-dips, or savory toppings, and can be baked directly on a parchment-lined sheet or a preheated baking stone for crisper bottoms.

Tips

Tips for Easy No-Yeast Turkish Bread

  • Hydration and texture: Keep the dough soft but manageable. If it sticks, dust with a little flour; if it’s dry, add water in 1 tablespoon increments until it comes together. Use warm water around 110°F/43°C to help activate the baking powder.
  • Handling without yeast: Since this uses baking powder instead of yeast, mix the dough just until the liquids are combined to avoid a tougher crumb. A gentle touch helps keep the bread tender.
  • Whisk the yogurt: Ensure yogurt is at room temperature and whisked smooth; if very thick, whisk in a splash of water or milk to loosen before mixing.
  • Flavor balance: If you use salted yogurt or salted olive oil, you may want to reduce the added salt by 1/4 teaspoon.
  • Salt distribution: Sprinkle salt evenly in the dry mix so every bite is seasoned and not concentrated.
  • Add-ins: If using oregano or garlic, whisk into the dry ingredients or fold in after the initial mix to distribute evenly. Crush oregano between your fingers to release aroma.
  • Oil handling: The 2 tablespoons olive oil keeps the dough tender and lubricates gluten. You can rub a little oil on your hands to prevent sticking while shaping.
  • Shaping and thickness: Roll the dough into a roughly even rectangle or oval and aim for about 1/4 inch (6 mm) thickness for a traditional flatbread; thinner for crisper edges, thicker for softer pockets.
  • Resting: Let the shaped dough rest 10-15 minutes before baking to relax gluten and improve oven spring.
  • Egg wash option: If using egg wash, brush lightly just before baking for a glossy crust. For vegan, use olive oil or plant-based milk instead.
  • Toppings: For best adhesion, brush seeds with a little oil or water and press seeds on gently. Toast sesame seeds briefly in a dry pan for extra aroma, then cool before using.
  • Oven and bake: Preheat to about 425-450°F (220-230°C). Bake on a hot sheet or stone for a crisper bottom. Check around 12-15 minutes; bake until the loaf is golden and cooked through.
  • Storage: Fresh bread is best the same day. Store in a clean cloth bag; reheat briefly wrapped in foil to restore softness, or freeze portions for longer storage.

FAQ

What is Easy No Yeast Turkish Bread?

It’s a quick flatbread inspired by Turkish pide that uses baking powder instead of yeast. It comes together with yogurt or milk to keep it tender and bakes in about 12–15 minutes, with no rising time required.

What ingredients do I need?

Typical ingredients:

  • 2 cups all-purpose flour (or 1:1 gluten-free flour blend)
  • 2 teaspoons baking powder
  • 1/2 teaspoon salt
  • 1/2 cup plain yogurt (or dairy-free yogurt for vegan option)
  • 1/4 cup warm water or milk
  • 1–2 tablespoons olive oil
  • Optional toppings: sesame seeds, nigella seeds, garlic powder, dried herbs
Can I substitute gluten-free flour?

Yes. Use a good gluten-free all-purpose blend. You may need to adjust moisture by adding a little more yogurt or water. Ensure your baking powder is gluten-free. Texture may differ slightly from wheat flour.

Can I make this vegan?

Yes. Use dairy-free yogurt (unsweetened) and a plant-based oil. Most baking powder brands are vegan, but check the label if you’re unsure.

How long does it take to make?

About 10–15 minutes to mix and shape the dough, plus 12–15 minutes baking. Total active time is around 20–30 minutes, depending on thickness.

What temperature and bake time should I use?

Preheat the oven to 425°F (220°C). Roll the dough to about 1/4 inch thick and bake on a parchment-lined sheet for 12–15 minutes, until lightly golden. For crisper crust, bake a bit longer or broil for 1–2 minutes at the end, watching closely.

Can I cook this on the stovetop or grill?

Yes. Use a heavy skillet or grill pan over medium-high. Lightly oil the surface, roll the dough to 1/4 inch, and cook 2–3 minutes per side until golden and cooked through. Rest briefly before serving.

How should I store and reheat leftovers?

Cool completely, then store in an airtight container at room temperature for 1–2 days or refrigerate up to 4 days. Reheat in a 350°F (175°C) oven for 5–7 minutes or warm on a skillet. Freeze for longer storage; reheat directly from frozen.

How can I customize the flavor?

Sprinkle sesame seeds, nigella seeds, minced garlic, or chopped herbs into the dough or brush with olive oil mixed with garlic or herbs before baking. For a cheesy twist (omit for vegan), sprinkle grated parmesan on top before baking.

Troubleshooting: My dough is sticky or not rising, what should I do?

Sticky dough: add a little flour 1 tablespoon at a time until it comes together. If it won’t rise, check that your baking powder is fresh. If the dough is too dry, mix in a splash more yogurt or water to reach a soft, pliable consistency.

Introduction / Hook

Close your eyes and picture a kitchen warmed by the tropical sun, where a gentle simmer fills the room with a comforting, coconut-scented fragrance. A platter of golden-brown chicken rests on the stove, its edges kissed by a velvety, pale-gold sauce that glows like sunshine on a plate. The air carries a hint of garlic, lime, and fresh cilantro, mingling with the rich, dairy-free pools of coconut milk that promise a luxurious, silky mouthful. This is Brazilian Coconut Chicken — a dish that feels like a vacation in a skillet: bright, inviting, and deeply satisfying in every bite. It’s the kind of recipe that carries you from the first sizzle to the last kiss of steam, leaving you with a lingering warmth and a smile that says you’ve just tasted sunshine in a bowl.

What makes this dish truly special is not just its creamy, coconut-forward character, but how effortlessly it harmonizes bold Brazilian flavors with everyday comfort. It’s the kind of recipe that invites you to cook with what you have: pantry staples, a few fresh herbs, and a girl or boy-next-door charm that makes it perfect for weeknights and weekend gatherings alike. The coconut milk lends a silken body to the sauce, while garlic, onion, and paprika add depth without overpowering the chicken’s natural succulence. A sprint of lime brings a zesty brightness, and chopped cilantro finishes the dish with a meadow-fresh finish. The result is a dish that feels indulgent yet approachable, tropical without being fussy, and flavorful without requiring a long parade of ingredients or a master-class technique.

This introduction is only the beginning. Beyond the surface, Brazilian Coconut Chicken is about the comfort of a home-cooked meal that travels with you—the memories of oceanside markets, the aroma of herbs tossed by a mother, the joy of friends gathered around a table, and the promise that dinner tonight can be both familiar and wonderfully new. It’s a recipe that invites you to slow down, savor the moment, and let the flavors do the storytelling. And because it’s adaptable, it can be a simple weeknight star or a vibrant centerpiece for a casual dinner party. So, gather a few ingredients, set aside a little time for yourself, and let this dish transport you to a warm coastal breeze while you cook, taste, and share.

The Story Behind the Dish

Brazilian Coconut Chicken lives at the crossroads of coastal flavors and family traditions. In many Brazilian kitchens, the coastline is not just a place of sea and sand but a pantry of ideas: coconut milk from the islands, palm oil or dendê for depth, lime for brightness, and a chorus of herbs that grow in sunny backyards. This dish draws inspiration from those coastal kitchens, where chicken is a reliable canvas and coconut cream lends a gentle splash of indulgence without heaviness. It’s a modern interpretation of a seaside supper, where every home cook can craft something that feels both exotic and familiar in the same bite.

Legend has it that in a small fishing village along Brazil’s vibrant coastline, families would gather after long days at sea to share meals that told stories of fearlessness, of tides that turned with the moon, and of meals that carried the warmth of the hearth into the night. Coconut milk, abundant in the region, became a natural partner to chicken, a protein that adapts to many cooking styles—from stews to quick sautés. The dish you’re about to make borrows fragments of that heritage: the idea that a single pan can cradle a symphony of flavors, that simple ingredients can become something memorable, and that food can be both a celebration and a consolation all in one. You don’t need a passport to taste this story; you simply need a pot, a stove, and a willingness to savor what a few well-chosen flavors can accomplish together.

There’s also a personal thread that often surfaces when families teach each other to cook. A grandmother’s advice—to swirl the pan little by little, to taste, to adjust with a careful hand—becomes the heartbeat of this dish. It’s not only about following a recipe but about listening to your ingredients and listening to your palate. The result is a version that respects tradition while embracing your own kitchen’s personality. The Brazilian Coconut Chicken invites you to start with a simple base and then let your tastes lead the way: perhaps a dash more lime for brightness, a pinch of paprika for depth, or a handful of fresh cilantro for a green, aromatic finish. It’s a dish that invites improvisation, a gentle nudge toward culinary curiosity, and a reminder that cooking is a conversation you have with your food—and, ultimately, with the people you feed.

Why You’ll Love This Recipe

  • One-pan ease with big, coaxing flavors: A single skillet creates a creamy sauce that clings to every piece of chicken, making cleanup a breeze and result deeply satisfying.
  • Creamy, dairy-free indulgence: The coconut milk brings a luxurious mouthfeel without dairy, making it suitable for many dietary needs while remaining exceptionally comforting.
  • Bright balance of flavors: Garlic, onion, lime, cilantro, and a whisper of heat create a harmonious, lively profile that isn’t heavy but feels indulgent.
  • Adaptable to your pantry: This dish thrives on pantry staples—coconut milk, chicken, spices—plus fresh herbs. It invites substitutions and personal twists without losing its soul.
  • Family-friendly and crowd-pleasing: It’s gentle enough for kids to enjoy, yet sophisticated enough to impress guests. The aroma alone draws people to the table.
  • Versatile for occasions: Perfect for weeknights, casual gatherings, or a Sunday dinner with friends. It pairs beautifully with rice, plantains, or a simple salad.
  • Comfort with a tropical twist: It delivers the comforting, homey feel of a familiar dish while transporting you to the flavors of Brazil’s coastline.

Flavor Profile & Texture

The first thing you notice is the fragrance. Coconut milk, when heated gently, loosens into a satin-like sauce that coats the chicken with a buttery-soft sheen. The sauce carries a balanced sweetness from coconut, a gentle savoriness from garlic and onions, and a tangy brightness from fresh lime. There’s a subtle warmth from paprika and a touch of pepper that adds a soft, lingering heat, never overpowering. The chicken itself stays succulent—reaching a flavorful tenderness where the meat shreds with a fork, releasing chicken juices that mingle with the coconut base to form a velvety, almost satin-like sauce.

Texture-wise, you’ll experience a contrast that makes the dish compelling: the crisp edges of lightly seared chicken pieces give way to the creamy, luscious coconut sauce that clings to every bite. The dish can be finished with a scattering of fresh cilantro, which introduces a crisp, herbaceous bite that lightens and elevates the overall mouthfeel. If you choose to add a component like lightly sautéed peppers or onions, you’ll introduce a slight crunch and a caramelized note that plays beautifully against the smoothness of the sauce. The combination is a dance between smooth richness and fresh, bright accents, a culinary paradox that Brazilian cooking often nails—comforting yet vibrant, familiar yet adventurous.

Texture is also influenced by the method: a gentle simmer keeps the chicken moist while coaxing the coconut flavors to mellow and marry with the lime and herbs. If you prefer a slightly thicker sauce, you can let it reduce a touch longer or add a small amount of cornstarch slurry (if your dietary preferences allow) to achieve the desired viscosity. The key is to maintain balance—neither the coconut nor the lime should overwhelm the other. When you serve, a sprinkle of chopped cilantro delivers a pop of green color and a fresh, slightly peppery note that instantly elevates the dish’s aroma and finish.

Occasions & Pairings

This Brazilian Coconut Chicken shines in a variety of settings. It’s equally at home on weeknights when you want something comforting yet quick, and at casual gatherings where you want a dish that tastes special but doesn’t require a master chef’s touch. It pairs beautifully with simple, starchy sides that soak up the luscious sauce and contrast with the chicken’s tenderness.

  • Serving ideas: White rice (steamed to fluffy perfection) to soak up the sauce; fried plantains or maduros for a sweet-savory balance; or roasted yuca for a satisfying texture contrast.
  • Vegetable options: Steamed broccoli, sautéed green beans, or a bright dux of roasted peppers and onions can add color and nutritional balance without overpowering the dish.
  • Drink pairings: A light, crisp white wine like a Sauvignon Blanc or a dry sparkling wine can complement the coconut and lime. For non-alcoholic options, try a sparkling limeade, a passion fruit juice, or an ice-cold coconut water with a squeeze of lime.
  • Holiday or party vibes: Scale up with a larger batch and garnish with extra cilantro and lime wedges; serve with a bright salad (think citrus segments, avocado, and red onion) to brighten the plate and the palate.
  • Regional twists: Add a teaspoon of dendê oil (palm oil) to deepen the Brazilian coastal flavor if you enjoy a more robust, earthy note, particularly reminiscent of moqueca. If you’d like a lighter, Southeast-Asian-inspired accent, a touch of lemongrass or lime leaves can be explored in the sauce for a fragrant lift.

Tips, Variations & Substitutions

Every kitchen has its own rhythm, and this dish is designed to be flexible without losing its essence. Here are suggestions to tailor the dish to your taste, dietary needs, or what you have on hand.

  • Protein options: While chicken thighs stay juicier and more forgiving, you can use chicken breasts if you prefer a leaner cut. For a different vibe, try turkey cutlets or even firm tofu or chickpeas for a vegetarian variation that carries the coconut flavors beautifully.
  • Flavor boosters: Boost the aromatics by adding minced fresh ginger or a small chili pepper for more heat. A teaspoon of smoked paprika can give a subtle barbecue warmth that pairs nicely with the coconut.
  • Herb and brightness: Cilantro is classic, but you can finish with chopped parsley or basil for a different fresh finish. A squeeze of lime just before serving heightens acidity and balance.
  • Dairy-free & gluten-free: This dish is naturally dairy-free and gluten-free as written, thanks to coconut milk. Ensure your stock or any add-ins are gluten-free if you’re accommodating celiac or gluten sensitivity.
  • Regional twists: If you’d like a Bahian moqueca-inspired version, finish with a drizzle of lemon juice or a few drops of lime leaf oil and stir in chopped fresh cilantro at the end.
  • Make it heartier: Add a handful of bell peppers or mushrooms with the onions for extra texture and color. A handful of cooked shrimp added in at the end can convert this into a surf-and-tearth dish for a special night.
  • Spice level: Adjust the heat by controlling the amount of paprika or adding a pinch of cayenne or red pepper flakes. For a milder version, skip the chili completely; for a bolder version, add a finely chopped jalapeño or serrano.

Storage & Make-Ahead Ideas

Storing and reheating this dish is straightforward, which makes it excellent for batch cooking or meal-prep. Coconut milk-based sauces can separate a little when stored, but a quick stir or simmer will bring back the silkiness.

  • Storage: Refrigerate leftovers in an airtight container for up to 3-4 days. The flavors often deepen with time, making the dish even more satisfying the next day.
  • Freezing: You can freeze the cooked chicken in its sauce for up to 2-3 months. Thaw overnight in the fridge and reheat gently on the stove, adding a splash of coconut milk or water to loosen as needed.
  • Make-ahead strategies: If you’re planning a busy day, marinate the chicken (with a light salt, pepper, and a little lime) and the coconut sauce a day ahead. The flavors will meld beautifully, and you’ll only need to finish by reheating and simmering gently until the chicken is cooked through and juicy.
  • Reheating tips: Reheat slowly over low heat to maintain moisture. If the sauce thickens too much, thin with a little chicken stock, water, or extra coconut milk until it returns to a saucy, clingy consistency.

Fun Facts & Trivia (Optional)

Here are a few tidbits that add flavor to your cooking conversation around Brazilian Coconut Chicken:

  • Coconut milk is a staple in many coastal cuisines, and in Brazil, it frequently appears in Bahian and Carioca-inspired dishes. Its creamy texture brings a tropical luxury to everyday meals while remaining light enough for regular dinners.
  • Dendê oil (palm oil) is a hallmark of Bahian cooking and moqueca. If you’re curious, a small amount can be added to deepen the color and earthy richness, but it’s optional and should be used with care due to its pronounced flavor.
  • Fresh cilantro (coentro) is a beloved herb in Brazilian kitchens, adding a bright, herby finish that accents citrus and coconut beautifully. It’s often used as a final garnish to keep its vibrant aroma intact.
  • In Brazilian cuisine, citrus and herbs are used to brighten hearty stews and sautés, ensuring that even a comforting dish like coconut chicken remains lively and refreshing on the palate.
  • This dish is an example of how international flavors can harmonize in a home kitchen. Coconut milk, a pantry staple in many regions, becomes a vehicle for cross-cultural nourishment—proof that a simple pan and thoughtful seasoning can create something that feels both novel and familiar.

Ingredients

Brazilian Coconut Chicken
Chicken and Marinade

    – 2 pounds boneless skinless chicken thighs, cut into 1-inch pieces and patted dry
    → The chicken provides the main protein and tender texture of the dish. Cutting into uniform 1-inch pieces ensures even cooking and thorough sauce coverage. Patting dry promotes a good sear rather than steaming, which builds flavor. For extra depth, you can marinate briefly (15–20 minutes) with a pinch of salt before cooking.
    – 1 tablespoon coconut oil for searing
    → Coconut oil adds a subtle tropical aroma that harmonizes with the coconut milk; its high smoke point helps achieve a crisp, golden exterior on the chicken. If you prefer a neutral flavor, substitute with grapeseed or canola oil.
    – 1 teaspoon fine sea salt
    → Essential for seasoning the chicken and promoting browning by drawing out moisture. Add gradually and adjust later when simmering—the sauce will pick up some salt from the chicken and broth.
    – 1/2 teaspoon freshly ground black pepper
    → Adds mild heat and depth; pepper aromatic oils release during searing, enriching the sauce. Use freshly ground pepper for maximum aroma and flavor.
    – 2 tablespoons fresh lime juice
    → Brightens the dish and helps balance the richness of coconut milk; freshest juice yields the most vibrant acidity. Squeeze just before using to maximize freshness.
    – Zest of 1 lime
    → Lime zest provides essential citrus oils that lift the entire sauce with fragrant aroma. Zest before juicing to capture all oils; avoid the white pith, which is bitter.
    Aromatics

      – 1 medium yellow onion, finely chopped
      → Builds the savory base of the sauce; sauteing the onion releases sweetness and depth that counterbalances the coconut. Finely chop to ensure even cooking and smooth integration into the sauce.
      – 3 cloves garlic, minced
      → Delivers pungent warmth and aroma; mince finely so it distributes evenly and avoids noticeable chunks. Sauté with onions until fragrant, not browned, to prevent bitterness.
      – 1 tablespoon grated fresh ginger (optional)
      → Adds a subtle spicy-sweet kick that complements lime and coconut; grate finely so it blends into the sauce without fibrous bits. Omit if you prefer a milder profile.
      – 1 small red bell pepper, diced
      → Introduces sweetness and color; dice evenly for uniform cooking and to maintain a pleasant bite in the sauce. Omit if you want a smoother texture.
      – 1-2 jalapeño peppers, minced (optional)
      → Provides gentle heat; remove seeds for milder heat or keep them for more spice. Sauté with aromatics to distribute heat evenly; adjust to taste.
      Coconut base and liquids

        – 1 can (14 oz) full-fat coconut milk
        → Core creamy base of the sauce; full-fat milk yields silkier texture and richer flavor. Shake can before opening to distribute the cream and liquid. Avoid light coconut milk for a thicker, richer sauce.
        – 1/2 cup shredded unsweetened coconut
        → Adds texture and extra coconut aroma; you can toast it lightly in a dry pan for a deeper nutty flavor before adding. Increase to 3/4 cup if you love coconut, or omit for a smoother sauce.
        – 1 cup chicken broth (low-sodium preferred)
        → Provides liquidity for simmering and helps lift browned bits from the pan into the sauce, enriching flavor. Use low-sodium broth to control salt; adjust later if needed.
        – 2 tablespoons water (optional, to adjust sauce consistency)
        → If the sauce becomes too thick, thin it with a bit of water. Add gradually and simmer to reach your preferred viscosity while preserving coconut flavor.
        Spices and flavorings

          – 1 tablespoon tomato paste
          → Adds depth, color, and a touch of sweetness; blooming the paste with the aromatics enhances its savoriness and avoids a raw-tasting finish. Cook it briefly with onions and garlic for best flavor.
          – 1 teaspoon ground cumin
          → Introduces warm, earthy notes that complement tropical flavors; toast briefly with onions for more pronounced aroma. If you like it stronger, increase to 1 1/2 teaspoons.
          – 1/2 teaspoon smoked paprika (or sweet paprika)
          → Provides subtle smokiness and color; smoked paprika gives a more pronounced depth, while sweet paprika keeps the profile milder. Use according to your preference.
          – 1/4 teaspoon ground coriander
          → Adds citrusy, earthy brightness that harmonizes with lime and coconut. If unavailable, you can omit; it won’t break the dish but reduces complexity slightly.
          – 1/2 teaspoon ground turmeric
          → Gives warm color and gentle earthiness; use sparingly to avoid overpowering other flavors. It also subtly enhances aroma and provides a hint of healthful compounds.
          – 1–2 tablespoons dendê palm oil (optional for authentic Bahian flavor)
          → Imparts a distinctive reddish-gold color and rich, nutty aroma typical of Bahia’s cuisine; use sparingly due to its strong flavor. If unavailable, substitute with an additional 1–2 tablespoons extra-virgin olive oil and a pinch of paprika for color.
          Finish and serve

            – 1/2 cup chopped fresh cilantro leaves
            → Adds bright, herbal notes that lift the dish at the finish; fold into the sauce off the heat or sprinkle on top as a vibrant garnish. If cilantro isn’t preferred, substitute with chopped parsley or green onions for a milder herbaceous touch.
            – Cooked white rice or coconut rice, to serve (about 4 servings)
            → A neutral bed that soaks up the coconut sauce; white rice is classic, while coconut rice intensifies the tropical vibe. Prepare in advance so the dish can be plated quickly.
            – Lime wedges, for serving
            → Offer fresh acidity at the table to brighten the coconut richness; a squeeze over each bite enhances balance and color.
            Optional Add-ins

              – 1/4 cup toasted shredded coconut (optional)
              → Extra coconut texture and aroma; toast until golden to deepen the flavor before sprinkling over the dish as a finish. Helps mimic traditional tropical garnishes and adds crunch.
              – 1/4 teaspoon red pepper flakes (optional)
              → For an extra kick; add to the pan with the aromatics to distribute heat evenly. Start with a small amount, then adjust to taste.
              – 2 tablespoons chopped fresh parsley (optional)
              → A lighter, herbaceous garnish if cilantro isn’t preferred; adds color and a fresh note at the end. Use in addition to or instead of cilantro according to taste.
              – 1 extra tablespoon lime juice (optional, to finish)
              → A final splash of acidity can brighten the sauce just before serving; add sparingly and taste, ensuring the lime doesn’t overpower the coconut.

              Instructions

              • Pat the chicken thighs dry with paper towels to remove surface moisture and promote a deep, golden sear rather than steaming; this step is crucial for developing flavor and a sturdy base for the coconut sauce.
                → Dry surfaces brown better, creating a flavorful crust that helps thicken the sauce as fond forms in the pan.
              • If time permits, briefly marinate the chicken: in a large bowl toss the 2 pounds of chicken pieces with 2 tablespoons lime juice and a pinch of salt; let rest for 15–20 minutes to begin flavor penetration and tenderization before searing.
                → A short acid-based marinate loosens muscle fibers, enhancing juiciness and brightening the eventual sauce.
              • Place a large, heavy skillet over medium-high heat and add 1 tablespoon coconut oil; heat until the oil shimmers and just begins to smoke lightly, signaling a hot surface for searing.
                → Coconut oil contributes a tropical aroma and a high smoke point that helps achieve a crisp exterior on the chicken without breaking down the meat’s interior.
              • Add the chicken in two batches, leaving space between pieces; sear each piece for 2–3 minutes per side until deeply golden but not fully cooked through, then transfer to a plate and set aside.
                → Batching prevents crowding, which would steam the meat; the browning develops fond in the pan that will flavor the sauce.
              • In the same pan, add the finely chopped yellow onion, minced garlic, grated ginger (if using), diced red bell pepper, and minced jalapeño (optional); sauté over medium heat until the onion is translucent and the mixture is fragrant, about 4–6 minutes.
                → Sautéing builds the savory base, while releasing garlic and ginger aromas that meld with the coconut for a cohesive tropical profile.
              • Stir in 1 tablespoon tomato paste and cook for 1–2 minutes, then sprinkle in 1 teaspoon ground cumin, 1/2 teaspoon smoked paprika, 1/4 teaspoon ground coriander, and 1/2 teaspoon ground turmeric; continue cooking to bloom the spices while coating the aromatics.
                → Blooming spices releases essential oils and deepens color, ensuring the spice notes carry through the creamy coconut sauce.
              • Deglaze the pan with 1 cup chicken broth, scraping up all browned bits with a wooden spoon; add 2 tablespoons water if the liquid reduces too quickly, and simmer for 1–2 minutes to incorporate the fond into the sauce.
                → Deglazing lifts flavorful bits from the pan, enriching the sauce with concentrated notes and preventing a flat flavor.
              • Pour in 1 can (14 oz) full-fat coconut milk and add 1/2 cup shredded unsweetened coconut; stir to combine and bring the mixture to a gentle simmer over medium heat.
                → Full-fat coconut milk yields a silkier sauce while the shredded coconut adds texture and a stronger coconut aroma; avoid light coconut milk for richer depth.
              • Return the seared chicken to the pan, nestling the pieces into the sauce; reduce the heat to a steady simmer and cook uncovered for 12–15 minutes, or until the chicken reaches 165°F (74°C) and the sauce thickens slightly.
                → Gentle simmering ensures the chicken cooks through evenly without breaking apart, while the sauce reduces to a luscious consistency.
              • Taste and adjust seasoning: add the 1 additional tablespoon lime juice (and more salt if needed, keeping in mind the salt from the simmered chicken and broth will concentrate) to brighten the dish without overpowering the coconut.
                → A bright acidity balances richness; add gradually and taste as you go to maintain harmony between lime, coconut, and spice.
              • Off the heat, fold in 1/2 cup chopped fresh cilantro leaves; this fresh herb finish brightens the dish and adds aromatic contrast to the creamy sauce.
                → Cilantro provides a vibrant finish that lifts the tropical flavors; if cilantro isn’t preferred, substitute with chopped parsley or green onions for a milder note.
              • Meanwhile, prepare your serving rice: cook white rice or coconut rice according to package instructions so it’s ready to plate alongside the simmering chicken.
                → A neutral, fluffy bed helps soak up the coconut sauce and balances the richness of the dish.
              • To plate, spoon a generous portion of coconut chicken over the hot rice, spooning extra sauce over the top; garnish with lime wedges for a final acidic finish at the table.
                → The lime at the table lets each diner adjust brightness to taste and enhances the dish’s color and aroma.
              • Optional finish-in additions: sprinkle 1/4 cup toasted shredded coconut over the finished dish for extra texture and nutty aroma; offer 1/4 teaspoon red pepper flakes for those who crave more heat; or scatter 2 tablespoons chopped fresh parsley in place of cilantro for a lighter herb note.
                → Toasting extra coconut emphasizes aroma and crunch; red pepper flakes provide controlled heat distribution; parsley offers a bright, mild alternative to cilantro.
              • Finish with an optional splash of 1 extra tablespoon lime juice just before serving if desired, testing carefully to avoid overpowering the coconut; this additional brightness should be used sparingly.
                → A final citrus lift can refresh the palate and highlight the dish’s tropical character without dulling the coconut sweetness.

              Notes

              These Brazilian Coconut Chicken notes guide you from sear to finish, focusing on building a silky coconut sauce, balancing brightness from lime, and finishing with fresh herbs. They cover timing, seasoning, and possible variations like dendê oil to evoke Bahian flavors. Serve with rice and lime wedges for a complete tropical meal.

              • Key technique: proper sear and browning
                Pat the chicken dry and cook in hot coconut oil in batches until deeply browned on all sides. Avoid crowding the pan to prevent steaming; browning adds flavor that will be lifted into the sauce.
              • Flavor base and aromatics
                Sauté finely chopped onion and minced garlic (and optional ginger) until translucent and fragrant. If using red pepper, add it with the aromatics to soften and sweeten slightly.
              • Build the sauce
                Stir in tomato paste and spices (cumin, paprika, coriander, turmeric) and bloom for about 1 minute. Add coconut milk, broth, and shredded coconut; scrape the pan to lift browned bits for depth.
              • Balance and brightness
                Add lime juice and lime zest to brighten the rich coconut. Taste and adjust salt slowly; the pan juices and broth will contribute salt too.
              • Finish and texture
                Return chicken to the pan and simmer gently until cooked through and sauce thickens to coat. Stir in cilantro off the heat for a fresh herbaceous lift. If you prefer more texture, sprinkle toasted coconut at the end.
              • Optional authentic touch
                For Bahian flavor, stir in 1–2 tablespoons dendê palm oil at the end. If unavailable, use an extra 1–2 tablespoons olive oil plus a pinch of paprika for color.
              • Serving and make-ahead tips
                Serve with white rice or coconut rice and lime wedges. The dish is forgiving for make-ahead meals; refrigerate up to 2–3 days and reheat gently, stirring to re-emulsify the sauce.

              Enjoyable variations: swap in chicken thighs for juicier meat; adjust heat with jalapeños or pepper flakes; substitute cilantro with parsley or green onions if desired.

              Tips

              Tips and Techniques for Brazilian Coconut Chicken

              • Cook in batches to prevent crowding the pan. A crowded pan triggers steaming rather than browning, which prevents the chicken from developing a rich crust. Rest the pan between batches if needed.
              • Pat the chicken dry thoroughly before searing. Dry surfaces promote a crisp, golden exterior and better browning, which is essential for building depth in the sauce.
              • Season in layers. Salt the chicken lightly before cooking, then adjust the sauce seasoning after simmering to avoid over-salting. The broth and coconut milk will contribute additional saltiness.
              • Bloom spices for maximum flavor. Toast ground cumin, paprika, and coriander in the hot oil with onions and garlic for 20–30 seconds to release their essential oils before adding liquids.
              • Deglaze to lift the fond. After searing, add a splash of chicken broth or water and scrape up the browned bits from the pan. Those browned bits are the backbone of the sauce’s flavor.
              • Handle coconut milk gently. Shake the can before opening and add full-fat coconut milk gradually to prevent separation. Maintain a gentle simmer rather than a boil to keep the sauce creamy.
              • Balance brightness with lime. Add fresh lime juice at the end to preserve its vibrant acidity and avoid dulling the coconut’s richness. Zest first to capture all essential oils.
              • Control heat with peppers. Jalapeños add noticeable warmth; remove seeds for a milder heat or keep them for more depth. Taste and adjust near the end.
              • Adjust texture with liquids. If the sauce thickens too much, whisk in a tablespoon of water or broth at a time until you reach your desired consistency while keeping the coconut flavor intact.
              • Utilize optional dendê palm oil wisely. It adds a distinct Bahian color and nutty aroma; use sparingly. If unavailable, substitute with extra-virgin olive oil plus a pinch of paprika for color.
              • Finish with fresh herbs off the heat. Stir in chopped cilantro right after cooking or sprinkle on top just before serving to keep its bright flavor and vibrant color. Parsley or green onions are good substitutes if cilantro isn’t preferred.
              • Choose the right starch. White rice or coconut rice make excellent bases; rice in advance helps plates come together quickly. Coconut rice intensifies the tropical vibe but takes a bit longer to cook.
              • Garnish thoughtfully. Optional toasted shredded coconut adds texture and aroma; red pepper flakes provide a final kick if you like extra heat.
              • Make-ahead and storage tips. This dish stores well in the refrigerator for 2–3 days. Reheat gently on the stove over low heat, thinning with a splash of broth if needed. The sauce may thicken when chilled; loosen with liquid and re-simmer.
              • Equipment matters. A heavy skillet or wide pan helps achieve even browning and better fond formation. A wooden spoon is ideal for scraping without damaging nonstick surfaces.
              • Adjust salt at the end. Taste after simmering and add salt gradually, since the broth and coconut milk contribute saltiness too. A balanced finish will keep the sauce velvety without being salty.

              FAQ

              What is Brazilian Coconut Chicken?

              Brazilian Coconut Chicken is a comforting, tropical-style dish where chicken is simmered in creamy coconut milk with aromatics like onion, garlic, and bell pepper. It often includes lime juice and cilantro for brightness, and many Bahian versions add a small amount of dendê palm oil for a distinctive nutty flavor. It pairs nicely with white rice and fried plantains.

              What ingredients do I need to make it?
              • 1.5–2 pounds (700–900 g) chicken thighs (bone-in or boneless) or a mix
              • 1 can (14–15 oz / 400 ml) coconut milk (full-fat for creaminess)
              • 1 medium onion, chopped
              • 2–3 garlic cloves, minced
              • 1 red bell pepper, sliced
              • 2 tablespoons olive oil (or additional dendê oil if you have it)
              • 1–2 teaspoons lime juice (plus lime wedges to serve)
              • Salt and pepper to taste
              • Fresh cilantro, chopped, for garnish
              • Optional: 1–2 teaspoons dendê palm oil (for Bahian flavor) or a small hot pepper (jalapeño or serrano) if you like heat

              Notes: You can tailor the ingredients to your preference, and use chicken breasts if you prefer a leaner option (cook times will vary).

              Can I use chicken thighs or breasts?

              Yes. Chicken thighs are juicier and more flavorful, especially in a coconut-based sauce. Chicken breasts can be used for a lighter version, but they tend to dry out if overcooked. If using breasts, reduce simmer time to avoid drying them out, and check for an internal temperature of 165°F (74°C).

              How do I make Brazilian Coconut Chicken?

              Steps:

              1. Season the chicken with salt and pepper.
              2. Heat oil in a skillet over medium heat. Brown the chicken on all sides, then remove and set aside.
              3. In the same skillet, sauté onion, garlic, and bell pepper until softened.
              4. Return the chicken to the pan. Pour in the coconut milk and add dendê oil (if using). Bring to a gentle simmer.
              5. Simmer uncovered for about 15–25 minutes, or until the chicken is cooked through and the sauce thickens slightly. Adjust salt to taste.
              6. Stir in lime juice and sprinkle with chopped cilantro. Serve with white rice and plantains.
              How long does it take to cook?

              Prep time: about 10–15 minutes. Cook time: 25–30 minutes. Total time: roughly 35–45 minutes, depending on the thickness of the chicken and whether you use thighs or breasts.

              How spicy can I make it?

              You can adjust the heat to your liking. For mild flavor, skip the hot pepper and use only a touch of lime zest. For more heat, add minced jalapeño or serrano with the onions and garlic, or stir in a pinch of chili flakes or a dash of hot sauce. Removing seeds from peppers will also reduce heat.

              What is dendê oil and should I use it?

              Dendê oil is palm oil used in Bahian Brazilian cuisine, giving a rich, nutty, slightly sweet flavor and a vibrant color. It is optional but adds authenticity. If you don’t have it, you can omit it or substitute with extra coconut oil or a small amount of olive oil. Start with 1–2 teaspoons if using dendê oil.

              How do I store and reheat leftovers?

              Let the dish cool completely, then refrigerate in an airtight container for up to 3–4 days. The coconut sauce may separate slightly when reheated; simply stir to combine. You can reheat on the stovetop over medium heat until warmed through, or in the microwave in short intervals, stirring in between. Freezing is possible but may affect the texture of the coconut sauce.

              What should I serve it with?

              Traditional pairings include steamed white rice and fried plantains or tostones. You can also serve it with farofa, a simple green side salad, or sautéed greens for a complete Brazilian-inspired meal.

Introduction / Hook

Imagine a kitchen that smells like sunlit citrus and a gentle breeze off the Aegean Sea. A pan on the stove releases a perfume of bright lemon, aromatic garlic, and peppery oregano, all kissed by a generous drizzle of olive oil. The chicken, taking on a rich, honey-gold color, glistens with juices that promise a bite of something both comforting and lively. This is Greek Lemon Chicken in its most inviting form: a dish that feels like a hug from the Mediterranean, a reminder of family tables on sun-soaked Sundays, and a reminder that simple ingredients can sing when treated with care. It’s not just dinner; it’s a travelogue in the kitchen, a quick escape to seaside tavernas where the air carries whispers of sea salt, oregano, and thyme. In a single pan, the recipe captures the heart of Greek home cooking: bright, honest, and deeply satisfying.

The Story Behind the Dish

Greek Lemon Chicken, sometimes affectionately referred to by home cooks as Kotopoulo Lemonato, sits comfortably at the crossroads of history, geography, and family tradition. Greece’s culinary identity is built on a trio of core elements: quality olive oil, vibrant citrus, and herbs that thrive in the sun–drenched landscapes of the mainland and its island shores. This dish embodies that triad, marrying the tang of lemon with the warmth of oregano and garlic, all coaxed to tenderness by olive oil and slow, attentive cooking. The result is a meal that recalls Sunday lunches in coastal villages, where neighbors gather to share a pan of roasted chicken, potato wedges, and bowls of olives, tzatziki, and crusty bread.

The origins of lemon-touched chicken in Greek kitchens are as humble as they are enduring. Lemons arrived along trade routes and with traveler’s stories, eventually becoming a staple that balanced the generous richness of olive oil and the heartiness of meat. Oregano, that pungent evergreen herb, is practically a culinary ambassador for Greece. It grows wild in sun-drenched fields and is tailed by the scent of thyme and bay, lending a rustic brightness to dishes that might otherwise lean heavy. In Greek households, a lemony roast chicken is not just a weekday meal; it’s a centerpiece that signals warmth, hospitality, and the joy of feeding people you love. The kitchen becomes a theater where the lemon’s acidity plays off the sweetness of caramelized garlic and the savory comfort of perfectly seared chicken. The dish is both simple and profound, a reminder that Greek cuisine often revels in few but extraordinary ingredients, treated with technique that honors their natural glory.

Why You’ll Love This Recipe

  • Bright, approachable flavor: Lemon, garlic, and oregano deliver a clean, vibrant profile that feels both refined and approachable.
  • One-pan comfort: The chicken, the aromatics, and any accompanying vegetables meld together in a single pan, reducing cleanup and maximizing flavor.
  • Versatile and forgiving: Works with different cuts of chicken, and it adapts easily to pan-searing, roasting, or even skillet-braising techniques.
  • Family-friendly and crowd-pleasing: The familiar Greek flavor profile is comforting without being spicy, making it ideal for weeknights or larger gatherings.
  • Pantry-friendly and budget-conscious: The core ingredients are simple pantry staples—lemon, garlic, oregano, olive oil—yet the result feels indulgent.
  • Make-ahead potential: The bright citrus and herb notes benefit from a little time to meld, making it suitable for meal-prep or a pull-taster on busy days.
  • Pairing versatility: Serves beautifully with roasted potatoes, rice, or a crisp salad; it also shines over a bed of orzo or with a side of yogurt-dill sauce.

Flavor Profile & Texture

The dish is an alchemy of contrasts working in harmony. The lemon introduces an acid brightness that cuts through the meat’s natural richness, leaving a clean, refreshing finish on the palate. Garlic contributes a mellow warmth, its sweetness blooming as it caramelizes against the pan or roasting surface. Oregano brings a Mediterranean, almost sun-warmed pine-like fragrance, earthy and slightly peppery, with a lingering herbal afterglow that makes the dish feel distinctly Greek. Olive oil acts as the velvet rope that ties everything together, enriching each bite with luscious fat and a silky mouthfeel, while also aiding in browning and a savory crust that delivers a satisfying crackle when you bite into the skin or crust.

Texture-wise, you can expect a range: crisp edges from well-seared skin or roasted surfaces, tender, juicy meat from properly rested chicken, and soft, honey-colored potatoes or vegetables (if you include them) that have absorbed the lemony, garlicky bath. When plated, the dish offers a tapestry of textures—nigglingly crisp components giving way to luscious, succulent bites, with the herbaceous aroma lingering in the air as you bring the fork to your mouth. The lemon’s brightness lingers without souring the palate, and the oregano leaves a fragrant memory that invites the next bite, the next mouthful becoming a small, celebratory ritual. It is comfort made bright, a reminder that everyday cooking can carry the soul of a sun-drenched Greek coastline into your home kitchen.

Occasions & Pairings

This dish is remarkably versatile, able to anchor weeknight dinners as easily as it can anchor a weekend feast. Here are a few ideal contexts and pairing ideas to elevate the experience:

  • Weeknight dinners: A fast, satisfying centerpiece that comes together with minimal fuss and is forgiving for busy days.
  • Sunday family meals: Serve with a side of roasted potatoes, a crisp Greek salad, and a dollop of yogurt or tzatziki for dipping.
  • Holiday gatherings: Elevate with a few extra lemon wedges, a scattering of olives, and a wine pairing that complements citrus and herbs.
  • Summer suppers: Pair with grilled vegetables, a light cucumber salad, and a glass of white wine with bright citrus notes.

Pairings to consider:

  • Side dishes: Roasted potatoes (classic), lemony rice or orzo, grilled or roasted vegetables, or a simple saffron-tlecked couscous for texture variation.
  • Salads: A crisp Greek salad with cucumbers, red onion, tomatoes, olives, and feta; or a refreshing herb yogurt salad to balance the citrus.
  • Sauces & accoutrements: Tzatziki or a light lemon-dill yogurt can echo the lemony notes; a drizzle of extra virgin olive oil enriches the presentation.
  • Wines & drinks: A dry white like Assyrtiko, Sauvignon Blanc, or a light Chardonnay; for a red option, a softly fruity Pinot Noir can work well if the dish leans heartier with potatoes.

Tips, Variations & Substitutions

  • Protein options: If you prefer a different cut, boneless, skin-on chicken thighs stay wonderfully juicy and yield crispier skin. You can also use bone-in thighs for deeper flavor. For a non-chicken adaptation, consider firm tofu or chickpeas as a vegetarian alternative, adjusting cooking time accordingly to retain tenderness and savoring the lemon-herb profile.
  • Herb and citrus variations: Dried oregano can substitute fresh if needed, though fresh herbs provide a brighter, more aromatic result. A hint of thyme or dill can alter the aroma in a pleasing way, depending on what you have on hand.
  • Seasoning balance: Use sea salt to enhance the citrus and olive oil; a pinch of black pepper adds warmth; a small amount of lemon zest intensifies fragrance and depth.
  • Hands-off options: If you’re pressed for time, you can sear the chicken to develop color and then finish in the oven with lemon slices and garlic for a gentle, even cook. This keeps the dish approachable while preserving its signature brightness.
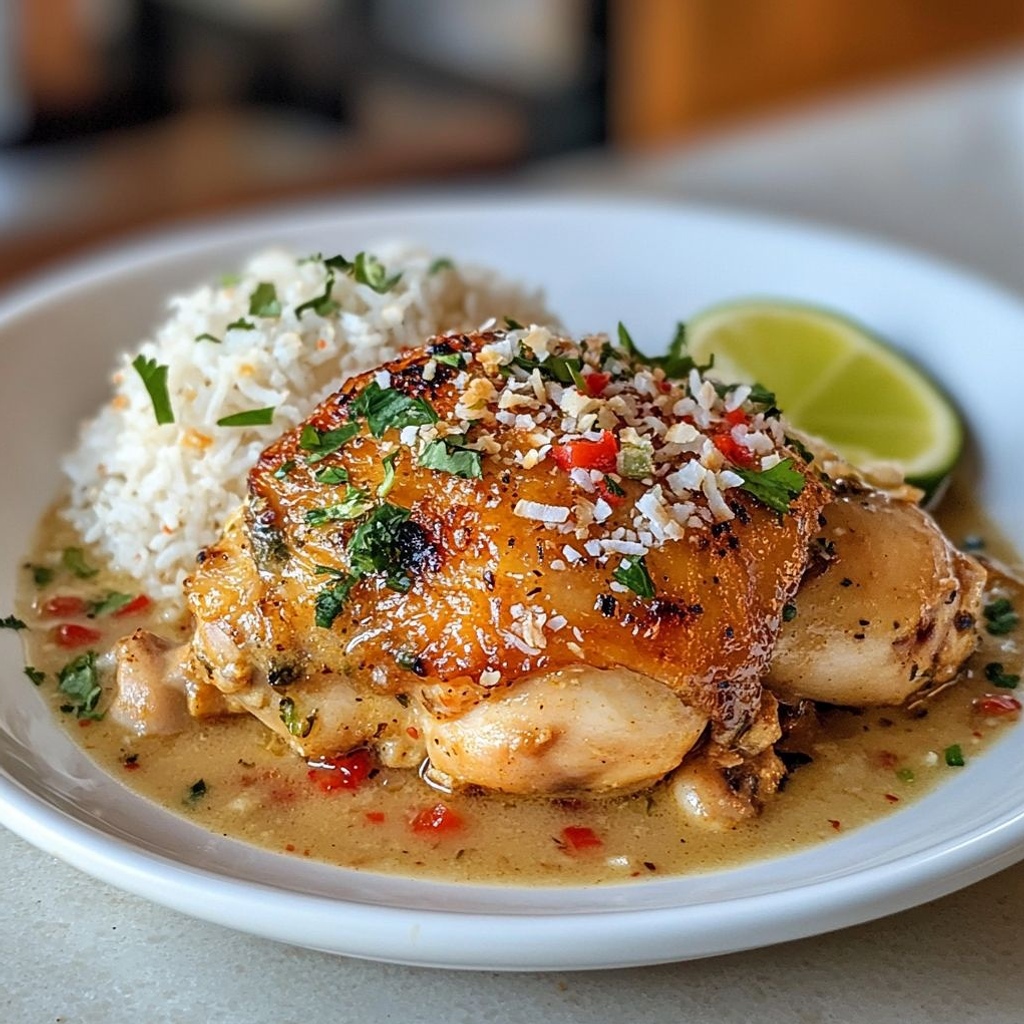
  • One-pan versatility: When vegetables are included, choose potatoes, onions, and peppers that will roast well together; their natural sugars caramelize, adding sweetness that balances the acidity of lemon.
  • Low-carb or gluten-free: This dish is naturally compatible with gluten-free diets if you avoid any breadcrumb coatings or gluten-containing add-ins; pair it with a simple green salad or cauliflower mash for a satisfying meal.
  • Make-ahead flavor boost: The flavors deepen after resting for a few hours or overnight in the fridge, which makes this a wonderful option for meal-prep or a make-ahead dinner party.

Storage & Make-Ahead Ideas

Storage and make-ahead options help you plan your week with ease. Proper handling ensures the dish remains flavorful and safe to enjoy over several days.

  • Storage: Refrigerate leftovers in an airtight container for up to 3–4 days. Reheat gently on the stovetop or in a moderate oven to preserve moisture and texture.
  • Freezing: Cooked chicken can be frozen for longer storage, although the texture of the lemony glaze may intensify upon thawing. For best results, freeze without any fresh herbs that lose brightness after freezing, and reintroduce fresh lemon zest and herbs when reheating.
  • Make-ahead: The dish benefits from a little rest time after cooking, allowing the lemon, garlic, and oregano flavors to mingle. If you intend to serve later, consider finishing the chicken in the oven or pan and then adding a final warm splash of lemon juice to brighten the dish before serving.
  • Leftover transformations: Shred the chicken and fold into a warm, light pilaf, or toss with vegetables and greens for a quick Mediterranean-inspired bowl. The lemony notes translate well into sauces and wraps for the following day’s lunches.

Fun Facts & Trivia (Optional)

Nothing anchors a recipe like a few delightful tidbits. Here are some morsels of Greek culinary lore to savor alongside your lemony chicken experience:

  • Oregano, the “joy of the mountains,” is a staple herb in Greek gardens and markets. Its scent is so closely tied to Greek cooking that the herb is almost a cultural emblem, offering a peppery, slightly bitter note that pairs beautifully with lemon and garlic.
  • Lemons have long been a brightening force in Greek cuisine, often used to balance the richness of olive oil in both meat dishes and seafood preparations. The acidity helps to cut through fat while lifting the overall aroma of the dish.
  • Avgolemono, a traditional Greek lemon-egg sauce, demonstrates how lemon can transform savory soups and sauces into silky, zesty ensembles. While this dish doesn’t use the sauce, the lemon-forward philosophy is evident in its flavor structure.
  • Olive oil, the “liquid gold” of Greece, is not just a fat but a flavor-maker. The quality of olive oil used can noticeably alter the depth and aroma of the dish, making it a centerpiece in many Greek home preparations.
  • Herb-and-creathe cooking: Greek kitchens often rely on the piney, resinous notes of oregano, thyme, and bay leaves to carry dishes forward without overwhelming the base ingredients. This is a testament to how balance and restraint can yield powerful flavor without complexity.

Ingredients

Greek Lemon Chicken Recipe

Chicken & Marinade

  • 4 bone-in, skin-on chicken thighs (about 2 pounds / 900 g)
    → For best flavor and juiciness, bone-in thighs with skin provide richer taste and stay moist during roasting; the skin crisps and adds texture. If you prefer boneless, reduce cooking time and monitor moisture carefully.
  • 1/4 cup fresh lemon juice (from about 1–2 lemons)
    → Lemon juice provides acidity to balance the oil and salt, helps tenderize the chicken, and brightens the overall dish. Strain seeds if any and measure after squeezing.
  • Fresh lemon zest (from 1 lemon)
    → Adds fragrant citrus oils that perfume the dish; zest before juicing to capture the essential oils; use a fine grater and avoid the white pith for a cleaner lemon aroma.
  • 4 garlic cloves, minced
    → Garlic provides savory depth and aroma; mince finely to distribute evenly; crush to release more flavor and ensure even integration into the marinade.
  • 3 tablespoons extra-virgin olive oil
    → The oil carries the marinade flavors onto the chicken and helps keep the meat moist during roasting; use good-quality EVOO; avoid using oil that has cooled too much and clumping.
  • 1 teaspoon dried oregano (Greek oregano preferred)
    → Classic Greek flavor; dried oregano adds warmth and herbal notes; if you have fresh, use 1–2 tablespoons chopped instead of dried; mix into the marinade evenly.
  • 1/2 teaspoon dried thyme (optional)
    → Adds earthy herbaceous notes that complement lemon and oregano; if using fresh thyme, substitute with 1 teaspoon chopped; omit if you prefer a purer oregano-forward profile.
  • 1 teaspoon kosher salt
    → Essential for seasoning and to help draw out moisture from the chicken during marination; adjust to taste and consider salt in the broth if you are using salted stock.
  • Freshly ground black pepper, to taste
    → Adds warmth and a subtle bite; grind just before cooking for the best aroma and distribute evenly in the marinade.

Sauce & Cooking Liquids

  • 1 cup low-sodium chicken broth
    → Forms the base of the pan sauce and keeps the chicken moist as it roasts; using low-sodium broth helps control salt and lets the lemon and herbs shine. You can reduce to concentrate flavors during roasting.
  • 1/4 cup dry white wine (optional)
    → Adds acidity and depth to the pan sauce; if you prefer not to use alcohol, substitute with an equal amount of extra broth or water; allow wine to reduce for a velvety finish.
  • 1 tablespoon cornstarch
    → Thickens the lemon pan sauce to a glossy finish; make a slurry with 2 tablespoons cold water before adding; whisk vigorously to prevent lumps as it cooks.
  • 2 tablespoons cold water
    → Part of the cornstarch slurry to create a smooth, lump-free sauce; ensure water is very cold for the best emulsification.
  • 2 tablespoons fresh lemon juice (additional to marinade)
    → Brightens the sauce and adds a clean citrus note; adjust to taste at the end of cooking, balancing with salt and broth.

Add-ins & Garnish

  • 1/2 cup pitted Kalamata olives (optional)
    → Introduce a briny contrast typical of Greek flavors; add them about halfway through cooking to prevent them from becoming mushy; rinse to remove excess brine and pat dry before adding.
  • 1/2 cup crumbled feta cheese (optional)
    → Adds tangy creaminess; sprinkle on top just before serving or gently warm to melt a little while maintaining crumbly texture; avoid overmelting if you want distinct chunks.
  • Fresh parsley, chopped (about 2 tablespoons)
    → Fresh green notes brighten the dish and add color; chop leaves finely and sprinkle over before serving; stems can be saved for stock.
  • Lemon wedges for serving (optional)
    → Extra citrus brightness at the table; guests can squeeze onto chicken for a personalized zing.

Roasted Potatoes (optional side)

  • 1 1/2 pounds baby potatoes, halved
    → Classic Greek accompaniment; halved potatoes roast evenly with the chicken, soaking up lemon, oregano and olive oil flavors; cut sides down promote caramelization.
  • 1 tablespoon olive oil
    → Helps potatoes crisp and brown; toss with salt, pepper, and oregano for an even roast; drizzle and toss to coat evenly.
  • Salt and pepper to taste
    → Season potatoes evenly; they will absorb some salt from the chicken and broth, so adjust at the end of roasting.
  • 1 teaspoon dried oregano (optional)
    → Echoes the chicken’s Greek flavors; if you have fresh oregano, use 1 tablespoon chopped for stronger aroma.

Instructions

  • Preheat your oven to 425°F (220°C) and line a large rimmed baking sheet with parchment paper or lightly grease it with oil to prevent sticking and promote even browning.
    → High heat helps render the skin and achieve a crisp exterior; parchment ensures easy cleanup and prevents the chicken from sticking to the pan.
  • Pat the chicken thighs dry with paper towels and season lightly on all sides with 1/2 teaspoon kosher salt and freshly ground black pepper to create a flavorful surface and promote browning.
    → Moisture on the surface can steam the meat rather than brown it; drying before seasoning allows the heat to contact the skin directly for a crisp finish.
  • In a large bowl, whisk together 1/4 cup fresh lemon juice (strained to remove seeds), lemon zest from 1 lemon, 4 garlic cloves (minced), 3 tablespoons extra-virgin olive oil, 1 teaspoon dried oregano (Greek oregano preferred), 1/2 teaspoon dried thyme (optional), 1 teaspoon kosher salt, and freshly ground black pepper.
    → This creates a balanced, emulsified marinade that penetrates the meat and perfumes the chicken; strain seeds from the lemon juice before adding to ensure a smooth mixture and accurate acidity.
  • Gently loosen the skin of each thigh with your fingers and rub the marinade under the skin as well as over the exterior to maximize flavor distribution and create a barrier that keeps moisture in during roasting.
    → Placing marinade under the skin seasons the meat more evenly and helps render the fat to baste the flesh from within as it cooks; use clean hands or a blunt utensil to prevent tearing.
  • Place the seasoned chicken in the bowl or a resealable bag with the remaining marinade, turning to coat all surfaces evenly, then cover and refrigerate for 30 minutes to 2 hours (or up to overnight). If time is short, you can marinate at room temperature for about 20-30 minutes, but do not exceed 2 hours at room temperature.
    → Marinating allows the acids and oil to permeate the meat, which tenderizes slightly and infuses deeper flavor; keeping it refrigerated slows bacterial growth for safety.
  • If you are including Roasted Potatoes, pre-toss 1½ pounds baby potatoes (halved) with 1 tablespoon olive oil, salt, pepper, and 1 teaspoon dried oregano, and spread them on a separate parchment-lined sheet or around the chicken on the same sheet.
    → Potatoes roast in the same oven and soak up the lemony, herby flavors; halved potatoes caramelize better with cut sides down, which encourages browning.
  • Transfer the marinated chicken to the prepared baking sheet in a single layer, skin side up, leaving space between pieces; if using potatoes, nestle the potatoes around the chicken so they roast evenly and absorb the pan flavors.
    → Even spacing ensures uniform heat exposure and prevents steaming, which helps the skin crisp and the meat cook evenly.
  • Roast uncovered in the preheated oven for 28–35 minutes until the thickest part of the chicken reaches 165°F (74°C) on an instant-read thermometer and the skin is deeply golden and crisp; if the skin isn’t browning after 25 minutes, broil for 1–2 minutes, watching carefully to prevent burning.
    → Proper internal temperature ensures safety and juiciness, while a hot oven and exposed skin maximize browning and texture.
  • While the chicken roasts, prepare the pan sauce by combining 1 cup low-sodium chicken broth and 1/4 cup dry white wine in a small saucepan; bring to a simmer and reduce by half to concentrate the flavors.
    → Deglazing the roasting pan later with this reduction enriches the sauce with fond and minerals drawn from the chicken and herbs.
  • In a separate small bowl, whisk 1 tablespoon cornstarch with 2 tablespoons cold water to make a smooth slurry; set aside for thinning and thickening the sauce as needed.
    → Cold slurry spreads easily and prevents lumps when added to hot liquid, yielding a glossy, cohesive sauce.
  • Gradually whisk the reduced broth and wine back to the pan, then whisk in the cornstarch slurry in small additions until the sauce clings to the back of a spoon; simmer for 1–2 minutes until the sauce thickens to a coating consistency.
    → The starch activates heat to achieve a velvety texture; avoid over-thickening by adding slurry gradually and tasting for balance.
  • Stir in 2 tablespoons fresh lemon juice to brighten the sauce, then season with salt and freshly ground black pepper to taste; keep warm over very low heat while the chicken finishes resting.
    → Lemon juice in the sauce adds a bright, clean citrus note that cuts richness and ties the dish together with the marinade.
  • When the chicken comes out of the oven, tent loosely with foil and rest for 5–10 minutes to allow the juices to redistribute and the skin to set; this yields more tender chicken and prevents rapid juice runoff when carving.
    → Resting relaxes muscle fibers and reabsorbs moisture, improving juiciness and flavor distribution.
  • If using Kalamata olives, scatter ½ cup pitted olives around the chicken about halfway through roasting (approximately 15 minutes before the end) so they heat through without becoming mushy; pat dry to avoid extra brine.
    → Olives provide a briny contrast characteristic of Greek flavor profiles, and late addition preserves their texture and flavor.
  • Just before serving, crumble ½ cup feta cheese over the chicken or sprinkle it on individual plates so it remains slightly crumbly rather than fully melted; garnish with chopped fresh parsley (about 2 tablespoons) and lemon wedges on the side.
    → Feta adds tangy creaminess without overpowering the lemon and oregano; parsley adds color and a fresh finish that brightens the plate.
  • If you prepared Roasted Potatoes, transfer them to a serving dish, spoon over a portion of the pan sauce, and finish with a light sprinkle of chopped parsley; adjust seasoning with salt if needed.
    → The potatoes absorb extra sauce and citrus essence, creating a cohesive, lemony Greek-inspired plate.

Notes

These Greek Lemon Chicken thighs are juicy and bright, marinated with lemon, garlic, oregano, thyme, and olive oil to form a fragrant base for roasting. Bone-in, skin-on thighs stay moist and develop a crisp, flavorful skin, making them a reliable choice for a weeknight or special occasion dinner. For best results, marinate for at least 2 hours (or up to 12 hours in the refrigerator). If time is tight, a 30-minute quick marinate still yields great aroma and flavor.

Prep tips: pat the chicken dry before marinating to promote crisp skin, and mix the marinade ingredients thoroughly so every piece gets seasoned. If possible, rub some marinade under the skin for deeper garlic-lemon notes. Reserve a small portion of marinade (without raw chicken contact) to brush on during roasting for extra flavor. Strain the lemon juice and zest to remove seeds and prevent bitterness, then add to the marinade or sauce as directed.

Roasting and pan sauce: roast in a hot oven (around 425°F / 220°C, or 400°F if using a gentler heat) until the thickest part of the meat reaches 165°F (74°C) and the skin is golden and crisp. Use low-sodium chicken broth as the roasting liquid to control salt and let the lemon and herbs shine; if you like more depth, add the optional white wine and let it reduce. To finish a glossy pan sauce, whisk a cornstarch slurry (1 tablespoon cornstarch whisked with 2 tablespoons cold water) into the simmering sauce and cook until slightly thickened. Brighten the sauce with 2 tablespoons additional lemon juice, then taste and adjust salt and acidity as needed.

Add-ins and garnishes: if using olives, add 1/2 cup pitted Kalamata olives halfway through cooking to preserve their texture and briny character. Sprinkle 1/2 cup crumbled feta on top just before serving or warm briefly to soften without losing its crumbly texture. Finish with fresh parsley (about 2 tablespoons) and lemon wedges for a vibrant, color-rich presentation. If you prefer a dairy-free option, omit feta and olives or substitute with artichoke hearts for a different tangy note.

Optional side and adjustments: classic Greek roasted potatoes pair beautifully with this dish. Halved baby potatoes tossed with 1 tablespoon olive oil, salt, pepper, and optional oregano roast alongside the chicken to soak up the lemony pan flavors. The pan drippings can also serve as a quick, bright sauce base—reduce with broth and lemon until glossy. For gluten-free considerations, ensure the broth is labeled gluten-free and that any wine used is gluten-free. Leftovers refrigerate well for 3–4 days and can be reheated in the oven or a skillet; you can also freeze portions for later meals, though texture may soften slightly after freezing.

Tips

Tips for Perfect Greek Lemon Chicken

Marinade and flavor development

  • For maximum flavor, gently loosen the skin of the chicken thighs and dollop the marinade underneath the skin as well as on the surface. This helps aromatics penetrate the meat and keeps the meat juicy during roasting.
  • Use fresh lemon zest and juice. Zest before juicing to capture essential oils, and strain the juice to avoid seeds in the marinade.
  • Marinate thighs for 2–6 hours in the refrigerator for depth. Overnight is fine, but avoid overly long marinades if using delicate cuts or if you’re using highly acidic components.
  • Pat the chicken very dry before roasting. Excess surface moisture prevents skin from crisping and can steam the meat instead of browning.
  • Season evenly by mixing salt and pepper into the marinade and rubbing it under the skin. Remember the broth used later will contribute salt, so taste before roasting.

Roasting and texture

  • Preheat your oven to a hot range (about 425°F / 220°C) to render fat from the skin and develop a crisp exterior. If your oven runs cool, start at 400°F (200°C) and watch closely for browning.
  • Roast the thighs skin-side up so the fat renders and the skin browns evenly. If your pan starts to smoke, reduce heat slightly and continue roasting.
  • Use a meat thermometer to check doneness: 165°F (74°C) in the thickest part of the thigh. If using bone-in thighs, the bone can stay a bit warmer; aim for safe internal temp without overcooking the meat.
  • Halfway through roasting, spoon a little of the pan juices over the chicken to keep it moist and flavorful. This also helps season the meat evenly.

Pan sauce and balance

  • Combine broth, wine (if using), and lemon juice in the pan after the chicken roasts for a bright, acidic pan sauce. If you prefer not to use wine, substitute with extra broth or water and allow a gentle simmer to concentrate flavors.
  • Whisk in the cornstarch slurry (2 tablespoons cold water + 1 tablespoon cornstarch) gradually to achieve a glossy, clingy sauce. Keep the sauce simmering until thickened, whisking to prevent lumps.
  • Finish the sauce with a final squeeze of lemon juice and a pinch of salt to taste. If the sauce tastes flat, a small pinch of sugar or a splash more broth can balance sharp acidity.
  • Retain some of the browned fond from the pan—it’s full of flavor. If necessary, scrape and deglaze a bit more to lift the fond before thickening the sauce.

Add-ins and serving

  • Kalamata olives add a briny contrast. Add them about halfway through cooking to prevent them from becoming mushy, and rinse to remove excess brine before adding.
  • Feta adds tangy creaminess. Sprinkle crumbled feta on top just before serving or briefly warm to soften slightly while keeping some texture.
  • Fresh parsley brightens the dish. Chop finely and scatter over the finished chicken for color and freshness.
  • Lemon wedges at the table let guests brighten the dish to their taste.

Roasted potatoes (optional side)

  • Roast potatoes cut side down for maximum caramelization and flavor absorption from the lemon, oregano, and olive oil.
  • Toss potatoes with 1 tablespoon olive oil, salt, pepper, and oregano (fresh if possible) for even browning and a Greek flavor profile.
  • For crisper skins, give potatoes a head start: parboil or pre-roast for 5–7 minutes before combining with the chicken, then finish together in the same pan to mingle flavors.
  • Adjust salt at the end, considering the salt in the broth and any feta that may be added later.

FAQ

Greek Lemon Chicken Recipe – FAQs

What is Greek Lemon Chicken?

Greek Lemon Chicken is a bright, tangy dish featuring chicken cooked with lemon juice and zest, garlic, oregano, and olive oil. It’s often roasted with potatoes and onions for a flavorful, Greek-inspired meal, finished with fresh parsley.

What ingredients do I need for Greek Lemon Chicken?
  • Chicken thighs or breasts (bone-in or boneless, skin-on recommended for extra flavor)
  • Fresh lemons (juice and zest)
  • Olive oil
  • Garlic, minced
  • Dried oregano (or 1-2 tbsp fresh)
  • Salt and black pepper
  • Optional: potatoes and onion wedges
  • Optional: olives, white wine or chicken broth, parsley for garnish
Can I use chicken breasts or thighs?

Both work. Thighs stay juicier and more forgiving in the oven; breasts cook faster and can dry out if overcooked. If using breasts, consider bone-in, skin-on for more flavor, and monitor cooking time closely.

How do I marinate the chicken?

Whisk together lemon juice, lemon zest, minced garlic, oregano, olive oil, salt, and pepper. Toss the chicken in the marinade, cover, and refrigerate for 30 minutes to up to 24 hours for deeper flavor.

Can I bake it in the oven, and at what temperature?

Yes. Preheat to 425°F (220°C). Arrange the marinated chicken (and optional potatoes/onions) on a baking sheet or in a shallow pan. Pour the marinade over and roast until cooked through and lightly browned, about 25–40 minutes depending on thickness and whether you use bone-in pieces.

How long does it take to cook in the oven?

Bone-in pieces typically take 35–40 minutes; boneless breasts can finish in about 25–30 minutes. Start checking doneness around 25 minutes if using breasts, and let juices run clear with an internal temperature near 165°F (74°C).

How do I know when the chicken is done?

Check that the thickest part reaches 165°F (74°C) with an instant-read thermometer. The juices should run clear, and the meat should be tender and not pink.

How do I make the lemony sauce and pan juices delicious?

After baking, transfer the chicken and any pan juices to a small pan. Simmer briefly with a splash of chicken broth or water, plus a squeeze of lemon juice. You can thicken slightly with a cornstarch slurry if desired, then pour over the chicken or serve on the side.

What are good serving suggestions or accompaniments?

Serve with roasted potatoes and onions from the pan, or alongside rice, or a Greek salad. Garnish with chopped parsley and extra lemon slices for a fresh finish.

How can I customize or variations for this recipe?

Variations include adding olives, capers, or cherry tomatoes; swapping oregano for thyme or adding a pinch of cinnamon for a warmer note; using lime juice for a different citrus profile; and finishing with feta crumbles for a salty tang.

How should I store leftovers and can I freeze this?

Store cooled leftovers in an airtight container in the refrigerator for up to 3–4 days. Reheat gently in the oven or skillet. For freezing, freeze cooked chicken (without potatoes) for up to 2–3 months; thaw in the fridge before reheating and serving.

Introduction / Hook

Imagine a dessert that feels like a sun-drenched stroll through a berry-filled field, where the air carries a subtle tart-sweet perfume of wild blueberries and the promise of something creamy, luscious, and unexpectedly energizing. Welcome to the Wild Blueberry Protein Cheesecake—an indulgent treat that doesn’t ask you to trade your health for happiness, but rather invites you to savor both in a single, satisfying bite. This is not your ordinary cheesecake. It’s a celebration of small, intense fruit flavors meeting a silken, protein-rich filling that keeps you fueled for the moments that follow dessert as much as during it. With each forkful, you’ll feel the cool creaminess give way to bursts of bright berry fragments, the soft, reassuring body of the filling, and a crust that offers a gentle crunch and a comforting, nutty whisper. It’s a dessert that feels special enough for company, yet friendly enough to enjoy after a long day. If you’ve ever wished for a cheesecake that could stand up to a workout, a busy week, or a spontaneous gathering without compromising on taste, you’ve found your new favorite.

Beyond its irresistible charm, this cheesecake has a story to tell—a story of bright, tiny berries picked at the edge of summer, of a kitchen tradition that loves both flavor and function, and of a modern twist that makes a classic silhouette feel contemporary and accessible. The wild blueberry variety brings a concentrated, tangy sweetness that pops in contrast with a creamy, indulgent center. The protein component—carefully balanced so it enhances creaminess without turning the dessert into a chalky afterthought—transforms what might be a purely decadent slice into a more complete, nourishing experience. This is dessert as an everyday joy and a little self-care, a recipe you’ll crave on a leisurely weekend and reach for after a sweaty workout alike. It’s a dish that respects restraint while inviting a sense of celebration in every bite.

As you prepare to read on, picture the first bite: the cool slice sliding from the plate, a moment of creamy ease meeting a bright berry spark, followed by a lingering, comforting finish. Whether you’re welcoming guests, stocking the freezer for weeknights, or simply treating yourself after a long day, the Wild Blueberry Protein Cheesecake promises a moment of pleasure that feels both grounded and uplifting. It’s a recipe designed to travel well to gatherings, to shine on a summer table, and to remind us that dessert can be a thoughtful balance of flavor, texture, and nourishment. Let this be your invitation to bake something that tastes like a memory you’ll want to repeat again and again.

The Story Behind the Dish

Wild blueberries have a storied place in North American lore, often signifying the quiet strength of local forests and the summer rhythms of family gatherings. Unlike their cultivated cousins, wild blueberries tend to be smaller, with a more concentrated sweetness and a brighter, zestier tartness. They are the kind of berry that tastes of early mornings, late evenings, and the unhurried hours of harvest season. In many culinary traditions, blueberries have long been celebrated not only for their flavor but for their vibrant color and the small burst of juice they release when you bite into them. They carry a notion of rustic authenticity—fragrant, sun-warmed, and honest to the core.

This cheesecake traces a lineage from those same woodland berries to a modern desire: to enjoy dessert without sacrificing protein, energy, or balance. The concept of a protein-forward cheesecake isn’t about stripping away indulgence; it’s about reimagining what a dessert can be when nutrition and pleasure share equal footing. The idea here is simple: we celebrate the wild blueberry’s natural brightness and pair it with a creamy, smooth filling that’s subtly enriched with protein to create a cake that isn’t heavy, isn’t overly sweet, and remains remarkably satisfying from first bite to last. The result is a dessert that feels both artisanal and approachable—a cheesecake that looks like a special occasion treat but behaves like a reliable favorite you’d make any week.

As you read through the sections ahead, you’ll notice a gentle thread of influence from family kitchens and picnic baskets. Think of a grandmother’s summer bake sale meeting a modern, health-conscious lifestyle—a collaboration between tradition and contemporary wellness. The crust, the filling, and the blueberry topping or swirl come together to tell a story about texture, contrast, and balance. It’s a recipe built on the idea that we can savor soft, silky creaminess while still enjoying the bright, tart zing of wild berries, all while lending a little extra protein to support satiety and muscle recovery after activity. It’s a celebration of flavor, of heritage, and of the idea that something as beloved as cheesecake can be reimagined to fit a more mindful, energetic life.

Throughout its evolution, this dish has found a home in kitchen test moments, weekend meal preps, and celebratory menus alike. It’s the kind of recipe that invites curiosity: what happens if you swap in almond flour for a different crust texture? How does a light swirl of blueberry preserve the color and intensity of the berries? What if you tweak the protein level to suit a post-workout snack versus a refined dessert for guests? Each question opens a doorway to small, delicious experiments that keep the spirit of cheesecake intact while inviting new flavors, textures, and nutritional considerations to the table. That sense of possibility—paired with the unmistakable joy of blueberries—gives this dish its lasting appeal and makes it a favorite in kitchens that love both flavor discovery and practical, weeknight-friendly indulgence.

Why You’ll Love This Recipe

  • High-protein dessert without sacrificing creaminess or flavor. The cheesecake offers a luscious texture that feels indulgent, but the added protein helps balance sweetness and sustain fullness.
  • Bright, seasonal flavor from wild blueberries. The berries contribute a lively tart-sweet profile that cuts through the richness of the filling and lingers pleasantly on the palate.
  • Silky texture with a gentle crust contrast. Expect a smooth, almost velvety center that yields to a subtle, satisfying edge—crisp enough to provide structure, soft enough to melt in your mouth.
  • Adaptable for different diets. The concept easily lends itself to vegan or gluten-free tweaks, or to substitutions that accommodate dairy-free preferences, without losing the essence of the dish.
  • Make-ahead friendly. This cheesecake holds up well in the fridge and can be portioned for quick servings, making it ideal for gatherings, meal-prep, or gift-worthy jars for friends and family.
  • Versatile for occasions. From casual picnics and weekend brunches to post-workout treats and special celebrations, it pairs beautifully with a range of beverages and side dishes.
  • Beautifully photogenic and crowd-pleasing. The natural color of wild blueberries against a pale, creamy filling makes for a striking dessert presentation that’s as inviting to the eye as to the palate.

Flavor Profile & Texture

The flavor profile of the Wild Blueberry Protein Cheesecake is a careful dialogue between contrast and harmony. The filling is luxuriously smooth, with a gentle tang that comes from a balance of dairy and its protein-enhanced composition. It’s not overly sweet; instead, it has a refined sweetness that allows the blueberries to shine through. The wild blueberries bring a vibrant, almost citrusy brightness with a depth that ordinary cultivated berries sometimes lack. Their tartness acts as a counterpoint to the creamy interior, creating a layered experience with every bite.

The texture of the filling is where the magic often lies. It’s seductively light and airy yet substantial enough to hold its shape when sliced. This is not a mousse; it’s cheesecake—a structure that supports a delicate, almost silken mouthfeel. The crust offers a contrasting bite: a firmer, crumbly foundation that provides a crunchy-to-soft transition as you move from the first bite to the second. The crust’s subtle toasty notes anchor the dish and keep the blueberry brightness from feeling too delicate, creating a complete, cohesive mouthfeel that invites you to savor slowly.

In terms of aroma, expect a gentle bouquet of vanilla, a whisper of dairy richness, and the inevitable fresh perfume of wild blueberries. When you cut into the slice, you’ll notice the way the filling releases a faint, creamy fragrance that mingles with the fruit’s juice. On tasting, the initial coolness of the filling meets the lively fruit, then settles into a lingering finish that balances sweet, tart, cool, and comforting all at once. This is a dessert that respects the blueberry’s natural character while elevating it with a modern, protein-forward approach—an appealing proposition for both dessert lovers and the health-conscious alike.

Occasions & Pairings

Where this cheesecake shines is in its versatility. It suits warm-weather gatherings, weekend family dinners, and post-workout recovery moments that demand a treat without heavy heaviness. Here are some ideas for when to serve it and what to pair with it:

  • Summer gatherings and potlucks: the bright berry notes and elegant presentation make it a standout on a shared table.
  • Weeknight dessert with a point of pride: quick to portion and easy to store, it’s a refined finish after a busy day.
  • Post-workout snack or recovery treat: the protein boost supports satiety and can help replenish energy after activity.
  • Brunch hospitality: pairs gracefully with a light sparkling beverage, a citrus-forward tea, or a mild coffee.
  • Celebrations and special occasions: serves as a showpiece without feeling overly formal, inviting guests to linger over dessert.

Pairings to consider:

  • Beverages: a chilled sparkling beverage, a bright white wine, espresso, or a citrusy herbal tea.
  • Side bites: a light fruit compote, a dollop of whipped cream (or dairy-free yogurt), or toasted nuts for added crunch.
  • Flavor accents: a whisper of citrus zest (lemon or orange), a touch of mint, or a light drizzle of dark chocolate for contrast.
  • Complementary desserts: a small, tart sorbet or a simple lemon tart can create an engaging tasting menu with the cheesecake as the centerpiece.

Tips, Variations & Substitutions

The beauty of this cheesecake lies in its flexibility. Here are thoughtful ways to adapt it to different tastes, dietary needs, or ingredient availability, all while keeping the spirit of the dish intact:

  • Vegan or dairy-free version: use dairy-free cream cheese alternatives and plant-based yogurt or cream substitutes. Ensure the protein component remains balanced to maintain the cheesecake’s texture.
  • Gluten-free or nut-free crust options: swap in crushed nuts (almonds, pecans) or nut-free crushed cereals for the crust, or use a gluten-free crust base that suits your dietary needs.
  • Flavor boosters: incorporate a hint of citrus zest, vanilla bean, or almond extract to accent the blueberry brightness and the filling’s creaminess without overwhelming the fruit.
  • Protein variations: choose a protein powder that suits your preference (unflavored or vanilla works well). If you prefer a non-powder source of protein, consider using Greek yogurt as part of the filling to naturally boost the protein content while preserving texture.
  • Fruit variations: while wild blueberries are the star, you can experiment with a mix of berries or a blueberry compote swirl for a different visual and flavor profile, keeping the overall balance in mind.
  • Texture play: for a hint of extra bite, add a thin layer of chopped nuts or a crisp sugar-free crumble on top after the cheesecake sets (if you’re preparing ahead, keep toppings separate until serving).
  • Make-ahead ideas: this cheesecake often tastes better after a day or two, when flavors have had time to meld. Prepare, chill, and keep tightly wrapped; slice portions as needed to minimize handling.

Storage & Make-Ahead Ideas

Storage is one of the practical delights of this dessert. Its structure holds up well in the refrigerator, making it ideal for make-ahead meals, weekend entertaining, or gifting in portions. Here are some practical tips to keep texture and flavor at their best:

  • Refrigeration: store whole or sliced portions in an airtight container or wrapped tightly to prevent drying out. Typically, this cheesecake will stay fresh for up to 3–5 days in the fridge when properly covered.
  • Freezing: for longer-term storage, wrap slices individually and freeze. Thaw in the refrigerator overnight or at room temperature for a quicker finish. The filling can remain silky after freezing, though a slightly softer texture may occur.
  • Make-ahead strategy: if you’re planning a dessert spread, prepare the filling and crust separately and assemble the day you plan to serve, or freeze the assembled cheesecake and thaw the day you intend to present it.
  • Portion control: slicing into individual servings before refrigerating makes it easy to grab a ready-to-go treat without exposing the entire cheesecake to air each time.
  • Transportation: for picnics or potlucks, transport the cheesecake in its dish with a tight lid and a chilled pack to maintain a cool, fresh feel upon arrival.

Fun Facts & Trivia (Optional)

Did you know that blueberries—especially wild varieties—are celebrated not only for their flavor but for their nutrient density? Wild blueberries typically harbor a higher concentration of antioxidants per berry than cultivated varieties, contributing to their reputation as a berry with a superfood smile. The deep indigo hue of wild blueberries is a natural indicator of anthocyanins, compounds linked to potential health benefits and vibrant color in baked goods and desserts. In North America, blueberries have a long history of use in folk remedies, seasonal desserts, and festive table centers, where their bright color and tangy sweetness bring a sense of place and season to the table.

Cheesecake itself is a culinary traveler—its roots wander through ancient civilizations and diverse kitchens, evolving into the dense, creamy, and luxurious dessert many enjoy today. The twist of adding protein into a classic cheesecake is a modern innovation that aligns with a broader trend: treating indulgence as something that can harmonize with an active, health-minded lifestyle. This fusion of tradition and contemporary nutrition makes the Wild Blueberry Protein Cheesecake a representation of how kitchens adapt to the times—honoring history while inviting new possibilities.

Finally, there’s a simple but delightful consideration: the color story. The blueberry swirl or topping brings a rich, jewel-toned contrast to the pale cream filling, making the dessert as pleasing to the eye as it is to the palate. The berries’ natural pigments are more than just decoration; they signal the fruit’s robust flavor and the promise of a bright, satisfying finish that lingers long after the plate is cleared. In this dessert, color, aroma, texture, and taste converge to tell a story of summer, balance, and a little culinary science that makes joy easy to reach.

Whether you’re a longtime cheesecake devotee, a fitness-minded foodie, or someone who simply loves the taste of wild berries in dessert form, the Wild Blueberry Protein Cheesecake invites you to savor a moment that feels both comforting and invigorating. It’s an invitation to bake with intention, to celebrate seasonal fruit, and to treat yourself to something that nourishes as it delights. When you’re ready to plate it, you’ll find that this dessert isn’t just a dish—it’s an experience: cool, bright, creamy, and wonderfully complete in every sense.

Ingredients

  • Crust
  • 1 1/2 cups almond flour (unsalted, finely ground)
    → The crust provides the base and structure for the cheesecake. Almond flour yields a gluten-free, grain-free crust with a rich, nutty flavor and helps with moisture balance when combined with fat. Measure by spooning into a cup and leveling for consistency. For extra flavor, lightly toast the almond flour in a dry pan for 2-3 minutes before mixing with the fat to deepen nuttiness.
  • 2 tablespoons melted coconut oil (unrefined or refined)
    → Acts as the fat to bind the crust and help it set when chilled. Use melted and slightly cooled oil so it blends evenly with dry ingredients. If dairy is preferred, substitute with an equal amount of melted butter for a richer crust (note it will not be vegan).
  • 1-2 tablespoons maple syrup or honey (optional, for sweetness)
    → Adds a touch of sweetness and helps bind the crust together. If using honey, whisk thoroughly to distribute; adjust sweetness in the filling accordingly to avoid an overly sweet cheesecake. For a lower-sugar option, omit entirely or reduce to 1 tablespoon.
  • Pinch of salt
    → Enhances flavor and balances sweetness by bringing out the nutty notes of the almond flour. Use fine salt to ensure even distribution and avoid any grainy texture.
  • Filling
  • 16 oz (450 g) cream cheese, softened to room temperature
    → Provides the creamy base and body of the cheesecake. Softened cream cheese blends smoothly and prevents lumps; beat on medium speed for 1-2 minutes before adding other ingredients to achieve a silky texture. Use full-fat for best richness; lower-fat options can result in a lighter but less luscious result.
  • 1 cup Greek yogurt, full-fat (or 2/3 cup strained plain yogurt for a thicker texture)
    → Adds tang, moisture, and extra protein. If using regular yogurt, strain through cheesecloth or a fine sieve to remove whey and thicken; full-fat yogurt yields richer mouthfeel. Greek yogurt helps stabilize the filling and contributes creaminess without too much fat.
  • 1/2 cup vanilla whey protein isolate (unflavored or vanilla)
    → Boosts protein content and helps set the filling with dairy components. Sift to remove lumps and whisk with a small amount of the cream cheese mixture to form a smooth paste before folding into the rest of the filling; this minimizes gritty texture from clumps.
  • 2 large eggs, at room temperature
    → Bind and help the cheesecake set. Room-temperature eggs emulsify better, producing a smoother batter. Do not overmix after adding eggs; mix until just combined to prevent aeration and cracking during baking or chilling.
  • 1/3 cup maple syrup or honey (adjust sweetness)
    → Provides natural sweetness and moisture without overpowering the berry flavors. If using honey, whisk well to incorporate; adjust other sweeteners as needed to maintain balanced flavor and avoid a sugary aftertaste.
  • 1 teaspoon vanilla extract
    → Adds warmth and depth that complements blueberries. Use real vanilla for the best aroma; if you have vanilla bean, scrape the seeds for extra flavor and reduce extract by about half.
  • 1 tablespoon lemon juice (optional)
    → Brightens the filling and helps balance richness; acid also slightly improves setting and enhances blueberry flavor. If using lemon zest instead, reduce or omit juice based on desired citrus intensity.
  • 1 cup wild blueberries, fresh or thawed from frozen (well-drained)
    → The star fruit element, providing pop of color and tart-sweet flavor. Fold in gently to avoid breaking berries; if using frozen, pat dry to minimize extra moisture and prevent a watery cheesecake. Reserve a few berries for topping if desired.
  • Toppings (optional finishing touches)
  • 1/2 cup fresh wild blueberries, for topping
    → Creates a vibrant, fresh look and adds a burst of berry flavor at serving. Rinse gently and pat dry; arrange decoratively after the cheesecake is chilled to maintain shape and color. If you want a glossy look, you can gently warm a small amount of blueberry sauce and brush lightly on top.
  • Blueberry compote (optional) — 1/2 cup blueberries, 1-2 tablespoons water, 1 teaspoon lemon juice, 1 teaspoon maple syrup; simmer until thick and glossy
    → A luscious, fruity ribbon that enhances blueberry intensity. Cool completely before spooning or swirling into the top to avoid melting into the filling; store any leftovers in the fridge for up to 5 days.
  • 1 tablespoon lemon zest (optional)
    → Adds extra citrus aroma to pair with blueberry; use sparingly as a finishing note rather than an overpowering flavor. Zest before juicing to capture essential oils in the zest.
  • 1/4 cup chopped almonds or walnuts (optional)
    → For crunchy texture if you like a textured crust or topping. Toast the nuts lightly to deepen flavor and chop finely so they distribute evenly; add to the crust before baking or sprinkle on top after chilling for crunch.

Instructions

  • Preheat your oven to 325°F (165°C) and prepare a 9-inch (23 cm) springform pan by greasing the sides with a neutral oil and lining the bottom with a parchment circle for easy release.
    → A steady, even temperature ensures the cheesecake bakes uniformly and the crust releases cleanly when chilled and unmolded.
  • If desired, lightly toast 1 1/2 cups almond flour in a dry skillet over medium heat for 2–3 minutes, stirring constantly until it becomes fragrant and brings out a deeper nutty aroma.
    → Toasting intensifies almond flavor and helps dry the flour slightly, improving crust texture and preventing sogginess.
  • In a medium bowl, whisk together the toasted (or untoasted) almond flour with a pinch of salt, the 2 tablespoons melted coconut oil, and 1–2 tablespoons maple syrup or honey to form a cohesive crust mixture.
    → The fat binds the crust and the sweetener helps with binding and flavor; mixing thoroughly ensures an even distribution for mindful slicing later.
  • Press the crust mixture firmly into the prepared springform pan, spreading evenly across the bottom and a light rise up the sides with the back of a spoon or the flat of a glass. Chill the pan in the freezer for 15–20 minutes to set.
    → A chilled crust holds its shape during filling and baking, preventing slumping and reducing cratering at the edges.
  • In a large mixing bowl, beat 16 oz (450 g) cream cheese at room temperature on medium speed until smooth and creamy, about 1–2 minutes, to remove lumps.
    → Softened cheese emulsifies better, creating a silkier filling and preventing a grainy texture in the finished cheesecake.
  • Whisk in 1 cup full-fat Greek yogurt (or 2/3 cup strained plain yogurt for thicker texture) until fully incorporated and the mixture is glossy.
    → Yogurt adds tang, moisture, and protein while stabilizing the filling; ensure there are no visible lumps for a flawless batter.
  • Stir in 1/2 cup vanilla whey protein isolate, sifted first to remove lumps, and whisk with a small amount of the cheese mixture to form a smooth paste; fold this paste into the rest of the filling to distribute the protein evenly.
    → This boosts protein content and helps the filling set with a creamy, cohesive texture without making it chalky.
  • Beat in 2 large eggs, one at a time, on low-to-medium speed until each is just incorporated and the batter looks smooth; avoid overmixing to prevent air bubbles that can crack during chilling.
    → Eggs provide structure; overmixing introduces air that expands during baking and cooling, risking cracks.
  • Stir in 1/3 cup maple syrup or honey, 1 teaspoon vanilla extract, and optional 1 tablespoon lemon juice to brighten the filling; mix until uniform.
    → The natural sweeteners keep the cake moist and balanced, while vanilla and lemon elevate the blueberry flavor without overpowering it.
  • Gently fold in 1 cup wild blueberries, taking care not to crush them; if using frozen berries, pat them dry on a paper towel to minimize extra moisture.
    → Gentle folding preserves berry integrity for visible pockets of color and tart sweetness in every slice.
  • Pour the filling into the prepared crust, smoothing the top with a spatula so it is level and reaches the edges; tap the pan on the counter a few times to eliminate any air pockets.
    → A level, compact batter bakes evenly and reduces the likelihood of a sunken center or cracking.
  • Wrap the outside of the springform pan with two layers of heavy-duty foil and place it into a larger roasting pan; add hot water to the outer pan until it comes halfway up the sides of the springform to create a water bath.
    → The water bath provides gentle, even heat and helps prevent cracking by stabilizing the temperature and moisture during baking.
  • Bake at 325°F (165°C) for 60–70 minutes, or until the outer edge is set but the center still quivers slightly when the pan is gently shaken. If the center seems overly jiggly, bake in 5-minute increments, testing until just set.
    → The gentle jiggle indicates proper set without overcooking; residual heat will continue to set the center as it cools.
  • Turn off the oven, crack the door slightly, and let the cheesecake rest in the oven for 1 hour to gradually cool and prevent sudden temperature shifts that could cause cracking.
    → Slow cooling minimizes stress on the structure, reducing the risk of cracks and improving a silky texture.
  • Carefully remove the cake from the water bath, transfer to a rack, and let it come to room temperature before chilling; refrigerate for at least 4 hours or overnight for full set and sliceable texture.
    → Chilling firms the filling thoroughly, making clean slices and letting flavors meld for a smoother finish.
  • Prepare optional topping: simmer 1/2 cup blueberries with 1–2 tablespoons water, 1 teaspoon lemon juice, and 1 teaspoon maple syrup until thick and glossy to create a blueberry compote; cool completely before using.
    → The sauce adds intensity and a glossy finish; cooling prevents it from melting into the filling and softening the crust.
  • Just before serving, top with 1/2 cup fresh wild blueberries and a light sprinkle of lemon zest (optional) or a drizzle of blueberry compote; slice with a warm knife (hot water wiped dry) for clean cuts.
    → Fresh berries provide bright contrast and vibrant color; warming the knife reduces dragging through the creamy filling for neater portions.

Notes

These wild blueberry protein cheesecakes are a gluten-free dessert that balances a crisp almond crust with a luscious protein-packed filling and bright berry notes. The crust relies on almond flour and coconut oil for structure and richness, with a touch of maple syrup or honey for gentle sweetness. Toasting the almond flour briefly deepens its nutty aroma and helps with moisture balance when mixed with the fat. For a dairy-free version, substitute coconut oil and a plant-based cream cheese, keeping in mind texture may shift.

Crust

  • 1 1/2 cups almond flour (unsalted, finely ground) with a pinch of salt. Optional: lightly toast the almond flour in a dry pan for 2-3 minutes to deepen flavor.
  • 2 tablespoons melted coconut oil (unrefined or refined). Allow to cool slightly so it blends evenly with the dry ingredients.
  • 1-2 tablespoons maple syrup or honey (optional, for sweetness). Adjust to taste and bake time; sweeter crusts may require less sugar in the filling.
  • Press the mixture into a 9-inch springform pan to form an even crust about 1/4 inch thick. Chill for 15-20 minutes or bake at 350°F (175°C) for 8-10 minutes to set, then cool completely before filling.

Filling

  • 16 oz (450 g) cream cheese, softened to room temperature.
  • 1 cup Greek yogurt, full-fat (or 2/3 cup strained plain yogurt for a thicker texture).
  • 1/2 cup vanilla whey protein isolate (unflavored or vanilla). Sift to remove lumps and whisk with a small amount of the cream cheese mixture to form a smooth paste before folding into the rest of the filling.
  • 2 large eggs, at room temperature.
  • 1/3 cup maple syrup or honey (adjust sweetness).
  • 1 teaspoon vanilla extract.
  • 1 tablespoon lemon juice (optional) to brighten the filling; or lemon zest for extra aroma.
  • 1 cup wild blueberries, fresh or thawed from frozen (well-drained). Fold in gently to avoid breaking berries; reserve a few for topping if desired.

Pour the filling over the prepared crust, spreading evenly. Gently tap the pan on the counter to release air bubbles. Bake in a preheated 325-350°F (160-175°C) oven until the edges are set and the center has a slight jiggle, about 40-50 minutes. Turn off the oven and let the cheesecake cool in the oven with the door ajar for 1 hour to prevent cracking, then chill in the refrigerator for at least 4 hours or overnight for best texture.

Toppings and finishing touches

  • 1/2 cup fresh wild blueberries for topping. Rinse gently and pat dry; arrange decoratively after the cheesecake is chilled.
  • Blueberry compote (optional): 1/2 cup blueberries simmered with 1-2 tablespoons water, 1 teaspoon lemon juice, and 1 teaspoon maple syrup until thick and glossy. Cool completely before swirling or spooning onto slices.
  • 1 tablespoon lemon zest (optional) for a bright finishing note. Zest before juicing to capture essential oils.
  • 1/4 cup chopped almonds or walnuts (optional) for a crunchy texture. Lightly toast before using and sprinkle on top after chilling.

Storage and tips: Cover and refrigerate slices for up to 3-4 days. The cheesecake can be frozen, well-wrapped, for up to 2-3 months and thawed in the fridge before serving. For best texture, keep dairy components at room temperature only briefly during mixing, and avoid overmixing after adding eggs to minimize cracking. Always ensure your almond flour and whey protein isolate are certified gluten-free if you have gluten intolerance.

Tips

Tips for Perfect Wild Blueberry Protein Cheesecake

  • Crust flavor and texture: Toast almond flour in a dry skillet for 2–3 minutes until fragrant and lightly browned, then cool completely before mixing with the fat to deepen nuttiness and improve binding.
  • Crust binding and cleanliness: Use melted coconut oil (cooled slightly) to bind the crust. Press firmly into the pan and up the sides if you like, using parchment underneath to prevent sticking. Chill the crust for 15–30 minutes before filling to reduce crumbling.
  • Sweetness control: If using maple syrup or honey in the crust, whisk thoroughly to distribute sweetness; adjust sweetness in the filling accordingly to avoid an overly sweet cheesecake. For a lower-sugar option, omit the crust sweetener or reduce the filling sugar slightly.
  • Softening dairy for a smooth filling: Bring cream cheese to room temperature and beat until very smooth (about 1–2 minutes) before adding other ingredients to avoid lumps. Cut the blocks into cubes to speed even softening.
  • Yogurt texture: For a thicker, creamier filling, use full-fat Greek yogurt. If you use regular yogurt, strain through cheesecloth or a fine sieve to remove whey and thicken.
  • Protein powder handling: Sift the vanilla whey protein isolate to remove lumps, then whisk a small amount into a portion of the filling to form a smooth paste before folding back into the rest of the mixture to minimize grittiness.
  • Eggs and mixing: Add eggs one at a time and mix just until combined. Overmixing after eggs are added can incorporate air and cause cracking during baking or chilling.
  • Sweetness balance in filling: The 1/3 cup maple syrup or honey should be balanced with the tang from yogurt and lemon; taste the batter and adjust if needed. If you add lemon juice or zest, consider slightly reducing other sweeteners to avoid a citrus-forward sweetness clash.
  • Flavor depth: Use real vanilla extract for the best aroma; if you have vanilla bean, scrape the seeds and mix with the filling, reducing extract by about half.
  • Brighten with citrus: Lemon juice brightens the filling and enhances berry flavor; if using lemon zest, add it with the vanilla to release essential oils. If using juice, adjust sweetness accordingly to maintain balance.
  • Blueberry handling: Drain fresh or thawed blueberries well to prevent extra moisture from thinning the filling. If using frozen berries, pat dry before folding in and reserve a few to decorate on top after chilling.
  • Topping ideas: Fresh wild blueberries on top look stunning and add brightness. For a glossy finish, swirl a cooled blueberry compote (1/2 cup blueberries, 1–2 tbsp water, 1 tsp lemon juice, 1 tsp maple syrup) on the surface after the cheesecake chills, then refrigerate until set.
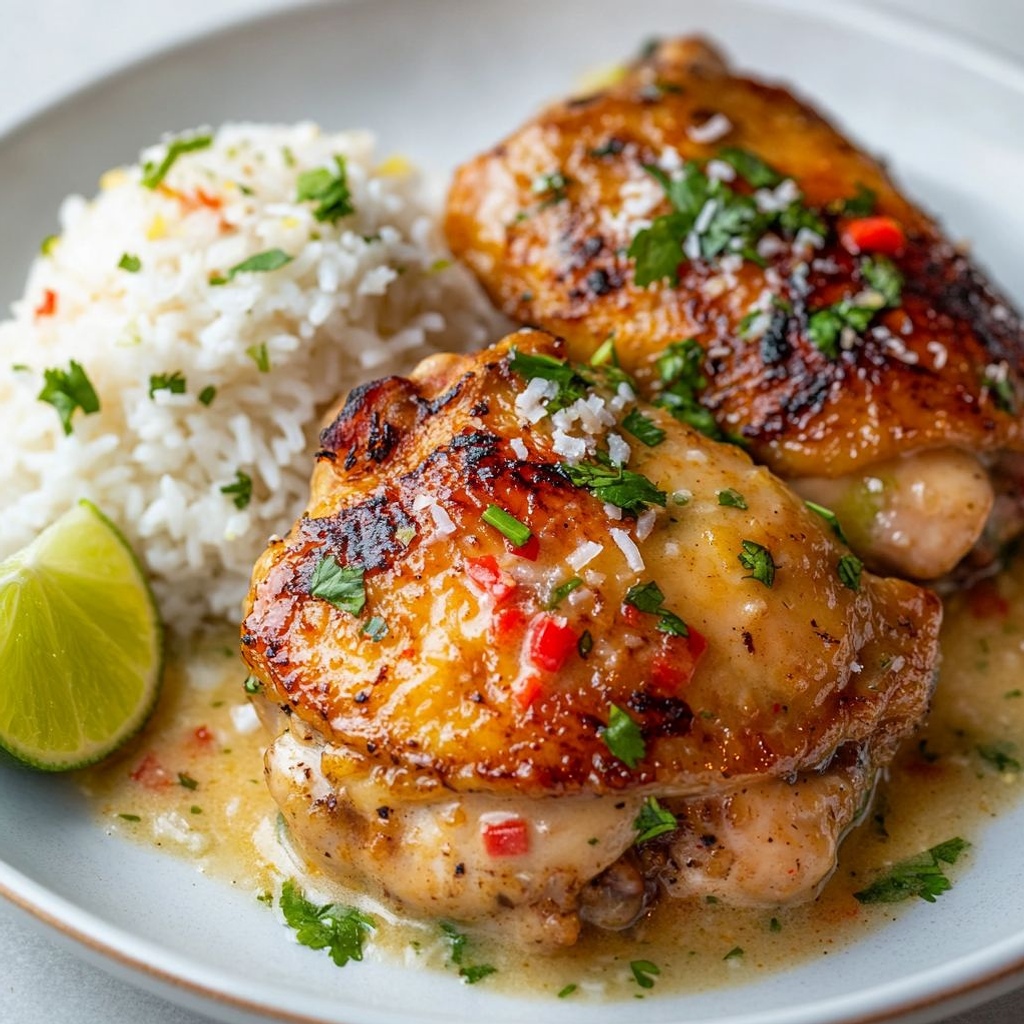
  • Texture and flavor with toppings: 1 tablespoon lemon zest adds a citrusy aroma; sprinkle finely chopped almonds or walnuts for a subtle crunch if you like texture in the crust or as a topping. Toast nuts lightly to deepen flavor before adding.
  • Chilling and serving: Chill the assembled cheesecake for at least 4 hours or overnight for clean slices. For neat cuts, run a knife under hot water, wipe dry, and slice. Keep leftovers refrigerated for up to 3–4 days or freeze individual portions for longer storage.

FAQ

What is Wild Blueberry Protein Cheesecake?

A creamy cheesecake swirled with wild blueberries and boosted with protein from ingredients like Greek yogurt and protein powder. It pairs the tangy richness of cheesecake with a berry-forward flavor and a crust, delivering a dessert that’s higher in protein than traditional cheesecake.

Is it baked or no-bake?

Both versions exist. No-bake versions set by chilling the filling in the fridge, while baked versions are cooked gently in the oven (often with a water bath) to help set the texture. No-bake is usually quicker, while baked can yield a firmer, sliceable result.

What ingredients provide the protein?

The main protein comes from Greek yogurt and cream cheese, plus protein powder added to the filling. Cottage cheese or ricotta can be used as alternatives. Protein per serving depends on the brands and amounts used, but you can expect a noticeable protein boost compared to a traditional cheesecake.

What protein powder types work best?

Unflavored or vanilla protein powders are the most versatile. Whey provides creaminess, casein adds thickness, and plant-based powders (pea, soy, rice, etc.) work well too. Start with 1–2 scoops and adjust to taste and desired texture.

Can you explain the crust and gluten-free options?

Crust ideas include almond flour crust with melted butter or coconut oil, or a gluten-free cookies crumb crust pressed into the pan. To keep it gluten-free, avoid wheat-based cookies or crackers and choose certified gluten-free ingredients. Chill the crust until set before filling.

Can I use frozen wild blueberries?

Yes. Thaw them and drain well before folding into the filling or arranging on top. Reserve a little juice to intensify color if desired, but avoid adding too much liquid, which can affect the filling’s texture.

How should I store and how long does it last?

Store in the refrigerator, covered, for about 4–5 days. For longer storage, freeze slices individually or the whole cheesecake (wrapped tightly) for 2–3 months. Thaw frozen portions in the fridge overnight before serving.

Can I make it dairy-free or vegan?

Yes. Use dairy-free cream cheese or a blend of silken tofu and plant-based yogurt, plus a plant-based protein powder. For the crust, use almond flour or gluten-free cookies with a dairy-free fat like coconut oil. Texture and flavor will vary slightly from dairy versions.

How do I prevent cracks or get a smooth texture?

Mix just until the ingredients are combined to avoid overworking the filling. If baking, bake at a lower temperature and use a water bath to maintain moisture. For no-bake versions, ensure the filling is fully chilled for several hours or overnight before slicing, and run a knife around the edges to release.

How can I customize flavor or sweetness?

Enhance the profile with a little lemon zest or vanilla extract. Adjust sweetness with sugar, maple syrup, or your preferred sweetener. You can also swirl in extra blueberries or top with fresh berries and a blueberry compote for an extra burst of berry flavor.