Author

Ocean Nightleaf

Browsing

As winter blankets the landscape in a soft layer of snow, the allure of cozy moments spent indoors becomes irresistible. Picture this: a crackling fireplace, the aroma of warm spices wafting through the air, and a delightful array of decadent treats set before you. Among these delightful confections, the Winter Wonderland Almond Tarts stand out as emblematic of the season’s spirit. These delicate pastries, filled with almondy goodness and enveloped in crisp, buttery shells, add a touch of elegance and charm to any winter gathering.

But what truly makes these tarts a seasonal sensation? It begins with the buttery tart crust—a perfect foundation that crumbles just right under the pressure of your fork, delivering an irresistible crunch. The moment you take a bite, the buttery richness harmonizes with the nutty aroma of toasted almonds, awakening your senses and whispering of festive gatherings and heartwarming conversations. Each tart is wonderfully adorned, often dusted with a poof of powdered sugar that mimics the beauty of freshly fallen snow—creating an aesthetic that draws your guests closer, begging for a taste.

Winter is a time of reflection, celebration, and warmth, both literally and figuratively. With the world outside blanketed in white, food becomes a vessel for gathering loved ones around the table. And nothing invites a crowd quite like these Winter Wonderland Almond Tarts. They are versatile, too—perfectly suited as a sustenance for holiday parties, intimate family dinners, or even as a sweet treat at a winter soirée. With each bite, you can almost hear the laughter echoing through the frosty air, the clinking of glasses filled with hot cocoa, and candlelight dancing upon the walls, creating an atmosphere steeped in joy and good cheer.

Almonds, being a star ingredient in this recipe, not only bring delicious flavor but also carry nutritional benefits. Rich in vitamin E, magnesium, and antioxidants, almonds add a delightful crunch while supplying health benefits that you’ll feel good about sharing. Embracing these wholesome nuts resonates with this season of giving and gratitude, transforming a simple dessert into a nourishing morsel everyone can enjoy. The natural sweetness of the almonds, paired with a hint of vanilla and a touch of floral notes from almond extract, creates an enchanting experience that transports you to a winter wonderland with every mouthful.

In addition to their aesthetic and flavor, these tarts also offer endless opportunities for creativity. Want to spice things up? Consider adding an unexpected twist by infusing your almond filling with citrus zest, warming spices like cinnamon or nutmeg, or even drizzling a hint of honey for a touch of rustic flair. The possibilities are limited only by your imagination and the pantry ingredients at your disposal. Why not experiment with toppings? A ribbon of chocolate ganache, a sprinkle of sea salt, or even candied ginger can elevate the tart’s sweetness and play against the savory depths of almond—a delightful dance of flavors that can surprise seasoned palates.

The joy of baking these Winter Wonderland Almond Tarts also lies in the process itself. Preparing the crust requires a modest amount of time, but it is undeniably therapeutic—the act of mixing flour and butter brings a satisfying sense of nostalgia, evoking memories of holiday baking with loved ones. Once you roll out the dough and form it into delicate shells, you can prepare the filling—another stage where anticipation builds as you blend ingredients into a creamy almond paste, smelling the essence of winter come alive in your kitchen. As the tarts bake and their aroma begins to fill the air, you’ll likely feel a warm glow emanating from the knowledge that something lovely is unfolding right before your eyes.

Baking is as much about gathering moments as it is about sharing flavors, and Winter Wonderland Almond Tarts encapsulate this beautifully. They provide a tangible way to unite family and friends, whether you’re hosting a lively holiday party or enjoying a quiet evening at home. They can be served with coffee, tea, or even a glass of dessert wine, crafting an intimate experience that invites storytelling and reminiscence—of winters past, of traditions upheld, and dreams for the future. Sharing these tarts is almost like sharing the warmth of your heart; it becomes a symbol of love, connection, and the celebration of flavors that unite us all.

As the snow continues to fall softly outside your window, preparing a batch of Winter Wonderland Almond Tarts becomes more than merely following a recipe—it transforms into an adventure, an exploration of your culinary abilities, and a way to create sweet memories with those you hold dear. Imagine presenting a platter brimming with these delightful treats, each adorned with powdered sugar, lovingly arranged to catch the eye and spark conversation. They deploy their magic, each bite whispering tales of warm fires, fresh snowfall, and the bonds we forge around the table.

These tarts also offer an unassuming beauty—a quaint elegance that can elevate even the simplest of gatherings into a festive occasion. With every carefully crafted tart, you are embracing the winter spirit, celebrating not just the ingredients but the love and joy that they inspire. The simple act of sharing homemade treats can act as a bridge to connection, laughter, and the nostalgic comforts of home. In these chilly months, they can become a comforting reminder that love, like winter’s gentle snow, blankets us in warmth even in the coldest of times.

So, whether you’re a seasoned baker seeking a winter classic or a novice eager to embrace the warmth of the kitchen, let the Winter Wonderland Almond Tarts be your delightful companion this season. They embody the flavors of love, celebration, and the festive spirit that allows us to create lasting memories, one tart at a time. What could be better than a pastry that so beautifully captures the essence of winter, one that evokes not only flavor but also fond memories, laughter, and togetherness? Prepare your kitchen, gather your ingredients, and allow the magic of baking to transport you to your own winter wonderland.

Ingredients

  • Almond Tart Base
    • 1 1/2 cups almond flour
    • 1/4 cup coconut flour
    • 1/4 cup powdered sugar
    • 1/4 tsp salt
    • 1/4 cup unsalted butter, softened
    • 1 large egg
    • 1 tsp vanilla extract
  • Almond Cream Filling
    • 1 cup almond paste
    • 1/4 cup unsalted butter, softened
    • 2 large eggs
    • 1 tsp vanilla extract
    • 1/4 tsp almond extract
  • Topping
    • 1/2 cup sliced almonds
    • Powdered sugar for dusting

Instructions

  • Preheat your oven to 350°F (175°C) and grease a 9-inch tart pan or a similar baking dish.
  • In a mixing bowl, combine the almond flour, coconut flour, powdered sugar, and salt for the tart base.
  • Add the softened unsalted butter to the dry ingredients and mix until crumbly.
  • In a separate bowl, whisk the egg and vanilla extract together, then add them to the flour mixture. Mix until a dough forms.
  • Press the dough evenly into the bottom and up the sides of the prepared tart pan.
  • Bake the almond tart base in the preheated oven for 10-12 minutes, or until lightly golden. Remove from the oven and let it cool slightly.
  • While the tart base is cooling, prepare the almond cream filling. In a mixing bowl, combine the almond paste and softened butter. Beat until smooth and creamy.
  • Add the eggs, vanilla extract, and almond extract to the almond paste mixture, and mix until well combined.
  • Pour the almond cream filling into the pre-baked tart shell, spreading it evenly.
  • Sprinkle sliced almonds over the top of the filling.
  • Bake the tart in the oven for an additional 25-30 minutes, or until the filling is set and lightly golden.
  • Once baked, remove the tart from the oven and allow it to cool completely in the pan.
  • Before serving, dust the top of the tart with powdered sugar for decoration.
  • Slice and enjoy your Winter Wonderland Almond Tarts!

Notes

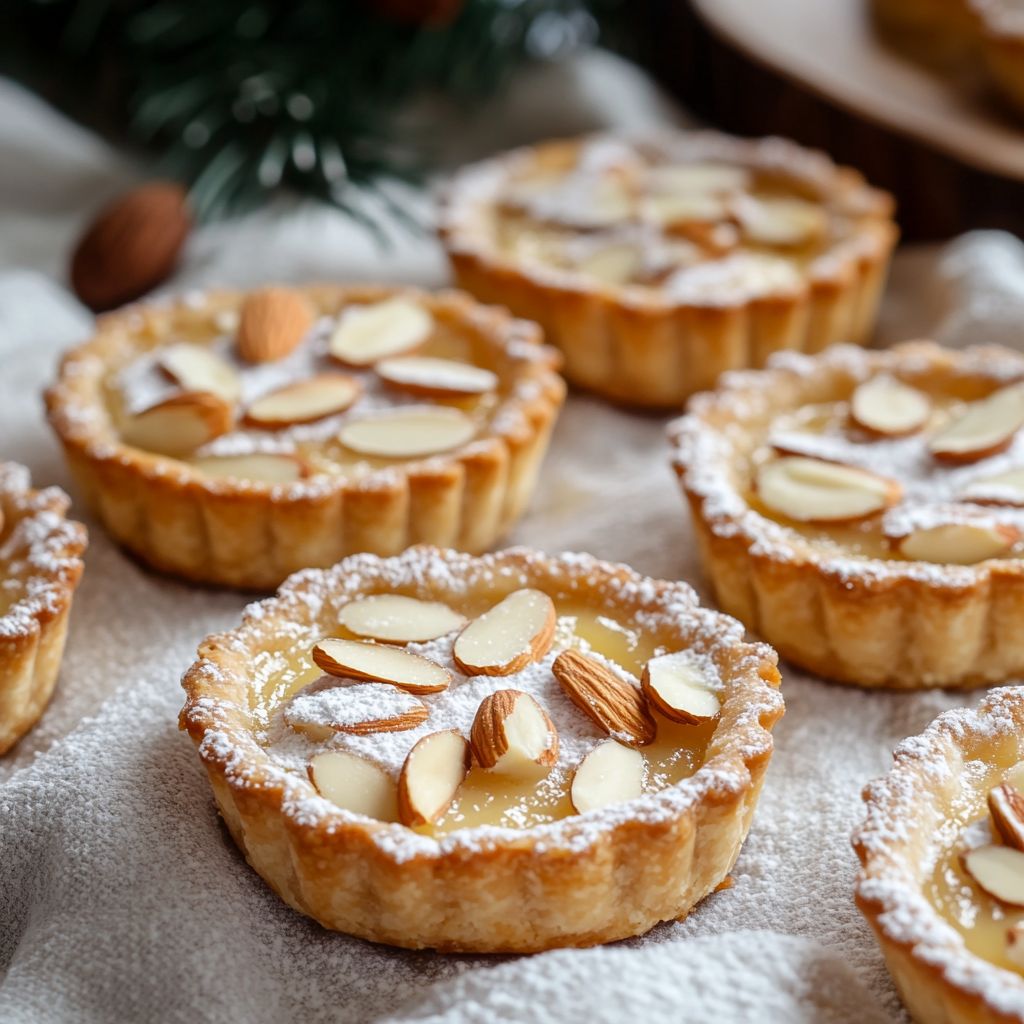
These Winter Wonderland Almond Tarts are a delightful combination of rich almond flavor and buttery sweetness, perfect for celebrating the holiday season or enjoying any time of year. The almond tart base is made with almond and coconut flour, giving it a unique and subtle flavor, while the velvety almond cream filling adds depth and richness. These tarts are beautifully topped with sliced almonds and a dusting of powdered sugar, creating an elegant presentation.

Feel free to serve these tarts warm or at room temperature. They pair wonderfully with a dollop of fresh whipped cream or a scoop of vanilla ice cream for an indulgent touch. If you want to add a personal twist, consider incorporating citrus zest, such as lemon or orange, into the almond cream filling for a refreshing brightness. Leftover tarts can be stored in an airtight container in the refrigerator for up to three days, but they’re so delicious, they might not last long!

Be sure to check that your almond flour and almond paste are of high quality for the best results. If you’re preparing these tarts for a special occasion, you can also create a festive atmosphere by serving them on a beautiful platter adorned with seasonal decorations.

Faq

What are Winter Wonderland Almond Tarts?

Winter Wonderland Almond Tarts are delicious pastry treats made with almond flour, butter, sugar, and a hint of vanilla, typically filled with almond cream and topped with a dusting of powdered sugar, creating a festive dessert perfect for winter celebrations.

Are Winter Wonderland Almond Tarts gluten-free?

Yes, Winter Wonderland Almond Tarts can be made gluten-free by using almond flour as the base instead of traditional wheat flour.

How long do I need to prepare the tarts before baking?

The preparation time for Winter Wonderland Almond Tarts is usually around 30 minutes, including mixing the ingredients and chilling the dough, followed by additional baking time.

What ingredients do I need to make these tarts?

The essential ingredients include almond flour, all-purpose flour (optional), butter, sugar, eggs, and vanilla extract, along with any additional toppings such as powdered sugar or slivered almonds.

Can I add other flavors or toppings to the tarts?

Absolutely! You can enhance your Winter Wonderland Almond Tarts with flavors like lemon zest, orange zest, or even chocolate. Toppings like berries or a drizzle of melted chocolate can also add a delicious twist.

How should I store the tarts after baking?

Store the tarts in an airtight container at room temperature for up to 3 days, or in the refrigerator for up to a week. You can also freeze them for longer storage.

Can I make the almond tart dough in advance?

Yes, you can prepare the tart dough in advance. Simply wrap it in plastic wrap and refrigerate it for up to 3 days, or freeze it for up to a month before baking.

What can I serve with Winter Wonderland Almond Tarts?

These tarts are delightful on their own, but they pair wonderfully with whipped cream, vanilla ice cream, or fresh fruit for added flavor and texture.

Decadent Chocolate Strawberry Shortcake

Imagine a dessert that embodies the spirit of indulgence, where the rich depth of chocolate meets the fresh juiciness of ripe strawberries, all resting atop a delicate and fluffy shortcake base. This Chocolate Strawberry Shortcake is not just a dessert; it’s an experience, a celebration of flavors and textures that transports you to a world of heavenly sweetness with every bite. Whether you’re hosting a summer barbecue, preparing a romantic dinner, or simply treating yourself to something luscious, this dessert promises to captivate your taste buds and impress your guests.

The magic begins with the shortcake itself—a tender, buttery creation that crumbles deliciously at the slightest touch. Unlike traditional sponge cakes, this shortcake combines just the right amount of sweetness with a light, airy texture, serving as the perfect bed for the star ingredients. As you bake this golden delight in your oven, the inviting aroma will fill your kitchen, enticing everyone to gather around and await the masterpiece that is about to unfold.

Next comes the pièce de résistance: the chocolate layers. Rich, velvety chocolate is melted down and folded into a luxurious mousse or ganache that promises to send your chocolate cravings into overdrive. The chocolate not only adds a decadent layer of flavor but also creates a magical contrast with the fresh strawberries, elevating the entire dessert to new heights. Imagine each forkful delivering a rich chocolate punch that collides harmoniously with the tartness of perfectly sliced strawberries.

What makes this dessert even more intriguing is the addition of the strawberries—the ripest, sweetest berries you can find. Each strawberry is strategically placed, showcasing its glistening crimson exterior and juicy interior. The natural sweetness and slight tartness of the strawberries starkly contrast the richness of the chocolate, resulting in a composite flavor profile that is nothing short of extraordinary. As you bite into this confection, your palate is met with a delightful sequence of sensations—from the creamy richness of the chocolate to the bright, refreshing taste of the strawberries.

While the primary elements of this dessert are undeniably enticing, it’s the art of layering that takes this Chocolate Strawberry Shortcake to the next level. Picture this: fluffy slices of shortcake are meticulously layered with chocolate and strawberries, resulting in a stunning dessert that is visually striking and utterly mouthwatering. Each layer tells a story, inviting your friends and family to get lost in the narrative of flavors as they savor each exquisite bite. It is this beautiful presentation that transforms a simple dessert into a work of art—perfect for occasions where aesthetics count just as much as taste.

What’s more, this Chocolate Strawberry Shortcake is incredibly versatile, allowing for personal twists to make it uniquely yours. You might choose to embellish the chocolate with a hint of espresso or a splash of vanilla, enhancing its depth and inviting even more complexity. Alternatively, a drizzle of warm chocolate sauce can be added just before serving, transforming each slice into a gooey, chocolate-laden delight. Even the strawberries can be customized—consider macerating them in a splash of balsamic vinegar and sugar to create a nostalgic twist that accentuates their natural flavors. The possibilities are endless, and the choice is yours!

This dessert is more than just a treat; it’s a centerpiece that sparks conversation and joy. As your guests take in the striking layers of chocolate and strawberry, their eyes will light up with excitement, and their mouths will water in anticipation. This is a dessert that encourages sharing—each slice becomes a reason to gather around the table, reminisce about old memories, and create new ones. It’s perfect for birthdays, anniversaries, or even a casual dinner with loved ones. And let’s not forget that it’s also an excellent way to celebrate the arrival of strawberry season, showcasing those sweet, juicy beauties at their peak—making it a deliciously seasonal treat.

If you’re feeling adventurous or want to plan ahead, you can prepare certain components of the Chocolate Strawberry Shortcake in advance. The shortcake can be made a day before and stored in an airtight container, allowing the flavors to develop even more deeply. The chocolate ganache or mousse can also be set aside, ready to be layered when you’re ready to assemble. Just keep those ripe strawberries on hand; they’re best enjoyed fresh and full of flavor.

Beyond birthdays or seasonal parties, consider this Chocolate Strawberry Shortcake for gatherings, picnics, or springtime celebrations. Its flavors bring a sense of renewal and joy, aligning perfectly with the blossoming beauty of nature. Picture presenting this stunning dessert at a garden party, surrounded by lush greenery, where its vibrant hues complement the colorful flowers and sun-drenched atmosphere.

And let’s not forget the richness of tradition this dessert carries. Shortcake is a classic that has graced the tables of countless households over decades, often evoking nostalgic memories of family gatherings or summertime celebrations. By adding chocolate to the mix, you’re not just elevating a beloved classic; you’re also bridging generational tastes and preferences, enticing younger palates while keeping the essence of tradition alive.

As you dive into making this Chocolate Strawberry Shortcake, remember that it’s about the joy of creation as much as it is about the end product. Taking your time to whip up the shortcake, folding chocolate with care, and arranging the layers thoughtfully can be a meditative process, where creative expression meets culinary art. So gather your ingredients, put on your favorite music, and let the kitchen be your sanctuary for a while. The laughter and excitement that fill the room will be well worth the effort once the cake is unveiled. Each slice will stand as a testament to your dedication, passion, and love for cooking and sharing.

In conclusion, this Chocolate Strawberry Shortcake is more than just a dessert—it’s a celebration of flavors, creativity, and togetherness. Your journey to creating this delightful cake will be filled with the anticipation of the delicious moments that await. From the first slice to the last, it’s bound to leave a lasting impression on everyone fortunate enough to partake in its decadence. So don’t hesitate—indulge in this tantalizing treat that’s sure to bring smiles and joy to any occasion. Embrace the opportunity to create a memorable experience with your Chocolate Strawberry Shortcake, and watch as it transforms a simple gathering into a delightful feast of flavors, textures, and shared happiness.

Ingredients

  • Chocolate Cake Layers
    • 1 3/4 cups all-purpose flour
    • 1 3/4 cups granulated sugar
    • 3/4 cup unsweetened cocoa powder
    • 1 1/2 tsp baking powder
    • 1 1/2 tsp baking soda
    • 1 tsp salt
    • 2 large eggs
    • 1 cup whole milk
    • 1/2 cup vegetable oil
    • 2 tsp vanilla extract
    • 1 cup boiling water
  • Strawberry Filling
    • 4 cups fresh strawberries, hulled and sliced
    • 1/4 cup granulated sugar
    • 2 tbsp lemon juice
  • Whipped Cream
    • 2 cups heavy whipping cream
    • 1/4 cup powdered sugar
    • 1 tsp vanilla extract

Instructions

  • Preheat your oven to 350°F (175°C) and grease two 9-inch round cake pans or line them with parchment paper.
  • In a large mixing bowl, combine the all-purpose flour, granulated sugar, unsweetened cocoa powder, baking powder, baking soda, and salt. Whisk until well blended.
  • Add the eggs, whole milk, vegetable oil, and vanilla extract to the dry mixture. Using an electric mixer, beat on medium speed for about 2 minutes until the batter is smooth.
  • Carefully stir in the boiling water until fully combined. The batter will be thin.
  • Divide the batter evenly between the prepared cake pans.
  • Bake for 30-35 minutes or until a toothpick inserted into the center comes out clean.
  • Remove the cake layers from the oven and allow them to cool in the pans for 10 minutes. Then, turn the cakes out onto a wire rack to cool completely.
  • While the cakes are cooling, prepare the strawberry filling. In a medium bowl, combine the sliced strawberries, granulated sugar, and lemon juice. Toss gently and let sit for about 30 minutes to allow the berries to release their juices.
  • For the whipped cream, in a large mixing bowl, combine the heavy whipping cream, powdered sugar, and vanilla extract. Whip the mixture using an electric mixer on high speed until stiff peaks form.
  • Once the chocolate cake layers are completely cool, place one layer on a serving platter. Spread a layer of whipped cream over the top, followed by half of the strawberry filling.
  • Place the second cake layer on top and repeat the process with the remaining whipped cream and strawberries.
  • Optionally, you can garnish the top with additional strawberries, chocolate shavings, or a drizzle of chocolate syrup.
  • Slice and serve the chocolate strawberry shortcake, enjoying the layers of chocolate, strawberries, and whipped cream.

Notes

Indulge yourself with this delightful Chocolate Strawberry Shortcake, a perfect dessert to impress your guests or savor on a special occasion. Start by preheating your oven to 350°F (175°C) and greasing your cake pans to ensure easy removal after baking. The chocolate cake layers are rich and moist, thanks to the combination of cocoa powder and the boiling water added to the batter, which helps to bloom the cocoa and intensify the chocolate flavor. Always remember to combine the dry ingredients well before adding the wet ones to achieve a smooth batter.

For the strawberry filling, let the fresh strawberries marinate with sugar and lemon juice while the cake bakes. This step enhances their natural sweetness and creates a juicy filling that complements the chocolate cake beautifully. Once the cake layers are cool, assemble your shortcake by placing one layer on a serving plate, generously spreading the strawberry filling on top, and finishing with a layer of whipped cream. Repeat with the second layer and top with more whipped cream and berries for a lovely presentation.

The whipped cream is light and airy, thanks to the whipping process, which incorporates air into the cream. It’s essential to start with cold heavy cream for the best results, and don’t overwhip to avoid turning it into butter. Customize this dessert with your favorite toppings or a sprinkle of chocolate shavings for an extra special touch.

This Chocolate Strawberry Shortcake is best served immediately after assembling but can also be refrigerated for a few hours. Just keep in mind that the layers may absorb moisture, which can change the texture slightly. Leftovers can be covered and stored in the refrigerator for up to 2 days. Enjoy this decadent treat that combines the richness of chocolate with the freshness of strawberries!

Faq

What ingredients are needed to make Chocolate Strawberry Shortcake?

The main ingredients include chocolate cake layers, fresh strawberries, whipped cream, and chocolate ganache.

How do I prepare the chocolate cake layers?

To prepare the chocolate cake layers, mix together the dry ingredients, add the wet ingredients, and bake in round cake pans until a toothpick comes out clean.

Can I use frozen strawberries for this recipe?

Yes, you can use frozen strawberries, but fresh strawberries are recommended for the best flavor and texture.

How long does this dessert last in the refrigerator?

The Chocolate Strawberry Shortcake can be stored in the refrigerator for up to 3 days, although it is best enjoyed fresh.

Is it possible to make the cake layers in advance?

Yes, you can bake the cake layers in advance. Just make sure to wrap them well and store them in the fridge or freezer until you are ready to assemble.

What can I substitute for heavy cream in the whipped cream?

You can substitute heavy cream with coconut cream or silken tofu blended until smooth for a dairy-free option.

Can I add other fruits to the shortcake?

Absolutely! You can add other fruits such as raspberries, blueberries, or bananas for added flavor and variety.

What is the best way to serve Chocolate Strawberry Shortcake?

Serve the Chocolate Strawberry Shortcake chilled, garnished with extra strawberries and drizzled chocolate ganache for a beautiful presentation.

Indulge in the Perfect Sweet Treat: Chocolate Raspberry Brownie Cups

Have you ever experienced the delightful fusion of rich chocolate and vibrant raspberry that makes your taste buds dance with joy? These Chocolate Raspberry Brownie Cups are not just an ordinary dessert; they are a symphony of flavors and textures that celebrates the perfect harmony between tartness and sweetness. Picture this: a velvety, fudgy brownie shell cradling a luscious, fresh raspberry filling, all topped with a dollop of whipped cream or a sprinkle of cocoa powder. Each bite transports you to a place of utter bliss, where guilty pleasures become gentle luxuries. Whether you’re hosting a glamorous dinner party or just indulging yourself on a cozy Friday night, these brownie cups are guaranteed to impress.

Imagine the satisfaction of creating these delectable treats in your own kitchen, filling your home with the irresistible aroma of baking brownies and fresh raspberries. It’s an experience that evokes warmth and nostalgia, bringing back memories of shared moments and joyous celebrations. These brownie cups are perfect for any occasion, be it birthdays, anniversaries, or simply a sweet end to a long day. The combination of chocolate and raspberry is timeless, recalling the classic pairings that have delighted dessert lovers for generations. But these brownie cups take it a step further, allowing you to enjoy them in an elegant, single-serve format that is as delightful to look at as it is to eat.

Let’s delve into the wonderful world of flavors that this unique dessert offers. The brownies, made from high-quality cocoa and rich chocolate, are dense and fudgy—every bit as indulgent as a traditional brownie but presented in an upscale form. Their chocolate richness is perfectly complemented by the bright tartness of fresh raspberries, which not only provide a contrasting flavor but also add a burst of color. As you cut into a brownie cup, you’ll see the enticing raspberry filling peeking through, begging you to take a bite. The visual appeal of these dessert cups is sure to captivate your guests and leave them reaching for seconds.

But beyond aesthetics and flavor, there’s something incredibly satisfying about enjoying a dessert that incorporates fresh fruit. Raspberries are not just delicious; they are also packed with antioxidants, vitamins, and minerals, making them a deliciously healthy addition to your dessert. This makes indulging in these Chocolate Raspberry Brownie Cups feel a little less sinful, allowing you to savor each bite without the weight of guilt. Plus, the slight tartness from the raspberries offsets the sweetness of the brownie perfectly, creating a well-balanced dessert that does not overwhelm your palate.

These brownie cups also offer a versatile canvas for creativity in the kitchen. Feel free to experiment with different toppings to make them your own. Consider drizzling some melted dark chocolate over the top or adding a sprinkle of crushed nuts for an added crunch. A few fresh mint leaves can add a beautiful touch of color and a burst of freshness that will elevate your dessert even further. You can also play around with the raspberry filling by incorporating a hint of vanilla or almond extract for a surprising twist. Brimming with culinary possibilities, these brownie cups allow for personalization to suit your taste and occasion.

Making Chocolate Raspberry Brownie Cups can also be a fun activity to share with loved ones. Imagine gathering in the kitchen with friends or family, bonding over the mixing, baking, and decorating processes. It’s a wonderful way to create memories while also crafting something delicious. And the best part? These little cups can easily be prepared in advance, making them a convenient dessert option for busy weeknights or last-minute gatherings. Simply prepare and bake the brownie cups, allow them to cool, and then store them in an airtight container until you’re ready to fill them with the tart raspberry mixture. This level of convenience means you can enjoy the pleasure of homemade desserts without the stress of last-minute preparations.

The process of making these delicious brownie cups starts simply with crafting the brownie batter. Rich, melted chocolate will combine with butter, sugar, and eggs to create a decadent base. As the brownies bake to perfection, you’ll prepare the raspberry filling from fresh or frozen raspberries, coupled with a touch of sugar to enhance their natural sweetness. This multitasking approach ensures that you’re effectively utilizing your time in the kitchen while your brownies achieve the ideal fudginess. And as the aroma of chocolatey goodness wafts through your home, anticipation will build to a delightful crescendo.

Once you’ve assembled your brownie cups, don’t forget the finishing touches. A light dusting of powdered sugar, a dollop of whipped cream, or even a sprinkle of cocoa powder can elevate your creation from delicious to divine. The key to these brownie cups lies not just in the ingredients, but in the love and care you imbue in their preparation. Each layer, from the brownie shell to the raspberry filling, is an invitation to experience joy in the act of making and eating these delightful treats.

Finally, indulge in the chocolate raspberry brownie cups while they’re fresh. Enjoy them warm from the oven or chilled from the refrigerator—each method offers a unique taste experience. As you savor every mouthful, take the time to appreciate the marriage of flavors that brings these cups to life. The gem-like raspberries nestled in the rich brownie shell not only offer aesthetic appeal, but they also balance the sweetness with their tangy flavor and lush juiciness. They are the star of this dessert show, and the brownie is their trusty sidekick, holding everything together in harmony.

In conclusion, Chocolate Raspberry Brownie Cups are not merely a treat; they are an experience. An experience full of flavor, creativity, and the joy of cooking. They represent a perfect blend of elegance and comfort, making them suitable for any occasion. So whether you’re celebrating a milestone or simply need a sweet pick-me-up, these delightful brownie cups will deliver on flavor and presentation, captivating the hearts and palates of all who are lucky enough to share in your creation. Don’t hesitate; venture into your kitchen, gather your ingredients, and let the magic of chocolate and raspberries come together to create a dessert that’s sure to be remembered.

Ingredients

  • Brownie Base
    • 1/2 cup unsalted butter melted
    • 1 cup granulated sugar
    • 2 large eggs room temperature
    • 1 tsp vanilla extract pure
    • 1/3 cup unsweetened cocoa powder
    • 1/2 cup all-purpose flour
    • 1/4 tsp salt
    • 1/4 tsp baking powder
  • Chocolate Raspberry Filling
    • 1 cup fresh raspberries
    • 1/2 cup semi-sweet chocolate chips
    • 1/2 cup heavy cream
    • 1 tbsp powdered sugar optional
  • For Topping
    • Fresh raspberries
    • Chocolate shavings or drizzle optional

Instructions

  • Preheat your oven to 350°F (175°C) and grease a muffin tin or line it with paper liners.
  • In a mixing bowl, combine the melted unsalted butter and granulated sugar. Mix until well combined.
  • Add the eggs and vanilla extract to the butter and sugar mixture, and whisk until smooth.
  • In a separate bowl, sift together the cocoa powder, all-purpose flour, salt, and baking powder.
  • Gradually add the dry ingredients to the wet ingredients, mixing until just combined. Be careful not to overmix.
  • Evenly distribute the brownie batter into the prepared muffin tin, filling each cup about halfway.
  • In a separate bowl, make the chocolate raspberry filling by heating the heavy cream in a small saucepan over medium heat until it starts to simmer.
  • Remove the pan from heat and add the semi-sweet chocolate chips. Stir until melted and smooth. If desired, add powdered sugar for sweetness.
  • Gently fold the fresh raspberries into the chocolate mixture.
  • Pour a spoonful of the chocolate raspberry filling over each brownie cup, filling them to the top.
  • Bake in the preheated oven for about 18-20 minutes, or until a toothpick inserted into the brownie base comes out with moist crumbs.
  • Let the brownie cups cool in the tin for 5 minutes before transferring them to a wire rack to cool completely.
  • Once cooled, top each brownie cup with fresh raspberries and optional chocolate shavings or drizzle for garnish.

Notes

These Chocolate Raspberry Brownie Cups are a delightful dessert that combines rich chocolate brownies with a luscious raspberry filling. The brownie base is fudgy and decadent, creating a perfect backdrop for the bright, tart flavor of the raspberries. To enhance the presentation, consider adding fresh raspberries and chocolate shavings on top.The brownie cups are simple to prepare and bake, ensuring a melt-in-your-mouth experience. You can even make the brownie base in advance, allowing for a seamless assembly on the day you plan to serve them. If you’re short on time, consider using frozen raspberries; just make sure to thaw and drain them well to avoid excess moisture.

Feel free to customize the filling with other berries or mix in some chopped nuts for added texture! These brownie cups are perfect for entertaining or as a special treat for yourself. Serve with a dollop of whipped cream for an extra touch of indulgence. Enjoy them fresh, but they can also be stored in an airtight container in the refrigerator for a tasty treat in the days to come.

Faq

What ingredients are needed to make Chocolate Raspberry Brownie Cups?

The main ingredients include unsweetened cocoa powder, all-purpose flour, sugar, eggs, butter, vanilla extract, fresh raspberries, and salt.

How long does it take to prepare Chocolate Raspberry Brownie Cups?

Preparation time typically takes about 15 minutes, and baking time is around 20-25 minutes, making the total time approximately 40 minutes.

Can I use frozen raspberries instead of fresh ones?

Yes, frozen raspberries can be used. Just make sure to thaw and drain them to avoid excess moisture in the brownie cups.

How should I store leftover Chocolate Raspberry Brownie Cups?

Store the brownie cups in an airtight container at room temperature for up to 3 days or in the refrigerator for up to a week.

Can I make these brownie cups gluten-free?

Yes, you can substitute all-purpose flour with a gluten-free flour blend to make the recipe gluten-free.

What is the best way to serve Chocolate Raspberry Brownie Cups?

They can be served warm, optionally topped with a scoop of vanilla ice cream or whipped cream, and garnished with additional raspberries.

How many servings does this recipe yield?

This recipe typically yields about 12 brownie cups, depending on the size of your muffin tin.

Can I add nuts to the Chocolate Raspberry Brownie Cups?

Absolutely! Chopped nuts such as walnuts or pecans can be folded into the batter for added texture and flavor.

Chocolate Passionfruit Soufflé: A Heavenly Dessert Experience

Imagine walking into a quaint French patisserie, the air rich with the intoxicating scent of chocolate and the vibrant tang of fresh passionfruit. This Chocolate Passionfruit Soufflé is more than just a dessert; it’s a dreamy experience that transports you straight to the heart of Paris with every delicate bite. Luxurious, airy, and decadently rich, this soufflé is the epitome of culinary elegance—a dazzling companion for dinner parties, special occasions, or simply when you want to treat yourself to something extraordinary.

Nothing quite compares to the delightful surprise of slicing through the delicate crust of a perfectly baked soufflé, only to reveal a warm, airy center that promises an explosion of rich flavor. The blending of velvety chocolate with the zesty brightness of passionfruit creates a harmonious balance that dances on your palate, offering the perfect contrast of sweetness and tartness. This exquisite dessert isn’t merely an indulgence; it embodies the art of dessert-making itself—a true testament to the harmonious relationship between chocolate and fruit.

At its core, a soufflé is an emblem of culinary mastery, often resulting in a sense of awe as it rises dramatically in the oven. For many home cooks, the soufflé holds a reputation for being a challenging dish to conquer, one that requires careful attention and a touch of finesse. However, fear not! With our straightforward yet detailed recipe, you can unlock the secrets to crafting this delightful dish in your own kitchen. From whipping the egg whites to the final presentation, every step offers a learning opportunity while paving the way to a stunning dessert that will impress your family and friends.

One of the most enchanting aspects of this Chocolate Passionfruit Soufflé is its versatility. While the marriage of chocolate and passionfruit is undeniably indulgent, the soufflé can effortlessly adapt to your unique taste preferences. Imagine infusing it with a hint of orange zest for that extra citrus kick or swapping out the passionfruit for another tropical fruit like mango or guava, creating your own signature version. However you choose to make this dessert your own, rest assured that the core of this soufflé—the dreamy experience—remains intact.

The origins of the soufflé date back to the early 18th century in France, and since then, it has become a staple in both fine dining establishments and home kitchens around the world. The word “soufflé” actually means “to breathe” or “to puff,” which captures the essence of this airy dessert beautifully. The soufflé’s signature rise is achieved through the incorporation of air into the egg whites, creating a light and fluffy texture that contrasts beautifully with the dense chocolate mixture. Each bite provides a perfect fusion of flavors, where the richness of the chocolate meets the tantalizing acidity of the passionfruit, awakening your taste buds and leaving you craving more.

As you embark on this culinary adventure, gathering your chosen ingredients will set the stage for a truly creative experience in the kitchen. High-quality chocolate is key; opting for a rich dark chocolate will impart deep, seductive flavors into the soufflé. The passionfruit, with its unique combination of tartness and sweetness, complements the richness of the chocolate perfectly. Together, this duo transforms a classic dessert into an extraordinary delight that is as pleasing to the eyes as it is to the taste buds.

To elevate your Chocolate Passionfruit Soufflé, consider the presentation. True to the art of French cuisine, the aesthetic appeal of a dish can be just as important as its taste. Serving the soufflé in elegant ramekins ensures that each guest receives their own individual portion, allowing for personal admiration before digging in. Dusting the top with powdered sugar adds a refined touch, while a few extra piped dollops of whipped cream infused with a touch of vanilla or even a delicate swirl of passionfruit puree can elevate your creation from a mere dessert to a masterpiece on the table.

For those looking to impress, pair your Chocolate Passionfruit Soufflé with a glass of dessert wine or a flavored coffee, enriching the experience and adding an extra dimension to your meal. The smoothness of a Moscato or a delightful espresso will intertwine beautifully with the flavors of the soufflé, making the entire dessert feel like a journey rather than just a sweet end to a meal. It’s all in the details, and creating an unforgettable dining experience is as much about the environment as it is the food.

As delightful as it is to feast upon such an exquisite dessert, it’s equally rewarding to dive into the process of making it. The journey of crafting a Chocolate Passionfruit Soufflé can ignite a passion for cooking in both novice and experienced chefs alike. It’s a chance to connect with the methodical beauty of baking, understanding how simple ingredients can transform into something so spectacular. Together, let us embrace the challenge—it’s the moments spent in the kitchen, the anticipation of watching the soufflé rise in the oven, and the joy of sharing it with loved ones that make the experience truly rewarding.

So, are you ready to capture the essence of luxury and creativity in your own kitchen? Let’s embark on this journey together. You will not only gain the skills to create a Chocolate Passionfruit Soufflé but also make cherished memories that will last a lifetime. Whether it’s a romantic dinner, a festive gathering, or just a delightful treat for yourself, this soufflé promises to enchant and delight with every bite. Your new adventure awaits—let’s savor the delicate dance of chocolate and passionfruit!

Ingredients

  • 4 oz dark chocolate chopped
  • 2 tbsp unsalted butter
  • 3 large eggs separated
  • 1/4 cup granulated sugar
  • 1/2 tsp vanilla extract pure
  • 1 tbsp passionfruit pulp fresh
  • 1/4 tsp salt
  • Butter for greasing ramekins
  • Cocoa powder for dusting ramekins

Instructions

  • Preheat your oven to 375°F (190°C) and prepare four small ramekins by greasing them with butter, then dusting the insides with cocoa powder.
  • In a heatproof bowl, melt the chopped dark chocolate and unsalted butter together over a pot of simmering water or in the microwave in short bursts, stirring until smooth.
  • In a mixing bowl, whisk the egg yolks with 2 tablespoons of the granulated sugar, vanilla extract, and passionfruit pulp until well combined and slightly thickened.
  • Once the chocolate mixture has cooled slightly, fold it into the egg yolk mixture until fully incorporated.
  • In a separate bowl, use an electric mixer to beat the egg whites with the salt until soft peaks form. Gradually add the remaining 2 tablespoons of granulated sugar and continue to beat until stiff peaks form.
  • Gently fold one-third of the whipped egg whites into the chocolate mixture to lighten it, then carefully fold in the remaining egg whites until no streaks remain. Be cautious not to deflate the mixture.
  • Evenly divide the soufflé mixture among the prepared ramekins, filling them to just below the rim.
  • Bake in the preheated oven for 12-15 minutes, or until the soufflés have puffed up and the tops look set but still slightly wobbly in the center.
  • Remove from the oven and serve immediately, optionally dusting with powdered sugar or cocoa powder for presentation.

Notes

These chocolate passionfruit soufflés are a delightful and decadent dessert that perfectly balance rich chocolate with the tangy sweetness of passionfruit. Ensure your dark chocolate is of high quality for the best flavor. When separating the eggs, be careful not to let any yolk mix with the whites, as this can prevent them from whipping to the desired stiff peaks. Make sure to grease your ramekins thoroughly and dust them with cocoa powder to help the soufflés rise evenly. Serve immediately after baking to enjoy their light and airy texture at its best. You can also experiment by adding a bit more passionfruit pulp or zest for an even stronger fruit flavor. Pair these soufflés with a dollop of whipped cream or a scoop of vanilla ice cream for an indulgent treat.

Faq

What is a Chocolate Passionfruit Soufflé?

A Chocolate Passionfruit Soufflé is a light and airy dessert made with chocolate and passionfruit puree, giving it a unique flavor combination that is both rich and refreshing.

What ingredients do I need to make this soufflé?

You will need dark chocolate, passionfruit puree, eggs, sugar, butter, and a pinch of salt. Optional garnishes include whipped cream or fresh fruit.

Is it difficult to make a soufflé?

While soufflés can be tricky due to their delicate nature, following the recipe closely and mastering the technique of whipping egg whites will help you achieve a successful result.

Can I use a different fruit instead of passionfruit?

Yes, you can substitute passionfruit with other tart fruits such as lemon, orange, or mango for a different flavor profile, though the texture may vary slightly.

How do I ensure my soufflé rises properly?

Make sure to properly whip the egg whites until stiff peaks form, and gently fold them into the chocolate mixture. This incorporates air, which is crucial for rising.

Can I make the soufflé in advance?

Soufflés are best served fresh. However, you can prepare the base ahead of time and refrigerate it. Just whip the egg whites and fold them in before baking.

What should I serve with Chocolate Passionfruit Soufflé?

A dollop of whipped cream, fresh berries, or a drizzle of chocolate sauce complements the soufflé beautifully. You can also serve it with a scoop of vanilla ice cream.

How do I store leftover soufflé?

If you have any leftovers, cover them with plastic wrap and store them in the refrigerator. However, soufflés are best enjoyed fresh and will lose their texture when reheated.

Grilled Lemon Garlic Chicken

If you’re searching for a culinary experience that tantalizes your taste buds while being simple to prepare, look no further than Grilled Lemon Garlic Chicken! This dish is a harmonious blend of zesty lemons and fragrant garlic, creating a marinade that strikes the perfect balance between refreshing and savory. Imagine succulent pieces of chicken, marinated to perfection, seared on a hot grill, with grill marks etched deep in the surface – giving you a aesthetic feast even before the first bite. Each mouthful is an explosion of flavor, and it’s no wonder this dish has earned its place as a favorite at summer barbecues and family dinners alike.

The beauty of Grilled Lemon Garlic Chicken lies in its versatility. It can be the star of your dinner table or a delightful addition to a potluck, effortlessly complementing a variety of side dishes. A fresh garden salad, fluffy couscous, or even a savory pasta can provide the perfect backdrop to showcase this grilled masterpiece. The bright lemon notes awaken the palate, while the garlic imparts depth and heartiness, making it a universally adored dish that speaks to both casual eaters and more discerning palates.

But let’s dig a little deeper into what makes this dish so appealing. First, consider the ingredients: fresh lemons bursting with citrusy goodness, combined with aromatic garlic – nature’s flavor enhancers. The essential oils found in lemon zest elevate this chicken to new heights, enhancing not only the taste but also the aroma. The garlic, rich in antioxidants and known for its health benefits, adds a robust flavor profile that perfectly complements the marinade, infusing the chicken with a delightful zest. This simple combination is grounding yet elegant, making Grilled Lemon Garlic Chicken a go-to for both novice cooks and seasoned chefs.

Preparation is key when it comes to achieving the ideal grilled chicken. First, you’ll want to ensure your chicken is tender and flavorful. This can be achieved through marination—an essential step in this recipe. Allowing the chicken to soak in the lemon-garlic mixture not only elevates the taste but also enhances the juiciness of the meat. An equally important aspect is the grilling process itself; achieving the right temperature is crucial. If you’ve ever experienced dry, overcooked chicken, you’ll appreciate how the right grilling technique can transform your dish. The aim is to lock in moisture while developing that much-coveted charred exterior, delighting the eye and enhancing the flavor with that smoky essence we all love about grilled food.

Another layer to the appeal of Grilled Lemon Garlic Chicken is its ability to be tailored for various dietary preferences. Whether you are a devoted carnivore, a health-conscious eater, or someone looking to try a keto-friendly option, this dish adapts beautifully. Pair it with steamed vegetables for a wholesome meal, or toss it into a vibrant salad loaded with greens and quinoa for a refreshing lunch option. You could even slice or dice the grilled chicken into bite-sized pieces for a delightful topping on pizzas or in wraps, showcasing how truly multifunctional this dish can be.

And don’t forget about the presentation! As you grill the chicken to mouthwatering perfection, remember that we eat with our eyes first. Consider garnishing your final dish with fresh herbs like parsley or cilantro, and perhaps a sprinkle of lemon zest for that extra zing. Present it on a colorful plate with vibrant vegetables or sides that highlight the zesty flavors of the chicken, creating a feast not just for the palate, but also for the eyes.

Now, let’s talk about gathering your ingredients. While the classic lemon-garlic combo is timeless, this dish opens the door to creativity. Elevate your Grilled Lemon Garlic Chicken by experimenting with additional spices such as paprika, cumin, or fresh herbs like rosemary and thyme, adding depth and uniqueness to your creation. The beauty of cooking lies in its natural freedom to communicate your tastes and preferences – don’t hesitate to make it your own! Incorporating an array of flavors will encourage your palate to discover new avenues of delight, making every cooking session a new adventure.

This dish also carries with it an element of nostalgia for many home cooks. Picture a summer afternoon, the grill sizzling nearby, laughter filling the air as friends and family gather around. Memories of shared meals, delicious food, and cherished conversations can be seamlessly woven into the fabric of this Grilled Lemon Garlic Chicken recipe. Breaking bread with loved ones becomes not just a meal, but a cherished ritual—a time spent nourishing not just our bodies, but our relationships as well.

Furthermore, Grilled Lemon Garlic Chicken can certainly find its place outside the traditional summer barbecues. Consider incorporating it into your fall and winter feasts, perhaps alongside roasted root vegetables or warm grain salads that provide cozy notes to contrast the zesty chicken. The adaptability of this recipe allows it to be appreciated throughout the seasons, reminding us that good food knows no bounds and can be cherished year-round.

As you embark on your culinary journey, take heart in the simple fact that every great dish begins with a single idea. The creation of Grilled Lemon Garlic Chicken exemplifies how accessible ingredients and straightforward techniques can lead to culinary satisfaction that resonates with everyone at your table. It’s an invitation to gather loved ones, celebrate the freshness of ingredients, and indulge in the healing power of good food. So why wait? Let’s get excited about preparing this zesty, flavorful dish designed to elevate any occasion.

So today, I encourage you to embrace your inner chef and explore the gratifying process of making Grilled Lemon Garlic Chicken. Imagine the bright flavors igniting your senses and the joy of sharing your creation with family and friends, delighting their taste buds with every succulent bite. Let this be the moment you step into the kitchen not just to cook, but to create a meal that builds connections and fosters a sense of community — a meal that is not only about nourishment, but about love, laughter, and long-lasting memories.

Ingredients

Grilled Lemon Garlic Chicken

  • 4 boneless, skinless chicken breasts
  • 1/4 cup olive oil
  • 3 tablespoons fresh lemon juice
  • 4 cloves garlic minced
  • 1 teaspoon dried oregano
  • 1 teaspoon dried thyme
  • Salt to taste
  • Pepper to taste
  • Zest of 1 lemon

Instructions

  • In a small bowl, whisk together the olive oil, fresh lemon juice, minced garlic, dried oregano, dried thyme, salt, pepper, and lemon zest until well combined.
  • Place the boneless, skinless chicken breasts in a large resealable plastic bag or shallow dish. Pour the marinade over the chicken, ensuring each piece is well coated.
  • Seal the bag or cover the dish, and marinate the chicken in the refrigerator for at least 30 minutes, or up to 4 hours for more flavor.
  • Preheat your grill to medium-high heat (about 375°F to 400°F or 190°C to 204°C).
  • Remove the chicken from the marinade and let any excess liquid drip off, discarding the marinade.
  • Lightly oil the grill grates to prevent sticking, then place the chicken breasts on the grill.
  • Grill the chicken for about 6-7 minutes on one side without moving it, to get nice grill marks.
  • Flip the chicken breasts and continue to grill for an additional 6-7 minutes, or until they reach an internal temperature of 165°F (75°C) and are cooked through.
  • Once cooked, remove the chicken from the grill and let it rest for 5 minutes before slicing.
  • Serve the grilled lemon garlic chicken with your choice of sides and enjoy!

Notes

Notes

This grilled lemon garlic chicken is a flavorful and healthy dish, perfect for a summer barbecue or a quick weeknight dinner. The marinade, made with fresh lemon juice, garlic, and herbs, infuses the chicken with bright flavors while keeping it juicy and tender. Letting the chicken marinate for at least 30 minutes, or preferably a few hours, enhances the flavor even more.

Feel free to customize this recipe by adding herbs like rosemary or basil, or adjusting the garlic level to suit your taste. This dish pairs wonderfully with a side of grilled vegetables or a fresh salad for a complete meal.

Once cooked, the chicken can be sliced and used in salads, wraps, or enjoyed on its own. Leftover chicken can be stored in the refrigerator for up to three days and can also be frozen for longer storage. Serve it with a squeeze of fresh lemon juice on top for an extra zing!

Faq

What ingredients do I need to make Grilled Lemon Garlic Chicken?

You will need chicken breasts, fresh lemon juice, garlic, olive oil, salt, pepper, and optional herbs like rosemary or thyme for added flavor.

How long should I marinate the chicken?

Marinate the chicken for at least 30 minutes, but for best results, aim for 2 to 4 hours to allow the flavors to fully penetrate the meat.

Can I use other cuts of chicken for this recipe?

Yes, you can use thighs, drumsticks, or even boneless skinless chicken tenders. Just adjust the cooking time based on the cut and thickness.

What can I serve with Grilled Lemon Garlic Chicken?

This dish pairs well with grilled vegetables, a fresh green salad, rice, or quinoa. You can also serve it with a side of garlic bread for a complete meal.

How do I know when the chicken is fully cooked?

The chicken is ready when it reaches an internal temperature of 165°F (75°C). You can use a meat thermometer to check the temperature.

Can I make this recipe ahead of time?

Yes, you can marinate the chicken ahead of time and grill it later. Alternatively, you can grill the chicken in advance and store it in the refrigerator for up to 3 days.

Is this recipe suitable for meal prep?

Absolutely! Grilled Lemon Garlic Chicken is great for meal prep. You can batch cook it and portion it out for easy, healthy meals throughout the week.

Can I freeze the marinated chicken?

Yes, you can freeze the marinated chicken. Just place it in a freezer-safe bag or container and store it for up to 3 months. Thaw in the refrigerator before grilling.

Discover the Joy of Cooking: Spicy Chickpea Stir-Fry

Whether you’re in need of a quick weeknight dinner, a nourishing meal prep option, or just a comforting bowl of goodness that packs a punch, look no further than this Spicy Chickpea Stir-Fry. Imagine crispy chickpeas roasted to perfection, tossed with a waterfall of vibrant vegetables, and enveloped in a smoky, spice-laden sauce. It’s not just a meal; it’s an experience that sings flavors and textures in every bite!

The appeal of this dish lies in its simplicity and versatility. Chickpeas are not only a protein powerhouse but also an incredibly forgiving ingredient. When cooked precisely, they provide both a creamy interior and a slightly crunchy exterior, making them perfect for stir-frying. They’re like little nuggets of joy that absorb flavors wonderfully, ensuring that every mouthful is bursting with savory goodness.

What sets this recipe apart is its fiery twist. A medley of spices—ranging from the warmth of cumin to the heat of red pepper flakes—intertwine, creating an explosion of taste that will have your taste buds dancing. Add to that a touch of soy sauce that offers a nice umami depth, and you have a dish that transforms simple ingredients into a culinary delight. The journey begins as you sauté aromatic garlic and onions, layering the flavors that are essential to this dish’s success.

Moreover, this Spicy Chickpea Stir-Fry is your canvas—feel free to throw in any vegetables you have lying around! Broccoli, bell peppers, snap peas, or even some crisp bok choy can be great additions. The key is to maintain a balance of colors and textures that not only makes the dish visually stunning but also nutritionally robust. You can easily customize it according to your family preferences or the seasonal offerings at your local market.

One of the best parts about this recipe? It’s ready in about 30 minutes, making it the perfect go-to solution for those hectic evenings when time is of the essence. This efficiency doesn’t come at the expense of flavor; instead, your kitchen will be filled with mouthwatering aromas that beckon everyone to the dinner table. You’ll love the sizzling sound of the chickpeas and veggies meeting the pan, as it’s that moment where the translational magic of cooking begins!

High in protein, fiber, and packed with nutrients from the variety of vegetables used, this dish is not just satisfying to the palate but also to the body. The blend of spices plays a significant role in offering health benefits too—cumin is known for its digestive properties, and red pepper flakes may even help boost metabolism. Eating healthily doesn’t mean you need to sacrifice taste; this dish is a testament to that philosophy.

Whether you are meal-prepping for the week or simply serving dinner for the family, this Spicy Chickpea Stir-Fry is a crowd-pleaser. Imagine the buzz at the dinner table, as both children and adults dig into their bowls, each person discovering their own favorite niblet or unusual spice kick. And leftovers? They make for an amazing lunch, where the flavors meld even more beautifully overnight, yielding an even more delicious experience the next day.

This dish also joins the ranks of being inherently adaptable to various dietary choices—vegan, vegetarian, and gluten-free friends can all enjoy this hearty bowl of satisfaction. With just a few tweaks, like using tamari instead of soy sauce for a gluten-free option, everyone can join in on the fun. But even for those who consume everything, it strikes a perfect balance of flavor to keep even the pickiest eaters happy and healthy.

To elevate your serving experience further, consider pairing this incredible stir-fry with a bowl of steaming jasmine rice or fluffy quinoa. The grains will perfectly absorb the spicy sauce, creating a wholesome bite that ensures no flavor is left behind. You can also serve it on a bed of mixed greens for a fresh, crunchy contrast, enhancing both the texture and nutrition of the meal.

A drizzle of tangy tahini sauce or a squeeze of fresh lemon juice just before serving could take this dish to another level, adding a creaminess or zest that rounds out the heat. Don’t hesitate to top it off with some fresh herbs, like cilantro or parsley, for that final touch of freshness and a pop of color while boosting the visual appeal of the dish.

As with any great recipe, the key lies in tasting as you cook. Adjust the spice levels according to your preference—the beauty of cooking is in the experimentation. If you like things hot, don’t hold back on that chili! Conversely, if you prefer a milder dish, simply reduce the amount of red pepper flakes and focus on the aromatic profile of the spices.

Once you’ve prepared this round of Spicy Chickpea Stir-Fry, take a moment to appreciate your culinary creation. Each ingredient plays its part in a harmonious dance of flavor, color, and texture. Cooking is about bringing people together, and there’s something fundamentally satisfying about sharing a homemade meal. Every bite resonates with love and effort, and there’s a story behind each herb and spice used.

So preheat your stir-fry pan, gather your spices, and let’s embark on a culinary adventure that will not only fill your belly but will also satisfy your soul. Dive into this delightful dish, and you will find yourself coming back for seconds—and you may even want to try variations or experiment with different cuisines. The sky’s the limit with Spicy Chickpea Stir-Fry!

Ingredients

  • 1 can chickpeas drained and rinsed
  • 2 tablespoons olive oil
  • 1 onion diced
  • 2 cloves garlic minced
  • 1 bell pepper sliced
  • 1 zucchini sliced
  • 1 carrot julienned
  • 1 teaspoon ground cumin
  • 1 teaspoon smoked paprika
  • 1/2 teaspoon cayenne pepper
  • Salt to taste
  • Pepper to taste
  • 2 tablespoons soy sauce
  • 1 tablespoon lemon juice
  • Fresh cilantro for garnish

Instructions

  • In a large skillet, heat the olive oil over medium heat.
  • Add the diced onion and sauté for about 3-4 minutes until it becomes translucent.
  • Stir in the minced garlic and cook for an additional 1 minute, being careful not to let it burn.
  • Add the sliced bell pepper, zucchini, and julienned carrot to the skillet. Cook for about 5-7 minutes until the vegetables are tender.
  • Sprinkle in the ground cumin, smoked paprika, cayenne pepper, salt, and pepper. Stir well to coat the vegetables in the spices.
  • Add the drained and rinsed chickpeas to the skillet, stirring to combine them with the vegetables and spices.
  • Pour in the soy sauce and lemon juice, mixing everything well. Cook for an additional 3-4 minutes to allow the flavors to meld.
  • Remove from heat and garnish with fresh cilantro before serving.

Notes

This spicy chickpea stir-fry is a vibrant and nutritious dish that’s packed with flavor and perfect for a quick weeknight meal. Chickpeas provide a great source of protein and fiber, making this dish not only satisfying but also healthy. Feel free to substitute the vegetables based on what you have on hand; broccoli, snap peas, or spinach would work wonderfully as well. For added crunch, consider topping your stir-fry with toasted sesame seeds or crushed peanuts. Serve this dish over a bed of rice, quinoa, or enjoy it on its own for a hearty vegan option. To elevate the flavors further, let the stir-fry sit for a few minutes off the heat after cooking, allowing the spices to meld together beautifully.

Faq

What ingredients do I need for Spicy Chickpea Stir-Fry?

You’ll need chickpeas, bell peppers, onion, garlic, ginger, soy sauce, chili paste, and your choice of vegetables such as broccoli or zucchini. Cooked rice or quinoa can be served as a base.

How long does it take to prepare the Spicy Chickpea Stir-Fry?

The preparation and cooking time should take approximately 20-30 minutes.

Is this recipe suitable for a vegan diet?

Yes, Spicy Chickpea Stir-Fry is entirely plant-based and suitable for vegans.

Can I make this dish gluten-free?

Yes, just ensure to use gluten-free soy sauce or tamari instead of regular soy sauce.

What can I substitute for chickpeas?

You can substitute chickpeas with any canned or cooked beans such as black beans, lentils, or kidney beans for a different texture and flavor.

How can I adjust the spice level in this recipe?

You can easily adjust the spice level by varying the amount of chili paste or adding more vegetables like jalapeños or crushed red pepper flakes.

What can I serve with Spicy Chickpea Stir-Fry?

This dish goes well with rice, quinoa, or noodles. You can also serve it with a side of salad or steamed vegetables.

How do I store leftovers?

Store any leftovers in an airtight container in the refrigerator for up to 3-4 days. Reheat in the microwave or on the stovetop before serving.

Indulge in a Culinary Journey with One-Pan Creamy Tuscan Chicken

Imagine the sun-drenched landscapes of Tuscany, where the rolling hills are dotted with vineyards and the air is infused with the aromas of fragrant herbs and freshly cooked meals. Now, picture bringing that same exquisite essence to your dinner table, all within a single, easy-to-clean pan. One-Pan Creamy Tuscan Chicken is not just another recipe; it’s a delightful experience that captures the heart of Italian cuisine while combining simplicity with elegance.

This dish embodies everything that Italian comfort food stands for: rich flavors, satisfying textures, and a sense of warmth that invites you to linger at the table longer than usual. The star of the show, succulent chicken breasts, are infused with the essence of the Tuscan countryside through a medley of fresh ingredients and a luxurious cream sauce. However, what truly sets this dish apart is not just the flavor profile but the convenience—everything comes together in one single pan, ensuring that cleanup is as effortless as the cooking process itself.

As the chicken cooks to golden perfection, you will be captivated by the aroma of garlic sautéing alongside shallots and vibrant sun-dried tomatoes, all coming together to create a fragrant base. Each element plays a key role, contributing to a dish that feels complex yet is remarkably straightforward to prepare. Imagine the contrast of juicy chicken paired with the creamy sauce enriched with spinach and a touch of parmesan cheese, all crowned with a sprinkle of fresh basil to elevate the dish to new heights. This is just what One-Pan Creamy Tuscan Chicken delivers—a symphony of flavors designed to impress and satisfy.

Perfect for a weeknight family dinner or a cozy gathering with friends, this dish adapts beautifully to any occasion. The preparation is quick, ensuring that you can savor the moment without spending endless hours in the kitchen. Imagine coming home after a long day and whipping up this scrumptious entrée in under 30 minutes. The ability to serve such a delightful and flavorful meal effortlessly is something every home cook dreams of, and with this recipe, that dream can become a reality.

Consider the health benefits, too. The incorporation of leafy spinach adds not only nutrition but color and vibrancy to the plate, making it visually appealing. The dish is a well-balanced combination of protein, healthy fats, and vegetables, making it a wholesome choice for those looking to maintain a balanced diet without sacrificing flavor. A creamy sauce doesn’t mean sacrificing nutrition; with the right ingredients, you can create a decadent dish that also nourishes your body.

One-Pan Creamy Tuscan Chicken also brings an element of customization to the table. Feel free to add your favorite seasonal vegetables or even substitute the chicken for turkey or a plant-based alternative. This adaptability means that whether you’re catering to dietary preferences or simply looking to shake things up, this recipe has you covered. You can even adjust the creaminess of the sauce to your liking—add a little more or a little less depending on your personal taste. The options for creativity are as vast as your imagination allows.

And let’s not forget about the presentation! This dish is not only delicious but also visually stunning, making it perfect for impressing guests at dinner parties. Serve it alongside a crisp green salad or a side of garlic bread to soak up every drop of that luscious sauce, transforming a simple meal into a restaurant-quality dining experience right at home.

The ease of preparation and cleanup associated with One-Pan Creamy Tuscan Chicken means that you can devote more time to what truly matters—savoring good food with good company. In a world that often feels rushed and chaotic, cooking can be a grounding experience. Taking the time to prepare a meal that warms your heart and soul can lead to meaningful moments shared around the dining table, which is what food is truly about.

So gather your ingredients, put on your apron, and allow the comforting aromas of this remarkable dish to envelop your kitchen as you embark on this culinary adventure. There is something undeniably special about creating a meal that transports you to far-off lands, making mealtimes a celebration even amidst the busyness of daily life. With every bite of One-Pan Creamy Tuscan Chicken, you’ll find yourself swooning over the harmonious balance of flavors, the tender chicken, and the silkiness of the cream sauce.

Let’s not overlook the power of cooking as a shared experience—inviting loved ones to join in on the preparation or sitting down together to enjoy the feast can enhance the joy of this dish exponentially. Think of the stories shared, the laughter exchanged, and the memories created as you all gather around the table, relishing this Tuscan-inspired delight. Whether you’re making it for yourself, your family, or guests, this dish is sure to ignite a spark of joy.

In summary, One-Pan Creamy Tuscan Chicken is much more than just a meal. It’s an invitation to unwind, create, and enjoy life’s simple pleasures while indulging in a culinary wonder that marries ease with exquisite taste. Dive into this dish, and let the flavors transport you to the picturesque scenery of Tuscany, where every meal is a celebration. Prepare to be amazed by how readily this dish becomes a staple in your culinary repertoire, bringing joy to mealtimes for years to come.

Ingredients

  • 1 lb boneless, skinless chicken breasts
  • Salt and pepper to taste
  • 2 tbsp olive oil
  • 3 cloves garlic minced
  • 1 cup cherry tomatoes halved
  • 1 cup fresh spinach
  • 1/2 cup heavy cream
  • 1/2 cup grated Parmesan cheese
  • 1 tsp dried Italian seasoning
  • 1/2 tsp red pepper flakes optional
  • Fresh basil for garnish optional

Instructions

  • Season the chicken breasts with salt and pepper on both sides.
  • In a large skillet, heat the olive oil over medium-high heat. Once hot, add the chicken breasts and sear them for about 5-7 minutes on each side until they are golden brown and cooked through. Remove the chicken from the skillet and set aside.
  • In the same skillet, add the minced garlic and sauté for about 30 seconds until fragrant.
  • Next, add the cherry tomatoes and cook for 2-3 minutes until they start to soften.
  • Add the fresh spinach to the skillet and cook until wilted, about 1-2 minutes.
  • Pour in the heavy cream and stir to combine with the vegetables. Then, add the grated Parmesan cheese, dried Italian seasoning, and red pepper flakes (if using), stirring until the cheese melts and the sauce is creamy.
  • Return the cooked chicken to the skillet and spoon some of the creamy sauce over the chicken to coat it well.
  • Let everything simmer together for an additional 2-3 minutes to heat through.
  • Garnish with fresh basil if desired before serving. Enjoy your One-Pan Creamy Tuscan Chicken!

Notes

These One-Pan Creamy Tuscan Chicken dishes are not only delicious but also incredibly easy to prepare, making them perfect for weeknight dinners. The chicken breasts are seared to golden perfection, and then simmered in a luscious cream sauce that’s infused with garlic and herbs. You can customize the dish by adding more vegetables such as bell peppers or zucchini for extra flavor and nutrition. This dish pairs wonderfully with pasta or rice to soak up the creamy sauce. Don’t forget to garnish with fresh basil for that burst of freshness. For meal prep, you can store leftovers in an airtight container in the fridge for up to three days.

Faq

What ingredients do I need for One-Pan Creamy Tuscan Chicken?

You will need chicken breasts, spinach, sun-dried tomatoes, garlic, heavy cream, parmesan cheese, chicken broth, and Italian seasoning.

How long does it take to prepare and cook One-Pan Creamy Tuscan Chicken?

The total time for preparation and cooking is approximately 30-40 minutes.

Can I use a different type of meat for this recipe?

Yes, you can substitute chicken with turkey, pork, or even shrimp. However, cooking times may vary.

Is this recipe suitable for meal prep?

Yes, this dish is great for meal prep. It stores well in the refrigerator for up to 3 days.

What can I serve with One-Pan Creamy Tuscan Chicken?

This dish pairs well with pasta, rice, or a fresh salad. You can also serve it with crusty bread to soak up the sauce.

Can I make this dish dairy-free?

Yes, you can use coconut cream or a dairy-free cream alternative along with dairy-free cheese for a dairy-free version.

What if I can’t find sun-dried tomatoes?

If sun-dried tomatoes are unavailable, you can use fresh tomatoes or skip them altogether. You may need to adjust the seasoning for flavor.

How can I make the sauce thicker?

You can thicken the sauce by letting it simmer a bit longer or adding a bit of cornstarch mixed with cold water until you reach the desired consistency.

Indulge Your Senses with Cinnamon Sugar Palmiers

If you’re searching for a delightful pastry that marries the nostalgic warmth of cinnamon with an irresistible sweetness, look no further than Cinnamon Sugar Palmiers. These elegant treats, with their delicate, flaky layers, are as enchanting to the taste buds as they are to the eyes. With minimal ingredients and straightforward techniques, you’ll find these pastries not only a joy to make but also a show-stopping addition to any gathering. Imagine the aroma of warm cinnamon wafting through your kitchen, inviting friends and family to share in your culinary creation!

Palmiers, also known as “elephant ears,” are French pastries that are surprisingly simple yet sophisticated. Their name derives from their unique shape, resembling the ears of an elephant, which is as fun to say as it is to eat. Originating from puff pastry, palmiers are created by folding layers of dough with a coating of sugar and spices, resulting in a visually captivating treat that is as flaky and buttery as can be. Perfectly baked, they reveal a beautiful golden-brown exterior, with a crunchy crust giving way to soft, airy goodness within.

What sets Cinnamon Sugar Palmiers apart is the delightful sprinkling of cinnamon sugar that permeates every layer, adding a fragrant depth that harmonizes beautifully with the buttery pastry. This recipe invites you to experiment with the proportions of sugar and cinnamon to suit your personal preferences, allowing you to be creative with your flavors. Whether you prefer a dusting that offers a gentle hint of cinnamon or a robust flavor that commands attention, the choice is yours!

As you embark on making these delightful pastries, rest assured that they require only a handful of pantry staples—puff pastry, sugar, cinnamon, and perhaps a dash of salt for balance. This simplicity means you can whip them up on a whim or prepare them for planned gatherings, providing versatility that modern bakers cherish. The process involves rolling, folding, and slicing the dough to create the signature palmier shape. Each action is imbued with the anticipation of how these humble ingredients will transform in the oven.

Whether you serve them at a brunch gathering, as an afternoon snack with coffee, or as a sweet addition to a festive platter, Cinnamon Sugar Palmiers are sure to impress. Their visual appeal is undeniable; the golden layers glisten under the light, while the sugar sparkles add a touch of magic. Your guests will undeniably be drawn to their elegant appearance, and as they take a bite, they will be mesmerized by the crunchy texture and the unmistakable flavor of buttery sweetness laced with cinnamon.

Beyond their deliciousness, Cinnamon Sugar Palmiers hold an understated charm that encourages communal enjoyment. Think about how lovely it will be to serve a plate of warm pastries, inviting everyone to indulge in the joyful experience of breaking them apart and savoring each flaky bite together. Share tidbits about their French origins, and you’ll spark conversations that weave the culinary stories of various cultures, adding depth to the simple act of sharing food.

This recipe is ideal for bakers of all skill levels. Beginners will find the steps easy to follow, while seasoned bakers can appreciate the technique involved in creating perfectly flaky puff pastry. You might even find yourself inspired to venture beyond the classic cinnamon sugar combination—consider adding zests from citrus fruits, a hint of cardamom, or even drizzling chocolate over the baked palmiers for an extra flourish. The possibilities are ever-expanding, and creativity in the kitchen is always encouraged!

When it comes to serving, consider complementary offerings—perhaps a rich chocolate ganache for dipping or a simple glaze made from powdered sugar and milk to drizzle over the top, transforming a humble palmier into a gourmet experience. Pair them with rich coffee, herbal teas, or even dessert wines to elevate their elegance. You might host a delightful afternoon tea where these palmiers take center stage alongside a variety of other sweet treats, resulting in a charming spread that epitomizes indulgence.

One noteworthy point is the versatility of palmiers in terms of modifications. While the recipe celebrates cinnamon sugar, you might explore other tantalizing fillings. Consider using melted chocolate, almond paste, or different spices for a unique twist. The success of palmiers relies not just on the choice of ingredients but also on the execution—understanding how to achieve that perfect layer formation or the ideal baking time can be immensely rewarding and boosts your baking confidence.

Beyond the immediate delight they bring, these pastries are an opportunity to create memories—sharing recipes with loved ones, baking alongside children, or surprising someone for a special occasion. Teaching others how to make palmiers is akin to passing down a culinary tradition, instilling the joy of baking in the next generation. Picture a cozy kitchen filled with laughter, flour dusting the counters, and the warm embrace of shared experiences as you fold, roll, and sprinkle your way to creating something not only delicious but also deeply fulfilling.

So whether you’re preparing for a holiday feast, welcoming friends to indulge in a simple gathering, or treating yourself to something special, consider whipping up a batch of these delightful Cinnamon Sugar Palmiers. They are more than mere pastries; they are a celebration of flavor, tradition, and the joy of sharing. Experience the magic for yourself, and you’ll understand why they have remained a beloved treat across generations and continents.

In conclusion, Cinnamon Sugar Palmiers shimmer with elegance and charm, promising an experience that is as much about collaboration and warmth as it is about flavor and texture. Don’t just bake; create a little magic in your kitchen that will spread joy with every bite. The journey to sweet perfection begins with just a few ingredients, and by the end, you may find that you’ve not only baked a delicious pastry but also created a lasting memory. So preheat your oven, roll out your pastry, and let the adventure begin!

Ingredients

  • Puff pastry, thawed
  • 1 cup granulated sugar
  • 1 tablespoon ground cinnamon
  • 1/4 cup unsalted butter, melted
  • Flour, for dusting

Instructions

  • Preheat your oven to 400°F (200°C) and line a baking sheet with parchment paper.
  • On a lightly floured surface, roll out the thawed puff pastry to a rectangle, approximately 10×12 inches.
  • Brush the melted unsalted butter evenly over the surface of the puff pastry.
  • In a small bowl, mix together the granulated sugar and ground cinnamon.
  • Evenly sprinkle the cinnamon sugar mixture over the melted butter on the puff pastry.
  • Starting from the long edge, roll the pastry tightly into a log. Roll it inward until you reach the center, then do the same from the opposite side, so the two rolls meet in the middle.
  • Wrap the rolled pastry in plastic wrap and refrigerate for about 15 minutes to firm up.
  • Once chilled, remove the pastry from the refrigerator and slice it into 1/2 inch thick pieces.
  • Place the slices cut-side up on the prepared baking sheet, leaving some space between each one to allow for spreading.
  • Bake in the preheated oven for 12-15 minutes, or until golden brown and crispy.
  • Allow the palmiers to cool on the baking sheet for a few minutes before transferring them to a wire rack to cool completely.

Notes

These Cinnamon Sugar Palmiers are a delightful combination of flaky puff pastry and sweet cinnamon sugar, making them an irresistible treat that is perfect for any occasion. The buttery richness from the melted unsalted butter enhances the flavor while ensuring the pastry crisps up beautifully in the oven. For added texture, you can use coarse sugar in place of regular granulated sugar to give your palmiers a bit of crunch. These pastries are best enjoyed fresh out of the oven, but they can be stored in an airtight container for a few days. Serve them warm or at room temperature, and consider pairing them with a cup of tea or coffee for a delightful afternoon snack. If you want to experiment, try adding a pinch of nutmeg or vanilla extract to the cinnamon sugar mixture for an extra flavor twist.

Faq

What are Cinnamon Sugar Palmiers?

Cinnamon Sugar Palmiers are delicate, crispy pastries made from puff pastry, rolled with a mixture of cinnamon and sugar to create a sweet and flaky treat. They are shaped like palm leaves, giving them their name.

What ingredients do I need to make Cinnamon Sugar Palmiers?

You will need puff pastry, granulated sugar, ground cinnamon, and butter. Optional ingredients include vanilla extract or a sprinkle of sea salt for added flavor.

How difficult is it to make Cinnamon Sugar Palmiers?

This recipe is relatively easy to make, even for beginners. The most crucial step is handling the puff pastry, but with some patience, anyone can achieve crispy and delicious palmiers!

Can I make my own puff pastry for this recipe?

Yes, you can make your own puff pastry from scratch if you prefer. However, using store-bought puff pastry saves time and ensures consistent results.

How long do Cinnamon Sugar Palmiers last?

When stored in an airtight container at room temperature, Cinnamon Sugar Palmiers will last for about 3-5 days. For longer storage, you can freeze them.

Can I add other flavors to the palmiers?

Absolutely! Feel free to experiment with different flavors by adding chocolate, nuts, or dried fruits to the sugar mixture or by using flavored sugar.

Are Cinnamon Sugar Palmiers suitable for special diets?

Cinnamon Sugar Palmiers can be made gluten-free by using gluten-free puff pastry. However, they are generally not vegan or dairy-free due to the butter in the puff pastry. Check ingredients carefully to suit your dietary needs.

What is the best way to serve Cinnamon Sugar Palmiers?

Cinnamon Sugar Palmiers are best enjoyed fresh, either warm or at room temperature. They make a lovely accompaniment to coffee or tea and can be served as a dessert or a snack.

Raspberry Swirl Cheesecake Bars

Indulging in a slice of Raspberry Swirl Cheesecake Bars is like taking a journey through a lush raspberry orchard on a sun-drenched summer day. The vibrant burst of red from the fresh raspberries, artfully swirling through a creamy, luscious cheesecake filling, is enough to capture anyone’s heart and taste buds. These delightful bars are not just a dessert; they are an experience that combines the tangy sweetness of raspberries with the rich, velvety texture of cheesecake, all beautifully nestled on a buttery graham cracker crust. Imagine serving these at a gathering, where the moment guests take their first bite, they are transported to a world of blissful flavors and delightful textures—what could be more enticing?

Crafting these Raspberry Swirl Cheesecake Bars is a venture filled with joy and creativity. The process begins with a simple yet flavorful graham cracker crust, providing a perfectly crunchy base that complements the creamy cheesecake filling topped with swirls of tart raspberry puree. The contrast between the sweet and the tangy is a harmonious matrimony of flavors that delights the palate. With each bite, the tangy burst of raspberry cuts through the richness of the cheesecake, creating a balanced dessert that won’t weigh you down but lift you up instead.

The preparation of these cheesecake bars is straightforward, making it an excellent choice for both seasoned bakers and those just beginning to explore the world of desserts. It requires minimal effort to create something that looks and tastes show-stoppingly elegant. Imagine the admiration your friends and family will express as you pull these stunning bars out of the refrigerator, revealing layers of smooth cheesecake generously flecked with glossy red swirls of raspberry. They will be lured in by the alluring scent wafting through your kitchen even before the first bite. It’s this simplicity of creation paired with the lavish end result that makes these bars truly special.

Raspberries are at the heart of this recipe, not just for their vibrant color but for their unique flavor profile that strikes the perfect balance between sweet and tart. Fresh raspberries, when pureed, can transform not just the taste of the cheesecake but also its visual appeal. The striking contrast of the bright red raspberry against the pristine white cheesecake is a feast for the eyes, making these bars as much a centerpiece as they are a dessert. You might even find yourself compelled to take a photo before you devour the first piece! The vibrant color and irresistible design truly embody dessert artistry.

When you decide to whip up a batch of these cheesecake bars, consider the endless variations you can add, tweaking the basic recipe to suit your desires. If you want to enhance the berry flavor, we suggest adding a layer of fresh raspberries on top before serving for an even more striking presentation. Alternatively, consider swirling in other berry purees like blueberry or strawberry to create a multi-berry cheesecake experience. The beauty of these bars is that they are versatile and can easily accommodate various flavor profiles, allowing your creativity to shine through. The only limit is your imagination!

And let’s not forget the delightful attributes of this dessert—perfectly portioned for easy serving and sharing. The bars can be cut into squares or rectangles, making them perfect for parties, potlucks, or even as a sweet treat to enjoy at home with your family. Each bite-sized piece is like a little treasure, easy to transport and share. Because they hold up well in the fridge, they make for excellent make-ahead desserts—prepping them in advance allows the flavors to meld and mature, making the next day’s taste even more divine!

As you prepare to create these Raspberry Swirl Cheesecake Bars, keep in mind that the key to their success lies not only in quality ingredients but also in the love and care you put into the preparation. Baking is a form of expression, and pouring your heart into these bars ensures that not only will they look delicious, but they will also taste incredible. The feeling of satisfaction you get when you see smiles on the faces of your loved ones as they take their first bite is a reward that is truly unmatched.

For those who are health-conscious, rest assured that this recipe can be adapted to fit various dietary preferences. You can opt for low-fat cream cheese, substitute a gluten-free option for the crust, or even adjust the sugar levels to suit your taste. Each of these tweaks opens a new door to catering to different dietary needs while still providing that distinctive flavor you seek in a good cheesecake bar.

As seasons shift, the Raspberry Swirl Cheesecake Bars can offer a refreshing change to your dessert lineup. Raspberries are often freshest during the summer months, making them a seasonal treat that evokes memories of hot days spent outdoors. However, with frozen raspberries widely available, you can enjoy these delightful bars year-round. This versatility carries through with holiday gatherings, casual brunches, or even cozy evenings in with a book. They are the dessert that suits every occasion, bridging sweet summer days to cozy winter evenings.

Moreover, cheesecake bars have this incredible ability to evoke strong feelings of nostalgia. Many of us have memories of joyous family gatherings, birthdays, and celebrations centered around sweet treats. Making these Raspberry Swirl Cheesecake Bars can help rekindle those feelings and create new memories as you gather with friends and family. The anticipation of the first slice often brings everyone together, making the baking process an enjoyable experience in itself. Don’t be surprised if you find everyone congregating in the kitchen, excitedly awaiting their turn for a piece of this spectacular dessert.

So, gather your apron, embrace the excitement of a little baking magic, and prepare to impress not only your palate but those who are fortunate enough to share in your delicious creation. Once you dive into this easy yet impressive dessert, you’ll likely make it a fixture in your recipe rotation. Whether it’s a special occasion or a mid-week treat, the experience of making and sharing these Raspberry Swirl Cheesecake Bars will surely lead to smiles, laughter, and enjoyment. Dive into the world of flavor, texture, and beautiful presentation, and let every bite transport you to dessert heaven.

Ingredients

  • Crust
    • 1 1/2 cups graham cracker crumbs
    • 1/4 cup granulated sugar
    • 1/2 cup unsalted butter melted
  • Cheesecake Filling
    • 16 oz cream cheese softened
    • 1/2 cup granulated sugar
    • 1 tsp vanilla extract
    • 2 large eggs room temperature
    • 1/4 cup sour cream
  • Raspberry Swirl
    • 1 cup fresh raspberries
    • 1/4 cup granulated sugar
    • 1 tbsp lemon juice

Instructions

  • Preheat your oven to 325°F (160°C) and line an 8-inch square baking pan with parchment paper, leaving some overhang for easy removal.
  • In a mixing bowl, combine the graham cracker crumbs and granulated sugar. Pour in the melted butter and mix until the crumbs are evenly coated.
  • Press the crumb mixture firmly into the bottom of the prepared baking pan to form an even crust. Bake the crust for 8-10 minutes until lightly golden, then remove from the oven and let it cool slightly.
  • While the crust is cooling, prepare the cheesecake filling. In a large mixing bowl, beat the softened cream cheese with a hand mixer until smooth and creamy.
  • Add the granulated sugar, vanilla extract, eggs, and sour cream to the cream cheese, and mix on medium speed until all ingredients are well incorporated and smooth.
  • Pour the cheesecake filling over the cooled crust, spreading it evenly.
  • For the raspberry swirl, combine the fresh raspberries, granulated sugar, and lemon juice in a small saucepan over medium heat. Cook for about 5-7 minutes, stirring gently, until the raspberries break down and the mixture thickens slightly.
  • Drizzle the raspberry sauce over the cheesecake filling. Use a knife or a toothpick to swirl the raspberry sauce into the cheesecake to create a marbled effect.
  • Bake the cheesecake bars in the preheated oven for 30-35 minutes, or until the center is set but still slightly jiggles when shaken.
  • Once baked, remove the cheesecake from the oven and let it cool at room temperature for about 1 hour. Then, refrigerate for at least 4 hours or overnight to fully set.
  • Once chilled, lift the cheesecake out of the pan using the parchment overhang. Cut into bars and serve.

Notes

These raspberry swirl cheesecake bars are a delightful dessert that combines creamy cheesecake with a fruity raspberry topping. The graham cracker crust provides a perfect crunchy base that complements the smooth filling. You can enhance the raspberry swirl by mashing the raspberries a bit more for a vibrant color and flavor. For a touch of elegance, serve these bars chilled and garnish with fresh raspberries and a dusting of powdered sugar. They can be made ahead of time and stored in the refrigerator for a few days, making them a convenient treat for parties or family gatherings. If you’re feeling adventurous, try experimenting with other fruits like strawberries or blueberries for a unique twist on this classic recipe.

Faq

What ingredients are needed to make Raspberry Swirl Cheesecake Bars?

You will need cream cheese, sugar, eggs, vanilla extract, graham cracker crumbs, butter, and fresh raspberries.

Can I use frozen raspberries instead of fresh?

Yes, you can use frozen raspberries, but make sure to thaw and drain them well to prevent excess moisture in the bars.

How long do Raspberry Swirl Cheesecake Bars need to bake?

They typically need to bake for about 30-35 minutes at 325°F (163°C) or until the cheesecake is set around the edges but slightly jiggly in the center.

How should I store leftover Raspberry Swirl Cheesecake Bars?

Store leftovers in an airtight container in the refrigerator for up to 5 days, or freeze for up to 2 months.

Can I make these bars ahead of time?

Absolutely! You can make them a day in advance and keep them refrigerated until ready to serve.

How do I know when the cheesecake bars are done?

The bars are done when the edges are firm, but the center has a slight jiggle. They will continue to set as they cool.

Can I add other fruits to the cheesecake bars?

Yes, you can experiment with other fruits like blueberries, strawberries, or peaches for a different flavor profile.

What type of pan is best for baking these bars?

A 9×9-inch square baking pan works best for this recipe. Make sure to line it with parchment paper for easy removal.

There’s a magical moment that envelops a household on Christmas morning, and it begins not with the unwrapping of presents but with the warm, tantalizing aroma of freshly baked coffee cake wafting through the air. Picture this: the sun gently peeking through frosted windows, colorful lights glistening in the soft glow of the early morning, and the tantalizing scent of sugar, cinnamon, and baked goods tantalizing your senses. The warmth of the cake, paired with the rich, inviting aroma of a freshly brewed pot of coffee, creates an unparalleled atmosphere—a perfect setting for gathering under one roof with family and loved ones, all while swapping stories of Christmases past. Christmas Morning Coffee Cake is much more than a delightful accompaniment to your morning brew; it’s a centerpiece of cherished traditions and a canvas for new memories to be written each year.

Enveloping your home with sweet fragrances and joyful chatter, this coffee cake serves as a perfect way to begin day filled with joy and celebration. It’s the type of dish that inspires conversation and encourages slowing down, reminding us it’s not just about the gifts beneath the tree, but the shared moments that linger long after they’re opened. Made with a soft, buttery cake base, this luscious coffee cake is layered with a cinnamon-streusel filling and topped with a glittering, sugary glaze that shines like fresh snow on a winter’s morning. Each bite offers a delightful combination of textures, from the tender cake to the crunchy cinnamon topping, and the sweetness of a luscious glaze, culminating in a perfect harmony that dances across your palate.

One of the best aspects of this Christmas Morning Coffee Cake is its versatility. You can personalize it to fit your family’s taste preferences; add nuts for a nutty crunch, substitute fruits like apples or cranberries for a tart contrast, or even incorporate chocolate chips for a decadent twist. This recipe encourages creativity, inviting you to make it your own while still capturing the quintessential holiday essence. Moreover, the process of baking this coffee cake is a delightful way to spend time with family. Imagine laughter filling the kitchen, children measuring flour, and others mixing the ingredients as you share stories or listen to your favorite Christmas tunes. It’s an opportunity to create bonds and strengthen relationships—all while preparing a culinary masterpiece that you’ll look forward to enjoying for years to come.

Remember, the best recipes are those that tell a story, and this coffee cake carries countless narratives. Whether it’s Grandma’s handwritten recipe, freshly passed down through generations, or a new creation born from your culinary experiments, each slice embodies the spirit of the season. It’s more than just dessert; it’s a flavorful bridge connecting the past with the present, a reminder of gatherings where family members found time to pause, savor, and truly engage with one another.

Preparing this coffee cake is not only a process but an art form. As you sift the flour and sugar, you may find yourself transported back to your childhood kitchen, the sounds of laughter and the holiday spirit surrounding you like a warm blanket. You’ll enjoy the symphony of crackling butter, the warm touch of cinnamon, and the sweetness of sugar—ingredients that are inherently festive, awakening the feelings of nostalgia and warmth. Learning the techniques of creaming butter and sugar to perfection or achieving that ideal streusel topping isn’t just culinary knowledge; it’s a skill that transforms home cooks into kitchen magicians, elevating simple ingredients into unforgettable holiday experiences.

The layering of flavors in this cake is a delightful surprise that offers something different in each slice. The moist crumb of the cake serves as the perfect backdrop for the warm, spiced flavors of cinnamon and the nutty crunch of the streusel topping, as well as a fragrant glaze that catches the light—celebrating the joyful essence of the season in a single bite. As you serve this cake, you create an opportunity for gratitude, a moment to reflect on what this time means to you and your loved ones.

Beyond the immediate enjoyment of savoring each bite, this coffee cake opens the door to conversations about traditions. It may inspire talks of family recipes, of cooking lessons learned at a loved one’s side, and of the hopeful anticipation of future holidays. Perhaps it shall become a new favorite for your family, and you’ll look forward to the moment when you can pass along the recipe to the next generation—ensuring the legacy deliciously lives on.

As the cake bakes, and those final few minutes stretch into uncontainable excitement, you can feel the anticipation begin to build, much like the glistening lights that hang on your tree. Each slice serves as an invitation—each moment spent together, each smile shared, festively wrapped in delicious flavor and love. Imagine those late-morning conversations, over coffee cups filled to the brim, laughter punctuating the evening air, as everyone takes a bite of the goodness you’ve created together. This Christmas Morning Coffee Cake stands as a testament to love and tradition, a cherished way to bring friends and family together, celebrating the joys of the season, one slice at a time.

But what makes this recipe even more special is the way it can draw out the flavors of your favorite coffee. Choose a blend that elevates the experience, whether you prefer a sweet, floral roast or something bold and dark—pair it with the right kind of coffee to complement your cake will enhance the experience, making this festive ritual all the more indulgent. As the cake warms in the oven, set the stage with mugs and tableware that express your holiday spirit. Create a cozy nook at your breakfast table adorned with pine branches or festive decorations, allowing the atmosphere to transform and embrace the fullness of what the holiday season brings.

In the end, this Christmas Morning Coffee Cake isn’t merely a dish; it’s an experience. It is the harmony of flavor, the joy of gathering, and the intimate connections that sustain us throughout the year. So, as you roll up your sleeves and gather your cherished ingredients, let this delightful dessert embody the true spirit of Christmas—one filled with laughter, love, and the joy of sharing special moments with those you hold dear. In the bustling days of December, this cake is a gentle reminder to slow down, embrace the season, and enjoy the sweet rewards of togetherness.

So place your trust in this recipe and your heart into your baking; with your family around, watch as this charming coffee cake turns into cherished memories, brightening your home and hearts with each delightful slice. Gather your loved ones, brew a pot of coffee, and prepare to celebrate a Christmas morning that will resound for years—filled with the joy, flavors, and sweetness that only this special coffee cake can bring.

Ingredients

  • For the Cake
    • 2 cups all-purpose flour
    • 1 cup granulated sugar
    • 1/2 cup unsalted butter softened
    • 1 cup sour cream
    • 3 large eggs
    • 1 tsp vanilla extract
    • 1 tsp baking powder
    • 1 tsp baking soda
    • 1/2 tsp salt
  • For the Cinnamon Swirl
    • 1/2 cup brown sugar packed
    • 2 tsp ground cinnamon
    • 1/4 cup unsalted butter melted
  • For the Topping
    • 1/2 cup chopped pecans or walnuts
    • 1/4 cup brown sugar
    • 1 tsp ground cinnamon

Instructions

  • Preheat your oven to 350°F (175°C) and grease a 9×13 inch baking pan or line it with parchment paper.
  • In a large mixing bowl, cream together the softened unsalted butter and granulated sugar until light and fluffy.
  • Beat in the eggs, one at a time, followed by the vanilla extract, until all are well combined.
  • Add the sour cream to the mixture and mix until smooth.
  • In another bowl, whisk together the all-purpose flour, baking powder, baking soda, and salt.
  • Gradually add the dry ingredients to the wet ingredients, mixing gently until just combined. Do not overmix.
  • In a small bowl, prepare the cinnamon swirl by combining the packed brown sugar, ground cinnamon, and melted unsalted butter.
  • Pour half of the cake batter into the prepared baking pan, and then drizzle half of the cinnamon swirl mixture over the top.
  • Spread the remaining batter on top of the cinnamon layer, and then swirl in the remaining cinnamon mixture with a knife or spatula to create a marble effect.
  • In another bowl, mix together the chopped pecans or walnuts, brown sugar, and ground cinnamon for the topping.
  • Sprinkle the topping mixture evenly over the cake batter.
  • Bake for 30-35 minutes, or until a toothpick inserted into the center comes out clean.
  • Allow the coffee cake to cool in the pan for 10 minutes, then transfer it to a wire rack to cool completely before slicing and serving.

Notes

This Christmas Morning Coffee Cake is a delightful treat that brings warmth and joy to your holiday celebrations. Its rich, moist texture comes from the combination of sour cream and butter, ensuring it’s a cake that pairs beautifully with your morning coffee or tea. The cinnamon swirl adds a sweet and aromatic flavor, making each bite a festive experience.

Feel free to get creative with the toppings! You can substitute pecans with walnuts or even add some dried fruit to the cake batter for an extra special touch. This cake can be made ahead of time and stored in an airtight container, which makes it perfect for busy holiday mornings. It also freezes well if you want to prepare it in advance.

To enhance the coffee cake, consider drizzling a light glaze made of powdered sugar and milk over the top after it cools, or serve it with a side of whipped cream or crème fraîche. Whether it’s for Christmas morning or any festive gathering, this cake is sure to be a hit. Enjoy every bite!

Faq

What ingredients are needed for the Christmas Morning Coffee Cake?

The main ingredients for the Christmas Morning Coffee Cake include flour, sugar, butter, eggs, baking powder, cinnamon, vanilla extract, and a topping of streusel or nuts, along with optional additions like chocolate chips or dried fruits.

How long does it take to prepare the Christmas Morning Coffee Cake?

The preparation time for the Christmas Morning Coffee Cake is approximately 20-30 minutes, with an additional baking time of about 30-40 minutes.

Can I make the Christmas Morning Coffee Cake ahead of time?

Yes, you can prepare the batter and store it in the refrigerator overnight. It’s best to bake it fresh in the morning for optimal flavor and texture.

What is the best way to store leftover coffee cake?

Leftover Christmas Morning Coffee Cake can be stored in an airtight container at room temperature for up to 3 days. For longer storage, refrigerate it for up to a week or freeze it for up to 3 months.

Can I substitute any of the ingredients in the recipe?

Yes, you can substitute all-purpose flour with a gluten-free blend, use applesauce instead of butter for a healthier option, or use dairy-free milk alternatives if needed. Adjust measurements accordingly.

What can I serve with the Christmas Morning Coffee Cake?

The Christmas Morning Coffee Cake pairs beautifully with coffee, tea, or hot chocolate. You might also serve it with whipped cream, icing, or fresh fruit for added flavor.

Is this coffee cake suitable for vegetarians?

Yes, the Christmas Morning Coffee Cake is generally suitable for vegetarians, as it primarily contains plant-based ingredients and milk, but it is always best to check specific brand ingredients if you’re concerned about dairy.

How do I know when the coffee cake is done baking?

The Christmas Morning Coffee Cake is done when a toothpick inserted in the center comes out clean or with a few crumbs attached. Additionally, the edges will start to pull away from the pan and the top will be golden brown.