Author

Ocean Nightleaf

Browsing

Introduction / Hook

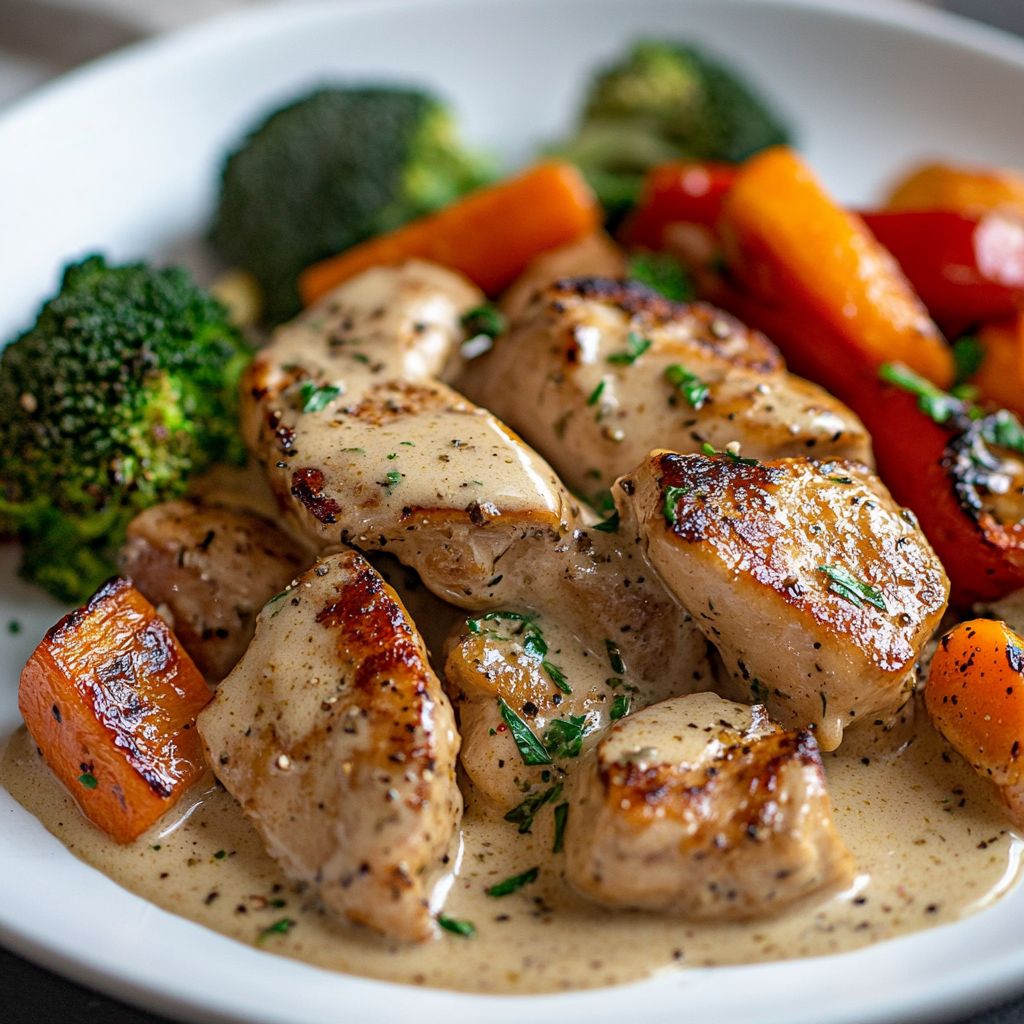
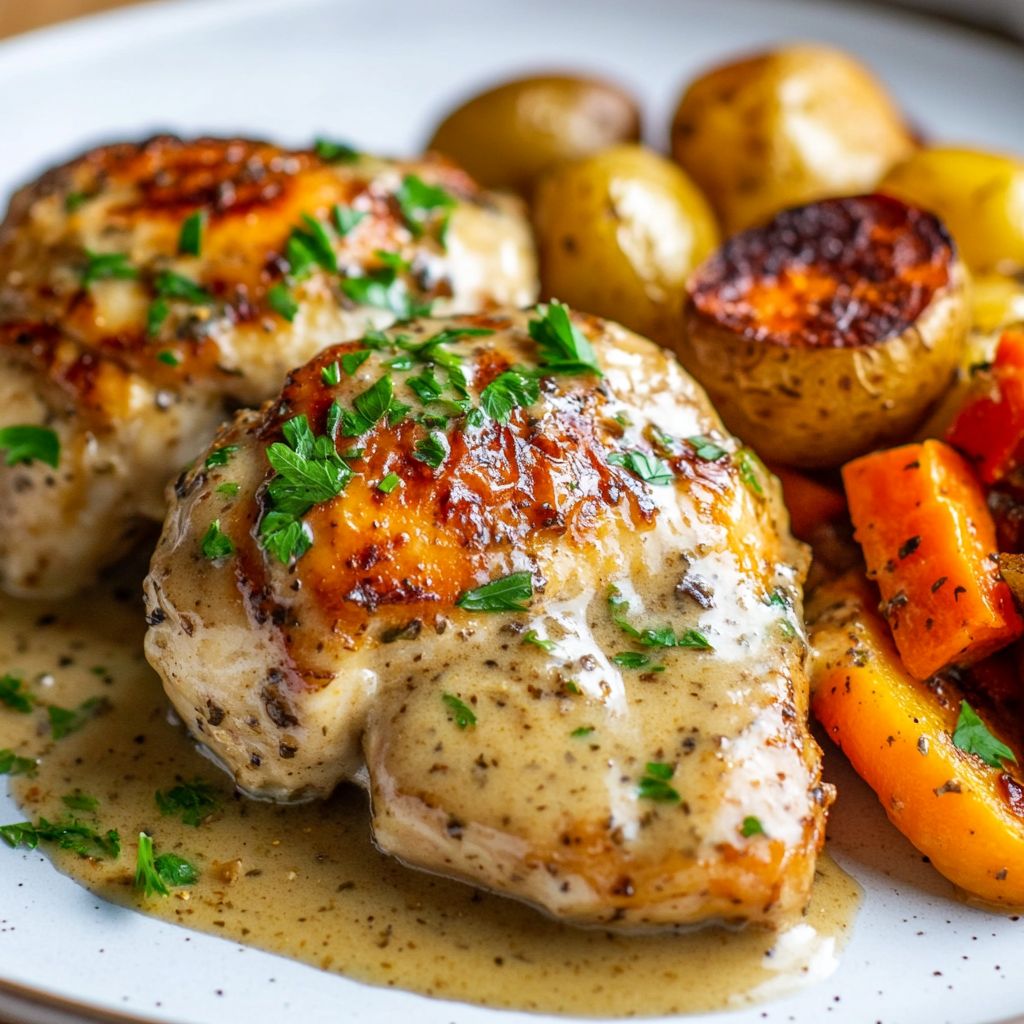
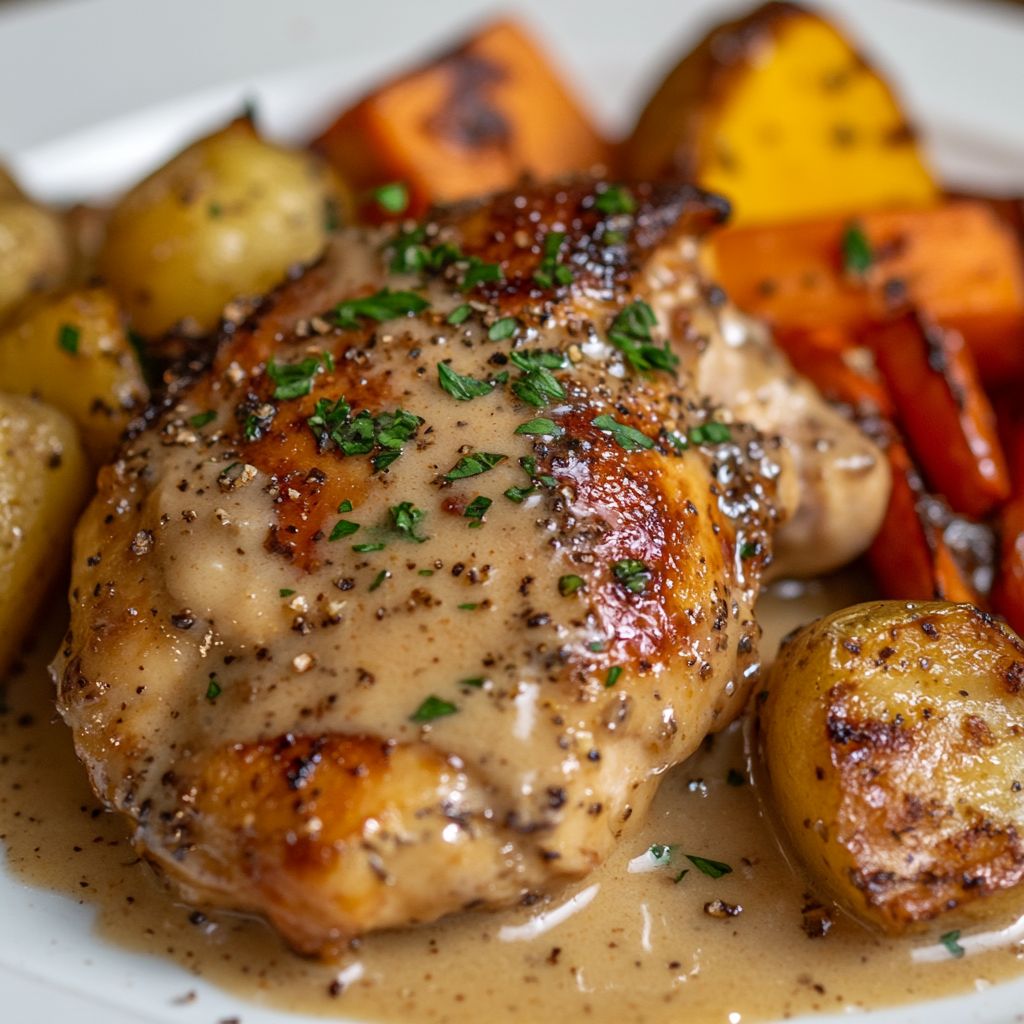
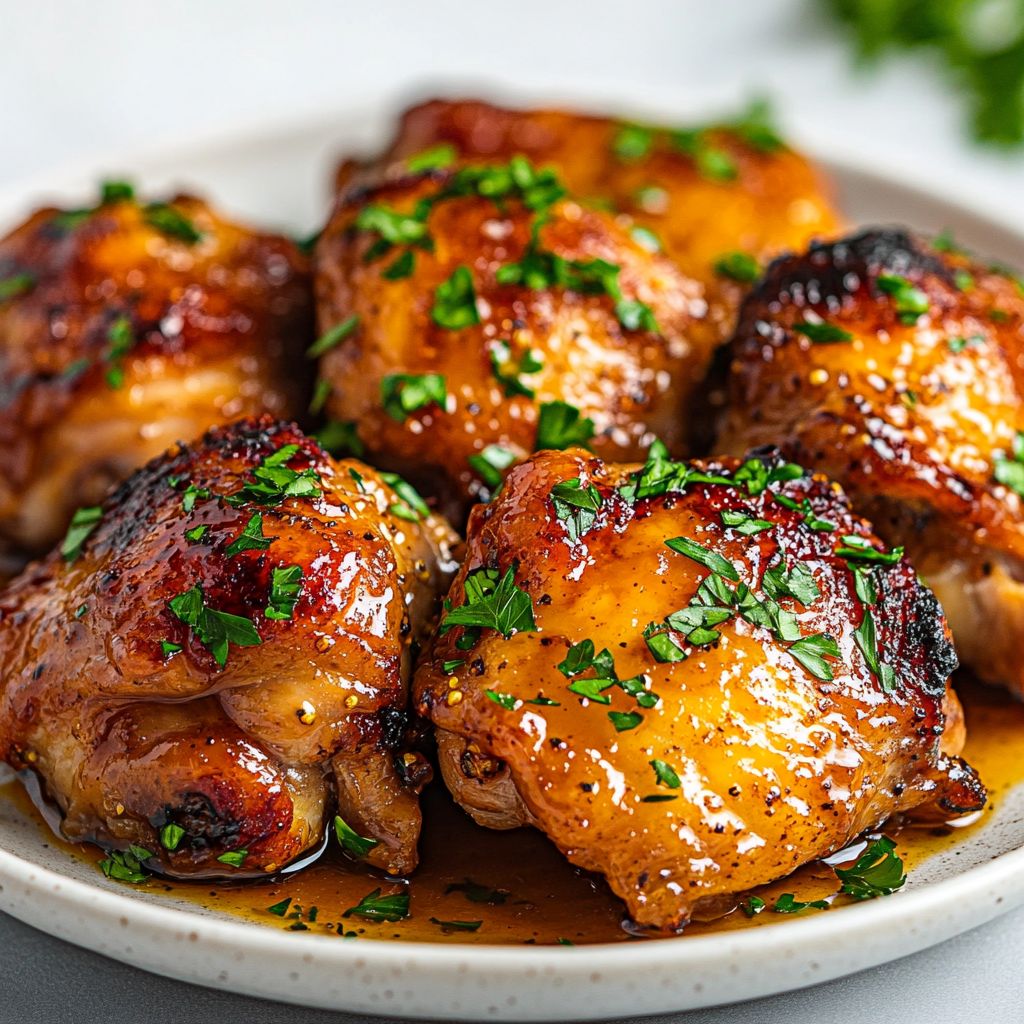
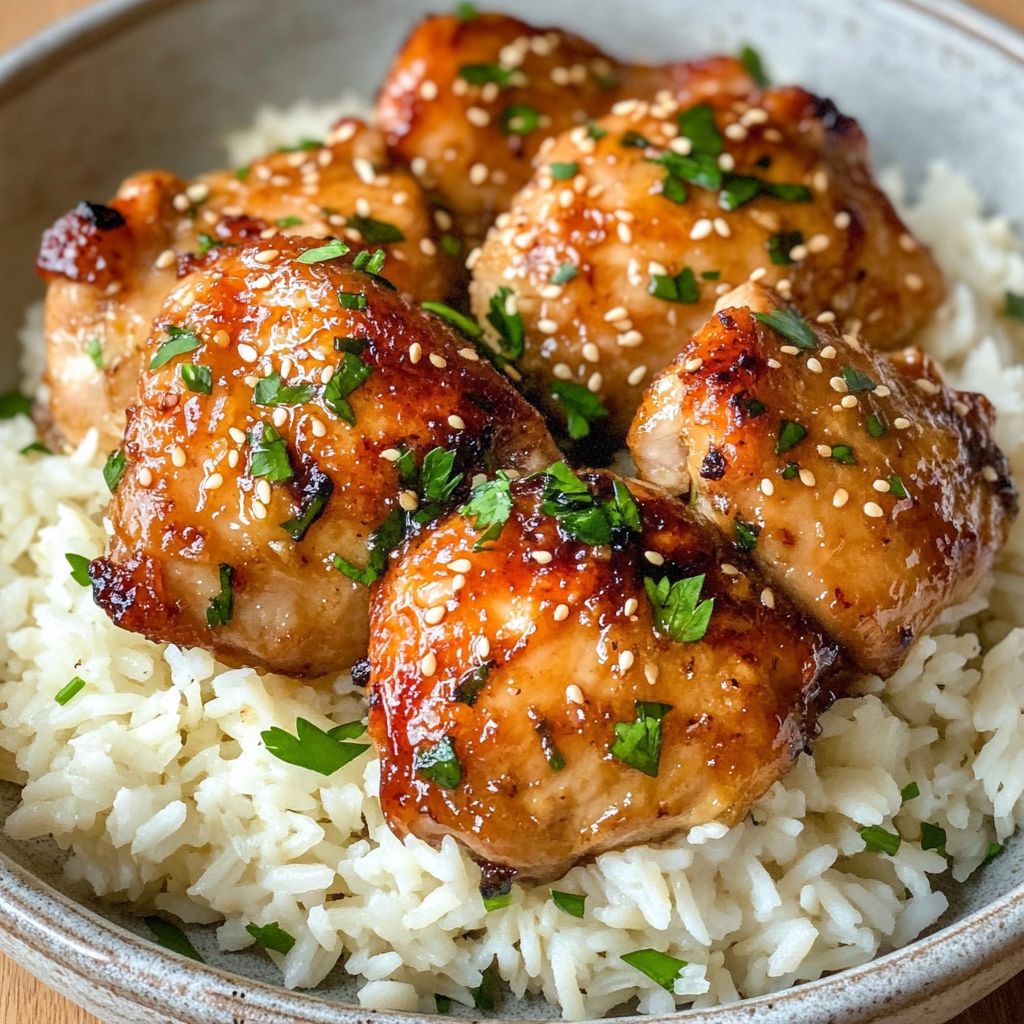
If you can imagine the perfect fusion of sweet, savory, and succulent in a single bite, then you’ll fall head over heels for our Honey Glazed Chicken Thighs and Rice. Picture tender, juicy chicken thighs cloaked in a sticky, golden honey glaze that glistens enticingly with each hue of the day’s retreating sun. Pair this with the comforting embrace of perfectly cooked rice, which absorbs every aromatic droplet of the seasoned marinade, and you have a dish that not only appeases the appetite but enlivens the spirit.

This recipe captures the quintessence of culinary delight — simplicity and flavor coming together in harmonious dance. Whether you’re an experienced gourmand or a busy individual looking for a swift yet memorable dinner, these honey-glazed beauties will linger in the taste buds and in conversation long after the plates are empty.

The Story Behind the Dish

While honey-glazed meats have graced dining tables globally, the combination of chicken and rice has a particularly rich heritage. Originating from Asian kitchens, where “honey chicken” is customary, this dish has transcended its roots to become a celebrated culinary creation worldwide.

Historically, the integration of honey in cooking dates back to ancient Egypt, where it was used as a natural sweetener long before sugar was commonplace. It was a luxury item, a counterpart to the divine, much like the ambrosia of gods. The technique of glazing chicken with honey spread through the eras, reaching medieval Europe where sweetness was reserved for special occasions.

Today, the use of honey not only imparts an exquisite golden hue to the chicken but also provides a healthier alternative to processed sugars. The adaptability of this ingredient also symbolizes a reunion of cultures, from the Middle Eastern honeyed lamb to the Southeast Asian caramelized pork, proving that some combinations simply belong together.

Why You’ll Love This Recipe

  • Effortless Elegance: With minimal ingredients and easy steps, you’ll achieve the kind of sophisticated flavor that impresses effortlessly.
  • Versatile and Family-Friendly: This dish segues easily from a midweek family meal to a sophisticated dinner party centerpiece.
  • Balance of Flavors: The sweetness of honey juxtaposes beautifully with savory elements, while garlic and soy sauce add complexity to the chicken.
  • Healthy and Natural: Featuring whole ingredients like honey and chicken thighs high in protein, this meal aligns perfectly with balanced eating.

Flavor Profile & Texture

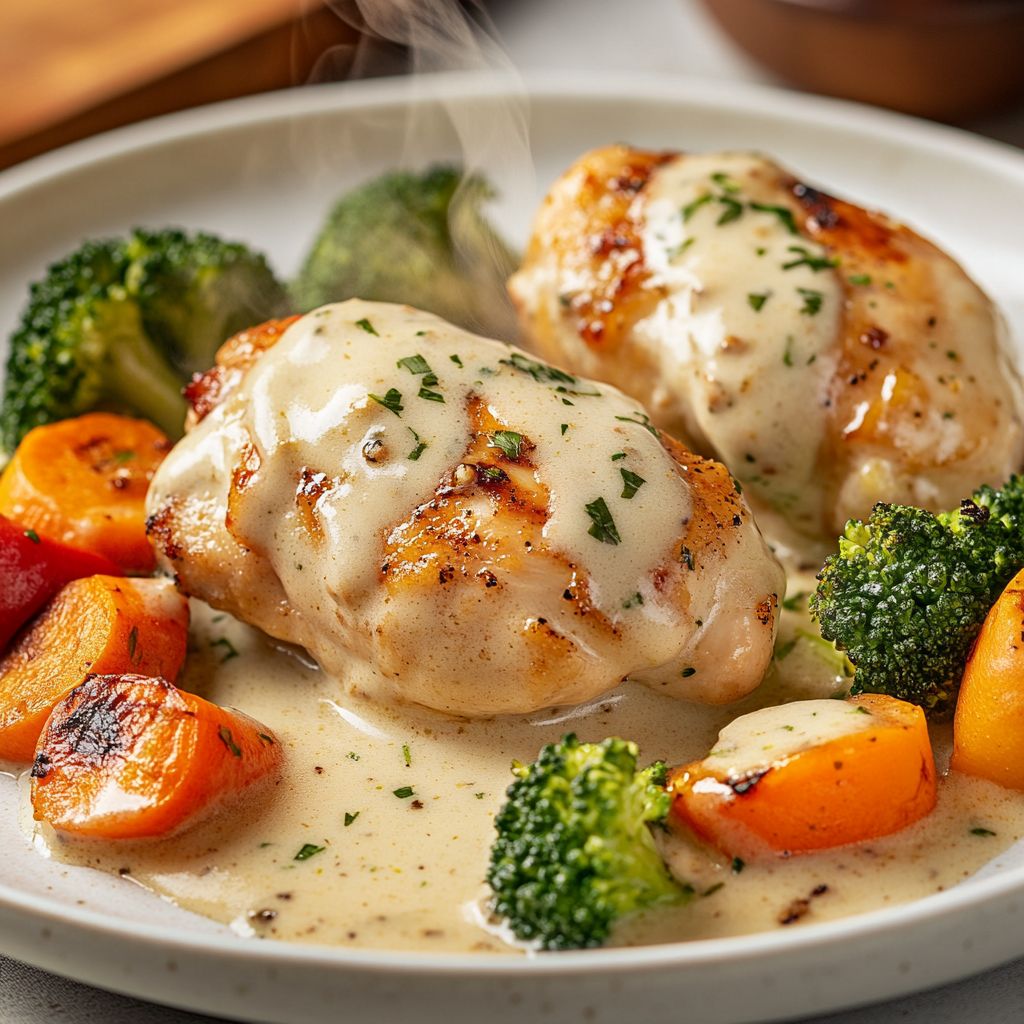
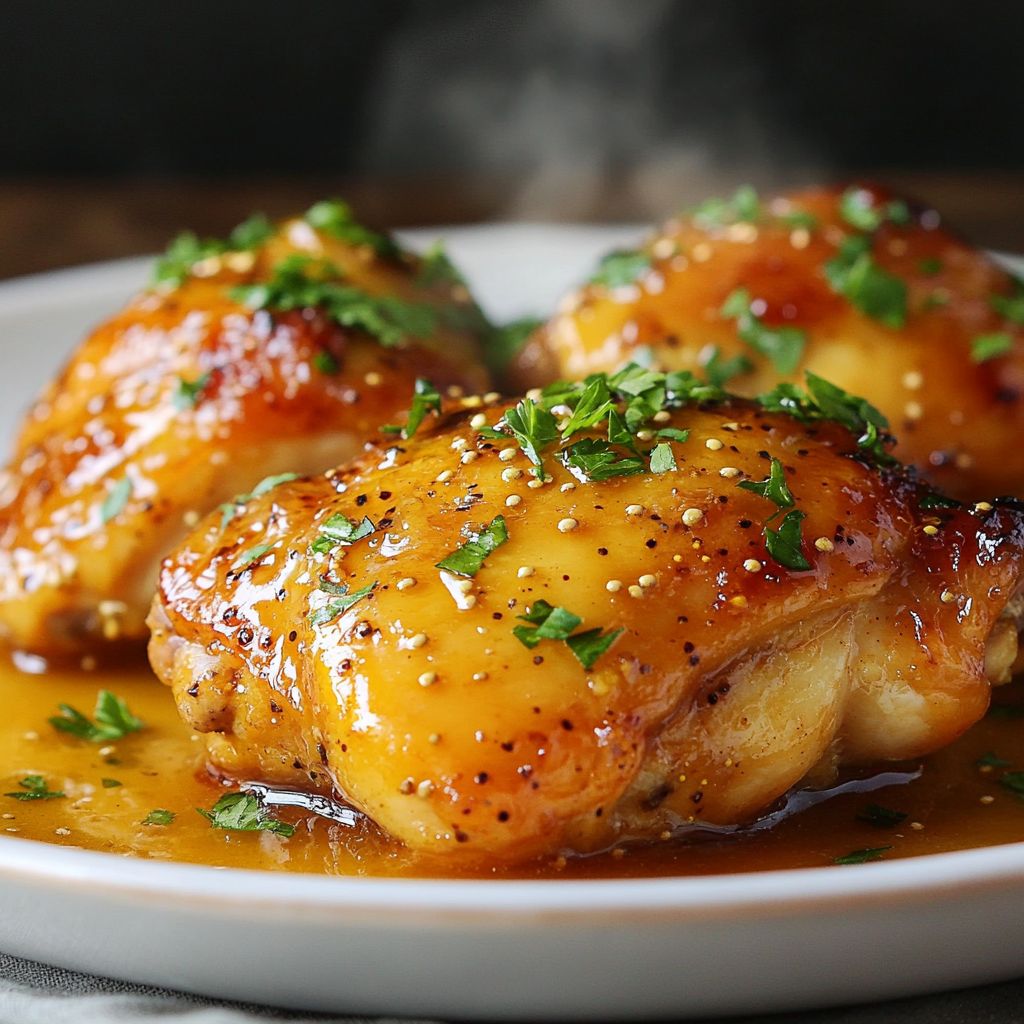
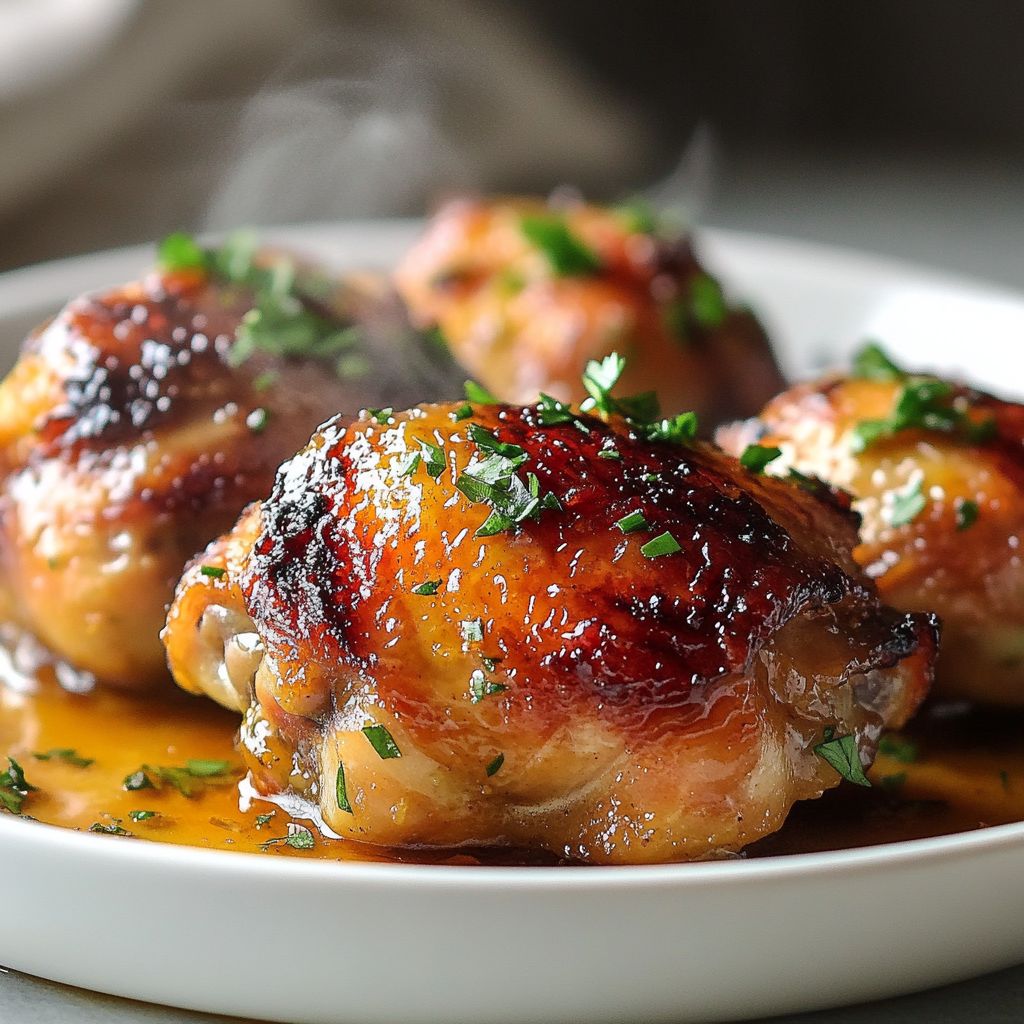
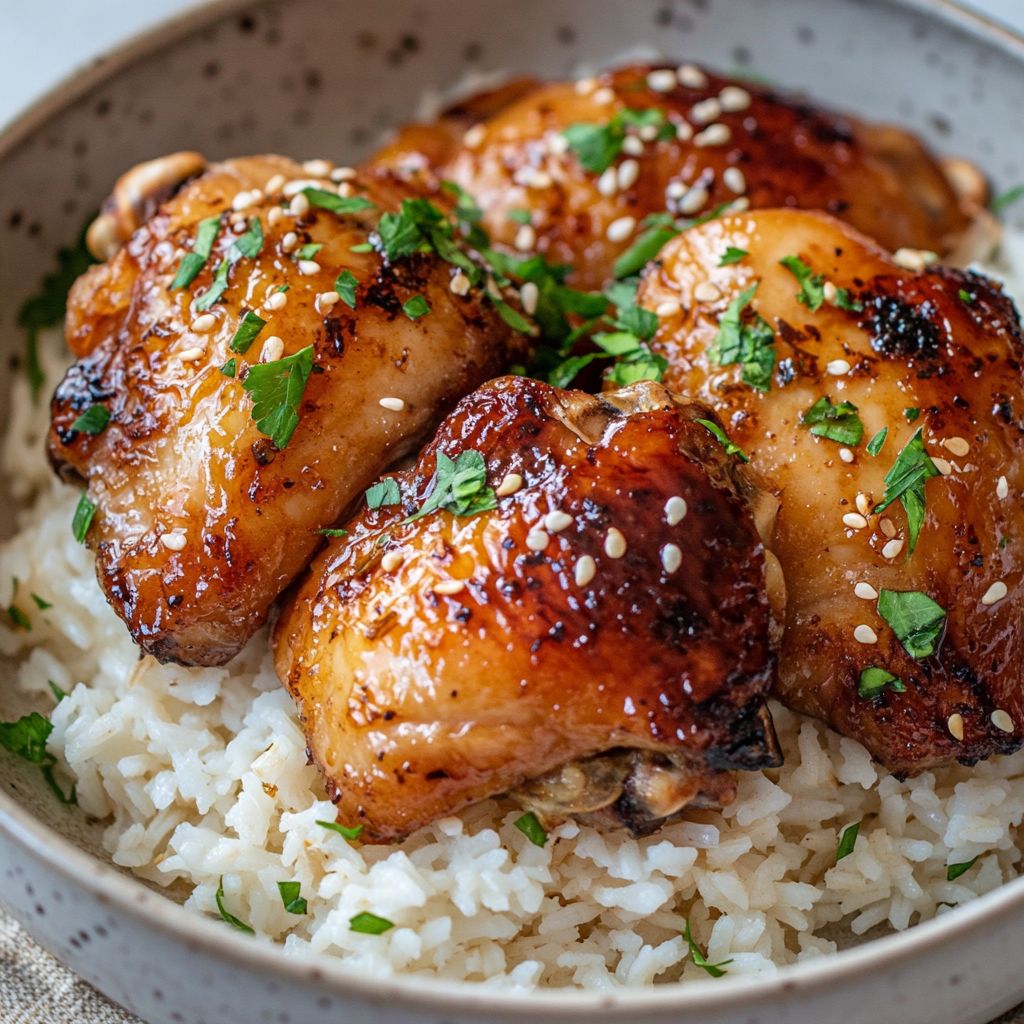
The honey glaze is the headline act, characterized by its seamless fusion of sweetness and umami, with subtle notes of garlic and soy sauce weaving through the blend. The chicken thighs offer moist, succulent bites with every forkful, contrasting beautifully with the slightly crispy, caramelized exterior.

The rice serves as an ideal blank canvas to soak up the glaze’s essence, offering a gentle and neutral counterpoint to intensely flavored chicken. Expect each grain to be infused with fragrant spices and the lingering whisper of honey.

Occasions & Pairings

This dish is perfect for an array of settings, from serene family dinners to lively holiday feasts. It’s especially suited for occasions that prioritize communal enjoyment over intricate preparation.

For pairings, consider a crisp, dry white wine like Sauvignon Blanc or a subtle sparkling cider to engage with the dish’s sweetness. For a non-alcoholic option, a chilled herbal tea with mint can cleanse the palate between bites, enhancing the dining experience.

Suggestions for Side Dishes:

  • Steamed green vegetables, such as broccoli or bok choy, for a healthy and vibrant color contrast.
  • A fresh garden salad with a zesty lemon vinaigrette to counterbalance the richness.
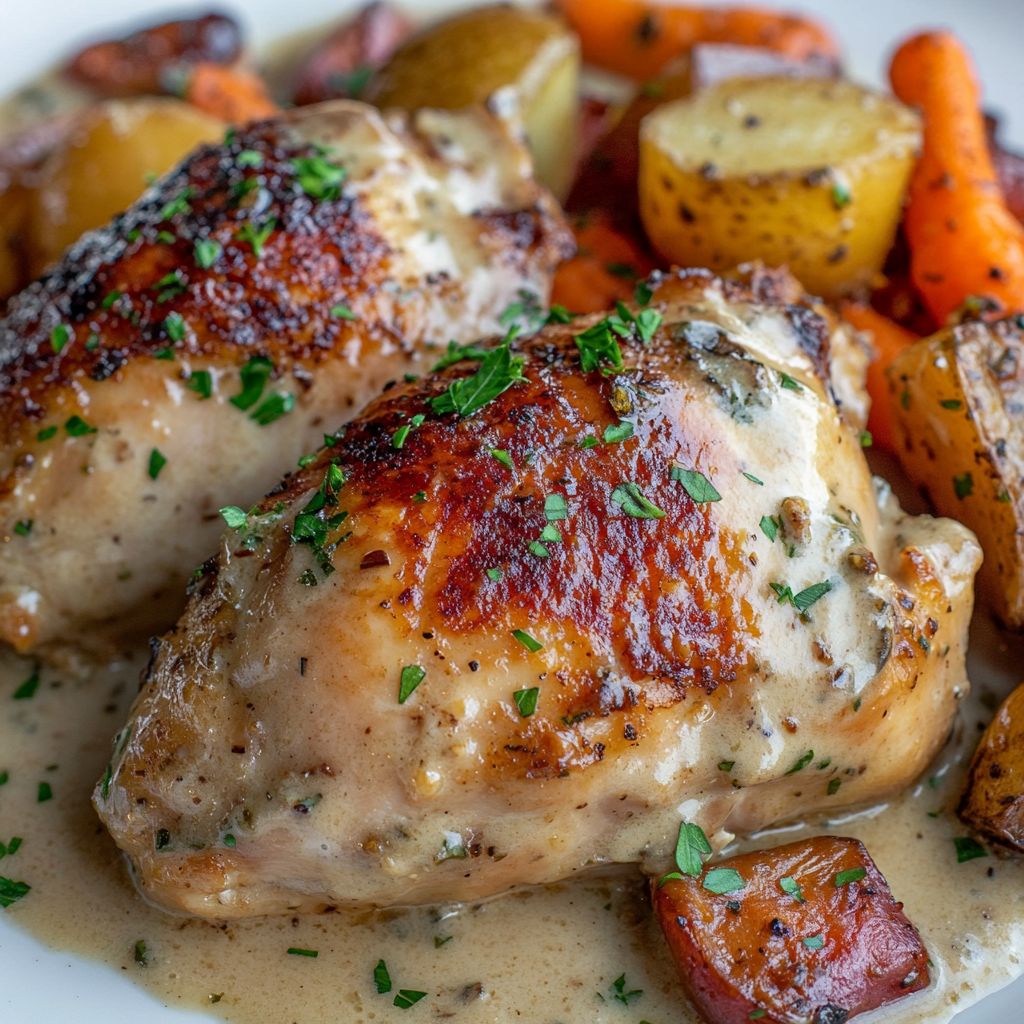
  • Roasted root vegetables, which echo the dish’s earthy undertones.

Tips, Variations & Substitutions

While the recipe is a crowd-pleaser as is, there are numerous avenues to explore for customization or dietary needs:

  • Spice it Up: Add some chili flakes to the glaze for a spicy kick that cuts through the sweetness.
  • Vegan Alternative: Substitute chicken with firm tofu or tempeh, marinated and baked till crispy.
  • Gluten-Free Adaptation: Use tamari instead of soy sauce without sacrificing the umami hit.
  • Regional Twists: For a Mediterranean slant, incorporate a squeeze of lemon and fresh herbs such as oregano.

Storage & Make-Ahead Ideas

If you have leftovers (though it’s highly unlikely), proper storage ensures future enjoyment:

  • Refrigeration: Place the chicken and rice in an airtight container, where it can be refrigerated for up to three days.
  • Freezing: For longer storage, freeze individual portions in freezer-safe bags for up to one month. To reheat, thaw overnight in the refrigerator and warm up on the stove or in the microwave.
  • Make-Ahead: Prepare the honey glaze in advance and marinate the chicken to elevate flavors even further when you’re ready to cook.

Fun Facts & Trivia

Did you know that honey never spoils? Archaeologists have found pots of honey in ancient Egyptian tombs that are over 3,000 years old and still safe to eat. Its natural composition acts as a preservative, keeping it fresh almost indefinitely, much like the timelessness of the dishes it enhances.

Further, rice is a staple food for more than half of the world’s population, with over 40,000 varieties, adaptable to almost any climate and cuisine, showcasing its versatility in dishes, much like the honey-glazed chicken we’re celebrating.

Ingredients

  • Chicken Thighs
    → Bone-in, skin-on chicken thighs are ideal as they remain juicy and flavorful during cooking. They can be left whole or cut into smaller pieces if desired. Make sure to pat them dry before marinating to ensure a crispier skin. Always choose thighs that are even in size for uniform cooking.
  • Honey
    → Honey serves as the primary sweetener and glaze component, providing a shiny finish and rich flavor. Opt for raw or local honey for a more complex taste and to avoid additives. Measure the honey in a liquid measuring cup to make pouring easier and prevent sticking.
  • Soy Sauce
    → Soy sauce adds a savory umami flavor that balances the sweetness of the honey. Choose low-sodium soy sauce if you’re concerned about salt intake. Make sure to stir well before measuring to distribute any sediment that may have settled at the bottom of the bottle.
  • Garlic (minced)
    → Fresh garlic enhances the depth of flavor in the marinade. Mince it finely for even distribution and to release its essential oils, which bring out its bold aroma. For a milder taste, consider roasting the garlic before adding it to the marinade.
  • Fresh Ginger (grated)
    → Grated fresh ginger adds a warm spice and slight bite to the glaze, complementing the honey’s sweetness. Use a microplane for grating, as it yields a finer texture and blends seamlessly into the marinade. Fresh ginger is preferred over powdered for the best flavor and zest.
  • Lemon Juice
    → Freshly squeezed lemon juice brightens the dish with acidity, helping to balance the sweetness of the honey and the saltiness of the soy sauce. Roll the lemon on the counter before cutting to maximize juice yield. Always use fresh juice over bottled for optimal flavor.
  • Rice (long grain preferred)
    → Long grain rice, such as basmati or jasmine, is perfect for this dish as it remains fluffy and separate when cooked. Rinse the rice under cold water before cooking to remove excess starch, which helps prevent stickiness and results in a better texture.
  • Chicken Broth (or water)
    → Chicken broth adds additional flavor to the rice while cooking. Choose low-sodium broth for better control over salt levels in your dish. If using water, consider seasoning with a pinch of salt or a bay leaf to enhance the overall taste.

Instructions

  • Start by marinating the chicken thighs. In a large bowl, combine the honey, soy sauce, minced garlic, grated fresh ginger, and freshly squeezed lemon juice.

    → This mixture will serve as both the marinade and glaze. Ensure you mix well to combine all the ingredients into a smooth sauce, allowing the flavors to meld beautifully. Marinating will enhance the flavor of the chicken, making it juicy and tender. Ensure the thighs are evenly coated in the marinade.
  • Place the chicken thighs in the marinade, ensuring they are fully submerged or covered. Cover the bowl with plastic wrap and refrigerate for at least 30 minutes, or preferably 2 hours.

    → Marinating allows the chicken to absorb the flavors from the honey and spices. If time allows, marinate overnight for maximum flavor infusion. Turn the chicken thighs occasionally during marination to ensure even coating.
  • While the chicken is marinating, rinse the long grain rice under cold water in a fine-mesh strainer until the water runs clear.

    → Rinsing the rice removes excess starch that can cause it to become gummy during cooking. This ensures the rice cooks up fluffy and individual grains remain distinct.
  • In a medium saucepan, combine the rinsed rice and chicken broth (or water) in a ratio of 1 cup of rice to 2 cups of liquid. Bring the mixture to a boil over medium-high heat.

    → The broth adds flavor, while the boiling process initiates the cooking. Ensure you stir the rice briefly after boiling to keep it from sticking to the bottom of the pan.
  • Once boiling, reduce the heat to low, cover the saucepan with a tight-fitting lid, and simmer for about 15-18 minutes.

    → Lowering the heat allows the rice to cook evenly without burning while maintaining moisture. Avoid lifting the lid while cooking, as it releases steam necessary for cooking.
  • After cooking, remove the saucepan from heat and let it sit, covered, for 5 minutes to allow the rice to finish steaming.

    → This resting period lets the rice absorb any residual liquid and makes it fluffier. Use a fork to gently fluff the rice before serving.
  • While the rice is resting, preheat your oven to 400°F (200°C) if cooking the chicken in the oven. Alternatively, prepare a grill for medium heat if grilling the chicken.

    → Preheating is essential as it ensures the chicken cooks quickly and evenly, forming a nice glaze. If grilling, make sure the grates are well oiled to prevent sticking.
  • Remove the marinated chicken thighs from the bowl, shaking off excess marinade, and arrange them skin-side up in a baking dish or on the grill.

    → Proper spacing allows the thighs to cook evenly without steaming each other. Keeping the skin side up allows the fat to render properly, resulting in crispy skin.
  • Drizzle any remaining marinade over the chicken thighs, making sure to reserve some for basting later. Bake in the preheated oven for 35-40 minutes, or until the internal temperature reaches 165°F (74°C).

    → This step caramelizes the honey and creates a delicious, sticky glaze. Use an instant-read thermometer to check for doneness, ensuring safety and preventing overcooking.
  • If grilling, cook for about 6-7 minutes on each side, basting occasionally with reserved marinade to enhance flavor and moisture.

    → Basting infuses the chicken with more flavor and helps maintain juiciness. Ensure the grill lid is closed between flips to maintain heat.
  • Once the chicken is done cooking, remove it from the oven or grill and let it rest for about 5-10 minutes before serving.

    → Resting allows the juices to redistribute, making the chicken more flavorful and tender when cut.
  • Serve the honey glazed chicken thighs over the fluffy rice, garnishing with sesame seeds or chopped green onions if desired.

    → This vibrant addition not only enhances presentation but also adds a subtle crunch and fresh flavor contrast to the sweet glaze. Enjoy your delicious dish!

Notes

These honey glazed chicken thighs and rice create a delightful and filling meal that’s perfect for any night of the week. The combination of honey, soy sauce, garlic, and ginger produces a rich flavor that beautifully marries the sweetness and savory notes. Remember to let the chicken marinate for at least 30 minutes to enhance the flavor, or even overnight for the best results.

Using bone-in, skin-on chicken thighs not only ensures a juicier texture but also offers a richer flavor, so don’t skip this step. When cooking, ensure the skin is well-seared to achieve that lovely crispy finish. The rice cooked in chicken broth elevates the dish, making it more savory and flavorful. Rinsing the rice before cooking is key to achieving that perfect fluffy texture.

This dish is easily customizable; you can add vegetables like bell peppers or snap peas into the rice for an added touch of color and nutrition. If you desire a bit of spice, consider adding a pinch of red pepper flakes or serve with sliced green onions for garnish. These honey glazed chicken thighs and rice not only make for a satisfying meal but also serve well as leftovers, maintaining their flavor when reheated.

Pair it with a simple side salad or steamed green vegetables for a complete meal. Enjoy this dish as a comforting, satisfying dinner that brings both warmth and a burst of flavor to your table!

Tips

Cooking Tips for Honey Glazed Chicken Thighs and Rice

  • Marination Time: Allow the chicken thighs to marinate for at least 30 minutes, but ideally, let them sit for several hours or overnight for maximum flavor infusion. The longer they marinate, the more flavorful they will become.
  • Cooking Method: For crispy skin, consider searing the chicken thighs skin-side down in a hot skillet before transferring them to the oven. This creates a delicious golden brown crust and locks in flavor.
  • Oven Temperature: Bake the chicken at a high temperature (around 400°F or 200°C) to ensure a perfectly caramelized glaze. Keep an eye on them to prevent burning, especially since honey can caramelize quickly.
  • Timing for Rice: Start cooking the rice at the same time you put the chicken in the oven. This way, everything will be ready at once, and the rice will absorb flavors from the chicken broth while it cooks.
  • Resting the Chicken: After removing the chicken from the oven, let it rest for about 5-10 minutes before serving. This resting period allows the juices to redistribute, ensuring tender and juicy meat.
  • Serving Suggestion: Serve the chicken over the fluffy rice, drizzling any leftover glaze from the baking dish over the top for added flavor. You can also garnish with sliced green onions or sesame seeds for extra texture and taste.
  • Storage Tips: Leftovers can be stored in an airtight container in the refrigerator for up to 3 days. Reheat gently in the oven or microwave to preserve texture and flavor.

FAQ

What ingredients do I need for Honey Glazed Chicken Thighs and Rice?

You will need chicken thighs, honey, soy sauce, garlic, rice, chicken broth, olive oil, and your choice of vegetables (optional).

How long does it take to prepare this dish?

The total preparation and cooking time is approximately 45 minutes.

Can I use a different type of meat instead of chicken thighs?

Yes, you can substitute chicken breasts, drumsticks, or even pork thighs. Just adjust the cooking time accordingly.

Is this recipe suitable for meal prep?

Yes, Honey Glazed Chicken Thighs and Rice makes for an excellent meal prep option. It can be stored in the refrigerator for up to 3 days.

What type of rice works best for this recipe?

Jasmine rice or basmati rice works best due to their fragrant qualities, but you can use any type of rice you prefer.

Can I make this dish in a slow cooker?

Yes, you can adapt the recipe for a slow cooker. Combine the honey glaze ingredients and chicken thighs in the cooker and cook on low for 6-8 hours.

How can I make the glaze thicker?

You can thicken the glaze by simmering it longer or by adding a cornstarch slurry (mix cornstarch with water) to the sauce while it’s cooking.

What can I serve as a side dish with Honey Glazed Chicken Thighs and Rice?

Suggested side dishes include steamed vegetables, a fresh salad, or roasted potatoes to complement the meal.

Introduction

Imagine the sizzle of a perfectly cooked piece of salmon, aromatic herbs embracing it as it rests in a pool of tangy, luscious lemon juice. The vibrant colors and enticing aromas beckon from the kitchen, promising not just sustenance but an experience. This is the allure of our One-Pan Lemon Herb Salmon—a dish that captivates the senses and elevates a simple dinner into a moment to remember. With bright citrus notes playing harmoniously against the rich, buttery flavor of salmon, each bite promises to be a symphony of taste and texture. If you’re yearning for a meal that delivers gourmet flavor without the gourmet fuss, this recipe is your ticket to culinary bliss.

The Story Behind the Dish

The origins of citrus-marinated dishes extend back centuries, crisscrossing various cultures from Mediterranean coasts to Asian markets. Each region adds its unique spin, favoring local herbs and spices to complement the citric allure of lemon. Lemon and fish—a match made throughout history—find frequent occasions to unite, as seen in traditional seafood preparations from around the globe. With the emergence of the one-pan cooking craze, influenced by both busy modern lifestyles and a desire for clean-up simplicity, this one-pan approach melds historic flavors with contemporary convenience.

Every time you prepare this dish, know that you’re partaking in a tradition that transcends borders, connecting kitchens and cultures through the timeless appeal of fresh, simple ingredients beautifully combined.

Why You’ll Love This Recipe

  • Ease of Preparation: No complicated techniques or endless steps. Simply assemble and let your oven do the work.
  • Quick to Cook: Ready in less than 30 minutes, making it perfect for last-minute meals or streamlined dinner planning.
  • Healthy & Nutrient-Rich: Packed with omega-3 fatty acids, vitamins, and minerals—salmon is a powerhouse of nutrition.
  • Minimal Clean-Up: Using just one pan ensures that clean-up is a breeze, helping you spend more time enjoying your meal.
  • Versatile Pairing Options: Complements a myriad of sides and wines, perfect for any dining occasion.

Flavor Profile & Texture

This dish brings together the subtle, rich taste of salmon, which when baked, achieves a flaky, melt-in-your-mouth quality. The infusion of lemon juice throughout the cooking process adds a zesty brightness, effectively cutting through the natural oiliness of the fish, while fresh herbs provide an aromatic and earthy complexity. The result is a dynamic flavor journey—each taste contrasting yet balancing the others, leaving a refreshing finish on the palate. Accompanied by roasted vegetables or nestled on a bed of grains, the fish offers a fulfilling texture, balancing soft fish with the varying crunch of accompaniments.

Occasions & Pairings

This One-Pan Lemon Herb Salmon is the ideal candidate for any occasion. Its simplicity makes it feasible for an easy weekday dinner, yet its flavor and presentation shine for a Sunday lunch or dinner party.

Suggested Pairings:

  • Side Dishes: Roasted asparagus, garlic mashed potatoes, or a light arugula salad.
  • Drinks: Pair with a crisp white wine, like a Sauvignon Blanc or Chardonnay, to complement the citrus notes.
  • Desserts: Follow with a lemon tart or a berry compote to continue the fruit theme.

Tips, Variations & Substitutions

Our one-pan approach allows for easy customization, giving you room to adapt the dish to your preferences or dietary needs.

  • Add Spice: Include a pinch of red pepper flakes for a hint of heat.
  • Herb Variations: Substitute dill or thyme for a different herbal essence, or a mix depending on your herb garden’s bounty.
  • Vegan Option: Substitute salmon with firm tofu slices, marinated beforehand to absorb flavors.
  • Gluten-Free: The base recipe is naturally gluten-free when paired with appropriate sides.

Storage & Make-Ahead Ideas

The beauty of this dish extends beyond immediate consumption, offering quick storage solutions and make-ahead potential that add to its appeal.

  • Refrigeration: Store any leftovers in an airtight container for up to 3 days. Reheat in the oven for best texture, or serve cold atop a salad.
  • Freezing: While ideally enjoyed fresh, the dish can be frozen. Allow it to cool completely, wrap tightly in foil, and place in a freezer-safe bag for up to 1 month.
  • Make Ahead: Prepare the lemon and herb marinade in advance. Keep the salmon refrigerated in the marinade for up to 8 hours before cooking, intensifying the infusion of flavors.

Fun Facts & Trivia

Did you know that the pairing of lemon with fish became popularized in the Middle Ages due to its ability to balance and mask the sometimes overly ‘fishy’ odors of less fresh fish? While nowadays we enjoy this duo out of choice, it was initially a culinary necessity that has stood the test of time as a classic pairing.

Moreover, salmon itself has an intriguing journey—once abundant and central to Indigenous cultures in the Pacific Northwest, its preservation methods, from smoking to salting, afforded a celebration of resourcefulness that echoes today as a beloved staple in many households worldwide.

With its storied past and contemporary adaptations, the One-Pan Lemon Herb Salmon remains a testament to culinary evolution, available to simplify our lives while promising tastes that are nothing short of extraordinary every time you indulge.

Ingredients

  • Salmon Fillets
    → Fresh salmon fillets are the star of the dish, providing a rich source of protein and healthy omega-3 fatty acids. Look for fillets that are bright in color with a moist appearance. For the best results, pat the fillets dry with paper towels before seasoning to ensure a nice sear when cooking.
  • Olive Oil
    → Extra virgin olive oil adds flavor and helps to keep the salmon moist while cooking. It also acts as a medium for the herbs and spices to adhere to the fish. Use high-quality olive oil for the best taste and health benefits, and make sure it’s at room temperature before mixing with spices.
  • Fresh Lemons
    → Fresh lemons provide acidity and brightness to the dish, balancing the richness of the salmon. You’ll need both lemon juice and lemon slices. Squeeze the juice directly from the fruit for freshness, and choose organic lemons to avoid pesticides when using the zest.
  • Garlic
    → Fresh garlic adds a robust flavor that complements the salmon and herbs. Mince the garlic finely to release its essential oils and enhance its pungency. To prevent bitterness, add the garlic later in the cooking process if you’re sautéing or roasting.
  • Fresh Herbs (such as parsley, dill, or cilantro)
    → Fresh herbs enhance the dish with vibrant flavors and aroma. Finely chop the herbs to release their natural oils, allowing for even distribution throughout the dish. Always use fresh herbs instead of dried for a more pronounced flavor. Adjust quantities based on personal preference.
  • Salt
    → Kosher salt is ideal for seasoning as it helps to elevate the flavors of the salmon and herbs. Use it sparingly at first, as you can always adjust to taste after cooking. Consider using a flaky sea salt as a finishing touch for added crunch and flavor.
  • Black Pepper
    → Freshly ground black pepper adds a mild heat and depth of flavor. Grind the peppercorns just before seasoning the salmon to maximize its flavor. Adjust the amount based on spice preference, keeping in mind that freshly ground pepper is more potent than pre-ground.
  • Asparagus (or other vegetables, like zucchini or bell peppers)
    → Fresh asparagus adds color, texture, and additional nutrients to the dish. Trim the tough ends and cut the stalks to a uniform size for even cooking. Toss the vegetables in olive oil and season them ahead of time for enhanced flavor.

Instructions

  • Preheat your oven to 400°F (200°C) and prepare a large baking sheet by lining it with parchment paper.

    → Preheating the oven ensures that the salmon cooks evenly from the start, and lining the sheet with parchment paper will prevent sticking and make for easy cleanup.
  • Pat the salmon fillets dry with paper towels on both sides.

    → Drying the fillets will help achieve a nice sear and prevent steaming in the oven, contributing to a flavorful crust.
  • In a small mixing bowl, combine the olive oil, minced garlic, salt, freshly ground black pepper, and chopped fresh herbs.

    → Mixing the olive oil with the other ingredients allows for them to be evenly distributed on the salmon, enhancing the overall flavor profile of the dish.
  • Brush the salmon fillets on both sides liberally with the herb mixture using a basting brush.

    → A generous coating of the oil and herb mixture ensures that the flavors penetrate the salmon while it cooks, leading to a tender and flavorful result.
  • Place the seasoned salmon fillets in the center of the prepared baking sheet, skin side down.

    → Positioning the fillets in the center allows for optimal heat circulation around the fish, ensuring even cooking.
  • Prepare the asparagus by washing it thoroughly, snapping off the tough ends, and cutting any larger stalks to match in size with the smaller ones.

    → Trimming the asparagus this way promotes even cooking and enhances texture; nobody wants chewy, stringy ends in their dish.
  • Toss the trimmed asparagus in a bowl with a drizzle of olive oil, salt, and pepper.

    → Coating the asparagus in olive oil helps it to roast beautifully without drying out, and seasoning enhances its natural flavor.
  • Spread the seasoned asparagus around the salmon on the baking sheet.

    → Arranging the asparagus around the fish allows them to cook concurrently and absorb some of the salmon’s flavors, creating a harmonious dish.
  • Slice one of the lemons into rounds and lay the slices on top of the salmon and asparagus.

    → The lemon slices add acidity during cooking, infusing the salmon and vegetables with a bright, tangy flavor and preventing them from drying out.
  • Transfer the baking sheet to the preheated oven and bake for about 12-15 minutes or until the salmon flakes easily with a fork and reaches an internal temperature of 145°F (63°C).

    → Cooking time may vary depending on the thickness of the fillets; monitoring the internal temperature ensures the salmon is safely cooked without overcooking.
  • Remove the baking sheet from the oven and let the salmon rest for a few minutes before serving.

    → Allowing the fillets to rest helps the juices redistribute within the fish, resulting in a moist and tender bite when you serve.
  • Garnish with extra fresh herbs and a squeeze of fresh lemon juice just before serving.

    → Fresh herbs and a squeeze of lemon elevate the dish, enhancing its presentation and flavor.; the brightness will contrast beautifully with the richness of the salmon.
  • Serve the lemon herb salmon alongside the roasted asparagus for a complete meal.

    → Plating the dish attractively not only adds to the visual appeal but also makes for an inviting presentation, encouraging enjoyment.

Notes

These One-Pan Lemon Herb Salmon fillets are an easy and flavorful meal that combines the richness of salmon with the freshness of herbs and citrus. The simplicity of this dish is perfect for weeknight dinners, requiring minimal cleanup while still delivering a delicious and nutritious meal. Pair the salmon with seasonal vegetables like asparagus, zucchini, or bell peppers for a complete plate. Don’t hesitate to experiment with different herbs to find your preferred flavor profile. Additionally, the leftovers make a great addition to salads or wraps for lunch the next day. Make sure to watch the cooking time closely to avoid overcooking the salmon, which can dry it out. It’s best served immediately after cooking for optimal taste and texture.

Tips

Cooking Tips for One-Pan Lemon Herb Salmon

  • Choose the Right Salmon: When selecting salmon fillets, opt for those that are fresh with a vibrant appearance. Look for fillets with even thickness to ensure even cooking.
  • Preheat the Pan: Make sure to preheat your pan before adding the salmon. This will help achieve a golden-brown crust. A hot pan also reduces the likelihood of sticking.
  • Perfectly Seasoned Fillets: For enhanced flavor, season the salmon fillets generously with salt and pepper just before cooking. This step locks in moisture and enhances the taste.
  • Lemon Zest Flavor Boost: Don’t discard the lemon zest! Grate the outer yellow skin of the lemon before juicing to add an extra burst of citrus flavor to the dish.
  • Cooking Time: Salmon cooks quickly; typically, it takes about 4-6 minutes per side depending on the thickness. A good rule of thumb is to cook until the salmon flakes easily with a fork.
  • Add Garlic Wisely: To avoid burning the garlic, consider adding it halfway through the cooking process. This timing allows the garlic to infuse its flavor without becoming bitter.
  • Don’t Overcrowd the Pan: If you’re cooking vegetables alongside the salmon, make sure to leave enough space in the pan for both the salmon and the veggies. Overcrowding can lead to steaming rather than searing.
  • Resting the Salmon: After cooking, let the salmon rest for a couple of minutes before serving. This helps redistribute the juices and keeps the fish moist.
  • Garnishing: Finish off your dish with a sprinkle of fresh herbs and a few lemon slices on top for a beautiful presentation and additional flavor.
  • Leftover Tips: If you have leftovers, store them in an airtight container in the fridge. Reheat gently in the oven or on a skillet to prevent drying out.

FAQ

What ingredients are needed for One-Pan Lemon Herb Salmon?

The main ingredients include salmon fillets, lemon, fresh herbs (such as dill and parsley), olive oil, garlic, salt, and pepper. You may also add vegetables like asparagus or zucchini for a complete meal.

How long does it take to prepare One-Pan Lemon Herb Salmon?

The total preparation and cooking time is approximately 30 minutes, making it a quick and easy meal option.

Can I use frozen salmon for this recipe?

Yes, you can use frozen salmon. Make sure to thaw it completely before cooking for even results.

What types of herbs work best with this dish?

Fresh herbs like dill, parsley, and basil work wonderfully with lemon herb salmon. Feel free to mix them according to your preference.

Can I make this recipe in the oven instead of on the stovetop?

Absolutely! Preheat your oven to 400°F (200°C), place all ingredients in a baking dish, and bake for about 15-20 minutes or until the salmon is cooked through.

Is One-Pan Lemon Herb Salmon healthy?

Yes, this recipe is healthy as it features salmon, which is high in omega-3 fatty acids, and it’s packed with vegetables. It’s low in carbohydrates, making it a great option for many diets.

What sides pair well with One-Pan Lemon Herb Salmon?

Some great sides include quinoa, brown rice, or a fresh green salad. Roasted potatoes or any seasonal vegetables also complement the dish nicely.

Can I substitute salmon with another type of fish?

Yes, you can substitute salmon with other fish like trout, cod, or tilapia. Just adjust the cooking time based on the thickness of the fillets.

Introduction: The Alluring Allure of Creamy Garlic Chicken with Roasted Veggies

Imagine tender chicken pieces enveloped in a sumptuously creamy garlic sauce, paired with perfectly roasted vegetables that are both nourishing and palate-pleasing. The Creamy Garlic Chicken with Roasted Veggies is not just a dish—it’s a culinary experience that invites warmth, flavor, and comfort right to your dining table. This is the sort of dish that, with each bite, unfolds layers of richness and subtleties that entice your senses and bring a sense of homey satisfaction.

The Story Behind the Dish

Originating from the rich tapestry of European culinary traditions, creamy garlic chicken embodies the luxurious marriage of simplicity and flavor that many classic cuisines are known for. This dish, with its velvety sauce and rustic charm, brings to mind French provincial kitchens, where the focus is on fresh ingredients and the kind of hearty, soul-nourishing meals that are designed to be shared.

Garlic, often revered as the “stinking rose,” has been celebrated for centuries across various cultures, not only for its robust flavor but also for its reputed health benefits. Combine this with the omnipresent element of cream, beloved for its ability to transform ordinary dishes into indulgent experiences, and it becomes clear why this dish has stood the test of time.

Why You’ll Love This Recipe

  • Flavorful Simplicity: This dish manages to be both sophisticated and effortlessly simple, perfect for any level of cooking expertise.
  • Family-Friendly: The delightful combination of creamy and savory flavors makes it a hit among both kids and adults.
  • Nutritious: Packed with vegetables and lean protein, it offers a balanced meal that doesn’t compromise on taste.
  • Versatile: Ideal for a cozy family dinner or a larger gathering where you want to impress without stress.

Flavor Profile & Texture

The predominant flavor in this dish is, unsurprisingly, garlic. When sautéed to a golden hue, garlic’s sharp bite mellows into a warm sweetness that infuses every piece of the chicken and permeates the creamy sauce. Layered into this are hints of earthy herbs and a whisper of lemon, which introduce a refreshing acidity that cuts through the richness of the sauce.

The vegetables, with their natural sugars enhanced by roasting, offer a contrasting texture—crispy edges with tender centers—providing different layers of texture that beautifully complement the chicken’s tender silkiness. Each bite is an orchestration of lush, creamy notes paired with delectably caramelized vegetables.

Occasions & Pairings

This dish is your perfect companion for various occasions:

  • Weeknight Dinners: Quick enough to prepare on a busy evening, yet satisfying and hearty.
  • Holiday Feasts: Ideal for impressing guests with minimal effort on special occasions and holiday gatherings.
  • Themed Dinner Parties: Consider pairing with a crisp white wine to complement the garlic and cream, such as a Chardonnay or Sauvignon Blanc.
  • Side Pairings: Serve it alongside warm, crusty bread to mop up the delicious sauce or a simple green salad to balance the richness.

Tips, Variations & Substitutions

One of the great joys of making Creamy Garlic Chicken with Roasted Veggies is the flexibility to adapt the dish to your liking. Here are some ideas:

  • Added Spice: If you prefer a bit of heat, adding a pinch of red pepper flakes or a splash of hot sauce can elevate the dish.
  • Vegetarian Alternative: Replace chicken with hearty vegetables like mushrooms or cauliflower for a vegetarian twist.
  • Dairy-Free Option: Use coconut cream or a dairy-free cream substitute to cater to lactose-intolerant diets.
  • Herb Variations: Try incorporating fresh herbs such as thyme, rosemary, or basil for an aromatic finish.

Storage & Make-Ahead Ideas

Should you find yourself with leftovers—a rare occurrence with this crowd-pleaser—rest assured it stores beautifully:

  • Refrigerate: Store in an airtight container in the refrigerator for up to three days.
  • Freezing: This dish can be frozen for up to a month. For best results, ensure the chicken and sauce are well-covered to prevent freezer burn.
  • Reheating: Gently reheat on the stove over low heat, stirring occasionally to maintain the cream’s integrity. Add a splash of milk or cream if the sauce has thickened.

Fun Facts & Trivia

Did you know that garlic has been cultivated for over 5,000 years and was used as a form of currency in ancient Egypt? In medieval times, it was eaten to cleanse people of evil spirits and flu, believed to harbor protective properties. This rich history is what you are tasting when you indulge in this dish.

This Creamy Garlic Chicken with Roasted Veggies is more than mere sustenance; it’s a dish that carries with it nuances of history, health, and happiness, perfect for bringing a touch of gourmet indulgence to any meal.

Ingredients

  • Chicken

    → Use boneless, skinless chicken breasts or thighs for a tender and juicy result. Chicken thighs have more fat, which can enhance the flavor and keep the meat moist during cooking. Ensure the chicken is at room temperature before cooking to promote even cooking.
  • Garlic

    → Fresh garlic cloves are essential for creating a rich, aromatic base for the dish. Mince or finely chop the garlic to release its oils and flavor. Be careful not to burn the garlic in the pan, as it can turn bitter.
  • Heavy Cream

    → Heavy cream adds a rich, creamy texture to the sauce, making it indulgent and luxurious. Use fresh heavy cream straight from the refrigerator for the best results; its higher fat content helps create a luscious consistency when combined with garlic and spices.
  • Vegetable Broth

    → Use low-sodium vegetable broth as a base for the sauce to enhance the flavor without adding excessive salt. If you prefer a richer taste, chicken broth can also be used. Allow the broth to come to a gentle simmer before adding to the pan with the garlic.
  • Olive Oil

    → Extra virgin olive oil is perfect for sautéing the chicken and vegetables, imparting a lovely flavor. Use it to lightly coat the bottom of the pan and ensure an even sear on the chicken. Opt for high-quality olive oil for the best taste.
  • Vegetables

    → A mix of colorful vegetables like bell peppers, broccoli, and zucchini brings both nutrition and visual appeal. Chop them into uniform sizes to ensure even roasting. Toss them in olive oil, salt, and pepper before roasting to enhance their natural sweetness and flavor.
  • Salt

    → Salt brings out the flavors of the chicken and vegetables, enhancing the overall taste of the dish. Use kosher salt for seasoning; its coarse texture makes it easier to control the amount you use. Season both the chicken and vegetables generously before cooking.
  • Pepper

    → Freshly ground black pepper adds a subtle heat and depth of flavor. Use a pepper grinder for the freshest taste. Adjust the amount based on your preference for spice; a moderate amount enhances the overall flavor without overpowering the dish.
  • Fresh Parsley (for garnish)

    → Fresh parsley adds a burst of color and a hint of freshness to the dish. Chop it finely and sprinkle it over the finished plate just before serving to brighten the flavors. Use flat-leaf parsley for a more robust flavor compared to curly parsley.

Instructions

  • Preheat your oven to 425°F (220°C) and prepare a large baking sheet by lining it with parchment paper.

    → Preheating the oven ensures that your vegetables roast evenly and develop a nice caramelization, which enhances their natural sweetness. Parchment paper helps prevent sticking and makes cleanup easier.
  • Gather and prepare all your ingredients, including chicken, vegetables, garlic, heavy cream, vegetable broth, olive oil, salt, pepper, and parsley.

    → Having your ingredients ready and within reach (a process called “mise en place”) streamlines the cooking process and helps you work quickly and efficiently, allowing you to focus on technique and flavor.
  • Chop your vegetables—bell peppers, broccoli, and zucchini—into uniform pieces, approximately 1-inch in size.

    → Uniform cutting ensures even cooking and allows all vegetables to roast at the same rate, resulting in optimal texture and flavor.
  • Toss the chopped vegetables in a large bowl with 2-3 tablespoons of olive oil, and season generously with salt and freshly ground black pepper.

    → The olive oil helps the vegetables to roast nicely, while the seasoning enhances their flavors. Use your hands to mix them thoroughly, ensuring every piece is evenly coated.
  • Spread the seasoned vegetables in a single layer on the prepared baking sheet.

    → Spreading the vegetables out allows for proper air circulation and browning; overcrowding the pan can lead to steaming instead of roasting.
  • Place the baking sheet with the vegetables in the preheated oven and roast for 20-25 minutes.

    → Roasting at a high temperature helps to achieve a deliciously crispy exterior while keeping the insides tender. Stir halfway through cooking to promote even browning.
  • While the vegetables are roasting, heat 1 tablespoon of olive oil in a large skillet over medium-high heat.

    → Heating the oil properly ensures the chicken sears effectively, forming a flavorful crust and locking in juices.
  • Season the chicken breasts or thighs generously with salt and freshly ground black pepper.

    → Proper seasoning is crucial for enhancing the chicken’s natural flavor; the seasoning also creates a delicious crust during cooking.
  • Once the oil is shimmering, carefully add the seasoned chicken to the skillet in a single layer.

    → Avoid overcrowding the pan, as this would lower the temperature and prevent a proper sear. Allow the chicken to cook undisturbed for about 6-7 minutes until golden brown.
  • Flip the chicken pieces and cook for an additional 6-7 minutes on the other side until cooked through and the juices run clear.

    → This step is critical for ensuring the chicken is fully cooked. You can use a meat thermometer to check the internal temperature; it should reach 165°F (75°C).
  • Remove the chicken from the skillet and set aside on a plate, covering it with foil to keep warm.

    → Resting the chicken after cooking allows the juices to redistribute, making it more tender and juicy when sliced.
  • In the same skillet, add minced garlic and sauté for about 30-60 seconds until fragrant, stirring constantly.

    → Garlic cooks quickly and can burn easily; stirring continuously ensures it doesn’t scorch, which can create a bitter flavor.
  • Pour in 1 cup of vegetable broth to the skillet and bring to a gentle simmer, scraping up any browned bits from the bottom of the pan.

    → This deglazing step adds great flavor to the sauce and utilizes the fond (browned bits) left in the skillet, enhancing the overall dish.
  • Once simmering, reduce the heat to low and stir in ½ cup of heavy cream.

    → Mixing the cream into the broth thickens the sauce and creates a rich, velvety texture. Stir until fully combined and heated through.
  • Return the chicken to the skillet, spoon the sauce over it, and let it simmer for an additional 3-4 minutes to absorb the flavors.

    → This step ensures that the chicken not only heats back up but also becomes infused with the creamy garlic sauce, enhancing its flavor.
  • When the vegetables are roasted to perfection, remove them from the oven and garnish them with a pinch of salt.

    → An extra sprinkle of salt before serving enhances the flavor of the roasted veggies and helps balance the dish.
  • To serve, arrange the creamy garlic chicken on plates alongside the roasted vegetables.

    → Presenting your dish thoughtfully enhances the dining experience; the colors and textures will invitingly attract attention.
  • Finish by sprinkling freshly chopped parsley over the chicken and vegetables for a touch of color and freshness.

    → The parsley adds visual appeal and a fresh herbal note to the dish, brightening the flavors and making it more vibrant.

Notes

Get ready to enjoy a rich and flavorful Creamy Garlic Chicken with Roasted Veggies, a dish that perfectly balances indulgence and nutrition. Start by preparing your ingredients to ensure a smooth cooking process. First, opt for boneless, skinless chicken breasts or thighs, as they will yield tender meat. Remember to let the chicken reach room temperature before cooking for even cooking.

Fresh garlic is crucial for this recipe—mince the cloves well to release their aromatic properties, but keep a close eye on them while cooking to avoid any bitterness from burning.

The addition of heavy cream transforms your sauce into a luxurious experience. Always use fresh cream right from the fridge, as its higher fat content creates a wonderfully creamy consistency when combined with garlic and broth. Low-sodium vegetable broth serves as an excellent base, but feel free to substitute chicken broth for a deeper flavor. Let the broth simmer gently before integrating it with the other ingredients.

For sautéing, choose extra virgin olive oil to not only cook your chicken and veggies but also to impart a delicious flavor. Invest in a high-quality oil for the best outcome. Your vegetables should be a colorful mix—bell peppers, broccoli, and zucchini work well. Chop them uniformly for even roasting, and coat them with olive oil, salt, and pepper to accentuate their sweetness and flavor during the roasting process.

When seasoning, use kosher salt to enhance flavors without bringing the dish’s sodium level too high. Season both the chicken and vegetables generously before cooking to ensure that every bite is flavorful. Freshly ground black pepper will add a slight kick to the dish—adjust the amount based on your heat tolerance to achieve the perfect balance of taste.

Finally, don’t forget the fresh parsley! This herb not only garnishes the dish beautifully but also adds a refreshing touch. Chop it finely and sprinkle it over the dish just before serving. For a more pronounced flavor, go for flat-leaf parsley over curly parsley.

This Creamy Garlic Chicken with Roasted Veggies is sure to be a hit at your dining table, providing both comfort and nourishment. Enjoy!

Tips

Cooking Tips for Creamy Garlic Chicken with Roasted Veggies

  • Chicken Preparation: To ensure your chicken is evenly cooked, take it out of the refrigerator about 30 minutes before cooking to bring it to room temperature. This prevents the outside from cooking too quickly while the inside remains undercooked.
  • Garlic Handling: For the best garlic flavor, use fresh cloves and mince them right before cooking. If you find you have garlic left over, store it in an airtight container in the fridge for up to a week. However, avoid freezing minced garlic as it can alter its flavor.
  • Creating the Sauce: After sautéing the garlic, add the heavy cream slowly while stirring to avoid curdling. Keep the heat on medium-low to create a velvety sauce without boiling, as boiling can cause the cream to separate.
  • Vegetable Broth Tips: If you’re using store-bought vegetable broth, taste it first before adding salt to ensure the seasoning balances well with the dish. You can also add a splash of white wine for an extra layer of flavor.
  • Oil Choice: When using olive oil, allow it to heat slightly before adding the chicken to achieve a good sear. If the oil starts smoking, it’s too hot. Lower the heat to ensure an even cook without burning.
  • Roasting Vegetables: Spread the vegetables in a single layer on the baking sheet to ensure they roast evenly. Avoid overcrowding, as this can lead to steaming rather than roasting. Check for doneness by piercing with a fork or knife; they should be tender and slightly caramelized.
  • Seasoning: Taste and adjust the seasoning after cooking. If the dish tastes flat, a pinch of salt can often uplift and enhance the flavors. Remember to season in layers, adding some during cooking and then adjusting at the end.
  • Garnishing with Parsley: Adding parsley just before serving preserves its vibrant color and flavor. Consider chopping larger quantities beforehand to garnish several servings quickly.

FAQ

What ingredients do I need for Creamy Garlic Chicken with Roasted Veggies?

You will need chicken breasts, garlic, heavy cream, olive oil, assorted vegetables (like bell peppers, zucchini, and carrots), salt, pepper, and fresh herbs (such as thyme or parsley).

How long does it take to prepare Creamy Garlic Chicken with Roasted Veggies?

The total preparation and cooking time is approximately 40-50 minutes.

Can I use a different type of meat instead of chicken?

Yes, you can substitute chicken with turkey, pork, or even tofu for a vegetarian option.

What vegetables work best for roasting?

Good options for roasting include bell peppers, zucchini, carrots, broccoli, and brussels sprouts. Feel free to mix and match according to your preference.

Is this recipe suitable for meal prep?

Absolutely! Creamy Garlic Chicken with Roasted Veggies is great for meal prep. Just store the components separately in airtight containers for up to 4 days in the refrigerator.

Can I make this recipe dairy-free?

Yes, you can use a dairy-free cream alternative, such as coconut cream or almond milk, to make it dairy-free.

What can I serve with Creamy Garlic Chicken?

This dish pairs well with rice, quinoa, or pasta. You can also serve it with a side salad for a lighter option.

Can I freeze leftovers?

Yes, you can freeze the leftovers. Just make sure to store them in a freezer-safe container and consume within 2-3 months for best quality.

Introduction to Hearty Vegetable and Bean Stew

Imagine the warm, inviting aroma of simmering herbs and spices filling your kitchen, enticing your senses as you anticipate the comfort that awaits. Our Hearty Vegetable and Bean Stew is more than just a meal; it’s a culinary embrace, offering solace and satisfaction with every spoonful. This recipe takes you on a flavorful journey, showcasing the simple yet profound power of combining nature’s bounty into a nourishing and flavorful stew. Perfect for chilly evenings or when you need a wholesome touch, this stew is a symphony of earthy vegetables and protein-rich beans, with a luscious broth that ties every component together into delightful harmony.

The Story Behind the Dish

The origins of vegetable and bean stews can be traced back centuries, rooted in the culinary traditions of cultures around the world. From French ratatouille to Italian minestrone, the theme of combining seasonal vegetables with legumes has been a staple across continents. This approach capitalizes not only on the abundance of fresh ingredients but also on the art of making do with what one has on hand. Historically, these stews were meals of necessity, created from the desire to nourish large families with simple, accessible produce. Our Hearty Vegetable and Bean Stew follows in this tradition, honoring the rustic elegance and practicality of these time-tested recipes while adding its own flair to create something truly special.

In many cultures, such stews are shared during family gatherings and celebrations, symbolizing unity and warmth. This recipe carries those sentiments forward, inviting you to partake in a tradition that spans continents and generations. By cooking this stew, you become part of a living tapestry that celebrates the richness of plant-based foods and their ability to bring people together.

Why You’ll Love This Recipe

  • Nutrient-rich: Packed with an array of vegetables and beans, this stew is a powerhouse of vitamins, minerals, and fiber.
  • Easy to make: With straightforward instructions and common ingredients, you can whip up this delightful dish with minimal fuss.
  • Customizable: The ingredients can be swapped out to suit your preferences or what you have in your pantry, making it incredibly versatile.
  • Vegan friendly: Naturally plant-based, this stew caters to a wide variety of dietary preferences and restrictions.
  • Comforting and satisfying: With its rich flavors and warm textures, it’s perfect for cozy nights in.

Flavor Profile & Texture

The allure of this stew lies in its expertly layered flavors and pleasing textures. At its heart, the stew boasts a robust and aromatic herb-infused broth, which acts as the perfect canvas for the medley of ingredients. Every bite delivers a burst of flavors; the savory notes from carrots and celery, the subtle sweetness of bell peppers, and the deep, hearty undertones of tomatoes create a delightful balance.

Beans introduce a creamy texture that complements the slight crunch of al dente vegetables. The stew’s consistency is substantial yet fluid, providing a comforting experience that warms you from the inside out. Each spoonful is a testament to the beauty of humble ingredients transformed through slow, attentive cooking.

Occasions & Pairings

This hearty stew makes an ideal dish for various occasions, from casual weeknight dinners to festive family gatherings. Its versatility means it can be a standalone entrée or part of a larger meal spread. Here are some suggestions for when to enjoy it and what to pair it with:

  • Cold Winter Nights: Serve alongside crusty bread or warm cornbread to soak up the rich broth.
  • Holiday Meals: Incorporate into your holiday menu as a comforting starter or a vegan main course option.
  • Weeknight Suppers: Pair with a fresh green salad or roasted vegetables for a light yet fulfilling dinner.
  • Serving with Wine: A medium-bodied red wine like Merlot or Zinfandel complements the stew’s robust flavors beautifully.
  • For Lunch or Picnics: Enjoy it chilled or at room temperature, which allows the flavors to meld even further.

Tips, Variations & Substitutions

One of the joys of making a stew like this is its adaptability. You can tweak it to fit dietary needs or personal tastes. Consider the following tips and variations:

  • Vegetable Variations: Enhance the stew with seasonal vegetables like squash or zucchini for a fresh twist.
  • Bean Substitutions: Swap out cannellini beans for chickpeas or kidney beans for a different texture and flavor profile.
  • Herb Additions: Add a bay leaf during simmering for a more complex taste, or finish with fresh basil for a fragrant touch.
  • Spice Adjustments: Give the stew a bit of heat with the addition of red pepper flakes or smoked paprika.
  • Thickening Options: For a thicker consistency, blend a portion of the stew and stir it back into the pot, or add a spoonful of tomato paste.
  • Gluten-Free and Vegan Alternatives: Ensure all spice blends and broth bases are gluten-free and vegan-certified.

Storage & Make-Ahead Ideas

Proper storage and planning are vital for enjoying your stew beyond its initial serving. Here are some useful tips to ensure you get the most out of this delicious dish:

  • Storage: Transfer leftovers to an airtight container and refrigerate for up to five days.
  • Freezing: This stew freezes beautifully! Portion it into freezer-safe bags or containers. It can be frozen for up to three months. Thaw overnight in the refrigerator before reheating.
  • Reheating: Gently reheat on the stovetop over medium heat, stirring occasionally, until warmed through. You can also use a microwave for individual portions.
  • Make-Ahead: Prepare this stew a day in advance, as the flavors will deepen while resting, offering an even richer taste when you serve it.

Fun Facts & Trivia

Did you know that beans, a central ingredient in this stew, have been cultivated for over 7,000 years? They were essential to the diets of ancient civilizations, valued for their resilience and nutritional content. Moreover, their cultivation significantly contributes to soil health, thanks to their nitrogen-fixing properties, making them an eco-friendly crop choice.

In the language of flowers, carrots symbolize roots and foundational strength, which aligns with their role in this dish. Each portion of this stew is not just a meal but a connection to the earth and the cycles of nature that enable these ingredients to flourish.

So, roll up your sleeves and treat yourself and your loved ones to a bowl of this Hearty Vegetable and Bean Stew—where history, flavor, and nourishment unite in every bite.

Ingredients

  • Vegetable Base
    • 2 tablespoons olive oil
      → Olive oil serves as the foundation for sautéing the vegetables, adding richness and depth to the stew. Use extra virgin olive oil for its robust flavor. Heat the oil over medium heat before adding the vegetables to enhance their natural sweetness.
    • 1 large onion (diced)
      → Onions add sweetness and a savory depth to the stew. Dice them into small, uniform pieces to ensure they cook evenly. Sauté the onions until they become translucent; this process unlocks their flavors and enhances the overall taste of the dish.
    • 2 cloves garlic (minced)
      → Garlic provides a fragrant aroma and depth of flavor. Mince the garlic finely to release its oils and ensure it blends well with the other ingredients. Add garlic to the pot once the onions are softened to prevent burning and bitterness.
    • 2 medium carrots (sliced)
      → Carrots add natural sweetness and a vibrant color to the stew. Slice them into even rounds for consistent cooking. Using fresh, firm carrots ensures that they retain their texture and flavor, adding heartiness to the stew.
    • 2 stalks celery (sliced)
      → Celery contributes crunch and a fresh flavor to the stew. Slice the stalks thinly for even cooking. Fresh celery with bright green color and firm texture will give the best results, infusing the stew with aromatic qualities.
    • 1 bell pepper (diced)
      → Bell peppers add a sweet crunch and vibrant color. Dice the pepper into small pieces so they cook quickly and integrate with the other vegetables. Choose a ripe pepper with smooth skin for the best flavor and texture.
    • 1 zucchini (sliced)
      → Zucchini brings moisture and a subtle flavor to the stew. Slice it evenly to ensure quick cooking. Choose medium-sized zucchini that are firm to the touch; avoid those that are overly soft or blemished.
    • 1 can (14.5 oz) diced tomatoes (with juices)
      → Diced tomatoes add acidity, moisture, and a rich flavor base for the stew. Use canned tomatoes packed in juice for a more robust flavor. To keep the stew fresh, consider using low-sodium tomatoes to control salt levels.
  • Legumes
    • 1 can (15 oz) kidney beans (drained and rinsed)
      → Kidney beans provide protein, fiber, and heartiness to the stew. Make sure to drain and rinse the beans to remove excess sodium and retain their flavor. Using canned beans saves time, but if using dried beans, soak and cook them beforehand.
    • 1 can (15 oz) black beans (drained and rinsed)
      → Black beans add texture and additional protein to the stew. Similar to kidney beans, drain and rinse them before adding to the pot for optimal taste. This step also helps remove any canning liquid that can dilute flavor.
  • Liquids and Seasonings
    • 4 cups vegetable broth
      → Vegetable broth serves as the primary liquid for the stew, infusing it with flavor. Use low-sodium broth to control salt levels in the dish. If homemade broth is available, it can enhance the overall freshness and taste.
    • 1 teaspoon dried thyme
      → Dried thyme adds an earthy, herbal flavor that complements the vegetables. Simply sprinkle it into the broth; the heat will help release its aromatic qualities, enriching the stew as it simmers.
    • 1 teaspoon ground cumin
      → Ground cumin brings warmth and complexity to the dish. Add it to the stew early in the cooking process, allowing its flavors to meld with the other ingredients. Avoid using too much, as it can become overpowering.
    • Salt and black pepper (to taste)
      → Salt enhances the overall flavor of the stew, while black pepper adds a hint of heat. Start with a small amount of each and adjust towards the end of cooking to ensure seasoning is balanced.
  • Finishing Touches
    • 1 tablespoon fresh parsley (chopped)
      → Chopped fresh parsley adds a bright, fresh flavor to finish off the stew. Stir it in just before serving to maintain its vibrant color and taste. Choose vibrant green parsley for the best quality.

Instructions

  • Heat 2 tablespoons of olive oil in a large pot over medium heat.

    → Olive oil serves as the foundation for sautéing the vegetables, adding richness and depth to the stew. Heating the oil allows it to reach the right temperature, which ensures even cooking and enhances the natural sweetness of the vegetables you will add next.
  • Add 1 large diced onion to the pot and sauté for 5-7 minutes.

    → Onions add sweetness and a savory depth to the stew. Be sure to dice them into small, uniform pieces so they cook evenly. Sauté until they turn translucent; this process unlocks their flavors and enhances the overall taste of the dish.
  • Stir in 2 minced garlic cloves and cook for an additional minute.

    → Garlic provides a fragrant aroma and depth of flavor. Mince the garlic finely to release its oils and prevent burning. Adding it after the onions are softened helps avoid bitterness, ensuring your stew has a beautiful depth of flavor.
  • Add 2 sliced medium carrots and 2 sliced stalks of celery to the pot.

    → Carrots contribute natural sweetness and vibrant color, while celery adds crunch and a fresh flavor. Slice the vegetables into even pieces for uniform cooking. Use fresh, firm carrots and celery for the best texture and taste.
  • Incorporate 1 diced bell pepper and 1 sliced zucchini into the mixture.

    → Bell peppers add sweetness and vibrant color, while zucchini brings moisture and subtle flavor. Dice the bell pepper and slice the zucchini evenly to ensure they cook at similar rates. Choosing ripe vegetables enhances the stew’s overall flavor.
  • Pour in 1 can (14.5 oz) diced tomatoes with their juices.

    → Diced tomatoes add acidity, moisture, and a rich flavor base for the stew. Use tomatoes packed in juice for robust flavor; this will help create a thick, hearty texture in your stew and balance the flavors of the other vegetables.
  • Add 1 can (15 oz) drained and rinsed kidney beans, followed by 1 can (15 oz) drained and rinsed black beans.

    → Kidney and black beans provide protein, fiber, and heartiness to the stew. It’s important to drain and rinse them to remove excess sodium and any undesired flavors from the canning liquid. If using dried beans, ensure they are cooked and softened before adding.
  • Pour in 4 cups of vegetable broth.

    → Vegetable broth serves as the primary liquid for the stew, infusing it with flavor. Using low-sodium broth allows you to control the salt content. Homemade broth enhances freshness and the overall taste of the stew.
  • Sprinkle in 1 teaspoon of dried thyme and 1 teaspoon of ground cumin.

    → Dried thyme adds an earthy aroma, while cumin introduces warmth and complexity. Adding these spices at this stage allows their flavors to meld with the other ingredients as they cook, creating a well-rounded flavor profile.
  • Season the stew with salt and black pepper to taste.

    → Salt enhances the overall flavor of the stew, and black pepper adds a hint of heat. Start with a small amount of each; it is easier to adjust seasoning towards the end rather than risk overpowering the dish.
  • Bring the stew to a gentle boil, then reduce the heat to low and let it simmer for 30 minutes.

    → Simmering allows the flavors to meld and develop fully. Keep it covered partially to prevent excessive evaporation while allowing some steam to escape. Stir occasionally to ensure nothing sticks to the bottom of the pot.
  • Taste the stew before serving and adjust seasoning if necessary.

    → Tasting the stew ensures all flavors are balanced. You may find it needs a pinch more salt, pepper, or spice, so adjust accordingly. This step is crucial for achieving the perfect flavor.
  • Stir in 1 tablespoon of chopped fresh parsley just before serving.

    → Fresh parsley adds a bright, fresh flavor and a pop of color to the finished dish. Stir it in just before serving to maintain its vibrant color and enhance the stew’s presentation.
  • Serve the hearty vegetable and bean stew hot, ideally with crusty bread or over rice.

    → Serving it hot allows the flavors to shine, and pairing it with crusty bread can add texture, making for a wholesome meal. Enjoy your nutritious and hearty stew!

Notes

  • Start by preparing all the ingredients: Dice the onion, mince the garlic, slice the carrots, celery, bell pepper, and zucchini. Drain and rinse the beans. Having everything prepped will streamline your cooking process.
  • In a large pot, heat the olive oil over medium heat. Once hot, add the diced onion and sauté until it becomes translucent, about 5-7 minutes. This will create a fragrant base for your stew.
  • Add the minced garlic to the pot only after the onions are soft; sauté for about 1 minute until fragrant but not browned. This prevents any bitter flavors from burnt garlic.
  • Next, add the sliced carrots, celery, and bell pepper to the pot. Stir occasionally, cooking them until they start to soften, about 5 minutes.
  • Add the sliced zucchini to the pot along with the canned diced tomatoes (with their juices). Stir everything together, allowing the flavors to mix.
  • Pour in the vegetable broth and bring the mixture to a boil. Once boiling, reduce the heat to a simmer.
  • While the stew simmers, add the rinsed kidney and black beans, along with the dried thyme and ground cumin. Stir well to ensure all ingredients are integrated and coated in the flavorful broth.
  • Season the stew with salt and black pepper according to your taste preferences. It is better to start with smaller amounts and adjust as needed later.
  • Let the stew simmer for at least 20-30 minutes, stirring occasionally, allowing the flavors to meld and the vegetables to become tender. This is where the magic happens!
  • Once done, taste and adjust seasoning if necessary. Serve hot, garnished with fresh chopped parsley for a pop of color and freshness.
  • This hearty vegetable and bean stew can be enjoyed on its own or served with crusty bread or over rice for a more filling meal. It’s perfect for leftovers; the flavors deepen as it sits, making it even more delicious the next day.

Tips

Cooking Tips for Hearty Vegetable and Bean Stew

  • Prepping Your Vegetables: For optimal flavor, prepare all your vegetables before starting to cook. This ensures that you can sauté them quickly and at the right time, maintaining their textures and flavors.
  • Sautéing Technique: When sautéing your onion, garlic, and other vegetables, keep the heat at medium. This prevents burning while allowing the vegetables to become tender and release their natural sugars, enhancing sweetness.
  • Layering Flavors: Consider adding the vegetables in stages based on their cooking times. Start with the onion and garlic, then add the carrots and celery, and finally the bell pepper and zucchini, which require less time to cook.
  • Season Gradually: When seasoning your stew, add spices and herbs gradually. Start with cumin and thyme, then taste as the stew cooks. This helps to build layers of flavor without overpowering the dish.
  • Consistency Check: If your stew appears too thick, add more vegetable broth a little at a time. Conversely, if it’s too thin, let it simmer uncovered to allow some liquid to evaporate.
  • Beans Choice: If using dried beans instead of canned, remember to soak them overnight and cook them until tender before adding them to the stew. This will ensure even cooking and prevent them from becoming mushy.
  • Fresh Herbs: Fresh herbs like parsley should be added at the end of cooking to preserve their flavor and vibrant color. You can also consider adding other herbs such as basil or cilantro for a different taste profile.
  • Flavor Enhancements: For added depth, consider adding a splash of balsamic vinegar or a squeeze of lemon juice just before serving. These can brighten the flavors and add a nice finishing touch.
  • Serving Suggestions: Serve the stew hot with crusty bread or over a bed of rice for a complete meal. This can also help soak up the delicious broth.
  • Make-Ahead Option: This stew tastes even better the next day! Feel free to prepare it in advance and reheat it gently, allowing the flavors to meld together beautifully.

FAQ

What ingredients are needed for the Hearty Vegetable and Bean Stew?

The main ingredients include assorted vegetables (like carrots, potatoes, and bell peppers), various beans (such as kidney beans and chickpeas), vegetable broth, tomatoes, garlic, and herbs like thyme and bay leaf.

How long does it take to prepare the Hearty Vegetable and Bean Stew?

The preparation time is approximately 15 to 20 minutes, while the cooking time ranges from 30 to 40 minutes, making a total time of about 1 hour.

Can I use canned beans for the stew?

Yes, canned beans are a great option as they save time. Just be sure to rinse them well to reduce sodium content before adding them to the stew.

Is this stew suitable for vegans?

Absolutely! The Hearty Vegetable and Bean Stew is entirely plant-based, making it a perfect choice for vegans and vegetarians.

Can I add meat to the Hearty Vegetable and Bean Stew?

Yes, if you prefer a meaty version, you can add cooked meat such as chicken or beef. Adjust the cooking time accordingly to ensure the meat is thoroughly heated.

What can I serve with the Hearty Vegetable and Bean Stew?

This stew pairs wonderfully with crusty bread, rice, or quinoa. It can also be served alongside a fresh salad for a complete meal.

Can leftovers be stored in the fridge?

Yes, the stew can be stored in an airtight container in the refrigerator for up to 3-4 days. It also freezes well for longer storage.

What variations can I make to the Hearty Vegetable and Bean Stew?

Feel free to mix and match vegetables based on your preference or seasonal availability. You can also experiment with different herbs and spices to customize the flavor.

Introduction to One-Pan Lemon Herb Salmon

Imagine a dish that captures the invigorating essence of a Mediterranean seaside landscape: the tangy zest of lemon, the aromatic allure of fresh herbs, and the succulent richness of perfectly cooked salmon. This One-Pan Lemon Herb Salmon not only promises a delectably satisfying meal but also transforms your kitchen into a scene of effortless culinary elegance. Whether you’re seeking a quick weeknight dinner solution or an eye-catching entrée for a special occasion, this dish strikes a harmonious balance between healthful simplicity and gourmet refinement. With just one pan, minimal clean-up, and a symphony of fresh flavors, it’s a culinary masterpiece that’s as delightful to prepare as it is to savor.

The Story Behind the Dish

The origins of lemon herb salmon find their roots in the sun-drenched coasts of the Mediterranean, where seafood is a staple and the abundant local produce forms the foundation of every meal. The luscious interplay of lemon and herbs is a classic pairing, historically celebrated for their ability to enhance and elevate the natural flavors of fish. In this modern rendition, the one-pan approach marries convenience with the time-honored tradition of producing wholesome, fresh meals. This method has been passed down over generations, evolving from fire-heated stones to contemporary ovens, while retaining its rustic charm and nourishing integrity. As cuisine has traveled and transformed, the simplicity and versatility of the approach have made it a beloved choice for home cooks and professional chefs alike.

Why You’ll Love This Recipe

  • Quick and Easy: With everything cooked in a single pan, this recipe minimizes both effort and clean-up time, making it perfect for busy weeknights.
  • Health Benefits: High in omega-3 fatty acids, this dish is not only delicious but also supports heart health.
  • Family-Friendly: The mild yet flavorful taste is appealing to both children and adults, ensuring it’s a hit at the dinner table.
  • Visually Appealing: The vibrant colors of the herbs and lemons create a beautiful presentation, ideal for special dinners and holidays.

Flavor Profile & Texture

This dish offers a tantalizing blend of flavors that dance on your palate. The salmon provides a rich, buttery texture, perfectly contrasted by the bright, zesty punch of lemon. Fresh herbs like dill, parsley, and rosemary add layers of complexity, each with their unique aroma and taste, harmonizing beautifully with the natural flavors of the fish. A hint of garlic enhances its rich undertones, offering subtle earthiness. With its crisp, lightly browned crust and tender, flaky interior, this salmon dish simultaneously delivers satisfying heartiness and refreshing lightness.

Occasions & Pairings

One-Pan Lemon Herb Salmon is versatile enough to serve at an array of occasions. Whether enhancing the menu of a festive holiday dinner or starring as a simple weeknight meal, it consistently impresses. Looking to create an elevated dining experience? Pair this dish with a crisp white wine like Sauvignon Blanc or an unoaked Chardonnay that complements the citrusy notes perfectly. For sides, consider a refreshing cucumber salad or roasted seasonal vegetables. Additionally, a serving of fluffy couscous or a rustic bread adds a comforting, hearty touch to complete the meal.

Tips, Variations & Substitutions

There’s ample room for creativity with this recipe, allowing you to customize it according to your preferences or dietary needs. For a variation, consider using lime instead of lemon, offering a slightly different citrus profile. If you’re cooking for someone who prefers a different protein, swap salmon with another firm fish like cod or halibut. Vegetarians can substitute salmon with marinated tofu or hearty vegetables like eggplant or zucchini. To accommodate different dietary needs, olive oil can be replaced with a buttery vegan alternative or even coconut oil for a tropical twist.

Storage & Make-Ahead Ideas

Any leftovers from this dish can be efficiently stored in an airtight container in the refrigerator, where they’ll remain fresh for up to three days. For those who love to meal prep, this dish can be cooked in advance and stored, allowing the flavors to meld and intensify over time. When ready to serve, gently reheat in an oven preheated to 350°F for approximately 10–15 minutes, ensuring the salmon remains moist but heated through. Alternatively, if preparing for a larger gathering, season the salmon in advance and store it in the refrigerator, then pop it in the oven just before your guests arrive.

Fun Facts & Trivia

Did you know that salmon is one of the most widely farmed fish in the world, with origins tracing back to the icy waters of the Atlantic and Pacific Oceans? In ancient times, salmon was prized by many indigenous peoples for its abundance and nutritional profile, leading it to become a significant part of their diet and culture. Today, the health benefits of salmon are well-documented, and it remains a favorite ingredient in kitchens worldwide, particularly praised for its versatility and robust, adaptable flavors. This dish, with its vibrant colors and rich history, aptly reflects the collective evolution of culinary practices that transcend borders and time.

In conclusion, One-Pan Lemon Herb Salmon is more than just a meal; it’s an experience crafted with simplicity and elegance. Anchored by its Mediterranean roots and elevated by modern techniques, it encapsulates the beauty of minimalist cooking. Perfect for all skill levels and occasions, it continues to be a testament to the art of transforming the ordinary into the extraordinary, one pan at a time.

Ingredients

  • Salmon Fillets
    → Fresh salmon fillets are the star of the dish, providing a rich source of protein and healthy omega-3 fatty acids. Choose fillets that are bright and moist, with a slightly firm texture. For the best flavor and texture, look for wild-caught salmon when possible, as it tends to be more flavorful and sustainable.
  • Olive Oil
    → Extra virgin olive oil is used to drizzle over the salmon and vegetables, providing healthy fats and enhancing flavor. The oil also helps in achieving a delightful golden crust when roasting. Opt for high-quality olive oil for the best taste, and feel free to measure it by feel if a specific amount isn’t critical.
  • Fresh Lemon Juice
    → Freshly squeezed lemon juice brightens the dish with acidity, enhancing the flavors of both the salmon and vegetables. For optimal results, use juice from ripe, juicy lemons; avoid bottled lemon juice as it lacks vibrancy. When juicing, roll the lemon on the countertop to release more juice.
  • Lemon Zest
    → The zest adds a burst of citrus aroma, amplifying the lemon flavor without extra acidity. To zest, use a microplane or zester, taking care to only remove the outer yellow skin and avoiding the bitter white pith underneath. Fresh zest can significantly elevate the overall taste of the dish.
  • Garlic (minced)
    → Minced garlic infuses the dish with its distinct and aromatic flavor, complementing the salmon beautifully. Use fresh garlic cloves rather than pre-minced garlic for better flavor; let the minced garlic sit for a few minutes after chopping to enhance its aromatic qualities. Adjust the amount based on your preference for garlic intensity.
  • Fresh Herbs (such as parsley and dill)
    → Fresh herbs provide an aromatic finish to the dish, enhancing its flavor and visual appeal. Chop the herbs finely before adding them to the dish. Use a combination of parsley and dill for a traditional flavor pairing with salmon. Snip herbs just before using them to retain their freshness and flavor.
  • Cherry Tomatoes
    → Cherry tomatoes add a sweet, juicy burst and vibrant color to the dish. They can be halved or left whole, depending on your preference. Select ripe tomatoes for the best flavor; roasting will enhance their sweetness and create a lovely contrast with the salmon.
  • Asparagus (or preferred vegetables)
    → Asparagus brings a tender-crisp texture and green color, making it an excellent side that pairs well with salmon. Trim the woody ends before cooking. If using other vegetables, ensure they can roast at the same time as salmon, or adjust the cooking times for different types of vegetables.
  • Salt and Pepper
    → Salt and freshly ground black pepper are essential seasonings that enhance all flavors in the dish. Season generously but tastefully; start with a light sprinkle of salt on the salmon and vegetables, then adjust after cooking if more seasoning is needed. Freshly ground pepper adds a nice pungent kick, so use it well for a better flavor profile.

Instructions

  • Preheat your oven to 400°F (200°C) and prepare a large baking sheet by lining it with parchment paper.

    → Preheating your oven ensures that your salmon and vegetables cook evenly from the start. Lining the baking sheet prevents sticking and makes cleanup easier, allowing for a perfectly roasted dish.
  • Arrange your salmon fillets on the prepared baking sheet, skin-side down and spaced apart.

    → This positioning allows for sufficient airflow during cooking, leading to even roasting. Ensure the fillets are of similar thickness for consistent cooking times, which will prevent some pieces from overcooking while others are underdone.
  • Drizzle olive oil evenly over the salmon fillets, using about 2 tablespoons in total.

    → The olive oil not only adds flavor but also helps achieve a crispy texture on the salmon’s surface. Make sure each fillet is coated without drowning them, which can lead to steaming instead of roasting.
  • In a small bowl, combine the fresh lemon juice, lemon zest, minced garlic, salt, and pepper. Stir this mixture until well combined.

    → This marinade infuses the salmon with bright flavors and garlic aroma. Mixing these ingredients ensures each bite will carry an even distribution of the lemony flavor, enhancing the overall dish.
  • Pour the lemon marinade over the salmon fillets, ensuring they are well-coated, and let them sit for 10 minutes to marinate.

    → Allowing the salmon to marinate lets the flavors seep in and develop a more pronounced taste. Remember that the acidity from the lemon can change the texture of the fish, so don’t exceed 20 minutes for the marinating process.
  • While the salmon marinates, prepare the vegetables: trim the woody ends of the asparagus and halve the cherry tomatoes.

    → Trimming the ends of asparagus ensures that you only cook tender stems and eliminates any tough, woody textures. Halving the cherry tomatoes maximizes their exposure to heat, which will caramelize their sugars for added sweetness.
  • Spread the prepared asparagus and cherry tomatoes around the salmon fillets on the baking sheet.

    → This arrangement allows the vegetables to absorb the flavors from the salmon and the marinade, which enhances their taste while roasting. Make sure they are not overcrowded for appropriate browning.
  • Drizzle a little more olive oil over the vegetables and sprinkle with additional salt and pepper to taste.

    → Coating the vegetables in olive oil helps them roast beautifully, resulting in a caramelized finish. Seasoning them will enhance their natural sweetness and balance the dish.
  • Put the baking sheet in the preheated oven and roast for 12-15 minutes, or until the salmon is cooked through and flakes easily with a fork.

    → Cooking time may vary depending on the thickness of the salmon fillets. To check for doneness, insert a fork into the thickest part of the salmon; if it flakes apart easily and is opaque in color, it’s ready. Be cautious not to overcook, as this can dry out the fish.
  • Once cooked, remove the salmon and vegetables from the oven and sprinkle the chopped fresh herbs over the dish for garnish.

    → Garnishing with fresh herbs adds a burst of flavor and visual appeal, elevating the dish. Use this final touch sparingly to allow the natural flavors of the lemon and salmon to shine through.
  • Serve immediately with extra lemon wedges on the side for an additional burst of citrus if desired.

    → Serving fresh lemon wedges allows your guests to add acidity to their taste, enhancing their meal experience. Enjoy the harmonious flavors of this one-pan lemon herb salmon dish!

Notes

These One-Pan Lemon Herb Salmon fillets are not only easy to prepare but also packed with flavor and nutrients. The combination of fresh lemon juice and zest brightens the dish, allowing the rich salmon flavor to shine through. Using a variety of fresh herbs like parsley and dill elevates the dish further, adding layers of aromatic freshness.

Roasting the salmon alongside cherry tomatoes and asparagus creates a beautifully balanced meal, where the sweetness of the tomatoes contrasts wonderfully with the savory salmon. You can experiment with different vegetables like zucchini or bell peppers if you prefer, as long as they have similar cooking times.

This dish is perfect for a weeknight dinner due to its simplicity, but it’s also elegant enough to serve for guests. Feel free to serve it with a side of quinoa or brown rice to soak up the delicious juices. And remember, using high-quality olive oil, fresh ingredients, and properly seasoning will make all the difference in achieving a flavorful outcome.

For the best experience, enjoy the salmon hot from the oven, perhaps with an extra squeeze of lemon on top. Leftovers can be stored in an airtight container in the refrigerator for up to two days, making this a convenient meal prep option.

Tips

Cooking Tips for One-Pan Lemon Herb Salmon

  • Choosing Salmon: Opt for salmon fillets that are bright in color and have a shiny appearance. If available, wild-caught salmon will provide a richer flavor compared to farmed varieties.
  • Prepping the Vegetables: Before assembling, wash and prepare your cherry tomatoes and asparagus. For the tomatoes, cutting them in half can help them roast more evenly and release their juices for added flavor.
  • Marinating the Salmon: For an extra boost of flavor, consider marinating the salmon in olive oil, lemon juice, garlic, and herbs for 15-30 minutes before cooking. This will enhance the flavors and moisture.
  • Even Cooking: Make sure to spread the vegetables and salmon in a single layer in your pan to ensure even cooking. If the pan is overcrowded, the salmon may steam instead of roast, which will affect its texture.
  • Checking Doneness: Salmon is perfectly cooked when it reaches an internal temperature of 145°F (63°C) and flakes easily with a fork. Use a meat thermometer for accuracy.
  • Finishing Touches: Just before serving, add an extra drizzle of high-quality olive oil and a sprinkle of fresh herbs for brightness. A sprinkle of lemon zest can also enhance the dish’s appeal.
  • Serving Suggestions: This dish pairs wonderfully with a side of rice or quinoa, which soak up the delicious juices. A light salad or fresh bread can also complement the meal perfectly.

FAQ

What ingredients do I need for One-Pan Lemon Herb Salmon?

You will need salmon fillets, lemon juice, olive oil, garlic, fresh herbs (such as parsley or dill), salt, and pepper. You can also add seasonal vegetables of your choice for roasting.

How long does it take to prepare One-Pan Lemon Herb Salmon?

The preparation time is about 10 minutes, while the cooking time is approximately 20 minutes. Overall, you can have the meal ready in around 30 minutes.

Can I use frozen salmon for this recipe?

Yes, you can use frozen salmon. However, it’s best to thaw the salmon completely before cooking to ensure even cooking and better flavor absorption.

What vegetables pair well with One-Pan Lemon Herb Salmon?

Vegetables like asparagus, broccoli, zucchini, and cherry tomatoes work well. You can choose your favorites or what you have available to create a colorful meal.

Is One-Pan Lemon Herb Salmon a healthy meal option?

Yes, this recipe is a healthy option. Salmon is rich in omega-3 fatty acids, and the addition of vegetables increases the nutrient content, making it a balanced meal.

Can I substitute the herbs in this recipe?

Absolutely! You can use any fresh herbs you like. Some great alternatives include thyme, basil, or chives, which will impart their unique flavors to the dish.

What should I serve with One-Pan Lemon Herb Salmon?

This dish pairs nicely with rice, quinoa, or a fresh salad. You can also serve it with crusty bread to soak up the delicious juices.

Can I make this recipe ahead of time?

While it’s best served fresh, you can prepare the marinade ahead of time and store the salmon in it for a few hours in the refrigerator before cooking for enhanced flavor.

Introduction: A Comforting Classic with a Twist

Imagine sinking your fork into a steaming plate of deliciously cheesy baked ziti, where each mouthful is a sumptuous mix of gooey cheese, hearty pasta, and a burst of fresh spinach. This dish does more than just satisfy hunger; it creates a culinary experience that envelops you in warmth and comfort. It’s the perfect marriage of protein-packed cheese and fresh, nutritious spinach entwined in pillowy pasta and layered with a zesty tomato sauce. One could easily say that Cheesy Baked Ziti with Spinach is a meal that spurs smiles, gathers family members, and creates unforgettable memories around the dinner table. Let’s embark on a delicious journey where we’ll uncover what makes this variation of a classic Italian dish a beloved favorite in households around the world.

The Story Behind the Dish

Baked ziti is an American-Italian comfort food that owes its ancestry to traditional Italian baked pasta dishes such as lasagna. Ziti, the pasta star of this dish, is thought to have origins in the Campania and Sicily regions of Italy. It was traditionally served at weddings, hence the name ‘ziti,’ derived from an Italian term for ‘fiancé.’ This classic pasta shape is ideal for trapping tasty sauces and enhancing its flavorful journey. While traditional versions of baked ziti focus on meat sauces, Cheesy Baked Ziti with Spinach shifts focus towards a more vegetarian-friendly fare that caters to a broader palate without sacrificing any of its delightful tastes.

By incorporating fresh spinach, this dish modernizes the classic, aligning with current culinary trends emphasizing wholesome and nutrient-rich ingredients. Spinach not only enhances the nutritional value of the meal but also introduces a tender green texture that marries wonderfully with melty cheese and robust tomato sauce. This fusion of Italian heritage with contemporary health-conscious dining creates a dish that’s familiar yet refreshingly innovative.

Why You’ll Love This Recipe

  • Perfect Balance: Cheesy Baked Ziti with Spinach achieves a perfect balance of flavors, where creamy cheese meets fresh greens.
  • Family-Friendly: This recipe is a hit with adults and kids alike, making it a great option for family dinners.
  • Convenience: It’s simple to prepare and bake, with ingredients that are easy to find and budget-friendly.
  • Comforting: The ultimate comfort food, offering a warm and satisfying hug with each bite.
  • Versatile: Can be served as a main dish, or a side for a larger meal, adaptable to various dining occasions.

Flavor Profile & Texture

The first thing that will strike you about this dish is its layered texture. The al dente bite of ziti compliments the creaminess of the cheese and the slight earthiness of the spinach. The cheese, often a blend of ricotta, mozzarella, and parmesan, melts into a smooth, creamy sauce that envelops each piece of pasta, while the tomato sauce adds an indispensable teeming of tangy flavor, balancing the richness of the cheese. The spinach adds an additional layer of flavor and nutrition, maintaining a slight crunch, which works wonders in creating a dynamic personality for the dish. The fusion of ingredients results in a satisfying symphony of flavors and textures that dance on the palate.

Occasions & Pairings

This versatile dish is perfect for numerous occasions. From a cozy weeknight dinner with family to an impressive main course during a warm, bustling potluck gathering, Cheesy Baked Ziti with Spinach is a stellar choice. It’s also a fantastic option for make-ahead meals, ensuring delicious, homemade food is available no matter how busy the schedule. For pairing, consider serving this dish with a simple side salad, garlic bread for scooping up that delicious sauce, or a crisp white wine that enhances its richness.

Tips, Variations & Substitutions

  • Customize Your Cheese: If you’re feeling adventurous, try different combinations of cheeses such as provolone, or experiment with a dash of goat cheese for a tangy twist.
  • Vegan-Friendly Option: Utilize plant-based cheese and creamy cashew sauce as a substitution for the dairy elements for a vegan version.
  • Herb Infusion: Add fresh herbs like basil or oregano to enhance the flavors of your sauce.
  • Protein Boost: For those craving additional protein, consider incorporating Italian sausage or shredded chicken.
  • Gluten-Free Alternative: Swap traditional ziti for gluten-free pasta alternatives to accommodate dietary needs without losing any of the dish’s soul-soothing qualities.

Storage & Make-Ahead Ideas

Cheesy Baked Ziti with Spinach is an excellent dish for meal prep, as it stores beautifully. To store leftovers, let the baked ziti cool completely, then transfer it to an airtight container and refrigerate for up to 4 days. To reheat, simply warm it in the oven at 350°F until heated through, ensuring the cheese is wonderfully re-melted over the top.

For longer storage, you can freeze the baked ziti. Prepare the dish as instructed but stop before the final bake. Cover it tightly with foil and plastic wrap, then freeze for up to 3 months. When ready to eat, thaw in the refrigerator overnight, then bake at 375°F. Baking time might be slightly longer given the chilled start, but the end result will be just as delicious as if it were made fresh.

Fun Facts & Trivia

Did you know that ziti makes frequent appearances in pop culture, particularly in mafia-related movies and TV shows? It’s often depicted as a comforting dish that brings characters together around a bustling table, symbolizing family unity and tradition. Its star turn in shows like “The Sopranos” has cemented its role as more than just a meal but a beloved American-Italian staple reflecting the importance of family and shared meals.

In conclusion, Cheesy Baked Ziti with Spinach is more than just a dish — it’s an experience of warmth, love, and creativity. Its rich flavors, delightful textures, and accommodating nature make it a joy to prepare and a pleasure to serve. Whether you’re a novice in the kitchen or a seasoned chef, this dish invites you to savor not only its deliciousness but also the comforting sense of home it evokes.

Ingredients

  • Pasta
    → Use 1 pound of ziti pasta, which will serve as the base and structure of the dish. Cook the pasta according to the package directions until al dente, as this will help prevent it from becoming mushy during baking. After cooking, drain and set aside, allowing it to cool slightly before combining with the other ingredients.
  • Cheese Mixture
    → Combine 15 ounces of ricotta cheese and 2 cups of shredded mozzarella cheese, which create a creamy and cheesy filling that binds the pasta together. Using whole milk ricotta can enhance creaminess, while the mozzarella contributes stretchy, gooey texture. Allow the cheese to come to room temperature for easier mixing.
  • Spinach
    → Add 5 cups of fresh spinach, which provides nutrients and a pop of color to the dish. Wash and chop the spinach roughly before cooking it down in a skillet until wilted. This helps reduce its volume and removes excess moisture, preventing the ziti from becoming watery.
  • Tomato Sauce
    → Use 3 cups of marinara sauce; this adds flavor and moisture to the baked ziti. Choose a high-quality store-bought sauce or homemade for the best flavor punch. Mix the sauce with the cooked pasta and cheese mixture to ensure that every bite is coated with deliciousness.
  • Seasonings
    → Incorporate 1 teaspoon of dried oregano and 1 teaspoon of garlic powder to enhance the overall flavor profile. These spices add depth to the dish without overpowering it. Ensure they are evenly distributed throughout the pasta mixture for balanced flavor.
  • Parmesan Cheese
    → Sprinkle 1/2 cup of grated Parmesan cheese on top before baking for a savory, cheesy crust. Use freshly grated Parmesan for superior taste and texture. This cheese will melt and form a delicious layer that enhances the presentation while adding a salty kick.
  • Olive Oil
    → Drizzle 2 tablespoons of olive oil over the finished ziti before baking. This helps to enrich the dish and encourages the cheese to brown nicely on top. Use high-quality extra virgin olive oil for the best flavor; moreover, you can use it to sauté the spinach, adding even more richness.

Instructions

  • Preheat your oven to 375°F (190°C) and prepare a 9×13 inch baking dish by lightly greasing it with cooking spray or olive oil.

    → Preheating the oven ensures that your baked ziti will cook evenly from the bottom up and create a perfect texture. Greasing the dish prevents sticking and makes for easier serving later on.
  • Bring a large pot of salted water to a rolling boil, and add 1 pound of ziti pasta. Cook the pasta according to the package directions until it is al dente, usually around 8-10 minutes.

    → Salting the water enhances the flavor of the pasta itself. Cooking to al dente means the pasta will still have a slight bite, which is essential in baked dishes to prevent it from becoming mushy.
  • Once cooked, drain the ziti pasta and let it cool slightly in the colander.

    → Allowing the pasta to cool prevents it from cooking further and ensures it binds well without becoming overly soft in the final dish.
  • In a mixing bowl, add 15 ounces of ricotta cheese and 2 cups of shredded mozzarella cheese. Allow these cheeses to come to room temperature if they were stored in the refrigerator.

    → Room temperature cheese mixes more smoothly and evenly, creating a better consistency in your filling. Look for whole milk ricotta, as its creaminess enhances the overall richness of the dish.
  • Wash and roughly chop 5 cups of fresh spinach, then place it into a skillet over medium heat. Cook the spinach until wilted, about 3-5 minutes, stirring frequently.

    → Cooking the spinach down reduces its volume and eliminates excess moisture, preventing a watery baked ziti. This also helps enhance the flavor of the spinach.
  • Once wilted, remove the spinach from the heat and let it cool slightly before adding it to the cheese mixture.

    → Cooling the spinach prevents it from cooking the ricotta and mozzarella when combined, helping maintain a creamy texture.
  • In the mixing bowl with the cheese, add the cooked spinach, 3 cups of marinara sauce, 1 teaspoon of dried oregano, and 1 teaspoon of garlic powder. Stir until well combined.

    → This mixture will be the flavorful binding component of your dish. Ensure the ingredients are evenly distributed for a balanced flavor throughout the pasta.
  • Gently fold in the cooked ziti pasta into the cheese and spinach mixture until all the pasta is evenly coated.

    → Folding helps maintain the integrity of the pasta while ensuring every piece is enveloped in the creamy cheese mixture, which is key to a well-combined dish.
  • Transfer the ziti mixture to the greased baking dish, spreading it out evenly.

    → Spreading the mixture ensures even baking and helps every portion receives the same amount of crispy cheese topping.
  • Sprinkle 1/2 cup of grated Parmesan cheese over the top of the ziti evenly.

    → Freshly grated Parmesan will melt beautifully, forming a delicious, golden crust that not only enhances the flavor but also improves the visual appeal of the final dish.
  • Drizzle 2 tablespoons of olive oil over the top of the assembled ziti before placing it in the oven.

    → This step adds richness to the final bake and helps achieve a beautiful browning effect on the cheese, enhancing both flavor and texture.
  • Bake the ziti in your preheated oven for 25-30 minutes, or until the top is bubbling and golden brown.

    → Baking at the right temperature allows the ingredients to meld together, creating a harmonious dish. Check for doneness by observing the color and bubble action.
  • Once baked, remove the dish from the oven and let it rest for about 10 minutes before serving.

    → Allowing the ziti to rest helps the cheese firm up a little, making it easier to cut sections without the layers slipping apart.
  • Serve the Cheesy Baked Ziti with Spinach warm, optionally garnished with fresh basil or additional Parmesan cheese.

    → Fresh garnishes can elevate the presentation, adding a pop of color and an extra flavor dimension to the finished dish.

Notes

These cheesy baked ziti with spinach are a comforting and satisfying meal that the whole family will love. The combination of ricotta and mozzarella cheeses creates a wonderfully creamy texture that clings to the pasta, while the fresh spinach adds a nutritious twist and a beautiful burst of color. To enhance the flavor even further, consider using homemade marinara sauce or adding freshly chopped herbs such as basil or parsley.

For the best results, ensure that the pasta is cooked al dente to maintain its structure during baking. If you want to make this dish ahead of time, you can prepare it up to the baking step, refrigerate it, and bake it just before serving. Leftovers can be stored in an airtight container in the fridge and make for an excellent reheatable meal during the week.

Feel free to customize your baked ziti by adding other vegetables, such as bell peppers or mushrooms, or incorporating protein like cooked chicken or sausage for a heartier option. When ready to serve, allow the dish to cool for a few minutes after baking, as this will help with cutting clean slices. For an extra dash of flavor, consider adding a sprinkle of red pepper flakes for some heat or a drizzle of balsamic reduction before serving. Enjoy this wholesome dish as a quick weeknight dinner or a crowd-pleasing potluck option!

Tips

  • Cooking Pasta:
    When cooking your ziti, ensure to add a generous amount of salt to the boiling water. This helps season the pasta from the inside out and enhances the overall flavor of the dish. Once al dente, reserve a cup of pasta water before draining, as it can be used later to adjust the consistency of the sauce if needed.
  • Cheese Mixing Tips:
    For the cheese mixture, consider adding an egg to the ricotta mixture to enhance its richness and binding properties. This will create a firmer texture that holds up well during baking. You can also mix in some fresh herbs, like basil or parsley, for added depth of flavor.
  • Preparing Spinach:
    After cooking down the spinach, make sure to squeeze out any excess moisture using a clean kitchen towel. This prevents the dish from becoming too watery and helps maintain the perfect texture in your baked ziti.
  • Choosing Tomato Sauce:
    If you decide to use store-bought marinara, look for options labeled as ‘all-natural’ or ‘homemade-style’ for a richer, more authentic flavor. Adding a splash of red wine or a pinch of sugar to the sauce before mixing it with the pasta can further enhance its taste.
  • Even Seasoning:
    When incorporating seasonings, you can sauté them briefly in olive oil before adding to the pasta mixture. This helps release their essential oils and brings out more flavor. Don’t forget to taste and adjust salt and pepper to your preference.
  • Layering for Perfection:
    For a better texture and flavor blend, consider layering the baked ziti. Start with a spoonful of sauce at the bottom of the baking dish, then alternate between pasta, cheese, spinach, and sauce. This ensures that every layer gets optimal flavor and moisture.
  • Baking Timings:
    When baking, cover the ziti with foil for the first part of the baking time to avoid over-browning. Removing the foil for the last 10-15 minutes will allow the cheese to get golden and bubbly. Keep an eye on it to ensure it doesn’t burn.
  • Resting Period:
    After removing the baked ziti from the oven, let it rest for about 10-15 minutes before serving. This allows the dish to set and makes it easier to slice and serve while still being hot and delicious.

FAQ

What ingredients do I need for Cheesy Baked Ziti with Spinach?

You will need ziti pasta, ricotta cheese, mozzarella cheese, parmesan cheese, spinach (fresh or frozen), marinara sauce, garlic, onion, olive oil, salt, and pepper.

Can I use a different type of pasta instead of ziti?

Yes, you can substitute ziti with other pasta types such as penne, fusilli, or rigatoni. Just ensure that the pasta is similar in size and shape.

Is this recipe suitable for vegetarians?

Yes, Cheesy Baked Ziti with Spinach is a vegetarian dish as it contains no meat ingredients.

Can I make Cheesy Baked Ziti ahead of time?

Absolutely! You can assemble the dish ahead of time, cover it, and refrigerate it. Bake it when you’re ready to serve, but expect a longer cooking time if it’s cold from the fridge.

How can I make this dish healthier?

You can make it healthier by using whole wheat pasta, low-fat cheese, adding more vegetables, and reducing the amount of cheese or sauce used.

Can I freeze leftover Cheesy Baked Ziti?

Yes, you can freeze leftovers. Just ensure to store it in an airtight container. It can be frozen for up to three months. Thaw it overnight in the refrigerator before reheating.

What can I serve with Cheesy Baked Ziti?

Cheesy Baked Ziti pairs well with a side salad, garlic bread, or steamed vegetables for a complete meal.

How long does it take to bake the Cheesy Baked Ziti?

It typically takes about 25-30 minutes to bake at 350°F (175°C) or until the cheese is bubbly and golden brown on top.

Introduction

Dive into the savory world of culinary delight with our exquisite Creamy Garlic Chicken with Roasted Veggies. This dish is a symphony of flavors and textures, a feast for the senses that promises to enamor every taste bud with its aromatic presence and rich, comforting embrace. Imagine succulent pieces of chicken enveloped in a luxurious, creamy garlic sauce, perfectly paired with the crisp, earthy sweetness of roasted vegetables. This isn’t just a meal—it’s an experience, a culinary journey that transports you to a place where food truly nourishes both body and soul.

Whether you’re preparing a bustling family dinner or indulging in a quiet night savoring each delectable bite, this dish offers more than a meal; it offers a moment of pure, unadulterated joy. Each mouthful is a celebration of flavor, a testament to the artful blending of simplicity and sophistication.

The Story Behind the Dish

The origins of our Creamy Garlic Chicken with Roasted Veggies can be traced to a convergence of European culinary traditions. The use of garlic and cream is a hallmark of French cuisine, known for bringing depth and character to dishes since time immemorial. Chicken, a universally loved protein, found its way into this creamy symphony through the timeless technique of sautéing in Italian kitchens, while roasted vegetables, a staple of Mediterranean diets, add a harmonious, healthful touch.

The recipe evolved through generations, adapting to contemporary kitchens while never losing its rustic charm. Historically, cream sauces were a mark of refinement and celebration, used sparingly to elevate dishes during feasts. Today, we savor such combinations with an understanding of the ingenuity and spirit of those who passed these flavors down to us.

Why You’ll Love This Recipe

  • Quick and Easy: This recipe is designed for cooks of all levels, ensuring a delicious meal without the stress of complex preparation.
  • Healthy and Nourishing: With a balance of proteins, healthy fats, and fiber-rich vegetables, it’s a wholesome dish that nourishes without compromising on flavor.
  • Family-Friendly: The creamy texture and mild garlic flavor make it a hit with both kids and adults, bridging the gap between sophistication and comfort.
  • Customizable: Easily adaptable to include your favorite vegetables or dietary needs, it’s a versatile recipe that fits into any meal plan.

Flavor Profile & Texture

The Creamy Garlic Chicken is a delightful medley of robust and comforting flavors. The earthiness of the garlic complements the rich, buttery cream sauce, bringing a depth that’s both warm and inviting. Each bite of tender chicken is coated in this luscious sauce, offering a melt-in-your-mouth experience that’s both satisfying and indulgent.

The roasted veggies add a crucial textural contrast, their slight caramelization providing a sweet counterpoint to the savory notes of the chicken. The vegetables are crispy on the outside yet tender within, amplifying the dish’s complex flavor profile and offering a multifaceted culinary adventure with every forkful.

Occasions & Pairings

This dish is adaptable to a wide array of dining scenarios. Perfect for a cozy winter evening when comfort food is a necessity, it equally shines as a star attraction during festive gatherings, offering guests a taste adventure they won’t soon forget.

Pair this dish with a crisp, chilled white wine such as a Chardonnay or a Sauvignon Blanc. The acidity of the wine cuts through the richness of the sauce while complementing the subtle garlic notes. Alternatively, a dry rosé can accentuate the roasted flavors of the veggies. For a non-alcoholic option, try a refreshing homemade lemonade or iced tea with a hint of mint.

Tips, Variations & Substitutions

Creative Customizations:

  • Vegetable Variations: Almost any vegetable can be added to complement the dish. Consider adding asparagus tips, bell peppers, or even sweet potatoes for a burst of color and flavor.
  • Dietary Alternatives: For a dairy-free version, substitute the cream with coconut milk or almond milk, adding a hint of nutmeg for extra warmth.
  • Herb Enhancements: Enhance the dish with fresh herbs like rosemary, thyme, or basil to add an aromatic twist. Sprinkle them towards the end of cooking to preserve their freshness.

Storage & Make-Ahead Ideas

Efficient kitchen management makes this dish a convenient choice for meal prep or leftovers. The Creamy Garlic Chicken can be stored in an airtight container in the refrigerator for up to three days. For longer storage, freeze the chicken and veggies separately for up to a month. When ready to serve, thaw overnight in the fridge.

Reheating the chicken in a skillet with a splash of cream or broth can bring back its freshly-cooked texture. Ensure the temperature is regulated to avoid splitting the sauce. The roasted veggies can be re-crisped in the oven or an air fryer for about 5-10 minutes, ensuring their delightful texture remains intact.

Ingredients

  • Chicken
    → Chicken thighs or breasts are essential for this dish, providing the protein base. Thighs will yield a juicier dish due to their higher fat content compared to breasts. The chicken should be boneless and skinless for ease of cooking, and it should be patted dry before cooking to achieve a nice sear.
  • Garlic
    → Fresh garlic is key for creating the rich, creamy sauce. Use whole cloves and mince them finely to release their flavors. The more garlic used, the stronger the flavor, so feel free to adjust to your preference. Avoid pre-minced garlic for the freshest taste.
  • Heavy Cream
    → Heavy cream is crucial for achieving the creamy consistency of the sauce. It should be at room temperature before adding to the pan, as this helps it incorporate more easily without curdling. Opt for a good quality cream for optimal richness.
  • Vegetable or Chicken Broth
    → Broth adds depth to the sauce and enhances the overall flavor profile of the dish. Use low-sodium broth to control the saltiness; this allows for better flavor adjustment later in the cooking process. Ensure the broth is warmed slightly before adding to the pan for seamless blending.
  • Parmesan Cheese
    → Grated Parmesan cheese brings savory flavor and creaminess to the sauce. Use freshly grated cheese for the best texture and flavor; pre-grated versions often contain anti-caking agents that can affect melting. Stir in the cheese at the end of cooking for a smooth finish.
  • Olive Oil
    → Olive oil is used for searing the chicken and roasting the vegetables. A good-quality extra virgin olive oil will enhance the flavors of both the chicken and the veggies. Heat the oil before adding the chicken to ensure a proper sear and lock in moisture.
  • Vegetables
    • Bell Peppers
      → Bell peppers add sweetness and color to the dish. Use a variety of colors for visual appeal. They should be sliced into even strips to ensure even roasting. Aim for firm, glossy peppers free of blemishes.
    • Zucchini
      → Zucchini contributes moisture and a tender texture. Slice them into half-moons or rounds for even cooking. Choose smaller zucchini, as they tend to have fewer seeds and a sweeter flavor. Don’t overcook them to maintain their structure.
    • Red Onion
      → Red onion brings a mild sweetness and beautiful color. Cut them into wedges for roasting. Choose firm onions, as they have a better flavor and texture. Roasting will caramelize the sugars, enhancing their sweetness.
  • Herbs and Spices
    • Dried Oregano
      → Dried oregano brings an earthy flavor that complements both the chicken and the veggies. Use about a teaspoon for a balanced taste, and add it early in the cooking process to allow the flavors to infuse. Crushing it between your fingers before adding helps release more essential oils.
    • Salt and Pepper
      → Essential for seasoning, both should be adjusted to taste. Use kosher salt for a cleaner taste; it dissolves easily in cooking. Freshly cracked black pepper enhances the overall flavor without overpowering the dish. Remember to taste the sauce before serving to ensure it’s well-seasoned.

Instructions

  • Begin by preheating your oven to 425°F (220°C).

    → This high temperature is essential for roasting the vegetables properly, allowing them to caramelize and develop flavors while ensuring the chicken cooks thoroughly without drying out.
  • While the oven is heating, prepare the chicken by patting it dry with paper towels.

    → Removing excess moisture helps achieve a better sear and ensures the chicken doesn’t steam while cooking. Dry chicken will form a golden-brown crust, enhancing flavor and texture.
  • In a large oven-safe skillet, heat 2 tablespoons of olive oil over medium-high heat.

    → Heating the oil before adding the chicken creates a thermal shock that helps to seal the meat quickly, locking in juices. Use an oil with a high smoke point like extra virgin olive oil for best results.
  • Once the oil is shimmering, carefully add the chicken pieces to the skillet, spacing them apart for even cooking.

    → Placing chicken too close together can cause steaming rather than searing. Sear for 6 minutes on one side without moving them, allowing a rich, golden crust to form.
  • After 6 minutes, flip the chicken over to sear the other side for an additional 4-5 minutes.

    → This ensures that the chicken cooks evenly and enhances flavor development through the Maillard reaction, which enhances the overall taste of the dish.
  • While the chicken is searing, wash and chop the vegetables. Slice bell peppers into strips, zucchini into half-moons, and cut the red onion into wedges.

    → Uniform cutting promotes even cooking. Choose vegetables that are fresh, firm, and brightly colored for the best flavor and presentation.
  • Once the chicken is seared, remove it from the skillet and set aside on a plate.

    → This resting allows the juices to redistribute within the meat, resulting in a juicier bite when cooked completely.
  • Add the prepared vegetables to the same skillet and drizzle with an additional tablespoon of olive oil.

    → Using the residual oil and flavors from the chicken adds depth to the veggies, making the dish cohesive. Stir to coat the vegetables evenly with oil.
  • Sprinkle 1 teaspoon of dried oregano, salt, and pepper over the vegetables, mixing well to evenly season them.

    → Seasoning early helps the herbs and spices permeate the vegetables as they roast, enhancing flavor development.
  • Return the chicken to the skillet, nestling it amidst the vegetables.

    → This allows the chicken to absorb the aromas from the vegetables as they roast together in the oven, creating a harmonious dish.
  • Transfer the skillet to your preheated oven and roast for about 20-25 minutes, or until the chicken reaches an internal temperature of 165°F (74°C).

    → Accurate cooking is important for safety; use an instant-read thermometer to check the doneness without cutting into the meat, which keeps the juices intact.
  • While the chicken and vegetables are roasting, prepare the creamy garlic sauce. In a small saucepan, heat 1 tablespoon of olive oil over medium heat, then add minced garlic and sauté for 1-2 minutes, or until fragrant.

    → Add the minced garlic at this stage to prevent burning and bitterness; stirring continuously allows for even cooking and flavor release. Fresh garlic can burn quickly; watch it closely.
  • Once the garlic is fragrant, slowly pour in 1 cup of warmed heavy cream while stirring to combine.

    → Pouring in the cream gradually prevents it from curdling; warming it beforehand encourages smooth incorporation into the sauce.
  • Add ½ cup of chicken broth to the mixture and stir well.

    → This helps to dilute the cream and create a nice sauce consistency while boosting the flavor with the savory broth.
  • Let the sauce simmer for 3-5 minutes, then stir in the grated Parmesan cheese until melted and combined.

    → Gradually adding cheese allows it to melt smoothly without clumping, giving you a silky sauce. Freshly grated cheese will yield a better texture than pre-packaged varieties.
  • After 20-25 minutes of roasting, remove the skillet from the oven and let it cool slightly. Drizzle the creamy garlic sauce over the chicken and vegetables, or serve it on the side.

    → Allowing the dish to cool for a moment helps prevent burns and allows flavors to meld beautifully. Serve immediately to enjoy optimal texture and flavor!

Notes

These Creamy Garlic Chicken with Roasted Veggies offer a perfect blend of protein and comfort, ideal for a family dinner or meal prep. The creamy garlic sauce is rich, flavorful, and complements the tender chicken beautifully. To enhance the dish, consider marinating the chicken in olive oil, garlic, and herbs for added flavor before cooking.

The dish is versatile; you can swap in your favorite vegetables based on seasonal availability or personal preference. Asparagus, carrots, or broccoli would also work wonderfully. Ensure that your vegetables are cut uniformly for even roasting, and don’t forget to toss them in olive oil and seasonings before roasting to maximize flavor.

This meal not only makes for a hearty dinner but also provides excellent leftovers. The flavors meld well overnight, making it easy for a quick reheatable lunch option. Serve it with crusty bread to soak up the delicious creamy sauce or over a bed of fluffy rice or pasta for a complete meal. To add a fresh touch, garnish with freshly chopped parsley or basil before serving.

Always remember to adjust the garlic according to your preference. If you love a strong garlic flavor, feel free to add more cloves. Conversely, for a milder taste, stick to the recommended amount. Additionally, when incorporating the heavy cream, monitor the heat to prevent it from curdling. Stirring constantly will help achieve that velvety texture. Enjoy this delectable dish!

Tips

Cooking Tips for Creamy Garlic Chicken with Roasted Veggies

  • Pat Dry the Chicken: Always pat the chicken dry with paper towels before cooking. This step helps to achieve a well-seared exterior, locking in moisture for a juicier bite.
  • Mince Garlic Properly: To get the most flavor out of garlic, finely mince it rather than chopping it roughly. The finer the mince, the more flavor will be released into the sauce.
  • Room Temperature Ingredients: Allow the heavy cream and broth to come to room temperature before adding them to the pan, which helps to blend them smoothly into the sauce without curdling.
  • Use Fresh Parmesan: For the best flavor and texture, always opt for freshly grated Parmesan cheese. It melts better and combines more seamlessly into the sauce.
  • Properly Heat the Oil: Make sure to heat the olive oil until it’s shimmering in the pan before adding the chicken. This ensures a proper sear, which enhances flavor and texture.
  • Equal Vegetable Sizes: When preparing your vegetables, cut them into uniform sizes to ensure even cooking. This helps prevent some pieces from being undercooked while others become mushy.
  • Monitor Roasting Time: Keep an eye on the vegetables while roasting to avoid overcooking. Aim for vibrant colors and slight caramelization, which adds sweetness and flavor without losing their firmness.
  • Season Gradually: Add salt and pepper gradually during cooking and taste as you go. This technique helps achieve a balanced seasoning that’s perfectly customized to your preference.
  • Infuse Spices Early: Incorporate dried oregano and other spices early in the cooking process, allowing them to release their essential oils and deepen their flavors as the dish cooks.
  • Sauce Consistency: If you prefer a thicker sauce, allow it to reduce on low heat for a few more minutes before adding the Parmesan. This concentrates the flavors even further.

FAQ

What ingredients do I need for Creamy Garlic Chicken with Roasted Veggies?

You will need chicken breasts, garlic, heavy cream, assorted vegetables (like bell peppers, zucchini, and carrots), olive oil, salt, pepper, and fresh herbs like thyme or parsley.

How long does it take to prepare this dish?

Preparation time is approximately 15-20 minutes, while cooking time is around 30-40 minutes, making the total time about 55-60 minutes.

Can I use different vegetables for roasting?

Absolutely! Feel free to use any vegetables you enjoy or have on hand, such as broccoli, cauliflower, or asparagus. Adjust cooking times as necessary based on the vegetable’s tenderness.

Is this recipe suitable for meal prep?

Yes, Creamy Garlic Chicken with Roasted Veggies is great for meal prep! Store the components in separate containers in the fridge and reheat as needed.

Can I make this recipe dairy-free?

Yes, you can substitute heavy cream with non-dairy cream alternatives like coconut cream or cashew cream to make it dairy-free.

What kind of chicken should I use?

Boneless, skinless chicken breasts are commonly used, but you can also use chicken thighs for more flavor and moisture.

How do I know when the chicken is fully cooked?

The chicken is ready when it reaches an internal temperature of 165°F (75°C). You can check this with a meat thermometer.

Can I add more spices or seasoning to this recipe?

Definitely! Feel free to experiment with spices like paprika, cayenne pepper, or Italian seasoning to enhance the flavor profile to your liking.

Introduction: A Symphony of Flavors

Welcome to the world of culinary delight where tender chicken thighs meet the sweet and tangy embrace of honey mustard. Our Slow-Cooked Honey Mustard Chicken Thighs are not just a dish; they are an experience. Imagine juicy pieces of chicken cooked to perfection, each bite melting in your mouth, complemented by the harmony of honey’s sweetness and mustard’s sharpness. This recipe stands as a testament to the magical transformation that can occur when simple ingredients come together to create something truly memorable.

Perfect for a cozy dinner or for impressing guests, this dish promises an olfactory and gustatory journey that is rich and layered with flavor. Serve this elegant yet comforting meal, and watch as it becomes an instant family favorite, garnering compliments and smiles with every serving.

The Story Behind the Dish

Chicken has been a staple in cuisines across the world for centuries, appreciated for its versatility and ability to absorb a wide array of flavors. Honey mustard, on the other hand, has its roots deeply planted in culinary history, with mustard being one of the world’s oldest condiments. Honey adds a natural sweetness that counterbalances mustard’s pungency, creating a classic culinary marriage beloved around the globe.

The technique of slow cooking, which makes this recipe shine, has been used for generations. It allows rich flavors to develop slowly over time, resulting in a depth of flavor that is hard to achieve with quicker methods. This traditional method, combined with the timeless appeal of honey mustard, transforms humble chicken thighs into a dish that tells a story of heritage and taste.

Why You’ll Love This Recipe

  • Ease of Preparation: With minimal prep time and effort, the slow cooker does the hard work while you go about your day.
  • Flavor Explosion: A perfect blend of sweet and savory flavors that appeals to both adults and children alike.
  • Nutrient-Rich: Packed with protein from the chicken and antioxidants from the mustard, it’s a health-conscious choice you can feel good about.
  • Family-Friendly: The taste is universally pleasing, making it an ideal choice for family meals and special occasions alike.
  • Versatility: Pair it with a variety of sides to switch up the flavor profile anytime you want.

Flavor Profile & Texture

Describing the flavor of these Slow-Cooked Honey Mustard Chicken Thighs is like painting with a palette of harmonious tastes. The chicken thighs are succulent and juicy, absorbing the marinade’s ambrosial syrup of honey and mustard. The honey provides a subtle caramelized sweetness, while the mustard imparts a sharp, zesty contrast. With the slow-cooking method, the meat becomes unbelievably tender, allowing the flavors to penetrate deeply for a truly indulgent culinary experience.

This dish is not only about flavor; the texture is equally sublime. The slow cooking process allows the connective tissues in the meat to break down, resulting in a melt-in-your-mouth sensation that requires minimal effort to enjoy. The sauce thickens and clings to the chicken, providing bursts of tangy sweetness with every bite.

Occasions & Pairings

Whether you’re hosting a holiday gathering, preparing for a weeknight dinner, or planning a weekend feast, this dish fits every occasion. For a casual dinner, serve the chicken thighs over a bed of fluffy mashed potatoes or fragrant rice. For a more formal affair, accompaniments like roasted vegetables or a crisp green salad elevate the dish into something truly special.

Pair this recipe with your favorite wine—a sauvignon blanc or a light pinot noir would complement the flavors beautifully. If you prefer non-alcoholic options, a sparkling apple cider or ginger ale can highlight the honey mustard notes perfectly. Finish off your meal with a light dessert, like a fruit sorbet or a simple lemon tart, to cleanse the palate and complete the experience.

Tips, Variations & Substitutions

This recipe’s beauty is its adaptability. Here are some creative ways to tailor it to your preferences:

  • Spice It Up: Add a dash of cayenne or crushed red pepper flakes to the sauce for a hint of heat.
  • Make It Herbal: Fresh herbs such as thyme or rosemary can be added for a more earthy note.
  • Vegan Alternative: Try swapping the chicken for chickpeas or tofu for a plant-based version, keeping the same flavorful sauce.
  • Gluten-Free: Ensure your mustard is gluten-free, and you’re ready to serve this dish to those avoiding gluten.

Storage & Make-Ahead Ideas

This dish not only tastes amazing fresh out of the slow cooker but also makes for excellent leftovers. Store any remaining chicken thighs in an airtight container in the refrigerator for up to three days.

If you’re planning a busy week, consider preparing a double batch and freezing individual portions. These can be stored in the freezer for up to two months. To reheat, simply defrost overnight in the refrigerator and gently warm through on the stove or in the microwave. The flavors will have further developed, and the dish will be just as delicious as the day you made it. This make-ahead advantage allows you to enjoy home-cooked meals without needing to spend hours in the kitchen every day.

Fun Facts & Trivia

Did you know that mustard, as we know it today, was used as long ago as Roman times? They mixed the seeds with unfermented grape juice to create a spicy paste quite similar to modern preparations. Honey, with its timeless appeal, has been revered since ancient Egyptian times not just as a food but as a symbol of prosperity and joy. The ancient Greeks and Romans both used honey as a common sweetener and believed it to have medicinal properties.

The beautiful balance between honey and mustard we enjoy today in this dish takes its roots from these ancient practices—bringing together the warmth of honey with the sharp note of mustard in a combination that generations have loved.

In summary, Slow-Cooked Honey Mustard Chicken Thighs is much more than a recipe; it’s a celebration of time-honored traditions, flavors, and the comforting act of slow cooking. It bridges the gap between the simplicity of everyday meals and the elegance of special occasion dining, making it a must-try in every kitchen. From its aromatic allure to its unbeatable taste, this dish invites you to indulge in something truly special—and once you’ve tried it, you’ll find yourself returning to it time and again.

Ingredients

  • Chicken Thighs
    → The main protein of the dish, chicken thighs are chosen for their rich flavor and tenderness. They benefit from slow cooking, which retains moisture and enhances their natural taste. Look for boneless, skinless thighs for easier eating and more even cooking.
  • Honey
    → Honey acts as a natural sweetener that balances the tanginess of the mustard. It creates a beautiful glaze on the chicken as it cooks. Use a high-quality, raw honey for a more robust flavor and health benefits. Measuring it carefully will ensure the sweetness is just right.
  • Dijon Mustard
    → This mustard adds a zesty kick and depth of flavor to the dish. Its smooth texture helps it to coat the chicken evenly. Use a whole grain variety for added texture and flavor complexity, and mix it well with the honey to ensure an even distribution throughout the dish.
  • Garlic
    → Fresh garlic cloves infuse the chicken with aromatic flavors. They should be minced finely to release their essential oils and maximize their impact in the marinade. Using fresh garlic instead of pre-minced enhances the dish’s overall flavor profile.
  • Olive Oil
    → Olive oil serves as a cooking fat that helps to sauté the garlic and prevents the chicken from sticking to the pan. Use high-quality extra virgin olive oil for the best flavor. It should be measured carefully to add richness without making the sauce too oily.
  • Chicken Broth
    → Chicken broth adds moisture and depth to the cooking liquid, helping to keep the chicken thighs juicy. Opt for low-sodium broth so you can control the saltiness of the dish. If using homemade broth, ensure it is well-seasoned to enhance the overall flavor.
  • Salt
    → Salt is essential for enhancing the flavors of the dish. Use kosher salt for better control over seasoning. Be sure to taste the sauce before serving and adjust accordingly, keeping in mind that the broth and mustard will have some salt content.
  • Pepper
    → Freshly ground black pepper adds a subtle heat and depth of flavor to the dish. Use a coarser grind for a more pronounced peppery punch. Adding it at the beginning of cooking infuses the chicken with flavor, but you can adjust it to taste before serving as well.
  • Fresh Herbs (optional)
    → Fresh herbs such as thyme or rosemary can elevate the dish with vibrant notes of flavor. Add them during the last hour of cooking to preserve their bright taste. Chopping them finely will ensure their oils are released into the sauce, enhancing the dish’s aroma and complexity.

Instructions

  • Begin by preparing the chicken thighs by rinsing them under cold running water and then patting them dry with paper towels.

    → This step is essential to remove any potential bacteria and excess moisture, ensuring that seasoning adheres better and that the chicken browns optimally in the cooking process.
  • Season the chicken thighs with kosher salt and freshly ground black pepper.

    → This initial seasoning enhances the base flavor of the chicken. Make sure to sprinkle the salt and pepper evenly on both sides of the thighs, allowing them to absorb the seasoning.
  • In a bowl, combine the honey and Dijon mustard, whisking them together until well-blended and smooth.

    → This creates a sticky marinade that will coat the chicken evenly. Ensuring a smooth mixture helps in evenly distributing the flavors during cooking.
  • Mince the garlic cloves finely, aiming for a paste-like consistency for maximum flavor release.

    → The finer you mince the garlic, the more surface area is exposed, intensifying its aromatic qualities and infusing the dish more effectively. This step is key to achieving a robust flavor with each bite.
  • Heat the olive oil in a large skillet over medium heat until shimmering but not smoking.

    → This temperature ensures that the oil is hot enough to sauté the garlic without burning it, which would impart a bitter taste to the dish. Adding the oil at the right temperature enhances the overall flavor instead of detracting from it.
  • Add the minced garlic to the hot oil and sauté for about 30 seconds until fragrant.

    → Cooking the garlic briefly releases its essential oils, but be cautious not to let it brown, as burnt garlic can taste acrid. Stir continuously during this step for even cooking.
  • Remove the skillet from the heat and pour the honey-mustard mixture into the pan, stirring to combine with the garlic.

    → This cools the pan slightly and allows you to create a flavorful base for the sauce that will cook with the chicken later. Mixing ensures all flavors meld together before adding the chicken.
  • Place the seasoned chicken thighs into the slow cooker.

    → Arrange them in a single layer for even cooking, ensuring the thighs have enough space to absorb the flavors of the marinade fully.
  • Pour the honey-mustard sauce mixture over the chicken thighs, ensuring they are well-coated.

    → This allows the flavors to penetrate the meat during cooking, creating a delicious glaze. Gently spoon the sauce over the chicken to prevent displacing them from their arranged position.
  • Add the chicken broth into the slow cooker, pouring it directly around, not over the chicken, to keep the glaze intact.

    → The broth adds moisture and richness to the cooking liquid while preventing the glaze from washing off the chicken. This will help to keep the thighs juicy as they cook.
  • Cover the slow cooker with its lid and set it to low for 6-8 hours or high for 3-4 hours, depending on your available time.

    → Cooking on low allows the flavors to meld beautifully while the chicken becomes tender and succulent. Check for doneness around the recommended time to prevent overcooking.
  • If using, add finely chopped fresh herbs during the last hour of cooking to preserve their vibrant flavor.

    → This ensures that the fresh herbs maintain their aromatic qualities and add a burst of flavor to the dish, complementing the honey mustard beautifully.
  • Once cooked, check that the chicken reaches an internal temperature of 165°F (75°C) using an instant-read thermometer.

    → This critical step ensures the chicken is safe to eat, making sure it is fully cooked while retaining moisture and tenderness.
  • Carefully remove the chicken thighs from the slow cooker and place them on a serving platter.

    → Use tongs to avoid tearing the meat, allowing the glaze to cling to the chicken. Presentation matters, especially when serving guests!
  • For extra glaze, if desired, transfer the cooking liquid to a saucepan and simmer on medium heat for a few minutes to thicken.

    → Reducing the sauce intensifies its flavor and creates a syrupy glaze that can be drizzled over the chicken, enhancing the dish’s appearance and taste.
  • Serve the honey mustard chicken thighs warm with a side of your choice and drizzle the thickened glaze over the top.

    → Pairing with sides like roasted vegetables or rice will complement the rich, sweet, and tangy flavors, creating a well-rounded meal.

Notes

  • These slow-cooked honey mustard chicken thighs are a perfect blend of sweet and savory flavors, making a truly satisfying meal. The chicken thighs become tender and juicy as they simmer in the honey mustard sauce, allowing the flavors to deepen.
  • To achieve optimal results, sear the chicken thighs in olive oil before adding them to the slow cooker. This process caramelizes the meat and adds extra flavor. Be sure to brown the chicken on all sides for a rich, golden color.
  • For enhanced flavor, marinate the chicken thighs in the honey mustard mixture for at least 30 minutes before cooking, if time permits. This allows the flavors to penetrate the meat, resulting in a tastier dish.
  • When cooking, consider the size of your chicken thighs; larger pieces might require slightly longer cooking times. Always check for doneness with a meat thermometer, aiming for an internal temperature of 165°F (75°C).
  • Feel free to customize the recipe by adding vegetables like carrots, potatoes, or green beans directly into the slow cooker. This makes for a complete one-pot meal and adds nutrition to your dish.
  • Serve the honey mustard chicken thighs over a bed of rice, quinoa, or alongside roasted vegetables for a balanced plate. The sauce is delightful drizzled over your sides, ensuring nothing goes to waste.
  • Leftovers can be saved in an airtight container in the refrigerator and will keep well for a few days. Reheat on the stove or microwave, adding a splash of chicken broth to maintain moisture.
  • For a finishing touch, garnish the dish with chopped fresh herbs before serving. This adds not only color but also a burst of fresh flavor that brightens up the slow-cooked goodness.

Tips

Cooking Tips for Slow-Cooked Honey Mustard Chicken Thighs

  • Marination: For a more flavorful dish, consider marinating the chicken thighs in the honey mustard mixture for a few hours or overnight in the refrigerator. This allows the flavors to penetrate the meat more deeply.
  • Even Cooking: Ensure that the chicken thighs are of uniform size for even cooking. If some are larger than others, consider cutting them to size or cooking them in batches.
  • Temperature Control: When slow-cooking, ensure the temperature is low and steady. This prevents the chicken from drying out and allows for tender, juicy results.
  • Browning the Chicken: For added depth of flavor, consider browning the chicken thighs in the olive oil before adding them to the slow cooker. This creates a richer flavor profile through the Maillard reaction.
  • Adjusting Consistency: If the sauce is too thin after slow cooking, remove the chicken and set the cooker to high. Let the sauce reduce for 15-20 minutes to thicken it up before serving.
  • Serving Suggestions: Serve the chicken thighs alongside buttery mashed potatoes or a fresh green salad to balance the sweetness of the dish. The sauce can also be drizzled over rice or quinoa for a complete meal.
  • Storing Leftovers: Leftover chicken can be stored in an airtight container in the refrigerator for up to 3 days. Reheat gently on the stovetop or in the microwave, adding a splash of broth to keep it moist.
  • Freezing Tips: For longer storage, you can freeze the cooked chicken thighs and sauce in a freezer-safe container for up to 3 months. Thaw in the refrigerator overnight before reheating.
  • Flavor Variations: Feel free to experiment with the mustard type; whole-grain, spicy brown, or even honey mustard can change the flavor profile while maintaining the essential sweetness.

FAQ

What ingredients do I need for Slow-Cooked Honey Mustard Chicken Thighs?

You will need chicken thighs, honey, mustard (yellow or Dijon), garlic, soy sauce, olive oil, salt, pepper, and optional herbs like thyme or rosemary for added flavor.

How long should I cook the chicken thighs in the slow cooker?

Cook the chicken thighs on low for 6-8 hours or on high for 3-4 hours, or until the chicken is tender and fully cooked.

Can I use bone-in chicken thighs for this recipe?

Yes, bone-in chicken thighs can be used. Just adjust the cooking time to ensure they are fully cooked and tender.

Is it necessary to brown the chicken before slow cooking?

While it’s not necessary, browning the chicken thighs in a skillet first can enhance the flavor and add a nice color to the dish. It’s optional!

What can I serve with Slow-Cooked Honey Mustard Chicken Thighs?

This dish pairs wonderfully with steamed vegetables, rice, mashed potatoes, or a fresh salad for a complete meal.

Can I make this recipe in advance?

Yes, you can prep the ingredients and store them in the fridge overnight. Just transfer everything to the slow cooker in the morning and let it cook during the day.

How do I store leftovers?

Store any leftovers in an airtight container in the refrigerator for up to 3-4 days. You can also freeze them for up to 3 months.

Can I substitute the honey with another sweetener?

Yes, you can use maple syrup or brown sugar as an alternative to honey, but keep in mind that the flavor profile will change slightly.

Introduction / Hook

Welcome to the delightful world of chocolate indulgence with our irresistible Festive Chocolate Delights. Imagine biting into a decadent treat where velvety chocolate dances on your taste buds, offering warmth, comfort, and a blissful sense of joy with every mouthful. This recipe takes the joy of chocolate to new heights, making it the perfect centerpiece for any celebration. Indulge in the rich, luxurious aroma that fills your home as these treats bake, signaling the beginning of a truly enchanting experience. Whether you’re preparing for a holiday gathering or simply want to treat yourself to something special, these chocolate delights will captivate and seduce your senses.

The Story Behind the Dish

The allure of chocolate has enchanted palates for centuries, with its roots tracing back to the ancient Mesoamericans who revered it as the “food of the gods”. Over the ages, chocolate has evolved from a bitter beverage to a much-loved sweet delight cherished across the globe. Our Festive Chocolate Delights pay homage to this rich history and cultural significance, embodying the spirit of celebration and togetherness that chocolate has come to symbolize.

This recipe is inspired by the intricate chocolate craftsmanship that orators of fine patisserie have mastered over generations. By incorporating traditional techniques with a modern twist, these delights bring forth the joyous traditions of holiday baking with an added touch of sophistication and elegance.

Why You’ll Love This Recipe

  • Quick and Easy: Despite their gourmet appeal, these chocolate delights are surprisingly simple to make, perfect for both seasoned bakers and beginners alike.
  • Decadently Rich: Each bite promises a chocolate experience so indulgent and satisfying that it feels like a luxurious treat.
  • Perfect for All Occasions: Whether it’s a Christmas party, a birthday celebration, or a cozy family gathering, these offerings elevate any occasion.
  • Customizable: Personalize each bite with an array of favorite toppings and fillings, allowing for endless possibilities and creativity.
  • Kid-Friendly Fun: A great way to get the little ones involved in the kitchen, making it a family-friendly activity that everyone can enjoy.

Flavor Profile & Texture

The symphony of flavors in these Festive Chocolate Delights is nothing short of divine. Each morsel offers a decadent and lush taste profile that perfectly balances delicate sweetness with the deep, intense notes of chocolate. A subtle hint of vanilla accentuates the chocolate and lends an extra layer of warmth and comfort.

Texture-wise, these treats are a masterpiece: expect a soft, melt-in-your-mouth center that is contrasted by a slightly crisp exterior. Every bite delivers a satisfying blend of smooth and creamy, punctuated by optional nuts or fruit bits that add an appealing crunch and additional texture dimension.

Occasions & Pairings

These chocolate delights are perfect for a variety of occasions, making them a versatile addition to any baking repertoire:

  • Holidays: An ideal treat for festive gatherings, enchanting guests with their decadent charm.
  • Birthdays: Ditch the traditional cake for these delights that offer a classy and delicious alternative.
  • Casual Get-togethers: Add elegance to brunches, tea parties, or picnics with these delightful bites.

When it comes to serving suggestions, pair these delicious treats with a glass of port or a full-bodied red wine for adults. A warm cup of rich coffee or creamy hot chocolate complements the flavors beautifully. For a refreshing contrast, enjoy them with a scoop of vanilla ice cream or a dollop of fresh whipped cream.

Tips, Variations & Substitutions

While our recipe is delicious as it stands, here’s how you can personalize your Festive Chocolate Delights or adapt them to any dietary needs:

  • Spice it Up: Add a hint of chili powder or cayenne for a spicy twist, offering a subtle heat that complements the richness of the chocolate.
  • Nuts and Fruits: Incorporate crushed nuts like almonds or hazelnuts for an extra crunch, or add dried fruits like cranberries or cherries for a sweet-tangy bite.
  • Vegan Alternative: Substitute dairy products with plant-based versions such as coconut cream or almond milk, and use vegan chocolate.
  • Gluten-Free Option: Simply swap traditional flour for a gluten-free blend to accommodate dietary restrictions, without compromising texture or taste.
  • Miniature Variants: Prepare petite versions for holiday platters, adding variety and a touch of playfulness to your confectionery selections.

Storage & Make-Ahead Ideas

To maintain the freshness of your Festive Chocolate Delights, follow these storage tips:

  • At Room Temperature: Store in an airtight container at room temperature for up to 4 days, retaining their moist, tender texture.
  • Refrigeration: Keep them in the fridge for up to a week, although chilling may make them slightly denser.
  • Freezing: Freeze your treats for up to 3 months. To defrost, place them in the fridge overnight or at room temperature for a few hours before serving.

If you prefer to streamline your process, the dough can be prepared in advance and stored in the refrigerator for up to 48 hours. This allows you to bake them fresh for your special occasion, ensuring the most enjoyable eating experience.

Fun Facts & Trivia

Did you know that chocolate was once used as currency by the Aztecs? Given its high value, it was traded and consumed as a luxury, reserved only for the elite and used in sacred rituals. Today, chocolate still holds its status as a cherished luxury but is thankfully accessible for all to enjoy.

Beyond its delicious taste, chocolate is brimming with antioxidants and has been linked to various health benefits, including lowering the risk of heart disease and improving mood. Combined with the undeniable joy of eating these Festive Chocolate Delights, there’s more reason than ever to embrace this indulgent pleasure guilt-free!

In essence, our Festive Chocolate Delights bring together the best of what chocolate has to offer: history, indulgence, and joy. They’re a testament to the art of baking and the timeless appeal of one of the world’s most beloved ingredients. Enjoy making — and savoring — each batch as much as your loved ones will enjoy devouring them.

Ingredients

  • Chocolate Batter
    • 1 cup all-purpose flour
      → All-purpose flour serves as the main structure for the chocolate delights, providing the necessary framework for the batter. It’s best to sift the flour before measuring to incorporate air and prevent clumps, ensuring a light and fluffy texture.
    • 1 cup granulated sugar
      → Sugar not only sweetens the batter but also helps create a tender crumb through its interaction with the flour. It’s pivotal to use fine granulated sugar, which dissolves easily into the batter, promoting an even distribution of sweetness and moisture.
    • 1/2 cup unsweetened cocoa powder
      → Cocoa powder imparts the rich chocolate flavor that is central to these delights. Opt for high-quality unsweetened cocoa powder for the best taste. Sifting it before adding to the mixture can help avoid lumps and ensure a smooth batter.
    • 1/2 cup unsalted butter (melted)
      → The melted butter adds moisture and flavor, enriching the chocolate goodness. Use unsalted butter to control the amount of salt in the recipe. Allow it to cool slightly before mixing into the batter to avoid cooking any eggs added later.
    • 2 large eggs
      → Eggs function as a binding agent, providing structure and stability to the delights. It’s best if the eggs are at room temperature as they incorporate more easily into the batter, leading to a smoother texture and better rise.
    • 1 teaspoon vanilla extract
      → Pure vanilla extract enhances the chocolate flavor, adding depth and aroma. Avoid imitation vanilla to preserve the dish’s quality. Add it towards the end of mixing to prevent it from evaporating and losing its potency.
    • 1/2 teaspoon baking powder
      → Baking powder serves as the leavening agent, helping the delights to rise and achieve a fluffy consistency. Ensure that the baking powder is fresh for optimal leavening action, and mix it thoroughly with the dry ingredients to distribute evenly.
    • 1/4 teaspoon salt
      → Salt balances the sweetness and enhances the overall flavors of the chocolate delights. Using fine sea salt allows for easier integration into the batter, ensuring even distribution without creating any salty pockets.
  • Optional Mix-Ins
    • 1/2 cup chocolate chips (dark or milk)
      → Chocolate chips add bursts of melted chocolate in every bite, enriching the flavor. Choose high-quality chips to elevate the taste. For a fun texture, sprinkle some on top before baking for a melty decoration.
    • 1/4 cup chopped nuts (walnuts or pecans, optional)
      → Chopped nuts provide a crunchy texture and enhance the flavor profile. Toast the nuts lightly before adding them to the batter to boost their flavor. Chop them into even pieces to ensure they distribute throughout the batter uniformly.
    • 1/4 cup dried cherries or cranberries (optional)
      → Dried cherries or cranberries contribute a tart contrast to the rich chocolate, adding depth and complexity. If very firm, soak them in warm water for 10 minutes to plump them up before mixing into the batter.

Instructions

  • Preheat your oven to 350°F (175°C) and prepare a 9×9 inch baking pan by greasing it lightly or lining it with parchment paper.

    → Preheating the oven ensures an even baking environment right from the start, allowing the chocolate delights to rise properly. Lining the pan with parchment paper helps with easy removal after baking, avoiding the risk of breakage.
  • In a mixing bowl, sift together 1 cup of all-purpose flour, 1/2 cup of unsweetened cocoa powder, 1/2 teaspoon of baking powder, and 1/4 teaspoon of salt.

    → Sifting these dry ingredients removes lumps, aerates the flour, and promotes even mixing. Ensuring the baking powder is well mixed with the flour helps activate it uniformly when the wet ingredients are added, leading to better rise.
  • In another bowl, combine 1 cup of granulated sugar and 1/2 cup of melted unsalted butter. Mix until well blended and creamy.

    → Creaming these together helps to dissolve the sugar into the butter, incorporating air into the mixture which assists with the rise during baking. Allow the melted butter to cool slightly before this step to prevent curdling the eggs later.
  • Add 2 large eggs one at a time to the sugar-butter mixture, mixing thoroughly after each addition. Then stir in 1 teaspoon of vanilla extract.

    → Adding eggs individually ensures they incorporate smoothly and fully into the mixture. Room temperature eggs mix better and help create a smooth batter, while vanilla enhances the overall flavor profile.
  • Gradually add the dry ingredient mixture to the wet ingredients, folding gently with a spatula until just combined.

    → Folding prevents overmixing, which can lead to dense chocolate delights. This method gently incorporates the flour without deflating the air bubbles created during creaming.
  • If desired, fold in any mix-ins such as 1/2 cup of chocolate chips, 1/4 cup of chopped and toasted nuts, or 1/4 cup of plumped dried cherries or cranberries.

    → Adding mix-ins enhances the flavor and texture, providing delightful surprises in each bite. Ensure that the mix-ins are evenly distributed throughout the batter by folding gently but thoroughly.
  • Pour the batter into the prepared baking pan, smoothing the top with a spatula to create an even surface.

    → Smoothing the top leads to even baking, ensuring that all areas cook uniformly without any uneven peaks or dips.
  • Place the pan in the preheated oven and bake for 25-30 minutes, or until a toothpick inserted into the center comes out with a few moist crumbs.

    → Checking for doneness with a toothpick is essential; you want to avoid overbaking to ensure the delights remain moist and fudgy. Baking times may vary based on oven characteristics, so monitoring is key.
  • Once done, remove the baking pan from the oven and allow the chocolate delights to cool in the pan for about 10 minutes.

    → Letting them cool slightly helps set their structure, making them easier to cut and preventing them from crumbling when removed.
  • Carefully transfer the delights to a wire rack to cool completely before slicing into squares for serving.

    → Cooling on a wire rack allows air to circulate around the delights, preventing them from becoming soggy and ensuring a perfect texture.
  • Enjoy your Festive Chocolate Delights plain or serve with your choice of toppings such as whipped cream or a sprinkle of powdered sugar for an extra festive touch!

    → Adding a garnish not only enhances the presentation but can also elevate the flavor experience with contrasting textures and flavors.

Notes

These Festive Chocolate Delights are the perfect treat for any special occasion. The combination of rich chocolate flavor and sweet undertones creates a delightful dessert that everyone will love. Feel free to customize the recipe by adding your favorite mix-ins such as nuts, chocolate chips, or dried fruits to give each batch a unique twist. To achieve the best results, ensure all your ingredients are fresh, particularly the baking powder, and use high-quality cocoa powder for an intense chocolate taste.

For a festive presentation, dust the tops with powdered sugar or drizzle with melted chocolate once they have cooled. These delights can be stored in an airtight container at room temperature for a few days or frozen for longer storage. Just make sure to separate layers with parchment paper to prevent sticking. Serve them warm for a cozy treat, possibly with a scoop of ice cream or a dollop of whipped cream for an extra indulgence.

Always remember to preheat your oven before baking to achieve an even bake, and allow the delights to cool in the pan for a few minutes before transferring them to a wire rack. This helps set the structure while keeping them moist. Enjoy your baking experience!

Tips

Cooking Tips for Festive Chocolate Delights

  • Preparation is Key: Gather all your ingredients and equipment before you start. This ensures a smooth workflow and helps prevent missing any key components during the mixing process.
  • Sifting Dry Ingredients: Always sift the flour and cocoa powder before mixing. This not only removes any lumps but also aerates the ingredients, leading to a lighter batter.
  • Butter Temperature: Allow the melted butter to cool slightly before adding it to the batter to prevent cooking the eggs. This step is crucial for achieving a perfectly blended mixture.
  • Egg Temperature: Using room temperature eggs helps them incorporate easier and lead to better emulsification. Try taking them out of the fridge at least 30 minutes before using.
  • Mixing Technique: When combining wet and dry ingredients, mix just until combined. Overmixing can lead to tough delights, so keep it gentle.
  • Be Mindful of Baking Powder: Check the expiration date of your baking powder. If in doubt, you can test it by adding a teaspoon to warm water; if it bubbles vigorously, it’s still active!
  • Even Baking: To ensure even baking, rotate your baking pan halfway through the baking time. This promotes uniform heat distribution, resulting in evenly cooked delights.
  • Cooling Time: Allow the delights to cool in the pan for a few minutes before transferring to a wire rack. This prevents them from breaking apart and allows for better texture development.
  • Storing Leftovers: Store any leftover delights in an airtight container at room temperature for up to 3 days. To keep them fresh longer, you can refrigerate them, but be sure to bring them back to room temperature before serving for the best flavor and texture.
  • Customizing with Mix-Ins: Don’t hesitate to get creative with your mix-ins! Consider using different types of chocolate chips or incorporating spices like cinnamon or espresso powder for an added flavor twist.

FAQ

What are Festive Chocolate Delights?

Festive Chocolate Delights are rich and indulgent chocolate treats made especially for celebrations and holidays. They can include a variety of chocolate-based desserts like truffles, brownies, or chocolate-covered fruits, each with festive decorations and flavors.

What ingredients do I need to make Festive Chocolate Delights?

The basic ingredients typically include high-quality chocolate, cream or butter, sugar, and flavorings such as vanilla or peppermint. Additional ingredients may include nuts, dried fruits, or toppings like sprinkles and cocoa powder.

Are Festive Chocolate Delights suitable for special diets?

Festive Chocolate Delights can be made to suit various dietary needs. There are options for vegan chocolate, gluten-free ingredients, and reduced-sugar alternatives. Be sure to check specific recipes to accommodate dietary restrictions.

How long do Festive Chocolate Delights last?

When stored properly in an airtight container in a cool, dry place, Festive Chocolate Delights can last up to two weeks. For longer storage, you can refrigerate or freeze them, depending on the recipe.

Can I make Festive Chocolate Delights ahead of time?

Yes, many recipes for Festive Chocolate Delights can be made ahead of time. They often taste better after the flavors have melded together, making them ideal for preparing in advance for holidays or gatherings.

What are some popular variations of Festive Chocolate Delights?

Popular variations include peppermint bark, chocolate-covered strawberries, coconut truffles, and espresso-infused chocolates. You can also incorporate seasonal flavors like orange, ginger, or cinnamon for a festive twist.

How do I properly decorate Festive Chocolate Delights?

Decorating can involve dipping them in chocolate, rolling them in nuts or coconut, or drizzling with different colored chocolate. Adding edible glitter or fondant shapes can also enhance their festive appearance.

Can children help make Festive Chocolate Delights?

Yes! Children can help in various stages such as mixing ingredients, rolling truffles, or decorating. Just be sure to supervise them, especially when working with hot melted chocolate or sharp tools.

Introduction / Hook

The Vibrant Whimsy of Winter: Apple Beet Salad

Imagine nestling into the cozy allure of winter with a salad that embodies the vibrant spirit of the season. The Winter Apple Beet Salad is not just a dish, it’s a tapestry of textures and flavors, weaving together the crispness of apples and the earthy sweetness of beets. Perfectly suited to chase away the winter blues, this salad is a multi-sensory delight, offering a burst of color, a symphony of flavors, and an ode to freshness amid the chill. Your taste buds are in for a treat, as every bite promises a harmonious blend of tart, sweet, and refreshing undertones. This salad is your ticket to a winter culinary escape, where simplicity meets sophistication on a single plate.

The Story Behind the Dish

The Journey from Farm to Fork: A Tale of Tradition

Our Winter Apple Beet Salad traces its roots to the European countryside, where cold months were seasoned with creativity in the kitchen. Centuries ago, the robust nature of beets and the refreshing crunch of apples were brought together not only out of necessity but also out of a passion for flavor. Traditionally, ingredients that thrived in the colder months were the stars of winter dishes. In countries like Poland and Russia, beets and apples were common staples, cherished for their storability and versatility. This salad captures the essence of hearty, rustic winter fare, celebrating a rich history of culinary tradition.

As families gathered during the winter months, the warmth of shared meals was central to their routines. In this salad, we see echoes of those past gatherings, where innovation and resourcefulness took center stage. It’s a dish that not only transcends time but also bridges cultural gaps, offering a historical connection from farmhouse tables of old to contemporary kitchens today.

Why You’ll Love This Recipe

Five Reasons to Fall for Winter Apple Beet Salad

  • Healthy Yet Hearty: Packed with antioxidants and vitamins, it nourishes the body while delighting the palate.
  • Quick and Easy: With minimal prep time and straightforward steps, it’s perfect for busy winter evenings.
  • Visual Feast: Its vibrant colors bring a touch of summer brightness to your winter table.
  • Versatile: Serves beautifully as a side dish or a standalone lunch.
  • Family-Friendly: The naturally sweet ingredients are a hit with adults and kids alike.

Flavor Profile & Texture

Indulge in Layers of Flavor and Texture

This Winter Apple Beet Salad is a sensory journey, beginning with the earthy, sweet aroma of freshly roasted beets. The juxtaposition of crunchy apples and soft beets creates a delightful textural contrast that elevates each mouthful. The natural sweetness of the beets is perfectly complemented by the tart and crisp nature of the apples, working in symphony with a tangy vinaigrette that ties the flavors together seamlessly.

Each component of the salad brings its unique charm: the earthy base notes of the beets are highlighted by the vibrant zest of the apples. A dynamic dressing – perhaps hinting at mustard or citrus – further amplifies these core ingredients, creating a dance of flavors on the palate. The result is a salad that feels luxurious yet comforting, daring yet familiar.

Occasions & Pairings

Perfect Pairings and Celebratory Situations

Versatility is at the heart of this salad, making it an ideal addition to various occasions. Whether you’re serving it at a festive holiday gathering or a casual weeknight dinner, it brings both style and substance to the table. For holiday feasts, pair it with a juicy roasted turkey or a savory pork tenderloin to balance hearty flavors.

When thinking about drinks, opt for a crisp white wine like Sauvignon Blanc or a warm mulled cider to accentuate the dish’s refreshing notes. A crusty sourdough bread would also make a fitting accompaniment, offering a chewy counterpoint to the salad’s textures.

Tips, Variations & Substitutions

Customize Your Culinary Experience

The beauty of this Winter Apple Beet Salad lies in its adaptability. Here are a few tips and variations to customize it:

  • Vegan Twist: Opt for maple syrup in the dressing instead of honey, and replace any dairy additions with plant-based alternatives.
  • Nuts to Add Crunch: Consider sprinkling toasted walnuts or pecans for an extra layer of texture and warmth.
  • Cheese Lovers’ Delight: Crumbles of feta or goat cheese can enhance the salad with a creamy tang.
  • Gluten-Free: The salad is naturally gluten-free. Just ensure that all condiments used are certified gluten-free.

Whether you prefer a touch of spice with a dash of cayenne or a hint of citrus with some fresh orange zest, this salad can be tailored to suit any taste preference.

Storage & Make-Ahead Ideas

Preserve and Prepare for Flavors that Last

While best enjoyed fresh, the Winter Apple Beet Salad offers flexibility for those who love to prepare ahead. If you’re planning a busy week, consider roasting the beets in advance—this can be done days before assembly and kept refrigerated until needed. Likewise, the dressing can be prepared and stored separately in an airtight container for quick salad assembly.

For storing leftovers, keep the components separated if possible to preserve their textures, especially the dressing and apples. This ensures that when you’re ready to enjoy the salad, the apples maintain their crispness, and the flavors remain distinct and vibrant. If assembled, store in an airtight container in the fridge for up to two days—any longer may see the apples softening and losing some crunch.

Need a make-ahead meal for a relaxing evening or impromptu guests? Simply combine these elements when ready to serve, and present a salad that feels fresh and celebratory, no matter the time constraints.

Fun Facts & Trivia

Interesting Tidbits About Beets and Apples

The combination of beets and apples in culinary traditions stretches back centuries with fascinating mentions in folklore and farming lore. Beets were first cultivated by the Romans, rapidly spreading across Europe as their vibrant color and hearty nature were valued. Meanwhile, apples have a legendary status—it’s said that humans have been eating them since prehistoric times.

Did you know that the natural dye in beets, betalains, was often used as a coloring agent for food, textiles, and even as an early form of lipstick? These vibrant pigments are not only beautiful but also packed with antioxidants.

With deeper understanding emerges a richer appreciation for the harmonic pairing in this salad. So, next time you savor a bite, remember that you’re partaking in a historical tradition that spans cultures and eras, celebrated by palates from farm to city.

Ingredients

  • Salad Base
    • 4 cups mixed greens (such as arugula, spinach, and kale)
      → A blend of mixed greens forms the base of this salad, providing a complex flavor and a variety of textures. Choose fresh, crisp greens for the best taste, and wash them thoroughly under cold water before serving to remove any dirt or grit.
    • 2 medium beets (roasted and diced)
      → Beets add a sweet earthiness and vibrant color to the salad. Roast the beets in the oven wrapped in foil at 400°F (200°C) for about 45-60 minutes until they are tender. Allow them to cool slightly before peeling and dicing them to enhance their natural sweetness.
    • 2 medium apples (sliced, preferably tart varieties like Granny Smith)
      → Tart apples provide a refreshing crunch and a balancing acidity against the sweetness of the beets. Slice them thinly and toss them with a bit of lemon juice to prevent browning and maintain their crispness.
    • 1/2 cup crumbled feta cheese
      → Feta cheese adds a creamy and tangy flavor that complements the sweetness of the beets and apples. Choose a quality feta for the best flavor. Allow the feta to come to room temperature before serving, as it enhances its creaminess.
  • Vinaigrette
    • 1/4 cup extra virgin olive oil
      → Olive oil serves as the base for the vinaigrette, providing richness and a smooth texture. Use high-quality extra virgin olive oil for its robust flavor and health benefits. Allow it to sit at room temperature for optimal emulsion with the other ingredients.
    • 2 tablespoons apple cider vinegar
      → Apple cider vinegar provides acidity that balances the flavors of the salad. It also enhances the overall freshness and adds a slight tang. Choose unfiltered vinegar for a more complex flavor. Shake well before adding to ensure it blends nicely.
    • 1 tablespoon honey or maple syrup
      → Honey or maple syrup adds a hint of sweetness to the vinaigrette, complementing the beets and apples. If using honey, allow it to warm slightly to help it mix easily with the other liquids. Maple syrup offers a unique savory note.
    • Salt and pepper to taste
      → Salt enhances the overall flavor profile of the dressing and salad, while black pepper adds a touch of heat. Use sea salt or kosher salt for better texture and taste. Adjust according to your preference after tasting the vinaigrette.
  • Toppings
    • 1/4 cup toasted walnut halves
      → Toasted walnuts provide a crunchy texture and rich, nutty flavor to the salad. Toast the walnuts in a dry skillet over medium heat for 5-7 minutes, stirring frequently, until fragrant. Be careful not to burn them, as they can turn bitter.
    • 2 tablespoons fresh herbs (such as parsley or dill, chopped)
      → Fresh herbs add an aromatic element and brighten up the dish. Chop them finely and sprinkle them over the salad just before serving to maintain their freshness and color.

Instructions

  • Begin by preparing the mixed greens.

    → Rinse 4 cups of mixed greens, including arugula, spinach, and kale, under cold running water to remove any dirt or grit. Shake off excess water or use a salad spinner to dry the greens thoroughly, as excess moisture can make the salad soggy.
  • Roast the beets.

    → Preheat your oven to 400°F (200°C) and wrap the 2 medium beets individually in aluminum foil, sealing the edges to create a pouch. Place them directly on the oven rack and roast for 45-60 minutes, or until a fork easily pierces through. Let them cool slightly before peeling, as this minimizes mess and facilitates easier handling.
  • Dice the roasted beets.

    → Once cool enough to handle, peel the skin using your fingers or a paper towel. Cut the beets into small, even dice to ensure they distribute evenly throughout the salad, adding both color and flavor in every bite.
  • Prepare the apples.

    → Slice the 2 medium tart apples, like Granny Smith, thinly and uniformly to create a consistent texture in the salad. To prevent browning, toss the slices gently with a squeeze of fresh lemon juice. This step also adds a touch of acidity, enhancing the overall taste.
  • Allow the feta cheese to come to room temperature.

    → Remove 1/2 cup of crumbled feta cheese from the refrigerator and set it aside for about 15 minutes. This not only improves the flavor but also makes it easier to crumble and incorporate into the salad.
  • Make the vinaigrette.

    → In a small bowl or jar, combine 1/4 cup of extra virgin olive oil, 2 tablespoons of apple cider vinegar, and 1 tablespoon of honey or maple syrup. Whisk or shake vigorously until emulsified. The quality of your olive oil and the balance of the vinegar and sweetness will elevate the flavor profile of your salad.
  • Season the vinaigrette.

    → Add salt and pepper to taste to the vinaigrette. Start with a pinch of salt and a few grinds of fresh black pepper, then taste for seasoning. The right balance will enhance all components of the salad, so adjust according to your preference.
  • Toast the walnut halves.

    → In a dry skillet over medium heat, add 1/4 cup of walnut halves and toast them for approximately 5-7 minutes, stirring frequently. Watch for a change in aroma and color; they should be golden and fragrant but not burnt. Transfer them to a plate to cool, as they continue to cook in the hot pan.
  • Chop the fresh herbs.

    → Finely chop 2 tablespoons of fresh herbs, such as parsley or dill, and set aside. Fresh herbs should be chopped just before serving to retain their vibrant color and aromatic quality, giving the salad a fresh finish.
  • Assemble the salad.

    → In a large salad bowl, combine the washed mixed greens, diced roasted beets, apple slices, and crumbled feta cheese. Toss gently to combine the ingredients without bruising the greens, ensuring an even distribution of flavors and textures.
  • Dress the salad.

    → Drizzle the prepared vinaigrette over the salad and toss lightly to coat the ingredients uniformly. Take care not to overdress; you can always add more dressing at serving if needed.
  • Finish with toppings.

    → Sprinkle the toasted walnut halves and chopped fresh herbs over the top of the salad just before serving. This adds crunchy and aromatic elements that elevate the visual appeal and flavor of the dish, making it more inviting.
  • Serve immediately and enjoy your Winter Apple Beet Salad.

    → For the best flavor and texture, serve the salad fresh right after preparation. This salad makes a perfect light lunch or a vibrant side dish for any dinner.

Notes

  • Preparation Tips
    • For an effortless assembly, prepare all your ingredients ahead of time. Roast the beets a day in advance and store them in the refrigerator. This not only saves time but also enhances the flavors as they marinate in their juices.
    • When mixing the salad, use a large bowl to allow for easy tossing of the greens and other ingredients without spillage. Gently toss the mixed greens, diced beets, sliced apples, and crumbled feta to evenly distribute the flavors.
    • To elevate the vinaigrette, consider adding a teaspoon of Dijon mustard for a bit of zest and creaminess. This will also help in emulsifying the dressing more effectively. Shake well before drizzling over the salad.
  • Serving Suggestions
    • Serve the salad immediately after dressing to keep the greens crisp. If you’re preparing it in advance, coat the salad gently with the vinaigrette just before serving.
    • This salad pairs beautifully with grilled chicken or fish for a wholesome meal. Alternatively, it can stand alone as a light meal or a delightful side dish.
    • For a festive touch, consider adding pomegranate seeds for a pop of color and sweetness. They also add a crunchy texture that complements the other ingredients.
  • Storage Tips
    • If you have leftovers, store the salad components separately to keep everything fresh. Keep the dressing in a sealed container in the refrigerator, and avoid mixing it with the greens until you are ready to eat again.
    • To maximize freshness, consume the salad within 2 days of preparation. The apples may brown slightly, but will still be delicious. If browning is a concern, try soaking them in a mixture of water and lemon juice before slicing.

Tips

Tips for Preparing Winter Apple Beet Salad

  • Choosing Fresh Greens: When selecting mixed greens, opt for vibrant, unblemished leaves. Check for any wilting or browning, and choose organic whenever possible for the best flavor and health benefits.
  • Roasting Beets: For perfectly roasted beets, wrap them well in foil to retain moisture, which helps in cooking them evenly. Consider roasting a larger batch and storing leftovers for future salads or sides.
  • Apple Preparation: To enhance the tartness of the apple slices, consider pairing them with a pinch of cinnamon or a sprinkle of nutmeg before adding them to the salad. This can elevate the overall flavor profile.
  • Feta Cheese Tips: Crumbling feta can be easier if it’s cold; however, letting it come to room temperature will make it more creamy. If possible, use a fork rather than your hands to crumble it, preventing it from becoming too dense.
  • Making Vinaigrette: To achieve the perfect vinaigrette consistency, gradually whisk the olive oil into the vinegar mixture. This will help emulsify the dressing, preventing it from separating.
  • Adding Sweetness: If you prefer a sweeter vinaigrette, experiment with the amount of honey or maple syrup. Tasting as you mix will help you find the ideal balance between sweetness and acidity.
  • Seasoning to Taste: Always taste your vinaigrette before dressing the salad. You might find you need a bit more salt or pepper depending on your personal preference or the saltiness of the feta used.
  • Walnut Toasting: Keep a close eye on walnuts while toasting; they can go from perfect to burnt in seconds. Once they turn golden brown and fragrant, remove them from heat immediately and let them cool to enhance their crunchiness.
  • Herb Freshness: For the freshest flavor, add herbs at the last moment before serving. This prevents wilting and allows their aromatic oils to remain potent, giving the salad a burst of flavor.
  • Texture Variety: Feel free to add additional toppings like dried cranberries or pumpkin seeds for extra texture and flavor, enhancing the overall salad experience.

FAQ

What are the main ingredients in the Winter Apple Beet Salad?

The main ingredients include fresh apples, roasted beets, mixed greens, walnuts, feta cheese, and a vinaigrette dressing.

How do you prepare the beets for this salad?

To prepare the beets, wash them thoroughly, trim the ends, wrap in aluminum foil, and roast in the oven until tender, then peel and slice them.

Can I use canned beets instead of fresh beets?

Yes, you can use canned beets for convenience, but fresh roasted beets add a deeper flavor and better texture.

Is this salad suitable for vegan diets?

To make this salad vegan, simply omit the feta cheese or use a plant-based cheese alternative.

What type of dressing works best for this salad?

A light vinaigrette made with olive oil, balsamic vinegar, honey (or maple syrup for vegan), salt, and pepper complements the flavors very well.

How can I make this salad gluten-free?

This salad is naturally gluten-free. Just ensure that any additional ingredients like dressings or toppings are also gluten-free.

How long can I store leftover Winter Apple Beet Salad?

Leftovers can be stored in an airtight container in the refrigerator for up to 2 days, but it’s best to add the dressing just before serving.

What can I add to enhance the flavor of the salad?

You can add ingredients like avocado, cranberries, or pumpkin seeds to enhance both the flavor and texture of the salad.