Author

Ocean Nightleaf

Browsing

Introduction

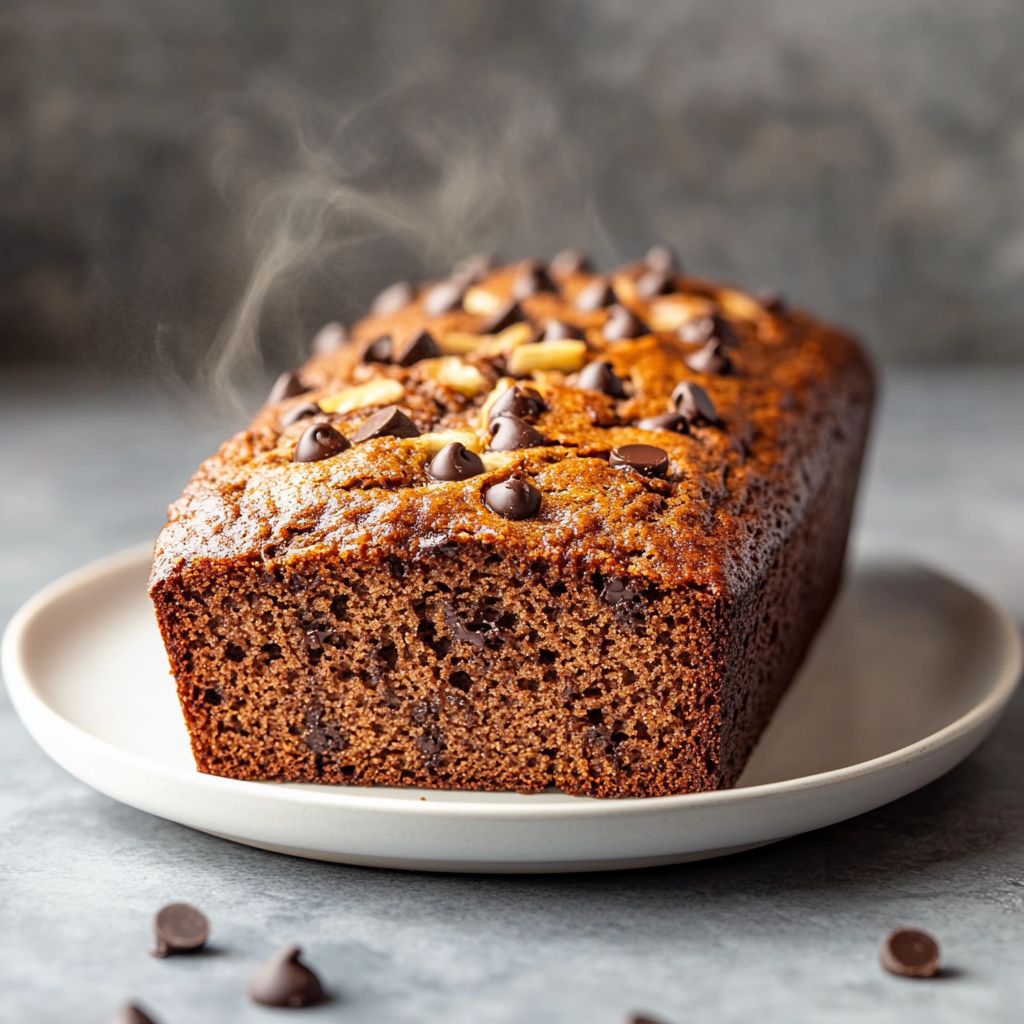
There’s something undeniably enchanting about the aroma of freshly baked bread wafting through the kitchen, and when that bread is infused with the sweet scent of ripe bananas and rich chocolate chips, it becomes nothing short of magical. Enter Chocolate Chip Banana Bread, a timeless classic that marries the comforting familiarity of banana bread with the indulgent allure of chocolate. This delectable treat is more than just a dessert — it’s an experience, evoking feelings of warmth, nostalgia, and the simple joys of home-baked goodness.

The beauty of this recipe lies in its perfect balance: it’s rich yet light, sweet yet not overwhelming, and indulgent yet undeniably wholesome. Whether you’re a seasoned baker or a kitchen novice, this chocolate chip banana bread is a surefire way to impress your friends, family, or just yourself! Join us as we explore the enchanting world of this delightful dish, uncovering its story, flavors, and irresistible charm.

The Story Behind the Dish

Chocolate chip banana bread, as we know it today, is the result of a culinary journey steeped in history and innovation. The origins of banana bread can be traced back to the 1930s, during the Great Depression. As resourcefulness became a necessity, home bakers found new and creative ways to use overripe bananas, which were once discarded. The result was a delightful, sweet bread that quickly became a household staple.

Flash forward to the modern era, and the simple banana bread has seen countless variations, with the addition of chocolate chips being one of the most popular. Introduced in the mid-20th century by ingenious bakers looking for a way to elevate their creations, chocolate chips added a luxurious and decadent touch, creating a marriage of flavors that’s hard to resist. The result is a beloved treat that has stood the test of time, cherished by generations for its rich taste and comforting appeal.

Why You’ll Love This Recipe

  • Easy to Make: With straightforward steps and simple ingredients, this recipe is perfect for both beginner and experienced bakers.
  • Wholesome Indulgence: Made with real bananas and quality chocolate, it’s a sweet treat that you can feel good about.
  • Versatile: Enjoy it as a breakfast treat, an afternoon snack, or a delightful dessert.
  • Family Favorite: Its universal appeal makes it a hit with kids and adults alike.
  • Freezes Well: Make a batch and freeze for those days when you need a quick and satisfying snack.

Flavor Profile & Texture

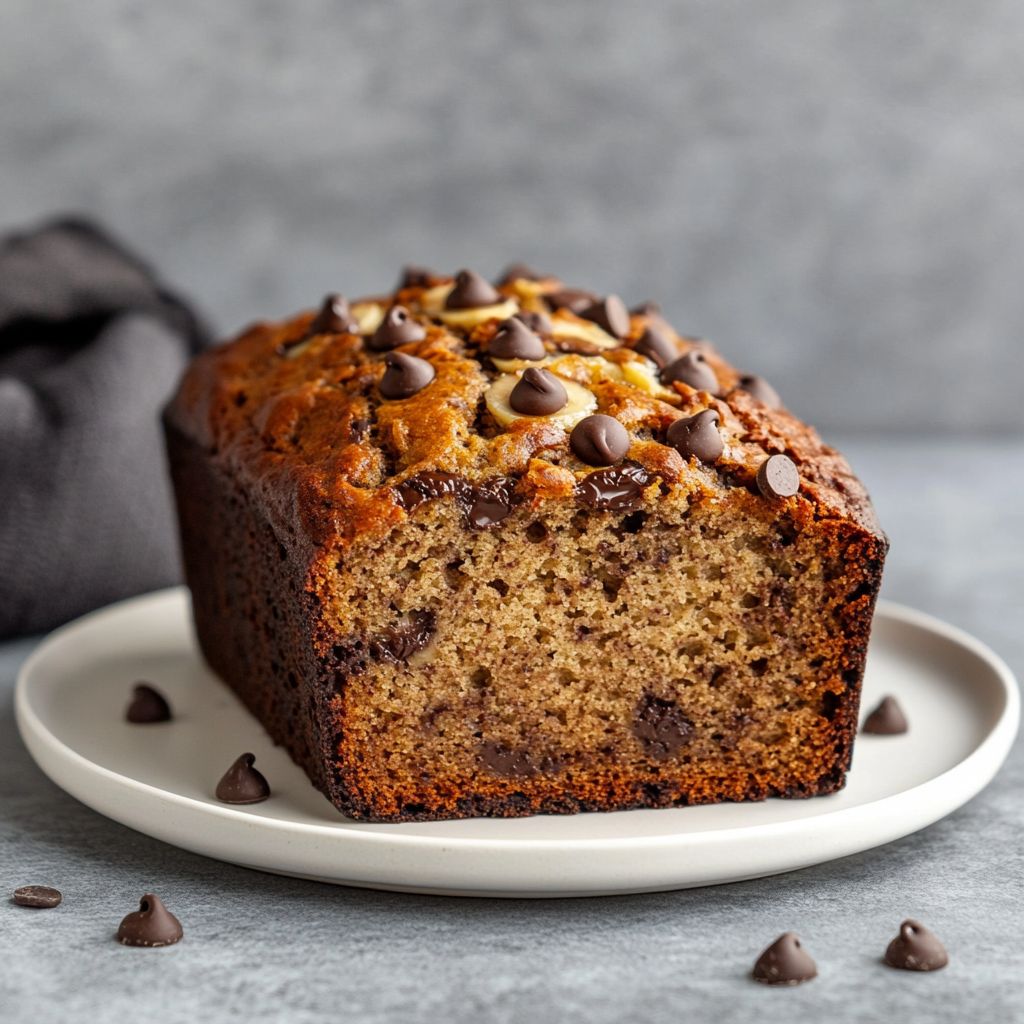
This chocolate chip banana bread is a sensory delight, harmoniously blending the natural sweetness of ripe bananas with the rich, melty goodness of semi-sweet chocolate chips. The bananas lend an unparalleled moistness to the bread, ensuring each bite is soft, tender, and full of flavor. Meanwhile, the chocolate chips offer delightful little pockets of luxury, providing a perfect balance of sweetness and texture.

Beyond the dominant flavors of banana and chocolate lies a subtle complexity, with hints of vanilla and perhaps a whisper of cinnamon, adding warmth and depth to the overall profile. The texture is a triumph, achieving that elusive balance between moistness and structure, ensuring every slice holds together beautifully while melting in your mouth.

Occasions & Pairings

Chocolate chip banana bread is a versatile staple that can be enjoyed on virtually any occasion. Whether you’re serving it at a leisurely brunch, packing it up for a picnic, or enjoying it as a cozy after-dinner treat, it never fails to deliver. It’s an ideal companion to a variety of beverages:

  • Morning Coffee: Start your day with a slice of this bread and a robust cup of coffee for a satisfyingly sweet pick-me-up.
  • Afternoon Tea: Pair it with a lightly brewed tea to mellow the sweetness and enhance the banana and chocolate flavors.
  • Dessert Wine: For a sophisticated twist, enjoy it with a sip of dessert wine, highlighting the bread’s subtle complexities.

Tips, Variations & Substitutions

Chocolate chip banana bread is incredibly adaptable, and there are countless ways to make it your own:

  • Add Nuts: Incorporate walnuts or pecans for extra crunch and a nutty depth.
  • Dairy-Free: Use dairy-free chocolate chips and swap butter with coconut oil or a plant-based alternative.
  • Gluten-Free: Substitute regular flour with a quality gluten-free blend to meet dietary needs without sacrificing flavor.
  • Spices: Experiment with spices like cinnamon, nutmeg, or cardamom for a new flavor twist.
  • Swirl In Nutella: For a decadent treat, swirl in some Nutella before baking for added richness and flavor.

Storage & Make-Ahead Ideas

Chocolate chip banana bread is as convenient as it is delicious. Here’s how you can enjoy it at its best:

  • Room Temperature: Store in an airtight container at room temperature for up to four days.
  • Freezing: Wrap individual slices in plastic wrap, then place in a freezer-safe bag. Freeze for up to three months. Simply thaw at room temperature when ready to enjoy.
  • Reheating: Refresh slices by warming them in the oven or toaster for a few minutes to enjoy that freshly-baked quality.
  • Make Ahead: Prepare the batter in advance and refrigerate overnight. Bake fresh the next day for best results.

Fun Facts & Trivia

Did you know that bananas are technically berries? This makes banana bread a wonderful “berry bread,” if you will. Interestingly, the United States celebrates National Banana Bread Day on February 23, providing the perfect excuse to whip up a batch of this scrumptious bread.

Moreover, chocolate chip banana bread aligns with the growing trend of “rescued produce,” which champions using ingredients that might otherwise go to waste. In kitchens worldwide, overripe bananas find new life in the form of this beloved bread, making it a delicious and environmentally conscious choice.

In conclusion, chocolate chip banana bread is more than just a recipe; it’s a celebration of flavor, history, and innovation. Each bite tells a story of comfort and indulgence, making it a staple that you’ll return to time and time again. Whether you enjoy it alone or share the joy with others, this delightful creation is sure to become a cherished favorite in your culinary repertoire.

Ingredients

    Banana Bread Base

  • 3 ripe bananas (mashed)
    → Use very ripe bananas with plenty of brown spots to ensure maximum sweetness and moisture. The natural sugars in ripe bananas not only provide sweetness but also act as a binder, keeping the banana bread moist and flavorful. Mash them well to avoid any large chunks that might disrupt the texture of the bread.
  • 1/3 cup melted coconut oil (or unsalted butter)
    → Coconut oil or butter adds richness and moisture to the bread. If using coconut oil, let it cool slightly before adding to the mixture to prevent cooking the eggs. Unsalted butter can also be used for a more traditional flavor. Both should be thoroughly melted but not smoking to ensure easy incorporation into the batter.
  • 1/2 cup granulated sugar
    → Granulated sugar provides sweetness and helps with the browning of the crust. You can adjust the amount of sugar based on your preference, but be careful not to reduce it too much, as this will affect the overall taste and texture. For a deeper flavor, consider using brown sugar instead.
  • 2 large eggs (room temperature)
    → Eggs add structure and moisture to the banana bread. Room temperature eggs mix more easily into the batter, creating a smoother consistency. Ensure they are fully incorporated to avoid any separation during baking, which could lead to uneven texture.
  • 1 teaspoon pure vanilla extract
    → Pure vanilla extract adds a rich, aromatic flavor that complements the bananas and chocolate chips. Avoid imitation vanilla if possible, as it lacks the depth of flavor provided by pure vanilla. Measure accurately to ensure a balanced flavor.
  • 1 teaspoon baking soda
    → Baking soda acts as a leavening agent, helping the banana bread rise and achieve a light texture. Make sure to use fresh baking soda, as old or expired baking soda may not provide the same level of leavening. Combine it with the dry ingredients thoroughly to ensure even rising.
  • 1/2 teaspoon salt
    → Salt enhances the flavor of the banana bread and balances the sweetness. It’s essential for bringing out the flavors of the other ingredients. Use fine salt for even distribution, and it’s best to combine it with the dry ingredients before mixing it into the batter.
  • 1 1/2 cups all-purpose flour (or gluten-free flour blend)
    → All-purpose flour provides structure and binds the ingredients together. If you prefer a gluten-free option, opt for a gluten-free flour blend that contains xanthan gum to mimic the elasticity of traditional flour. Sift the flour before measuring to remove any lumps and ensure an even texture.
  • Chocolate Chips

  • 1 cup semi-sweet or dark chocolate chips
    → Chocolate chips add richness and sweetness to the bread. Use good quality chocolate chips for the best flavor. You can also mix in milk chocolate for a sweeter taste or dark chocolate for a richer one. For a fun twist, consider adding white chocolate chips or chunks for a contrasting flavor and texture.

Instructions

  • Preheat your oven to 350°F (175°C) and line a 9×5-inch loaf pan with parchment paper or grease it thoroughly.

    → Preheating ensures that the banana bread bakes evenly from the start. Lining the pan with parchment paper or greasing it prevents sticking, allowing for easy removal of the bread once baked. This also helps achieve a nice crust on the outside.
  • In a large mixing bowl, mash the 3 ripe bananas until smooth using a fork or a potato masher.

    → Ensure that the bananas are very ripe, as their high sugar content contributes to the sweetness and moisture of the bread. Mash them thoroughly to create a smooth base without large chunks, which could affect the texture of the final product.
  • Add 1/3 cup of melted coconut oil or unsalted butter to the bowl with the mashed bananas and mix thoroughly.

    → The oil or melted butter adds a rich flavor and moisture to the bread. If using coconut oil, let it cool to room temperature before combining to avoid cooking the other ingredients. Stir until well blended, ensuring the fat is evenly distributed throughout the banana mixture.
  • Incorporate 1/2 cup of granulated sugar into the banana and oil mixture, stirring until fully combined.

    → Sugar not only sweetens the bread but also contributes to its texture. Mixing it in thoroughly will ensure even sweetness throughout the loaf. This step also helps to create a uniform wet mixture before adding the dry ingredients.
  • Crack in 2 large eggs, ensuring they are at room temperature, and add 1 teaspoon of pure vanilla extract. Stir until the mixture is smooth and homogenous.

    → Room temperature eggs combine more easily into the batter, leading to a smoother texture. The vanilla extract enhances the overall flavor profile, making the bread aromatic and delicious. Ensure that no egg whites are left separate to avoid lumps in the batter.
  • In a separate bowl, whisk together 1 teaspoon of baking soda, 1/2 teaspoon of salt, and 1 1/2 cups of all-purpose flour until well combined.

    → Combining dry ingredients in a separate bowl ensures even distribution of the baking soda and salt, which are critical for proper leavening and flavor. Sifting the flour before measuring can help avoid clumps and ensure accurate that the correct amount is used.
  • Gradually add the dry flour mixture to the wet banana mixture, folding gently with a spatula until just combined.

    → Be careful not to overmix, as this can lead to tough banana bread. Gently folding preserves the air bubbles needed for a light texture. Stop mixing when no dry flour is visible; a few lumps are perfectly okay.
  • Fold in 1 cup of semi-sweet or dark chocolate chips into the batter until evenly distributed.

    → Adding chocolate chips enhances the flavor and adds a delightful texture contrast. Mixing them in gently ensures they are evenly spread throughout the batter without breaking them into smaller pieces.
  • Pour the banana bread batter into the prepared loaf pan, smoothing the top with the spatula for an even surface.

    → Smoothing the top helps the bread rise evenly and creates a nice appearance after baking. Make sure the batter reaches the corners of the pan for uniform baking.
  • Bake in the preheated oven for 60 to 65 minutes, or until a toothpick inserted into the center comes out clean or with a few moist crumbs.

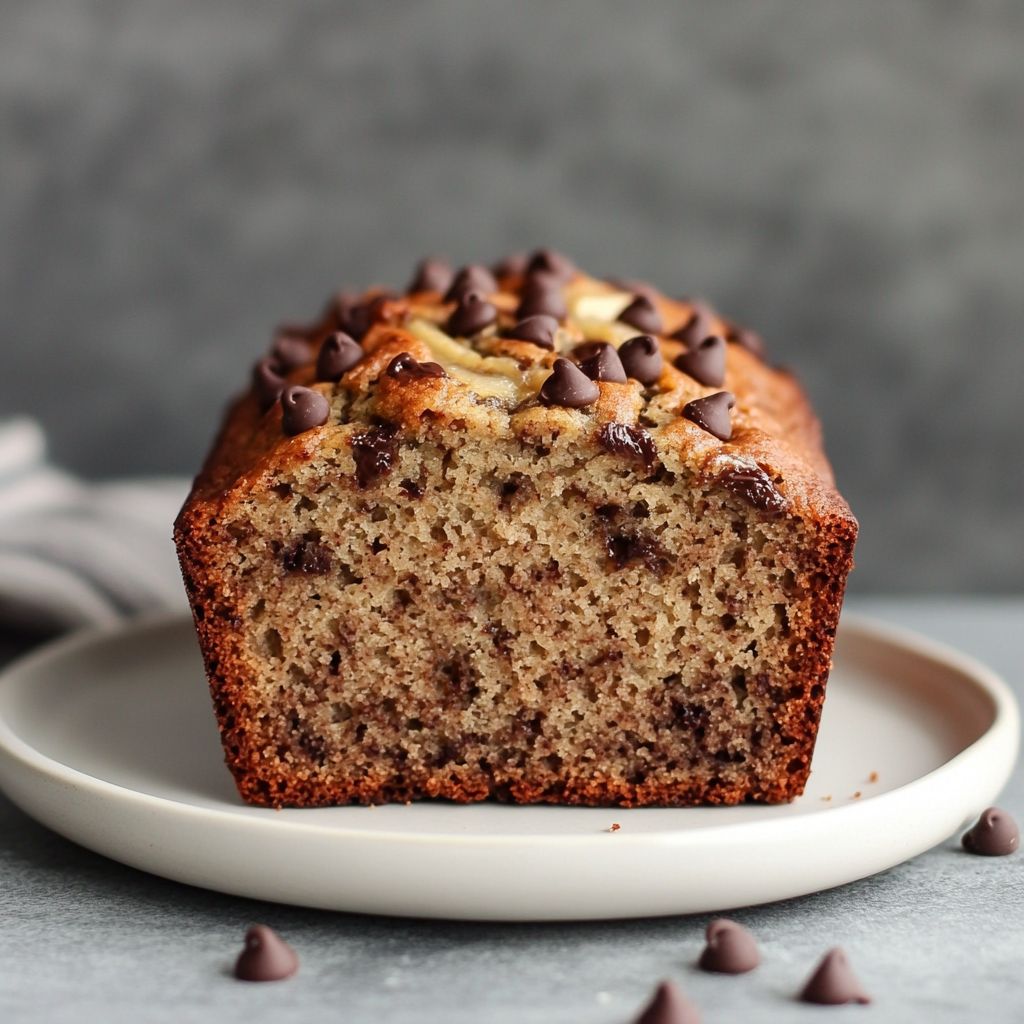
    → Baking for the correct amount of time is key to achieving a fully cooked loaf. Start checking around the 60-minute mark to avoid overbaking, which can lead to dryness. Remember that the bread will continue to cook slightly after being removed from the oven.
  • Remove the banana bread from the oven and let it cool in the pan for 10-15 minutes, then transfer it to a wire rack to cool completely.

    → Allowing the bread to cool in the pan helps set its shape, while transferring it to a wire rack prevents sogginess by allowing air to circulate around the loaf. Cooling completely before slicing will give you cleaner, more attractive slices.
  • Slice and serve the chocolate chip banana bread once cooled, enjoying it fresh or toasted with a touch of butter if preferred.

    → Slicing the bread at room temperature ensures that it holds its shape without crumbling. Toasting can enhance the flavor and provide a delightful contrast to the soft interior, making each bite a tasty experience.

Notes

  • Preheat your oven to 350°F (175°C). This ensures that your banana bread bakes evenly and rises properly. It’s best to use an oven thermometer to confirm the accurate temperature.
  • Prepare a loaf pan by greasing it with coconut oil or butter, or line it with parchment paper for easy removal later. Using parchment paper can also help prevent sticking.
  • In a large mixing bowl, mash the ripe bananas thoroughly with a fork or potato masher until they resemble a smooth puree. This will ensure even distribution throughout the batter.
  • In the same bowl, whisk in the melted coconut oil (or butter), granulated sugar, room temperature eggs, and pure vanilla extract. Mix until the ingredients are fully combined and smooth.
  • In a separate bowl, combine the baking soda, salt, and all-purpose flour (or gluten-free flour blend). Stir these dry ingredients together to ensure they are well mixed before adding to the wet ingredients.
  • Gradually fold the dry ingredients into the wet mixture using a spatula. Be careful not to overmix; stop as soon as you see no more flour. This helps maintain a tender texture.
  • Gently fold in the chocolate chips, reserving a handful to sprinkle on top if desired. This will create a delicious chocolate layer on the surface of the bread once baked.
  • Pour the batter into the prepared loaf pan, smoothing out the top. Tap the pan lightly on the counter to remove any air bubbles.
  • Bake in the preheated oven for 55-65 minutes or until a toothpick inserted into the center comes out clean or with a few moist crumbs. The baking time may vary based on your oven and pan size.
  • Once baked, allow the banana bread to cool in the pan for about 10 minutes before transferring it to a wire rack to cool completely. This will help prevent sogginess at the bottom.
  • Store any leftover banana bread in an airtight container at room temperature for up to 3 days, or refrigerate for up to a week. For longer storage, slice and freeze individual pieces, allowing you to enjoy a quick treat later.
  • Consider serving your chocolate chip banana bread warm or toasted, with a spread of nut butter or a dollop of yogurt for added richness. Enjoy with a cup of coffee or tea for a cozy snack!

Tips

Cooking Tips for Chocolate Chip Banana Bread

  • Banana Selection: The key to delicious banana bread is using overripe bananas. Look for bananas that are soft, with plenty of brown spots. They should be easy to mash and provide maximum sweetness.
  • Mashing Bananas: Ensure that the bananas are mashed thoroughly. Using a fork or a potato masher works best to create a smooth consistency, as large chunks of banana can create uneven texture in the final bread.
  • Coconut Oil Temperature: If you’re using coconut oil, allow it to cool until it’s warm but not hot before pouring it into the banana mixture. This prevents the eggs from cooking prematurely and helps to maintain the integrity of the batter.
  • Room Temperature Ingredients: For the best texture, let your eggs and any dairy product sit out for about 30 minutes before mixing. This will help them blend more easily with the other ingredients, resulting in a well-combined batter.
  • Sweetness Adjustments: When measuring sugar, always do so accurately. If you prefer a less sweet bread, consider reducing the sugar slightly—but keep in mind this may affect the moisture and texture of the finished product.
  • Baking Soda Freshness: Check the expiration date on your baking soda before use. An effective leavening agent is crucial for a light and fluffy loaf. You can test it by adding a couple of drops of vinegar; if it bubbles, it’s good to go!
  • Mixing Technique: When combining the wet and dry ingredients, mix until just combined. Overmixing can lead to dense banana bread, as it develops the gluten in the flour. A few lumps in the batter are perfectly fine.
  • Chocolate Chip Variety: For a more complex flavor profile, experiment with different types of chocolate chips. Semi-sweet, dark, or even a mixture can enhance the taste. Consider folding in some nuts for added texture if desired.
  • Cooling: After baking, let the banana bread cool in the pan for about 10-15 minutes before transferring it to a wire rack. This will prevent it from becoming soggy and allow it to set properly.
  • Storage Tips: Store any leftovers in an airtight container at room temperature for up to 3 days, or refrigerate for longer freshness. You can also freeze slices wrapped in plastic wrap and aluminum foil for up to 3 months—perfect for on-the-go snacks!

FAQ

What ingredients do I need to make Chocolate Chip Banana Bread?

To make Chocolate Chip Banana Bread, you will need ripe bananas, all-purpose flour, sugar, butter, eggs, baking soda, vanilla extract, salt, and chocolate chips.

How ripe should the bananas be?

The bananas should be very ripe, preferably with dark spots and a soft texture. Overripe bananas provide the best flavor and sweetness for the bread.

Can I use frozen bananas for this recipe?

Yes, you can use frozen bananas. Make sure to thaw them completely and drain any excess liquid before mashing and using them in the recipe.

Can I substitute whole wheat flour for all-purpose flour?

Yes, you can substitute part or all of the all-purpose flour with whole wheat flour. The texture will be denser, but it will add more nutrition to your bread.

How long should I bake the bread?

The chocolate chip banana bread should be baked at 350°F (175°C) for about 60-70 minutes, or until a toothpick inserted into the center comes out clean.

Can I add nuts to the Chocolate Chip Banana Bread?

Absolutely! You can add chopped walnuts or pecans for extra texture and flavor. Just mix them in along with the chocolate chips.

How should I store the leftover banana bread?

Store leftover banana bread in an airtight container at room temperature for up to 3 days, or refrigerate it for longer freshness. You can also freeze it for up to 3 months.

Can I make this recipe vegan?

Yes! You can make vegan chocolate chip banana bread by substituting the eggs with flax eggs or applesauce and using dairy-free butter and chocolate chips.

Introduction: A Sweet Adventure Awaits

Imagine biting into a warm chocolate chip cookie that’s fresh from the oven — the divine blend of crispy edges and a chewy center, with gooey chocolate in every bite. Now, picture that same indulgent experience only amplified, in the form of a Chocolate Chip Cookie Bar. These bars are a spectacular transformation of the classic cookie, offering a symphony of flavors and textures that captivate the senses from the first bite. They are wonderfully dense yet soft, with each square promising a perfect balance of sweet chocolate and buttery dough. If you’re ready for a journey of taste that is both comforting and exhilarating, then Chocolate Chip Cookie Bars are exactly what you need.

The Story Behind the Dish

Chocolate chip cookies have been a staple in the dessert world since their serendipitous creation in the 1930s by Ruth Wakefield of the Toll House Inn. The original version was an accidental marvel, borne of a simple substitution in ingredients. Over time, this classic treat has evolved into numerous variations, each bringing its own charm to the table. The Chocolate Chip Cookie Bar is one such delightful evolution, taking inspiration from the universal love of the traditional cookie and adding a twist in presentation and texture.

This variation likely emerged from the desire for a quicker, less labor-intensive way to enjoy the beloved chocolate chip cookie. Instead of placing individual dollops of dough onto a baking sheet, the dough is spread uniformly in a pan, baked to perfection, and then cut into bars. This approach not only saves time but also enriches the flavor, as the dough bakes more evenly and the chocolate is distributed across more surface area. These cookie bars have since become a beloved treat in many households, perfect for everything from casual gatherings to midnight snacks.

Why You’ll Love This Recipe

  • Effortlessly Simple: Prepare your cookie dough, spread it in a pan, and let your oven do the rest.
  • Celebrated Flavor: Enjoy the classic taste you love, enhanced with a new texture.
  • Great for Groups: Perfect for potlucks, parties, or cozy family nights.
  • Customizable: Adapt the recipe to suit your dietary needs or culinary creativity.
  • Satisfying Texture: Delight in the combination of a soft center with slightly crispy edges.

Flavor Profile & Texture

The Chocolate Chip Cookie Bar captures the quintessence of its cookie counterpart; each bite is a harmonious blend of brown sugar, butter, and vanilla. The chocolate chips are not merely an accent but a full-fledged partner in flavor, melting just enough to integrate subtly yet unsurely with the dough. As you bite into one, you’ll notice the bar’s soft and chewy heart, which is beautifully offset by the slightly crisp, golden-brown edge.

The bar’s texture is a noteworthy aspect — while cookies can sometimes be uniform in their chewiness, the bars offer a layered experience. The top is slightly firm, giving way to a dense, luxuriously soft interior that results in a mouthfeel that will have you reaching for another piece.

Occasions & Pairings

These bars are versatile treats that can elevate any occasion, be it a casual family gathering or a sophisticated evening soirée. Here are some ideas for when and how to enjoy them:

  • Everyday Treat: Perfect for an after-school snack or a lunchbox surprise.
  • Festive Celebrations: Add them to dessert tables at holidays or special events as a crowd-pleaser.
  • Pairings: Pair with a cold glass of milk, steaming cup of coffee, or a dollop of vanilla ice cream for an extra layer of indulgence.

Tips, Variations & Substitutions

Customize Your Cookie Bars

One of the best features of this recipe is its adaptability. Here are some creative ways to make it your own:

  • Add Some Nuts: Fold in chopped walnuts or pecans for an additional crunch and depth of flavor.
  • Try Different Chocolates: Swap the classic semi-sweet chips for dark, milk, or white chocolate to suit your taste.
  • Experiment with Flavors: Introduce a hint of sea salt or a sprinkle of cinnamon for a surprising twist.

Dietary Alternatives

  • Gluten-Free: Use a gluten-free flour blend suitable for baking.
  • Vegan Version: Replace butter with coconut oil or vegan butter, and use a flax egg as a binder.

Storage & Make-Ahead Ideas

Chocolate Chip Cookie Bars are not only delicious but also convenient when it comes to storage and make-ahead options:

  • Keep Fresh: Store in an airtight container at room temperature for up to a week.
  • Freeze for Later: Wrap in plastic wrap and aluminum foil for freezing. They will last up to three months. Thaw at room temperature before serving.
  • Make Ahead: Prepare the dough in advance and refrigerate it for up to three days before baking. This chilling time can also enhance the flavor by allowing it to fully develop.

Fun Facts & Trivia

The concept of cookie bars is thought to have gained popularity during war times when resources were scarce, and efficient baking was a necessity. This efficient method of preparing dessert was quickly embraced and has stood the test of time, much to our taste buds’ delight!

Chocolate chip cookie bars offer more than just convenience and flavor; they provide a connection to a simpler time, where resourcefulness was as essential as taste. Each bite is not only a taste of decadence but a nod to the past, a perfect blend of history and culinary artistry.

So next time you find yourself craving something sweet, why not dive into the world of Chocolate Chip Cookie Bars? It’s a culinary adventure you won’t soon forget!

Ingredients

  • Cookie Base
    • 2 1/4 cups all-purpose flour
      → All-purpose flour is the main structure builder for the cookie bars. It provides the necessary gluten, which helps the bars hold their shape and gives them a chewy texture. To ensure accurate measurement, spoon the flour into your measuring cup and level it off without packing it down.
    • 1 teaspoon baking soda
      → Baking soda acts as a leavening agent in the cookie bars, promoting rise and creating a light, airy texture. It should be mixed well with the dry ingredients to ensure even distribution, and always check the expiration date for optimal effectiveness.
    • 1/2 teaspoon salt
      → Salt is essential for enhancing the flavors of the cookie bars, balancing the sweetness of the sugar and chocolate. By incorporating it into the dry ingredients, you ensure an even distribution throughout the batter for enhanced flavor in every bite.
    • 3/4 cup unsalted butter (softened)
      → Softened unsalted butter provides richness and moisture to the cookie bars, helping to create a tender crumb. Be sure to leave it out at room temperature for about an hour before baking, or soften it in the microwave for 10-second intervals until just pliable, but not melted.
    • 1 cup packed brown sugar
      → Brown sugar contributes moisture, chewiness, and a rich, caramel-like flavor to the bars, thanks to its molasses content. Always pack it firmly into the measuring cup to ensure you get the right amount, which will help the bars stay soft and chewy.
    • 1/2 cup granulated sugar
      → Granulated sugar aids in creating a balance between sweetness and texture, promoting a slight crispness on the edges of the cookie bars. Combine it thoroughly with the brown sugar and butter to ensure proper incorporation and aeration for a fluffy base.
    • 2 large eggs (room temperature)
      → Eggs act as binders in the recipe, helping to combine the ingredients while also providing richness. Ensure they are at room temperature before mixing, as this helps achieve a smoother batter and improves the overall consistency of the finished product.
    • 2 teaspoons pure vanilla extract
      → Pure vanilla extract enhances the overall flavor profile of the cookie bars, adding a sweet and aromatic note. For the best results, use high-quality pure vanilla extract rather than imitation vanilla, which can lack depth and richness.
    • 1 1/2 cups semisweet chocolate chips
      → Chocolate chips provide bursts of gooey chocolate throughout the cookie bars, making them irresistible. Choose high-quality semisweet chocolate chips for a balanced sweetness, and add them to the batter gently to keep them intact for optimal melty goodness.
  • Optional Add-ins
    • 1/2 cup chopped nuts (optional)
      → Chopped nuts, such as walnuts or pecans, add crunch and a complementary flavor texture to the soft cookie bars. Toast them lightly before chopping to enhance their flavor. Use even pieces for uniform distribution.
    • 1/2 cup shredded coconut (optional)
      → Shredded coconut contributes a chewy texture and subtle sweetness, beautifully complementing the chocolate. Use unsweetened coconut for a more balanced flavor, and consider toasting it lightly for a richer, nuttier taste.

Instructions

  • Preheat your oven to 350°F (175°C) and line a 9×13 inch baking pan with parchment paper, leaving some overhang on the sides.

    → Preheating the oven ensures that your cookie bars bake evenly from the start. Lining the pan with parchment paper allows for easy removal of the bars once they are baked, preventing any sticking.
  • In a medium mixing bowl, whisk together 2 1/4 cups all-purpose flour, 1 teaspoon baking soda, and 1/2 teaspoon salt.

    → This step combines the dry ingredients, ensuring the baking soda and salt are evenly distributed throughout the flour. Whisking helps aerate the flour, preventing clumps, which is crucial for achieving a uniform texture in the baked bars.
  • In a large mixing bowl, cream together 3/4 cup softened unsalted butter, 1 cup packed brown sugar, and 1/2 cup granulated sugar using a hand mixer or stand mixer on medium speed until the mixture is light and fluffy.

    → Creaming the butter and sugars properly incorporates air into the mixture, which is essential for a light and fluffy cookie bar. Scrape down the sides of the bowl occasionally to ensure all ingredients are well mixed and nothing is left unmixed at the bottom.
  • Add 2 large room temperature eggs, one at a time, mixing well after each addition. Then add 2 teaspoons of pure vanilla extract and continue to blend until well incorporated.

    → Mixing the eggs in one at a time allows for thorough emulsification, which provides stability to the batter. Room temperature eggs mix more smoothly with the butter and sugar, ensuring a creamy texture. The vanilla extract enhances the flavor, so mix until it’s fully integrated.
  • Gradually add the flour mixture to the wet ingredients, mixing on low speed until just combined but still slightly streaky.

    → This technique helps to prevent overmixing, which could lead to tough cookie bars. Mixing until just combined ensures the structure remains tender by not overdeveloping the gluten in the flour.
  • Gently fold in 1 1/2 cups semisweet chocolate chips (and any optional add-ins like 1/2 cup chopped nuts or 1/2 cup shredded coconut, if using) using a spatula or wooden spoon until evenly distributed throughout the batter.

    → Folding keeps the batter light and fluffy while ensuring the chocolate chips and any add-ins are evenly spread throughout. Be careful not to overmix, as this could deflate the batter.
  • Pour the batter into the prepared baking pan and spread it evenly into the corners using a spatula.

    → Spreading the batter evenly helps ensure uniform baking, which will lead to consistent texture and doneness throughout the cookie bars. A spatula helps create a smooth surface.
  • Bake in the preheated oven for 25-30 minutes, or until the edges are golden brown and a toothpick inserted into the center comes out with a few moist crumbs.

    → Checking the doneness with a toothpick ensures you don’t overbake the bars, which could make them dry. The bars continue to cook slightly as they cool, so pulling them out when they are still slightly underdone allows for the ideal fudgy texture.
  • Remove the baking pan from the oven and allow the cookie bars to cool in the pan for about 15 minutes before lifting them out using the parchment overhang.

    → Allowing the bars to cool in the pan helps set their structure. Using the parchment to lift them out prevents breaking and makes it easier to cut them into squares. Cooling fully on a wire rack is recommended for best results.
  • Once fully cool, cut into squares or bars using a sharp knife.

    → A sharp knife ensures clean cuts without tearing the cookie bars. For even squares, you can score the bars with your knife in a grid pattern before cutting all the way through.
  • Serve and enjoy your delicious chocolate chip cookie bars, optionally drizzling melted chocolate on top for added decoration.

    → Adding a drizzle of melted chocolate can enhance visual appeal and intensify the chocolate flavor, making your bars even more irresistible.

Notes

These chocolate chip cookie bars are the perfect mix of chewy and gooey, making them an irresistible treat for any occasion. The combination of brown sugar and granulated sugar creates a nice balance of texture and sweetness, ensuring the bars are soft in the middle with a slight crispness on the edges. For best results, make sure to use room temperature eggs and softened butter, as this will help to create a perfectly smooth batter.

Feel free to customize your cookie bars further by adding in your favorite nuts or shredded coconut. Toasting nuts beforehand will enhance their flavor, while unsweetened shredded coconut can add a lovely chewiness without adding extra sweetness. If you’re feeling adventurous, you could also experiment with other types of chocolate chips, like dark or white chocolate, to cater to your taste.

These bars are also great for meal prepping; they can be stored in an airtight container for up to a week or frozen for longer storage. Just cut them into squares, and you have a delightful snack or dessert ready to go! Serve these cookie bars as-is, or for an indulgent treat, enjoy them warm with a scoop of ice cream or a drizzle of your favorite sauce.

Remember to allow the bars to cool completely before slicing to ensure clean cuts and prevent them from falling apart. Use a sharp knife for the best results. Enjoy your baking!

Tips

  • Measuring Ingredients: Always use spoons and cups specifically designed for dry or liquid measurements to ensure accuracy. For flour, spoon it into the measuring cup and level it off with a knife for the best results.
  • Mixing the Batter: Mix the wet ingredients together on low speed to avoid overmixing, which can lead to tougher cookie bars. Once the flour is added, mix just until you no longer see dry flour to maintain a tender texture.
  • Egg Temperature: For best results, use eggs that have been at room temperature. If you forget to take them out ahead of time, you can place them in a bowl of warm water for about 10 minutes to quickly warm them.
  • Chilling the Dough: If you find that the dough is too sticky, consider chilling it in the refrigerator for 30 minutes before spreading it into your pan. This can help with shaping and reduce spreading while baking.
  • Baking Pan Liners: Line your baking pan with parchment paper, allowing some to hang over the edges. This makes it easier to lift the cookie bars out and cut them evenly once they are cooled.
  • Baking Time: Keep a close eye on your cookie bars as they bake. The edges should look set and lightly golden while the center may still look slightly underbaked. They will continue to firm up as they cool.
  • Cooling the Bars: Allow the cookie bars to cool completely in the pan before cutting. Using a sharp knife or a pizza cutter can help create clean cuts without disturbing the bars too much.
  • Storing Leftovers: Store any leftover cookie bars in an airtight container at room temperature for up to a week. For longer storage, you can freeze them by wrapping individual bars in plastic wrap and then placing them in a freezer bag.
  • Customization: Feel free to experiment with add-ins such as toffee bits, peanut butter chips, or different types of nuts to create variations of the classic chocolate chip cookie bars!

FAQ

What ingredients do I need to make chocolate chip cookie bars?

To make chocolate chip cookie bars, you will need the following ingredients: all-purpose flour, baking soda, salt, unsalted butter, granulated sugar, brown sugar, vanilla extract, eggs, and chocolate chips.

Can I use a different type of chocolate in the recipe?

Yes, you can use different types of chocolate chips such as dark chocolate, milk chocolate, or white chocolate. You can also mix different types for added flavor.

How long do I need to bake the cookie bars?

The baking time for chocolate chip cookie bars typically ranges from 25 to 30 minutes. It’s best to check for a golden-brown color around the edges and a slight softness in the center.

Should I chill the dough before baking?

Chilling the dough is optional, but it can help improve the flavor and texture of the cookie bars. If you have time, consider chilling for at least 30 minutes before baking.

Can I add nuts or other ingredients to the bars?

Yes, you can add chopped nuts, such as walnuts or pecans, or even other mix-ins like dried fruit or oats to customize your chocolate chip cookie bars.

How should I store leftover cookie bars?

Store leftover chocolate chip cookie bars in an airtight container at room temperature for up to one week. You can also freeze them for longer storage; just make sure to wrap them well.

Can I double the recipe to make more cookie bars?

Yes, you can double the recipe. Just ensure you use a larger baking dish and adjust the baking time as needed, checking for doneness as you near the original baking time.

How can I tell when the cookie bars are fully baked?

The cookie bars are done when the edges are golden brown and a toothpick inserted into the center comes out with a few moist crumbs. They may look slightly underbaked in the center, but they will continue to cook as they cool.

Introduction to Baked Chocolate Cheesecake

Imagine sinking your fork into a slice of rich, indulgent chocolate cheesecake, perfectly baked to creamy perfection. This isn’t just any cheesecake — it’s a baked chocolate masterpiece that brings a new level of luxury to the classic dessert. As your fork glides through, you hear the light crunch of the buttery crust meeting the velvety chocolate filling, enhancing the joy of this decadent treat. With each bite, your senses are enveloped by the deep, rich flavors of chocolate mingling harmoniously with the tangy cream cheese. It’s a dessert that’s not only intrinsically satisfying but is also a showstopper, promising to elevate any occasion to something truly special.

The Story Behind the Dish

The chocolate cheesecake, a beloved dessert across the world, draws its roots from ancient Greece where the earliest forms of cheese-based treats were offered to athletes during the first Olympic games in 776 B.C. However, the delightful transformation into cheesecake as we know it began in 19th century New York, with the creamy blend of fresh cheese and sugar topped typically with vibrant berries or chocolate. The baked chocolate cheesecake is a modern twist that brings together the classic tang of cream cheese with the lush richness of chocolate, resulting in a dessert that feels both nostalgic and innovative.

This combination is no mere culinary accident; it’s a thoughtful melding of ingredients that heralds from both European and American culinary traditions. With the global popularity of chocolate, recipes have evolved and spread, embedding themselves in the hearts of dessert lovers from various cultures, each bringing their variation to the table. Yet, no matter where you enjoy it, a slice of baked chocolate cheesecake remains an indulgent reminder of the universal love for chocolate and creamy desserts.

Why You’ll Love This Recipe

  • Decadence Redefined: With every mouthful, savor the unique richness that only a well-balanced chocolate cheesecake can deliver. It’s a dessert that combines the best elements of chocolate and cheesecake, reimagining each in the most delectable form.
  • Simple Elegance: Although it offers a complex symphony of flavors, the recipe remains accessible to home bakers of all skill levels, promising spectacular results every time.
  • Versatile Delight: Whether served at a lavish dinner party or a cozy family gathering, this cheesecake is sure to be the centerpiece of the table and a conversation starter.
  • Mood Booster: Chocolate is renowned for its mood-enhancing properties, so imagine that uplift coupled with the satisfaction of a homemade dessert.

Flavor Profile & Texture

The baked chocolate cheesecake is a dessert lover’s dream. At its core, the flavor profile is a marriage of bittersweet luxury and creamy delight. The deep cocoa notes contrast the mild tang from the cream cheese, creating a balanced sweetness that is neither overpowering nor dull. This harmony makes each bite more irresistible than the last. Picture the texture: a subtly crisp, buttery crust holds a luscious filling that is both dense and silky, topped with a smooth, glossy ganache that envelopes the senses in pure chocolate nirvana.

Occasions & Pairings

This indulgent baked chocolate cheesecake is perfect for virtually any occasion that calls for a touch of elegance and comfort. Celebrate a friend’s birthday, serve it as the grand finale at a dinner party, or simply luxuriate in a slice during a quiet night in.

When it comes to pairing, consider offering a dollop of whipped cream or a scoop of vanilla ice cream alongside your cheesecake. To drink, a rich cup of espresso or a glass of port wine can deepen the flavor experience. Fruit-forward wines or dessert cocktails can also complement or cut through the cheesecake’s richness, refreshing the palate with new sensations.

Tips, Variations & Substitutions

This versatile recipe provides numerous opportunities for customization:

  • Add a Fruity Twist: Top with fresh raspberries or strawberries to introduce a slightly tart element that contrasts beautifully with the rich chocolate.
  • Make it Gluten-Free: Substitute the crust with gluten-free cookie crumbs or a base of nut flours for those who avoid gluten.
  • Dietary Alterations: Use vegan cream cheese and an egg replacer for a plant-based version that doesn’t compromise on flavor or texture.
  • Region-specific Flavors: Infuse spices like cayenne or cinnamon into the ganache to give it a Mexican chocolate flair, or incorporate Irish cream into the filling for a boozy twist.

Storage & Make-Ahead Ideas

One of the beauties of baked chocolate cheesecake is its ability to stay fresh and delicious over several days with proper storage. Keep it in an airtight container in the refrigerator, where it can last for up to a week. For longer preservation, wrap individual slices in plastic wrap and store them in a freezer-safe bag for up to three months; just be sure to let them thaw in the refrigerator before serving.

You can prepare the cheesecake a day or two in advance before a big event, allowing you to focus on other preparations while knowing you have an exceptional dessert ready and waiting.

Fun Facts & Trivia

Did you know that National Cheesecake Day is celebrated annually on July 30th in the United States? It’s the perfect excuse to whip up a baked chocolate cheesecake and share it with friends and family, or to indulge in a slice just for you!

Moreover, ancient cheesecakes made with different layers and textures can be found in various parts of the world, from the Italians’ ricotta-based versions to the Japanese cotton-soft cheesecakes. Each region illustrates its cultural adaptations through this dessert, embracing ingredients that capture their culinary essence.

Indeed, the baked chocolate cheesecake is more than a dessert; it’s an epitome of gastronomic art across ages and continents, a deliciously unifying experience found in its smooth, chocolatey depths.

Ingredients

  • Cream Cheese
    → Cream cheese is the primary ingredient providing the rich and creamy texture characteristic of cheesecake. Use full-fat cream cheese for the best flavor and smooth consistency. Ensure it is at room temperature to avoid lumps during mixing, leading to a perfectly smooth batter.
  • Granulated Sugar
    → Sugar sweetens the cheesecake and balances the flavors. It also contributes to the texture by helping to create a pleasing mouthfeel. For even incorporation, measure accurately and mix thoroughly with the cream cheese until completely blended.
  • Cocoa Powder
    → Unsweetened cocoa powder adds the signature chocolate flavor to the cheesecake. Sift it before adding to avoid lumps and ensure it blends evenly throughout the batter. Use high-quality cocoa powder for the richest flavor and color.
  • Eggs
    → Eggs act as a binding agent, providing structure and stability to the cheesecake. They should be at room temperature to ensure even mixing and to help the cheesecake rise slightly during baking without cracking. Be careful not to overbeat, as this can incorporate air and create a dense texture.
  • Sour Cream
    → Sour cream adds creaminess and a tangy flavor that balances the sweetness of the sugar. It also helps to keep the cheesecake moist. Use full-fat sour cream for the best results, and mix it gently with the other ingredients to avoid excess air pockets.
  • Vanilla Extract
    → Pure vanilla extract enhances the overall flavor profile and adds depth to the cheesecake. Use high-quality pure vanilla extract rather than imitation for the best taste. Add it towards the end of mixing to ensure its aromatic qualities remain intact.
  • Chocolate Crust
    → A chocolate crust typically made from crushed chocolate cookies mixed with melted butter provides a flavorful foundation for the cheesecake. Use a food processor to finely crush the cookies to ensure even distribution. Press the mixture firmly into the bottom of the pan to create a sturdy base.
  • Melted Dark Chocolate
    → Melted dark chocolate provides an intense chocolate flavor and richness to the cheesecake. Choose high-quality dark chocolate with at least 60% cocoa content for depth. Allow the chocolate to cool slightly before incorporating it into the cream cheese mixture to prevent curdling.

Instructions

  • Prepare your workspace by gathering all the ingredients and tools needed for the cheesecake.

    → This includes measuring cups, spoons, mixing bowls, a food processor, a springform pan, and a rubber spatula. Having everything ready minimizes interruptions and mistakes during the preparation process.
  • Preheat your oven to 325°F (163°C) and prepare a 9-inch springform pan.

    → Preheating ensures the cheesecake bakes evenly and at the right temperature, preventing it from cooking too slowly or unevenly. Grease the sides of the pan with butter or cooking spray to ensure easy removal.
  • Make the chocolate crust by finely crushing chocolate cookies in a food processor.

    → Choose chocolate cookies like Oreos or any similar brand. Process until you achieve a sand-like consistency, ensuring there are no large chunks. This step is crucial for an even crust that holds together.
  • Combine the crushed chocolate cookies with melted butter and mix well.

    → The melted butter acts as a binder to hold the crust together. Use a fork or your hands to combine thoroughly, ensuring that all crumbs are moistened. This creates a compact crust that will hold its shape once baked.
  • Press the crust mixture firmly into the bottom of the springform pan.

    → Use the bottom of a measuring cup or a flat object to create an even layer, pressing down to compact the crust. This firmness prevents the crust from crumbling when serving the cheesecake.
  • Bake the crust in the preheated oven for 10 minutes, then remove and allow to cool.

    → Baking the crust helps to set it, preventing it from becoming soggy once the cheesecake filling is added. Cooling it afterward makes sure it doesn’t melt the cream cheese mixture when layered.
  • In a large mixing bowl, beat the room temperature cream cheese with granulated sugar until smooth.

    → Use an electric mixer on medium speed for about 2-3 minutes. Start slowly to avoid splattering. This step is essential for achieving a silky texture, ensuring that the sugar is fully dissolved.
  • Sift the cocoa powder into the cream cheese mixture and blend until combined.

    → Sifting removes any lumps and ensures even distribution throughout the batter. Mix on low speed to prevent cocoa powder from flying out of the bowl.
  • Add the eggs one at a time to the mixture, mixing gently after each addition.

    → This technique allows each egg to incorporate fully before adding the next, creating a smoother batter while reducing the risk of overmixing, which can lead to cracks in the cheesecake.
  • Stir in the sour cream and vanilla extract, mixing until just combined.

    → Gently folding in these ingredients minimizes air bubbles in the batter. The sour cream adds moisture and a slight tang, enhancing the overall flavor profile.
  • Melt the dark chocolate in a microwave or a double boiler until completely smooth.

    → If using a microwave, heat in 20-second intervals, stirring in between to prevent burning. Allow it to cool slightly before adding to the batter to avoid curdling the cream cheese.
  • Pour the melted dark chocolate into the cheesecake mixture and gently fold to combine.

    → Use a spatula to incorporate the chocolate evenly without deflating the batter. This step adds rich flavor and color to the cheesecake.
  • Carefully pour the cheesecake filling over the cooled crust in the springform pan.

    → Pouring gently helps avoid disturbing the crust while ensuring an even layer of filling. Spread the top lightly with a spatula for a uniform surface.
  • Bake the cheesecake in the preheated oven for 55-65 minutes, or until the edges are set but the center is slightly jiggly.

    → The residual heat will continue to cook the center after removing it from the oven. This prevents cracking by ensuring the cheesecake isn’t overcooked.
  • Turn off the oven and let the cheesecake cool inside with the door ajar for 1 hour.

    → This gradual cooling process helps prevent sudden temperature changes that can cause cracks. Leaving the door slightly open allows steam to escape, further stabilizing the texture.
  • Remove the cheesecake from the oven and let it cool to room temperature.

    → Allowing it to cool completely before refrigerating is important for achieving the right texture. Cover it with plastic wrap once it reaches room temperature to prevent drying out.
  • Refrigerate the cheesecake for at least 4 hours, or overnight if possible, for the best flavor and set consistency.

    → Chilling allows the flavors to meld beautifully and helps the cheesecake firm up, making it easier to slice. A well-chilled cheesecake also has a more satisfying texture.
  • When ready to serve, carefully unclip the springform pan and slice the cheesecake.

    → Use a sharp knife dipped in hot water for clean slices, wiping the blade between cuts. This technique ensures beautiful presentation and prevents the cheesecake from sticking to the knife.
  • Serve chilled, optionally garnishing with whipped cream or chocolate shavings for an added touch.

    → The garnish not only enhances the visual appeal but also adds extra flavor, offering a delightful contrast to the rich chocolate cheesecake.

Notes

These baked chocolate cheesecakes are a decadent dessert that combines a rich chocolate flavor with a smooth, creamy texture. To ensure that your cheesecake turns out perfectly, it’s crucial to use room temperature cream cheese to avoid lumps and achieve a silky batter. When combining the sugar with the cream cheese, mix thoroughly to ensure it is fully incorporated, as this will enhance the overall texture of the cheesecake.

Using high-quality unsweetened cocoa powder is essential for achieving a deep chocolate flavor. Sifting the cocoa powder before adding it to the mixture will help eliminate any lumps and ensure an even distribution throughout the batter. Remember that the eggs are important for providing structure, so they should also be at room temperature for optimal mixing.

Incorporating full-fat sour cream adds a delightful tanginess to the sweetness and ensures your cheesecake remains moist and creamy. Be gentle when mixing the sour cream to prevent incorporating too much air, which can lead to a dense texture.

For added depth of flavor, opt for pure vanilla extract instead of imitation vanilla, and add it towards the end of mixing. When preparing the chocolate crust, crush the cookies finely using a food processor to create an even texture, and be sure to press the mixture firmly into the pan for a stable base.

Lastly, melted dark chocolate enriches the cheesecake with a robust chocolate essence. Be cautious to let it cool slightly before mixing it in, as hot chocolate can curdle the cream cheese. Once baked, allow the cheesecake to cool gradually in the oven to prevent cracking, and chill in the refrigerator for a few hours or overnight for the best texture and flavor.

Tips

Cooking Tips for Baked Chocolate Cheesecake

  • Preparation is Key: Before starting, make sure to gather all your ingredients and tools. This will help streamline the process and avoid any last-minute rush.
  • Soften the Cream Cheese: Ensure your cream cheese is fully softened to room temperature. You can speed up this process by cutting it into smaller pieces or microwaving it for a few seconds, but avoid melting it.
  • Mixing Technique: When mixing the cream cheese and sugar, use a hand mixer or stand mixer on low speed to avoid adding too much air, which can lead to cracking during baking. Scrape down the sides of the bowl frequently to incorporate all ingredients evenly.
  • Sifting Cocoa Powder: Always sift the cocoa powder before adding it to the mixture. This helps avoid clumps that can create an uneven texture in your cheesecake.
  • Egg Temperature: For best results, ensure your eggs are at room temperature, as this creates a smoother batter and better incorporation of ingredients.
  • Creating a Perfect Crust: After pressing the chocolate crust mixture into the pan, consider baking it for about 10 minutes at 350°F (175°C) to set it slightly before adding the cheesecake filling. This helps maintain its structure and prevents it from becoming soggy.
  • Watch for Overbaking: The cheesecake is done when the edges are set, but the center has a slight jiggle. Overbaking can lead to cracks. To prevent cracking, you can also turn off the oven and leave the cheesecake inside with the door slightly ajar for 1 hour to cool gradually.
  • Chill Time: Be patient! Allow the cheesecake to cool completely at room temperature before transferring it to the fridge. Chilling for at least 4 hours, preferably overnight, helps the flavors meld and enhances the creamy texture.
  • Serving Suggestions: For an added touch, top your cheesecake with whipped cream, chocolate shavings, or fresh berries just before serving to enhance presentation and flavor.

FAQ

What ingredients are needed for Baked Chocolate Cheesecake?

The main ingredients include cream cheese, sugar, eggs, chocolate, vanilla extract, and a graham cracker crust.

How long does it take to bake a Chocolate Cheesecake?

The baking time is typically around 50-60 minutes, followed by cooling time to set properly.

Can I use a different type of chocolate?

Yes, you can use dark, milk, or even white chocolate, depending on your preferred taste and sweetness level.

Is it necessary to refrigerate the cheesecake after baking?

Yes, it’s important to refrigerate it for at least 4 hours or overnight to allow it to set correctly and enhance the flavors.

How can I tell when the cheesecake is done?

The cheesecake should be set around the edges but still slightly jiggly in the center. It will continue to firm up as it cools.

Can I make this cheesecake in advance?

Absolutely! Baked chocolate cheesecake can be made a day or two in advance and stored in the refrigerator until you are ready to serve it.

What toppings pair well with Baked Chocolate Cheesecake?

Whipped cream, chocolate ganache, fresh berries, or a dusting of cocoa powder are all great toppings to complement the cheesecake.

Is it possible to make a gluten-free version?

Yes, you can use gluten-free graham crackers or a nut-based crust to create a gluten-free Baked Chocolate Cheesecake.

Introduction / Hook

Imagine biting into a warm, freshly baked chocolate donut, its rich cocoa aroma enticing your senses while a light dusting of sugar melts on your lips. Each bite is a perfect symphony of moist chocolatey goodness intertwined with a slight crunch from its baked crust. Baked chocolate donuts are the epitome of indulgence without the guilt, offering a healthier alternative to their deep-fried counterparts while still delivering a full-bodied taste that screams decadence. Whether you’re a chocolate enthusiast or just seeking a sweet escape, these donuts will transport you to indulgent bliss with just one bite.

The Story Behind the Dish

The journey of the donut is a fascinating tale that weaves through various cultures and centuries. While the classic fried donut can trace its roots back to early Dutch settlers in North America, who initially made ‘olykoeks’ or ‘oily cakes,’ the baked donut is a more modern twist, embodying contemporary health-conscious trends. Over time, with increasing awareness of healthier lifestyles, bakers began experimenting with baking instead of frying, preserving the essence of the donut but eliminating some of the guilt of indulgence. Chocolate, a universally adored flavor, found its place in this evolution, and thus the baked chocolate donut emerged—a harmonious blend of tradition and innovation.

Why You’ll Love This Recipe

  • Healthier Indulgence: Being baked rather than fried means these donuts are lighter, reducing added fats without compromising on that irresistible chocolate flavor.
  • Quick and Easy: From mixing the batter to enjoying the final product, this recipe streamlines the donut-making process, perfect for busy mornings or a last-minute treat.
  • Versatile Treat: Suitable for breakfast, dessert, or a sweet snack, they can be adapted to any time of day or occasion.
  • Family-Friendly: A fun activity to involve the little ones. Kids will love dipping and decorating these chocolate delights.
  • Rich and Moist: Despite being baked, these donuts maintain an impeccable level of moisture with a soft, cake-like crumb that melts in your mouth.

Flavor Profile & Texture

The baked chocolate donut is a wonderful tapestry of flavors and textures. It’s characterized by its deep, intensive chocolate flavor that is both comforting and invigorating. The cocoa used in the batter provides a rich, bittersweet note, perfectly balanced with the sugar’s sweetness for an elevating experience with each bite. Texturally, you’ll enjoy a moist, tender crumb that rivals even the finest cakes, all encased beneath a slightly crisp shell that’s developed naturally in the oven. The light sugar coating or optional glaze adds a hint of sweetness and texture contrast, making every mouthful a balanced journey of flavors.

Occasions & Pairings

Baked chocolate donuts are versatile and can easily adapt to various occasions. They make an excellent addition to a weekend brunch spread, served alongside fresh fruit and a pot of freshly brewed coffee. Consider them for your dessert table at gatherings—they’re an assured crowd-pleaser and can be jazzed up with toppings like sprinkles, nuts, or even a drizzle of white chocolate. For a truly decadent experience, pair them with a scoop of vanilla ice cream or a glass of cold milk. Holidays, birthdays, or a simple afternoon tea party are made even more special with the inclusion of these delightful treats.

Tips, Variations & Substitutions

This recipe offers an array of possibilities for customization. You can easily adapt it to suit various dietary needs or flavor preferences:

  • Chocolate Lovers’ Twist: Add chocolate chips to the batter for extra bursts of chocolate.
  • Gluten-Free Option: Substitute the all-purpose flour with a gluten-free flour blend. Ensure the flour is suitable for baking, which typically includes xanthan gum for elasticity.
  • Vegan Adaptation: Replace the butter with coconut oil, and use flaxseed mixed with water as an egg substitute. Opt for plant-based milk in the batter.
  • Spicy Kick: Include a pinch of cayenne pepper or cinnamon in the batter for a warm, spicy twist.
  • Nutritional Boost: Incorporate a handful of oats or nuts into the batter for added texture and nutrition.

Storage & Make-Ahead Ideas

Baked chocolate donuts are a make-ahead marvel. They can easily be stored in an airtight container at room temperature for up to two days, retaining their freshness and flavor. For longer storage, consider freezing them; after cooling completely, wrap each donut individually in plastic wrap or foil, then place them in a freezer bag. When ready to enjoy, simply thaw at room temperature. Reheating can be done in a preheated oven or toaster for a few minutes to revive their warmth and soft texture. This flexibility makes them perfect for preparation ahead of busy weeks or upcoming gatherings, ensuring you always have a delicious treat on hand.

Fun Facts & Trivia (Optional)

Did you know that donuts, in various forms, can be found across the globe? From the Berliner in Germany to the Italian Zeppole and the Spanish Churro, each culture has its interpretation, celebrated in its unique way. The term ‘donut’ itself came into popular use in the 20th century, an abbreviated form of ‘doughnut,’ which rose conveniently alongside America’s love for confections.

The baked chocolate donut today pays homage to this rich historical backdrop while embracing a healthier direction. It’s not only a treat for your taste buds but also a delightful addition to the ongoing story of global cuisine, showing that sometimes the path to healthier living doesn’t mean compromising on taste or tradition.

Ingredients

  • Donut Batter
    • 1 cup all-purpose flour
      → This flour forms the main structure of the baked donuts. For a lighter texture, it’s important to spoon the flour into the measuring cup rather than scooping it directly. This prevents the flour from becoming packed, which could result in dense donuts.
    • 1/2 cup unsweetened cocoa powder
      → Cocoa powder adds rich chocolate flavor and color to the donuts. Ensure to sift it before mixing to remove any lumps and achieve a smooth batter. Using high-quality cocoa powder will enhance the chocolate taste.
    • 3/4 cup granulated sugar
      → Sugar sweetens the donuts and helps to create a tender crumb. Use fine granulated sugar for better incorporation into the batter. It’s essential to mix it well with other dry ingredients to ensure even sweetness throughout.
    • 1 teaspoon baking powder
      → This leavening agent helps the donuts rise and become fluffy. Make sure the baking powder is fresh for maximum effectiveness. It should be combined with the dry ingredients to ensure even distribution in the batter.
    • 1/2 teaspoon baking soda
      → Baking soda works synergistically with acidic ingredients in the recipe (like vinegar or yogurt) to aid in leavening. Ensure it is also fresh and mix it well with the other dry ingredients.
    • 1/4 teaspoon salt
      → Salt enhances the flavors in the donuts and balances the sweetness. Use fine salt for even distribution throughout the batter. This small amount is crucial for bringing out the chocolate flavor without making the donuts taste salty.
    • 1/2 cup buttermilk (or milk with vinegar)
      → Buttermilk adds moisture and a slight tanginess, contributing to the overall flavor and texture of the donuts. If you don’t have buttermilk, you can create a substitute by adding 1/2 tablespoon of vinegar to regular milk and letting it sit for 5 minutes.
    • 1 large egg (room temperature)
      → Eggs provide moisture and richness while helping to bind the ingredients together. For best results, ensure the egg is at room temperature to allow for better emulsion into the batter.
    • 2 tablespoons vegetable oil
      → Oil adds moisture and tenderness to the donuts. Choose a neutral oil so it doesn’t interfere with the chocolate flavor. Mixing it in with the wet ingredients helps to create a smoother batter.
    • 1 teaspoon pure vanilla extract
      → Vanilla adds depth and enhances the overall flavor of the donuts. Always opt for pure vanilla extract over imitation for the best flavor profile. Adding it to the wet ingredients will help integrate its flavor evenly.
  • Chocolate Glaze
    • 1 cup powdered sugar
      → Powdered sugar is the base for the glaze, providing sweetness and a smooth texture. Sift it before use to prevent lumps in the glaze for a creamy finish.
    • 2 tablespoons cocoa powder
      → Adding cocoa powder to the glaze enhances the chocolate flavor and gives it a rich, dark color. Ensure it is sifted before mixing to avoid clumping in the glaze.
    • 2 tablespoons milk (or cream)
      → Milk or cream is essential for achieving the desired consistency of the glaze. Adjust the quantity depending on how thick or thin you prefer your glaze, but start with 2 tablespoons and add more if necessary.
    • 1 teaspoon pure vanilla extract
      → A touch of vanilla in the glaze amplifies the chocolate flavor and adds a hint of sweetness and warmth to the finish. As with the batter, using pure vanilla extract is recommended for the best results.

Instructions

  • Preheat your oven to 350°F (175°C) and grease a donut pan well.

    → Preheating the oven ensures that the donuts rise properly and bake evenly. Greasing the donut pan will prevent the donuts from sticking and make it easier to release them once baked.
  • In a large mixing bowl, sift together 1 cup of all-purpose flour, 1/2 cup of unsweetened cocoa powder, 3/4 cup of granulated sugar, 1 teaspoon of baking powder, 1/2 teaspoon of baking soda, and 1/4 teaspoon of salt.

    → Sifting helps to aerate the dry ingredients and remove any lumps, leading to a lighter batter. The combination of these dry ingredients is essential for the structure, flavor, and leavening of your donuts.
  • In a separate bowl, combine 1/2 cup of buttermilk (or create a buttermilk substitute with milk and 1/2 tablespoon of vinegar), 1 large egg (at room temperature), 2 tablespoons of vegetable oil, and 1 teaspoon of pure vanilla extract.

    → Mixing the wet ingredients separately allows for better integration into the dry mixture. Using room-temperature egg helps create a smoother batter and ensures better emulsification of the ingredients.
  • Pour the wet ingredients into the bowl with the dry ingredients.

    → This step brings all the components together. Use a spatula or wooden spoon and gently fold the ingredients together until just combined. Be careful not to overmix, as this can develop gluten and make the donuts dense.
  • Transfer the batter into a piping bag or a zip-top bag with a corner snipped off for easy filling.

    → This technique helps to neatly fill the donut mold without making a mess. It also allows for better portioning, ensuring that each donut is uniform in size.
  • Fill each cavity of the donut pan about halfway full with the batter.

    → Filling halfway allows room for the donuts to rise while baking. If you fill them too full, the batter will overflow, resulting in misshapen donuts.
  • Bake in the preheated oven for 10-12 minutes, or until a toothpick inserted into the center of a donut comes out clean.

    → The exact baking time may vary based on your oven, so keep an eye on the donuts. Toothpick testing is key to determine doneness; when it comes out clean, the donuts are properly baked and ready.
  • Remove the donuts from the oven and allow them to cool in the pan for about 5 minutes before transferring them to a wire rack to cool completely.

    → Cooling in the pan helps them firm up slightly before you transfer them, preventing breakage. The wire rack allows for even cooling, which is vital for the texture of the donuts.
  • While the donuts cool, prepare the chocolate glaze by sifting together 1 cup of powdered sugar and 2 tablespoons of cocoa powder in a bowl.

    → Sifting ensures a smooth glaze without lumps, which is important for achieving the desired glossy finish. Make sure to blend these two to fully incorporate their flavors.
  • Add 2 tablespoons of milk (or cream) and 1 teaspoon of pure vanilla extract to the powdered sugar mixture.

    → Combining these wet ingredients gives your glaze the necessary consistency to both coat and drip elegantly from the donuts. Start with the minimum amount of liquid and adjust as needed.
  • Whisk the mixture until smooth and glossy, adjusting with more milk if necessary to reach your desired glaze thickness.

    → The whisking process incorporates air into the glaze, making it lighter, while adjusting the thickness ensures it adheres well to the donuts without sliding off. A thicker glaze will sit on top, while a thinner one will create a drip effect.
  • Once the donuts are completely cooled, dip the tops into the chocolate glaze, allowing any excess to drip off.

    → Dipping creates an even coating and gives a beautiful finish. Letting the excess glaze drip off ensures that the glaze isn’t too thick, which may impact the texture.
  • Place the glazed donuts back on the wire rack for a few minutes to allow the glaze to set.

    → Allowing the glaze to set gives it a shiny, firm finish and prevents it from being disturbed or smudged while you prepare to serve or store them.
  • Optionally, sprinkle additional cocoa powder or chocolate shavings on top of the glaze while it’s still wet for decoration.

    → This decorative touch adds an extra layer of flavor and visual appeal to your donuts, making them even more enticing.
  • Serve your baked chocolate donuts immediately or store them in an airtight container at room temperature for up to three days.

    → Storing in an airtight container will keep them fresh and prevent them from becoming stale. However, for the best texture and flavor, they are best enjoyed fresh from the oven.

Notes

These baked chocolate donuts are a delightful treat, perfect for breakfast or as a snack throughout the day. The use of all-purpose flour and cocoa powder creates a rich chocolate flavor and tender texture, making them irresistible. For the best results, measure your flour carefully to avoid dense donuts, and don’t skip sifting the cocoa powder to ensure a smooth batter.

Adding buttermilk contributes moisture and a slight tang, which balances the sweetness from the sugar. If you’re out of buttermilk, a simple substitute can be made with regular milk and vinegar. Remember to let your egg come to room temperature before incorporating it into the batter, as this helps create a better texture.

The chocolate glaze takes these donuts to the next level, adding a glossy finish and extra sweetness. Be sure to sift the powdered sugar and cocoa powder together to prevent lumps for a creamy, decadent glaze. You can adjust the thickness of the glaze by varying the amount of milk or cream, depending on your preference.

Feel free to customize your baked donuts by adding chocolate chips or nuts into the batter for extra texture. These donuts are best enjoyed fresh but can also be stored in an airtight container for a few days or frozen for later consumption. They make for a fantastic pairing with a cup of coffee or a glass of milk, making them an ideal choice for any time of day.

Tips

Tips for Making Baked Chocolate Donuts

  • Measuring Ingredients: When measuring flour, use a spoon to fluff it up before scooping it into the measuring cup, then level it off with a straight edge. This helps avoid packing the flour, ensuring light and fluffy donuts.
  • Sifting Dry Ingredients: Sifting the cocoa powder and powdered sugar not only removes lumps but also aerates the ingredients, leading to a smoother batter and glaze. Don’t skip this step for the best texture!
  • Mixing Technique: When combining the dry and wet ingredients, mix until just combined. Over-mixing can lead to dense donuts. A few lumps are perfectly fine!
  • Room Temperature Ingredients: Always aim to use room temperature eggs and buttermilk. This helps in achieving a better emulsion and results in a smoother batter, contributing to the overall texture of the donuts.
  • Elevating Flavor: For a richer chocolate flavor, consider adding a splash of coffee to the batter. It enhances the chocolate taste without adding a coffee flavor to the donuts.
  • Donut Pan Preparation: Ensure to grease your donut pan thoroughly or use a non-stick spray to prevent sticking. If possible, use a silicone donut pan for easy removal.
  • Baking Time: Keep a close eye on the donuts as they bake. They typically take about 10-12 minutes, but oven temperatures can vary. Look for a springy surface and a toothpick inserted into the center should come out clean.
  • Glaze Consistency: When making the chocolate glaze, start with the recommended amount of milk or cream. If the glaze is too thick, gradually add more liquid until you reach your desired consistency.
  • Cooling Time: Allow the donuts to cool in the pan for a few minutes before transferring them to a wire rack. This helps set their shape and prevents sogginess from heat trapped in the pan.
  • Customization: Feel free to customize your toppings! Consider adding sprinkles, chopped nuts, or shredded coconut on top of the glaze for an extra layer of flavor and texture.
  • Storage: Store leftover donuts in an airtight container at room temperature for up to 2 days. If you want to keep them longer, consider refrigerating them, though this may affect their texture.

FAQ

1. What ingredients do I need to make baked chocolate donuts?

To make baked chocolate donuts, you will typically need all-purpose flour, cocoa powder, sugar, baking powder, baking soda, salt, eggs, milk, vegetable oil, and vanilla extract.

2. Can I use whole wheat flour instead of all-purpose flour?

Yes, you can substitute whole wheat flour for all-purpose flour, but the texture may be denser. Consider using a blend of both for a lighter donut.

3. How do I store baked chocolate donuts?

Baked chocolate donuts can be stored in an airtight container at room temperature for up to 2 days, or in the refrigerator for about a week. You can also freeze them for longer storage.

4. Can I make the donut batter ahead of time?

It’s best to bake the donuts shortly after making the batter for optimal freshness. If you must prepare it ahead of time, store it in the refrigerator, but be aware that baking time may vary.

5. What can I use as a glaze for the donuts?

You can use a simple glaze made from powdered sugar and milk, or try a chocolate glaze made from melted chocolate and butter. Adding sprinkles or chopped nuts can enhance the presentation.

6. Are baked chocolate donuts healthier than fried donuts?

Yes, baked chocolate donuts are generally considered healthier than fried ones, as they typically have less fat and fewer calories due to the absence of frying oil.

7. Can I add chocolate chips to the batter?

Absolutely! Adding chocolate chips to the batter can add extra flavor and texture. Just fold them in gently before pouring the batter into the donut pan.

8. How long do I need to bake the donuts?

Baked chocolate donuts usually take about 10-12 minutes to bake in a preheated oven at 350°F (175°C). Check for doneness by inserting a toothpick; it should come out clean.

Introduction / Hook

Imagine a dessert that marries the richness of a chocolate cake with the indulgent allure of molten chocolate flowing like lava from its center. That’s the magic of the Fudgy Chocolate Lava Cake. Each bite is a symphony of textures: the soft, spongy cake yielding effortlessly to reveal a molten core that flows like liquid gold, rich and decadent. This luxurious dessert promises an experience that captivates both the senses and the spirit, inviting you to savor every delightful moment. Whether for a special occasion or just a self-indulgent treat, this cake is the ultimate indulgence for chocolate lovers everywhere.

The Story Behind the Dish

The Chocolate Lava Cake, often dubbed the “molten chocolate cake,” made its revered entry into the culinary spotlight not too long ago. First crafted and perfected in the world-renowned kitchens of France, this dessert rose to popularity in the 1980s. Its creation is often attributed to French chef Michel Bras, whose quest for a unique dessert led him to innovate this iconic dish. Fudgy Chocolate Lava Cake embodies the perfect blend of classic French baking techniques with a touch of modern flair.

Interestingly, its popularity soared in the United States thanks to celebrated chef Jean-Georges Vongerichten. The blend of soft exterior with a liquid center puzzled many a pastry chef but enchanted every palate it touched. Its widespread acclaim replaced the long, ingredient-heavy desserts that dominated menus, proving that simplicity and elegance are often the ultimate sophistication.

Why You’ll Love This Recipe

  • Quick and Easy: This dessert can be whipped together in just about the same time it takes to watch your favorite TV show episode.
  • Restaurant-Quality: Bring the luxe experience of fine dining to your kitchen with this indulgent cake.
  • Show-Stopping Dessert: Perfect for impressing guests, this dessert’s presentation is as impressive as its flavor.
  • Customizable Sweetness: Adjust the chocolate type and amount of sugar to suit your personal taste preference.
  • Family-Friendly Fun: An engaging recipe that invites fun interactions and eager taste tests from little helpers.

Flavor Profile & Texture

The beauty of the Fudgy Chocolate Lava Cake lies in its complexity of flavors and textures. The outer cake is rich with chocolate and subtly sweet, offering a slight sponginess that complements the indulgently gooey center. The molten core is a luxurious, velvety surprise, bursting with an intensified chocolate essence that coating the tongue in pure bliss. Together, these textures create a multi-dimensional experience—one moment you’re tasting fine chocolate cake, and the next flows into a soothing dessert sauce.

This mesmerizing balance between soft cake and runny center is the hallmark of an exquisite lava cake. Choose from a variety of high-quality chocolates, whether semisweet, bittersweet, or milk, and enjoy the dance of sweet and bitter on your palate.

Occasions & Pairings

The elegance and allure of the Fudgy Chocolate Lava Cake make it a perfect dessert for special occasions. Impress your Valentine with this masterpiece or serve it as the grand finale to your festive family gatherings. Birthdays, anniversaries, or any celebratory dinner benefit from the addition of this dazzling dessert.

For the ultimate experience, pair this cake with a scoop of vanilla ice cream. The cold and creamy counterpart enhances the warmth of the chocolate, creating a divine contrast. Alternatively, a dollop of freshly whipped cream or a sprinkle of berries can add a refreshing edge to balance the cake’s richness. For beverage pairings, consider a velvety port or a rich espresso.

Tips, Variations & Substitutions

While the classic Fudgy Chocolate Lava Cake is a delight, there are numerous ways to personalize the recipe:

  • Flavor Infusions: Add a splash of espresso or a dash of your favorite liqueur for a grown-up twist to your lava cake.
  • Dietary Alternatives: Opt for gluten-free flour or almond flour for a gluten-sensitive friendly version. For lower calorie content, consider using dark chocolate with high cacao content.
  • Regional Twists: Experiment with a sprinkle of sea salt or chili to create a tantalizing sweet-spicy contrast.
  • Chocolate Choices: Explore different chocolate types, from silky milk chocolate to robust dark chocolate, each providing a unique flavor tone.

Storage & Make-Ahead Ideas

The method of eating a Chocolate Lava Cake fresh out of the oven guarantees a molten center, but should you have leftovers, they can be stored with care. Wrap each cake individually in cling film to maintain moisture, then refrigerate for up to two days. Reheat gently in the oven at low heat to avoid drying out or compromising the molten core. Alternatively, the batter can be prepared and refrigerated for a day ahead. When ready to bake, bring to room temperature and follow the baking steps to ensure a perfectly flowing center.

For those who love planning, freeze individual portions of baked cakes and reheat them at a low setting for dessert on demand. Being able to excite guests with a seemingly fresh lava cake without the hassle of preparation makes entertaining a breeze.

Fun Facts & Trivia

Embrace these curious titbits as you enjoy your delicious dessert:

  • The molten center technically isn’t molten at all. Instead, it’s an undercooked batter that results from intentionally short baking times, allowing the center to remain runny.
  • Although associated predominantly with France and the U.S., variations of chocolate lava cakes have been discovered worldwide, each incorporating unique local flavors and spices.
  • The popularity of lava cakes coincided with the rise of television cooking programs, becoming a hallmark of culinary shows that demonstrated the lusciousness of a sophisticated dessert with simplicity.

Ingredients

  • 1/2 cup unsalted butter
    → Unsalted butter adds richness and moisture to the lava cake, creating a fudgy texture that’s both decadent and indulgent. When using butter in baking, it’s best to melt it gently—either in the microwave or over a double boiler—so it incorporates smoothly into the batter without cooling it too much.
  • 1 cup dark chocolate (at least 60% cocoa)
    → High-quality dark chocolate is essential for achieving the deep, rich flavor associated with fudgy lava cake. Chop the chocolate into small pieces to ensure it melts uniformly with the butter. Choose a chocolate that you enjoy eating on its own for the best flavor in the finished cake.
  • 2 large eggs
    → Eggs provide structure and stability to the cake, helping it rise while contributing to a moist texture. Make sure to bring them to room temperature before using to ensure they mix well with the other ingredients, allowing for a smoother batter.
  • 2 large egg yolks
    → Additional egg yolks contribute to a richer flavor and creamier texture, enhancing the cake’s molten center. Use fresh eggs and separate them carefully, ensuring that not even a drop of egg white gets into the yolks, as this can affect the emulsion.
  • 1/4 cup granulated sugar
    → Sugar sweetens the cake while also helping to create a tender crumb. When measuring, it’s important to scoop and level the sugar rather than packing it in, as this will give you a more accurate measure for your recipe.
  • 2 tablespoons all-purpose flour
    → Flour provides the necessary structure to the cake but in a minimal amount; this allows for a delightfully gooey center. Sift the flour before measuring to remove any lumps and incorporate air, which helps with even distribution throughout the batter.
  • 1 teaspoon vanilla extract
    → Pure vanilla extract enhances the overall flavor of the cake. Opt for pure vanilla rather than imitation for a more complex and aromatic profile. Add it at the mixing stage to ensure it disperses evenly in the batter.

  • Powdered sugar (for dusting)
    → Powdered sugar adds a touch of sweetness and a visually appealing finish to the lava cake. Dust it over the cakes just before serving to prevent it from dissolving into the warm chocolate, ensuring it looks beautiful on the plate.
  • Vanilla ice cream or whipped cream (for serving)
    → A scoop of vanilla ice cream or a dollop of whipped cream adds a cool, creamy contrast to the warm, gooey lava cake. Serve immediately after baking while the center is still molten for the best experience. Using high-quality ice cream can elevate the dessert further.

Instructions

  • Preheat your oven to 425°F (220°C) and prepare four ramekins by greasing them with butter and dusting them with cocoa powder.

    → This high temperature is crucial for creating the gooey center while ensuring the outside cooks through. Greasing and dusting the ramekins will prevent the lava cakes from sticking, allowing for easy removal after baking.
  • Melt the unsalted butter and dark chocolate together using a double boiler or a microwave.

    → Use a double boiler by placing a heatproof bowl over simmering water, stirring occasionally until melted, or microwave in 20-second intervals, stirring in between. This gentle heating prevents the chocolate from seizing. The mixture should be smooth and slightly warm when completed.
  • Remove the melted butter and chocolate mixture from the heat and allow it to cool slightly.

    → Cooling the mixture prevents cooking the eggs when they are added, ensuring the batter remains smooth without scrambling any of the ingredients.
  • In a mixing bowl, whisk together the large eggs and egg yolks until well combined and slightly frothy.

    → Whisking introduces air into the eggs, giving the lava cake a light and airy texture. This should take about 1-2 minutes. Ensure the mixture is homogeneous for even baking.
  • Gradually mix in the granulated sugar into the egg mixture until it is fully dissolved and slightly thickened.

    → This step is crucial as dissolving the sugar creates a smoother batter and helps with aeration. You can use a whisk or an electric mixer on low speed for this process.
  • Add the melted chocolate and butter mixture to the egg and sugar mixture, and mix until smooth.

    → Incorporating the chocolate slowly ensures an even distribution of flavors throughout the batter, creating a rich and decadent taste in every bite. Avoid overmixing to maintain the air bubbles created in the eggs.
  • Sift the all-purpose flour over the batter and gently fold it in until just combined.

    → Folding involves using a spatula to lift the batter from the bottom and over the top, ensuring you do not deflate the air bubbles. This keeps the lava cake light while still allowing the flour to achieve structure.
  • Stir in the vanilla extract to the batter until fully incorporated.

    → The vanilla enhances the overall flavor profile of the cake, making it more aromatic. Make sure it’s evenly mixed for consistent flavor throughout the cake.
  • Divide the batter evenly among the prepared ramekins, filling each about 3/4 full.

    → Filling them to this level allows space for the cakes to rise without overflowing, ensuring a perfect dome shape. Use a spatula to scrape the bowl clean for maximum yield.
  • Bake the lava cakes in the preheated oven for 12-14 minutes or until the edges are firm, but the center remains soft.

    → Baking times can vary based on your oven, so start checking at 12 minutes. The ideal cake should have a set edge but jiggle slightly when gently shaken, indicating a molten center.
  • Remove the lava cakes from the oven and let them cool for 1 minute before inverting onto serving plates.

    → Allowing them to rest for a minute helps to slightly firm up the edges, making them easier to unmold. Gently tapping the ramekin on the plate can help release any stubborn spots.
  • Dust the tops with powdered sugar and serve immediately with vanilla ice cream or whipped cream, if desired.

    → The powdered sugar adds a touch of elegance and sweetness, while the cold ice cream or whipped cream contrasts beautifully with the warm molten chocolate, creating a delightful experience.

Notes

This fudgy chocolate lava cake is an indulgent dessert, perfect for chocolate lovers. The key to achieving the classic molten center is careful timing; make sure to keep an eye on the baking time to avoid overcooking the cake. Serve it warm for the most decadent experience, allowing the rich chocolate to flow out with each slice. You can experiment with flavor by adding a pinch of sea salt or a splash of espresso powder to enhance the chocolate flavor. This dessert pairs perfectly with a scoop of vanilla ice cream or a dollop of whipped cream, providing a delightful contrast in temperatures and textures. For an impressive presentation, dust the finished cakes with powdered sugar just before serving, and consider adding fresh berries for a pop of color and freshness. Be sure to use high-quality ingredients, especially chocolate, to elevate the dessert’s overall flavor.

Tips

Cooking Tips for Fudgy Chocolate Lava Cake

  • Prep Your Ingredients: Before you start, gather all your ingredients and measure them out. This will help you bake more efficiently and ensures you don’t forget any key components during the process.
  • Use Quality Chocolate: Always choose high-quality dark chocolate for the best flavor. The cocoa percentage in the chocolate can significantly affect the richness of your lava cake, so aim for a chocolate that you love.
  • Room Temperature Eggs: Remember to allow your eggs to come to room temperature before using them. This helps them blend more seamlessly into the mixture and improves the overall texture of your cake.
  • Gently Melt Butter: Melt the butter slowly to avoid separating or burning it. This preserves its emulsifying properties, which are crucial for achieving the right texture in your batter.
  • Don’t Overmix: When combining your wet and dry ingredients, mix until just combined. Overmixing can result in a denser cake rather than a light, fudgy texture.
  • Prepare Your Molds: Ensure your ramekins or muffin tins are well-greased. You can also dust them with cocoa powder instead of flour to prevent sticking and add an extra hint of chocolate flavor.
  • Baking Time: Keep a close eye on your lava cakes in the oven. They’re done when the edges look set but the center still jiggles slightly. This ensures the molten center you’re looking for!
  • Let Them Rest: Allow the cakes to rest for a minute or two after removing them from the oven before serving. This allows them to firm up slightly, which makes it easier to plate without breaking.
  • Serving Suggestions: Serve your lava cakes immediately with a spoonful of vanilla ice cream or whipped cream for a delightful contrast of temperatures. You can also drizzle some chocolate sauce on top for extra indulgence.
  • Storage Tips: If you have leftovers, store them in an airtight container in the fridge. Reheat gently in the microwave just before serving to regain that delicious gooey center.

FAQ

What are the main ingredients in Fudgy Chocolate Lava Cake?

The main ingredients include dark chocolate, butter, eggs, sugar, flour, and vanilla extract.

How long does it take to make Chocolate Lava Cake?

Preparation time is typically 15 minutes, and baking time is around 12-15 minutes, making the total time approximately 30 minutes.

Can I make Fudgy Chocolate Lava Cake ahead of time?

Yes, you can prepare the batter ahead of time and refrigerate it. Just pour it into the ramekins and bake when you’re ready to serve.

What should I serve with Chocolate Lava Cake?

It’s delicious served with vanilla ice cream, whipped cream, or fresh berries.

How do I know when the Chocolate Lava Cake is done baking?

The edges should be set but the center will still be slightly jiggly. The tops should look dry and not shiny.

Can I use milk chocolate instead of dark chocolate?

Yes, you can use milk chocolate, but the lava cake may be sweeter and less rich in flavor.

Is there a gluten-free version of Chocolate Lava Cake?

Absolutely! You can substitute regular flour with a gluten-free flour blend to make the cake gluten-free.

Can I add flavors or toppings to my lava cake?

Yes! You can add flavors like espresso, orange zest, or almond extract to the batter. For toppings, consider raspberries or a dusting of powdered sugar.

Introduction: The Allure of Creamy Garlic Chickpea Soup

Imagine a steaming bowl of velvety goodness bringing warmth to your soul on a chilly evening. That’s the magic of Creamy Garlic Chickpea Soup. This indulgent yet wholesome dish weaves together the smoky aroma of roasted garlic with the subtle nutty undertones of chickpeas, creating a symphony of flavors that is as nourishing as it is satisfying. Perfectly creamy without a drop of dairy, this soup is a testament to the culinary alchemy that transforms humble ingredients into culinary gold. If you’re seeking comfort, warmth, and a dash of gourmet elegance in one bowl, look no further than this intoxicating concoction.

The Story Behind the Dish

Creamy Garlic Chickpea Soup hails from a rich tapestry of culinary traditions that span the globe. The soup is a modern twist on dishes rooted in the kitchens of the Mediterranean, Middle Eastern, and North African regions, where chickpeas are a dietary staple and garlic is a beloved seasoning. These cuisines have long celebrated simple ingredients elevated through thoughtful preparation. Chickpeas, known for their versatility and nutrition, have been cultivated for thousands of years, celebrated for their ability to enrich meals with protein and earthy flavor.

This dish also takes inspiration from the rustic simplicity of Mediterranean cuisine, where minimalism in ingredient selection highlights the ingredients’ natural flavors. The use of aromatics such as garlic ties this recipe to the ancient practices of layering flavors to build depth in seemingly simple dishes, emphasizing the longstanding culinary philosophy that sometimes, less truly is more.

Why You’ll Love This Recipe

  • Simple Ingredients: Using pantry staples like chickpeas and garlic makes this soup easy to whip up any time the craving strikes.
  • Nutrient-Rich: Packed with plant-based protein, fiber, vitamins, and minerals, this soup supports a balanced, healthy diet.
  • Dairy-Free Creaminess: Achieve a luscious texture without using heavy creams, making it suitable for vegans and those with lactose intolerance.
  • Customizable Flavor: Easily adapt to your palate with your choice of herbs and spices.
  • Comforting and Warm: Perfect for cozy nights in or when you need a bit of comfort cuisine.

Flavor Profile & Texture

This soup is a celebration of rich, layered flavors, kickstarted by the infusion of roasted garlic. The roasting process transforms the garlic’s sharpness into a sweet, caramelized aroma, which blends seamlessly with the hearty chickpeas. The result is a smooth, creamy base that serves as a perfect canvas for additional layers of flavor you can customize to your liking, such as sprigs of rosemary or a sprinkle of smoked paprika. The texture is silken and indulgent, offering the kind of mouthfeel that typical creamy soups provide, but without the addition of milk or cream. Each spoonful offers a delightful contrast between the smooth puree and the occasional soft bite of a whole chickpea, sending your taste buds on a pleasure trip.

Occasions & Pairings

Creamy Garlic Chickpea Soup is as versatile as it is delicious. Serve it as a starter for a Mediterranean-themed dinner party, or make it the star of a simple weeknight meal accompanied by a crusty loaf of bread. For an additional layer of sophistication, pair this soup with a crisp white wine, like a Sauvignon Blanc, to cut through the richness and brighten the garlic notes. It’s also beautifully complemented by a fresh side salad with peppery arugula or baby spinach, drizzled with a tangy vinaigrette to balance the creaminess. Whether you’re hosting a festive gathering or enjoying a quiet meal for one, this soup fits seamlessly into any dining occasion.

Tips, Variations & Substitutions

If you’re looking to personalize this dish, there are plenty of ways to add your own culinary signature:

  • Herb Enhancements: Introduce a burst of green by blending in fresh herbs like basil or parsley at the end of cooking for extra freshness.
  • Spice It Up: A dash of cayenne or red pepper flakes will add a gentle kick for those who enjoy a spicier profile.
  • Vegan Cream Options: For an even richer texture, incorporate a swirl of coconut milk or cashew cream.
  • Protein Boost: Toss in some cooked quinoa or lentils for an added protein punch.
  • Crunchy Toppings: Finish with toasted pita croutons or a handful of roasted, salted chickpeas for a satisfying crunch.

Storage & Make-Ahead Ideas

This soup is a fabulous make-ahead dish that benefits from allowing the flavors to meld together overnight. Simply let the soup cool to room temperature before transferring it to an airtight container, where it will keep in the refrigerator for up to a week. If you’re planning to enjoy it beyond this timeframe, transfer portions to freezer-safe containers and freeze for up to three months. Reheat gently on the stovetop or in the microwave, adding a splash of vegetable broth or water to restore its creamy consistency if needed. This soup’s robust nature means it does beautifully in both storage and reheating, making it a staple for meal prep enthusiasts or for those quick weekday lunches.

Fun Facts & Trivia

Did you know that chickpeas have been part of the human diet as far back as 7,500 years ago? Archaeologists have unearthed chickpea remains in the Middle East dating back to this era, evidencing their long history of cultivation and consumption. Additionally, garlic’s culinary use is as old as the pyramids, with ancient Egyptians employing it both as a seasoning and medicinal ingredient. These powerhouse ingredients have stood the test of time, and this soup is a modern homage to their enduring nutritional and flavorful contributions. Combining these age-old ingredients in contemporary cooking not only connects us to our culinary past but forecasts their continued legacy in dishes like this Creamy Garlic Chickpea Soup.

Ingredients

  • Chickpeas (2 cans, drained and rinsed)
    → Chickpeas serve as the main protein source in this soup, providing a creamy texture once blended. Using canned chickpeas saves time; just make sure to drain and rinse them thoroughly to reduce sodium content and enhance taste. If using dried chickpeas, soak them overnight and cook until tender for optimal texture.
  • Garlic (6 cloves, minced)
    → Garlic adds a pungent flavor that is essential to the soup’s character. Use fresh cloves for the best flavor, as pre-minced garlic can lose its potency. Mince them finely to ensure even distribution of flavor throughout the soup.
  • Onion (1 large, diced)
    → Onions provide a sweet and savory base for the soup. Dice them into small, uniform pieces to ensure they cook evenly. Sauté them until they are translucent to develop their sweetness before adding other ingredients.
  • Carrots (2 medium, diced)
    → Carrots add natural sweetness and a vibrant color to the soup. Dice them into small pieces for quicker cooking and even blending. Choose fresh, firm carrots; they will enhance the overall flavor of the soup.
  • Vegetable broth (4 cups)
    → Vegetable broth serves as the liquid base, adding depth of flavor. Select a low-sodium broth to control salt levels; you can also use homemade broth for a fresher taste. Warm the broth slightly before adding it to the pot to help the ingredients meld together more quickly.
  • Coconut milk (1 cup, full-fat)
    → Coconut milk adds creaminess and richness, making the soup velvety smooth. Choose full-fat coconut milk for the best texture and flavor. Shake the can well before opening to mix the cream and liquid evenly, or heat gently in a saucepan if it’s too thick to pour.
  • Olive oil (2 tablespoons)
    → Olive oil is used for sautéing the onions and adding richness to the soup. Opt for extra virgin olive oil for maximum flavor. Heat the oil in the pot before adding the onions to allow the flavors to bloom effectively.
  • Salt (to taste)
    → Salt enhances the overall flavor of the soup. Start with a teaspoon and adjust towards the end of cooking, as certain ingredients (like broth) can already contain salt. This helps prevent over-salting and allows for the natural flavors of the other ingredients to shine through.
  • Pepper (to taste)
    → Freshly cracked black pepper adds a subtle heat and depth to the soup. Use a pepper grinder for the freshest flavor, adding it in small amounts and adjusting to your preferred spice level.
  • Lemon juice (1 tablespoon, freshly squeezed)
    → Lemon juice brightens the flavors of the soup, providing acidity that balances the creaminess of the coconut milk. Use fresh lemon juice rather than bottled for the best taste. Squeeze the juice in at the end of cooking to maintain its vibrant flavor.

Instructions

  • Gather all your ingredients and kitchen tools, including a large pot, a wooden spoon, a cutting board, and a sharp knife.

    → Having everything prepped in advance makes the cooking process smoother and more efficient, allowing you to focus fully on the task at hand without searching for items mid-recipe.
  • Drain and rinse the canned chickpeas thoroughly under cold running water.

    → Rinsing chickpeas removes excess sodium and improves their flavor. This step is crucial if you’re using canned chickpeas, as it enhances the overall taste of your soup.
  • Peel and mince the garlic cloves finely, then set aside.

    → Minced garlic releases its oils and flavor more effectively than whole cloves. A finer mince ensures that the garlic flavor distributes evenly in your soup.
  • Prepare the onion by peeling and dicing it into small, uniform pieces. Aim for about 1/4-inch dice.

    → Uniform dicing allows the onion to cook at the same rate, ensuring it becomes sweet and soft rather than unevenly cooked chunks in the soup.
  • Peel the carrots and dice them into small pieces, similar in size to the onion.

    → Making the carrot pieces small ensures they cook quickly and blend easily into the soup, contributing both flavor and a pleasant texture.
  • Heat 2 tablespoons of olive oil over medium heat in a large pot until shimmering.

    → Heating the olive oil properly allows you to sauté the vegetables effectively, helping to release their natural flavors and sweetness.
  • Add the diced onion to the pot and sauté for about 5-7 minutes, stirring occasionally, until the onion becomes translucent.

    → Sautéing develops the onion’s sweetness and forms a flavorful base for your soup. Stirring regularly prevents it from browning too quickly.
  • Incorporate the minced garlic into the pot and sauté for an additional 1-2 minutes until fragrant.

    → Garlic cooks quickly; thus, adding it after the onion ensures it doesn’t burn, which can impart a bitter taste. Stir constantly to prevent it from sticking.
  • Add the diced carrots to the pot and continue to sauté for another 3-4 minutes, stirring frequently.

    → This step allows the carrots to soften slightly before the liquid is added, enhancing their sweetness and flavor within the soup.
  • Pour in the drained and rinsed chickpeas, stirring to combine everything in the pot.

    → This ensures that the chickpeas and vegetables are well mixed, allowing the flavors to meld together as the soup cooks.
  • Add 4 cups of vegetable broth to the pot, ensuring it covers all the ingredients, and bring to a gentle boil.

    → Using warm broth can help expedite the heating process. Bringing the mixture to a boil activates the cooking process, releasing flavors from the chickpeas and vegetables.
  • Once boiling, reduce the heat to low, cover the pot, and let it simmer for about 15-20 minutes.

    → Simmering allows the flavors to meld beautifully and the carrots to become tender while retaining some texture, enhancing the soup’s overall character.
  • After simmering, use an immersion blender to blend the soup until smooth and creamy. Alternatively, transfer the soup in batches to a countertop blender.

    → Blending the soup creates a creamy consistency due to the chickpeas and enhances the thermal experience of eating it. Always blend carefully to avoid splattering, especially with hot liquids.
  • Add 1 cup of full-fat coconut milk to the blended soup and stir well to combine.

    → Coconut milk provides creaminess and a subtle sweetness that balances the garlic flavor. Stirring thoroughly ensures it integrates smoothly into the soup.
  • Season with salt and freshly cracked black pepper to taste, and then stir in 1 tablespoon of freshly squeezed lemon juice.

    → Adjusting seasonings at this stage allows you to enhance the flavors. The lemon juice adds brightness, cutting through the creamy coconut, making the soup feel fresh and lively.
  • Simmer the soup for an additional 5 minutes to allow the flavors to meld after adding the coconut milk and seasonings.

    → This final simmer helps to warm the coconut milk through and allows the flavors to harmonize beautifully, resulting in a more cohesive soup.
  • Serve the soup hot, garnished with additional cracked pepper or fresh herbs if desired.

    → Presenting the soup with a touch of added pepper or herbs enhances visual appeal and introduces fresh notes, inviting your guests or family to enjoy a delicious meal.

Notes

This creamy garlic chickpea soup is a flavor-packed, wholesome meal that can be made in under an hour. The key to its deliciousness lies in the balance between the garlic’s intensity and the creaminess from the coconut milk. Feel free to adjust the garlic according to your preference; adding more can intensify the flavor, while reducing it will create a milder taste.

The soup can be easily customized with additional vegetables such as spinach or kale for a nutrient boost, or you can stir in some cooked grains like quinoa or rice for added heartiness. If you’re a fan of spice, consider adding a pinch of red pepper flakes for a bit of heat.

This soup makes for excellent meal prep—store any leftovers in the fridge for up to three days or freeze individual portions for convenient meals later on. When reheating, you might want to add a splash of vegetable broth or water to restore the creamy texture.

For serving, consider garnishing with fresh herbs like parsley or cilantro for a pop of freshness. A drizzle of olive oil or a dollop of yogurt can also enhance both the presentation and flavor. This comforting soup is perfect for a cozy night in or as a nutritious lunch option that will keep you satiated.

Tips

  • Prep Ahead: To save time, you can prepare the vegetables in advance. Chop the onions, carrots, and mince the garlic the day before and store them in airtight containers in the refrigerator. This way, you’ll have less prep to do on the day of cooking.
  • Texture Tips: For a smoother soup, blend the soup in batches if using a countertop blender. If you prefer a chunkier texture, reserve some of the chickpeas and add them back into the soup after blending.
  • Herb Infusion: Consider adding fresh or dried herbs such as thyme or parsley for added flavor. You can sauté minced herbs along with the onions for a fragrant start or sprinkle fresh herbs on top as a garnish before serving.
  • Cooking Technique: Sauté the onions on medium heat to avoid burning, which can create a bitter taste. If they brown too quickly, lower the heat and add a splash of broth to deglaze the pot, scraping up any browned bits.
  • Pan Size: Use a large pot to ensure there is enough space for the soup to simmer without overflowing. This helps in even cooking and reduces the chances of the soup sticking to the bottom of the pot.
  • Spice Variation: Experiment with spices like cumin, coriander, or smoked paprika to give the soup an extra layer of flavor. Add them during the sautéing stage so they can bloom in the oil.
  • Balance the Flavor: Before serving, taste the soup and adjust seasoning. If it’s too rich, adding a bit more lemon juice can help balance the flavors. Adjust seasoning with salt and pepper carefully, since the flavors will deepen as the soup sits.
  • Storage Tips: Store leftovers in an airtight container in the refrigerator for up to 4 days. The flavors will develop even further, making it delicious for lunches! Reheat gently on the stove and add a splash of vegetable broth or water if it thickens too much.
  • Serving Suggestions: Pair the soup with crusty bread or a side salad for a complete meal. Garnish each bowl with a drizzle of olive oil or additional fresh herbs to enhance presentation and flavor.

FAQ

What ingredients do I need to make Creamy Garlic Chickpea Soup?

You will need chickpeas, garlic, vegetable broth, onion, coconut milk (or cream), olive oil, salt, pepper, and your choice of spices such as cumin or paprika.

Can I use dried chickpeas instead of canned?

Yes, you can use dried chickpeas. Just be sure to soak them overnight and cook them thoroughly before adding them to the soup.

Is this soup vegan-friendly?

Yes, Creamy Garlic Chickpea Soup is entirely vegan, especially if you use coconut milk or a plant-based cream alternative.

How can I make this soup spicier?

You can add red pepper flakes, chili powder, or diced fresh chili peppers during the cooking process to increase the heat.

Can I freeze Creamy Garlic Chickpea Soup?

Yes, this soup freezes well. Allow it to cool completely before transferring it to airtight containers and store it in the freezer for up to 3 months.

How long does it take to cook the soup?

The entire cooking process takes about 30-40 minutes, depending on whether you are using canned or dried chickpeas.

What can I serve with this soup?

This soup pairs well with crusty bread, a side salad, or grilled vegetables for a complete meal.

Can I make this soup in a slow cooker?

Yes, you can make this soup in a slow cooker. Just combine all ingredients and cook on low for 6-8 hours or high for 3-4 hours. Blend before serving for a creamy texture.

Introduction: A Deliciously Aromatic Journey

Imagine coming home after a long day to a household filled with the invigorating aroma of lemon and herbs, mingling with the comforting scent of chicken slow-cooked to perfection. Presenting our Slow Cooker Lemon Herb Chicken and Rice, this recipe promises a delightful culinary experience that takes your palate on a journey through exquisite flavors and textures. It’s not just a meal; it’s an orchestrated tale of taste, where simplicity meets gourmet, and where the humble chicken and rice dish is elevated to new heights. This recipe invites your taste buds to a citrusy world underlined by aromatic herbs and tender, succulent chicken, all nestled over a bed of perfectly cooked rice. Ready for an unforgettable sensory experience?

The Story Behind the Dish: From Humble Origins to Your Table

The marriage of chicken and rice is as old as time itself, with variations found across many cultures and cuisines. The confluence of these ingredients can be traced back to countless culinary traditions stretching from Asia to Europe. But our Slow Cooker Lemon Herb Chicken and Rice is a tribute to the Mediterranean countryside, where fresh herbs and lemons are culinary staples, used to imbue dishes with an incomparable freshness and vibrancy.

Incorporating the slow cooker into this tradition brings a modern twist to an already beloved concept. It allows for the gradual melding of flavors, enhancing the richness of each ingredient without the need for constant attention. The result? A meal that not only carries the essence of Mediterranean cooking but is also tailored for today’s busy lifestyles, offering a hands-free approach while still achieving a deeply satisfying dish.

Why You’ll Love This Recipe

  • Effortless Cooking: Let your slow cooker do the work for you, freeing up your time to focus on other things.
  • Perfect Harmony of Flavors: The tang of lemons, coupled with the earthiness of herbs, creates a symphony of flavors that is both unexpected and delightful.
  • Whole-Meal Solution: Cooked chicken and rice means you have your protein and carb ready in one pot, perfect for a hearty and filling meal.
  • Healthy and Nutritious: Lean chicken, whole grains, and fresh herbs make this a wholesome meal option for the entire family.
  • Adaptable: Easily adjust the recipe to suit dietary needs, making it a versatile choice for varying food preferences.

Flavor Profile & Texture: Citrus Meets Comfort

As you take your first bite, prepare to encounter a delicate balance of zesty and savory notes. The lemon imparts a unique brightness that enlivens the dish, while the various herbs contribute a fragrant depth. The slow cooking process tenderizes the chicken to an almost melting texture, while the rice absorbs the flavorful juices, resulting in a cohesion of taste and texture that is both comforting and exhilarating.

With every bite, you’re reminded of both comfort food at its finest and a refined, elegant dining experience. This dish is the perfect balance between homely and sophisticated, satisfying cravings for something familiar yet complex.

Occasions & Pairings: The Versatility of a Classic

This recipe is an all-season favorite, suitable for a multitude of occasions. Whether you’re preparing a family weeknight dinner, hosting friends for a cozy gathering, or needing a reliable dish for a potluck, the Slow Cooker Lemon Herb Chicken and Rice fits seamlessly into any setting. Its appeal lies in its ability to offer a gourmet experience while still maintaining the comforts of a home-cooked meal.

For those looking to enhance the meal, consider pairing it with a crisp, green salad for a refreshing contrast or a side of grilled seasonal vegetables to round out your palate. When it comes to drinks, this dish shines with a chilled glass of Sauvignon Blanc or a light, citrusy lemonade.

Tips, Variations & Substitutions: Customize Your Creation

One of the strengths of this recipe lies in its adaptability, allowing you to make it your own. Here are some ideas:

  • Dietary Alternatives: Substitute brown rice for an even healthier option or use quinoa for a higher protein content.
  • Herb Varieties: Experiment with different herbs such as thyme, rosemary, or sage to create new aroma profiles.
  • Vegan Twist: Replace chicken with tofu or chickpeas for a plant-based version.
  • Spice It Up: Introduce chili flakes or a dash of smoked paprika if you desire a bit of heat.

Storage & Make-Ahead Ideas: Convenience Meets Freshness

One of the fantastic aspects of this recipe is its suitability for making ahead of time. If you’re looking to prep in advance, simply assemble all ingredients in the slow cooker the night before, refrigerate, and start cooking the next day with minimal effort. Leftovers are equally versatile and can be stored in the refrigerator for up to four days, allowing for easy re-invention as a quick lunch or dinner during the week.

For long-term planning, this dish freezes beautifully. Simply portion it out into airtight containers, and freeze for up to three months. To reheat, allow it to thaw overnight in the refrigerator and then heat gently on the stovetop or microwave, adding a splash of broth or water if needed to restore moisture.

Fun Facts & Trivia: A Culinary Journey

Did you know that from a historical perspective, lemon and herbs have been used in chicken dishes across cultures as a form of preservation method? The acidity of lemon acts as a natural preservative while herbs deter spoilage, highlighting the practical origins of such flavor combinations.

Furthermore, the notion of cooking meals slowly to enhance flavor is found is an ancient practice. The slow cooking process, embraced globally in various forms—from the French sous-vide to the Indian dum pukht—demonstrates a universal understanding of flavor development, proving that although methods evolve, the quest for deliciousness is timeless.

In creating this recipe, you are not just cooking a meal; you are engaging in a rich culinary tradition that spans centuries and continents, celebrating both innovation and heritage in your kitchen. Enjoy every moment of this gastronomic adventure!

Ingredients

  • Chicken
    → Use 4 boneless, skinless chicken breasts for this recipe, as they provide a lean source of protein. Ensure the chicken is thawed if previously frozen to allow for even cooking. Searing the chicken briefly before adding it to the slow cooker is optional but can enhance flavor with a rich, browned exterior.
  • Rice
    → 1 cup long-grain white rice works best for this dish, as it absorbs flavors well and cooks evenly. Rinse the rice under cold water to remove excess starch, which can make the final dish gummy. This will help achieve a fluffy texture in the finished meal.
  • Chicken Broth
    → 2 cups low-sodium chicken broth serve as the liquid base to cook the rice and chicken, adding savory depth to the dish. Opt for low-sodium options to control salt levels in the recipe, allowing the herbs and lemon to shine through.
  • Garlic
    → 4 cloves of fresh garlic, minced, add a robust flavor to the dish. Crushing or finely chopping garlic releases its essential oils, infusing the chicken and rice with aromatic goodness. Fresh garlic is preferred over pre-minced for optimal potency.
  • Lemon Juice
    → 1/4 cup fresh lemon juice enhances flavors with its acidity and brightness. Use freshly squeezed lemon juice rather than bottled, as it provides a fresher taste and ensures that the essential oils from the lemon zest can enhance the flavor profile further.
  • Lemon Zest
    → Zest from 1 lemon adds intense citrus flavor and aromatic oils to the dish. Use a microplane or zester to finely grate the yellow part of the lemon peel, avoiding the bitter white pith underneath. This will bring a beautiful fragrance and enhance the overall lemon flavor.
  • Herbs
    → 2 teaspoons of dried thyme and 1 teaspoon of dried oregano deliver fragrant herbal notes. Dried herbs should be crumbled between fingers before adding to release their oils and enhance the flavors. If using fresh herbs, use three times the amount and add them toward the last hour of cooking.
  • Salt and Pepper
    → 1 teaspoon salt and 1/2 teaspoon black pepper enhance the overall flavors of the dish. Season the chicken and broth mixture adequately to ensure the flavors are well-rounded. Adjust to taste towards the end of cooking to account for salt added from broth.
  • Olive Oil
    → 2 tablespoons of extra virgin olive oil add richness and help to sear the chicken if you choose to do so. Olive oil not only enhances flavor but also aids in moisture retention during slow cooking. If skipping searing, simply add the olive oil directly to the slow cooker.
  • Vegetables (Optional)
    → 1 cup of diced carrots and 1 cup of diced celery (optional) can add texture and nutrition. Chop the vegetables evenly for consistent cooking and distribute them evenly in the slow cooker. They will absorb flavors from the chicken and herbs, making them a more integral part of the dish.

Instructions

  • Prepare your ingredients by gathering all the components listed, including chicken, rice, chicken broth, garlic, lemon juice, lemon zest, herbs, salt, pepper, olive oil, and optional vegetables.

    → Having everything ready ensures a smooth cooking process and helps prevent missing any elements during preparation. This is known as mise en place in culinary terms.
  • Rinse 1 cup of long-grain white rice under cold water in a fine-mesh strainer.

    → Rinsing the rice removes excess starch, which can cause the rice to be sticky and gummy. This step is crucial for achieving fluffy, well-separated grains once cooked.
  • Optionally, sear 4 boneless, skinless chicken breasts in 2 tablespoons of extra virgin olive oil over medium-high heat in a large skillet for 2-3 minutes per side until golden brown.

    → Searing the chicken adds a rich flavor through the Maillard reaction and creates a more appealing appearance. If you skip this step, directly add the chicken breasts to the slow cooker with a drizzle of olive oil.
  • Place the seared (or raw) chicken breasts in the bottom of the slow cooker.

    → Layering the chicken at the bottom allows it to cook evenly in the broth while infusing the rice with flavor. Ensure they fit neatly without overcrowding.
  • Add the rinsed rice on top of the chicken in the slow cooker.

    → Distributing the rice evenly ensures that each grain has access to the cooking liquid and flavors, promoting even cooking throughout.
  • Pour in 2 cups of low-sodium chicken broth evenly over the rice and chicken.

    → The broth serves as the primary cooking liquid and is essential for both cooking the rice and infusing moisture into the chicken. Using low-sodium broth allows for better control over the dish’s saltiness.
  • Add 4 minced cloves of fresh garlic, 1/4 cup of fresh lemon juice, and the zest from 1 lemon into the slow cooker.

    → The garlic provides aromatic depth, while the lemon juice and zest bring brightness and acidity. Fresh ingredients guarantee a more vibrant flavor than their pre-prepared counterparts.
  • Sprinkle in 2 teaspoons of dried thyme and 1 teaspoon of dried oregano over the mixture.

    → Crumbling the dried herbs between your fingers before adding them releases essential oils, enhancing their flavor profile in the dish. Fresh herbs can be used but should be added later in the cooking process.
  • Season the entire mixture with 1 teaspoon of salt and 1/2 teaspoon of black pepper, adjusting based on taste if desired.

    → Seasoning layers at this stage ensures that every component of the dish is properly flavored. Remember, the salt will intensify as the liquid reduces, so it can be adjusted towards the end of cooking.
  • If desired, add 1 cup of diced carrots and 1 cup of diced celery around the chicken and rice in the slow cooker.

    → Adding vegetables not only enhances the nutrition of the meal but also contributes additional flavor as they cook. Ensure even cuts for uniform cooking.
  • Cover the slow cooker and set it to cook on low for 4 to 6 hours, or on high for 2 to 3 hours, checking for doneness periodically.

    → Cooking on low allows for deeper flavor development and tenderness in the chicken, while cooking on high is suitable for quicker meals. Make sure to avoid lifting the lid too often, as this releases heat and can extend cooking time.
  • Check to ensure the chicken reaches an internal temperature of 165°F (75°C) and the rice is tender and fluffy.

    → This step is crucial for food safety and ensures the chicken is fully cooked while the rice absorbs all the delicious flavors from the broth and herbs.
  • Once cooked, gently fluff the rice with a fork and incorporate the chicken and any vegetables to mix flavors before serving.

    → Fluffing the rice helps separate the grains for a better texture. Stirring all components together allows for even distribution of flavors and makes for a more satisfying presentation.
  • Serve the Slow Cooker Lemon Herb Chicken and Rice hot, garnished with additional lemon zest or fresh herbs if desired.

    → Garnishing adds a visually appealing touch and can elevate the dish’s presentation, enhancing the overall dining experience.

Notes

These Slow Cooker Lemon Herb Chicken and Rice are a delightful one-pot meal that offers a balance of protein, carbohydrates, and flavor. The use of boneless, skinless chicken breasts not only provides a lean protein source but also keeps the dish light and wholesome. Thaw the chicken fully before cooking for maximum tenderness and even cooking. Searing it briefly can add a rich flavor, but it is optional.

The choice of long-grain white rice ensures that it absorbs the savory chicken broth, resulting in fluffy and perfectly cooked grains. Remember to rinse the rice well, as this step helps prevent a gummy texture in the finished dish.

Fresh garlic and lemon juice are key players here. Their bright and aromatic qualities elevate the entire meal, making it vibrant and refreshing. Always opt for freshly squeezed lemon juice, as it imbues the dish with a layer of freshness that bottled lemon juice cannot replicate. Additionally, using fresh lemon zest provides an extra burst of citrus flavor, enhancing the aroma.

The herbs used—dried thyme and oregano—bring fragrant notes to the dish. Crushing dried herbs before adding them can help activate their oils and flavors. If you decide to use fresh herbs, remember to adjust the quantity, and add them towards the end of cooking for the best flavor.

Seasoning with salt and pepper is essential to balance all the flavors, and they can be adjusted before serving to ensure the dish meets your taste preferences.

Extra virgin olive oil not only contributes to a richer flavor but also helps keep the chicken moist during the cooking process. If you prefer to skip the searing step, simply add the olive oil directly to the slow cooker.

For added nutrition and flavor, you can incorporate diced carrots and celery. These vegetables will absorb the wonderful flavors of the chicken and herbs, contributing a nice texture to the dish.

Serve this lemon herb chicken and rice with a sprinkle of fresh herbs on top to enhance presentation and flavor. Enjoy your comforting and aromatic meal!

Tips

Cooking Tips for Slow Cooker Lemon Herb Chicken and Rice

  • Thaw the Chicken: Ensure your chicken breasts are completely thawed before cooking. This allows for even cooking throughout and helps avoid rubbery texture.
  • Sear for Flavor: If you have time, consider searing the chicken in olive oil before placing it in the slow cooker. This step enhances the flavor and adds a beautiful golden color.
  • Rinse the Rice: Rinsing the rice removes excess starch, preventing the dish from becoming gummy. This simple step can significantly improve the texture of your final dish.
  • Choose Quality Broth: Since broth contributes significantly to the flavor, selecting a high-quality, low-sodium chicken broth is recommended. This gives you better control over the seasoning.
  • Fresh Ingredients Matter: Use fresh garlic and lemon juice for the best flavor. Fresh ingredients can elevate your dish and make it more vibrant.
  • Mind the Zest: When zesting, be careful to only grates the yellow part of the skin, avoiding the white pith underneath, which can impart a bitter taste.
  • Season Wisely: The salt and pepper can always be adjusted at the end of cooking. Start with less and taste before serving to find the right balance.
  • Add Vegetables Wisely: If you’re adding optional vegetables, make sure to chop them uniformly so they cook evenly, and consider adding them early to distribute flavors better.
  • Cook Time: This dish benefits from low and slow cooking. Aim for 4-6 hours on low heat for optimal tenderness and flavor infusion.
  • Rest Before Serving: Let the dish sit for approximately 10 minutes after cooking before serving. This allows flavors to meld and the rice to absorb any remaining liquid.

FAQ

What ingredients do I need for Slow Cooker Lemon Herb Chicken and Rice?

You’ll need chicken thighs or breasts, rice, chicken broth, lemon juice, garlic, olive oil, and your choice of herbs (such as thyme, rosemary, and parsley). Don’t forget salt and pepper for seasoning!

Can I use brown rice instead of white rice in this recipe?

Yes, you can use brown rice, but you may need to adjust the cooking time as brown rice typically takes longer to cook than white rice.

How long should I cook the lemon herb chicken and rice in the slow cooker?

Cook on low for 6-8 hours or on high for 3-4 hours, until the chicken is cooked through and the rice is tender.

Can I add vegetables to this dish?

Absolutely! You can add vegetables such as carrots, peas, or bell peppers. Add them in the last hour of cooking for best results.

Is it possible to make this recipe gluten-free?

Yes, you can make this dish gluten-free by ensuring that you use gluten-free chicken broth and rice.

What can I serve with Slow Cooker Lemon Herb Chicken and Rice?

This dish pairs well with a fresh green salad or steamed vegetables. You can also serve it with a side of crusty bread to soak up the delicious juices.

Can I freeze leftovers from this recipe?

Yes, you can freeze leftovers. Store them in an airtight container for up to 3 months. Reheat thoroughly before serving.

How can I store the leftovers properly?

Leftovers should be stored in an airtight container in the refrigerator for up to 3-4 days. Make sure to cool the dish completely before storing to maintain freshness.

Introduction: A Bowlful of Healthy Goodness

The Healthy Chicken & Sweet Potato Rice Bowl is a vibrant culinary symphony, where nutritious meets delicious in perfect harmony. Imagine succulent pieces of perfectly roasted chicken, nestled among fluffy grains of rice, punctuated by the delightful sweetness of sweet potato and a medley of fresh vegetables. It’s a dish that calls out with an inviting aroma and a tempting visual appeal, begging to be enjoyed. Whether you’re looking to spruce up your meal prep game or searching for a crowd-pleaser for family dinners, this recipe promises to captivate your senses and soothe your soul with its wholesome, hearty appeal.

The Story Behind the Dish

The origin of the rice bowl is as diverse as the varieties it holds. This rendition, focusing on the wholesome goodness of chicken and sweet potato, takes inspiration from global cuisine while incorporating the rich heritage of farm-to-table freshness. The concept of combining rice with proteins and vegetables is an age-old tradition, beloved across many cultures. Whether it’s the Japanese donburi, the Korean bibimbap, or the Hawaiian poke bowl, rice bowls are a testament to the versatility and adaptability of rice as a staple food. The Healthy Chicken & Sweet Potato Rice Bowl is a nod to these traditions, reimagined for the modern palate with an emphasis on health and nutrition.

Why You’ll Love This Recipe

  • Nutritious: Packed with lean protein from chicken, healthy carbs from sweet potatoes, and fibers from assorted veggies, it’s a balanced meal that fuels your body.
  • Versatile: Perfect for lunch, dinner, and meal prep. Suitable for any occasion, from casual lunches to elegant dinners.
  • Customizable: Easily tailored to meet dietary needs. Swap ingredients for a vegan or low-carb version.
  • Satisfying: The combination of textures and tastes provides a truly fulfilling eating experience.
  • Easy to Prepare: Requires minimal kitchen skills and equipment, making it accessible for beginners and busy individuals alike.

Flavor Profile & Texture

This dish is a delightful clash of contrasts and complementary flavors. The chicken, tender and infused with the richness of spices, provides a savory anchor to the dish. Sweet potatoes, caramelized to perfection, offer a natural sweetness that heightens the overall taste. The fluffy rice acts as a neutral canvas, soaking up the flavors and providing a satisfying bite. The inclusion of fresh vegetables adds a refreshing crunch and a touch of earthiness, balancing the dish with vivid colors and a mosaic of textures. Together, these components create a symphony of taste that is both comforting and exhilarating.

Occasions & Pairings

The Healthy Chicken & Sweet Potato Rice Bowl is versatile enough to shine on any table. It’s the ideal choice for a weeknight dinner, when time is tight, and you need something nourishing yet quick. Its presentation and complexity make it suitable for more formal gatherings like lunches with friends or potluck parties. To enhance your dining experience, consider pairing this dish with a crisp, refreshing green salad or a light, citrusy vinaigrette. For drinks, a glass of chilled white wine or a lemon-infused iced tea would complement the meal beautifully.

Tips, Variations & Substitutions

One of the beauties of the Healthy Chicken & Sweet Potato Rice Bowl is its adaptability to suit various dietary preferences and ingredient availability. Here are some tips and variations to consider:

  • Vegetarian/Vegan Option: Replace chicken with grilled tofu or tempeh. Use vegetable broth for cooking the grains.
  • Grains Alternatives: Substitute brown rice with quinoa, farro, or cauliflower rice for a lower-carb option.
  • Spice Up: Add some heat with chili flakes or Sriracha sauce for those who enjoy a spicy kick.
  • Flavor Boost: Consider incorporating herbs such as cilantro, parsley, or mint for additional layers of flavor.

Storage & Make-Ahead Ideas

This dish is as practical as it is delicious, offering excellent storage potential and make-ahead benefits. Prepare the various components ahead of time, storing them separately in airtight containers. The chicken and sweet potatoes can be pre-cooked and refrigerated, while the rice can be made a day in advance. When ready to serve, simply reheat and assemble the bowl. For leftovers, the entire dish can be stored in the fridge for up to three days, making it an excellent option for meal prep enthusiasts. For longer storage, consider freezing portions in microwave-safe containers, ensuring easy access to a wholesome meal on busy days.

Fun Facts & Trivia

Did you know? Sweet potatoes are often confused with yams, but they are botanically different. The sweet potato is a part of the Convolvulaceae family, while yams belong to the Dioscoreaceae family, typically found in Africa and Asia. In addition to being a tasty addition to various dishes, sweet potatoes are superfoods packed with vitamin A, antioxidants, and fiber!

Embrace your culinary curiosity and allow this Healthy Chicken & Sweet Potato Rice Bowl to be a nourishing mainstay in your kitchen. With its rich tapestry of flavors, satisfying textures, and impressive versatility, it promises not only to please your palate but also to inspire a lifestyle of wellness and creativity. So, gather your ingredients, channel your inner chef, and savor the joy of cooking and eating this delightful creation.

Ingredients

  • Chicken
    → Chicken breast is the main protein source for this dish, providing lean protein that is essential for muscle repair and growth. Use skinless, boneless chicken breasts for a healthier option. Cube or slice the chicken into uniform pieces to ensure even cooking. Marinate the chicken in your choice of spices or seasonings before cooking for enhanced flavor.
  • Sweet Potatoes
    → Sweet potatoes add a natural sweetness and a nutritious element to the bowl, packed with vitamins A and C, fiber, and antioxidants. Peel and cube the sweet potatoes into bite-sized pieces for even roasting or boiling. Cook until tender but not mushy to maintain their texture and flavor. Roasting brings out their sweetness and adds a caramelized effect, enhancing the overall taste.
  • Brown Rice
    → Brown rice serves as a hearty base for the bowl, providing complex carbohydrates and fiber that will keep you full longer. Rinse the rice under cold water before cooking to remove excess starch. Cook according to package instructions, using a 2:1 water to rice ratio, for fluffy results. For added flavor, consider cooking the rice in vegetable or chicken broth instead of water.
  • Olive Oil
    → Olive oil is used for cooking the chicken and sweet potatoes, adding healthy fats that aid in the absorption of fat-soluble vitamins. Use extra virgin olive oil for its superior flavor and health benefits. Drizzle it over the vegetables before roasting for a beautifully browned exterior, and use it for sautéing the chicken to keep it moist and tender.
  • Garlic
    → Garlic adds a punch of flavor and aroma to the dish. Fresh garlic cloves are preferable for the best taste; mince or crush them to release their oils before adding to the chicken as it cooks. Be careful not to overcook garlic as it can become bitter quickly; add it toward the end of cooking the chicken for maximum flavor without burning.
  • Spinach or Kale
    → Leafy greens add a nutritional boost, packed with vitamins, minerals, and antioxidants. Use fresh spinach or kale, as they will wilt and cook down when added to the warm ingredients. If using kale, remove the tough stems and chop it into smaller pieces to make it easier to eat. Cook the greens briefly to retain some texture and vibrant color.
  • Salt and Pepper
    → Salt and pepper are essential for enhancing the flavors of all the ingredients. Use sea salt for seasoning the chicken and vegetables to enhance their natural flavors. Freshly ground black pepper adds a layer of spice; add to taste while cooking. Start with a small amount, and adjust as necessary to avoid overpowering the dish.
  • Lemon Juice
    → Fresh lemon juice brightens the entire dish and balances the flavors. Use the juice from a ripe lemon, and squeeze it over the chicken and vegetables just before serving to maximize freshness. Adding a sprinkle of lemon zest can intensify the citrus flavor further. Avoid bottled lemon juice as it may contain preservatives that alter the taste.
  • Optional Toppings
    → You can customize your rice bowl with various toppings for added flavor and texture. Consider items like sliced avocado for creaminess, chopped green onions for freshness, or a dollop of Greek yogurt for tanginess. Sprinkle sesame seeds or crushed nuts for crunch. Use whatever toppings you enjoy to make the dish your own!

Instructions

  • Prepare the chicken by cutting it into uniform cubes or slices and marinating it in your chosen spices.

    → Ensuring that the chicken pieces are uniform allows for even cooking, preventing some pieces from being overcooked while others are undercooked. Marinating enhances the flavor, making every bite more delicious.
  • Preheat your oven to 400°F (200°C).

    → Preheating the oven is crucial for ensuring that the sweet potatoes roast properly. This temperature allows for caramelization, which enhances their natural sweetness.
  • Peel and cube the sweet potatoes into bite-sized pieces.

    → Uniformly cutting the sweet potatoes ensures they cook evenly. Aim for 1-inch cubes for consistent roasting time. This size allows them to caramelize beautifully while still retaining a firm texture.
  • Toss the cubed sweet potatoes with olive oil, salt, and pepper in a large bowl.

    → Coating the sweet potatoes in olive oil prevents them from drying out as they roast and allows the seasoning to adhere better. Salt enhances their natural flavor, while pepper adds a subtle spice.
  • Spread the sweet potatoes in a single layer on a baking sheet.

    → Spreading them out allows for even roasting. If they are overcrowded, they will steam instead of roast, resulting in a less appealing texture.
  • Roast the sweet potatoes in the preheated oven for about 25-30 minutes, or until they are tender and slightly caramelized on the edges.

    → Roasting brings out the natural sugars in sweet potatoes, creating a deeper flavor. Test doneness by piercing a piece with a fork—it should be easy to cut through.
  • While the sweet potatoes are roasting, rinse the brown rice under cold water in a fine-mesh sieve.

    → Rinsing the rice helps remove excess starch, which prevents the rice from becoming gummy. This step is essential for achieving fluffy, separate grains.
  • In a saucepan, add the rinsed brown rice and double the amount of water (2:1 ratio) or broth for more flavor. Bring it to a boil.

    → Using a flavored liquid instead of water enhances the overall taste of the rice. Bring the water to a boil, then reduce the heat to low and cover the pan.
  • Simmer the rice for about 40-45 minutes, or until the water is absorbed and the rice is tender.

    → Proper simmering allows the rice to absorb moisture without becoming mushy. Remove it from heat once done and let it sit covered for 5-10 minutes to allow the steam to finish cooking the rice.
  • Heat olive oil in a skillet over medium heat, then add the marinated chicken pieces.

    → Medium heat ensures the chicken cooks through without burning. Searing the chicken adds flavor through browning, which creates a delicious crust.
  • Cook the chicken for about 5-7 minutes, stirring occasionally until browned and cooked through, then add minced garlic in the last minute of cooking.

    → Adding garlic towards the end prevents it from burning and becoming bitter. Stir constantly to keep it from sticking to the pan while infusing the oil with its flavor.
  • Add the spinach or kale to the skillet and cook until wilted, about 1-2 minutes.

    → Cooking the greens briefly retains their vibrant color and nutrients while ensuring they integrate well with the chicken. Stir gently to mix everything together.
  • Season the dish with additional salt and pepper to taste.

    → Taste as you go! Adjusting seasoning enhances the flavors of all ingredients, ensuring a well-balanced dish.
  • Prepare to serve by placing a scoop of brown rice in a bowl, then layering the cooked chicken, sweet potatoes, and greens on top.

    → Assembling the bowl this way creates a visually appealing presentation, making each component easy to recognize while allowing for a variety of flavors in each bite.
  • Finish with a squeeze of fresh lemon juice over the top and add any optional toppings you desire, such as avocado, green onions, or sesame seeds.

    → The lemon juice brightens and balances the flavors in the dish, while toppings add texture and variety. Customize your bowl according to your taste preferences!
  • Serve immediately while everything is warm, and enjoy your nutritious chicken & sweet potato rice bowl!

    → Serving the dish warm enhances the flavors and makes the bowl more comforting. Enjoy each component’s distinct taste while benefiting from a balanced meal.

Notes

  • Chicken
    These chicken and sweet potato rice bowls are a perfect blend of protein and nutrients. To ensure your chicken breast cooks evenly, try to cut it into pieces that are similar in size. Marinating beforehand not only infuses flavor but also helps in keeping the chicken moist during cooking. Spice it up with your favorite blend, whether it’s a simple salt and pepper mix or a more complex marinade to suit your taste.
  • Sweet Potatoes
    Sweet potatoes are not only delicious but are also packed with vitamins and fiber. When preparing them, cutting them into uniform cubes helps them cook more evenly. Roasting them in the oven can transform their natural sweetness; make sure to toss them in olive oil and a pinch of salt before baking. Aim for a golden-brown exterior to enhance their flavor.
  • Brown Rice
    Using brown rice as your base adds a nutty flavor and a wealth of nutrients to your bowl. Rinsing the rice helps with the cooking process, removing excess starch that can make it gummy. If you want to elevate the flavor, consider simmering the rice in broth—this gives a satisfying depth to the dish. Keep an eye on the water level to ensure you achieve that fluffy texture.
  • Olive Oil
    Opt for high-quality extra virgin olive oil when cooking; not only does it enhance the flavor, but it also provides healthy fats. Use it generously to toss the sweet potatoes before roasting, as this promotes even cooking and prevents sticking. Drizzling it over the chicken while sautéing keeps it juicy and adds a lovely flavor profile.
  • Garlic
    Garlic is a foundational ingredient that brings your dish to life with its distinctive aroma and flavor. For the best results, finely mince or crush fresh garlic and add it towards the end of cooking the chicken to avoid burning it. This will allow the garlic to infuse its delightful flavor without taking on a bitter taste.
  • Spinach or Kale
    Adding leafy greens like spinach or kale is an easy way to boost the nutritional value of your bowl. These greens are best added once the chicken and sweet potatoes are cooked; they only require a brief cooking time until wilted. If using kale, chop it into small pieces for easier eating, and remember to remove any tough stems.
  • Salt and Pepper
    To truly bring out the flavors of each ingredient, don’t forget to season with salt and freshly ground black pepper. Sea salt enhances the natural flavors of the chicken and sweet potatoes while black pepper adds a mild spice. Start with small amounts and adjust as you go to achieve the perfect balance.
  • Lemon Juice
    Fresh lemon juice is key to adding brightness to the dish. Squeeze it over everything just before serving to preserve its refreshing flavor. To enhance the taste even further, consider adding a touch of zest from the lemon peel—this brings an added citrusy aroma that complements the sweet potatoes beautifully.
  • Optional Toppings
    Feel free to personalize your bowl with delightful toppings such as sliced avocado for added creaminess, or chopped green onions for a fresh crunch. A spoonful of Greek yogurt can introduce a pleasant tang, and sesame seeds or crushed nuts add texture. Customize your creation to suit your preferences and make it uniquely yours!

Tips

Cooking Tips for Healthy Chicken & Sweet Potato Rice Bowl

  • Marinade Magic: Prior to cooking your chicken, marinate it for at least 30 minutes or up to overnight. This allows the spices to penetrate deeper, enhancing the flavor. Consider a mix of lemon juice, garlic, paprika, and an herb of your choice for a flavorful marinade.
  • Uniform Cooking: To ensure all your ingredients cook evenly, aim for uniform sizes when chopping vegetables. This is especially important for sweet potatoes and chicken to avoid having some pieces overcooked while others remain undercooked.
  • Perfectly Roasted Sweet Potatoes: To achieve perfectly roasted sweet potatoes, spread them out in a single layer on a baking sheet and avoid overcrowding. This allows them to caramelize rather than steam. Toss with a little olive oil, salt, and pepper for added flavor before roasting.
  • Rice Preparation: Let your cooked brown rice sit covered for 5-10 minutes after cooking to allow it to steam. This helps in making it fluffier. Fluff the rice with a fork before serving to separate the grains.
  • Watch the Garlic: For the best flavor, add minced garlic to the chicken during the last 2-3 minutes of cooking. This prevents the garlic from burning and becoming bitter, while still allowing its aroma to infuse the dish.
  • Greens Cooking: When adding spinach or kale, lightly sauté it with a pinch of salt. This enhances its flavor and preserves its vibrant green color. Avoid overcooking to maintain its nutrient profile.
  • Season Gradually: Start with a small amount of salt and pepper, tasting as you go. You can always add more, but it’s harder to fix an overly salty dish!
  • Finishing Touch: Just before serving, give your bowl a generous drizzle of fresh lemon juice. This not only brightens the flavors but also adds a refreshing citrus kick that pairs wonderfully with all the ingredients.
  • Personalize Your Bowl: Get creative with your toppings! Fresh herbs, a sprinkle of feta cheese, or a drizzle of balsamic reduction can elevate your rice bowl from good to great. Don’t hesitate to mix and match based on your flavor preferences!

FAQ

What are the main ingredients in the Healthy Chicken & Sweet Potato Rice Bowl?

The main ingredients include chicken breast, sweet potatoes, brown rice, spinach, garlic, olive oil, and various spices.

Can I use brown rice instead of white rice?

Yes, using brown rice is recommended for a healthier option as it is higher in fiber and nutrients.

How can I make this dish vegetarian?

You can substitute chicken with tofu or chickpeas and use vegetable broth instead of chicken broth.

Is this recipe gluten-free?

Yes, the Healthy Chicken & Sweet Potato Rice Bowl can be made gluten-free by ensuring the rice and other ingredients do not contain gluten.

How many servings does this recipe yield?

This recipe typically yields about 4 servings, depending on portion sizes.

Can I meal prep this dish in advance?

Absolutely! This dish stores well in the refrigerator and can be made in advance for meal prepping.

How long can I store leftovers?

Leftovers can be stored in an airtight container in the refrigerator for up to 4 days.

What can I serve with this rice bowl?

You can serve it with a side of fresh salad, steamed vegetables, or a yogurt-based sauce for added flavor.

Introduction

Imagine the aroma of roasted garlic filling your kitchen, the delightful nutty fragrance of Parmesan cheese wafting through the air, and the warm, sweet scent of sweet potatoes browning to perfection. If just the thought makes your mouth water, then you’re in for a treat. Garlic Parmesan Sweet Potato Wedges are a revelatory take on a classic side dish, elevating humble sweet potatoes to a new level of culinary delight. These wedges are not only indulgent and satisfying but also bring a delicious twist to any meal. Perfectly crisp on the outside and tender on the inside, they offer a symphony of flavors that is hard to resist.

Whether you’re looking for an exciting side dish for your weeknight dinners or a stand-out addition to your party menu, these Garlic Parmesan Sweet Potato Wedges deliver every time. They strike the perfect balance between the earthy sweetness of the potatoes and the sharp, savory notes of freshly grated Parmesan. The subtle heat from the garlic enhances the dish, making each bite an exciting journey for your taste buds. But there’s more to this dish than just taste — its simplicity and versatility make it a kitchen staple that you’ll want to make again and again.

The Story Behind the Dish

Sweet potatoes have a rich history and cultural significance, tracing back thousands of years. Originating in Central and South America, sweet potatoes were a staple in the diets of indigenous peoples. They later traveled to Europe with Christopher Columbus and have since become a beloved component of cuisines around the world. In the United States, sweet potatoes are closely associated with Southern cooking, particularly during the fall and winter months when they feature prominently in dishes like casseroles and pies.

Garlic Parmesan Sweet Potato Wedges take this historic ingredient and transform it with a modern twist. By infusing them with flavors of garlic and Parmesan, which have their own storied pasts, this dish becomes an homage to culinary traditions across multiple cultures. Garlic, known for its health benefits, has been used in cooking and medicine for centuries, while Parmesan originates from the Parma region in Italy and is celebrated worldwide for its robust and umami-rich profile.

Why You’ll Love This Recipe

  • Simple Ingredients: Made with ingredients you probably already have in your kitchen.
  • Quick and Easy: From prep to plate in under an hour, making them ideal for any meal.
  • Healthy Choice: Sweet potatoes are packed with nutrients, including fiber and vitamins A and C.
  • Versatile: A perfect side dish, appetizer, or snack that pairs well with various entrees.
  • Customizable: Easily tailored to fit dietary preferences or tastes with simple substitutions.

Flavor Profile & Texture

These wedges boast an intriguing balance of flavors that keep you reaching for more. The natural sweetness of sweet potatoes is enhanced by roasting, bringing out their caramelized notes. Garlic infuses a subtle pungency that cuts through the sweetness, while the Parmesan cheese provides a savory, nutty contrast that lingers on your palate. Rosemary and other herbs can be added for an earthy robustness, enriching the overall flavor profile.

Texturally, these wedges are a delight. Achieving that perfect balance of crispy exteriors and soft, fluffy interiors is the hallmark of a well-executed wedge. The secret lies in high-temperature roasting, which gives them that desirable crunch while keeping the inside moist and tender. Parmesan, when baked, forms a delectable crust that crumbles beautifully with each bite.

Occasions & Pairings

These wedges are incredibly adaptable, making them suitable for a variety of occasions. They’re a fantastic side for barbecue nights, offering a unique alternative to regular fries. Think of them as an upgrade for burger meals or grilled chicken platters during summer cookouts. During festive gatherings, their rich flavor makes them a perfect companion to roasts and holiday turkeys.

In terms of pairings, consider balancing them with a light green salad or a creamy dipping sauce, such as a cool garlic aioli or herbed yogurt dip. For drinks, a chilled sauvignon blanc or a crisp lager complements the cheesy, garlicky goodness of the wedges beautifully. And for a luxurious touch, serve these with a sparkling wine, which will create a delightful contrast with their richness.

Tips, Variations & Substitutions

While the classic recipe is already a hit, there are numerous ways to customize these wedges to fit your needs or explore new flavors:

  • Vegan Version: Omit the Parmesan or use a vegan cheese alternative to keep the wedges dairy-free.
  • Spice It Up: Add a pinch of chili flakes or cayenne pepper for a spicy twist.
  • Herbaceous Notes: Experiment with fresh herbs like thyme, basil, or cilantro to enhance the flavors.
  • Low-Carb Option: For a lower carb version, consider using turnips or rutabagas instead of sweet potatoes.

Storage & Make-Ahead Ideas

The flexibility of Garlic Parmesan Sweet Potato Wedges extends to how you can store and prepare them. If you have leftovers (which is rare), store them in an airtight container in the refrigerator for up to 3 days. When you’re ready to enjoy them again, reheat in the oven at 350°F (175°C) until warmed through and crispy.

For those who love to plan ahead, these wedges can be prepared in advance. Simply cut and season the potatoes and store them in the refrigerator for up to 24 hours before cooking. This means you can have your wedges ready in no time when mealtime arrives. They are also freezer-friendly — just follow the recipe until baking, then freeze the wedges on a baking sheet. Once frozen, transfer them to a freezer-safe container, and they will keep for up to 2 months.

Fun Facts & Trivia

Did you know that sweet potatoes are not actually related to regular potatoes? Despite their similar names, they come from different plant families. Sweet potatoes are part of the morning glory family, while white potatoes belong to the nightshade family. Also, in North America, what we often call “yams” are actually sweet potatoes; true yams are a different species altogether, native primarily to Africa and Asia.

Garlic, another star of this dish, has its own interesting trivia. In ancient times, it was considered both food and medicine. Egyptian slaves were reportedly given garlic to boost their strength as they built the pyramids. It was also believed to ward off vampires and evil spirits — aromatically intoxicating with plenty of folklore to boot!

Ingredients

  • Sweet Potatoes
    → Sweet potatoes serve as the star of this dish, providing natural sweetness and a creamy texture. Choose medium to large-sized sweet potatoes for even roasting. To prepare, wash and scrub the skins clean, then cut them into wedges, ensuring they are uniform in size for consistent cooking.
  • Olive Oil
    → Olive oil is essential for roasting the sweet potatoes and helps them achieve a crisp exterior while keeping the inside tender. Use extra virgin olive oil for its rich flavor. Toss the sweet potato wedges in the oil to ensure they are evenly coated, which aids in the roasting process.
  • Garlic Powder
    → Garlic powder adds a robust, savory flavor that complements the sweetness of the potatoes. It is more concentrated than fresh garlic and distributes evenly throughout the dish. Use a generous amount to infuse the wedges with garlicky goodness.
  • Parmesan Cheese
    → Freshly grated Parmesan cheese gives the sweet potato wedges a delightful umami flavor and a crispy texture when roasted. Opt for high-quality cheese for the best flavor. For an even coating, sprinkle the cheese over the wedges shortly before they finish roasting, allowing it to melt and crisp up.
  • Salt
    → Salt enhances the natural flavors of the sweet potatoes and balances their sweetness. Use coarse sea salt or flaky sea salt for a burst of flavor. Sprinkle moderately over the wedges before roasting, and adjust to taste once they’re cooked.
  • Pepper
    → Freshly cracked black pepper adds a subtle heat and depth to the flavor profile. It works in harmony with the garlic and Parmesan. Use a pepper mill to grind just before use, ensuring the freshest taste.
  • Paprika (optional)
    → Paprika can add a smoky depth to the sweet potato wedges, enhancing their flavor profile. Choose sweet or smoked paprika based on your preference. Add a teaspoon to the seasoning mix for a lively color and additional taste. Adjust the amount based on how much smokiness you desire.

Instructions

  • Preheat your oven to 425°F (220°C) and line a baking sheet with parchment paper or foil.

    → Preheating the oven is crucial as it ensures that the sweet potato wedges start cooking immediately when placed inside, leading to better caramelization and a crispier texture. Lining the baking sheet helps prevent sticking and makes for easier cleanup.
  • Wash and scrub 2 large sweet potatoes until the skins are clean, then cut them into wedges.

    → Cleaning the sweet potatoes removes any dirt or debris that could impact flavor. Cut the sweet potatoes into wedges of uniform size (about 1-inch thick) to ensure they cook evenly. You can cut them in half lengthwise and then slice each half into several wedges.
  • In a large bowl, combine the sweet potato wedges with 3 tablespoons of extra virgin olive oil.

    → Using a large bowl allows for enough space to toss the wedges without overcrowding, ensuring every piece is evenly coated with oil. Olive oil helps the wedges caramelize beautifully and adds flavor during roasting.
  • Add 2 teaspoons of garlic powder, 1 teaspoon of salt, ½ teaspoon of freshly cracked black pepper, and optional 1 teaspoon of paprika to the bowl with the sweet potato wedges.

    → Garlic powder, salt, pepper, and paprika contribute not only to flavor but also to the overall taste profile of the dish. The garlic powder will season the wedges effectively, and the salt enhances their natural sweetness. Adjust the quantities based on your taste preference.
  • Toss the sweet potato wedges well until evenly coated with the oil and seasonings.

    → This step is essential for ensuring that every wedge has a good coverage of oil and spices. Use your hands or a spatula to mix thoroughly; this will promote even roasting and prevent any areas from becoming bland.
  • Spread the seasoned wedges in a single layer on the prepared baking sheet, ensuring they are not overlapping.

    → Spacing the wedges properly allows hot air to circulate around each piece, which is vital for achieving a crispy texture. Overlapping them can lead to steaming rather than roasting, resulting in a soggy product.
  • Roast in the preheated oven for 25-30 minutes, flipping halfway through to ensure even browning.

    → Flipping the wedges allows for both sides to brown evenly and develop that desirable crispy exterior. Keep an eye on them toward the end – the wedges should be fork-tender and caramelized to a deep golden-brown.
  • In the last 5 minutes of roasting, remove the baking sheet from the oven and sprinkle ¼ cup of freshly grated Parmesan cheese over the wedges.

    → Adding Parmesan towards the end of the roasting process ensures it melts and adheres to the sweet potatoes without burning. Freshly grated cheese will create a delicious, crispy layer that elevates the dish.
  • Return the baking sheet to the oven and roast for an additional 5 minutes, or until the cheese is melted and golden.

    → Observing the cheese closely during this last phase prevents it from overcooking. The perfect finish will be a crisp cheese layer that adds a delightful texture and enhances the flavor of the sweet potatoes.
  • Remove the sweet potato wedges from the oven and let them cool for a minute on the baking sheet.

    → Allowing the wedges to sit for a moment helps set the cheese and make them easier to handle. This brief cooling period also prevents burns when served.
  • Serve warm, garnished with additional Parmesan cheese and fresh herbs if desired, and enjoy your Garlic Parmesan Sweet Potato Wedges.

    → Serving the wedges warm reveals the creamy texture and brings out the flavors beautifully. Adding fresh herbs, like parsley or thyme, can introduce a bright note to balance the richness.

Notes

These Garlic Parmesan Sweet Potato Wedges are a deliciously crunchy side dish that pairs wonderfully with almost any meal. The natural sweetness of the roasted sweet potatoes balances perfectly with the savory garlic and Parmesan flavors, creating a mouthwatering experience. To ensure even cooking and maximum crispiness, cut the sweet potatoes into uniform wedges. Tossing them in olive oil before roasting is key to achieving that ideal crunch and tenderness. For an extra burst of flavor, feel free to experiment with additional herbs like rosemary or thyme, or add a sprinkle of cayenne for a kick of heat.

Once roasted, these wedges are best enjoyed fresh out of the oven, but they can also be stored in an airtight container in the fridge for a few days. Simply reheat them in the oven to restore their crispy texture. They also make a great addition to salads or as a topping for grain bowls. Consider serving these wedges with a dip such as aioli or Greek yogurt for a delightful combo. Always remember to use freshly grated Parmesan for the best taste, and feel free to adjust the seasoning to suit your palate.

Tips

  • Choosing Sweet Potatoes: When selecting sweet potatoes, look for ones that are firm and free from blemishes or soft spots. The skin should have a vibrant, consistent color, indicating freshness. If possible, buy organic sweet potatoes to avoid any pesticide residues.
  • Cuts and Size: Aim to cut your wedges about 1 inch thick. This size helps them roast evenly and ensures they have that perfect balance between crispy outside and fluffy inside. If they’re too thin, they may cook too quickly and burn, while thick cuts may require longer cooking times.
  • Coating with Olive Oil: For best results, place the wedges in a large mixing bowl and add the olive oil before tossing. This method ensures that all surfaces get coated, leading to a more even roast. You can also use a brush to apply oil directly if you prefer less mess.
  • Garlic Powder Distribution: To enhance the garlic flavor, mix garlic powder with the olive oil before tossing with the sweet potatoes. This helps the garlic powder to dissolve and evenly coat the wedges.
  • Melting the Parmesan: To ensure the Parmesan cheese gets crispy and adheres well, add it during the last 5-10 minutes of roasting. Optionally, you can broil them for 1-2 minutes at the end to achieve a perfect golden crust on the cheese.
  • Adjusting Seasonings: Taste is key! After the wedges come out of the oven, give them a quick sprinkle of additional salt and pepper if needed. This is much easier than fixing it before cooking since flavors intensify during roasting.
  • Serving Suggestions: These sweet potato wedges pair beautifully with dips such as garlic aioli, ranch, or a spicy sriracha mayo. For a complete meal, serve them alongside grilled chicken or fish, or toss them into a salad for added texture and flavor.
  • Storing Leftovers: Any leftover wedges can be stored in an airtight container in the fridge for up to 3 days. Reheat them in the oven for a few minutes to regain their crispiness, as microwaving can make them soggy.

FAQ

What are garlic parmesan sweet potato wedges?

Garlic parmesan sweet potato wedges are a delicious side dish made from sweet potatoes that are cut into wedge shapes, coated with garlic, parmesan cheese, and various seasonings, then baked until crispy.

How do I prepare sweet potatoes for the recipe?

To prepare sweet potatoes, wash them thoroughly, peel if desired, and cut them into wedges. Make sure to keep them relatively uniform in size for even cooking.

What ingredients do I need to make garlic parmesan sweet potato wedges?

The main ingredients include sweet potatoes, olive oil, minced garlic, grated parmesan cheese, salt, pepper, and optional seasonings like paprika or Italian herbs.

Can I use other types of potatoes instead of sweet potatoes?

Yes, you can substitute regular potatoes, such as Russets or Yukon Golds, if you prefer, but the flavor and texture will differ from the sweet potatoes.

How long does it take to bake the sweet potato wedges?

Typically, garlic parmesan sweet potato wedges take about 25-30 minutes to bake at 425°F (220°C), but cooking time may vary based on the size of the wedges.

Can I make these wedges in advance?

Yes, you can prep the sweet potato wedges in advance, toss them with the seasonings, and store them in the refrigerator for a few hours before baking. However, they are best enjoyed fresh and crispy.

What can I serve with garlic parmesan sweet potato wedges?

These wedges pair well with a variety of dishes, including grilled meats, burgers, or as a tasty snack with dipping sauces like ranch, garlic aioli, or ketchup.

Are garlic parmesan sweet potato wedges healthy?

Sweet potatoes are rich in vitamins, minerals, and fiber, making garlic parmesan sweet potato wedges a healthier alternative to regular fries, especially when baked instead of fried.

Introduction: A Delightful Indulgence

Imagine a dessert that is as indulgent as it is nutritious. A bowl of velvety chocolate pudding that tantalizes your taste buds with rich, creamy bliss. What if I told you that this isn’t just your ordinary dessert, but a high-protein treat that fuels your body and keeps your health concerns at bay? Welcome to the world of High Protein Chocolate Chia Seed Pudding. This unique twist on a classic dessert elevates the regular pudding experience to a new realm of deliciousness, blending the decadent taste of chocolate with the superfood power of chia seeds. This pudding offers a perfect balance of textures and flavors, making it not only a guilt-free pleasure but also a nourishing boost you can enjoy any time of day.

The Story Behind the Dish

Chocolate pudding has been a staple in comfort food circles for generations, often associated with nostalgia and warmth. Its roots can be traced back to the bustling kitchens of the early 19th century, when it was revolutionarily simple yet achieved a sublime richness that made it a favorite among both children and adults. As food science evolved, so did our understanding of nutrition and the importance of catering both to indulgence and dietary needs.

Chia seeds, first cultivated by the ancient Aztecs and Mayans, were hailed as a powerhouse of strength. These diminutive seeds were more than mere food; they were believed to offer sustained energy and strength, vital attributes for warriors and messengers of the era. Fast forward to today, and chia seeds have found a place in the modern diet, celebrated for their high fiber content, ability to absorb liquid, and role as an excellent plant-based protein source.

Combining the luxurious taste of chocolate with the nutritious punch of chia seeds has given birth to a dessert that not only satisfies sweet cravings but does so with a health-conscious mindset. The resulting High Protein Chocolate Chia Seed Pudding bridges this traditional comfort food with contemporary health knowledge, inviting everyone to savor a dish steeped in history, yet perfectly suited for today’s lifestyle.

Why You’ll Love This Recipe

  • Protein-Packed: Ideal for fitness enthusiasts or anyone looking to add more protein to their diet without compromising on taste.
  • Quick and Easy: Requires minimal preparation and can be made ahead of time, perfect for busy schedules.
  • Versatile: Suitable for breakfast, a snack, or a dessert. Can be enjoyed by kids and adults alike.
  • Allergy-Friendly: Easily adaptable to be vegan, gluten-free, and dairy-free.
  • Nutritious: Chia seeds are loaded with antioxidants, fiber, and omega-3 fatty acids.

Flavor Profile & Texture

This pudding is a delightful dance of flavors and textures. At first bite, you’re greeted with the smooth, rich taste of chocolate, which is both decadent and inviting. The chocolate melts seamlessly in your mouth, enhanced by the subtle crunch of chia seeds, which provide a playful contrast to the creaminess of the pudding.

The natural sweetness is perfectly balanced, neither overpowering nor understated, allowing the cocoa’s full-bodied aroma to shine through. A hint of vanilla rounds out the flavors, adding a sweet warmth that complements the chocolate beautifully. The texture is unique, reminiscent of tapioca or rice pudding, but with an added level of sophistication. This culinary harmony makes each spoonful irresistibly enjoyable, satisfying both the craving for a treat and the desire for a nourishing dish.

Occasions & Pairings

The High Protein Chocolate Chia Seed Pudding is versatile enough to be served on a myriad of occasions. It fits effortlessly into a leisurely breakfast, a refreshing afternoon snack, or a sumptuous dessert. Picture serving small cups of this pudding as part of a sophisticated brunch spread or pairing it with a scoop of coconut milk ice cream for a post-dinner treat.

Pair this pudding with a cup of freshly brewed coffee or a glass of almond milk for the perfect balance of flavors. Consider garnishing it with elements like fresh berries, shredded coconut, or sliced almonds to add an extra dimension and make it a centerpiece on any celebratory table. Whether enjoyed solo or with companions, this pudding promises to be a crowd-pleaser.

Tips, Variations & Substitutions

Customization Ideas:

  • Add Some Spice: Incorporate a pinch of cinnamon or chili powder to give it a spicy twist.
  • Fruity Flair: Top with fresh or dried fruits like raspberries, strawberries, or mango for enhanced freshness.
  • Nutty Notes: Sprinkle with crushed nuts like almonds, pecans, or pistachios for added crunch.

Dietary Modifications:

  • Vegan-Friendly: Use plant-based milk alternatives like almond, soy, or oat milk.
  • Low-Carb Options: Sweeten with a natural, low-calorie sweetener like stevia or monk fruit extract.
  • Gluten-Free Assurance: Ensure all chocolate components and toppings are certified gluten-free.

Storage & Make-Ahead Ideas

One of the many conveniences of this pudding is its longevity. It can be prepared in advance and stored in the refrigerator for up to five days, making it a perfect option for meal prepping. To store, seal the pudding in an airtight container or cover your serving bowls tightly to prevent drying out or absorbing other fridge odors.

If you want to prepare it even further in advance, consider freezing individual portions. When ready to enjoy, simply defrost a serving in the refrigerator overnight and give it a good stir to restore its luscious consistency. Reaching for this pudding during the week not only saves time but also ensures you always have a healthy snack option ready to go.

Ingredients

  • Chia Seed Base
    • 1/2 cup chia seeds
      → Chia seeds are the star ingredient of this pudding, providing a unique gel-like texture that forms when they absorb liquid. These tiny seeds are rich in omega-3 fatty acids, fiber, and protein, making the pudding not only delicious but also highly nutritious. It’s essential to let them soak in liquid to achieve the desired pudding consistency.
    • 2 cups unsweetened almond milk (or any milk of choice)
      → Almond milk is used as the base liquid for the pudding, contributing a creamy texture without the added calories of dairy. You can use any milk, such as coconut or oat milk, depending on preference. Ensure that it is unsweetened to keep the flavors balanced, particularly if additional sweeteners are added later.
    • 1/4 cup pure maple syrup or honey (adjust to taste)
      → Maple syrup or honey acts as a natural sweetener, adding a touch of sweetness to the pudding. Adjust the amount based on your preference for sweetness. If using honey, make sure it’s at room temperature or slightly warmed to blend well into the cold mixture.
    • 1/4 cup unsweetened cocoa powder
      → Cocoa powder provides the rich chocolate flavor in the pudding. Choose high-quality, unsweetened cocoa powder for the best depth of flavor. It should be sifted directly into the mixture to avoid clumps, ensuring a smooth, creamy pudding.
    • 1 teaspoon vanilla extract
      → Pure vanilla extract enhances the flavor profile of the pudding, adding warmth and complexity. Always opt for pure extract over artificial vanilla to achieve a more authentic taste. Add it towards the end of mixing to preserve its aromatic qualities.
    • Pinch of salt
      → A pinch of salt heightens the overall flavor of the pudding, balancing the sweetness and bringing out the chocolate richness. It’s important not to overdo it; a small amount goes a long way in enhancing the taste.
  • Optional Toppings
    • Fresh berries (strawberries, blueberries, or raspberries)
      → Fresh berries add a burst of flavor and a colorful presentation to the pudding. They provide a natural sweetness and a juicy contrast to the creamy pudding. Rinse them under cold water just before serving to remove any dirt or impurities.
    • Chopped nuts (almonds, walnuts, or pecans)
      → Chopped nuts contribute a crunchy texture and additional protein, elevating the health benefits of your pudding. Toasting the nuts slightly can enhance their flavor. Make sure to chop them finely to ensure even distribution and ease of eating.
    • Shredded coconut (unsweetened)
      → Shredded coconut adds a chewy texture and tropical flavor to the pudding. Unsweetened coconut is recommended to maintain control over the overall sweetness of the dish. Add it just before serving to keep it fresh and crunchy.
    • Dark chocolate chips or cacao nibs
      → Chocolate chips or cacao nibs are perfect for chocolate lovers looking to intensify the chocolate experience of this pudding. Use high-quality dark chocolate for the best flavor, and add them just before serving to keep them melty and delightful.

Instructions

  • Gather all the ingredients and kitchen tools before you start.

    → This ensures a smooth cooking process without interruptions. You will need measuring cups, a mixing bowl, a whisk or spoon, a refrigerator, and serving bowls for later.
  • In a large mixing bowl, combine ½ cup chia seeds with 2 cups unsweetened almond milk.

    → Start by pouring the almond milk over the chia seeds. Stir gently with a whisk or spoon to ensure the seeds are evenly distributed in the liquid. This is crucial as it prevents the seeds from clumping together and helps them hydrate properly.
  • Add ¼ cup pure maple syrup (or honey), ¼ cup unsweetened cocoa powder, 1 teaspoon vanilla extract, and a pinch of salt to the mixing bowl.

    → Pour the maple syrup slowly into the mixture to allow it to blend smoothly. Sift the cocoa powder directly into the bowl to avoid lumps and ensure a uniform texture. Stir everything together thoroughly to dissolve any clumps and mix the ingredients evenly; this step is vital for the final flavor.
  • Whisk the entire mixture for about 2 minutes until it becomes thick and creamy.

    → This helps to activate the chia seeds’ gelling properties, ensuring the pudding has a rich, velvety texture. The mixture should start to expand and thicken as the chia seeds absorb the liquid.
  • Cover the bowl with plastic wrap or a lid and place it in the refrigerator for a minimum of 4 hours, or preferably overnight.

    → Letting the pudding sit in the fridge allows the chia seeds to absorb the liquid completely and swell, achieving the perfect pudding consistency. Overnight chilling enhances the flavor and texture even more.
  • After the resting period, check the consistency of the pudding.

    → The pudding should be thick and creamy. If it’s too thick, you can stir in a little more almond milk to reach your desired consistency, ensuring it remains creamy and smooth.
  • Prepare your optional toppings just before serving.

    → Rinse fresh berries under cold water and pat dry; chop the nuts if using; and have shredded coconut or chocolate chips ready. Preparing these beforehand makes assembly quicker and easier.
  • Serve the chia pudding in individual bowls or glasses.

    → Use a spoon to scoop the pudding evenly into the serving dishes, ensuring that each portion is filled and looks appealing. This presentation enhances the eating experience!
  • Add your choice of toppings, like fresh berries, chopped nuts, shredded coconut, or dark chocolate chips.

    → Layer the toppings creatively on top of the pudding to make it visually dynamic. This not only adds texture and flavor but also makes the dish look enticing.
  • Enjoy your high-protein chocolate chia seed pudding immediately or store any leftovers in the refrigerator for up to 5 days.

    → If storing, cover the pudding to keep it fresh. This pudding is great for meal prepping and can be enjoyed as breakfast, a snack, or dessert!

Notes

These high protein chocolate chia seed puddings are a delicious and nutritious dessert or snack option. Chia seeds not only add a unique texture but also pack a powerhouse of omega-3 fatty acids, fiber, and protein, making this pudding a healthy choice. Be sure to let the chia seeds soak in the almond milk for a few hours or overnight to achieve the perfect pudding consistency. You can easily customize the flavor by adjusting the sweetness level with maple syrup or honey and choosing different types of milk based on your dietary preferences.

When it comes to toppings, fresh berries add not just flavor, but also a beautiful presentation to your dish. A sprinkle of chopped nuts can provide a delightful crunch while enhancing the protein content further. For those who appreciate a tropical twist, unsweetened shredded coconut works wonderfully, and for chocolate lovers, adding a few dark chocolate chips or cacao nibs can take the experience to the next level. Remember to prepare these toppings just before serving to maintain their freshness and texture.

Enjoy your chocolate chia seed pudding as a healthy breakfast, snack, or dessert option. Not only is it customizable, but you can make a batch ahead of time to enjoy throughout the week. This pudding keeps well in the refrigerator and can be a perfect grab-and-go option filled with nutrients!

Tips

Cooking Tips for High Protein Chocolate Chia Seed Pudding

  • Soaking Time: Ensure you soak the chia seeds in the almond milk for at least 2 hours or overnight. This allows them to absorb the liquid fully and develop that perfect gel-like texture for your pudding.
  • Mix Thoroughly: When combining the chia seeds and milk, whisk vigorously to prevent clumping. Chia seeds can stick together, so a thorough mix will help achieve a smoother pudding consistency.
  • Flavor Variations: Feel free to experiment with the flavors! Try adding a pinch of cinnamon or a dash of espresso powder for a unique twist on the chocolate pudding.
  • Texture Preferences: If you prefer a creamier pudding, blend the mixture in a blender until smooth after the chia seeds have absorbed the liquid. Just be sure to let it sit afterward so the chia seeds can thicken it up again.
  • Chill Before Serving: For the best experience, chill the pudding for a couple of hours before serving. This helps the flavors meld and enhances the overall taste and texture.
  • Storage Tips: Store any leftover pudding in an airtight container in the refrigerator. It can last for up to 5 days, making it a great meal prep option for a nutritious snack throughout the week.
  • Serving Ideas: Layer the pudding in jars or cups with your chosen toppings for a beautiful presentation. This makes it ideal for serving at gatherings or as a delightful treat for yourself.
  • Topping Combinations: Consider combining different toppings, such as berries and chopped nuts, for a burst of flavor and texture in each bite. This not only enhances the taste but also adds visual appeal.

FAQ

What are the main ingredients in High Protein Chocolate Chia Seed Pudding?

The main ingredients include chia seeds, cocoa powder, protein powder, almond milk (or other milk alternatives), sweetener (like honey or maple syrup), and vanilla extract.

How do chia seeds contribute to the protein content?

Chia seeds are a great source of plant-based protein, providing about 5 grams of protein per 2 tablespoons, as well as healthy fats and fiber.

Can I use any type of milk for this recipe?

Yes, you can use any type of milk, including almond milk, soy milk, coconut milk, or regular dairy milk, based on your dietary preferences.

How long should I let the pudding set in the fridge?

You should let the pudding set for at least 2 hours, but for best results, it’s recommended to refrigerate it overnight for a thicker consistency.

Can I add fruits or toppings to my pudding?

Absolutely! You can top your pudding with fruits like bananas, berries, or nuts, and even add a dollop of yogurt or whipped cream for extra richness.

Is this recipe suitable for vegan diets?

Yes, as long as you use a plant-based protein powder and a non-dairy milk, this recipe is entirely vegan-friendly.

How do I sweeten the pudding?

You can sweeten the pudding with honey, maple syrup, agave nectar, or even use a sugar substitute like stevia or erythritol, depending on your preference.

Can I meal prep this pudding?

Yes, this pudding is great for meal prepping! You can make a batch and store it in individual containers in the refrigerator for up to 5 days.