Author

Ocean Nightleaf

Browsing

Introduction / Hook

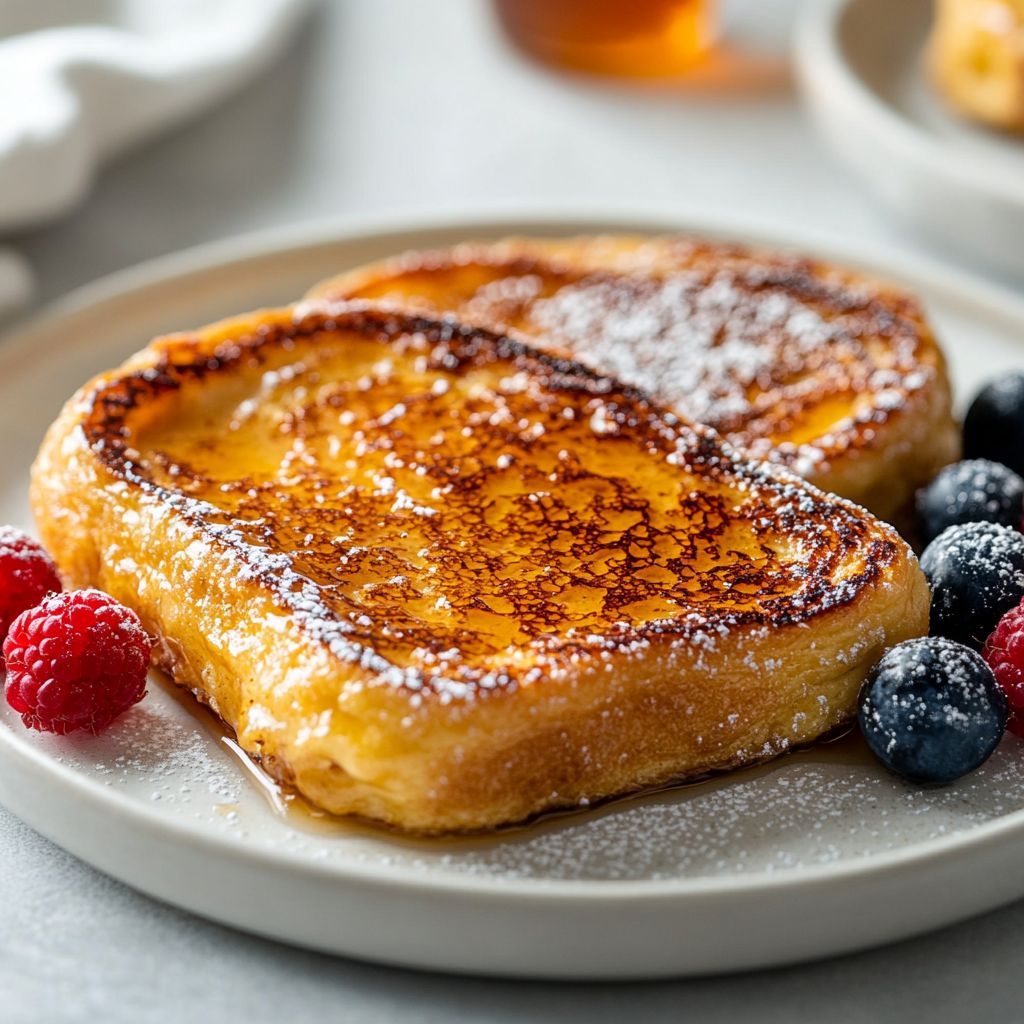
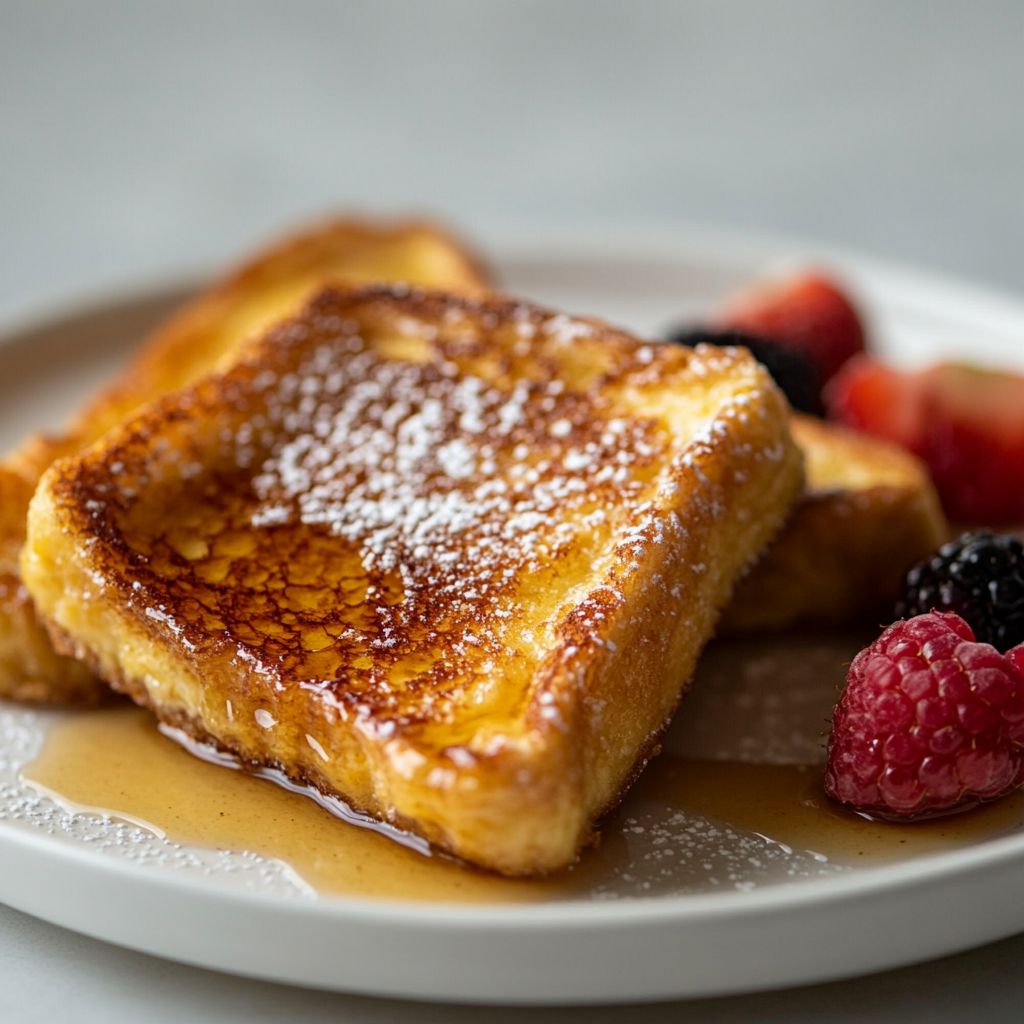
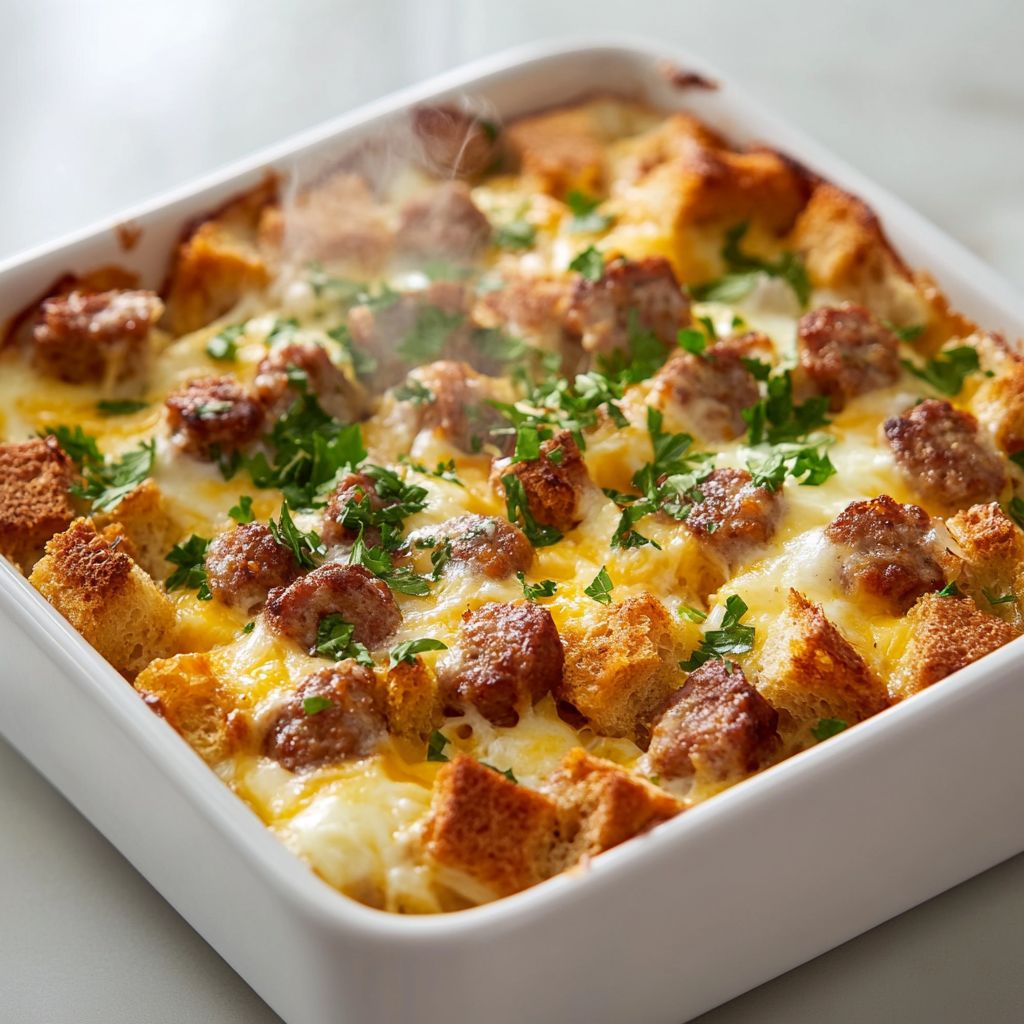
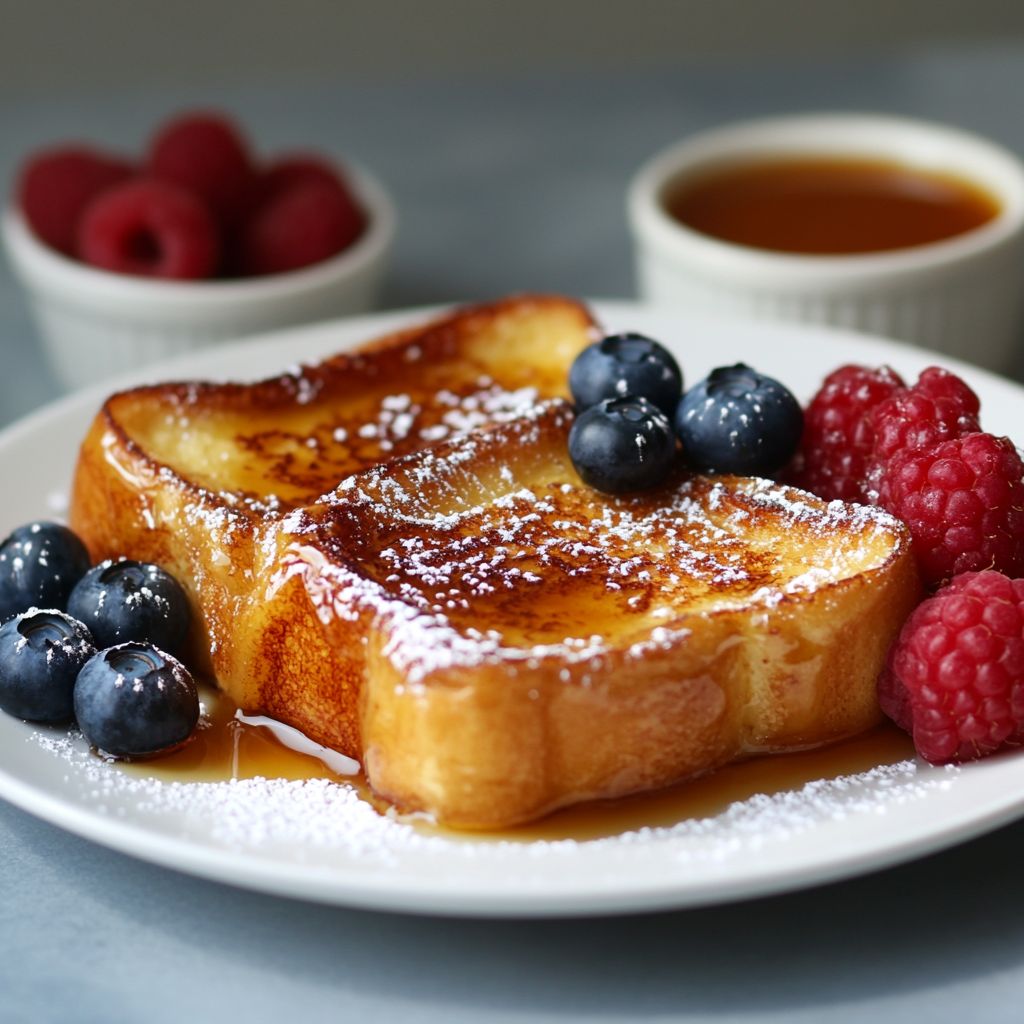
Imagine a breakfast that lingers like dessert and feels like a warm hug from the inside out. Crème Brûlée French Toast is not merely a dish; it’s a sensory experience that starts with the scent of vanilla and toasty brioche wafting through the kitchen, rising as a promise of indulgence. The exterior, kissed by heat, becomes a delicate caramelized crust that shatters with a satisfying crack when you press a fork into it. Beneath that glistening shell lies a custard-soft interior, rich and silky, reminiscent of the classic crème brûlée but transformed into a brunch-worthy treat. This is the kind of breakfast that turns a ordinary weekend into a small celebration, inviting slow bites, lingering aromas, and conversation that tastes just as good as the dish itself.

What makes this fusion so irresistible is the way it marries textures and temperatures: the crisp sugar surface that crackles with the glow of a kitchen torch, the creamy, custardy center that melts in the mouth, and the warm, slightly vanilla-scented air that surrounds you as you serve it. It’s a dish that satisfies both the sweet tooth and the appetite for comfort. The first bite offers a gentle sweetness, the second reveals a lush depth of eggy richness, and every subsequent bite reveals a faint hint of citrus or spice that keeps the palate awake. It’s not merely a recipe; it’s an invitation to slow down, savor, and share a moment of brunch theater with family and friends.

Crème Brûlée French Toast is the kind of recipe that makes people ask, “What’s the secret?” The beauty lies in the contrast—the toasty outside, the custardy core, and that crackly top that sounds like a mini celebration every time you break it open. It’s a breakfast that feels special without requiring a long list of complicated steps, a dish that looks restaurant-worthy on a Sunday morning and still feels cozy enough for a casual family brunch. As you plate it, you’ll notice how the colors—golden browns, pale ivory interiors, and the glistening caramel sheen—come together like a visual ode to comfort food, inviting you to dive in with a smile before the first bite even lands on your tongue.

Whether you’re cooking for one indulgent weekend treat or laying out a little brunch spread for a crowd, this French toast incarnation brings a sense of theater and warmth to the table. It’s a celebration of the familiar, familiarized in a new form. The result is not only a dish you’ll crave again and again but also a memorable experience you’ll want to recreate, again and again, for anyone who loves the simple, refined pleasure of a well-made breakfast that tastes like a dessert and feels like a hug.

The Story Behind the Dish

Creme brulee and French toast—the two cousins of rich, comforting breakfasts—come from different culinary worlds, yet they share a surprising kinship when you bring them together. Crème brûlée, with its custard base and a hard, caramelized sugar crust, hails from French patisserie traditions that treasure refined technique and a balance of textures. French toast, on the other hand, has roots that reach back to antiquity and cross-cultural kitchens where stale bread found a second, higher purpose through soaking and pan-frying in fat until it became golden and tender. The idea of blending the two isn’t merely a clever trick; it’s a storytelling approach to brunch that honors both classic methods and modern whimsy.

This particular rendition often traces its charm to weekend mornings when bakers and cooks crave a decadent finish to a humble slice of bread. The genius lies in borrowing the luscious, custard-like interior from crème brûlée and wrapping it in the comforting, bread-forward exterior of French toast. A silky custard tucked inside a sturdy slice—perhaps brioche or challah—picks up notes of vanilla, citrus zest, and warm spices as it sits and basks. Then the surface is lacquered with sugar and kissed with heat until the sugar crystallizes into a crackling, glassy crust—the moment when breakfast becomes theater. The crack of the top is a tiny ritual, a sound that signals the convergence of pastry science and kitchen artistry.

In many homes, improvisation plays a big role in this dish. A splash of cream or a curling thread of citrus zest sometimes makes its way into the custard, a whisper of cinnamon or nutmeg dusts the surface, and a torch or hot broiler seals the top into that unmistakable brûlée gloss. The result is a dish that feels both luxurious and approachable—brunch-worthy without demanding a complicated, multi-course preparation. That balance—elegant yet forgiving—has helped Crème Brûlée French Toast migrate from occasional splurges to a beloved staple in many kitchen repertoires, loved by early risers and late-night feast planners alike.

For those who learned to cook from family stories, the dish can carry a memory: a grandmother who kept the kitchen light with the hum of the stove, a story shared over frost-kissed windows, or a joyful first bite after a long week where every moment felt earned. The dish becomes a culinary memory as much as a recipe, a bridge between tradition and modern brunch culture. It’s the kind of dish that invites questions about technique, sparkles with the glow of the kitchen’s flame, and leaves you with a sense of accomplishment that’s both humble and indulgent—proof that great flavors don’t always require complexity, just thoughtful pairing of technique with good ingredients and a little spark of showmanship.

Why You’ll Love This Recipe

  • Brunch drama without fuss. A show-stopping dish that feels special without an overflowing to-do list. It looks impressive on the plate, yet the concept remains approachable for weekend cooks.
  • Texture heaven. A crisp, caramelized top that cracks open to reveal a creamy, custardy center—a textural contrast that sings with every bite.
  • Versatile ingredients. Brioche or challah give a rich, buttery backbone; custard components can be adapted with dairy or plant-based substitutes to fit dietary needs; flavor boosters like vanilla, citrus zest, or warming spices offer endless customization.
  • Make-ahead-friendly for entertaining. You can plan ahead and savor the moment together, knowing the foundation is built for a relaxed, unhurried service.
  • Elegant but comforting. It feels like a dessert but wears the gown of a breakfast dish—perfect for birthdays, anniversaries, Mother’s Day, or a simple weekend treat that tastes like a celebration.
  • Impressive for guests. The caramel top and the fragrant aroma wafting from the kitchen create a moment of anticipation that makes guests feel pampered and invited to linger at the table.
  • Room for customization. With optional toppings, spice twists, or citrus accents, you can tailor the dish to seasons, occasions, or personal preferences.

Flavor Profile & Texture

The first impression is the crackle—the delicate, glassy crust formed by a sugar top that has been heated until it melts and hardens into a lacquered surface. This top delivers a quick, satisfying crunch that gives way to a cloud-soft interior. Inside, the custard—rich with eggs and cream (or dairy-free alternatives)—offers a luxuriously silky mouthfeel that clings to the bread, a gentle sweetness balanced by vanilla’s warmth. The bread itself acts as a stage for the custard, soaking just enough so that each slice yields a tender bite rather than a dry edge or a soggy center.

The flavor is a refined harmony of indulgent dessert notes and comforting breakfast familiarity. Vanilla provides a clean, creamy tone that’s complemented by a hint of sweetness that isn’t cloying. Depending on your mood or pantry, you can lean into citrus brightness—zest from lemon or orange can brighten the custard and lift the entire dish with a subtle citrus perfume. A whisper of warm spices such as cinnamon, nutmeg, or cardamom can turn the flavor profile into a brunch-ready version of a holiday dessert, giving it a nostalgic twist without tipping into heavy dessert territory. The caramelized sugar top adds a toasty, slightly burnt sugar depth that contrasts perfectly with the custard’s mellow richness, creating a layered tasting experience that evolves from bite to bite.

Texture-wise, this dish plays with multiple sensations: the initial crisp snap of the burnt-sugar crust, the soft and creamy center, and the bread’s gentle chew. The bread choice is critical—the right bread provides a sturdy soak without disintegrating, ensuring the interior remains tender and flavorful, while the exterior achieves that coveted crackly veneer. When finished, the dish presents a glossy surface that glitters under warm lighting, inviting the senses to explore both aroma and flavor before a single bite is taken. It’s a masterclass in balanced contrasts, where sweetness is refined, texture is dynamic, and aroma lingers long enough to make mouths water even before tasting begins.

Occasions & Pairings

This dish shines at many gatherings and moments, from quiet weekend indulgences to lively brunches. It’s ideal for birthdays and anniversaries when you want to turn a standard morning into a celebratory event, or for holidays when the table sighs with gratitude at the sight of something sumptuous but not overly fussy. Because it pairs so gracefully with coffee, sparkling water, or a lightly fruity beverage, it can anchor a brunch spread or stand alone as the star of a small gathering.

Pairings to consider include:

  • Fresh berries or a berry compote to add brightness and color that plays against the creamy interior.
  • Maple syrup or a drizzle of honey for an extra layer of sweetness.
  • Whipped cream or vanilla yogurt for a dairy-forward finish that heightens the dessert-like feel.
  • Light fruit salads or citrus segments to cut through the richness and provide a refreshing balance.
  • Cavendish or lightly roasted coffee, or a sparkling beverage like prosecco or an orange-spiked mocktail for a celebratory touch.

Seasonality can also steer the pairings. In cooler months, a cinnamon-spiced syrup or a warm citrus reduction can accompany the dish, turning the plate into a comforting, winter-leaning treat. In spring or summer, bright berries and a dollop of yogurt or crème fraîche keep the dish light while preserving its indulgent center. This flexibility makes Crème Brûlée French Toast a versatile choice for various occasions, from intimate family mornings to larger, more festive gatherings where you want something that feels special but still comfortable and approachable.

Tips, Variations & Substitutions

  • Bread choices. Rich, sturdy bread is your best friend here. Brioche or challah offer a luxurious, tender crumb that soaks beautifully while maintaining structure. If you’re working with a different bread, consider slightly thicker slices and a gentler soak to avoid sogginess.
  • Vegan and dairy-free options. Use plant-based milk (almond, oat, or coconut) with a splash of dairy-free cream and a neutral oil or vegan butter for a similar mouthfeel. For the top, a sugar substitute that caramelizes well can be experimented with, though the classic crackle comes most reliably from regular sugar. Coconut sugar can provide a more nuanced caramel note while staying within plant-based parameters.
  • Flavor boosters. Add a pinch of citrus zest, such as orange or lemon, to the custard base for a bright lift. A dash of cinnamon, nutmeg, or cardamom can warm the profile without overpowering the vanilla.
  • Caramel top variations. The brûlée top can be achieved with white sugar, brown sugar for deeper caramel notes, or a mix. For a gluten-free twist, use a fine sugar that melts evenly and supports a smooth crust when torched or broiled.
  • Make-ahead concept. The custard can be prepared in advance and stored briefly, while the bread slices can be pre-soaked and kept refrigerated for a short period. On serving day, complete the dish with the brûlée topping just before finish to preserve the crackle and texture contrast.
  • Texture tweaks. If you prefer a softer top, reduce the amount of sugar used on the surface. For a crispier top, ensure you apply a thin, even coating of sugar that caramelizes evenly under high heat.
  • Regional twists. Incorporate a splash of espresso into the custard for an affogato-like accent or finish with a light drizzle of orange blossom honey for a Mediterranean twist. A hint of almond extract can add a subtle nutty layer that pairs beautifully with vanilla.

Storage & Make-Ahead Ideas

Crème Brûlée French Toast can be planned with future mornings in mind, making it a smart choice for entertaining. If you’ve made this dish for a crowd, the leftovers can be stored in the refrigerator for a couple of days. Reheating is best done in a low oven or a gentle toaster oven to preserve the crisp top and prevent the custard from becoming overly dense. If you’ve prepared the custard and soaked the bread in advance, keep the components refrigerated separately until you’re ready to assemble and finish with the brûlée top. When you want the crackle on the day of serving, rewarm gently and then apply the sugar topping and run a kitchen torch or broiler for that final lacquered shell just before plating.

For freezer-friendly options, you can freeze individual slices after they have cooled fully, wrapped tightly to prevent freezer burn. Thaw in the refrigerator overnight and reheat slowly to maintain the interior’s tenderness. The brûlée top, formed just before serving, will still provide that signature crack when you give it a gentle tap with a fork.

To maintain the dish’s balance over a longer weekend or a brunch marathon, consider preparing a few components ahead of time: slice and toast the bread a day before or lightly toast them, keep the custard mixture ready, and assemble on the morning of serving. This approach minimizes stress on the day of your event while still delivering the full crème brûlée experience that your guests crave. The key is to protect the integrity of the custard’s creaminess and to ensure the sugar top has the best chance to caramelize and crack when the moment arrives.

Fun Facts & Trivia (Optional)

  • Crème brûlée translates to “burnt cream” in French, a nod to the iconic crackling sugar crust that defines the dessert’s signature moment.
  • French toast is sometimes called “pain perdu” in France, which means “lost bread,” reflecting its clever repurposing of stale bread into something delicious.
  • The combination of custard and sugar crackle found in this dish is a delightful culinary bridge between two classic techniques—custard-based desserts and the flash caramelization perfected in French patisserie.
  • Many kitchens use a culinary torch to create the brûlée top, but a hot broiler or a very hot oven can also achieve the crackly crust when sugar is spread evenly and heated aggressively.
  • Variations of this dish are loved worldwide, with pastry chefs and home cooks alike embracing the idea of infusing the custard and topping with local flavors—matcha, chai spice, citrus glazes, or even a hint of amaretto for adults-only brunch moments.

Ingredients

  • French Toast Base
  • 6 thick-sliced brioche or challah bread, cut into 1-inch thick slices, preferably day-old for best soaking
    → The bread is the vehicle for the custard. Brioche or challah provides a rich, tender crumb that absorbs the custard without falling apart. If using fresh bread, toast lightly or dry in a low oven (250°F/120°C) for 5–8 minutes to reduce moisture and improve absorption.
  • 4 large eggs
    → Eggs form the custard’s structure and binding. Use eggs at room temperature for easier whisking and a uniform mixture. Beat thoroughly to fully combine yolks and whites; this ensures a smooth, cohesive soak.
  • 1 cup whole milk
    → Milk lightens the custard and helps it soak into the bread evenly. Whole milk gives more body; for a lighter version you can use 2% but expect a less creamy texture. For dairy-free, substitute with a fortified dairy-free milk and adjust sweetness and spices accordingly.
  • 1 cup heavy cream
    → Heavy cream adds richness and a luscious mouthfeel to the custard. If you prefer lighter, reduce to 3/4 cup or substitute part with more milk, but the result will be less custard-like and more bread pudding-like.
  • 1/2 cup granulated sugar
    → Sugar sweetens the custard and helps with browning during cooking. It also aids in dissolving into the liquid for a smooth texture. You may reduce by 2–4 tablespoons if you want a less sweet dish, but not below 1/4 cup.
  • 2 teaspoons pure vanilla extract
    → Vanilla provides warmth and depth to the custard. Real vanilla extract is preferred; if using vanilla bean, scrape seeds into the mixture for more intense aroma. Let the mixture rest a few minutes to bloom the vanilla.
  • 1/4 teaspoon ground cinnamon
    → Cinnamon complements the custard with warm spice notes and blends well with the brûléed topping. Freshly ground is best; you can adjust to taste, up to 1/2 teaspoon for stronger spice.
  • Pinch of fine sea salt
    → Salt enhances sweetness and depth, amplifying the vanilla and spice. Use a light hand to keep flavors balanced; it also helps the custard set properly.
  • 2 tablespoons unsalted butter, for cooking
    → Butter creates a flavorful, golden crust on both sides of the French toast and prevents sticking. Use medium-high heat to avoid burning; start with a small amount and add more as needed to cover the pan surface.
  • Caramel Brûlée Topping
  • 1/3 cup granulated sugar
    → This sugar is melted and caramelized to form the crisp, amber crust on top of each toast slice. Work with a clean, dry pan over medium heat; avoid stirring once the sugar begins to melt to prevent crystallization. Caramel should be amber-colored, not dark brown, to avoid burnt flavors.
  • 2 tablespoons water
    → Water helps distribute heat and prevent the sugar from scorching. It also aids in the even dissolution of the sugar as it melts, resulting in a smoother caramel. For a more controlled caramel, you can skip water and melt sugar directly in a small, clean pan if you’re confident in your heat control.
  • Optional: a pinch of cream of tartar
    → Cream of tartar can stabilize the sugar syrup, reducing foaming and helping to prevent crystal formation, yielding a smoother top. It’s optional and can be omitted if you don’t have it.
  • To Serve / Toppings
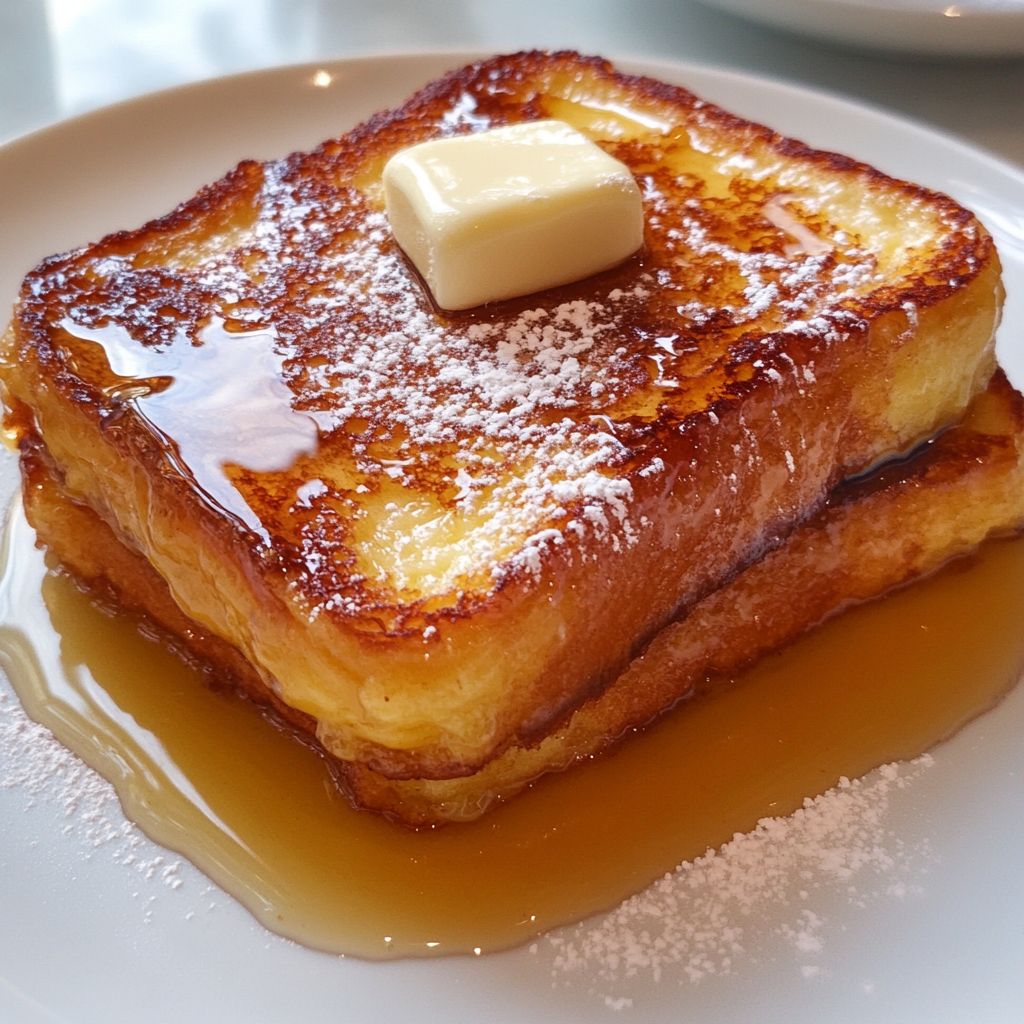
  • Powdered sugar, for dusting (optional)
    → A light dusting enhances presentation and adds a touch more sweetness. Sift evenly over the top just before serving to avoid soggy caramel. This keeps the brûléed topping crisp for longer.
  • Fresh berries or sliced fruit (optional)
    → Bright, tangy fruit provides contrast to the rich custard and caramel, adding freshness and color. Choose ripe berries or sliced stone fruit to pair with the toast. Arrange around the slices for an attractive plate.
  • Maple syrup or honey for serving (optional)
    → A small drizzle adds extra sweetness and a complementary flavor to the custard. If you plan to brûlée, reserve the syrup for serving instead of topping before caramelizing to maintain the crisp shell. Use sparingly to avoid oversaturation that softens the top.

Instructions

  • Dry the bread slices and prepare them for soaking by arranging the 6 thick-sliced brioche or challah on a rimmed baking sheet in a single layer; if the bread is day-old, you are already in ideal condition, but if it is fresh, dry or toast lightly in a 250°F (120°C) oven for 5–8 minutes to reduce moisture so the custard absorbs evenly and the slices hold their shape during cooking.

    → Dry bread soaks evenly without becoming mushy and helps form a cohesive interior with a crisp exterior once cooked.
  • Whisk the custard base by beating the 4 eggs with the 1/2 cup granulated sugar in a large bowl until the mixture is pale and fully emulsified; this creates a uniform custard that coats the bread without separating.

    → Thorough whisking ensures yolks and whites are fully combined, giving a smooth, cohesive soak that sets evenly during cooking.
  • Whisk in the liquids and flavorings by adding the 1 cup whole milk, 1 cup heavy cream, 2 teaspoons pure vanilla extract, 1/4 teaspoon ground cinnamon, and a pinch of fine sea salt; whisk until completely smooth and homogeneous, then let the mixture rest 5–10 minutes to bloom the vanilla and integrate the spice.

    → Resting allows the vanilla and cinnamon to release their aromatics, giving a richer, more integrated custard.
  • Soak the bread slices by dipping each into the custard, turning to coat both sides, and soaking for about 60–90 seconds per side; remove with tongs and let excess drain briefly on the edge of the bowl or a rack before placing on a sheet for soaking; avoid over-soaking to prevent the slices from breaking apart.

    → Proper soaking yields a custard-filled interior without oversaturation that would cause sogginess or breakage during cooking.
  • Preheat a heavy skillet (cast iron preferred) over medium heat and melt 2 tablespoons unsalted butter, swirling the pan to coat; wait until the butter foams and subsides so the surface is hot but not actively browning before adding the bread; this ensures a crisp, golden crust without burning the fat.

    → A properly heated, well-oiled pan sears the exterior quickly, sealing in custard and creating a desirable contrast between crust and interior.
  • Cook the soaked bread slices in the hot, buttered skillet for 3–4 minutes per side, until deeply golden and the custard is just set in the center; flip gently with tongs and press lightly to ensure even browning; if the edges darken too quickly, lower the heat to maintain a soft interior with a crisp crust.

    → Even, patient cooking builds a sturdy crust while preserving a creamy interior that resembles classic French toast textures.
  • Keep the cooked slices warm by transferring them to a 200°F (93°C) oven or a warming rack while you finish the remaining slices; keeping them separate from stacked layers prevents trapped moisture from softening the crust.

    → Warm but dry resting keeps texture intact and prevents sogginess as you complete the batch.
  • Prepare the caramel brûlée topping by combining 1/3 cup granulated sugar, 2 tablespoons water, and an optional pinch of cream of tartar in a small, heavy-bottomed saucepan; cook over medium heat without stirring until the syrup turns a rich amber color, then remove from heat and let it rest briefly to avoid scorching when applied.

    → The caramel color indicates the sugar has reached the proper temperature for a crisp, crackly shell that contrasts with the custard beneath.
  • Apply and shape the caramel onto the toast by drizzling or brushing a thin, even layer of the hot caramel over the top of each custardy slice; allow a moment for the surface to set into a glossy film before brûlée to ensure an even shell.

    → A uniform caramel layer ensures a consistent crackly shell across all slices and prevents pooling that would soggy the surface.
  • Caramelize the tops by using a handheld culinary torch to sweep the flame across the caramelized surface in small, steady motions about 1–2 inches from the toast until the sugar darkens to a deep amber and forms a hard crackly crust; if a torch is unavailable, place the slices under a hot broiler on a rack and watch closely, rotating for even browning for 1–2 minutes.

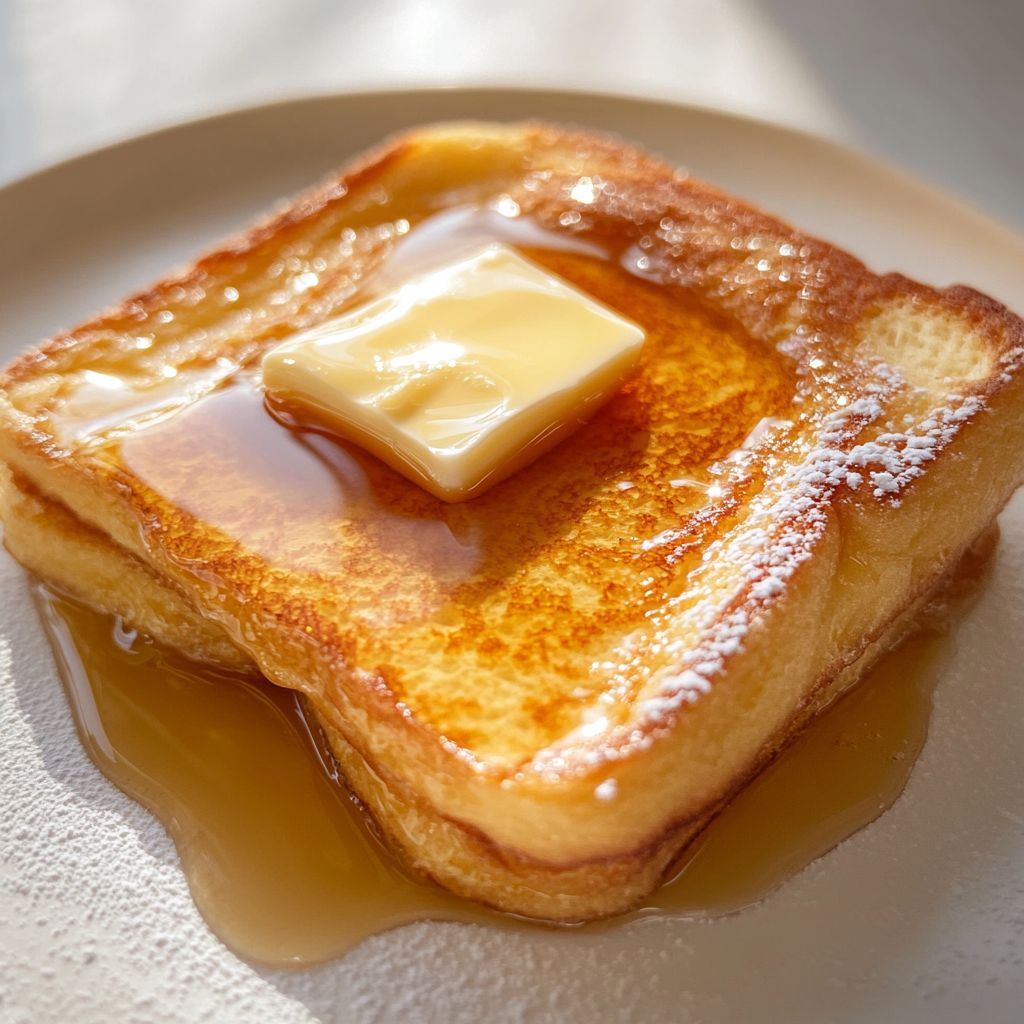
    → The brûléed crust provides a dramatic, crisp contrast to the creamy custard beneath and instantly elevates the dish to a dessert-like finish.
  • Rest the brûléed tops for 1–2 minutes to allow the shell to finish setting and harden; if desired, dust lightly with powdered sugar just before serving to enhance the visual contrast and sweetness without softening the top.

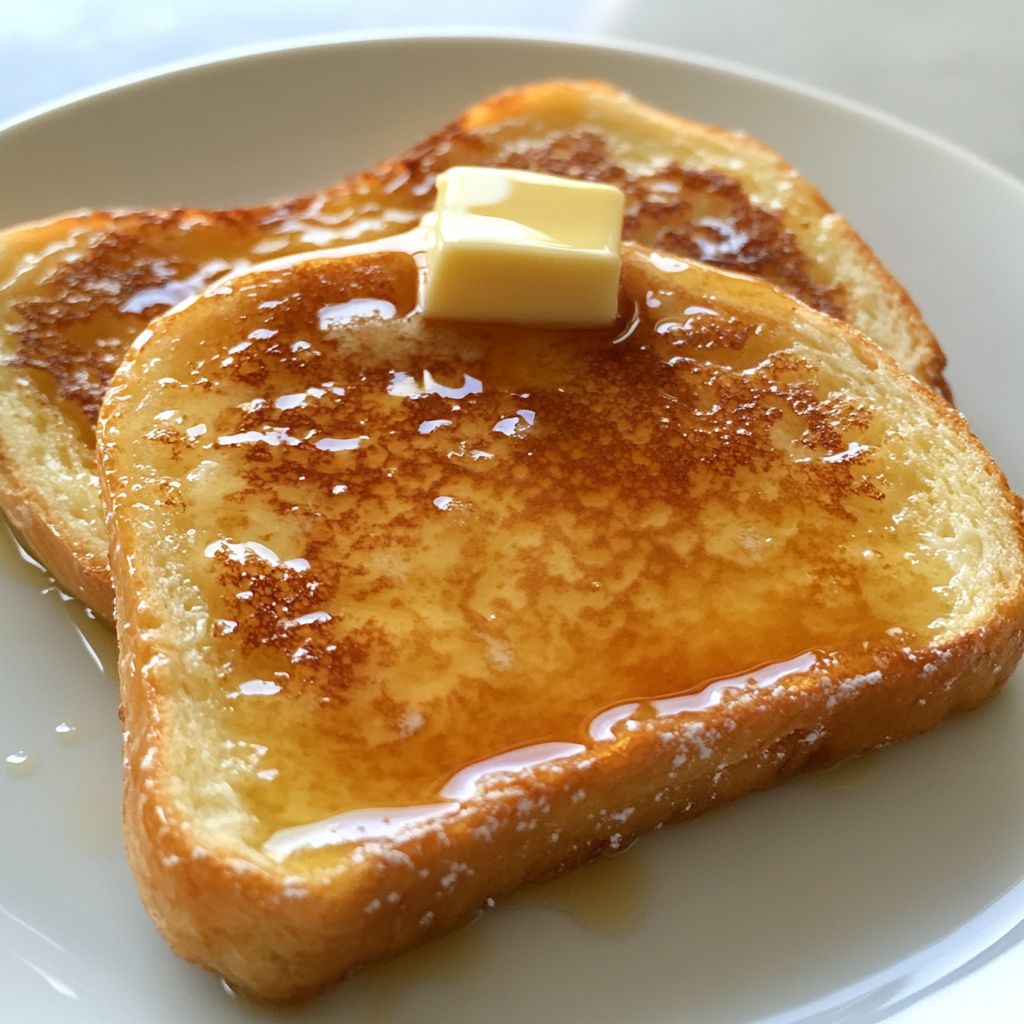
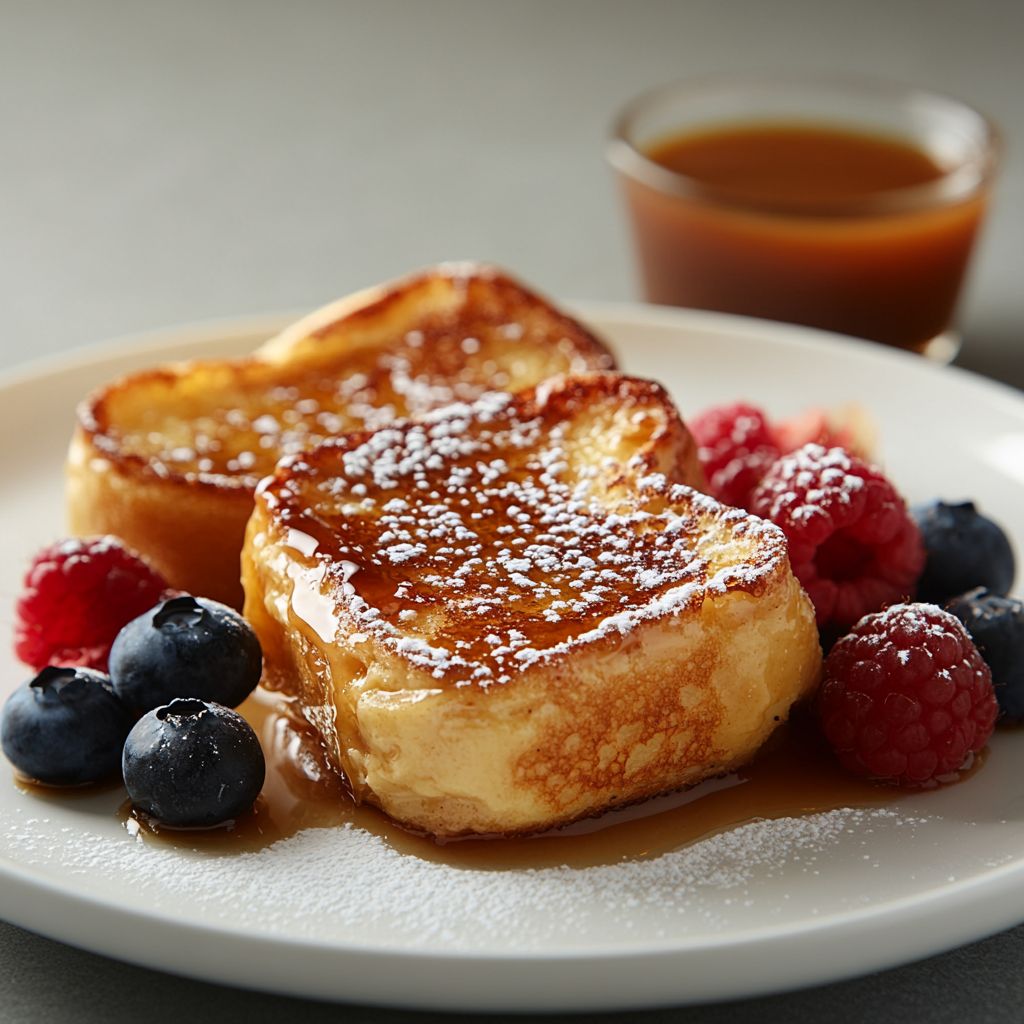
    → A brief rest ensures the shell remains crackly and the interior remains pleasantly warm, preserving the intended texture balance.
  • To serve, arrange the slices on plates with optional fresh berries or sliced fruit around them and offer maple syrup or honey on the side; drizzle sparingly to avoid oversaturating the crisp top, and serve immediately to enjoy the contrasting textures of crackling top and velvety custard.

    → Fresh fruit adds brightness, while a small amount of syrup complements the richness without softening the brûléed surface, ensuring an optimal eating experience.

Notes

Crème Brûlée French Toast is a show-stopping brunch dish where slices of day-old brioche or challah soak in a rich custard, are fried to a golden crust, and finished with a crisp caramel brûlée shell. The custard comes from eggs, whole milk, heavy cream, vanilla, and cinnamon, yielding a luxurious center with a crackly, sugar-sheathed top.

Key technique: use day-old bread for maximum absorption; if your bread is fresh, toast or dry it briefly to reduce moisture. Allow the custard to rest a few minutes after whisking to bloom the vanilla and cinnamon, which deepens the flavor and helps even soaking.

Cook the toast in butter over medium-high heat until deeply golden on both sides. Dip each slice briefly in the custard (about 30 seconds per side) so the surface crisps while the interior stays creamy. For the brûléed topping, melt 1/3 cup sugar with 2 tablespoons water in a clean dry pan until the syrup turns amber, adding a pinch of cream of tartar if available. Avoid stirring once the sugar begins to melt to prevent crystal formation. Pour or spoon the hot caramel over the warm toast and, if you have a culinary torch, lightly brûlée the surface until a hard, glassy crust forms. If you don’t have a torch, you can briefly broil the tops, watching carefully to prevent burning.

To serve, dust with a light shower of powdered sugar, add fresh berries or sliced fruit, and finish with a drizzle of maple syrup or honey if desired. This dish is best served immediately to preserve the brûlée crust, but you can keep cooked slices warm in a low oven for a few minutes before topping. Make-ahead tip: you can batch soak the bread in the custard for 1–2 hours in the fridge, then cook and brûlée right before serving. Variations: for a dairy-free version, substitute fortified dairy-free milk and use coconut cream to maintain richness; for gluten-free, use gluten-free bread and ensure all flavorings are gluten-free. Note: always ensure your bread and any flavorings labeled gluten-free if you have gluten intolerance.

Tips

Tips and Techniques for Crème Brûlée French Toast

Bread selection and prep

  • Use thick‑sliced brioche or challah bread for a tender, soakable crumb. Day‑old bread absorbs custard best; if your loaf is fresh, dry it slightly in a 250°F (120°C) oven for 5–8 minutes to reduce moisture.
  • Aim for slices about 1 inch thick so they soak evenly without falling apart.

Custard base and soaking

  • Warmth matters: use eggs at room temperature for easier whisking and a smoother custard. Beat yolks and whites thoroughly to ensure a cohesive soak.
  • Balance the dairy: 1 cup whole milk plus 1 cup heavy cream gives a rich, custard‑like texture. For lighter or dairy‑free versions, substitute with fortified plant milk/cream and adjust sweetness and spices.
  • Flavor layering: 2 teaspoons vanilla extract (or vanilla bean seeds) plus 1/4 teaspoon ground cinnamon creates warmth; bloom flavors by letting the mixture rest a few minutes before soaking.
  • Salt matters: a pinch of fine sea salt enhances sweetness and depth, helping the custard set properly.

Soaking and assembly best practices

  • Soak time: let the bread soak in the custard long enough to absorb flavor but not so long that slices disintegrate. 15–30 minutes per side is a good guideline; overnight soaking in the fridge is also workable for a deeper soak.
  • Even soaking: arrange slices in a single layer in a shallow dish so all surfaces soak evenly; press gently to ensure full absorption without breaking the bread.

Cooking the French toast

  • Butter helps achieve a golden, crisp crust. Use 2 tablespoons of unsalted butter and cook over medium‑high heat, watching closely to prevent burning.
  • Avoid overcrowding the pan; cook in batches if needed to allow evenly browned exteriors without steaming.

Caramel brûlée topping

  • Caramel basics: combine 1/3 cup granulated sugar with 2 tablespoons water. Use a clean, dry pan over medium heat; once the sugar begins to melt, resist stirring—swirl gently to distribute heat and prevent crystallization.
  • Watch color closely: aim for amber, not dark brown, to avoid bitter caramel. If using cream of tartar, a pinch helps stabilize the syrup and reduces foaming/crystallization.
  • Even topping: once caramel is ready, keep the slices warm and top them evenly. For a traditional brûléed shell, finish with a culinary torch or a brief moment under a hot oven/broiler until the top is crisp and glassy.

To serve and toppings

  • Dust with powdered sugar just before serving to maintain the crisp caramel top. Avoid pre‑dusting, which can make the surface soggy.
  • Fresh berries or sliced fruit provide bright contrast to the rich custard and caramel; arrange around the slices for an appealing plate.
  • Drizzle maple syrup or honey sparingly at serving time. If brûlée is planned, reserve syrup for serving rather than topping before caramelizing to preserve the crisp shell.

  • Make ahead: the custard and bread soak can be prepared ahead and refrigerated (up to 8–12 hours). Bring to room temperature before cooking for best absorption and texture.
  • Storage: leftover French toast can be stored refrigerated for 1–2 days. Reheat gently in a 350°F (175°C) oven to help restore some crust; the brûléed top may soften with time.
  • Variations: for dairy‑free versions, use fortified almond/soy/oat milk and coconut cream. Add citrus zest (orange or lemon) to brighten, or a pinch of nutmeg for extra warmth. A splash of brandy or orange liqueur can be stirred into the custard for an adult twist.

FAQ

What is Crème Brûlée French Toast?

A decadent breakfast treat where slices of brioche are soaked in a crème brûlée–style custard, then cooked until golden and finished with a crisp, caramelized sugar topping that mimics the famous dessert.

What ingredients do I need?

Here’s a common lineup (adjust for dietary needs):

  • 6 slices brioche or thick challah
  • 4 large eggs
  • 1 cup heavy cream or half-and-half
  • 1/2 cup milk (dairy or plant-based)
  • 1/4 cup granulated sugar
  • 1 teaspoon vanilla extract
  • Pinch of salt
  • Butter for cooking
  • For the topping: 2–3 tablespoons brown sugar, a little water or orange juice (optional)
How do you make Crème Brûlée French Toast?

Steps (summary): whisk custard, soak bread, cook in butter until golden, then caramelize the top with brown sugar using a torch or broiler.

  1. Whisk eggs, cream (or half-and-half), milk, sugar, vanilla, and salt in a shallow dish.
  2. Dip each brioche slice, letting it soak briefly to absorb the custard without becoming soggy.
  3. Cook in a lightly buttered skillet over medium heat until golden on both sides.
  4. Sprinkle the browned sugar on top and caramelize with a culinary torch or under a hot broiler until crisp.
Can I make this ahead of time?

Yes. You can soak the bread in the custard in the refrigerator for up to 8 hours. Keep the pan ready; bake or cook just before serving, and caramelize the top just before serving for best texture.

How do I caramelize the top without burning it?

Sprinkle a thin, even layer of brown sugar on each slice. Use a culinary torch on a low to medium flame and move it constantly to evenly melt and caramelize. If using a broiler, place the pan close to the heat and watch closely for 1–2 minutes to prevent burning.

How long does it take to make Crème Brûlée French Toast?

Active cooking time is about 15–20 minutes per batch. If you soak the bread overnight, the hands-on time stays similar, but total time increases with chilling.

Can I make dairy-free or gluten-free versions?

Yes:

  • Dairy-free: Use plant-based milk and coconut or almond cream; replace butter with a dairy-free butter or oil.
  • Gluten-free: Use thick gluten-free bread or gluten-free brioche; ensure the custard uses dairy-free milk if needed.
What toppings pair well with Crème Brûlée French Toast?

Suggestions include:

  • Maple syrup or honey
  • Fresh berries (strawberries, blueberries, raspberries)
  • Whipped cream or mascarpone
  • Powdered sugar dusting
  • Orange zest or cinnamon for a warm note
How should I store leftovers?

Store cooled slices in an airtight container in the refrigerator for up to 2 days. Reheat in a 350°F (175°C) oven for 8–10 minutes or until warmed, then caramelize again if desired.

Any tips for the best texture and flavor?

Use day-old brioche for better soaking, avoid over-soaking to prevent sogginess, cook over medium heat to form a crisp exterior, and caramelize the top right before serving for a contrasting crackling surface.

Introduction / Hook

Imagine a centerpiece that steals the spotlight at the dinner table without shouting for attention. Crispy Baked Cauliflower Steaks are that quiet showstopper: elegant slices of cauliflower transformed into golden-brown, jam-packed-with-flavor slabs that deserve their own curtain call. When you crack the first bite, you’ll hear the satisfying crunch give way to a tender, almost creamy interior—like a tiny cloud of cauliflower comfort that has learned a few clever tricks from the oven. The aroma alone is enough to summon hungry family members from every room: toasty edges swirled with garlic, a whisper of smoke from the roasting pan, and a hint of nutty warmth that lingers in the air long after the plates are cleared. This dish takes a humble cruciferous vegetable and elevates it into a restaurant-worthy moment, without requiring a chef’s toolkit or a calendar’s worth of kitchen time. It’s the kind of recipe that makes weeknights feel special and dinner parties feel effortless.

What makes Crispy Baked Cauliflower Steaks truly special is that it balances technique with simplicity. The steaks themselves are sturdy enough to stand up to bold flavors, yet forgiving enough for home cooks who are still learning the rhythm of their ovens. The outer crust forms a savory, CRISP-edged robe around a tender, almost decadent interior. It’s a texture dance—crunch, chew, melt—accompanied by a chorus of toasty, caramelized notes that sing with every bite. And because this dish arises from roasting, there’s a natural caramelization that brings out the cauliflower’s innate sweetness, as if the vegetable has decided to glow from the inside out.

As you consider serving Crispy Baked Cauliflower Steaks, think of them not merely as a vegetable side, but as a centerpiece that invites conversation. They pair beautifully with bright, acidic dressings or sauces that cut through their richness. They hold their own against bold toppings, from nutty seeds and roasted garlic to tangy yogurt or smoky chilies. This recipe is your invitation to play with textures and flavors while keeping the cooking approachable, predictable, and deeply rewarding. Whether you’re planning a weeknight supper for a crowd or a more formal dinner, these cauliflower steaks bring a sense of celebration to the table with minimal fuss and maximum impact.

The Story Behind the Dish

Cauliflower has long lived in the shadow of more dramatic vegetables, but in recent years it has earned its own moment of culinary fame. It began as a pantry staple—versatile, affordable, and excellent at absorbing the flavors around it. People started pairing it with robust spices, roasting it until the edges turned caramel amber, and discovering that its pale, creamy interior could take on surprising richness. Crispy Baked Cauliflower Steaks is a modern homage to that journey: a dish that respects the vegetable’s natural sweetness while giving it a bold, almost indulgent crust.

The idea of cutting a whole head of cauliflower into big, steak-like discs is a playful nod to traditional steakhouse presentations, but with a plant-forward twist. The concept invites you to treat cauliflower as a venue for flavor, texture, and aroma rather than a mere accompaniment. In many cultures, roasted vegetables occupy the heart of a comforting meal, offering warmth and nourishment without overpowering the senses. This recipe continues that tradition, turning a humble vegetable into a star attraction—the sort of dish that travels well, satisfies a range of diets, and sparks curiosity at the table.

There’s a quiet storytelling thread woven through the method: slice down through the dense stalk, expose the creamy florets in the middle, then crown each slice with a crust that crackles as it bakes. The result is a cinematic moment, the kind you can announce with a flourish and then sit back to savor. Whether you’re cooking for a weeknight family dinner or a gathering with friends who love bold flavors, these cauliflower steaks arrive with a narrative you can tell with every bite—the story of a simple vegetable transformed by heat, patience, and a little culinary swagger.

Why You’ll Love This Recipe

  • Versatility: A single head of cauliflower becomes multiple generous portions, ideal for sharing or for hearty leftovers the next day.
  • Texture magic: A crisp, well-seasoned crust contrasted with a tender, flavorful center creates a satisfying bite that’s hard to resist.
  • Plant-forward comfort: Rich-sounding flavors and a satisfying texture make this feel indulgent without relying on meat or heavy dairy.
  • Low-effort brilliance: Simple ingredients, straightforward technique, and minimal hands-on time yield a spectacular result.
  • Adaptable to many diets: Naturally gluten-friendly, easily made dairy-free, and friendly to vegan or vegetarian menus with minor tweaks.
  • Great for entertaining: Their visually striking presentation makes them an impressive centerpiece for casual supper clubs or holiday tables.
  • Make-ahead potential: You can prep the components in advance and finish them off close to serving time for maximum freshness.

Flavor Profile & Texture

The flavor journey begins with a simmering chorus of toasty, nutty notes—the subtle sweetness of the cauliflower becomes more pronounced as it roasts. The crust introduces a savory depth: a blend of savoriness, a whisper of smokiness, and a hint of earthiness from any herbs or spices you choose to embrace. Garlic, pepper, and a touch of salt bring immediate, familiar comfort, while optional ingredients like smoked paprika or lemon zest can lend a brighter, more contemporary twist. The crust’s crunch provides a contrast that makes each bite an event; beneath it, the interior remains lush and tender, almost creamy, which makes the dish feel indulgent yet surprisingly light.

Texture-wise, this dish is a celebration of gradients. The exterior crackles in pleated ridges, each bite releasing a gust of roasted aroma that tempts you to take another taste. The center stays moist and pale, a tender counterpoint to the crisp shell. Depending on how you season or what you choose to brush onto the steaks, you can tilt the flavor toward herby, garlicky, smoky, or citrusy—each approach offering a distinct personality to the plate. The texture and flavor together create a sensory experience that is both comforting and forward-moving, satisfying cravings for something hearty without veering into heaviness.

Occasions & Pairings

These cauliflower steaks shine in a variety of settings—from weeknight dinners when you want something a bit more special to celebratory feasts that need a vegetarian centerpiece. They pair magnificently with bright, fresh salads that provide acidity to cut through the richness, as well as with creamy dips or yogurt-based sauces that offer a cooling contrast. They also work beautifully alongside grains such as quinoa, farro, or wild rice, where the nutty notes of the grains share the stage with the cauliflower’s own sweetness.

Recommended occasions:

  • Weeknight dinner star: Quick, satisfying, and easy to dress up with simple sauces or toppings.
  • Holiday or feast-table centerpiece: A stunning, crowd-pleasing main or side that makes the table feel special.
  • Brunch or lunch showcase: Pair with a tangy herb yogurt or bright citrus drizzle for a vibrant midday option.
  • Vegetarian or vegan mains: Create a complete plate by pairing with a protein-rich grain or legume-based dish.

Suggested pairings:

  • Side dishes: A lemony herb quinoa, wild mushroom sauté, or a sparkling-green salad with a zesty vinaigrette.
  • Drinks: A crisp, chilled white wine (like a Sauvignon Blanc) or a sparkling herbal tea for a refreshing contrast; for non-alcoholic options, a cucumber-mint cooler or a citrus-forward spritzer works beautifully.
  • Desserts: Light fruit-based desserts or yogurt-topped parfaits that echo the tang of a citrus glaze or yogurt drizzle.

Tips, Variations & Substitutions

Making it Crispy

To maximize crunch, consider a two-step approach: first, let the steaks rest at room temperature for a short time after cutting to reduce moisture, then give them a dusting of a light coating that includes a touch of cornstarch or almond flour to help crisping. A gentle brush of olive oil or a light spray of oil before baking encourages browning and an even crust. If you like extra texture, finish with a brief broil (watch carefully) to amber the crust and intensify the crackle.

Flavor Boosters

Add depth with a few flavor boosters that suit your pantry:

  • Smoked paprika or chipotle for a smoky edge.
  • Lemon zest or a splash of lemon juice for brightness that cuts through richness.
  • Finely grated hard cheese or vegan cheese alternatives for a savory kick (note that this will alter the dairy content).
  • Fresh herbs like thyme, rosemary, or parsley to lift the aroma and finish.
  • Garlic confit or roasted garlic cloves dispersed on top for a mellow, caramelized sweetness.

Vegan, Gluten-Free & Other Variations

The beauty of this dish is its adaptability. For vegan and gluten-free kitchens, the crust can be formed with almond flour, a touch of chickpea flour, or a gluten-free breadcrumb mix, all of which provide a satisfying crunch without gluten. Dairy-free options include olive oil-based coatings and dairy-free toppings, while keeping the interior luscious. For a lighter version, reduce the amount of coating and pair with a bright, tangy yogurt dip made from plant-based yogurt and lemon zest. For a heartier, wintery flavor, mix in warm spices like cumin and coriander, then finish with a drizzle of pomegranate molasses for a sweet-tinish tang that lifts the dish.

Cultural Twists

Bring in regional notes to reflect your mood or the season. In a Mediterranean twist, add oregano, lemon, and pine nuts for a sun-kissed crust. A North African vibe might lean on cumin, coriander, preserved lemon, and a crisp drizzle of olive oil. Japanese-inspired accents could include a sesame-soy glaze brushed on at the end, with sesame seeds sprinkled on top. Each variation preserves the core idea—the crisp exterior and tender interior—while offering a new cultural lens to enjoy the same base ingredient.

Storage & Make-Ahead Ideas

The beauty of these steaks is that they travel well and hold up gracefully as leftovers. If you’re meal-prepping, you can pre-slice the cauliflower into steaks a day ahead and refrigerate them unseasoned or lightly seasoned. When you’re ready to cook, bring them to room temperature for a short time before baking to ensure even cooking. Leftovers store well in an airtight container in the refrigerator for up to three days. Reheat gently to preserve the crust and avoid overcooking the interior, which can make the steaks mealy. If you plan to freeze, flash-freeze the raw, seasoned steaks on a tray, then transfer to a bag. They should keep for up to two months; bake from frozen—allow a little extra time for the crust to form and the interior to heat through.

Make-ahead ideas to maximize weeknight efficiency:

  • Prepare a batch of the crust mix or the coating components in advance and store in an airtight jar; you can combine them with the cauliflower slices just before baking.
  • Pre-roast florets for a quick reheat-and-serve variant by placing pre-cooked slices into the oven for a short period to re-crisp the crust.
  • Offer a variety of finishing toppings that can be added just before serving, allowing you to customize plates for a crowd.

Fun Facts & Trivia (Optional)

Did you know that cauliflower comes in a rainbow of colors beyond the familiar white? While white cauliflower is the most common, purple, orange, and green varieties exist. Each hue has its own slightly different flavor profile and nutritional emphasis, but all share the same satisfying versatility that makes cauliflower a kitchen workhorse. The crisp-tender texture you love in Crispy Baked Cauliflower Steaks is the result of careful roasting that concentrates natural sugars while maintaining a sturdy structure—cauliflower’s ability to transform from bland to brilliant with the right heat is a testament to why this vegetable has earned a permanent place on contemporary menus.

Historically, cauliflowers were prized in Middle Eastern and Mediterranean cuisines long before they appeared on modern Western tables as a mainstream vegetable. The idea of turning a head into steaks is a playful modern twist that embodies the spirit of culinary experimentation—honoring tradition while inviting new flavors and textures. The dish you’re about to savor is part of this evolving story, a bridge between comforting home cooking and adventurous, globally inspired plates.

In some culinary circles, the term “steak” signals a bold, substantial cut designed to deliver a satisfying mouthfeel. Here, the term’s usage is both metaphorical and practical: we’re embracing the dramatic, centerpiece-worthy presentation while celebrating a plant-based, approachable cooking method that any home cook can master. The result is a dish with a personality as confident as its textures—crisp, creamy, bright, and warmly seasoned—a modern classic that sits comfortably at the intersection of comfort food and contemporary dining.

Ingredients

Crispy Baked Cauliflower Steaks

Cauliflower Steaks

  • 1 large head cauliflower, core trimmed and leaves removed; cut into 3/4-inch thick steaks, using the center portion of the head to form “steaks” and saving any side florets as extra pieces
    → The base for the dish. Thick, intact steaks cook evenly and hold together during flipping. For best results, pick a firm head with tight florets; after trimming, pat dry and rinse quickly to remove any residual dirt. Slice into even thickness to ensure uniform browning. The scraps can be roasted as extra florets to serve on the side.

Coating & Seasoning

  • 2 tablespoons extra-virgin olive oil
    → Coats the cauliflower to help the crust adhere and promote crisping; use a light hand to avoid soggy crust. Toss the steaks in a bowl until evenly coated; pat dry if there is excess moisture before applying the crust mixture.
  • 1/2 teaspoon fine sea salt
    → Balances flavors and helps draw a little moisture to the surface to encourage crust formation; you can adjust after tasting. For lower-sodium options, reduce to 1/4 teaspoon or omit if the cheese adds enough saltiness.
  • 1/4 teaspoon freshly ground black pepper
    → Adds subtle heat and aroma; distribute evenly in the coating by whisking with spices or by adding to the oil before tossing. Pepper enhances flavor contrast and pairs with paprika.
  • 1 teaspoon garlic powder
    → Delivers robust savory depth; powder is ideal for even distribution across the uneven cauliflower surface. If you prefer real garlic flavor, you can substitute with 1 small minced garlic clove but this can burn if overcooked; add to oil and toss for extra bite.
  • 1 teaspoon smoked paprika (or regular paprika)
    → Provides color and a gentle smoky brightness that complements the roasted cauliflower. Smoked paprika creates a more pronounced crust; if using regular paprika, consider a dash of cayenne or chili powder for heat.
  • 1/4 teaspoon cayenne pepper (optional)
    → A hint of heat; add gradually if you like more punch. Omit entirely for a mild version. This also helps accentuate browning on the crust.
  • 1/3 cup grated Parmesan cheese (or 2 tablespoons nutritional yeast for a vegan option)
    → Adds umami and helps form a crisp, cheesy crust. Parmesan contributes richness and browning; nutritional yeast provides a dairy-free, nutty flavor. If using dairy, keep cheese amounts reasonable to avoid soggy crust; for vegan, rely on nutritional yeast and breadcrumbs for texture.
  • 1/3 cup breadcrumbs or gluten-free breadcrumbs (optional)
    → Adds extra crunch and helps trap moisture within the crust. To prevent sogginess, toast breadcrumbs lightly before mixing and distribute evenly around the cauliflower surface.
  • 2 tablespoons all-purpose flour or gluten-free flour blend (optional)
    → Acts as a dry binder and helps the crust adhere to the cauliflower while absorbing surface moisture for a crisp exterior. Use gluten-free flour for dairy-free/vegan version; if the coating seems too wet, whisk in a touch more flour.

Dipping Sauce

  • 3 tablespoons tahini (sesame paste)
    → Creates a creamy, nutty base for dipping; tahini emulsifies with lemon and water to form a smooth sauce that complements the roasted cauliflower. Stir well if separated; if very thick, whisk in small amounts of water or olive oil to reach desired pourability.
  • 2 tablespoons lemon juice
    → Adds bright acidity to balance richness; adjust to taste. Freshly squeezed juice yields the best flavor; substitute with lime juice if preferred.
  • 1 small garlic clove, minced
    → Provides a sharp, aromatic bite; mince finely to distribute evenly; omit if you prefer a milder sauce or roast the garlic beforehand for sweetness.
  • 1 tablespoon olive oil
    → Helps emulsify and create a silky texture; optional, you can substitute with water to adjust thickness, but oil enhances mouthfeel and gloss.
  • 2-3 tablespoons water (to thin)
    → Adjusts the sauce to your desired consistency; start with 2 tablespoons and add gradually. Warm water helps with emulsification.
  • Pinch of salt
    → Season to taste; depending on the saltiness of the tahini, lemon, and cheese in the crust, you may want less or more salt in the dip.

Garnish & Serving

  • Fresh parsley or microgreens, chopped (optional)
    → Adds color and a fresh aroma when sprinkled over the hot steaks; helps buoy the rich crust visually. Use flat-leaf parsley for best brightness.
  • Lemon wedges (optional)
    → Offer a bright, citrusy squeeze to finish the dish; the acid brightens the flavors and adds balance to the seasoned crust.

Instructions

  • Preheat your oven to 425°F (220°C) and line a large baking sheet with parchment paper or a silicone mat to ensure even browning and easy cleanup.
    → High heat drives rapid Maillard browning for a crisp crust, while parchment prevents sticking and makes flipping easier.
  • Prepare the cauliflower by removing its leaves and core, then cut into center 3/4-inch thick steaks; set the extra side florets aside to roast as crunchy crostini-like pieces.
    → Thick, intact steaks hold together during cooking and flip more reliably, while extra florets become tasty sides.
  • Pat the cauliflower steaks dry with paper towels after a quick rinse to remove any residual dirt; this moisture must be removed to promote crust adhesion and browning.
    → Excess moisture creates steam, which softens the crust and prevents crispness.
  • Toss the steaks with 2 tablespoons extra-virgin olive oil, then season evenly with 1/2 teaspoon fine sea salt and 1/4 teaspoon freshly ground black pepper; toss again to coat all surfaces.
    → Oil carries fat-soluble flavors and helps the crust cling; even seasoning ensures uniform taste on every bite.
  • In a separate bowl, combine 1/3 cup grated Parmesan cheese, 1/3 cup breadcrumbs (or gluten-free breadcrumbs), 1 teaspoon garlic powder, 1 teaspoon smoked paprika, and a 1/4 teaspoon cayenne pepper (optional); whisk until evenly blended.
    → This dry mix creates a flavorful, cohesive crust; whisking guarantees even distribution of spices for consistent browning.
  • If you are using a flour binder, whisk 2 tablespoons all-purpose flour or gluten-free flour into the crust mixture to help absorb surface moisture and improve crust adhesion; set aside.
    → The flour acts as a dry binder, reducing crust sogginess and enhancing crust structure during baking.
  • Press the crust mixture onto the top and sides of each cauliflower steak, rotating the steak as needed to cover all surfaces; press firmly to ensure the crumbs bond and do not shed during baking.
    → Firm pressing creates a cohesive crust that stays intact through flipping and yields a crisp, even coating.
  • Arrange the coated steaks on the prepared sheet with at least 1/2 inch of space between them, and scatter the extra florets around them if you plan to roast them as sides.
    → Adequate spacing allows hot air to circulate, promoting uniform browning and preventing steaming.
  • Bake for 12-15 minutes, then carefully flip each steak with tongs and bake for another 12-15 minutes until the crust is golden brown and the cauliflower is tender when pierced with a thin knife or skewer.
    → Flipping ensures both sides crisp evenly; visual color and a tender center confirm doneness beyond time alone.
  • Optional: If you desire extra-crisp edges, switch to a brief high-heat broil on high for 1-2 minutes, watching closely to prevent burning; this intensifies browning and flavor.
    → A quick blast of heat produces deeper caramelization without overcooking the interior.
  • Meanwhile, prepare the tahini dipping sauce by whisking 3 tablespoons tahini, 2 tablespoons lemon juice, 1 minced garlic clove, and 1 tablespoon olive oil in a small bowl; gradually whisk in 2-3 tablespoons warm water until smooth and pourable, then season with a pinch of salt.
    → The tahini sauce offers a creamy, tangy contrast to the roasted cauliflower; thinning with warm water yields a silky, clingy consistency.
  • Let the baked steaks rest on the sheet for 3-5 minutes to set the crust and redistribute moisture; this helps the crust stay intact when you plate them.
    → Resting firms the crust and prevents cracking or crumbling when cutting and serving.
  • Transfer the steaks to a serving platter, drizzle with a touch more olive oil if desired, and garnish with chopped fresh parsley or microgreens plus lemon wedges for brightness.
    → Fresh greens add color and aroma, while citrus finish brightens the savory crust and balances richness.

Notes

These crispy baked cauliflower steaks are a gluten-free-friendly vegetarian main that deliver a crowd-pleasing crunch with a tender, roasted interior. Start with a firm head, trim leaves and core, and slice into 3/4-inch thick steaks, reserving any side florets as tasty extras. Toss the steaks with olive oil, salt, pepper, garlic powder, and smoked paprika, then coat with Parmesan cheese for a cheesy crust or swap in nutritional yeast for a dairy-free version. For extra texture, add breadcrumbs and a touch of flour, and let the coated surfaces rest for about 5 minutes before baking to help the crust set. Bake on a parchment-lined sheet at 425°F (220°C) until golden and crisp, flipping halfway for even browning, about 18-22 minutes, then 8-12 more minutes until deeply browned and crusty. While the cauliflower bakes, make the tahini lemon dipping sauce by whisking together tahini, lemon juice, minced garlic, olive oil, and water, adding salt to taste and adjusting thickness with more water as needed. Serve the steaks hot with the dipping sauce spooned over or on the side, and garnish with fresh parsley or microgreens and lemon wedges if desired. Leftovers can be stored in the fridge for up to 3 days and reheated in a hot oven to restore crispness; for gluten-free prep, ensure breadcrumbs and flour are certified gluten-free and use a dairy-free cheese substitute if needed.

Tips

Tips for Crispy Baked Cauliflower Steaks

Preparation and cutting
  • Choose a firm head with tight florets. A compact head will slice into more uniform, sturdy steaks that hold together during flipping.
  • Trim leaves and core, then cut the head into about 3/4-inch thick center steaks. Save any side florets as extra pieces to roast alongside the steaks for a complete plate.
  • Pat the cauliflower dry after trimming to remove surface moisture. Excess moisture is the main culprit of a soggy crust, so dry thoroughly before coating.
  • Aim for even thickness on all steaks to ensure uniform browning and doneness from edge to center.
Coating, crust and seasoning
  • Toss the steaks with olive oil first to help the crust adhere and promote crisping. Use a light hand—too much oil can soggy the crust.
  • Pat dry any moisture after tossing to keep the crust from sliding off the surface.
  • For seasoning, distribute salt, pepper, garlic powder, paprika, and optional cayenne evenly. Whisk spices with the oil if you want a more uniform coating, or sprinkle over the oil-coated steaks and toss gently.
  • If using cheese, mix in the grated Parmesan (or nutritional yeast for vegan) so the coating forms a savory, browning crust. Don’t overdo the cheese or it can make the crust dense—balance with breadcrumbs and flour if you like a lighter texture.
  • Optional breadcrumbs add extra crunch. Toast breadcrumbs lightly before mixing to prevent sogginess and help them cling to the cauliflower.
  • The flour helps absorb surface moisture and helps crust adhesion. If the coating looks wet, whisk in a little more flour or breadcrumbs to reach a dry-but-sticky texture.
Cooking for best crispness
  • Preheat the oven to 425–450°F (220–232°C). Higher heat helps the crust blister and brown without overcooking the cauliflower center.
  • Use a parchment-lined sheet or a wire rack set over a sheet to promote air circulation and even browning. Avoid crowding the pan—space the steaks so heat can circulate.
  • Bake about 25–30 minutes, flipping halfway through. If your steaks are thicker, they may need a few extra minutes; keep an eye on the crust and interior doneness.
  • For a crisper crust, finish under the broiler for 1–2 minutes at the end, but watch closely to prevent burning.
  • If you’re not achieving the crust you want, dust the exposed crust with a little extra breadcrumbs or a pinch more flour mixed into the coating and give it a light pat to re-adhere.
Dipping sauce tips
  • Tahini-based sauce emulsifies with lemon and water to create a creamy, silky dip. If the sauce separates, whisk vigorously and add a touch more water or olive oil to re-emulsify.
  • Fresh lemon juice brightens the tahini; start with 2 tablespoons and adjust to taste. If the sauce is too tangy, a pinch of salt can balance it.
  • Minced garlic adds punch; to mellow it, roast the garlic briefly before adding to the sauce or use half a clove.
  • Olive oil helps with gloss and mouthfeel. If you prefer a lighter dip, substitute with water in smaller increments to reach your desired consistency.
  • Always season the sauce with a pinch of salt (and a whisper of pepper if desired) after adjusting thickness, as the tahini and lemon carry saltiness differently each time.
Garnish, serving and make-ahead
  • Finish with chopped fresh parsley or microgreens for color and a fresh aroma. A squeeze of lemon over the plated steaks elevates the dish just before serving.
  • The little side florets are perfect for roasting alongside the steaks; they’re a great way to use scraps and add variety on the plate.
  • Reheating tip: store leftovers in an airtight container for 2–3 days. Recrisp on a lined sheet at 400°F (205°C) for 5–7 minutes to restore crunch.
  • For a dairy-free version, keep Parmesan out and rely on nutritional yeast plus extra breadcrumbs for texture and umami.
  • If you want an air-fryer option, cook at 375–400°F (190–205°C) for 10–12 minutes, flipping halfway, until crust is crisp and center is tender.

FAQ

What are cauliflower steaks?

Cauliflower steaks are thick slices cut from a whole head of cauliflower. They’re roasted or baked until tender on the inside and nicely crispy on the edges.

How do I prepare the cauliflower to get crispy edges?

Trim the leaves and stem so the head sits flat, then slice into thick steaks about 3/4 to 1 inch thick. Pat dry, brush with olive oil, and optionally coat with a light crust (breadcrumbs or a starch mix) to help crisp. Bake on a parchment-lined sheet or on a wire rack for even browning. Flip halfway through.

What ingredients do I need?
  • 1 large cauliflower
  • Olive oil
  • Salt and pepper
  • Garlic powder or minced garlic
  • Paprika or your favorite spice (optional)
  • Breadcrumbs or crushed cornflakes (optional for extra crunch)
  • Parmesan or nutritional yeast (optional, for cheesy flavor)
  • Optional citrus zest or lemon juice
What temperature and how long should I bake it?

Preheat to 425°F (220°C). Bake for about 25–30 minutes, flipping halfway, until the edges are golden and the centers are tender. For extra crispness, finish under the broiler for 1–2 minutes, watching closely.

How can I keep the steaks from falling apart?

Slice thick steaks (3/4 to 1 inch) from a firm head, handle gently, and let them rest a minute after slicing. Baking on a rack or parchment helps them hold their shape and prevents sticking.

Can I make this vegan or dairy-free?

Yes. Use olive oil, dairy-free breadcrumbs or crushed cornflakes, and substitute parmesan with nutritional yeast or a vegan cheese alternative. Check labels for gluten if needed.

Can I make ahead or reheat leftovers?

Leftovers keep well in the fridge for 3–4 days. Reheat in a 350°F (180°C) oven for 8–10 minutes, or until hot and crisp. For the best texture, re-crisp under the broiler for 1–2 minutes.

What sauces or toppings go well with crispy cauliflower steaks?

Try lemon-tahini sauce, garlic yogurt (or dairy-free yogurt for vegan), chimichurri, or a garlic aioli. A squeeze of fresh lemon or a drizzle of hot honey also complements the flavor nicely.

How should I store and what about freezing?

Store cooked steaks in an airtight container in the fridge for 3–4 days. To freeze, freeze raw cauliflower steaks on a sheet tray, then transfer to a bag; bake from frozen at 400°F (200°C) for 25–30 minutes. You can also freeze baked steaks and reheat later in the oven.

Variations to try

Try different spice blends such as buffalo, za’atar, curry powder, or smoked paprika. Top with grated parmesan or nutritional yeast after baking. For extra crust, mix breadcrumbs with a little cornmeal or panko. Fresh herbs added after baking brighten the dish.

Introduction / Hook

Imagine a sun-dappled carnival of tropical warmth resting on a plate: coins of pineapple with a kiss of amber rum glaze, edges caramelized to a gentle crackle, and a perfume of coconut, vanilla, and smoky sugar drifting through the air. Rum-Soaked Fried Pineapple is a celebration of contrast—bright, juicy fruit meeting a kiss of heat and depth, crisp on the outside, tender and fragrant within. Each bite waltzes from sweet to tangy to a whisper of char, like a beach bonfire that lingers long after the last wave has receded. This dish isn’t just dessert or topping; it’s a mood—an invitation to slow down, savor, and let the sun-warmed flavors transport you to a sunlit terrace, a luau, or a quiet kitchen where conversation and laughter simmer alongside the pan. It’s approachable enough for a weeknight finale and exuberant enough to star at a party; a little caramel magic that makes ordinary moments feel extraordinary.

The Story Behind the Dish

Pineapple has long been a symbol of hospitality and warm welcomes in many island cultures, a bright tuft of sweetness handed to guests as a sign of good cheer. The fruit’s natural acidity and robust perfume pair beautifully with sugar and heat, a pairing that goes back centuries in tropical kitchens where fruit, spice, and distilled spirits converge. Rum, with its deep Caribbean roots and notes of vanilla, citrus, and molasses, has historically been used not just for drinking, but as a culinary companion—marinating, flambéing, and finishing dishes to lift flavors without overpowering them. When you marry pineapple with a kiss of rum and a touch of sizzling oil or butter, you awaken a bridge between sun-drenched island snacks and the comfort of a homey skillet technique. The result is a dish that feels both festive and familiar: a nod to tiki bars, a wink to family dinners, and a reminder that simple ingredients, treated with warmth and intention, become something magical.

In many kitchens around the world, variations of fried fruit with a spirited glaze have evolved as part of celebratory feasts and everyday joy alike. The idea is elegantly simple: you illuminate the pineapple’s natural sweetness and bright acidity with heat, letting the edges caramelize and the center stay juicy, then finish with a rum-bright sheen that ties all the flavors together. This particular interpretation—rum-soaked fried pineapple—embraces that heritage while leaning into modern sensibilities: a quick, satisfying treat that can be enjoyed warm from the pan, spooned over ice cream or yogurt, or served as a luscious topping for pancakes, waffles, or brunch bowls. It’s a recipe that invites storytelling as you cook, a reminder that flavors carry memory and place as surely as they carry aroma and texture.

Why You’ll Love This Recipe

  • Quick and forgiving: This approach to pineapple balances speed with technique, so you can enjoy something impressive without spending hours in the kitchen.
  • Layered flavor in every bite: The fruit remains bright and juicy while the exterior gains a delicate, crisp caramel crust with a hint of smoky sweetness from the pan.
  • Versatile finish: Perfect as a dessert on its own, a topping for ice cream or yogurt, or a glamorous addition to brunch plates with pancakes or Belgian waffles.
  • Impressive with minimal fuss: A small handful of pantry staples creates a big, party-worthy flavor profile that feels celebratory.
  • Adaptable to different diets and preferences: The concept works with dairy-free toppings, vegan ice creams, or dairy-based creams without losing its charm.
  • Comforting nostalgia with a tropical twist: It evokes the warmth of sunshine and vacation memories while staying grounded in everyday comfort food.

Flavor Profile & Texture

At first bite, you’ll encounter a tantalizing contrast: the pineapple’s lively, fruity brightness gives way to the toasty, almost-but-not-quite-crispy edge that forms where sugar caramelizes in a hot pan. The interior stays succulently juicy, a refreshing counterpoint to the exterior’s caramel-kissed depth. The rum introduces a gentle, warm-adjacent complexity—vanilla-laced with a whisper of spice—without intruding on the pineapple’s orchard-fresh essence. There’s a subtle saltiness from the pan or a light sprinkle of finishing salt, which serves to sharpen the flavors and keep them from tipping too sweet. If you add a drizzle of cream, a dollop of vanilla ice cream, or a chiffon of coconut cream, you’ll introduce a creamy, cooling community of textures that makes each mouthful feel luxurious yet effortless.

The texture journey is part of the delight: the fruit’s natural moisture keeps the center tender, while the outside forms a crisp, caramelized crust. The sugar that melts and then recrystallizes as it cools gives a gentle snap, almost like a candied shell that yields to the softness beneath. The rum, when used thoughtfully, doesn’t overpower—it rounds the sweetness, adds a peppery warmth, and brightens the fruit’s aroma, creating a bouquet of tropical notes that feel both nostalgic and fresh. The aromatics—the scent of caramelized sugar, toasted butter, vanilla, and a faint kiss of citrus—float through the kitchen, inviting conversation and anticipation before the first taste. This is a dish that dances between brightness and indulgence, a celebration of contrasts that never clobbers the palate.

Occasions & Pairings

This dish shines in multiple settings, making it a versatile choice for entertaining or a simple weeknight treat.

  • Holiday gatherings and festive dinners: A dessert or a refined topping that brings a tropical glow to the table without requiring elaborate preparation.
  • Brunch or weekend breakfasts: Pair with warm pancakes, waffles, or French toast for a sunny, indulgent start to the day.
  • Summertime barbecues and tiki nights: The fruit’s brightness and the rum’s warmth harmonize with grilled everything and fruity cocktails.
  • Dessert with a twist: A scoop of vanilla or coconut ice cream or a spoonful of tangy yogurt can elevate the experience into a show-stopping finish.

Pairing ideas to consider, depending on your mood and occasion, include:

  • Vanilla or coconut ice cream to create a creamy counterpoint that melts into the warm fruit.
  • Plain or Greek yogurt for a tangy, refreshing balance that brightens the sweetness.
  • A light drizzle of lime or orange zest to add a citrusy zing that lifts the dish even more.
  • A side of coconut whipped cream or a splash of coconut milk for extra indulgence.
  • Complementary beverages like a lightly spiced rum punch, a citrusy sparkling soda, or a cold brew coffee to contrast with the warmth of the dish.

Tips, Variations & Substitutions

Here are ideas to adapt the concept to your pantry, guests, or dietary needs:

  • Alcohol-free version: Use a splash of pineapple juice or a non-alcoholic rum-flavored syrup to capture the aroma without the alcohol.
  • Health-conscious angle: Use a heart-healthy oil like avocado oil instead of butter for frying, and opt for a lighter touch of sweetener or a drizzle of honey sparingly.
  • Vegan adaptation: Ensure any fats used for frying are plant-based and pair with dairy-free ice cream or yogurt for serving.
  • Gluten-free: The dish is naturally gluten-free; ensure any serving accompaniment (like ice cream or toppings) is gluten-free certified if needed.
  • Regional twists: Swap pineapple for other tropical fruits like mango or jackfruit to explore new aromatics and textures, or add a pinch of warm spices—nutmeg, cinnamon, or allspice—for a cozy twist.
  • Textural variation: For extra crunch without losing juiciness, finish with a light dusting of toasted coconut or chopped roasted nuts just before serving.
  • Make-ahead note: The pineapple can be prepared ahead (without the final frying step) and fried quickly right before serving, keeping the fruit juicy and the crust crisp.

Storage & Make-Ahead Ideas

Because this dish centers on a delicate balance of caramelized exterior and juicy interior, storage considerations matter for texture and flavor retention.

  • Leftovers: Store cooled fried pineapple in an airtight container in the refrigerator for up to 2 days. Reheat gently in a skillet over low heat, reserving a touch of fat to re-crisp the edges. Avoid overcrowding the pan to preserve the crispiness.
  • Make-ahead approach: If you’re planning a party, you can prepare the pineapple slices and marinate them in a light rum syrup ahead of time. When ready to serve, finish with a quick fry or pan-sauté to re-activate the caramelization and warm through the fruit.
  • Freezing: Freezing fried pineapple is not ideal for best texture, as the caramelized crust can become less crisp upon thawing. If you must freeze, freeze in a single layer on a sheet tray first, then transfer to an airtight container. Reheat in a hot pan to reclaim some of the crisp edges.

Fun Facts & Trivia (Optional)

Did you know that pineapple is not only a tasty fruit but also a symbol of hospitality across many cultures? Its distinctive crown makes it instantly recognizable and often used in decorative motifs that evoke the idea of welcome and festive sharing. Rum, meanwhile, has a storied history tied to the Caribbean and the global trade networks that connected distant islands to bustling ports. The fusion of pineapple and rum in cooking echoes centuries of exploration, colonization, and cultural exchange—each bite a reminder that food travels, evolves, and becomes something more than the sum of its origins. And the “fried” technique? It draws from a long tradition of skillet sweet treats where high heat creates a caramel-crust that crackles under a tender fruit interior, offering a comforting, almost universal appeal—from island markets to grandmother’s kitchen tables.

Inspiration Notes

For cooks seeking an emotionally resonant dish that still feels modern, Rum-Soaked Fried Pineapple hits a sweet spot. It blends nostalgia with novelty, the familiar with the adventurous. The dish invites storytelling—about family gatherings, tropical travels, or simply a moment when you decide to treat yourself with something bright and indulgent. Use it as a canvas to tailor sweetness, acidity, and aroma to your own taste profile, and you’ll find it becomes a personal signature, perfect for sharing with friends and loved ones.

Ingredients

  • Pineapple Prep
    • 1 medium pineapple, peeled, cored, cut into thick rings or chunky pieces
      → The star of the dish; choose ripe but firm pineapple to balance tartness with sweetness. Cutting into uniform rings or chunks ensures even soaking and frying. Remove the tough core to avoid fibrous bites. If using rings, trim uneven edges for consistent cooking.
    • 1/2 cup white or gold rum for soaking
      → Infuses pineapple with aroma and a light sweetness; use a light to medium rum so the flavor remains balanced. Soak the pineapple for about 20–30 minutes to impart flavor without turning the flesh mushy. Reserve any soaking liquid to use in the glaze if desired, but discard if strongly concentrated.
    • 2 tablespoons light brown sugar (optional)
      → Helps balance tartness and promotes caramelization during soak and frying. If you prefer less sweetness, reduce or omit. Dissolve the sugar in the soaking liquid to ensure even distribution.
    • 1 tablespoon fresh lime juice
      → Brightens pineapple flavors and helps cut through the richness of the fried crust. Use freshly squeezed lime for best acidity; strain to remove seeds if necessary.
  • Batter and Coating
    • 1 cup all-purpose flour (or gluten-free all-purpose flour)
      → Forms the dry base of the batter. All-purpose yields a light, crisp crust; gluten-free blends can be used in the same ratio but may require a touch more liquid. Sift to remove lumps for an even coating.
    • 1/3 cup cornstarch
      → Improves crispness and helps the coating cling to the pineapple. It also creates a delicate crust that stays crisp after frying; substitute with potato starch if needed.
    • 1/2 teaspoon baking powder
      → Provides lightness to the batter so the crust puffs slightly rather than staying dense. Do not skip or texture may be heavy.
    • 1/4 teaspoon salt
      → Enhances overall flavor and helps shell crispness; balances sweetness. Use fine sea salt for best results.
    • 1/2 teaspoon ground cinnamon (optional)
      → Adds warm spice that complements pineapple and rum. If you prefer a cleaner fruit flavor, leave out.
    • 1 cup very cold sparkling water or club soda
      → Creates a light, aerated batter that fries into a crisp crust. Keep the liquid ice-cold; for a thicker crust, slightly reduce the liquid or add a little more flour as needed.
  • Frying and Glaze
    • Neutral frying oil (vegetable, canola, or peanut) enough to fill your pan 1 to 2 inches deep
      → For frying, maintain a steady temperature around 350°F (175°C) for a crisp crust without scorching. Do not overcrowd the pan to preserve oil temperature and even cooking.
    • 2 tablespoons unsalted butter (for glaze)
      → Melts with sugar to create a glossy glaze that coats the pineapple. If dairy-free, substitute with coconut oil or omit and rely on sugar and rum glaze instead.
    • 2 tablespoons light brown sugar (for glaze)
      → Caramelizes with the butter and rum to form a luscious glaze that complements the tropical fruit. Adjust sweetness to taste; simmer until syrupy but not burned.
    • 2 tablespoons dark or spiced rum (for glaze)
      → Intensifies aroma and depth of flavor in the glaze; warm gently with butter and sugar to release complexity. If avoiding alcohol, omit and rely on a vanilla-imbued syrup or additional glaze sugar.
    • 1 teaspoon pure vanilla extract
      → Adds depth to the glaze; use genuine vanilla for best aroma. Add after the glaze has thickened slightly to preserve aroma during finishing.
    • Pinch of salt
      → Balances sweetness and enhances overall flavor of the glaze. Add toward the end of reduction for best integration.
  • Finish and Serving
    • Whipped cream or coconut cream for topping (optional)
      → Provides a creamy contrast to the hot, crisp pineapple and glossy glaze. For dairy-free, use whipped coconut cream; serve immediately for best texture.
    • Toasted shredded coconut (optional)
      → Adds extra tropical aroma and texture. Lightly toast in a dry skillet until lightly golden to release oils before sprinkling over the finished dish.
    • Fresh mint leaves (optional)
      → Adds a pop of color and a fresh aroma that brightens the overall flavor. Tear or finely chop and scatter on top just before serving.

Instructions

  • Prepare the pineapple by selecting a ripe but firm fruit and cutting it into uniform thick rings or chunky pieces for even soaking and frying; stand the pineapple on its base, trim the crown and base, then slice away the skin, core if desired, and cut into pieces of consistent thickness to prevent uneven cooking; pat dry with paper towels to remove surface moisture that would hinder coating adhesion.
    → Uniform pieces ensure even heat transfer and soaking, and dry surfaces help the batter adhere for a crisp crust.
  • Whisk together the soaking liquid by combining 1/2 cup rum, 2 tablespoons light brown sugar, and 1 tablespoon fresh lime juice in a wide bowl until the sugar dissolves completely and the mixture is smooth; taste for balance and adjust if needed; set aside briefly so the flavors meld.
    → Dissolving sugar ensures even sweetness and a smooth soak; the lime juice brightens the pineapple, countering richness later.
  • Immerse the pineapple pieces in the prepared soaking liquid, turning to coat fully, then cover and refrigerate for 20–30 minutes to infuse aroma without turning the flesh mushy; reserve any soaking liquid to use in the glaze if desired, but discard if it becomes strongly concentrated.
    → Soaking imparts tropical aroma and a touch of sweetness; do not over-soak to preserve texture for frying.
  • While the pineapple soaks, prepare the batter by sifting 1 cup all-purpose flour (or gluten-free alternative) with 1/3 cup cornstarch, 1/2 teaspoon baking powder, and 1/4 teaspoon salt in a large bowl; whisk in 1/2 teaspoon ground cinnamon (if using) to evenly distribute spice; chill or rest the dry mixture briefly to keep it light.
    → Sifting removes lumps for a smoother batter; airiness from the baking powder helps the crust puff lightly during frying.
  • Introduce the cold liquid to the dry mix by gradually whisking in 1 cup very cold sparkling water or club soda until the batter is thick enough to coat a piece but still flows; avoid overmixing to keep the batter light and aerated; if too thick, add a tiny splash more sparkling water.
    → The carbonation creates a crisper crust; cold liquid minimizes gluten development and yields a lighter fry.
  • Line a rack or baking sheet with parchment and pat the soaked pineapple pieces dry again to remove surface moisture; then dip each piece into the batter, turning to coat completely, and allow any excess batter to drip back into the bowl; place coated pieces on the rack so crust is set slightly before frying.
    → A thorough coating ensures a uniform crust; excess batter can cause greasy hot spots or clumping.
  • Heat neutral frying oil in a heavy, deep pan or skillet to 350°F (175°C); use a thermometer to monitor temperature and maintain it within 340–360°F during frying; avoid overcrowding the pan to prevent temperature drop and soggy crust.
    → A steady, hot oil produces a crisp crust and prevents greasy results; crowding lowers oil temperature and leads to uneven browning.
  • Fry the battered pineapple pieces in batches, cooking until golden brown and crisp, about 2–3 minutes per batch, flipping once if necessary for even color; use a slotted spoon to turn pieces and maintain control, then transfer to a wire rack over a sheet pan to drain excess oil.
    → Proper frying time yields a crisp exterior while keeping the pineapple tender inside; draining prevents sogginess from residual oil.
  • Prepare the glaze by in a small saucepan combining 2 tablespoons unsalted butter, 2 tablespoons light brown sugar, and 2 tablespoons dark or spiced rum; warm gently over medium heat until the butter melts and the sugar dissolves, then simmer briefly until the mixture thickens to a glossy syrup; remove from heat and stir in 1 teaspoon pure vanilla extract and a pinch of salt.
    → Gentle warming releases the rum’s aroma and integrates flavors; a light simmer ensures a coatable glaze that clings to the hot pineapple.
  • Add the fried pineapple to the glaze in small batches or brush the glaze over each piece; toss or swirl to coat completely, allowing the glaze to glossy coat and set slightly on the hot surface; if desired, keep glazed pieces warm on a rack while finishing the rest.
    → Coating while hot ensures adhesion and a luscious, shiny finish; stirring too vigorously can remove the crust, so handle gently.
  • Finish with optional toppings by dolloping whipped cream or coconut cream alongside the glazed pineapple, sprinkling toasted shredded coconut over the top for extra tropical aroma, and scattering fresh mint leaves for color and brightness; add these just before serving to preserve texture and aroma.
    → Cream and coconut add contrast to the hot, crisp pineapple and glossy glaze; toasted coconut heightens aroma and texture while mint provides a fresh finish.

Notes

These rum-soaked fried pineapple pieces are a tropical treat with a crisp, caramel-glazed crust. The pineapple is briefly soaked in light rum to infuse aroma and a touch of sweetness before being coated in a delicate batter and fried until golden. For best results, choose ripe but firm pineapple and cut it into uniform chunks to ensure even soaking and frying. A squeeze of fresh lime juice in the soak brightens the fruit, while a pinch of cinnamon in the batter adds warm depth that pairs beautifully with the tropical flavors. The glaze—made with butter, brown sugar, vanilla, and a little more rum—forms a glossy syrup that clings to the hot pineapple and enhances the aroma as it cooks. Keep your frying oil at about 350°F (175°C) and fry in small batches to avoid crowding, which can dull the crust and lower the oil temperature. Serve with whipped coconut cream or a light dusting of toasted coconut and fresh mint for contrast; dairy-free options substitute coconut oil for butter and use coconut cream as topping. To accommodate gluten-free diets, use gluten-free all-purpose flour and ensure the baking powder is gluten-free; you may need a touch more liquid if using a gluten-free blend. Leftovers reheat well in a 350°F (175°C) oven to re-crisp, though they are at their best fresh from the fryer.

Tips

Tips for Rum-Soaked Fried Pineapple

Pineapple prep tips

  • Choose pineapple that smells sweet at the crown and feels heavy for its size. Firm flesh with a little give is ideal for soaking and frying.
  • Cut into uniform thick rings or chunky pieces to ensure even soaking and consistent cooking; remove the tough core to avoid fibrous bites.
  • Pat the pineapple dry after cutting. Excess moisture can dilute the rum soak and cause splattering during frying.
  • Soak the pineapple for 20–30 minutes in the rum mixture. Keeping the soak brief but thorough preserves texture while imparting aroma; refrigerate during soak if you’re scaling up the time.
  • Dissolve the brown sugar in the soaking liquid to promote even caramelization during the soak and subsequent fry. If you prefer less sweetness, reduce or omit.
  • If using rings, trim uneven edges to promote uniform soaking and frying; arrange pieces in a single layer for even exposure.
  • Reserve soaking liquid for glaze only if it tastes balanced; discard if it’s too concentrated or strong.

Batter and coating tips

  • Sift dry ingredients (flour, cornstarch, baking powder, salt) to remove lumps and ensure a smooth, crisp crust.
  • Warmth and aeration matter: use very cold sparkling water and keep it on ice until ready to mix for a lighter, crisper coating. If the batter thickens, whisk in small amounts of cold water.
  • For a lighter crust, use 1 cup all-purpose flour with the indicated amount of cornstarch; for a slightly sturdier crust, you can increase cornstarch by up to 1–2 tablespoons.
  • Keep the pineapple pieces dry before dipping to improve batter adhesion. A quick pat with paper towels helps.
  • If you want a bit of extra warmth, add the optional 1/2 teaspoon ground cinnamon to the batter; for a cleaner fruit flavor, leave it out.
  • If you’re avoiding gluten, use a gluten-free all-purpose flour blend in the same ratio; you may need to adjust liquid slightly.
  • Test-fry a small piece first to check the crust thickness and oil temperature before proceeding with all pieces.

Frying and glaze tips

  • Maintain neutral frying oil at a steady 350°F (175°C). Use a thermometer and avoid overcrowding to prevent temperature drops and uneven cooking.
  • Pat the batter-coated pineapple briefly to remove excess batter; this prevents a thick, gummy crust.
  • Fry in batches until the crust is golden and crisp, about 2–3 minutes per batch. Transfer to a rack to drain excess oil.
  • For the glaze, melt butter with brown sugar over medium heat, then stir in the rum. Simmer until the mixture thickens to a glossy syrup; remove from heat before it scorches.
  • Add a splash of vanilla extract and a pinch of salt toward the end of the glaze reduction to deepen flavor and balance sweetness.
  • If you’d like a lighter glaze, you can substitute part of the rum with a touch of pineapple juice or water and simmer until syrupy but not overly thick.
  • Warmly glaze the fried pineapple while it’s still hot so the coating accepts the glaze evenly. Reserve a small amount for serving on the side if desired.
  • Alcohol notes: if you prefer no alcohol, omit the rum in the glaze and replace with a vanilla syrup or a small amount of pineapple juice reduced with sugar.

Finish and serving tips

  • Serve immediately for the best contrast between the hot crisp crust and the glossy glaze. If needed, keep warm in a 200–250°F (90–120°C) oven in a single layer until ready to plate.
  • Top with whipped cream or coconut cream for a creamy counterpoint to the warm fruit. For dairy-free, use whipped coconut cream.
  • To add texture and tropical aroma, sprinkle toasted shredded coconut just before serving; lightly toast in a dry skillet until fragrant and golden.
  • Finish with fresh mint leaves and a light drizzle of any remaining glaze for color and brightness.
  • If prepping ahead, keep the pineapple and batter components separate; fry just before serving to maintain crispness.

FAQ

What is Rum-Soaked Fried Pineapple?

A tropical dessert where pineapple chunks are briefly soaked in rum to infuse flavor, then coated and fried until crisp and caramelized. It’s typically served warm with vanilla ice cream or whipped cream. Note that some alcohol remains after cooking, but much of it cooks off during frying.

What ingredients do I need?

You’ll need a few ingredients for the pineapple, the rum soak, and the fried coating:

  • 1 medium pineapple, peeled, cored, and cut into 1-inch chunks (or rings)
  • 2–4 tablespoons light or dark rum (for soaking)
  • 2–3 tablespoons brown sugar (adjust to taste)
  • 1/2 teaspoon vanilla extract
  • Batter/coating: 1/2 cup all-purpose flour, 1/4 cup cornstarch, 1/2 teaspoon baking powder, pinch of salt, about 2/3 cup cold water or club soda
  • Oil for frying (neutral oil like canola or peanut)
  • Optional for serving: vanilla ice cream, whipped cream, mint leaves
Should I use fresh pineapple or canned?

Fresh pineapple is preferred for texture and brightness. Choose ripe but firm fruit, then cut into chunks. If you must use canned pineapple, drain well (and pat dry) and consider reducing extra sugar since the fruit may be sweeter from syrup. You may also rinse and pat dry to remove excess syrup before soaking.

How long should I soak the pineapple in rum?

Soak the pineapple for about 15–30 minutes. Soaking helps impart rum flavor, but too long can make the pineapple soggy. If you’re short on time, 10–15 minutes still adds noticeable aroma without compromising texture.

Can I omit the alcohol or use a substitute?

Yes. For a non-alcohol version, use pineapple juice with a few drops of almond extract or rum-flavoring, or simply skip the flavoring altogether for a milder version. The dish will still be delicious with a touch of vanilla or caramel notes from the fried coating.

What oil and frying method should I use?

Use a deep, heavy pan or a wide skillet with high sides. Heat oil to 350–375°F (175–190°C). Fry pineapple in batches to avoid overcrowding, about 2–4 minutes per batch until the coating is golden and crisp. Drain on a rack or paper towels.

How do I get a crispy coating and caramelized pineapple?

Tips for best results:

  • Pat the pineapple dry after soaking to help the coating stick and to prevent oil splatter.
  • Prepare the batter with ice-cold liquid and keep it just thin enough to coat the pineapple.
  • Dust the pineapple pieces lightly with a touch of cornstarch before dipping in batter for extra crisp.
  • Maintain consistent oil temperature and fry in small batches to avoid soggy results.
  • Let fried pieces drain well and serve immediately for maximum crispiness.
Is it safe to flambé the rum after frying?

Flambéing is optional. If you choose to flame, heat a small amount of rum separately and ignite it away from the pan, or carefully flame a warmed rum-soaked portion with a long lighter away from the fryer. Always prioritize safety: keep hair tied back, use a long-handled tool, and have a lid or fire extinguisher handy in case of emergencies.

How should I serve and pair it?

Serve the warm fried pineapple with vanilla ice cream or whipped cream. A light caramel sauce or extra rum sauce drizzled on top is nice, and a sprinkle of fresh mint or a pinch of cinnamon adds aroma and color.

How do I store leftovers and reheat?

Leftovers can be treated best when kept crisp. Store fried pieces on a rack in the refrigerator or a container with ventilation for up to 2–3 days. Reheat in a 350°F (175°C) oven or air fryer for a few minutes to restore crispiness. Avoid microwaving, which can soften the coating.

Introduction / Hook

There’s something almost magical about a single cauliflower transformed into a gleaming, golden “steak”—crisp on the outside, tender within, and infused with the comforting warmth of caramelized edges. Crispy Baked Cauliflower Steaks are not just a side dish; they’re a conversation starter, a centerpiece that proves you don’t need meat to achieve satisfying heft and depth. As the oven hums and the kitchen fills with a toasty, savory perfume, you’ll feel the anticipation rise: a plate that looks impressive enough for a dinner party, yet friendly enough for a weeknight crowd. Each bite offers a satisfying crack of crust, a whisper of nutty sweetness from the roasted cauliflower, and a delicate, almost creamy interior that gates the flavor with a gentle, lingering finish. This dish invites you to slow down, savor the aroma, and let the textures do the talking. It’s one of those recipes that makes you want to pull up a chair, plate seconds, and tell stories while the pan glistens with a sun-kissed glaze and the room smells like a warm, inviting kitchen on a late autumn afternoon.

What makes Crispy Baked Cauliflower Steaks so appealing isn’t merely the taste—it’s the confidence they bring to the table. There’s a sense of theater in presenting thick, uniform slices that hold their shape, a dramatic sizzle when they emerge from the oven, and a versatility that turns them into a canvas for countless flavor profiles. You can reach for a simple, bright finish with citrus and herbs, or lean into a deeper, smoky glaze that evokes cozy winter meals. The result is a plant-based star that can stand shoulder to shoulder with meat dishes, offering protein-friendly satisfaction without compromising on texture or aroma. In short, these cauliflower steaks celebrate vegetables in all their glory: sturdy, striking, and surprisingly indulgent.

Beyond the visual appeal, this recipe is a practical ally for any cook. It’s easy to prepare in advance, forgiving when a spice blend doesn’t quite hit the mark, and wonderfully adaptable to dietary needs or ingredient availability. The method embraces the natural porous structure of cauliflower, inviting it to soak up flavors while forming that coveted crust—crisp, nutty, and deeply toasted in every bite. It’s a dish that travels well from oven to table, pairs beautifully with a variety of sauces, and remains a comforting, familiar favorite even for those who aren’t sure what to do with a head of cauliflower. When you serve Crispy Baked Cauliflower Steaks, you’re serving a moment of culinary theater—without a lot of fuss—where simple ingredients are elevated by technique, care, and a touch of culinary bravado.

The Story Behind the Dish

The idea of turning vegetables into substantial, steak-like slices has roots in the modern plant-forward movement, where cooks began reimagining familiar shapes to celebrate vegetables as the centerpiece rather than a supporting cast. Cauliflower, with its compact cross-section and sturdy stalks, is uniquely suited to become a sliceable, shareable “steak.” The appeal is practical as well: when you slice a head into thick rounds, you reveal a clean geometry that bakes evenly and presents dramatically on a plate. The kitchen folklore around this dish suggests that the success lies in treating the cauliflower kindly—let it dry a bit after slicing, give it a gentle browning on all sides, and finish with a glaze or seasoning that evokes a contrast of toasted savoriness with bright, zesty notes. It’s a modern riff on classic roasts, a vegetable-forward homage to the concept of a hearty entrée, and a reminder that plant-based cuisine can offer the same satisfying textures and aromatic complexity you expect from traditional meat-centered dishes.

As with many iconic dishes, this recipe has traveled through home kitchens, test kitchens, and café menus before arriving at the confident place it occupies today. The cauliflower steak captures a trend—turning a humble vegetable into a visually striking and deeply flavorful main course—while maintaining accessibility. It’s the kind of dish that travels well: a café menu might feature it with a drizzle of lemon-tahini sauce and a sprinkle of herbs, a family dinner might pair it with a dollop of garlicky yogurt or a smoky pepper relish, and a weeknight rotation might see it dressed with olive oil, paprika, and a touch of grated cheese if desired. The story isn’t just about technique; it’s about how a simple head of cauliflower can become a canvas for seasonality, texture, and creative cooking that speaks to both tradition and experimentation.

Historically, vegetables have always played a starring role in many cuisines, and this dish is part of a broader dialogue about honoring plant-based ingredients with respect for how they’re cooked. The cross-sectional “steak” format evokes a sense of familiarity—an invitation to treat vegetables as you would a cut of protein—while reminding us that the most satisfying flavors often come from honest, time-honored techniques like roasting, searing, caramelizing, and finishing with a bright accent that lifts the profile. In that sense, Crispy Baked Cauliflower Steaks is more than a recipe; it’s a small celebration of how far home cooking has come, how delicious vegetables can be when given room to shine, and how a little heat, a little salt, and a little patience can transform something as unassuming as cauliflower into a centerpiece worthy of sharing with family and friends.

Why You’ll Love This Recipe

  • Impressive centerpiece without the heaviness: Thick, wine-stain slices that hold their shape and present beautifully on a plate.
  • Ultra-crispy crust with a tender interior: A contrast that feels indulgent and comforting, like a roasted vegetable au gratin without the dairy burden.
  • Versatile flavor canvas: Works with bright citrus, herby greens, smoky paprika, garlic-tinged sauces, or a tangy yogurt-based drizzle—perfect for customization.
  • Plant-based, gluten-free, and easily dairy-free: A friendly option for a wide range of dietary preferences without sacrificing taste or texture.
  • Make-ahead friendly: Slices can be prepared in advance, then crisped and finished just before serving for a streamlined weeknight or entertaining plan.
  • Great for meal prep: A single well-cooked head yields multiple satisfying portions that reheat nicely without losing flavor or texture.
  • High culinary versatility: Pairs beautifully with grains, legumes, salads, roasted vegetables, or a bright smear of sauce, making it suitable for everyday dinners and special occasions alike.

Flavor Profile & Texture

The flavor profile of Crispy Baked Cauliflower Steaks is a harmonious balance of roasted, nutty, and slightly sweet notes, with a toasty, caramelized crust that provides a direct hit of savoriness. The exterior develops a deep, amber-brown crust—almost like a crust that forms on a good roast—thanks to the natural sugars in the cauliflower and the gentle browning that occurs in a hot oven. This crust offers a crisp bite that’s as satisfying as potato skin, yet lighter, with a delicate crumb that reveals the soft interior beneath.

The interior is creamy and fork-tender, with the cauliflower’s natural sweetness peeking through. It isn’t mushy or watery; it holds shape and yields a comforting bite that invites you to savor each mouthful. The careful balance between the crust and the center is what makes these steaks so alluring: you get the best of both worlds—crisp texture and a tender, forgiving middle. Depending on how you season or glaze them, you can dial the flavor profile toward brightness and lift or toward warmth and depth. A subtle touch of lemon zest or a drizzle of olive oil with herbs can brighten the palate, while garlic, paprika, cumin, or smoked spices can deepen the profile and create a more roasty, comforting theme.

In terms of aroma, expect a toasty perfume that mingles with the soft, earthy scent of roasted cauliflower. The onion-and-garlic notes from seasonings (even if used lightly) fill the kitchen with a savory warmth, and any fresh herbs added at the finish release a hint of piney brightness or citrus lift. Texture-wise, the contrast between the crisp exterior and the tender center creates a sensory experience that’s both satisfying and elegant—an interplay of sound and softness that makes each bite a little celebration.

Occasions & Pairings

Crispy Baked Cauliflower Steaks shine in a variety of settings. They’re equally at home as a weeknight main course for vegetarians and as an impressive centerpiece at a dinner party. Their versatility makes them a wonderful option for seasonal menus, holiday tables, or casual family gatherings where you want something a bit luxe without a lot of fuss.

Here are a few ideas for occasions and pairings to help you envision the finished plate:

  • Weeknight comfort with a bright finish: Serve the steaks with a lemon-tahini drizzle or a garlicky yogurt sauce and a side of quinoa or farro for a complete, satisfying meal.
  • Entertaining with flair: Pair the steaks with a vibrant chimichurri, preserved lemon relish, or a herbaceous gremolata, plus a colorful salad and roasted root vegetables.
  • Holiday tables with a modern touch: Plate alongside roasted squash, braised greens, and a grain pilaf, finishing with a candied citrus zest to add festive brightness.
  • Meatless Mondays or plant-forward feasts: Use as a central protein-like element in a larger spread featuring legumes, grains, and seasonal vegetables.

Pairings to consider, depending on your flavor direction:

  • Sauces and drizzles: Lemon-tahini, garlic yogurt (dairy or dairy-free), herb chimichurri, roasted red pepper relish, or a smoky paprika-miso glaze.
  • Fresh, bright accompaniments: A cucumber-dill yogurt salad, simple arugula and citrus salad, or a tomato-caper relish to cut through the richness.
  • Starches and grains: Quinoa, barley, farro, or a small handful of herbed couscous offer a welcome textural contrast and balance.
  • Drink pairings: A crisp white such as Sauvignon Blanc or Vermentino; or a light red with gentle spice notes like Gamay or Pinot Noir; for non-alcoholic options, a sparkling citrus soda or a cold-pressed green juice can be refreshing contrasts.

Tips, Variations & Substitutions

Here are ideas to tailor Crispy Baked Cauliflower Steaks to your pantry, dietary needs, and taste preferences. The goal is to maintain the magic of the crust while letting you explore different flavor roads without stepping away from the core technique.

General Tips

– Dry the cauliflower slices well before applying any oil or seasonings; removing surface moisture helps the crust develop and adhere evenly.

– Don’t overcrowd the baking sheet; give each steak space so air can circulate and promote even browning.

– Consider finishing with a bright, fresh element at the end—such as a squeeze of lemon or a handful of chopped herbs—to keep flavors lively and not heavy.

Vegan & Dairy-Free Variations

– Use olive oil or a neutral oil with your preferred spice blend; skip any dairy-based toppings or sauces, opting for plant-based yogurts or tahini sauces instead.

– A miso-glazed finish can add a savory, umami-rich layer that remains dairy-free and adds depth.

Gluten-Free & Grain-Free Variations

– Use gluten-free breadcrumbs or ground nuts (like almonds or pistachios) for a crunchy crust alternative that adheres well to the surface of the steaks.

– For a grain-free option, finish with a sesame crust or a simple herb crust and a drizzle of olive oil and lemon.

Flavor Variations

– Mediterranean vibes: Za’atar, sumac, lemon zest, and a drizzle of olive oil before roasting; finish with fresh parsley and a dollop of almond yogurt.

– Smoky & savory: Smoked paprika, cumin, garlic powder, and a chili crunch topping to add a little heat and complexity.

– Herby and bright: Fresh dill, parsley, lemon juice, and a light yogurt or cashew-based sauce for contrast.

Regional Twists

– Indian-inspired: Turmeric, garam masala, coriander, and a yogurt-based raita-style topping to balance the heat and spice.

– North African-inspired: Ras el hanout, sesame seeds, preserved lemon zest, and a drizzle of olive oil to bring warmth and aromatics.

Storage & Make-Ahead Ideas

Cacking on a few practical strategies can help you plan ahead and keep the dish vibrant even when you’re short on time. These tips are designed to maintain texture and flavor so leftovers remain appealing.

Leftovers can be stored in an airtight container in the refrigerator for up to 3 days. Reheat in the oven or toaster oven to restore crispness; avoid microwaving if you want to preserve the crust, as moisture can soften it. If you anticipate hosting or meal-prepping, you can slice the cauliflower in advance and keep the raw slices wrapped in a damp cloth in the refrigerator for a short period or season lightly to reduce prep time on the day of cooking. Freezing is possible for very prepared portions, but note that freezing and thawing may affect the texture of the crust and interior softness; for the best texture, cook fresh when possible, or re-crisp thoroughly in a hot oven after thawing.

Make-ahead ideas include marinating the surfaces with olive oil, garlic, and herbs a few hours before cooking, or preparing a bright, citrusy sauce in advance to drizzle over just before serving. If you’re entertaining, you can roast extra heads, slice into steaks, and hold them at room temperature briefly before finishing in a hot oven; this allows plates to be ready to go without losing the crust’s crisp edge.

Fun Facts & Trivia (Optional)

  • Cauliflower is a member of the Brassica oleracea family, related to broccoli, kale, and cabbage—making it a versatile seed of flavors in many culinary traditions.
  • The “steak” presentation is a modern culinary trend that celebrates vegetables as the main attraction, encouraging creative plating and bold flavor pairings.
  • Cauliflower contains fiber, vitamins, and minerals that support digestion and satiety, making it a satisfying plant-based option for meals that feel indulgent without heaviness.
  • Roasting or baking cauliflower at high heat caramelizes its natural sugars, creating a nutty, slightly sweet profile that pairs surprisingly well with acidic, bright, or smoky accents.
  • Experiments with crusts and coatings let home cooks tailor texture, from crumbly granules to a crisp, crunchy crust that echoes roasted nuts.

Ingredients

Cauliflower Steaks
  • – 1 large head cauliflower (about 1.5 pounds / 680 g), trimmed of leaves and core, cut into 1-inch thick steaks

    → The cauliflower acts as the base and center of the dish; keeping the core helps slices stay intact and hold toppings. Wash the head well and thoroughly dry the surface to help crisping in the oven. If some slices crumble, you can shave them into florets and roast as a separate side dish.
  • – 2 tablespoons extra-virgin olive oil, divided

    → Oil provides moisture for the steaks to roast and helps the crust adhere; divide so you can brush the steaks first and also moisten the crumb coating if needed. If you prefer less fat, you can reduce to 1 tablespoon, but expect a softer crust.
  • – 1/2 teaspoon kosher salt

    → Salt enhances natural cauliflower flavor and helps draw out surface moisture, promoting crisper edges during baking. Use fine kosher or sea salt for even distribution; adjust to taste if your cheese is salty.
  • – 1/4 teaspoon ground black pepper

    → Adds subtle heat and aroma to balance richness; freshly ground pepper releases more flavor and should be evenly distributed on all sides of each steak for consistent seasoning.
Crust & Seasoning
  • – 1/2 cup breadcrumbs (plain or gluten-free)

    → The crumb layer forms the crisp outer crust. Plain breadcrumbs keep the flavor neutral and crisp; gluten-free options work well. For extra crunch, mix with a portion of panko or crushed nuts, if desired.
  • – 1/4 cup grated parmesan cheese (or 2 tablespoons nutritional yeast for vegan)

    → Parmesan adds a salty, nutty depth and helps brown the crust; if avoiding dairy, use nutritional yeast to achieve a cheesy, savory flavor and color.
  • – 1 teaspoon garlic powder

    → Garlic powder gives concentrated savory aroma without introducing moisture that could make the crust soggy; evenly mix into the crumb to ensure consistent flavor in every bite.
  • – 1/2 teaspoon smoked paprika (or use regular paprika for milder flavor)

    → Imparts color and a gentle smoky note that pairs beautifully with roasted cauliflower; adjust to taste depending on how bold you want the crust.
  • – 1/2 teaspoon onion powder

    → Builds a deeper savory profile in the crust and complements garlic; it helps create a more rounded, restaurant-like finish without needing fresh onion.
  • – 2 tablespoons chopped fresh parsley (optional)

    → Adds color and a burst of fresh herb aroma; fold into the crumb mix for even distribution or sprinkle on after baking for garnish. If using dried parsley, reduce to 1 teaspoon.
  • – 1/4 teaspoon red pepper flakes (optional)

    → A touch of heat to balance the richness; cancel if you prefer a milder result; adjust amount to tolerance.
  • – 1-2 tablespoons warm water or dairy-free milk (optional, to moisten crumb)

    → If the crumb mixture feels dry or doesn’t cling well, whisk in a small amount of liquid until it just comes together; this helps the coating adhere to the cauliflower steaks without pooling moisture.
Optional Add-ins
  • – 1 tablespoon fresh lemon juice (optional, for serving)

    → A bright splash of acidity helps cut through the rich crust and enhances overall flavor; squeeze a little over the steaks just before serving or offer lemon wedges on the side.
  • – Fresh parsley leaves for garnish (optional)

    → A final green accent and fresh aroma; tear or chop leaves and scatter lightly over the hot steaks; parsley adds visual appeal and a clean finish.

Instructions

  • Preheat your oven to 425°F (220°C) and line a large rimmed baking sheet with parchment paper or lightly grease it to prevent sticking and promote even browning; a hot, prepared surface helps the crust set quickly and yields crisper edges.
    → Ensures the cauliflower steaks start roasting immediately when they hit the sheet, which aids in achieving a firm crust rather than a soggy surface.
  • Wash the cauliflower head, remove the outer leaves and the fibrous core, and trim so that you can slice into even 1-inch thick steaks; uniform thickness ensures even cooking and crust adhesion.
    → Keeping the core helps the steaks stay intact; if some slices crumble, reserve them as florets for roasting or another side dish.
  • Slice the head into roughly 1-inch thick “steaks” by cutting straight downward through the stem and keeping as much core as possible intact; handle gently to avoid breaking delicate edges; place on the prepared sheet spaced apart.
    → Uniform slices roast evenly; the core acts like a natural backbone to hold the shape during baking.
  • Pat both sides of each cauliflower steak thoroughly dry with a clean kitchen towel or paper towels to remove surface moisture that would steam the crust; dryness promotes browning and crisp texture.
    → Moisture on the surface creates steam when heated, which undermines crust formation and softens the exterior.
  • Brush the tops and the sides of the steaks with 1 tablespoon of the extra-virgin olive oil (reserve the remaining 1 tablespoon for later use) and season with 1/2 teaspoon kosher salt and 1/4 teaspoon black pepper; even coating ensures consistent browning and flavor.
    → Oil helps moisture balance, carries fat-soluble flavors into the crust, and aids adhesion of the crumb coating; salt enhances surface dryness and taste perception.
  • In a separate bowl, whisk together 1/2 cup breadcrumbs, 1/4 cup grated parmesan (or 2 tablespoons nutritional yeast for vegan), 1 teaspoon garlic powder, 1/2 teaspoon smoked paprika, 1/2 teaspoon onion powder, and 2 tablespoons chopped fresh parsley (optional) until evenly combined; this forms a cohesive, flavorful crust.
    → Even distribution of the spices and cheese ensures every bite has consistent aroma and color, while parsley adds brightness.
  • If the crumb mixture seems dry and will not cling, whisk in 1–2 tablespoons warm water or dairy-free milk a little at a time until the mixture just holds together when pressed; avoid soggy crumbs that slide off.
    → A moistened crumb coats better without pooling moisture, yielding a crisp, adherent crust.
  • Gently press the crumb mixture onto the top and sides of each cauliflower steak, turning to coat all surfaces and pressing firmly so the crust adheres; if needed, brush a thin layer of the reserved olive oil onto the crust to help it grab.
    → Firm adhesion prevents the crust from flaking off during flipping and baking, producing a uniform crust throughout.
  • Place the coated steaks back on the prepared sheet, giving each space to breathe; lightly mist or brush the tops with the remaining 1 tablespoon olive oil to promote golden-brown coloration during bake.
    → A light oil boost on the crust encourages Maillard browning, enhancing both flavor and appearance.
  • Bake for 25–30 minutes, flipping the steaks once halfway through the cooking time to ensure even crusting and tenderness; monitor for doneness as ovens vary.
    → Flipping ensures both sides develop crust and prevents one side from over-roasting while the other remains pale.
  • For extra crispness, optionally broil on high for 1–2 minutes at the end, watching closely to prevent burning; this intensifies color and edge crunch.
    → Brief high heat finishing enhances crust texture and deepens caramelization without drying the interior.
  • Remove from the oven and let the cauliflower steaks rest on the sheet for 5 minutes; resting helps the crust set and makes them easier to handle when serving.
    → Resting allows juices to redistribute slightly and the crust to firm up, reducing the risk of breaking apart when plated.
  • Optional finishing and serving: squeeze fresh lemon juice over the hot steaks and scatter extra chopped parsley for a bright contrast; serve immediately to enjoy the crisp crust at its best.
    → Acidity from lemon cuts richness and enhances color and aroma, while fresh parsley provides a vibrant finish.

Notes

These crispy baked cauliflower steaks deliver a savory, crisp crust while keeping the creamier interior of the cauliflower. Start with a large head to yield sturdy, 1-inch thick steaks; trim leaves and core, rinse well, and dry completely to promote browning and crust adhesion. If some slices crumble, save them as extra florets to roast separately or toss into a side dish.

Prepare the steaks by slicing straight down through the stem to maintain stability; keep the core intact so the steaks hold their shape during roasting. Brush the steaks with olive oil (the full 2 tablespoons divided) to help moisture the surface and aid the crust, reserving a portion to moisten the crumb if needed. If you prefer fewer calories, you can use 1 tablespoon of oil, but expect a slightly softer crust.

Season lightly with salt and pepper to enhance natural cauliflower flavor and draw surface moisture for crisper edges. Sprinkle 1/2 teaspoon kosher salt and 1/4 teaspoon ground black pepper, distributing evenly on all sides of each steak.

For the crust, combine 1/2 cup breadcrumbs (plain or gluten-free) with 1/4 cup grated parmesan cheese (or 2 tablespoons nutritional yeast for vegan). Add 1 teaspoon garlic powder, 1/2 teaspoon smoked paprika, 1/2 teaspoon onion powder, and optional 1/4 teaspoon red pepper flakes for a gentle kick. Fold in 2 tablespoons chopped fresh parsley if available for color and brightness. If using dried parsley, reduce to 1 teaspoon.

To help the crust cling, whisk in 1-2 tablespoons warm water or dairy-free milk as needed until the crumb mixture just comes together. Avoid adding too much liquid, which can make the crust soggy or runoff from the steaks.

Optional finishing touches: finish with a squeeze of fresh lemon juice over the hot steaks to brighten the flavors, and scatter extra parsley leaves for a fresh, colorful garnish. You can also serve lemon wedges on the side.

Cooking tips: preheat your oven to about 425°F (220°C) and line a baking sheet with parchment or a light coating of oil. For the crispiest crust, place the steaks on a rack set over the sheet to allow air to circulate; you can also bake directly on the sheet. Press the crumb mixture onto the top and sides of each steak, then bake about 20-25 minutes, flipping halfway, until the crust is golden and the cauliflower is tender inside. If you want extra crispness, broil for 1-2 minutes at the end, keeping a close eye to prevent burning.

Storage and variations: leftovers refrigerate well for 2-3 days; reheat in a hot oven to restore crispness. For dairy-free versions, rely on nutritional yeast for cheesy flavor and use gluten-free breadcrumbs. If you’re gluten-sensitive, ensure your gluten-free breadcrumbs are certified gluten-free. The crumb mixture can be customized with crushed nuts for extra crunch or a peppery kick with additional red pepper flakes.

Tips

  • Thoroughly dry the cauliflower after washing. Moisture on the surface will steam the crust rather than crisp it. After trimming, pat dry with a clean towel and let the florets sit uncovered for a few minutes to air-dry as needed before cutting into 1-inch steaks.
  • Keep the core intact when slicing to maintain structure. If any steak crumbles, don’t waste it—roast the pieces as florets on the side and enjoy them as a crunchy, separate component.
  • Oil helps both moisture and crust adhesion. Brush each steak with olive oil on all sides before coating, using the remaining oil to moisten the crumb if it seems dry. Avoid puddling oil, which can make the crust greasy.
  • To maximize crust crunch, toast plain or gluten-free breadcrumbs lightly in a dry skillet for 1–2 minutes until just golden before mixing with cheese and spices. This deepens flavor and improves browning of the crust.
  • Parmesan adds a salty, nutty depth and browning color. If you’re dairy-free, substitute with nutritional yeast and consider a small extra pinch of salt if needed to achieve a similar savory profile.
  • Distribute the garlic powder, onion powder, smoked paprika, and red pepper flakes evenly in the crumb mixture to ensure every bite is balanced. Freshly ground pepper also enhances aroma—don’t skip it.
  • Binder the crust with liquid as needed. If the crumb feels dry or isn’t clinging, whisk in 1–2 tablespoons warm water or dairy-free milk until the mixture just comes together. Too much liquid will soggy the crust, so add gradually.
  • Use a parchment-lined sheet or a wire rack over a sheet to bake. A rack allows air to circulate around each steak, promoting even browning and a crisper bottom. If you don’t have a rack, rotate the pan halfway through.
  • Roast at 425–450°F (220–230°C) for about 18–25 minutes, flipping halfway for even browning. If you have convection, or if you prefer extra crispness, run the oven with convection and keep an eye on color—the crust should be deep golden and the cauliflower just tender.
  • Finish with bright contrast. A squeeze of fresh lemon juice just before serving brightens the dish and cuts through richness. Garnish with chopped parsley for color and aroma; if using dried parsley, reduce to a light sprinkle.
  • Storage and reheating: refrigerate leftovers in an airtight container for up to 3 days. Reheat in a hot oven (375–400°F) for 8–12 minutes to recapture crispiness; a brief broil at the end helps re-crisp the crust.

FAQ

How do I choose a good cauliflower and cut it into steaks?

Look for a firm, dense head with tight white florets and minimal browning leaves. Remove the outer leaves, trim the stem ends, and slice the head into 3/4 to 1-inch thick steaks. Cut straight down through the core to create sturdy “steaks.” You may get 2–3 good steaks per head; the extra bits can crumble into florets.

What makes these cauliflower steaks crispy?

Dry the surface well, use a crunchy coating, and bake on a hot, parchment-lined sheet with space between each steak. A crust formed from panko and Parmesan (or almond flour for gluten-free) with a touch of oil crisps nicely. Flip halfway and finish under the broiler for extra crispness if you like.

What should I use for the crispy crust?

Classic Parmesan–Panko crust: 1/2 cup panko, 1/4 cup grated Parmesan, 1 teaspoon garlic powder, 1/2 teaspoon paprika, salt and pepper to taste, plus 1–2 tablespoons olive oil to help bind. For gluten-free, substitute almond flour (about 1/2 cup) in place of breadcrumbs. You can also add a pinch of Italian seasoning or lemon zest for brightness.

What temperature and how long should I bake them?

Preheat to 425°F (220°C). Line a baking sheet with parchment, arrange the steaks, and brush or spray lightly with oil. Bake 20–25 minutes, flip, then bake another 5–10 minutes until the coating is golden and crisp. If you want extra crispness, broil for 1–2 minutes at the end, watching closely.

Do I need to preheat the sheet or avoid crowding?

Yes. A preheated, hot sheet helps crisp the crust. Keep about 1 inch of space between steaks; overcrowding causes steaming and soggy crusts.

Are these recipes dairy-free or vegan-friendly?

Yes. Use dairy-free Parmesan substitutes or nutritional yeast for cheesy flavor, and oil or dairy-free mayo as a binder. For gluten-free prep, use almond flour or crushed nuts in place of breadcrumbs. Most ingredient lists are naturally vegan with these substitutions.

What flavor variations can I try?

Try lemon zest and chopped parsley after baking, or a drizzle of tahini–lemon sauce. Add a pinch of cayenne for heat, smoked paprika for depth, or garlic–butter (dairy-free if needed) after baking. Nutritional yeast also provides a cheesy note without dairy.

How should I store and reheat leftovers?

Cool completely, then refrigerate in an airtight container for up to 3 days. Reheat in a 350°F (175°C) oven for 5–7 minutes until hot and crisp again. The oven helps restore crispness better than the microwave.

Can I freeze cauliflower steaks?

Fresh baked steaks freeze best for up to 1 month. Reheat from frozen in a 350°F (175°C) oven until hot and crisp. Freezing raw steaks is not recommended, as texture can degrade after thawing.

What are common problems and how can I fix them?

Problems like soggy crust or uneven cooking can be caused by excess moisture, overcrowding, or uneven steak thickness. Pat the cauliflower dry, cut steaks to uniform thickness, apply a thin, even coating, and ensure space on the baking sheet. If edges brown too quickly, tent with foil and adjust the rack height or oven temperature slightly.

Introduction / Hook

Imagine biting into a slice of toast that tastes like a dream you didn’t know you were allowed to have for breakfast. Crème Brûlée French Toast is where brunch elegance meets comforting childhood favorites. The outside wears a crackling caramel crust that shimmers like glass, giving way to a supremely tender, custard-soft center that whispers vanilla, cream, and a kiss of citrus. The aroma unfurls through the kitchen in warm waves—brown butter, vanilla bean, and a faint citrus brightness that lifts the dish from comforting to celebratory. This is a recipe that feels both luxe and familiar, a testament to the magic that happens when a storied classical dessert is reimagined for a lazy weekend morning or a festive brunch with friends and family. It’s the sort of dish that earns a chorus of “wow” before the first bite and a chorus of “again, please” after. The ritual begins with choosing the right bread—thick-sliced brioche or challah that can soak up custard without losing its structure—and ends with that satisfying crack of caramel meeting a silk-smooth interior. The taste memory lingers: butter-soft bread, vanilla-sweet custard, a whisper of orange or lemon zest, and a caramel top that crackles beneath a fork. It’s decadence without pretension, simple techniques elevated by a single, transformative finishing touch. If you’re seeking a breakfast that doubles as a dessert-worthy showstopper, this Crème Brûlée French Toast invites you to savor every moment—crispy, creamy, fragrant, and deeply comforting all at once.

The Story Behind the Dish

The idea of French toast is steeped in the history of thrifty, delicious breakfasts—a clever way to revive stale bread and turn it into something irresistible. The French call it pain perdu, literally “lost bread,” and for centuries cooks have embraced the humble loaf, soaking it in enriched custard and cooking until it achieves a soft custard interior and lightly fried exterior. Crème brûlée, by contrast, is a quintessential French dessert—a silky custard finished with a brittle sugar crust created by torched caramel. The beauty of Crème Brûlée French Toast lies in marrying these two culinary cousins: the comforting, custard-soaked bread of a grand brunch and the dramatic, dessert-like sugar crust that crackles with a precisely torched sweetness.

One might picture a sunlit kitchen in a vintage French home, where generations of cooks passed down the practice of elevating simple ingredients with patient technique. The modern twist—combining the custard-soaked slices with a caramelized top that shatters under a fork—represents a culinary conversation between old-world technique and contemporary brunch culture. It’s the kind of dish that could originate from a family breakfast table that wanted to feel special without straying too far from the familiar. In many ways, Crème Brûlée French Toast embodies a global breakfast philosophy: honor quality ingredients, embrace thoughtful contrasts of texture, and let a single, well-executed flourish do the heavy lifting. The result is a plate that feels celebratory, almost festive, but remains approachable enough to become a beloved weekend ritual in homes across the world.

Why You’ll Love This Recipe

  • Impressively luxe, with minimal effort. The crust delivers a show-stopping crack, while the interior stays luxuriously custardy—no complicated techniques required beyond a simple caramelizing finish.
  • Make-ahead friendly. The bread can be prepared in advance by letting it soak in a custard-like mixture, making weekend mornings easier and more relaxed.
  • Versatile and adaptable. Use your favorite bread (brioche, challah, or even sturdy morning rolls), and adjust sweetness and citrus notes to taste.
  • Perfect for brunch or special occasions. It looks like a dessert but works beautifully as a celebratory breakfast or a sophisticated brunch centerpiece.
  • Balanced flavor profile. The vanilla custard brings creaminess and depth, the citrus adds a brightness, and the caramelized sugar provides a crisp contrast that lingers on the palate.
  • Kid-friendly and adult-friendly alike. It’s indulgent enough for grown-up mornings and approachable enough to win over younger palates with comforting flavors.
  • Pairs beautifully with accompaniments. Fresh berries, whipped cream, a dusting of extra citrus zest, or a splash of maple syrup all enhance the experience without overpowering the core flavors.

Flavor Profile & Texture

Crème Brûlée French Toast is a study in contrasts—soft versus crisp, warm versus bright, indulgent versus familiar. The base is bread that has soaked in a custardy bath until it’s supremely tender and aromatic. Think silky vanilla bean custard, enriched with cream or milk, gently perfumed by vanilla and a hint of citrus zest. When the slices hit the hot pan, they set into a delicate, custard-soft interior that remains resilient enough to hold its shape. The exterior transforms into a glossy, amber-gold surface that caramelizes into a thin, crackling crust—a sugar crust that crackles with the bite of a dessert while staying perfectly edible with the fork’s press.

The flavor journey starts with the comfort of butter and vanilla. The bread’s natural sweetness—especially if you choose brioche or challah—provides the perfect canvas for the custard’s richness. The citrus essence, subtle but precise, lifts the dish from heavy indulgence to something more nuanced and refreshing on the palate. A pinch of salt balances sweetness and heightens flavor, mirroring the delicate alchemy of a classic crème brûlée. When you slice through the top, the crack reveals a velvety interior that glides across the tongue, followed by the crisp, tiny shards of caramel that provide texture and a satisfying snap. The overall experience is both comforting and exciting: a brunch dish that behaves like a dessert, yet remains wholeheartedly suited to the morning table.

Texture-wise, you’ll love the interplay: the outer shell offers a delicate crunch that gives way to a creamy, custard center, each bite releasing a chorus of vanilla, dairy richness, and a whisper of citrus. The bread’s crumb holds its own without becoming stodgy; the custard bridges the gap between soft and structured, and the final sugar top delivers that iconic brûlée crack that makes this dish feel special every single time.

Occasions & Pairings

Crème Brûlée French Toast is a versatile star that can anchor a weekend brunch, a special holiday breakfast, or a celebratory breakfast-in-bed surprise. Its showpiece finish and universally appealing flavors make it an ideal centerpiece for gatherings where you want to impress without feeling overwhelmed in the kitchen. Here are some occasions and pairing ideas to consider.

  • Serve with a cevitable spread of fresh berries, yogurt, granola, and a light syrup or honey. The dish’s richness pairs well with brighter accompaniments and a sparkling beverage to brighten the table.
  • Elevate a festive spread with a few citrus twists and edible flowers as garnish, turning a simple weekend breakfast into a memorable holiday indulgence.
  • A single, perfectly prepared slice on a warm plate, a side of fresh fruit, and a mug of strong coffee or a light mimosa to set the tone for a cozy morning.
  • The custard sweetness and caramel top tend to be a hit with kids, especially when served with a dollop of whipped cream or a sprinkle of powdered sugar and berries.
  • Since the bread can soak and the custard can sit in the fridge for a short while, you can stagger the assembly and have a hot, crispy finish ready just as guests arrive.

Pairings to consider:

  • Fresh berries and citrus zest for a bright contrast.
  • Whipped cream or a dollop of vanilla yogurt for extra creaminess.
  • A warm maple or spiced syrup to drizzle as you cut into the crackling top.
  • A light dusting of cinnamon, nutmeg, or cardamom to accent the custard’s warmth.
  • Complementary beverages: a flat white, a robust black coffee, or a sparkling wine for brunch celebrations.
  • Side dishes: buttery, salted roasted nuts, a small fruit compote, or a tangy yogurt parfait to balance the richness.

Tips, Variations & Substitutions

Here are practical ideas to tailor Crème Brûlée French Toast to your kitchen, dietary needs, and taste preferences. Each tip preserves the magic of the dish while offering flexible options to fit your life.

Make it vegan

Use a plant-based milk with a thick creaminess (such as coconut cream mixed with almond milk) and a flaxseed or chia “egg” to mimic richness. Replace butter with a plant-based butter substitute, and opt for a vegan caramelizing option, such as a maple-syrup-based glaze with a touch of coconut sugar to achieve a crackly top. Use a sturdy vegan bread that soaks well without dissolving.

Gluten-free and grain-free options

Choose a gluten-free brioche or challah alternative, or use thick slices of a sturdy gluten-free bread. The custard itself is naturally gluten-free; ensure any toppings, syrups, or flavorings are gluten-free and avoid cross-contamination if you’re serving guests with celiac disease.

Low-sugar or alternative sweeteners

To reduce sugar, you can replace part of the sugar in the custard with a natural sweetener such as tightly controlled amounts of monk fruit or erythritol. For the brûlée top, you can use a brown sugar substitute or a smaller amount of sugar with a higher caramelization technique. The key is to maintain the balance between the top crunch and the interior’s creaminess.

Flavor variations

  • Add more zest to the custard and a touch of orange blossom water or lemon oil for a brighter finish.
  • A pinch of cinnamon, nutmeg, or a tad of ground clove can provide a warm, autumnal note that pairs beautifully with maple syrup.
  • A few drops of almond extract or a pinch of finely ground nuts in the custard add depth and a nutty aroma.
  • A light pinch of sea salt and a drizzle of olive oil over the finished slices can create an intriguing savory-sweet contrast for adventurous palates (serve with fruit or yogurt to balance).

Regional twists

  • Fold a little finely ground espresso or coffee into the custard for a mocha-inspired finish that pairs perfectly with chocolate-dipped fruits.
  • Use a cinnamon-spiced syrup or glaze to echo the flavors of classic maple-cinnamon breakfasts.
  • A whisper of rosemary or thyme in the glaze creates an aromatic, savory-with-sweet contrast that is surprisingly elegant.

Storage & Make-Ahead Ideas

Crème Brûlée French Toast offers several practical paths for make-ahead preparation and storage, making it friendly for busy mornings as well as leisurely weekend plans.

  • Make-ahead custard soak: Slice the bread and lay it in a dish, then pour over the custard mixture and refrigerate. The bread can soak for several hours or overnight, soaking up flavors and becoming deeply tender. When ready to cook, simply finish with the brûlée topping and caramelize just before serving for the best crackle.
  • Storage of baked portions: If you bake slices to serve later, store them in an airtight container in the refrigerator for up to 2 days. Reheat gently in a low oven or toaster oven to restore some crispness, and re-crystallize a fresh sugar top for the brûlée finish if desired.
  • Freezing tips: Bread slices freeze well before soaking. Freeze slices after they are cut, then thaw and soak as usual. After cooking, the top can be caramelized quickly to regain that crisp crystalline crust.
  • Make-ahead topping: Caramelize the sugar just before serving to preserve the signature crack. If you must prepare in advance, keep the topping separate and apply the brûlée crust when you’re ready to plate.

Fun Facts & Trivia (Optional)

Delightful anecdotes and culinary trivia can deepen appreciation for this dish. For instance, the act of caramelizing sugar with a kitchen torch is a technique famously associated with desserts like crème brûlée and some modern brunch dishes alike. The contrasting textures—a crisp caramel top and a soft, custardy interior—mirror the way chefs in brasserie kitchens modernize classic comfort food. The use of brioche or challah bread pays homage to bread-making traditions that celebrate enrichment with eggs and butter, creating a luxurious base that absorbs custard while maintaining structure. And while crème brûlée and French toast may hail from different culinary heritages, Crème Brûlée French Toast is a fascinating synthesis—an edible bridge between a beloved, hedonistic dessert and a timeless, comforting breakfast—embodying the best of both worlds in a single, memorable bite.

Ingredients

Crème Brûlée French Toast

Crème Brûlée French Toast Base

  • 8 thick-sliced brioche or challah bread slices (about 1 inch thick)
    → The bread acts as the vessel for the custard. Choose sturdy, day-old bread for best soakability and structure; fresh bread may become overly soft, so if using fresh, lightly toast or dry it for 10–15 minutes to firm up the crust.
  • 4 large eggs
    → Eggs provide the custard’s binding and structure, yielding a creamy interior after cooking. Whisk until completely blended and slightly airy to promote even absorption and a smooth texture.
  • 1 cup heavy cream
    → The heavy cream delivers rich, velvety custard and a decadent mouthfeel typical of crème brûlée-inspired dishes. For a lighter version, substitute with an equal amount of whole milk or a 50/50 mix, understanding it will be less luscious.
  • 1/2 cup whole milk
    → Adds moisture and helps balance the richness of the cream. Using whole milk preserves some creaminess without tipping into heaviness; adjust to taste if you prefer a lighter custard.
  • 1/3 cup granulated sugar
    → Sweetens the custard base and aids in a tender texture by slightly browning during cooking. You can adjust down a bit if you prefer less sweetness, but keep some sugar to maintain the classic crème brûlée balance.
  • 1 teaspoon pure vanilla extract
    → Imparts a warm, aromatic sweetness that drives the flavor of the custard. Use high-quality vanilla; if you have vanilla bean, scrape seeds into the custard and simmer briefly for extra depth.
  • 1/4 teaspoon fine sea salt
    → Enhances overall flavor and counteracts sweetness, ensuring the custard tastes well-rounded rather than flat. Even in rich mixtures, a pinch of salt is essential.
  • 1/2 teaspoon ground cinnamon (optional)
    → Adds a comforting warmth that complements the egg custard. If omitted, the toast will still be delicious; you can also sprinkle cinnamon on top just before serving for aroma.
  • 2 tablespoons unsalted butter, plus more for the pan
    → Used to cook the French toast, providing flavor and preventing sticking. Add a small amount of butter to the pan between batches to maintain a nice, even crust.

Brûlée Topping

  • 1/4 cup granulated sugar for topping
    → This sugar creates the caramelized brûlée crust once torched or broiled. Distribute evenly over the cooked French toast; use a fine or superfine sugar for a smoother shell, and ensure the toast is hot but not steaming when applying the sugar so it caramelizes correctly.

Serving Suggestions (Optional)

  • Pure maple syrup for serving
    → A light drizzle of maple syrup adds sweetness and moisture without overshadowing the brûléed crust. Serve warm to maintain crispness on top.
  • Fresh berries or sliced fruit for serving
    → Adds brightness and acidity to balance the richness of the custard and the sweetness of the brûlé shell. Choose seasonal berries or stone fruits for best flavor.
  • Powdered sugar for dusting (optional)
    → A delicate dusting enhances presentation and a touch more sweetness without adding much moisture, helping the dish look as appealing as it tastes.

Instructions

  • Dry the bread slices if using fresh brioche or challah by toasting in a 300°F (150°C) oven for 10–15 minutes, turning once, until the exterior feels firm to the touch; this preserves structure during soaking.
    → Dry bread absorbs custard without becoming soggy and helps maintain a sturdy, souffle-like interior after cooking.
  • In a large bowl, whisk the 4 eggs with 1/3 cup granulated sugar, 1/4 teaspoon fine sea salt, and 1 teaspoon pure vanilla extract until completely blended and slightly airy; the aeration promotes an even, tender custard.
    → A smooth, airy mixture ensures uniform binding and prevents pockets of raw egg in the finished toast.
  • Whisk in 1 cup heavy cream and 1/2 cup whole milk until the custard is homogeneous and no streaks remain; the dairy provides richness and a silky mouthfeel.
    → Fully combined dairy prevents separation during soaking and results in a creamy interior once cooked.
  • If desired, whisk in 1/2 teaspoon ground cinnamon to the custard for warmth; omit if you prefer a pure vanilla profile.
    → Cinnamon adds a comforting aroma and depth that pairs well with the brûléed crust.
  • Measure 1/4 cup granulated sugar and set aside for topping, using a fine-grained sugar for a smoother brûlée crack; keep it ready near the stove.
    → A uniform sugar layer caramelizes evenly, forming a crisp, glassy shell when torched or broiled.
  • Dip each bread slice into the custard, allowing about 60–90 seconds per side for thorough soaking without oversaturation, then transfer to a rack to drain briefly before cooking.
    → Proper soaking ensures a creamy interior while the crust remains intact for a good sear.
  • Warm a large skillet over medium heat and add 1–2 tablespoons unsalted butter, swirling to coat; wait until the butter foams and just begins to brown for nutty aroma.
    → The butter provides flavor and helps develop a golden, crisp exterior without sticking.
  • Cook the soaked slices in the buttered pan until deeply golden on the first side, about 2–3 minutes; flip with tongs and cook the second side for another 2–3 minutes, adjusting heat to prevent burning.
    → Medium heat yields an even crust and a tender center, essential for a crème brûlée-style finishing.
  • Transfer finished slices to a warm oven (200°F/93°C) on a rack to keep them crisp while you complete the remaining slices.
    → Gentle warmth prevents moisture from building on the crust and maintains consistent texture across the batch.
  • Sprinkle a thin, even layer of the reserved 1/4 cup sugar over each warm slice just before brûlée; avoid piling sugar so it caramelizes uniformly.
    → An even sugar distribution ensures a uniform caramel shell and predictable browning during torching or broiling.
  • Use a handheld culinary torch to sweep the flame over the sugar in small circles until it melts, bubbles, and turns a deep amber, moving steadily to avoid hot spots; rotate the slice as needed for even coverage.
    → Direct heat creates a glassy, crackly crust that contrasts with the creamy custard underneath and should be applied evenly for uniform color.
  • If you do not have a torch, preheat the oven broiler on high, place the sugared toast on a parchment-lined sheet, and broil 1–2 minutes, watching constantly and rotating for even caramelization; remove as soon as the top is amber and crisp.
    → Broiling provides an alternative caramelization method, but requires vigilant attention to prevent scorching or soggy edges.
  • Serve the brûléed French toast immediately while the top remains crisp; drizzle with pure maple syrup and garnish with fresh berries or sliced fruit for brightness, offering a contrast to the rich custard.
    → The hot, crackly shell should crack on first bite, revealing the creamy interior and balanced sweetness from syrup and fruit.
  • Optionally dust lightly with powdered sugar just before serving to enhance presentation and add a touch more sweetness without moisture.
    → A delicate final touch elevates plating and aroma without sogginess.

Notes

“These Crème Brûlée French Toasts are indulgent and crowd-pleasing, built from sturdy brioche or challah soaked in a custard of eggs, heavy cream, milk, vanilla, sugar, and a pinch of salt for balance. Use day-old bread for the best soak and structure; if your bread is fresh, lightly toast or dry slices for 10–15 minutes before dipping. Whisk the eggs, cream, milk, sugar, vanilla, salt, and optional cinnamon until completely blended and slightly airy to encourage even absorption. Dip each slice briefly (do not oversoak) and cook in butter over medium heat until the edges are set and the surface is golden. The brûlée crust is created after cooking by sprinkling 1/4 cup sugar over the hot toast and caramelizing with a culinary torch or under a hot broiler until glossy and crackly. Serve immediately with maple syrup, fresh berries, or a dusting of powdered sugar, and consider a dollop of yogurt or crème fraîche for tang. Leftovers can be stored refrigerated for 1–2 days and gently reheated; re-brûlée the top quickly to refresh the crust. For a lighter version, substitute part of the cream with milk and/or reduce the sugar, keeping enough sweetness to maintain the brûlée signature. If making ahead for guests, you can prepare the custard and bread soak up to 24 hours in the fridge, then proceed with cooking and topping just before serving.”

Tips

Tips for Crème Brûlée French Toast

  • Bread selection and prep: Use thick-sliced, sturdy brioche or challah about 1 inch thick. If using fresh bread, dry or toast it lightly (10–15 minutes) to firm the crust so it soaks up the custard without becoming mushy. Trim uneven edges for even cooking.
  • Custard technique: Whisk eggs and sugar until pale and slightly airy. Warm the heavy cream and milk just to a gentle steam, then slowly whisk into the eggs to temper and prevent scrambling. Strain the mixture for an ultra-smooth custard. If using vanilla bean, scrape seeds into the cream for deeper flavor.
  • Soaking it right: Dip each bread slice in the custard and soak for about 8–12 minutes total, turning halfway. Thicker slices will hold more custard for a creamier interior. Avoid over-soaking to prevent the bread from disintegrating.
  • Seasoning balance: A pinch of fine sea salt enhances the custard’s sweetness. The optional 1/2 teaspoon cinnamon adds warmth; if omitted, you can finish with a light cinnamon dust just before serving for aroma.
  • Cook with flavor: Use a small amount of unsalted butter in a nonstick skillet and cook over medium heat. Let the pan come to temperature before adding the bread, and cook 2–3 minutes per side until deeply golden and the custard is set through.
  • Butter management: Add a touch more butter between batches to maintain flavor and prevent sticking. Wipe the pan with a paper towel between batches for even browning.
  • Applying the brûlée crust: After the toast is cooked, sprinkle a thin, even layer of granulated sugar on top. Use superfine sugar for a smoother shell. Apply the sugar while the toast is hot but not steaming to promote even caramelization.
  • Caramelizing the sugar: Caramelize with a culinary torch held about 6 inches away, moving in small circles to avoid hot spots. If using a broiler, place under a hot broiler for 1–2 minutes, watching closely to prevent burning.
  • Safety and control: Keep a damp towel handy and never rush the torch. If sugar begins to burn, move to a fresh slice and reapply sugar after a brief rest.
  • Make-ahead and serving notes: The custard can be prepared ahead; soak the bread and refrigerate for up to 24 hours before cooking. Let the brûléed crust rest 1–2 minutes to set, then serve immediately with maple syrup, berries, or a dusting of powdered sugar.

FAQ

Crème Brûlée French Toast — FAQ

What is Crème Brûlée French Toast?

Crème Brûlée French Toast is a custard-soaked French toast that captures the creamy interior and caramelized sugar crust of crème brûlée. Thick slices of bread are saturated in a rich egg–cream mixture, pan-fried until golden, and finished with a brûléed sugar topping for a crisp, glassy crust.

What ingredients do I need?

Essential ingredients:

  • Thick-cut brioche or challah bread
  • Eggs
  • Heavy cream (or a mix of milk and cream)
  • Milk
  • Granulated sugar
  • Vanilla extract
  • Salt
  • Butter for frying
  • Coarse sugar (demerara or turbinado) for the top

Optional serving ideas: fresh berries and maple syrup.

What bread should I use?

Use thick slices of sturdy bread like brioche or challah. Day-old bread is ideal because it soaks up the custard without falling apart. Avoid soft sandwich loaves that are too fresh and may become soggy.

How do I soak the bread?

Whisk together eggs, heavy cream, milk, sugar, vanilla, and a pinch of salt (and cinnamon if you like). Dip each bread slice in the custard, allowing it to absorb for about 30–60 minutes. For a stronger custard, you can soak overnight in the refrigerator, covered.

How do I cook Crème Brûlée French Toast?

Preheat a skillet over medium heat and melt a tablespoon of butter. Fry the soaked bread slices 2–3 minutes per side until golden and set. You can finish them in a 350°F (175°C) oven for 8–12 minutes to ensure the centers are cooked through. Remove from heat and prepare for brûlée topping.

How do I caramelize the top?

Sprinkle an even layer of coarse sugar over each slice. Use a culinary torch to caramelize the sugar until it’s melted and golden, forming a crisp crust. If you don’t have a torch, place the slices under a hot broiler for 1–2 minutes, watching closely to prevent burning.

How can I prevent soggy or undercooked centers?

Tips for best results:

  • Use thick, sturdy bread and not the freshest, most airy loaf.
  • Do not over-soak; 30–60 minutes is usually enough, and overnight soaking is optional.
  • Cook the slices on medium heat until the exterior is golden and the interior is set; finishing in the oven helps.
Can I prepare this ahead or store leftovers?

Yes. You can soak the bread overnight in the fridge (unbrowned). When ready to serve, cook the slices and brûlée the topping just before serving. Leftovers can be refrigerated for 1–2 days. Reheat in a toaster oven or moderate oven, then re-brûlée the top for a fresh crust if desired.

What variations can I try?

Try these tasty twists:

  • Add citrus zest (orange or lemon) to the custard for brightness.
  • Spice it with cinnamon, nutmeg, or cardamom.
  • Include a splash of liqueur (like Grand Marnier) for depth.
  • Top with fresh berries, a dollop of whipped cream, or a drizzle of maple syrup.
  • For a dairy-free version, use almond milk with coconut cream and a dairy-free butter substitute, and ensure the bread is dairy-free.

Introduction / Hook

The moment the skillet hits the stove and the air fills with the savory scent of breakfast sausage, you know something comforting is about to happen. Classic breakfast sausage and egg casserole is more than a recipe—it’s a warm invitation to gather, linger, and savor a morning that feels like it’s wrapped in a cozy blanket. Imagine the sizzle of sausage meeting eggs, the light crackle of a cheese-crusted top, and steam curling from a dish that promises hearty nourishment with minimal effort. This casserole is built for weekends when you want to feed a crowd without spending your entire day in the kitchen, yet it tastes as if every bite were prepared with patience and care. The beauty lies in its simplicity: simple ingredients transformed into a luxurious, comforting dish that tastes like a hug on a plate. When you slice through the golden edges to reveal the tender, custard-like center, you’ll understand why this classic breakfast favorite endures—from family kitchens to brunch spots, it’s a recipe that sticks to the ribs and lingers on your memory long after the last bite.

The Story Behind the Dish

Breakfast casseroles have long held a place of affection in American kitchens, evolving from practical, make-ahead solutions to beloved weekend traditions. The combination of sausage, eggs, and cheese echoes the hearty breakfasts that fueled farmers, craftspeople, and families who woke early to begin their day with warmth and protein. Sausage brings a bold, savory backbone—often seasoned with sage, pepper, and a hint of fennel—while the eggs provide a creamy canvas that binds every ingredient into one cohesive bite. Bread or potatoes, when included, were historically used to soak up the eggs and juices, turning leftovers into something special rather than something to tuck away. This dish, in its classic form, embodies the philosophy of nourishment with ease: you whisk together a few everyday ingredients, pour them into a pan, and bake until the surface turns a reassuring golden, the interior stays soft and forgiving, and the aroma beckons everyone to the table. There’s a nostalgic thread here, too. Many households grew accustomed to making an oversized pan ahead of time for guests, holiday mornings, or busy workweeks ahead, knowing that a warm slice would always brighten the moment. The casserole’s enduring appeal lies in its versatility and the sense that a simple pantry purchase can become something memorable when treated with care and time in the oven.

Why You’ll Love This Recipe

  • One-pan convenience with make-ahead flexibility — assemble the night before and bake in the morning for a seamless brunch or weekend breakfast.
  • Family-friendly and crowd-pleasing — a balanced, comforting dish that suits both kids and adults, encouraging leisurely meals together.
  • Budget-friendly ingredients that stretch to feed a crowd without skimping on flavor.
  • Versatile foundation — tasty on its own, but forgiving enough to pair with a variety of sides and beverages.
  • Creamy, savory satisfaction with a satisfying contrast between fluffy interior and golden-topped edges.
  • Sweet memories in every bite — a dish that evokes weekend mornings, shared stories, and soft sunlight on a kitchen table.
  • Adaptable to dietary needs — simple substitutions can keep this dish accessible for vegetarians, gluten-free diets, or lower-carb preferences (see tips and variations).

Flavor Profile & Texture

The flavor of this classic breakfast casserole centers on the marriage of savory sausage and creamy eggs, with cheese lending richness and a gentle lift of tang. The sausage provides a robust, meaty backbone—think slightly peppery, herbaceous notes with a touch of sage or fennel depending on the blend you choose. As the casserole bakes, the eggs swell and set into a soft, custard-like interior that swathes every bite in a delicate silkiness. The cheese melts into the mix, creating pockets of molten warmth that pull the dish into lush, comforting territory. The top develops a light, golden crust with hints of toasty aroma, offering a pleasing textural contrast to the soft center. If you’ve included bread or other starches, those pieces soak up the eggy richness, becoming tender morsels with a satisfying bite. The overall mouthfeel is a balance of tenderness and structure: airy enough to melt in your mouth, sturdy enough to hold its shape when scooped with a fork. Aromatics play their own small, bright role—onions, peppers, or herbs can peek through, delivering a fresh scent that lifts the dish from hearty to welcoming. The end result is a comforting, familiar flavor profile that feels timeless yet adaptable to your cooking mood—whether you crave a classic, unadorned rendition or a slightly bolder version with extra herbs or heat.

Occasions & Pairings

This casserole shines in a variety of settings, from intimate weekend breakfasts to generous holiday spreads. It’s equally at home as a lazy Sunday brunch star or a hearty post-party morning remnant that somehow makes everyone smile. Consider these occasions and pairing ideas to elevate the experience:

  • Weekends and family brunches — the kind of dish that gets people talking and plates cleared in no time.
  • Holiday mornings — bake a larger pan and let guests help themselves, creating a relaxed, festive atmosphere.
  • Company breakfasts or potlucks — easy to transport in a covered dish and easy to rewarm on arrival.
  • Game-day mornings — pair with hash browns or roasted potatoes, a crisp green salad, and a sparkling juice or mimosa bar.

Pairing suggestions to complete the table:

  • Side dishes: roasted potatoes or hash browns, sautéed greens, buttered toast, or a crusty baguette to scoop up every bite.
  • Fruit and brightness: a citrusy fruit salad, sliced oranges, or a yogurt-topped bowl of berries to balance the richness.
  • Beverages: strong coffee, rich espresso, or a light champagne or sparkling juice for a celebratory vibe; orange juice or a light mimosa works beautifully for brunch.
  • Dessert-style finish (optional): a light, lemony yogurt parfait or a scoop of vanilla bean yogurt can provide a clean finish after a hearty plate.

Tips, Variations & Substitutions

Made for creativity, this classic base invites a range of tweaks to suit your pantry, dietary needs, or cravings. Here are ideas to customize while keeping the essence intact:

  • Meat variations — swap in ground turkey or chicken for a lighter option, or mix mild and spicy sausage for deeper warmth. For a vegetarian version, use high-quality plant-based sausage or sautéed mushrooms with onions for savory depth.
  • Herbs and aromatics — fresh parsley, chives, thyme, or a pinch of smoked paprika can wake up the dish. A dash of hot sauce or crushed red pepper flakes adds a morning kick for those who like a bit of heat.
  • Cheese choices — cheddar provides classic sharp melt and color; pepper jack adds a gentle heat; Gruyère or fontina offers a nutty, luscious finish; for a lighter profile, use part-skim cheeses or a cheese blend.
  • Bread and starch options — if you want a heartier texture, fold in cubed crusty bread or hash browns. For a gluten-free version, substitute gluten-free bread cubes or omit bread altogether and rely on a higher cheese-to-egg ratio with a light breadcrumb-free top.
  • Vegetable inclusions — bell peppers, onions, spinach, or sautéed mushrooms introduce color, texture, and a nutrition boost without overpowering the sausage flavor.
  • Low-carb or keto-friendly tweak — reduce or omit bread or starches; increase eggs and cheese to maintain structure and richness while keeping the carb count lower.
  • Make-ahead/backup plan — assemble the dish, cover tightly, and refrigerate overnight. In the morning, bake a little longer at a slightly lower temperature to ensure the center sets without over-browning the top.
  • Regional twists — infuse with southwestern notes using green chili, cumin, and a touch of cilantro; or go classic New American with thyme and black pepper for a simple, elegant finish.

Storage & Make-Ahead Ideas

One of the strengths of a breakfast casserole is its ability to be prepared in advance and enjoyed later with little effort. Here are practical strategies to maximize flavor and texture while keeping the dish convenient:

  • Make-ahead preparation — assemble the casserole in your baking dish, then cover tightly with plastic wrap or a lid and refrigerate for up to 24 hours before baking. This not only saves time on busy mornings but also helps the flavors meld and develop a cohesive, well-seasoned profile.
  • Storage after baking — refrigerate any leftovers in an airtight container for up to 3–4 days. Reheat gently in the oven at a moderate temperature (around 325°F/165°C) until warmed through, or reheat in portions in the microwave for a quicker option.
  • Freezing tips — freeze uncooked assembled casseroles for up to 2–3 months; bake from frozen with a covered foil lid, adding extra time to ensure the center heats through. Once baked, leftovers can be frozen for an additional month or two and reheated when needed.
  • Reheating guidance — for the best texture, reheat in the oven rather than the microwave. Cover with foil to prevent excessive browning and bake until the center is hot and the cheese is melty again.
  • Seasoning adjustments after storage — if you notice that the dish tastes a touch flat after refrigeration, a light pinch of salt, pepper, or a drizzle of hot sauce at serving can brighten the flavors without overpowering the casserole’s balance.

Fun Facts & Trivia (Optional)

Delightful morsels of history lie beneath the surface of breakfast casseroles. A few fun notes you can share around the table while serving this dish:

  • Casseroles gained immense popularity in the United States during the mid-20th century, often celebrated for their practicality and ability to feed many with minimal hands-on cooking time. They became a symbol of homey, family-oriented meals.
  • Eggs have long been a breakfast hero across many cultures; when combined with meat and starch, they offer a complete, comforting dish that’s both quick to prepare and satisfying to eat.
  • Cheese, a staple in many casseroles, adds not only flavor but also a creamy texture that helps bind ingredients into a cohesive, sliceable dish—perfect for sharing at a table where conversation flows as freely as the cups of coffee.
  • Every region has its take on breakfast frittatas, strata, or bakes, but the sausage-and-egg combination remains a universal favorite because of its robust flavor and familiar, home-cooked character.

Ingredients

Sausage and Veggie Filling

  • Breakfast sausage (pork), 1 lb, crumbled

    → The sausage provides the primary savory flavor and fat that flavors the casserole. Crumbling the sausage allows the meat to render evenly and mix with the vegetables, creating a rich base. Brown completely in a skillet until no pink remains; drain excess fat if needed before mixing with vegetables.
  • Olive oil, 1 tbsp

    → Used to sauté the onions, peppers, and garlic so they soften evenly and develop sweetness without sticking to the pan. If your sausage has a lot of fat, you may reduce or omit the oil, but using a small amount helps prevent scorching of the aromatics.
  • Onion, medium, diced

    → Adds sweetness and depth to the filling; sauté until translucent and lightly caramelized to maximize flavor. Uniform dice ensures even cooking and consistent texture in the finished casserole.
  • Red bell pepper, diced

    → Contributes color, sweetness, and crunch; sauté with onion until tender. If you like more heat, you can mix in a small diced jalapeño or orange pepper.
  • Garlic cloves, minced (2)

    → Delicate sharpness that enhances the sausage and vegetables; add after the onions begin to soften so the garlic doesn’t burn and turn bitter. Mincing finely helps release aroma evenly throughout the dish.
  • Mushrooms, sliced (optional)

    → Adds earthiness and extra moisture; sauté until moisture has evaporated and the mushrooms are browned for best texture. Slice evenly to ensure uniform cooking and prevent soggy patches.
  • Fresh spinach, roughly chopped (optional)

    → Provides color, nutrition, and a light, leafy contrast; wilt quickly in the hot pan with the other vegetables. Squeeze out any excess moisture after wilting to avoid watery casserole.

Egg Custard

  • Eggs, large, 6

    → The eggs form the binding and structure of the casserole; whisk them thoroughly with the milk to create a smooth custard. Bring to room temperature for best emulsification and lift in texture once baked.
  • Whole milk, 2 cups

    → Provides moisture and tenderness to the custard; whole milk yields a creamier texture. If you prefer lighter, you can substitute part with 2% milk, but expect a less rich result.
  • Salt, 1/2 tsp

    → Essential for seasoning the custard and balancing flavors, especially with sausage. If your sausage is high in salt, you may want to start with 1/4 tsp and adjust to taste after mixing with the bread and cheese.
  • Black pepper, freshly ground, 1/4 tsp

    → Adds a gentle bite that complements the rich sausage and cheese; freshly ground pepper is more aromatic than pre-ground. Adjust amount to taste if using other strong ingredients.
  • Dijon mustard (optional), 1 tsp

    → A small tang to brighten the custard and help emulsify the mixture with the bread and cheese. If you don’t have Dijon, a teaspoon of regular mustard works as well, but mustard powder can also substitute for a milder flavor.

Bread Base and Assembly

  • Day-old crusty bread, 6 cups, cubed

    → The bread acts as a sponge for the custard, binding all components into a cohesive casserole with a soft, bread-y crumb. Use crusty bread so it soaks up the custard without turning into mush; cut into roughly 1-inch cubes for even absorption.
  • Melted butter, 2 tbsp

    → Toss the bread cubes with melted butter to enrich their texture and help the custard cling to each piece. Butter adds flavor and contributes to a slightly crisper edges as it bakes. If you prefer a lighter version, you can skip the butter, but the texture will be different.

Cheese and Herbs

  • Cheddar cheese, shredded, 2 cups

    → Provides the main melty, sharp cheese presence; some cheese can be stirred into the custard for extra ooze, with the remainder sprinkled on top to form a golden crust. For balanced flavor, choose a sharp or medium cheddar that melts well.
  • Parmesan cheese, grated (optional), 1/4 cup

    → Adds a salty, nutty note and helps with browning; use freshly grated Parmesan for best flavor. A small amount goes a long way in enhancing depth without overpowering the sausage.
  • Fresh parsley, chopped, 2 tbsp

    → Brightens the dish with fresh herbal aroma; fold a portion into the egg mixture or sprinkle on top after baking for color and flavor. Use flat-leaf parsley for best flavor; avoid heavy chopping to preserve color.
  • Green onions, sliced (optional), 1/4 cup

    → Gives a mild onion kick with a fresh crunch; sprinkle over the baked casserole for a pop of color and aroma. If using, add at the end to keep their brightness.

Instructions

  • Preheat your oven to 350°F (175°C) and lightly grease a 9×13-inch baking dish or a deep casserole dish with butter or nonstick spray.
    → This ensures the casserole releases cleanly and slices neatly after baking without sticking.
  • Set a large skillet over medium-high heat and crumble the breakfast sausage into the pan; cook, breaking up the meat with a spatula, until it is uniformly browned and no pink remains.
    → Browning develops rich flavor and renders fat, which will flavor the vegetables and custard; draining excess fat prevents greasiness in the finished dish.
  • If needed, add a light sheen of olive oil to the sausage pan, then add diced onion and red bell pepper; sauté until the vegetables are tender and the onions are translucent, about 5 to 7 minutes.
    → The oil ensures even cooking and sweetens the aromatics; uniform softness prevents uneven texture in the filling.
  • Add minced garlic and sliced mushrooms to the pan; cook until the mushrooms release their moisture and brown, about 4 to 6 minutes.
    → Garlic should be added after the onions begin to soften to prevent bitterness from burning, and browning mushrooms deepens savory flavor.
  • Stir in the roughly chopped fresh spinach and cook just until wilted; remove from heat and squeeze out any excess moisture.
    → Wilted spinach adds color and lightness without watery patches; squeezing moisture avoids a soupy finish.
  • In a large bowl, whisk together six large eggs and 2 cups whole milk with 1/2 teaspoon salt and 1/4 teaspoon freshly ground black pepper; add 1 teaspoon Dijon mustard if using and whisk until the mixture is smooth. If you want extra richness, whisk in 1 cup shredded cheddar into the custard at this stage.
    → Thorough whisking creates a cohesive emulsion that coats the bread evenly, yielding a creamy, uniform texture.
  • Place 6 cups of day-old crusty bread cubes in a separate large bowl and drizzle 2 tablespoons melted butter over them; toss until the cubes are evenly coated and glossy.
    → Butter enriches texture and flavor, and helps the bread absorb the custard while developing a gentle crust.
  • Combine the browned sausage and sautéed vegetables with the buttered bread cubes; fold in the wilted spinach, ensuring the mixture is evenly distributed and no large clumps remain; let it rest for 5 minutes so the bread can begin absorbing the flavors.
    → Resting helps moisture and seasonings distribute evenly for a cohesive bake.
  • Pour the prepared egg custard evenly over the sausage-bread mixture in the dish; press down gently with a spatula to ensure every piece of bread makes contact with the liquid for thorough absorption.
    → Even absorption prevents dry pockets and yields a creamy, well-bound casserole.
  • Sprinkle 1 cup shredded cheddar and 1/4 cup grated Parmesan over the top, then scatter chopped fresh parsley and sliced green onions if using; this builds a cheesy crust and bright herb aroma.
    → The top layer melts into a bubbly crust and the herbs finish with color and fragrance.
  • Bake in the preheated oven at 350°F (175°C) for 40 to 60 minutes, until the center is set, a knife inserted into the middle comes out clean or with a few moist crumbs, and the edges are lightly golden; if the top browns too quickly, tent with foil halfway through.
    → Proper baking time ensures the custard sets without drying and the cheese forms a pleasing crust; coverage prevents over-browning.
  • Remove the casserole from the oven and let it rest for 10 minutes before slicing; this rest period allows the custard to finish setting and makes serving cleaner.
    → Resting helps moisture redistribute and yields neater portions with better texture.
  • Slice into portions and serve warm, optionally garnished with extra chopped parsley or green onions for a fresh finish.
    → Finishing herbs provide color and aroma that complement the rich sausage and custard.

Notes

These Classic Breakfast Sausage and Egg Casserole notes help you deliver a comforting, make-ahead brunch that comes together with a rich sausage and egg custard bound by crusty bread.

  • Cook the sausage thoroughly and drain excess fat before mixing with vegetables to keep the casserole from becoming greasy.
  • Brown the onions and peppers well; aim for tenderness and a touch of caramelization to add sweetness and depth.
  • Add the minced garlic after the onions begin to soften to prevent burning and bitterness, ensuring a fragrant, evenly distributed aroma.
  • If using mushrooms, sauté until their moisture evaporates and they brown for a deeper earthy flavor and better texture.
  • For spinach, wilt quickly and squeeze out any excess moisture to avoid a watery bake.
  • Whisk the eggs with the milk until completely combined; bringing them to room temperature helps with emulsification and a smoother custard.
  • Use day-old crusty bread cut into roughly 1-inch cubes; toss with melted butter so the pieces soak up the custard and brown nicely during baking.
  • Stir some cheddar into the custard for extra ooze, and sprinkle additional cheese on top for a golden crust.
  • Make-ahead tip: prepare the filling and bread base in advance, whisk the custard separately, then refrigerate overnight and bake the next day for a quick morning meal.
  • Storage and reheating: refrigerate leftovers promptly; reheat individual portions until steaming hot, or bake a covered casserole to restore moisture. The dish can be frozen after baking for longer storage.
  • Gluten-free option: use day-old gluten-free bread and check sausage ingredients for gluten-containing fillers; avoid breadcrumbs unless they are gluten-free.
  • Dairy-free or lighter adaptations: substitute non-dairy milk (such as almond or oat milk) and use dairy-free cheese if desired; the texture and flavor will be lighter, but still tasty.
  • Serving ideas: pair with a simple green salad or sautéed greens and a bright fruit accompaniment to balance the richness.

Tips

Tips for Classic Breakfast Sausage and Egg Casserole

  • Brown the sausage in a large skillet over medium heat until fully cooked and nicely browned. Don’t crowd the pan; break it up as it cooks to ensure even rendering of fat and flavor.
  • Drain the excess fat after browning to prevent a greasy casserole and to help the custard set properly.
  • When sautéing vegetables, use a little olive oil as needed; sauté onions first until translucent, then add peppers and mushrooms. Add garlic near the end to prevent bitterness from burning.
  • If using mushrooms, salt lightly and cook until their moisture evaporates and the edges brown for deeper flavor and better texture.
  • Spinach should be added after the vegetables begin to wilt; roughly chop and cook just until wilted, then squeeze out excess moisture to avoid a watery casserole.
  • Bring eggs to room temperature and whisk thoroughly with the milk to create a smooth custard. Emulsification is best when ingredients are closer in temperature.
  • Whole milk yields a creamier custard; you can substitute part with 2% milk for a lighter result, but expect a less rich texture.
  • Season the custard thoughtfully. Because sausage can be salty, start with 1/4–1/2 teaspoon salt and adjust after mixing with bread and cheese.
  • Freshly ground black pepper adds a gentle bite; consider a small pinch of cayenne or hot sauce if you like a little heat.
  • Dijon mustard is optional but helpful; whisk 1 teaspoon into the custard to brighten flavors and aid emulsification. If unavailable, a small amount of regular mustard works too.
  • Use day-old crusty bread cut into roughly 1-inch cubes; toss with melted butter so each piece soaks up flavor and develops a slightly crisper edge as it bakes.
  • Ensure the bread is evenly distributed and well moistened by the custard, but avoid sogginess; aim for a cohesive bake with soft interiors and golden edges.
  • Cheese layering: shred cheddar evenly and reserve some to sprinkle on top for a golden crust; mixing a portion into the custard adds extra ooze.
  • Freshly grate Parmesan for a nutty, salty note and better browning; a little goes a long way.
  • Herbs brighten the dish. Fold chopped parsley into the egg mixture or sprinkle on top after baking for color and aroma; green onions add a fresh finish if used.
  • General bake tips: bake at 350°F (175°C) until the center is just set; cover with foil if the top browns too quickly. Let the casserole rest about 10 minutes before slicing.
  • Make-ahead option: assemble, cover, and refrigerate overnight; bake a bit longer if starting cold (plan for about 10–15 extra minutes).
  • Leftovers store well: refrigerate up to 3 days or freeze baked portions; reheat gently to maintain texture and moisture.

FAQ

What is Classic Breakfast Sausage and Egg Casserole?

A warm, comforting baked breakfast dish that layers savory sausage, scrambled eggs, bread cubes, and melted cheese. It’s easy to prepare ahead and feeds a crowd.

What do I need to make this casserole?

Main ingredients typically include 1 lb ground sausage, about 8 eggs, 6–8 cups cubed bread (day-old bread works great), 2 cups shredded cheddar, 1 cup milk, and a small onion. Optional additions are a bell pepper, herbs, salt, and pepper. A little butter or oil for greasing the dish is also handy.

How many servings does it make?

Depending on portion size, this casserole serves about 6–8 people, making it ideal for family breakfasts or brunches.

Can I prepare it ahead of time?

Yes. Assemble the casserole in a greased dish, cover tightly, and refrigerate overnight. In the morning, let it sit at room temperature for about 30 minutes before baking. Bake as directed, but you may need a few extra minutes if starting from cold.

How long and at what temperature should I bake it?

Bake at 350°F (175°C) for about 45–55 minutes, or until the center is set and a knife inserted in the middle comes out clean. The top should be lightly golden. For a faster bake, ensure the center reaches 165°F (74°C).

How can I customize the fillings or make substitutions?

Try these variations: replace sausage with turkey or chicken sausage, ham, or bacon; add sautéed spinach, mushrooms, or bell peppers; swap in gluten-free bread if needed; you can also reduce cheese or use a mix of cheeses. For a lighter version, use fewer eggs or a bit more milk.

Is this recipe gluten-free or dairy-free friendly?

Gluten-free: use gluten-free bread and check that the sausage and seasonings are gluten-free. Dairy-free: substitute non-dairy milk (almond, cashew, or soy) and dairy-free cheese, or omit cheese entirely. The rest of the recipe remains the same.

How should I store and reheat leftovers?

Store refrigerated in an airtight container for 3–4 days. Reheat in the oven at 325–350°F (165–175°C) for 15–20 minutes, or until warmed through, or use the microwave in 1–2 minute bursts, watching closely to avoid drying out.

Can I freeze the casserole for later?

Yes. You can freeze unbaked assembled casserole (tightly wrapped) for up to about 2–3 months, or freeze baked slices. Thaw overnight in the fridge, then bake or reheat as usual. If baking from frozen, increase bake time by about 15–30 minutes and ensure the center reaches 165°F (74°C).

What size dish should I use?

A standard 9×13-inch (23×33 cm) casserole dish works well, but you can scale to a larger or smaller pan if needed. The goal is to have a single layer of bread along the bottom with the egg mixture evenly distributed for even cooking.

Introduction / Hook

In the soft glow of a bustling cha chaan teng, where the clatter of cutlery harmonizes with the hiss of a hot griddle and the scent of caramelized sugar wafts through the air, there exists a toast that feels almost magical: the Hong Kong French Toast. It is not merely breakfast; it is a sensory invitation—an edible postcard from the city where East meets West in the most deliciously affectionate way. Imagine a thick, stalwart slice of bread, its edges crisped to a caramel kiss, its interior tender and custardy like a sunrise over Victoria Harbour. Envision a chorus of textures playing across your palate: the first crack of a perfectly fried crust, a whisper of butter melting into the crumb, and then a gentle flood of sweet-silver syrup or velvety condensed milk that streams through the gap between bread and memory. This is comfort food with urban swagger, a dish that speaks of early mornings in crowded stairwells, rain on sidewalks, and the quiet ritual of turning ordinary bread into something truly transcendent. Hong Kong French Toast is more than a recipe—it’s a celebration of texture, nostalgia, and the simple joy of feeding the people you love with something that tastes like a window to a city’s soul.

The Story Behind the Dish

Origins in a Crossroads Kitchen

The Hong Kong French Toast emerged from the cha chaan tengs, the lively, cluttered, endlessly inventive tea restaurants that became the heartbeat of Hong Kong’s culinary scene in the mid-20th century. These eateries were built to feed a city that moved at a brisk pace—from ferry riders to office clerks to students—and they answered with a menu that fused Western techniques with Chinese pantry staples. French toast itself was adapted from the French and American classics, but the Hong Kong version took a playful detour: a thick slice of white bread, often treated with a bit of butter, sealed with jam or peanut butter, then dipped in an eggy wash and fried until the crust turned a sugary bronze. It was, in its essence, a humble dish—meant to satisfy a craving and a budget—yet it quickly became iconic, a symbol of a city that could borrow from the world and turn it into something unmistakably local.

As decades passed, this toast evolved. The traditional method—two thick slices pressed together, a generous smear of something sweet or savory in the middle, and a crispy, custardy exterior—became a canvas for personal expression. Some stall owners perfected the double-fry technique to ensure a snap that persisted with every bite; others experimented with different fillings and toppings, layering flavors the way a Cantonese speaker layers meaning in a sentence. The dish traveled beyond the bustling markets and into home kitchens, where families added their own touches—perhaps a drizzle of condensed milk, a pool of golden syrup, or a swirl of peanut butter—creating a tapestry of regional variations that still feels unmistakably Hong Kong in spirit.

From Street Corners to Breakfast Tables

Today, the Hong Kong French Toast is as comfortable on a lazy weekend brunch as it is on a weeknight supper, as beloved in a quiet apartment as in a neon-lit dining hall. It survives in a modern world of Instagram-worthy plated desserts and grand Sunday roasts because it remains unfussy, surprisingly quick, and endlessly forgiving. The traditional technique—though it can feel like a tiny culinary feat—still fits neatly into a busy morning or a relaxed afternoon when you want a dish that rewards patience and a little attention to heat. The story of this toast is really the story of a city that loves to eat with friends and families, turning a simple slice of bread into a memory you can hold in your hand and revisit at will.

Why You’ll Love This Recipe

  • It delivers instant nostalgia: a taste of Hong Kong’s cha chaan teng culture that feels both retro and radiant.
  • Texture heaven: a crisp, caramelized crust encasing a soft, custardy center that remains tender as it cools.
  • Fast and forgiving: with a few pantry staples, you can craft a comforting hug of a toast in under 20 minutes.
  • Versatile pairing: it shines solo, but also pairs beautifully with creamy condensed milk, amber syrup, or fruit compotes.
  • Crowd-pleasing and shareable: the thick slices slice into generous breakfast portions perfect for family brunches or weekend gatherings.
  • Customizable to suit different diets and tastes: vegan options, gluten-free bread, or dairy-free toppings can be explored without losing its soul.
  • Presence and aroma: the sizzling sound, the perfume of butter and sugar, and the warm glow from the pan create an irresistible multisensory experience.
  • Perfect canvas for toppings: from peanut butter and jam to fresh fruit and a dusting of cinnamon, the dish invites creative embellishments.

Flavor Profile & Texture

The Hong Kong French Toast dances between sweet and comforting, with a sweet-salty balance that feels indulgent without being heavy. The bread, thick-cut and hardy, forms a sturdy shell that holds up to the eggy coating. When it hits the hot pan, the exterior sizzles into a glossy, bronzed crust, inviting a crisp bite that breaks open to reveal a cloudlike interior. The egg wash—often seasoned with a pinch of vanilla or a whisper of sugar—coaxes the bread toward a custard-like center, slightly creamy and airy, with a gentle flavor that lets the bread’s natural sweetness shine through. If you opt for fillings like peanut butter or jam, you’ll experience a layered surprise: the creamy peanut spreading through in a ribbon of salty-sweet richness, or the fruity brightness of jam providing a tart counterpoint to the richness of the egg and butter—each bite offering a different personality of the same dish.

The butter undertones are essential, not merely for richness but for the magical crust that forms when melted butter caramelizes with a touch of sugar. The result is a crust that is crisp on the outside and tender on the inside, with just enough bite to hold its shape as you slice through. If you choose to add a finishing drizzle of condensed milk, you’ll witness a luxurious cascade that pools in the crevices, adding dairy-sweet depth and a velvety mouthfeel that coats the palate. When the toast is served alongside a mug of hot tea or milk tea, the encounter between toasted sweetness and the tea’s tannins creates a harmony that is truly emblematic of Hong Kong’s afternoon rituals. In short, this toast offers a symphony of textures and flavors: crisp exterior, tender interior, sweet and slightly savory accents, and the comforting warmth that lingers long after the plate has been cleared.

Occasions & Pairings

This dish shines at a variety of occasions, from quick weekday breakfasts to leisurely weekend brunches. It’s equally at home as a comforting mid-morning treat, a post-school snack, or a lazy Sunday dessert that pairs with a cup of tea or coffee. Its richness makes it ideal for cooler mornings when a lighter breakfast won’t suffice but a full pastry bief isn’t necessary; it offers enough satisfaction to start the day with a smile without weighing you down. For celebrations, it can be a playful option on a breakfast-for-dinner menu, or a charming addition to a brunch spread alongside fresh fruit, yogurt parfaits, and a pot of jasmine tea or strong Hong Kong milk tea.

Pairings to consider include:

  • Drinks: Hong Kong-style milk tea, strong black tea, coffee, or a mug of hot chocolate for a comforting pairing.
  • Accompaniments: a dollop of whipped cream, a drizzle of condensed milk or maple syrup, or a light berry compote for a touch of acidity to balance sweetness.
  • Side options: fresh fruit (pineapple, mango, berries) for brightness, or a small side of yogurt with a hint of vanilla.
  • Sweet contrasts: a tiny slice of candied ginger or a sprinkle of cinnamon to warm the palate.

Tips, Variations & Substitutions

Core Techniques & Best Practices

To achieve that signature crisp crust and tender interior, pay attention to heat and timing. A moderately hot pan—enough to sizzle upon contact yet not so hot that the exterior scorches before the interior sets—will work best. Let the bread slices rest briefly after assembling with any fillings to help them hold together during frying, if you choose to add fillings like peanut butter or jam between slices.

Butter and oil both play roles. Butter contributes flavor and browning, while a touch of neutral oil helps raise the smoke point, ensuring a crisp exterior without burning. The bread choice matters: a thick-cut, sturdy loaf or a fresh, soft white bread that won’t crumble holds up better to the egg bath and frying. If you love a deeper caramel note, a light brush of warm sugar on the surface before frying can intensify color and texture in a pleasing way.

Vegan, Gluten-Free, and Dietary Variations

  • Vegan option: Use plant-based milk (soy, almond, oat) and a flaxseed or aquafaba-based egg substitute to create a similar batter. Choose a vegan butter or oil for frying, and skip any dairy toppings, substituting with a vegan condensed milk or coconut cream drizzle if desired.
  • Gluten-free option: Choose a sturdy gluten-free bread that won’t crumble under the egg coating. Most gluten-free breads will fry up nicely using the same technique; just be mindful of the crumb’s dryness and adjust the fry time slightly.
  • Dairy-free option: Fry in a neutral oil (like canola or avocado oil) and finish with a dairy-free drizzle, such as coconut condensed milk or a maple syrup with a splash of coconut cream for silkiness.

Regional Twists & Flavor Variations

  • Peanut butter twist: A thin spread of peanut butter sandwiched between bread slices before dipping yields a creamy, toasty center that pairs perfectly with a light drizzle of honey or maple.
  • Jam-filled version: A thin layer of your favorite jam or marmalade adds a fruity brightness that cuts the richness and enhances aroma.
  • Syrup pairing: Traditional Golden Syrup or a spoonful of thick condensed milk can be used to finish; you can also try a light drizzle of caramel or a citrus honey syrup for a modern edge.
  • Citrus lift: A whisper of orange zest added to the batter (or dusted on top) brings a fragrant zing that brightens the dish without overpowering the sweetness.

Storage & Make-Ahead Ideas

The Hong Kong French Toast is best enjoyed fresh, when the crust maintains its crispness and the interior remains luxuriously soft. However, you can plan ahead and still savor it later with a few practical tips. If you know you’ll have extra portions, assemble the components in advance: keep the bread ready for dipping in an airtight container, and prepare any fillings or toppings separately. When you’re ready to cook, rewarm the slices in a moderate oven to refresh the crust rather than microwaving, which can make the exterior soft. Leftover toast can be stored in the refrigerator for up to a day if kept in a sealed container, though the edges may lose some of their crispness. Re-crisp in a hot skillet or oven for best results before serving again.

For make-ahead brunch scenarios, you can pre-slice the bread and keep it in the fridge, then quickly prepare the egg wash and frying while you brew tea. If you prefer freezer-friendly options, freeze pre-sliced bread thaws quickly; however, for optimal texture, fry the slices fresh rather than freezing after battering. The beauty of this dish lies in its simplicity and speed: in about 15 to 20 minutes, you can transform ordinary bread into an extraordinary breakfast or brnight-time treat.

Fun Facts & Trivia (Optional)

1. The term cha chaan teng literally translates to “tea restaurant” in Cantonese, a nod to the place where Western-style beverages and dishes were adapted to local tastes. The Hong Kong French Toast is one of the enduring stars on these menus, beloved by generations for its nostalgia and comforting richness.

2. Some stories say the Hong Kong twist on French toast owes its soul to the city’s resourcefulness—using simple, affordable ingredients to create something indulgent and satisfying. A portion of butter, a smear of peanut butter, and a drizzle of condensed milk could turn a plain slice into a dessert-like breakfast that felt like a small luxury in a bustling urban landscape.

3. The ritual of dipping bread in an egg wash and frying is a technique shared by many cultures, but the Hong Kong version elevates it with a delicate balance—enough egg to coat and bind, enough sweetness to tempt, and enough precision in heat to deliver that coveted crisp crust without drying the interior. It’s a microcosm of Hong Kong cooking: practical, comforting, and deeply satisfying.

4. In many cha chaan tengs, the toast is not simply a standalone dish; it’s part of a broader breakfast culture that pairs heavily with tea. Milk tea, often strong and slightly sweet, acts as the perfect companion, cutting through the richness of the toast and refreshing the palate for the next bite. This pairing channels a daily ritual that has persisted for decades, proving that a simple breakfast can be a moment of calm amidst a rapidly changing city.

Ingredients

Hong Kong French Toast
Fillings

  • 2 slices white sandwich bread (crusts removed; day-old preferred)
    → The bread is the foundation of HK French toast. It should be slightly stale to soak up the egg mixture without tearing. Remove crusts for a neat square shape, or keep them for extra texture if you like. If your bread is very fresh, dry it out briefly by leaving it uncovered for 10–15 minutes or toasting lightly.
  • 2 teaspoons smooth peanut butter
    → Filling that creates a creamy, nutty center; spread evenly on one slice to act as a binder between slices. Use natural, unsweetened peanut butter for best flavor; if you prefer kaya, you can use it as an alternative filling or in addition to peanut butter, but keep the layer thin to prevent leakage during frying.
  • 2 teaspoons kaya jam
    → Alternative or additional sweet filling offering coconut-egg richness. Spread in a thin layer to prevent leaking during frying; kaya adds moisture and a fragrant aroma. If the kaya is very sweet, adjust other sugars in the recipe accordingly.

Egg Mixture

  • 2 large eggs
    → The binding agent that forms the coating and helps develop a custardy interior once fried. Whisk thoroughly until completely blended, with no streaks. For best soaking, use eggs at room temperature to improve emulsification and even saturation of the bread.
  • 1/4 cup milk or evaporated milk
    → Dilutes the eggs to create a pourable coating that coats the bread evenly and browns nicely. Evaporated milk yields a creamier texture; dairy-free milk can be used as a substitute, though it may alter richness slightly.
  • 1 tablespoon granulated sugar
    → Adds gentle sweetness and aids browning during frying. If your chosen fillings are already very sweet, you may reduce sugar to 1 teaspoon or omit entirely.
  • 1/2 teaspoon vanilla extract
    → Provides warm, aromatic depth to the coating. Pure vanilla extract is preferred for a more robust flavor; if using vanilla sugar, reduce the granulated sugar accordingly.
  • Pinch salt (optional)
    → Enhances overall flavor and balances sweetness; omit if using salted fillings or salted butter.

Frying

  • 1 tablespoon unsalted butter
    → Delivers rich flavor and helps achieve a crisp, golden crust characteristic of Hong Kong toast. Fry over medium heat to avoid burning; for a crisper edge and lower risk of scorching, you can blend in a small amount of neutral oil.
  • 1 teaspoon neutral oil (optional)
    → Raises the smoking point and assists in crisping the exterior if your pan tends to brown butter too quickly. Use if you prefer a lighter browning or want to reduce butter exposure.

Serving

  • Syrup, honey, or sweetened condensed milk for serving
    → Typical HK presentation includes a drizzle of a sweet topping. Sweetened condensed milk is traditional and pairs beautifully with the eggy toast; warm it slightly for easy pouring. If you prefer, use maple syrup or honey as a lighter alternative.
  • Powdered sugar for dusting (optional)
    → Finishes the dish with a delicate sweetness and visual appeal. Best sprinkled after the toast has rested briefly to allow any excess moisture to settle and prevent clumping.

Instructions

  • Assemble the filling sandwich by spreading 2 teaspoons smooth peanut butter on one bread slice and 2 teaspoons kaya jam on the other, then press the slices together to enclose the fillings; you may remove the crusts for a neat square shape, or leave them on for extra texture if you prefer.
    → The bread is the foundation of HK French toast. It should be slightly stale to soak up the egg mixture without tearing. Remove crusts for a neat square shape, or keep them for extra texture if you like. If your bread is very fresh, dry it out briefly by leaving it uncovered for 10–15 minutes or toasting lightly.
  • Prepare the egg mixture by whisking 2 large eggs with 1/4 cup milk or evaporated milk until completely blended and smooth; then whisk in 1 tablespoon granulated sugar, 1/2 teaspoon vanilla extract, and a pinch of salt until the mixture is uniform and glossy.
    → The binding agent that forms the coating and helps develop a custardy interior once fried. Whisk thoroughly until completely blended, with no streaks. For best soaking, use eggs at room temperature to improve emulsification and even saturation of the bread.
  • Dip the assembled sandwich into the egg mixture, turning to saturate both sides evenly; allow to soak for about 15–25 seconds per side, until the bread is thoroughly saturated but not falling apart.
    → Dilutes the eggs to create a pourable coating that coats the bread evenly and browns nicely. Avoid oversoaking to prevent a soggy center.
  • Preheat a nonstick skillet over medium heat and add 1 tablespoon unsalted butter, letting it melt and foam; if your pan runs hot, swirl in a teaspoon of neutral oil to raise the smoke point and reduce browning speed.
    → The butter provides rich flavor and a crisp, golden crust; oil helps control browning and keeps the exterior from scorching when your heat is high.
  • Gently lay the soaked sandwich in the hot pan and cook the first side until deep golden brown and the crust is crisp, about 2–3 minutes; press lightly with a spatula to ensure even contact and browning.
    → A steady, even heat builds a custardy interior and a crisp exterior without tearing the bread; avoid moving the sandwich too soon to form a good crust.
  • Flip the sandwich carefully and cook on the other side until it is equally golden and the center is set and creamy, about 2–3 more minutes; if the underside browns too quickly, reduce the heat to medium-low and cook slowly.
    → Even browning ensures a delicious contrast between the crisp crust and soft interior; controlling temperature prevents a burned exterior with an underdone center.
  • Transfer the toast to a warm plate or rack and let it rest for 1–2 minutes to set the custard inside and prevent overflowing when cut.
    → Resting allows the interior to finish cooking and helps the fillings stabilize, making slicing neater and the texture creamier.
  • Slice the French toast diagonally into two or three portions for an appealing presentation. Drizzle syrup, honey, or sweetened condensed milk over the top and serve immediately; warm the condensed milk slightly first if using for a smoother pour.
    → A traditional HK serving style; warm toppings enhance the flavor and adjust sweetness; condensed milk pairs beautifully with the eggy bread and contrasts with the crispy crust.
  • Dust with powdered sugar if desired once the toast has rested briefly, providing a delicate sweetness and visual contrast without adding excessive moisture.
    → Finishes the dish with a light sweet finish that makes the dish look polished and adds a subtle finish to the overall sweetness.

Notes

These Hong Kong-style French toast is a decadent, custardy treat fried until the outside is crisp and the inside stays soft. For best results, use day-old white sandwich bread with the crusts removed for neat squares; spread 2 teaspoons smooth peanut butter on one slice and 2 teaspoons kaya jam on the other to create a creamy, sweet center, or customize with your favorite fillings. In a bowl, whisk 2 large eggs with 1/4 cup milk (or evaporated milk for a richer interior), 1 tablespoon granulated sugar, 1/2 teaspoon vanilla extract, and a pinch of salt until completely blended. Assemble by sandwiching the filling between the slices and then dip briefly in the egg mixture, ensuring an even coat without soaking through. Fry in a nonstick or well-seasoned skillet with 1 tablespoon unsalted butter over medium heat, adding 1 teaspoon neutral oil if you prefer lighter browning or to prevent the butter from burning. Cook until the exterior is deep golden and crisp, about 2–3 minutes per side, adjusting heat as needed. Serve warm with syrup, honey, or warm sweetened condensed milk; dust with a light coating of powdered sugar after the toast rests briefly to prevent clumping. This dish can be customized with extra toppings like sliced banana, toasted coconut, or an extra drizzle of kaya. If you’re gluten-sensitive, choose gluten-free bread and check that your fillings are gluten-free. Leftovers refrigerate well for a day and reheat gently in a skillet to restore crispness or toast briefly to refresh the exterior.

Tips

Tips for Hong Kong French Toast

  • Bread selection: Use day-old white sandwich bread for the best soak. Remove crusts if you prefer neat squares, or keep them for extra texture. If your bread is very fresh, dry it out briefly by leaving it uncovered for 10–15 minutes or toasting lightly to prevent tearing.
  • Soaking strategy: Whisk the egg mixture well and let the bread soak just long enough to saturate without becoming mushy. Too long soaking can cause a custard leak when frying; too short can leave the center undercooked.
  • Filling balance: Apply a thin, even layer of peanut butter to one slice as a binder and flavor base. Kaya jam can be added as a secondary layer or a substitute, but keep fillings thin to minimize leakage during frying.
  • Room temperature eggs: Use eggs at room temperature to improve emulsification and even saturation of the bread. This yields a creamier, more uniform coating.
  • Milk choice and richness: Evaporated milk gives a creamier interior; dairy-free milk can be used if needed, but it may alter richness slightly. If using regular milk, you may increase the soaking time slightly for better absorption.
  • Sweetness control: The recipe uses 1 tablespoon sugar in the egg mixture. If your fillings are very sweet (like kaya), consider reducing the sugar to 1 teaspoon or omitting it to keep the balance.
  • Vanilla and salt: Vanilla adds warmth; use pure vanilla extract for depth. A pinch of salt helps balance sweetness; omit if your fillings are already salted.
  • Butter and oil for frying: Use 1 tablespoon unsalted butter for a rich, crisp crust. Adding a teaspoon of neutral oil can raise the smoking point and help prevent browning too quickly, giving you a more even crust.
  • Pan temperature and technique: Cook over medium heat to develop a golden crust without burning. If your pan tends to brown butter too fast, use a small amount of neutral oil or lower the heat slightly.
  • Handling the batter: After dipping, let excess coating drip off before placing in the pan to reduce sogginess and leaks.
  • Frying tips: Flip carefully with a wide spatula once the underside is deeply golden. Press lightly to maximize contact with the pan for even browning.
  • Resting and serving: Let the finished toast rest for 1–2 minutes on a rack to settle the custard and prevent clumping when dusting with powdered sugar.
  • Finish with toppings: Traditional HK presentation uses a drizzle of sweet toppings. Warm sweetened condensed milk for easy pouring; or swap with maple syrup or honey if you prefer a lighter sweetness.
  • Storage and reheating: leftovers can be stored in the fridge and reheated in a 350°F (175°C) oven for a few minutes to restore crispness.

FAQ

What is Hong Kong style French toast?

Hong Kong style French toast is a popular breakfast or snack that features thick slices of soft white bread (often milk bread) pressed together with fillings like kaya (c coconut jam) and/or peanut butter. The sandwich is dipped in a beaten egg mixture and fried in butter until the outside is deeply golden and crisp, while the inside stays soft. It’s typically served hot with a pat of butter and a drizzle of syrup or condensed milk.

How is it different from regular French toast?

Traditional French toast usually uses thinner slices and is served plain or with jam. Hong Kong style is typically a thick, sometimes layered sandwich with sweet fillings, fried to achieve an extra crispy exterior, and often topped with extra butter and sweet sauces like condensed milk or kaya. The result is richer, sweeter, and more dessert-like.

What bread should I use?

Use soft, thick-sliced white bread such as milk bread or brioche. In HK, people often cut loaf bread into thick slabs. Day-old bread can hold up better to soaking, but fresh bread also works for a tender interior. Trim crusts if you prefer neater edges, though crusts add texture.

What fillings are traditional?

The classic pairing is kaya (coconut jam) with peanut butter. Other common options include:

  • Kaya alone or with butter
  • Peanut butter alone
  • Jam or cream cheese
  • Banana slices for extra sweetness

Fill one slice with the fillings and top with the other slice to form a sandwich before dipping in egg.

What ingredients do I need for the batter and coating?

For the batter: eggs, milk (or cream), a pinch of salt, and a little sugar. Optional additions include:

  • Vanilla extract for fragrance
  • Condensed milk for extra sweetness
  • A tiny amount of cornstarch to help the crust crisp up

You’ll also need the bread, fillings, and butter or oil for frying.

How do I assemble and cook it?

Steps:

  • Spread fillings on one slice (e.g., kaya on one side, peanut butter on the other), then top with the second slice to form a sandwich.
  • Whisk eggs with milk, salt, and optional vanilla.
  • Dip the sandwich in the egg mixture, letting it soak briefly but not become soggy. Let excess drip off.
  • Fry in a hot skillet with butter (or oil) until the outside is deeply golden and crisp on both sides. Adjust heat to avoid burning.
  • Drain briefly on a rack, then serve immediately with toppings.
How can I achieve extra crispiness?

Tips for a crisp crust:

  • Use thick slices and lightly toast the bread before assembling.
  • Ensure the bread is well-sealed with fillings to prevent leaks.
  • Dip quickly in the egg mixture and fry in hot butter or oil so the exterior browns fast.
  • Consider a small amount of cornstarch in the batter for an extra crusty finish.
How should I serve and what toppings are common?

Serve immediately while hot. Common toppings include:

  • A pat of butter on top
  • Drizzles of maple syrup or corn syrup
  • Condensed milk or extra kaya
  • Powdered sugar or fresh fruit for contrast

Pairs well with a hot cup of Hong Kong-style milk tea or coffee.

Can I adapt this for dietary needs or substitutions?

Yes, with some caveats:

  • Dairy-free: fry with a neutral oil or dairy-free butter and use plant-based milk.
  • Gluten-free: use gluten-free bread; fillings can stay the same.
  • Vegan attempt: the traditional recipe relies on eggs, so you can try a flax-egg or aquafaba soak and a plant-based milk with dairy-free butter, but keep in mind the texture will differ from the classic version.
Can I make this in an air fryer or oven?

Yes. Options include:

  • Air fryer: Preheat to about 180°C (350°F). Lightly brush or spray the sandwich with oil and air-fry for 6–8 minutes, flipping once, until crisp.
  • Oven: Bake at 190°C (375°F) for 10–12 minutes, then optional quick sear in a hot pan with a little butter for color.

Note: The texture may be less crisp than pan-frying, but it’s a convenient alternative.

How should I store or reheat leftovers?

Hong Kong-style French toast is best eaten fresh. If you must store:

  • Keep fillings separate if possible and reheat the toast in a toaster oven or regular oven to restore crispness.
  • Avoid microwaving, which can make the bread soggy.
  • Freezing is not ideal, but you can freeze unassembled bread slices with fillings for later assembly and fry later.

Introduction / Hook

In the quiet hum of a slow cooker, something magical happens: humble ingredients surrender to gentle heat and become something bright, bold, and almost celebratory. Slow Cooker Street Corn Chicken takes the sun-drenched warmth of classic elote—the beloved street corn stacked with creamy sauce, tangy cheese, and a whisper of smoky heat—and reimagines it as a one-pot, weeknight-friendly meal. Imagine forkfuls of succulent chicken enveloped in a glossy corn-topped cloak, the kernels bursting with natural sweetness, the cream marrying with zesty lime, and a final kiss of salty cotija that leaves you savoring the last bite with a sigh. It’s a dish that feels festive without demanding the hours, a crowd-pleaser that tastes like you spent the day coaxing caramel into every morsel. The aroma alone—charred corn, roasted garlic, hints of chili and cilantro—will draw people to the table, and you’ll be ready to serve a comforting, vibrant supper with minimal effort. This is the kind of recipe that makes a weeknight feel like an evening at a lively market, where every bite carries a memory of sunlit streets and joyous gatherings. Slow Cooker Street Corn Chicken is more than a meal; it’s a mood—savory, bright, and irresistibly satisfying.

The Story Behind the Dish

Elote, the star of many street-food scenes across Latin America, has long been a symbol of communal eating and street-side celebration. Vendors wheel carts through crowded avenues, generously coating grilled corn with a whipped embrace of mayonnaise or crema, dusting it with crumbled cotija cheese, chili powder, and a squeeze of lime. It’s a dish that thrives on contrast: the char of the grill against the creaminess of dairy, the heat of chile against the cool brightness of citrus, and the occasional pop of fresh cilantro that brightens every bite. The soul of elote is not merely in the flavors; it’s in the ritual—the care with which corn is roasted, the way the toppings cling to every crunchy kernel, and the shared experience of passing the skewers or cobs from hand to hand in a sun-warmed plaza.

Transplant that spirit into a home kitchen with a slow cooker, and you’ve unlocked a different kind of magic. The slow cooker invites all the elements to mingle, to blend, to soften without losing their identity. Chicken, naturally forgiving and versatile, becomes a stage for the corn’s sweetness and the topping’s tang. Instead of standing by a grill, you create a low, even warmth that lets every component contribute its best: the meat becomes tender and juicy; the corn, tender-crisp and coated in a satin layer of sauce; the cheese mingles with the cream to form a glossy, clingy sauce that coats every bite. The result is a dish that nods to tradition while embracing modern practicality—a comfort-forward, crowd-pleasing supper that captures the essence of street-food joy and distills it into a single, satisfying pot. The story is about gathering, about the generous spirit of shared meals, and about how one simple idea—infusing chicken with the lullaby-slow, corn-forward flavors of elote—can transform a regular weeknight into something memorable.

Why You’ll Love This Recipe

  • Hands-off convenience: You set it up and let the slow cooker do the heavy lifting, freeing you to focus on sides, a salad, or simply some downtime while supper aromas fill the house.
  • Big, bold flavors: A sunny blend of sweet corn, tangy lime, creamy dairy, and a gentle kick of chili creates a complex profile that’s warmly familiar yet irresistibly bright.
  • Comfort with a twist: It’s familiar enough for family dinners but infused with the playful spirit of street-food elote, making it feel special without being fussy.
  • Versatile protein pairing: Chicken takes center stage, but the concept lends itself to other proteins or even vegetarian adaptations, widening its appeal.
  • Budget-friendly and scalable: Corn and chicken are economical staples, and the dish scales up easily for gatherings, potlucks, or weeklong meal prepping.
  • Make-ahead-friendly: The flavors deepen as they rest, making this a great candidate for meal prep or Sunday dinners that taste even better the next day.
  • Balanced texture: Tender, juicy chicken contrasts with the glossy, slightly chewy corn topping, all bound together by a velvety, citrus-bright coating.

Flavor Profile & Texture

From the first spoonful, you’ll encounter a playful symphony of flavors. The chicken provides a savory anchor—meaty and succulent, with a softness that almost dissolves on the tongue. The corn adds a honeyed sweetness, the kind that comes from ripe kernels kissed by sun and harvested at their peak. The sauce or topping—think of it as a whispering chorus of mayo or crema blended with a touch of cheese and a kiss of aromatics—contributes a creamy, velvety texture that clings to every bite. Lime punctuates the dish with a bright, citrusy zing, a reminder that dairy-rich flavors need a lift to avoid feeling heavy. The cotija cheese offers a crumbly, salty contrast, a micro-snowfall of savoriness that adds both texture and depth, while a hint of chili powder or paprika introduces a gentle warmth without overwhelming the palate.

As the flavors mingle, they create a layered experience: the initial sweetness of corn, the tang of lime, the lactic roundness of dairy, and the savory depth of tender chicken. Each bite carries a note of smokiness that can come from the corn’s natural caramelization or from the spice blend that gives the dish its signature edge. The cilantro—bright and herbal—finishes the dish with a fresh lift, offering a green, almost floral aroma that lingers after the last bite. The overall texture is lush and cohesive: the chicken remains juicy and fork-tender, while the corn and sauce wrap around each piece with a silky, glossy finish. For those who enjoy a little extra texture, a quick, high-heat finish—briefly broiling or toasting the top—can add a subtle caramelization on the corn edges and a final crackle that makes the dish feel extra special, without compromising the soft center that slow cooking brings.

If you crave a dairy-free or lighter version, you can imagine a crema-style alternative or a dairy-free mayo, which will still yield that creamy coat and tangy brightness, albeit with a slightly different mouthfeel. The beauty of this dish is in its core sensibilities: bold, comforting, and deeply satisfying, yet flexible enough to adapt to your tastes and dietary needs while preserving the bright, celebratory spirit of street corn.

Occasions & Pairings

This is the kind of dish that shines in a variety of settings. For weeknights, it brings a sense of weekend luxury with minimal effort. For weekends, it scales up beautifully for gatherings, potlucks, or casual fiestas where the air is perfumed by citrus and warm spices. It also pairs wonderfully with a spectrum of sides and drinks that echo its vibrant character. Consider serving with:

  • Cirm a bed of cilantro-laden rice or fluffy quinoa to soak up the delicious sauce.
  • Charred or roasted vegetables—bell peppers, zucchini, or corn-on-the-cob brushed with a light olive oil—echo the corn’s sweetness and add color and texture.
  • A fresh avocado or sliced radishes for a cool, creamy contrast and a pop of color on the plate.
  • Simple black beans or a light bean salad to bring protein variety and fiber into the meal.
  • Light, crisp salads with citrusy vinaigrettes to balance the richness and keep the meal feeling bright.

Best beverage companions range from a bright, lime-forward cocktail like a margarita or a cerveza with a splash of lime to a sparkling agua fresca for a non-alcoholic option. The dish reads well as a casual family dinner or a lively, festive gathering; it’s equally at home on a weeknight table or as a star component of a larger Latin-inspired menu.

Tips, Variations & Substitutions

  • Protein swaps: If you prefer beef or pork, you can adapt the concept with pork shoulder or shredded beef, though cooking times may vary. For a lighter version, use chicken breasts but monitor for tenderness to avoid drying out.
  • Dairy-free options: Use dairy-free crema or a vegan mayo alternative. You can also mix in a little dairy-free yogurt to mimic the tanginess and creaminess of traditional toppings.
  • Cheese variations: Cotija adds signature saltiness and texture, but you can substitute a grate of Parmesan or a crumble of queso fresco for a different but equally satisfying profile. If you want to skip cheese, you’ll still retain a creamy, tangy finish from the dairy-free alternatives.
  • Heat levels: For more bite, incorporate a pinch of chili powder or chipotle powder in the topping. To keep it milder, reduce or omit the chile element and rely on a squeeze of lime for brightness.
  • Herbaceous lift: If cilantro isn’t your favorite, substitute with finely chopped parsley or a touch of oregano for a different aroma while keeping the dish’s fresh character.
  • Texture play: To introduce a bit of toastiness, finish with a brief, high-heat blast on the top of the dish (under a hot broiler or in a hot oven) just to lightly caramelize the corn edges and brighten the color.
  • Make-ahead ideas: Prepare the toppings a day in advance and store them separately. In the morning, assemble in the slow cooker and let the flavors mingle as you go about your day, so dinner comes together with minimal fuss.
  • Gluten-free considerations: The dish is naturally gluten-free when you choose dairy products and spices without gluten-containing additives. Always check packaged ingredients for cross-contamination if this is a concern.

Storage & Make-Ahead Ideas

Leftovers become part of the joy of this meal. In the refrigerator, the flavors continue to meld, often tasting better the next day as the sauce thickens slightly and clings to every piece of chicken and kernel. Store any leftovers in an airtight container for up to 3–4 days. Reheating is simple: gentle reheating on the stovetop or in the microwave with a splash of lime juice or a little extra dairy-free cream helps restore creaminess and keep the chicken from drying out. You can also repurpose the dish as a quick topping for warm tostadas, as a filling for soft tacos, or folded into a quick, comforting rice bowl.

If you’re planning ahead for a busy week, you can portion the chicken and corn into meal-prep containers, keep the sauce separate, and combine at serving time to retain the creaminess and prevent the dish from becoming too dense. For longer storage, the dish freezes well after cooking; freeze in individual portions or shallow containers to ensure rapid thawing. When you’re ready to eat, thaw overnight in the fridge and rewarm gently, adding a touch of lime to refresh the brightness. The slow cooker method is particularly forgiving for make-ahead execution, allowing you to enjoy the same vibrant flavors with minimal daily effort.

Fun Facts & Trivia

  • The word elote simply means “corn” in Spanish, but the preparation and toppings vary widely across Latin America, reflecting regional cheeses, chilies, and citrus preferences.
  • Cotija cheese, a staple in elote toppings, originates from the Mexican town of Cotija in the state of Michoacán. It’s a salty, crumbly cheese that resembles aged feta in texture and intensity, and it adds a distinctive finish to the corn glaze.
  • Crema, often used in elote-style toppings, is similar to sour cream but with a milder tang and richer mouthfeel. In many Latin American markets, crema is a staple that creates that signature silky coating on vegetables and corn.
  • Street food culture often embraces the concept of “assembly at the counter”—a social ritual that turns mealtime into a small celebration. Translating that to home cooking is a way to invite shared moments around the table, just as a cart would do in a sunlit plaza.

Ingredients

Slow Cooker Street Corn Chicken

Main Protein

  • 2 pounds boneless skinless chicken breasts (or thighs, or a mix)
    → The main protein for this dish. In a slow cooker, chicken remains moist and tender when cooked low and slow. Using a mix of breasts and thighs yields a good balance of lean protein and rich texture. For shreddable meat, cook whole pieces and shred after cooking, then return to the sauce to coat. If chicken is partially frozen, add a few extra minutes and pat dry before adding to improve even cooking.
  • 1 teaspoon kosher salt
    → Helps season the chicken and enhance the overall flavor. Since cotija and other toppings will add salt, start with this amount and adjust after tasting the finished dish.
  • 1/2 teaspoon freshly ground black pepper
    → Adds aroma and a subtle bite that balances the sweetness of the corn and richness of the sauce. Use freshly ground pepper for best flavor; adjust to taste.

Elote Sauce

  • 2 cups frozen corn kernels (thawed) or 3 cups fresh corn kernels
    → Provides the characteristic sweetness and texture of street corn. If using frozen, thaw completely and pat dry to avoid watering down the sauce; if using fresh, cut kernels from the cob just before mixing to maximize flavor.
  • 1/2 cup mayonnaise
    → Creates the creamy base that coats the corn and chicken. Use full-fat mayo for best texture; for a lighter version, you can substitute part-skim mayo or mix with Greek yogurt, though texture may be lighter.
  • 1/4 cup sour cream
    → Adds tang and extra creaminess, balancing the mayo’s richness. Use full-fat for best texture; dairy-free options can be used as a substitute, but expect flavor differences.
  • 1/4 cup cotija cheese, grated
    → Classic elote saltiness and crumbly texture that blends into the sauce. If unavailable, feta or queso fresco can be substitutes, though flavor and melting properties will differ.
  • 2 tablespoons lime juice
    → Brightens the sauce and cuts richness. Freshly squeezed lime juice is best; adjust after cooking to taste.
  • 2 garlic cloves, minced
    → Infuses savory depth throughout the sauce. Finely minced garlic distributes evenly; you can crush lightly for a milder release of aroma.
  • 1 teaspoon chili powder
    → Provides warm, smoky heat reminiscent of grilled street corn. Adjust to taste; for milder flavor, use 1/2 teaspoon, for spicier, 1–2 teaspoons.
  • 1/2 teaspoon smoked paprika
    → Adds a subtle smoky aroma and color that complements the corn. If unavailable, substitute with regular paprika and a touch of cumin.
  • 1/2 teaspoon ground cumin
    → Introduces earthy warmth that pairs with lime and corn. Use sparingly to avoid overpowering other flavors; adjust to taste.
  • 1/4 teaspoon cayenne pepper (optional)
    → Adds extra heat for those who like it spicy. Start with a small amount and increase if needed after tasting the sauce.
  • 1/2 teaspoon salt, to taste
    → Salt anchors the dish, especially with cotija and potential broth. Begin with this amount and adjust after mixing with the chicken and tasting the finished sauce.
  • 1/4 teaspoon black pepper
    → Finishes the seasoning with a gentle zing. Freshly ground is best for maximum aroma.
  • 1/2 cup low-sodium chicken broth (optional)
    → Adds moisture to keep the sauce saucy and helps the chicken stay tender in the slow cooker. Add gradually and adjust to achieve your preferred consistency.

Finish & Serving

  • 1/4 cup chopped fresh cilantro
    → Adds bright herbal notes and color. Add toward the end of cooking or as a fresh garnish to preserve its vibrant flavor. If cilantro isn’t preferred, substitute with chopped parsley or green onions for color and bite.
  • 2 tablespoons cotija cheese, crumbled for topping
    → Extra salty, crumbly topping to finish the dish. Sprinkle over just before serving for maximum texture. If cotija isn’t available, feta can be used as a substitute, with a different texture and salt level.
  • 1 lime, cut into wedges for serving
    → Provides an extra burst of acidity at the table. Guests can squeeze on as desired to brighten each bite; fresh lime is preferred for best flavor.

Optional Add-ins

  • 1 small jalapeño, seeded and minced (optional)
    → Adds extra heat and a crisp bite. Remove seeds for a milder heat, or add to the sauce for a spicier finish, depending on your guests’ preferences.

Instructions

  • Pat the chicken dry with paper towels, then season all pieces evenly with 1 teaspoon kosher salt and 1/2 teaspoon freshly ground black pepper, rubbing the spices into the surface so they cling and flavor penetrates during the long, gentle heat.

    → Dry surface helps seasoning adhere and prevents excess moisture from pooling in the slow cooker, which can dilute flavors and slow cooking.
  • In a large mixing bowl, whisk together the elote sauce: 1/2 cup mayonnaise, 1/4 cup sour cream, 2 tablespoons lime juice, 2 minced garlic cloves, 1 teaspoon chili powder, 1/2 teaspoon smoked paprika, 1/2 teaspoon ground cumin, optional 1/4 teaspoon cayenne, 1/2 teaspoon salt, and 1/4 teaspoon black pepper until the mixture is smooth and emulsified.

    → Whisking thoroughly creates a stable emulsion that coats the corn and chicken uniformly; ensure no separated oil by whisking vigorously for about 45 seconds.
  • If using frozen corn, thaw completely and pat dry; if using fresh corn, shuck just before cutting kernels from the cob to preserve sweetness, then measure 2 cups; moisture or residual water weakens the sauce and can steam the chicken.

    → Fully thawed or freshly cut corn yields bright color and crisp sweetness without watering down the sauce.
  • In a separate bowl, combine the corn with 1/4 cup cotija cheese being folded in gently to avoid breaking the kernels, then reserve the remaining 2 tablespoons cotija for finishing; this builds a creamy base with salty, crumbly texture and ensures you retain topping for later.

    → Folding gently prevents bruising the corn and keeps the cheese from clumping; reserving some cotija ensures a distinct finish topping.
  • Spread a thin layer of elote sauce at the bottom of the slow cooker, then arrange the seasoned chicken on top in a single layer as much as possible to promote even cooking, followed by spooning the remaining sauce over the chicken to coat all surfaces.

    → A bottom layer of sauce keeps the chicken moist and starts flavor development; layering ensures every piece receives adequate sauce for flavor and tenderness.
  • If you desire a bit more moisture, pour 1/2 cup low-sodium chicken broth around the sides of the chicken; this adds steam and helps prevent the sauce from drying out, especially if the slow cooker vents moisture differently.

    → The broth creates a gentle braising environment that keeps meat tender and sauce saucy, rather than stiff or scorched on the edges.
  • Cover and cook on Low for 6 to 8 hours or High for 3 to 4 hours, until the chicken reaches 165°F (74°C) and shreds easily if desired; verify with an instant-read thermometer inserted into the thickest part of the meat.

    → Low and slow heat yields tender, juicy chicken and allows the flavors to meld with the elote sauce; doneness ensures safety and proper texture.
  • If you prefer shreddable chicken, remove the chicken from the slow cooker, shred with two forks on a cutting board, then return the meat to the pot and toss to coat with the sauce; shredding increases surface area for saucing and yields a more cohesive dish.

    → Shredded meat absorbs more sauce and distributes flavor evenly in every bite; keep the meat moist by not over-drying during shredding.
  • Stir in 1/4 cup chopped fresh cilantro and taste for salt; adjust seasoning with additional salt or lime juice if needed to balance richness and acidity; fresh herbs brighten the dish at this stage.

    → Cilantro adds aromatic brightness; tasting and balancing at this point ensures the final dish is vibrant and well-seasoned.
  • Just before serving, sprinkle the remaining 2 tablespoons cotija cheese over the surface for a final saltiness and crumbly texture, then set out lime wedges for guests to brighten their bowls.

    → Finishing with cotija adds contrast and saltiness; lime at the table allows each person to tailor acidity to their palate.
  • Garnish with the chopped cilantro if you prefer extra color and aroma, and offer an optional jalapeño addition: stir in 1 small seed- and vein-seeded jalapeño, minced, into the sauce either before cooking for integrated heat or at the table for guests who want control.

    → Jalapeño adds fresh heat; removing seeds lowers heat, while adding whole minced jalapeño distributes spiciness evenly through the dish.
  • Serve the Slow Cooker Street Corn Chicken with warm tortillas, rice, or a crisp cabbage slaw, spooning generous amounts of sauce over each portion and finishing with a lime wedge for a bright, tangy contrast.

    → The combination of creamy elote sauce, tender chicken, and bright acidity creates a balanced, satisfying meal with classic street corn flavors in a comforting slow-cooked format.

Notes

These gluten-free slow cooker street corn chicken notes are designed to help you achieve a creamy, zesty elote-inspired dish with hands-off convenience. For deeper flavor, quickly sear the chicken in a hot skillet before adding to the slow cooker, then return to the sauce to coat; or skip browning for a totally hands-off meal. Use a mix of chicken breasts and thighs for moist, shreddable meat, and be sure to pat the meat dry if partially frozen to promote even cooking. Thaw and pat dry corn kernels before mixing into the sauce to avoid watery results. The elote sauce benefits from fresh lime juice and cilantro added toward the end to maintain brightness; adjust the cayenne and chili powder to your desired heat level. If the sauce seems too thick, stir in extra low-sodium chicken broth a little at a time until you reach your preferred consistency. Serve over rice, warm tortillas, or with a side of black beans, and finish with extra cotija and fresh cilantro for texture. Leftovers keep in the fridge for 3–4 days and can be frozen for longer storage; reheat gently to avoid separating the sauce. Always ensure your cotija cheese and other toppings are gluten-free if you have gluten intolerance.

Tips

General Prep and Cooking Tips

  • Choose a mix of chicken breasts and thighs if possible. Thighs stay juicier in a slow cooker, while breasts keep a lean profile. A mix gives a good balance of texture and moisture.
  • For shreddable meat, cook the chicken whole and shred after it’s done, then return the pieces to the sauce to coat evenly.
  • If chicken is partially frozen, add a few extra minutes to the cooking time and pat the pieces dry before adding to the slow cooker for more even cooking.
  • Start with 1 teaspoon kosher salt for the chicken and adjust later after tasting the finished sauce, since cotija and toppings add salt.
  • For deeper flavor, you can brown the chicken quickly in a skillet before adding it to the slow cooker. This is optional but adds a richer crusty note without losing moisture.

Elote Sauce Tips

  • Thaw frozen corn completely and pat dry to prevent watery sauce; if using fresh corn, cut kernels just before mixing for the best sweetness and texture.
  • Use full-fat mayonnaise for creaminess; if you want a lighter version, you can substitute part-skim mayo or blend in Greek yogurt, but expect a lighter texture and tang.
  • Sour cream contributes tang and extra creaminess; opt for full-fat, and note that dairy-free substitutions will alter flavor and texture.
  • Cotija cheese provides saltiness and crumbly texture. If unavailable, feta or queso fresco can work, but flavor and melting behavior will differ.
  • Lime juice brightens the sauce. Freshly squeezed juice is best; adjust after combining with other ingredients to taste.
  • Finely mince garlic so it distributes evenly in the sauce; you can crush it lightly for a milder aroma if preferred.
  • Chili powder adds warm, smoky heat. Start with 1 teaspoon and adjust to your desired spice level; for milder heat, use less, or for more, add up to 2 teaspoons.
  • Smoked paprika gives a subtle smoky aroma and color. If you don’t have it, use regular paprika with a pinch of cumin for similar warmth.
  • Ground cumin introduces earthy warmth; use sparingly to avoid overpowering other flavors.
  • Cayenne pepper is optional for extra heat. Start with 1/4 teaspoon and increase after tasting the sauce.
  • Season with salt to taste. The cotija and toppings can add salt, so taste after mixing with the chicken and adjust as needed.
  • Freshly ground black pepper adds a bright finish; season lightly at the end.
  • Optional broth helps keep the sauce saucy and the chicken tender. Add gradually and adjust to reach your desired consistency.

Finish, Garnish, and Serving Tips

  • Stir in chopped fresh cilantro toward the end of cooking for bright herbal notes; if cilantro isn’t preferred, substitute with chopped parsley or green onions for color and bite.
  • Finish with an extra crumble of cotija cheese just before serving to add texture and saltiness.
  • Serve with lime wedges on the side so guests can brighten each bite to taste.
  • If the sauce thickens, whisk in a little broth or water to loosen it to your preferred consistency.

Substitutions, Variations, and Make-Ahead Tips

  • For dairy-free or lighter options, use dairy-free mayo and sour cream alternatives; note that flavor and texture will vary slightly.
  • To adjust heat, modify the jalapeño (if using) or cayenne; seed removal will reduce heat for sensitive palates.
  • Substitute cotija with feta or queso fresco if needed, keeping in mind saltiness and texture differences.
  • The recipe can be prepared ahead: mix the elote sauce components (without cilantro and cotija topping) and refrigerate; assemble in the slow cooker when ready to cook.

Make-Ahead, Storage, and Reheating

  • Leftovers store in an airtight container in the refrigerator for 3–4 days. Reheat gently on the stovetop or in the microwave, adding a splash of broth if the sauce thickens.
  • shredded chicken can be prepared ahead and kept refrigerated, then mixed back into the sauce when reheating for faster meal prep.
  • Freezing is not recommended for this dish due to dairy-based sauce; fresh reheating yields best texture and flavor.

FAQ

What is Slow Cooker Street Corn Chicken?

A creamy, comforting dish where tender chicken simmers with corn in a street corn-inspired sauce, finished with lime, cilantro, and a touch of cheese. It’s all cooked in a slow cooker for hands-off flavor.

What ingredients do I need?
  • 2 pounds boneless, skinless chicken breasts
  • 3 cups corn kernels (fresh or frozen)
  • 8 ounces cream cheese, softened
  • 1/2 cup sour cream or Greek yogurt (optional for extra tang)
  • 1/4 cup mayonnaise (optional for classic street corn creaminess)
  • 1 jalapeño, minced (seeds removed for mild; leave seeds for extra heat)
  • 2 cloves garlic, minced
  • 1 teaspoon chili powder
  • 1 teaspoon paprika
  • 1/2 teaspoon cumin
  • 1/2 teaspoon salt, to taste
  • 1/4 teaspoon black pepper
  • Juice of 1 lime
  • 1/2 cup chicken broth or water
  • Fresh cilantro, chopped
  • Cotija cheese or queso fresco for serving (optional)
Can I use frozen chicken or whole chicken?

Yes. You can use frozen boneless, skinless chicken breasts, but plan for a longer cook time. For thawed breasts, cook on low 6–8 hours or high 3–4 hours. If using bone-in pieces, add extra 30–60 minutes and ensure all chicken reaches 165°F (74°C).

How do I cook it in the slow cooker?

1) Place chicken, corn, jalapeño, garlic, salt, pepper, chili powder, paprika, cumin, and broth in the slow cooker. 2) Cover and cook on low for 6–8 hours or high for 3–4 hours, until the chicken is cooked through. 3) Remove chicken and shred or dice. Return to the pot, add cream cheese and sour cream or mayo (if using), and stir until melted and creamy. 4) Stir in lime juice and cilantro; adjust seasonings to taste. Keep on warm until ready to serve.

How do I get the ‘street corn’ flavors?

To mimic street corn, blend lime juice with mayo and cream cheese, whisk until smooth, then fold into the hot mixture. Finish with chopped cilantro and crumbled cotija cheese for a classic finish. You can also add a pinch of chili powder on top for extra color and taste.

Is it spicy?

Spice level comes from the jalapeño. Remove seeds and membranes for a milder dish. If you want more heat, leave seeds in or add a small diced serrano pepper. You can also sprinkle extra chili powder at serving time.

Can I make this dairy-free or gluten-free?

Yes. For dairy-free, use dairy-free cream cheese and a vegan mayo or omit dairy products altogether. For dairy-free sour cream, use a dairy-free yogurt. Gluten-free is naturally met, but be sure any spice blends or cotija substitutes are certified gluten-free. Use gluten-free chicken broth if needed.

How do I thicken the sauce or adjust the consistency?

If the sauce is too thin, remove the lid and simmer on high for 10–15 minutes to reduce, or stir in a little extra cream cheese until thickened. You can also whisk 1 teaspoon cornstarch dissolved in 1 tablespoon cold water into the sauce and heat until it thickens.

How should I serve it?

Serve over white rice, with warm tortillas, or with crusty bread. Top with extra cilantro and crumbled cotija. A squeeze of fresh lime over the top brightens the flavors.

How should I store leftovers?

Cool completely and store in an airtight container in the refrigerator for 3–4 days. Reheat gently in the microwave or on the stovetop, adding a splash of broth if needed to loosen the sauce.

Can I freeze leftovers?

Yes. Freeze in a freezer-safe container for up to 2–3 months. Thaw overnight in the fridge and reheat slowly on the stove or in the microwave, adding a little liquid if the sauce has thickened too much.

Introduction / Hook

Picture a skillet that crackles with a golden glow, the scent of sunny honey drifting through the kitchen, and a blanket of creamy, briny feta melting into every corner of the plate. Hot Honey Feta Chicken is the kind of dish that feels both comforting and bold in the same bite—like a beacon of warmth on a busy weeknight and a little celebration on a weekend table. The moment it lands on the table, it promises more than just sustenance: it promises a memory in the making. You’ll savor the way the honey’s sweetness meets a sly kick from a peppery heat, which is tempered by the cool, tangy embrace of feta. It’s a dance of contrasts—juicy chicken with a crisp exterior, creamy cheese that softens and brightens, and a glaze that clings with a glossy sheen. In every mouthful, you’ll sense sun-soaked flavors, coastal breezes, and the quiet pleasure of a dish that feels both rustic and refined.

This recipe isn’t just about taste; it’s about the story you tell while you cook. It invites you to pause, take a breath, and let the kitchen fill with a chorus of sounds—the whisper of a pan, the soft crackle that hints at caramelization, the steady hum of conversation as you prep a simple garnish or a side. It’s the kind of dish that makes weeknights feel special and celebratory meals feel approachable. And because it balances sweetness, heat, and salt in a single, satisfying moment, it’s equally at home on a casual family dinner table and a table of guests who appreciate a little culinary flair.

The Story Behind the Dish

The origins of Hot Honey Feta Chicken aren’t tied to a single country or tradition, but rather to a moment when bright Mediterranean flavors met modern, palate-pleasing comfort. The idea grew from three kitchen obsessions: the briny tang of feta that elevates nearly anything it touches, the sun-warmed sweetness of honey that doesn’t overwhelm, and the sense that poultry can be a versatile canvas for both sweet and spicy notes. A friend once told me that the joy of cooking is in balancing bold flavors with gentle nuance, and this dish embodies that philosophy. The feta acts as a creamy counterpoint to the honey’s glow and the chili’s whisper, while the chicken provides a neutral, satisfying base that carries the entire flavor story. It’s a recipe that traveled in spirit—from seaside markets where feta sits in airy blocks and honey glows in jars, to cozy kitchens where a skillet becomes a stage for caramelization and gloss. The result is a dish that tastes like memory and possibility—impeccably simple, deeply satisfying, and endlessly adaptable.

In many coastal cuisines, a hint of sweetness against salt brings balance to bold ingredients. Think of feta’s briny personality softening under a touch of honey; think of heat that invites you to lean in rather than overpower. This dish captures that spirit and then adds a modern twist: a glossy glaze that clings to each piece, providing a little shimmer of sweetness with a friendly heat that lingers. It’s a reminder that comfort food can still feel adventurous, and that the best weeknight meals can carry the soul of a special occasion without demanding hours in the kitchen.

Why You’ll Love This Recipe

  • Fast and weeknight-friendly: The dish comes together with minimal fuss and makes those busy evenings feel intentional.
  • Alluring flavor trio: Creamy feta, bright citrus, and a hot honey glaze create a dynamic, crowd-pleasing profile.
  • Versatile and forgiving: Works well with boneless chicken, adaptable spice levels, and simple pantry staples.
  • Comforting yet elevated: A homey, satisfying centerpiece that still feels special enough for guests.
  • One-pan or one-skillet magic: Minimal cleanup, maximum flavor, and a glossy finish that makes the dish look restaurant-worthy.
  • Shareable and social: A dish that invites conversation, drizzled stories, and generous plating—perfect for gatherings or cozy date nights.
  • Leftovers that shine: The flavors often deepen overnight, turning another day’s lunch into something exciting.
  • Kid-friendly without losing character: Gentle enough in heat for younger palates but interesting enough for adults.

Flavor Profile & Texture

Hot Honey Feta Chicken is a study in contrast—soft and crisp, sweet and savory, tangy and heat-kissed. The chicken, when prepared with care, offers a delicate, bronzed crust that gives way to juicy, tender meat beneath. Inside, there’s a subtle succulence that carries the glaze without being overwhelmed. The feta contributes a creamy, savory brightness that penetrates the chicken with its distinctive saltiness, a tangy whisper that brightens the entire dish. The honey glaze provides a generous gloss—sticky, glossy, and dangerously moreish—where warmth from the chili flares up in the back of the palate and then softens as it mingles with the feta’s creaminess. The overall effect is a chorus of textures: the initial crisp bite, the tender interior, and the occasional, delectable bite of feta that melts in and around the chicken on contact with the glaze.

In terms of aroma, expect the scent of a sunlit pantry—the sweetness of honey meeting the earthiness of garlic and oregano, with a salty, slightly funky note from feta. There’s a citrusy lift from lemon or bright zest, which keeps the richness from tipping into heaviness. When plated, the contrast continues: a glossy, lacquered surface on the chicken, the soft crumble of feta peeking through, a sprinkle of fresh herbs adding a peppery, vibrant finish, and a few crisp edges that hint at caramelization and Maillard reactions. The result is a well-rounded flavor profile that invites you to take another bite before you’ve even swallowed the first mouthful.

This dish doesn’t shy away from heat, but it doesn’t overwhelm either. The heat from the hot honey is a friendly nudge rather than a punch—enough to wake the senses and leave a gentle warmth that lingers after the plate is cleaned. The feta’s saltiness acts as a counterbalance, ensuring the glaze remains harmonious rather than cloying. The texture interplay—crisp edges, juicy center, and soft, creamy cheese—keeps every bite interesting and satisfying, making this a memorable dish that people return to with anticipation.

Occasions & Pairings

Whether you’re feeding a busy family, planning a date night at home, or entertaining friends, Hot Honey Feta Chicken fits a wide range of occasions. It naturally elevates a weeknight dinner without demanding hours in the kitchen, and it scales effortlessly for a small gathering or a casual buffet. The dish also plays well with seasons: the brightness of lemon and fresh herbs in spring and summer, the heartiness of a warm, roasted side in fall and winter.

Pairing ideas to consider:

  • Sides: A simple lemon quinoa, fluffy couscous, or roasted vegetables (think zucchini, peppers, and clusters of cherry tomatoes) provide freshness and a texture contrast. For a starchier option, a light herbed or garlic mashed potato can create a comforting pairing with the creamy feta glaze.
  • Salads: A crisp green salad with cucumber, red onion, and a yogurt-lemon dressing or a peppery arugula salad with toasted almonds offers a bright counterpoint to the dish’s richness.
  • Breads: A crusty loaf or warm pita can help scoop up the feta-laced glaze and any juices for a satisfying finish.
  • Drinks: A chilled, citrusy white wine—think Sauvignon Blanc or a dry Riesling—complements the honey and feta without overpowering them. For a non-alcoholic option, a sparkling lemon-ginger beverage or a lightly flavored iced tea works beautifully.
  • Desserts: Opt for something light and refreshing to balance the richness, such as citrus sorbet, yogurt-based desserts, or a simple fresh fruit platter.

Tips, Variations & Substitutions

Tips

Here are some ideas to keep in mind if you’re adapting or refining the dish to your kitchen:

  • Balance is key: The feta’s saltiness needs counterpoints, so keep a note of acidity from lemon or vinegar in your accompanying sides to maintain harmony.
  • Texture matters: If you love a crispier finish, consider finishing with a brief, high-heat sear to re-crisp the chicken’s surface just before serving.
  • Glaze dynamics: A slightly thicker glaze will cling more and give that glossy, restaurant-like appearance. If you’re using store-bought hot honey, taste it first to determine whether you want to reduce the amount for milder heat or add a touch of chili flake if you crave more kick.
  • Herbal lift: Fresh oregano or dill can accentuate the feta and lemon notes beautifully; a pinch of chopped parsley at the end provides color and a fresh aroma.

Variations

  • Herby feta variation: Swap a portion of the feta for a tangy goat cheese to introduce a different tang that still melts beautifully into the glaze.
  • Herb-forward version: Increase the emphasis on herbs—thyme, oregano, and rosemary—to evoke a more Mediterranean garden profile.
  • Spice-forward version: Add a pinch of crushed red pepper or a dash of smoked paprika to deepen the heat and add a subtle smokiness to the glaze.
  • Vegetarian option: Replace chicken with firm tofu or cauliflower steaks for a plant-based adaptation that still showcases feta and honey beautifully. Press and bake or roast to achieve a nice crust and a creamy interior.

Dietary Alternatives

  • Gluten-free: This dish can be naturally gluten-free as written, assuming all pantry items used are gluten-free. Be mindful of any glaze components that may include hidden gluten in certain brands of hot honey or processed sauces.
  • Low-sodium: Use a lower-sodium feta and a light honey glaze; balance with additional lemon and herbs to maintain brightness.
  • Dairy-free option: Use a high-quality dairy-free feta alternative and a dairy-free creaminess element such as coconut yogurt or a cashew-based sauce to mimic the tang and mouthfeel, adjusting for saltiness accordingly.
  • Kosher-friendly note: If using kosher chicken or feta, check labeling for certification and ensure other ingredients align with dietary requirements.

Storage & Make-Ahead Ideas

Leftovers, when stored properly, can still deliver great flavor. If you’re planning ahead, consider these tips to keep the dish fresh and enjoyable:

  • Storage: Refrigerate any leftovers in an airtight container for up to 3 days. The glaze may intensify as it rests, so you may notice a deeper sweetness on day two.
  • Reheating: Gentle reheating on the stovetop with a splash of water or broth can help loosen any hardened glaze and bring the dish back to a tender, saucy state without drying out the chicken. Microwave reheating can work but may soften the glaze texture.
  • Make-ahead: You can prepare components in advance. Slice and season the chicken (if you’re comfortable with pre-seasoning) and pre-mix the feta-honey glaze sauce ahead of time. Reheat and finish with a final glaze before serving to retain the glossy finish and texture.
  • Freezing: While not ideal for feta-based components, you can freeze the chicken portion separately (without feta glazing) and reheat with a fresh glaze when thawed. If you freeze leftovers, expect some minor texture changes in the feta component after thawing.

Fun Facts & Trivia (Optional)

  • Honey has long been used as a natural preservative and flavor booster in many cultures. Its sweetness pairs particularly well with tangy cheeses like feta, creating a timeless savory-sweet contrast.
  • Feta cheese, traditionally made from sheep’s milk (and sometimes a touch of goat milk), brings a unique crumbly creaminess when warmed. Its saltiness is enhanced by gentle heating, which helps it melt and spread through a dish.
  • Hot honey is a relatively modern kitchen darling that lets you control heat without sacrificing sweetness. It’s a versatile glaze that works with everything from pizza to fried chicken and roasted vegetables.
  • Chicken, feta, and honey pairings appear in various cultural riffs, from North African-inspired dishes to Mediterranean and Middle Eastern-inspired meals, highlighting the universal appeal of combining protein with tangy cheese and a touch of sweetness.
  • Texture layering is a timeless trick in cooking: combining crisped edges with creamy centers creates a more satisfying eating experience by engaging multiple senses with each bite.

Ingredients

Chicken & Marinade

  • 4 boneless, skinless chicken thighs (about 1.5 lb)
    → The protein base of this dish. Thighs stay moist and flavorful through cooking; trim any excess fat and pat dry to promote browning. They can be substituted with breasts, but watch cooking times to avoid drying out. Let the meat rest for 5 minutes after cooking for juiciness.
  • 2 tablespoons olive oil
    → Used to lightly coat the chicken before cooking and to help the surface brown evenly. Choose a good-quality olive oil for best flavor. If you are pan-searing, ensure the oil is hot before adding the chicken to prevent sticking.
  • 1 teaspoon kosher salt
    → Enhances overall seasoning and helps draw moisture to create a balanced crust; since feta and glaze are salty, start with this amount and adjust to taste. Use coarse kosher salt or a salt that dissolves gradually for even seasoning. Pat the chicken dry before applying salt for better browning.
  • 1/2 teaspoon freshly ground black pepper
    → Adds aroma and a gentle heat that complements garlic and lemon; grind just before use for maximum brightness. If you prefer, substitute half the pepper with a pinch of white pepper for a milder aroma.
  • 2 garlic cloves, minced
    → Imparts aromatic depth that permeates the meat; mince finely to distribute evenly, or press through a garlic press for a stronger punch. If you want a milder garlic note, you can sauté the minced garlic in the olive oil for a minute before mixing with the chicken.
  • 1 tablespoon fresh lemon juice
    → Brightens the marinade and cutting richness from the feta glaze; use freshly squeezed juice for the freshest acidity. Optionally add a pinch of lemon zest for extra citrus aroma.

Hot Honey Glaze

  • 1/4 cup hot honey (store-bought) or 2 tablespoons honey plus 1/2 teaspoon chili flakes
    → Primary sweet-spicy component that caramelizes on the chicken; use hot honey if possible for convenience. If you only have plain honey, add chili flakes to taste and adjust as it cooks. Warm the glaze briefly to loosen it so it coats evenly.
  • 1 tablespoon soy sauce or tamari (optional)
    → Adds savory depth and a touch of saltiness to balance sweetness. Use low-sodium soy sauce to avoid oversalting; this is optional and can be omitted if you prefer to keep the glaze without additional salt.
  • 1/2 teaspoon smoked paprika (optional)
    → Introduces a subtle smokiness that enhances the glaze and meat exterior; use if you enjoy smoky notes. If you don’t have smoked paprika, use a pinch of regular paprika plus a drop of liquid smoke or omit entirely.

Feta Crumble & Finish

  • 3/4 cup feta cheese, crumbled (about 4 oz)
    → The signature tangy topping that completes the dish; crumble your feta by hand from a block for texture and even distribution. Feta with a bit of brine adds moisture to the glaze; if using pre-crumbled feta, choose a block and crumble yourself for better texture and flavor.
  • 1 tablespoon olive oil (to drizzle over feta before finishing)
    → Helps the feta soften and melt slightly under heat, creating a creamy contrast with the crisped chicken. Drizzle evenly over the feta before broiling or finishing in the oven; avoid using too much or you’ll mask the feta flavor.
  • 1 tablespoon chopped fresh parsley (optional, for garnish)
    → Adds color and a fresh herby note that brightens the dish; chop finely and sprinkle over the top after cooking. If you don’t have parsley, substitute with chives or a small amount of dill for a different herbal touch.
  • 1/4 teaspoon crushed red pepper flakes (optional)
    → Extra heat that can complement the hot honey; add to taste and tailor to your spice tolerance. If you’re serving to kids or sensitive eaters, omit or reduce this component.

To Serve (Optional Add-ins)

  • 1 cup cherry tomatoes, halved
    → Adds sweetness and acidity to pair with the feta and honey; sauté or roast briefly with the chicken to blister the skins and intensify the flavor. If your tomatoes are very ripe, add them at the end to keep their shape.
  • 4 cups baby arugula or spinach (for serving bed)
    → Fresh greens provide a contrasting peppery or leafy note and make the dish feel complete; lay a bed of greens on plates and top with the chicken. If you prefer, use only arugula for a sharper bite.
  • Lemon wedges (to serve)
    → Bright citrus at the finish; offer wedges on the side so guests can squeeze to taste. This is especially nice with a feta glaze that benefits from a touch of acidity.

Instructions

  • Preheat your oven to 425°F (220°C) and line a large rimmed baking sheet with parchment paper to prevent sticking and promote even browning.
    → A hot, prepared surface ensures the chicken develops a crisp exterior without drying out, and parchment makes cleanup easier.
  • Pat dry 4 boneless, skinless chicken thighs and trim any visible fat, then place them in a large mixing bowl to prepare for seasoning.
    → Removing surface moisture helps the seasoning adhere and promotes better browning during roasting.
  • Toss the chicken with 2 tablespoons olive oil, 1 teaspoon kosher salt, 1/2 teaspoon freshly ground black pepper, 2 minced garlic cloves, and 1 tablespoon fresh lemon juice until every piece is evenly coated.
    → Olive oil carries fat-soluble flavors, salt seasons for balance, garlic provides aromatic depth, and lemon juice brightens the overall flavor while helping tenderize slightly.
  • Let the chicken marinate for 15–30 minutes at room temperature (or refrigerate up to 2 hours) to deepen flavor and promote even cooking.
    → Resting time allows the seasoning to permeate the surface and reduces the temperature differential when it hits the hot pan or oven.
  • In a small saucepan, warm 1/4 cup hot honey with 1 tablespoon soy sauce (optional) and 1/2 teaspoon smoked paprika over low heat until the mixture is smooth and glossy, whisking to emulsify.
    → Heating loosens the viscosity so the glaze coats the chicken evenly and the paprika distributes its flavor without clumping.
  • Crush 3/4 cup feta cheese by hand into a loose crumble and lightly drizzle with 1 tablespoon olive oil to moisten; set aside to finish with the chicken.
    → The feta will melt slightly and spread a tangy, creamy contrast over the crisp chicken when heated further, while the oil helps prevent clumping.
  • Arrange the marinated chicken thighs on the prepared sheet in a single layer with space between pieces for air circulation.
    → Spacing ensures even heat exposure and prevents steaming, which helps achieve a golden crust.
  • Bake the chicken in the oven for 12 minutes to begin cooking and develop color on the edges.
    → Starting with a hot oven seals juices inside and starts browning for a tasty crust.
  • Remove the sheet from the oven and brush each thigh generously with the warm honey glaze, coating the surface evenly.
    → Applying glaze mid-cook builds layers of sweetness and spice that caramelize with heat for a glossy finish.
  • Return the pan to the oven and continue roasting for another 8–10 minutes, or until the internal temperature reaches 165°F (74°C) and the glaze is deeply caramelized.
    → Accurate internal temperature ensures safety and juiciness; caramelization enhances flavor and depth of the glaze.
  • Transfer the cooked chicken to a clean plate and brush with any remaining glaze for a final glossy coat; keep warm while finishing the feta.
    → A last glaze adds shine and a concentrated flavor hit that unites the feta and honey notes.
  • Top each thigh with the crumbled feta and, if desired, slide the pan under the oven broiler for 2–3 minutes to soften the cheese and further caramelize the glaze; watch closely to prevent burning.
    → Brief broiling merges the feta into a creamy topping and intensifies the glaze’s sweetness with a crisp edge on the chicken.
  • Remove from the broiler, then sprinkle 1 tablespoon chopped fresh parsley and 1/4 teaspoon crushed red pepper flakes (optional) over the dish for color, aroma, and a gentle extra kick.
    → Fresh herbs brighten the plate and a touch of heat complements the honey-spice profile without overpowering it.
  • To serve, create a bed of 4 cups baby arugula or spinach on each plate, nestle the hot honey feta chicken atop, and scatter 1 cup halved cherry tomatoes around; add lemon wedges on the side for a bright finish.
    → The greens add contrast and freshness to balance the rich feta and honey glaze, while tomatoes offer acidity to cut through the sweetness; lemon wedges let each diner tailor the brightness.

Notes

These hot honey feta chicken thighs deliver juicy, caramelized meat topped with a tangy feta crumble and a glossy sweet-spicy glaze. You can customize them by using chicken breasts instead of thighs, but adjust the cooking time to avoid drying; letting the meat rest for 5 minutes after cooking helps keep juices intact. For a quicker finish, whisk together olive oil, minced garlic, fresh lemon juice, salt, and pepper as a light marinade (15–30 minutes or up to 2 hours), then pat dry and sear. Warm the hot honey glaze briefly so it coats the chicken evenly, brushing on during the last few minutes of cooking for a lacquered look. Finish with crumbled feta, drizzle a little olive oil over the top to soften the cheese, and, if you like, broil for 1–2 minutes to lightly brown the feta. Garnish with chopped fresh parsley and optional red pepper flakes for extra color and heat. Serve on a bed of arugula or spinach with lemon wedges; side options like roasted vegetables, quinoa, or gluten-free bread perfect the meal. Leftovers refrigerate for up to 3 days and reheat gently to preserve tenderness; the glaze may tighten as it sits, so re-warm with a splash of broth or water to loosen. For gluten-free diets, use gluten-free soy sauce or tamari and check that the hot honey and feta are gluten-free.

Tips

Tips for Cooking Hot Honey Feta Chicken

  • Pat the chicken dry with paper towels before seasoning. Extra moisture on the surface steams rather than browns, which prevents a crisp exterior. For even faster browning, let the seasoned thighs rest uncovered in the fridge for 15–30 minutes (food safety permitting).
  • Marinate the chicken for best flavor: coat the chicken in the marinade ingredients (oil, garlic, lemon juice, salt, pepper) and let it sit 30 minutes to 4 hours in the fridge. If you’re short on time, a quick 15-minute soak still improves flavor and tenderness.
  • When searing, use a hot pan and avoid crowding. Cook in batches if necessary to achieve a golden crust; a bit of extra space helps the surface brown evenly.
  • Taste the glaze separately when adjusting sweetness and saltiness. If using soy sauce, opt for low-sodium to prevent oversalting; you can omit the soy entirely if you prefer a purer honey heat.
  • Warm the hot honey glaze briefly to loosen it so it coats the chicken evenly. A quick 1–2 minute simmer or a short microwave blast makes the glaze glossy and easier to brush on.
  • Brush or spoon the glaze onto the chicken during the last few minutes of cooking to build layers of flavor without burning the sugars. Avoid applying early when the pan is very hot to prevent scorching.
  • Finish with feta while the chicken is hot: crumble feta by hand over the top and drizzle about 1 tablespoon olive oil over it. If using the broiler, place under high heat for 1–2 minutes until the feta softens; watch closely to prevent melting away completely.
  • Optional smoked paprika adds a subtle smokiness to the glaze. If you don’t have smoked paprika, use regular paprika with a tiny drop of liquid smoke or omit entirely.
  • Let the chicken rest for 5 minutes after cooking. Resting helps redistribute juices and keeps the meat moist when cut into.
  • Garnish with fresh parsley for color and brightness; red pepper flakes add a final kick if you like extra heat. Serve with lemon wedges to boost acidity on the plate.
  • Prepare a simple serving bed with arugula or spinach and halved cherry tomatoes to balance the richness of feta and honey. The greens and tomatoes add freshness and acidity that brighten the dish.
  • Leftovers store well in an airtight container for 3–4 days in the fridge. Reheat gently in a skillet or low oven to maintain moisture and prevent the feta from breaking apart.

FAQ

What is Hot Honey Feta Chicken?

Hot Honey Feta Chicken is a sheet-pan dinner where juicy chicken cooks with crumbled feta on top and a spicy-sweet hot honey glaze. The feta melts into the pan and the honey glaze caramelizes for a glossy finish and bold flavor.

What ingredients do I need?
  • 4 boneless, skinless chicken breasts (or 4 chicken thighs for juicier results)
  • 1 cup feta cheese, crumbled
  • 1/4 cup hot honey (adjust to taste)
  • 2 tablespoons olive oil
  • 2 cloves garlic, minced
  • 1 teaspoon lemon zest (optional)
  • 1 teaspoon dried oregano
  • 1/4 teaspoon red pepper flakes (optional, for more heat)
  • Salt and pepper to taste
  • Optional topping: breadcrumbs or gluten-free breadcrumbs for a crisp topping
Can I use chicken thighs instead of chicken breasts?

Yes. Chicken thighs stay juicier and more forgiving. If using thighs, bake at 400°F (200°C) for about 25–35 minutes (times vary by thickness). Ensure internal temperature reaches 165°F (74°C).

How do I cook it step by step?
  1. Preheat oven to 400°F (200°C). Line a sheet pan with parchment or lightly oil it.
  2. Pat chicken dry, place on the pan, and drizzle with olive oil. Season with salt, pepper, oregano, and minced garlic.
  3. Bake 20–25 minutes until the chicken is cooked through (reaching 165°F/74°C).
  4. Remove from oven, sprinkle crumbled feta over the chicken, and return to the oven for 3–5 minutes to soften the cheese.
  5. Drizzle hot honey over the chicken and feta. If you like extra browning, broil for 1–2 minutes watching closely.
  6. Garnish with lemon zest or chopped parsley before serving.
How spicy is the dish, and how can I adjust the heat?

The heat comes from the hot honey and optional red pepper flakes. To reduce heat, use regular honey or a milder honey and omit the red pepper flakes. To increase heat, add a bit more hot honey or a pinch of chili flakes.

Can I make this ahead or marinate the chicken?

You can marinate the chicken (garlic, oregano, lemon zest, olive oil, salt, pepper) for 30 minutes to 4 hours for extra flavor. Add the feta and hot honey just before baking. If you marinate, pat dry before cooking to ensure a good sear.

How should I store leftovers?

Store leftovers in an airtight container in the refrigerator for 3–4 days. Reheat in a 350°F (175°C) oven for 8–12 minutes until warmed through, or reheat briefly in a skillet over medium heat.

What should I serve it with?

Great sides include roasted vegetables (zucchini, peppers, broccoli), rice (white, brown, or pilaf), quinoa, couscous, pita bread, or a simple green salad to balance the richness of the feta and honey.

Is Hot Honey Feta Chicken gluten-free?

Usually yes, but check labels: feta and honey are naturally gluten-free, and the plain recipe ingredients are gluten-free. If you use breadcrumbs for a topping, make sure they are gluten-free or omit the topping entirely to keep it gluten-free.

Can I make this dairy-free or vegan?

You can substitute a dairy-free feta alternative or omit the feta altogether and use a dairy-free cheese substitute. The dish will be less creamy, but the hot honey glaze will still shine. If you want to keep a cheesy note, try a dairy-free feta substitute available in many supermarkets.

Can I freeze or reheat the dish?

Leftovers can be refrigerated for 3–4 days. For freezing, it’s best to freeze cooked chicken without the feta and reheat, then crumble feta and add hot honey after reheating for best texture. Reheat in an oven at 350°F (175°C) until warmed through. Avoid freezing raw feta-topped leftovers, as feta texture can change after freezing.

What is hot honey in this recipe?

Hot honey is honey infused with chili peppers or chili pepper flakes to add sweetness with a spicy kick. You can buy it ready-made or make your own by heating honey with a pinch of chili flakes and letting it steep for a few hours or days. Adjust the chili level to taste.

Introduction / Hook

Step into a sunny moment of dessert bliss with Luscious Lemon Raspberry Swirl Cheesecake Cups. Picture delicate bite-sized crescents of creaminess tucked into a crisp, elegant crust, their pale centers glimmering with a lemony glow. Each cup holds a whisper of tart brightness, a tangy swirl of ruby-raspberry ribbon, and a velvety finish that melts on the tongue. The aroma of citrus and berry perfuming the air as you lift a forkful is like a warm invitation to slow down, share a smile, and savor a moment of celebration. These cheesecake cups are not just a dessert; they’re a miniature fête—bright, refreshing, and somehow both fancy and comforting at once. They arrive ready to impress, yet they’re simple enough to conjure on a weeknight, turning ordinary gatherings into memories you’ll revisit with a glow in your eye and a satisfied sigh on your lips.

The Story Behind the Dish

This recipe began as a playful experiment in a sunlit kitchen, where the craving for something bright and breezy met the timeless charm of cheesecake. The lemon—zesty, aromatic, almost commanding in its clarity—became the conductor of the symphony, while raspberries offered a jewel-toned contrast that felt like a kiss of summer. The idea of turning a classic slice into bite-sized, portable delights came from the joy of sharing. After all, dessert tastes sweeter when it comes with a little ceremony: a pretty cup, a delicate swirl, a moment of anticipation as friends gather and the first spoon glides through the surface to reveal that creamy, cloud-soft interior. There’s also a thread of nostalgia in these cups—the memory of seaside picnics and grandmother’s gentle patience in coaxing the perfect mousse or custard to set just right. In crafting this treat, I wanted to honor that comforting, timeless slice of joy while giving it a modern, accessible twist: no fuss, just finesse, and a flavor profile that sings with contrast and balance.

Why You’ll Love This Recipe

Uncomplicated elegance

These cheesecake cups combine the sophistication of a refined dessert with the ease of a no-fuss presentation. They look stunning on a platter, yet you can assemble them with minimal effort, making them ideal for dinner parties, potlucks, or a celebratory family meal.

Bright, balanced flavors

The lemon brings lively brightness that cuts through the creamy filling, while the raspberry swirl adds a gentle tart-sweet note and a pop of color. The result is a harmonious, refreshing bite that keeps guests reaching for one more cup.

Texture contrast that delights

Think of a crisp, possibly biscuit-like crust giving way to a silky, airy center, with a ribbon of fruity jaminess swirling through it. Each layer offers its own character, making every mouthful intriguing.

Make-ahead friendly

Because these are served in individual cups, they’re naturally suited to make-ahead prep. You can assemble the components in stages, chill them, and have a dessert that’s ready to plate and serve with almost no last-minute rush.

Adaptable for many diets

With mindful substitutions, these cups can be transformed to suit dairy-free, gluten-free, or even vegan preferences, without sacrificing the hallmark creaminess or the bright lemon-raspberry signature.

Versatile for occasions

From casual gatherings to elegant showers, these cups bridge the gap between everyday and special-occasion desserts. They’re a crowd-pleaser that feels celebratory without being fussy.

Flavor Profile & Texture

The flavor profile is a bright dance between citrus, berry, and creamy sweetness. The lemon contributes a clean, zesty tang that awakens the palate, while the raspberry swirl introduces a soft tartness that lingers pleasantly after each bite. The creamy filling carries a velvety, almost mousse-like character when properly chilled, delivering a luxurious mouthfeel that coats the tongue without heaviness. The crust or base—whether imagined as a crisp biscuit layer, a light graham-like crumb, or a delicate nut-based crust—provides a subtle, toasty contrast to the cool filling, adding a gentle crunchy texture that remains crisp even after cold storage. The living crescendo comes from the raspberry swirl: a ribbon of ruby sweetness that threads through the pale cheesecake, offering pockets of fruity brightness that punctuate the otherwise mellow sweetness with lively, fruity interrupts. This interplay of flavors makes every bite feel balanced and complete, as if you’ve enjoyed both a tart, refreshing first course and a creamy finish, all in one charming cup.

The textures play a crucial role in the experience as well. The exterior crust offers a slight snap or crumbly bite, depending on the chosen base, which sets the stage for the whisper-soft interior. The center should be custardy yet firm enough to hold its shape when lifted with a spoon, ensuring that no single component overwhelms the others. The swirl should be glossy and smooth, not grainy, a sign of careful mixing and proper temperature control during creation. In short, this dessert delivers a symphony of sensations: crisp, creamy, tangy, and sweet, all woven together into a portable, elegant format that invites tasting and sharing.

Occasions & Pairings

These lemon raspberry swirl cheesecake cups shine at a multitude of occasions, from casual weeknight treats to festive celebrations. Their compact size makes them perfect for buffets, brunches, and dessert tables where guests can sample without committing to a larger portion. They also lend themselves well to themed events—think springtime gatherings, bridal showers, garden parties, or even a refined tea-time spread—where a touch of citrus-sparkle elevates the overall mood.

When to serve

– Weeknights when you want something momentous but not complicated.
– Summer gatherings, picnics, and al fresco dinners where the bright flavors feel appropriate to the season.
– Special occasions like birthdays, anniversaries, or showers that call for a dessert with a polished appearance.

Suggested pairings

  • Light, sparkling beverages such as Prosecco or chilled sparkling water with citrus zest for a refreshing counterpoint.
  • Fresh berry compotes or a drizzle of berry coulis to echo the raspberry swirl (optional, if you want an extra berry punch).
  • Delicate teas or citrus-infused iced teas that complement the lemon notes.
  • Simple vanilla or almond cookies on the side to echo the crust’s mild sweetness and provide a textural contrast.

Tips, Variations & Substitutions

Here are practical ideas to tailor these cheesecake cups to your pantry, your guests, and your dietary preferences, all while preserving the elegant charm of the dessert.

General tips for best results

  • Chill thoroughly: The filling benefits from a good chill to set and hold its shape, especially when served in cups. Plan ahead so the cups are cold and firm at serving time.
  • Swirl with finesse: Pour a portion of the filling into each cup, then drizzle a ribbon of raspberry puree or whole berry compote before topping with the rest. Use a skewer or thin knife to gently swirl for a marbled effect.
  • Balance sweetness: Taste and adjust the swirl intensity and overall sweetness with natural flavorings. You want the lemon to punch through without becoming overpowering.

Diet-friendly variations

  • Gluten-free option: Choose a gluten-free crust base, such as finely ground gluten-free cookies or nut-based crumbs, to preserve the texture and crunch.
  • Dairy-free / vegan: Use a dairy-free cream cheese substitute and a plant-based cream to achieve a similar creaminess. A light coconut hint can complement the lemon zest if desired, but balance to avoid overpowering the lemon.
  • Low-sugar or sugar-free: Opt for a fruit-sweetened swirl or a sugar substitute compatible with dairy-free fillings, and consider using a crust made with naturally sweetened ingredients to reduce added sugars.
  • Nut-free: If nuts are a concern, substitute any nut-based crust with a crisp, oat-based or gram-based alternative designed to stay sturdy when chilled.

Flavor twists and regional touches

  • Herbal brightness: A touch of fresh mint or basil in the swirl can lend a surprising, refreshing nuance that pairs beautifully with lemon.
  • Ginger snap twist: A hint of ground ginger or crystallized ginger in the crust adds a warming note that complements the lemon’s brightness.
  • Berry variation: Swap in raspberries for another bright berry such as wild blueberries or a mix of blackberries and raspberries for a deeper color and flavor.
  • Toast and spice: A pinch of vanilla bean or a sesame sesame-friendly note in the crust can add depth without overshadowing the citrus.

Make-ahead and assembly ideas

  • Prepare the crust and filling components in advance and chill separately. When ready to serve, fill cups, swirl the berry, and finish with a quick chill.
  • To streamline serving at a party, set up a “cup bar” with pre-filled cups arranged on a tray, ready to be garnished with a final lemon zest dusting or a fresh berry.

Storage & Make-Ahead Ideas

These cups store well in the refrigerator, maintaining their structure for a pleasant length of time. If you’re preparing ahead for a party, plan on assembling the crusts, filling, and swirls on separate trays, then combining them just before serving to preserve the distinct layers and textures. Freezing is possible for the filling portion if you’re making a large batch, but freezing the assembled cups may alter texture, so plan accordingly. When storing leftovers, keep them in airtight containers to prevent the delicate lemon aroma from absorbing other flavors in the fridge. Before serving, a brief return to the fridge or a gentle touch of room temperature will restore the ideal texture and mouthfeel.

Fun Facts & Trivia (Optional)

  • Cheesecake itself has ancient roots, with versions traced back to ancient Greece. The modern cream-cheese-based cheesecake, however, is a distinctly New World adaptation that gained popularity in the 20th century.
  • Lemons were once a symbol of wealth and opulence in culinary tradition, valued for their bright aroma as much as their flavor.
  • Raspberries are among the few fruits that ripen in delicate clusters, each berry packed with tiny seeds that add a subtle crunch and texture to a dessert rendition.
  • Serving desserts in individual cups became popular in modern entertaining for both elegance and practicality—easy portioning, elegant presentation, and minimal plating cleanup.
  • Flavor pairings like lemon and raspberry are a classic for a reason: the citrus tang and berry sweetness mirror each other’s acidity, creating a balanced, refreshing dessert experience.

Ingredients

Crust

  • 1 1/2 cups graham cracker crumbs (or gluten-free graham crackers)
    → This crust provides the firm, buttery base that supports the creamy cheesecake. The crumbs are pressed into each cup to form a compact layer that yields a crisp bite; using gluten-free crumbs will ensure the recipe is accessible for gluten-sensitive eaters. If you prefer a nuttier flavor, you can swap in crushed digestive biscuits or add 1 tablespoon finely chopped toasted nuts to the crust mixture.
  • 3 tablespoons unsalted butter, melted
    → The melted butter binds the crust, adding richness and moisture. Mix the crumbs with the butter until all crumbs are evenly moistened, then press firmly into the bottom of each liner to form a compact, cohesive base. If the mixture seems dry, add a teaspoon more melted butter; if too wet, add a few more crumbs to reach the right consistency.
  • 2 tablespoons granulated sugar (optional)
    → Sweetens the crust subtly to balance the tang of the cheesecake. This is optional if you prefer a less sweet crust; mix with the crumbs before adding butter for even distribution. For a crisper texture, you can toast the crumbs lightly before mixing with sugar and butter.
  • 8-12 disposable mini muffin liners
    → Provides individual portions and easy removal. Line each cup before pressing in the crust so the crust holds its shape during chilling and serving. If using silicone liners, you can skip paper liners but still press the crust firmly into the base.

Cheesecake Filling

  • 16 oz cream cheese, softened to room temperature (2 cups)
    → The main body and tang of the cheesecake; soft, room-temperature cream cheese blends smoothly, creating a light, lump-free filling. Beat until completely smooth and airy, scraping the bowl often for an even texture. Cold cream cheese will resist blending and lead to graininess.
  • 1/2 cup granulated sugar
    → Balances the tang of the cream cheese and lemon with sweetness. Add gradually and beat until the mixture is silky and no sugar crystals remain. If you prefer a lighter filling, you can reduce to 1/3 cup and compensate with a touch more cream.
  • 1/2 cup sour cream, plain (full-fat preferred)
    → Adds creaminess, subtle tang, and helps create a velvety texture that sets nicely without becoming too dense. Ensure it is well incorporated to avoid marbling; if you prefer a richer filling, substitute with an equal amount of heavy cream.
  • 1 tablespoon lemon juice
    → Provides brightness that complements the raspberry swirl and keeps the lemon flavor cohesive with the crust. Use freshly squeezed juice and strain to remove any seeds or pulp that could disrupt the smooth filling.
  • 1 teaspoon lemon zest, finely grated
    → Intensifies lemon aroma and flavor; zest contains essential oils that brighten the filling. Zest before juicing to maximize oils, and avoid grating into the white pith, which can introduce bitterness.
  • 1 teaspoon pure vanilla extract
    → Adds warmth and depth to balance tangy cheese. Use high-quality vanilla for a more pronounced aroma; if you have vanilla beans, you can infuse the milk or cream with scraped seeds for an extra layer of flavor.
  • 1/8 teaspoon salt (optional)
    → Enhances overall flavor and helps the sweetness taste balanced. Omit if using salted butter or if you prefer a sweeter, less savory profile; taste the filling and adjust accordingly before filling the cups.

Raspberry Swirl

  • 1 cup fresh raspberries (or thawed frozen)
    → Provides a vivid color and tart, fruity contrast to the creamy filling. Fresh berries yield the brightest flavor and color, while frozen are convenient and budget-friendly; if using frozen, thaw and drain excess juice to keep the swirl from becoming too liquid.
  • 2 tablespoons granulated sugar
    → Sweetens the raspberry puree to balance tartness; adjust according to berry sweetness and personal preference. If berries are very ripe and sweet, you can reduce the amount slightly.
  • 1 teaspoon lemon juice
    → Brightens the raspberry flavor and helps prevent dull coloration. Use fresh juice for best flavor; balance the acidity to avoid overpowering the berry taste.
  • 1 teaspoon cornstarch dissolved in 1 tablespoon cold water (optional)
    → Thickens the raspberry sauce so it holds shape when swirled into the filling, creating a defined ribbon. If you skip this, the swirl will be looser and more marbled after chilling. Warm the sauce gently to activate the cornstarch, then cool slightly before layering in the cups.

Toppings

  • fresh raspberries for garnish
    → Adds a pop of color and a fresh bite on top. Arrange a few berries on each cup after chilling for an appealing display. If making ahead, keep berries refrigerated separately to preserve color and texture.
  • lemon zest for garnish
    → Finishes the cups with a bright citrus aroma. Use a microplane to grate a fine, fragrant layer over the tops just before serving; avoid the white pith for a clean lemon note.
  • whipped cream for topping, optional
    → Lightens the presentation and provides a creamy contrast to the dense cheesecake. Pipe small rosettes or dollops after chilling; keep chilled and rewhip if needed to maintain volume.

Instructions

  • Line each muffin cup with a disposable mini muffin liner and set the tin on a stable workspace.
    → Linered cups prevent the crust from sticking and make removal neat; liners also help portion control and presentation.
  • In a medium bowl, combine the graham cracker crumbs and the optional 2 tablespoons of granulated sugar, then pour in the 3 tablespoons of melted unsalted butter and stir until all crumbs are evenly moistened.
    → Even moisture ensures a cohesive crust that compresses firmly into the liners and holds together when chilled.
  • Divide the crumb mixture evenly among the lined cups and press firmly into the bottom and slightly up the sides using the flat bottom of a small glass or a mini tart tamper.
    → Firm pressing creates a stable base that won’t crumble when the filling is added, and slight side height helps contain the filling for clean presentations.
  • Chill the crust-lined muffin tin for 15–20 minutes in the refrigerator to set the butter and help prevent crumbling during filling.
    → Chilled crust firms up so the filling stays distinct and the cups retain their shape as they chill.
  • In a large mixing bowl, beat the softened 16 oz cream cheese on medium-high speed until completely smooth and creamy, scraping the bowl often to ensure there are no lumps.
    → A lump-free base yields a silky cheesecake texture and even flavor distribution throughout each cup.
  • Add the 1/2 cup granulated sugar and continue beating on medium speed until fully incorporated and the mixture is light and airy, with no visible crystals.
    → Fully integrated sugar prevents graininess and helps the filling set with a creamy mouthfeel.
  • Beat in the 1/2 cup sour cream until just combined and silky, scraping the sides as needed to maintain a uniform texture.
    → Sour cream adds moisture, subtle tang, and helps create a velvety cheesecake that sets without being too dense.
  • Stir in the 1 tablespoon lemon juice and the finely grated zest, then beat in the 1 teaspoon pure vanilla extract and the optional 1/8 teaspoon salt on low speed until the mixture is cohesive and aromatic.
    → Fresh lemon elevates brightness and aroma; vanilla adds warmth to balance tang while salt enhances overall flavor.
  • In a separate small bowl, prepare the raspberry swirl by mashing the 1 cup fresh raspberries with the 2 tablespoons sugar and 1 teaspoon lemon juice until you reach a slightly chunky puree.
    → The puree provides vibrant color and tart contrast to the creamy filling; a few small raspberry pieces contribute texture.
  • If using cornstarch, dissolve 1 teaspoon cornstarch in 1 tablespoon cold water to make a slurry, then stir the slurry into the raspberry mixture and cook briefly over low heat just until thickened, then cool completely before using.
    → Thickening the swirl helps it hold its shape when swirled into the filling rather than blending completely.
  • Spoon or pipe the cheesecake filling into each crust-lined cup, filling to about 3/4 full to leave space for the swirl.
    → This height provides room for the raspberry ribbon and prevents overflow during chilling.
  • Drop small spoonfuls of the raspberry puree onto the surface of each filled cup and use a toothpick or skewer to swirl the sauce through the filling in a gentle figure-eight or circular motion for defined ribbons.
    → Swirling distributes color and raspberry flavor without completely marbling the filling; it should look like ribbons rather than a uniform mix.
  • Chill the assembled cups, uncovered or lightly covered, in the refrigerator for at least 4 hours or until set; for best flavor, refrigerate overnight.
    → Chilling firms the filling, stabilizes the swirl, and allows flavors to meld for a clean slice and neat presentation.
  • Before serving, garnish each cup with a fresh raspberry, a light sprinkle of lemon zest, and an optional dollop of whipped cream; keep whipped cream cold until ready to use.
    → Fresh garnish enhances color and aroma, while whipped cream provides a luxurious contrast to the dense cheesecake; add just before serving to preserve texture.
  • If desired, store any leftovers tightly covered in the refrigerator for up to 3–4 days, and avoid stacking to prevent crushing the tops.
    → Proper storage maintains texture and flavor; use the topping fresh if possible to keep appearance optimal.

Notes

These lemon raspberry swirl cheesecake cups are a bright, creamy, bite-sized dessert that come together with a crisp crust and a tangy-sweet lemon filling swirled with raspberry. For best results, press a compact crust into each mini muffin liner using the back of a spoon or a small glass; if you’re avoiding gluten, use gluten-free graham crackers and ensure the crumbs are finely processed. Make sure the cream cheese is softened to room temperature before mixing with the sugar, sour cream, lemon juice, and zest, plus vanilla and a pinch of salt, to achieve a smooth, lump-free filling. To intensify lemon brightness, increase zest by 1/2 teaspoon and use fresh juice strained of seeds. For the raspberry swirl, mash or blend raspberries with sugar and lemon juice, then thicken with a light cornstarch slurry if you want the swirl to hold its shape; drop spoonfuls of the raspberry mixture over the filling and swirl with a skewer or toothpick for a defined ribbon. Chill the cups until set, about 2–4 hours or overnight; these are great make-ahead desserts. They store well in the fridge for several days and can be frozen for longer storage—freeze unassembled crusts and filling separately for the best texture, or freeze the assembled cups in a single layer and transfer to a freezer bag once frozen; thaw in the fridge before serving. To serve, garnish with fresh raspberries and a little lemon zest, and add a dollop of whipped cream if desired. Always ensure any gluten-free ingredients you use, such as gluten-free graham crackers and cornstarch, are certified gluten-free if you have a gluten intolerance.

Tips

Tips for Perfect Luscious Lemon Raspberry Swirl Cheesecake Cups

  • Bring all dairy to room temperature before mixing, especially the cream cheese and sour cream, to achieve a smooth, lump-free filling. If you’re short on time, cut the cream cheese into small cubes and microwave in short 5–10 second bursts until pliable but not melted.
  • Crust texture matters: grind graham crackers to a fine, even crumble. If the crumbs feel dry, mix in a teaspoon or two of melted butter and press until the mixture holds together. For gluten-free crusts, ensure crumbs are finely ground and add a touch more butter if needed for cohesion.
  • Pressing the crust firmly ensures it supports the filling. Use the flat bottom of a small glass or a measuring cup to press crumbs evenly into each liner, starting from the center and working outward. Chill 10–15 minutes before filling to set the base.
  • Beat the filling until completely smooth. Cream cheese and sugar should be mixed on medium speed, scraping the bowl often, until glossy. Add sour cream, lemon juice, lemon zest, vanilla, and salt, mixing just until combined to avoid incorporating too much air.
  • For the raspberry swirl, fresh berries yield the brightest color, but thawed frozen berries work well too. If you cook the berries, add a splash of lemon juice and a touch of sugar, then simmer until thickened. Strain to remove seeds and cool completely before swirling.
  • Optionally thicken the raspberry sauce with a cornstarch slurry (cornstarch dissolved in cold water) and cook briefly until glossy. Let it cool completely before swirling to prevent pooling or curdling in the filling.
  • Swirl technique: after filling the cups halfway, add a dollop of raspberry sauce, then cover with more cheesecake filling. Use a skewer or toothpick to create a defined ribbon by gently dragging from center to edge in a figure-8 pattern.
  • Chill time is crucial for setting. Refrigerate the assembled cups for at least 2–4 hours, or overnight, to ensure a clean slice. If you’re short on time, a short chill in the freezer (30–60 minutes) can help firm the filling, followed by a longer chill in the fridge.
  • Make-ahead and storage: Assemble through the swirl and refrigerate. Top with whipped cream and garnish just before serving. Covered cups will stay fresh in the refrigerator for 2–3 days; freeze un-topped cups for up to 1 month and thaw in the fridge before serving.
  • Garnish tips: Add a few fresh raspberries and a light grate of lemon zest just before serving for color and aroma. If preparing ahead, keep garnish separate and add at serving time to preserve brightness.
  • Customization options: To vary sweetness or texture, you can omit the sugar in the crust or use a mix of graham crackers and finely chopped toasted nuts for added crunch and flavor. For a dairy-free option, consider using a plant-based cream cheese and sour cream alternative with lemon zest and vanilla.

FAQ

What are Luscious Lemon Raspberry Swirl Cheesecake Cups?

A crowd-pleasing, individual cheesecake dessert with a buttery crust, a creamy lemon cheesecake filling, and a raspberry swirl for a bright, tangy twist. Each cup is ready to serve and perfect for gatherings or make-ahead treats.

Are these baked or no-bake?

They are no-bake. The crust is pressed into cups, and the filling is whipped and chilled to set. For extra firmness, you can lightly set the filling with a small amount of gelatin.

What ingredients do I need?

You’ll need two parts: a crust and a filling, plus a raspberry swirl. Here’s a quick guide:

  • Crust: graham cracker crumbs, melted unsalted butter, sugar
  • Filling: softened cream cheese, powdered sugar, lemon zest, lemon juice, vanilla extract, heavy cream (or Greek yogurt as a lighter option)
  • Raspberry swirl: fresh raspberries or raspberry puree with a bit of sugar; optional lemon juice or a touch of cornstarch to thicken
  • Toppings (optional): fresh raspberries, extra lemon zest
How do I create the lemon-raspberry swirl?

Whisk or blend the raspberries with a little sugar to make a bright puree. For the lemon portion, prepare the lemon filling separately. When assembling, dollop lemon filling into each cup, add a spoonful of raspberry puree, then use a toothpick or skewer to marble them together without fully mixing.

How long does it take to chill and set?

Plan for at least 4 hours in the refrigerator, and overnight is ideal for best texture. The cups should be fully chilled before serving.

How many cups does this recipe yield?

Typically about 12 mini cups when using standard 2-inch muffin cups. If you use slightly larger or smaller cups, the yield will vary accordingly (roughly 10–14 cups).

Can I make these ahead? How should I store them?

Yes. You can prepare the crust and filling a day ahead. Assemble the cups and refrigerate up to 3–4 days. For longer storage, cover tightly and freeze for up to 1–2 months. Thaw in the fridge before serving. Refrigerated cups are best served within 3–4 days.

Can I customize the flavors (lime, strawberry, etc.)?

Absolutely. Swap in lime juice and zest for a lime twist, or use other berries like strawberries or blueberries for the swirl. You may need to adjust sugar slightly to balance sweetness when changing flavors. The method remains the same.

Are there dairy-free or gluten-free options?

Yes. For dairy-free: use dairy-free cream cheese, a plant-based cream or coconut cream, and dairy-free butter; for the crust, use gluten-free graham crackers or a gluten-free crumble. For gluten-free, simply substitute gluten-free crackers or cookies in the crust. Check that all toppings and thickeners (like gelatin) align with your dietary needs.

How can I prevent cracking or a grainy texture in the filling?

Use softened, room-temperature ingredients and blend the filling until very smooth. Do not overbeat after adding whipped cream if you use it. Chill the filling thoroughly, and consider adding a small amount of unflavored gelatin (bloomed in hot water) for extra stability if you’re worried about texture. Avoid exposing the filling to temperature extremes during assembly.

What equipment do I need?

Here’s a handy list:

  • Mini muffin tin or silicone mini cups
  • Paper liners (optional, for easy removal)
  • Mixing bowls and a mixer or whisk
  • Spatula for scraping and smoothing
  • Spoon or piping bag for filling
  • Toothpick or skewer for creating the swirl
What toppings pair well with the cups?

Fresh raspberries or lemon zest microplanes, a mint leaf, or a light dusting of powdered sugar all pair nicely. You can also drizzle a little raspberry coulis over the top just before serving for extra color and flavor.