Introduction / Hook
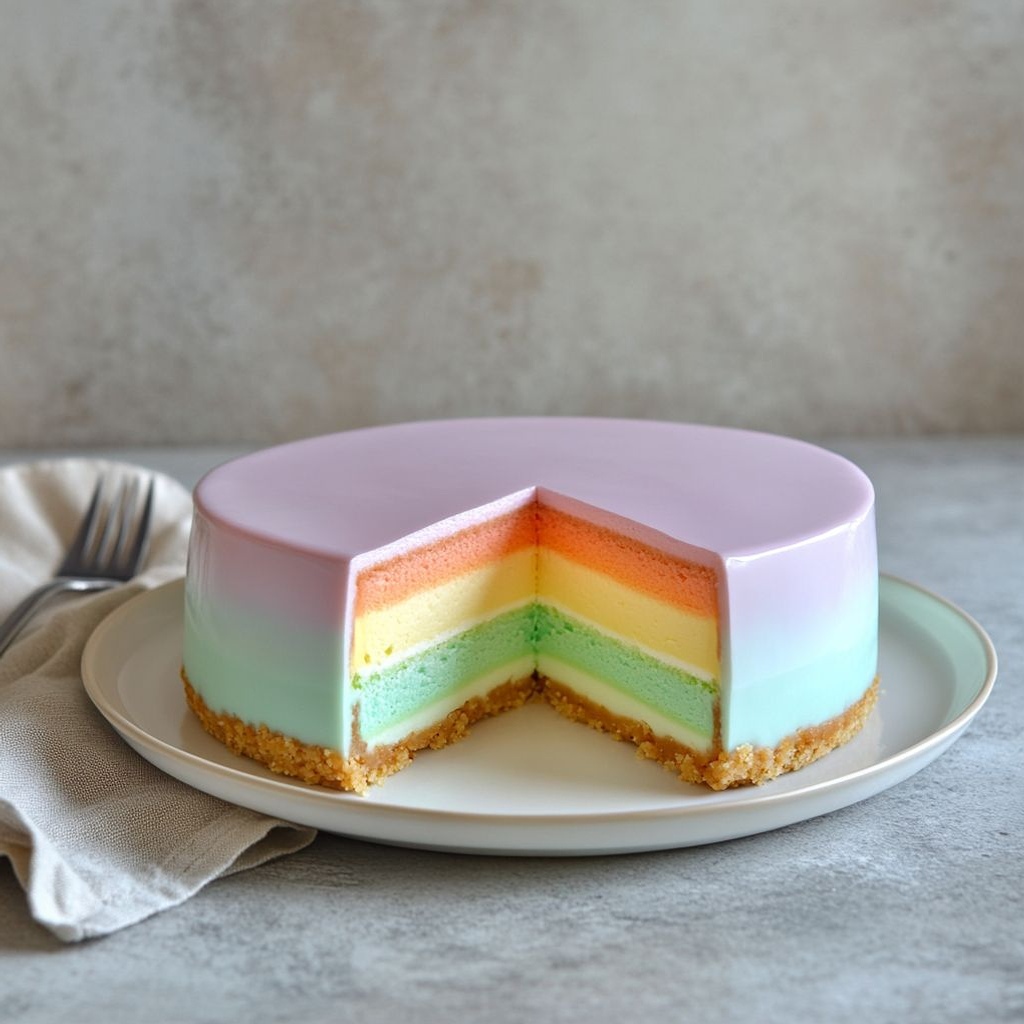
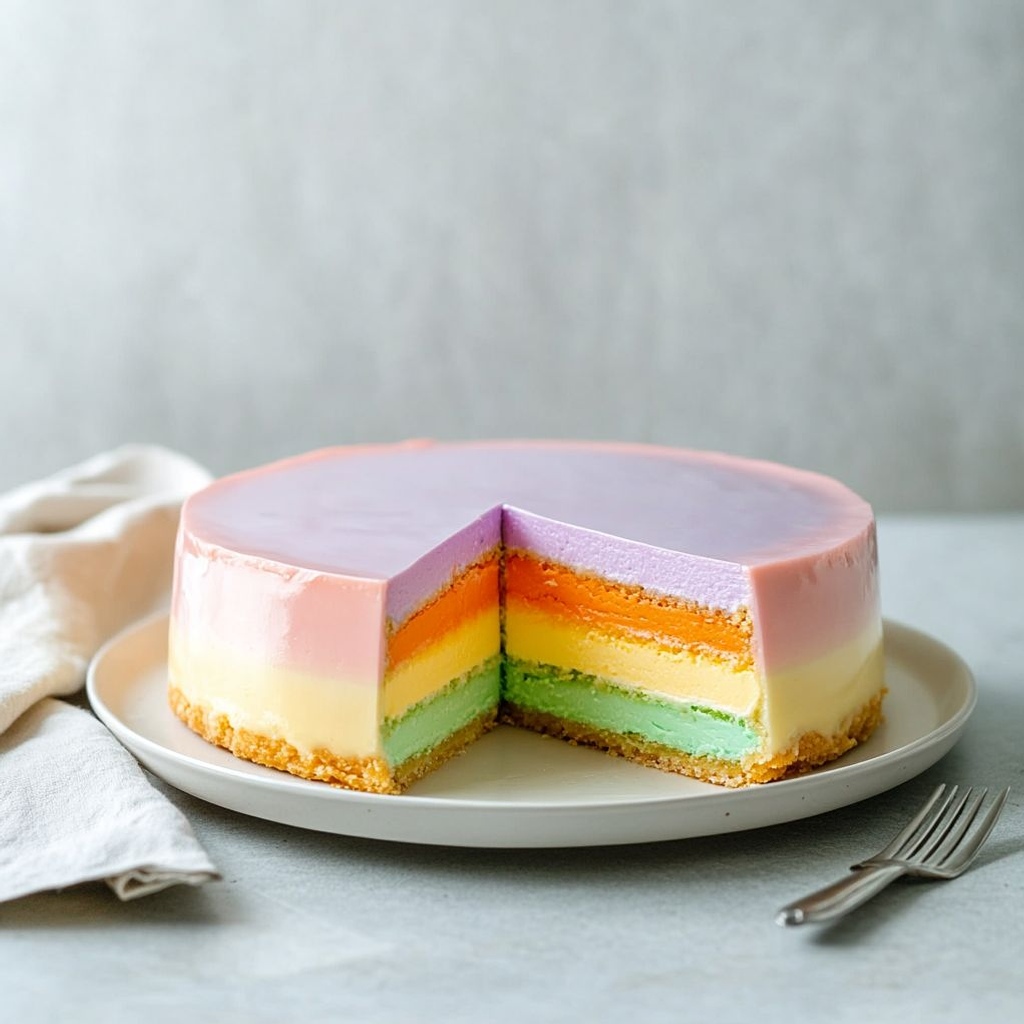
There’s something irresistibly joyful about a Rainbow cheesecake that goes beyond its swaying colors and glossy surface. It’s a dessert that wears a smile in every slice, a celebration of brightness tucked into a velvety, cloud-light filling. Picture a crisp, delicate crust that gives way to a silken center, each bite revealing a gentle surprise of color and flavor as if you’re tasting a rainbow in slow motion. The aroma alone—vanilla warmth mingling with a whisper of citrus and summer fruit—begins the party well before the first forkful lands on your tongue. Rainbow cheesecake isn’t merely dessert; it’s a mood booster, a showpiece, a memory-maker that turns ordinary occasions into something memorable. It invites friends and family to lean in, to guess which shade will appear next, to savor not just the sweetness but the sense of whimsy that accompanies every colored layer.
What makes this dish truly special is its dual nature: visually stunning yet wonderfully approachable. It isn’t a high-strung, fussy bake that demands perfect timing and professional equipment; it’s a celebration you can assemble with a generous heart and a bit of patience. The color story—soft pastels or bold primaries—offers a playful canvas for creativity while the creamy, airy texture anchors every bite in comfort. You can experience the drama of a rainbow without losing the simplicity that makes cake beloved by all ages. The result is a dessert that feels festive enough for a birthday, elegant enough for a dinner party, and forgiving enough for a weekend project that ends in applause at the table.
As you read on, imagine the hush of the room as the centerpiece arrives, the gleam of the cut revealing a spectrum of layers, and the delighted cheers as the first slices disappear. Think about how this dessert can be tailored to your season, your mood, or your menu—whether you’re crafting a playful centerpiece for a children’s celebration, a chic finale for a refined dinner, or a show-stopping addition to a weekend brunch spread. Rainbow cheesecake is more than a recipe; it’s an invitation to dream a little with your palate.
The Story Behind the Dish
Cheesecake as a concept stretches across centuries and continents, tracing back to ancient Greece where it was offered to athletes and celebrated in temples of the time. Early versions emphasized a simple harmony of soft cheese, honey, and a dense, sustaining crust. As trade routes opened and culinary cultures mingled, the idea of a jam-packed, indulgent cheesecake evolved, absorbing regional flavors, textures, and techniques. Fast-forward to modern kitchens, where the dessert becomes a canvas for color, personality, and artistry. The Rainbow cheesecake we celebrate today is a product of that evolution—a playful homage to tradition with a contemporary wink.
The rainbow itself is a universal symbol: a bridge between different colors, a natural sculpture painted in the sky after rain. In the kitchen, it translates into layers of batter tinted with cheerful hues, each layer offering a slightly different note while contributing to a harmonious whole. The story of this dish is, in a way, the story of cheerful resilience—how a classic, beloved dessert can be reimagined with a modern palette, turning a familiar favorite into something new, shareable, and photo-ready without losing the comfort that makes cheesecake beloved in the first place.
For many cooks, Rainbow cheesecake became a personal tradition: a dessert reserved for celebrations, a way to mark a milestone with a spectacle of color, and a reminder that joy can be both simple and spectacular. Some bakers fondly recall decorating the top with edible glitter, while others tell stories of family gatherings where friends competed to suggest the most creative color combination. The dish speaks in colors, but its heart remains the same: a creamy, tangy filling resting on a sturdy base, held together by a crust that anchors the sweetness with a touch of crunch.
Why You’ll Love This Recipe
- Visual magic that doubles as a conversation starter: a multilayer rainbow that instantly elevates any table.
- A balance of textures that pleases every palate: a crisp crust, a creamy center, and a satin-smooth glaze or finishing touch.
- Adaptable to different dietary needs and celebrations with thoughtful variations—no overcomplication, just creative flexibility.
- Effort that feels grand but stays approachable: you can achieve stunning results with a little planning and patience.
- Make-ahead friendly: you can prepare elements in advance and assemble when you’re ready to serve.
- Versatile flavor canvas: you can tilt the color story toward springtime citrus, tropical fruit shades, or classic berry tones—whatever suits your mood, season, or occasion.
- Great for sharing: its generous portions and shareable slices make it perfect for potlucks, holidays, and weekend gatherings.
Beyond aesthetics, Rainbow cheesecake offers a sensory journey. The first bite delivers a gentle tang and creaminess that immediately feels luxurious, while the finish carries a soft sweetness that lingers in a way that invites another slice. The layers add subtle variations in aroma and flavor as you move from one color to the next, turning dessert into a playful tasting experience. This is dessert hospitality at its finest: generous, inclusive, and almost irresistibly inviting.
Flavor Profile & Texture
At its core, Rainbow cheesecake is a study in contrasts that come together in perfect harmony. The filling is typically a delicate balance of creamy dairy richness with a bright tang, often softened by mild vanilla notes. While the taste remains comforting, the color layers introduce gentle nuances—some shades may hint at fruity brightness, others at creamy vanilla softness, and a few at a kiss of citrus. The palette is designed to feel light on the palate, even when the dessert is decadently indulgent.
Texture-wise, you’ll experience a cradle of crispness from the base, followed by a lush, spoonable center that melts with ease. The contrast between a slightly crumbly crust and a silky interior creates a satisfying mouthfeel from the first bite to the last. When a glossy finish crowns the top, it adds a subtle gloss that catches the light, making each slice gleam like a sugar-kissed rainbow. If you choose to add a glaze or fruit coulis as a finishing touch, you’ll notice a bright, tart-acid lift that brightens the palette yet remains complementary to the soft, creamy core.
The color itself often plays with perception; pastels can evoke gentleness and ease, while brighter hues can spark excitement and celebratory energy. Regardless of the exact shade, the sensory impression is consistent: a dessert that feels light, accessible, and irresistibly inviting. The layering technique helps distribute flavors evenly so that no single bite becomes cloying. Instead, each portion offers a soft progression—subtle shifts in aroma and taste that make the act of slicing and serving feel like unwrapping a tiny, edible gift.
Occasions & Pairings
Rainbow cheesecake shines in moments that deserve a little shine. It’s an ideal centerpiece for birthday parties, family reunions, bridal or baby showers, and backyard get-togethers where the food is as much a conversation starter as the company. Because of its festive appearance, it also works beautifully for seasonal holidays when you want a dessert that feels special without being fussy. The no-fuss, no-stress vibe makes it a great choice for celebrations where you’re hosting with warmth and generosity in mind.
Pairings can elevate the experience without overshadowing the cake’s charm. Consider light, refreshing accompaniments that echo the color theme: a bright berry compote or citrus-tinged coulis that brightens the palate between bites; a delicate sparkling beverage or a lightly sweetened tea that cleanses the palate; a dollop of whipped topping or a fresh mint leaf for a finishing flourish. If serving after a hearty main course, a crisp, citrusy or lightly aromatic wine or a sparkling rosé can complement the cheesecake’s creaminess while keeping the mood celebratory.
For seasonal twists, think about fruit-driven layers that reflect the time of year—pale peaches and apricots for a late-summer rendition, or a cool, minty accent that nods to spring greens. The beauty of Rainbow cheesecake is that the color palette invites you to tailor its personality to your menu and your guests’ preferences, turning dessert into a curated experience rather than a one-size-fits-all finale.
Tips, Variations & Substitutions
Make it your way
- Try a no-bake approach for a lighter texture and easier handling. The filling sets in the fridge, giving you a creamy experience without oven time.
- Explore dairy-free or vegan adaptations by using plant-based cheeses and a gluten-free crust. Natural thickeners and gel-setting agents can help replicate the creamy texture without animal products.
- Flavor the layers with gentle fruit essences, citrus zest, or subtle spice notes to add depth without overpowering the color bouquet.
- Natural food colorings, derived from fruits and veggies, offer a more muted, sophisticated look than synthetic dyes. They also reduce the risk of color bleed into adjacent layers.
- Switch up the crust base by using crushed cookies that suit your dietary needs or regional preferences, such as almond-based crusts for gluten-free menus.
- Consider a minimalist top finish: a light glaze or a dusting of fine crumbs that doesn’t steal the show from the colorful interior.
If you’re aiming for a more classic flavor profile, you can keep the focus on a clean, vanilla-forward filling and use the color layers purely for visual impact. For a fruity-forward approach, designate each layer to showcase a gentle fruit reference—think a subtle citrus-lavored layer alongside berry-toned ones—while maintaining the creaminess that defines the dessert. The room for experimentation is part of the charm; the result remains accessible and inviting.
Storage & Make-Ahead Ideas
Rainbow cheesecake holds beautifully in the refrigerator, and its make-ahead potential is one of its strongest assets. If you’re planning a party or a multi-hour event, you can prepare the components ahead of time and assemble closer to serving time, or you can assemble the whole cake and chill to set well in advance. The chilled environment helps maintain the distinct layer separation, ensuring the rainbow effect remains vivid when you slice.
Leftovers should be stored in an airtight container or tightly wrapped to prevent a crust from drying out and to protect the color layers from fading. For longer storage, freezing can be an option; wrap well and freeze in portions, then thaw slowly in the refrigerator to preserve texture. If you’re freezing an assembled version, plan on a slight texture shift, but many bakers find that the creamy center holds up well with proper packaging.
Make-ahead ideas include preparing a pale, neutral base that serves as a neutral canvas for your color layers, pre-detecting the color palette, and chilling the filling to the point where it’s ready to be layered. You can also prep toppings like fruit compotes or light syrups in advance and add them just before serving to maintain brightness and crunch.
Fun Facts & Trivia (Optional)
Here are a few tidbits that might surprise you as you embark on your Rainbow cheesecake journey:
- The tradition of cheesecake stretches back thousands of years, and while today we often top it with fruit or glossy finishes, ancient recipes emphasized basic dairy, honey, and a simple crust that could be enjoyed by athletes and everyday celebrants alike.
- The idea of a rainbow on a dessert plate taps into a long-standing love for color in culinary arts—color not only pleases the eye but can influence appetite and mood, making the dining experience more memorable.
- Rainbow desserts rose to widespread popularity as a playful, inclusive symbol of celebration and diversity, often gracing parties that aim to be joyful and welcoming for guests of all ages.
- No-bake versions of rainbow cheesecakes became especially popular in warmer climates or busy households because they minimize oven usage and still deliver that creamy satisfaction.
- Color psychology suggests that hues can evoke different emotions. Soft pastels tend to feel soothing and uplifting, while brighter tones spark excitement and playfulness—the perfect pairing for a celebratory dessert.
Ingredients
Rainbow cheesecake
Crust
- – 1 1/2 cups graham cracker crumbs (or gluten-free digestive biscuits)
→ The crust forms the base and provides a crisp contrast to the creamy filling. Use finely ground crumbs for an even crust; if needed, use certified gluten-free crackers to keep the dessert gluten-free. - – 6 tablespoons unsalted butter, melted
→ Binds the crumb mixture into a cohesive crust that holds its shape during baking and chilling. Ensure the butter is fully melted and evenly dispersed through the crumbs for a uniform crust. - – 2 tablespoons granulated sugar
→ Adds a subtle sweetness to the crust and helps balance the overall flavor; omit if your crackers are sweetened.
Cheesecake Filling
- – 24 ounces (680 g) cream cheese, softened to room temperature
→ Creates the creamy, smooth base of the cheesecake. Softened cheese blends more easily with sugars and dairy, preventing lumps and a grainy texture. - – 1 cup granulated sugar
→ Provides the primary sweetness and helps balance the tang of the cream cheese; adjust to taste if you prefer a less sweet cake. - – 1/2 cup sour cream
→ Adds tang and extra moisture, contributing to a silkier, creamier crumb while reducing density. - – 1/2 cup heavy cream
→ Adds richness and helps create a velvety texture in the bake. Use at room temperature to blend smoothly; omit if you want a firmer cake. - – 4 large eggs
→ Bind and set the filling; add eggs one at a time on low speed to avoid overmixing and air pockets that can cause cracks. - – 1 tablespoon vanilla extract
→ Enhances overall flavor; for a more intense aroma, use good-quality vanilla or vanilla bean paste. - – 1/4 teaspoon fine salt
→ Balances sweetness and amplifies the cheese flavor; adjust to taste depending on the saltiness of your crackers and butter. - – 2 tablespoons all-purpose flour (or 2 tablespoons cornstarch for gluten-free)
→ Stabilizes the custard, helping prevent cracking and producing a smoother set. Sift with the sugar to ensure even distribution.
Rainbow Color Layers
- – Gel food coloring set (red, orange, yellow, green, blue, purple)
→ Divide the prepared cheesecake batter into six portions and tint each with a different hue. Gel colors are preferred to avoid thinning the batter; add drops gradually to reach vibrant, even colors without overmixing.
Toppings
- – Fresh mixed berries (strawberries, blueberries, raspberries, blackberries) 1–2 cups total, hulled or sliced as desired
→ Adds a colorful, fresh contrast and reinforces the rainbow theme. Wash berries gently and pat dry before arranging on the cake. - – Berry glaze or coulis (optional) 1/2 cup berry purée + 1–2 tablespoons sugar, simmered to glossy consistency
→ Provides a glossy finish and intensified fruit flavor; cool completely before drizzling to avoid melting the filling. - – 1 cup heavy whipping cream
→ For a light whipped topping to serve with the slices. Chill the bowl and beaters, whip to soft or stiff peaks, and sweeten with powdered sugar and vanilla to taste. - – 2 tablespoons powdered sugar
→ Sweetens the whipped cream; sift before adding to prevent lumps; adjust to desired sweetness. - – 1 teaspoon vanilla extract
→ Flavor enhancer for the whipped cream; use pure vanilla for best aroma and depth.
Instructions
- Preheat your oven to 325°F (165°C) and prepare a 9-inch (23 cm) springform pan: wrap the exterior with two layers of heavy-duty aluminum foil for a water bath, lightly grease the interior, and place a parchment circle on the bottom.
→ This prevents water from seeping into the pan and ensures the crust and filling release cleanly for easy slicing. - Combine the crust ingredients: in a medium bowl, stir together graham cracker crumbs, granulated sugar, and the melted butter until the mixture resembles damp sand and clumps when pressed.
→ Thoroughly moistened crumbs create a cohesive crust that bakes evenly and holds its shape when sliced. - Press the crust into the pan: transfer the crumb mixture to the prepared pan and press firmly across the bottom and about 1/2 inch up the sides using the flat bottom of a measuring cup or a small spreader to create an even, compact crust.
→ A dense, even crust prevents crumbling and provides a stable base for the creamy filling. - Chill the crust to set: refrigerate the crust for 15 to 20 minutes or freeze for 10 minutes so the butter firms and the crust holds its shape during filling.
→ A cold crust resists shifting when the hot filling is added and reduces bake time. - Prepare the water bath: wrap the springform pan securely with two layers of heavy-duty foil and set it in a larger shallow baking dish; carefully pour hot water into the outer dish to come halfway up the sides of the pan.
→ The water bath provides gentle, even heat that minimizes cracks and prevents the cheesecake from puffing and cracking during cooling. - Beat the cream cheese until smooth: in a stand mixer or large bowl, beat softened cream cheese on medium speed until completely smooth and free of lumps, about 2 to 3 minutes, stopping to scrape the bowl as needed.
→ Smoothing the cheese base prevents grainy texture and ensures a silky filling. - Incorporate sugar into the cheese: add granulated sugar in 2–3 additions, beating on medium speed after each addition until light and creamy, about 1 to 2 minutes total.
→ Ample aeration balances tang and creates a creamy, airy cheesecake without dense pockets. - Blend in sour cream and heavy cream: mix in the sour cream and heavy cream on low speed until just incorporated and smooth; do not overmix to avoid incorporating excess air.
→ The dairy contributes moisture, tang, and a luxuriously silky texture; overmixing can cause cracks. - Add eggs one at a time: with the mixer on low speed, add eggs one by one, mixing briefly after each addition until just combined; stop as soon as there is no visible streak of yolk.
→ Adding eggs gradually minimizes air incorporation, reducing crack risk and keeping the filling dense and even. - Season and stabilize the batter: mix in vanilla extract, fine salt, and sifted flour (or cornstarch) until the batter just comes together; scrape the bowl to ensure even distribution.
→ Flour or starch stabilizes the custard, helps prevent cracking, and yields a smoother slice. - Divide batter into six portions and tint with gel colors: separate the batter into six equal bowls; add tiny amounts of red, orange, yellow, green, blue, and purple gel color to each, mixing gently until vibrant but not milky.
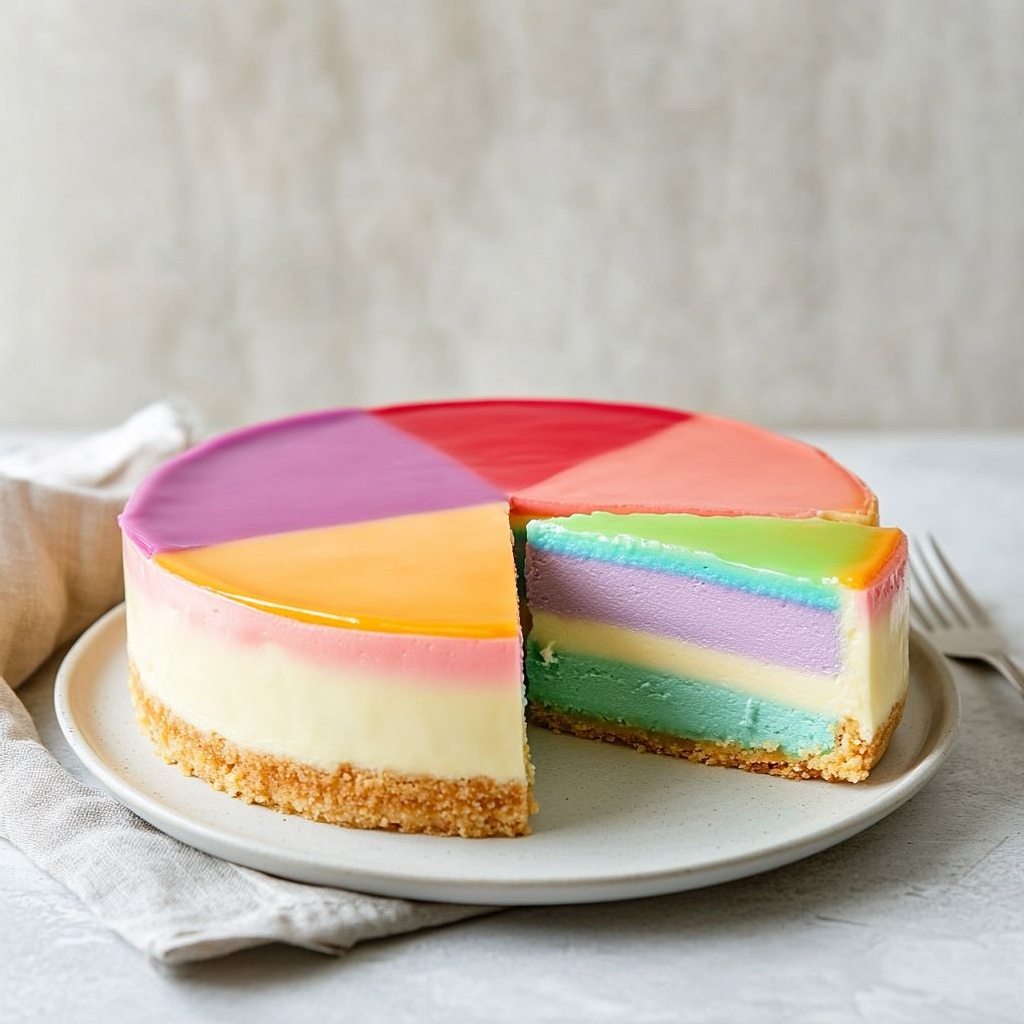
→ Gel colors preserve batter consistency and produce vivid, opaque layers without thinning the mixture. - Layer the colors into the rainbow: beginning with the red layer, spoon or pipe a narrow stripe across the center, then add orange, yellow, green, blue, and purple in even bands; use a small offset spatula to smooth each layer without mixing, leaving slight gaps between bands.
→ Distinct, evenly spaced layers create clean rainbow stripes once cut and maximize visual impact. - Bake the rainbow cheesecake in the water bath: carefully transfer the foil-wrapped pan to the oven and bake at 325°F (165°C) for 60 to 75 minutes, or until the center jiggles slightly when the pan is nudged and the edges are set.
→ Gentle heat and a slow bake prevent cracking; the center should still have a gentle wobble to set as it cools. - Cool gradually in the oven and then on a rack: turn off the oven, crack the door, and let the cheesecake cool in the oven for about 1 hour; then remove to a rack to come to room temperature before refrigerating.
→ Slow cooling reduces thermal shock and minimizes cracking; cooling on a rack prevents condensation from pooling on the surface. - Chill the cheesecake thoroughly: once at room temperature, refrigerate the cake for at least 4 hours or overnight to allow the filling to fully set and the flavors to meld.
→ Chilling firms the custard and makes slicing clean with neat rainbow layers visible. - Prepare the whipped cream topping: chill a mixing bowl and whisk or beaters; whip the heavy cream to soft peaks, then fold in powdered sugar and vanilla to taste until the desired sweetness and stiffness are reached.
→ Whipped cream provides a light, airy contrast to the dense cheesecake and helps balance sweetness. - Make the berry glaze (optional): simmer fresh berry purée with sugar until glossy and slightly thickened, then cool completely; this glaze can be drizzled for sheen and extra fruit intensity.
→ A cooled glaze adds shine without melting the filling and intensifies fruit flavor. - Unmold and decorate: release the chilled rainbow cheesecake from the springform, place it on a platter, spread or pipe whipped cream around the top as desired, arrange fresh berries in a rainbow pattern across the surface, and drizzle the berry glaze if using.
→ Properly unmolding preserves the design and makes the finish visually striking while the toppings add texture and brightness. - Serve and refrigerate leftovers: slice with a clean hot knife, wipe between cuts for neat edges, and serve chilled; refrigerate any leftovers in an airtight container for up to 3–4 days.
→ Keeping the slices cold maintains the cheesecake texture and prevents the colors from bleeding.
Notes
These rainbow cheesecake layers look dazzling and taste ultra-silky, with a crisp crust and six vivid color bands. For best texture, make sure the cream cheese is softened to room temperature and beat on low speed to avoid air pockets; add sugar, sour cream, and heavy cream gradually and mix until completely smooth. Bake the cheesecake in a water bath: wrap the pan tightly in foil, place in a larger pan with hot water, and bake until the center is just set; then allow the oven to cool gradually with the door slightly ajar to prevent cracking. Chill the fully baked cake for at least 6 hours or overnight for clean, easy slicing. To create the rainbow, divide the filling into six equal portions and tint each with gel food coloring (red, orange, yellow, green, blue, purple); add colors gradually and avoid overmixing between portions to keep each layer vibrant. For a gluten-free crust, use gluten-free graham crackers or digestives; melt the butter, mix with the crumbs and a little sugar, press firmly into a 9-inch springform pan, and chill until set. If you need a gluten-free filling, substitute 2 tablespoons cornstarch (for the 2 tablespoons of flour) and whisk well to ensure a smooth custard. For a glossy finish, top with fresh berries arranged in a rainbow, and optionally drizzle a berry glaze or coulis made by simmering 1/2 cup berry purée with 1–2 tablespoons sugar until glossy and thick, then cool before drizzling. A light whipped cream topping adds elegance: whip 1 cup heavy cream with 2 tablespoons powdered sugar and 1 teaspoon vanilla to soft or stiff peaks, as you prefer. The cake stores well: refrigerate slices for up to 3 days or freeze individual slices wrapped tightly for up to 1 month. When preparing, ensure all dairy is cold until mixing and use high-quality vanilla for a richer aroma. Always check labels to guarantee gluten-free ingredients if you have gluten intolerance or celiac disease.
Tips
Crust tips
- Use finely ground graham cracker crumbs (or gluten-free digestive biscuits) for a smooth, even crust. If you want a gluten-free crust, verify that all crumbs are certified gluten-free.
- Ensure the butter is fully melted and evenly mixed with the crumbs so the crust clumps together when pressed.
- Press the crust firmly into the pan and up slightly on the sides for a stable base. Use a flat-bottomed glass or measuring cup to level and compact the crust.
- Lightly pre-bake the crust (about 8–10 minutes at 350°F / 175°C) to set the crumbs before adding the filling. Allow to cool completely before filling.
Filling tips
- Let cream cheese, sour cream, and heavy cream come to room temperature so they blend smoothly and prevent lumps.
- Beat the cream cheese with sugar until completely smooth and glossy, scraping the bowl often for an even texture.
- Add eggs one at a time at low speed to avoid overbeating and air pockets that can cause cracks.
- Include the flour or cornstarch and a pinch of salt, sifted with the sugar, to stabilize the custard and reduce cracking. Do not overmix after adding the flour.
- Bake with a water bath (foil-wrapped pan placed in a larger pan of hot water) to maintain even heat and minimize cracking. Ensure the outer wrap is secure to keep water out of the cake.
- Cool the cheesecake gradually: turn off the oven and crack the door open for about an hour, then move to a rack to finish cooling before refrigerating.
Rainbow color layering tips
- Divide the batter evenly into six bowls and tint each portion with gel food coloring. Gel colors give vibrant results without thinning the batter.
- Stir colors gently and only until the shade is achieved to avoid overworking the mixture.
- To get clean color bands, chill or partially set each colored layer before adding the next. Use a small offset spatula or piping bag to place each layer precisely without mixing.
- Maintain even layer thickness by weighing portions or using a consistent measuring method so all six colors appear balanced when sliced.
Toppings and finishing tips
- Wash berries gently and pat dry to prevent extra moisture from seeping into the cheesecake.
- If using berry glaze, simmer until glossy and cool completely before drizzling to avoid melting the filling.
- For whipped cream topping, chill the bowl and beaters, whip cream to soft or stiff peaks, and sweeten with powdered sugar and vanilla to taste. Pipe or dollop decoratively around the slices.
- Decorate with a few contrasting berries around the edges to emphasize the rainbow theme and add visual appeal.
Make-ahead, storage and serving tips
- Chill the assembled cheesecake for at least 4 hours, preferably overnight, to ensure clean slicing and full set of colors.
- Store leftovers in an airtight container in the refrigerator; for longer storage, slice and freeze individual portions, then thaw in the fridge when ready to serve.
- Use a warm, sharp knife (wipe blade between cuts) for clean slices that reveal the rainbow layers nicely.
FAQ
What is rainbow cheesecake?
Rainbow cheesecake is a colorful, multi-layered dessert where a classic cheesecake batter is divided into several portions and each portion is tinted a different color before baking. The result is a vibrant, stripey cheesecake with a creamy texture and a show-stopping look.
What ingredients do I need for the crust and filling?
For the crust: graham cracker crumbs or digestive biscuits, melted butter, and a little sugar (optional). For the filling: softened cream cheese, granulated sugar, vanilla extract, sour cream or yogurt, eggs, a pinch of salt, and food coloring (gel works best). You can add lemon zest or a splash of citrus for brightness if you like.
How many color layers should I make?
6 to 8 colors work well. Divide the filling into equal portions, tint each with a different color, and spread in order to create a rainbow gradient. Using gel food coloring helps keep the colors vibrant and prevents thinning the batter.
How do I color the batter without muddy colors?
Use gel or paste food coloring in small amounts. Add the color gradually, mix until uniform, and avoid overmixing to prevent air pockets. If you want electric hues, start with a white base and apply colors in thin layers to keep them distinct.
Should I bake the cheesecake in a water bath?
Yes. A water bath helps prevent cracking and ensures even baking. Wrap the pan tightly in foil, place it in a larger roasting pan, and pour hot water around the pan until it comes halfway up the sides. Bake as directed, then remove the water bath and cool gradually.
What temperature and how long do I bake it?
Bake at 325°F (165°C) for about 50–60 minutes, or until the center jiggles slightly when the pan is gently shaken. The outer edge should be set while the center remains a bit soft. Turn off the oven and let the cheesecake cool in the oven with the door slightly open for about 1 hour to minimize cracking.
How can I prevent cracking?
Use room-temperature ingredients and avoid overmixing after adding eggs. Bake in a water bath, cool slowly in the oven, and run a knife around the edge after baking to release steam. Don’t overbake—the center should have a gentle wobble and will firm up as it chills.
Can I make this gluten-free, dairy-free, or vegan?
Yes, with substitutions: gluten-free crust using crushed gluten-free cookies or almond flour; dairy-free/vegan fillings can use vegan cream cheese and unsweetened plant-based yogurt, plus flax or aquafaba to replace eggs. The color layers may look slightly different, and you may need to adjust bake times. If making vegan, choose a no-bake method or vegan set agent compatible with your recipe.
How should I store and freeze rainbow cheesecake?
Refrigerate the cake for up to 5–7 days; cover well to prevent absorbing odors. For longer storage, freeze sliced pieces or whole cake wrapped tightly in plastic and foil for up to 2–3 months. Thaw overnight in the fridge before serving.
How to slice and serve for clean layers?
Chill the cake well before slicing (a few hours or overnight). Use a warm knife or wipe the blade between cuts for clean, distinct layers. Gently lift slices with a pie server and finish with fresh berries, whipped cream, or a drizzle of fruit sauce.
What if colors bleed or layers aren’t distinct?
Ensure each layer is fully set before adding the next; chill between layers for 20–60 minutes. Keep the filling portions evenly thick and avoid adding too much liquid to any single color. If needed, you can re-chill the entire cake after assembly before chilling overnight.
What are decoration ideas and serving tips?
Top with whipped cream, colorful sprinkles, edible glitter, fresh fruit, or a drizzle of fruit coulis. For extra sparkle, garnish with white chocolate shavings or mint leaves. Serve well chilled for the best color and texture.