Introduction / Hook
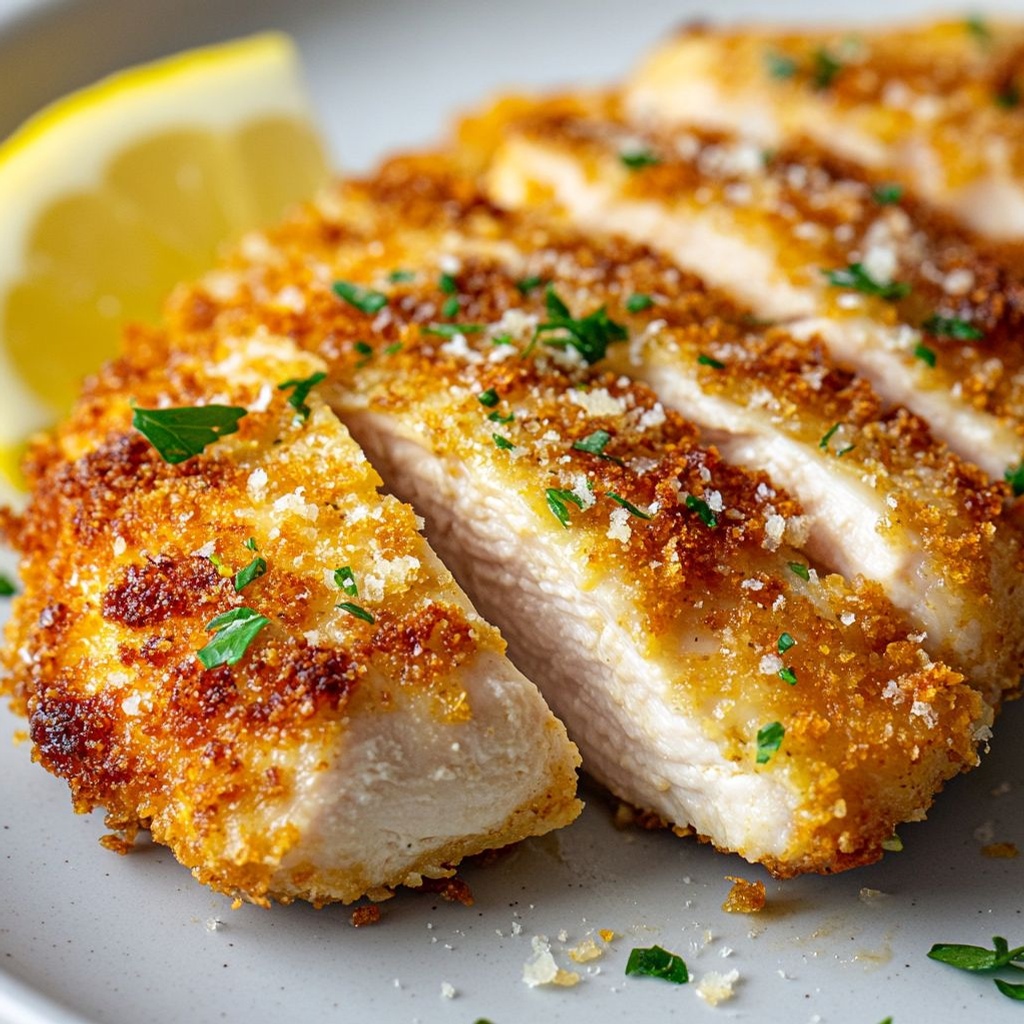
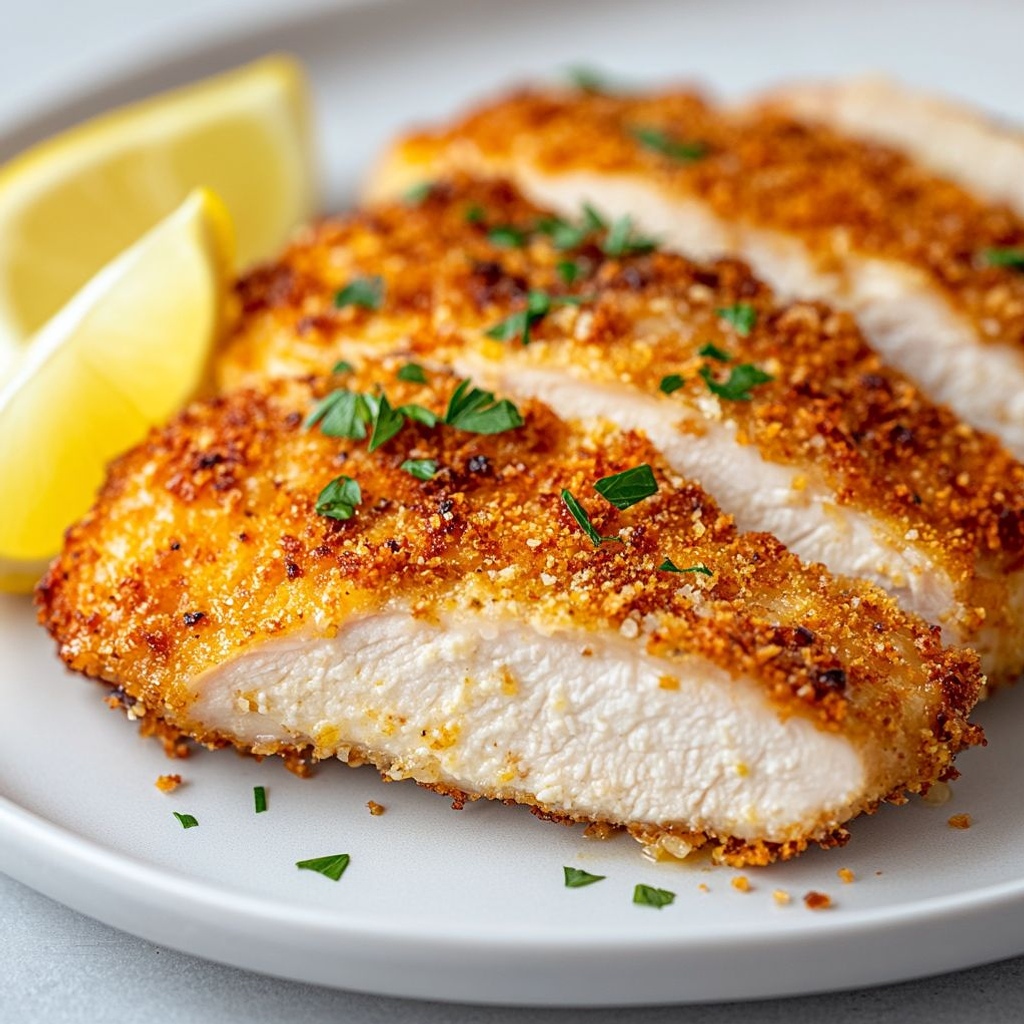
There’s something irresistibly satisfying about a plate of Parmesan chicken: a crackling, sun-gold crust that gives way to juicy, tender meat, all crowned with a kiss of melted cheese and a whisper of bright tomato. It’s the kind of dish that makes weeknights feel like a small celebration and Sunday dinners feel like a warm reunion. As the knife sinks into the crust, you hear the gentle sigh of breadcrumbs soaking up pan drippings, followed by the soft sigh of cheese against the warm chicken. The aroma—garlic, butter, nutty parmesan, a hint of herbs—floats through the kitchen and stirs the appetite long before the first bite. Whether you’re plating for a family of four or cooking for one and a friend who drops by, Parmesan chicken is a comforting, crowd-pleasing classic that never goes out of style. It’s clean in its technique, bold in its flavor, and flexible enough to become your own signature version with a few thoughtful tweaks. If you crave something that tastes like home but feels special enough for a weekend treat, this is the dish you’ll reach for again and again.
Imagine a plate that looks as good as it tastes: crisp edges catching the light, a tender center ready to be pulled apart, a glossy layer of marinara peeking through, and a blanket of stringy, molten cheese that clings to every bite. Parmesan chicken is more than a recipe; it’s a comforting ritual. It invites you to pair it with simple, honest sides—perhaps a garlicky green vegetable, a steaming bowl of spaghetti, or a lemony arugula salad that cuts through richness with bright acidity. The simplicity of the technique makes it approachable for cooks of all levels, while the result carries the confidence of a dish that’s been perfected through practice. So, whether you’re feeding a family after a long day, entertaining friends with a no-fuss yet dazzling centerpiece, or savoring a personal, satisfying meal, Parmesan chicken delivers a memorable experience with every bite.
The Story Behind the Dish
The lineage of Parmesan chicken is a delicious example of how a simple, beloved technique travels and evolves. In many kitchens, a crisp, cheesy crust on breaded meat has long been a staple—an homage to the Italian technique of parmesan-dusted coatings that add aroma and texture without masking the meat’s natural flavors. The concept scaled up in American home cooking through the mid-20th century, when Italian-American households embraced breading as a reliable way to achieve a golden crust. While the dish today is commonly associated with “Parmesan” or “Parmigiana” styles, it’s important to note that there are several regional threads that feed into the same delicious idea.
In its most classic form, Parmesan chicken is inspired by the broader family of dishes that rely on a crust enriched with grated hard cheese—parmesan or pecorino—paired with breadcrumbs for crunch. The cheese not only adds savor but also helps create a protective crust that keeps the chicken moist inside. In some versions, the dish is finished with a light marinara sauce and mozzarella, a homage to the Italian-American comfort dish known as chicken parmesan. In other renditions, the cheese is blended into the crust with herbs, giving the chicken a deeply aromatic, toasty note the moment you break through the crust.
Culinary historians note that breaded and cheese-tinished meats have roots in rustic, home-style cooking, where pantry staples like stale bread, grated cheese, garlic, and dried herbs formed the backbone of a satisfying meal. Parmesan chicken, in its modern iteration, captures that heritage while offering a streamlined, weeknight-friendly method that still feels celebratory. The beauty of this dish is that it respects tradition while inviting personalization: some cooks favor a simple flour-egg-breadcrumb crust; others reach for panko for extra crunch; some enrich the crust with Dijon or lemon zest for a brighter lift; still others pop it under a broiler briefly to mimic the blistered edges you might see in a wood-fired kitchen. The result is a dish that shows how a timeless technique adapts to new kitchens, new palates, and new moments worth savoring.
From the first bite, Parmesan chicken tells a small story of pantry ingenuity and shared meals. It’s a dish that travels well—from a weeknight supper to a celebratory weekend dinner—because it speaks to universal cravings: something crispy and savory on the outside, something juicy and comforting on the inside, and just enough acidity and dairy to keep it balanced. The cheese-laced crust embodies a simple elegance, while the chicken at the center remains honest and straightforward. It’s this balance—between texture, richness, and brightness—that makes Parmesan chicken a standout in countless kitchens and a favorite for cooks who appreciate how a classic recipe can still feel contemporary and exciting with the right touch of care.
Why You’ll Love This Recipe
- Effortless comfort with a “you-made-that?” impact: a crisp crust and juicy interior feel like a chef-level success without demanding hours in the kitchen.
- Versatile and forgiving: swap in different cuts of chicken, use different cheeses, or adjust seasonings to suit your pantry and preferences.
- Family-friendly and crowd-pleasing: the familiar flavors of parmesan, garlic, and tomato sauce win over kids and adults alike.
- Texture magic: a toasty, slightly nutty crust provides a satisfying crunch that contrasts beautifully with tender chicken.
- Make-ahead friendly: you can prep components ahead of time or bake in batches for meal prep.
- Pairs beautifully with a wide range of sides—from simple greens to hearty pasta—making it easy to tailor to any occasion.
Flavor Profile & Texture
The hallmark of Parmesan chicken is the interplay between textures and the harmony of flavors. The crust delivers a golden, almost caramelized crackle thanks to the parmesan and breadcrumbs browning in the pan or oven. That crust acts as a protective shell, sealing in the natural juices of the chicken so the interior stays moist and tender. The cheese itself contributes a nutty, savory depth and a subtle tang that brightens the whole dish without overpowering the meat. Seasonings—often garlic, dried oregano or Italian seasoning, and a pinch of black pepper—bring warmth and aromatics that waft through the kitchen as the dish cooks.
When finished, many versions feature a light coating of marinara or tomato sauce beneath a bubbling veil of melted mozzarella or provolone. The tomato’s acidity brightens the richness of the cheese, while the dairy adds a creamy counterpoint that rounds the flavors into a comforting, cohesive bite. The chicken’s mild sweetness provides a perfect canvas for the cheese’s savoriness, so the dish remains approachable for a wide range of palates. Each bite offers a satisfying contrast: the crispness of the crust against the succulent bite of the chicken, then the gooey, stretchy cheese meeting the tang of the sauce. The result is a flavor profile that feels both luxurious and homey—a rare combination that invites seconds and holds its own on a plate that looks as good as it tastes.
Texture-wise, you’ll notice a sturdy crust that holds up well to forks and knives, yet gives way to a soft, juicy interior. If you prefer extra crispness, you can opt for a longer sear in a hot skillet or finish under a broiler for a minute or two to blister the cheese topping. For a lighter version, you can bake instead of pan-frying and skip heavy oil, relying on a light drizzle of olive oil to encourage browning. The aroma—garlic and parmesan mingling with toasty breadcrumbs—tells you you’re in for something special long before you take the first bite. This is one of those dishes where sensory pleasure meets practical technique, delivering a result that feels indulgent without being heavy.
Occasions & Pairings
Parmesan chicken shines in a variety of settings, from weeknight dinners to weekend gatherings. Its flexibility makes it a reliable centerpiece for different vibes:
- Weeknights: Quick to prepare, satisfying, and forgiving enough for busy schedules. It can be plated with simple side dishes to create a complete, balanced meal in under an hour.
- Family gatherings: A crowd-pleaser that scales well. Bake in a large dish and serve with family-style sides for a warm, convivial table.
- Romantic dinners: Pair with a light salad and a glass of white wine for an intimate, comforting main course.
- Holiday menus: A familiar, comforting option that can be dressed up with extra herbs or a more luxurious cheese topping for special occasions.
Pairings that complement Parmesan chicken beautifully:
- Side dishes: Garlic butter greens, sautéed spinach, roasted vegetables (zucchini, bell peppers, cherry tomatoes), or a crisp, lemony arugula salad.
- Starches: Simple spaghetti or linguine tossed in olive oil and garlic, creamy mashed potatoes, or fluffy polenta to soak up any extra sauce.
- Drinks: A medium-bodied white like Chardonnay or a light red such as Pinot Noir; for non-alcoholic options, a sparkling water with a squeeze of lemon or a chilled hybrid tea works nicely.
- Dessert: A light lemon Sorbet or a biscotti-dusted panna cotta can provide a refreshing finish after a rich, cheesy main.
Tips, Variations & Substitutions
Here are mindful tweaks to tailor Parmesan chicken to your pantry, dietary needs, or mood:
- Crust texture variations: For extra crunch, mix panko breadcrumbs with finely grated parmesan. For a finer crust, use regular breadcrumbs or crush saltines for a light, delicate crunch.
- Cheese options: While parmesan is classic, a blend of parmesan and pecorino Romano adds a sharper tang. If you’re dairy-free, try a finely grated dairy-free hard cheese substitute or nutritional yeast for a cheesy, umami-packed crust.
- Herb and spice flexibility: Add dried thyme, rosemary, or a pinch of smoked paprika for a warm, nuanced edge. Fresh garlic or shallot minced into the crust can boost aroma without adding extra moisture.
- Gluten-free approach: Use gluten-free breadcrumbs or crush gluten-free crackers to achieve a similar crunchy texture.
- Low-carb or keto-friendly version: Use almond flour or crushed pork rinds in place of traditional breadcrumbs to keep the crust light while staying low in carbohydrates.
- Butterfly and pound: To ensure fast, even cooking, lightly pound the chicken to an even thickness; this helps the crust brown evenly and the interior stay juicy.
- Sauce variations: If you prefer a lighter finish, skip the marinara or mozzarella and finish with a bright lemon-butter sauce, a caper-burnished olive oil drizzle, or a simple classic herb butter.
- Make-ahead crust: Prepare the crust mixture in advance and store in a sealed container. Coat the chicken just before cooking for a fresh, bakery-like crust every time.
- Oven vs skillet: For a hands-off approach, bake the chicken in a hot oven until the crust is deeply golden; for a crisper crust, finish with a brief broil at the end.
- Make-ahead topping: If you’re serving a crowd, you can assemble the crusted chicken in a sheet pan and refrigerate up to 1 day; bake when ready to serve and top with sauce and cheese right before presenting at the table.
Storage & Make-Ahead Ideas
Parmesan chicken can be prepared in advance in a few practical ways to save time on busy days:
- Raw prep: Bread and season the chicken ahead of time, then refrigerate overnight. The next day, simply fry or bake and finish with your chosen sauce and cheese.
- Leftovers: Store baked Parmesan chicken in an airtight container in the refrigerator for up to 3 days. Reheat gently in the oven or a skillet to maintain crispness; avoid overheating to prevent dryness.
- Freezing: Unbaked, breaded chicken cutlets can be frozen on a sheet tray, then transferred to a freezer bag for up to 2 months. Thaw completely before cooking. Cooked leftovers can also be frozen and reheated, though crust may lose some crunch after freezing.
- Make-ahead sauces: A simple marinara or tomato-based sauce can be prepared in advance and used to finish the dish when you’re ready to serve, adding a bright, fresh note to the final plate.
Fun Facts & Trivia (Optional)
Delightful tidbits that deepen appreciation for Parmesan chicken:
- The term “parmesan” in the United States often refers to a breaded, cheese-crusted chicken or veal, while in Italy you might encounter “parmigiana” or “alla parmigiana,” variations rooted in regional naming and tradition.
- Parmigiano-Reggiano, the real Parmesan cheese used in traditional preparations, must be aged for a minimum of 12 months, with many wheels maturing for 24 to 36 months to develop a rich, crystalline flavor.
- In Italy, the technique of breading meats with cheese has parallels in dishes like cotoletta and milanese, where breaded, seared cutlets are celebrated for their crisp texture and comforting heartiness.
- The science behind the crust: The combination of cheese and breadcrumbs creates a Maillard reaction, browning and flavor development that yields that desirable deep, nutty crust.
- There’s a playful culinary legend that a crusty chicken cutlet can be transformed into a “parm” with the addition of a quick dollop of sauce and a layer of cheese—a little homage to how the dish evolved into its familiar form.
Ingredients
Parmesan Chicken
- 4 boneless skinless chicken breasts, pounded to 1/2 inch thickness
→ Purpose: ensures even cooking and a uniform crust; Preparation: gently pound the chicken between two sheets of plastic wrap with a meat mallet until about 1/2 inch thick for uniform cooking. Tips: if breasts vary in size, slice thicker ones horizontally to even out, then chill briefly to help the coating adhere before dredging. - 1 cup all-purpose flour, for dredging
→ Purpose: creates a dry surface for the egg wash to cling to and forms the base of the crust; Preparation: season lightly with salt and pepper before dredging. Tips: for gluten-free versions, substitute with a gluten-free flour blend or rice flour mix and adjust seasoning. - 2 large eggs, beaten
→ Purpose: acts as the binding layer between the dredged surface and the breadcrumb-Parmesan crust; Preparation: whisk until smooth with a pinch of salt, add a splash of water if needed to loosen slightly. Tips: ensure eggs are well beaten for even coating adhesion. - 1 cup breadcrumbs (plain or Italian seasoned) or a 50/50 mix with panko
→ Purpose: provides the crunchy crust; Preparation: mix breadcrumbs with the grated Parmesan and optional seasonings; Tips: for extra crunch, toast breadcrumbs lightly in a dry pan for 1–2 minutes before mixing with Parmesan. For gluten-free, use gluten-free breadcrumbs or crushed gluten-free crackers mixed with Parmesan. - 1/2 cup finely grated Parmesan cheese
→ Purpose: adds salty, umami depth and helps form a cohesive crust; Preparation: grate Parmesan freshly for best flavor; Tips: fresh-grated cheese yields a brighter aroma than pre-grated varieties; mix evenly into the breadcrumb mixture to prevent clumps. - 1 teaspoon garlic powder or 2 garlic cloves, minced
→ Purpose: introduces aromatic depth to the crust; Preparation: if using minced garlic, press into the breadcrumb-Parmesan mix so it distributes evenly; Tips: for a milder garlic note, use garlic powder; if using fresh garlic, sauté briefly in a little oil before mixing with crumbs to mellow and bloom the flavor. - 1/2 teaspoon dried Italian seasoning
→ Purpose: provides classic herb profile to the crust; Preparation: sprinkle into the breadcrumb mixture; Tips: if using fresh parsley, finely chop and fold into breadcrumbs after toasting for brightness; dried seasoning is more consistent for coating. - 1/2 teaspoon paprika (optional)
→ Purpose: adds color and a mild warmth; Preparation: dust into the coating; Tips: smoked paprika will impart a stronger smoky note—adjust to taste to avoid overpowering the chicken. - 1/2 teaspoon kosher salt
→ Purpose: enhances overall flavor; Preparation: season the coating and the chicken as needed; Tips: Parmesan and breadcrumbs can be salty, so taste and adjust; if using salted breadcrumbs, reduce added salt. - 1/4 teaspoon freshly ground black pepper
→ Purpose: provides a subtle bite to balance richness; Preparation: freshly grind just before use; Tips: distribute evenly in the crust to prevent hot spots of pepper flavor.
Pan Frying
- 2-3 tablespoons olive oil
→ Purpose: creates a crisp crust and prevents sticking; Preparation: heat in a large skillet over medium heat until shimmering before adding chicken; Tips: avoid overcrowding the pan; fry in batches if needed to maintain heat and achieve an even crust. - 1 tablespoon unsalted butter
→ Purpose: adds richness and helps browning; Preparation: add with the oil or towards the end of frying to baste for a golden crust; Tips: butter can brown quickly, so monitor heat and combine with oil to prevent burning.
Finish & Garnish
- Fresh parsley, chopped
→ Purpose: adds color and a fresh herbal note; Preparation: sprinkle over the chicken after resting for a bright finish; Tips: for extra herb presence in the crust, fold chopped parsley into the breadcrumb mixture before coating. - Lemon wedges
→ Purpose: provides bright acidity to cut richness; Preparation: serve on the side and squeeze over just before eating; Tips: zest a small amount over the hot chicken for added aroma, but avoid zesting directly onto the hot surface to prevent bitterness.
Optional Lemon-Butter Sauce
- 2 tablespoons butter
→ Purpose: base for a simple lemon-butter sauce to drizzle over the chicken; Preparation: melt gently in a small pan, then whisk in lemon juice; Tips: keep heat low to prevent separation; you can add a pinch of garlic powder for garlic butter, if desired. - 1 tablespoon fresh lemon juice
→ Purpose: provides bright acidity to balance richness; Preparation: use freshly squeezed juice; Tips: adjust to taste and consider a touch of lemon zest for extra brightness. - 1 clove garlic, minced (optional)
→ Purpose: adds aromatic depth to the sauce; Preparation: sauté minced garlic briefly in the butter before adding lemon juice; Tips: cook just until fragrant to avoid bitter garlic; omit if you prefer no-garlic sauce.
Instructions
- Pound the chicken breasts to an even 1/2 inch thickness using a meat mallet, placed between two sheets of plastic wrap; gently tap and rotate to achieve uniform thickness; chill briefly if needed to help the coating cling later.
→ Why: ensures even cooking and a uniform crust; How-to: cover the chicken to protect the surface, use steady, controlled taps, and check thickness with a ruler or by eye for consistency. - Arrange three shallow dishes: one with seasoned all-purpose flour, one with beaten eggs, and one with the breadcrumb-Parmesan crust mixture; pre-season the flour with salt and pepper for balanced flavor; lightly toast the breadcrumbs in a dry skillet for 1–2 minutes if you want extra crunch, then cool before mixing with Parmesan and spices.
→ Why: creates distinct coating layers that adhere and build flavor; How-to: keep stations close so you can move quickly from flour to egg to crumbs to maintain coating integrity. - Mix the breadcrumb, Parmesan, garlic powder, dried Italian seasoning, paprika (optional), kosher salt, and black pepper in the third dish until evenly combined; fold in any chopped fresh parsley if using, for a brighter herb note.
- Dredge each chicken breast in the seasoned flour, pressing lightly to remove excess and create a dry surface for even egg adhesion; shake off excess flour so only a thin coat remains.
→ Why: flour absorbs the egg wash and aids crust adhesion; How-to: pick up the breast and roll it in flour while giving a gentle shake to remove clumps, ensuring all sides are lightly covered. - Dip the floured chicken into the beaten eggs, rotating to coat completely and letting any excess egg drip back into the bowl; the egg acts as a binding layer that helps the crust cling during frying.
→ Why: ensures a uniform bond between the flour layer and breadcrumb crust; How-to: hold the edge and roll the chicken through the egg, lifting and allowing a little run-off to prevent pooling. - Press the egg-coated chicken into the breadcrumb-Parmesan mixture, turning to coat all surfaces and pressing firmly so crumbs adhere; tap gently to remove any loose crumbs and ensure an even crust.
→ Why: a solid crust prevents coating from flaking during frying and yields a crisp, flavorful crust; How-to: use your other hand to press and rotate, avoiding crust gaps. - Heat 2–3 tablespoons olive oil and 1 tablespoon unsalted butter in a large skillet over medium heat until the oil shimmers and the butter foams gently; this combination promotes a crisp crust with rich browning.
→ Why: oil provides heat transfer and prevents sticking, while butter adds flavor and helps browning; How-to: test a crumb by laying it in the pan—if it sizzles steadily, the pan is ready. - Fry the coated chicken in batches, cooking 3–4 minutes per side until the crust is golden brown and the chicken reaches 165°F (74°C) internally; avoid overcrowding to maintain steady heat and crust development.
→ Why: proper heat ensures crisp crust without sogginess; How-to: flip once using tongs, maintaining gentle contact to avoid crust loss, and monitor the temperature with an instant-read thermometer for accuracy. - Transfer fried chicken to a wire rack set over a sheet pan or to paper towels to drain briefly, then rest 5 minutes to reabsorb juices and finish crust setting; this step prevents a soggy crust from steaming.
→ Why: resting helps unify the crust and juices; How-to: avoid stacking pieces, spacing them out for air flow and quick cooling. - Finish with fresh chopped parsley sprinkled over the chicken for color and a bright herbal note; place lemon wedges on the side for a fresh acidity that cuts richness.
→ Why: herbs and citrus provide balance and brightness; How-to: mince parsley finely just before use and scatter evenly, and slice lemons crosswise for ease of squeezing at the table. - Optional Lemon-Butter Sauce: melt 2 tablespoons butter in a small pan over low heat, then whisk in 1 tablespoon fresh lemon juice; add minced garlic if desired and cook briefly until fragrant, keeping heat low to prevent separation.
→ Why: lemon-butter sauce adds glossy richness and a zingy balance; How-to: keep the sauce warm on very low heat and whisk constantly to emulsify; drizzle just before serving. - Plate the Parmesan chicken with a light squeeze of lemon, drizzle the optional lemon-butter sauce if prepared, and serve immediately with your chosen side dishes for a complete meal.
→ Why: serving hot ensures maximum crust texture and flavor; How-to: arrange on warm plates, garnish with parsley, and present with lemon wedges for added aroma at the table.
Notes
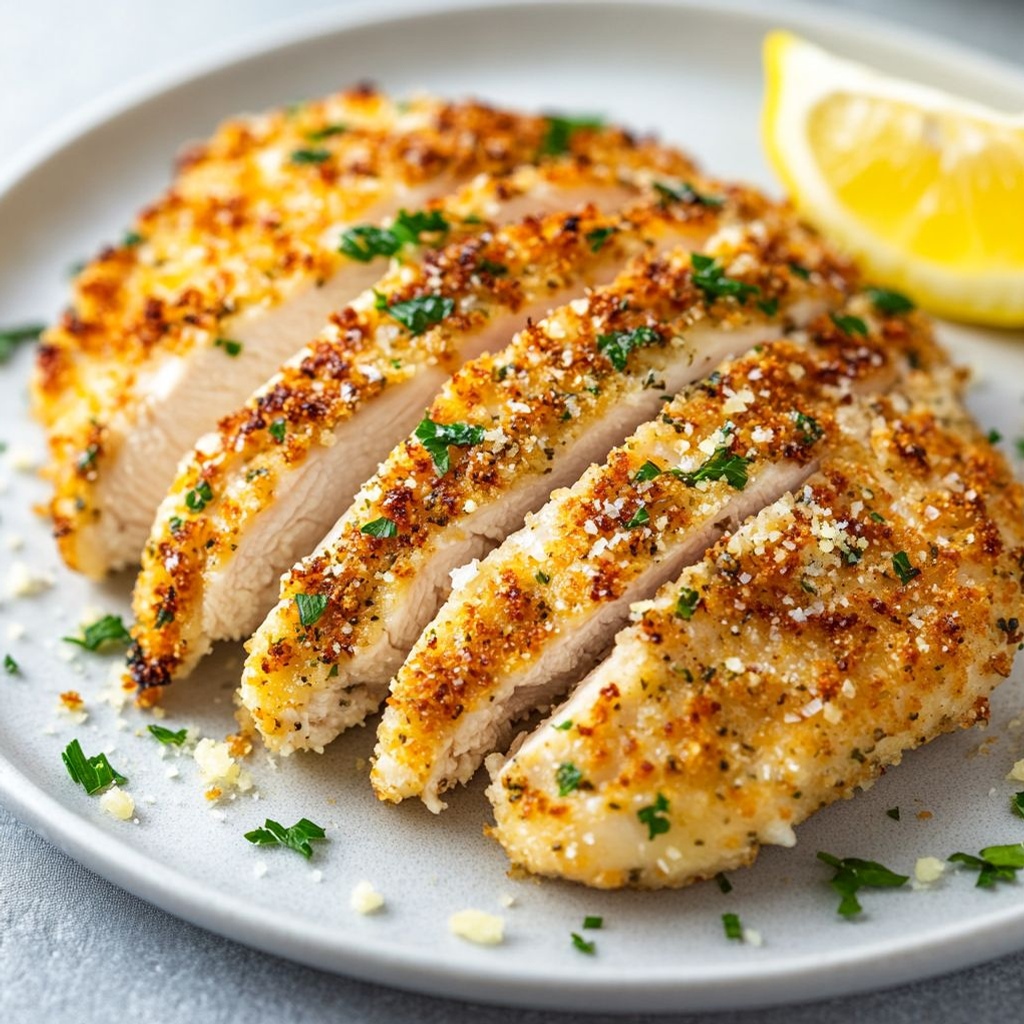
These Parmesan chicken cutlets are crispy, golden, and deeply savory thanks to a crunchy breadcrumb-Parmesan crust. To ensure even cooking and a uniform crust, pound the chicken to about 1/2 inch thickness and season lightly, then dredge in seasoned flour, dip in beaten eggs, and press into a mixture of breadcrumbs with freshly grated Parmesan, garlic powder or minced garlic, dried Italian seasoning, paprika, salt, and pepper. For extra crunch, toast the breadcrumbs briefly in a dry skillet before mixing with the Parmesan. Fry in a large skillet with olive oil and a little butter until the crust is deeply golden and the chicken reaches a safe internal temperature; cook in batches to avoid crowding. Let the meat rest briefly before serving, then finish with a sprinkle of chopped fresh parsley and a wedge of lemon for bright contrast. If you prefer a sauce, whisk together melted butter with lemon juice (and a pinch of garlic powder if desired) to make a simple lemon-butter sauce to drizzle over the chicken. Or bake the coated cutlets at 425°F until cooked through, flipping once halfway. Leftovers refrigerate for 3–4 days; reheat in the oven to maintain crust crispness. The dish freezes well when cooked and cooled, up to 2–3 months. For gluten-free needs, substitute gluten-free breadcrumbs or crushed gluten-free crackers with the Parmesan; ensure the Parmesan is freshly grated for best flavor. Serve with lemon wedges and extra parsley, and pair with a light salad, roasted vegetables, or pasta for a complete meal.
Tips
Tips for Perfect Parmesan Chicken
Coating and chicken prep
- Ensure even thickness for all chicken breasts. A uniform 1/2 inch thickness cooks evenly and yields a consistent crust. If sizes vary, halve the thicker breasts horizontally or trim to even widths.
- Chill the pounded chicken briefly (10–15 minutes) before coating to help the crust adhere and prevent tearing during dredging.
- Pat the chicken dry before dredging in flour. A dry surface helps the flour stick and forms a better base for the egg wash.
- Season the flour lightly with salt and pepper so the coating has flavor from the first bite.
Egg wash and crust assembly
- Whisk eggs until smooth and add a pinch of salt; a splash of water or milk can help loosen the mixture for even coating.
- Shake off excess flour from the chicken before dipping into eggs to prevent clumps in the crust.
- Press the breadcrumb–Parmesan mixture onto the chicken as you coat, turning the piece to ensure full coverage. A gentle press helps the crust hold during frying.
- Toast breadcrumbs lightly in a dry skillet for 1–2 minutes before mixing with Parmesan for extra crunch and nutty flavor.
- Freshly grated Parmesan yields brighter flavor and better melting/binding than pre-grated versions—grate just before mixing into the crumb blend.
- For gluten-free versions, use gluten-free breadcrumbs or a mix of rice flour and gluten-free crackers; adjust salt to taste since some GF products can be saltier.
Pan frying technique
- Preheat the skillet over medium heat and test with a tiny droplet of water—if it sizzles, you’re ready. Maintain steady heat to avoid burning the crust.
- Use 2–3 tablespoons olive oil and 1 tablespoon unsalted butter. The butter adds browning and richness, but add it gradually to prevent burning.
- Avoid overcrowding the pan. Fry in batches if needed to maintain consistent heat and crust development.
- Fry about 4–5 minutes per side, adjusting for thickness. Look for a deep golden crust and an internal temp of 165°F (74°C).
- Do not press the chicken with the spatula while frying; this squeezes out crust and moisture, leading to a less crisp crust.
Finish, garnish, and optional sauce
- Let the chicken rest 5 minutes after frying to reabsorb juices and keep the crust intact. Resting helps the crust set and stay crisp.
- Sprinkle fresh parsley after resting for color and a bright herbal note. If you prefer a stronger herb presence, fold some parsley into the crumb mix before coating.
- Serve lemon wedges on the side. A squeeze of fresh lemon juice just before eating brightens the richness; you can zest a small amount over the hot chicken for extra aroma, but avoid zesting directly onto the hot surface to prevent bitterness.
Optional Lemon-Butter Sauce tips
- Keep the sauce warm on very low heat and whisk continuously to prevent separation; right before serving, swirl in the butter until glossy.
- Fresh lemon juice brightens the sauce; start with 1 tablespoon and adjust to taste. Add a pinch of garlic powder for a garlic-butter variation if desired.
- If you prefer a dairy-free option, skip the butter and use olive oil with a splash of lemon juice, but note the flavor will be lighter.
Make-ahead, storage, and reheating
- You can coat the chicken up to 2 hours before frying; keep it chilled on a tray covered loosely to prevent sogginess.
- Coated chicken can be frozen raw on a parchment-lined tray, then transferred to a bag for longer storage. Thaw before frying as instructed.
- Leftovers keep well in the refrigerator 2–3 days. Reheat in a 350°F (175°C) oven or air fryer at 375°F (190°C) for 6–10 minutes, until the crust is crisp and the inside is heated through. Avoid microwaving if you want to preserve the crust.
Serving ideas
- Pair with roasted vegetables, a simple green salad, or mashed potatoes for a comforting meal.
- Offer a light dipping sauce or a simple lemon-butter drizzle on the side to complement the crust without overpowering it.
FAQ
What is Parmesan chicken?
Parmesan chicken is a quick, weeknight-friendly dish where chicken cutlets are coated with a savory crust of breadcrumbs and grated Parmesan, then pan-seared or baked until golden and crispy. It’s often finished with melted cheese or served with a light marinara sauce.
What ingredients do I need to make Parmesan chicken?
- 4 boneless, skinless chicken breasts or 8 small cutlets
- 1 cup breadcrumbs or panko (use gluten-free if needed)
- 1/2 cup grated Parmesan cheese
- 2 large eggs, beaten
- 2 tablespoons milk or water
- 2 cloves garlic, minced (or 1 teaspoon garlic powder)
- 1 teaspoon Italian seasoning or dried oregano
- Salt and pepper to taste
- 2–3 tablespoons olive oil or butter for frying
- Optional toppings: mozzarella or provolone cheese, chopped parsley, lemon wedges
Do I need to use chicken cutlets or can I use breasts?
You can use whole chicken breasts, but they cook unevenly if thick. For best results, pound the breasts to about 1/2 inch thickness or slice them into cutlets. This helps the crust adhere and cooks the chicken evenly.
Can Parmesan chicken be gluten-free or dairy-free?
Yes. For gluten-free, use gluten-free breadcrumbs or crushed gluten-free crackers. For dairy-free, substitute dairy-free Parmesan (or nutritional yeast for cheesy flavor) and use dairy-free butter or oil. If using dairy-free cheese, add it on top only if you want a melted cheesy finish after baking.
What is the best method to cook Parmesan chicken for a crispy crust?
One popular method: dip the chicken in beaten eggs, then coat with a mixture of breadcrumbs and grated Parmesan, pressing to adhere. Pan-fry in a thin layer of oil over medium-high heat until golden, then finish in a preheated 400°F (200°C) oven for 8–12 minutes, or until the internal temperature reaches 165°F (74°C). You can also use an air fryer at 400°F for 8–12 minutes for extra crispiness.
How long does Parmesan chicken take to cook?
Thickness matters. For cutlets, pan-fry 3–4 minutes per side until golden, then finish in the oven for 6–12 minutes. In total, count about 12–20 minutes depending on thickness. If using an air fryer, aim for 8–12 minutes at 400°F (200°C) until cooked through.
How can I prevent the crust from sticking or falling off?
Tips: ensure the chicken is patted dry, use an egg wash to help the crust adhere, press the crumb mixture firmly onto the chicken, and let the breaded chicken rest 5–10 minutes in the refrigerator before cooking. Cooking at moderate heat helps keep the crust intact.
How should I store and reheat leftovers?
Store cooked Parmesan chicken in an airtight container in the refrigerator for up to 3–4 days. Reheat in a preheated oven at 350°F (175°C) for 8–10 minutes, or in an air fryer at 375°F (190°C) for 4–6 minutes to maintain crispness. Avoid microwaving if you want to keep the crust crispy.
What are some common variations or toppings?
Variations include topping with marinara sauce and mozzarella to mimic chicken parmesan, adding a squeeze of lemon over the finished dish, or finishing with chopped parsley. You can also swap in mozzarella or provolone cheese on top for a melty crust, or serve over pasta, zucchini noodles, or a green salad.
Can I freeze Parmesan chicken to meal prep?
You can freeze raw breaded chicken cutlets for later cooking—place them on a baking sheet to freeze individually, then transfer to a freezer bag. Use within 1–3 months. You can also freeze cooked Parmesan chicken, but the crust may lose some crispiness when reheated. Reheat in the oven to help restore texture.