Introduction / Hook
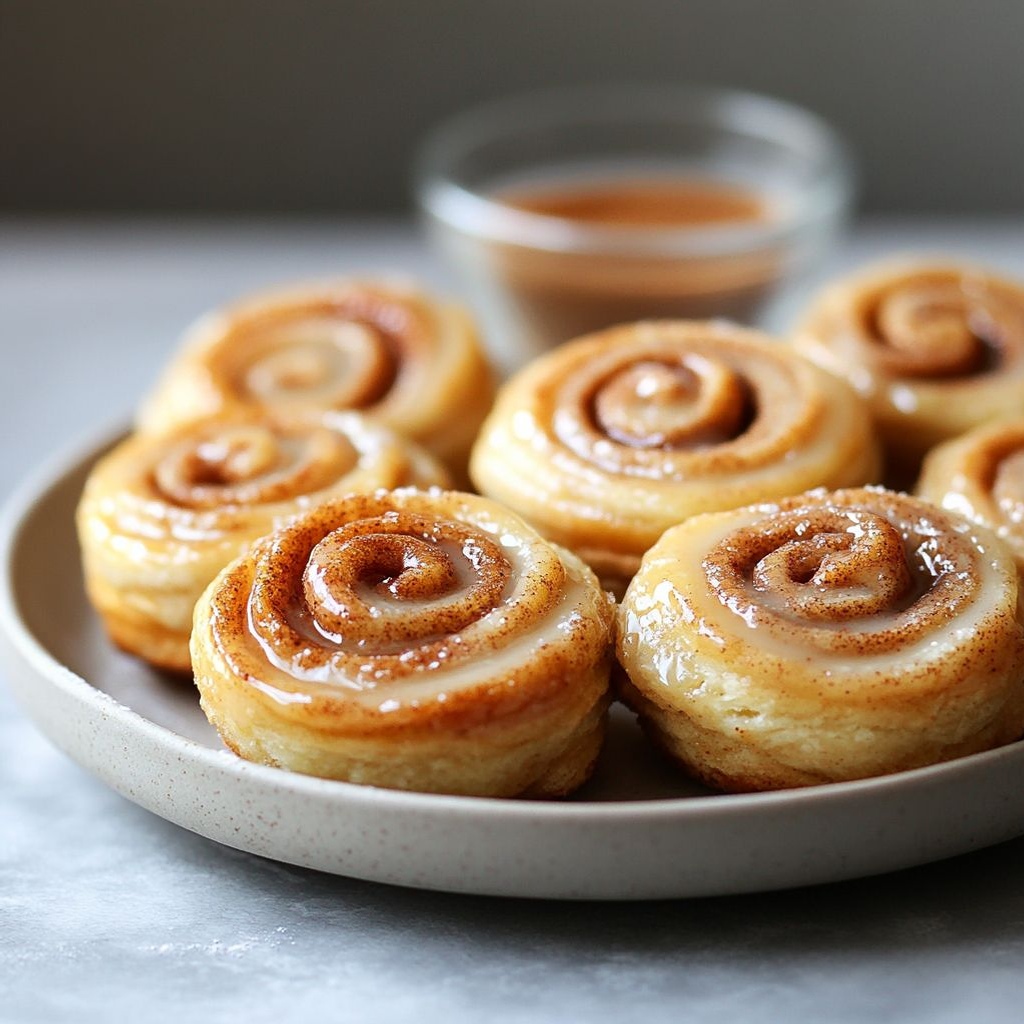
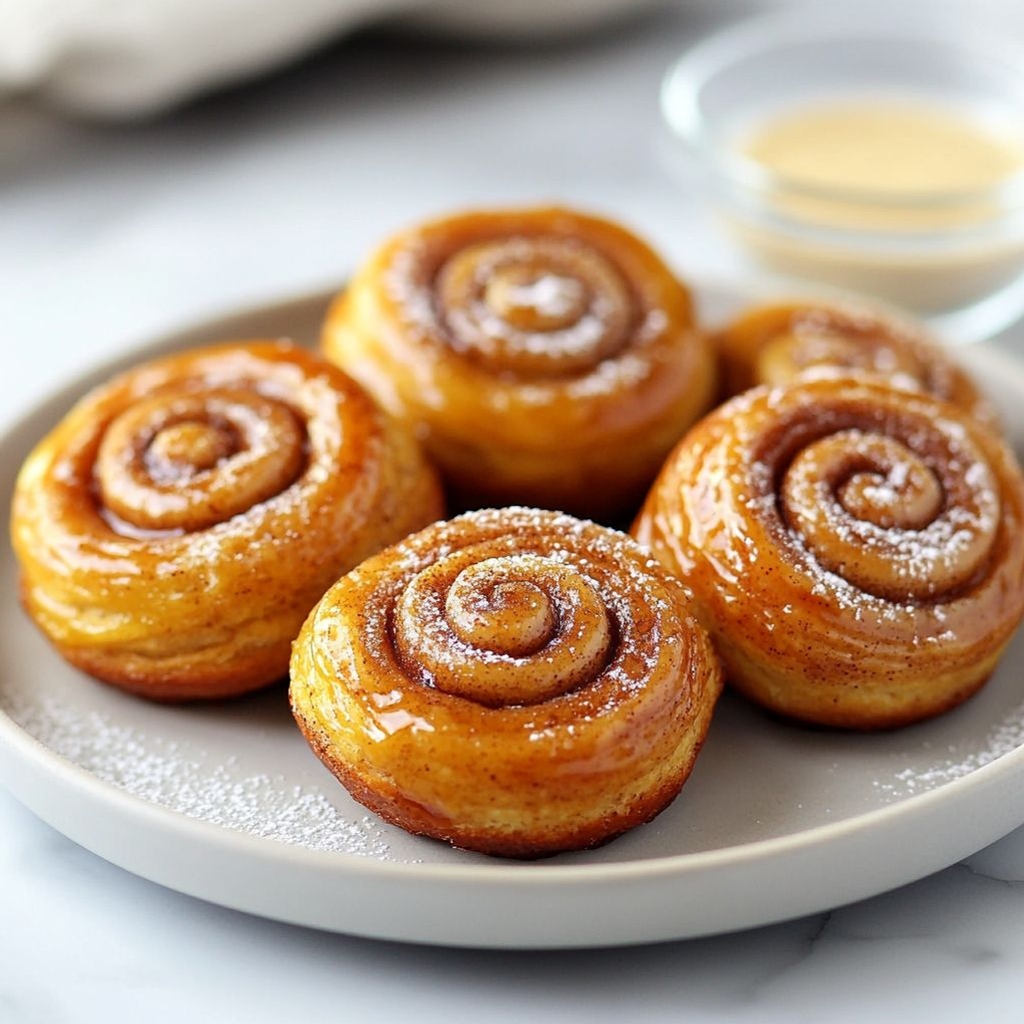
Picture this: a kitchen perfumed with the soft fragrance of vanilla, citrus zest, and warm, toasted butter. A sheet of dough, pale and velvety, is rolled into ribbons of golden spirals, each slice revealing a delicate pattern like sunlit origami. The glaze gleams on top—clear, glassy, and just-set—as if you could glimpse a small, sweet sunrise through every bite. Girelle glassate is not merely a dessert; it’s a memory in edible form. It’s the kind of treat that makes a Sunday morning feel like a celebration and a quiet afternoon feel like a warm hug. The beauty of these glazed rolls lies in their balance: a tender, fluffy crumb, a whisper of sweetness that hints at vanilla and citrus, and a lacquered finish that catches the light and invites you in for another, slower bite. Whether you’re baking for a holiday brunch, a weekend family gathering, or a simple moment when you want to treat your own senses to something comforting and refined, these rolls deliver with a soft charm that stays with you long after the last crumb has disappeared.
Girelle glassate are more than pastries; they are a small voyage to a sunlit Italian bakery, where every swirl tells a story of doughs perfected through patience, fillings chosen with care, and glazes crafted to gleam with a quiet, irresistible sheen. The experience begins at the counter with a warm, slightly sweet aroma that swirls through the air as you cut into the loaf-shaped log, revealing ribboned layers that hint at vanilla, almond, and citrus. The first bite offers a playful contrast: a soft, almost cloud-like interior with a faint chew at the edges, the glaze providing a glossy, crisp kiss that makes the roll feel both elegant and approachable. It’s the kind of dish that begs to be shared, photographed for a lingering Instagram moment, and enjoyed slowly with a strong cup of coffee or a small glass of something sparkling. In short, these glazed spirals invite you to savor not just a dessert, but a mood—a sensation of warmth, hospitality, and the timeless joy of good pastry.
The Story Behind the Dish
Girelle glassate belong to a family of rolled pastries that have long delighted Italian households and bakeries alike. “Girelle” translates to “spirals” or “little helices,” a playful nod to the way these doughs are rolled and sliced to reveal elegant, concentric layers. The concept of a rolled, glazed sweet has roots that wander through Europe, but what makes the Italian name truly special is the way it marries technique from lamination, the tenderness of brioche-like doughs, and the bright simplicity of a sugar glaze. In many coastal towns and inland villages, pastry counter favorites were born from a blend of local ingredients: eggs from farmsteads, butter churned from nearby dairies, citrus zest from groves along the shore, and almonds that traveled along trade routes to lend their gentle sweetness to desserts. Over generations, bakers refined the method: they would roll a soft, enriched dough with a sweet filling, let it rest so the layers relaxed into one another, and finally bake until the edges bronzed and the center stayed melt-in-your-mouth soft. The glaze—shimmering and clear—became the signature finish, a modern flourish that’s both visually striking and deliciously satisfying. The result is a pastry that feels both timeless and contemporary: familiar enough to comfort, yet refined enough to feel special for a celebration or a leisurely weekend morning.
There’s a personal note to this dish as well. Many families have their own “signature glaze,” often a family secret passed down with a wink and a recipe card taped to the linen cupboard. In the kitchens where I gathered stories for this dish, grandmothers and aunts spoke of Sunday mornings when the dough rested in a bowl until it looked satin-smooth, while the glaze was whisked with a careful hand to achieve the perfect gloss—neither too thick nor too runny, just enough to cling to the spirals and highlight their delicate ridges. The beauty of Girelle glassate is that it can be a delicacy you serve for a special occasion, or a comforting everyday indulgence that feels like a small luxury. It wears its Italian soul in the softness of the crumb, the brightness of citrus, and the clarity of its glaze, inviting you to slow down, breathe in the sweet scent, and savor the moment as if it were a gentle festival in your own home.
Why You’ll Love This Recipe
- Elevated comfort: A brioche-like dough that’s tender, fluffy, and satisfyingly soft, with a whisper of butter that lingers on the palate.
- Elegant presentation: The spiral technique reveals beautiful concentric layers when sliced, making every portion feel like a little pastry art piece.
- Glazed perfection: A glossy, gently sweet glaze that adds a refined finish without overpowering the dough’s delicate flavor.
- Versatile flavor notes: Subtle vanilla, a citrus zing from lemon or orange zest, and a hint of almond create a bright, memorable profile.
- Make-ahead potential: The dough and shaping steps can be prepared in stages, giving you flexibility for busy weekends or entertaining.
- Family-friendly treat: Sweet but not cloying, these rolls are appealing to both kids and adults and pair beautifully with coffee, tea, or dessert wines.
- Customizable textures: The glaze adds a crisp gloss that contrasts with the softness of the roll, creating a delightful bite every time.
Flavor Profile & Texture
The essence of Girelle glassate rests in the harmony between a soft, airy interior and a slightly firm, glossy exterior. The dough itself is a cradle of tenderness, enriched with eggs and a touch of butter to yield a crumb that feels luxurious without being heavy. When baked, the outer edge turns a delicate golden bronze, offering a faint, almost caramel-like note that enhances the overall sweetness without shouting over the filling. Inside, you’ll find wisps of aroma—a gentle whisper of vanilla, the brightness of citrus zest, and a suggestion of almond that lingers on the tongue like a soft aftertaste.
The filling, though not specified here, typically contributes a complementary sweetness and aroma. The swirl pattern invites a moment of anticipation as you cut into the log, and each subsequent slice reveals more of the concentric rings, a visual treat that makes the eating experience feel ceremonial. The glaze is where the magic concentrates: a glassy, pliable coat that sets to a sheen, catching the light with a quiet gleam. It adds just the right amount of sweetness and a subtle tang, which balances the richness of the dough and the softness of the interior. The overall result is a pastry with a delicate chew, a lingering fragrance of citrus and vanilla, and a finish that is crisp, not sticky, and glasslike in its gloss. It’s a texture journey as much as a flavor journey, inviting you to explore the layers and savor the interplay between soft crumb, fragrant zest, and the delicate snap of the glaze on the first bite.
Occasions & Pairings
Girelle glassate shine in moments when you want to elevate a simple gathering into something a touch more memorable. They are ideal for:
- Brunch with friends or family, pairing beautifully with coffee, cappuccino, or a glass of Prosecco for a celebratory note.
- Sunday slow breakfasts, where the ritual of slicing, glazing, and savoring becomes a comforting centerpiece of the day.
- Holiday mornings, Easter celebrations, or birthdays when you want a pastry with an elegant, festive air without being overly fussy.
- Afternoon teatime treats, alongside berries, a light yogurt or ricotta spread, and a hot pot of tea or espresso.
Pairing ideas to complement the glaze and the citrus notes include:
- Creshing citrus: a dollop of mascarpone with a zest sprinkle or a light lemon curd to echo the zest in the dough.
- Complementary beverages: a small glass of sweet vermouth on the rocks, a glass of Vin Santo, or a sparkling Moscato for a festive touch; for non-alcoholic options, a frothy vanilla chai or a citrusy iced tea works beautifully.
- Side bites: fresh berries (raspberries or blueberries) or a light yogurt parfait with sesame crunch add contrast without overpowering the pastry.
Tips, Variations & Substitutions
Here are ideas to tailor Girelle glassate to your preferences, dietary needs, or the ingredients you have on hand. Each variation keeps the spirit of the pastry intact while exploring new directions.
Variations by Flavor
Enhance or switch up the aroma by changing the zest or adding a subtle filling variation. Consider:
- Lemon zest with a light lemon glaze for a bright, citrus-forward profile.
- Orange zest and a small amount of orange blossom water for a more floral note.
- Aromatics like vanilla bean paste, almond extract, or a touch of amaretto for a nutty, aromatic finish.
Vegan & Plant-Based Option
Make a vegan version by using plant-based milk (such as almond or oat milk) and a vegan butter substitute. You can keep the dough enriched with a flax or chia egg, or use an egg replacer designed for enriched doughs. For the glaze, a dairy-free powdered sugar glaze with lemon or vanilla will still deliver the glossy finish without compromising the bright sweetness. The texture remains tender and approachable, ensuring that even without butter or eggs, the rolls stay light and fluffy.
Gluten-Free & Allergen-Friendly
Gluten-free adaptations can be surprisingly successful if you choose a robust all-purpose gluten-free flour blend and add a touch of xanthan gum if your blend lacks it. The result should retain a soft crumb and excellent rise, though the aroma may shift slightly depending on the blend. For the filling and glaze, you can lean into almond milk and a dairy-free butter substitute, and still achieve that signature glossy finish.
Regional Twists
Different Italian regions offer their own take on similar pastries. Consider these subtle twists to honor regional flavors:
- Naples-inspired: a touch of ricotta mixed into the filling for a mild creamy depth, with a lemon-vanilla glaze.
- Sicilian influence: a hint of almond paste or crushed pistachios folded into the filling and a glaze tinted with a whisper of orange.
- Coastal Amalfi: use lemon zest and a glaze brushed with lemon juice and a pinch of limoncello (or its non-alcoholic equivalent) for a bright, coastal aroma.
Make-Ahead & Freezing Options
One of the beauties of this pastry is that you can prepare it in stages, making it friendlier for entertaining or busy weekends:
- Make the dough and refrigerate it overnight to slow-ferment and deepen flavor. Roll and fill the next day, then bake when ready.
- Prepare the rolls, slice into individual portions, and freeze them on a parchment-lined tray. Transfer to a bag once firm; bake from frozen, adding a few extra minutes to the bake time.
- Alternatively, bake fully, cool completely, and freeze. Reheat gently in a low oven, then glaze the rolls just before serving to preserve that glossy finish.
Storage & Make-Ahead Ideas
The life of these glazed spirals can extend beyond a single serving if you store them properly. To maintain their tenderness and gloss, follow these tips:
- At room temperature: Store in a covered container for up to 2–3 days. If you’re in a warm climate, refrigerating can help preserve the glaze, but re-warm before serving to recapture softness.
- Refrigeration: They’ll keep 4–5 days in an airtight container. Reheat briefly in a 325–350°F (165–175°C) oven to revive the crumb and shine of the glaze.
- Freezing: Freeze baked rolls up to 1–2 months. Reheat in a low oven and glaze again if the finish has dulled.
- Make-ahead dough: The dough can be prepared, refrigerated, and then rolled, filled, and sliced the following day for a quick bake that still delivers the same comforting aroma and texture.
Fun Facts & Trivia (Optional)
– The term “girelle” evokes the playful spirals characteristic of many European pastries, from cinnamon rolls to Swiss rosettes. The spiral motif is not only visually pleasing but also a reminder of the careful layering that creates a tender, laminated-like crumb, even in enriched doughs that aren’t true laminated pastry.
– Glazing pastries has a long culinary tradition across Europe, serving both functional and aesthetic purposes. A glaze adds moisture, shine, and a guarded sweetness that invites diners to taste, linger, and smile. The term “glassate” in Italian highlights this glossy finish, signaling to the eater that what they are about to enjoy has a refined, glass-like sheen that is as much about appearance as about texture.
– The combination of vanilla, citrus, and almond in a single bite is a classic flavor alliance that appears in many Italian and Mediterranean sweet pastries. Each ingredient plays a specific role: vanilla for warmth, citrus for brightness, and almond for a delicate depth that lingers pleasantly after the last bite.
– Pastry traditions across Italy often emphasize the social aspects of baking—sharing a warm, sliced treat with family, friends, and neighbors. The ritual of cutting, glazing, and serving these rolls fosters connection, conversation, and a sense of hospitality that is central to Italian culinary culture.
As you prepare to bake your own Girelle glassate, remember that the joy of this pastry lies not only in the final slice but in the process: the soft rise of the dough, the satisfying roll of the filling, the patient wait as the glaze sets to a glossy finish, and the moment you present a platter of spiraled, gleaming treats to those you love. It’s a recipe that invites you to slow down, savor the aroma, and revel in the comforting textures and bright flavors that make every bite feel like a small celebration. When you finally lift a slice to your lips, you’ll discover why this humble Italian-inspired pastry has endured: it blends simple ingredients into something gracefully indulgent, universally appealing, and utterly irresistible. Enjoy the anticipation, the first bite, and the lingering glow of a glaze that catches the light and your heart in equal measure.
Ingredients
- Girelle Glassate
- Dough
- 2 1/2 cups all-purpose flour (300 g)
→ Provides the structure and body for the rolled cookie dough. Sift the flour before measuring to ensure an even crumb and prevent dense spots; if you are avoiding gluten, substitute with a 1:1 gluten-free flour blend plus 1/2 teaspoon xanthan gum and adjust moisture as needed so the dough remains pliable for rolling. - 1/2 cup granulated sugar (100 g)
→ Adds sweetness and helps create a slightly crisp edge as the dough bakes. For a less sweet version, reduce to 1/3 cup; ensure sugar is evenly incorporated with the butter to avoid graininess in the final texture; superfine sugar can help dissolve quickly for a smoother dough. - 1/4 cup unsweetened cocoa powder (20 g)
→ Gives the chocolate flavor and color to the dough. Sift to remove lumps for an even swirl; you can use Dutch-processed cocoa for a milder, more uniform color, but natural cocoa will yield a more intense chocolate note—adjust sweetness if using sweeter cocoa. - 1/2 teaspoon baking powder
→ Aids a gentle lift and helps keep the dough tender and rollable. Do not substitute with baking soda here; ensure the powder is evenly distributed by whisking with the flour to prevent uneven rise during baking. - 1/4 teaspoon salt
→ Enhances overall flavor and balances the sweetness. If using salted butter, reduce added salt to 1/8 teaspoon to avoid salting out the chocolate flavor; distribute salt evenly by whisking with dry ingredients. - 1/2 cup unsalted butter, softened (113 g)
→ The fat that yields a tender, flake-friendly dough and helps create the roll’s smooth, melt-in-the-mouth texture. Soften completely but do not melt; cream with sugar for better aeration, and cut butter into small pieces to ensure even incorporation. For dairy-free options, substitute with a neutral-tasting plant butter and adjust moisture if needed. - 2 large eggs
→ Bind the dough and add structure to hold the rolled form. Use eggs at room temperature for better emulsification; whisk lightly with the milk to prevent curdling and ensure an even batter that rolls smoothly. - 1/4 cup milk (60 ml)
→ Hydrates the dough and improves rollability. Use whole milk for richness; dairy-free milks are acceptable but may affect texture slightly—start with 1/4 cup and add a teaspoon at a time if the dough seems too dry or too crumbly. - 1 teaspoon vanilla extract
→ Adds depth of flavor to the dough. Use pure vanilla for the best aroma; if you prefer a different profile, almond extract is a good alternative but use a small amount (about 1/4 teaspoon) to avoid overpowering the chocolate.
- 2 1/2 cups all-purpose flour (300 g)
- Filling
- 3/4 cup seedless jam (apricot or raspberry)
→ Provides a fruity, sweet layer that becomes a swirl inside the bake. Warm the jam slightly to loosen it so it spreads evenly without tearing the dough; strain if seeds are a concern, and apply in a thin, even layer to prevent the roll from bursting during rolling. - 2 tablespoons hazelnut cream (optional)
→ Adds creamy richness and a nutty contrast to the chocolate dough. Keep the layer thin to avoid oozing when sliced; if using a Nutella-style spread, warm slightly to ease spreading and distribute evenly over the dough.
- 3/4 cup seedless jam (apricot or raspberry)
- Glaze
- 1 cup powdered sugar (120 g)
→ Base for a glossy glaze that coats the slices. Sift to remove lumps for a smooth finish; you can thicken the glaze with more sugar or thin it with milk if you prefer a drizzly top. - 2-3 tablespoons milk
→ Adjusts glaze consistency to your preference. Start with 2 tablespoons and add more gradually; use water or dairy-free milk if needed, and consider adding a pinch of vanilla or lemon juice for brightness. - 1/2 teaspoon vanilla extract (optional)
→ Enhances the glaze flavor; omit if you want a neutral sugar glaze, or substitute with a little lemon or orange zest for a citrusy accent that complements the chocolate.
- 1 cup powdered sugar (120 g)
- Optional Add-ins
- 1/4 cup finely chopped toasted hazelnuts (optional)
→ Adds a satisfying crunch and a toasty aroma. Toast nuts in a dry skillet or oven until fragrant (about 5–7 minutes at 175°C/350°F), cool completely, then chop finely to distribute evenly through or on the surface for contrast. - Zest of 1 orange (optional)
→ Provides bright citrus aroma that pairs beautifully with chocolate. Zest finely to avoid including pith; use sparingly if you’re sensitive to strong citrus oils. - 2 tablespoons mini chocolate chips (optional)
→ Create pockets of melted chocolate throughout the roll for bursts of sweetness. Fold into dough after initial mixing or sprinkle on the surface before rolling; chill dough slightly if chips begin to melt. - 1 tablespoon orange blossom water (optional)
→ Adds a delicate floral note that complements the chocolate and citrus. Use sparingly, as it can be overpowering; omit if you prefer a straightforward chocolate flavor.
- 1/4 cup finely chopped toasted hazelnuts (optional)
- Dough
Instructions
- Preheat your oven to 350°F (175°C) and line a large baking sheet with parchment paper to prevent sticking and promote even browning.
→ A hot, well-prepared surface ensures the rolled cookies bake evenly and release cleanly when cooled. - Sift together the dry dough ingredients: 2 1/2 cups all-purpose flour (300 g), 1/4 cup unsweetened cocoa powder (20 g), 1/2 teaspoon baking powder, and 1/4 teaspoon salt in a medium bowl, then whisk until uniformly distributed.
→ Sifting breaks up lumps and distributes leavening and salt evenly, preventing dense pockets and uneven color in the final cookies. - In a large mixer bowl, beat 1/2 cup unsalted butter (113 g) with 1/2 cup granulated sugar (100 g) on medium speed until pale, fluffy, and fully combined, about 2–3 minutes.
→ Creaming introduces air into the dough, yielding a tender texture and smoother rolling as the fat traps air that expands during baking. - Beat in 2 large eggs, adding them one at a time, then whisk in 1/4 cup milk (60 ml) and 1 teaspoon vanilla extract until the mixture is smooth and homogeneous.
→ Room-temperature eggs emulsify better for cohesive dough; milk provides moisture and helps achieve a rollable consistency without cracking. - With the mixer on low or using a spatula, gradually fold the dry ingredients into the wet until a soft, pliable dough forms; if the dough seems dry, add milk one teaspoon at a time and knead briefly until cohesive.
→ Gentle incorporation prevents gluten overdevelopment, producing a dough that rolls smoothly and holds shape without toughness. - If using optional add-ins, fold in 2 tablespoons finely chopped toasted hazelnuts, or 1/4 cup mini chocolate chips, or 1 teaspoon orange zest, distributing them evenly without overloading the dough.
→ Add-ins build texture and flavor layers; fold gently to avoid tearing and ensure even distribution within the dough. - Divide the dough into two equal portions and place each on a sheet of parchment; cover with another sheet of parchment and roll each portion into a rectangle about 12 by 7 inches (30 by 18 cm) and roughly 1/8 inch (3 mm) thick.
→ Rolling between parchment prevents sticking and yields a thin, uniform sheet that curls neatly into a tight log when filled. - Warm 3/4 cup seedless jam in a small saucepan or in short bursts in the microwave until loosened, then strain if desired to remove seeds; spread a thin, even layer of jam over each dough rectangle, leaving a 1/2 inch (1 cm) border.
→ Warm jam spreads more evenly and adheres to the dough; removing seeds yields a silkier swirl and prevents specks in the baked cookies. - If using hazelnut cream, warm it slightly and spread a thin layer over the jam, taking care not to overfill so the roll remains firm during baking.
→ A thin layer provides creamy richness without causing ooze or cracking during slicing. - Roll each rectangle away from you, using the parchment to help form a tight log; pinch the seam to seal and wrap the logs tightly in parchment; refrigerate for at least 60 minutes or until firm.
→ Chilling firms the dough and filling, making clean, even slices and preventing spreading in the oven. - Unwrap the logs and cut into slices about 1/2 inch (12–13 mm) thick; place the slices cut-side up on the prepared baking sheets with at least 1 inch (2.5 cm) of space between each.
→ Even spacing ensures uniform heat exposure and prevents sticking as the cookies spread slightly during baking. - Bake the cookies at 350°F (175°C) for 12–16 minutes, or until the edges are just set and the centers look slightly soft; rotate the sheets halfway through for even browning.
→ Proper bake time yields a tender, melt-in-the-mouth texture and avoids overly dry edges. - Remove from the oven and let the cookies cool on the sheets for 5–10 minutes, then transfer to a wire rack to cool completely before glazing.
→ Cooling stabilizes the crumb and makes glaze application neater and less likely to run. - In a small bowl, whisk 1 cup powdered sugar (120 g) with 2–3 tablespoons milk and 1/2 teaspoon vanilla extract until smooth and glossy; add more milk or sugar to reach your desired glaze consistency.
→ A well-balanced glaze provides a glossy finish without being too runny or too thick, and vanilla enhances the chocolate-jam profile. - Drizzle or brush the glaze over the cooled girelle slices in an even, thin layer and allow the glaze to set at room temperature for about 20 minutes; if desired, garnish with a dusting of zest or chopped hazelnuts once the glaze is tacky.
→ The glaze seals moisture, adds sweetness and a polished look, while toppings provide texture and aroma without overpowering the chocolate and jam flavors. - Store the finished girelle glassate in an airtight container at room temperature for up to 3 days or refrigerate for up to 1 week; allow to come to room temperature before serving to recrisp slightly if chilled.
→ Proper storage preserves texture and glaze integrity, keeping the cookies fresh and visually appealing.
Notes
These Girelle glassate are chocolate roll cookies with a silky jam swirl and a glossy glaze, making them a decadent yet approachable dessert for any occasion. You can customize the filling by using apricot or raspberry jam, or adding a thin layer of hazelnut cream for extra richness—just keep the spread light so the roll stays neat when sliced. For best results, chill the dough before rolling and roll tightly between parchment to prevent gaps; warm the jam slightly to spread evenly and avoid tearing during rolling. The glaze should be whisked smooth and poured over cooled slices for a shiny finish; adjust the thickness by adding more sugar or milk to taste. They store well in an airtight container for several days and can be frozen sliced (un-glazed) for longer storage, then glazed when needed. If gluten-free is required, substitute with a 1:1 gluten-free flour blend plus 1/2 teaspoon xanthan gum and adjust moisture as needed. For dairy-free versions, use a neutral plant butter and dairy-free milk. Always check that all fillings and add-ins are gluten-free if you have gluten intolerance.

Tips
Dough preparation tips
- For a lighter texture, cream the softened butter with the sugar until pale and fluffy before adding eggs. This helps create a tender crumb that rolls smoothly.
- To ensure an even roller, sift flour and cocoa powder together with the baking powder and salt. This prevents lumps and promotes uniform color in the swirl.
- Keep ingredients cool but not cold. If your kitchen is warm, chill the dough after mixing for 20–30 minutes to make rolling and shaping easier.
- When substituting gluten-free flour, use a 1:1 blend with 1/2 teaspoon xanthan gum per 300 g flour, and adjust moisture as needed so the dough remains pliable and rolls without cracking.
- If the dough feels dry, add milk sparingly — a teaspoon at a time — just until it comes together. If it’s too sticky, refrigerate briefly to firm up before rolling.
Rolling and shaping tips
- Roll the dough between two sheets of parchment to prevent sticking and to keep the surface even. Chill between rollings if it resists stretching.
- Aim for an even rectangle with a uniform thickness. This helps the filling layer sit evenly and results in tidy slices.
- Lightly flour the parchment or dust with cocoa powder to keep the dough from sticking without drying it out. Avoid using too much flour, which can make the roll dense.
- If the dough cracks while rolling, rest it in the fridge 10–15 minutes, then resume. Gentle, steady pressure prevents tearing.
Filling tips
- Warm jam slightly to loosen it, then strain to remove seeds if you prefer a silkier swirl. Apply in a thin, even layer to prevent the roll from bursting during rolling.
- Keep the hazelnut cream in a thin, uniform layer. A thick layer can ooze when sliced; if using a Nutella-style spread, warm and spread it evenly but don’t overfill.
- When using optional add-ins like orange zest or orange blossom water, add them sparingly so they enhance rather than overpower the chocolate base.
Baking tips
- Chill the assembled roll briefly before slicing to minimize filling leakage and to achieve clean, even slices.
- Use a sharp serrated knife and wipe the blade between cuts to prevent the filling from sticking and tearing the roll.
- Place slices on a parchment-lined sheet or in a shallow pan to bake; this helps prevent the bottoms from browning too quickly.
- Watch the bake time closely; the dough should be set with a slightly tender crumb. If the edges brown too fast, tent with foil halfway through bake time.
Glaze tips
- Sift powdered sugar to remove lumps for a glossy, smooth glaze. If you want a drizzled finish, start with 2 tablespoons milk and add more gradually.
- Choose your dairy or non-dairy milk based on desired gloss and thickness. For a thicker glaze, use less liquid; for a runnier glaze, add a bit more liquid.
- A pinch of vanilla (or a splash of citrus zest) can brighten the glaze. If you prefer a neutral finish, skip the flavoring.
- Let the glaze set at room temperature before storing; this helps prevent smearing when slicing.
Variations and add-ins tips
- To add crunch, toast finely chopped hazelnuts and fold them into the surface after rolling or sprinkle over the glaze once set.
- Orange zest provides a lively contrast to chocolate — grate finely and use sparingly to avoid overpowering the chocolate flavor.
- Mini chocolate chips create pockets of chocolate; chill the dough slightly before folding them in to prevent melting.
- Orange blossom water is delicate—use about 1 teaspoon or less. If you’re uncertain, omit and rely on vanilla or citrus zest for aroma.
Storage and make-ahead tips
- Wrap baked rolls tightly in plastic wrap and refrigerate for up to 3–4 days. Bring to room temperature before glazing for best shine.
- Unbaked rolls can be prepared up to the point of slicing, wrapped, and frozen for up to 1 month. Thaw in the fridge, slice, then bake as directed (you may need a minute or two extra).
- Glazed slices are best eaten within 2–3 days for optimal texture; if stacking, place a sheet of parchment between layers to prevent sticking.
FAQ
FAQ – Girelle glassate
Che cosa sono le Girelle glassate?
Le girelle glassate sono dolci a base di pasta lievitata spennellata con un ripieno (come confettura o crema), arrotolata a cilindro, tagliata a fette e glassata con una dolce copertura. Il risultato è una serie di rotolini a spirale teneri e lucidi.
Quali ingredienti servono?
Per l’impasto: 300 g di farina, 50 g di zucchero, 7 g di lievito di birra secco, 120 ml di latte tiepido, 50 g di burro morbido, 1 uovo, una presa di sale. Per il ripieno: confettura, Nutella o crema di formaggio dolce. Per la glassa: zucchero a velo e succo di limone o latte. Optionale scorza grattugiata di limone o arancia.
Si possono preparare senza latticini o senza glutine?
Sì, con modifiche: per latticini usa latte vegetale (mandorla, soia) e burro vegetale oppure olio. Per glutine puoi utilizzare una farina senza glutine 1:1 apposita per pane e aggiungere una piccola quantità di gomma xantana; i tempi di lievitazione e la consistenza possono variare rispetto all’impasto tradizionale.
Come si prepara l’impasto delle girelle?
Attiva il lievito sciogliendolo nel latte tiepido con un cucchiaino di zucchero. Mescola farina, zucchero, sale, aggiungi uovo e burro fuso, poi il latte con lievito. Impasta finché l’impasto è liscio ed elastico. Lascia lievitare finché raddoppia, circa 1 ora in luogo caldo.
Qual è la temperatura e il tempo di cottura?
Cuoci in forno preriscaldato a 180°C per 20-25 minuti, finché le girelle sono dorate. Controlla a partire dai 20 minuti per evitare bruciature.
Come si prepara la glassa?
Mescola zucchero a velo con 1-2 cucchiai di succo di limone o latte finché ottieni una consistenza liscia e lucida. Per una glassa al cioccolato, sciogli cioccolato fondente e aggiungi latte a poco a poco fino a ottenere la consistenza desiderata.
Come si conservano?
Conserva le girelle glassate in un contenitore ermetico a temperatura ambiente per 2-3 giorni, oppure in frigorifero per 4-5 giorni. Puoi anche congelarle: una volta cotte e raffreddate, avvolgile singolarmente e congelale; riporta a temperatura prima di servirle.
Come riscaldarle prima di servirle?
Riscaldale in forno a 150°C per 5-7 minuti oppure nel microonde per 15-20 secondi per porzione. Se vuoi, aggiungi un filo di glassa fresca dopo il riscaldo.
Possono essere farcire con altre creme o ripieni?
Sì. Alcune idee: crema al mascarpone, crema di nocciole, confettura di frutta, crema di formaggio dolce, limone o arancia canditi. Adegua la dolcezza del ripieno in modo che non sovrasti l’impasto.
Quali sono i problemi comuni e come risolverli?
Se l’impasto non lievita: controlla la temperatura del liquido (non troppo caldo) e la vitalità del lievito. Se l’impasto è appiccicoso: aggiungi piccole quantità di farina. Se le girelle si sfaldano: lascia lievitare bene e non tagliare fette troppo sottili. Se la glassa è troppo liquida: aggiungi altro zucchero a velo; se è troppo dura: aggiungi un po’ di liquido e mescola.