Introduction / Hook
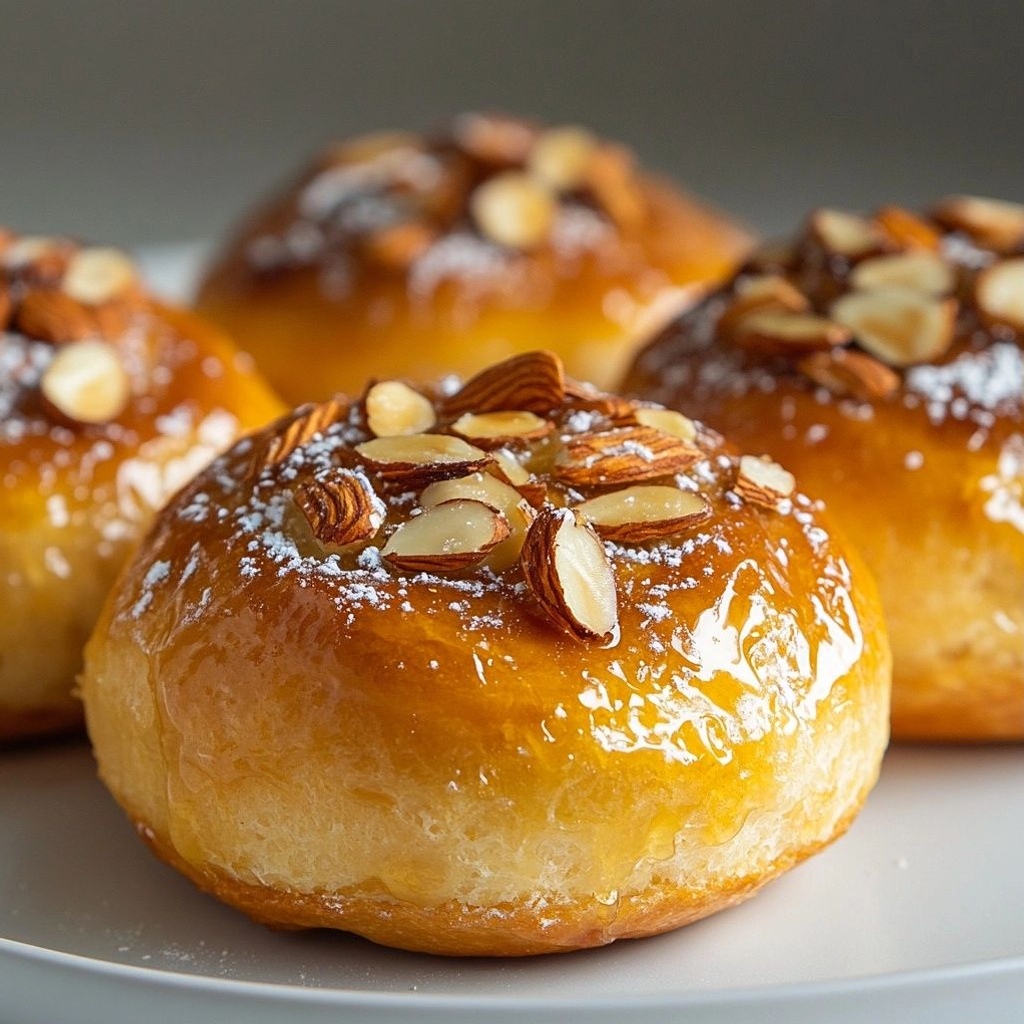
Imagine a morning that begins with the warm scent of honey lifting from soft, golden buns. The first bite is a gentle, comforting chorus of sweetness meeting toasted almond crunch, with a tender crumb that seems to melt on the tongue. Honey Almond Buns are more than a pastry; they are a sensory invitation to slow down, to savor, and to share. Each bun carries a memory of sunlit kitchens, weekend breakfasts, and the quiet joy of pastry moments that feel both familiar and delightfully new. The glaze glistens like morning dew, the almonds offer a delicate toastiness, and the honey–buttery interior stays plush and pillow-soft. It’s the kind of treat that satisfies a grown-up craving while still feeling perfectly at home in a child’s hands. This is the aroma that greets you at the door and lingers as you reach for a second, third, or fourth bite—comfort, craft, and a touch of sweetness all in one bite-sized package.
The Story Behind the Dish
Honey and almonds have long traveled hand in hand across culinary cultures, from the Middle East to the Mediterranean, revealing a shared love of nutty depth and natural sweetness. Honey, with its sun-kissed notes, is as ancient as baking itself—nectar transformed into a liquid amber that binds flavors without weighing them down. Almonds, with their gentle roasty aroma, bring a delicate crunch and a soothing earthiness that balances a pastry’s tenderness. The combination is timeless, a duet that appears in countless traditional desserts, from croissants brushed with honey to almond paste-studded breads that braided together households and harvests alike.
Honey Almond Buns emerged from a kitchen where late-summer blossoms meet early-mawn crusts, where the bread bowl of a bustling morning bakery is warmed by the slow, patient process of hands and dough. The idea took root when a friend shared a jar of local honey and a handful of sliced almonds, prompting a playful experiment: a soft, enriched dough that could cradle a gentle honey-kissed filling and a light almond crunch. The result is less a recipe and more a memory in the making—soft, tender buns that invite you to pull one apart and discover the sticky, syrupy interior that peaks when the top is lightly glazed and caramelized. It’s a celebration of simplicity and luxury: a few everyday ingredients transformed into something that feels indulgent without being extravagant.
In many households, bread is a daily ritual, a ritual that marks the start of a day or the comfort at the end of a long one. Honey Almond Buns fit into that ritual with grace: they can be enjoyed fresh from the oven with coffee on a quiet weekend, boxed up for a brunch gathering, or tucked into a lunchbox for a touch of sweetness. The story behind these buns is one of hospitality—baked goods as a welcome, a gift of warmth, a small piece of sunshine carried through a door and into a kitchen where conversations begin around a warm plate and a shared bite. This dish captures those quiet moments when you realize that something as simple as bread, honey, and almonds can become a memory-making ritual that tastes of home, wherever you might be.
Why You’ll Love This Recipe
- Soft, fluffy crumb: enriched dough with a tender, pillow-like interior that remains moist and flavorful with every bite.
- Honey sweetness: a natural glaze and gentle sweetness that doesn’t overwhelm, letting the almond flavor shine.
- Buttery aroma: the warm, toasty scent of almonds crisping on top and mingling with honey—irresistible as soon as the oven door opens.
- Elegant yet approachable: indulgent enough for special occasions, simple enough for a weekend bake with minimal equipment.
- Versatile serving: perfect for breakfast, tea time, or a dessert that doesn’t feel heavy—pair with coffee, yogurt, or a light citrus dessert to balance flavors.
- Make-ahead friendly: the dough can be prepared in advance or the buns can be baked, cooled, and reheated for quick servings later in the week.
- Customizable: you can adjust the almond presence (slivered, flaked, or finely chopped) and experiment with spice accents like cardamom or cinnamon for a personal twist.
Flavor Profile & Texture
The Honey Almond Bun is a study in balance. The dough offers a mellow sweetness and a soft, almost velvet crumb that yields gently to the bite. The honey provides a lingering floral sweetness and a subtle stickiness that keeps the interior moist without making the crust feel heavy. The almond component adds a delicate crunch and a gentle roasted aroma that mingles with the dough’s natural dairy notes to create a layered, comforting flavor.
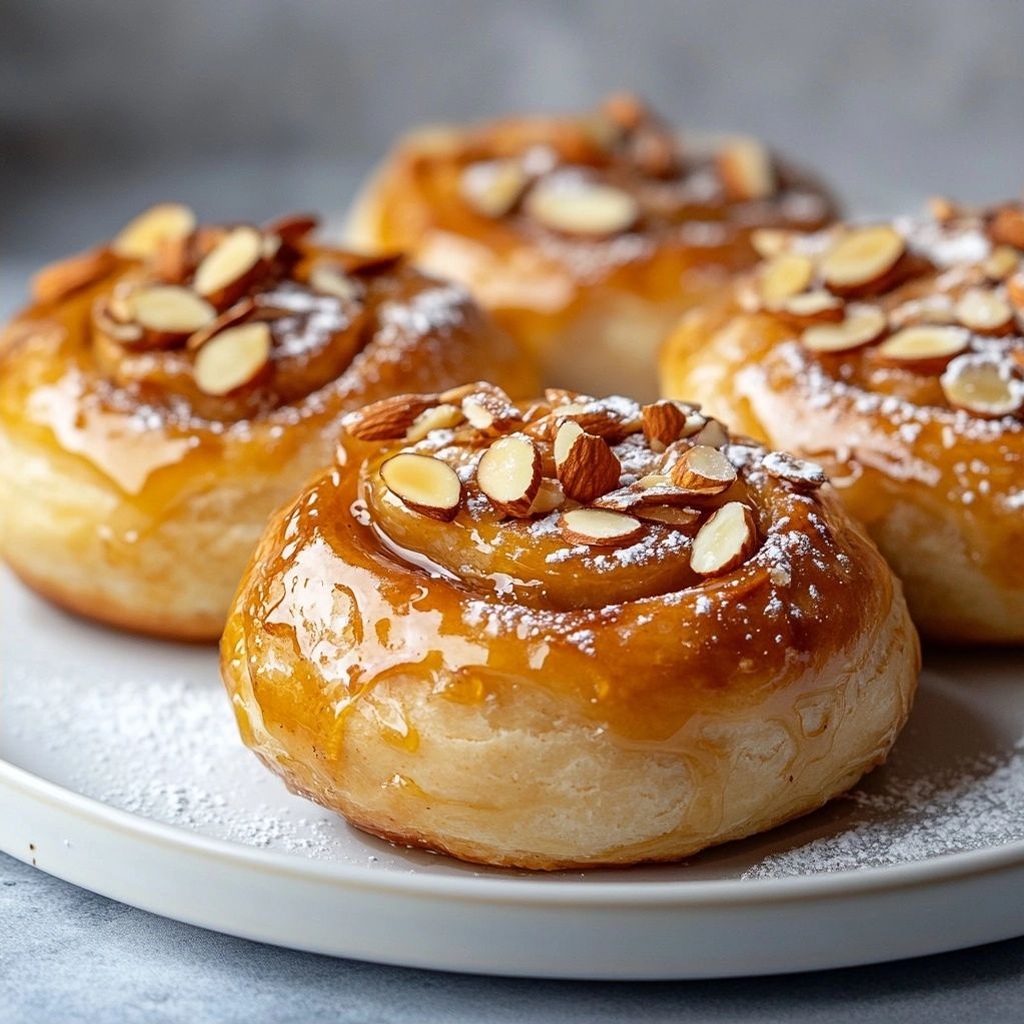
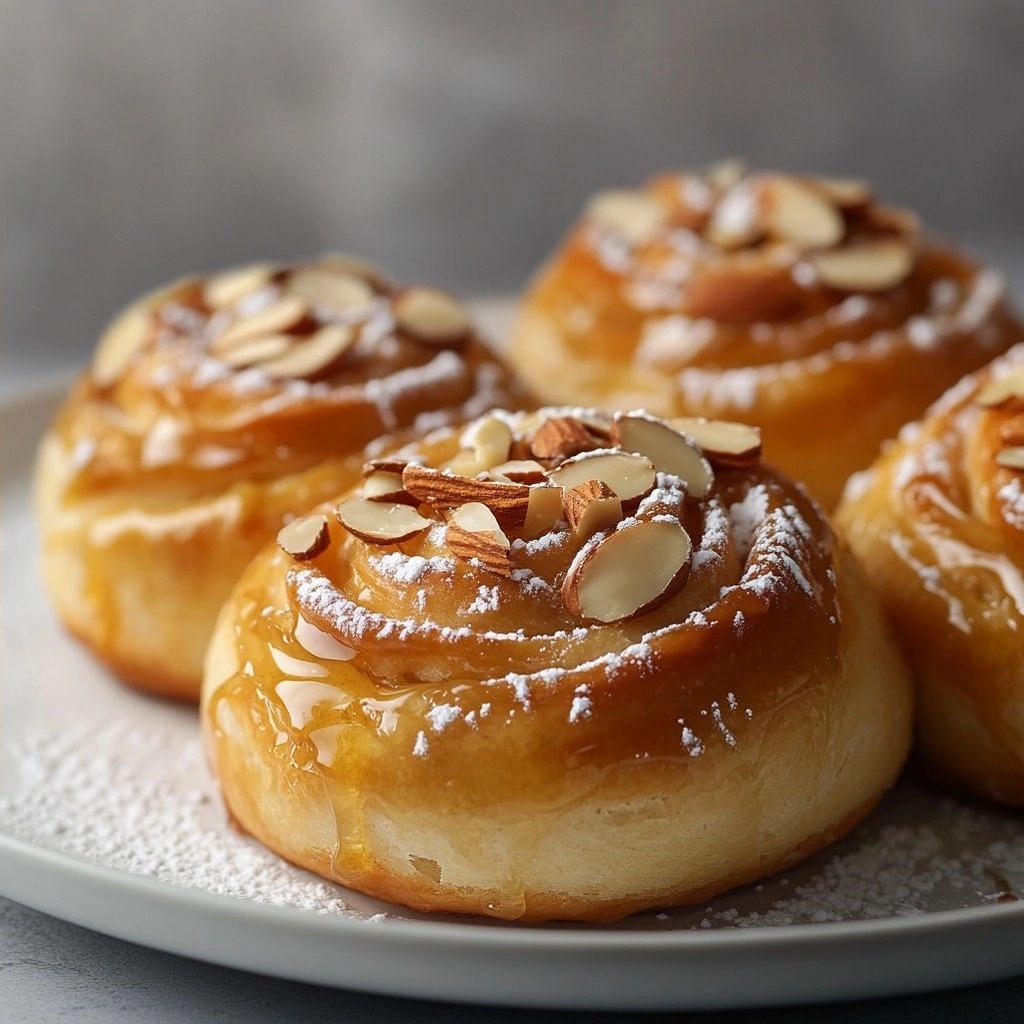
Texture-wise, imagine: a light crust with a glossy sheen from the glaze, giving way to a tender, airy center. The almond topping shimmers with a toasty crunch, each piece adding a tiny bit of heat and texture that contrasts nicely with the softness inside. When you take a bite, you’ll notice a faint huff of butter and milk, a whisper of vanilla, and a crisp edge that gives way to the plush interior. The interplay of honey’s sweetness, almond’s nutty depth, and the gentle richness of enriched dough makes every mouthful feel nourishing yet indulgent—the kind of bite that makes you want to close your eyes for a fraction of a second and slow down to savor the moment.
Occasions & Pairings
These buns shine in a spectrum of moments. They are ideal for:
- Weekend breakfasts that feel special without requiring a complicated kitchen setup.
- Brunch spreads where guests can pull apart a warm bun and drizzle with extra honey.
- Tea-time treats paired with a strong cup of coffee or a fragrant herbal tea.
- Gift-worthy baked goods for holidays, birthdays, or housewarming baskets.
Pairing ideas to elevate the experience:
- Drinks: coffee, dark roast, or milk-based drinks; a light Earl Grey or citrusy green tea complements the sweetness without overpowering it.
- Side dishes: a yogurt parfait with citrus zest, a fresh fruit salad, or a citrusy arugula salad to balance the pastry’s richness.
- Desserts: a dollop of whipped cream, vanilla custard, or a spoonful of lemon curd can provide a bright counterpart to the buns’ sweetness.
- Additional toppings: a light dusting of powdered sugar, a thin drizzle of orange blossom glaze, or a tiny sprinkling of sesame seeds for a sesame–almond twist.
Tips, Variations & Substitutions
- Make-ahead dough: prepare the dough, wrap tightly, and refrigerate overnight. In the morning, portion, proof, and bake for a just-out-of-the-oven experience that saves time on busy days.
- Glaze options: stick with honey for a pure flavor, or mix honey with a splash of orange juice or lemon zest to brighten the glaze. A light vanilla glaze can also complement the almond flavors nicely.
- Nut variations: swap in finely chopped pistachios for a vibrant color contrast and a different nutty profile; or use almond paste in the filling for a richer almond experience.
- Gluten-free option: use a well-tested 1:1 gluten-free bread flour blend and a touch more liquid to achieve a similar crumb; add an extra tablespoon of melted butter to mimic the richness.
- Vegan adaptation: replace dairy with plant-based milks and a vegan butter substitute. Ensure the honey is replaced with a vegan-friendly sweetener like maple syrup or agave if needed.
- Spice twists: add a pinch of cardamom or cinnamon to the dough for a warming note that pairs beautifully with honey and almonds.
- Almond toppings: for a stronger crunch, use a mix of slivered almonds and chopped almonds; toast them lightly in a dry pan before topping the buns.
Storage & Make-Ahead Ideas
Honey Almond Buns store well and can be streamlined for busy mornings. Here are practical tips to keep them delicious:
- Storage: once cooled, store buns in an airtight container at room temperature for up to 2 days, or freeze individually wrapped buns for up to 1 month. Freezing helps preserve the delicate texture of the interior.
- Reheating: reheat buns in a 300°F (150°C) oven for about 5–8 minutes, or briefly in a microwave if you’re in a rush. A light brush of warmed honey on top before reheating can refresh the glaze.
- Make-ahead planning: mix and shape the buns ahead of time, refrigerate them on a tray, and bake directly from the fridge the next day. You’ll enjoy a just-baked texture with minimal effort.
- Storing glaze: if you prefer a brighter glaze, glaze buns just before serving rather than before storage to preserve the shine and prevent sogginess.
Fun Facts & Trivia (Optional)
- Honey has natural preservative properties. In small amounts, it can help retain moisture in baked goods, contributing to a soft interior for longer.
- Almonds have long been associated with celebrations and hospitality in many cultures, from almond-filled pastries in the Mediterranean to marzipan traditions in Europe.
- The combination of honey and almonds is a recurring motif in festive treats around the world, symbolizing sweetness, warmth, and generosity—qualities that align perfectly with the spirit of home baking.
Conclusion: A Bake Worth Sharing
Honey Almond Buns offer more than just a recipe; they invite you into a small ceremony of home baking. The moment of mixing, the warm scent that fills the kitchen, the anticipation as the buns rise and glaze set, and the final, gratifying bite—all of these elements come together to create a comforting ritual. This is a pastry that travels well—from a warm kitchen to a cheerful brunch table—carrying with it the universal language of sweetness and comfort. Whether you’re baking for a quiet morning at home or presenting a tray of pastries at a gathering, these buns deliver a balanced, memorable experience: a soft, honey-kissed interior with a delicate almond crown, all wrapped in a crust that crackles just enough to keep the sensory joys alive. Bake, share, and savor—the honeyed warmth of almonds awaits you at every bite.
Ingredients
- Dough Base – 3 1/2 cups all-purpose flour (plus more for dusting)
→ This forms the structure of the buns. All-purpose flour provides a balanced gluten network for soft, tender crumb. If you prefer chewier buns, you can substitute 1 cup with bread flour. Sift lightly before measuring to ensure accurate texture. - Active Dry Yeast – 2 1/4 teaspoons (one 1/4-ounce packet)
→ Yeast leavens the dough, creating rise and a fluffy interior. Hydrate yeast first in warm milk with a pinch of sugar to activate; bloomed yeast will foam. If using instant yeast, you can mix directly with dry ingredients and reduce rise time by about 50%. Ensure milk is warm (about 110°F/43°C) but not hot to avoid killing the yeast. - Warm Milk – 1 cup (about 240 ml; 110°F/43°C)
→ Provides moisture for the dough and helps activate the yeast. Use dairy milk or a non-dairy alternative with similar fat content for a richer crumb. If using dairy-free milk, add a splash of 1–2 teaspoons oil to mimic richness. Do not exceed the recommended temperature to avoid inhibiting yeast. - Honey – 1/4 cup (plus more for brushing)
→ Adds natural sweetness and helps with browning. Honey contributes to moisture retention and a hint of floral aroma. Warm it slightly before mixing to help it dissolve into the dough; avoid boiling. - Granulated Sugar – 2 tablespoons
→ Feeds the yeast and balances flavor. If you prefer a deeper honey flavor, you can reduce sugar by half and rely on honey for sweetness. Ensure it’s evenly distributed to avoid clumps. - Unsalted Butter – 1/4 cup (56 g), melted and cooled
→ Adds richness, tenderness, and helps create a soft crumb. Melt and cool to warm to touch before mixing so it doesn’t kill the yeast. If you want dairy-free, use a high-quality plant-based butter substitute with similar fat content. - Egg – 1 large
→ Enriches the dough, improves structure, and aids browning. Use at room temperature for better emulsification and smoother dough. If you’re avoiding eggs, you can substitute with 1 tablespoon ground flaxseed whisked with 3 tablespoons water per egg, and mix into the dough. - Salt – 1/2 teaspoon
→ Enhances flavor and tightens gluten network for a better crumb. Add with the dry ingredients to ensure even distribution. - Warm Water (optional for adjustments) – 2–4 tablespoons
→ If the dough seems dry or flour is absorbing more liquid than expected, add 1 tablespoon at a time to reach the right kneadable consistency. Use only as needed to avoid dense buns. - Almond Filling – 1/2 cup almond paste, finely crumbled
→ Creates the signature almond center. Almond paste provides a sweet, nutty core that softens into the dough during baking. If almond paste is hard, grate it or crumble with fingers and mix with a teaspoon water or a little milk to loosen before spreading inside the dough. Alternatively, you can use 1/2 cup finely ground almonds with 2 tablespoons powdered sugar and 1 tablespoon milk to mimic paste. - Optional Whole Almonds (for filling or topping) – 1/4 cup sliced almonds (optional)
→ Adds texture and a nutty aroma. If using as a topping, press lightly into the dough after shaping. For a subtler crunch, toast almonds lightly in a dry skillet until fragrant before using. - Topping & Glaze – 1/4 cup sliced almonds, toasted
→ Finishes the buns with a toasty, nutty crown. Toast in a dry skillet over medium heat for 3–5 minutes until fragrant and lightly browned, then cool before applying to the tops. This enhances flavor and adds a pleasant crunch. - Egg Wash – 1 large egg, beaten with 1 tablespoon water
→ Gives a glossy, golden finish to the baked buns. Brush lightly over the formed buns just before baking. If you’re vegan, you can use a plant-based milk wash with a pinch of sugar, though the shine might be subtler. - Glaze (Honey Glaze) – 2 tablespoons honey + 1 tablespoon warm water
→ A light honey glaze gives a soft sheen and extra sweetness. Mix until smooth and brush onto warm buns just after baking or serve on the side for dipping. For a thicker glaze, simmer gently for a minute to slightly reduce.
Instructions
- Bloom the yeast: In a small bowl, whisk the warm milk (110°F/43°C) with the granulated sugar and the active dry yeast; let it sit for 5–10 minutes until the surface foams vigorously.
→ This confirms the yeast is alive and active; foaming signals it is ready to leaven the dough. - Combine the dry ingredients: In a large mixing bowl, sift or whisk together the all-purpose flour and salt to ensure even distribution of salt and to prevent clumps in the dough.
→ Sifting lightly or whisking creates a uniform crumb and helps the dough rise evenly by preventing localized salt or flour pockets. - Warm the wet ingredients and integrate the sweet components: In a separate medium bowl, whisk the melted and cooled butter with the honey and the egg until smooth, then stir in the bloomed yeast mixture and warm water if needed.
→ Ensures oil-like emulsion for tender crumb and distributes sugars for even fermentation; cooling the butter prevents killing the yeast. - Make the dough: Pour the wet mixture over the dry ingredients and mix with a dough hook or wooden spoon until a shaggy mass forms, adding the warm water 1 tablespoon at a time if the dough feels dry.
→ A gradual addition avoids overhydrating or under-hydrating the flour; proper hydration is essential for gluten development and a soft, elastic dough. - Knead to develop gluten: Turn the dough out onto a lightly floured surface and knead for 8–10 minutes until smooth, supple, and slightly tacky, stopping to dust with small amounts of flour as needed.
→ Proper kneading aligns gluten strands, trapping gas for volume; a tacky yet not sticky dough yields tender buns with good structure. - First rise: Lightly oil a clean bowl, place the dough inside, cover with plastic wrap or a damp towel, and let it rise in a warm, draft-free spot for 60–75 minutes or until doubled in size.
→ The rise creates air pockets that become the fluffy interior; temperature and moisture consistency optimize fermentation. - Prepare almond filling: Crumble the almond paste finely and whisk with 1–2 teaspoons water or milk to loosen into a paste-like consistency; set aside.
→ A pliable filling will spread evenly inside the dough without breaking through the surface during shaping, ensuring a uniform center. - Roll and portion the dough: Gently punch down the risen dough, transfer to a lightly floured surface, and roll into a about 18×12-inch rectangle; trim edges to create an even sheet.
→ A uniform sheet ensures even distribution of filling and consistent bun size; trimming avoids irregular shapes during cutting or filling. - Spread and divide the filling: Evenly spread the almond filling along a 4-inch-wide strip down the center of the rectangle, then sprinkle with optional whole almonds if using; fold the sides over the filling and press to seal, forming a log.
→ Encasing the filling creates a continuous center swirl inside the bun; sealing prevents leakage during proofing and baking. - Cut and portion the buns: Cut the log into 8–10 equal portions, shaping each into a round or slightly oval bun by cupping between the palms to create a smooth surface.
→ Uniform pieces ensure even baking and consistent filling distribution; gentle shaping prevents tearing the dough. - Second rise with space: Place the formed buns on a parchment-lined baking sheet, cover loosely, and let rise at warm room temperature for 25–35 minutes until puffy and slightly expanded; meanwhile preheat the oven to 350°F (175°C).
→ A gentle second rise develops more flavor and a light interior; warm oven ensures immediate oven spring for a soft crumb. - Apply the egg wash: Brush each risen bun lightly with the beaten egg wash, avoiding pooling at the base to prevent soggy bottoms and promote an even golden crust.
→ The egg wash adds shine and helps caramelization for an appealing, professional-looking finish. - Bake until golden and set: Bake the buns in the preheated oven for 18–22 minutes, rotating the pan halfway through to ensure even browning; remove when the tops are deep golden and the bottoms sound hollow when tapped.
→ Proper browning indicates Maillard reaction and full baking; testing by tapping ensures the internal crumb is cooked through without being dry. - Glaze the warm buns: In a small bowl, whisk the honey with 1 tablespoon warm water until smooth, and brush the glaze over the hot buns as soon as they come out of the oven, avoiding condensation.
→ The warm glaze adds a delicate sheen, helps retain moisture, and enhances the honey aroma on contact with the warm crust. - Finish with toasted toppings: If desired, press toasted sliced almonds gently onto the tops while the glaze is still tacky to secure them and provide a contrasting crunch.
→ The almonds impart aroma and texture; pressing them while the glaze is soft ensures they adhere firmly for an attractive crown. - Cool briefly and serve: Allow the buns to rest on a rack for 10–15 minutes before serving to finish setting the interior crumb; slice only after the steam dissipates to avoid gummy centers.
→ Resting prevents steam from creating a soggy crust and helps retain the intended soft, tender texture inside.
Notes
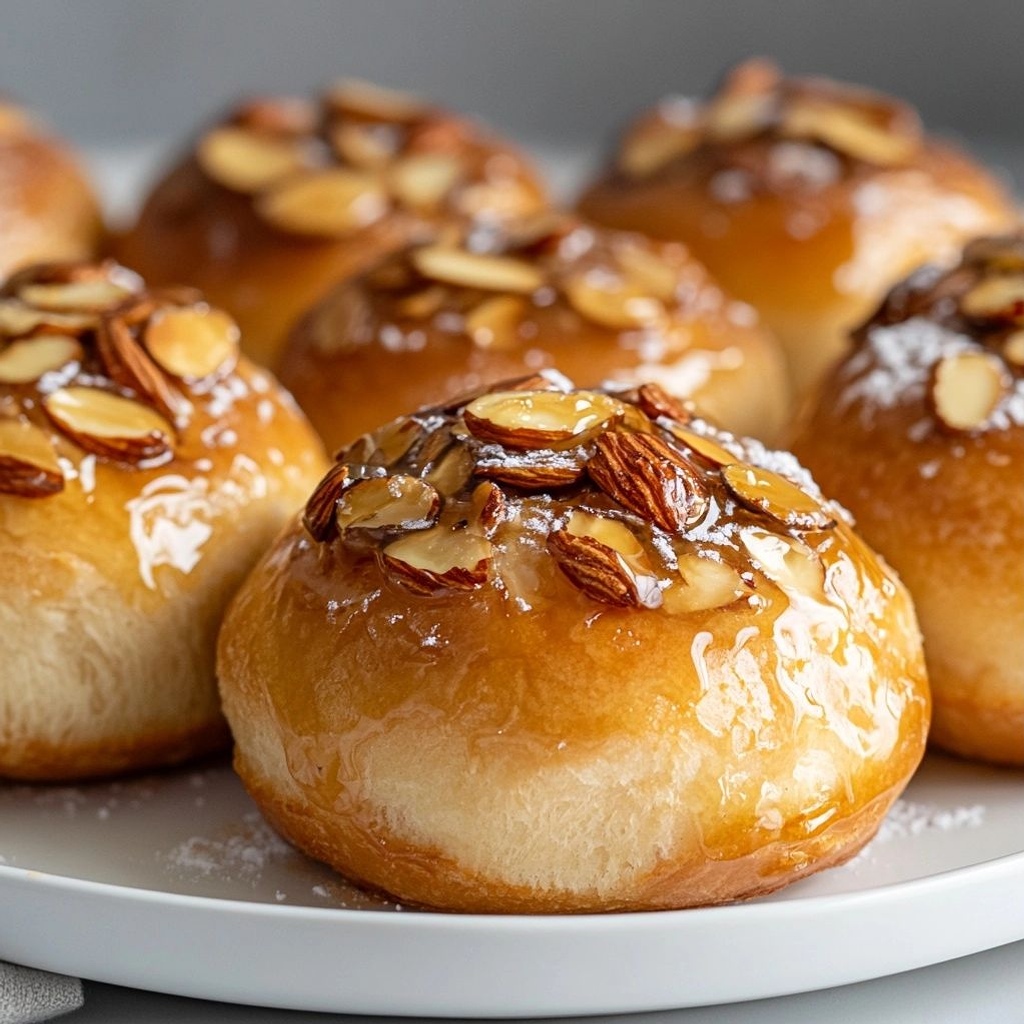
These honey almond buns are subtly sweet, richly nutty, and yield a soft, fluffy crumb thanks to the enriched dough and a fragrant almond filling. You can customize the flavor by adding a pinch of cinnamon or orange zest to the dough, or by using sliced almonds inside for extra texture. For a deeper almond aroma, toast the almond paste slightly before crumbling it into the filling. They bake best when the dough is properly proofed—look for a gentle domed rise and a pale golden crust. Brush with the honey glaze while still warm for a light sheen and to help the topping adhere; the glaze also adds a kiss of extra sweetness without veering into cloying. Leftover buns freeze well; reheat gently in a low oven or day-old in a toaster oven for best texture. If you prefer a dairy-free version, substitute the butter with a high-quality plant-based butter substitute and ensure the milk is fortified to mimic richness. Always keep your yeast and liquids at the recommended warm temperature to ensure a reliable rise.
Tips
- Starter tip: Before you begin, measure all dry ingredients first and sift the flour with salt to ensure even distribution throughout the dough. This prevents dense spots in the final buns.
- Yeast activation: If using active dry yeast, bloom it in warm milk (not hotter than 110°F/43°C) with a pinch of sugar for 5–10 minutes until foamy. If it doesn’t foam, discard and start over with fresh yeast.
- Dough temperature: Aim for a dough temperature around 75–78°F (24–26°C) after mixing. If your kitchen is warm, refrigerate the dough for a 20–30 minute rest before kneading to make handling easier.
- Kneading cue: Knead until the dough passes the windowpane test—stretch a small piece until it becomes translucent and holds its shape. This indicates sufficient gluten development for a soft crumb.
- Hydration balance: If the dough feels too sticky, dust with a little flour or oil your hands and the work surface lightly. If it feels dry, add warm water a teaspoon at a time until the dough is supple and tacky but not sticky.
- Butter handling: Add the melted cooled butter gradually; adding it too hot can kill yeast. Mixing with a stand mixer on low speed or by hand helps incorporate fat without overworking the dough.
- Sweetness and honey: For a deeper honey aroma, let the dough rest for 10–15 minutes after mixing to hydrate the sugars. Do not overproof, or the buns may collapse during baking.
- Filling technique: Chill the almond filling slightly if it’s too soft to handle. Roll the dough into a rectangle, spread the filling in a thin, even layer, and roll tightly to contain the filling during proofing.
- Shaping: After cutting or portioning into buns, seal the edges well to prevent the filling from leaking. A quick pinching seam and a gentle roll helps maintain a neat, uniform shape.
- Second rise: Allow the shaped buns to proof in a warm, draft-free spot until they’re visibly puffy and have about 1.5x volume. Avoid overproofing, which can cause flattening and uneven browning.
- Baking sheet prep: Use parchment paper or a silicone mat on your baking sheet to prevent sticking and promote even browning. Space buns evenly to allow heat circulation for a uniform bake.
- Egg wash: For a glossy finish, brush the formed buns with the egg wash just before baking. If you’re avoiding eggs, a light dairy-free milk wash with a pinch of sugar can still give a gentle shine.
- Toasting topping: Toast sliced almonds in a dry skillet until fragrant before adding to the buns for a stronger nutty aroma and crunch. Cool completely before applying to avoid soggy tops.
- Glaze moment: Apply the honey glaze while buns are still warm but not hot out of the oven. A light brush enhances shine and keeps the surface soft. Reheat leftovers gently and re-glaze if desired.
- Storage: After cooling, store leftovers in an airtight container at room temperature for 2–3 days or freeze baked buns for longer storage. Reheat gently in a low oven to restore softness.
FAQ
Honey Almond Buns – FAQ
What are the main ingredients in Honey Almond Buns?
The typical dough combines all-purpose flour, warm milk, honey, active dry yeast, butter, salt, and finely chopped almonds or almond paste for flavor. A light almond glaze or sliced almonds can be used for topping.
Can I make these buns dairy-free?
Yes. Use dairy-free butter or solid coconut oil in place of butter, and substitute dairy milk with almond, soy, or oat milk. Ensure any glaze or toppings are dairy-free as well.
Can I substitute almonds if I have a nut allergy?
You can omit the almonds entirely and keep the same dough for a plain honey bun. If you want a different flavor, try a little orange zest or cinnamon. If almond flavor is essential, consider using almond extract in small amounts, but avoid if allergic.
How do I know when the dough has risen enough?
The dough should roughly double in size after the first rise, about 1 to 1.5 hours in a warm, draft-free spot. You can test by gently pressing a finger into the dough; if the dent springs back slowly, it’s ready.
What is the best way to shape the buns?
Roll the dough into a 1/2-inch-thick rectangle, brush with a little melted butter and honey, sprinkle chopped almonds, then roll it up tightly like a cinnamon roll. Cut into even slices and place on a baking sheet or in a muffin pan for a classic bun shape before a second rise.
How long should I bake Honey Almond Buns?
Bake at 350°F (175°C) for about 15–20 minutes, or until the tops are golden and a toothpick inserted into a bun comes out clean. If you’re using a pan, start checking at 15 minutes to prevent overbaking.
How can I tell if the buns are done inside?
A light golden crust with an internal temperature around 190–195°F (88–90°C) indicates doneness. The centers should be soft but not doughy.
Should I glaze the buns, and how?
Yes, a honey glaze adds shine and sweetness. Mix equal parts honey and warm water or milk, whisk until smooth, and brush over the warm buns right after baking. You can also drizzle with a simple almond glaze made from powdered sugar, a splash of milk, and a tiny amount of almond extract.
How do I store Honey Almond Buns?
Store at room temperature in an airtight container for 2–3 days. For longer storage, freeze the cooled buns in an airtight bag and reheat in a warm oven or microwave. You can also freeze baked buns or the dough for extra convenience.