Introduction / Hook: A Slice of Comfort and Indulgence
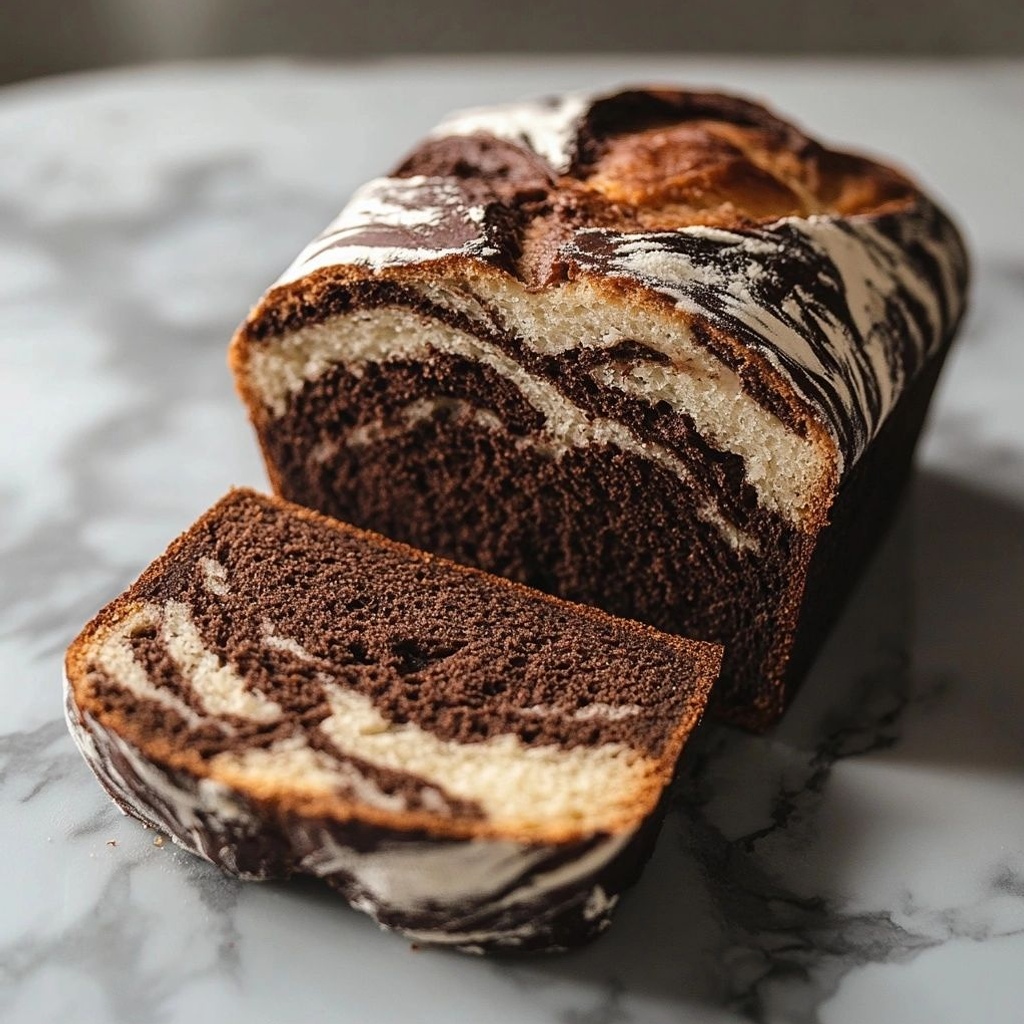
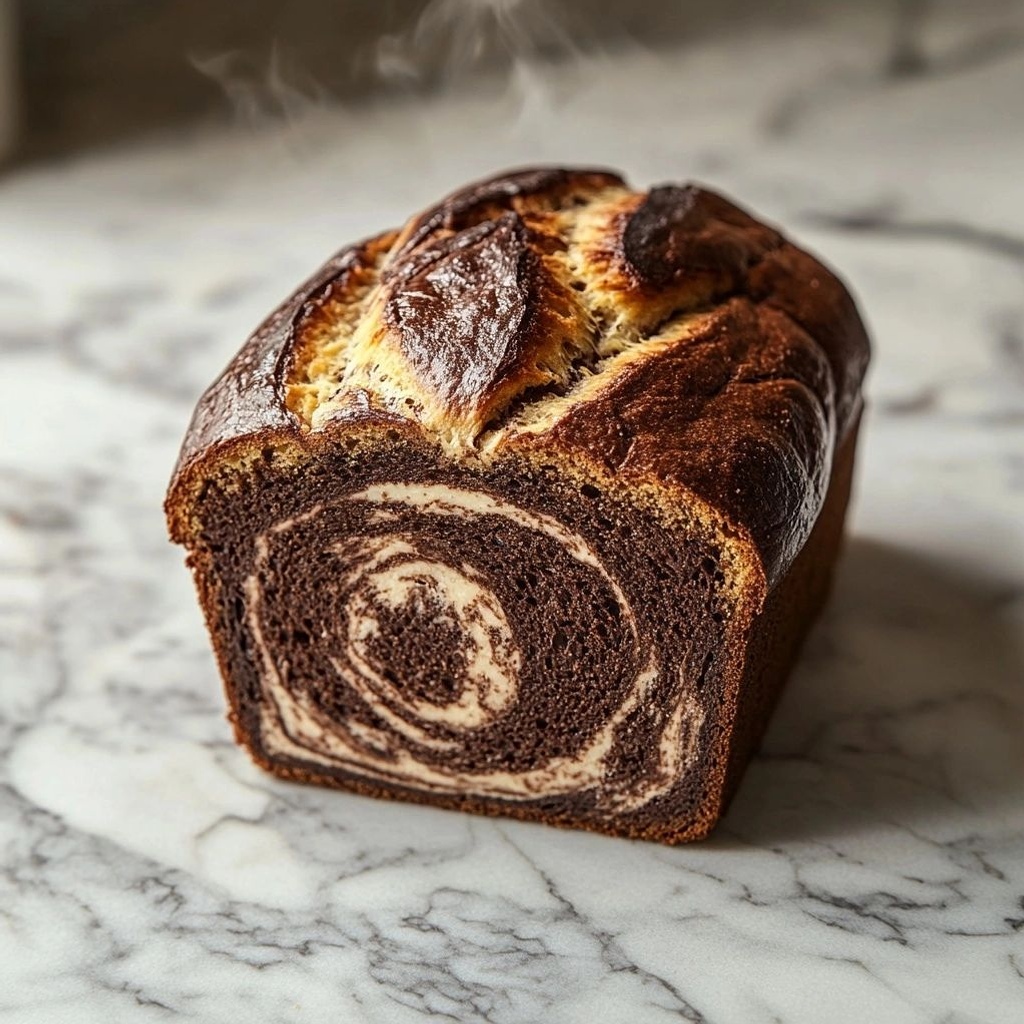
Imagine a loaf that greets you with the warm, familiar scent of freshly baked bread, then surprises you with ribbons of rich chocolate swirled through every tender crumb. Chocolate Marble Bread is the perfect union of two comforting worlds: a soft, yeasted sweetness inspired by classic pull-apart bread, and the luscious, cocoa-dark depths that evoke a chocolate lover’s dream. Each slice reveals a marbled pattern that looks hand-poured from a painter’s palette, a visual tease that promises more than just beauty. The taste is the kind of everyday luxury that turns an ordinary morning or a cozy afternoon into a small celebration—banana bread’s comforting cousins with a cacao twist, ready to be shared with a mug of coffee, a tall glass of milk, or a steaming cup of tea. The texture is a study in balance: a tender, fluffy interior that carries the supple bite of the crust, with wisps of chocolate flavor that linger on the palate rather than overpower it. It’s a bread you’ll reach for again and again, whether you’re winding down at the end of a long day or welcoming guests with a warm, tempting aroma that fills the room. And because it’s both approachable and impressive, it becomes an instant favorite for family breakfasts, weekend brunch, potlucks, or as a delightful addition to a dessert table. This is not just bread; it’s a small, edible sculpture of comfort that invites you to pause, savor, and savor again.
The Story Behind the Dish
Chocolate Marble Bread sits at the crossroads of two beloved baking traditions. On one side, we have the classic, soft pull-apart breads that have nourished breakfasts and tea times for generations—bread that’s sweet enough to feel like a treat, yet approachable enough to bake in a home oven. On the other side is the timeless appeal of chocolate—an ingredient that transcends borders and cultures, adding richness and depth to desserts, beverages, and even bread. The idea of marbling—creating alternating lighter and darker ribbons of batter—has long delighted bakers who love a little drama in their culinary presentation. When these two worlds meet in a loaf pan, the result is a visual feast and a tasting experience that feels both nostalgic and modern. The origins of marbled baking are humble: home bakers experimenting with layers of flavor and color, using simple techniques to create stunning results. By weaving cocoa through a soft, vanilla-scented dough, you capture the essence of chocolate in a way that’s less about sweetness alone and more about balance—the cocoa provides a counterpoint to the sweetness of the bread, creating a harmony that’s comforting without being cloying. The loaf becomes a memory in the making: a morning ritual that starts with flour-dusted countertops, a kitchen that smells like cocoa and vanilla, and a family gathering where everyone anticipates that first slice with a grin. Today, Chocolate Marble Bread carries on that tradition—simple, accessible, and endlessly adaptable—inviting bakers of all levels to craft something that feels special without demanding hours in the kitchen. The story is not just about a recipe; it’s about the simple joy of creating something beautiful, sharing it with loved ones, and savoring the moment when the swirl of chocolate first reveals itself in a warm, fragrant slice.
Why You’ll Love This Recipe
- Easy-to-follow method that yields a soft, plush crumb with a delicate marbled pattern.
- Perfect balance of vanilla sweetness and cocoa richness for chocolate lovers and bread enthusiasts alike.
- Great for everyday breakfasts, weekend mornings, or a show-stopping addition to dessert tables.
- Flexible and forgiving: you can adjust sweetness, cocoa intensity, or add-ins to suit preferences.
- Excellent make-ahead potential: bake ahead for gatherings, or freeze slices for quick indulgence.
- Small batch-friendly (or easily doubled) to fit your schedule and kitchen constraints.
- Kitchen aroma that fills your home with cozy, inviting scents—vanilla, butter, and cocoa mingling in the air.
Flavor Profile & Texture
The flavor profile of Chocolate Marble Bread is a study in contrasts that come together harmoniously. The bread base is subtly sweet, with a classic vanilla aroma that evokes fresh-dough warmth and the comforting taste of home-baked bread. Beneath this gentle sweetness lies the chocolate swirl, which introduces a velvety cocoa presence. The cocoa is rich but not overpowering, offering a quiet but discernible depth that lingers pleasantly on the tongue. When you bite into the loaf, you’ll notice a soft, pillowy crumb that remains tender even after cooling. The edges offer a slight crust with a satisfying, fleeting snap—a texture that complements the and folds of the interior. The marbling creates little pockets of chocolate intensity throughout the loaf, so each slice presents a new balance of light and dark—moments of vanilla-sweet bread with streaks of cocoa that feel like little discoveries. The result is not a dense, heavy cake nor a dry, crumby bread; it’s a moist, light bread with a luxurious cocoa ribbon that makes breakfast feel like a small celebration. A smear of butter on a warm slice enhances the mouthfeel, making the crumb melt and the flavors bloom, while a cup of coffee or a glass of cold milk completes the sensory experience. If you’re feeling fancy, a drizzle of chocolate glaze or a dusting of powdered sugar on the finished loaf can elevate the presentation without masking the core flavors. Overall, this loaf offers balance, comfort, and a touch of indulgence in every bite.
Occasions & Pairings
Chocolate Marble Bread is remarkably versatile. It shines at a variety of occasions and easily adapts to different moods and menus.
- Weekday breakfasts: Pair with a mug of coffee or a glass of milk for a comforting start to the day.
- Weekend brunch: Serve with fresh fruit, yogurt, or a light fruit compote to add brightness and contrast.
- Afternoon tea or coffee break: A perfect treat alongside a pot of tea or a cappuccino.
- Potlucks and gatherings: A visually appealing loaf that doubles as a centerpiece and a crowd-pleaser.
- Holiday mornings: A special touch for Christmas, Easter, or birthday breakfasts where you want something both festive and homey.
Suggested pairings to enhance the experience:
- Butters and spreads: Honey butter, vanilla bean butter, or a light cream cheese spread.
- Fruit accompaniments: Raspberry or strawberry jam, or a fig compote to add a tart-sweet contrast.
- Cold beverages: A glass of cold milk, a lightly sweetened latte, or a medium-roast coffee for balance.
- Fruity whites: A sparkling wine or a light dessert wine can make a celebratory brunch feel even more special.
Tips, Variations & Substitutions
Here are practical ideas to customize Chocolate Marble Bread to suit your pantry, dietary needs, or flavor preferences:
- Make it vegan: Use plant-based milk (almond, soy, oat) and a vegan butter substitute. Replace eggs with a flax egg (1 tablespoon ground flaxseed + 3 tablespoons water per egg) or a commercial egg replacer. Use dairy-free chocolate chips to keep the marbling intact.
- Gluten-free option: Start with a reliable gluten-free bread flour blend and add a touch more liquid if needed; use a binding agent like xanthan gum per the blend’s guidelines to maintain structure.
- Sugar adjustments: For a lighter loaf, reduce sugar slightly; for a more indulgent version, add an extra tablespoon or two of sugar to the vanilla batter or incorporate a hint of brown sugar for deeper molasses notes.
- Chocolate variations: Use semisweet or dark cocoa powder for a richer chocolate flavor, or fold in white chocolate chips for a marbling contrast that’s lighter in tone.
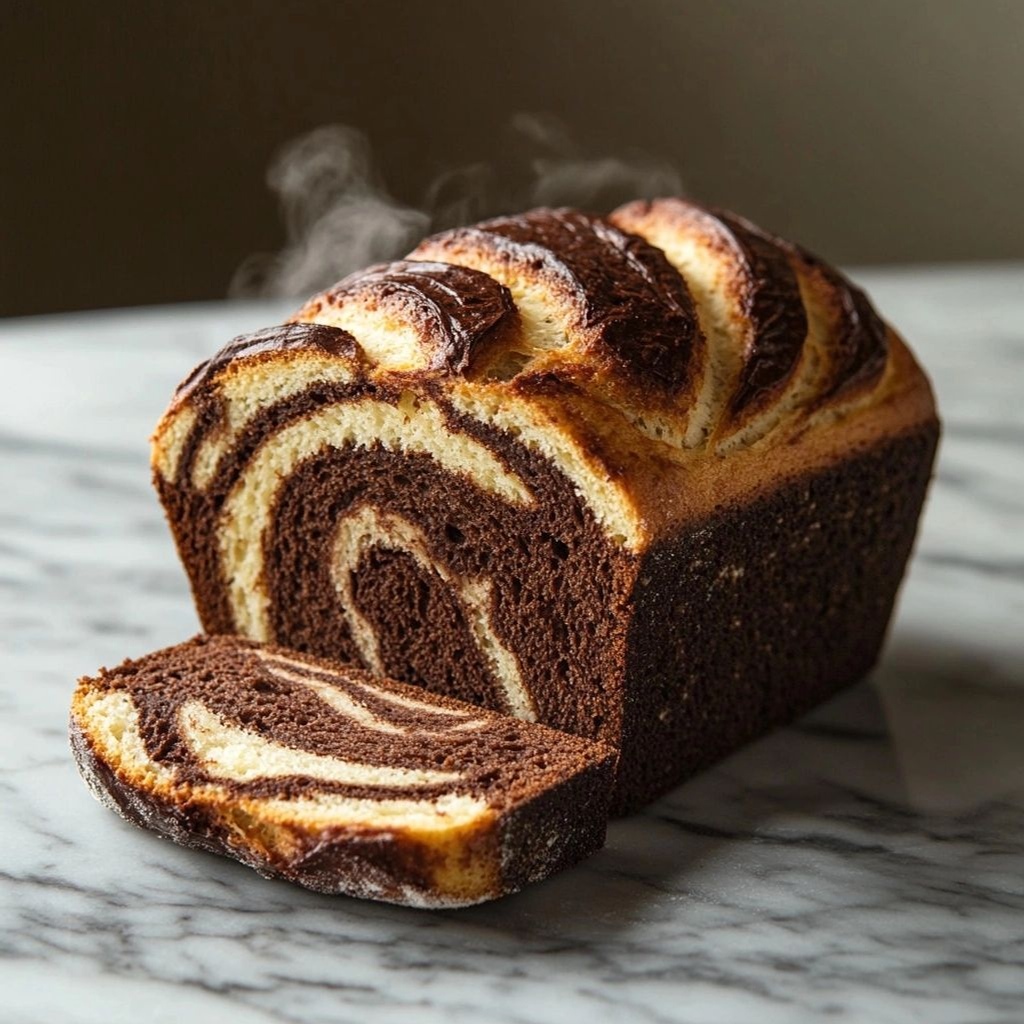
- Marble pattern tips: To achieve a more pronounced marbling, swirl the chocolate batter into the vanilla batter with a gentle figure-eight motion after layering; avoid overmixing to prevent blending the colors entirely.
- Spice note: A pinch of cinnamon or espresso powder in the vanilla batter can heighten the chocolate’s depth and add a subtle warmth.
- Texture tweaks: If you prefer a denser crumb, use a touch less liquid; for a lighter crumb, add a bit more milk or water and slightly extend proofing times.
- Mini loaf option: Bake in small loaf pans for giftable, individual portions that showcase the marbling in miniature form.
- Make-ahead option: Bake the loaf and let it cool completely; wrap tightly and freeze. Thaw at room temperature and warm briefly in a low oven or toaster to refresh the crust.
Storage & Make-Ahead Ideas
Proper storage helps Chocolate Marble Bread stay soft, flavorful, and fragrant for longer. Here are practical tips to maximize freshness and convenience:
- Room temperature: Wrap the cooled loaf tightly in plastic wrap and store in a bread box or an airtight container for up to 3 days.
- Refrigeration: If you live in a hot climate or want extended freshness, refrigerate for up to 5 days, but allow slices to come to room temperature before serving to regain softness.
- Freezing: Slice the loaf and freeze flat in a single layer, then transfer to a freezer bag. Freeze for up to 2–3 months. Reheat slices in a toaster or warm in a 350°F (175°C) oven for a few minutes for a freshly baked feel.
- Make-ahead bake: You can prepare the dough, refrigerate overnight, and bake in the morning for a fresh loaf with minimal hands-on time.
- Reheating tips: To revive softness after storage, wrap in foil and warm in a low oven (around 300°F/150°C) for 10–15 minutes, or microwave individual slices briefly until warm and pliable.
Fun Facts & Trivia (Optional)
Chocolate and bread—the combination of two ancient staples—has a fascinating history. Cocoa beans were cultivated by ancient civilizations in Central and South America long before Europeans encountered them. The idea of pairing chocolate with baking ingredients, however, is a relatively modern delight that has transformed home kitchens into temples of aroma and comfort. Marbling as a technique has roots in decorative baking practices, where bakers layered batters to create eye-catching patterns. The result, in this loaf, is both a visual and culinary sculpture—an edible art piece that invites admiration and tasting in equal measure. The name “marble” itself conjures images of opulence and timeless elegance, but in the context of this bread, it signals accessibility and warmth. This is a recipe that travels well—from the breakfast table to the picnic basket—carrying with it memories of family gatherings, shared slices, and the simple joy of a loaf that looks as good as it tastes.
Closing Thoughts
Chocolate Marble Bread is more than a recipe; it’s a celebration of contrasts that come together in a single loaf. It introduces cocoa into the comforting world of bread, creating a swirled, visually stunning treat that remains approachable for bakers of all levels. The baking process fills your home with an inviting aroma—vanilla sweetness mingling with cocoa’s deep scent—creating a sensory moment that you’ll remember long after the last crumb disappears. Whether you’re baking for yourself, for your family, or for guests, this loaf offers generosity in texture, flavor, and presentation. It’s a staple you’ll turn to again and again: a reliable, luxurious, and irresistibly delicious chocolate-forward bread that elevates everyday moments into something worth savoring. Embrace the swirl, embrace the warmth, and let every slice remind you that sometimes the greatest comfort comes from something as simple as a well-made loaf with a glossy ribbon of chocolate running through it.
Ingredients
- Chocolate Marble Bread –
→ This is the core dough base for the bread. The flour provides structure, the yeast helps the loaf rise with a soft crumb, sugar feeds the yeast and adds a touch of sweetness, salt enhances flavor, milk and egg enrich the dough for tenderness, and butter adds richness and moisture. Ensure the milk is warm (about 110°F/45°C) when activating the yeast, and mix until a smooth, cohesive dough forms before kneading. - 3 1/2 cups all-purpose flour (plus extra for kneading)
→ The main structure of the bread. All-purpose flour gives a balanced gluten development suitable for a soft yet sturdy loaf. If you prefer a healthier option, you can substitute up to 1 cup with whole wheat flour, but expect a denser crumb and slightly different rise. Sift or whisk to aerate before measuring for accuracy. - 1/4 cup granulated sugar
→ Provides sweetness and feeds the yeast for a gentle rise. It also helps promote browning of the crust during baking. If you want a less sweet bread, reduce by 1–2 tablespoons. Dissolve well into the warm liquid to prevent granules from clumping. - 1 teaspoon salt
→ Balances the sweetness and strengthens gluten development, improving the loaf’s flavor and crumb. Salt also helps control yeast activity for a steady rise. Add with the flour to evenly distribute throughout the dough. - 2 1/4 teaspoons active dry yeast (one packet)
→ Leavening agent that creates the bread’s rise and airy crumb. Check expiry and activate by dissolving in warm milk before mixing with dry ingredients. If using instant yeast, you can mix directly with dry ingredients and still achieve a good rise, but you may need slightly less rising time. - 1 cup warm milk (about 110°F/45°C)
→ Hydrates the yeast and contributes to a tender, fluffy crumb. Warm milk also enhances flavor and enriches the dough. If avoiding dairy, use a plant-based milk with similar fat content, but note it may slightly alter crumb. - 2 tablespoons unsalted butter, melted
→ Adds richness, moisture, and tenderness to the crumb. Melt and slightly cool the butter before mixing so it incorporates smoothly without cooking the dough. For dairy-free options, use a neutral oil like light olive oil in the same amount. - 1 large egg
→ Enriches the dough with fat and helps bind the crumb, contributing to a soft, pliable texture and better browning. Use at room temperature for easier incorporation. Optional: substitute with an extra tablespoon of milk for a slightly lighter loaf if avoiding eggs. - Chocolate Swirl Core –
→ The signature marble effect comes from a rich chocolate mixture folded into portions of the dough. The cocoa adds depth of flavor and color, while the melted chocolate ensures a luscious swirl throughout the loaf. - 1/4 cup unsweetened cocoa powder
→ Provides deep chocolate flavor and color for the marble pattern. Sift to remove lumps and whisk with a small amount of warm water or milk to form a smooth paste if needed before mixing with the dough. The cocoa’s bitterness should balance the bread’s sweetness. - 2 tablespoons granulated sugar
→ Simple sugar helps balance the cocoa’s bitterness and supports the formation of a glossy swirl when combined with melted chocolate. Adjust to taste if you prefer a sweeter swirl. - 1/4 cup warm water or warm milk
→ Used to loosen the cocoa powder into a smooth paste that can be easily swirled into the dough without forming dry pockets. Use enough liquid to achieve a spreadable consistency that can be easily rolled or layered into the dough. - 4 ounces semisweet chocolate, melted and cooled slightly
→ The primary source of dark chocolate flavor for the marble pattern. Melting ensures smooth integration into the swirl; let it cool a bit so it doesn’t seize the dough when swirled. If you prefer extra richness, you can use 6 ounces. - 1 teaspoon vanilla extract
→ Enhances the depth of both the dough and the chocolate swirl, tying the flavors together. Use real vanilla extract for the best aroma; if you only have vanilla paste or bean, you can substitute in equal amounts. - Optional Glaze (finish) –
→ A light glaze adds a glossy finish and a touch more sweetness to the loaf’s exterior. This is optional and can be a simple sugar glaze or a chocolate glaze based on preference. - 1/2 cup powdered sugar (for glaze)
→ Provides a smooth, sweet coating when mixed with a small amount of milk or water. Sift to remove lumps for a seamless glaze. Adjust thickness by adding more liquid a teaspoon at a time. - 1–2 tablespoons milk or water (for glaze)
→ Adjusts glaze consistency to achieve a pourable, spreadable glaze. Start with 1 tablespoon and add more as needed. If you want a shiny chocolate glaze, use a touch of melted chocolate whisked in. - Optional toppings
– Extra melted chocolate or cocoa powder for finishing swirls
→ Adds extra visual appeal and intensified chocolate flavor on the crust. Drizzle or dust sparingly to maintain a clean marble look after baking.
Instructions
- Preheat your oven to 350°F (175°C) and line a 9×5-inch loaf pan with parchment paper or grease it well.
→ This ensures the bread bakes evenly and can be released cleanly after rising and baking, preventing sticking and tearing of crusts. - Warm the 1 cup of milk to about 110°F (45°C) and whisk in the 2 1/4 teaspoons active dry yeast until fully dissolved, then let it rest 5 minutes until foamy.
→ Activating the yeast in warm liquid wakes the microbial activity, producing gas that will leaven the dough for a light, airy crumb. - In a large mixing bowl, whisk together 3 1/2 cups all-purpose flour, 1/4 cup granulated sugar, and 1 teaspoon salt until evenly distributed.
→ Dry ingredients should be uniformly mixed to ensure even gluten development and consistent rise; salting with the flour also helps control yeast activity. - Pour the foamy yeast mixture, 1 large egg at room temperature, and 2 tablespoons melted butter into the dry ingredients, then mix with a wooden spoon or dough hook on low until a shaggy dough forms.
→ Adding liquids and fat at this stage begins gluten formation, yielding a cohesive dough with tender crumb; avoid overmixing initially to prevent tough texture. - Turn the dough onto a lightly floured surface and knead for 8–10 minutes until smooth and supple, then incorporate the remaining 1/4 cup flour gradually if the dough remains sticky.
→ Proper kneading develops gluten, giving structure and elasticity; adding flour gradually prevents a dry, stiff dough while teaching you to judge the right feel. - Prepare the Chocolate Swirl Core by whisking 1/4 cup unsweetened cocoa powder with 2 tablespoons granulated sugar and enough warm water or warm milk (start with 1/4 cup) to form a smooth, spreadable paste, then stir in 4 ounces melted and cooled slightly semisweet chocolate and 1 teaspoon vanilla extract.
→ The paste should be glossy and of a spreadable consistency so it swirls evenly without seizing the dough; vanilla reinforces depth of flavor in both components. - Roll the dough into a large rectangle about 12×18 inches on a lightly floured surface, then evenly spread the chocolate paste over the entire surface, leaving a small margin at the edges.
→ A uniform layer ensures a consistent marble effect when rolled and cut; leaving margins prevents the paste from seeping out too early during shaping. - Lightly dust the remaining 1/4 cup flour over the paste, then starting from the short edge, roll the dough tightly into a log to encase the swirl completely, pinching the seam to seal.
→ Rolling tightly traps the air and secures the swirl, producing a tight, defined marble pattern and an even rise in the loaf. - Place the dough log into the prepared loaf pan seam-side down, cover with a clean kitchen towel, and proof in a warm spot until the dough crowns about 1 inch above the pan rim, roughly 45–75 minutes depending on room temperature.
→ A proper proof ensures the loaf achieves a good volume and a light crumb; dough should spring back slowly when gently pressed. - While the dough proofs, bake a small test: preheat the oven to 350°F (175°C) and position a rack in the center, then place a shallow pan of hot water on the rack beneath to create steam for a tender crust.
→ Steam during the first part of baking softens the crust, allows expansion, and yields a gleaming, blistered crust rather than a dry, hard exterior. - Once proofed, bake the loaf for 30–35 minutes, rotating the pan halfway through, until the top is deep golden brown and a wooden skewer inserted into the center comes out clean or with a few moist crumbs; if the crust browns too quickly, tent with foil.
→ Proper oven time and rotation promote uniform browning and bake-through; testing with a skewer confirms internal doneness without overbaking. - Transfer the loaf to a wire rack and cool completely for at least 1 hour before glazing, to allow the interior to set and slice cleanly.
→ Cooling stabilizes the crumb structure, preventing gummy interiors and ensuring neat slices for marble visibility; glazing while hot can cause sliding or sliding of the glaze. - Prepare optional glaze by whisking 1/2 cup powdered sugar with 1–2 tablespoons milk or water until smooth and pourable, then drizzle lightly over the loaf once cooled, allowing the glaze to set.
→ A glaze adds a glossy finish and a touch more sweetness; adjusting thickness ensures a neat, thin coat that enhances appearance without pooling. - Finish with optional toppings such as extra melted chocolate or a light dusting of cocoa powder for visual depth, applied sparingly to preserve the marble pattern after baking.
→ Finishing touches amplify the chocolate presence and provide a professional, bakery-like presentation without compromising the defined swirls.
Notes
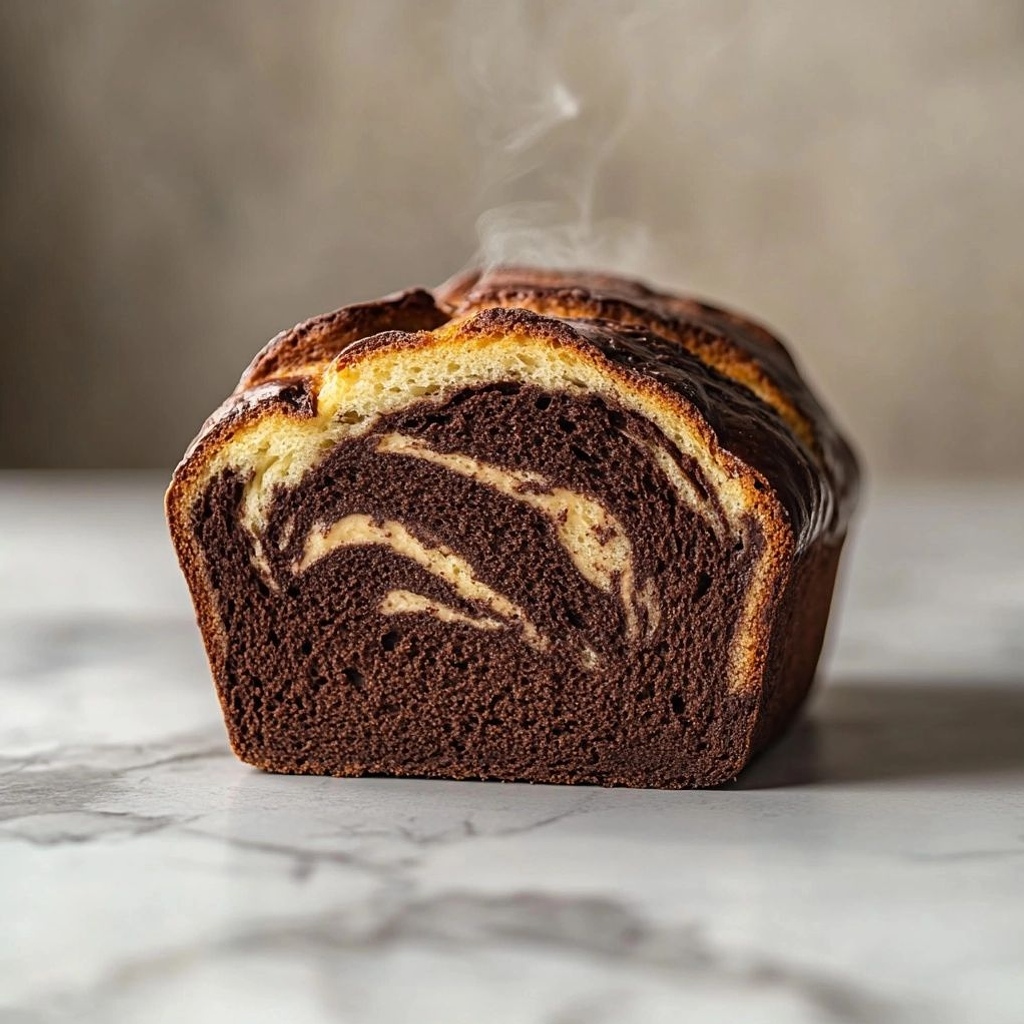
These chocolate marble bread is a rich, pull-apart loaf with a swirled chocolate core that combines a tender, yeasted crumb with a deep cocoa flavor. You can customize it by using a gluten-free flour blend (plus an extra tablespoon of yeast and a teaspoon of xanthan gum if your blend lacks it) or by substituting whole wheat flour for part of the all-purpose flour to alter the crumb. Ensure the milk is warm (about 110°F/45°C) to activate the yeast and help with a fluffy rise. If you prefer dairy-free, swap the milk and butter for plant-based alternatives with similar fat content, noting it may influence crumb and browning. For a slightly sweeter loaf, increase the sugar in the main dough by 1–2 tablespoons, or add a pinch of espresso powder to the cocoa for a more pronounced chocolate depth. When preparing the chocolate swirl, whisk the cocoa with warm water or milk to form a smooth paste before folding to avoid clumps and ensure a glossy, even swirl. Let the dough rise until doubled in size in a warm, draft-free spot, then roll and layer to create the marble pattern. The optional glaze adds a glossy finish and extra sweetness; you can also dust the loaf with a little cocoa powder for a decorative touch. The loaf freezes well—slice after fully cool and store in airtight bags for quick breakfasts or snacks. Always sift dry ingredients for accuracy and measure flour by weight or light, spooned, and leveled to ensure consistent texture.
Tips
Tips for Chocolate Marble Bread
- activate yeast in warm milk (about 110°F/45°C) for best rise; if using instant yeast, you can mix directly with dry ingredients but expect a slightly faster rise.
- sift flour and cocoa powder before measuring to ensure an accurate, light crumb and smooth marble swirls.
- make sure butter is melted and cooled slightly before adding to the dough so it incorporates evenly without tempering the yeast or cooking the eggs.
- keep all liquid ingredients at similar temperatures to avoid shocking the dough; warm liquids help develop a tender crumb but avoid overheating the eggs.
- to achieve a bold marble swirl, prepare the chocolate mixture in a separate bowl and spread a thin layer onto a rectangle of dough before rolling; repeat in layers to create distinct, attractive folds.
- for an even spiral, roll the dough into a tight log from the short end, then seal the seam and pinch the ends closed before placing in the loaf pan.
- proof the loaf until it springs back gently when touched and the dough passes the “finger test” (indentation slowly fills back). Avoid over-proofing, which can cause a pale crust and a dense crumb.
- score the top lightly with a sharp blade or knife before baking to control the loaf’s expansion and create an attractive finish.
- if you want a shinier crust, brush the loaf with a little milk or an egg wash right before baking; for a sweeter glaze, apply after baking once the bread has cooled slightly.
- cool completely before glazing or slicing to set the interior properly and prevent the swirl from smearing.
- for dairy-free options, substitute milk with a fortified plant-based milk and use a neutral oil in place of butter; expect a slightly different crumb and flavor profile.
- store baked bread in an airtight container at room temperature for up to 3 days, or freeze slices for longer storage; rewarm gently to revive tenderness.
FAQ
What is Chocolate Marble Bread?
Chocolate Marble Bread is a tender, lightly sweet bread with swirls of rich chocolate that create a marbled pattern when baked. It’s soft on the inside with a hint of vanilla and cocoa flavor.
What ingredients are needed for Chocolate Marble Bread?
Basic version: all-purpose flour, sugar, active dry yeast, warm milk, unsalted butter, eggs, vanilla extract, cocoa powder, and a pinch of salt. Optional: chocolate chips or a chocolate glaze for topping.
Can I make this dairy-free or vegan?
Yes. Use dairy-free milk (unsweetened), a plant-based butter substitute, and a flax egg or other vegan egg replacer in place of eggs. Cocoa powder is dairy-free as well. Note: texture may vary slightly.
Can I make this gluten-free?
You can adapt with a gluten-free bread flour blend that contains xanthan gum. Replace all-purpose flour with the gluten-free blend and follow the same directions. The texture will be somewhat different from traditional wheat bread.
How do I create the marble swirl?
Prepare two doughs or a single dough divided in half. Flavor one half with cocoa powder mixed with a little milk to form a paste. Roll or layer the light and chocolate doughs together, then gently run a skewer or knife through to create a marbled pattern before the final rise.
What oven temperature and bake time should I use?
Preheat to 350°F (175°C). Bake for about 30–40 minutes, until the loaf is golden and a toothpick inserted into the center comes out clean. If the top browns too quickly, tent with foil.
How can I tell when the bread is done?
A light tap on the bottom should sound hollow, and a toothpick inserted into the center should come out with few or no crumbs. The loaf should feel set and not jiggly in the middle.
How should I store leftovers?
Cool completely, then wrap tightly in plastic wrap or store in an airtight container. It stays fresh for 2–3 days at room temperature and longer in the fridge. Slice-freezing works well too.
Can I freeze Chocolate Marble Bread?
Yes. Wrap cooled loaf tightly in plastic wrap and foil, then freeze for up to 2–3 months. Thaw at room temperature and rewarm gently if desired.
Tips for troubleshooting common issues
If the bread is dense: ensure yeast is fresh and water/milk isn’t too hot. If the marbling isn’t visible, gently reroll and recreate the swirl before the final rise. If the crust is too thick, brush with a little melted butter during cooling to soften.