Introduction / Hook
Imagine a tray of little, sparkly-sweet nibbles that disappear faster than you can pour a glass of milk. Each Peanut Butter Bite is a tiny portal to comfort: a velvety center that whispers of roasted peanuts, a kiss of sweetness, and a glossy shell that gives way with a satisfying snap. In your mouth, it offers a moment of creamy warmth, then a delicate contrast of texture that keeps you reaching for just one more. These bites are the kind of treat that fits into busy days, casual gatherings, and quiet moments of indulgence alike—the kind of snack that feels spoonfuls of nostalgia reimagined for modern kitchen life. They’re rustic enough to feel homemade, but refined enough to serve at a casual party or a weekend brunch. In short, they’re the kind of bite-sized joy you’ll crave again and again.
What makes these Peanut Butter Bites so appealing is their balance: a tender center balanced by a luxurious coating, a sweetness that never overwhelms, and a depth that comes from the nutty, toasty aroma you get as soon as they’re set on the counter. They’re little edible promises of warmth—snuggest during a chilly evening, brighter around a sunny afternoon, and always welcome when you need a small, doable moment of treat yourself. The idea is simple: a bite that feels substantial enough to satisfy a craving, but light enough to enjoy without guilt or fuss. And because they’re easy to put together, they invite you to improvise, to tailor the experience to your mood, your pantry, and your guests.
Whether you’re seeking an easy, make-ahead snack for the week, a playful addition to a kids’ party, or a refined treat to offer guests after a dinner, Peanut Butter Bites hit the mark. The scent alone—roasted peanut aroma with a hint of chocolate and vanilla—creates an instant sense of welcome. The first bite reveals a creamy interior that glides across the palate, followed by a subtle, satisfying snap from the outer layer. It’s a sequence that invites you back for another, and another, until the tray is empty—and then you’ll start planning a fresh batch to restock the platter for a future craving.
What you’ll experience here is not just a recipe, but a small ritual: a handful of ingredients transformed into something shareable, portable, and delightfully indulgent. The essence of Peanut Butter Bites is familiarity with a dash of creativity—classic flavors elevated by texture play, presentation, and a chill-out-and-enjoy approach that makes them perfect for both weekday snacking and weekend entertaining.
The Story Behind the Dish
Peanut butter has a storied place in kitchen traditions around the world. From its practical origins as a protein-packed staple to its modern role as a beloved pantry staple, peanut butter has traveled a fascinating path. In many homes, its creamy richness conjures memories of lunch boxes and quick afternoon snacks; in bakeries and snack shops, it appears as a canvas for desserts, confections, and playful bites. The idea of transforming a simple spread into bite-sized treats is a natural extension of a long-running love affair with peanut goodness.
Storytellers of kitchens often recall the magic of turning everyday ingredients into something that feels special with only a slight shift in technique or presentation. The Peanut Butter Bite embodies that spirit: it takes the familiar comfort of a peanut butter flavor and pairs it with a glossy coating and a bite-size form that invites sharing. It’s a modern nod to the timeless appeal of a few well-chosen flavors, brought together in a tiny package that’s easier to savor, equally suited to a casual coffee break or a festive platter. The history behind peanut butter—its early creation, its embrace by home cooks, and its enduring popularity—becomes the backdrop for these bites, reminding us that great snacks often emerge from simple ideas, thoughtful contrasts, and a little bit of patience as flavors meld and set into something delightful.
There’s also a gentle nod to tradition in the way these bites are assembled: you might recall rolling a soft center between your palms, or dipping something in a glossy shell until it gleams with a dark, inviting sheen. The modern version keeps those tactile memories alive while elevating the experience with a refined balance of creaminess, sweetness, and a faint, savory-maritime hint of salt that makes the flavors sing. In homes near and far, the ritual of shaping, chilling, and sharing these bites becomes a small but meaningful moment—an invitation to slow down, savor, and connect with others through something as comforting as a favorite childhood treat, reimagined for grown-up kitchens and bigger appetites.
Why You’ll Love This Recipe
- Fast and approachable: no complex steps required, and you can make them in a single afternoon or as a last-minute treat.
- No-bake convenience: minimal equipment and no oven time, making it ideal for warm days or busy schedules.
- Portability and shareability: perfectly sized for lunch boxes, office treats, homerooms, potlucks, or party trays.
- Versatile texture and flavor: a creamy center with a glossy, slightly crisp exterior that crackles softly when you bite into it.
- Customizable without complexity: easy to adapt for different diets, celebrations, or flavor preferences without losing their core charm.
- Make-ahead magic: you can prepare in advance and let them firm up in the fridge or freezer, freeing up time later for other activities.
- Kid-friendly and crowd-pleasing: a familiar, comforting flavor profile that appealing to both younger tasters and adults alike.
- Impressive presentation with minimal effort: glossy finishes and uniform shapes give a polished, store-bought look that feels special on any platter.
Flavor Profile & Texture
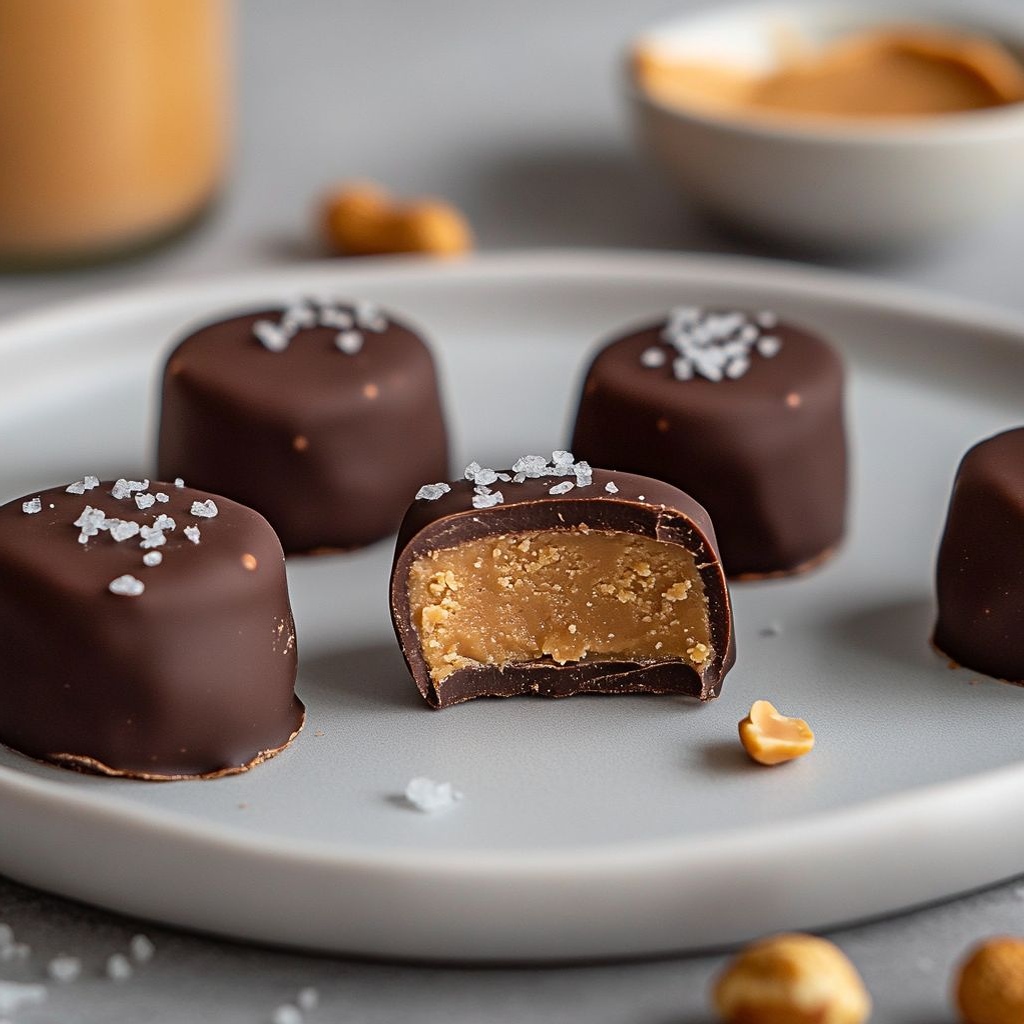
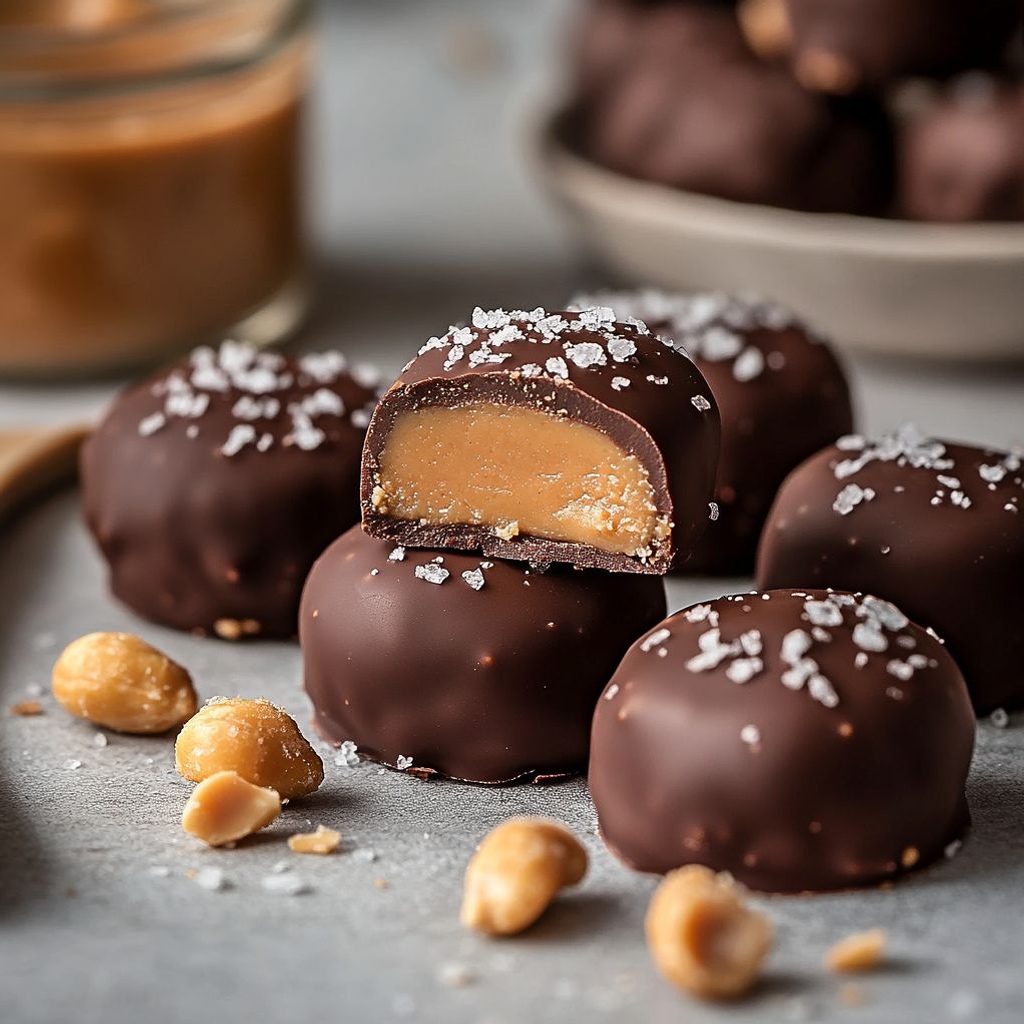
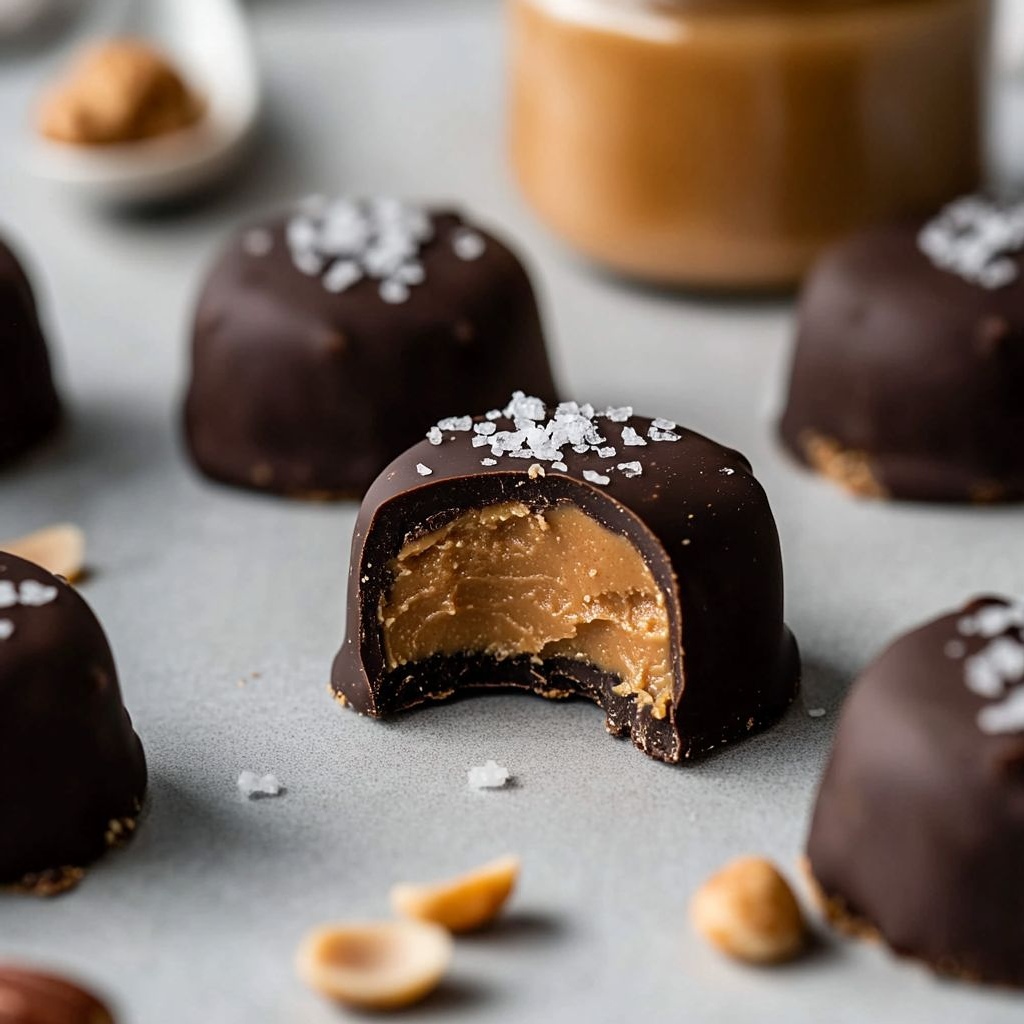
Peanut Butter Bites deliver a carefully balanced sensory experience. The core is softly creamy, reminiscent of a well-whipped filling that melts on contact with the tongue. That center carries a toasty, roasted-nut warmth, with a hint of sweetness that’s never cloying. Surrounding this velvety heart is a thin, glossy shell that offers a delicate snap to the bite—enough to satisfy the palate without overpowering the interior. The contrast between the smooth interior and the slightly crisp exterior is the hallmark that keeps these bites irresistible.
The flavor narrative is anchored by the unmistakable presence of peanut butter, which lends a comforting, nostalgic note. Subtle hints of vanilla or salt—depending on how you approach the finish—raise the aroma and deepen the overall experience. The coating, typically dark and shiny, brings a gentle chocolatey or lacquered impression that rounds out the flavor wheel with a touch of richness and a polished gleam. The overall effect is both comforting and sophisticated: a familiar, heartwarming taste lifted into a bite-sized indulgence that still feels balanced enough to enjoy as a everyday treat.
Texture-wise, think of it as a layered duet. The outside gives you a quick crisp or break, then yields to a creamy, almost satin-like center that glides across the palate. If you like a little extra texture, you can imagine a whisper of crunch as you bite into the inner layer—whether from a casual sprinkle of something on the surface or a subtle textural variation in the center itself. The finish lingers with a gentle, toasty peanut warmth and a faint echo of chocolate sweetness, inviting another bite without overpowering the senses. In short, these bites deliver comfort, contrast, and a finish that stays with you in a satisfying, not-too-sweet way.
Occasions & Pairings
These Peanut Butter Bites shine in a wide range of settings, making them a versatile addition to your entertaining repertoire. They’re equally at home as a quick afternoon treat, as a sweet note in a school lunch, or as a charming addition to a dessert plate at a casual gathering. Because of their bite-size nature and make-ahead potential, they’re particularly well-suited for the following occasions:
- Weeknight indulgences: a small, comforting break after a long day.
- Kids’ parties and school events: easy to distribute and easy for little hands to handle.
- Potlucks and office gatherings: a neat, no-fuss dessert or snack that travels well.
- Holiday trays and special-occasion platters: a touch of luxe without requiring a full dessert spread.
- Movie nights and cozy evenings: pair with a glass of milk or a warm beverage for a classic pairing.
Pairing ideas that complement the bites without adding complexity include drinks that are creamy or lightly acidic to balance sweetness, such as milk, a mellow coffee, or a lightly brewed tea. For a balanced platter, consider a small assortment of fresh fruit, crunchy crackers, or a few crisp cookies to provide contrast in texture and brightness. If you’re serving a larger crowd, a simple arrangement with a few decorative picks and a neat display tray can elevate the presentation while keeping the focus on the bites themselves. The goal is to create a moment of indulgence that feels approachable and cheerful, without requiring elaborate plating or long preparation times.
Tips, Variations & Substitutions
- Texture twists: for a crispier exterior, lightly dust the surface with a pinch of flaky salt or a small, decorative sprinkle that complements the sweetness. A soft, jewel-like sheen on the coating can also be achieved by a quick, gentle rolling technique that creates a uniform layer.
- Flavor shifts: while peanut butter is the star, you can experiment with subtle flavor accents that won’t overwhelm the core—think a whisper of vanilla, a touch of cocoa, or a hint of salt to enhance the profile. Keep changes small to preserve balance.
- Coating options: the traditional glossy shell can be achieved with a simple, smooth finish; you can also explore a chocolatey dip, a light glaze, or a decorative drizzle for visual appeal. The coating should complement, not drown, the center’s creaminess.
- Custom textures: if you desire more bite, incorporate a gentle crunch into the center through safe, small additions that stay within the no-oven realm—think crisp, toasted components or crisp-finished inclusions that melt into the filling as you bite.
- Diet-friendly notes: you can adapt the concept to various dietary needs by selecting substitutes that align with your eating plan. The core idea remains the same: a creamy center with a glossy exterior, presented in bite-sized form.
- Shape and presentation: while rounds are classic, feel free to experiment with small ovals, pillow shapes, or even themed molds for special occasions. Shape choices can be a playful part of the dining experience and can help with even portioning on a tray.
- Make-ahead ideas: these bites are well-suited to being prepared in advance. Form the centers, chill to set, and finish with the coating when you’re ready to serve. They tolerate a little extra rest in the fridge or freezer, which can be a real time-saver during busy weeks.
- Allergen-aware options: if you’re cooking for a crowd with allergies, you can explore dedicated substitutions that maintain the bite’s essence while avoiding common triggers. Prioritize clear labeling and separate preparation if you’re catering to multiple guests.
Storage & Make-Ahead Ideas
One of the biggest strengths of Peanut Butter Bites is their ability to be prepared ahead of time and enjoyed over several days. When you’re assembling them for a party, a week, or a busy weeknight, consider the following guidance for best texture and flavor retention:
- Refrigeration: store bites in an airtight container in the refrigerator for up to about a week. The chilling helps the coating firm up and preserves the creamy center’s smooth texture.
- Freezing: for longer storage, arrange bites on a parchment-lined tray and freeze until solid, then transfer to a freezer-friendly container or bag. They’ll keep well for several weeks to a couple of months. Thaw briefly at room temperature or in the fridge before serving.
- Make-ahead workflow: a practical approach is to prepare the centers in advance, refrigerate, and then coat and chill just before serving. This can help you scale up for gatherings without last-minute rushes.
- Transport tips: when taking them to a party or work event, arrange in a sturdy container and cushion with parchment between layers to prevent sticking. Chill well before departure to maintain the coating’s glossy finish.
Fun Facts & Trivia (Optional)
Peanuts and peanut butter carry a surprisingly rich cultural footprint. A few tidbits to tickle your curiosity:
- Peanuts are botanically legumes, not true nuts. They grow underground, forming pods that contain the edible seeds we roast and savor as a snack.
- In many parts of the world, peanut butter has long been valued as a protein-rich spread that helps sustain energy through busy days, making it a natural fit for quick, satisfying bites like these.
- America’s culinary landscape has embraced peanut butter in countless forms—from sandwiches and cookies to confections and modern bites—demonstrating how a simple, humble ingredient can inspire countless textures and experiences.
- Visual appeal matters: the glossy surface of a perfect bite not only signals a well-made treat but also contributes to the perception of flavor, making a tray look as enticing as it tastes.
- Pairing psychology suggests that sweet and salty interactions—like a creamy center paired with a lightly sweet or slightly salty finish—often create a more enjoyable, memorable eating moment for many people.
Ingredients
Peanut Butter Bites
Base
- 1 cup creamy peanut butter (natural, unsweetened)
→ Peanut butter acts as the primary binder and provides rich creaminess that helps the bites come together. Use a smooth, natural variety with no added sugar or hydrogenated oils for best texture and flavor. If the oil has separated, stir until smooth. Let it sit at room temperature for 10–15 minutes if it’s very thick to ease mixing. - 1/2 cup rolled oats (old-fashioned; gluten-free if needed)
→ The oats add texture and structure, helping the mixture hold its shape as bites. Use old-fashioned oats for chew; if you prefer a finer texture, briefly pulse them in a blender to a coarse meal. For gluten-free diets, choose certified gluten-free oats. If the mixture seems dry, a small splash of peanut butter or water can help. - 1/3 cup honey or maple syrup
→ Provides natural sweetness and helps bind the mixture when it chills. Honey yields a slightly thicker, stickier texture; maple syrup keeps the recipe vegan. Warm slightly if needed to blend more easily with peanut butter. - 2 tablespoons ground flaxseed or chia seeds
→ Adds fiber and acts as a binder; ground flaxseed works especially well for binding when mixed with moisture. If you want a stronger binder, you can create a flax “gel” by mixing 2 tablespoons flaxseed with 3–4 tablespoons warm water before adding (optional). If you don’t have flax or chia, you can substitute with an extra 1–2 tablespoons oats. - 1 teaspoon vanilla extract
→ Enhances the overall flavor by rounding the richness of peanut butter. Use pure vanilla extract for best aroma; if you dislike vanilla, you can omit, though the bites will be less aromatic. - 1/4 teaspoon fine sea salt
→ Balances sweetness and deepens the nutty flavor. If your peanut butter is salted, start with less or omit the additional salt and adjust after mixing.
Optional Add-ins
- 1/4 cup mini chocolate chips
→ Adds pockets of melted chocolate throughout the bites. Choose dairy-free chips if needed. For even distribution, fold in gently; if the mixture is very soft, chill for 15–20 minutes before shaping to help the chips set. - 2 tablespoons chopped roasted peanuts
→ Provides extra crunch and peanut flavor. Use unsalted peanuts for balanced saltiness; chop into small pieces so they distribute evenly without crumbling the bites while shaping. - 2 tablespoons unsweetened shredded coconut
→ Adds chewy texture and a subtle tropical note. Use unsweetened coconut to avoid extra sweetness; lightly toast first for a more pronounced aroma if desired. If the mixture seems dry, add a touch more peanut butter. - 1 tablespoon chia seeds
→ Additional texture and omega-3s; chia seeds will add a little chew. They can be omitted if you prefer a smoother texture.
Finish / Coating
- 1/2 cup melted dark chocolate chips for dipping
→ Creates a glossy, firm shell that encases each bite. Choose 60–70% cacao for a balanced chocolate flavor. Melt using a double boiler or in short bursts in the microwave, stirring between sessions. For vegan options, ensure the chocolate is dairy-free. Dip chilled bites for best coating. - 1 teaspoon coconut oil
→ Used to thin the melted chocolate for a smooth, even coating and to help it set with a shiny finish. Adds a subtle coconut note; if you skip it, the coating will be thicker and may take longer to set. You can substitute a neutral oil, but coconut oil gives the best texture and flavor for this treat.
Instructions
- Line a sheet pan with parchment paper or a silicone mat to provide a nonstick surface for chilling the bites and easy transfer later.
→ This prevents sticking when you set the bites down and makes cleanup effortless, especially after the chocolate coating. - In a large mixing bowl, combine creamy peanut butter, rolled oats, honey (or maple syrup), ground flaxseed (or chia seeds), vanilla extract, and fine sea salt; stir thoroughly until a uniform, slightly thick dough forms.
→ Even mixing ensures the oats hydrate properly, the binding agents are distributed, and the bites hold together without crumbling. - If you used ground flaxseed, allow the mixture to rest for 2–3 minutes so the flax can begin binding; for a stronger binder, you can pre-mix 2 tablespoons ground flax with 3–4 tablespoons warm water to make a gel and fold it in.
→ Resting or forming a flax gel provides additional structure, which helps the bites retain shape during chilling and coating. - Gently fold in your chosen optional add-ins (1/4 cup mini chocolate chips, 2 tablespoons chopped roasted peanuts, 2 tablespoons unsweetened shredded coconut, and/or 1 tablespoon extra chia seeds) until evenly distributed without overmixing.
→ Even distribution prevents pockets of sweetness or crunch and ensures every bite has consistent texture and flavor. - If the dough feels too soft or tacky to shape, chill it in the refrigerator for 15–20 minutes to firm up the oats and binding agents.
→ Chilling makes the dough manageable, reduces stickiness, and improves shaping accuracy. - Using a small cookie scoop or two spoons, portion the dough and gently roll each portion between your palms to form compact 1-inch bites.
→ Uniform sizing ensures even setting during chilling and dipping, and a consistent bite size for serving. - Place the bites on the prepared sheet and optionally flatten each ball slightly into a small disk if you plan to dip them for a smooth, even coating.
→ Flattening helps with a uniform dip and prevents thick chocolate pockets on top of rounded centers. - Chill the bites in the refrigerator for 20–30 minutes until firm; this step solidifies their shape and makes dipping into chocolate cleaner and less messy.
→ A firm center prevents the bites from sliding or squishing when they encounter warm chocolate. - In a heatproof bowl, melt 1/2 cup dark chocolate chips with 1 teaspoon coconut oil using a double boiler or in short 20–30 second bursts in the microwave, stirring between sessions until smooth and glossy.
→ The coconut oil loosens the chocolate for a smoother coating and helps it set with a glossy finish; overheating can cause graininess or separation, so melt gradually and stir well. - Dip each chilled bite into the melted chocolate, turning to coat evenly; lift with a fork or dipping tool, allow excess chocolate to drip back into the bowl, and place coated bites back on the parchment.
→ A thorough, even coat ensures a consistent shell and prevents exposed centers from drying out or becoming sticky. - Optional: while the chocolate is still soft, sprinkle or drizzle toppings such as a pinch of coconut, extra chopped nuts, or a light drizzle of white chocolate for contrast.
→ Toppings add visual appeal and an extra layer of texture without compromising the shell’s integrity. - Chill the coated bites for 15–30 minutes until the chocolate shell is fully set and firm to the touch.
→ A firm shell prevents smudging and ensures the bites are fully transportable and presentable. - Store any leftovers in an airtight container in the refrigerator for up to 5–7 days; bring to room temperature for 5–10 minutes before serving if you prefer a softer bite.
→ Refrigeration slows spoilage and keeps the chocolate shell glossy, while a brief warm-up makes the center feel creamier on the palate.
Notes
These peanut butter bites are a no-bake, bite-size treat built with creamy natural peanut butter, rolled oats, and a touch of honey or maple syrup for natural sweetness and binding. You can customize them with your favorite mix-ins, such as mini chocolate chips, chopped roasted peanuts, shredded coconut, or chia seeds for added texture and nutrition. For easier shaping, let the mixture soften at room temperature for 10–15 minutes or chill briefly if it’s very sticky, then scoop and roll into small bites. They set nicely after a brief chill, and you can finish with a glossy chocolate coating by dipping the bites in melted dark chocolate with a little coconut oil; refrigerate until the coating is firm. Store in an airtight container in the fridge for up to a week, or freeze for longer storage. Always ensure your oats are certified gluten-free if you have gluten intolerance, and opt for a smooth, unsweetened peanut butter with no added hydrogenated oils for the best texture and flavor. For a vegan version, substitute maple syrup for honey and use dairy-free chocolate chips.
Tips
Base and Binding Tips
- Use room-temperature, natural peanut butter. If the oil has separated, stir thoroughly until smooth. If very thick, let it sit 10–15 minutes at room temperature to soften for easier mixing.
- Keep rolled oats as old-fashioned oats for the best chew and structure. For a finer texture, pulse them briefly in a blender to a coarse meal. Use certified gluten-free oats if needed for gluten-free diets.
- Sweeteners: honey gives a slightly thicker, stickier texture, while maple syrup keeps the recipe vegan. Warm the sweetener slightly if needed so it blends smoothly with peanut butter.
- Ground flaxseed or chia seeds act as a binder and add fiber. If you want a stronger binder, make a flax gel (2 Tbsp ground flax + 3–4 Tbsp warm water, let sit until gelled) and fold it in.
- Vanilla extract enhances aroma and rounds the richness. If you don’t care for vanilla, you can omit it, but expect a less aromatic bite.
- Fine sea salt helps balance sweetness and deepen the nutty flavor. If your peanut butter is salted, start with less salt and adjust after mixing.
Optional Add-Ins Tips
- When adding mini chocolate chips or chopped peanuts, fold gently to distribute evenly without crushing the chips. If the mixture is very soft, chill for 15–20 minutes before shaping to help set the chips.
- For extra texture, lightly toast shredded coconut before mixing. Use unsweetened coconut to avoid additional sweetness; if the mixture seems dry, warm a touch more peanut butter to balance.
- Chia seeds add chew and omega-3s; they can be omitted if you prefer a smoother texture.
Finish / Coating Tips
- Melt chocolate chips slowly using a double boiler or short microwave bursts, stirring between sessions. Keep the chocolate as dry as possible; even a drop of water can seize it.
- Stir in 1 teaspoon coconut oil to thin the melted chocolate for a smooth, glossy coating and to help the shell set firmly. If you skip it, the coating will be thicker and may take longer to set, and you’ll lose the subtle coconut note.
- Dip chilled bites and place them on a parchment-lined tray. Refrigerate or chill until the coating is set (about 15–30 minutes). For faster setting, use a quick chill in the fridge; for a crisper shell, finish in the freezer for 10–15 minutes.
- If you don’t want a chocolate coating, you can roll finished bites in cocoa powder, finely crushed nuts, or dip in melted white chocolate for a different look and flavor.
Make-Ahead, Storage & Substitutions
- Recipe can be made in advance: prepare the base, chill it, shape into bites, then refrigerate up to 5 days before coating. If freezing, portion the bites on a sheet tray, freeze solid, then transfer to an airtight container for up to 3 months.
- Storage: keep finished bites in an airtight container in the fridge for up to 7 days. For longer storage, freeze and thaw briefly at room temperature before serving.
- Allergen-friendly note: if nut allergies are a concern, substitute peanut butter with sunflower seed butter. Check labels to avoid cross-contact with nuts.
FAQ
Peanut Butter Bites – Frequently Asked Questions
What are Peanut Butter Bites?
Peanut Butter Bites are no-bake, bite-sized treats made with peanut butter, oats, a touch of sweetness, and optional mix-ins like chocolate chips. They’re quick to make, portable, and great as a snack or energy boost.
Typical simple version:
- 1 cup creamy peanut butter
- 1/2 cup honey or maple syrup
- 1 1/2 cups rolled oats (gluten-free oats if needed)
- 1/4 cup mini chocolate chips (optional)
- 1 tsp vanilla extract
- Pinch of salt
Are these bites vegan and dairy-free?
They can be if you use maple syrup instead of honey and vegan chocolate chips. Use dairy-free chocolate chips and gluten-free oats if needed. Always check labels to confirm vegan/Dairy-free status.
Can I use natural or crunchy peanut butter?
Yes. Natural peanut butter works well; just give it a good stir because it can separate. Crunchy peanut butter adds extra texture, but you can use creamy if you prefer a smoother bite.
How can I adjust sweetness and texture?
To adjust sweetness, swap honey for maple syrup or adjust the amount slightly. For texture, add a bit more oats if the mixture is too sticky, or add more peanut butter or a splash of water to loosen it if it’s too dry. The mixture should hold together when rolled into balls.
How do I make Peanut Butter Bites?
Simple method:
- In a bowl, mix peanut butter, honey (or maple syrup), vanilla, and salt until smooth.
- Stir in oats and chocolate chips until evenly combined.
- Chill the mixture in the refrigerator for 20–30 minutes (optional but helps with rolling).
- Roll into bite-sized balls and, if desired, roll in shredded coconut or another coating.
- Store in an airtight container in the fridge or freezer.
How should I store Peanut Butter Bites and how long do they last?
Store in an airtight container in the fridge for about 1–2 weeks. For longer storage, freeze them in a single layer on a parchment-lined tray, then transfer to a freezer-safe bag or container; they’ll keep for about 2–3 months.
Can I freeze Peanut Butter Bites?
Yes. Freeze uncoated bites on a parchment-lined tray until solid, then transfer to a freezer bag. Thaw at room temperature for a few minutes or enjoy cold from the fridge or freezer as a cool treat.
How can I customize flavors and add-ins?
Get creative with mix-ins and coatings. Try:
- Shredded coconut, chopped nuts, or crushed pretzels
- Dried fruit like raisins or cranberries
- Chia seeds, flax meal, or protein powder
- Mini chocolate chips or cacao nibs (for extra chocolatey flavor)
- Spices like cinnamon or a pinch of sea salt for contrast
What if the mixture is too crumbly or too sticky?
If crumbly: add a little more peanut butter or honey to bind, or toast and crush extra oats to help. If sticky: chill the mixture longer or add a bit more oats until it’s easy to roll.