Introduction / Hook
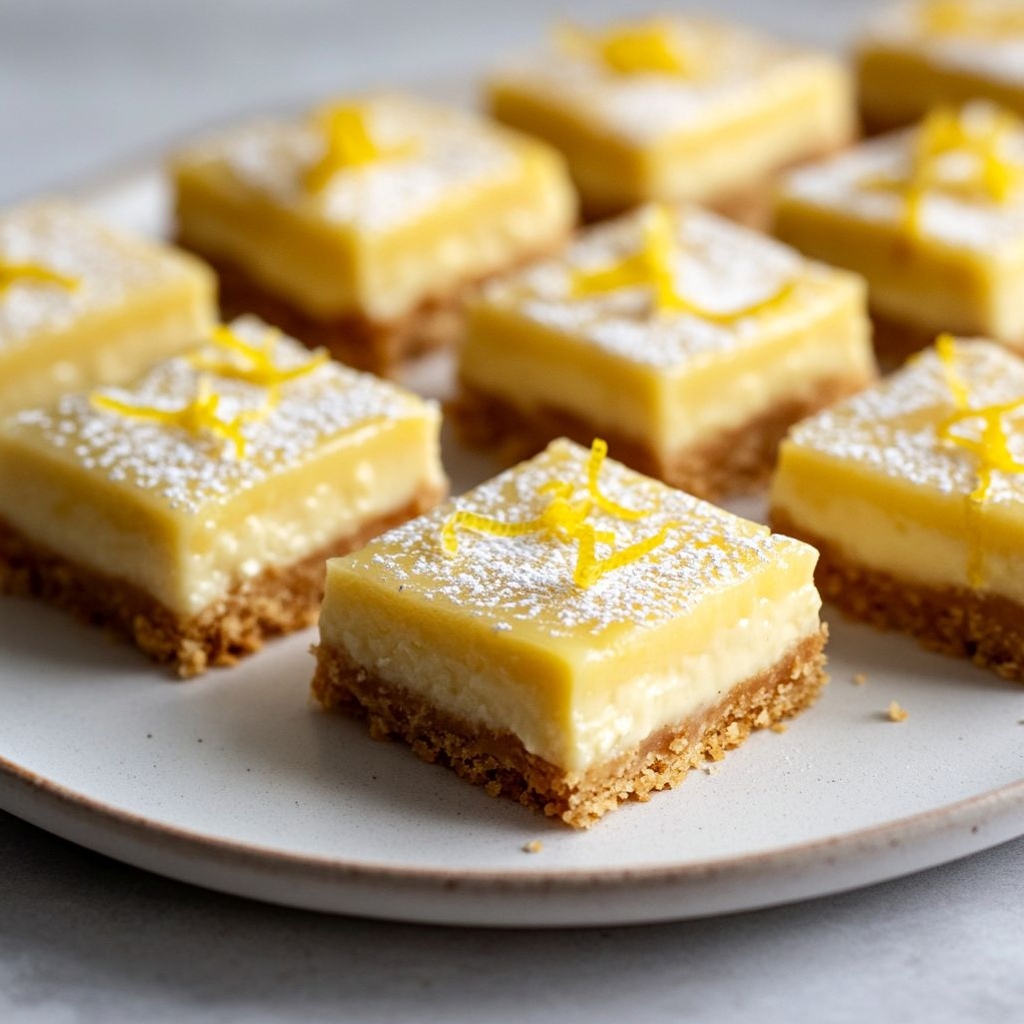
There’s a bright, sunlit bite to Lemon Cake Cheesecake Squares that feels like a summer afternoon wrapped in a single, perfect bite. Imagine thin lemon-scented cake layers that yield softly under your fork, giving way to a cloud of velvety cheesecake that carries just the right amount of tang to wake up the palate. Each square is a little memory in the making: the scent of lemon zest dancing through the air, a crackle of a delicate crust giving way to a creamy center, and a glaze that glistens like morning dew on a sun-kissed lemon. This dessert doesn’t just satisfy a craving; it elevates an ordinary moment into something celebratory—an instant classic that can brighten a weeknight and still feel special enough for guests. If you’ve been on the hunt for something that marries the citrusy cheer of a lemon cake with the indulgence of a cheesecake, you’ve found it in this generous, sliceable treat.
What makes these lemony squares so irresistibly persuasive isn’t merely the balance of flavors; it’s the harmony of textures, the way the cake layer offers a tender, almost crumbly bite that yields to a luxurious, smooth cheesecake center. When you take a bite, your senses are greeted by a gentle sweetness that never overpowers the lemon’s brightness, instead coaxing it into the foreground with grace. The result is a dessert that reads as elegant and refined, yet remains approachable enough to bake for a casual family gathering, a tea-and-chat afternoon, or a festive party playlist full of laughter and good company. Each square is compact and portable, making it perfect for sharing on a plate at potlucks, picnics, or a simple after-dinner moment that begs another slice and a moment of quiet joy.
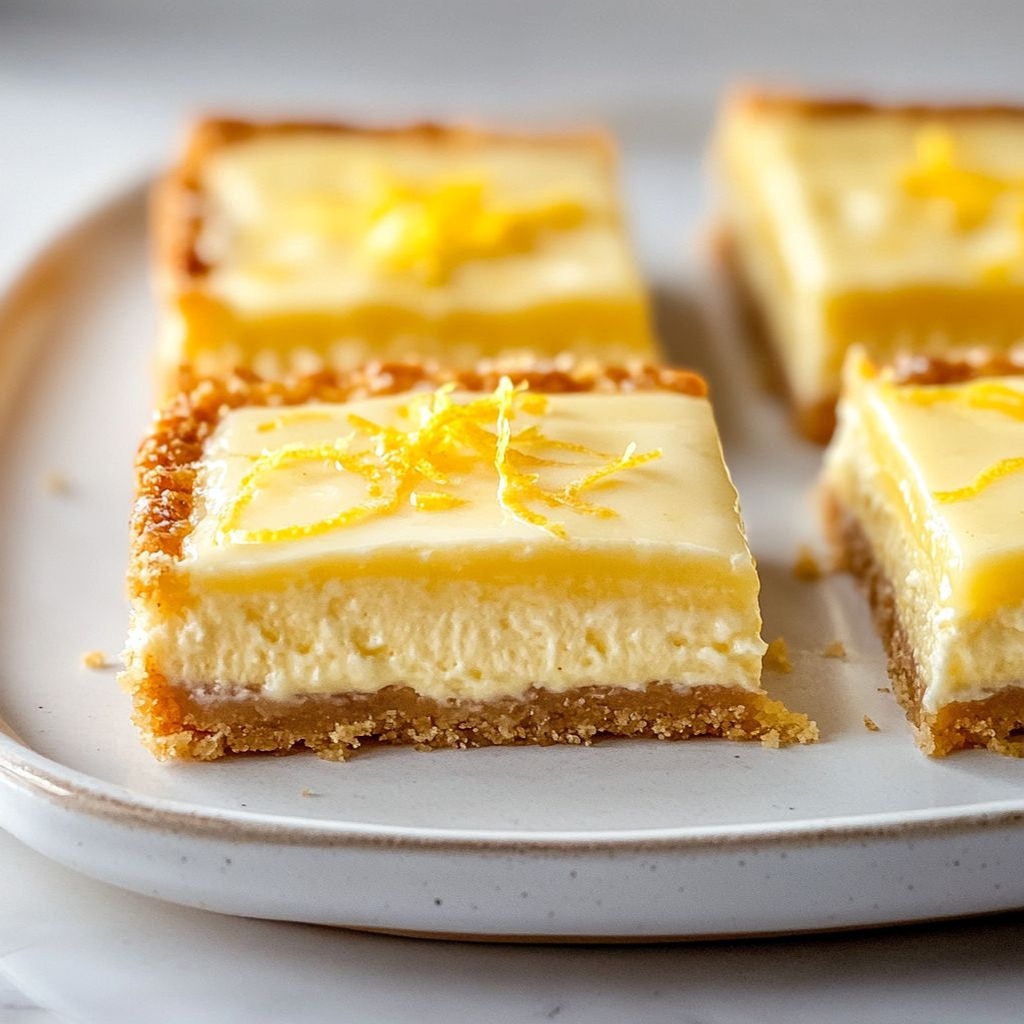
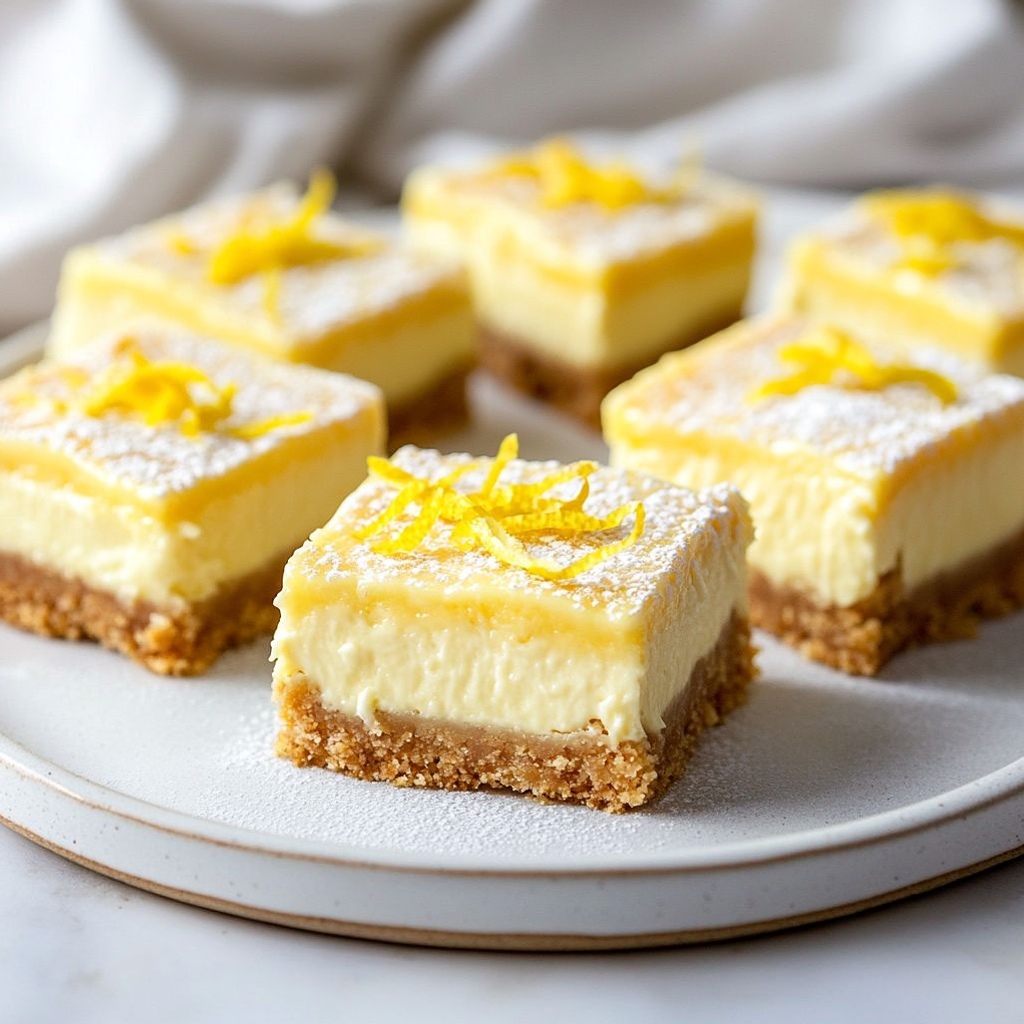
Beyond the surface beauty, there’s something deeply comforting about Lemon Cake Cheesecake Squares. They bring to mind childhood lemon desserts, but with a modern, sophisticated twist—the kind that makes you feel both nostalgic and utterly pampered at the same time. It’s the kind of dessert you can prepare ahead, slice neatly into perfect portions, and present with a flourish of zest and a dusting of powdered sugar. The fragrance wafts through the kitchen, turning a routine baking session into a memory-making ritual, and the first bite feels like a little celebration—the kind of sweet that speaks softly to the soul while still delivering a bright, crisp finish on the palate. This dessert isn’t merely something to eat; it’s an experience to savor, share, and remember.
The Story Behind the Dish
The idea of marrying lemon cake with cheesecake has its own little legend in many kitchens: two classic comforts, each with a distinct personality, finding a harmonious middle ground in a single dessert square. Lemon has long been celebrated for its sunlit personality and its ability to brighten even the richest flavors; cheesecake, with its luxuriously creamy center, has a universal appeal that transcends borders and seasons. When cooks sought a way to blend these two worlds, they often started with the same question: how can you preserve the lightness of a lemon cake while harnessing the indulgence of a cheesecake without making the result heavy or cloying?
One charming origin tale places this dessert at a family bakery that specialized in elegant, portable confections suited for fairs, weddings, and seaside retreats. The bakers experimented with a lemon-forward batters and a smooth, cultured-center layer, imagining a treat that could be sliced into neat squares for sharing and storytelling. The as-told-in-legends version says a grandmother whispered a counterintuitive trick: let the lemon zest and juice do the talking, but let the cheesecake layer offer a soft counterpoint so the flavors could dance rather than compete. The result was a dessert that traveled well, held its shape in the heat of a summer picnic, and carried with it the memory of lemon groves and sparkling afternoons. While every kitchen adds its own personal touch to the recipe, the enduring appeal remains the same—a delicate balance of bright citrus and creamy sophistication that feels both festive and familiar.
In contemporary kitchens, this dessert represents the joyful fusion of simplicity and refinement. The crust—crisp and lightly sweet—sets the stage for a creamy lemon cheesecake that’s seductively smooth but never heavy. The lemon layer can carry a whisper of vanilla, a hint of almond, or a touch of tangy tang that reminds you why citrus is such a masterful flavor partner. The story isn’t just about ingredients; it’s about the moment you lay the squares on a platter, the sound of friends and family leaning in, and the instant sense that something special is about to be enjoyed. That mix of history, comfort, and modern charm is what makes Lemon Cake Cheesecake Squares feel timeless, even as they arrive at your table fresh from the oven or the fridge, ready to be shared and celebrated.
Why You’ll Love This Recipe
- Bright, balanced flavor: lemon notes that sing without overwhelming the creamy cheesecake core.
- Textural contrast: crisp crust, light cake, and a silky cheesecake middle that melt together in every bite.
- Make-ahead convenience: easy to bake, chill, and slice later, making it ideal for gatherings.
- Portable and shareable: perfect for potlucks, picnics, school lunches, and dessert trays.
- Elegant yet approachable: looks impressive on a platter but requires no special equipment or techniques to achieve professional results.
- Versatile pairing: pairs beautifully with tea, coffee, sparkling beverages, or a light dessert wine.
- Distractingly uplifting aroma: lemon zest and vanilla notes fill the kitchen with a fresh, inviting fragrance during baking and cooling.
- Adapts to many diets: with substitutions, the concept can be transformed to gluten-free or dairy-free versions without sacrificing charm.
Flavor Profile & Texture
The flavor profile of Lemon Cake Cheesecake Squares is a carefully layered dialogue between brightness and silk. The lemon in the cake layers brings a citrusy, mildly floral tang that wakes up the palate with a clean, citrus-forward presence. It’s not a sharp sourness; it’s a sunny, balanced brightness that lingers just long enough to invite the creamy cheesecake to step forward. The cheesecake layer itself is luxuriously smooth, rich, and lightly tangy—more indulgent than a traditional cake, yet not heavy enough to overwhelm the citrus notes. When you bite through the crust, you’ll first experience a crisp, sugary edge that gives way to the tender, crumbly cake, followed by the lush, creamy center. The union of textures—crunch, tenderness, silk—creates a multi-sensory moment with each cut and bite.
The aroma is equally important: lemon zest releases a bright, citrus perfume that mingles with vanilla and a whisper of butter, creating a perfume that fills the room as the squares bake and cool. On the palate, you may notice a delicate vanilla undertone and a soft, almost caramel-like sweetness from the lightly browned edges of the crust. A gentle finish of lemon keeps the last impression refreshingly fresh, leaving you eager for another bite and a satisfying sense of balance. The texture is resilient enough to hold its shape when plated but soft enough to yield into a clean, satisfying bite—an ideal harmony for a dessert that aims to be both comforting and refined.
Occasions & Pairings
These lemon cheesecake squares are remarkably versatile and suit a wide range of occasions. They’re at home on a weekend brunch table, a spring lunch gathering, or a celebratory dessert after a weeknight dinner. Their portable, square form makes them perfect for sharing—whether you’re packing a dessert for a family picnic, presenting a tray at a birthday party, or bringing a sophisticated treat to a potluck. They also make a memorable finish for Easter, Mother’s Day, bridal showers, or summer soirees where a lighter, citrus-forward dessert is preferred.
Pairings elevate the experience. A light, sparkling wine, a dry rosé, or an aromatic tea (think Earl Grey or jasmine) complements the lemon brightness without competing with the cheesecake. For a non-alcoholic option, a citrusy iced tea or a lemon-ginger spritzer echoes the flavors of the squares beautifully. Fresh berries—raspberries, blueberries, or sliced strawberries—add a juicy contrast that brightens the plate and enhances the lemon’s tang. A dollop of lightly whipped cream or a subtle berry compote can be offered on the side for those who like a little extra indulgence. If you’re serving a crowd, consider a lemon-themed dessert board with these squares as the centerpiece, surrounded by lemon bars, lemon macarons, and a small bowl of zesty curd for dipping and dipping, if desired.
Tips, Variations & Substitutions
- Make it dairy-free: use non-dairy cream cheese and a plant-based butter for the crust. You can also explore coconut cream options for a richer texture, ensuring they are compatible with your dietary needs.
- Gluten-free adaptations: substitute all-purpose flour in the crust with almond flour or a gluten-free blend. The texture will remain tender with a lightly crisp edge if you press it evenly and bake until just golden.
- Flavor twists: swap lemon for lime or orange to create a different citrus profile. A touch of lime zest can brighten a lime version, while orange zest adds a sunny, sweeter nuance.
- Herbal nuances: a small amount of fresh thyme or basil can add an intriguing herbal note that pairs surprisingly well with citrus. Add it sparingly to the zest or a light glaze for a touch of sophistication.
- Texture variations: for a more pronounced cake layer, you can opt for a slightly thicker portion of cake relative to the cheesecake. Conversely, a thinner cake layer puts more emphasis on the cheesecake’s creaminess.
- Swirls and drizzles: swirl in lemon curd or a light raspberry ripple before chilling to create pattern and contrast in color and flavor. A glaze or light dusting of powdered sugar can finish the squares with a gleaming, professional look.
- Sweetness alignment: if you prefer a tarter finish, use a touch less sugar in the lemon portion or enhance the lemon zest for a more pronounced citrus edge.
- Make-ahead strategy: bake the crust and cake layers in advance, chill, and assemble the cheesecake layer closer to serving if you want a particularly pristine, neat presentation. This can also help those who like to prepare desserts in stages.
Storage & Make-Ahead Ideas
One of the most appealing aspects of Lemon Cake Cheesecake Squares is that they translate well into make-ahead desserts. You can prepare the crust and cake layers ahead of time, refrigerate or freeze them, and then assemble the cheesecake layer when you’re ready to serve. Here are a few practical tips to maximize freshness and ease:
- Store baked squares in an airtight container in the refrigerator for up to 4–5 days. Place parchment between layers to prevent sticking and preserve texture.
- For longer storage, freeze the individual squares (once completely cooled and set) in a single layer on a tray, then transfer to a freezer-safe bag or container. They can be frozen for up to 1–2 months. Thaw overnight in the refrigerator before serving for best texture.
- To refresh the flavor and texture after chilling or freezing, give the surface a light dusting of fresh lemon zest and a gentle re-cut of any softened edges to restore visual appeal before serving.
- Make-ahead assembly: bake the crust and cake layers a day ahead, chill, and then add the cheesecake layer the following day. This approach ensures clean, sharp edges and a flawless presentation when you slice the squares for guests.
Fun Facts & Trivia (Optional)
- Lemons were once considered a status symbol in 18th-century Europe, valued for their perceived health benefits and bright aroma—long before lemon desserts became everyday favorites.
- Cheesecake as a concept predates modern desserts by centuries, with early versions appearing in ancient civilizations. The modern cream cheese variety became popular in the 20th century, leading to endless riffs like these citrus-forward cheesecake squares.
- The combination of lemon and dairy has been a beloved pairing across many cuisines, with bakers often using zest to perfume batters without overpowering the dairy richness.
- Descriptive terms for the texture of a well-made cheesecake include “silky,” “velvety,” and “luscious”—descriptions that enthusiasts often use to convey the luxurious mouthfeel that this dessert delivers in every bite.
- In many cultures, citrus desserts symbolize freshness and renewal, making Lemon Cake Cheesecake Squares a natural choice for spring celebrations and early-summer gatherings.
- The visual appeal of a square dessert is not accidental: clean, even cuts highlight the precise layering and make the treat feel contemporary and restaurant-worthy in a home setting.
Ingredients
Crust/Base
- 1 1/2 cups all-purpose flour
→ Provides structure for the crust. When mixed with sugar, salt, and melted butter, it forms a tender, crumbly base that supports the lemon cake and cheesecake layers. Handle the mixture just until it comes together to avoid a tough crust. Press evenly into the pan and prebake for about 12–15 minutes to set before adding the next layers. - 1/3 cup granulated sugar
→ Adds sweetness and helps achieve a light, slightly sandy texture in the crust. Mix with the flour, salt, and melted butter to form a cohesive base. If you prefer a crisper crust, you can increase the butter slightly and press firmly into the pan before chilling briefly. - 1/4 teaspoon fine salt
→ Intensifies flavor and balances sweetness in the crust. Use fine salt for even distribution. If you used salted butter, adjust by reducing this salt a touch to avoid oversalting. - 1/2 cup unsalted butter, melted
→ The fat that binds the crust together and provides richness. Melted butter distributes evenly for a uniform crust. Cool slightly before mixing with the dry ingredients to prevent slight cooking of any future layers on contact.
Lemon Cake Layer
- 1 1/2 cups all-purpose flour
→ Forms the structure of the lemon cake layer. Sift to remove lumps and whisk with baking powder and salt to ensure even rise and a light crumb. This flour will create a soft, tender cake that complements the creamy cheesecake layer. - 1/2 cup granulated sugar
→ Provides sweetness and contributes to browning and crumb formation. Balance with lemon zest and juice for a bright flavor. Avoid overmixing after adding wet ingredients to keep the crumb tender. - 2 teaspoons baking powder
→ Leavening that lifts the cake portion for a light, airy texture. Whisk evenly with the dry ingredients to avoid uneven spots. If your baking powder is a bit old, test its rise with a small amount of hot water before mixing. - 1/4 teaspoon salt
→ Enhances overall flavor and helps balance the lemon acidity. Use fine salt for an even distribution; this is especially important in citrus-forward batters. - 2 large eggs
→ Provide structure and moisture. Bring eggs to room temperature for better emulsification and volume. Beat lightly before adding to the batter to ensure a smooth mixture without streaks. - 1/2 cup milk
→ Adds moisture and tenderness to the cake crumb. Whole milk yields a richer crumb; dairy-free substitutes can be used in a pinch, but ensure they are unsweetened and at room temperature for best incorporation. - 1/3 cup unsalted butter, melted
→ Adds fat and fullness of flavor to the cake. Allow to cool slightly before mixing with the eggs to prevent cooking them. For a lighter crumb, you can substitute with a neutral oil in equal measure. - 2 tablespoons fresh lemon juice
→ Infuses the batter with bright citrus acidity that helps balance sweetness and interact with the baking powder for a tender rise. Use fresh juice rather than bottled for the cleanest lemon flavor. - Zest of 2 lemons
→ Intensifies lemon aroma and adds a punch of citrus oils to the batter. Zest before juicing the lemons to maximize fragrance; avoid the white pith, which is bitter.
Cheesecake Filling
- 16 oz cream cheese, softened
→ The base of the creamy cheesecake layer. Softened cream cheese blends smoothly with sugar to create a silky filling without lumps. If your cream cheese is cold, microwave in 10-second bursts until just softened, then stir to smooth. - 1/2 cup granulated sugar
→ Sweetens the cheesecake and contributes to a creamy, airy texture when beaten with the cream cheese. Beat until light and fluffy to avoid a grainy texture, scraping the bowl a few times as needed. - 2 large eggs
→ Provide structure and rich, custard-like texture. Add eggs one at a time at medium speed to prevent curdling; do not overmix once eggs are added to keep the filling smooth and glossy. - 1 teaspoon vanilla extract
→ Enhances the cheesecake’s depth of flavor. Use pure vanilla for the best aroma; if you have vanilla bean, scrape the seeds for an extra layer of flavor. - 1 tablespoon lemon juice (optional)
→ Adds a subtle lemon tang that complements the lemon cake. Use freshly squeezed juice for the brightest flavor; if your lemon juice is very tart, you can reduce slightly to taste.
Lemon Glaze
- 1 cup powdered sugar
→ Provides the body and sweetness for a smooth, pourable glaze. Sift to remove any lumps and whisk with liquid gradually to reach a pourable consistency; adjust with more sugar or lemon juice as needed to achieve your preferred thickness. - 2–3 tablespoons fresh lemon juice
→ Thin glaze with bright citrus flavor; start with 2 Tbsp and add more to reach desired consistency. If you prefer a sweeter glaze, reduce the lemon juice slightly; for a more tart glaze, add a touch more juice. - Zest of 1 lemon (optional)
→ Extra lemon aroma and a speckled gloss to the glaze. Zest can be added to the glaze for a stronger citrus punch or sprinkled on top after glazing for a pop of color and fragrance.
Optional Add-ins
- 1/4 cup finely chopped almonds (optional)
→ Adds crunchy texture and a toasty, nutty note. Toast the almonds lightly in a dry skillet or oven to deepen flavor before folding into the crust, cake batter, or topping. Chop finely for even distribution. - 1/2 cup fresh blueberries (optional)
→ Provide bursts of fruity brightness that pair nicely with lemon. Gently fold into the lemon cake batter at the end to avoid breaking the berries; toss berries with a teaspoon of flour before adding to help prevent sinking and color bleed.
Instructions
- Preheat your oven to 350°F (175°C) and line a 9×13-inch baking pan with parchment paper or grease it well.
→ This ensures even baking and makes removal of the bars easy without tearing the crust. - If using almonds, toast 1/4 cup finely chopped almonds in a dry skillet over medium heat for 3–4 minutes until fragrant, then cool before adding.
→ To deepen the crust flavor and provide a toasty crunch that contrasts with the soft filling. - Whisk together 1 1/2 cups all-purpose flour, 1/3 cup granulated sugar, and 1/4 teaspoon fine salt in a medium bowl to distribute leavening and salt evenly.
→ Sifting or whisking this dry mix ensures even texture and prevents pockets of flour in the crust. - Stir in 1/2 cup melted unsalted butter until the mixture resembles coarse crumbs that hold together when pressed.
→ The fat coats the flour to create a tender, crumbly crust and helps it set when baked. - If you toasted almonds, fold them into the crust mixture now so they are evenly distributed in every bite.
→ Even distribution prevents large almond clusters and ensures consistent crunch across the bars. - Press the crust mixture evenly into the prepared pan using the flat bottom of a glass or spatula, guiding it to cover the bottom and a thin edge up the sides about 1/4 inch thick. Chill 10–15 minutes to set.
→ Chilling firms the fat in the crust so it bakes without sliding and shrinks less during the bake. - Bake the crust at 350°F (175°C) for 12–15 minutes until the edges are lightly golden; remove from the oven and let cool on a rack while you prepare the lemon cake batter.
→ Parbaking prevents a soggy base once the lemon cake batter is added and helps the crust set with defined edges. - In a separate bowl, whisk together 1 1/2 cups all-purpose flour, 1/2 cup granulated sugar, 2 teaspoons baking powder, and 1/4 teaspoon fine salt until evenly combined.
→ Ensures the leavening and salt are evenly distributed for a uniform crumb in the lemon cake layer. - In another bowl, whisk 2 large eggs, 1/2 cup milk, 1/3 cup melted unsalted butter cooled slightly, 2 tablespoons fresh lemon juice, and zest of 2 lemons until smooth and incorporated.
→ Room-temperature wet ingredients emulsify with the dry mix, creating a tender batter with bright lemon aroma. - Pour the wet ingredients into the dry ingredients and stir or fold just until you barely come together; stop as soon as there are no major streaks of flour remaining. If using fresh blueberries, gently fold in 1/2 cup in at this stage after coating with a teaspoon of flour to prevent color bleed and sinking.
→ Overmixing develops gluten, making the cake dense; a few tiny lumps yield a tender crumb; blueberries should stay suspended without tearing the batter. - Pour the lemon cake batter over the par-baked crust and spread it into an even layer with a spatula, working from the center outward to ensure a uniform thickness. Tap the pan gently on the counter to release any trapped air.
→ A smooth, level surface ensures even rising and prevents thin spots that could bake unevenly. - Bake the lemon cake layer at 350°F (175°C) for about 18–22 minutes, or until the top is set and a toothpick inserted into the center comes out with only a few moist crumbs. Cool completely on a rack before proceeding.
→ Proper cooling prevents the cheesecake filling from sliding and helps achieve clean, neat slices. - In a mixer or with a hand mixer, beat 16 oz softened cream cheese with 1/2 cup granulated sugar on medium speed until smooth and fluffy, scraping the bowl as needed.
→ Creaming until light ensures a silky cheesecake texture without graininess. - Add 2 large eggs one at a time, beating on medium speed after each addition until just incorporated and no visible streaks remain.
→ Adds structure while avoiding overmixing which can cause cracks or a dense texture. - Beat in 1 teaspoon vanilla extract and, if desired, 1 tablespoon lemon juice, until the filling is smooth and evenly flavored.
→ Vanilla enhances depth; lemon juice strengthens the lemon character and can brighten the tanginess of the cheesecake. - Pour the cheesecake filling over the cooled lemon cake layer and spread into an even, level surface with an offset spatula. Tap the pan once or twice to settle the batter and release any air pockets.
→ A level surface ensures uniform baking and clean edges when slicing later. - Bake the assembled bars at 325°F (165°C) for 25–30 minutes, or until the edges are set and the center still has a gentle wobble. Remove from the oven and let cool on a rack.
→ Gentle residual heat continues to set the center; avoid overbaking which causes cracks and a dry texture. - Chill the bars in the refrigerator for at least 2 hours or overnight to fully set the layers and make slicing clean.
→ Chilling firms the creamy cheesecake and lemon cake into neat bars for crisp cuts and clean presentation. - Prepare the lemon glaze by whisking 1 cup powdered sugar with 2–3 tablespoons fresh lemon juice in a small bowl until it is smooth and pourable; adjust by adding more sugar for thickness or more juice for a looser glaze.
→ A smooth glaze clings to the surface and adds a bright lemon finish without masking the bar texture. - If using lemon zest, whisk in zest of 1 lemon or sprinkle zest on top after glazing for extra fragrance and a pop of color.
→ Zest provides aromatic oils that intensify citrus aroma and visual appeal. - Drizzle or spoon the glaze over the chilled bars, tilting the pan to achieve an even coat; allow the glaze to set in the refrigerator for about 15–20 minutes before cutting.
→ A set glaze yields shiny, clean slices and prevents sliding off when serving. - Use a sharp knife warmed under hot running water and dried between cuts to slice clean, even squares; wipe the blade after each cut for neat presentation.
→ A hot knife minimizes tearing through multiple layers and yields precise, attractive portions.
Notes
These lemon cake cheesecake squares feature a buttery crust with a bright lemon cake layer and a creamy cheesecake filling. For the best texture and clean slices, follow these prep tips, assembly notes, and storage ideas as you prepare this dessert.
- Plan ahead and bring ingredients to room temperature for a smooth, homogeneous batter and filling. Milk, eggs, cream cheese, and butter blend more evenly when warm to room temperature (about 60–70°F / 15–21°C).
- Prep the crust correctly Press the crust evenly into the pan and prebake for 12–15 minutes until just set and fragrant. This short bake helps the crust stay crisp under the lemon cake layer and cream cheese filling.
- Whip the cheesecake filling to a silky texture Beat the softened cream cheese with sugar until light and fluffy, then add eggs one at a time on medium speed. Scrape the bowl well and avoid overmixing after adding the eggs to prevent cracks.
- Add fresh lemon flavor without overpowering the cake Use fresh lemon juice and zest in both the cake and optional glaze to achieve vibrant citrus aroma without bitterness. Zest the lemons before juicing to capture maximum oils.
- Handle the lemon cake layer gently When combining wet and dry ingredients, mix just until incorporated to keep the crumb tender. Overmixing can lead to a tougher texture.
- Bake with care to avoid cracks Bake the cheesecake and lemon cake layers at the recommended temperatures until set. If the top looks very glossy or the center wobbles slightly, it may need more time. A low, steady oven helps minimize cracking; if you notice cracks forming, don’t panic—slice and serve with glaze to disguise imperfect edges.
- Cool gradually for clean cuts After baking, cool the entire pan on a rack at room temperature, then refrigerate for several hours or overnight. This chilling step firms the layers and makes the bars easier to slice neatly.
- Prepare the glaze to finish with shine Whisk the powdered sugar with lemon juice gradually to reach a pourable yet set consistency. If too thin, add more sugar; if too thick, add a touch more juice. A light lemon zest in the glaze adds a fragrant finish.
- Storage and make-ahead notes The bars store well covered in the refrigerator for up to 3–4 days. For longer storage, freeze individual slices wrapped tightly in plastic and foil for up to 1–2 months; thaw in the refrigerator before serving. Glaze can be added after thawing for a fresh finish.
- Optional add-ins 1/4 cup finely chopped almonds add crunch and toast nicely in the crust or batter; 1/2 cup fresh blueberries provide bright bursts of flavor—fold them into the batter at the end to prevent color bleed.
- Gluten-free or dairy-free adjustments For a gluten-free version, substitute an all-purpose gluten-free flour blend and use certified gluten-free baking powder. For dairy-free, replace the butter with a neutral oil (equal measure) and use unsweetened dairy-free cream cheese and milk; note that texture may differ slightly.
Tips
Tips for Perfect Lemon Cake Cheesecake Squares
These tips will help you achieve a tender crust, a bright lemon cake, and a silky cheesecake layer that slice cleanly. Use them alongside the recipe steps for best results.
Crust and Baking Prep
- Line the pan with parchment paper, leaving overhangs on two sides. This makes it easy to lift the bars for slicing and prevents the crust from sticking.
- Chill the crust after pressing it into the pan. A brief chill (15–20 minutes) helps it set and prevents shrinking during baking.
- Prebake the crust until it’s just starting to turn a light golden color. This seals the base and reduces sogginess from the lemon cake layer.
- Cool melted butter slightly before mixing with the dry ingredients to avoid cooking the flour and creating a dense crust.
- Measure flour accurately by spooning into the cup and leveling off. Too much flour can make the crust dry and crumbly.
Lemon Cake Layer Tips
- Bring eggs and milk to room temperature for better emulsification and a lighter crumb.
- Whisk the dry ingredients well to ensure even rise and a uniform texture in the cake layer.
- When adding wet ingredients, mix until just combined to keep the crumb tender; overmixing can develop gluten and make the cake tougher.
- Use fresh lemon juice and zest for the brightest flavor. Zest before juicing to maximize aroma, and avoid the white pith, which can be bitter.
- If batter seems thick, whisk in small increments of milk until you reach a smooth, pourable consistency.
Cheesecake Filling Tips
- Let cream cheese soften completely; beat until smooth and creamy before adding sugar to avoid lumps.
- Gradually beat in sugar to keep the mixture light and prevent a gritty texture.
- Add eggs one at a time on medium speed, beating just until incorporated to maintain a glossy, custard-like texture.
- Include vanilla for depth of flavor and, if desired, a teaspoon of lemon juice to enhance brightness without thinning the filling.
- To prevent cracks, bake at a steady, moderate temperature and consider a water bath. If you opt for a bath, wrap the pan securely in foil to protect against moisture seeping in.
Lemon Glaze Tips
- Sift powdered sugar to remove lumps, then whisk gradually with lemon juice to reach a smooth, pourable consistency.
- Adjust thickness by adding more sugar for a thicker glaze or a bit more lemon juice for a thinner glaze. Let the glaze sit briefly to meld with the cake as it sets.
- Stir in lemon zest for extra aroma, either in the glaze or sprinkled on top after glazing for color and fragrance.
- Allow the bars to cool completely before applying glaze to prevent sliding and ensure an even coating.
General, Make-Ahead, and Storage Tips
- Chill the assembled bars for at least 1–2 hours (or overnight) to ensure clean, precise cuts.
- For clean slices, wipe the knife between cuts and use a long, smooth stroke rather than a saw motion.
- Make-ahead: Bake crust and lemon cake layers ahead, then chill. Prepare the cheesecake filling and glaze the day you plan to serve for best texture and brightness.
- Store any leftovers in the refrigerator, covered, for up to 3–4 days. For longer storage, freeze the cut bars (wrapped well) for up to 1 month.
- Flavor variations: swap some lemon juice for orange juice or add a pinch of zest to the cheesecake for a different citrus profile.
- Allergen-friendly options: use dairy-free cream cheese and plant-based milk if needed; check glaze ingredients for dairy-free compatibility. If using gluten-free flour, consider adding a pinch of xanthan gum for structure.
FAQ
What are Lemon Cake Cheesecake Squares?
A tangy-sweet dessert that combines a lemon-flavored cake layer with a creamy cheesecake swirl or layer, baked in a pan and cut into square-sized bars. They’re finished with a bright lemon glaze for extra citrus kick.
What ingredients do I need?
Typical ingredients include:
- Crust: graham cracker or shortbread crumbs + melted butter
- Lemon cake batter: all-purpose flour, sugar, baking powder, salt, eggs, melted butter, milk or yogurt, lemon zest and juice
- Cheesecake filling: softened cream cheese, sugar, eggs, lemon juice and zest
- Glaze (optional): powdered sugar + lemon juice
For exact amounts, refer to the recipe card you’re following.
Should I prebake the crust?
Yes. Preheat to 350°F (175°C). Mix crust crumbs with melted butter until evenly moistened and press into a greased 9×9-inch pan (lined with parchment for easy removal). Bake 8–10 minutes until just set, then cool before adding the cake batter.
How is the cheesecake filling prepared?
Beat the cream cheese with sugar until smooth and creamy. Add eggs one at a time, mixing just until incorporated. Stir in lemon juice and zest (and a touch of vanilla if desired). Do not overbeat after adding eggs to keep the filling silky.
How is the lemon cake batter prepared?
Whisk together dry ingredients (flour, sugar, baking powder, salt). In another bowl, whisk eggs, melted butter, milk or yogurt, lemon zest, and lemon juice. Combine the wet and dry ingredients until just blended. Pour over the cooled crust, then gently add the cheesecake batter on top or swirl it in.
How do I assemble and bake the bars?
You have two common methods:
- Swirl method: Dollop spoonfuls of cheesecake batter over the lemon cake, then use a knife to swirl into the cake batter. Bake until the center is just set.
- Layer method: Pour the lemon cake batter over the crust, then dollop cheesecake batter on top and gently spread or swirl as desired.
Bake at 350°F (175°C) for about 34–40 minutes, or until the edges are set and the center has a slight jiggle. Let cool on a rack, then refrigerate for at least 2 hours (preferably overnight) to firm up.
How can I tell if they’re done?
The edges should be set and pulling away slightly from the pan, while the center should still have a faint jiggle. A toothpick inserted near the center may come out with a few moist crumbs. If it looks liquidy, give it a few more minutes and test again.
How should I store and chill leftovers?
Store refrigerated in an airtight container for 4–5 days. For longer storage, you can freeze the bars (see freezing tips). If glazed, keep the glaze from getting soggy by storing with a parchment layer between layers.
Can I make this gluten-free or dairy-free?
Yes, with substitutions:
- Gluten-free: use a gluten-free all-purpose flour blend in place of regular flour and ensure your crust crumbs are gluten-free.
- Dairy-free: swap butter for a dairy-free butter substitute, use dairy-free cream cheese for the cheesecake, and use nondairy milk as needed. Note that texture and flavor may shift slightly.
Can I freeze these bars or make them ahead?
Yes. Fully cool the bars, then wrap individual squares or keep them in an airtight container and freeze for up to 2–3 months. Thaw in the refrigerator before serving. You can also bake ahead and refrigerate the unfrosted bars up to 1 day before serving.