Introduction / Hook
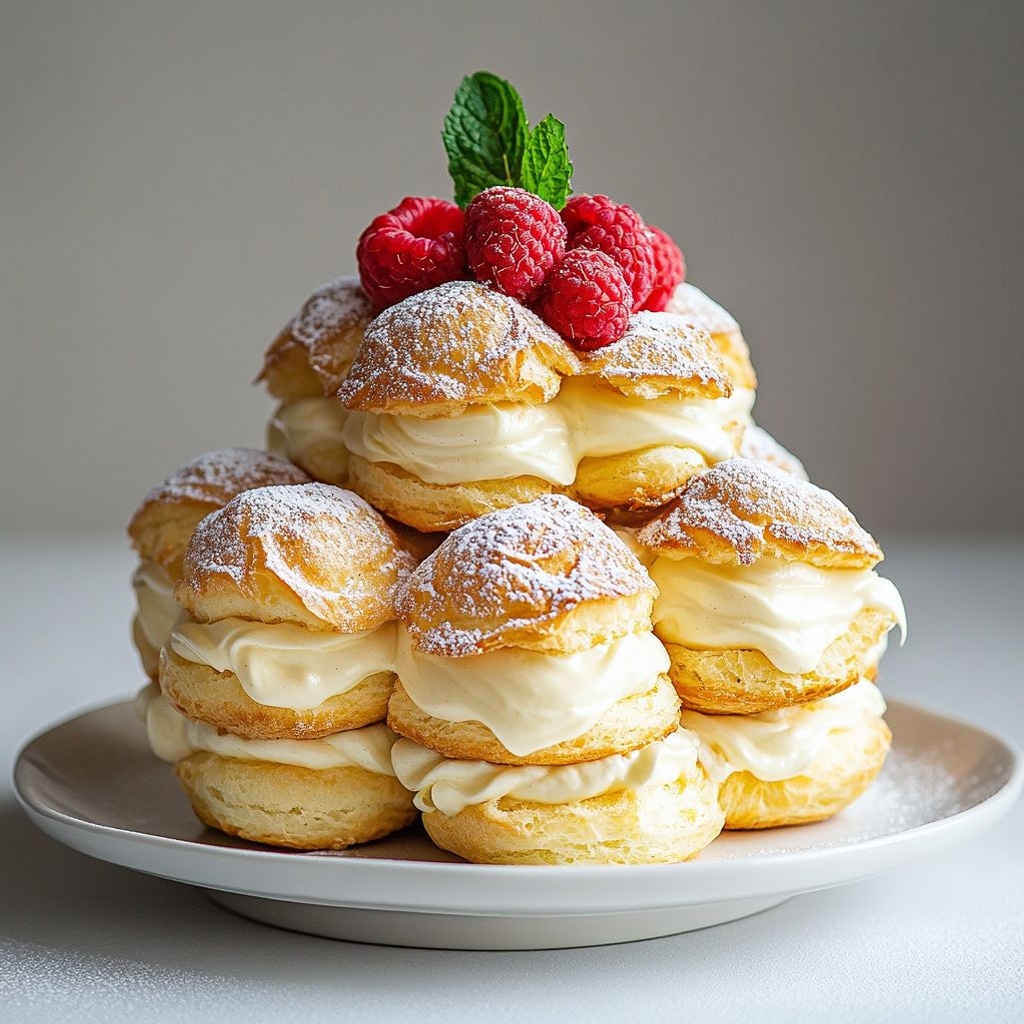
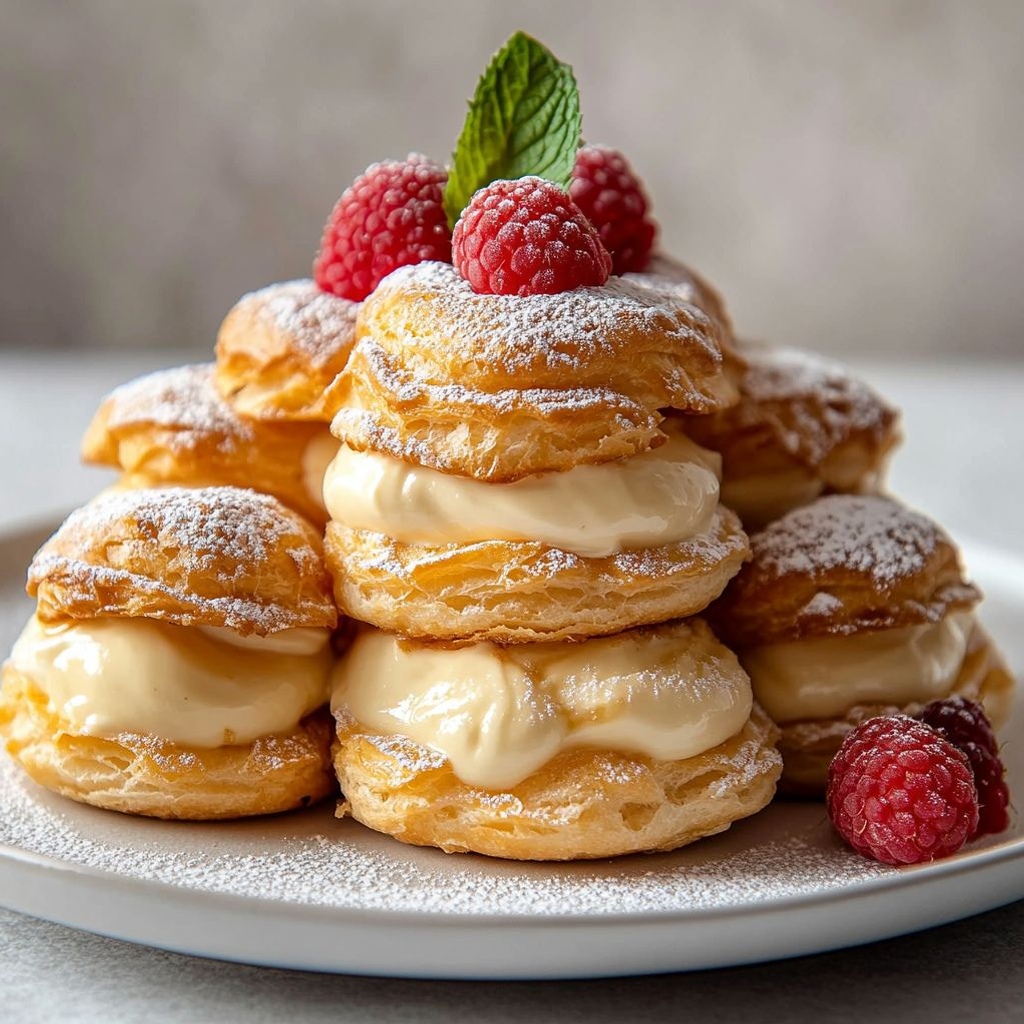
Imagine a dessert that feels like a celebration in every bite: a towering, cloud-light cake built from delicate cream puff shells, each half-shell cradling a silken, vanilla-kissed cream. The outer shells crackle ever so slightly as you slice through, releasing a waft of warm butter, toasted pastry, and the faint sweetness of pastry cream. The first bite delivers a crisp, melt-in-your-mouth shell, then gives way to a lush, airy interior that tastes almost custard-like, with whispers of vanilla, cream, and a kiss of almond. Cream Puff Cake is not merely a dessert; it is a sensory journey—a playful fusion of two beloved classics: the light, air-filled choux pastry and the indulgent, luxurious cream cake. It’s the kind of dessert that can dazzle on a holiday table, yet still feel like a comforting treat on a weeknight when you crave something memorable without being heavy.
What makes this dessert so special is its texture choreography. Picture thousands of miniature orbs of pastry—each puffed shell acting as a little edible bowl—that, when layered and assembled, form a sculpture you can slice into for sharing. The fondant-like sheen of the choux, the delicate crackle when a knife meets the crust, and the unctuous cream that sits like a velvet river inside—these contrasts create a symphony of sensations: the snap, the sigh, the soft sigh of cream slipping across the tongue. It’s a dessert that invites you to slow down, to savor, to flirt with the idea that something seemingly simple can be unexpectedly grand.
Cream Puff Cake is a modern homage to time-honored pastry technique, a dessert that feels both nostalgic and contemporary at once. It speaks to celebrations and quiet moments alike, offering a sense of theater without requiring a theater-level skill set. The indulgence is balanced by lightness: the shells provide a crisp counterpoint to the creamy center, while a gentle sweetness ensures every bite remains elegant rather than indulgent. In short, it’s the kind of dessert that earns a place on the table and lingers in the memory—beautiful enough for a celebration, approachable enough for a weekend bake.
The Story Behind the Dish
Choux pastry, the backbone of the cream puff, has a storied past that begins in France, where culinary pioneers in the 19th century transformed simple flour, fat, and water into something extraordinary. The magic of choux lies in its unusual chemistry: the high moisture content of the dough creates steam during baking, which pushes against a tight, egg-enriched structure to form hollow shells that become crisp on the outside and tender on the inside. Traditionally filled with pastry cream or whipped cream, choux pastries evolved into puff pastries, profiteroles, eclairs, and even delicate petits choux for elegant petits fours. The Cream Puff Cake takes that classic silhouette and reimagines it as a cake, stacking and surrounding the airy cream with an almost “cloud” of choux shells, then gluing it together with smooth, luscious filling.
The origin story of this dessert is less about one chef and more about culinary curiosity—the impulse to turn what is essentially individual pastry spheres into a grand milestone dessert. It’s a celebration of technique and texture: you harness the crispness of a perfectly baked puff, the silkiness of a well-made pastry cream or whipped-cream dream, and the visual drama of a layered confection that looks as though it belongs on a cake pedestal. In many kitchens, this is a dessert that arrives on a table with a small ceremony—slicing through the top to reveal the creamy interior, releasing a plume of vanilla perfume that invites oohs and aahs from guests.
Beyond its lineage, this dish also carries a cultural cadence. It nods to teatime elegance in some cultures, to festive banquets in others, and to the universal love of “filled” pastries in countless households. The beauty of the Cream Puff Cake is that it doesn’t require an elaborate background in pastry arts to appreciate; its lineage is a story you tell with your hands, your timing, and your palate. Each bite becomes a memory of a shared moment around the table—neighbors, family, friends—gathered to celebrate sweetness, texture, and the simple joy of something made with care.
Why You’ll Love This Recipe
- Impressive yet approachable: The dessert looks intricate and sophisticated, but it’s designed for home bakers who love the artistry of pastry without overwhelming steps.
- Textural contrast: Crisp, pale-gold choux shells give way to a luxuriously creamy center, offering a satisfying mouthfeel in every bite.
- Versatile flavor base: A classic vanilla pastry cream forms the backbone, but you can infuse citrus, almond, coffee, or chocolate to tailor it to your occasion.
- Make-ahead friendly: The shells can be prepared in advance, and the cream can be made ahead to assemble when ready to serve, making it ideal for celebrations.
- Celebration-worthy centerpiece: Its visual drama makes it a stunning centerpiece for birthdays, anniversaries, holidays, and special gatherings.
- Balanced sweetness: The airy pastry and creamy interior offer indulgence without heaviness, so you can enjoy generous slices with less post-dessert regret.
- Kid-friendly appeal: The familiar flavors of vanilla and cream are universally loved, making it a dessert that delights both young and old.
- Adaptable for dietary needs: With thoughtful substitutions, it can be made vegetarian, gluten-aware, dairy-conscious, or vegan-friendly, without losing the essence of the dessert.
Flavor Profile & Texture
At the heart of Cream Puff Cake lies a dialogue between textures and flavors. The choux shells, when baked to a pale, honeyed kiss of gold, present a shell that is crisp and delicate, crackling softly under pressure and revealing a hollow, almost airy interior. The exterior carries a subtle richness—a whisper of egg and butter—that lingers with a gentle toasty note. The interior of the shells, though hollow, is not bare; it becomes a perfect cradle for the filling you choose—whether a velvety vanilla pastry cream, a light whipped cream, or a custard-smooth mixture. When the shells are layered and connected, they create a light, architectural sweetness that holds together through knife and fork, maintaining their tenderness even as you slice through.
The filling, typically a pastry cream or a whipped-cream hybrid, embraces vanilla in its most fragrant form. Vanilla bean specks or a bright vanilla essence weave through the cream, delivering a comforting aroma that feels like sunshine and warm milk. If you opt for citrus accents, a hint of lemon or orange zest can lift the filling with a citrus-tresh of brightness, balancing the richness with a citrus-laced tang. A chocolate twist—whether as a glaze, a chocolate-dusted shell, or a cocoa-charged cream—adds depth, turning the Cream Puff Cake into a more dramatic, dessert-of-occasion version. No matter the variation, the core flavor remains clean, sweet, and refined, allowing the texture to stay at the forefront.
In each bite, you’ll notice a delicate contrast: the crisp bite of shell, the creamy, soft center, and a whisper of sweetness that doesn’t shout but lingers. The finish may carry a trace of vanilla, a kiss of dairy (or its vegan substitute), and a faint, almost imperceptible note of caramel from the slight toasting of the shells during baking. It’s a harmony of flavors that feels both timeless and modern, a dessert that invites lingering conversation as much as it invites another slice.
Occasions & Pairings
Cream Puff Cake shines in a range of settings—from intimate family suppers to grand parties. Its visual appeal makes it an ideal centerpiece for celebrations, while its lightness keeps it approachable for weeknight gatherings after a long day. Consider these occasions:
- Holiday feasts: A show-stopping end to a festive meal.
- Birthdays and anniversaries: An elegant alternative to the traditional layered cake.
- Tea parties and bridal showers: A refined, dollhouse-worthy dessert that pairs beautifully with tea or champagne.
- Weeknight celebrations: When you want something special but not overly heavy to end the day.
- Special-occasion brunches: A luxurious, dessert-forward finish that still feels light enough for daytime.
Pairings that enhance the Cream Puff Cake:
- Affogato or espresso: A shot of strong coffee or a scoop of vanilla ice cream complements the vanilla cream beautifully.
- Berry compote or fresh fruit: A bright fruit accompaniment provides a natural counterpoint to the sweetness.
- Dessert wines or sparkling wines: A late-harvest wine or a brut champagne can elevate the celebratory vibe.
- Herbal liqueurs or citrusy cocktails: A subtle lift that harmonizes with the filling’s vanilla accents.
- Light salads and cheese boards: For a more elaborate tasting menu, the cake can act as a sweet finale alongside savory bites.
Tips, Variations & Substitutions
The beauty of Cream Puff Cake lies in its flexibility. You can tailor it to your preferences, dietary needs, and the season without losing the essence of the dish. Here are some ideas and considerations:
Classic and Modern Variations
- Vanilla base: Stick with a traditional vanilla custard or whipped vanilla cream for a timeless result.
- Citrus lift: Add lemon, orange, or grapefruit zest to the filling for a bright, refreshing note that cuts through the sweetness.
- Chocolate sophistication: Incorporate a chocolate ganache glaze or a cocoa-infused cream for a richer profile.
- Espresso infusion: Lightly fold in espresso powder or a coffee liqueur into the cream for a mocha-inspired version.
- Berry breeze: Layer in a berry compote or swirl ripe crushed berries into the cream to echo seasonal fruit.
Dietary Adaptations
- Gluten-free: Use a gluten-free flour blend formulated for choux pastry; the result can still be light and crisp.
- Dairy-free / vegan: Substitute dairy with plant-based milks and butters designed for baking; use a vegan pastry cream (vanilla-scented cashew cream, for instance) and a vegan meringue or whipped topping if desired.
- Low-sugar option: Use a naturally sweetened cream with a hint of vanilla and a fruit compote to provide natural sweetness without refined sugar.
- Lactose-friendly: Keep dairy components but opt for lactose-free milk and butter, which still deliver a rich, familiar flavor.
Regional Twists
- French-inspired refinement: Emphasize vanilla and almond paste in the cream for a nutty, sophisticated finish.
- Italian crema version: Incorporate a hint of mascarpone into the filling for extra silkiness and a subtle tang.
- Matcha or sesame accents: Introduce a green tea powder or toasted sesame through the cream for a modern, international twist.
Storage & Make-Ahead Ideas
A well-planned Cream Puff Cake can be prepared in stages to minimize last-minute stress. Consider the following approaches:
- Make-ahead shells: Bake and cool the choux shells in advance, storing them in an airtight container at room temperature for up to 2 days. If you need to store longer, freeze the shells flat in a single layer, then transfer to a bag; re-crisp them briefly in a low oven before assembly.
- Make-ahead filling: Prepare the pastry cream or whipped cream a day ahead and refrigerate. If you plan to whip cream yourself, keep it separate until you’re ready to assemble to ensure maximum lift and lightness.
- Assembly timing: Assemble the cake shortly before serving for the best texture. If you’re hosting, you can arrange the shells on a large platter and fill as guests arrive, then slice to reveal the creamy interior.
- Storage after assembly: If you must refrigerate an assembled cake, cover loosely to prevent the shells from absorbing excess moisture. Serve within 24 hours for best texture.
Fun Facts & Trivia
Here are a few tidbits that might delight you as you bake and share Cream Puff Cake:
- Choux pastry, despite its simple ingredient list, owes its magic to steam. The moisture inside the dough creates pockets that inflate the shells, giving them their characteristic hollow shape.
- The name “cream puff” is a playful nod to puff pastry’s light, airy nature, but choux can be used to craft a variety of shapes, from spheres to elongated éclairs, each with its own personality.
- One of the oldest pastry traditions has always celebrated cream-filled delights as a symbol of abundance and merriment, a sentiment that is perfectly echoed in the drama and generosity of a cream puff cake design.
- In many culinary cultures, the act of filling a pastry is a social ritual—a moment to gather around the dessert, share stories, and savor the anticipation of that first, luscious bite.
- A well-made cream puff cake rewards patience and precision: allowing the shells to crisp thoroughly, tempering the fillings, and balancing sweetness with acidity or bitterness when adding citrus or chocolate.
Ingredients
- Choux Pastry Shells
- – 1 cup water
→ Water is the moisture base that, with heat, turns to steam to puff the dough. Combine with the butter, salt (and a little sugar if you want a touch of sweetness) and bring to a gentle boil before shaking in the flour. After adding the flour, cook the dough over low heat, stirring constantly, until it forms a smooth, glossy paste that pulls away from the pan ideas of a dry film. Let cool briefly before adding eggs to avoid scrambling them. - – 1/2 cup unsalted butter
→ Butter provides fat for tenderness and flavor and helps create a rich, glossy dough. Melt with the water and salt, then proceed with whisking in the flour. Ensure the butter is fully melted and evenly distributed to avoid lumps in the dough. - – 1/4 teaspoon salt
→ Salt enhances the overall flavor of the pastry and helps balance the sweetness. It also slightly strengthens the dough’s structure during the stirring stage. - – 2 tablespoons granulated sugar
→ A mild sweetness is traditional in choux pastries meant for desserts. It also aids browning during baking. If you prefer a less sweet cake, you can reduce this, but do not omit it entirely for flavor balance. - – 1 cup all-purpose flour
→ Flour provides the starch that turns to steam and creates the puff. It’s added all at once after the liquid comes to a simmer; continue stirring over heat until the dough forms a cohesive ball that dries slightly in the pan. - – 4 large eggs, at room temperature
→ Eggs enrich the dough and give it the lift and structure to hold air in the baked shells. Add them one at a time, beating well after each addition until the dough is smooth and pipeable. The dough should be thick but able to flow when pipe or spread; overworking or under-agitating can affect rise. - Pastry Cream Filling
- – 2 cups whole milk
→ The milk forms the base for a rich, smooth pastry cream. Use cold milk, then whisk in the yolk mixture; you’ll cook it until it thickens into a custard. For extra body, you can substitute half with cream, but this will be richer. - – 1/2 cup granulated sugar
→ Sugar sweetens the custard and helps it set with a creamy texture. Adjust to taste, but remember that the long-simmered pastry cream should remain pleasantly sweet to balance the light, airy choux shells. - – 4 large egg yolks
→ Egg yolks provide rich flavor and a silky, thick texture to the pastry cream. Whisk yolks with a portion of the hot milk to temper, then stir back into the pot. Cook gently until the custard coats the back of a spoon; do not scramble. - – 1/4 cup cornstarch (or 3 tablespoons all-purpose flour)
→ Cornstarch (or flour) is the custard’s thickener. Dilute with a little cold milk if using flour to avoid lumps, then whisk into the hot milk mixture. Cook until very thick and smooth, then remove from heat. - – 2 tablespoons unsalted butter
→ Butter enriches the pastry cream, adding a glossy finish and a luscious mouthfeel. Stir in off the heat until fully melted and integrated for a satiny texture. - – 1 teaspoon pure vanilla extract
→ Vanilla provides a warm, fragrant note that enhances the custard flavor. Use real vanilla extract or vanilla bean paste for deeper aroma. - – Pinch of salt
→ A small pinch sharpens the sweetness and rounds out the custard’s flavor, balancing the richness of the milk and butter. - Whipped Cream Layer (for light layering)
- – 1 cup heavy cream (chilled)
→ Cold heavy cream whips into light, airy peaks that form the delicate layer between pastry and custard. Chill the bowl and beaters for best volume. - – 2–3 tablespoons powdered sugar
→ Powdered sugar sweetens and helps stabilize the whipped cream to a light, fluffy texture without becoming gritty. Add to taste; for a less sweet cake, use the smaller amount. - – 1/2 teaspoon pure vanilla extract
→ Adds a subtle vanilla aroma to the whipped cream, enhancing the overall flavor without overpowering the custard and choux. - – 1 teaspoon unflavored gelatin (optional, 1–2 tablespoons cold water for blooming)
→ For a more stable, slice-friendly whipped cream layer that holds its shape. Bloom the gelatin in cold water, dissolve gently over low heat, and whisk into whipped cream after it holds soft peaks. This is optional but helpful for taller cake layers. - Chocolate Glaze
- – 6 ounces semisweet chocolate, chopped
→ High-quality chocolate yields a glossy, elegant glaze that hardens slightly as it cools. Chop finely for quick melting and a smooth finish. - – 1/2 cup heavy cream
→ Cream warms enough to melt the chocolate into a satin glaze. Do not boil; heat until just steaming, then pour over the chocolate to melt evenly. - – 1 tablespoon unsalted butter
→ Butter adds sheen and a silky mouthfeel to the glaze. Stir into the warm chocolate-cream mixture until glossy and smooth. - Toppings and Assembly
- – Powdered sugar for dusting (optional)
→ A light dusting right before serving adds a professional finish. Keep the cake well chilled until serving to maintain the clean, crisp presentation. - – Fresh berries or edible decorations (optional)
→ Berries add color and a bright contrast to the creamy layers. Arrange just before serving to maintain their freshness and appearance.
Instructions
- Preheat your oven to 425°F (220°C) and line two baking sheets with parchment paper or silicone mats so the choux puffs have a smooth surface to set on and won’t stick during baking.
→ A hot, well-prepared surface promotes even rising and easy removal of the puffs once baked. - In a heavy saucepan, combine 1 cup water, 1/2 cup unsalted butter, 1/4 teaspoon salt, and 2 tablespoons granulated sugar; bring to a vigorous simmer over medium heat so the butter fully melts and the mixture is uniformly hot before the flour is added.
→ The hot liquid infuses fat and salt evenly, while the steam helps the dough form structure as it cooks. - Remove the pan from heat and add 1 cup all-purpose flour all at once; whisk or stir vigorously with a wooden spoon until the dough forms a cohesive ball that pulls away from the sides of the pan and leaves a dry film on the bottom.
→ This step develops the starches that, when heated, convert to steam and lift the shells; avoid lumps by stirring thoroughly and evenly. - Return the dough to the burner and cook over low heat, stirring constantly for about 1 minute to dry out the surface and remove excess moisture that could impede rising.
→ A properly dried dough traps steam during baking, yielding light, hollow interiors essential for cream puffs. - Transfer the dough to a warm but not hot bowl and let it cool for 5–7 minutes so the temperature falls enough to prevent the eggs from scrambling when added.
→ If the dough is too hot, the eggs will cook prematurely, creating a dense texture that won’t rise well. - Beat in 4 large eggs, one at a time, until each egg is fully incorporated before adding the next; the dough should become thick, smooth, and pipeable rather than runny.
→ Proper incorporation maintains the emulsion and air incorporation necessary for a light, airy puff that holds its shape. - Fit a large round tip onto a piping bag and pipe mounds about 1.5 inches (3.8 cm) in diameter onto the prepared sheets, spacing them at least 2 inches apart to allow room for expansion.
→ Uniform circles ensure even baking and consistent puff size, facilitating neat assembly later. - Bake the puffs in the preheated oven at 425°F (220°C) for 15 minutes without opening the door to preserve steam, which drives the rise.
→ Opening the oven interrupts the steam, risking deflation and uneven surfaces. - Reduce the oven temperature to 375°F (190°C) and continue baking for 20–25 minutes, or until the puffs are deep golden and feel hollow when tapped from underneath.
→ The lower heat dries the centers without burning the exteriors, producing crisp shells that hold filling well. - Turn off the oven, crack the door slightly, and let the puffs dry in the residual heat for 10–15 minutes to prevent collapsing from sudden cooling and to finish the drying process.
→ Slow, gradual cooling helps the interior structure set, keeping the shells light and hollow. - Remove the puffs from the oven and transfer them to a wire rack to cool completely before filling.
→ Cooling on a rack prevents condensation from making the bottoms soggy and ensures the shells stay crisp. - Meanwhile, prepare the pastry cream: In a heavy saucepan, heat 2 cups whole milk with a pinch of salt until just below a simmer.
→ Hot milk ensures quick cooking of the yolk mixture and a smooth, glossy custard; cold milk would slow thickening and encourage lumps. - Whisk 4 large egg yolks with 1/2 cup granulated sugar and 1/4 cup cornstarch (or 3 tablespoons all-purpose flour) until pale and smooth.
→ The yolks provide richness, and cornstarch (or flour) thickens the custard to a stable, sliceable texture. - Temper the yolks by slowly whisking in a ladle of the hot milk, then pour the yolk mixture back into the pot and whisk to combine.
→ Tempering prevents scrambling and ensures a velvety custard; add gradually to avoid curdling. - Cook the mixture over medium heat, whisking constantly, until the custard thickly coats the back of a spoon and registers a light nap when drawn across the surface; do not let it boil.
→ This level of thickening indicates proper gelatinization of starch and a stable custard that won’t run when chilled. - Remove from heat, whisk in 2 tablespoons unsalted butter and 1 teaspoon pure vanilla extract, then add a pinch of salt; transfer through a fine sieve into a clean bowl and set over an ice bath or chill until completely cold.
→ Butter enriches the custard’s gloss and mouthfeel, while vanilla provides a warm aroma; straining removes any lumps for a silky texture. - Whip 1 cup cold heavy cream with 2–3 tablespoons powdered sugar and 1/2 teaspoon vanilla extract to soft peaks, using a chilled bowl and beaters for maximum volume.
→ Cold cream whips to a light, stable texture that contrasts with the rich pastry cream in the cake layers. - If you desire extra stability in the whipped cream, bloom 1 teaspoon unflavored gelatin in 1 tablespoon cold water; gently warm to dissolve and whisk into the whipped cream after it has begun to hold soft peaks.
→ Gelatin helps the whipped layer hold its shape when the cake is sliced, especially for taller constructions. - Prepare the chocolate glaze by heating 1/2 cup heavy cream until steaming (do not boil), then pouring it over 6 ounces chopped semisweet chocolate; let stand 2 minutes and whisk until smooth, then whisk in 1 tablespoon unsalted butter until the glaze is glossy.
→ A smooth, glossy glaze adheres evenly to the puffs and sets with a professional sheen as it cools. - Use a serrated knife to slice each choux puff horizontally into a bottom disk and a top cap.
→ Splitting the shells creates a convenient filling surface and helps you build layered texture in the finished cake. - Assemble the cake by placing a bottom puff on a serving plate, piping a ring of pastry cream around the edge of the bottom half, and spooning a generous amount of whipped cream into the center; cap with the top half and repeat to create a multi-layer stack with several puffs.
→ Layering the creams between the puff halves builds the signature cream puff cake structure, with distinct pockets of filling in every bite. - Once the layers are stacked to your preferred height, pour or drizzle the chocolate glaze over the top, letting some flow down the sides for a polished finish.
→ Drizzling creates a visually appealing finish and helps secure the top layer while adding a decadent chocolate note. - Chill the assembled cake for at least 30 minutes to set the glaze and help the layers hold together during slicing.
→ A brief chill helps the fillings set and makes clean slicing easier, reducing squishing of the layers. - Right before serving, dust with a light veil of powdered sugar and arrange fresh berries or edible decorations atop for color and contrasting brightness.
→ Finishing touches elevate presentation and provide a fresh counterpart to the rich creams and chocolate.

Notes
These cream puff cakes are a classic dessert featuring crisp choux shells filled with rich vanilla pastry cream and finished with a glossy chocolate glaze.
You can customize them by adding espresso or orange zest to the pastry cream, or by folding in lightly toasted nuts for texture and depth of flavor.
They freeze well and make a great make-ahead dessert; you can freeze the filled pastries or just the shells and assemble them before serving.
For an extra boost, serve with fresh berries, a drizzle of chocolate sauce, or a dollop of lightly sweetened whipped cream.
Always ensure your eggs are at room temperature and the pastry cream is cooked until thick and coats the back of a spoon for the smoothest, richest filling and the glossy glaze.
Tips
Tips for Cream Puff Cake
Choux pastry shell tips
- Use a heavy-bottom pan to prevent scorching and ensure even heat distribution as you cook the dough.
- Bring water, butter, and salt to a gentle boil, then add the flour all at once. Stir over low heat until the dough forms a smooth, glossy paste that pulls away from the pan and dries slightly.
- Let the dough cool for 5–10 minutes before adding eggs to prevent scrambling. Add eggs one at a time, beating well after each addition until the dough is thick and pipeable.
- If the dough looks too stiff after eggs are incorporated, beat a little longer; if too runny, mix in a touch more flour off the heat and cool a bit before piping again.
- Pipe or scoop evenly sized shells onto parchment; smooth any peaks with a damp finger for uniform rise.
- Bake at a high initial heat to create steam and puff. Keep the oven closed for the first 15–20 minutes to avoid collapsing. The shells should be puffed and dry when done.
- After baking, vent the shells to prevent sogginess by piercing the sides or poking small holes in the bottom; cool completely on a rack before filling.
- Store baked shells airtight at room temperature for 1–2 days or freeze for longer storage.
Pastry cream tips
- Use a heavy-bottom saucepan and whisk yolks with sugar until pale and thick. Temper them with hot milk gradually, then return to the pot.
- Cook over medium-low heat, whisking constantly until the custard thickens enough to coat a spoon; do not let it boil to prevent curdling.
- Strain the custard through a fine sieve to remove any lumps, then whisk in butter, vanilla, and a pinch of salt off the heat for a glossy finish.
- Chill the pastry cream thoroughly and cover the surface with plastic wrap to prevent a skin from forming.
- If using cornstarch, dissolve it in a little cold milk before adding to the hot mixture to avoid lumps; you can substitute 3 tablespoons all-purpose flour if preferred, but cook longer to thicken.
Whipped cream layer tips
- Chill the mixing bowl and whisk, and use cold heavy cream for best volume.
- Whip on medium-high until soft to stiff peaks form, then add powdered sugar and vanilla to taste. Stop just as stiff peaks form to avoid overbeating.
- Optional: bloom 1 teaspoon unflavored gelatin in 2 tablespoons cold water, dissolve over low heat, and whisk into the whipped cream after soft peaks for extra stability—helpful for taller layers.
- Keep whipped cream cold and avoid overwhipping, which can turn it grainy or turn to butter.
Chocolate glaze tips
- Use high-quality semisweet chocolate and finely chop it for quick melting and a smooth glaze.
- Heat the heavy cream to just steaming, not boiling, then pour over the chopped chocolate and let sit a moment before whisking until glossy. Add butter off the heat for extra shine.
- Gently rewarm if the glaze thickens, adding a splash of cream; avoid overheating or introducing moisture to prevent seizing.
- Pour or drizzle the glaze after the shells and fillings are well chilled; aim for a thin, even layer that sets with a smooth sheen.
Assembly and serving tips
- Ensure all components are well chilled before assembly to maintain clean slices and structure.
- For clean cuts, wipe the knife between slices or use a warm, dry knife to slice through the cake neatly.
- Dust with powdered sugar just before serving for a professional finish; keep the cake refrigerated to maintain the crisp choux texture.
- Decorate with fresh berries or edible decorations right before serving to preserve color and texture.
- If stacking layers, align shells evenly and use pastry cream as a glue between layers; a thin layer of whipped cream can provide additional height and tenderness.
- Store components separately if possible and assemble shortly before serving for best texture; the cake will keep in the refrigerator for 2–3 days.
FAQ
What is Cream Puff Cake?
Cream Puff Cake is a dessert built from choux pastry baked into flat sheets or large puffs, layered with a creamy filling such as vanilla pastry cream or whipped cream, and finished with a glaze or dusting of sugar. It resembles a cake made from individual cream puffs, yielding a light, airy texture with a rich filling.
What ingredients do I need for the choux pastry and filling?
For the pastry (choux):
- Water and/or milk, unsalted butter, sugar (optional), and a pinch of salt
- All-purpose flour (or a gluten-free blend)
- Eggs (usually 3–4, room temperature)
For the filling (choose one):
- Vanilla pastry cream (eggs, milk, sugar, cornstarch, vanilla)
- Whipped cream (heavy cream, sugar, vanilla; stabilized if desired)
- Mascarpone or cream cheese filling for a richer finish
Optional toppings: chocolate glaze or ganache, powdered sugar, fresh fruit, or shaved chocolate.
What equipment do I need?
- Heavy-bottom saucepan and wooden spoon
- Mixing bowls and whisk (and electric mixer if desired)
- Baking sheet and parchment paper
- Piping bag with a large round or star tip (optional)
- Cooling rack and sharp knife (to trim shells)
- Measuring cups/spoons and a thermometer if you use one
How do I bake and assemble the Cream Puff Cake?
Steps (overview):
- Make the choux dough: heat liquid with butter and salt, then stir in flour until a smooth ball forms; cook briefly to dry out the dough; cool slightly.
- Beat in eggs one at a time until glossy and thick.
- Pipe or spoon dough onto a parchment-lined sheet into two or more flat sheets or into puffs; bake at a high temperature until puffed and golden, then cool completely.
- Prepare the filling (pastry cream or whipped cream).
- Assemble: spread filling between layers or pipe onto the top of shells, then cover with a second layer or top shell; finish with glaze or dusting.
How should I bake the shells to ensure they puff properly?
Tips: preheat the oven fully; bake at 425°F (220°C) for 20–25 minutes, then lower to 375°F (190°C) for 10–15 minutes to dry out the shells without browning too much. Do not open the oven during the first 15–20 minutes to keep the steam in; venting can be done after that time if needed.
How do I store and serve Cream Puff Cake?
Unfilled shells can be stored in an airtight container at room temperature for up to 2 days (refrigeration can dry them out). Fill just before serving. Filled cakes should be refrigerated and consumed within 2–3 days. Let chilled fillings come to room temperature for easier spreading before serving.
Can I make this gluten-free or dairy-free?
Yes, with substitutions:
- Gluten-free: use a gluten-free flour blend plus a binding agent like xanthan gum (if not already included). You may need extra eggs for structure and more liquid to hydrate the dough.
- Dairy-free: replace butter with a dairy-free butter/margarine alternative and use plant-based milk in the pastry cream. The dough will still rely on eggs for structure.
What about fillings besides classic pastry cream?
You can try:
- Bright vanilla pastry cream, chocolate pastry cream, or custard
- Stabilized whipped cream or whipped cream folded with a bit of cream cheese
- Mascarpone filling or lemon curd for tang
Can I freeze Cream Puff Cake or its components?
Yes:
- Unfilled choux shells freeze well for up to 1 month; bake and cool, then freeze in a sealed container. Thaw at room temperature before filling.
- Filled shells are best fresh, but you can freeze assembled portions without glaze for a short time and re-glaze after thawing.
How can I decorate or customize the finish?
Suggestions:
- Drizzle with chocolate ganache or white chocolate
- Sift powdered sugar on top, or cocoa powder for contrast
- Top with fresh berries or fruit compote
- Sprinkle with chopped nuts or citrus zest for extra flavor
Can I make mini versions or a sheet cake version?
Yes. For minis, pipe small rounds or ovals and bake them as individual puffs on a sheet; for a sheet cake, bake a larger sheet of choux and cut into layers before filling. Adjust filling quantity accordingly and ensure small shells are fully dried before filling.