Introduction / Hook
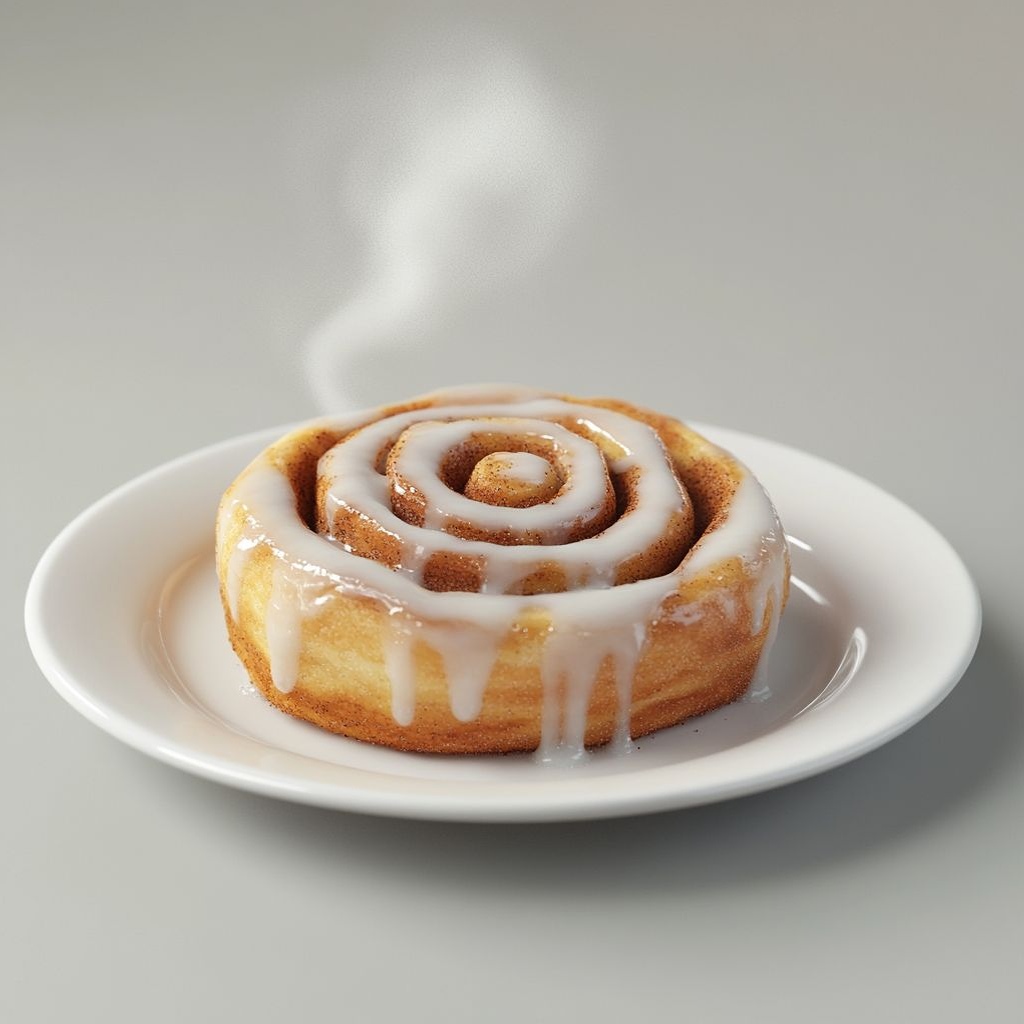
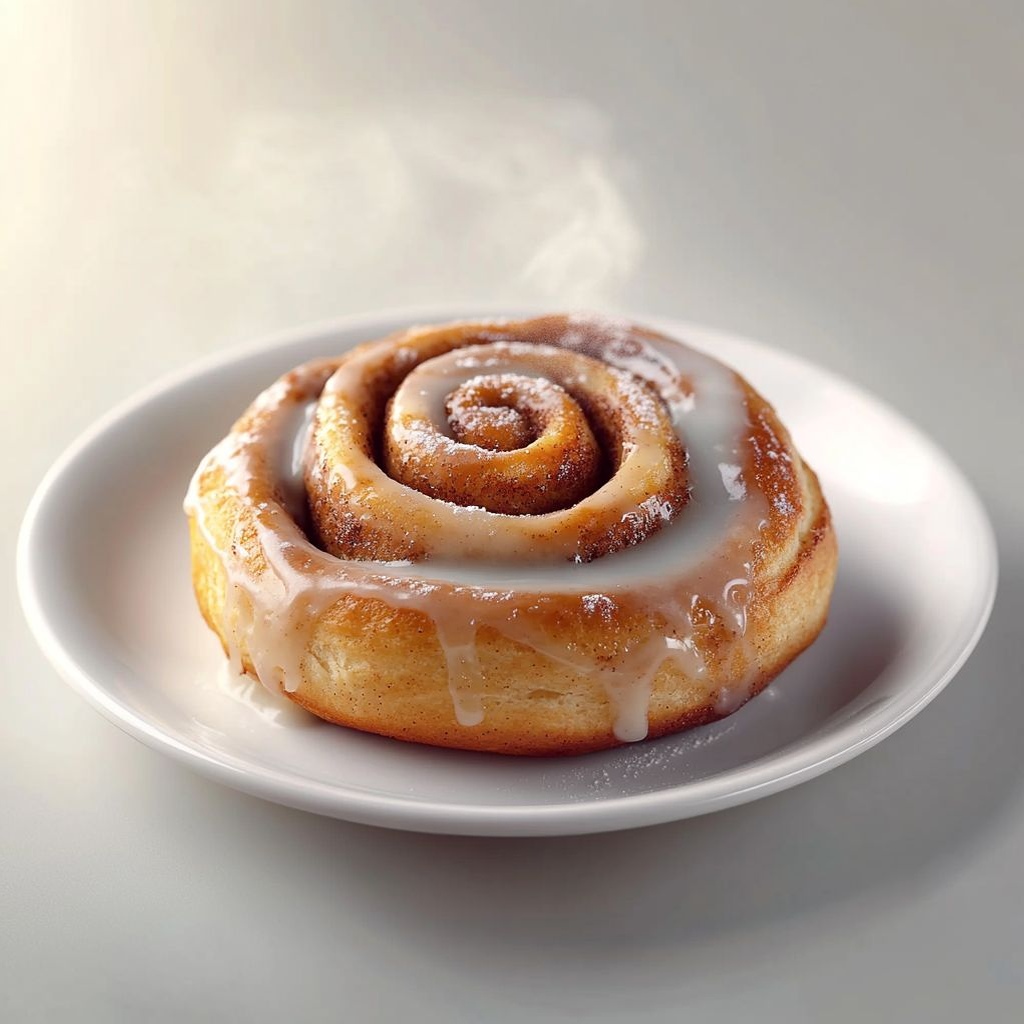
Imagine a morning that begins with the warm, cinnamon-scented air curling through your kitchen, as if a cozy bakery has opened its doors just for you. The Classic Cinnamon Roll is not merely a pastry; it’s a doorway to comfort, a soft, pillowy spiral of yeasted dough that hides treasure within—tunnels of cinnamon sweetness that melt on the tongue, crowned by a glossy, indulgent glaze. The moment you slice into one, you release a sigh of satisfaction as the steam carries notes of butter, vanilla, and caramelized sugar. It’s the kind of treat that makes weekends feel like holidays and weeknights feel a little brighter as you gather around the table with a mug of coffee or a warm cup of tea. This isn’t just breakfast; it’s an invitation to slow down, to savor, and to share. The Classic Cinnamon Roll has a way of turning a simple moment into a memory—one that lingers long after the last bite.
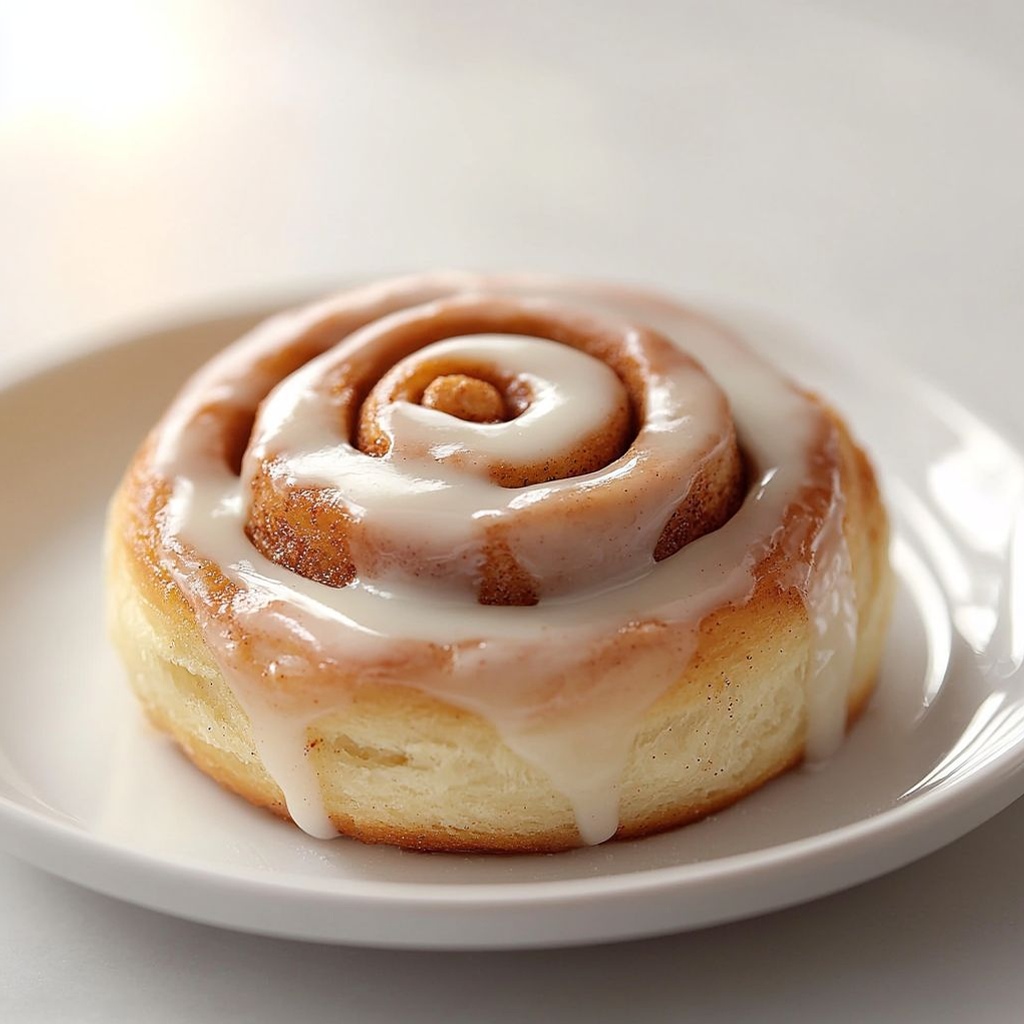
Cinnamon rolls have a magnetic pull because they balance warmth and luxury in every bite. The dough, soft and supple, yields to gentle pressure while maintaining a delicate chew. The cinnamon-sugar filling creates caramelized ribbons that reveal themselves with each forkful, releasing a scent that lingers on skin, on hair, on the rooms you’ve walked through a dozen times. The glaze—whether you prefer a silky cream-cheese finish or a smoother vanilla butter glaze—glosses the surface with a subtle sweetness that feels both indulgent and comforting. This classic rendition honors those contrasts: the light springiness of the dough against the deep, toasty notes of cinnamon; the hush of the morning’s quiet, punctuated by the joyous pull of a warm pastry. It’s a recipe that respects tradition while inviting personal touches, making it perfect for bakers of all levels to make their own.
As you read on, you’ll discover not only how this beloved roll came to be but also why it remains a staple in homes around the world. It’s a dish that travels well in memory—from a grandmother’s kitchen to a friend’s brunch table—yet it remains eternally fresh because every batch you bake becomes its own little story of scent, texture, and joy. Whether you’re envisioning a celebratory weekend brunch, a cozy holiday morning, or a simple weekday indulgence that feels like a small celebration, the Classic Cinnamon Roll offers a universal language of sweetness and warmth. Let this description guide you through the aroma-filled journey, and imagine the moment you pull apart the first roll and reveal the tender layers within.
The Story Behind the Dish
Cinnamon rolls sit at the crossroads of European comfort food and American innovation. Their ancestry traces to spiced, sweetened yeasted breads common in Northern and Central Europe, where cinnamon, cardamom, and brown sugar were treasured flavors long before industrial kitchens and grocery-store staples existed. The version most people recognize as a classic—soft dough spiraled with a cinnamon-sugar filling and crowned with a glossy glaze—began to flourish across North America in the 19th and 20th centuries. In many households, these rolls became a Sunday morning ritual, a way to celebrate the week’s end with a scent that invites the entire family to the table.
In Sweden, the beloved kanelbullar (cinnamon buns) are often scented with cardamom and rolled into fragrant, tender spirals. The Swedish approach emphasizes a delicate balance of spice and dough, and it’s easy to see how that sensibility influenced American cinnamon rolls: a sturdy, enriched dough that can stand up to generous cinnamon sweetness while staying soft and moist inside. The American iteration—often larger, richer, and glazed—took root in bakeries and households across the United States, each region adding its own touch: a tangy cream-cheese frosting here, a lighter vanilla glaze there, a sprinkle of chopped nuts, or even a drizzle of maple for a seasonal twist.
Beyond the kitchen, cinnamon rolls carry a cultural memory. They’re the kind of pastry that demonstrates hospitality—the way a kitchen fills with aroma as soon as the dough warms, inviting friends and family to linger longer at the table. They are adaptable, forgiving, and deeply comforting, which is why they endure as a favorite for celebrations, birthdays, and simple Sunday mornings alike. The Classic Cinnamon Roll is a reaffirmation of that tradition: a faithful homage to time-tested technique, married with the universal appeal of cinnamon’s comforting warmth.
A few fun facts help illuminate their place in culinary lore. Cinnamon itself is among the oldest spices known to humankind, once treasured by ancient civilizations and traded across vast networks. The cinnamon roll’s popularity in the United States surged with the rise of family bakeries and later large-scale pastry shops, where the dramatic spiral and the promise of a decadent glaze captured the imagination of hungry mornings. Some chains popularized a specific style of glaze and a generously sized roll, turning the cinnamon roll into a quintessential brunch symbol. Yet, at heart, every roll remains a personal creation—an edible canvas for the baker’s touch, whether that means a thicker glaze, a dash of orange zest, or a handful of toasted pecans folded into the filling.
Why You’ll Love This Recipe
- Easy, comforting morning ritual: The aroma and texture create a welcoming atmosphere that makes everyone smile.
- Versatile for gatherings: Perfect for weekend brunches, holidays, or spontaneous celebrations, and easy to scale up.
- Make-ahead friendly: The dough and shaping can be prepared ahead of time, freeing up your day for lingering conversations and coffee refills.
- Customizable glaze: Choose a creamy cream cheese finish, a smooth vanilla butter glaze, or a lighter milk-based version to suit your preferences.
- Family-friendly appeal: Sweet but balanced, with comforting flavors that appeal to both kids and adults alike.
- Customizable filling: While traditional, the cinnamon-sugar filling welcomes optional add-ins like raisins, chopped nuts, or citrus zest for brightness.
- Adaptable to dietary needs: With the right flour blends and dairy-free substitutions, you can craft a version that suits dairy-free or gluten-free diets without losing the comforting spirit.
Flavor Profile & Texture
The Classic Cinnamon Roll is a symphony of textures and flavors that play off one another in delightful harmony. The dough is enriched with butter and sometimes eggs, giving it a soft, almost cloud-like crumb that remains tender after baking. When you pull apart a roll, you reveal hidden ribbons of cinnamon-sugar caramelization that have absorbed just the right amount of moisture from the dough—enough to stay juicy but not so much that the roll feels heavy. The cinnamon contributes a warm, peppery sweetness, often enhanced by a hint of vanilla that brings the flavor forward without overshadowing it.
The outer surface, once glazed, offers a delicate gloss and a gentle snap before a melt-in-your-mouth interior yields. The glaze itself—whether a rich, tangy cream-cheese frosting or a silky, buttery vanilla glaze—adds elegance and a finishing sweetness that ties the whole piece together. The contrast between the slightly crisp top and the soft, springy layers inside creates a satisfying bite that lingers on the palate with hints of caramel, cream, and a comforting warmth. If you’re fortunate enough to include nuts, their roasted, nutty notes add texture and a subtle earthy balance to the sweetness.
Occasions & Pairings
The beauty of the Classic Cinnamon Roll is that it shines in both casual and special settings. It’s a star at weekend brunches when friends linger over mugs of coffee and conversation. It makes holiday mornings feel extra festive, the kind of sweet centerpiece that can be sliced and served to a hungry crowd. It’s also a thoughtful weekend treat for family gatherings, a cozy gift for someone who’s under the weather, or a simple indulgence to celebrate an ordinary Tuesday.
Pair this pastry with beverages that complement its warmth: a bold cup of coffee, an espresso, or a chai latte—the spices in the drink echo the spice in the roll. For a lighter pairing, serve with a glass of cold milk or a small bowl of fresh fruit to balance the richness. Side dishes that work well include a fresh fruit compote, a dollop of yogurt with honey, or a small dessert offering like vanilla ice cream on the side for those who want a contrast of temperatures.
Tips, Variations & Substitutions
- Make it dairy-friendly or vegan: Use plant-based milk and a dairy-free butter substitute for the dough, and choose a vegan cream cheese frosting or a dairy-free vanilla glaze.
- Gluten-free option: Replace with a trusted gluten-free all-purpose flour blend that includes xanthan gum, and monitor moisture to keep the dough soft and pliable.
- Alternative flavor boosters: Add a pinch of cardamom or nutmeg to the dough for depth; zest a small amount of orange or lemon into the filling for brightness.
- Chewy add-ins: Fold in chopped toasted pecans or walnuts, or soak raisins in warm water or orange juice to plump them and add a fruity note.
- Texture twists: For a lighter roll, reduce the fat in the dough slightly and increase the rise time; for a richer finish, brush with melted butter just before serving (if not dairy-free).
- Make-ahead options: Prepare the dough and shape the rolls up to the point of the final rise, then refrigerate overnight. In the morning, let them come to room temperature and finish rising before baking for a weekend-ready brunch.
- Storage-friendly variations: Unbaked rollsWrapped well and chilled can be baked the next day; baked rolls can be cooled, then stored in the fridge for up to 2 days and gently reheated to restore softness.
- Sweetness adjustments: If you prefer a lighter sweetness, apply a thinner glaze or use a glaze with a higher ratio of milk to sugar; for a dessert-like finish, use a richer cream cheese frosting with a touch of vanilla and a pinch of salt.
- Regional twists: Add a splash of cinnamon-cardamom blend and a touch of vanilla to the glaze for a Scandinavian-inspired version; or glaze with a honey-lemon drizzle for a bright, citrusy note.
Storage & Make-Ahead Ideas
Cinnamon rolls lend themselves wonderfully to planning ahead. If you’re entertaining or simply want a stress-free morning, you can prepare a good portion in advance:
- Unbaked dough and shaping: Assemble the rolls, arrange them in a baking dish, and cover tightly. Refrigerate for up to 24 hours. In the morning, remove from the fridge and allow them to come to room temperature and complete the final rise before baking.
- Unbaked in the freezer: After shaping, this dough can be wrapped well and frozen for up to 1-2 months. Thaw overnight in the fridge and then bring to room temperature and rise before baking.
- Baked leftovers: Store cooled rolls in an airtight container in the refrigerator for up to 2-3 days. Reheat gently in a 300°F (150°C) oven for a few minutes or warm in a low oven until the glaze glistens again.
- Freezing glazed rolls: It’s best to freeze unglazed rolls or freeze the rolls after baking and completely cooling, then reheat with a light glaze or frosting drizzled on top for a fresh finish.
- Make-ahead glaze: Prepare your glaze separately so you can apply or adjust sweetness as needed after baking, ensuring the glaze remains creamy and not overly stiff when reheated.
Fun Facts & Trivia (Optional)
- The term “cinnamon roll” encompasses a broad family of pastries worldwide, with regional twists that reflect local flavors, ingredients, and traditions.
- Cinnamon was once so valuable that it was used as a form of currency in ancient times; today it fills kitchens with its comforting aroma rather than funding empires.
- The Swedish kanelbulle, with their cardamom-scented dough, highlight a classic balance between spice and sweetness that resonates in many American versions today.
- Cinnabon, arguably the most famous modern cinnamon roll brand, began in 1985 in Seattle and popularized the visually striking, generously glazed roll that many people associate with the concept itself.
- Beyond breakfast, cinnamon rolls have appeared in desserts, brunch menus, and even as a nostalgic comfort food for holidays and family gatherings—proof of their universal appeal and ability to evoke warm memories.
Ingredients
Dough
- 4 cups all-purpose flour (plus more for dusting)
→ The flour provides the main structure and chew of the cinnamon roll. Use all-purpose for a balanced crumb; avoid too much extra flour as it can make the dough dry. If you prefer a chewier texture, you can substitute a portion with bread flour. Sift or whisk lightly to distribute any clumps before adding liquids for a smoother dough. - 2 1/4 teaspoons active dry yeast (1 standard packet)
→ Yeast acts as the leavening agent, producing carbon dioxide that makes the dough rise and creates a light, fluffy interior. To ensure reliable rise, proof the yeast in warm milk with a pinch of sugar until foamy (about 5–10 minutes). If it doesn’t foam, your yeast may be dead or the milk temperature too high; start again with fresh yeast and properly warmed liquid. - 1/4 cup granulated sugar
→ Provides a quick feed for the yeast and contributes a touch of sweetness to the dough. Dissolves into the liquid with the yeast during fermentation, aiding a uniform crumb. If you want a softer roll, you can slightly reduce or increase this amount based on your taste. - 1/2 cup warm milk (about 110°F / 43°C)
→ Hydrates the dough and activates the yeast; the temperature should be warm, not hot, to avoid killing the yeast. If using a dairy-free milk, choose an unsweetened version and maintain the same temperature for reliable fermentation. You may substitute with water, but the dough will be less rich. - 1/4 cup unsalted butter, melted and cooled
→ Adds richness and tenderness to the dough, helping to create a soft, pillowy crumb. The butter should be warm—not hot—to avoid cooking the egg or killing the yeast when mixing. Let it cool slightly so it blends evenly with the other liquids without causing clumps. - 1 large egg
→ Acts as a binder and contributes moisture and richness to the dough. Bring the egg to room temperature for better emulsification and a smoother dough; this helps with even gluten development and a cohesive crumb. - 1/2 teaspoon salt
→ Enhances flavor and strengthens gluten structure a bit, which improves dough elasticity. It also helps balance the sweetness of the filling. Dissolve the salt with the flour to ensure even distribution in the dough. - 1 teaspoon vanilla extract (optional)
→ Adds a warm, fragrant depth to the dough that complements the cinnamon filling. Use a good-quality vanilla; if you omit it, the rolls will still be delicious, but with a more straightforward flavor profile. Add to the wet ingredients for even distribution.
Filling
- 1/2 cup unsalted butter, softened
→ Creates a smooth, fat-rich base that carries the cinnamon-sugar filling. Softened butter spreads evenly across the dough without tearing it; if your butter is too cold, it won’t spread well. Let it sit at room temperature until pliable but not melted. - 1 cup light brown sugar, packed
→ Provides moisture, caramel flavor, and sweetness that caramelizes during baking for the signature swirl. Packing ensures a dense, even layer in the roll; if you prefer a milder sweetness, you can reduce slightly or substitute with white sugar for a lighter color. - 2–3 tablespoons ground cinnamon
→ The star spice of the filling, delivering the classic cinnamon roll flavor. Measure by spoon and level to avoid a concentrated or uneven swirl. For a stronger aroma, toast the cinnamon quickly in a dry pan for a moment, then cool before using, though this is optional. - Pinch of salt
→ Balances the sweetness and enhances the cinnamon’s flavor in the filling. Use just a pinch to keep the filling tasting balanced rather than sweet-tasting.
Pan Prep
- 2 teaspoons unsalted butter, for greasing the baking dish
→ Prevents the rolls from sticking to the pan and helps with even removal after baking. Use a pastry brush to coat the bottom and sides evenly, or line the pan with parchment for extra assurance of easy release and clean edges.
Icing (Glaze)
- 1 cup powdered sugar
→ Provides the classic smooth glaze that finishes the rolls. Its fine texture dissolves quickly into milk, creating a creamy glaze. If you want a thicker glaze, use less milk; for a runnier glaze, add a touch more milk and whisk until smooth. - 2–3 tablespoons milk or heavy cream
→ Adjusts glaze consistency. Start with 2 tablespoons and add more gradually until you reach your desired thickness. Use whole milk for a balanced glaze; heavy cream yields a richer, creamier finish. - 1/2 teaspoon vanilla extract
→ Adds aroma and a subtle sweetness to the glaze; optional but recommended for depth of flavor. If omitting, you can replace with a pinch of almond extract for a different nuance. - Pinch of salt
→ Enhances sweetness and helps the glaze taste more rounded. A tiny pinch is enough; avoid oversalting, or the glaze may taste salty against the sugar.
Optional Add-ins
- 1/2 cup raisins or chopped dates (optional)
→ Introduces chewy pockets of extra sweetness; for best texture, soak very dry raisins or dates in warm water for 5–10 minutes, then drain well before mixing into the filling to keep the rolls moist and evenly sweetened. - 1/2 cup chopped walnuts or pecans (optional)
→ Adds a crunchy, toasty contrast to the soft rolls. Toast the nuts lightly in a dry skillet for 2–3 minutes to heighten flavor, then cool before incorporating into the filling or sprinkling on top before baking.
Instructions
- Proof the yeast in the warm milk with a pinch of sugar until foamy, about 5–10 minutes.
→ This verifies the yeast is active and capable of leavening; if no foam forms, discard and repeat with fresh yeast and properly warmed liquid (105–110°F/40–43°C) to ensure reliable rise. - Whisk together the flour, granulated sugar, and salt in a large mixing bowl to distribute ingredients evenly and prevent clumps from forming in the dough.
→ Even distribution of dry ingredients promotes uniform gluten development and a consistent crumb throughout the rolls. - In a separate bowl, whisk the warm milk, melted cooled butter, egg, and vanilla (if using) until fully combined, ensuring the butter is not hot enough to scramble the egg.
→ Properly tempered liquids prevent oily patches or cooked eggs in the dough, contributing to a smooth, cohesive mixture. - Pour the wet mixture into the bowl with the dry ingredients and mix until a shaggy dough forms, then switch to kneading when it becomes too sticky to continue stirring.
→ Combining until a shaggy mass ensures the flour harnesses moisture uniformly, setting up for a strong gluten network during kneading. - Turn the dough onto a lightly floured work surface and knead for 8–10 minutes (or 5–6 minutes in a stand mixer on low), until the dough is smooth, elastic, and passes the windowpane test.
→ Gluten development gives the rolls their characteristic chew and structure; the windowpane test confirms elasticity without tearing. - Place the dough in a lightly oiled bowl, cover with plastic wrap or a damp towel, and let rise in a warm, draft-free spot until doubled in size, about 60–75 minutes.
→ A proper first rise contributes to a light, airy crumb; warmth and moisture encourage active fermentation and even expansion of the dough. - While the dough is rising, grease a 9×13-inch baking dish with 2 teaspoons unsalted butter (or line with parchment) to ensure easy release and even browning.
→ Coating the pan prevents sticking and helps keep the rolls intact when you lift them out after baking; parchment provides extra insurance for clean edges. - Prepare the filling by softening 1/2 cup butter to a spreadable stage, then stir in 1 cup packed light brown sugar, 2–3 tablespoons ground cinnamon, and a pinch of salt until evenly combined.
→ A smooth, evenly seasoned filling ensures consistent sweetness and aroma in every swirl; the salt helps balance the cinnamon’s bite. - Roll the dough out on a lightly floured surface into a rectangle about 16 by 12 inches and roughly 1/4 inch thick, rotating as needed to maintain an even thickness across the sheet.
→ A uniform sheet thickness guarantees even spreading of the filling and uniform slice widths, which yields evenly sized rolls. - Spread the filling evenly over the dough rectangle, leaving a 1/2-inch border on the far edge; if using optional add-ins, scatter 1/2 cup raisins or chopped dates and/or 1/2 cup chopped nuts over the filling before rolling.
→ An even layer prevents gaps in flavor and texture; add-ins should be distributed evenly to avoid concentrated bites. - Roll the dough tightly from the long edge to form a log, seam-side down, and pinch the seam to seal; chill the log briefly if it’s too soft to cut cleanly.
→ A tight roll prevents unraveling during slicing and baking, and chilling briefly helps create clean, even slices. - Using a sharp serrated knife or dental floss, cut the log into 12 equal slices and arrange them cut-side up in the prepared pan, spacing them about 1 inch apart for room to rise.
→ Even spacing ensures the centers bake evenly and the rolls don’t merge into a single slab. - Place the pan in a warm area and let the rolls undergo a second rise for 30–45 minutes, until they look plump and puffy and have visibly risen toward the edges of the pan.
→ A second rise expands the internal air pockets, producing a light, fluffy interior after baking. - While the rolls rise, preheat your oven to 350°F (175°C) to ensure immediate, even baking as soon as the rolls are ready.
→ A fully preheated oven ensures consistent temperature throughout baking, preventing under- or over-browning and aiding proper set of the structure. - Bake the cinnamon rolls in the preheated oven for 25–30 minutes, rotating the pan halfway through for even browning, until the tops are golden and the centers are set.
→ Proper browning indicates caramelization of the filling and a fully cooked interior; rotating prevents hot spots from scorching one side. - While the rolls bake, whisk together 1 cup powdered sugar, 2–3 tablespoons milk or heavy cream, 1/2 teaspoon vanilla extract, and a pinch of salt to form a smooth glaze, adjusting thickness with more milk or sugar as needed.
→ A glossy glaze clings to the warm rolls and provides the classic sweet finish; adding vanilla enhances depth of flavor, while salt enhances balance. - Cool the rolls in the pan for about 5–10 minutes, then drape with a light glaze over the top while they are still warm to allow the sugar to melt into the surface and create a glossy finish.
→ A brief rest helps set the structure for easier slicing and allows the filling to rehydrate the crumb; glazing while warm ensures a smooth, cohesive coat. - Optionally, if using raisins or chopped dates, ensure they were soaked briefly in warm water and drained well before mixing into the filling so they stay plump without releasing excess moisture into the dough.
→ Soaking plumps dried fruit for even distribution and prevents them from drawing moisture from the dough during proofing, which can affect texture. - Let the glazed cinnamon rolls rest a few minutes longer if you prefer a thicker glaze, or serve immediately with extra glaze on the side for dipping and an extra-sweet finish.
→ Resting the glaze helps it set slightly and prevents it from sliding off the rolls too quickly; hot rolls will absorb more glaze, yielding a richer finish.
Notes
These classic cinnamon rolls are soft, tender, and generously filled with a warm cinnamon-sugar swirl, finished with a glossy vanilla glaze. To ensure a reliable rise, proof the 2¼ teaspoons active dry yeast in warm milk (about 110°F / 43°C) with a pinch of sugar until foamy, then whisk this into the wet ingredients. Keep temperatures steady; use warm but not hot liquids to protect the yeast and develop a balanced crumb. When making the dough, combine the flour, salt, and sugar, then mix in the melted butter, egg, vanilla, and the yeast mixture; knead until the dough is smooth and elastic, about 8–10 minutes by hand or 5–6 minutes in a mixer with a dough hook. If the dough seems sticky, add flour in small increments; if it’s dry, add a teaspoon of water or milk at a time. After the first rise, roll the dough into a rectangle roughly 16 by 9 inches and spread with softened butter for the filling, then sprinkle the brown sugar, cinnamon, and a pinch of salt and spread evenly. Roll tightly along the long edge, seal the seam, and cut into even slices; arrange in a buttered pan. Let the rolls rise again in a warm, draft-free spot until puffy, then bake until tops are golden and the filling bubbles. Prepare the glaze by whisking powdered sugar with milk or cream, vanilla, and a tiny pinch of salt to achieve a pourable, glossy finish; drizzle while warm. For optional add-ins, fold in raisins or chopped nuts or scatter on top before baking. Make-ahead options: shape the rolls and refrigerate overnight to bake the next day, or freeze unbaked rolls for longer storage—thaw and proof before baking. If dairy or eggs are a concern, adapt with plant-based milk and vegan butter; the dough will still rise well with proper yeast activity. Finally, to keep them tender, avoid overworking the dough and allow cooling on a wire rack to prevent sogginess.
Tips
Dough tips
- Temperature matters: keep ingredients around 21–24°C (70–75°F) when mixing and kneading. If liquids are too hot, you’ll kill the yeast; if too cold, the dough may not rise well.
- Proofing the yeast: to ensure a reliable rise, proof the yeast in warm milk with a pinch of sugar until foamy (about 5–10 minutes). If it doesn’t foam, start over with fresh yeast and properly warmed liquid.
- Mixing method: whisk the dry ingredients, then whisk the wet ingredients separately and combine. This helps emulsify the egg and butter for a smoother dough crumb.
- Kneading and texture: knead until the dough is smooth and elastic (about 8–10 minutes by hand or 5–7 minutes with a stand mixer). If it’s too sticky, add flour in small increments; if you add too much flour, the rolls can become dry.
- Sticky dough handling: lightly oil hands and the work surface to prevent sticking. You can also oil the dough slightly as you roll it out to keep it manageable.
- Rising: let the dough rise in a warm, draft-free spot until doubled in size. If you’re short on time, you can speed this up by placing the bowl in a warm oven with the light on, but keep an eye on it to avoid overproofing.
- Substitutions: if using bread flour for extra chew, you may need a touch less liquid. Start with the same liquid amount and adjust as needed for a soft, tacky dough.
- Temperature of fats and eggs: bring the egg to room temperature and allow butter to cool slightly after melting. Very hot liquid or fat can affect gluten development and texture.
Filling tips
- Butter consistency: use softened butter that spreads easily. If it’s too cold, it won’t distribute evenly and can tear the dough when spreading.
- Brown sugar: packing the brown sugar ensures an even, moist filling. If you use loosely packed sugar, the distribution may be uneven and the swirl less rich.
- Cinnamon amount: 2–3 tablespoons is typical; for stronger aroma, briefly toast the cinnamon in a dry pan for 15–30 seconds, then cool before using. This intensifies flavor without adding moisture.
- Salt in filling: a pinch balances sweetness and enhances cinnamon flavor. Mix evenly to avoid salty pockets.
- Even spreading and rolling: spread filling uniformly to the edges. Leave a small margin on the far edge to seal properly when rolling.
Pan prep and baking tips
- Greasing: butter the pan or line with parchment to prevent sticking. This also makes clean slicing easier.
- Second rise in pan: after cutting the rolls, place them close together in the pan so they support each other as they rise, helping them stay soft and tall.
- Covering: loosely cover with plastic wrap or a damp towel during the final rise to prevent a dry surface.
- Baking: bake until the edges are lightly golden and a toothpick inserted in the center comes out clean. Rotate the pan halfway through for even browning.
- Avoid overbaking: cinnamon rolls can dry out quickly; start checking a few minutes before the stated time if your oven runs hot.
- Cooling and setting: allow rolls to rest 10–15 minutes in the pan before glazing so the filling sets enough to slice neatly.
Icing tips
- Powdered sugar: sift to prevent grainy texture in the glaze. If you don’t have a sifter, whisk vigorously to remove lumps.
- Glaze consistency: start with 2 tablespoons milk or cream and add more gradually until the glaze reaches your desired thickness. Use less liquid for a thicker glaze; more for a drippier glaze.
- Flavor pairings: vanilla adds aroma; you can substitute with almond extract (a small amount) for a different nuance. If omitting, a touch of salt helps balance sweetness.
- Application temp: glaze rolls when they’re warm but not piping hot; glaze sets nicely as the rolls cool.
- Salt in glaze: a tiny pinch enhances sweetness and depth, but avoid oversalting, which can make the glaze taste salty against the sugar.
Optional add-ins tips
- Raisins or dates: soak very dry raisins or dates in warm water for 5–10 minutes, then drain well before mixing into the filling to keep moisture even and avoid dry bites.
- Nuts: toast chopped walnuts or pecans lightly in a dry skillet for 2–3 minutes to heighten aroma; cool before adding to the filling or sprinkling on top.
- Distribution: mix add-ins evenly into the filling so every bite has balanced texture and sweetness.
FAQ
What ingredients do I need for classic cinnamon rolls?
- Dough: 3 1/2–4 cups all-purpose flour, 1/4 cup granulated sugar, 2 1/4 tsp active dry yeast, 3/4 cup warm milk, 1/4 cup unsalted butter (melted), 1 large egg, 1 tsp vanilla extract, pinch of salt.
- Filling: 1/2 cup packed brown sugar, 2–3 tbsp ground cinnamon, 3–4 tbsp melted butter.
- Frosting: 4 oz cream cheese, 2 tbsp unsalted butter, 1 cup powdered sugar, 1/2 tsp vanilla extract, splash of milk to thin as needed.
Do I need yeast and how do I activate it?
Yes. Use active dry yeast (or instant yeast). For active dry yeast, proof it first by dissolving in warm milk with a pinch of sugar until foamy, about 5–10 minutes. If using instant yeast, you can mix it directly with the dry ingredients without proofing.
How do I make the dough?
- Whisk together flour, sugar, salt, and yeast (if using instant yeast).
- In a separate bowl, combine warm milk, melted butter, egg, and vanilla.
- Mix wet and dry ingredients to form a shaggy dough, then knead: about 8–10 minutes by hand or 5–6 minutes with a stand mixer on medium speed, until smooth and elastic.
- First rise: place in a greased bowl, cover, and let rise in a warm spot until doubled, about 60–90 minutes.
How do I fill and roll the dough?
- Turn the dough out on a lightly floured surface and roll into a 12×18 inch rectangle.
- Brush the surface with melted butter, then evenly sprinkle the cinnamon-sugar mixture over it.
- Roll up tightly along the long edge and pinch the seam to seal.
- Cut into 12 equal rolls (about 1.5 inches thick) and place them in a greased 9×13 inch pan, spaced apart for rising.
- Cover and let rise again until puffy, about 30–45 minutes.
What baking time and temperature should I use?
Preheat to 350°F (175°C). Bake the rolls for 25–30 minutes, until the tops are lightly golden and they are cooked through. If they browns too quickly, loosely tent with foil during the last 5–10 minutes.
How do I make the frosting for the cinnamon rolls?
- Beat softened cream cheese and butter until creamy.
- Beat in powdered sugar and vanilla until smooth. Add a splash of milk to reach your desired pouring consistency.
- Spread on warm rolls so the glaze melts into the frosting.
Can I make cinnamon rolls ahead of time?
- Yes. After shaping, cover and refrigerate the unbaked rolls overnight (up to 12–16 hours). In the morning, let them come to room temperature and rise until puffy, then bake as directed.
- You can also freeze unbaked rolls: wrap tightly and freeze. Thaw in the fridge overnight, proof briefly, then bake 25–30 minutes at 350°F.
How should I store and reheat leftovers?
- Store leftovers in an airtight container or wrapped in foil in the fridge for 3–4 days. For longer storage, freeze the rolls (baked or unbaked) and reheat later.
- To reheat: warm in the microwave for 15–25 seconds per roll, or bake at 350°F for about 5–8 minutes until warm. Re-glaze if desired.
What are common issues and how can I fix them?
- Rolls are dense or heavy: ensure yeast is active and not past expiration; don’t add too much flour; allow adequate first rise in a warm spot; avoid over-kneading.
- Filling leaks out or rolls don’t seal: roll tightly and pinch the seam; chill the dough slightly if it becomes too soft to handle.
- Rolls brown too quickly: tent with foil and/or lower oven temperature by 25°F and extend bake time slightly.
Are there dairy-free or vegan options for classic cinnamon rolls?
- Yes. Use non-dairy milk (like almond or soy milk) and dairy-free butter substitutes. For the frosting, use a vegan cream cheese alternative or a simple glaze made with powdered sugar and non-dairy milk. You can replace the egg with a flax egg (1 tablespoon ground flaxseed mixed with 3 tablespoons water) or omit it if your dough still comes together well.
- To keep texture similar, ensure you still add some fat (butter or vegan butter) and adequate rising time for softness.