Introduction / Hook
Imagine bite-sized indulgence that tastes like a secret affair between creamy yogurt and a caramelly whisper. Salted caramel yogurt bites are the kind of treat you stash in the freezer for a late-night rendezvous with your cravings, yet they’re delicate enough to share at a party or tuck into a lunchbox for a midafternoon pick-me-up. Each bite is a small, velvet-soft pocket of tangy yogurt, swirled with ribbons of rich caramel, and finished with a kiss of sea salt that makes the sweetness pop. The charm of these bites is not just in their flavor; it’s in their texture—the way the outside is slightly crisp from a gentle chill, giving way to a soft, luxurious core that melts on your tongue. They’re deceptively simple, but they feel luxurious enough to serve as a dessert at a dinner party or as a celebratory treat for a family movie night. If you crave a dessert that is elegant in flavor yet playful in presentation, you’ve found your new go-to, a recipe you’ll come back to again and again.
What makes these salted caramel yogurt bites especially appealing is how they balance several opposing pleasures at once: tang from yogurt, sweetness from caramel, salt to amplify depth, and a cool, refreshing bite from the cold bite. It’s a harmony you can taste with every mouthful. And because the concept is friendly to customization, you can tailor them to your mood, season, or pantry—swap in different yogurt bases, drizzle in dark chocolate, sprinkle toasted nuts, or swirl in a fruit compote that adds a zing of brightness. In a world of overdone desserts, this is a refreshing twist that feels both nostalgic and novel—a small, polished treat that shines without demanding a long list of ingredients or laborious steps.
The Story Behind the Dish
This recipe emerged from a quiet kitchen moment when someone wanted something tasty, fast, and a little fancy, without committing to a full baking project. The idea was to capture the indulgent vibe of caramel desserts while keeping the texture light and approachable. Yogurt as the canvas adds brightness and a comforting tang, a nod to traditional yogurt-based sweets found across the Mediterranean, the Middle East, and parts of Europe. The salted caramel element is a modern riff, a nod to the classic combination that turned caramel into a universal crowd-pleaser in cafés and home kitchens alike. The result is a bite that feels both familiar and refreshing—the kind of treat you’d imagine a sunlit brunch on a warm weekend turning into a covert dessert after dinner, a little something to cap a busy day with a smile.
What’s more, these bites carry with them memories of sunny markets, late-night kitchen experiments, and the ritual of portioning out a plateful for friends and family. The process echoes the instinct to speed-bake joy into small, shareable portions. They’re the kind of treat that invites storytelling—about a favorite caramel drizzle that reminded you of a grandmother’s pantry, or a cocoa nib you found in a dusty jar while exploring a new grocery store. The story behind the dish is less about a precise origin and more about the spirit of play in the kitchen: transforming simple, everyday ingredients into something that feels festive and special.
Why You’ll Love This Recipe
- Quick to assemble and easy to scale, making it perfect for weeknights or spontaneous gatherings.
- Delicate but satisfying: a tangy yogurt center contrasted with a glossy caramel ribbon and a gentle salt finish.
- Kids and adults alike adore them, making these bites a versatile addition to lunchboxes, party trays, and potlucks.
- Make-ahead friendly: you can prepare components in advance and assemble at the last moment for a crisp, fresh bite.
- Customizable to suit dietary needs and flavor preferences, from dairy-free to vegan and from chocolate-dusted to fruity variations.
- Portion-controlled indulgence: you get the gratification of a dessert without overdoing sugar or heft, thanks to the light, yogurt-based base.
- Beautiful to look at: the elegant, tiny bites make a strong visual impression on any dessert board or snack display.
Flavor Profile & Texture
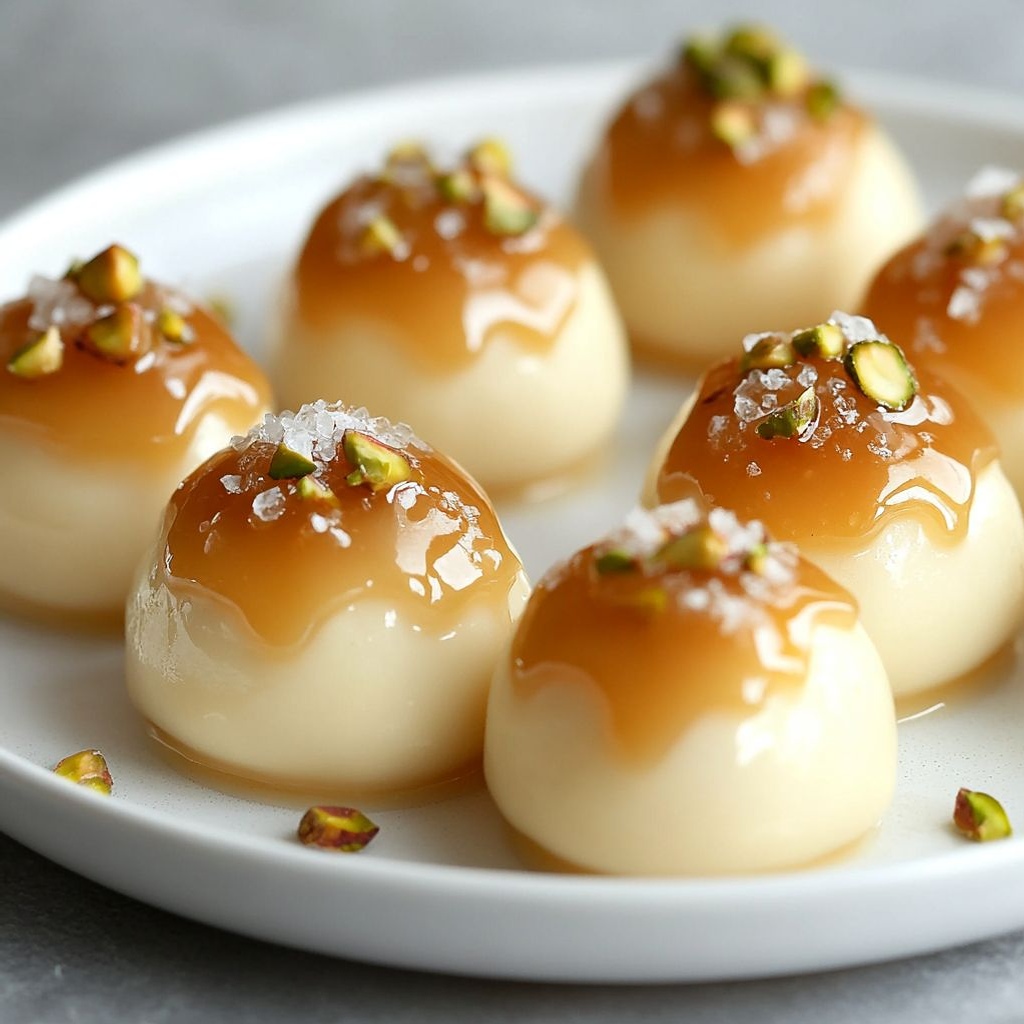
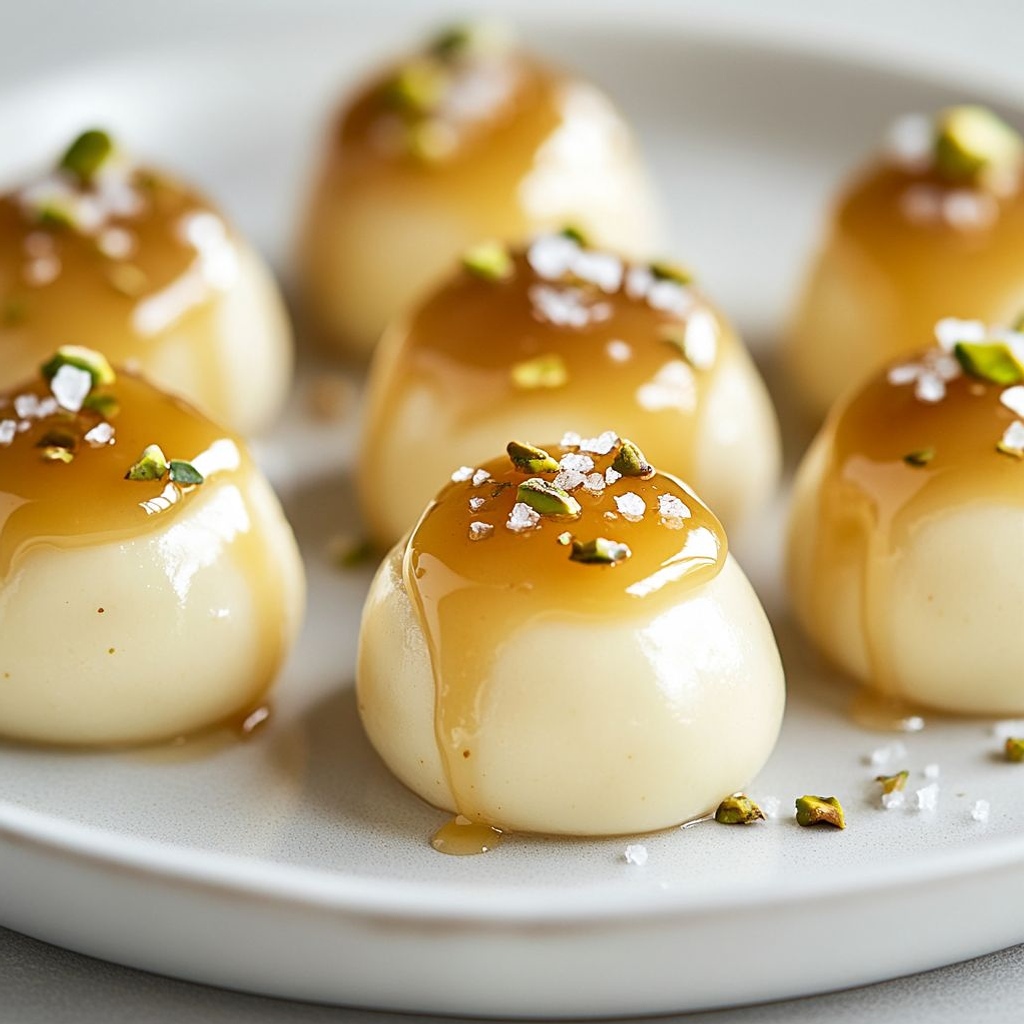
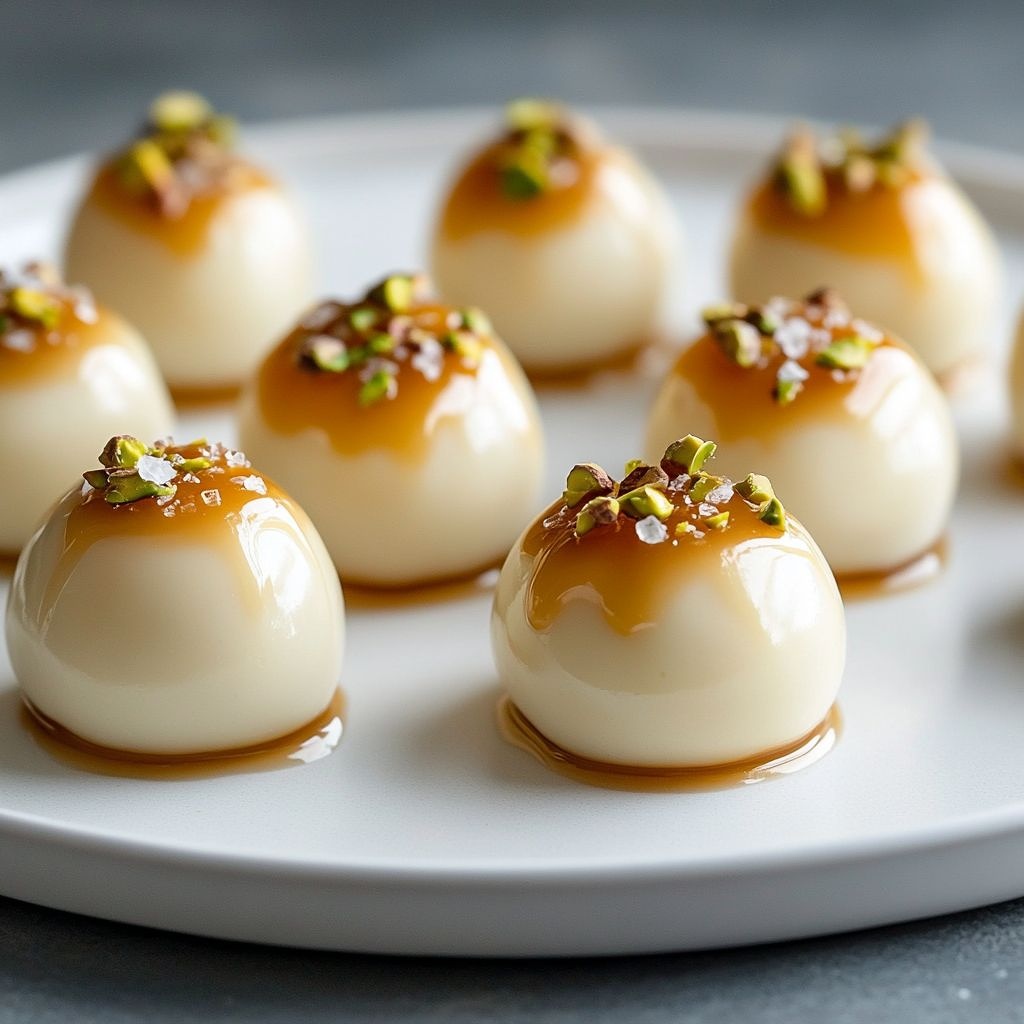
The backbone of these bites is the yogurt’s bright tang, which acts like a refreshing counterpoint to the deep, caramel sweetness. The salted caramel provides a ribbon of decadence—silky and luscious, with a hint of toasty, browned butter-like richness that lingers on the palate. The sea salt is essential; it elevates the caramel’s earthiness and makes the sweetness feel more complex, less cloying. The texture is a lesson in contrast: the outer surface often receives a gentle chill or a light freeze that yields a delicate snap, while the interior remains pillowy and creamy. There’s a subtle chew from any added mix-ins—crushed nuts, toasted oats, or crisped grains—that contribute another dimension without overpowering the core flavor. The result is a multi-sensory experience: you hear a soft crack as you bite, feel cool yogurt melt into a luxurious caramel center, and savor the balance of sweet, tang, and salt that lingers pleasantly on the tongue.
In this playful flavor triangle, the yogurt provides acidity and freshness; the caramel delivers warmth and caramelized flavors derived from sugar and dairy; the salt acts as a tuning mechanism that sharpens and widens the flavor spectrum. When you add optional toppings or mix-ins—such as toasted almond slivers, cocoa nibs, or a dusting of cinnamon—you introduce new aromatic notes and textures that dance with the base trio. The overall impression is one of refined comfort: a dessert-like bite that doesn’t feel heavy, and a snack that feels indulgent yet approachable for daily enjoyment.
Occasions & Pairings
These salted caramel yogurt bites shine in a variety of settings. They’re ideal for entertaining, where you want something elegant yet casual that guests can pick up with a toothpick or small fork. They’re equally at home in a lunchbox or as an after-school treat, offering a quick, satisfying moment without the heaviness of a full dessert. For holiday gatherings, they’re a refined option that pairs well with coffee, tea, or sparkling beverages, providing a refreshing counterpoint to richer dishes on the dessert table.
Suggested occasions:
- Brunch menus or late-morning gatherings with friends
- Parties and potlucks as a light, bewitching dessert bite
- Kids’ birthday celebrations, classroom treats, or scout meetings
- Stocking a snack tray for family movie nights or weekend grazing boards
- Picnic-friendly treats that travel well and don’t melt in the sun (when kept cool)
Pairings to consider:
- Bright beverages: chilled white wine spritzers, sparkling water with a twist of lemon, or a light coffee with milk
- Fruit elements: a few berry skewers or a small compote of strawberries and raspberries to contrast the caramel sweetness
- Nuts and crunch: toasted almonds, pecans, or crushed pistachios for added texture and a roasted note
- Drizzles and dustings: a dark chocolate drizzle, a light dusting of cocoa powder, or a hint of cinnamon for warmth
- Complementary desserts: vanilla shortbread cookies or almond biscotti to echo the nutty, creamy profile
Tips, Variations & Substitutions
One of the best things about salted caramel yogurt bites is how easily you can personalize them. Here are ideas to tailor the concept to your pantry, dietary needs, or taste preferences.
Vegan & Dairy-Free Options
- Use dairy-free yogurt alternatives such as coconut, almond, or soy yogurt. Choose unsweetened or lightly sweetened varieties to control the flavor balance.
- For caramel, opt for a dairy-free caramel sauce or make your own using coconut sugar and dairy-free butter substitutes. A maple or date-caramel drizzle can also be a delicious alternative with a distinct flavor.
Gluten-Free & Allergen-Friendly Tweaks
- Most yogurt and caramel bases are naturally gluten-free, but always check labels for any add-ins or thickeners that may contain gluten. If you’re using mix-ins like cookies or cereals, select certified gluten-free options.
- Enhance texture with gluten-free crunch: crushed gluten-free crackers, toasted almonds, or toasted coconut chips.
Flavor Twists
- Swap the classic salted caramel for salted espresso caramel for a mocha-inspired bite.
- Incorporate fruit-forward notes by folding in a ripple of raspberry, blueberry, or passion fruit puree into the yogurt before freezing (lightly swirled for a marbled effect).
- Add crunch with cacao nibs, toasted sesame seeds, or chopped hazelnuts for a toasty contrast against the smooth yogurt center.
- Finish with a dusting of freeze-dried fruit powder (strawberry, blueberry, or mango) for a tangy aroma and vibrant color.
Regional & Cultural Twists
- Turn the bites into a Middle Eastern-inspired treat by using pistachios and a touch of rosewater in the caramel for a floral accent.
- Channel Mediterranean flavors with a pinch of orange blossom water and crushed almond praline folded into the yogurt before shaping.
- Adopt a Scandinavian vibe with cardamom-scented yogurt and a drizzle of browned butter caramel for a caramelized, toasty finish.
Storage & Make-Ahead Ideas
Part of their charm is that these bites hold well or even improve with a little chilling time. You can segment the process into components (yogurt portions, caramel ribbons, toppings) and assemble when ready, which makes entertaining and busy days a breeze.
Storage tips:
- Frozen bites: Arrange on a parchment-lined tray and freeze until firm, then transfer to an airtight container or freezer bag. They keep well for several weeks and maintain a pleasant texture when eaten straight from the freezer.
- Refrigerated bites: For softer, creamier texture, store in an airtight container in the fridge. They’re best enjoyed within 3–5 days for optimal freshness.
- Make-ahead assembly: Prepare the yogurt portions in advance and freeze them on a tray, or refrigerate the yogurt portions and caramel in separate containers. When ready to serve, combine and finish with toppings for a near-fresh bite.
Make-ahead strategies without sacrificing texture include planning to set bases and flavors in stages. For example, you can pre-portion yogurt into small molds or mini silicone cups, freeze until solid, then wrap or stack for storage. When you’re ready to serve, drizzle with caramel and sprinkle with a pinch of salt, or roll in chopped nuts for an extra layer of texture. This approach is especially convenient for parties or bake-sales, where you want precise portions and a polished presentation without last-minute fuss.
Fun Facts & Trivia (Optional)
Did you know that salted caramel as a flavor trend didn’t become a global sensation overnight? It emerged gradually as chefs and dessert lovers experimented with the balance of sweet and salt. The salty element, which was once a culinary taboo in sweet desserts, became the magical amplifier that makes caramel’s sweetness feel more nuanced. Yogurt, too, has a long and storied history across many cultures. Fermented milk products have been enjoyed for centuries, prized for their tangy brightness and probiotic charm. Turning yogurt into a bite-sized dessert-like treat with caramel is a contemporary twist that celebrates both heritage and experimentation.
Other intriguing tidbits: many of us associate caramel with cocoa tones and kitchen alchemy—watching sugar melt and deepen into a glossy amber that smells like a sunny afternoon. The salt used in finishing is not just about flavor; it’s part of a culinary technique called salt finishing, which heightens aromas and makes the other ingredients pop. In small bites like these, salt is your friend, helping to balance the richness and brighten the yogurt’s acidity, resulting in a dessert that tastes both familiar and surprisingly sophisticated.
Finally, the popularity of bite-sized desserts has a practical origin: portion-controlled sweets are easier to share, adapt for dietary restrictions, and present beautifully on a tray. The shift toward elegant, compact morsels reflects a broader trend in modern hospitality—gourmet flavors delivered in approachable, convivial formats. Salted caramel yogurt bites capture all of that in one neat, delightful package.
Ingredients
- 1 cup rolled oats (certified gluten-free)
→ Oats form the chewy, crumbly base that will be bound by nut butter and sweet syrup. They provide structure and moisture while keeping the bites hearty. For gluten intolerance, ensure oats are certified gluten-free. If you prefer a finer texture, pulse the oats briefly in a processor to a rough flour; for a chewier bite, leave them as whole flakes. - 1/2 cup almond flour
→ Almond flour adds tenderness and helps bind the base, contributing a slightly crumbly texture without gluten. Use finely ground, unsweetened almond flour. If you don’t have almond flour, you can substitute with additional oats, but the texture will be denser and less cohesive. - 1/4 cup creamy peanut butter (or almond butter)
→ Acts as a moisture-rich binder and flavor booster, helping the base hold together when chilled. Use smooth, natural peanut or almond butter; if it separates, whisk while warm to re-emulsify. For a milder flavor, use unsalted butter in combination with a pinch more salt. - 1/4 cup honey (or maple syrup)
→ Provides sweetness and helps bind the crumb into a cohesive mixture. Maple syrup works well for vegan diets and adds a distinct depth of flavor; adjust to taste. Warm slightly to mix more easily with nut butter and oil if your ingredients are cold. - 2 tablespoons melted coconut oil
→ Adds richness and helps the base set firmly when chilled. Coconut oil also contributes a subtle tropical note. If you prefer not to taste coconut, use melted refined coconut oil or substitute with light olive oil, though this may alter flavor and texture slightly. - 1/4 teaspoon fine sea salt
→ Balances sweetness and enhances overall flavor, helping the base come alive against the yogurt and caramel. If using salted peanut butter, reduce this by half to avoid overly salty bites.
- 1 1/2 cups Greek yogurt (full-fat)
→ Provides a luscious, creamy center with protein to help set the bites. For a thicker layer, strain the yogurt for 15–30 minutes to remove excess whey, then whisk until smooth. Use fully chilled yogurt for best layering and set. - 2 tablespoons honey or maple syrup
→ Sweetens the yogurt layer and helps balance tang if using plain yogurt. Maple syrup yields a lighter flavor suitable for vegan versions; adjust to your preferred sweetness. Whisk well to create a uniform, creamy filling. - 1 teaspoon vanilla extract
→ Amplifies the yogurt’s aroma and pairs with caramel. Pure vanilla extract delivers a brighter, more aromatic note; if using vanilla bean paste, use about 1/2 teaspoon. - Pinch of fine sea salt
→ A touch of salt enhances the yogurt’s sweetness and complements the salted caramel swirl. Omit only if your yogurt is already salted or you prefer a very mild bite.
- 1/3 cup salted caramel sauce (store-bought)
→ The star swirl that provides the signature salted caramel flavor and a glossy finish. Choose a thick sauce that holds shape when spooned; if your caramel is thin, you can simmer it briefly with a tiny pinch of salt to intensify flavor. For a homemade option, see below notes on making salted caramel. - 1 tablespoon heavy cream (optional)
→ A small amount of cream loosens the caramel for a smoother, pourable swirl and helps it mix gently with the yogurt layer. Skip if you prefer a thicker, more defined swirl or if using very thick caramel sauce.
- Pinch of flaky sea salt, for finishing
→ Finishes the bites with a bright salt kick that heightens caramel and yogurt flavors. Sprinkle just before serving or after freezing to avoid drawing moisture to the surface. - 2 tablespoons chopped roasted almonds or peanuts (optional)
→ Adds crunch and a nutty contrast to the creamy layers. Toast the nuts lightly in a dry pan or oven to intensify aroma and flavor, then cool completely before chopping and sprinkling. - 2 tablespoons mini chocolate chips (optional)
→ Introduce a chocolatey bite inside the center or on top. Choose chips that hold their shape after freezing if you plan to chill the bites; fold into the base before chilling or sprinkle on top after setting.
Instructions
- Line a 12-cup muffin tin with paper liners or grease it well.
→ This ensures the bites lift out cleanly and hold their shape during chilling and set in the yogurt layer without sticking to the tin. - In a large bowl, whisk together rolled oats, almond flour, and fine sea salt until evenly distributed.
→ This creates a uniform dry base so that the binding ingredients coat every particle and form a cohesive crust rather than crumbly pockets. - Stir in the creamy peanut butter, honey (or maple syrup), and melted coconut oil until the mixture comes together as a thick, cohesive dough.
→ The fat and sugar provide moisture, shine, and help the base bind when chilled; warm the peanut butter slightly if it is stiff to avoid streaks of dry oats. - Divide the base mixture evenly into the lined muffin cups and press down firmly with the back of a small measuring spoon or a fingertip coated lightly with oil.
→ Pressing compactly creates a solid foundation that will hold shape when the yogurt layer is added and prevents crumbling on bite. - Chill the base in the refrigerator for 15–30 minutes (or briefly in the freezer for 10 minutes) until the edges feel firm to the touch.
→ Chilling firms the crust so it supports the filling and prevents spreading when the yogurt layer is added. - In a medium bowl, whisk together the full-fat Greek yogurt, honey or maple syrup, vanilla extract, and a pinch of fine sea salt until the mixture is smooth and evenly incorporates air.
→ Whisking aerates the yogurt for a lighter texture and the salt enhances sweetness; use a whisk with a wide blade to avoid clumps and ensure even flavor distribution. - If you prefer a thicker center, strain the yogurt through a fine-mesh sieve or a cheesecloth-lined sieve for 15–30 minutes to remove excess whey, then whisk again until silky.
→ Straining removes extra liquid, resulting in a firmer, less runny center that holds its shape in the freezer. - Scoop the prepared yogurt filling into each chilled crust, dividing evenly and smoothing the tops with the back of a spoon to create a level surface.
→ A uniform layer ensures the caramel swirl sits neatly and the bites look polished when served. - Warm the salted caramel sauce slightly if needed and drizzle a dollop over each yogurt layer, then use a toothpick or a small skewer to lightly swirl the caramel into the yogurt in a circular motion.
→ A swirl distributes the caramel where you want it, prevents large pools, and creates the signature marbled appearance; swirling while still soft avoids tearing the yogurt layer. - If using heavy cream, whisk it into the caramel to loosen it to a slightly pourable consistency before swirling, so the caramel mantle drapes rather than stiffly sits on top.
→ The cream yields a silkier swirl and helps the caramel integrate with the yogurt’s texture for a cohesive bite. - Lightly sprinkle a pinch of flaky sea salt onto each bite, producing a bright contrast that enhances the caramel and yogurt flavors.
→ The salt wakes the sweetness and mirrors the salted caramel profile without over-salting; adjust amount based on the saltiness of your caramel. - Optionally scatter two tablespoons of chopped roasted almonds or peanuts over the tops for extra crunch and nut aroma, ensuring the nuts are toasted and cooled before chopping for maximum flavor.
→ Toasting concentrates oils and aroma; adding the crunch after freezing prevents sogginess and preserves texture. - Optionally sprinkle two tablespoons of mini chocolate chips on top or lightly press a few into the surface; choose chips that hold shape after freezing if you want a visible chocolate bite.
→ Chocolate adds contrast and flavor depth; freezing helps chips stay intact rather than melting into the yogurt. - Place the tray in the freezer and chill until completely firm, at least 1–2 hours (or overnight for best convenience).
→ Freezing solidifies the yogurt and caramel layers, making the bites easy to unmold and bite-sized; do not rush this step for clean edges. - To serve, let the bites stand at room temperature for about 5–10 minutes to soften slightly for easy biting, then remove from the tin and transfer to a platter.
→ A short rest at room temperature yields a creamy center and avoids tearing the crust when you bite into it. - Store any leftovers in an airtight container in the refrigerator for up to 5–7 days or freeze for up to 1 month to preserve texture and flavor.
→ Refrigeration slows microbial growth and maintains a pleasant texture; freezing extends shelf life and lets you enjoy the bites later.
Notes
These gluten-free salted caramel yogurt bites are a decadent treat with a chewy oat-almond base, a rich Greek yogurt center, and a glossy salted caramel swirl.
You can customize them by swapping the nut butter, using maple syrup or honey, and adding chopped roasted nuts, dried fruit, or a few mini chocolate chips for texture and bursts of sweetness.
They set beautifully when chilled and freeze well, making them ideal for make-ahead snacking or grab-and-go treats. Store in an airtight container in the freezer for up to 2–3 weeks, or in the fridge for several days for a softer bite.
For best texture, chill the base until firm before layering with yogurt, then drizzle the caramel and swirl gently to create a polished finish. Always ensure your oats are certified gluten-free if you have gluten intolerance.
Tips
Tips for perfect salted caramel yogurt bites
- Prep and chill setup: Line a tray or use a mini muffin tin with parchment cups. Have all components measured and ready, and chill the yogurt briefly before assembly so the layers don’t smear.
- Base texture and gluten-free note: For a chewier base, pulse the oats briefly to a rough flour; for a crumblier bite, leave them as whole flakes. If gluten-sensitive, ensure the oats are certified gluten-free. Toasting the oats lightly before mixing can boost aroma and flavor.
- Binding and sweetness: Keep peanut or almond butter at room temp and whisk briefly to emulsify if separated. Warm honey slightly to blend more easily with nut butter and oil. If using maple syrup for vegan notes, expect a lighter sweetness and adjust to taste.
- Base binding adjustments: If the base seems too dry, add a teaspoon of water or additional melted coconut oil in small increments until it holds together without being sticky.
- Layering technique: Press the base firmly into the mold to avoid crumbly bites. Chill the base 15–20 minutes before adding the yogurt layer to help it set and prevent sinking.
- Yogurt filling: For a thicker center, strain the Greek yogurt for 15–30 minutes to remove whey, then whisk until smooth. Use fully chilled yogurt for best layering and set.
- Caramel swirl: If using store-bought caramel, warm it slightly with a splash of cream to loosen for a glossy swirl. If your caramel is very thick, a quick 10–15 second nudge in the microwave can help it pipe or spoon more neatly.
- Swirl technique: Spoon a small ribbon of caramel onto the yogurt layer, then drag a toothpick or skewer through for a natural swirl. A gentle swirl looks most elegant and prevents merging the layers too much.
- Toppings and texture contrast: Toast nuts until fragrant to intensify flavor, then cool completely before chopping. Sprinkle salt flakes just before serving or after freezing to prevent moisture migration.
- Chocolate option: If adding mini chips, fold some into the base before chilling or sprinkle on top after setting to retain shape in the freezer.
- Serving and storage: Freeze until firm (2–4 hours) and store in an airtight container. In the fridge, they’ll keep 3–4 days; in the freezer, up to 1 month. Thaw briefly at room temperature before eating if very cold.
- Flavor variations: For a coffee note, add a pinch of espresso powder to the yogurt or base. For a warm spice profile, add a pinch of cinnamon to the base or yogurt. You can also swap honey for brown rice syrup or agave for different sweetness profiles.
- Dairy-free option: To make dairy-free, use a thick coconut yogurt or almond yogurt version in place of Greek yogurt, and ensure your caramel is dairy-free as well.
FAQ
Salted Caramel Yogurt Bites – FAQ
What are Salted Caramel Yogurt Bites?
Small, frozen yogurt treats made with thick yogurt, swirled with salted caramel, and finished with a sprinkle of flaky sea salt. They’re quick to make and perfect as a cool snack or dessert.
What ingredients do I need?
Thick yogurt (Greek or strained), caramel sauce (store-bought or homemade), flaky sea salt, and optional add-ins like chopped nuts, chocolate chips, vanilla extract, or a touch of sweetener such as maple syrup or honey.
Can I use regular yogurt instead of Greek yogurt?
Thicker yogurt yields better bites. If you use regular yogurt, strain it to thicken (about 1–2 hours in a cheesecloth) or mix in a little cream cheese for a firmer texture.
How do I make Salted Caramel Yogurt Bites?
Line a mini muffin tin with liners. Spoon yogurt into each cup, swirl in a small amount of caramel, and sprinkle with sea salt. Freeze until firm, about 2–4 hours, then enjoy.
How long do they need to freeze?
Approximately 2–4 hours for a solid bite. For best texture, freeze overnight. Keep them in the freezer until ready to eat.
How should I store them?
Store in an airtight container or freezer bag in the freezer. They stay best for 1–2 weeks, and up to 1 month for optimal texture. Let them sit for a few minutes at room temperature if they’re very hard.
Can I customize toppings?
Yes. Try extra caramel drizzle, crushed nuts, mini chocolate chips, cocoa nibs, or a pinch of flaky sea salt. You can also add a splash of vanilla or a touch of cinnamon for extra flavor.
Can I make a dairy-free or vegan version?
Absolutely. Use coconut yogurt, almond yogurt, or another plant-based yogurt. Use a dairy-free caramel sauce or date caramel, and ensure all add-ins are vegan. Freeze as directed.
How can I adjust sweetness or saltiness?
Use less caramel or opt for a lower-sugar caramel sauce. Adjust the salt by adding fewer flakes or omitting them entirely if you prefer. Balance with a small amount of vanilla or maple syrup if needed.
Are these kid-friendly and allergy-aware?
Generally kid-friendly, but be mindful of dairy and nut ingredients in toppings. If there are nut allergies, skip nuts and use safe toppings like chocolate chips or fruit. Always check caramel and any add-ins for potential allergens.