Introduction / Hook
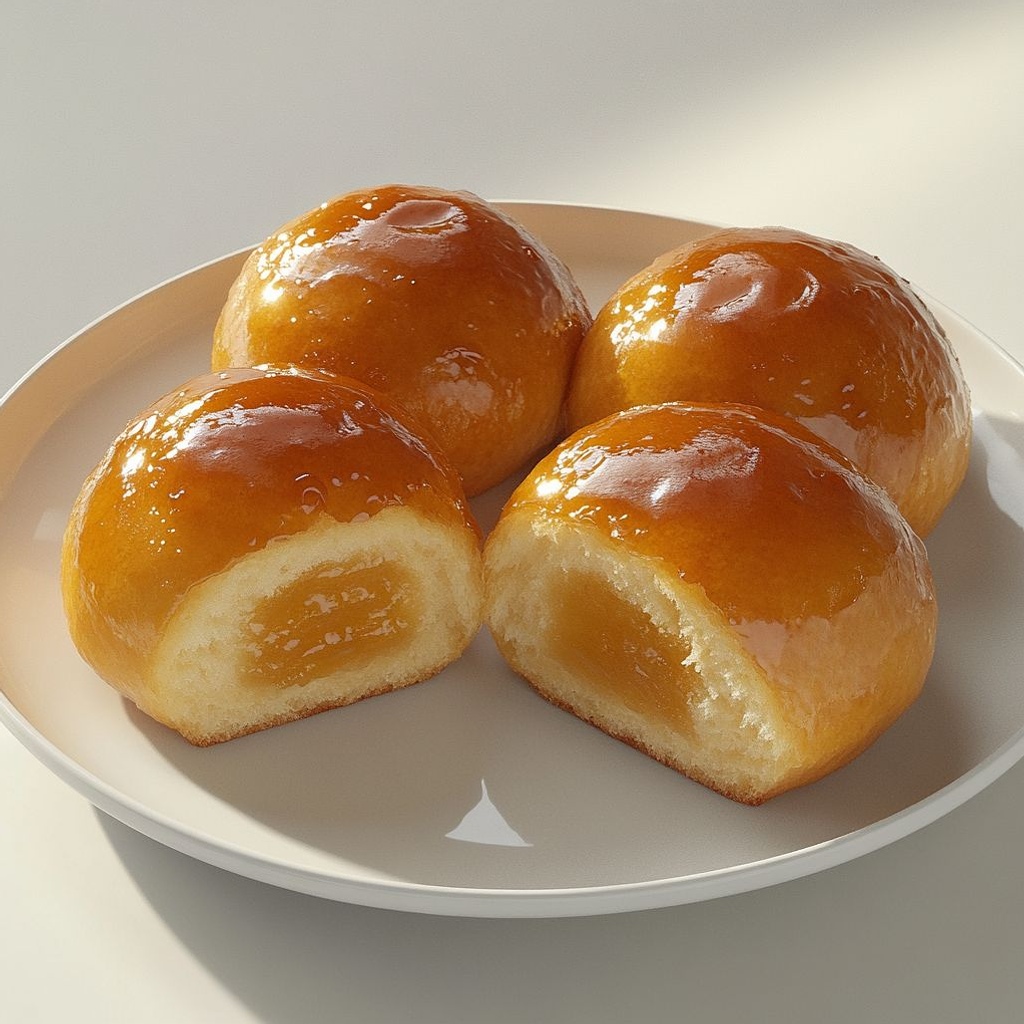
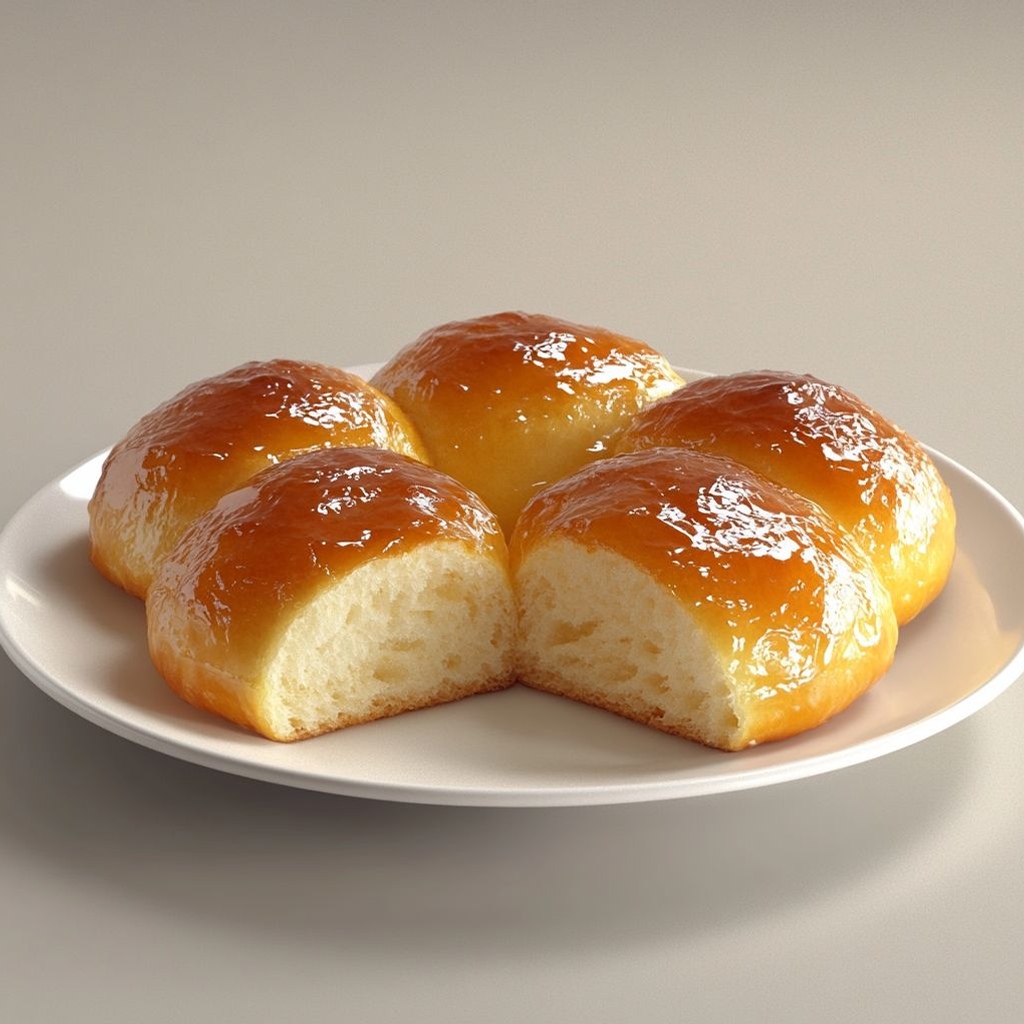
Picture a morning bakery escaping into your kitchen: a warm roll of golden dough, its surface kissed with a honeyed glow, steam rising in slow curls, and a scent that makes the room feel like a hug. Honey buns are more than a pastry; they are a memory made edible—soft, pillowlike interiors that yield to a gentle pull, a whisper of vanilla, and the faint sweetness of honey that lingers long after the last bite. The aroma alone can nudge your senses awake: a warm note of caramelized sugar mingling with caramelized butter, a hint of citrus zest brightening the backdrop, and a faint, comforting toasty edge that suggests both home and weekend indulgence. This description is not merely about eating something sweet; it’s about inviting a small ritual into your day—one that invites you to slow down, breathe in the warm, comforting scent, and savor a treat that feels indulgent yet familiar. Honey buns have a way of turning ordinary moments into something a little extraordinary, a reminder that comfort foods can carry nuance, balance, and a touch of elegance when crafted with care. If you’re craving something that’s at once cozy and celebratory, simple and swoon-worthy, this honey bun experience is for you. It’s the kind of dish that makes tea time feel like a celebration, a weekend treat that somehow fits into a weekday morning, and a nostalgic bite that can bridge generations—grandparents, parents, and the little ones who crave that sweet, soft bite that melts into happiness.
The Story Behind the Dish
Honey buns sit at an intersection of bakery culture and breakfast nostalgia. They exist in many forms across kitchens and storefronts, from mass-produced pastry aisles to the warm, crumb-laden shelves of neighborhood bakeries. The concept of a sweet, sticky roll that captures the sunlit sweetness of honey taps into a long history of using honey as a primary sweetener—an ancient pantry staple that appears in recipes across cultures. In the United States, particularly in bakeries that celebrate home-style pastries, honey buns emerged as a comforting, grab-and-go option that could be enjoyed with coffee or milk, at a kitchen counter, or on a quick morning ride to work. The dough, often enriched with butter and a touch of milk, evolves into something tender and resilient—capable of holding a glaze that glistens like morning light while staying soft and pliable with a gentle chew.
Cultural folklore around honey itself adds another layer. Honey, long valued for its perceived healing properties and its role in celebratory occasions, has a natural affinity with warmth and sweetness. When transformed into buns, it becomes part of a ritual: a morning treat that can stand up to a busy day, a weekend indulgence that invites friends to linger over a warm bite, or a comforting end to a night when the house finally quiets. The honey bun, in its many guises, can be seen as a symbol of hospitality—something you offer to others with a smile, and something you savor with a quiet sense of contentment. In some parts of the culinary world, variations of honey-sweetened rolls incorporate citrus zest, a touch of vanilla, or a whisper of spice, each adding a narrative layer to the sweetness and a reminder that pastry is a living tradition, always ready to adapt to local ingredients and memories.
Beyond the aroma and taste, there’s a practical charm to honey buns: their texture. The goal is a dough that remains soft and light inside, even as the glaze sets into a gentle sheen on the surface. The balance between tenderness and structure—between melt-in-your-mouth softness and a friendly pull when you bite—can transform a simple pastry into something you want to share, again and again. This dish invites you to explore technique in the most comforting form: how to coax air into the dough so it rises like a soft cloud, how to glaze so it clings with a glossy finish but doesn’t overwhelm the texture, and how to pair sweetness with a touch of contrast to keep things interesting. In many homes, making honey buns becomes a family affair—the kind of project that kids remember helping with, and adults remember enjoying after a long week. It’s a recipe that nods to tradition while offering a canvas for modern touches, allowing you to weave your own memories into each batch.
Why You’ll Love This Recipe
- Comfort with sophistication: The classic honey glaze brings a glow to the dough—soft, tender interiors with a glossy, fragrant exterior that feels indulgent yet approachable.
- Versatility for occasions: Perfect for weekend breakfasts, comforting weekday mornings, brunch spreads, or cozy teatime moments. They’re adaptable to different scales, from a small batch to a crowd-pleasing tray.
- Aromas that invite lingering: Vanilla, butter, honey, and a touch of citrus create a layered fragrance that fills the room and makes the wait to taste worth it.
- Textural harmony: The contrast between a pillowy crumb and a delicate glaze offers a satisfying bite that’s neither too dense nor overly dry.
- Make-ahead-friendly for busy days: With the right planning, honey buns can be prepared ahead of time and refreshed for serving, helping you enjoy bakery-like indulgence with minimal daily effort.
- Family-friendly appeal: A pastry that pleases all ages, from kids who adore the sweet glaze to adults who appreciate the subtle complexity of the dough.
- Beginner-friendly sophistication: While the technique yields bakery-quality results, the core idea remains simple: gently enriched dough, careful handling, and a glaze that flatters rather than overpowers.
Flavor Profile & Texture
The flavor story of honey buns starts with the dough itself: a softly enriched crumb that carries a delicate sweetness, a hint of butter, and the quiet richness of dairy. When the dough bakes, you’ll notice a gentle golden crust that gives way to a moist, tender interior. The honey glaze is the starry finish—a satin-smooth layer that brings a honeyed sweetness with a touch of vanilla and a whisper of citrus zest or orange blossom for brightness. The glaze should feel lush but not cloying, offering a glossy sheen that catches the light and a subtle stickiness that makes the first bite feel like a small, luscious treat.
Textures play a key role here. The dough should remain soft and yielding, with a fine, even crumb that gently dissolves on the tongue. A good honey bun should not be crumbly or dry; it should release steam and fragrance as you bite, revealing a light, almost cloudlike bite. The glaze adds another layer of texture—slightly tacky at first contact, then silky on the palate, with a slow fade that leaves a lasting honeyed note. In combination, the flavors can feel reminiscent of warm bread kissed by sun, a whisper of caramel from the sugar as it caramelizes, and the lush mouthfeel of a well-made pastry. If you enjoy a little contrast, a tiny pinch of flaky salt in the dough or a whisper of citrus zest in the glaze can elevate the sweetness, bringing brightness and balance without turning the treat savory. The overall experience is one of warmth, comfort, and a sense of home—the kind of bite that invites you to close your eyes and drift into a moment of simple satisfaction.
Occasions & Pairings
Honey buns shine in moments that crave a touch of happiness and a sense of celebration without ceremony. They’re ideal for:
- Weekend breakfasts that feel like a small, cheerful ritual
- Brunch spreads where a soft pastry offers a comforting alternative to heavier options
- Tea-time gatherings or casual coffee breaks with friends or family
- Birthday mornings or special occasions when you want something sweet and approachable
- Morning-after indulgences when you want to treat yourself without heavy richness
Pairing ideas to enhance the honey bun experience include:
- Drinks: a hot cup of coffee, a velvety latte, or a pot of black tea with a splash of cream
- Side dishes: fresh fruit on the side to add brightness, a light yogurt parfait for tangy contrast, or a simple cheese plate if you’re serving sweet and savory together
- Desserts: a dollop of whipped cream or a scoop of vanilla ice cream for a next-level breakfast-dessert hybrid
- Other sweets: a drizzle of dark chocolate or a sprinkle of citrus zest to introduce a lively note
Tips, Variations & Substitutions
Whether you’re baking for a crowd, adhering to dietary restrictions, or simply seeking a twist on the classic, these ideas can help you tailor the honey buns to your needs while preserving the essence of the dish.
Prepare the glaze in advance and warm it gently just before serving so it remains glossy and fluid on contact with the warm buns. Use plant-based butter or margarine and a dairy-free milk in the dough. For the glaze, substitute a vegan honey-flavored syrup or a light maple glaze to maintain sweetness and gloss. Choose a gluten-free enriched flour blend that behaves similarly to traditional enriched dough. Expect a slightly different crumb; you may need to adjust hydration with a touch more liquid if the blend runs dry. Reduce the glaze’s sweetness by using a balanced honey-to-vanilla ratio and a splash of sharp citrus to brighten the flavor, so the buns still feel luxurious without overkill on sugar. Add a pinch of cardamom, cinnamon, or nutmeg to the dough for warmth, or fold in finely grated citrus zest for a brighter finish that complements the honey. A hint of orange or lemon zest in the dough or glaze can lift the sweetness and add a modern, fresh aroma that pairs beautifully with honey. In some places, chefs finish honey buns with a light cream cheese glaze or a vanilla-tinged sugar glaze; others opt for a honey-butter glaze that leans toward a richer mouthfeel. To introduce a delicate contrast, consider a light sprinkle of sesame seeds on top or a thin drizzle of white chocolate for a subtle, additional layer of flavor and texture.
Storage & Make-Ahead Ideas
To keep honey buns at their best, a little planning goes a long way. Here are practical approaches to maximize freshness and minimize crustiness:
- Room-temperature storage: Store cooled buns in an airtight container or a sealed bag for up to 2–3 days. Reheat gently to restore softness before serving.
- Freezing: Freeze baked buns (glazed or unglazed) in an airtight container or freezer bag for up to 1–2 months. Thaw at room temperature and, if needed, warm briefly to refresh the texture. A light glaze reapplication can refresh the shine after freezing.
- Make-ahead strategy: Prepare the dough component in advance, shape the buns, and refrigerate overnight. In the morning, allow them to come to room temperature and finish baking for a bakery-like experience with reduced active prep time.
Reheat in a low oven or warm in a microwave with a damp paper towel for a quick revival. Finish with a light glaze if desired to recapture that glossy finish.
Fun Facts & Trivia
Honey buns sit at a charming crossroad of culinary trivia and everyday indulgence. Here are a few tidbits that might add a spark to your next batch:
- Honey has been used as a sweetener for millennia across many cultures, making it one of the oldest flavor carriers in the pantry.
- Enriched doughs, which form the soft, tender crumb of honey buns, trace their charm to European bakery traditions that elevated simple bread into pastry-like treats.
- The glaze on honey buns is more than a shiny finish; it also serves as a moisture barrier that helps keep the interior tender for longer periods after baking.
- In many communities, sharing a batch of fresh honey buns becomes a communal ritual—a way to welcome neighbors, celebrate birthdays, or simply make a weekday morning feel special.
Ingredients
Honey buns
Dough
- 4 cups bread flour
→ The backbone of the dough, providing structure and chew. Bread flour has higher gluten potential than all-purpose flour, which helps trap gas and produce a soft, airy bun with a sturdy crumb. Measure carefully by scooping into the measuring cup and leveling for accuracy. - 1 cup warm milk (about 110°F/43°C)
→ The liquid medium for the dough, hydrating the flour and helping the yeast activate. Warm the milk to roughly 110°F so the yeast wakes up without being killed. Reserve 1/4 cup of this milk to proof the yeast for best reliability, and use the rest in the dough. - 2 1/4 teaspoons active dry yeast (1 standard packet)
→ Leavens the dough, creating the light, fluffy buns. To ensure it’s alive, bloom the yeast in 1/4 cup of the warm milk with a pinch of sugar until foamy (about 5–10 minutes) before mixing into the dough. - 1/4 cup granulated sugar
→ Feeds the yeast during fermentation and adds mild sweetness to the dough. It also contributes to a tender crumb when fully incorporated. - 1/2 teaspoon salt
→ Enhances flavor and helps strengthen the gluten network, balancing the sweetness and keeping the dough from tasting flat. - 2 large eggs, room temperature
→ Provide richness, color, and structure. Room temperature eggs emulsify more easily with the fats in the dough, resulting in a smoother, more uniform crumb. - 6 tablespoons unsalted butter, melted and cooled
→ Adds tenderness, richness, and flavor. Melted and cooled butter should be added to the dough to avoid killing the yeast; mixing while warm helps with distribution without overheating the dough. - 1/4 cup honey
→ Natural sweetener and moisture provider, contributing a distinct honey flavor. Honey also aids browning of the crust. Ensure it’s cool enough to not heat the yeast excessively when added. - 1 teaspoon vanilla extract
→ Depth of flavor that complements the honey and the dough’s richness. Use pure vanilla for best aroma. - Optional: 1 teaspoon orange zest
→ Adds a bright citrus aroma that pairs beautifully with honey. Finely grate the zest and incorporate it into the dough for a fragrant finish.
Filling (Optional)
- 1/2 cup light brown sugar
→ Creates a cinnamon-sugar swirl that adds moisture, caramel-like flavor, and a chewy texture within the spirals. - 2 tablespoons ground cinnamon
→ Delivers warm spice to the filling. Increase or decrease to taste; freshly ground cinnamon yields a more vibrant aroma. - 2 tablespoons unsalted butter, melted
→ Binds the sugar and spice to spread evenly inside the rolled dough. Let it cool slightly so it won’t melt the dough when spreading.
Glaze (Topping)
- 1 cup powdered sugar
→ Forms the glaze base. Sift if possible to avoid lumps, then whisk with liquids to reach a smooth, pourable consistency. - 2–3 tablespoons milk
→ Adjusts glaze thickness. Use enough to achieve a pourable glaze; whole milk yields a creamier glaze, while skim milk keeps it light. - 1 tablespoon honey
→ Adds extra honey flavor and helps the glaze set with a subtle sheen. You can replace with a splash of vanilla for a simpler glaze if desired. - 1/2 teaspoon vanilla extract (optional)
→ Enhances glaze aroma and sweetness balance. Use optional if you want a richer vanilla note without extra dairy or sugar.
Instructions
- Warm 1 cup milk to about 110°F (43°C) and measure out 1/4 cup from it to reserve for proof, keeping the rest for the dough.
→ Heating to this temperature activates the yeast without killing it; reserving a portion ensures you have fresh liquid to bloom the yeast separately. - Bloom the yeast in the reserved 1/4 cup warm milk with a pinch of sugar until foamy, about 5–10 minutes, then set aside.
→ Foaming confirms the yeast is alive and active; if there is no foam, discard and start with new yeast to guarantee proper leavening. - Whisk together the bread flour, granulated sugar, and salt in a large mixing bowl to ensure even distribution of the dry ingredients, which strengthens the dough structure.
→ Even dry distribution prevents pockets of sweetness or salt that could hinder gluten development and uniform rise. - In a separate bowl, whisk the eggs, melted and cooled butter, honey, and vanilla extract until smooth and fully emulsified, which creates a cohesive dough with good crumb and aroma.
→ Proper emulsion ensures even flavor and prevents butter from separating during kneading, contributing to a tender texture. - Combine the foamed yeast mixture with the remaining warm milk (3/4 cup) and the liquid ingredient mixture, then pour into the bowl with the dry ingredients to form a shaggy dough.
→ Introducing all liquids at once allows the gluten to begin developing uniformly; avoid dumping liquids all at once to control hydration and dough feel. - Knead the dough on a lightly floured surface or with a stand mixer on low speed until smooth and elastic, about 8–10 minutes by hand or 6–8 minutes with a mixer, performing the windowpane test to ensure gluten development.
→ A well-kneaded dough stretches into a translucent film, indicating proper gluten structure that yields soft, chewy buns. - Transfer the dough to a lightly oiled bowl, cover it, and let it rise in a warm spot until doubled in size, typically about 60–90 minutes, depending on ambient temperature.
→ A proper bulk rise builds flavor and a lighter crumb; avoid rushing or overcrowding the dough, which can lead to dense results. - Prepare the filling by combining light brown sugar, ground cinnamon, and melted butter, stirring until the mixture is evenly moistened and cohesive, then let it cool slightly so it won’t melt into the dough.
→ A evenly mixed filling ensures consistent swirl pockets and prevents the filling from seeping too much into the dough during baking. - On a lightly floured surface, roll the risen dough into a large rectangle about 12 by 18 inches (30 by 46 cm) and 1/4 inch (0.6 cm) thick, maintaining an even thickness to promote uniform bake.
→ Uniform thickness prevents edges from overbrowning and ensures the rolls bake evenly with a tender crumb inside. - Spread the cooled filling evenly over the dough, leaving a small margin along the far edge to seal the roll, and press it lightly to ensure adhesion without squeezing out the filling.
→ Even distribution prevents dry cinnamon-sugar pockets and helps maintain a tidy spiral once rolled. - Roll the dough tightly along the long edge into a log, then pinch the seam to seal and prevent unrolling during proofing and baking.
→ A tight roll maintains clean spirals and prevents the filling from leaking during baking for an attractive appearance. - Using a sharp knife or bench scraper, cut the log into 12 equal slices and place them, spiral side up, in a greased 9×13-inch baking dish or in lined muffin cups for individual buns.
→ Even slices ensure uniform baking and spacing; spirals will showcase the filling as they bake. - Cover the pan and let the cut buns proof again in a warm spot until puffed and almost doubled, about 30–60 minutes, while you preheat the oven to 350°F (175°C).
→ A second rise adds volume and a lighter texture; preheating ensures immediate oven spring once baked. - Bake the buns in the preheated oven for 20–25 minutes, rotating the pan halfway for even browning, until the tops are golden brown and the centers are set.
→ Proper browning indicates caramelization of the sugar and a fully cooked crumb; use a toothpick to test for doneness if unsure. - Meanwhile, whisk the glaze by combining powdered sugar, 2–3 tablespoons milk, honey, and optional vanilla until smooth and pourable, adjusting with more milk or sugar to reach the desired consistency.
→ A glossy, smooth glaze adheres to the warm buns and provides a sweet finish without drying out the pastry. - As soon as the buns come out of the oven, drizzle the glaze over them while still warm to teach the glaze to set into the surface for a shiny finish.
→ The heat helps the glaze meld with the crust and gives a characteristic sheen that highlights the honey flavor. - Allow the honey buns to rest 10–15 minutes after glazing before serving so the glaze can set and the buns can be easily sliced or pulled apart without sticking.
→ Resting ensures the structure stabilizes and the glaze hardens to a delicate gloss, making handling neater.
Notes
These honey buns are best enjoyed warm, with a tender, fluffy crumb and a glossy honey glaze that sets into a delicate, irresistible shine. To ensure a reliable rise, bloom the yeast in 1/4 cup of the warm milk with a pinch of sugar until foamy, about 5–10 minutes, before mixing it into the dough. Measure the bread flour by scooping into the cup and leveling to avoid dense buns, and keep the milk at roughly 110°F/43°C so the yeast activates without being killed. Add the melted and cooled butter to the dough after the eggs to distribute fat without overheating the yeast, and use room-temperature eggs for better emulsification. If you like, fold in 1 teaspoon orange zest with the wet ingredients for a bright citrus note that complements the honey. Roll the dough into a rectangle, mix together the light brown sugar, cinnamon, and cooled melted butter for the filling, and spread evenly across the dough, leaving a small border. Roll up tightly, seal the seam, and slice into even pieces. Place the slices in a greased pan and let them rise again in a warm spot until puffed, about 30–45 minutes. Bake at 350°F (175°C) for 20–25 minutes, or until golden and cooked through. While the buns are warm, whisk together powdered sugar, 2–3 tablespoons milk, and 1 tablespoon honey until smooth and pourable, then drizzle over the buns for a glossy glaze; add a splash of vanilla if desired. For dairy-free or lighter glaze, use almond milk and a neutral oil or dairy-free butter substitute, understanding that texture may vary slightly. If the glaze is too thick, whisk in a teaspoon more milk; if too thin, add a touch more sugar. Storage and make-ahead tips: this dough can be prepared up to the first rise, then refrigerated overnight; complete the second rise, shape, and bake the next day. Leftover buns will keep in an airtight container for 2–3 days, and you can freeze baked buns or the unbaked rolls (frozen after shaping) for longer storage and reheat gently. Variations: add chopped nuts or raisins to the filling, or swap a portion of the brown sugar for an extra pinch of salt to balance sweetness. Always ensure your ingredients are fresh and that the milk, yeast, and eggs are at those recommended temperatures to achieve the best texture.
Tips
Tips for perfect Honey Buns
- Yeast activation: Bloom the active dry yeast in 1/4 cup of the warm milk with a pinch of sugar until foamy, about 5–10 minutes. This confirms the yeast is alive before mixing into the dough.
- Temperature control: Keep liquids around 110°F (43°C). Too hot kills yeast; too cool slows fermentation. If you don’t have a thermometer, test with your finger—the liquid should feel warm, not hot.
- Measure accurately: Because this is a yeast dough, precise measurements matter. If possible, weigh ingredients for the most consistent results; if you must use cups, scoop and level to avoid dense dough.
- Autolyse (optional): Let the flour and warm milk rest 10–15 minutes before adding yeast and eggs. This helps gluten development and can improve the dough’s texture.
- Salt placement: Dissolve or sprinkle salt into the flour and other dry ingredients separately, then mix with the liquids to prevent direct contact with yeast early on.
Tips for the dough and fermentation
- Knead for gluten development: Knead until the dough is smooth, supple, and passes the windowpane test. If sticky, sprinkle in small amounts of flour; if dry, add small amounts of milk, a teaspoon at a time.
- Butter handling: Add melted, cooled butter gradually after initial mixing to avoid undermining the gluten network. Warm fat can harm yeast performance, so let it cool before mixing.
- Honey and eggs: Ensure honey is cool enough not to shock the yeast and mix eggs in at room temperature for better emulsification and crumb structure.
- Consistency with fillings: If using the optional filling, ensure the spread is even and not overly thick. Let melted butter for the filling cool slightly so it doesn’t leak out when rolling.
- First rise: Let the dough rise in a warm, draft-free place until doubled. Depending on room temperature, this can take 60–120 minutes. If your kitchen is cool, expect longer rising times.
Tips for filling, shaping and baking
- Roll to even thickness: After a brief bench rest, roll the dough to about 1/4 inch (6–7 mm) thick for uniform spirals. Rotate the dough as you roll to keep it even.
- Filling technique: If using the cinnamon-sugar filling, spread it evenly and avoid overfilling to prevent oozing during baking. Let any melted butter for the filling cool slightly to prevent soggy dough.
- Cutting the rolls: For clean slices, roll tightly, seal the edge, and cut with a sharp knife or use dental floss to slice cleanly without squashing the roll.
- Second rise in pan: Place the cut buns in a greased or parchment-lined pan and let them rise until puffy and nearly doubled. Do not overproof, or they may collapse in the oven.
- Baking doneness: Bake in a preheated 350°F (175°C) oven until tops are deep golden and the internal temperature reaches about 190–195°F (88–90°C). Rotate the pan halfway for even browning.
Tips for glaze, storage and variations
- Glaze consistency: Whisk powdered sugar with milk, honey, and vanilla until smooth. Adjust thickness by adding more milk (for a pourable glaze) or more sugar (for a thicker glaze). Glaze while the buns are warm to help it set with a shine.
- Flavor adjustments: Add orange zest to the dough or a splash of vanilla to the glaze for extra aroma. If you prefer a creamier glaze, substitute part of the milk with cream.
- Make-ahead and freezing: Shape the buns and freeze them on a sheet before the final proof. Transfer to a bag and bake from frozen, adding 5–7 minutes to the bake time. Baked buns refrigerate for 2–3 days; reheat gently in a 300°F (150°C) oven for a few minutes.
- Storage tips: Keep baked honey buns in an airtight container at room temperature for up to 2–3 days; for longer storage, freeze them and reheat when needed.
FAQ
Honey buns – FAQ
What ingredients do I need for honey buns?
A basic honey bun dough uses flour, yeast, warm milk, an egg, soft butter, sugar, salt, and honey for flavor. For the glaze, honey with a bit of melted butter and a splash of milk. Optional add-ins include cinnamon, vanilla, or orange zest.
Can I substitute ingredients or make dairy-free?
Yes. Use plant-based milk (almond, soy, or oat) and a dairy-free butter substitute. Replace honey with maple syrup or agave if desired. For gluten-free, use a 1:1 gluten-free flour blend and add a little xanthan gum if the blend lacks it. Note that texture may vary with substitutions.
Do I need to knead the dough and how should it rise?
Yes. Knead until the dough is smooth and elastic (about 5–8 minutes by hand, 3–5 minutes with a mixer). Let the dough rise in a warm, draft-free spot until it has doubled in size (about 1 hour). After shaping, let the buns rise again until puffy before baking.
What temperature and how long do they bake?
Bake at 350°F (175°C) for about 20–25 minutes, or until the buns are light golden and sound hollow when tapped. If you use a denser dough or more fillings, you may need a few extra minutes.
How do I glaze the honey buns?
Warm honey with a little melted butter and a splash of milk to create a smooth glaze. Brush the glaze onto warm buns or drizzle over them. For a thicker glaze, whisk in a small amount of powdered sugar with extra honey.
How should I store honey buns?
Cool completely, then store in an airtight container at room temperature for 2–3 days. For longer freshness, refrigerate up to 5 days or freeze for 2–3 months. Reheat in the microwave or oven before serving for the best texture.
Can I freeze honey buns?
Yes. Freeze baked buns wrapped tightly, or freeze the shaped dough before the final rise. Thaw and reheat gently, or bake from frozen with a few extra minutes of bake time. This helps maintain softness.
What variations can I try?
Try cinnamon-sugar filling, chopped nuts, or a hint of vanilla. Add orange or lemon zest for bright citrus notes. You can also experiment with different glazes (plain honey glaze, cream cheese glaze, or a butter-honey glaze).
Troubleshooting: My honey buns didn’t rise or have a dense crumb—what happened?
Common causes include inactive or dead yeast, liquids that were too hot or too cold, insufficient kneading, or not enough rising time. Ensure liquids are around 110°F (43°C) to activate yeast, proof dough in a warm spot, knead until elastic, and allow enough time for both rises. If the dough doesn’t rise, start over with fresh yeast and properly warmed liquids.