Introduction / Hook
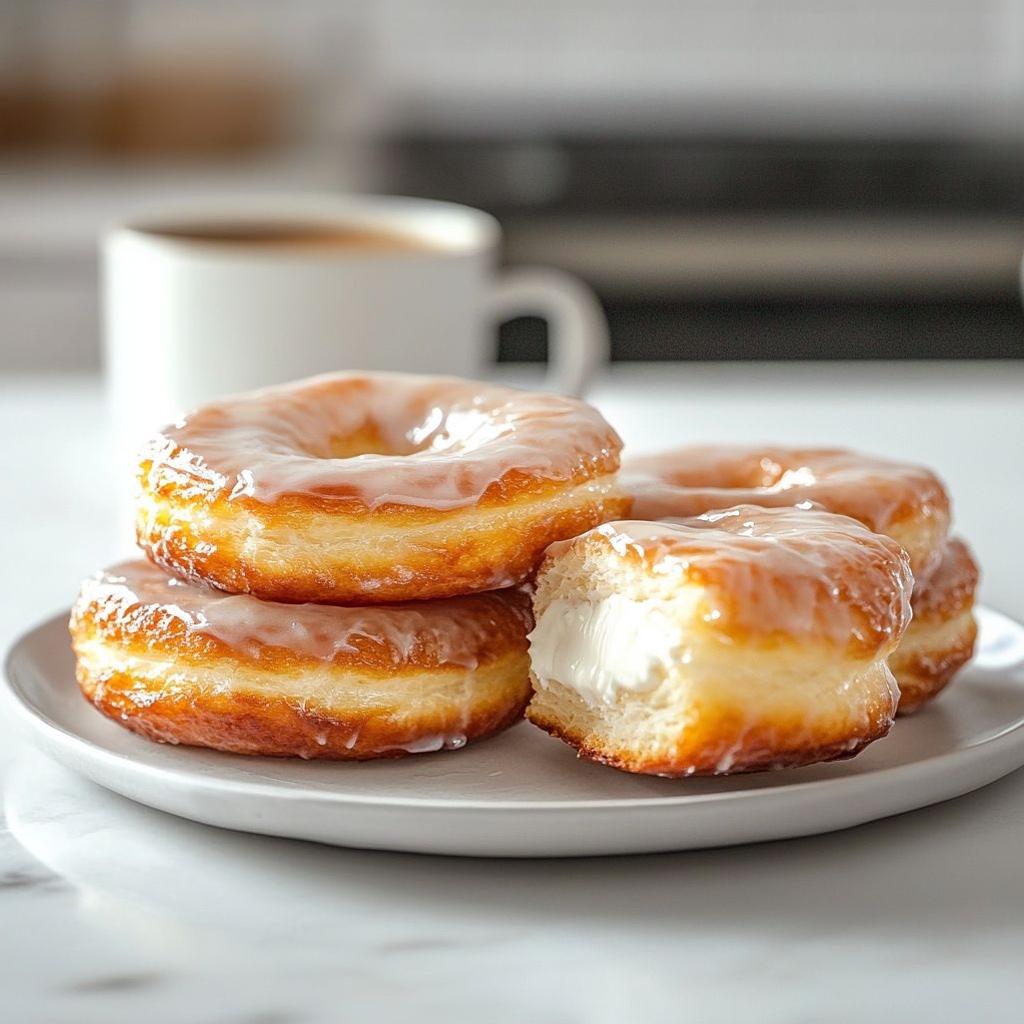
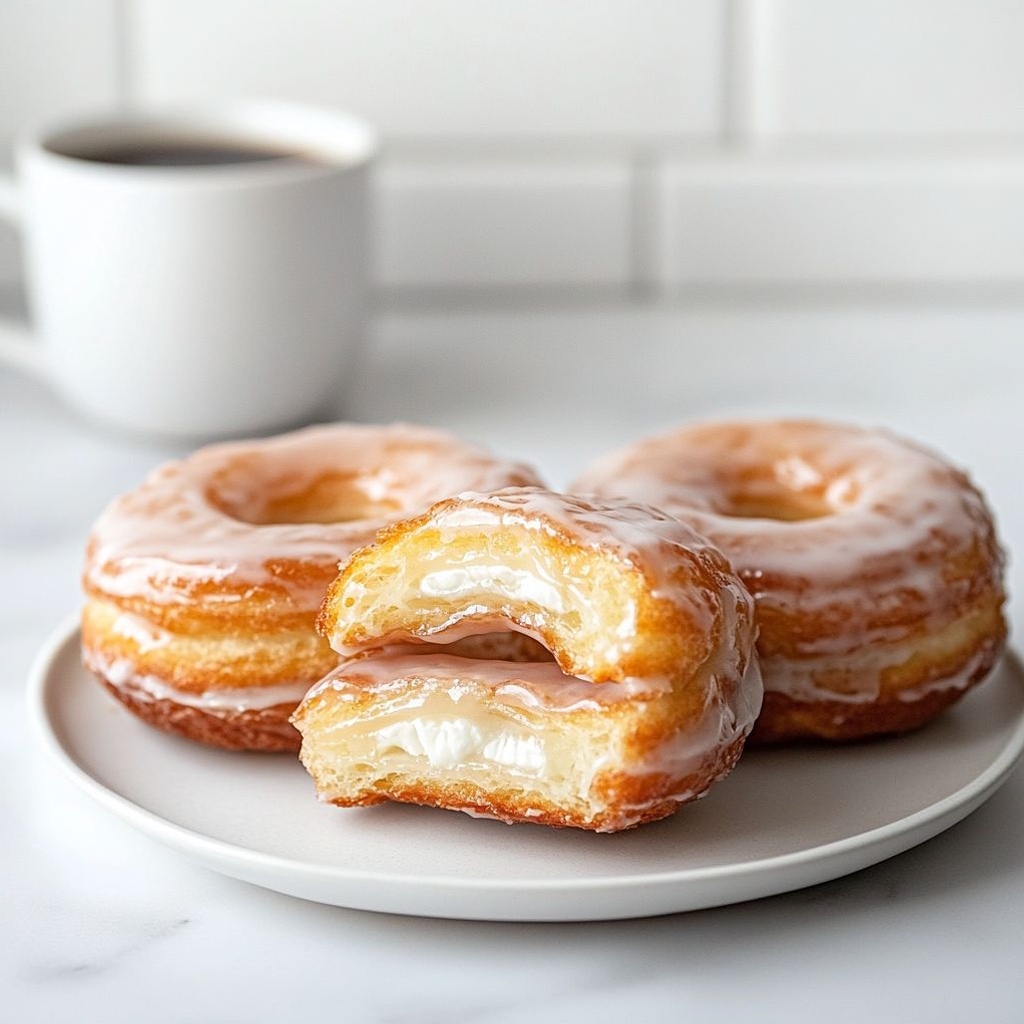
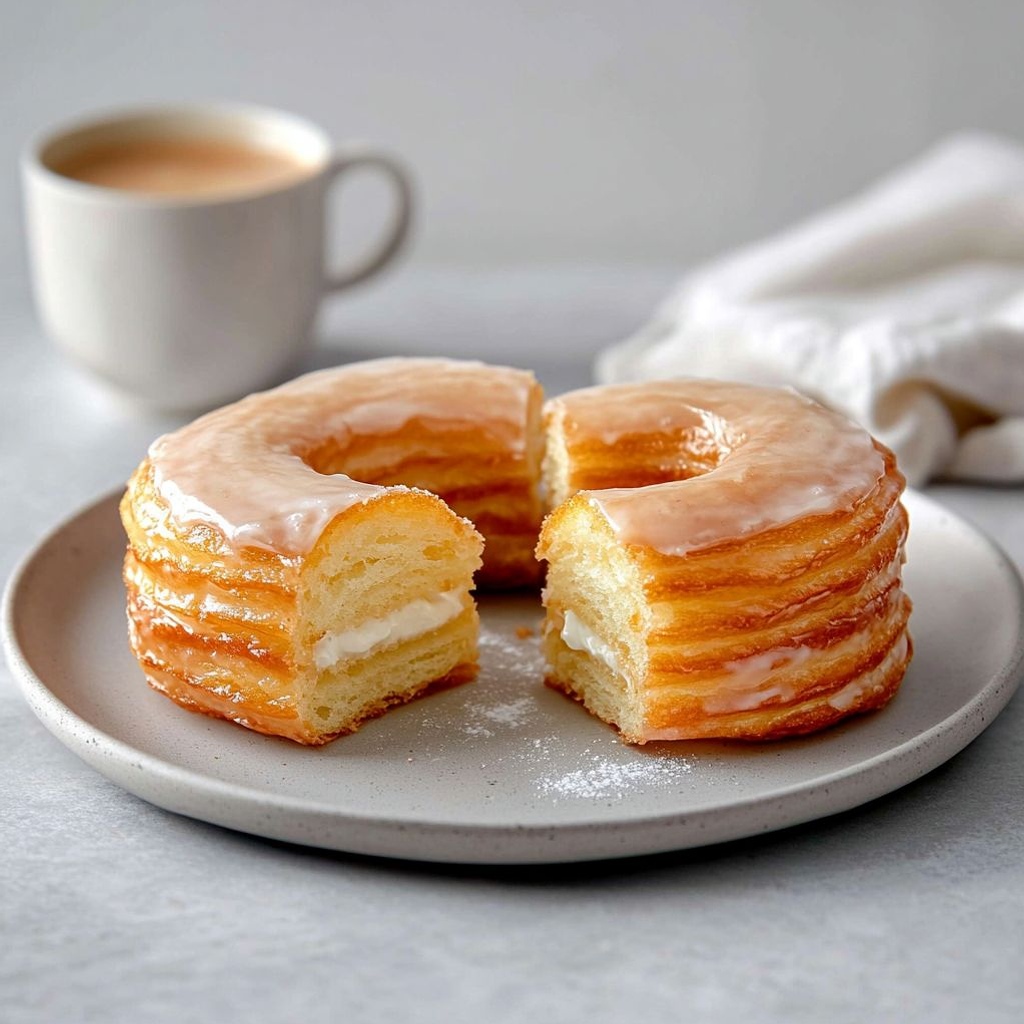
Imagine a pastry that treats morning like a celebration: the crack of a delicate sugar crust gives way to a tender, laminated interior that unfurls with every bite. The Cronut is a fusion of two beloved worlds—the flaky, butter-kissed goodness of a croissant and the comforting, nostalgic sweetness of a doughnut—assembled into a single, show-stopping pastry. When you bite into one, you’re greeted by a dance of textures: a crisp, caramelized exterior that shatters and a pillow-soft, airy center that melts on the tongue. The aroma alone—warm butter, vanilla, a hint of citrus glaze—pulls you in, long before you even glimpse the glossy finish or the sugar dusting. It’s no wonder Cronuts became a global sensation the moment they appeared, turning bakeries into pilgrimage sites and conversations into locked-in plans for weekend brunches. This is not just a pastry; it’s an experience that invites curiosity, a touch of indulgence, and a sense that anything is possible in a kitchen when pastry technique meets culinary imagination. If you’ve ever stood in line for a limited-edition treat, you know the thrill—the anticipation, the shared stories of fellow pastry enthusiasts, the instant verdict as the first bite lands. The Cronut captures all of that and more, offering both a story and a sensation you can recreate in your own home with reverence for technique and a playful spirit in flavor exploration.
The Story Behind the Dish
The Cronut arrived in the culinary spotlight in 2013, a dazzling invention that would reshape how many people think about pastry. It was born in New York City, in the bustling kitchens and storefronts of Dominique Ansel Bakery in SoHo, where a single, audacious experiment sparked a phenomenon. The idea was simple in concept but revolutionary in execution: take the lamination technique that creates the signature layers of a croissant and pair it with the comforting, familiar form of a doughnut. The result is a pastry that carries the best of both worlds—crisp, layered, buttery complexity on the outside with a soft, melt-in-the-mouth interior that carries subtle notes of vanilla and dairy, wrapped in a glaze or dusted with sugar.
The reception was electric. On any given day, customers waited in lines that snaked around blocks, eager to be among the first to sample the latest creation from the pastry shop that had already earned a reputation for pushing culinary boundaries. The Cronut became more than a pastry; it became a social event, a cultural moment, and a case study in how the food world can respond to novelty with both enthusiasm and reverence. The pastry’s name itself—Cronut—emerges from a clever blend: croissant + donut. It’s a linguistic snapshot of culinary hybridity, inviting curiosity and play. And while many chefs and bakers have since attempted their own versions, the Cronut remains a symbol of inventive pastry-making at its most daring and most delightful.
Behind the gloss, there are broader stories about technique, patience, and artistry. Laminated dough requires careful handling—the resting times, the precise folds, the temperature control—yet the results reward the baker with layers that unfurl like pages of a well-loved book. The glaze or sugar finish, often shimmering with a glossy coat or a gentle dusting, adds another layer of texture and flavor that punctuates the experience. The Cronut has also spawned a family of imitators, interpretations, and regional twists, each bringing their own twist while paying homage to the original concept. It’s a reminder that culinary history is not just a single line of invention but a living conversation in which tradition and invention mingle to create something that feels timeless yet incredibly contemporary.
Why You’ll Love This Recipe
- Hybrid Brilliance: A pastry that fuses croissant lamination with doughnut nostalgia, delivering a texture and experience that are greater than the sum of their parts.
- Texture Triumph: The exterior offers a delicate, almost glassy sugar crust that yields to a soft, airy, multi-layered interior—like a croissant waltzing with a doughnut.
- Impressive Yet Accessible: While the technique is advanced, the end result feels approachable and celebratory—perfect for brunches, special occasions, or a weekend treat that feels like a party in your kitchen.
- Flavor Versatility: The classic glaze or sugar finish is just the beginning. A Cronut welcomes a range of fillings and glazes that can reflect seasons, moods, or personal preferences.
- Shareable Experience: Cronuts spark conversations, photo-worthy moments, and a shared sense of indulgence that’s hard to resist in a social setting.
- Customizable Platform: Whether you’re into citrus-bright glazes, chocolate decadence, berry fillings, or creamy pastry creams, the Cronut serves as a canvas for your creativity.
- Celebrates Craft: The pastry invites appreciation for layering, temperature control, and the patience that good lamination demands, making every bite a reward for careful technique.
Flavor Profile & Texture
The flavor narrative of a Cronut begins with butter—rich, mellow, and unmistakably present. The laminated dough captures a gentle tang from fermentation, a whisper of yeast, and a deep, toasty note that emerges as the pastry bakes. As you bite through the crisp sugar crust, you hear a faint crackle, a sound that promises a soft interior beneath. Inside, the layers behave like a delicate stack of ultra-thin pastry sheets, each one thin and feather-light, releasing a warm, almost imperceptible steam that carries the perfume of butter and vanilla. The result is a mouthfeel that is simultaneously crisp, flaky, and almost cloud-like in its tenderness.
The glaze or dusting that finishes a Cronut adds a final layer of personality. A vanilla glaze delivers a soft sweet kiss that doesn’t overpower the pastry’s natural butteriness; citrusy notes add brightness and balance; chocolate or coffee tones provide a more indulgent counterpoint. Some versions opt for a simple sugar glaze, letting the crust do the talking, while others embrace a glossy, almost lacquered sheen that catches the light and invites a closer look. The texture is the star, but the flavor journey—where sweet meets dairy-forward depth and a whisper of yeast—keeps you coming back for another bite.
In terms of balance, Cronuts often walk the line between pastry refinement and comforting indulgence. The exterior sweetness is carefully calibrated so that it never drowns out the nuanced flavors inside. The filling, when used, can elevate the experience—creamy vanilla custard, tangy lemon curd, or a silky pastry cream that contrasts with the flaky, buttery layers. The result is a symphony of contrasts: a crisp surface against a tender core, a lightly sweet finish against a richer, more savory butter-forward baseline, and a glaze that gleams with promise on the outside while delivering a gentle sweetness on the palate.
Occasions & Pairings
Cronuts are at their best when they’re shared, celebrated, and paired with drinks that echo their elegance and whimsy. They shine as a standout centerpiece for weekend brunches, shower celebrations, and casual get-togethers where a sense of occasion elevates the mood. They also work beautifully as a giftable pastry—wrapped carefully, tied with a ribbon, and delivered with a note of indulgence. For those seeking everyday joy, a Cronut can transform an ordinary morning into something memorable, making waking up a little sweeter and more purposeful.
Pairing-wise, consider beverages that complement the pastry’s richness and brightness without competing for attention:
- Coffee accompaniments: a bold espresso, a creamy cortado, or a lightly sweetened latte to echo the pastry’s buttered depth.
- Tea pairings: robust black teas, late harvest oolongs, or a citrusy green tea to brighten the glaze notes.
- Cold beverages: a glass of sparkling water with a splash of lemon, or a light, fruity juice that can contrast the pastry’s richness.
- Complementary desserts: serve Cronuts with fresh berries, a dollop of vanilla pastry cream, or a small terrine of citrus curd to highlight the glaze and balance sweetness.
Seasonal variations can also shape how you present Cronuts. For spring, consider a lemon-vanilla glaze with a light dusting of powdered sugar and a citrus zest twist. For fall, a maple glaze or a cinnamon-spiced finish pairs beautifully with the deep, nutty butter notes. During holiday gatherings, you can craft a celebratory glaze—gold-dusted, perhaps, or layered with a fruit compote that adds color and brightness to the plate. No matter the occasion, Cronuts lend themselves to a sense of theater and delight, inviting guests to slow down, notice details, and savor a moment that feels just a touch magical.
Tips, Variations & Substitutions
While Cronuts are a celebration of technique, they also invite flexibility and creativity. Here are ideas to tailor the experience to your kitchen, dietary needs, or taste preferences.
Vibrant Fillings & Glazes
- Fillings: vanilla pastry cream, chocolate hazelnut spread, lemon curd, raspberry jam, or salted caramel cream. For a lighter touch, whipped vanilla cream or mascarpone with a hint of vanilla is wonderful.
- Glazes: classic vanilla glaze, chocolate glaze, citrus glaze (orange or lemon), or a berry glaze that introduces a fruity brightness. You can finish with a light dusting of dried fruit zest, edible glitter, or a thin layer of powdered sugar for that photogenic finish.
Dietary Alternatives
- Vegan version: use a high-fat plant-based butter substitute with a plant-based milk; be prepared for subtle differences in layering and lift, as vegan doughs can behave differently in lamination. You may need to adjust rolling and resting times accordingly.
- Gluten-conscious option: while traditional laminated dough relies on gluten for structure, some bakers experiment with gluten-free puff pastry styles or blends; note that the exact texture of a Cronut will differ from the classic version.
- Lower-sugar finish: if you’d like a lighter glaze or only a dusting of sugar, you can skip the thick glaze and rely on a simple sugar shower and a touch of vanilla to let the pastry shine through.
Creative Twists
- Seasonal fruit fillings that pair with light glazes—strawberry-rhubarb in spring, blueberry-lemon in summer, fig and apple in autumn.
- Spice accents inside the dough—tiny pinches of cinnamon, cardamom, or nutmeg—can add warmth without overpowering the pastry’s natural butter notes.
- Regional notes: a matcha glaze for an East-meets-West twist, or a miso-sweet glaze that plays with savory-sweet contrasts (for adventurous palates).
Technique Notes
- Temperature matters: keep butter and dough cool during lamination to preserve distinct layers and prevent the butter from seeping, which can weaken the puff.
- Resting and chilling times are essential to achieving the signature flakiness; don’t rush the dough or skip the cold folds.
- Frying vs. baking: classic Cronuts are fried, creating an unmistakably crisp crust and airy interior. If you prefer a lighter or oven-fried approach, you can explore air-frying or baking variants, but be aware of texture differences.
Storage & Make-Ahead Ideas
Fresh Cronuts are best enjoyed on the day they are made, when the crust remains crisp and the interior is at its most tender. If you need to plan ahead or have leftovers, consider these approaches to maintain quality and flavor.
- Room temperature: store in a single layer in an airtight container for up to 24 hours. Avoid stacking, which can crush the delicate layers.
- Refrigeration: refrigeration can dry the pastry and dull the texture, so if you must refrigerate, rewarm gently before serving to restore some of the crispness.
- Freezing: unfilled Cronuts (or the dough components after chilling) can be frozen for longer storage. For best results, seal tightly and thaw slowly in the refrigerator, then reheat gently to reactivate the layers. If you’ve filled them, consider freezing unfilled Cronuts and adding fillings and glazes after reheating for a fresh finish.
- Reheating: warm in a 325–350°F (165–175°C) oven for about 5–8 minutes, or until the exterior regains a light crackle. If you’ve filled them, reheat gently and apply fillings or glazes after warming.
- Make-ahead strategy: prepare dough portions ahead of time, refrigerate them, and bake or fry fresh when you’re ready to serve. This approach preserves a sense of freshness while letting you plan indulgence around busy days.
Fun Facts & Trivia (Optional)
The Cronut’s rise from a daring pastry experiment to a global sensation is a modern culinary legend with a few charming footnotes. Here are some quick bites of trivia to savor:
- The term Cronut became a registered trademark in some jurisdictions, underscoring its status not just as a pastry but as a culinary brand phenomenon.
- The release of Cronuts sparked a worldwide wave of imitation and invention, with bakeries around the world offering their own croissant-doughnut hybrids, each putting a personal stamp on the concept.
- In its early days, Cronuts inspired a kind of passport-style tourism—pastry lovers traveled to major cities specifically to try the original at Dominique Ansel Bakery, sharing experiences across social media and food blogs.
- Beyond the hype, the Cronut stands as a testament to the possibilities of laminated dough when paired with different formats, inviting a broader audience to appreciate the craft of pastry making and the pleasures of texture, contrast, and glaze.
- As with many iconic pastries, the Cronut’s narrative continues to evolve, with bakers around the world experimenting with fillings, glazes, and shapes, turning a single invention into a living tradition of creative pastry expression.
Closing thoughts
The Cronut is more than a pastry; it’s a celebration of technique, curiosity, and indulgence that invites you to slow down and savor a moment of pastry artistry. It combines time-honored methods—lamination, careful temperature control, patient resting—with modern whimsy and a sense of playful luxury. Whether you’re recreating a memory, introducing someone to a show-stopping dessert, or simply treating yourself to a moment of bliss, the Cronut offers a bridge between comforting familiarity and innovative charm. Embrace the process, respect the butter, and let the layers reveal themselves—one flaky, sugary, glistening bite at a time. Your kitchen can become a stage for this iconic pastry’s story, inviting friends and family to share in the wonder of a treat that feels both timeless and utterly contemporary.
Ingredients
Cronuts
Croissant Dough
-
– 3 cups all-purpose flour (unbleached)
→ Provides the gluten framework that gives structure to laminated dough while allowing the many folds to create flaky layers. Use unbleached all-purpose flour for best texture and flavor. Measure accurately (scoop and level or weigh) and avoid packing down the flour; rest the dough briefly after mixing to hydrate, which helps gluten form without toughness.
– 1/4 cup granulated sugar
→ Adds a touch of sweetness and assists with browning and flavor balance in the croissant dough. Keep to this amount to avoid weighing down the dough and hindering lift; sugar also interacts with butter to influence tenderness. If you like a hint more sweetness, you can increase by 1–2 tablespoons, but be mindful of lamination.
– 2 tsp instant yeast
→ Leavening agent that activates fermentation and helps give lift to the laminated dough; instant yeast can be mixed directly with dry ingredients. If using active dry yeast, proof in warm milk for 5–10 minutes until foamy before mixing; ensure the mixture isn’t too warm to avoid killing the yeast.
– 1 1/4 tsp salt
→ Flavor enhancer that also controls yeast activity and strengthens gluten. Use fine sea salt and mix evenly into the dry ingredients to prevent salty pockets.
– 1 cup cold whole milk
→ Adds moisture, tenderness, and helps create a tender crumb; keep cold to slow melting of the laminated butter and maintain dough temperature during rolling. Sub dairy-free if needed, but expect slight changes in texture; not hot milk here.
– 2 tbsp unsalted butter, melted and cooled
→ Enriches the dough with fat to improve tenderness and flavor; melted into the dough aids extensibility. Ensure butter is cooled to below around 60–70°F (15–21°C) before mixing so it doesn’t melt the laminated butter prematurely.
– 1 large egg
→ Enriches dough, adds structure and color; use room-temperature egg for better emulsification and even distribution. If you want a vegan version, you can use 1/4 cup unsweetened applesauce plus 1 tablespoon oil as a substitute, but the texture will be different.
Lamination Butter Block
-
– 1 1/2 cups unsalted butter, very cold (340 g)
→ The laminated fat used to create flaky layers; keep it cold but pliable and shape it into a rectangular block between parchment paper. Chill until firm but not rock-hard; encase in the dough with a strict butter-to-dough ratio to ensure clean lamination and distinct flaky layers; avoid exposure to heat when rolling.
Frying
-
– 6 cups neutral oil (vegetable, canola, or peanut)
→ For deep-frying cronuts; choose a neutral-tasting oil with a high smoke point. Heat to 350–360°F (175–180°C) and monitor carefully with a thermometer. Do not fill pot more than halfway to avoid overflow; fry in batches for even cooking; pat dry on paper towels before coating or glazing to prevent splatter.
Pastry Cream Filling (optional)
-
– 1 cup whole milk
→ Base for pastry cream; heat until just steaming, whisk in sugar and cornstarch slurry, then temper egg yolk. Use full-fat milk for a silkier cream; strain if lumps form for a ultra-smooth filling.
– 2 tbsp cornstarch
→ Thickening agent that sets pastry cream; whisk with a small amount of cold milk to form a smooth slurry before stirring into hot milk. Cook until the mixture thickens and coats the back of a spoon; avoid scorching.
– 2 tbsp granulated sugar
→ Sweetens the pastry cream; adjust to taste. Dissolve in the milk at the start to prevent gritty texture; if a milder center is desired, reduce slightly.
– 1 large egg yolk
→ Adds richness and helps set the pastry cream; temper by streaming a little hot milk into the yolk while whisking then whisk yolk mixture back into the rest of the milk. Do not scramble.
– 1/2 tsp vanilla extract
→ Infuses classic vanilla flavor; use pure vanilla for best aroma. Add after removing from heat to preserve fragrance; if using vanilla bean, scrape seeds for depth.
Glaze
-
– 1 cup powdered sugar
→ Base for glaze; sift to remove lumps; adjust consistency with milk to make a glaze that clings to warm cronuts. A thicker glaze sets quicker, while a thinner glaze yields a drizzle.
– 2-3 tbsp milk
→ Helps reach the desired glaze consistency; use dairy milk for a richer glaze or non-dairy as needed. Add gradually to avoid a runny glaze; warm glaze will spread more evenly.
– 1/2 tsp vanilla extract
→ Adds aroma and depth to the glaze; use real vanilla for best flavor; optional citrus zest can brighten the finish if desired.
Optional Chocolate Glaze
-
– 3 oz semisweet chocolate, chopped or chips, melted
→ Creates a glossy chocolate glaze alternative or addition; melt gently in a heatproof bowl over simmering water or short microwave bursts, stirring between to prevent scorching. Stir in 1 tbsp light corn syrup if you want extra shine; thin with 1–2 tbsp milk to reach drizzle consistency.
– 1 tbsp light corn syrup
→ Adds shine and helps the glaze set smoothly; optional but recommended for a professional-looking finish. If avoiding corn syrup, substitute with an extra teaspoon of milk or a touch of honey if not vegan.
– 1-2 tbsp milk
→ Adjusts the thickness of the chocolate glaze; add gradually until you reach drizzle or pourable consistency; use dairy or non-dairy milk to suit dietary needs.
Finish/Toppings
-
– 1/2 cup granulated sugar for coating after frying (optional)
→ Provides an extra crunch and sweetness when the cronuts are finished; apply while warm to help sugar adhere; you can roll in sugar or dust lightly for a subtle finish, depending on glaze choice.
– 1/4 cup coarse decorating sugar or pearl sugar (optional)
→ Adds decorative texture and sparkle; press onto glaze while tacky for best adhesion; choose colors to match the glaze or the occasion.
Instructions
- Whisk together the dry ingredients: 3 cups all-purpose flour (unbleached), 1/4 cup granulated sugar, 2 tsp instant yeast, and 1 1/4 tsp salt in a large mixing bowl until evenly distributed.
→ Even distribution ensures uniform gluten development and consistent yeast activity, preventing pockets of sweetness or salt that could skew flavor and rise. - Stir the wet ingredients: 1 cup cold whole milk, 2 tbsp unsalted butter melted and cooled, and 1 large egg, then pour them into the dry ingredients and mix to form a shaggy dough.
→ Cold milk slows butter melt so the dough stays cohesive for lamination; the egg adds richness and helps emulsify the dough for better texture. - Knead gently until cohesive and smooth, then wrap the dough and rest for 20–30 minutes at room temperature to hydrate the flour and relax the gluten fibers.
→ Resting prevents tearing during rolling and promotes even lamination by allowing flour to hydrate without overdeveloping gluten. - Prepare the lamination butter block by placing the 1 1/2 cups unsalted butter between two sheets of parchment and pounding it into a rectangular block about 1/4 inch thick, keeping it cold but pliable.
→ A firm, pliable butter block is essential for clean lamination; too warm and it will smear into the dough, too cold and it will crack the dough during rolling. - Roll the chilled dough into a rectangle large enough to enclose the butter block, about 8 by 12 inches, and about 1/8 inch thick. Then place the butter block on one half of the dough, fold the other half over to enclose, pinch edges to seal, and chill for 30–45 minutes.
→ Enclosing the butter creates distinct laminated layers; keeping it cold during enclosure prevents the butter from leaking and ensures even layering. - Roll the sealed dough into a long rectangle about 1/4 inch thick and perform the first turn by folding the rectangle into thirds (like a letter) and then chill for 20–30 minutes.
→ The turn initiates lamination, creating alternating fat and dough layers that puff into flaky cronuts when fried. - Rotate the dough 90 degrees, roll again to 1/4 inch thickness, and perform the second turn; chill 20–30 minutes.
→ Repeating the turn builds more layers and improves flakiness; keeping the dough cold between turns preserves the integrity of the butter layers. - Roll again to 1/4 inch thickness and perform the third turn; wrap and chill for 30–45 minutes.
→ The third turn compounds the laminated structure, yielding a crisp, airy crumb once fried. - Roll the laminated dough to about 1/4 inch thickness on a lightly floured surface and cut outer circles with a 3-inch round cutter and inner holes with a 1-inch round cutter to form cronuts; space them on parchment-lined sheets and chill for 15–20 minutes to firm their shape for frying.
→ Cutting with sharp, consistent edges produces even rings; chilling prevents deformation and oil splatter during frying. - Proof the cut cronuts at 75–85°F (24–29°C) for 45–60 minutes or until they appear puffy and slightly domed; keep them away from drafts and cover loosely if needed.
→ A gentle proof gains extra lift from the yeast, creating a tender, airy interior once fried while still preserving the dough’s structure. - Heat 6 cups neutral oil (vegetable, canola, or peanut) in a heavy pot to 350–360°F (175–180°C) on a candy thermometer or deep-fry thermometer, and maintain temperature throughout frying.
→ A controlled, high temperature ensures a crisp exterior without absorbing excessive oil; too cold and the cronuts will be greasy; too hot and they will burn before cooking through. - Fry cronuts in batches, turning once, for 1–2 minutes per side until golden brown and crisp; remove with a slotted spoon and drain on a rack lined with paper towels.
→ Short frying times at steady temperature produce a light, layered texture; draining prevents sogginess and helps glaze adhere evenly. - Prepare the pastry cream filling if using: in a saucepan, heat 1 cup whole milk until steaming; whisk 2 tbsp cornstarch and 2 tbsp sugar with a small amount of cold milk to form a slurry, then whisk into the hot milk and cook, stirring constantly, until thick and coats the back of a spoon; temper 1 large egg yolk with a little hot milk, whisk, then whisk yolk mixture back into the pot, remove from heat, add 1/2 tsp vanilla, and strain; chill thoroughly.
→ This yields a silky center for injecting into cronuts; tempering the yolk prevents scrambling and the vanilla provides classic flavor depth. - Fill the warm cronuts with pastry cream using a piping bag fitted with a small tip, inserting into the side or through the center hole until the filling is visible or slightly milled through.
→ Injecting the cream ensures a luscious, creamy center that contrasts with the flaky exterior; avoid overfilling to prevent bursting. - Prepare the glaze by whisking 1 cup powdered sugar with 2–3 tbsp milk and 1/2 tsp vanilla until smooth and glossy, adjusting thickness with more sugar or milk to reach a pourable but clingy consistency.
→ A well-balanced glaze adheres to the warm cronuts, creates a shiny finish, and prevents a gummy texture by avoiding excessive moisture. - Dip or brush the tops of the fried cronuts with the glaze while they are still warm and allow the glaze to set for a glossy exterior; for a richer finish, drizzle rather than dip.
→ Glazing on warm pastries helps the sugar melt and spread evenly, creating a smooth surface that seals in moisture and flavor. - Melt 3 oz semisweet chocolate gently and stir in 1 tbsp light corn syrup; thin with 1–2 tbsp milk to reach a pourable glaze, then apply over the cronuts for a chocolate finish if desired.
→ The chocolate glaze adds a decadent alternate finish with a professional sheen; optional but highly appealing. - Finish with optional toppings: while still warm, roll cronuts in 1/2 cup granulated sugar for extra crunch or press on 1/4 cup coarse decorating sugar for sparkle and texture.
→ Sugar coatings provide contrast in texture and a festive appearance, enhancing the overall eating experience. - Serve cronuts once the glaze has set, arranged on a platter or stacked for presentation, and enjoy while the interior remains tender and the exterior crisp.
→ Freshly fried, filled, and glazed cronuts offer the best balance of flaky layers, creamy filling, and glossy finish; timing maximizes texture and flavor.
Notes
These cronuts are a decadent fusion of flaky laminated pastry and a light donut-like interior, best enjoyed fresh when the layers are crisp and the crumb is tender. Because croissant dough relies on very cold ingredients and careful rolling, plan ahead and keep the lamination butter block cold and the dough chilled between turns to maintain distinct, visible lamination. Use unbleached all-purpose flour and measure accurately; let the dough rest after mixing to hydrate the gluten without developing toughness. When frying, maintain a steady oil temperature of 350–360°F (175–180°C), fry in small batches to avoid crowding, and pat dry with paper towels before coating or glazing to prevent soggy crust. After frying, you can finish cronuts with a simple vanilla glaze or the optional chocolate glaze; for a glaze, whisk powdered sugar with milk and vanilla until smooth and brush on while the cronuts are still warm enough to set quickly. If you choose the pastry cream filling, prepare a silky custard-like cream and chill it; fill the cronuts after they cool slightly to avoid bursting. For added texture and shine, you can add a sugar coating or decorative sugar while the glaze is tacky. The cronuts are best eaten the day they’re made, but they can be stored in an airtight container for up to 2 days and refreshed briefly in a warm oven. To customize, try a citrus zest in the glaze, a pinch of cinnamon in the sugar coating, or a thin ring of pastry cream for a flavored center. Always ensure your ingredients are fresh and handle the dough with cold hands to preserve the butter’s layers, which is essential for the signature flakiness.
Tips
Dough and lamination essentials
- Chill all components between folds. Rest the dough in the fridge for 20–40 minutes between turns to maintain a firm, workable surface and prevent the butter from becoming too soft.
- Roll dough on a lightly floured surface and use gentle, steady pressure. If the dough sticks, chill briefly rather than adding more flour, which can harden the dough and dull lamination.
- Aim for uniform thickness across the sheet (roughly 1/8–1/4 inch). Uneven thickness causes uneven layers and uneven browning during frying.
- Work with a cool workspace and cool hands. Warm hands or air can soften the butter too quickly, causing the layers to fuse.
- Don’t overwork the dough. Frequent rest periods help hydrate the gluten without developing toughness, preserving tender, flaky layers.
- Check that the dough seams are sealed well after each fold to prevent butter leakage during rolling and frying.
Shaping, proofing and timing
- Chill the laminated block before cutting to keep the butter solid. This helps maintain the lamination during proofing and frying.
- Cut cronuts with a sharp, clean cutter to prevent ragged edges that tear easily during frying.
- Proof until the dough looks puffy and slightly domed but not overly risen. Overproofing can cause structure collapse during frying.
- Use a gentle poke test: a slight indentation should fill back slowly. If it springs back immediately, give it a bit more time.
Frying like a pro
- Maintain a steady frying temperature of 350–360°F (175–180°C) with a reliable thermometer. Temperature swings lead to greasy texture or undercooked centers.
- Fry in batches to avoid overheating the oil and to keep the oil clean. Overcrowding drops the oil temperature and softens the texture.
- Pat the cronuts dry with paper towels after frying to remove surface moisture that can prevent even glazing.
- Let fried cronuts rest on a rack briefly before glazing; this helps the glaze adhere and prevents soggy bottoms from steam.
Pastry cream filling (optional) tips
- Heat the milk to just steaming, not boiling. A gentle simmer prevents scalding and preserves smooth texture.
- Whisk the cornstarch slurry well to avoid lumps; temper the yolk by adding a little hot milk before whisking back into the pot.
- Cook until the cream thickens to coat the back of a spoon, then strain to remove any lumps before chilling.
- Chill the pastry cream completely before filling; a cold filling helps maintain structure inside the cronuts and prevents sogginess.
Glazes and finishes
- Sift powdered sugar to avoid gritty clumps in the glaze. Add milk gradually to reach the desired thickness.
- Warm glazes slightly before dipping for smoother coverage, then let the glaze set completely for a glossy finish.
- For a chocolate glaze, melt gently and whisk until smooth. Add corn syrup if you want extra shine; thin with milk to reach drizzle consistency.
- Apply the glaze while cronuts are still warm but not dripping hot to ensure the coating adheres and sets evenly.
- If you want a dual finish, set one batch with a plain sugar glaze and another with a chocolate glaze for contrast.
Topping and storage tips
- Coat with granulated sugar while the cronuts are warm for a crisp, sugary crust that adheres well. Darker surfaces may require a lighter coating.
- Decorate with coarse or pearl sugar for texture; press gently onto the glaze while it’s still tacky for best adhesion.
- Fresh cronuts are best on the day they’re fried. If you must store, keep in a sealed container at room temperature for up to 1 day or re-crisp in a warm oven (not microwave) to restore texture.
- To reheat, warm gently in a 350°F (175°C) oven for 5–7 minutes to restore flakiness and aroma without drying them out.
Troubleshooting quick notes
- If the dough tears, chill it longer and roll with shorter, steady strokes; avoid forcing the dough through the rolling pin.
- If lamination butter leaks, ensure the butter is cold and the dough is cold; adjust rolling speed and avoid rolling across warm surfaces.
- If oil foams excessively, skim the foam and reduce heat if needed to maintain target temperature.
- If shells collapse after frying, check proofing level and ensure oil is hot enough before frying; underheated oil causes soggy centers.
FAQ
What is a cronut?
A cronut is a pastry hybrid that combines croissant‑style laminated dough with a doughnut’s shape and frying method. It’s flaky and buttery on the inside, with a slightly crispy exterior and usually a sweet glaze or topping.
Where did cronuts originate?
The cronut was created by Dominique Ansel Bakery in New York City and debuted in 2013. It sparked a worldwide craze with limited daily releases and long lines, inspiring many imitators.
What is the difference between a cronut, a croissant, and a doughnut?
A cronut uses laminated dough like a croissant but is shaped and fried like a doughnut, then glazed. A croissant is baked, flaky, and not usually fried; a doughnut is fried but typically not laminated. The cronut blends aspects of both for a flaky, ring‑shaped pastry.
What ingredients are used in a traditional cronut?
Core dough ingredients: flour, water, milk, butter, sugar, salt, yeast, and eggs. For frying: neutral oil. For glaze: sugar (or powdered sugar), water or milk, vanilla or other flavorings; optional toppings like sprinkles or chocolate.
How is a cronut made? (high‑level steps)
Typical steps: prepare a laminated dough (like croissant dough) and encase a butter block; perform folds and chilling to create flaky layers; roll out and cut into a ring; proof until slightly puffed; fry in hot oil until golden; drain; glaze and decorate while warm. Some versions may include fillings after frying.
Are cronuts vegan or gluten‑free?
Traditional cronuts contain gluten and dairy (and eggs), so they are not vegan or gluten‑free. Gluten‑free or vegan variants exist in some bakeries, but they’re typically special-order or experimental. Always check label or ask the bakery about ingredients and cross‑contamination risks.
How should cronuts be stored and reheated?
Best enjoyed fresh the day they’re made. Store loosely in an airtight container at room temperature for up to 1 day. To refresh, reheat in a preheated oven at about 350°F (175°C) for 5–8 minutes to restore crispiness; avoid microwaving if you want a flaky texture. You can freeze unglazed cronuts and reheat later, though texture may diminish slightly.
Can I make cronuts at home? Is it hard?
Yes, but it’s an advanced bake due to laminated dough and precise frying control. You’ll need cold ingredients, a rolling pin or dough sheeter, a donut cutter or ring molds, a thermometer to monitor oil temperature, and a stable work surface. If you’re unsure about lamination, you can start with a simpler laminated dough recipe and then experiment with a basic donut approach, but authentic cronut texture comes from proper lamination and frying.
What flavors or fillings are common for cronuts?
Common options include vanilla glaze, white or dark chocolate glaze, strawberry, lemon, or maple toppings. Fillings often involve pastry cream, custard, jam, or flavored cream squeezed into the center after frying. Seasonal flavors and decorations vary by bakery.