Introduction / Hook
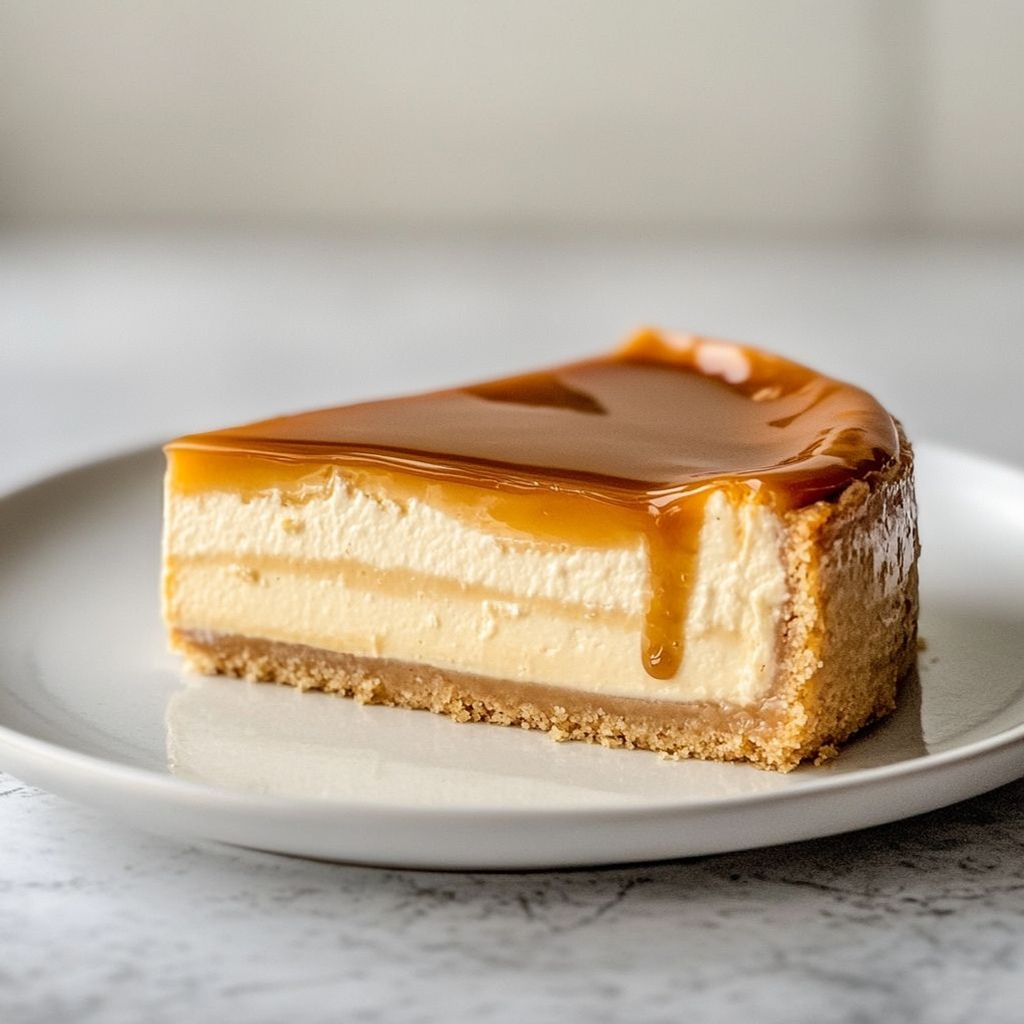
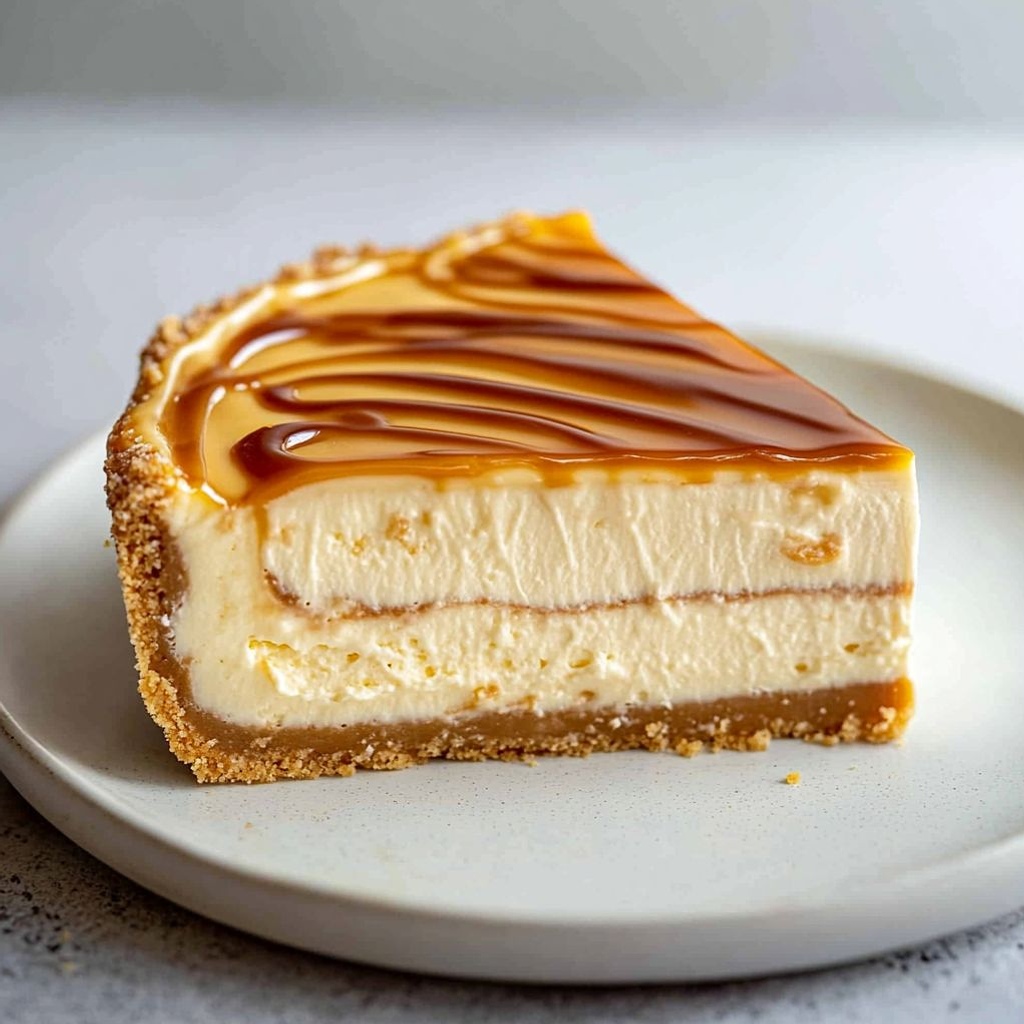
Imagine a slice that feels like a velvet cloud on your tongue, a cheesecake that carries the warm, indulgent kiss of caramel in every bite. Cheesecake al dulce de leche is not just a dessert; it’s a celebration of two beloved classics coming together in perfect harmony. The moment you release the first forkful, you’ll hear the soft sigh of a creamy center giving way to a ribbon of luscious dulce de leche that threads through the surface like caramel sunlight. The crust, subtly sweet and wonderfully crunchy, cradles the creamy filling as if it were a tiny golden shoreline. And the aroma—oh, the aroma—a slow, caramelized sugar scent that swirls through the room, inviting everyone to gather around the table with spoons poised and smiles ready. This dessert is a bridge between cultures, a nod to nostalgia, and a modern, irresistible indulgence that shines at celebrations and quiet weekends alike. It’s the kind of recipe you want to cook because you know it will make ordinary moments feel extraordinary, turning a simple slice into a shared memory that lingers long after the last bite.
In every spoonful, you’ll taste the delicate tang of cream cheese balanced by the toffee-like sweetness of dulce de leche, with a hint of vanilla and a whisper of salt to keep the flavors bright and honest. The first bite feels fine and smooth, then gradually reveals more depth as the caramel folds through the center. It’s comfort with a touch of sophistication, familiar enough to earn a place in your family repertoire, but special enough to feel like a treat you’d serve to guests who deserve something memorable. If you’ve ever loved a classic cheesecake and also fallen for the irresistible richness of dulce de leche, you’re about to discover a dessert that respects both loves while elevating them to a new, irresistible peak.
The Story Behind the Dish
Dulce de leche is a whisper of culinary history—one of those comforting legends that has traveled across generations and borders. Though its exact origin is the subject of affectionate debate among cooks and historians, most stories agree on a simple, patient method: milk and sugar simmered together until they transform into a thick, amber-sweet confection with a magical, glossy sheen. In Argentina, Uruguay, and much of Latin America, dulce de leche is more than a sauce—it’s a cultural staple, a pantry treasure, and a companion to countless desserts, from ice cream to pastries to pastries stuffed with fruit. The scent of slowly caramelizing milk evokes sunlit kitchens and long conversations, a reminder that good things often come from patient preparation and a gentle touch.
Cheesecake, meanwhile, has its roots in European cheesecakes that migrated across oceans and evolved into the modern, creamy form we love today. The marriage of cheesecake and dulce de leche feels almost natural: a silky, tangy filling that aligns beautifully with the deep caramel notes of dulce de leche. When you swirl or ribbon the caramel through the batter or lay it as a gleaming top, you create a dessert that looks as luxurious as it tastes. The result is a hybrid that honors both traditions—the Latin American beloved dulce de leche and the classic New World cheesecake—while offering a contemporary celebration of texture and flavor. The idea of combining these two treasures isn’t just about indulgence; it’s about storytelling through taste. Each bite becomes a page in a delicious diary, a reminder that food can connect cultures, memories, and the people you share it with.
As families pass down recipes and reinterpret them for modern kitchens, Cheesecake al dulce de leche becomes a canvas for personal touch: you can tuck in a touch of citrus zest for brightness, a splash of espresso for depth, or a sprinkle of sea salt to punctuate the sweetness. It’s the kind of dish that invites improvisation without losing its essence—a creamy core, a caramel kiss, and a crust that offers a satisfying counterpoint to the luxurious filling. If you’ve ever pursued a dessert that feels both timeless and contemporary, you’ve found it in this cheesecake, a treat that travels well from a cozy Sunday supper to a festive soirée.
Why You’ll Love This Recipe
- Luxuriously creamy, with a caramel-kissed center: The dulcet undertones of dulce de leche melt into the velvety cheesecake for a smooth, indulgent mouthfeel.
- Balanced sweetness: The tang from cream cheese and a hint of vanilla keep the richness in check, so every bite feels refined rather than heavy.
- Effortful-looking, you-can-do-it results: It’s an impressive dessert that rewards patience but doesn’t require pastry-chef precision to succeed.
- Versatile in presentation: Whether you drizzle more dulce de leche on top, swirl it through the batter, or finish with a salted caramel layer, it’s easy to customize.
- Crowd-pleasing for celebrations and weeknights alike: Elegant enough for guests, comforting enough for family gatherings.
- Textural harmony: A crisp, buttery crust grounds the creamy filling, while the dulce de leche introduces a glossy, luscious ribbon that surprises with every slice.
- Make-ahead friendly: This dessert is forgiving when it comes to timing, making it ideal for parties and meal planning.
Flavor Profile & Texture
The flavor profile of Cheesecake al dulce de leche is a careful composition of contrasts that come together in a single, unforgettable bite. The filling presents a gentle tang from cream cheese, which acts as a counterpoint to the deep sweetness of dulce de leche. Vanilla adds a soft, seductively aromatic warmth, while a delicate pinch of salt elevates every caramel note, helping it sing rather than overpower. You’ll notice a light, creamy silkiness in the texture, which glides across the palate and lingers with a faint, luxurious glow of caramel at the finish.
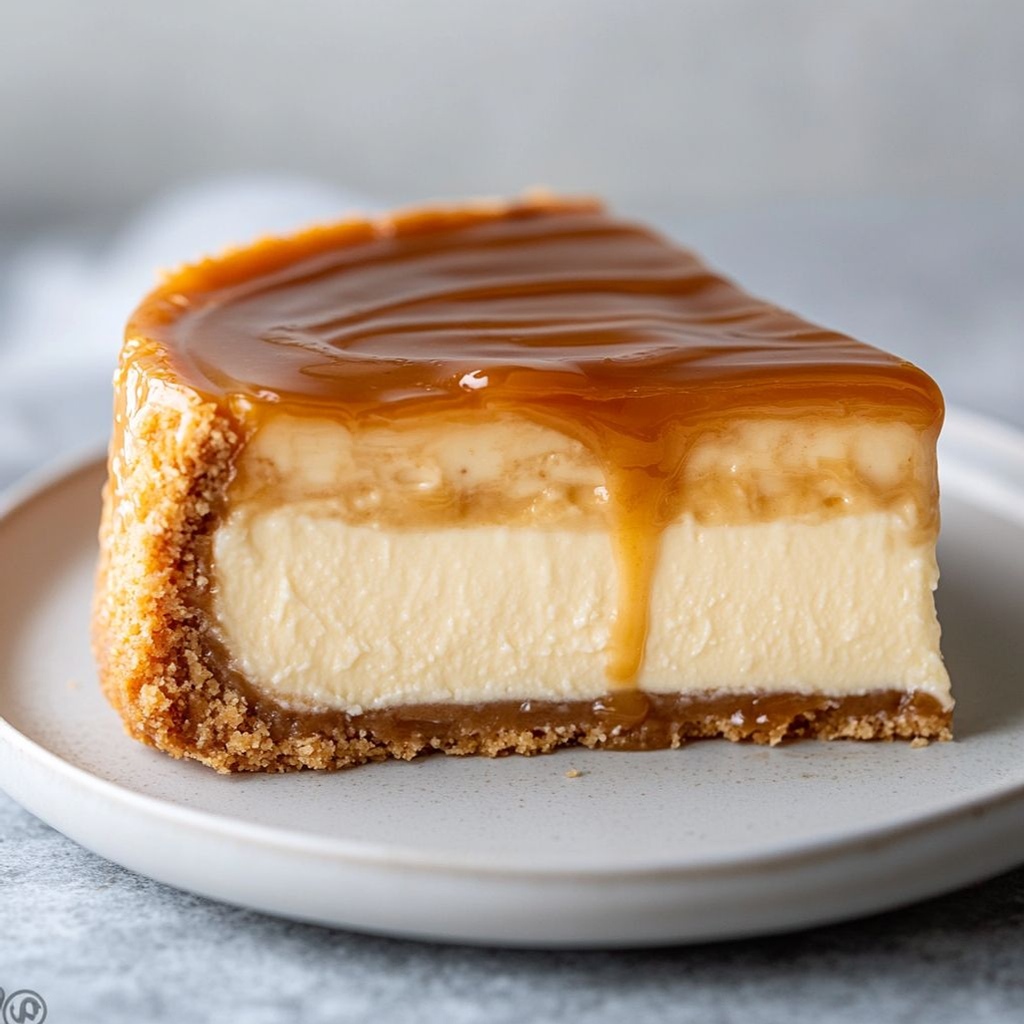
The crust offers its own character—a crisp, buttery base that provides a satisfying crunch and a caramelized edge of toasty flavor. Depending on your choice of crackers or cookies, the crust might carry a subtle toffee-like nuance that plays beautifully with the dulce de leche. When dulce de leche is swirled through the batter or layered on top, it creates a ribbon of decadence that catches the light and reveals itself slice after slice. The interplay of these components—tangy, creamy, caramel-rich, and a touch salty—creates a multi-dimensional experience that keeps the palate intrigued from first bite to last crumb.
Texture-wise, think: a firm yet yielding slice, a crust that gives under a gentle press, a filling that holds its shape but dissolves smoothly on the tongue, and a caramel layer that remains glossy and luscious. The contrast between the cool, creamy center and the slightly caramelized surface can be accentuated by a quick refrigerate before serving, ensuring the flavors settle and the slice holds its structure for an elegant presentation. If you prefer a touch more texture, you can optionally finish with a salted caramel drizzle that adds a brief crunch and a wave of salt-tinged sweetness at the end of each bite.
Occasions & Pairings
This cheesecake shines at every kind of gathering—from intimate family dinners to festive celebrations. It’s particularly fitting for holidays, birthdays, or any event that calls for something a little extra special without requiring an elaborate set-up. Its classic yet indulgent character makes it a reliable centerpiece for dinner parties, potlucks, or as a show-stopping weekend dessert to cap off a meals-with-friends night.
Pairing ideas to elevate the experience:
- Beverages: A robust espresso, a dark roast coffee, or a glass of aged port or sherry can complement the caramel notes without overwhelming the cheesecake’s delicate tang.
- Fruit & freshness: Fresh berries (strawberries, raspberries, or blueberries) offer a bright contrast that cuts through the sweetness. A light citrus zest over the plate can awaken the palate between bites.
- Side options: A dollop of whipped cream or a spoonful of lightly whipped mascarpone can add a cloudlike counterpoint to the dense filling.
- Dessert pairings: Dark chocolate shards, a quiet almond biscotti, or a pinch of flaky sea salt on top can provide textural and flavor accents that enhance the overall experience.
Tips, Variations & Substitutions
Tips for a flawless cheesecake al dulce de leche
– Temperature matters: Use room-temperature cream cheese to avoid lumps and achieve a silky filling. Gently blend the filling until smooth, avoiding over-mixing which can introduce air pockets.
– Gentle water bath environment: If you bake, a water bath helps prevent cracks and ensures even heat. If you skip it, monitor the edges to prevent over-baking.
– Dulce de leche placement: For a dramatic look, swirl dulce de leche through the batter with a skewer before baking or chilling. For a more uniform top, reserve a portion to drizzle after chilling.
– Chilling time: A longer chill (overnight if possible) helps the flavors meld and makes slicing neat, clean edges easier.
Variations
Use a crumbled biscuit crust with melted butter and a filling of cream cheese blended with dulce de leche and a touch of lemon juice; refrigerate until set for a creamy, no-oven alternative. Incorporate a teaspoon of orange or lemon zest to brighten the profile; the zest brings a fresh counterpoint to the sweetness. Finish with a final sprinkle of flaky sea salt or a light salt sprinkle on top right before serving to enhance the caramel’s complexity. Use crushed almonds, hazelnuts, or macadamias in the crust for added texture and an extra layer of flavor that pairs beautifully with dulce de leche. Swirl in finely ground almonds or gluten-free cookies for a crust that remains crisp and satisfying for gluten-sensitive guests. Use a plant-based cream cheese and vegan butter in the crust; pair with a dairy-free dulce de leche alternative if available, keeping in mind texture may shift slightly.
Substitutions
If you don’t have homemade dulce de leche on hand, good-quality store-bought varieties work beautifully. For a lighter touch, use half dulce de leche and half plain caramel sauce with a touch of salt. For dairy-free or lactose-free versions, choose a high-quality dairy-free cream cheese and adjust sweetness to taste, ensuring the texture remains creamy.
Storage & Make-Ahead Ideas
One of the greatest strengths of this cheesecake is how well it travels from the kitchen to the table and how forgiving it is in terms of timing. You can prepare it a day ahead or stash slices in the freezer for impromptu gatherings.
Refrigeration: Once set, store the cheesecake tightly covered in the refrigerator for up to 4-5 days. This makes it an excellent candidate for weekend meal planning or a make-ahead dessert for a dinner party.
Freezing: Slice the cheesecake and wrap individual portions tightly in plastic wrap, then place in an airtight container or zip-top bag. Freeze for up to 2-3 months. Thaw overnight in the refrigerator before serving. The filling remains creamy, though the texture may become slightly denser after freezing; a light whipping of the surface before serving can refresh its appearance.
Make-ahead strategies: If you’re hosting, you can prepare the crust and filling separately a day in advance, keeping them refrigerated. Assemble and bake (or set) just before serving, or opt for the no-bake version if you’re short on oven time. For a busy weekend, consider portioning the filling into mini cheesecakes in muffin tins; this makes individual servings easier to portion and serve at a party.
Fun Facts & Trivia (Optional)
Did you know that dulce de leche literally translates to “candy of milk”? It’s a name that hints at the beloved caramel-like sweetness that has charmed kitchens across Latin America and beyond. The exact technique—whether milk is simmered, baked, or slow-cooked to coax out its caramel color—has inspired generations of cooks to experiment, share, and improvise. In some regions, dulce de leche is a pantry staple as essential as flour or sugar, used to fill pastries, spread on toast, or elevate coffee and chocolate desserts to something closer to a ritual. The cultural resonance of this ingredient is matched by its adaptability: it’s wonderful in simple cookies, luxurious in cheesecakes, and endlessly creative in layered desserts and toppings. If you’ve ever tasted a spoonful of dulce de leche straight from the jar, you know the allure of its glossy, melt-in-your-mouth texture and caramel-forward flavor profile—an irresistible foundation for a cheesecake that feels both familiar and novel.
From a culinary perspective, this dessert showcases a global palate: the creamy, tangy backbone of a classic cheesecake meets the deeply nostalgic sweetness of dulce de leche. It’s a reminder that desserts aren’t just about sugar; they’re about memory, texture, and the way a single bite can conjure a memory of a childhood kitchen or a festive gathering with friends. Whether you’re revisiting a family recipe or crafting a new tradition, Cheesecake al dulce de leche invites you to slow down, savor, and share. It’s the kind of dessert that makes conversations linger, cameras flourish, and spoons disappear—one luscious slice at a time.
Ingredients
-
Crust
– 1 3/4 cups graham cracker crumbs (or digestive biscuits)
→ To form the crust: crush crackers into fine crumbs, then mix with sugar and melted butter until the texture resembles wet sand. Press firmly into the bottom and slightly up the sides of a 9-inch springform pan. Chill briefly before filling to help the crust set and stay crisp during baking.
– 1/4 cup granulated sugar (optional, for crust)
→ Adds gentle sweetness to the crust; adjust based on the sweetness of your crackers. Mix with crumbs and butter, then press into pan.
– 6 tablespoons unsalted butter, melted (85 g)
→ Binds the crust; use melted, cooled butter to evenly moisten the crumbs. If the crust seems dry, add a touch more butter, then press evenly, and chill to set before filling.
Filling
– 4 (8 oz) packages cream cheese, softened to room temperature (about 900 g)
→ The creamy base of the cheesecake; soften completely to avoid lumps and beat until smooth. Scrape the bowl often for a silky batter that sets evenly.
– 1 cup granulated sugar (200 g)
→ Sweetens the filling; beat with the cream cheese until light and fluffy, dissolving sugar for a smooth texture. Adjust to taste if you prefer less sweetness.
– 4 large eggs, room temperature
→ Provide structure and setting for the baked cheesecake. Add one at a time on low speed, mixing just until combined to prevent overbeating and cracks.
– 1/2 cup sour cream, at room temperature (120 g)
→ Adds moisture and tang, yielding a creamier texture. Blend in after the cheese is smooth to avoid curdling; keep batter glossy.
– 1/4 cup heavy cream (60 ml)
→ Increases richness and silkiness of the filling. Add gradually to reach the desired consistency without thinning the batter too much.
– 1 teaspoon vanilla extract
→ Provides classic vanilla aroma; use pure vanilla extract or vanilla bean paste for best flavor. Avoid imitation vanilla for a richer note.
– 2 tablespoons all-purpose flour or 2 tablespoons cornstarch (for stabilization)
→ Helps the filling set and reduces cracking. If gluten-free, use a gluten-free flour blend; mix thoroughly to avoid lumps in the batter.
– 1/4 teaspoon fine salt
→ Enhances overall flavor balance and prevents the filling from tasting flat. Even with cream cheese, a pinch of salt lifts sweetness.
– Optional: 1 teaspoon lemon zest (zest of 1 lemon)
→ A hint of brightness to cut through richness; distribute evenly to avoid large specks of zest. Use fresh zest for best aroma.
Dulce de Leche Swirl
– 1/2 to 1 cup dulce de leche, warmed to pourable consistency (120–250 g)
→ The signature caramel-like swirl; warming makes it easier to pipe or swirl through the batter. Drizzle or ripple through the filling after a portion is poured into the pan for even distribution.
– Optional extra dulce de leche for topping after bake
→ If you want a very pronounced swirl or surface layer, dollop and swirl more dulce de leche on top after baking and before chilling; it will set as it cools.
Finish and serving
– flaky sea salt for finishing (pinch)
→ Finishing salt enhances the dulce de leche sweetness and adds a subtle crunch. Sprinkle just before serving for best texture.
– fresh berries or whipped cream for serving (optional)
→ Classic accompaniments that balance richness; add just before serving to preserve texture and presentation.
Instructions
- Preheat your oven to 350°F (175°C) and grease a 9-inch springform pan; if desired, line the bottom with parchment to ensure clean release, then set aside while you prepare the crust.
→ Proper pan preparation prevents sticking and ensures clean slices when the cheesecake is unmolded after chilling. - Crumble graham crackers (or digestive biscuits) into a fine, uniform crumb and transfer to a mixing bowl; add granulated sugar (optional) and pour in melted butter; stir until the mixture resembles wet sand and holds together when pressed; this creates a cohesive, flavorful crust that bakes evenly.
→ Uniform crumbs and even moisture distribution prevent crust gaps and ensure a sturdy base. - Press the crumb mixture firmly into the bottom and slightly up the sides of the prepared pan using the flat bottom of a measuring cup or a small flat-bottomed tool; chill for 15 minutes to set the crust so it does not crumble when filling is added.
→ A compact, chilled crust acts as a stable foundation for the creamy filling and resists shifting during baking. - Bake the crust in the preheated oven for 8 to 10 minutes until it is set and lightly golden; remove and cool completely on a rack before adding the filling to prevent soggy edges from steam and moisture.
→ Par-baking seals the crust, enhances flavor, and keeps it crisp under a moist cheesecake filling. - Reduce the oven temperature to 325°F (165°C) in preparation for baking the filling; this gentler heat helps the cheesecake set slowly and reduces the risk of cracks.
→ A stable, slow bake yields a smoother, creamier interior without overcooking the edges. - In a large mixing bowl, beat the softened cream cheese on medium speed until smooth and creamy, about 2 to 3 minutes, scraping the bowl halfway to ensure no lumps remain; this yields a velvet texture free of clumps.
→ Lumps can cause an uneven texture and uneven rise during baking, so thorough smoothing is essential. - Gradually add the granulated sugar to the cream cheese while continuing to beat on medium speed until the mixture is light, fluffy, and fully incorporated; this dissolves the sugar and contributes to a tender filling.
→ Proper sugar incorporation prevents gritty pockets and ensures a silky batter. - With the mixer on low speed, add the eggs one at a time, beating just until each is combined before adding the next; overmixing at this stage can overdevelop gluten or incorporate too much air, leading to cracks.
→ Gentle incorporation preserves density and a smooth, crack-free center. - Beat in the sour cream, heavy cream, and vanilla extract until the batter is smooth and glossy; this step adds moisture, tang, and a luxurious mouthfeel; avoid overbeating to prevent incorporate air bubbles that may surface as cracks.
→ Dairy enriches the texture and flavor, producing a creamy, balanced cheesecake. - Sprinkle in the all-purpose flour or cornstarch and the fine salt, then mix on low speed just until the batter comes together and no lumps remain; the stabilizer helps the cheesecake set firmly and minimizes cracking during cooling.
→ Stabilizers create a more uniform set and reduce surface cracking without altering the flavor. - If using lemon zest, fold in the zest at this stage to distribute bright citrus aroma evenly without large specks; zest should be added with the last mix to avoid overheating the surface and dulling its fragrance.
→ A touch of lemon heightens flavor without overpowering the dulce de leche. - Warm the dulce de leche to a pourable consistency by microwaving in short bursts or placing the container in a warm bath; stir until smooth and free of thick ribbons so it swirls beautifully into the batter without breaking apart.
→ A pourable consistency ensures clean, even swirls that bake into the cheesecake rather than sinking to the bottom. - Pour half of the cheesecake filling into the cooled crust, then drizzle one-third of the warmed dulce de leche over this layer; use a knife or skewer to gently swirl the dulce de leche through the batter to create marbled ribbons, ensuring some pockets for flavor distribution later.
→ Swirling distributes dulce de leche flavor and creates an appealing visual pattern without overpowering the texture. - Pour the remaining filling over the swirled layer and smooth the top with an offset spatula to an even surface; this ensures uniform baking and an attractive finish when sliced.
→ A level top helps the cheesecake set evenly and slices cleanly for presentation. - Wrap the bottom and sides of the springform pan tightly with heavy-duty aluminum foil to seal out water, then set the pan in a larger high-sided baking dish; pour hot water into the outer dish until it reaches halfway up the springform to form a water bath that cushions the bake and reduces cracking.
→ The water bath provides a humid, gentle environment that prevents shrinking and cracking, yielding a creamy center. - Bake the cheesecake in the water bath at 325°F (165°C) for 60 to 70 minutes, or until the center wobbles slightly when the pan is gently jiggled; if the top becomes too browned, tent with foil and continue baking until the edges are set but the center remains just shy of firm.
→ A barely-set center yields a creamy interior as the cheesecake cools and chills, while the edges are fully set. - Turn off the oven, crack the door, and let the cheesecake cool in the oven for about 1 hour to gradually drop the temperature and minimize cracking from sudden heat loss; this slow cooling stabilizes the structure.
→ Gradual cooling prevents rapid moisture migration and keeps the surface smooth. - Carefully remove the cheesecake from the water bath and outer foil; place on a rack to cool completely before refrigerating; once cool, cover loosely and refrigerate for at least 4 hours or ideally overnight to ensure full set and clean slices.
→ Chilling tightens the filling, enhances flavor melding, and makes slicing effortless. - Just before serving, optionally drizzle a final delicate swirl of dulce de leche on top or dollop with extra, and finish with a pinch of flaky sea salt; serve with fresh berries or lightly whipped cream if desired for contrast and balance.
→ Sea salt accents sweetness and enhances caramel notes, while berries or whipped cream provide brightness and texture.
Notes
This cheesecake al dulce de leche is a decadent, creamy dessert with a buttery crust and ribbons of caramel-like dulce de leche swirled through the filling. For a gluten-free option, use gluten-free graham crackers or digestive biscuits (or a nut-based crust) and ensure all substitutes are certified gluten-free. Crush the crackers into fine crumbs, then mix with a little sugar and melted butter until the texture resembles wet sand; press firmly into a 9-inch springform pan and chill briefly to help set the crust before filling.
Keep ingredients at room temperature for a smoother batter: soften the cream cheese completely, beat with the sugar until light and fluffy, and scrape the bowl often. Add eggs one at a time on low speed to avoid overmixing, which can cause cracks. Blend in sour cream, heavy cream, vanilla, and a pinch of salt until the mixture is glossy.
To bake with minimal cracking, use a water bath: wrap the pan in foil to seal and place it in a larger roasting pan filled with hot water. Bake until the center barely jiggles, then gradually cool in the oven with the door ajar to prevent sudden temperature changes. If you don’t use a water bath, bake at a slightly lower temperature and monitor closely, cooling slowly on the counter before refrigerating.
For the dulce de leche swirl, warm the dulce de leche to a pourable consistency and drizzle or ripple through the batter after the first pour into the pan, then swirl gently with a knife for a marbled look. Reserve extra dulce de leche for topping after chilling if you want a more pronounced finish.
Finish and serving: a light sprinkle of flaky sea salt enhances the dulce caramel flavor and provides a nice contrast. Serve with fresh berries or a dollop of whipped cream. The cake needs to chill at least 6 hours, preferably overnight, for clean slices. It freezes well—wrap tightly and freeze, then thaw in the fridge before serving. For tidy slices, wipe the knife between cuts and slice through a fully chilled cake.
Tips
Consejos prácticos para Cheesecake al Dulce de Leche
- Crust duro y crujiente: asegúrate de triturar las galletas hasta obtener migas finas. Mezcla con el azúcar (si lo usas) y la mantequilla derretida hasta que la textura parezca arena mojada. Presiona firmemente en el fondo y ligeramente por los bordes de un molde desmontable de 23 cm. Refrigera 10–15 minutos antes de rellenar para que la base se asiente.
- Consistencia de la base: si la mezcla de galleta parece seca, añade un poco más de mantequilla derretida, una cucharadita a la vez, y vuelve a mezclar hasta que tenga una textura que se adhiera al molde sin desmenuzarse.
- Para opciones sin gluten: usa galletas sin gluten y, si lo prefieres, añade una pizca de sal en la corteza para equilibrar sabores.
- Crema bien suave: deja el queso crema a temperatura ambiente hasta que esté muy blando y sin grumos. Bate a velocidad media hasta lograr una mezcla suave y esponjosa; raspa el bol con espátula varias veces para incorporar bien.
- Azúcar y batido: incorpora el azúcar con la crema de queso hasta que la mezcla esté ligera y esponjosa. Un batido insuficiente puede dejar sabor a queso y una textura menos suave.
- Huevos con cuidado: añade los huevos uno a la vez a baja velocidad, mezclando apenas hasta que se integren. Evita batir en exceso para prevenir burbujas de aire y grietas.
- Hidratación y acidez: añade la crema agria y la nata lentamente, procurando que la mezcla quede brillante. Estos ingredientes aportan humedad y suavidad, así que no los añadas en frío del todo.
- Vainilla y aroma: usa vainilla de buena calidad (extracto puro) para un aroma más rico. Si usas vainilla en pasta, evita excederte para no aportar amargor.
- Opción de estabilizante: si decides usar harina o maicena, mézclalos bien con los otros ingredientes secos para evitar grumos y asegurar que el relleno no se agriete al hornearse.
- Ralladura de limón (opcional): si te gusta un toque cítrico, añade solo 1 cucharadita de ralladura de limón para dar frescura sin sobrecargar el sabor.
- Dulce de leche templado para el remolino: calienta el dulce de leche hasta que tenga consistencia de vertido para facilitar su merodeo en la masa. Si está muy espeso, añade un chorrito de leche o crema para aligerarlo.
- Cómo hacer el remolino: añade una capa de masa, vierte hilos de dulce de leche templado en diferentes puntos y usa un palillo para hacer remolinos suaves. Evita verter todo en un solo lugar para una distribución uniforme.
- Más dulce de leche para la superficie: si quieres un sabor más marcado, añade más dulce de leche al final, justo antes de hornear o tras enfriar ligeramente. Ten en cuenta que endurecerá al enfriar.
- Horneado seguro: hornea a 325–350°F (160–175°C). Si horneas sin baño María, envuelve el exterior del molde con varias capas de papel aluminio para evitar filtraciones de agua y para mantener la cocción uniforme.
- Prevención de grietas: para evitar grietas, hornea a baño María y deja que el pastel enfríe lentamente dentro del horno con la puerta entreabierta tras apagar el calor. Esto reduce el choque de temperatura.
- Enfriado y reposo: deja enfriar completamente el cheesecake a temperatura ambiente, luego refrigéralo al menos 4 horas o idealmente toda la noche para que tome cuerpo y quede suave al cortar.
- Finishing y servicio: espolvorea una pizca de sal marina justo antes de servir para realzar el dulce; acompáñalo con frutos rojos o crema batida para contrarrestar la riqueza.
- Almacenamiento: guarda las porciones cubiertas en el refrigerador hasta 3–4 días. También puedes congelar porciones individuales envueltas; descongélalas en refrigeración antes de servir.
FAQ
Cheesecake al dulce de leche — Preguntas frecuentes
¿Qué es la Cheesecake al dulce de leche?
Es un pastel de queso cremoso con un toque de dulce de leche, que puede llevar una base crujiente de galleta y, a veces, una capa o remolino de dulce de leche por encima o dentro del relleno.
¿Qué necesito para la base?
Galletas trituradas (tipo digestive o vainilla), mantequilla sin sal derretida y una pizca de sal. Opcional: una cucharada de azúcar si las galletas no son dulces.
¿Qué necesito para el relleno?
Queso crema a temperatura ambiente, azúcar, huevos, vainilla y crema espesa. También dulce de leche para el remolino o capa. Opcional: una yema extra para mayor riqueza.
¿Qué tamaño de molde es ideal?
Un molde redondo de 20–23 cm (8–9 pulgadas) funciona perfecto. Si usas un molde más grande, el relleno quedará más delgado; para porciones más gruesas, usa un molde de 18 cm.
¿Se hornea al baño María?
Sí, es recomendado hornear al baño María para evitar grietas y cocción desigual. Envuelve la base del molde en papel aluminio y coloca el molde en una bandeja con agua caliente.
¿A qué temperatura y por cuánto tiempo hornear?
Hornear a 160–165 °C (325–330 °F) durante 60–70 minutos, o hasta que el centro esté apenas tembloroso al mover ligeramente el molde. Apaga el horno y deja que termine de cocerse con el calor residual.
¿Cómo evitar que se agriete o se parta?
Usa baño María, no abras la puerta del horno durante la cocción y permite que el relleno se cocine suavemente. Deja reposar el cheesecake dentro del horno con la puerta entreabierta unos minutos al terminar.
¿Cómo enfriar y desmoldar correctamente?
Retira el baño María y deja enfriar a temperatura ambiente, luego refrigera mínimo 4–6 horas o toda la noche. Desmolda pasando un cuchillo fino por los bordes y retirando con cuidado el aro del molde.
¿Cómo decorar o hacer un remolino de dulce de leche?
Una vez frío, añade una capa de dulce de leche por encima y crea remolinos con un tenedor o cuchillo. Puedes espolvorear con sal marina y decorar con nueces picadas o trocitos de chocolate.
¿Se puede adaptar para dietas o sustituciones?
Sí. Para versión sin gluten, usa galletas sin gluten. Para reducir azúcares, utiliza un edulcorante apto para repostería y ajusta la cantidad de dulce de leche. Si no quieres crema espesa, puedes usar yogur griego espeso mezclado con un poco de crema, aunque la textura será menos firme.
¿Cómo conservar y cuánto dura?
Conservar refrigerado: 4–5 días. También se puede congelar por porciones durante 1–2 meses; descongélalo en el refrigerador durante la noche antes de servir.
¿Cuántas porciones rende?
Con un molde de 20–23 cm suele rendir 8–12 porciones, dependiendo del tamaño de las rebanadas.