Author

Ocean Nightleaf

Browsing

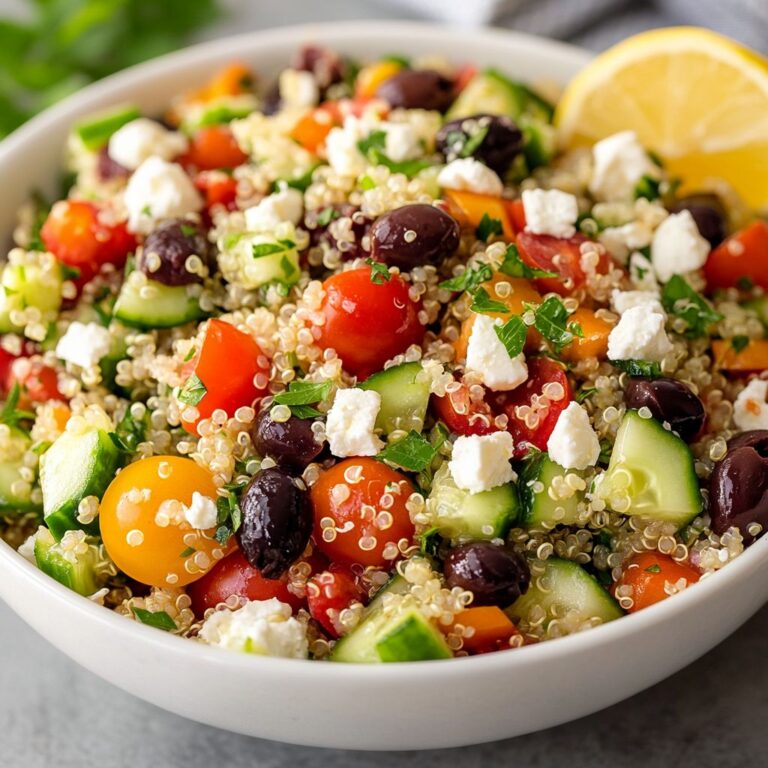
Are you ready to embark on a culinary journey that brings the vibrant flavors of the Mediterranean straight to your kitchen? Introducing the Mediterranean Quinoa Salad—a dazzling dish that effortlessly combines nutrition and flavor in every bite. With its bright colors, fresh ingredients, and delightful textures, this salad is more than just a meal; it’s an experience. The moment you take your first forkful, you’ll be transported to sun-drenched coastlines, olive groves, and bustling markets, where every ingredient is a celebration of nature’s bounty. Whether you’re preparing a quick weekday lunch, a stunning side for a dinner party, or a nutritious post-workout meal, this salad has all you need to impress and satisfy.

At the heart of this recipe is quinoa, a superfood that has skyrocketed to fame due to its remarkable health benefits. Packed with protein, fiber, and essential amino acids, quinoa serves as a fantastic base that complements an array of Mediterranean staples. Gluten-free and versatile, it absorbs the flavors around it, making every mouthful a harmonious blend of tastes. As you cook and fluff the quinoa to perfection, you’ll appreciate its slightly nutty flavor, a foundation that sets the stage for the fresh, vibrant ingredients that follow.

Now, let’s talk about the awe-inspiring medley of vegetables and herbs that bring this salad to life! Juicy tomatoes burst with sweetness, while crisp cucumbers offer a refreshing crunch. Bell peppers, in their vibrant hues of red, yellow, and orange, add color and a subtle sweetness that enhances the overall flavor profile. To elevate the taste even further, we fold in finely chopped red onions, which introduce a mild heat and a lovely crunch—just the right balance to complement the other ingredients. And let’s not forget the herbs! Fresh parsley, mint, and basil add aromatic layers that transport you directly to a seaside taverna.

This salad wouldn’t be complete without a dash of Mediterranean flair, and that’s where olives and feta cheese come in. The salty, briny flavor of olives creates a delicious contrast to the fresh vegetables, while the creamy feta adds a luxurious texture and delicious tang. Crumbling this cheese on top takes the salad from delightful to extraordinary, ensuring every bite is filled with that quintessential Mediterranean taste. If you’re feeling adventurous, try mixing in some different types of olives or substituting the feta with a vegan alternative for a delightful spin!

One of the best aspects of the Mediterranean Quinoa Salad is its incredible versatility. This dish is as customizable as it is delicious, allowing you to tailor it to meet your preferences or dietary needs. Swap out the feta for goat cheese or opt for a handful of nuts for a crunchy twist. You could even toss in some roasted vegetables for a warm, hearty version. Want a touch of sweetness? Adding dried fruits like raisins or cranberries can provide a delightful contrast to the savory elements. The possibilities are endless, ensuring that your Mediterranean journey can take many delicious forms.

If you’re concerned about meal prep, fear not! This salad is perfect for make-ahead meals. In fact, the flavors only improve as they meld together over time. Prepare a large batch at the beginning of the week, and you’ll have a nutritious option ready to go for lunch or dinner. Pack it for a picnic, enjoy it at a barbecue, or serve it as a side to grilled meats or fish. The Mediterranean Quinoa Salad is as adaptable as your lifestyle demands, making it an effortless option for any occasion.

As you prepare this vibrant salad, you’ll become engrossed in the nourishing process—each step cultivates an appreciation for whole foods and mindful cooking. The colorful ingredients offer a canvas for creativity; you’ll find joy in selecting the ripest tomatoes, the crunchiest cucumbers, and the freshest herbs. With each chop, dice, and toss, you’ll connect with the spirit of Mediterranean cooking, which prizes wholesome ingredients and the joy of sharing food with loved ones.

Let’s not overlook the health benefits that this salad brings to your table. In addition to being protein-rich, quinoa is also a fantastic source of essential vitamins and minerals. It is high in magnesium, iron, and B-vitamins, supporting your body’s overall well-being. Meanwhile, the variety of vegetables contributes fibers, antioxidants, and phytonutrients that are vital for maintaining optimal health. The inclusion of olive oil, a staple of the Mediterranean diet, adds healthy monounsaturated fats that support heart health and promote longevity. This salad embodies a wholesome, balanced approach to eating—a true testament to the Mediterranean philosophy that emphasizes fresh, nutrient-dense foods.

What’s more, this quinoa salad is perfect for any season. In the summer, the light and refreshing ingredients make for a soothing meal on hot days. In the fall, you can incorporate roasted squash or sweet potatoes to lean into the comforting, warming qualities of the season. It’s just as delightful as a cozy dish served alongside a fireplace in winter, radiating warmth and heartiness with its variety of flavors. And as spring blossoms, the freshness of the salad mirrors the vibrant blooms outside, making it an ideal choice to celebrate the renewal that comes with the season.

As you prepare to dive into this incredible Mediterranean Quinoa Salad, you’ll not only create a dish that is visually stunning and packed with flavors, but also one that contributes positively to your health and well-being. Each bite is a fusion of taste, color, and nourishment, making you feel invigorated and ready to take on the day. Get excited, gather your ingredients, and let the delightful aromas fill your kitchen as you create a wholesome meal that speaks to you and your loved ones.

In summary, the Mediterranean Quinoa Salad is more than just a salad; it’s a cultural experience, a nutritional powerhouse, and a canvas for creativity. Ideal for any occasion, easy to make, and wonderful to share, it embodies everything we love about Mediterranean cuisine. So, roll up your sleeves, grab your freshest ingredients, and let’s prepare to create a salad that will surely enchant your taste buds and elevate your culinary repertoire.

Ingredients

  • 1 cup quinoa rinsed
  • 2 cups water or vegetable broth
  • 1 cup cherry tomatoes halved
  • 1 cucumber diced
  • 1/2 red onion finely chopped
  • 1 bell pepper diced
  • 1/2 cup Kalamata olives pitted and sliced
  • 1/2 cup feta cheese crumbled
  • 1/4 cup fresh parsley chopped
  • 1/4 cup fresh lemon juice
  • 3 tablespoons olive oil
  • 1 teaspoon dried oregano
  • Salt and pepper to taste

Instructions

  • Rinse the quinoa under cold water in a fine mesh strainer to remove any bitterness.
  • In a medium saucepan, combine the rinsed quinoa and water or vegetable broth. Bring to a boil, then reduce the heat to low, cover, and let it simmer for about 15 minutes or until the quinoa is fluffy and the liquid is absorbed.
  • Once cooked, remove the saucepan from heat and let it sit covered for 5 minutes. Then, fluff the quinoa with a fork and let it cool to room temperature.
  • While the quinoa is cooling, prepare the vegetables: halve the cherry tomatoes, dice the cucumber, finely chop the red onion, and dice the bell pepper.
  • In a large mixing bowl, combine the cooked quinoa, cherry tomatoes, cucumber, red onion, bell pepper, Kalamata olives, feta cheese, and fresh parsley.
  • In a small bowl or jar, whisk together the fresh lemon juice, olive oil, dried oregano, salt, and pepper to create the dressing.
  • Pour the dressing over the quinoa salad and toss gently to combine all the ingredients evenly.
  • Taste and adjust seasoning if necessary, adding more salt, pepper, or lemon juice as desired.
  • Serve immediately or let it chill in the refrigerator for 30 minutes to allow the flavors to meld together before serving.

Notes

This Mediterranean Quinoa Salad is a refreshing and nutritious dish, perfect for warm weather or as a side at any meal. Quinoa, a complete protein, provides a great base and is enhanced by the vibrant flavors of fresh vegetables and tangy feta cheese. To prepare the salad, start by cooking the quinoa in water or vegetable broth to infuse it with added flavor. Let it cool before mixing with your chopped vegetables, olives, and feta.

The combination of fresh parsley and lemon juice adds brightness and helps to enhance the overall taste. Drizzling with olive oil and seasoning with dried oregano, salt, and pepper will tie all the ingredients together beautifully. This salad is not only aesthetically pleasing but also versatile, allowing you to add or substitute ingredients like avocados, artichokes, or grilled chicken for extra protein.

It can be made ahead of time and stored in the refrigerator, making it an ideal meal prep option. The flavors continue to develop as it sits, so it can be enjoyed the next day for lunch or dinner. Serve it as a standalone dish or as a side accompanying grilled meats or seafood. This salad is naturally gluten-free and vegan-friendly, catering to various dietary needs.

Faq

What is Mediterranean Quinoa Salad?

Mediterranean Quinoa Salad is a healthy and vibrant dish made from cooked quinoa, fresh vegetables, and Mediterranean ingredients such as olives, feta cheese, and herbs, all tossed in a light dressing.

Is this salad gluten-free?

Yes, quinoa is naturally gluten-free, making Mediterranean Quinoa Salad a great option for those with gluten sensitivities or celiac disease.

Can I meal prep this salad?

Absolutely! Mediterranean Quinoa Salad is perfect for meal prep. It can be stored in the refrigerator for several days and the flavors often improve as it sits.

What variations can I make to the recipe?

You can customize the salad by adding or substituting ingredients like chickpeas, grilled chicken, roasted vegetables, or different types of cheese based on your preference.

How long does this salad last in the fridge?

Mediterranean Quinoa Salad can last in the refrigerator for up to 4-5 days if stored in an airtight container.

What is the nutritional value of the salad?

The salad is high in protein and fiber due to the quinoa and vegetables. It is rich in vitamins, minerals, and healthy fats, especially if you add ingredients like olive oil and avocado.

Can I serve this salad warm?

While it is typically served chilled or at room temperature, you can serve it warm if you prefer. Just be sure to let the cooked quinoa cool slightly before adding other ingredients.

What dressing is recommended for this salad?

A simple dressing made from olive oil, lemon juice, salt, and pepper works perfectly. You can also add a splash of balsamic vinegar or a sprinkle of herbs for extra flavor.
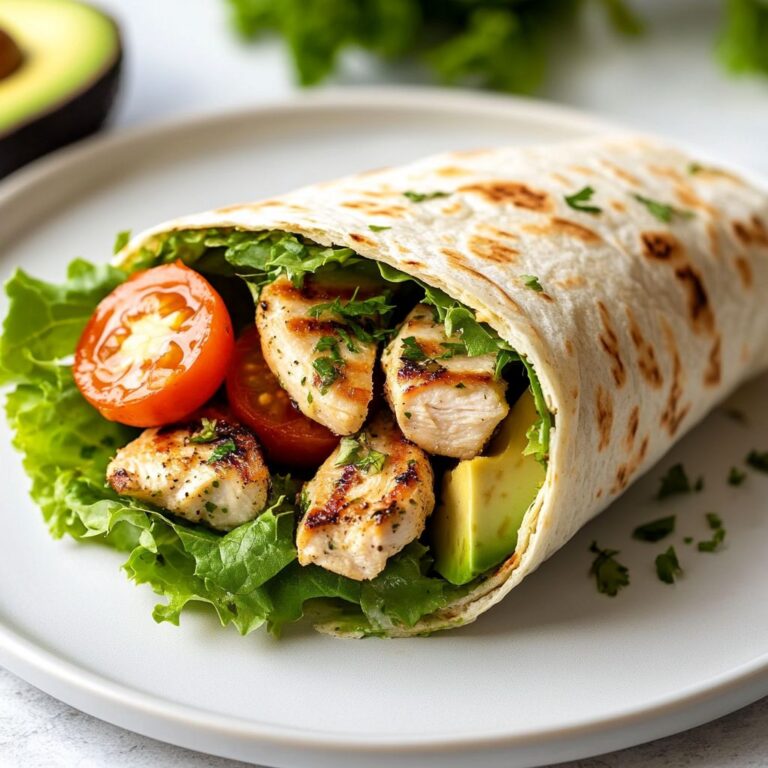
Imagine biting into a warm, soft wrap filled with succulent chicken, fragrant herbs, and a medley of flavors that dance on your palate. These Garlic Herb Chicken Wraps are not just a meal; they are an experience that encapsulates the essence of comforting home-cooked goodness with the exciting twist of vibrant, fresh ingredients. Whether you’re looking for a quick weeknight dinner or a delightful addition to your lunch meal prep, these wraps are versatile, satisfying, and incredibly delicious.

At the heart of each wrap lies garlic-herb marinated chicken, tender and juicy, infused with spices that resonate with the freshness of the ingredients. The aromatic blend of garlic, rosemary, thyme, and parsley transforms a simple chicken breast into a bold flavor powerhouse, making it the star of the show. The marinade not only tenderizes the meat but also creates a delightful crust when cooked, ensuring that every bite is bursting with flavor.

The beauty of these Garlic Herb Chicken Wraps is in their simplicity. You can whip them up in under an hour, making them perfect for those busy afternoons when time is of the essence. As you prepare the chicken, you’ll start to notice the intoxicating scent of garlic and herbs permeating your kitchen, inviting everyone in the house to gather around and anticipate a delicious meal. Pairing the chicken with a mix of crisp, fresh vegetables adds a delightful crunch and makes these wraps not only tasty but also nutritious. Crisp lettuce, juicy tomatoes, and refreshing cucumbers complement the seasoned chicken perfectly, creating a harmony of textures.

But the greatness of these wraps goes beyond the chicken and veggies. The choice of wrap makes a significant difference in the overall experience. Whether you opt for whole wheat, spinach, or traditional flour tortillas, the wrap acts as the canvas upon which your culinary masterpiece is built. Each bite reveals a new layer of flavor, making you want to go back for more. As an added bonus, wraps are inherently portable, making them ideal for picnics, road trips, or a quick lunch at your desk. They’re easy to prepare in batches and can be customized to suit various tastes, making them a fantastic option for families or gatherings where everyone can create their own unique combinations.

Moreover, these Garlic Herb Chicken Wraps are a fantastic way to incorporate leftover chicken or vegetables into a new meal. If you find yourself with extra grilled chicken from the weekend or a variety of vegetables that need to be used up, you can easily adapt this recipe to minimize waste while maximizing enjoyment. This adaptability not only saves you time but is also an excellent approach to ensure you are eating fresh, wholesome meals throughout the week.

To elevate your wraps even further, consider adding sauces or spreads that enhance the flavor profile. A creamy garlic sauce, tangy yogurt dressing, or zesty chimichurri can take your wraps to new heights. Experimenting with different sauces allows you to play with flavors and textures, ensuring that your meal remains exciting and enjoyable. You can also cater to dietary preferences or restrictions by selecting gluten-free wraps or plant-based proteins, emphasizing the versatility of this dish.

Preparing Garlic Herb Chicken Wraps can also be a fun and interactive cooking experience. Invite family members or friends to join in on the assembly process. Setup a wrap bar with all the ingredients laid out, allowing everyone to customize their own to their liking – it’s a great alternative to traditional family meals and a wonderful way to bond over cooking. Demonstrating the joy of cooking together can be a memorable experience that fosters a love for food and creativity in the kitchen.

For those who crave a bit of heat, don’t hesitate to add a spicy element. Whether it’s a dash of sriracha, pickled jalapeños, or a sprinkle of chili flakes, a little spiciness can elevate the flavor and provide a delightful contrast to the savory chicken and fresh vegetables. Thus, every bite is not only satisfying but also exciting, providing a variety of sensations that make your meal truly unforgettable.

These wraps are also an excellent way to introduce children to new flavors and textures. The fun of rolling their own wraps empowers them to engage with their food, stimulating their curiosity and encouraging healthy eating habits. You can involve them in the preparation, allowing them to choose their own ingredients while explaining the health benefits of the various vegetables and proteins; this helps cultivate an appreciation for nutritious food from an early age.

In terms of storage, Garlic Herb Chicken Wraps can easily be prepped ahead of time. Once assembled, they can be wrapped tightly in foil or parchment paper and stored in the refrigerator for up to 3 days. That means less time spent cooking and more time enjoying meals with loved ones. You can even freeze the wraps for longer storage, just ensure that you keep them in air-tight containers to preserve freshness. This means that not only do you have a quick, delicious meal at your fingertips, but that you are also making efficient use of your time and resources in the kitchen.

As you savor these Garlic Herb Chicken Wraps, you’ll find that they embody all that is enjoyable about cooking at home. With the ability to prioritize flavor, nutrition, and convenience, this recipe encapsulates the spirit of modern eating. It’s about celebrating the joy of good food, simple preparation, and the happiness that comes from sharing a meal with others. The crispy vegetables, tender chicken, and herby goodness combined with a variety of sauces make for a uniquely customizable dish that can be suited to anyone’s palate.

These Garlic Herb Chicken Wraps are not just another recipe; they are an opportunity for creativity, nourishment, and togetherness. So roll up your sleeves, gather your favorite ingredients, and prepare to embark on a culinary adventure that is sure to delight and inspire! Dive into the endless possibilities these wraps offer, and let your kitchen become a realm of delicious experimentation. From family dinners to office lunches or sunny picnics, there is a wrap for every occasion, and it all starts with this simple, yet exquisite, Garlic Herb Chicken Wrap recipe.

Ingredients

  • Chicken breasts boneless, skinless
  • 2 tbsp olive oil
  • 4 cloves garlic minced
  • 1 tbsp fresh rosemary chopped
  • 1 tbsp fresh thyme chopped
  • 1 tsp salt
  • 1/2 tsp black pepper
  • 4 large whole wheat or lettuce wraps
  • 1 cup mixed greens
  • 1/2 cup cherry tomatoes halved
  • 1/4 cup feta cheese crumbled
  • 1/4 cup tzatziki sauce optional

Instructions

  • Start by marinating the chicken. In a mixing bowl, combine the olive oil, minced garlic, chopped rosemary, chopped thyme, salt, and black pepper.
  • Add the boneless, skinless chicken breasts to the marinade, ensuring they are well coated. Cover and let them marinate for at least 30 minutes at room temperature, or up to 2 hours in the refrigerator for more flavor.
  • Preheat your grill or a grill pan over medium-high heat.
  • Once hot, remove the chicken from the marinade and place it on the grill. Cook for 6-7 minutes on each side, or until the chicken is cooked through and has nice grill marks. The internal temperature should reach 165°F (75°C).
  • Once cooked, remove the chicken from the grill and let it rest for a few minutes before slicing it into strips.
  • To assemble the wraps, lay out the whole wheat or lettuce wraps on a clean surface.
  • Layer each wrap with a handful of mixed greens, sliced cherry tomatoes, and a portion of the sliced grilled chicken.
  • If desired, sprinkle crumbled feta cheese on top and add a dollop of tzatziki sauce for extra flavor.
  • Fold the sides of the wraps inward, then roll them up tightly from the bottom to the top.
  • Slice the wraps in half and serve immediately, or wrap them in parchment paper for a portable meal.

Notes

These garlic herb chicken wraps are a delightful and satisfying option for lunch or dinner, packed with flavor and nutrition. Marinated in a savory blend of garlic, rosemary, and thyme, the chicken is both tender and aromatic. For a healthier twist, use whole wheat wraps or crisp lettuce leaves as a low-carb alternative. Feel free to customize your wraps with additional veggies, such as cucumbers or bell peppers, for added crunch and color. The creamy feta adds a rich, tangy note, while tzatziki sauce enhances the overall flavor profile, making each bite refreshing and delicious. These wraps are perfect for meal prep; simply grill the chicken and assemble the wraps when you’re ready to eat. Enjoy them warm or cold—they’re versatile and fantastic for on-the-go meals!

Faq

1. What ingredients do I need to make Garlic Herb Chicken Wraps?

You will need chicken breasts, garlic, mixed herbs (like thyme, basil, and oregano), tortillas, lettuce, tomatoes, and your choice of dressing or sauce.

2. How long does it take to prepare Garlic Herb Chicken Wraps?

The preparation time is approximately 15 minutes, and cooking the chicken takes about 20 minutes, making the total time around 35 minutes.

3. Can I use leftover chicken for this recipe?

Yes, leftover chicken works great! Just shred or chop it and add it to the wraps with the other ingredients.

4. Is it possible to make these wraps ahead of time?

Yes, you can prepare the fillings ahead of time. Just store them in an airtight container in the fridge and assemble the wraps right before serving to keep the tortillas from getting soggy.

5. What type of tortillas works best for Garlic Herb Chicken Wraps?

Flour tortillas are commonly used, but you can also opt for whole wheat, spinach, or even low-carb tortillas depending on your dietary preferences.

6. Can I make these wraps vegetarian?

Absolutely! You can replace chicken with grilled vegetables, tofu, or chickpeas seasoned with garlic and herbs for a delicious vegetarian option.

7. What sauces pair well with Garlic Herb Chicken Wraps?

Your choice of dressing can vary; ranch, Caesar, or a zesty garlic mayo work wonderfully. Additionally, a simple vinaigrette or yogurt dressing can also be delicious.

8. How can I store leftover wraps?

Wrap any leftovers in foil or plastic wrap and store them in the fridge. They are best eaten within 1-2 days; just be sure to keep the sauce separate to avoid sogginess.

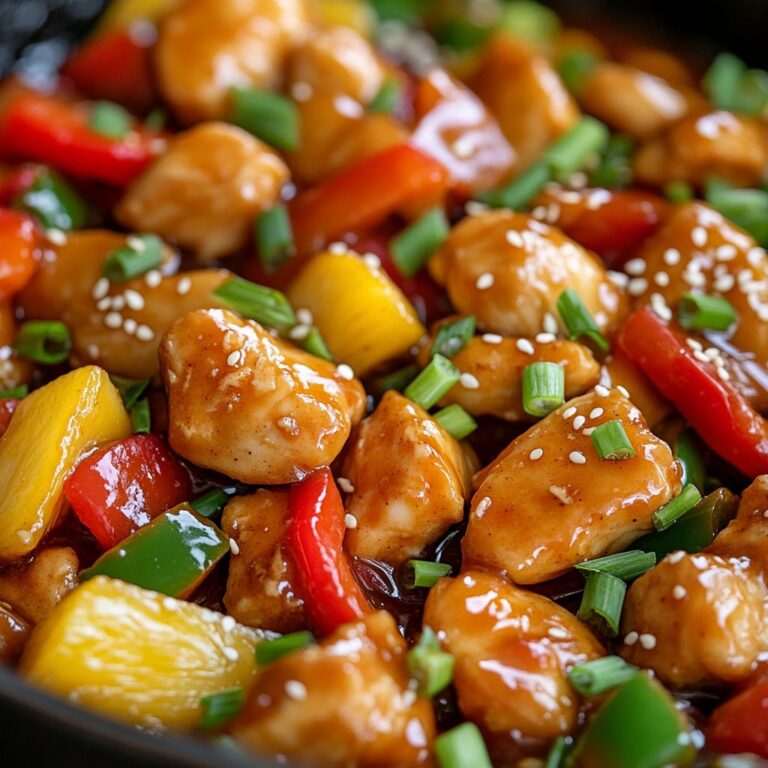
Imagine a dish that tantalizes your taste buds with a delightful harmony of flavors, where the zesty sweetness of sun-ripened pineapples dances with the invigorating bite of freshly chopped bell peppers. Welcome to the vibrant world of Sweet and Sour Chicken Skillet! This iconic dish not only brings a splash of color to your dinner table but also wraps you in culinary nostalgia, evoking images of busy weeknight dinners that erupt with laughter and joy amidst the clinking of utensils.

Sweet and Sour Chicken is more than just a meal; it’s an experience that enlivens the senses and satisfies a multitude of cravings. It’s the perfect marriage of sweet and tangy flavors that can instantly transition from a casual family dinner to an elegant gathering with friends. The bite-sized pieces of chicken are lovingly coated in a harmonious blend of sweet and sour sauce, which is often made from scratch, infusing the dish with a freshness that you simply can’t achieve with store-bought alternatives. The vibrant colors and the enticing aroma wafting from your skillet will beckon everyone to the dinner table.

Originating from Chinese cuisine, Sweet and Sour Chicken has captured hearts around the world. The magic lies in its adaptability and comfort. To many, it brings back fond memories of takeout nights or family celebrations. The sweet-tart sauce is remarkably versatile, allowing you to pair it with rice, noodles, or even on its own with a side of crisp vegetables. Each bite offers a perfect balance, satisfying those who revel in sweet meals while still appealing to savory lovers with a punch of umami.

What sets the Sweet and Sour Chicken Skillet apart is its simplicity and speed. In mere minutes, your kitchen can become a hub of delightful aromas and bubbling sauces, with vibrant colors dancing in the skillet. With just one pan, you can achieve a meal that’s not only delicious but also free from the hassle of numerous pots and pans piling up in the sink. This method of cooking encapsulates an essence of efficiency – ideal for those who lead busy lives but refuse to compromise on culinary delight.

But what makes this recipe shine is not merely the chicken or the sauce; it’s the technique and the fresh ingredients that play a crucial role in achieving that authentic taste you crave. Start with juicy, tender chicken breast or thighs that are marinated for depth of flavor. Each piece should be sautéed to golden perfection until they develop a light crust that seals in the juiciness. Combine this with a medley of bright vegetables like bell peppers, vivid carrots, and red onions, which add crunch and color, making the dish not only a feast for the taste buds but also a visual delight.

The beauty of using a skillet for this recipe is the way the flavors come together in one unified dish. As the chicken sizzles, the vegetables soften just enough to still retain their crispness while absorbing the fantastic flavors of the sauce. The sweet and sour sauce itself is a labor of love, combining ingredients such as ketchup, rice vinegar, soy sauce, and sugar to create a complex yet balanced flavor profile that coats each piece of chicken and vegetable beautifully. You can customize the sweetness to your liking, whether you prefer a more traditional touch or a bolder zing.

One of the joys of cooking Sweet and Sour Chicken Skillet is its adaptability to seasonal ingredients. Feel free to swap out vegetables based on what’s fresh at your local market. Snap peas, broccoli, or even zucchini can effortlessly elevate your dish while still embodying that signature sweet and tangy vibe. Experimenting with seasonal produce not only enhances the meal but also introduces an exciting flair that turns a classic dish into a unique culinary creation each time.

This recipe also provides a fantastic opportunity to engage in the art of culinary experimentation. Want to up the heat? Toss in a pinch of red pepper flakes or drizzle some chili oil for a kick. Craving a more complex flavor? Consider throwing in fresh ginger or garlic right at the beginning of your cooking process to infuse the oil with warmth and zest. The possibilities are endless, and you’ll undoubtedly find yourself making this dish repeatedly, tweaking elements each time until it becomes your signature Sweet and Sour Chicken.

Another reason why Sweet and Sour Chicken Skillet is a household favorite is its meal prep potential. You can easily double or even triple the recipe, which means you’ll have leftovers for lunch the next day or an easy reheatable dinner later on. Just let the flavors meld overnight in the refrigerator, and you’ll be rewarded with an even more delicious experience come mealtime. This is the kind of dish that gets better with time, making it excellent for busy weeks ahead.

To serve, consider a fluffy bed of jasmine rice or sticky rice that soaks up all the delectable sauce. For a more contemporary twist, cauliflower rice is a fantastic low-carb alternative that still complements the flavors beautifully. Rounding out your meal with a light side salad or steamed vegetables can offer a perfect balance of flavors and textures. And if you’re feeling adventurous, have some crispy spring rolls on the side to peek your guests’ appetites further.

When it comes to plating, take a moment to appreciate the bright hues and enticing textures. Garnish with a sprinkle of sesame seeds or finely sliced green onions for an Instagram-worthy presentation. Not only does this add visual flair, but it also contributes additional layers of flavor that elevate the dish even more.

Sweet and Sour Chicken Skillet is not just another recipe; it’s a canvas for your culinary creativity and a gateway to delightful meals shared with loved ones. Whether you’re cooking for your family on a bustling weeknight or impressing guests on the weekend, this dish stands ready to deliver punches of flavor and comfort that everyone will enjoy. So step into your kitchen, gather fresh ingredients, and let the Sweet and Sour Chicken Skillet bring joy to your table and warmth to your heart.

In the end, cooking this dish is about connecting with those around you and sharing the love that you put into your food. Celebrate the vibrant flavors and the joy of cooking, knowing that every time you prepare this Sweet and Sour Chicken Skillet, you’re not just feeding the body but also feeding the soul. So, get ready to whip up a delightful meal that will leave ever-lasting impressions at every table it graces.

Ingredients

  • 2 boneless, skinless chicken breasts cut into bite-sized pieces
  • 1/4 cup cornstarch
  • 2 tablespoons vegetable oil
  • 1 bell pepper chopped
  • 1 onion sliced
  • 2 cloves garlic minced
  • 1/2 cup pineapple chunks with juice
  • 1/4 cup rice vinegar
  • 1/4 cup ketchup
  • 1/4 cup soy sauce low sodium
  • 1 tablespoon brown sugar
  • 1/2 teaspoon ground ginger
  • 1/4 teaspoon red pepper flakes optional
  • Salt and pepper to taste
  • Cooked rice for serving

Instructions

  • In a large bowl, toss the bite-sized chicken pieces with the cornstarch until evenly coated.
  • Heat the vegetable oil in a large skillet over medium-high heat.
  • Add the coated chicken pieces to the skillet and cook for about 5-7 minutes, stirring occasionally, until the chicken is browned and cooked through. Season with salt and pepper to taste.
  • Remove the chicken from the skillet and set it aside on a plate.
  • In the same skillet, add the chopped bell pepper, sliced onion, and minced garlic. Sauté for about 3-4 minutes, or until the vegetables are tender.
  • Return the cooked chicken to the skillet with the vegetables.
  • Add the pineapple chunks along with the juice, rice vinegar, ketchup, soy sauce, brown sugar, ground ginger, and red pepper flakes (if using). Stir to combine all the ingredients.
  • Bring the mixture to a simmer and let it cook for an additional 3-5 minutes, allowing the sauce to thicken slightly.
  • Remove from heat and serve the sweet and sour chicken over cooked rice.

Notes

These Sweet and Sour Chicken Skillet dishes are a perfect balance of flavors, combining the savory taste of chicken with the tangy sweetness of pineapple and the refreshing crunch of bell peppers. This one-pan meal is not only quick to prepare but also easy to clean up afterward, making it a fantastic choice for busy weeknights. To enhance the dish, serve it over a bed of steamed rice for a filling meal. You can adjust the sweetness and tanginess by modifying the amount of brown sugar and rice vinegar to suit your taste. Feel free to add other vegetables such as snap peas or carrots for more color and crunch. For meal prep, this dish can be stored in the refrigerator for up to three days and reheats well, making it an excellent option for lunch or dinner. Always ensure you use low-sodium soy sauce to keep the dish healthier.

Faq

What is Sweet and Sour Chicken Skillet?

Sweet and Sour Chicken Skillet is a delicious, stir-fried dish made with chicken pieces, a tangy sweet and sour sauce, and various vegetables, all cooked together in a single skillet for easy preparation and cleanup.

What ingredients do I need to make Sweet and Sour Chicken Skillet?

Essential ingredients include chicken breast or thighs, bell peppers, onion, pineapple chunks, garlic, ginger, soy sauce, vinegar, brown sugar, and cornstarch for thickening the sauce. Optional items can include additional vegetables or sesame seeds for garnish.

How long does it take to prepare Sweet and Sour Chicken Skillet?

The preparation and cooking time typically takes about 30-40 minutes, making it a quick and convenient meal option for busy nights.

Can I use frozen chicken for this recipe?

Yes, you can use frozen chicken, but it is recommended to thaw it beforehand for even cooking. Cook the chicken thoroughly before adding the sauce and vegetables.

Is Sweet and Sour Chicken Skillet healthy?

The healthiness of the dish can be adjusted based on the ingredients used. Opting for lean chicken, a variety of vegetables, and using less sugar in the sauce can make it a healthier choice.

What can I serve with Sweet and Sour Chicken Skillet?

This dish is commonly served over steamed rice, but it can also be paired with quinoa, brown rice, or even cauliflower rice for a low-carb option. You can also add a side salad for extra greens.

Can I make Sweet and Sour Chicken Skillet ahead of time?

While it’s best enjoyed fresh, you can prepare the chicken and chop the vegetables ahead of time. Cooked leftovers can be stored in the refrigerator for 2-3 days, and reheated when needed.

What variations can I try with Sweet and Sour Chicken?

You can experiment with different proteins like shrimp or tofu, use various vegetables like broccoli or snap peas, or switch up the sauce ingredients by adding chili sauce for extra heat or swapping the pineapple for mango.

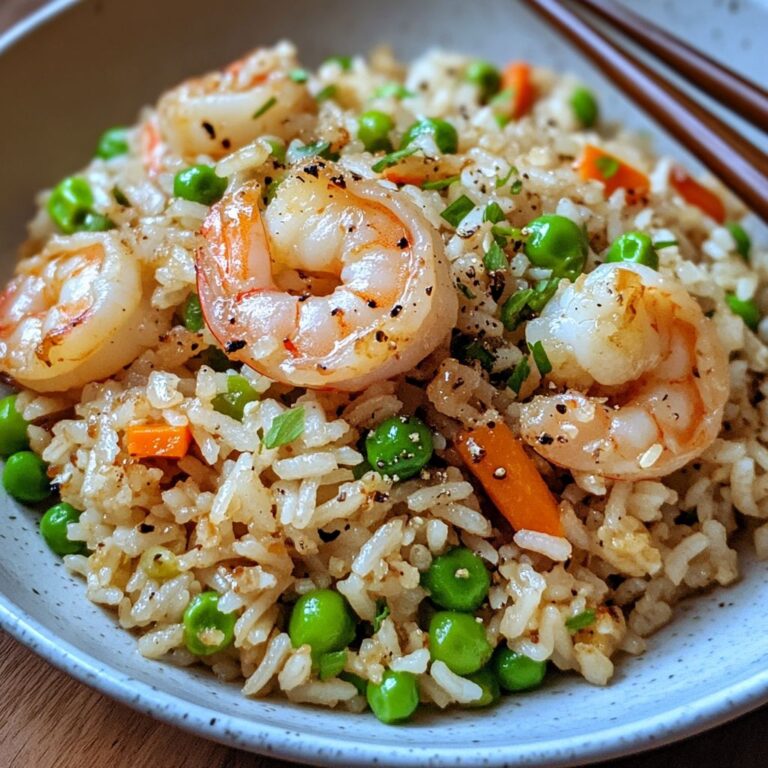
Quick Shrimp Fried Rice

Few culinary masterpieces embody the essence of comfort food like a scrumptious plate of fried rice. And when it comes to elevating this beloved dish, the addition of plump, succulent shrimp transforms a simple meal into a delightful experience that tantalizes the taste buds. Imagine diving into a colorful, fragrant dish that showcases the flavors of the sea intertwined with the satisfying heartiness of perfectly cooked rice. It’s a dish that not only satisfies cravings but also captivates the senses with its vibrant colors and aromatic spices. Whether you’re whipping it up for a busy weeknight dinner or serving it to impress guests on a celebratory occasion, Quick Shrimp Fried Rice is bound to become a favorite in your culinary repertoire.

This ingenious recipe allows you to create an incredible restaurant-quality meal in a fraction of the time. In just under 30 minutes, you can have this satisfying dish prepared and served, making it the perfect solution for those evenings when cooking feels like a chore. With a handful of readily available ingredients, you can achieve a balance of flavors and textures that will leave your family or guests raving. Picture crisp vegetables sautéed to perfection, the subtle sweetness of shrimp, and the satisfying chewiness of rice, all harmoniously coming together in this delightful one-pan wonder.

Unleashing the potential of shrimp fried rice starts with using the freshest ingredients. Opt for medium or large shrimp, which, when cooked, are tender and juicy, bringing a sweet ocean flavor to the dish. As for the rice, day-old cooked rice is highly recommended since it is drier than freshly cooked rice. This quick-fried version takes advantage of the chilled rice’s slightly firm texture, resulting in a better-tasting and perfectly textured meal. However, if you haven’t had a chance to prepare rice the day before, don’t fret—the beauty of this recipe lies in its flexibility. A quick drying-out trick in your pan can salvage the situation if you’re using freshly cooked rice.

The magic of this dish is not only about the shrimp and rice; it lies in the medley of vegetables and seasonings that bring the whole ensemble to life. Peas and carrots are classic additions, providing vibrant pops of color while contributing essential nutrients and a natural sweetness. You could also personalize this dish to your liking, throwing in bell peppers, corn, or scallions for added flavor and crunch. The versatility of Quick Shrimp Fried Rice allows you to utilize whatever vegetables you have on hand, making this an ideal cleaning-the-fridge recipe. It’s an ingredient-based dish that welcomes substitution and creativity, perfect for inspiring any home cook to make it uniquely their own.

When it comes to flavoring your fried rice, you have considerable control. A classic base typically features soy sauce, which offers a savory umami component that pairs exceptionally well with the shrimp and vegetables. Adding a hint of sesame oil not only enhances the dish’s aroma but also encapsulates that authentic Asian flavor profile. Moreover, garlic and ginger—two essential ingredients in many Asian cuisines—add a warm, fragrant depth that perfectly complements the dish. Just a squeeze of lime or a sprinkle of chili flakes can dial up the freshness and spice, taking your fried rice to new heights.

Preparation plays a pivotal role in ensuring the success of Quick Shrimp Fried Rice. The key is to have all your ingredients prepped and ready to go before heating the pan. This strategy prevents overcooking and ensures that every component retains its desired texture and flavor. Cooking in a hot wok or large skillet is crucial for achieving that coveted ‘wok hei’—the charred aroma that is a hallmark of expertly stir-fried dishes. The rapid cooking at high temperatures not only seals in flavors but also gives a slight crisp to the veggies and shrimp, enhancing the overall dining experience.

Beyond mere flavor, Quick Shrimp Fried Rice is also a practical dish that showcases the beauty of balance. It is a well-rounded meal that provides a healthy serving of protein, carbs, and vegetables, making it ideal for nourishing yourself and your loved ones. Whether you’re concerned about weekday dinners or seeking a new dish to add to your weekend feast repertoire, this fried rice variation has balanced nutrition without compromising on taste. It’s the kind of meal that fits seamlessly into modern-day dining, especially with its potential for meal prep or leftovers that taste as delightful the next day.

If you’re a shrimp lover or simply someone who appreciates a good bowl of rice, this recipe caters to your taste and convenience. You might decide to pair it with a light salad, a side of steamed dumplings, or even enjoy it as a standalone meal. Its rich, savory flavors, combined with its ease of preparation, make it a compelling option for any occasion, from busy family dinners to serene weekend brunches. Furthermore, its quick preparation highlights the art of cooking—how simple ingredients can be transformed into something extraordinary with just a little thought and care.

Moreover, restaurant-quality meals at home don’t have to break the bank. Quick Shrimp Fried Rice is a remarkably cost-effective dish that makes use of pantry staples and ingredients that can often be purchased in bulk. Shrimp, especially when bought in larger quantities, becomes a hearty investment that can yield numerous meals. This not only saves money but introduces a variety of flavors and textures into daily meals without the need for constant shopping. Plus, once you master this recipe, you’ll have the confidence to experiment with other proteins or even a vegetarian/vegan option by replacing shrimp with tofu or an assortment of mushrooms.

Lastly, as you explore the exciting world of Quick Shrimp Fried Rice, don’t shy away from infusing your personality into the dish. The flexibility of ingredients allows for endless variations, making it a canvas for your culinary creativity. Adding nuts like cashews or peanuts can impart a delightful crunch, while herbs like cilantro can give freshness that elevates every bite. Consider the tastes of your household or guests and gear your variations accordingly; this is your moment to savor the joy of cooking!

In conclusion, Quick Shrimp Fried Rice is a celebration of flavors, a canvas for creativity, and a trusty ally in the kitchen. Embrace the vibrancy of this dish, indulge in its comforting warmth, and unearth the joy it brings to both cooking and dining. Get ready to make your kitchen your sanctuary, where simple ingredients transform into an ingenuity of flavors. So why wait? Dive into the art of creating the perfect fried rice, and watch as this dish finds its way into your regular meal rotation, bringing satisfaction, warmth, and happiness to every bite!

Ingredients

  • 2 cups cooked white rice, preferably cold
  • 1 lb shrimp, peeled and deveined
  • 2 tablespoons vegetable oil
  • 2 eggs, lightly beaten
  • 1 cup mixed vegetables (peas, carrots, bell peppers)
  • 3 green onions, chopped
  • 3 tablespoons soy sauce
  • 1 teaspoon sesame oil
  • 2 cloves garlic, minced
  • 1/2 teaspoon ground black pepper

Instructions

  • Heat a large skillet or wok over medium-high heat and add 2 tablespoons of vegetable oil.
  • Once the oil is hot, add the minced garlic and sauté for about 30 seconds until fragrant.
  • Add the peeled and deveined shrimp to the skillet and cook for 2-3 minutes, or until they turn pink and opaque. Remove the shrimp from the skillet and set aside.
  • In the same skillet, push the shrimp aside and pour the lightly beaten eggs into the pan. Scramble them until just set, then mix them with the shrimp.
  • Add the mixed vegetables to the skillet and stir-fry for about 2-3 minutes until they are tender but still vibrant.
  • Stir in the cold cooked rice, breaking up any clumps, and mix it with the shrimp and vegetables.
  • Pour the soy sauce and sesame oil over the rice mixture and add ground black pepper. Stir well to combine all ingredients.
  • Add the chopped green onions and stir-fry for an additional minute to heat through.
  • Taste and adjust seasoning if necessary before serving hot.

Notes

These Quick Shrimp Fried Rice make for a delicious and satisfying meal that can be whipped up in no time. Using cold, cooked rice is essential for achieving that perfect fried rice texture—freshly cooked rice tends to be too sticky. Feel free to swap the shrimp for chicken, tofu, or a combination of your favorite proteins. The mixed vegetables can also be adjusted based on what you have on hand, such as broccoli or snap peas. For an extra kick, consider adding some sriracha or chili flakes. Enjoy it as a quick lunch or a comforting dinner, and don’t forget to garnish with extra green onions for a pop of color and flavor.

Faq

What ingredients are needed for Quick Shrimp Fried Rice?

The main ingredients include shrimp, cooked rice, eggs, peas, carrots, soy sauce, green onions, garlic, and sesame oil.

How long does it take to prepare Quick Shrimp Fried Rice?

The total time to prepare Quick Shrimp Fried Rice is approximately 20-30 minutes, including both preparation and cooking time.

Can I use frozen shrimp for this recipe?

Yes, frozen shrimp can be used. Just make sure to thaw and drain them before cooking.

What type of rice is best for fried rice?

Day-old cooked rice is best for fried rice as it is drier and helps achieve a better texture. If you don’t have day-old rice, you can use freshly cooked rice that has cooled down.

Is it possible to make this recipe gluten-free?

Yes, you can use gluten-free soy sauce or tamari as a substitute for regular soy sauce to make it gluten-free.

Can I add other vegetables to Quick Shrimp Fried Rice?

Absolutely! You can add other vegetables such as bell peppers, broccoli, or snap peas based on your preference.

How can I make Quick Shrimp Fried Rice spicier?

You can add chili sauce, red pepper flakes, or diced jalapeños to increase the spice level of the dish.

What is the best way to store leftover fried rice?

Leftover fried rice should be stored in an airtight container in the refrigerator for up to 3-4 days. You can also freeze it for longer storage, up to 2 months.

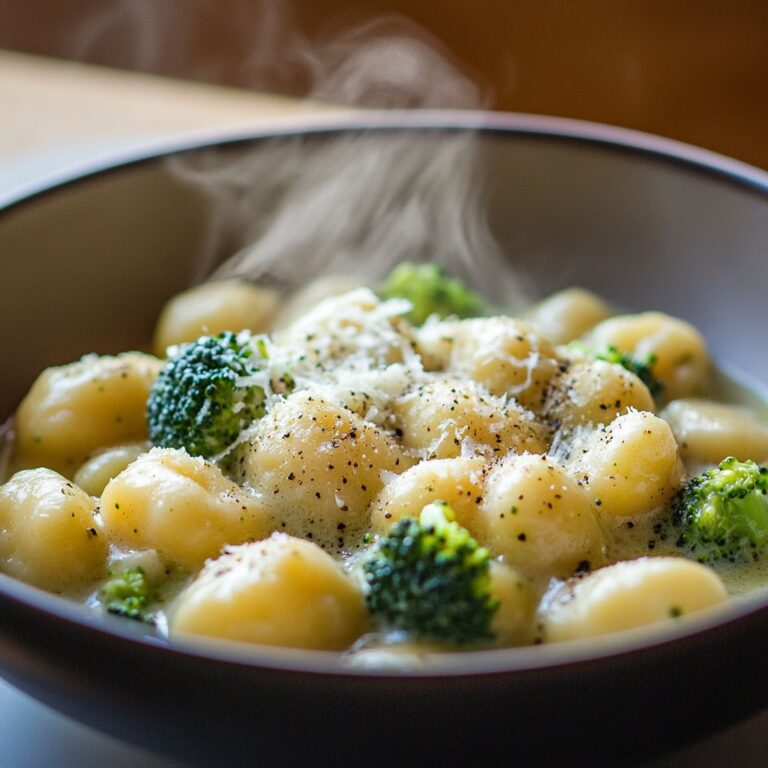
Discover the Irresistible Allure of Creamy Broccoli Gnocchi

Imagine a dish that embodies comfort and elegance, a masterpiece that tantalizes your taste buds while nourishing your body. Creamy Broccoli Gnocchi does just that! This delightful creation marries the soft, pillowy goodness of gnocchi with the vibrant, earthy flavors of fresh broccoli, all enveloped in a silky sauce that ensnares your senses with its creamy richness. Whether you’re looking to impress guests for a special occasion or craving a simple yet gourmet meal after a hectic day, this dish effortlessly fits the bill. Dive into the irresistible world of Creamy Broccoli Gnocchi and unlock a culinary experience that transcends ordinary pasta!

At its core, gnocchi represents a beloved Italian tradition, revered for its delicate texture and versatility. While traditional potato gnocchi holds a certain nostalgic charm, this recipe elevates your experience by incorporating broccoli into the mix. Broccoli not only adds a nutritional powerhouse element to the dish but also contributes a subtle crunch that contrasts beautifully with the smooth gnocchi. Each bite balances the flavors of savory garlic, buttery cream, and the unmistakable goodness of green vegetables, creating a symphony of tastes that is both wholesome and indulgent.

Let’s take a moment to appreciate the process of creating your own gnocchi. The act of rolling out the dough, cutting it into perfect little pillows, and gently pressing each piece with a fork imbues the cooking experience with a personal touch that mere store-bought gnocchi simply can’t replicate. With each gnocchi, you’re not just preparing a meal; you’re making a memory. It adds an element of joy to your dining experience, showcasing your cooking skills and allowing for creativity in the kitchen. And if you’re short on time, store-bought gnocchi can work wonders too, seamlessly blending into this creamy, comforting dish.

The secret to truly getting the most out of your Creamy Broccoli Gnocchi lies in the sauce. A harmonious blend of cream, garlic, and parmesan creates a flavor explosion that clings to each piece of gnocchi and vegetable. As the garlic begins to sauté, your kitchen transforms into an aromatic haven, inviting family and friends to gather around the dining table, eagerly anticipating what’s to come. The creaminess of the sauce envelops each gnocchi, making every bite an explosion of flavor that is rich yet not overwhelming. Paired perfectly with the tender broccoli, this dish embraces an exquisite balance that even the most discerning palates will appreciate.

To elevate your Creamy Broccoli Gnocchi even further, don’t shy away from adding your own personal touches. A sprinkle of freshly cracked black pepper, or perhaps a dash of crushed red pepper flakes, can instantly add an enticing layer of heat. Imagine the vibrant colors on your plate, marrying the lush green of the broccoli with the creamy backdrop of the sauce, complemented by the warmth of spices. The visual appeal of the dish is certainly one that will captivate the hearts and appetites of anyone at your table.

Not only is this Creamy Broccoli Gnocchi a joy to create, but it is also incredibly versatile. You can enjoy it straight off the stove, warm and comforting, or let it cool and serve it cold as a delightful pasta salad for a summer gathering. Toss in other vegetables, such as sun-dried tomatoes or sautéed mushrooms, to give it your unique twist. For the protein lovers out there, consider adding grilled chicken, shrimp, or even crispy pancetta to take the dish to new mouthwatering heights.

This recipe also highlights an important narrative about healthy eating; brokered in a world where the allure of convenience sometimes overshadows nutrition, Creamy Broccoli Gnocchi allows you to enjoy the best of both worlds. The incorporation of broccoli not only enriches the dish with its vitamins and fibers, but also sends a clear message: that eating deliciously can be paired with eating well. Studies have shown that embracing more vegetables in your meals leads to superior health outcomes, and what better way to do so than indulging in this creamy treat?

Moreover, let’s talk about leftovers. If you’re fortunate enough to have any remaining Creamy Broccoli Gnocchi, rejoice! This dish tastes even better the next day, as the flavors meld together and deepen into a comforting, luscious experience. Heating it up for lunch or dinner the following day means you don’t have to sacrifice taste for convenience. The simple reheating process does nothing to diminish its original charm, ensuring you can enjoy this delightful meal multiple times.

And what about accompanying beverages? From a crisp white wine to a refreshing sparkling water with a splash of lemon, the drink you choose can enhance the overall experience of your meal. The creaminess of the sauce calls for something that can cut through the richness, so consider pairing with a lovely Sauvignon Blanc or a zesty Pinot Grigio. The right wine not only complements the dish but elevates it, turning an ordinary dinner into a culinary celebration.

As we delve deeper into the art of making Creamy Broccoli Gnocchi, you can think of it as a journey through flavors and textures. This recipe invites you into its embrace, encouraging you to create, enjoy, and share. Whether you’re cooking for a family gathering, a romantic dinner, or just a cozy night in, each step in the preparation process transforms the mundane into something extraordinary. Every stir of the sauce, every squeeze of lemon, and every sprinkle of cheese becomes an opportunity for creativity and passion to shine.

So gather your ingredients, roll up your sleeves, and get ready for a delightful culinary adventure with Creamy Broccoli Gnocchi! Let the allure of its creamy goodness draw you in and the heartiness of its flavors keep you coming back for more. You’ll not only savor the taste but also relish the experience of crafting this unforgettable dish in your own kitchen. From novice cooks to seasoned chefs, everyone can find joy and satisfaction in serving up this comforting plate of gnocchi. As you share it with loved ones, relish not just the meal, but the moments created around it. Enjoy every creamy bite, and let the world of flavors unfold before you with each serving!

Ingredients

  • 1 package (16 oz) gnocchi
  • 2 cups broccoli florets
  • 2 tablespoons olive oil
  • 3 cloves garlic minced
  • 1 cup heavy cream
  • 1/2 cup grated Parmesan cheese
  • 1/2 teaspoon salt
  • 1/4 teaspoon black pepper
  • 1/4 teaspoon red pepper flakes optional
  • Fresh basil for garnish optional

Instructions

  • Bring a large pot of salted water to a boil. Add the gnocchi and cook according to the package instructions, typically for about 2-3 minutes until they float to the top. Drain and set aside.
  • In the same pot, add the olive oil over medium heat. Once hot, add the minced garlic and sauté for about 1 minute until fragrant, being careful not to burn it.
  • Add the broccoli florets to the pot and sauté for 2-3 minutes until they are bright green and tender-crisp.
  • Pour in the heavy cream and bring the mixture to a gentle simmer. Stir well to combine the garlic and broccoli.
  • Add the grated Parmesan cheese, salt, black pepper, and red pepper flakes (if using), stirring continuously until the cheese has melted and the sauce is smooth.
  • Gently fold in the cooked gnocchi, ensuring they are well coated with the creamy sauce.
  • Cook for an additional 1-2 minutes to heat through, then remove from heat.
  • Serve immediately, garnishing with fresh basil if desired.

Notes

These creamy broccoli gnocchi are a comforting and satisfying dish that combines tender gnocchi with vibrant broccoli in a rich cream sauce. The garlic and Parmesan cheese add depth of flavor, while the red pepper flakes provide a hint of spice that can be adjusted to your taste. For a delightful presentation, top with freshly chopped basil before serving. This dish is perfect for a cozy weeknight dinner or as a side dish for a special occasion. Feel free to add other vegetables like spinach or mushrooms, or protein such as grilled chicken or shrimp for a heartier meal. Enjoy this creamy dish hot for the best texture and flavor!

Faq

What ingredients do I need to make Creamy Broccoli Gnocchi?

You’ll need gnocchi, fresh broccoli, heavy cream, garlic, Parmesan cheese, salt, pepper, and olive oil.

Can I use frozen broccoli instead of fresh?

Yes, you can use frozen broccoli. Just make sure to thaw and drain it before cooking.

How long does it take to cook the gnocchi?

Fresh gnocchi usually takes about 2-3 minutes to cook in boiling water, while dried gnocchi usually takes about 3-5 minutes.

Is this recipe suitable for vegetarians?

Yes, this Creamy Broccoli Gnocchi is a vegetarian dish as long as you use vegetarian cheese.

Can I make this dish gluten-free?

Yes, just use gluten-free gnocchi to make the dish gluten-free.

How can I store leftovers?

Store leftovers in an airtight container in the refrigerator for up to 3 days. Reheat on the stovetop or in the microwave.

What can I serve with Creamy Broccoli Gnocchi?

This dish can be served as a main course or paired with a side salad or garlic bread.

Can I add protein to this dish?

Yes, you can add grilled chicken, sausage, or sautéed shrimp for added protein.

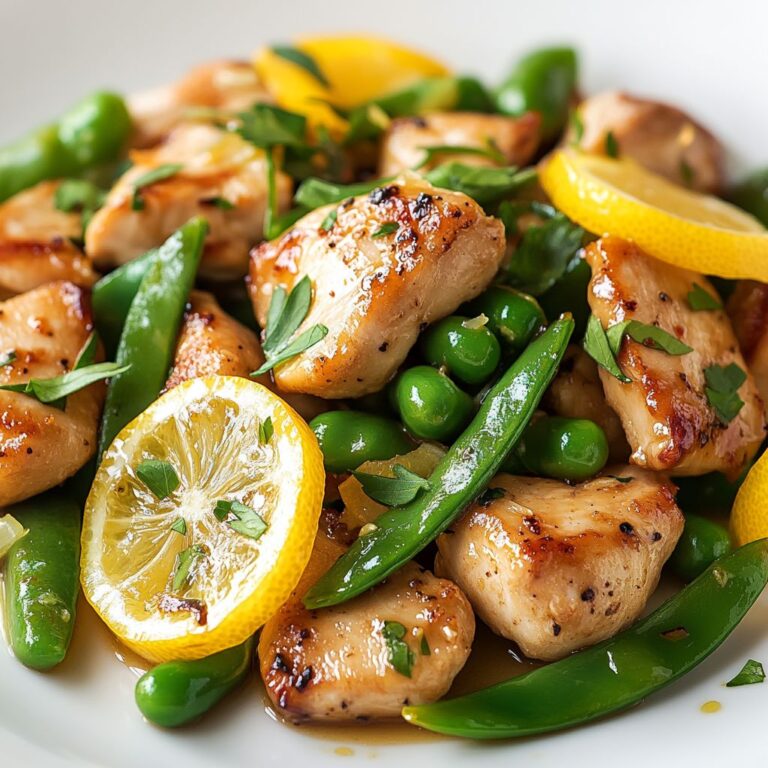
Lemon Garlic Chicken Stir-Fry

Imagine this: a vibrant and colorful plate filled with a medley of tender chicken, crisp vegetables, and a tantalizing lemon-garlic sauce that’s bursting with flavor. This isn’t just dinner; it’s an experience—a culinary journey that not only nourishes but captivates your senses. The Lemon Garlic Chicken Stir-Fry is more than just a dish; it’s a celebration of fresh ingredients, aromatic spices, and the satisfaction that comes from a home-cooked meal.

Stir-fries are hailed around the world for their quick cooking times and dramatic flavors. This particular recipe highlights the harmonious relationship between zesty citrus tones and the savory depth of garlic, creating a perfect balance that dances on your palate. The moment you take that first bite, you’re met with a brilliant burst of lemony goodness combined with the rich umami of sautéed chicken. The versatility of this dish allows it to shine as an everyday meal while also being suitable for entertaining guests or special occasions.

One of the most appealing aspects of this Lemon Garlic Chicken Stir-Fry is its adaptability. While the ingredients can be customized to suit your taste buds, it often features tender slices of chicken breast stir-fried to juicy perfection, accompanied by an array of vibrant vegetables such as bell peppers, broccoli, and snap peas. Each bite offers a delightful crunch, complemented by the sauce’s velvety texture, which coats the vegetables and chicken alike. Serve this stir-fry over a bed of fluffy rice or tender noodles, and you’ve got a wholesome, satisfying meal that’s ready in a flash!

This recipe is particularly ideal for a busy weeknight when time is of the essence, but you still crave something wholesome and flavorful. Typically, the preparation time is short, allowing you to whip up an impressive dish that feels gourmet without needing a lot of cooking experience. Plus, this stir-fry requires minimal cleanup, making it as easy to love as it is to make! The simple technique of quickly tossing ingredients in a hot wok allows for an explosion of flavors while preserving the nutrients in the vegetables, ensuring that you approach your dinner with both health and delight.

Now, let’s talk about the star of this show: the lemon garlic sauce. It’s easy to whip up at home, consisting of fresh squeezed lemon juice, garlic (of course), soy sauce, and a few other pantry staples that likely already reside in your kitchen. What could be more satisfying than knowing that the rich, mouthwatering flavors in your dish are homemade? There’s no need for overly complicated ingredients—just simple, honest foods that come together to create something truly scrumptious.

Incorporating this Lemon Garlic Chicken Stir-Fry into your meal rotation is an excellent way to introduce freshness and zest into your diet. Additionally, the health benefits of consuming chicken, paired with an abundance of colorful vegetables—rich in vitamins and minerals—make this dish an inherently nourishing choice. You’ll find your dish bursting with antioxidants and complex carbohydrates, elevating your dining experience into one that’s nourishing to both body and soul.

One of the greatest joys of cooking is the opportunity to gather friends and family around the table. Picture a cozy evening spent sharing stories while enjoying steaming bowls of Lemon Garlic Chicken Stir-Fry. It’s a dish that invites conversation and connection, a meal that stirs the senses, and perhaps even inspires some spontaneous family traditions. With its bright flavors and uplifting aroma wafting through your kitchen, it’s more than just food; it’s a reminder of the love and care that goes into cooking for those we cherish.

Moreover, this recipe provides an excellent platform for experimentation. Want to give it a unique twist? Consider adding a splash of sesame oil for a nutty undertone or a sprinkle of red pepper flakes for an extra kick. Feel free to swap out the protein: shrimp, beef, or tofu can all seamlessly transition into this delightful stir-fry. The addition of seasonal vegetables also allows you to embrace farm-to-table principles, ensuring your dish is as fresh as can be! The versatility doesn’t stop there; serve this dish for lunch the next day as a wrap, salad topping, or in a bento box—with minimal leftover fuss.

In today’s fast-paced world, dishes like this Lemon Garlic Chicken Stir-Fry remind us of the importance of taking a moment to enjoy what we eat and who we share it with. With its ease of preparation yet robust flavors, it’s a spectacular reminder of the joy and comfort that home-cooked ingredients can provide. Whether you’re an experienced cook or just beginning your culinary adventure, this recipe is one to have in your repertoire—filling your kitchen with the irresistible aroma of garlic and lemon, you’ll find yourself returning to it time and time again.

In conclusion, Lemon Garlic Chicken Stir-Fry is not only simple and quick to prepare, but it also showcases the beauty of wholesome ingredients in their finest form. It is a dish that captures the essence of comfort while providing nourishment and a vibrant explosion of taste. Try this recipe at home and enjoy not only the delightful flavors but also the happiness that comes with creating a meal that is deeply satisfying, effortlessly elegant, and thoroughly enjoyable. Your taste buds will thank you, and your loved ones will cherish the moments spent sharing this delightful meal together. So roll up your sleeves, gather your ingredients, and get ready to stir up something magical!

Ingredients

  • Chicken Breast
    • 1 lb boneless, skinless chicken breast, cut into bite-sized pieces
  • Vegetables
    • 1 cup broccoli florets
    • 1 bell pepper, sliced (red or yellow)
    • 1 cup snap peas or snow peas
    • 2 carrots, thinly sliced
    • 2 green onions, sliced
  • Garlic
    • 4 cloves garlic, minced
  • Lemon
    • 1 lemon, juiced and zested
  • Sauce
    • 1/4 cup soy sauce (or tamari for gluten-free)
    • 2 tbsp honey or maple syrup
    • 1 tbsp cornstarch (optional for thickening)
  • Oil
    • 2 tbsp olive oil or sesame oil
  • Seasoning
    • Salt and pepper to taste

Instructions

  • Heat a large skillet or wok over medium-high heat and add the olive oil or sesame oil, allowing it to heat up.
  • Add the bite-sized pieces of chicken breast to the skillet and season with salt and pepper. Cook for about 5-7 minutes, stirring occasionally, until the chicken is browned and cooked through.
  • Once the chicken is cooked, add the minced garlic to the skillet and stir-fry for an additional 1-2 minutes until fragrant, being careful not to burn the garlic.
  • Add the broccoli florets, sliced bell pepper, snap peas or snow peas, and thinly sliced carrots to the skillet. Stir-fry the vegetables with the chicken for about 4-5 minutes until they are tender-crisp.
  • In a small bowl, combine the soy sauce, honey or maple syrup, lemon juice, lemon zest, and cornstarch (if using) and mix well. Pour this sauce over the chicken and vegetables in the skillet.
  • Stir everything together and cook for another 2-3 minutes, allowing the sauce to reduce slightly and thicken, if cornstarch is included.
  • Finally, sprinkle the sliced green onions over the stir-fry just before serving for added freshness and flavor.
  • Serve the lemon garlic chicken stir-fry over rice or noodles, if desired, and enjoy your meal!

Notes

These lemon garlic chicken stir-fry is a vibrant and healthy dish that brings together tender chicken pieces and a colorful mix of vegetables, all tossed in a zesty lemon garlic sauce. It’s a quick meal that you can easily whip up on a busy weeknight. For maximum flavor, make sure to marinate the chicken in some of the lemon juice and garlic for at least 15 minutes before cooking. You can also add additional vegetables like zucchini or mushrooms based on your preference. This dish pairs beautifully with rice or quinoa, allowing the sauce to soak into the grains. If you want a spicier kick, add a sprinkle of red pepper flakes or Sriracha to the stir-fry. Enjoy this light yet satisfying meal any time of the year!

Faq

What ingredients do I need for Lemon Garlic Chicken Stir-Fry?

You will need chicken breast, garlic, lemon juice, vegetables (like bell peppers and broccoli), soy sauce, olive oil, salt, and pepper.

Can I use frozen chicken for this recipe?

Yes, you can use frozen chicken, but it is recommended to thaw it first for even cooking and better texture.

How long does it take to prepare this dish?

The preparation time is approximately 15 minutes, and the cooking time is around 10-15 minutes, making it a quick meal overall.

What vegetables work best in this stir-fry?

Vegetables such as bell peppers, broccoli, snap peas, and carrots are great choices for a flavorful stir-fry.

Can I make this recipe in advance?

Yes, you can prep the ingredients and store them in the refrigerator until you’re ready to cook. However, it’s best to enjoy it fresh for optimal taste and texture.

Is this dish gluten-free?

This dish can be made gluten-free by using gluten-free soy sauce or tamari instead of regular soy sauce.

What can I serve with Lemon Garlic Chicken Stir-Fry?

This stir-fry pairs well with steamed rice, quinoa, or noodles. You can also serve it atop a bed of greens for a lighter option.

How can I adjust the spice level in the dish?

You can adjust the spice level by adding red pepper flakes, chili sauce, or fresh chopped chilies according to your taste preference.

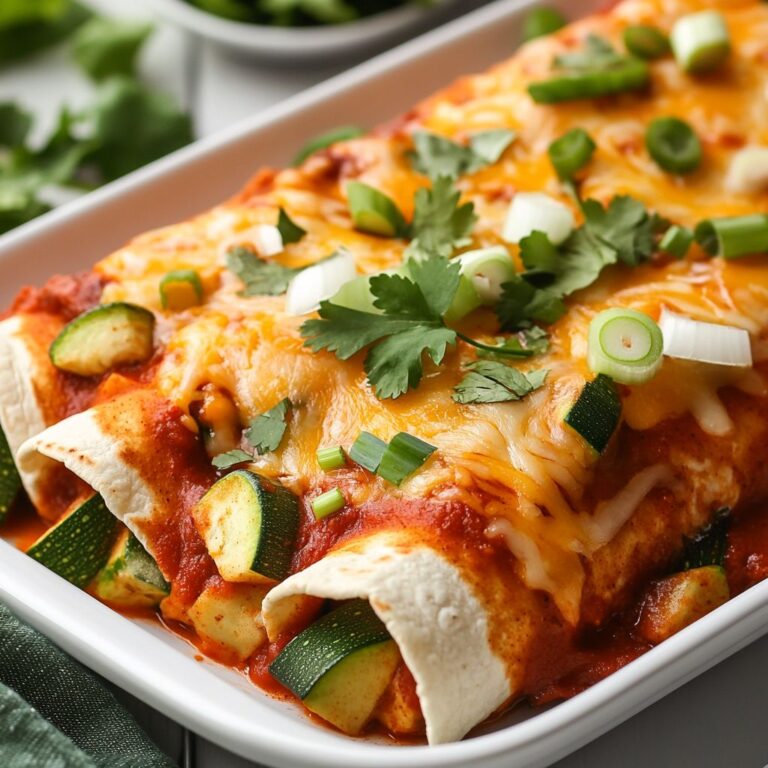
Looking for a delightful way to spice up your dinner routine while ensuring you eat healthily? Look no further than these Easy Veggie Enchiladas! Bursting with vibrant colors and flavors, this dish is not only a feast for the eyes but also a nourishing choice for your body and soul. Imagine mouth-watering tortillas filled with wholesome vegetables, seasoned to perfection and smothered in zesty enchilada sauce. It’s an irresistible combination that will have your taste buds dancing and your family coming back for more!

The beauty of enchiladas lies in their versatility. This recipe allows you to customize the filling with your favorite vegetables or whatever you have on hand, making it an excellent option for a clean-out-the-fridge meal. From bell peppers and zucchini to spinach and black beans, every bite is packed with nutrients and flavor. Plus, the hearty enchilada sauce, rich in spices and a touch of sweetness, creates the perfect harmony with the indirectly roasted veggies.

These Easy Veggie Enchiladas can serve as a fantastic weeknight dinner, offering satisfaction and comfort for the whole family. Wondering if your picky eater will give them a chance? Fear not! The cheese and savory sauce will appeal to their palate, while the vegetables provide a delightful crunch that will keep them engaged. And if you’re feeding a crowd, just double the recipe, spit them on a baking tray, and let your oven do the magic!

Not only are these enchiladas delicious, but they also cater to various dietary preferences. Whether you’re vegetarian, vegan, or simply trying to incorporate more plant-based meals into your diet, this recipe makes it easy to enjoy a wholesome, satisfying meal without sacrificing flavor. If you prefer to keep things on the dairy-free side, simply swap out the cheese for some cashew cream or a sprinkle of nutritional yeast for a cheesy flavor without the dairy. The blend of spices works beautifully regardless of the chosen toppings, guaranteeing a delicious outcome every time!

Let’s not forget the aromatic herbs and spices that give these enchiladas their signature taste. Cumin, chili powder, and oregano come together beautifully to create layers of flavor. You can easily adjust the spice level to fit you and your family’s preferences; omit the chili powder for a milder version or add a bit more for an extra kick. The balance between the warmth of the spices and the freshness of the veggies creates a symphony of flavors that will make these enchiladas a highlight of any meal!

Not only do Veggie Enchiladas satisfy your taste buds, but they also nourish your body. The array of vegetables offers a wealth of vitamins and minerals, while the beans provide a good source of protein and fiber, making this dish a balanced meal option. On top of that, they’re incredibly filling, ensuring you can enjoy your meal without feeling weighed down afterward. And let’s not forget about meal prep! These enchiladas can easily be prepared ahead of time and stored in the refrigerator or freezer, making them a time-saving option for busy weeknights.

As you gather your ingredients and start to prepare this wholesome dish, envision the joy it will bring to your family and friends. The aroma wafting through your kitchen will surely draw everyone in, while the colorful plating is bound to impress even the pickiest of eaters. And there’s nothing quite like the feeling of serving a home-cooked meal that’s not only delicious but also nourishing and satisfying!

Incorporating these Easy Veggie Enchiladas into your regular dinner rotation will not only expand your culinary repertoire but also inspire a love for plant-based cooking within your household. With their comforting texture and delightful flavors, these enchiladas are sure to become a family favorite that everyone will cherish. So, roll up your sleeves, embrace your culinary creativity, and let’s get cooking! You’re only moments away from transforming simple ingredients into a vibrant, delicious masterpiece that will satisfy both your cravings and your commitment to a healthier lifestyle!

As you dive into this recipe, keep in mind that cooking is not only about following instructions—it’s about exploring, experimenting, and having fun! Feel free to get creative with the ingredients, whether it’s adding a sprinkling of your favorite seeds for an added crunch, or swapping out the enchilada sauce for a lighter alternative. The options are endless, and that’s the beauty of this Easy Veggie Enchiladas recipe. It’s a canvas ready for your culinary artistry!

In conclusion, these Easy Veggie Enchiladas encapsulate everything you crave in a meal: they’re quick, easy, healthy, and downright delicious. Dive into this delightful recipe and enjoy the satisfaction of crafting a dish that brings warmth and joy to your table. Your health, taste buds, and family will thank you for this scrumptious addition to your recipe collection!

Ingredients

  • Enchilada Filling
    • 2 cups cooked black beans, drained and rinsed
    • 1 cup corn, frozen or canned
    • 1 bell pepper, diced
    • 1 small onion, chopped
    • 2 cloves garlic, minced
    • 1 tsp chili powder
    • 1 tsp cumin
    • 1/2 tsp smoked paprika
    • Salt and pepper, to taste
  • Enchilada Sauce
    • 2 cups enchilada sauce, store-bought or homemade
  • Tortillas
    • 8 corn or flour tortillas
  • Toppings
    • 1 cup shredded cheese, optional
    • 1/4 cup fresh cilantro, chopped
    • 1 avocado, sliced

Instructions

  • Preheat your oven to 375°F (190°C) and lightly grease a 9×13 inch baking dish.
  • In a large skillet over medium heat, add a splash of oil and sauté the chopped onion and diced bell pepper for about 5 minutes, or until softened.
  • Add the minced garlic, chili powder, cumin, smoked paprika, salt, and pepper to the skillet. Cook for an additional 1-2 minutes, stirring frequently.
  • Stir in the cooked black beans and corn, mixing everything well. Cook for another 2-3 minutes until heated through. Remove from heat.
  • Pour a thin layer of enchilada sauce into the bottom of the prepared baking dish to prevent sticking.
  • Warm the tortillas slightly in a dry skillet or microwave to make them more pliable.
  • Take a tortilla and spoon a generous amount of the veggie filling into the center. Roll it up tightly and place seam-side down in the baking dish. Repeat with remaining tortillas and filling.
  • Once all the enchiladas are arranged in the dish, pour the remaining enchilada sauce evenly over the top.
  • If using, sprinkle shredded cheese over the enchiladas for a cheesy topping.
  • Bake in the preheated oven for 20-25 minutes, until the enchiladas are heated through and the cheese is melted and bubbly.
  • Remove from the oven and let cool for a few minutes before serving.
  • Garnish with chopped cilantro and avocado slices before serving.

Notes

These easy veggie enchiladas are a delightful way to enjoy a hearty meal packed with flavors and nutrients. The combination of black beans, corn, and spices creates a delicious filling that is both satisfying and wholesome. You can customize the filling by adding your favorite vegetables, such as zucchini or spinach, to enhance the nutritional value. If you’re looking to make this dish vegan, simply omit the cheese or use a dairy-free alternative.

The enchilada sauce is the star of the dish, and using either store-bought or homemade options can save time. For a spicier kick, consider adding jalapeños to the filling or drizzling some hot sauce over the enchiladas before serving. These enchiladas can be prepared in advance and stored in the fridge for a quick reheatable meal during the week.

For presentation, garnish with fresh cilantro and avocado slices to add freshness and creaminess. Serve with a side of rice or a simple salad for a complete meal. Enjoy these enchiladas with your family or friends, and watch them disappear quickly!

Faq

What ingredients do I need for Easy Veggie Enchiladas?

You will need corn tortillas, black beans, bell peppers, onions, zucchini, enchilada sauce, cheese (or a dairy-free alternative), and spices like cumin and chili powder.

Can I use frozen vegetables in this recipe?

Yes, you can use frozen vegetables as a convenient option. Just make sure to thaw and drain them before adding them to the enchiladas.

How long does it take to prepare and cook the Easy Veggie Enchiladas?

Preparation and cooking time is approximately 30 to 40 minutes, depending on your chopping speed and oven temperature.

Can I make the enchiladas ahead of time?

Absolutely! You can assemble the enchiladas ahead of time and store them in the refrigerator for up to 24 hours before baking.

Is it possible to make a gluten-free version of these enchiladas?

Yes, simply use gluten-free corn tortillas and ensure that your enchilada sauce is also gluten-free.

What can I serve with Veggie Enchiladas?

They pair well with rice, guacamole, sour cream, or a fresh salad to balance the meal.

How can I store leftovers?

Store any leftovers in an airtight container in the refrigerator for up to 3 days. Reheat them in the oven or microwave before serving.

Can I customize the filling for my Veggie Enchiladas?

Yes! You can customize the filling to include your favorite vegetables or even add protein like tofu or tempeh.

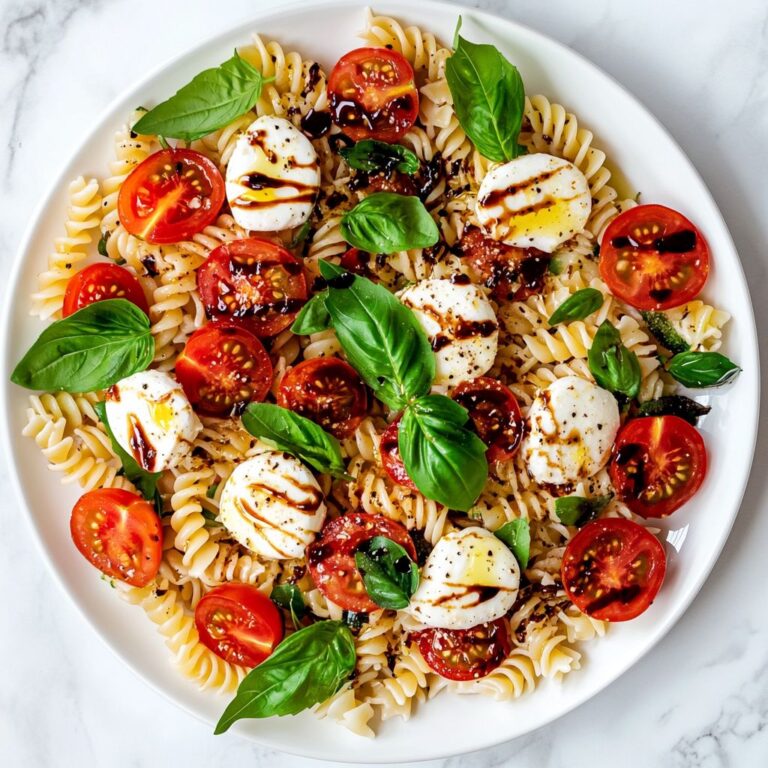
Imagine a plate filled with vibrant colors, where fresh tomatoes glisten like jewels and creamy mozzarella balls offer a delightful contrast, all nestled atop a bed of perfectly cooked pasta. This isn’t just a salad; it’s a celebration of summer in a bowl, a refreshing escape for your taste buds, and a dish that embodies the spirit of Italian cuisine. The Caprese Pasta Salad takes inspiration from the classic Caprese salad, which combines the simplest of ingredients—ripe tomatoes, fresh basil, and mozzarella—into a dish that sings of sunny days and carefree afternoons. Here, we transform that beloved combination into a hearty pasta salad perfect for gatherings, picnics, or a quick weeknight dinner that feels anything but ordinary.

This sensational salad is not just about taste; it’s a visual feast as well. Picture plates piled high with twists of al dente pasta, speckled with bursts of red, green, and white. The bright, aromatic basil leaves bring an earthy note that dances through each bite, while the olive oil glistens invitingly, hinting at the incredible flavor to come. As you gather your ingredients, you’ll be filled with anticipation, knowing that your dining companions will delight in this beautiful creation. It’s the perfect dish to impress friends and family or simply to enjoy the flavors of Italy right at home.

The Caprese Pasta Salad also offers incredible versatility. It can be served as a side dish, enhancing any grilled meats, seafood, or hearty entrees, or it can stand proudly as a main course on its own, especially during those warm summer months when you crave lighter fare. Whether you’re hosting a backyard barbecue, a potluck, or just enjoying a quiet dinner on your balcony, this dish effortlessly adapts to any occasion. And did we mention how easy it is to whip up? In as little as 30 minutes, you can create a meal that bursts with freshness and flavor, leaving your guests none the wiser about how little effort went into preparing such a stunning dish.

As with many Italian recipes, the power lies in the quality of your ingredients. When it comes to making a Caprese Pasta Salad, using fresh, organic ingredients will elevate the dish significantly. Select the ripest tomatoes you can find—heirloom varieties are a fabulous choice with their rich flavors and varying colors. Aim for freshly made mozzarella, ideally the kind that comes packed in water, as it will be creamier and more delicate than pre-shredded options. Fresh basil will be your aromatic anchor, so don’t skimp on this key herb; it’s what brings everything together, adding a fragrant, peppery note to each bite.

Now, let’s talk about the pasta! The type of pasta you use can alter the entire experience. Something like fusilli or rotini is excellent for catching the olive oil and the dressing, ensuring that each forkful is full of flavor. You could also opt for penne or farfalle for a textural contrast, but whatever shape you choose should be one that holds on to the dressing and toppings well. Cook it al dente—this means firm to the bite—not only to retain a nice chew but also to ensure it doesn’t become mushy when tossed with the salad dressing.

Now, this Caprese Pasta Salad can easily be customized to suit your dietary preferences or seasonal ingredients. Want a little kick? Add some spicy arugula or sliced jalapeños. Craving something a bit richer? Toss in some olives or artichoke hearts for an additional depth of flavor. You could even switch out the pasta for a gluten-free alternative if you need. This salad is a blank canvas, inviting you to play and experiment until you find your perfect balance of flavors.

The dressing is another opportunity to showcase your creativity. While a drizzle of high-quality extra virgin olive oil and a splash of balsamic vinegar is traditional, consider adding a bit of garlic or a sprinkle of red pepper flakes to give it a spirited twist. Fresh lemon juice can brighten up the salad, and for a creamy version, a dollop of ricotta cheese can add a luxurious touch. Just make sure to taste as you go, letting your palate guide your seasoning.

When it comes time to assemble your salad, there’s something incredibly satisfying about layering the ingredients. Start with the pasta in a large bowl, followed by a generous amount of halved cherry tomatoes, diced mozzarella, and fresh basil leaves. Drizzle with your dressing, tossing gently to coat each component without breaking the delicate cheese or smashing the tomatoes. Let it sit for a few minutes to allow the flavors to meld together—much like a fine wine, this salad gets better with a little time!

As you serve your Caprese Pasta Salad, consider the presentation too. A simple yet elegant bowl or platter can elevate the approach to this rustic dish. For an added touch, top the salad with additional basil leaves or a sprinkle of freshly cracked black pepper and sea salt, creating a visually stunning centerpiece for your dining table. Each time you serve this dish, it will not only nourish but also delight, offering a moment of togetherness as people gather around to enjoy the bounty of fresh ingredients and celebratory flavors.

Moreover, while this dish shines when consumed fresh, it also keeps well in the refrigerator for a day or two, making it a perfect advance-prep meal. Imagine biting into the delightful contrast of dense pasta with the lightness of basil and the creaminess of mozzarella even a day later—it’s the gift that keeps on giving! From fancy dinners to straightforward weekday meals, the Caprese Pasta Salad is the embodiment of culinary joy that brings people together, a testament to the beauty of simplicity and the vibrancy of flavors. Don’t hesitate to make this dish your own, and enjoy the journey it takes you on—a delightful Italian escape, one forkful at a time.

Ingredients

  • 8 oz pasta of choice
  • 1 cup cherry tomatoes halved
  • 1 cup fresh mozzarella balls
  • 1/2 cup fresh basil leaves torn
  • 1/4 cup extra virgin olive oil
  • 2 tbsp balsamic vinegar
  • 1 clove garlic minced
  • Salt to taste
  • Pepper to taste

Instructions

  • Cook the pasta according to package instructions in a large pot of salted boiling water until al dente. Drain and set aside to cool.
  • In a large mixing bowl, combine the halved cherry tomatoes, fresh mozzarella balls, and torn basil leaves.
  • In a small bowl, whisk together the extra virgin olive oil, balsamic vinegar, minced garlic, salt, and pepper to create the dressing.
  • Add the cooled pasta to the bowl with the tomatoes, mozzarella, and basil.
  • Pour the dressing over the pasta salad and gently toss to combine all ingredients evenly.
  • Taste and adjust the seasoning with additional salt and pepper if necessary.
  • Serve immediately or refrigerate for 30 minutes to allow the flavors to meld before serving.

Notes

This Caprese Pasta Salad is a refreshing and vibrant dish that’s perfect for warm weather gatherings or a light lunch. Using fresh ingredients like juicy cherry tomatoes, creamy mozzarella, and fragrant basil, this salad is not only delicious but also visually appealing. The combination of extra virgin olive oil and balsamic vinegar adds a delightful tanginess that complements the flavors beautifully. You can easily customize this salad by adding protein such as grilled chicken or chickpeas for extra heartiness. This dish is best served fresh, but it can be stored in the refrigerator for a day. For an added touch, consider drizzling with pesto or topping with crushed red pepper for a spicy kick.

Faq

What is a Caprese Pasta Salad?

A Caprese Pasta Salad is a fresh and vibrant dish that combines the classic flavors of a Caprese salad—tomatoes, mozzarella cheese, and basil—with pasta, typically dressed in olive oil and balsamic vinegar.

What ingredients do I need to make Caprese Pasta Salad?

You will need cooked pasta (such as penne or fusilli), fresh tomatoes, mozzarella cheese, fresh basil, olive oil, balsamic vinegar, salt, and pepper.

Can I use different types of pasta for this salad?

Yes, you can use any type of pasta you prefer, such as fusilli, rotini, or farfalle. Just make sure to cook it al dente for the best texture.

Is Caprese Pasta Salad served cold or warm?

Caprese Pasta Salad is typically served cold or at room temperature, making it a refreshing dish, especially in warm weather.

How long can I store leftover Caprese Pasta Salad?

Leftover Caprese Pasta Salad can be stored in the refrigerator for up to 3 days. However, it’s best enjoyed fresh for optimal flavor and texture.

Can I customize the recipe with other ingredients?

Absolutely! You can add ingredients like grilled chicken, olives, arugula, or red onion to suit your taste preferences.

Is Caprese Pasta Salad suitable for vegetarians?

Yes, Caprese Pasta Salad is suitable for vegetarians as it consists mainly of vegetables, pasta, and cheese.

What can I serve with Caprese Pasta Salad?

This salad pairs well with grilled meats, garlic bread, or can serve as a standalone dish for lunch or a light dinner.

Honey Garlic Shrimp Bowls: A Sweet and Savory Delight

Imagine the tantalizing aroma of juicy shrimp sautéed to perfection, infused with a heavenly blend of honey, garlic, and a splash of soy sauce. This is not just a meal; it’s a culinary experience that transforms your dinner table into a vibrant showcase of flavors. Honey Garlic Shrimp Bowls are the epitome of quick and easy gourmet food that anyone can master, making it a perfect choice for busy weeknights or delightful weekend feasts.

In this dish, plump shrimp take center stage, infused with a sweet garlic glaze that dances on your palate with each bite. The combination of honey and soy sauce creates a rich, luscious coating that caramelizes beautifully in a hot skillet. The result? Succulent shrimp that look almost too beautiful to eat, nestled amongst a bed of fluffy rice or crispy quinoa, vibrant veggies, and a burst of fresh herbs. It’s an explosion of colors and textures that beckons you to take a delicious journey through every layer of the bowl.

What sets Honey Garlic Shrimp Bowls apart from other shrimp recipes is their versatility. You can customize them to cater to your individual tastes or dietary preferences. Want to add a little heat? Toss in some red pepper flakes or fresh chili slices. Prefer a lighter meal? Substitute the rice for a refreshing salad of leafy greens. You can even switch out the shrimp for chicken, tofu, or your favorite plant-based protein! This meal is perfect for those seeking to indulge in coastal flavors while still maintaining a balance of health and indulgence.

Moreover, the beauty of this recipe lies not only in its incredible flavor but also in its convenience. With minimal prep and cooking time, Honey Garlic Shrimp Bowls can be on your table in under thirty minutes. Whether you’re putting together an intimate dinner for two or feeding a bustling family, this dish accommodates both effortlessly. The ingredients are likely to be ones you already have on hand, making it a practical option for last-minute dinners without compromising on taste or quality.

Picture this: it’s a Wednesday evening, you’ve had a long day, and the last thing you want to do is spend hours in the kitchen. Enter the Honey Garlic Shrimp Bowl—easy to prepare, extraordinarily delicious, and impressive enough to serve your loved ones. Pair this delightful dish with a chilled glass of white wine or a refreshing mocktail, and you’ll feel as if you’ve been transported to a seaside bistro where the waves lull you into a state of relaxation.

Once you’ve enjoyed your first bowl, you’ll see how quickly and elegantly this dish becomes a staple in your recipe repertoire. It’s the kind of meal that encourages creativity; next time you make it, why not switch out the veggies? Maybe add some snap peas and carrots for a crunch, or substitute brown rice for cauliflower rice for a lighter bite. The possibilities are endless, and that, dear reader, is part of the magic of Honey Garlic Shrimp Bowls.

The freshness of the ingredients not only elevates the flavor but also contributes to the vibrant aesthetic that makes this dish so appealing. Colorful bell peppers, tender asparagus, or crisp broccoli can find their way into the mix, providing a beautiful contrast to the glistening golden shrimp. And let’s not forget the garnishing—a sprinkle of green onions, a handful of fresh cilantro, or a few toasted sesame seeds can take your presentation from simple to spectacular. It’s the finishing touches that transform this bowl into an Instagram-ready feast!

Beyond the aesthetics and ease, Honey Garlic Shrimp Bowls also pack a nutritional punch. Shrimp are a fantastic source of protein while being low in calories, making them an ideal choice for health-conscious eaters. Combined with a variety of vegetables, this dish allows you to enjoy a wholesome meal that supports your dietary needs and well-being. The honey in this recipe offers not just sweetness but also antioxidants that can enhance your health, while garlic is renowned for its immune-boosting properties.

Serving the Honey Garlic Shrimp in bowls adds to the communal experience of sharing a meal. Each individual can customize their bowls to their liking, from how much rice they want to which veggies they prefer. This not only makes mealtime enjoyable and interactive but encourages people to explore different flavor combinations. There’s something incredibly gratifying about assembling your bowl just the way you like it, and it can lead to delightful conversations about food preferences and hidden culinary talents.

As you savor each bite of your Honey Garlic Shrimp Bowl, you may find yourself inspired to explore other culinary worlds, trust your instincts in the kitchen, and tweak recipes to develop your signature style. That’s the essence of cooking—it’s not just about following a recipe; it’s about expressing yourself and spreading joy through food.

So the next time you’re met with the challenge of meal planning or weeknight dinners, consider turning to the delightful simplicity of Honey Garlic Shrimp Bowls. This dish brings together the charm of comforting home cooking with the excitement of bold flavors and fresh ingredients, leaving you and your loved ones eager for leftovers. And who knows? It might just become your new go-to dish, a delightful reminder that sometimes, the best meals come together in a flash, bringing warmth and happiness to your home.

Get ready to explore the layers of sumptuous flavors, textures, and colors that make Honey Garlic Shrimp Bowls a winner. The crunch of the veggies, the tenderness of the shrimp, and the sweetness of the honey glaze meld together in a symphony of taste that’s sure to please even the pickiest of eaters. As you set about creating this dish, enjoy the process, embrace your culinary creativity, and most importantly, enjoy every delicious bite!

Ingredients

  • Shrimp
    • 1 lb large shrimp peeled and deveined
  • Marinade
    • 1/4 cup honey
    • 1/4 cup soy sauce
    • 3 cloves garlic minced
    • 1 tsp freshly grated ginger
    • 1 tbsp sesame oil
    • 1 tbsp rice vinegar
  • Bowls
    • 2 cups cooked jasmine rice or quinoa
    • 1 cup broccoli florets steamed
    • 1 red bell pepper sliced
    • 1 avocado sliced
    • 2 green onions sliced
    • 1 tbsp sesame seeds for garnish
    • Chopped cilantro for garnish

Instructions

  • In a mixing bowl, combine honey, soy sauce, minced garlic, grated ginger, sesame oil, and rice vinegar to create the marinade. Whisk until well blended.
  • Add the peeled and deveined shrimp to the marinade. Toss to coat the shrimp evenly and let it marinate for at least 15-30 minutes.
  • While the shrimp is marinating, prepare the rice or quinoa according to package instructions, and steam the broccoli florets until tender.
  • Heat a large skillet over medium-high heat. Once hot, add the marinated shrimp to the skillet in a single layer, discarding any remaining marinade.
  • Cook the shrimp for about 2-3 minutes on each side or until they turn pink and opaque. Be careful not to overcook them.
  • To assemble the bowls, place a serving of cooked jasmine rice or quinoa at the bottom of each bowl.
  • Top the rice or quinoa with steamed broccoli, sliced red bell pepper, sliced avocado, and the cooked shrimp.
  • Garnish the bowls with sliced green onions, sesame seeds, and chopped cilantro.
  • Serve immediately and enjoy your Honey Garlic Shrimp Bowls!

Notes

These honey garlic shrimp bowls are a delightful combination of sweet and savory flavors, making them a perfect quick and easy weeknight dinner. The shrimp marinated in honey, soy sauce, garlic, and ginger pack a flavorful punch and come together in minutes. You can modify the vegetables based on your preferences or what’s in season; bell peppers, broccoli, and avocado provide a colorful and nutritious base. For added texture and flavor, sprinkle toasted sesame seeds and fresh cilantro on top just before serving. If you want to elevate the dish, consider serving it with a side of pickled vegetables or edamame for a complete Asian-inspired meal.

Faq

What ingredients do I need to make Honey Garlic Shrimp Bowls?

To make Honey Garlic Shrimp Bowls, you will need shrimp, honey, garlic, soy sauce, ginger, olive oil, vegetables of your choice (like bell peppers, broccoli, or snap peas), and rice or quinoa for serving.

Can I use frozen shrimp for this recipe?

Yes, you can use frozen shrimp. Just make sure to thaw them completely and pat them dry before cooking for the best results.

How spicy is this dish?

The Honey Garlic Shrimp Bowls are not inherently spicy but you can easily add red pepper flakes or sriracha to increase the heat level according to your taste.

How long does it take to prepare and cook the shrimp?

The preparation and cooking time for Honey Garlic Shrimp Bowls is approximately 20-25 minutes.

Can I prepare the Honey Garlic sauce in advance?

Yes, you can prepare the Honey Garlic sauce in advance and store it in the refrigerator for up to a week. Just reheat it before adding to the shrimp.

What can I serve with Honey Garlic Shrimp Bowls?

You can serve Honey Garlic Shrimp Bowls with rice, quinoa, or cauliflower rice. Adding a side salad or steamed vegetables would also complement the dish nicely.

Is this dish suitable for meal prep?

Absolutely! Honey Garlic Shrimp Bowls are great for meal prep. You can store cooked shrimp and vegetables in airtight containers and enjoy them throughout the week.

Can I substitute the shrimp with another protein?

Yes, you can substitute shrimp with chicken, tofu, or even beef. Just adjust the cooking time based on the protein you choose to ensure it is cooked thoroughly.

Indulging in a bowl of creamy mushroom risotto is like wrapping yourself in a warm, comforting blanket on a chilly evening. The mere thought of it evokes the inviting aroma of earthy mushrooms, rich stock, and velvety Arborio rice simmering gently on the stove. Renowned for its luxurious texture and deep, satisfying flavor, this Italian classic has captivated hearts and palates all over the world. Whether you’re looking to impress dinner guests, cozy up for a family meal, or simply treat yourself to a decadent dish, creamy mushroom risotto fits the bill perfectly. This isn’t just a simple recipe; it’s an invitation to create a culinary masterpiece that showcases the beauty of simplicity, balance, and impeccable technique.

The origin of risotto can be traced back to Northern Italy, particularly the region of Lombardy. This cooking method celebrates the unique characteristics of short-grain rice, particularly Arborio, Carnaroli, and Vialone Nano varieties. What makes risotto so distinctive is the technique of slowly stirring the rice while gradually adding broth. This process releases the rice’s starches, creating a creamy, luscious texture that is synonymous with this dish. Risotto is incredibly versatile, serving as a base for countless flavor combinations, but the addition of mushrooms takes it to another level. Earthy, umami-rich, and deeply fragrant, mushrooms infuse risotto with a depth of flavor that transforms this dish into something truly extraordinary.

Mushrooms, with their myriad varieties – from the common button to the luxurious porcini or the exotic shiitake – each lend their unique profile to the risotto. As they gently sauté in olive oil or butter, they release their natural moisture and intensify in flavor, melding beautifully with the creamy rice. The interplay of textures, with the rice’s creaminess contrasting with the tender, slightly chewy mushrooms, creates a delightful mouthfeel that is sure to please. To take a simple risotto to gourmet levels, a splash of white wine enhances the dish’s overall brightness while the addition of fresh herbs like thyme or parsley elevates the flavors with freshness and vibrancy.

Crafting the perfect creamy mushroom risotto is not just about the ingredients; it’s about the experience. The cooking process itself becomes a meditative act—standing at the stove, stirring lovingly, watching as the rice transforms from firm to al dente, and finally to that coveted creamy consistency. This dish invites you to slow down, engage with your ingredients, and savor every moment of the cooking journey. It’s an opportunity to experiment, to adjust flavors, and to find your own rhythm in the kitchen. The satisfaction of achieving that creamy and perfectly cooked risotto is unparalleled. The reward is not just in the eating but also in the creating.

Part of the beauty of creamy mushroom risotto lies in its adaptability. Imagine adding a sprinkle of truffle oil for a touch of luxury, or folding in steamed asparagus or peas to introduce a pop of color and seasonal flavor. The variations are endless, allowing for creativity based on personal preferences or what you might have on hand. For a heartier version, consider including cooked chicken or pancetta, which adds richness and complexity to the dish. Alternatively, making it vegan-friendly is easy by using vegetable broth and omitting any dairy ingredients, proving that this dish can cater to a variety of dietary needs while still preserving its essence.

Another appealing aspect of this dish is its presentation. A beautifully plated bowl of creamy mushroom risotto, garnished with fresh herbs and perhaps a sprinkle of grated Parmesan, is not just food; it is art. The contrast of textures and colors, the glossy sheen of the risotto, and the scattered earthy mushrooms make for a charming sight that can transform any table setting into a fine dining experience. Pair it with a crisp salad and a glass of white wine, and you have a meal that feels both rustic and luxurious, inviting everyone to the table and sparking conversation over shared stories and laughter.

Don’t forget, risotto isn’t just an indulgent dish for special occasions; it’s also perfect for a cozy weeknight dinner. With some preparation and patience, you can whip up a delicious meal that feels like you’re dining in a fine Italian restaurant without ever leaving your home. The leftovers, if you are lucky enough to have any, also make for a delightful next-day treat, where the flavors have melded even further and can be easily reheated and enjoyed.

The process of making creamy mushroom risotto may seem like a culinary rite of passage, but fear not if you find it intimidating at first. Every chef, whether novice or expert, has had their share of kitchen failures. It’s through practice, patience, and a dash of passion that you will master the art of risotto. Embrace the opportunity to learn and grow, to make mistakes, and to evolve your technique. Each attempt will teach you something new about flavor, consistency, and timing, turning this classic dish into a signature recipe that you can call your own.

In conclusion, creamy mushroom risotto is not just a recipe; it’s a celebration of the wonders of simple ingredients and the joy of cooking. It embodies the essence of comfort food while still offering that touch of elegance that makes it suitable for any occasion. Allow yourself the freedom to experiment, to make it your own, and to enjoy the process as much as the result. With each spoonful, you’ll discover the magical combination of flavors and textures that make this dish an enduring favorite. So roll up your sleeves, put on your apron, and get ready to create a deliciously creamy risotto that will have everyone coming back for seconds, eager to savor the delightful symphony of flavors that only a homemade dish can provide. Happy cooking!

Ingredients

  • 4 cups vegetable broth
  • 1 cup Arborio rice
  • 1 medium onion finely chopped
  • 2 cloves garlic minced
  • 8 oz mushrooms sliced
  • 1/2 cup white wine
  • 2 tbsp olive oil
  • 2 tbsp butter
  • 1/2 cup grated Parmesan cheese
  • 1/4 cup fresh parsley chopped
  • Salt to taste
  • Pepper to taste

Instructions

  • In a saucepan, heat the vegetable broth over medium heat and keep it warm on a low simmer.
  • In a large skillet or saucepan, heat 2 tablespoons of olive oil and 2 tablespoons of butter over medium heat.
  • Add the finely chopped onion and cook for about 2-3 minutes until it becomes translucent.
  • Stir in the minced garlic and cook for an additional minute until fragrant.
  • Add the sliced mushrooms to the skillet and sauté until they are golden brown, about 5-7 minutes.
  • Stir in the Arborio rice and cook for 2 minutes, allowing the rice to absorb the flavors.
  • Pour in the white wine and cook until it is mostly absorbed by the rice, stirring frequently.
  • Begin adding the warm vegetable broth one ladle at a time, stirring constantly and allowing the rice to absorb the liquid before adding more. Continue this process for about 18-20 minutes, or until the rice is creamy and al dente.
  • Once the rice is cooked to your desired texture, remove from heat and stir in the grated Parmesan cheese.
  • Season with salt and pepper to taste and mix in the chopped fresh parsley.
  • Serve the risotto immediately, garnished with additional parsley if desired.

Notes

This creamy mushroom risotto is a luxurious and comforting dish that showcases the rich flavors of sautéed mushrooms and a hint of white wine. Arborio rice is essential for this recipe, as its high starch content creates a creamy consistency. Be sure to stir constantly while adding the broth gradually; this technique helps to release the starches from the rice, resulting in that signature creaminess. You can swap out the mushrooms for your favorite vegetables or add some protein like chicken or shrimp for a heartier meal. For added creaminess, consider stirring in a splash of cream at the end. Garnish with freshly chopped parsley for a touch of color and flavor. This risotto is best enjoyed immediately, but if you need to store leftovers, reheating with a splash of broth or water can help restore its creamy texture.

Faq

What is creamy mushroom risotto?

Creamy mushroom risotto is a traditional Italian dish made with Arborio rice, sautéed mushrooms, and a creamy broth, often finished with Parmesan cheese for added richness and flavor.

What type of rice is best for risotto?

Arborio rice is the best choice for risotto because it has a high starch content, which helps to create the creamy texture characteristic of this dish.

Can I use other types of mushrooms in this recipe?

Yes, you can use a variety of mushrooms such as cremini, shiitake, or porcini. Each type will bring its own flavor and texture to the dish.

Is it necessary to add wine to risotto?

While adding white wine enhances the flavor of risotto, it is not strictly necessary. You can substitute it with vegetable or chicken broth for a non-alcoholic version.

Can I make creamy mushroom risotto vegetarian or vegan?

Yes, to make it vegetarian, use vegetable broth and skip the cheese. For a vegan version, you can use nutritional yeast instead of Parmesan cheese for a cheesy flavor.

How long does it take to cook risotto?

The cooking process typically takes about 20-30 minutes, during which you gradually add broth to the rice and stir frequently to release the starches.

What can I serve with creamy mushroom risotto?

Creamy mushroom risotto pairs well with a simple green salad, roasted vegetables, or grilled chicken for a more complete meal.

Can I store leftovers, and how do I reheat them?

Yes, you can store leftovers in an airtight container in the fridge for up to 3 days. To reheat, add a splash of broth or water to loosen the risotto and warm it gently on the stovetop.