Author

Ocean Nightleaf

Browsing

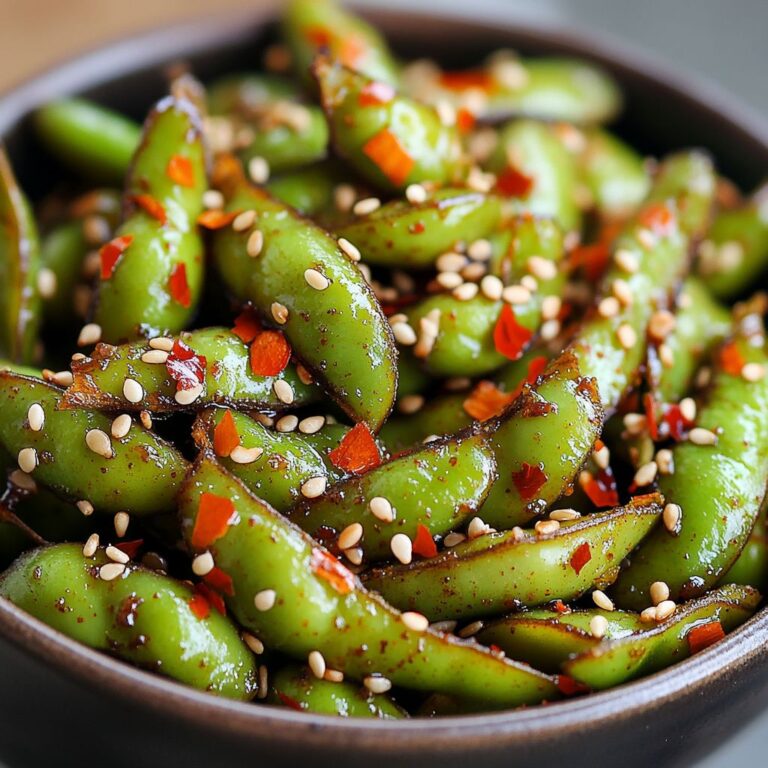
Are you ready to elevate your snacking game to a whole new level? Look no further than our Spicy Roasted Edamame recipe—a tantalizing treat that perfectly balances health and flavor. Imagine the satisfying crunch of perfectly roasted edamame, beautifully infused with a symphony of spices that will dance on your palate. This delightful dish not only offers a burst of flavor but also packs a nutritional punch, making it the ideal choice for health-conscious snackers and flavor enthusiasts alike. Whether you’re hosting a game night, enjoying a movie marathon, or simply craving something delicious, spicy roasted edamame is the snack that will keep you reaching for more!

Edamame, the star of this recipe, are young, green soybeans that are rich in protein, fiber, and essential nutrients. These little green gems are often found in Japanese cuisine, usually served as an appetizer, but their versatility stretches far beyond the confines of traditional dishes. Roasting edamame not only enhances their natural sweetness but also gives them a delightfully crunchy texture that’s hard to resist. And when you spice them up with a medley of seasonings, they become a zesty, addictive treat that you can enjoy anytime.

In this Spicy Roasted Edamame recipe, we will guide you through the process of transforming simple, steamed edamame into a culinary masterpiece. We’ll cover everything from selecting the right beans to achieving that perfect roast. The beauty of this recipe lies not just in its simplicity but in the endless customization options. Want to turn up the heat? Add more chili powder. Prefer a smoky flavor? Toss in some smoked paprika. This dish invites you to get creative and adjust flavors to suit your personal taste.

One of the most compelling reasons to embrace the deliciousness of spicy roasted edamame is their impressive health benefits. These tiny soybeans are rich in antioxidants, vitamins, and minerals that are crucial for maintaining optimal health. Their high protein content makes them a fantastic plant-based alternative to other protein sources, significantly reducing the risk of heart disease and supporting muscle repair and growth. The fiber found in edamame not only aids digestion but also helps to keep you feeling full longer, making it an excellent choice for those looking to manage their weight without sacrificing flavor.

What’s more, preparing Spicy Roasted Edamame is incredibly easy and requires minimal equipment. With just a baking sheet and a little bit of pantry staples, you can whip up this savory snack in no time. The best part? You can enjoy them warm, straight from the oven, or store them for later, making them perfect for meal prepping or as a quick snack on the go. With a manageable ingredient list and straightforward instructions, this recipe is suitable for both novice cooks and seasoned chefs alike.

Imagine the aromatic smell wafting through your kitchen as fragrant spices mingle with the rich earthiness of the edamame, enticing everyone nearby. It’s the kind of aroma that pulls people in, making it impossible to resist a taste. As they roast to perfection, a golden-brown hue will envelop each bean, promising an unparalleled crunch with every bite. You’ll be surprised at how effortlessly this dish can impress guests or become a family favorite.

The versatility of this recipe extends beyond snacking; spicy roasted edamame can play a role in a variety of meals. Use them as a vibrant topping for salads or grain bowls, adding both texture and a fiery kick. Incorporate them into stir-fries for an extra dose of protein and flavor. Mix them into biscuits or bread for a unique twist, or simply toss them into your favorite pasta dishes. The possibilities are tantalizingly endless! So, whether you’re aiming to spice up a casual gathering or looking for a healthy and delicious addition to your meal prep routine, Spicy Roasted Edamame is your answer.

But before we dive into the ingredients and step-by-step instructions, let’s talk about the fun of making spicy roasted edamame! This recipe is not just about cooking; it’s about immersing yourself in the culinary experience. The process encourages you to explore different flavors, experiment with various spice blends, and engage all your senses. From the satisfying snap of a stir through the edamame to the delightful sizzle as they roast—every step will feel like a mini-adventure in your kitchen.

Spicy Roasted Edamame is also perfect for those of you who love to host. These bites don’t just satiate hunger; they create a lively, communal atmosphere as guests inevitably gather around the bowl, sharing stories and laughter while munching on these delightful morsels. Their vibrant green color adds a pop of freshness to any table setting, making them a beautiful and healthy addition to your spread. Pair them with drinks for a flavorful appetizer that will certainly spark conversations among your guests.

For added convenience, you can prepare this dish in batches. The simplicity of storage and reheating means you can always have a stash of spicy roasted edamame ready for snacking, meal prep, or entertaining. They also make for a great on-the-go snack—just toss a handful into a ziplock bag for an energizing pick-me-up during a busy day! No more reaching for those chips or cookies; with spicy roasted edamame, you’ll have a deliciously satisfying option that fuels both your body and soul.

So, whether you’re a spice lover who craves fiery flavors or a health-conscious individual seeking nutritious snack options, our Spicy Roasted Edamame will not disappoint. Get excited, gather your ingredients, and prepare to fall in love with a dish that’s as nourishing as it is delightful. This recipe is more than just a snack; it’s an invitation to discover the amazing world of edamame and the endless opportunities it presents in the kitchen. Let’s get started on this culinary journey together!

Ingredients

  • 1 pound frozen edamame in the pod, thawed
  • 2 tablespoons olive oil
  • 1 teaspoon chili powder
  • 1/2 teaspoon smoked paprika
  • 1/2 teaspoon garlic powder
  • 1/2 teaspoon onion powder
  • 1/4 teaspoon cayenne pepper (adjust to taste)
  • Salt to taste
  • Fresh lime wedges for serving

Instructions

  • Preheat your oven to 400°F (200°C) and line a baking sheet with parchment paper.
  • In a large mixing bowl, combine the thawed edamame, olive oil, chili powder, smoked paprika, garlic powder, onion powder, cayenne pepper, and salt.
  • Toss the edamame until they are evenly coated with the oil and spice mixture.
  • Spread the seasoned edamame in a single layer on the prepared baking sheet.
  • Bake in the preheated oven for 20-25 minutes, stirring halfway through, until the edamame are crispy and slightly browned.
  • Remove from the oven and let cool for a few minutes.
  • Serve warm with fresh lime wedges for squeezing over the spicy edamame.

Notes

These spicy roasted edamame are a delightful and nutritious snack that packs a flavorful punch. The combination of chili powder, smoked paprika, and cayenne provides a wonderful kick that enhances the natural nuttiness of the edamame. You can easily adjust the level of spiciness by modifying the amount of cayenne pepper to suit your taste. Serve these roasted edamame warm, with fresh lime wedges on the side to squeeze over for a zesty finish. They make an excellent appetizer for gatherings or a healthy afternoon snack. For a unique twist, consider mixing in some sesame seeds or serving with a light dipping sauce. Enjoy your crunchy and satisfying treat!

Faq

What ingredients do I need to make Spicy Roasted Edamame?

You will need the following ingredients: edamame (fresh or frozen), olive oil, soy sauce, garlic powder, red pepper flakes, salt, and pepper. Optionally, you can add sesame oil for extra flavor.

Can I use frozen edamame for this recipe?

Yes, frozen edamame is perfect for this recipe. Just ensure you thaw them before roasting. You can do this by placing them in a bowl of warm water for a few minutes.

How long does it take to roast edamame?

Roasting edamame typically takes about 20-25 minutes at 400°F (200°C). Make sure to toss them halfway through for even cooking.

Can I adjust the spice level in this recipe?

Absolutely! You can increase or decrease the amount of red pepper flakes according to your spice preference. For a milder version, use less or omit the flakes altogether.

What can I serve with Spicy Roasted Edamame?

Spicy Roasted Edamame makes a great snack on its own, but you can also serve it as an appetizer or side dish alongside sushi, grilled meats, or salads.

How should I store leftover Spicy Roasted Edamame?

Store any leftover roasted edamame in an airtight container in the refrigerator. They are best consumed within 2-3 days for optimal flavor and texture.

Can I make this recipe vegan-friendly?

Yes, this recipe is naturally vegan-friendly as it primarily consists of plant-based ingredients. Just ensure that the soy sauce used is also vegan.

Is there a way to make this dish gluten-free?

Yes! To make the recipe gluten-free, substitute regular soy sauce with tamari or a gluten-free soy sauce alternative. The rest of the ingredients are already gluten-free.
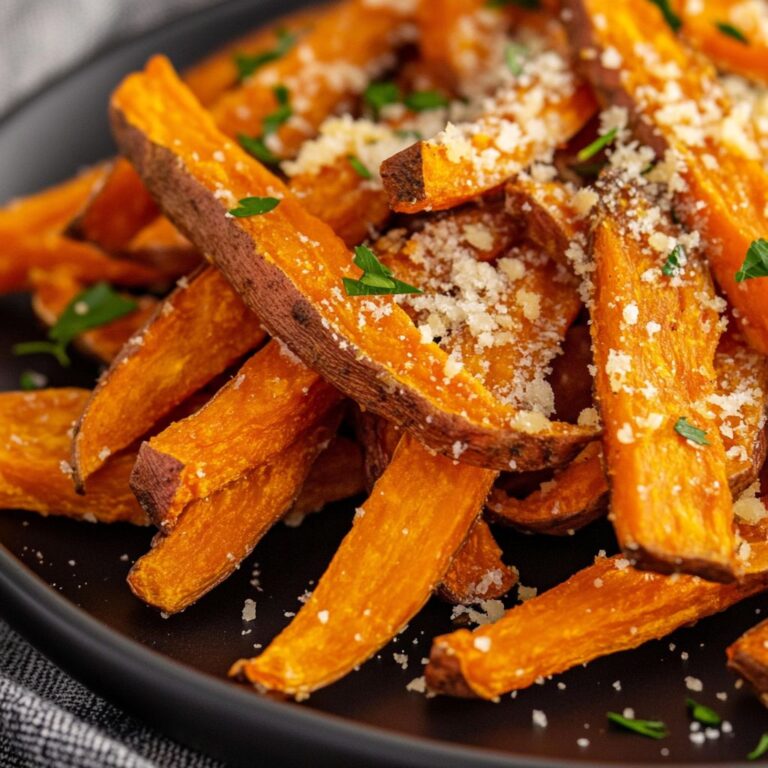
There’s something irresistibly delightful about the combination of sweet potatoes and garlic, and when you throw in the richness of Parmesan cheese, you’ve created a snack that transcends the ordinary – welcome to the world of Garlic Parmesan Sweet Potato Fries. These golden, crispy delights owe their appeal not just to their flavor, but also to their vibrant color and satisfying texture, making them a perfect side dish or a standalone snack that’s bound to impress. You can serve them for any occasion, be it a casual family dinner, a fancy party, or simply as a late-night craving. Imagine biting into the crispy outside, followed by the soft, sweet interior, all enhanced by fragrant garlic and the nuttiness of freshly grated Parmesan. Yum!

Sweet potatoes have become the darling of the culinary world in recent years, adored for their versatility and health benefits. Packed with vitamins, minerals, and antioxidants, they provide a far superior alternative to regular potatoes. Sweet potatoes are known for their complex carbohydrates, which are digested slowly, providing energy without the crash associated with other simple carbohydrates. Their natural sweetness complements savory dishes perfectly, and when roasted or baked, they caramelize beautifully, intensifying their flavor and adding a comforting touch. The pairing of sweet potatoes with the robust tastes of garlic and Parmesan doesn’t just elevate the dish into a gourmet experience; it also creates a mouthwatering contrast that keeps your palate entertained.

Garlic, often referred to as nature’s antibiotic, is more than just an aromatic; it adds a depth of flavor that transforms simple dishes into culinary masterpieces. Its distinct, pungent notes offer a savory element that’s hard to resist, especially when it’s roasted to perfect golden-brown tenderness. The addition of garlic not only enhances the fries’ taste but also brings health benefits such as improved heart health and immune support. Your kitchen will smell divine, turning the cooking process into an aromatic journey that ends with a mouthful of flavor.

Now let’s talk about the cheese – Parmesan! This revered cheese hails from Italy and brings a nutty, salty zing that perfectly complements the natural sweetness of the sweet potatoes. Its gritty texture and intense flavor are just what you need to elevate simple fries into a gourmet dish. When melted or sprinkled on hot fries, Parmesan brings an indulgent richness that makes these sweet potato fries utterly irresistible. A sprinkling of freshly grated or finely shredded Parmesan transforms these fries into something far more elevated, making them the star of your table.

Preparation is straightforward, and the cooking process allows you to bask in the golden-brown glory. The fries can be baked or air-fried, providing a lighter alternative that still delivers on all the crispy goodness we love. If you prefer a crunchier texture, a quick blast in the oven at high heat will do the trick, allowing the naturally sweet interiors to caramelize while the exterior becomes perfectly crisp. You can even customize your Garlic Parmesan Sweet Potato Fries with your favorite herbs and spices. A pinch of paprika or cayenne can add a delightful kick, while fresh parsley brings a burst of color and freshness.

Pair these Garlic Parmesan Sweet Potato Fries with your favorite dipping sauce for an even more indulgent treat. Whether it’s a simple garlic aioli, tangy ketchup, or a creamy ranch dressing, the options are delightfully endless. As you gather with friends and family around your table, those sweet potato fries are sure to become a cherished dish, inviting everyone to dig in and enjoy. Perfect for sharing, these fries can ignite festivities or quiet moments, making any day feel special.

Worried about the health aspect? Fret not! Choosing sweet potatoes means you’re indulging in a fiber-rich option that can satisfy cravings without the guilt of traditional fries. They have a lower glycemic index compared to regular potatoes, which is fantastic news for those mindful of blood sugar levels. The preparation method also plays a key role; by opting to bake or air-fry, you’re significantly cutting down on the oil typically associated with deep-frying, allowing you to enjoy a healthier version without sacrificing flavor and texture. Who says indulgence can’t be good for you?

Cooking can also be a fantastic bonding experience. Gather your loved ones, and let everyone have fun with the prep! From cutting the sweet potatoes into perfect fry shapes to tossing them in the aromatic garlic and Parmesan blend, you’ll create cherished memories around the kitchen counter. Encourage friendly competition for everyone’s unique twist on seasoning or dipping sauce ideas. The kitchen isn’t just for cooking; it’s the heart of the home where laughter and creativity thrive. And let’s be honest – who doesn’t want to create some culinary magic together? Create the ultimate comfort food experience as you share these crispy, cheesy morsels fresh from the oven, showcasing that cooking can be a joyful event.

Ultimately, Garlic Parmesan Sweet Potato Fries represent more than just a recipe; they embody the spirit of innovation in the kitchen, showcasing how basic ingredients can transform into something extraordinary with just a little love and ingenuity. As these fries crisp up beautifully, their captivating aroma and golden hue will entice even the pickiest eaters. Every bite is a celebration of the flavors working in perfect harmony, inviting you to savor each moment spent together while enjoying a plateful of these delightful fries.

In a world buzzing with endless fast-food options, Garlic Parmesan Sweet Potato Fries remind us that homemade meals bring a special kind of magic. They offer a reminder that wholesome, flavorful dishes can be created right at home with simple ingredients. So the next time you find yourself craving something crunchy and savory yet satisfying and sweet, whip up a batch of these delightful fries. Trust us; you’ll find it hard to stop at just one serving. Once you have these flavorful babies in front of you, they are bound to be gone before you know it! So grab those sweet potatoes, gather your ingredients, and say hello to your new favorite indulgent yet healthy snack!

Ingredients

  • Sweet potatoes, cut into fries
  • 2 tablespoons olive oil
  • 3 cloves garlic, minced
  • 1/4 cup grated Parmesan cheese
  • 1 teaspoon garlic powder
  • 1 teaspoon paprika
  • 1/2 teaspoon salt
  • 1/4 teaspoon black pepper
  • Chopped fresh parsley for garnish (optional)

Instructions

  • Preheat your oven to 425°F (220°C) and line a baking sheet with parchment paper for easy cleanup.
  • In a large bowl, combine the cut sweet potato fries with olive oil, making sure each fry is well-coated.
  • Add the minced garlic, garlic powder, paprika, salt, and black pepper to the bowl. Toss everything together until the fries are evenly coated with the seasonings.
  • Spread the sweet potato fries in a single layer on the prepared baking sheet to ensure they cook evenly.
  • Bake in the preheated oven for 25-30 minutes, flipping the fries halfway through to ensure they become crispy on all sides.
  • In the last 5 minutes of baking, sprinkle the grated Parmesan cheese over the fries and return to the oven until the cheese is melted and slightly golden.
  • Once baked, remove the fries from the oven and let them cool for a couple of minutes.
  • If desired, garnish with chopped fresh parsley before serving for an extra touch of flavor and color.
  • Enjoy your Garlic Parmesan Sweet Potato Fries hot, as a delicious snack or side dish!

Notes

These Garlic Parmesan Sweet Potato Fries are a delicious and healthier alternative to traditional fries, packed with flavor and nutrients. The combination of roasted sweet potatoes and savory garlic creates a mouthwatering snack or side dish. Make sure to cut the sweet potatoes evenly for uniform cooking and crispiness. You can adjust the seasoning to your preference; feel free to add more garlic or herbs for an extra kick. For a fun twist, try serving them with a spicy dipping sauce or a creamy ranch dressing. Garnish with fresh parsley for a pop of color and flavor. They are best enjoyed fresh out of the oven, but you can also store leftovers in an airtight container for a few days and reheat them in the oven for a crispy finish.

Faq

What ingredients do I need for Garlic Parmesan Sweet Potato Fries?

You will need sweet potatoes, olive oil, garlic powder, grated Parmesan cheese, salt, and pepper.

How do I cut the sweet potatoes for this recipe?

Slice the sweet potatoes into thin strips, about 1/4 inch thick, to ensure they cook evenly and get crispy.

Can I bake the fries instead of frying them?

Yes, these fries are best when baked. Preheat your oven to 425°F (220°C) and bake them on a baking sheet for about 20-30 minutes, flipping halfway through.

How can I make the fries extra crispy?

To get extra crispy fries, soak the sweet potato strips in cold water for 30 minutes before baking. This removes excess starch. Dry them thoroughly and toss with oil and seasonings.

What dipping sauces pair well with Garlic Parmesan Sweet Potato Fries?

Delicious dipping sauces include garlic aioli, ranch dressing, or a spicy mayo. You can also try a simple ketchup or BBQ sauce.

How can I store leftover fries?

Store leftover fries in an airtight container in the fridge for up to 3 days. To reheat, spread them out on a baking sheet and heat in the oven until crispy.

Can I add other seasonings to the fries?

Absolutely! Feel free to experiment with different seasonings like paprika, cayenne pepper, or even Italian herbs to customize the flavor.

Are Garlic Parmesan Sweet Potato Fries suitable for a gluten-free diet?

Yes, this recipe is gluten-free since it does not contain any flour or gluten-containing ingredients. Just ensure that your Parmesan cheese is gluten-free.

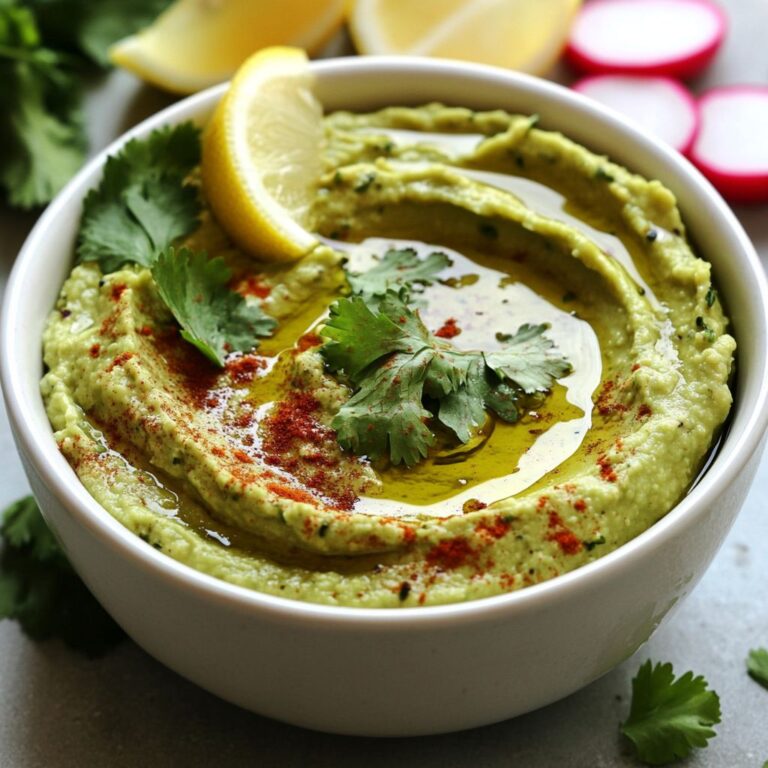
If you’re searching for a delightful and healthy appetizer that’s guaranteed to impress your guests and tantalize your taste buds, look no further than this creamy avocado hummus dip. Imagine a velvety dip that melds the rich texture of ripe avocados with the nutty essence of tahini, the zest of garlic, and a splash of fresh citrus. This dish takes the classic concept of hummus and elevates it to new heights by incorporating the creaminess of avocados, making it not only a feast for the eyes but also a nourishing choice for any gathering. Whether you’re hosting a casual get-together, a holiday party, or simply sharing a quiet evening at home, this dip will undoubtedly be the star of the show.

Avocado is often revered for its health benefits, packed with heart-healthy fats, fiber, and a plethora of essential vitamins and minerals. This makes our creamy avocado hummus not just a sumptuous snack but also a wholesome one that can fit seamlessly into a variety of dietary regimes—vegan, vegetarian, gluten-free, and more. The avocado’s buttery texture contributes to a dip that is both satisfying and light, allowing your palate to experience all the vibrant flavors without feeling heavy.

One of the great things about this creamy avocado hummus dip is its versatility. It’s a dish that can adapt beautifully to your preferences and paired companions. Serve it alongside crispy pita chips, crunchy vegetable sticks, or as a spread on your favorite sandwich for a delicious kick. You can even use it as a luscious topping on grilled meats or fish, adding a unique touch to your main course and giving it a flavor explosion that is hard to resist.

But the allure of this dip doesn’t stop at its flavor and health benefits. It also provides a fantastic canvas for culinary creativity. You can easily customize the dip by adding your favorite spices, fresh herbs, or even roasted vegetables to enhance the flavor profile to your liking. Imagine incorporating a hint of smoked paprika for a subtle smokiness, or perhaps fresh basil or cilantro for a burst of herbal freshness. You can experiment with different flavor combinations until you find your signature style or create a new favorite for every season.

Moreover, the process of making this creamy avocado hummus dip is as easy as it is enjoyable. In just a few simple steps, you’ll have a stunningly beautiful, vibrant green dip that not only tastes incredible but also looks gorgeous on your serving table. It’s a great activity to involve friends or family as you create your masterpiece together, leading to a shared sense of accomplishment and joy. Just gather your ingredients, unleash your inner chef, and watch how easy it is to whip up this irresistible dip.

As an added bonus, this hummus can be prepared ahead of time. In our fast-paced lives, having a go-to recipe for last-minute gatherings is a lifesaver. Prepare your creamy avocado hummus dip a day in advance, store it in the fridge, and simply serve it cold or allow it to come to room temperature before your guests arrive. This means more time for you to enjoy the occasion and mingle, without being tied to the kitchen. That’s the kind of time-saving strategy that every host (or home chef) will appreciate!

The creamy avocado hummus dip is perfect for any occasion, and its health benefits are just a bonus. When you’re entertaining, you want food that not only fills bellies but also satisfies the mind and spirit. This dip checks all those boxes. It’s made from wholesome, fresh ingredients, devoid of unnecessary preservatives, allowing you to feel great about what you’re serving. With each velvety bite, you can relish the harmony of flavors while knowing you are indulging in something that’s nourishing.

Use this creamy avocado hummus as a base for experimenting with your culinary adventures. Transport your taste buds to the Mediterranean by adding a drizzle of olive oil and a sprinkle of za’atar or sumac for an unexpected twist. Alternatively, make a spicy version by mixing in some chopped jalapeños or a splash of hot sauce for those who crave an extra kick. You might also toast up some pumpkin seeds or pine nuts for a nutty crunch—a perfect contrast to the creaminess of the dip.

In addition to serving this dip at home, it travels beautifully if you’re heading out to a potluck, picnic, or outdoor barbecue. Just pack it up in an airtight container, bring along your dipping accompaniments, and watch it disappear from the table as friends and family come back for seconds. With its beautiful green color, this creamy avocado hummus dip will captivate eyes just as much as it captivates taste buds. Your friends will be begging for a second batch before the event even ends!

Remember, the quality of the ingredients can significantly enhance the taste of your creamy avocado hummus dip. Opt for ripe avocados that yield slightly to pressure for perfect creaminess, and ensure you’re using fresh garlic for a more vibrant flavor. You can also select high-quality tahini—this nutty sesame paste will contribute to the overall depth of flavor, making your dip taste homemade and gourmet at the same time. Additionally, fresh lemon juice not only provides brightness but also helps preserve the color of the avocado, keeping your dip looking fresh and inviting.

If you’re also mindful about your nutritional intake or are on a specific diet plan, this dish easily accommodates that concern. Using fresh ingredients means you can control what goes into your dip, allowing for adjustments that can reduce calories while still providing plenty of flavor. Instead of traditional chips or crackers for dipping, you can opt for an array of colorful veggies like cucumbers, bell peppers, and carrots to keep the health theme going strong. Your guests won’t even realize they’re enjoying a healthy option since the taste is simply divine!

Lastly, the experience of sharing food and creating memories around the dining table transcends beyond the ingredients alone. Meal times can serve as a platform for bonding, storytelling, and laughter—values that are so important in our modern, fast-paced lives. As you dip, share, and enjoy this creamy avocado hummus with those nearest to you, you’ll find moments that resonate as much as the flavors you’re indulging in.

With all these points in mind, it’s clear that the creamy avocado hummus dip offers not only an enticing blend of flavor and texture but also a connection to health and creativity. It’s more than just a recipe; it’s an experience waiting to happen, an invitation to gather and celebrate eating well in our lives. So grab those ripe avocados, ready your food processor, and get ready to create something extraordinary with this creamy avocado hummus dip. Indulge in the good life, one dip at a time!

Ingredients

  • 2 ripe avocados peeled and pitted
  • 1 can (15 oz) chickpeas drained and rinsed
  • 1/4 cup tahini
  • 2 tbsp olive oil
  • 2 tbsp lemon juice freshly squeezed
  • 2 garlic cloves minced
  • 1/2 tsp ground cumin
  • Salt to taste
  • 2-3 tbsp water as needed for consistency
  • Fresh cilantro or parsley for garnish optional

Instructions

  • In a mixing bowl, add the ripe avocados and use a fork or a potato masher to mash them until smooth.
  • Add the drained and rinsed chickpeas to the bowl with the mashed avocados.
  • In a food processor, combine the mashed avocado and chickpeas with tahini, olive oil, lemon juice, minced garlic, ground cumin, and salt.
  • Blend the mixture until smooth and creamy. If the dip is too thick, add water a tablespoon at a time until you reach your desired consistency.
  • Taste and adjust seasoning with more salt or lemon juice if needed.
  • Transfer the creamy avocado hummus to a serving bowl.
  • If desired, garnish with fresh cilantro or parsley before serving.
  • Serve with your favorite vegetable sticks, pita chips, or as a spread on sandwiches.

Notes

This creamy avocado hummus dip is a delicious and nutritious alternative to classic hummus, perfect for serving with fresh veggies, pita chips, or as a spread on sandwiches. The avocados lend a rich creaminess while providing healthy fats, and the chickpeas add a great source of protein. The dip is easy to whip up in just a few minutes and can be customized by adjusting the levels of garlic and cumin to suit your taste. For a twist, try adding spices like paprika or chili powder for additional flavor. This dip is best enjoyed fresh but can be stored in an airtight container in the fridge for up to three days. To prevent browning, sprinkle a little extra lemon juice on top before storing. Garnish with fresh cilantro or parsley for a pop of color and added freshness.

Faq

What ingredients are needed for creamy avocado hummus dip?

The main ingredients include ripe avocados, chickpeas, tahini, garlic, lemon juice, olive oil, salt, and cumin.

How do I make creamy avocado hummus dip from scratch?

To make the dip, blend ripe avocados with chickpeas, tahini, garlic, lemon juice, olive oil, salt, and cumin until smooth. Adjust the seasoning to taste.

Can I make avocado hummus dip in advance?

Yes, you can make it in advance. However, to prevent browning, store it in an airtight container and cover the surface with plastic wrap or lemon juice.

What can I serve with creamy avocado hummus dip?

This dip pairs well with pita chips, fresh vegetables, crackers, or as a spread on sandwiches and wraps.

Is creamy avocado hummus dip suitable for vegan diets?

Yes, the creamy avocado hummus dip is entirely plant-based and suitable for vegans.

Can I modify the recipe for spicy avocado hummus dip?

Absolutely! You can add jalapeños, red pepper flakes, or hot sauce to the recipe to give it a spicy kick.

How long can I store creamy avocado hummus dip in the refrigerator?

It can be stored in the refrigerator for up to 3 days, though it’s best enjoyed within the first couple of days for optimal freshness.

What nutritional benefits does creamy avocado hummus dip offer?

This dip is rich in healthy fats from avocados, high in fiber from chickpeas, and contains vitamins and minerals like vitamin E, potassium, and magnesium.

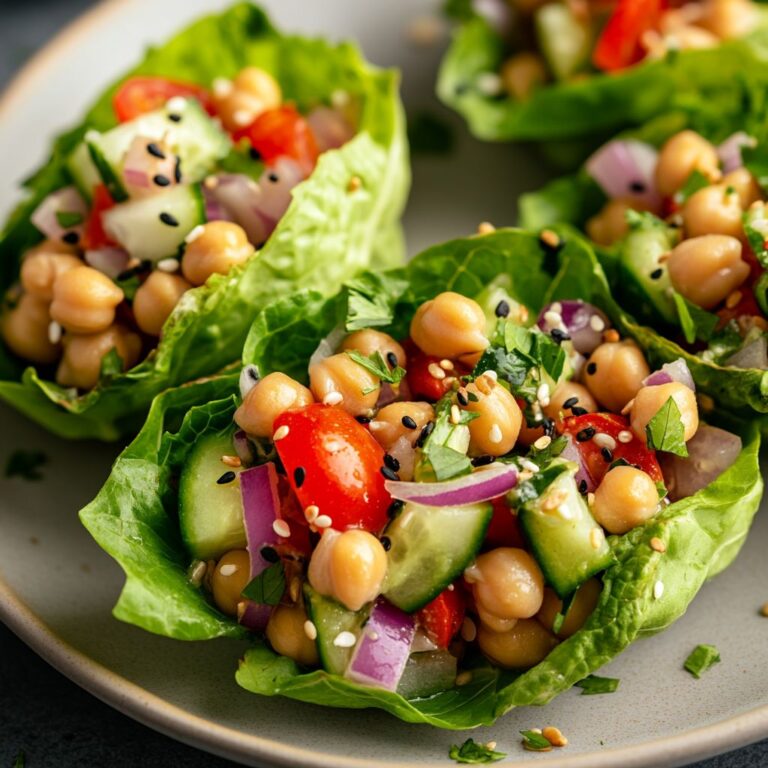
Discover the Delights of Mini Chickpea Salad Lettuce Cups

Imagine a vibrant explosion of flavors beautifully nestled in crisp, refreshing lettuce cups—this is what you can expect from our Mini Chickpea Salad Lettuce Cups. These delightful bites not only present a feast for the eyes but are also a celebration of health and taste in each adorable serving. Whether you are looking for a light lunch, a healthy snack, or an impressive starter to impress your guests at your next gathering, these lettuce cups deliver on all fronts.

Chickpeas, also known as garbanzo beans, are the star of this recipe. Renowned for their versatility and rich nutritional profile, chickpeas are loaded with protein, fiber, and a wealth of essential vitamins and minerals. They are a fantastic plant-based protein source, making this dish ideal for vegetarians, vegans, and anyone looking to reduce their meat intake while enjoying an abundance of flavor. But what truly sets this salad apart is not only its health benefits but also its delightful medley of textures and tastes—from the pleasing crunch of fresh vegetables to the creamy dressing that beautifully ties it all together.

The base of these luscious little cups is made from a mix of fresh veggies and herbs that intricately dance on your taste buds. Think finely chopped cucumbers, crisp bell peppers, bright red onions, and fragrant parsley—all combined for a colorful palette of flavors that enhance the chickpeas’ nutty taste. Each ingredient has been carefully selected, both for its unique contribution to the overall flavor and its texture, creating a satisfying combination that each bite evokes sheer delight.

But let’s not overlook the lettuce! The light, crunchy layers of lettuce provide a perfect vehicle for this refreshing salad. Romaine, butter lettuce, or even crisp iceberg can be used, depending on your preference. Not only do they add a delightful crunch, but they also bring in a wonderful layer of freshness, making each cup a guilt-free indulgence that is perfect for warm days or whenever you need a burst of energy from wholesome ingredients. And the best part? You get to enjoy this feast without the heaviness of traditional wraps or bread, making it an excellent choice for anyone aiming for lighter fare.

The dressing, a harmonious blend of olive oil, zesty lemon juice, and aromatic spices, further elevates this salad, ensuring that each element complements the other seamlessly. The lemon provides a bright acidity that balances the richness of the chickpeas and the creaminess of the dressing, while various herbs and seasonings amplify the overall flavor profile. For a little kick, feel free to toss in some red pepper flakes or diced jalapeños; they add just the right amount of heat to enliven your palate.

Not only are these Mini Chickpea Salad Lettuce Cups delightful in flavor, but they are also incredibly easy to prepare. Whipping them up requires minimal cooking; most of the work revolves around cutting and mixing fresh ingredients. This no-fuss approach makes it an ideal recipe for busy weeknights, spontaneous gatherings, or meal prepping for the week ahead. In just a few simple steps, you can transform pantry staples like chickpeas and lettuce into a beautifully presented dish that is sure to impress.

Customization is another wonderful aspect of this recipe. With the base of chickpeas and lettuce, the possibilities are limitless! Feel free to jazz up the salad with your favorite ingredients. Throw in diced avocados for an ultra-creamy texture or add olives for an extra salty brininess. You could also mix in grains like quinoa or farro to create a heartier version. Even a sprinkle of feta cheese or toasted nuts would elevate the dish even more, adding delightful layers of flavor and grandeur! The adaptability of this recipe makes it resonate with each individual’s unique taste, ensuring everyone can enjoy their very own version of these mouth-watering cups.

As we delve into the nutritional aspects, these cups shine brightly as a wholesome option. Packed with protein, fiber, and a hearty dose of vitamins, they make for a satisfying dish that can even help curb late-night cravings or serve as a nutritious lunch on the go. Each cup is a tiny powerhouse of energy, inviting you to indulge without the guilt. Plus, since they’re naturally gluten-free, they cater to various dietary needs, making them a perfect choice for parties where guests have different preferences.

Serving these Mini Chickpea Salad Lettuce Cups is just as effortless as making them. Present them on a bright serving platter, garnished with extra slices of lemon or fresh herbs for an eye-catching display that is sure to be a conversation starter at any event. As guests reach for their cups, watch their faces light up with excitement as they take their first bites of this vibrant and crunchy salad. The beauty of these cups lies in their portability; you can easily enjoy them at home or pack them for a picnic or work lunch. They are also a lovely option as a party appetizer, allowing your guests to enjoy a health-conscious yet tantalizing treat.

In summary, Mini Chickpea Salad Lettuce Cups are not just another recipe to add to your repetoire; they’re an invitation to explore the delightful possibilities of plant-based cuisine. With their appealing presentation, health benefits, and an incredible burst of flavor, these cups embody everything that is good about eating fresh, wholesome meals. The ease of preparation combined with the potential for customization makes them a stellar addition, whether cooking for oneself, family, or a large gathering.

So why not take a culinary adventure today? Dive into the colorful world of chickpeas and vegetables encapsulated in crisp lettuce, and discover how simple ingredients can transform into a beautiful and nourishing experience. With every bite, allow yourself to be transported to a place of flavor and health—your taste buds and body will thank you for this delectable journey. Enjoy creating and savoring these delightful Mini Chickpea Salad Lettuce Cups; they are sure to become a quick favorite in your household!

Ingredients

  • 1 can (15 ounces) chickpeas, drained and rinsed
  • 1/2 cup diced cucumber
  • 1/2 cup diced bell pepper
  • 1/4 cup diced red onion
  • 1/4 cup cherry tomatoes, halved
  • 1/4 cup chopped fresh parsley
  • 2 tablespoons olive oil
  • 1 tablespoon lemon juice
  • 1 teaspoon Dijon mustard
  • Salt, to taste
  • Pepper, to taste
  • 1 head of butter or romaine lettuce, leaves separated

Instructions

  • Begin by draining and rinsing the chickpeas under cold water to remove excess sodium and any canned taste.
  • In a large mixing bowl, combine the rinsed chickpeas, diced cucumber, diced bell pepper, diced red onion, halved cherry tomatoes, and chopped fresh parsley.
  • In a small jar or bowl, whisk together the olive oil, lemon juice, Dijon mustard, salt, and pepper until well combined to create the dressing.
  • Pour the dressing over the chickpea mixture and gently toss everything together until all the vegetables and chickpeas are evenly coated.
  • Taste the salad and adjust seasoning with additional salt and pepper if needed.
  • Lay out the separated lettuce leaves on a serving platter or individual plates.
  • Using a spoon, fill each lettuce leaf with a generous amount of the chickpea salad mixture.
  • Serve immediately as a refreshing appetizer or light meal, or refrigerate until ready to serve.

Notes

These Mini Chickpea Salad Lettuce Cups are a refreshing and healthy option for a light lunch or appetizer. Packed with protein and fiber from the chickpeas, they provide a satisfying bite without weighing you down. The combination of fresh vegetables adds crunch and vibrant flavor, while the simple dressing made from olive oil, lemon juice, and Dijon mustard ties everything together beautifully. You can easily customize the salad by adding other vegetables like shredded carrots or avocado, or even a sprinkle of feta cheese for added creaminess. Serve these lettuce cups immediately for the best texture, or prepare the chickpea salad ahead of time and assemble just before serving to keep the lettuce crisp. They’re perfect for meal prep and make a nutritious snack on-the-go!

Faq

What are mini chickpea salad lettuce cups?

Mini chickpea salad lettuce cups are a light and healthy appetizer or meal option made by filling lettuce leaves with a flavorful chickpea salad, typically including ingredients like diced vegetables, herbs, and a dressing.

What ingredients do I need to make mini chickpea salad lettuce cups?

To make mini chickpea salad lettuce cups, you will need chickpeas, lettuce leaves (such as romaine or butter lettuce), diced vegetables (like cucumbers, tomatoes, and bell peppers), herbs (like parsley or cilantro), and a dressing (such as olive oil, lemon juice, salt, and pepper).

Are mini chickpea salad lettuce cups gluten-free?

Yes, mini chickpea salad lettuce cups are naturally gluten-free as the main ingredients are chickpeas and lettuce, making them suitable for individuals with gluten sensitivities or celiac disease.

How can I make the salad more flavorful?

You can enhance the flavor of the chickpea salad by adding spices, such as cumin or paprika, incorporating ingredients like feta cheese or olives, and using fresh herbs and a flavorful dressing to bring everything together.

How long can I store the mini chickpea salad?

The chickpea salad can be stored in the refrigerator in an airtight container for about 3 to 4 days. However, it’s best to assemble the cups right before serving to keep the lettuce crisp.

Can I make mini chickpea salad lettuce cups ahead of time?

Yes, you can prepare the chickpea salad a day in advance and store it in the refrigerator. However, it is recommended to fill the lettuce cups shortly before serving to prevent the leaves from wilting.

Are mini chickpea salad lettuce cups vegan?

Yes, mini chickpea salad lettuce cups are vegan as they consist of plant-based ingredients and do not contain any animal products.

What variations can I try with the recipe?

You can customize the recipe by adding different proteins like avocado or tofu, experimenting with various dressings, or substituting different vegetables according to your preference. You could also try different types of lettuce or other greens.

Easy Veggie Chili: A Heartwarming Bowl of Comfort

When the weather turns chilly or you’re simply craving something warm and comforting, few meals can compete with a hearty bowl of chili. Enter our Easy Veggie Chili, a vibrant, flavor-packed dish that celebrates the bountiful world of vegetables, pulses, and spices. This dish is not just any chili; it’s a celebration of ingredients that come together harmoniously, creating a rich and satisfying meal that everyone will love—whether you’re a lifelong vegetarian or simply looking to incorporate more plant-based dishes into your diet.

Imagine the fragrant aroma of onions, garlic, and spices dancing in your kitchen, helping to create an atmosphere of warmth and comfort. This Easy Veggie Chili is designed for everyone, from experienced chefs to kitchen novices. It’s easy to prepare, making it an ideal choice for busy weeknights or a cozy weekend gathering with family and friends. Plus, the ingredients are accessible and affordable, allowing you to whip it up without breaking the bank. Versatility is the name of the game; you can modify this chili to suit your taste preferences and dietary needs, making it truly your own.

Chili is a staple in many households, often accompanied by stories, traditions, and a longing for home-cooked meals. Our Easy Veggie Chili invites you to explore the rich tapestry of flavors inspired by various cuisines around the world. With each spoonful, you’ll uncover a myriad of textures and tastes, all while nourishing your body with nutrient-dense ingredients. This isn’t just a meal; it’s an experience. You’ll be amazed at how a simple combination of vegetables, beans, and spices can create flavors so comforting, they’ll warm your heart.

As you delve into the recipe, picture the stunning colors of bell peppers, zucchini, and tomatoes melding together in a bubbling pot. Each ingredient carries its own character and enhances the dish in remarkable ways. Not only are these veggies visually appealing, they also pack a nutritional punch, providing essential vitamins, minerals, and antioxidants that promote overall well-being. You’re not only feeding your hunger but also nourishing your body and soul, which is philosophy we can all resonate with.

Our Easy Veggie Chili is not just about flavor; it’s also a fantastic way to utilize leftover vegetables from your fridge. This recipe encourages creativity in the kitchen as you can easily add your favorite veggies, such as carrots or corn, or even switch up the beans to include black beans, chickpeas, or lentils. The possibilities are endless, and the result will always be a delightful symphony of flavor that invites you to explore what your produce drawer has to offer.

Furthermore, as part of a growing trend towards plant-based eating, this Easy Veggie Chili answers the call for sustainable meal options. With the rising concern for our planet, choosing plant-based meals is a step toward a healthier Earth. Reducing your meat consumption is not only beneficial for your health, but it also lessens your carbon footprint. Let’s face it: we all love a cozy meal, and what better way to enjoy it than with a delicious veggie chili that aligns with our commitment to healthy living and sustainability?

Whether you’re preparing this dish for yourself, hosting a gathering, or sharing with family, chili is one of those meals that tastes even better the next day. It freezes beautifully too! So, if you have leftovers—or make a double batch—rest assured it can be stored and enjoyed later. This makes it a perfect meal prep option for those busy weeks where time is of the essence. With a little forethought, you can effortlessly set yourself up for healthy lunches and easy dinners throughout the week, all while providing your tastebuds with a delightful treat.

One of the best aspects of chili is the toppings! Once you’ve perfected your veggie chili, the choice of toppings opens up a new world of flavor and textural contrasts. Whether you prefer a dollop of creamy avocado, a sprinkle of fresh cilantro, a splash of zesty lime juice, or a generous handful of crunchy tortilla chips, the right toppings can elevate your chili to new heights. Discussing your favorite toppings can even become a fun conversation starter among friends and family as they gather around the table to enjoy this comforting dish.

Have you thought about how to serve your Easy Veggie Chili? A warm, crusty piece of cornbread or a fluffy roll can be the perfect companion to your chili, soaking up all those delicious juices and adding a wonderful texture to each meal. Pair it with a fresh, crispy salad, or perhaps even serve it over a bed of grains like quinoa or rice for an added boost of nutrition. This dish becomes not just a meal but an opportunity to experiment and bring variety to the table.

The heart of any great recipe lies in the quality of its ingredients. For our Easy Veggie Chili, we encourage you to choose fresh, in-season produce whenever possible. Not only does this guarantee peak flavor, but it also supports local farmers and sustainable practices. A short trip to your local farmer’s market can yield beautiful, vibrant vegetables that bring life and energy to your culinary creations. Remember, the foundation of any dish is the kind of love and attention you pour into it, and choosing fresh ingredients is the first step in this enriching process.

This Easy Veggie Chili is versatile enough to suit various dietary preferences, also making it a wonderful choice for gatherings where guests may have different food needs. Whether you need a gluten-free option, a nut-free dish, or something low-sodium, the customizable nature of this recipe ensures everyone at your table can enjoy a nourishing and flavorful meal.

In summary, Easy Veggie Chili is more than just a recipe; it’s an invitation to savor the flavors of fresh produce, embracing a wholesome lifestyle that’s as kind to your body as it is to your taste buds. Gather your loved ones, share warm bowls, and indulge in the comfort of a home-cooked meal that will surely become a cherished tradition. Dive in and enjoy the magic of this comforting dish—your future self will thank you for the cozy warmth it brings on any chilly day.

Ingredients

  • 1 tablespoon olive oil
  • 1 medium onion diced
  • 2 cloves garlic minced
  • 1 bell pepper diced
  • 2 carrots chopped
  • 1 zucchini diced
  • 1 can (15 ounces) kidney beans drained and rinsed
  • 1 can (15 ounces) black beans drained and rinsed
  • 1 can (15 ounces) corn drained
  • 1 can (28 ounces) crushed tomatoes
  • 2 cups vegetable broth
  • 2 teaspoons ground cumin
  • 2 teaspoons chili powder
  • 1 teaspoon smoked paprika
  • Salt to taste
  • Black pepper to taste
  • Fresh cilantro chopped, for garnish
  • Avocado diced, for serving (optional)

Instructions

  • In a large pot, heat the olive oil over medium heat.
  • Add the diced onion and sauté for about 5 minutes, until translucent.
  • Stir in the minced garlic and cook for an additional minute, until fragrant.
  • Add the diced bell pepper, chopped carrots, and diced zucchini. Cook for about 5-7 minutes, stirring occasionally, until the vegetables begin to soften.
  • Stir in the drained and rinsed kidney beans, black beans, and corn.
  • Pour in the crushed tomatoes and vegetable broth, and mix well.
  • Add the ground cumin, chili powder, smoked paprika, salt, and black pepper. Stir to combine all the ingredients.
  • Bring the chili to a simmer and let it cook uncovered for 20-25 minutes, stirring occasionally, until the vegetables are tender and the flavors meld together.
  • Taste and adjust seasoning as necessary.
  • Serve the chili hot, garnished with chopped fresh cilantro and diced avocado if desired.

Notes

This easy veggie chili is a hearty and comforting dish, perfect for a cozy dinner or meal prep for the week. Packed with a variety of vegetables and protein-rich beans, it’s both nutritious and filling. You can adjust the spice level by adding more chili powder or fresh jalapeños if you prefer a kick. It’s a great way to use up leftover vegetables in your fridge, so feel free to get creative with the mix. Serve it with a dollop of sour cream, diced avocado, or shredded cheese to enhance the flavors. This chili can be made ahead of time and stored in the fridge for up to five days, or it can be frozen for future meals. When reheating, simply add a splash of vegetable broth if it’s too thick. Enjoy this vegan and gluten-free dish that’s sure to please everyone at the table!

Faq

What ingredients do I need for Easy Veggie Chili?

You will need canned beans, diced tomatoes, bell peppers, onion, garlic, corn, vegetable broth, chili powder, cumin, and salt. Optional toppings include avocado, cheese, or sour cream.

How long does it take to prepare Easy Veggie Chili?

The total preparation and cooking time is approximately 30 to 45 minutes.

Can I make Easy Veggie Chili in advance?

Yes, you can prepare it in advance and store it in the refrigerator for up to 3 days or freeze it for longer storage.

Is Easy Veggie Chili suitable for vegans?

Yes, this recipe is entirely plant-based and contains no animal products, making it suitable for vegans.

What can I serve with Easy Veggie Chili?

Easy Veggie Chili goes well with cornbread, rice, tortilla chips, or a simple side salad.

Can I customize the spice level of Easy Veggie Chili?

Absolutely! You can adjust the spice level by adding more chili powder or fresh peppers, or even incorporating jalapeños or hot sauce as desired.

How can I thicken my Easy Veggie Chili?

You can thicken the chili by allowing it to simmer longer, adding a cornstarch slurry, or mashing some of the beans.

Is Easy Veggie Chili gluten-free?

The recipe can be made gluten-free by ensuring the vegetable broth and other ingredients are labeled gluten-free. Most beans and vegetables are naturally gluten-free.

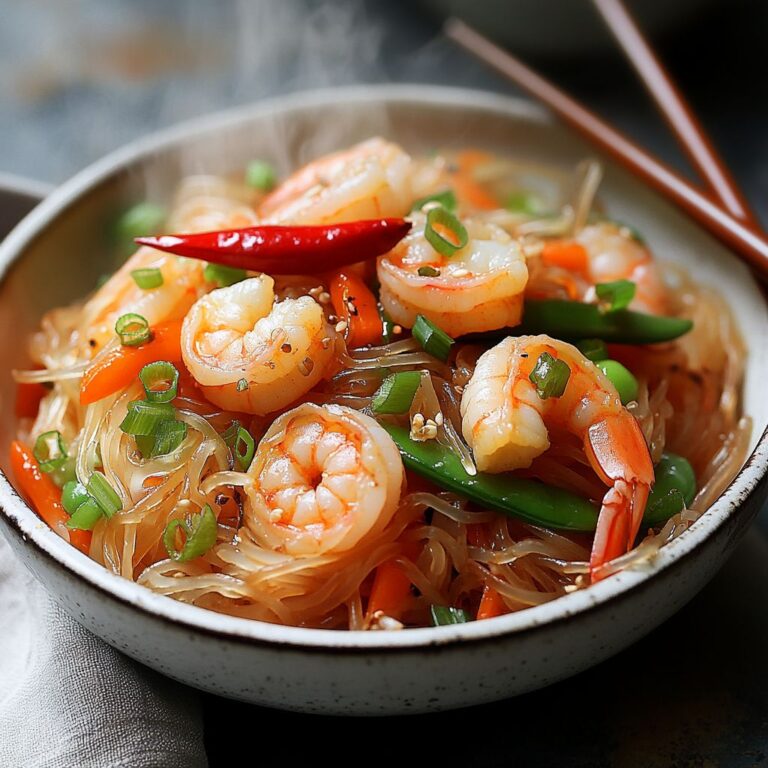
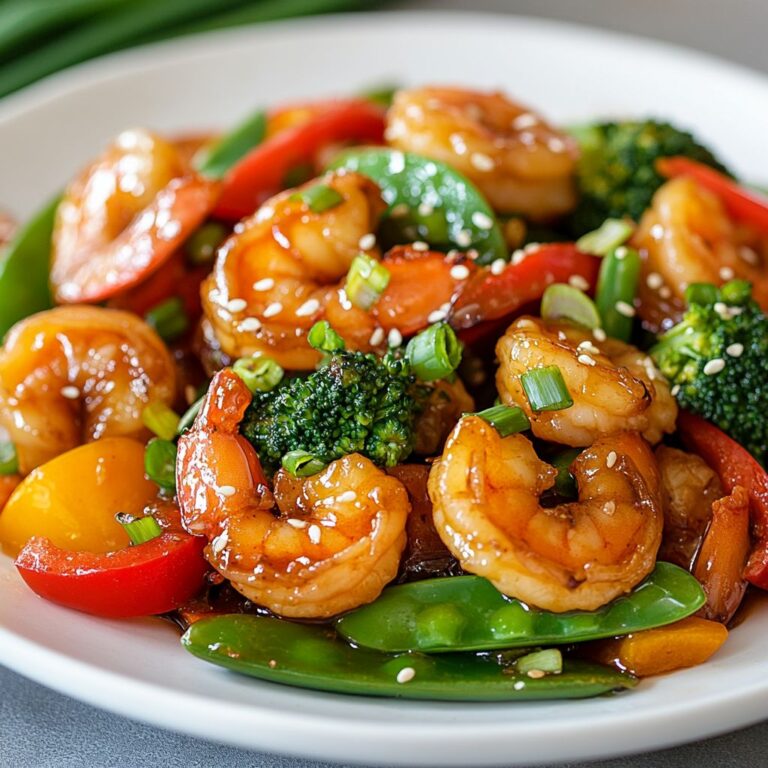
Imagine a dish that embodies a harmonious blend of vibrant flavors, tantalizing textures, and an explosion of colors right on your plate. Shrimp Stir-Fry with Rice Noodles is not just another meal; it’s a culinary adventure that whisks you away to the bustling streets of Southeast Asia, where street vendors expertly toss together fresh ingredients and aromatic spices. This delightful dish is a symphony of succulent shrimp, perfectly cooked rice noodles, and an array of crisp vegetables, all embraced by a savory sauce that ties each element together.

In the world of quick and satisfying meals, stir-fries reign supreme. They offer a versatile platform that can be adapted to suit any palate, yet the addition of rice noodles takes this particular dish to extraordinary heights. These silky noodles, with their slightly chewy texture, soak up the flavors of the sauce beautifully, enhancing every bite with the essence of the dish. With the quick cooking time and deep flavors, this recipe is ideal for busy weeknights or even a relaxed weekend gathering with friends and family.

One of the most appealing aspects of Shrimp Stir-Fry with Rice Noodles is its accessibility. Whether you’re a seasoned chef or a novice in the kitchen, you’ll find this recipe straightforward yet rewarding. It requires minimal preparation, and the cooking process is swift—meaning you can have a delicious and satisfying meal on the table in no time. The star of the dish, shrimp, is a seafood delicacy that cooks in mere minutes, promising a moist and tender bite that resonates with both flavor and nutrition.

The beauty of this stir-fry lies in its versatility. While shrimp is the primary protein in this recipe, feel free to experiment with other seafood or even proteins such as chicken or tofu if you prefer. Furthermore, the vegetables you incorporate can vary based on the season or your personal taste. Crisp bell peppers, snap peas, broccoli florets, and vibrant carrots not only add nutritional value but also contribute visual appeal. Imagine plating up a spectrum of colors that not only whets the appetite but tells a story of freshness and innovation.

As we delve into the sauce, which is the magical element of this dish, it brings together all the ingredients to create an unforgettable dining experience. Typically a mixture of soy sauce, garlic, and ginger, the sauce can be tailored to your liking. Add a hint of sweetness with honey or brown sugar, or perhaps a dash of heat with red pepper flakes for a delightful kick. The balance of salty, sweet, and savory is critical; it’s what elevates this dish from mere sustenance to a dish that you’ll crave time and time again.

Cooking Shrimp Stir-Fry with Rice Noodles offers not only a meal but also an opportunity to engage with the process. Stir-frying is a technique that encourages you to be dynamic and adaptable in the kitchen. You’ll quickly learn to appreciate the sizzle and aroma that fills the air as the shrimp turn a lovely pink and the vegetables soften while still retaining their crunch. The quick cooking method allows you to stay engaged, ensuring that everything is perfectly cooked without losing the freshness of each ingredient.

The communal aspect of stir-frying enhances the experience as well. Consider preparing it together with family or friends, allowing everyone to participate in the cooking process. An evening spent creating this dish together not only results in a delicious dinner but also fosters connection, laughter, and unforgettable moments in the kitchen. It’s not just about the meal; it’s about the experience that surrounds it.

When it comes to serving, this dish can stand as a main course on its own, but it can also be complemented with sides if you wish to create a more elaborate feast. Pair it with spring rolls for a delightful appetizer or a refreshing cucumber salad to balance the warmth of the stir-fry. And don’t forget to set the table with chopsticks and some traditional Asian dinnerware—a little aesthetic touch that enhances the entire dining experience. Lighting a few candles or playing soft music can elevate the ambiance, turning an ordinary meal into an extraordinary occasion.

As we conclude this prelude to the recipe, let’s talk about the nutritional benefits of Shrimp Stir-Fry with Rice Noodles. This dish can be easily modified for various dietary preferences, and it incorporates lean protein, vitamins, and fiber from the vegetables, making it a balanced choice for various diets. Shrimp is rich in protein and low in calories, while rice noodles provide a gluten-free option for those with dietary restrictions. Load your stir-fry with colorful vegetables for a health boost, ensuring you have a meal that’s not only tasty but also nourishing.

Embark on this culinary journey with the Shrimp Stir-Fry with Rice Noodles recipe, and allow it to transport you to the vibrant markets and street-side eateries of Asia. With each bite, you’re not just enjoying a meal; you are indulging in a story of culture and tradition, beautifully expressed through flavors and ingredients. Ready your ingredients and your wok, and let the enticing aroma of shrimp and vegetables fill your kitchen, as you prepare to serve a dish that will surely please the palate and warm the heart.

Ingredients

  • Shrimp
    • 1 pound large shrimp, peeled and deveined
  • Rice Noodles
    • 8 ounces rice noodles
  • Vegetables
    • 1 bell pepper, sliced
    • 1 cup snap peas
    • 1 carrot, julienned
    • 2 green onions, chopped
    • 2 cloves garlic, minced
    • 1 inch ginger, grated
  • Sauce
    • 3 tablespoons soy sauce
    • 2 tablespoons oyster sauce
    • 1 tablespoon sesame oil
    • 1 tablespoon rice vinegar
    • 1 teaspoon chili sauce (optional)
  • Other
    • 2 tablespoons vegetable oil for cooking

Instructions

  • Begin by soaking the rice noodles in hot water for about 15-20 minutes, or until they are soft. Drain, rinse with cold water, and set aside.
  • While the noodles are soaking, prepare the sauce by mixing the soy sauce, oyster sauce, sesame oil, rice vinegar, and chili sauce (if using) in a small bowl. Set aside.
  • Heat the vegetable oil in a large skillet or wok over medium-high heat.
  • Add the minced garlic and grated ginger to the skillet, sautéing for about 30 seconds or until fragrant.
  • Next, add the large shrimp to the skillet and stir-fry for about 2-3 minutes or until they turn pink and opaque.
  • Once the shrimp are cooked, add the sliced bell pepper, snap peas, and julienned carrot to the skillet. Stir-fry the vegetables for another 2-3 minutes until they are tender but still crisp.
  • Stir in the drained rice noodles and pour the prepared sauce over the mixture. Toss everything together gently to combine and heat through, about 2 minutes.
  • Finally, add the chopped green onions, mixing them in before serving.
  • Serve the shrimp stir-fry warm, garnished with extra green onions if desired.

Notes

These shrimp stir-fry with rice noodles offer a quick and vibrant meal packed with protein and fresh vegetables. The combination of shrimp and assorted veggies creates a colorful dish that is as nutritious as it is delicious. Feel free to customize this recipe by adding other vegetables like broccoli or bell pepper for additional flavor and texture.Make sure to have all your ingredients prepped and ready to go before you start cooking, as stir-frying is a fast-paced process. It’s best to cook the shrimp until they’re just opaque to ensure tenderness. For an added layer of flavor, consider marinating the shrimp in a bit of soy sauce and garlic before cooking.

This dish can easily be made gluten-free by using gluten-free soy sauce and ensuring your rice noodles are certified gluten-free. Serve this stir-fry immediately for the best flavor and texture, or chill it for a flavorful lunch option the next day. Garnishing with fresh herbs like cilantro or basil can elevate the dish further and add a fresh touch.

Faq

What ingredients do I need for Shrimp Stir-Fry with Rice Noodles?

You will need shrimp, rice noodles, bell peppers, broccoli, carrots, garlic, soy sauce, sesame oil, and optional toppings like green onions and sesame seeds.

How long does it take to prepare and cook Shrimp Stir-Fry?

The entire process takes about 30 minutes, including preparation and cooking time.

Can I use frozen shrimp for this recipe?

Yes, you can use frozen shrimp. Just make sure to thaw them before cooking for best results.

Is this recipe customizable?

Absolutely! You can add or substitute vegetables based on your preferences, such as snap peas or zucchini, and adjust the sauce to your taste.

What type of rice noodles should I use?

You can use any flat rice noodles, such as Banh Pho or Pad Thai noodles. Ensure they are cooked according to the package instructions before adding them to the stir-fry.

Can I make this dish vegetarian?

Yes, you can replace shrimp with tofu or tempeh and use vegetable broth instead of seafood seasonings in the sauce.

What type of soy sauce is best for this recipe?

Either regular soy sauce or low-sodium soy sauce works well. For a gluten-free option, you can use tamari.

How do I store leftovers of Shrimp Stir-Fry?

Store leftovers in an airtight container in the refrigerator for up to 3 days. Reheat in a microwave or in a pan over medium heat before serving.

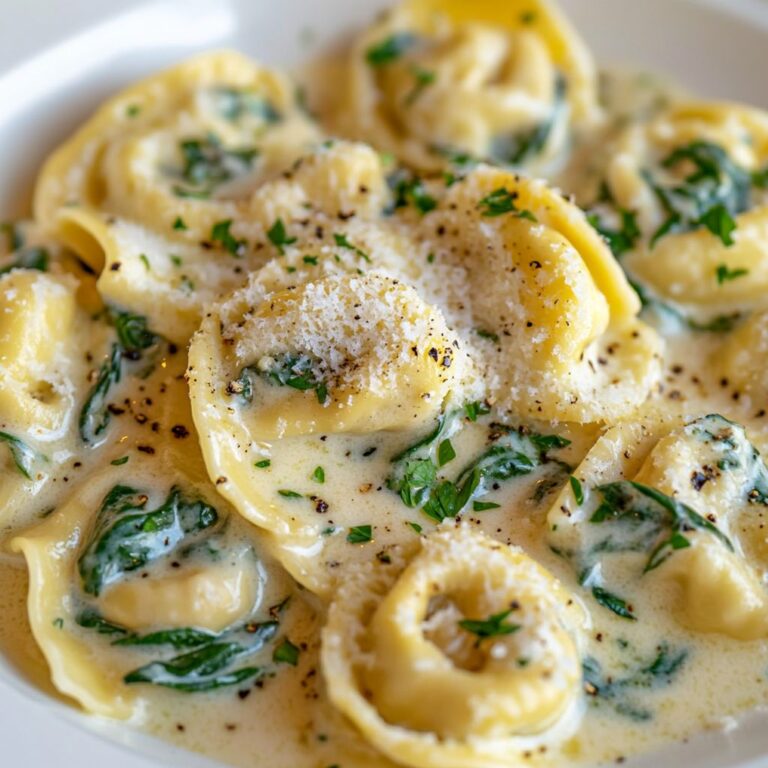
Indulge in the alluring world of Italian cuisine with a delightful dish that embodies comfort and sophistication—Creamy Spinach Tortellini. Picture this: tender, plump tortellini filled with a luscious blend of ricotta, spinach, and a hint of nutmeg, all enveloped in a velvety, creamy sauce that dances on your palate. This dish is not just mere food; it is a comforting embrace that warms the soul and ignites the senses, making it the perfect choice for a weeknight dinner or a special family gathering.

The allure of tortellini lies not only in its delightful flavors but also in its charming shape. Each piece is a little parcel of joy, crafted to hold an explosion of delectable fillings. When paired with a rich, creamy sauce that caresses each twisted noodle, you have a symphony of textures and tastes that is nothing short of extraordinary. The addition of fresh spinach elevates this dish, infusing it with vibrant color and a nutritional boost, making it an enticing option that is as good for the body as it is for the soul.

Imagine the scene: a bustling kitchen filled with the warm aroma of simmering garlic and sautéed onions, the sound of bubbling cream, and the vibrant green of fresh spinach contrasting against the golden hue of cooked tortellini. It’s a culinary melody that invites you to come closer, entice your appetite, and prepare for a delightful feast. But what makes this Creamy Spinach Tortellini truly irresistible is the simple elegance it brings to the table. With minimal fuss and maximum flavor, you can create a dish that looks like it came straight from a gourmet restaurant while being easy enough to whip up on a whim.

As you delve into this recipe, you will find that the balance of ingredients is key. The cream is lightly seasoned with garlic, a touch of nutmeg, and parmesan cheese, ensuring that each bite bursts with flavor. The spinach, slightly wilted, adds a refreshing element that cuts through the richness of the sauce, creating a harmonious blend that you simply can’t resist. Not only does this dish please the taste buds, but it also offers an opportunity to get creative. You can easily customize the recipe by adding protein like grilled chicken or shrimp, or even tossing in other vegetables such as sun-dried tomatoes or artichoke hearts for added depth and variety.

The versatility of this Creamy Spinach Tortellini means that it can seamlessly fit into any occasion—whether you’re hosting an intimate gathering, cooking for a special date night, or feeding the whole family at the dining table. With its vibrant colors and inviting aroma, this dish remains a visual feast as much as a culinary delight. The creamy sauce clings lovingly to the tortellini, coating each piece like a satisfying blanket that beckons you to indulge a little more.

Not only is Creamy Spinach Tortellini delicious, but it also holds the power to bring people together. Sharing a meal has always been a way to connect, to celebrate, and to create lasting memories. Imagine a jovial dinner table filled with laughter, clinking glasses, and the enticing aroma of tortellini wafting through the air. With every bite, stories are shared, and friendships are nurtured, turning an ordinary evening into something extraordinary.

Moreover, this dish is extremely forgiving. Whether you’re a seasoned chef or a kitchen novice, the steps to crafting this delightful meal are straightforward and approachable. This makes it a fantastic option for families, busy professionals, or anyone looking to enjoy a splendid meal without spending hours in the kitchen. The ability to prepare and assemble the dish with ease means that you’ll have more time to enjoy the company of your loved ones rather than getting bogged down by complicated culinary techniques.

In addition, the creamy sauce in this recipe presents an opportunity for experimentation. Each cook can adapt it according to their personal preferences, whether it’s using heavy cream, half-and-half, or even a lighter version with vegetable broth. You can also spice things up with a pinch of red pepper flakes for warmth or fresh herbs such as basil or thyme for additional fragrance and flavor. This adaptability means that your Creamy Spinach Tortellini will never get old; each time you make it, it can feel like a brand-new experience.

And let’s not forget the leftovers! If you happen to have any remaining tortellini after your meal, rejoice! This dish reheats beautifully, making it the perfect candidate for meal prep or a delightful lunch the next day. A quick microwave or stovetop warm-up, and you’ll be able to savor the comforting flavors all over again, bringing a slice of home-cooked goodness back into your busy day.

As you prepare to recreate this masterpiece in your own kitchen, remember that food is not merely about sustenance; it is an experience, a journey that brings us closer to one another. Each ingredient represents a story, a tradition passed down through generations, and every bite connects us to the people and moments that matter. So grab your apron, gather your loved ones, and let’s embark on this culinary adventure together as we explore the delightful possibilities of Creamy Spinach Tortellini.

Whether you decide to serve this comforting dish with a crisp side salad or a warm loaf of garlic bread, the end result promises to be an affair to remember. The wonderful world of flavors, textures, and colors will captivate your family and friends, leaving them reaching for seconds and asking for the recipe. So don’t hold back! Dive into this indulgent pasta experience, and let the sumptuousness of Creamy Spinach Tortellini take you on a delicious journey that you’ll cherish long after the last bite has been savored.

Ingredients

  • 1 package (9 oz) cheese tortellini
  • 2 cups fresh spinach
  • 1 tablespoon olive oil
  • 2 cloves garlic minced
  • 1 cup heavy cream
  • 1 cup grated Parmesan cheese
  • 1/2 teaspoon salt
  • 1/4 teaspoon black pepper
  • 1/4 teaspoon red pepper flakes optional
  • Fresh basil leaves for garnish optional

Instructions

  • Bring a large pot of salted water to a boil. Add the cheese tortellini and cook according to package instructions until al dente. Drain and set aside.
  • In a large skillet, heat the olive oil over medium heat. Add the minced garlic and sauté for 1-2 minutes until fragrant, being careful not to burn it.
  • Stir in the fresh spinach and cook for 2-3 minutes until wilted.
  • Reduce the heat to low and pour in the heavy cream. Stir well to combine with the spinach and garlic.
  • Add the grated Parmesan cheese, salt, black pepper, and optional red pepper flakes. Stir until the cheese is melted and the sauce is creamy.
  • Gently fold in the cooked tortellini until well coated with the creamy sauce.
  • Remove from heat and let it sit for a minute to thicken slightly.
  • Serve warm, garnished with fresh basil leaves if desired.

Notes

These creamy spinach tortellini are a delightful and satisfying meal, perfect for a cozy dinner. The fresh spinach adds not only color but also nutrients, making this dish both delicious and healthy. You can easily reserve some of the pasta cooking water to adjust the sauce consistency to your liking. If you want to increase the flavor profile, consider adding freshly grated nutmeg to the cream sauce. For a meatier option, sauté some diced chicken or shrimp to add in. This dish is best served immediately after preparation but can also be refrigerated for a quick reheat the next day. Top with fresh basil and additional Parmesan cheese for an extra touch of flavor.

Faq

What ingredients do I need to make Creamy Spinach Tortellini?

You will need tortellini (fresh or frozen), fresh spinach, cream, garlic, Parmesan cheese, olive oil, salt, pepper, and optional nutmeg for seasoning.

How long does it take to prepare Creamy Spinach Tortellini?

The preparation time is about 10 minutes, and cooking time is approximately 15 minutes, making the total time around 25 minutes.

Can I use frozen spinach instead of fresh spinach?

Yes, you can use frozen spinach. Just make sure to thaw and drain it well to remove excess water before adding it to the dish.

Is Creamy Spinach Tortellini a vegetarian dish?

Yes, this recipe is vegetarian as it primarily consists of vegetables and dairy products.

Can I make Creamy Spinach Tortellini in advance?

Yes, you can prepare the dish in advance, but it’s best to store the sauce and tortellini separately and combine them just before serving to maintain the texture.

What can I substitute for heavy cream in this recipe?

You can use half-and-half, coconut cream, or a vegan cream alternative for a lighter or dairy-free option.

How do I reheat leftover Creamy Spinach Tortellini?

Reheat on the stovetop over low heat, adding a splash of milk or cream to keep the sauce creamy. Stir occasionally until heated through.

Can I add protein to Creamy Spinach Tortellini?

Absolutely! Grilled chicken, shrimp, or even cooked sausage can be added for extra protein and flavor.

Discover the Ultimate Garlic Butter Chicken Thighs Recipe

If you’re looking to elevate your weeknight dinners to gourmet levels without breaking a sweat, then look no further than this Garlic Butter Chicken Thighs recipe! Bursting with flavor and incredibly satisfying, this dish promises to become a staple in your culinary repertoire. Imagine succulent chicken thighs, perfectly seared, bathed in a rich, aromatic garlic butter sauce. The golden-brown, crispy skin contrasted with the tender, juicy meat will surely make your taste buds sing. It’s no wonder why garlic butter has secured its place among the most beloved combinations in the culinary world. This recipe masterfully blends the boldness of garlic with the comforting richness of butter, creating an irresistible dish that will impress family and friends alike.

The beauty of Garlic Butter Chicken Thighs lies not only in its mouthwatering flavors but also in its simplicity. You don’t have to be an expert chef to whip up this dish; even novice cooks will find success with ease. Three key elements make this recipe shine: high-quality chicken thighs, fresh garlic, and a dash of herbs. Plus, the dish can be ready in under 30 minutes, making it ideal for busy weeknights when you want something satisfying without spending hours in the kitchen. With minimal prep work and straightforward cooking methods, you can serve a delightful meal that feels special without the fuss.

Beyond taste and convenience, Chicken Thighs are a fantastic choice for a main course due to their rich flavor and natural juiciness compared to chicken breasts. Their higher fat content allows for a more forgiving cooking process, meaning you can achieve that heavenly golden-brown exterior while keeping the interior moist and tender. This recipe allows the chicken to soak up the flavors of the garlic and butter, resulting in a dish that delivers on every level. Pair them with nourishing sides like steamed vegetables or fluffy rice soaked in that aromatic sauce, and you’ve got a well-rounded meal that will satisfy even the hungriest of appetites.

Now, let’s talk about garlic—an ingredient that elevates many dishes, but when combined with butter, it reaches a whole new level of deliciousness. Garlic is renowned for its distinct pungency and health benefits, ranging from antioxidant properties to anti-inflammatory effects. Roasting garlic can take its flavor profile to new heights, adding sweetness to the dish. By using fresh garlic, you will achieve that robust, aromatic punch that we all love. Allow those garlic cloves to brown gently in the pan, creating a nutty aroma that will make your kitchen feel welcoming and enticing.

One of the unique aspects of this Garlic Butter Chicken Thighs recipe is the versatility in how you can customize it. Depending on your taste preferences, you can introduce additional herbs—like rosemary, thyme, or parsley—to enhance the flavor even further. Want some heat? Incorporating a pinch of red pepper flakes or drizzle of hot sauce will add a spicy kick that will leave your guests asking for more. You can also mix in vegetables such as green beans, asparagus, or bell peppers that will roast beautifully alongside the chicken, turning this main course into a complete meal that caters to your nutritional needs!

When it comes to cooking methods, both pan-frying and oven-roasting deliver fabulous results. Pan-frying allows for that ever-desired crispy skin, while oven-roasting can ensure even cooking and tenderization. The beauty of this recipe is its adaptability; whether you are cooking for your family or preparing an intimate dinner for two, you can scale it accordingly for any occasion. Imagine gathering friends around the dinner table, the enticing aroma of garlic butter wafting through the air, your perfectly cooked chicken placed at the center—this dish is sure to be a conversation starter!

Presentation plays a vital role in any dining experience, and Garlic Butter Chicken Thighs are no exception. After cooking, allow the chicken to rest for a few minutes before serving. This resting period not only helps the juices redistribute, yielding an exceptionally moist chicken, but it also provides you with a golden opportunity to whip up an elegant plating. Drizzle some of that glorious garlic butter sauce over the chicken, and garnish with freshly chopped herbs and a few lemon wedges. The vibrant colors and aroma will entice everyone at the table and set the stage for an unforgettable culinary experience.

As with any cooking endeavor, making Garlic Butter Chicken Thighs is about more than just the food. It’s about creating moments—gathering with loved ones, sharing stories, and enjoying each other’s company over a great meal. The heartwarming flavors of garlic and butter are symbolic of home cooking, filling your kitchen with comforting aromas and bringing smiles to every face. Family dinners, holiday feasts, and cozy nights in are all elevated with a dish that encompasses the very essence of comfort food.

In the culinary world, Garlic Butter Chicken Thighs have earned their place as a favorite for a good reason. Its balance of flavor, ease of preparation, and adaptability serve to make it not just a meal, but an experience. Whether you’re serving it with a side of mashed potatoes, tossing it alongside a fresh, vibrant salad, or enjoying it solo with a piece of crusty bread to soak up that divine garlic butter sauce, there’s no wrong way to savor this dish. So let’s get cooking! Prepare to indulge in a dish that’s sure to become a cherished family favorite, ready to warm hearts and fill bellies with warmth and joy.

Now that you’re ready to embark on this culinary journey, remember that cooking is about creativity and joy! Feel free to make adjustments, experiment with flavors, and make this recipe your own. Share your own twists and turns with friends and family, and create lasting memories as you explore the delectable world of Garlic Butter Chicken Thighs. Bon appétit!

Ingredients

  • Chicken Thighs – 4 bone-in, skin-on
  • Butter – 1/4 cup unsalted
  • Garlic – 5 cloves, minced
  • Fresh Parsley – 2 tbsp, chopped
  • Salt – 1 tsp
  • Pepper – 1/2 tsp
  • Lemon Juice – 1 tbsp, fresh
  • Olive Oil – 1 tbsp

Instructions

  • Preheat your oven to 425°F (220°C) and prepare a baking dish or skillet to hold the chicken thighs.
  • In a small saucepan over low heat, melt the unsalted butter. Once melted, add the minced garlic and sauté for 1-2 minutes until fragrant, being careful not to burn the garlic.
  • Stir in the chopped fresh parsley, salt, pepper, and lemon juice into the melted butter and garlic mixture until well combined.
  • In a large bowl, drizzle the olive oil over the chicken thighs and season them with additional salt and pepper, ensuring they are well coated.
  • Place the chicken thighs skin-side up in the prepared baking dish or skillet.
  • Brush the garlic butter mixture generously over the skin of each chicken thigh, making sure to coat them well.
  • Transfer the baking dish or skillet to the preheated oven and bake for 35-40 minutes or until the internal temperature reaches 165°F (75°C) and the skin is golden and crispy.
  • Once cooked, remove the chicken from the oven and let it rest for about 5 minutes before serving.
  • Garnish with additional chopped parsley if desired and enjoy your garlic butter chicken thighs!

Notes

These garlic butter chicken thighs are a flavorful and easy-to-make dish perfect for weeknight dinners or special occasions. The combination of garlic and butter creates a rich sauce that enhances the juicy chicken thighs, making them incredibly delicious. For best results, choose thighs with the skin on as they retain moisture and flavor during cooking. You can adjust the level of garlic according to your taste—add more for a stronger flavor or reduce it for a milder dish. Serve alongside roasted vegetables or a fresh salad to complement the richness of the chicken. Leftovers can be stored in an airtight container in the refrigerator and reheated for a quick meal. To elevate the dish further, consider adding a sprinkle of parmesan cheese or serving it with a side of crusty bread to soak up the delicious sauce.

Faq

What ingredients do I need to make Garlic Butter Chicken Thighs?

You will need chicken thighs, garlic, butter, olive oil, fresh parsley, salt, pepper, and any additional seasonings of your choice.

How long does it take to prepare Garlic Butter Chicken Thighs?

The total preparation and cooking time is approximately 30 to 40 minutes.

Can I use chicken breasts instead of thighs?

Yes, you can use chicken breasts, but keep in mind that they may cook faster and could become dry if overcooked. Adjust cooking times accordingly.

Is this recipe suitable for meal prep?

Absolutely! Garlic Butter Chicken Thighs are great for meal prep and can be stored in the refrigerator for up to 4 days.

What can I serve with Garlic Butter Chicken Thighs?

This dish pairs well with rice, mashed potatoes, steamed vegetables, or a fresh salad.

Can I make this recipe in the oven?

Yes, you can bake the chicken thighs in the oven at 400°F (200°C) for about 25-30 minutes after searing them on the stovetop for extra flavor.

How do I know when the chicken is fully cooked?

The chicken is fully cooked when it reaches an internal temperature of 165°F (75°C), and the juices run clear when pierced.

Can I use dried garlic instead of fresh?

Yes, you can use dried garlic, but fresh garlic gives a stronger flavor. If using dried, about 1 teaspoon should suffice. Adjust to taste.

Experience the Freshness of Summer with Caprese Flatbreads

Imagine biting into a warm, crispy flatbread topped with an explosion of fresh ingredients that scream summer—juicy ripe tomatoes, creamy mozzarella, fragrant basil, and a drizzle of balsamic glaze that elevates each flavor to new heights. Caprese Flatbreads are not just a meal; they encapsulate the essence of a sun-kissed Italian summer, where food is a celebration of the simple joys in life. Perfect for gatherings, casual dinners, or even as a delightful appetizer, these flatbreads promise to impress your family and friends with their vibrant colors and sensational flavors.

This wonderfully versatile dish is rooted in the Italian Caprese salad, which embodies the freshness of its key ingredients. The combination of tomatoes and mozzarella paired with basil is an age-old culinary tradition that dates back to the island of Capri. Each component harmonizes beautifully, creating a dish that is both beautiful and delicious. The flatbread serves as the ideal canvas, allowing these ingredients to shine while offering a satisfying crunch and chew in every bite.

What’s fantastic about Caprese Flatbreads is the way they can be customized to suit anyone’s taste. Whether you prefer a more traditional approach with classic ingredients or want to add a twist with unique toppings, the possibilities are endless. You can start with a basic store-bought flatbread or make your own dough from scratch if you’re feeling adventurous. The end result—whether simple or elaborate—is a stunning visual feast that tastes as incredible as it looks.

One of the best aspects of Caprese Flatbreads is how quick and easy they are to prepare. They make for an ideal weeknight meal when you’re short on time but still want something delicious and wholesome. Simply layer your fresh ingredients during the last few minutes of baking to achieve that perfect melty mozzarella goodness, and your flatbreads will be ready in under 30 minutes. Furthermore, they are an excellent choice for meal prep; you can roast or grill your veggies ahead of time, ensuring that you have a quick and satisfying meal option ready at your fingertips.

As you explore this delightful recipe, consider the different elements you can incorporate. For a delightful twist, try adding seasonal vegetables such as zucchini, asparagus, or bell peppers. A sprinkle of chili flakes or a touch of pesto can also transform the flavor profile and add depth to your flatbreads. If you have any leftovers, consider them for lunch the next day—these flatbreads warm up beautifully and are just as satisfying the next day.

Let’s not forget the nutritional benefits! Fresh tomatoes are packed with vitamins and antioxidants, mozzarella provides a delicious source of calcium and protein, and basil offers numerous health benefits, including anti-inflammatory properties and essential oils that are known for boosting mood and mental clarity. This dish not only looks appealing but is also a wholesome choice you can feel good about serving to your loved ones.

While Caprese Flatbreads are delicious on their own, they pair beautifully with a variety of sides and sauces—think a vibrant arugula salad dressed with lemon in the summertime or perhaps a chilled gazpacho for a refreshing touch. Serve your flatbreads alongside a glass of crisp white wine or infused lemonade for a perfect dining experience.

These flatbreads aren’t just perfect for summer; they can be adapted to different seasons as well. In the fall, consider adding roasted butternut squash and a sprinkle of feta cheese for a heartier version. In the winter, don’t shy away from experimenting with winter greens combined with the classic ingredients—think braised kale alongside your mozzarella and tomatoes. This versatility makes Caprese Flatbreads a family favorite, suitable for various moods, occasions, and dietary preferences.

Whether you are hosting a summer barbecue, creating a festive spread for a holiday gathering, or simply enjoying a casual dinner at home, Caprese Flatbreads are a wonderful addition to your culinary repertoire. They embody not just flavor and beauty but also the warmth of sharing a meal with loved ones—a celebration of life’s simplest and most enjoyable pleasures.

In addition to the delightful taste and texture your guests will experience, the presentation of Caprese Flatbreads is equally exciting. The vibrant colors of the red tomatoes, white mozzarella, and green basil create a stunning visual appeal, which will undoubtedly get your guests talking before they even take their first bite. Consider serving the flatbreads sliced into wedges, displaying them on a large wooden board, garnished with additional basil and a drizzle of balsamic reduction to add flair and creativity to your table setting.

The aroma wafting from the oven as your flatbreads bake is simply irresistible—enticing your family and guests with its rich, fresh ingredients. Preparing Caprese Flatbreads can easily become a fun, interactive cooking activity with family or friends. You can set up a flatbread-making station, allowing everyone to customize their own creations while enjoying good company and laughter. It’s an experience bound to create unforgettable memories while you savor each bite of your delicious handiwork.

With the beautiful simplicity of Caprese Flatbreads, you are encouraged to let your creativity shine. Take this recipe as a starting point and experiment with flavors, textures, and styles to create your unique masterpiece. Whether you decide to stick with the classic Caprese or venture into more adventurous toppings, the results will always be satisfying and delicious.

So prepare to embrace the abundance of summer flavors with this delightful dish that truly captures the spirit of fresh, Italian cuisine. You’ll find yourself coming back for more, eager to experiment further and share your culinary creations with those you love. Once you try Caprese Flatbreads, they will surely become a favorite in your kitchen and on your dining table, bringing joy and taste to every meal.

Ingredients

Caprese Flatbreads

  • 1 cup all-purpose flour
  • 1/2 teaspoon salt
  • 1/2 teaspoon baking powder
  • 1/3 cup water
  • 1 tablespoon olive oil
  • 1 cup fresh mozzarella cheese, sliced
  • 1 cup cherry tomatoes, halved
  • 1/4 cup fresh basil leaves
  • 2 tablespoons balsamic glaze
  • Salt and pepper to taste

Instructions

  • In a mixing bowl, combine the all-purpose flour, salt, and baking powder.
  • Gradually add the water and olive oil to the dry ingredients, mixing until a dough forms.
  • Knead the dough on a lightly floured surface for about 2-3 minutes until smooth.
  • Divide the dough into two equal portions and roll each portion into a flatbread shape, about 1/4 inch thick.
  • Heat a non-stick skillet or griddle over medium heat. Cook the flatbreads one at a time for 3-4 minutes on each side or until golden brown and cooked through.
  • Remove the cooked flatbreads from the skillet and place them on a serving platter.
  • Top each flatbread with slices of fresh mozzarella cheese and halved cherry tomatoes.
  • Add fresh basil leaves on top of the tomatoes and drizzle with balsamic glaze.
  • Season with salt and pepper to taste.
  • Serve immediately while the flatbreads are warm and the cheese is slightly melted.

Notes

These Caprese flatbreads are a delightful and quick dish that brings together fresh ingredients for a burst of flavor. The combination of creamy mozzarella, juicy cherry tomatoes, and aromatic basil complements the crispy flatbread perfectly. This recipe is versatile; feel free to add a sprinkle of dried oregano or a pinch of red pepper flakes for an extra kick. They can be served warm as an appetizer, or as a light lunch paired with a salad. Enjoy with a drizzle of balsamic glaze for a touch of sweetness and acidity that enhances the dish beautifully. Leftovers can be stored in the refrigerator and reheated for a tasty snack later.

Faq

What are Caprese Flatbreads?

Caprese Flatbreads are a delicious Italian-inspired dish that features a combination of flatbread topped with fresh tomatoes, mozzarella cheese, basil, and drizzled with balsamic glaze.

What ingredients do I need to make Caprese Flatbreads?

You will need flatbread, fresh mozzarella, ripe tomatoes, fresh basil leaves, olive oil, balsamic glaze, salt, and pepper.

Can I use store-bought flatbreads for this recipe?

Yes! Store-bought flatbreads are a convenient option and work perfectly for making Caprese Flatbreads.

How long does it take to prepare Caprese Flatbreads?

Preparation time is typically around 10-15 minutes, with an additional 10 minutes for baking, making it a quick and easy dish.

Can I add other toppings to the Caprese Flatbreads?

Absolutely! Feel free to customize your flatbreads with additional toppings such as avocado, arugula, or even grilled chicken for added flavor and texture.

Are Caprese Flatbreads suitable for a vegetarian diet?

Yes, Caprese Flatbreads are vegetarian-friendly, as they primarily consist of fresh vegetables and cheese.

How should I store leftovers?

Store any leftover Caprese Flatbreads in an airtight container in the refrigerator. Consume within 1-2 days for best quality.

Can I make Caprese Flatbreads ahead of time?

Yes, you can prepare the ingredients ahead of time and assemble the flatbreads just before serving. Baking them fresh will give the best taste.

Honey Garlic Shrimp Stir-Fry

Imagine a vibrant, colorful dish that not only tantalizes your taste buds but also transports you to a bustling Asian market filled with the intoxicating aroma of freshly prepared meals. Our Honey Garlic Shrimp Stir-Fry captures the essence of that experience, bringing together succulent shrimp, fresh vegetables, and a mouthwatering sauce that is the perfect balance of sweetness and savory flavors. This dish epitomizes the beauty and harmony of stir-fry cooking—a technique that allows various ingredients to shine while coming together in a symphony of taste and texture.

The allure of shrimp as a protein option is undeniable. Packed with lean protein, omega-3 fatty acids, and an array of essential nutrients, shrimp not only satisfies your hunger but also offers numerous health benefits. When combined with a delectable honey garlic sauce, the shrimp becomes a star ingredient, boasting a natural sweetness that perfectly complements its oceanic flavor. The sauce, made from a blend of honey, garlic, soy sauce, and a hint of ginger, creates a glossy coating that clings to each succulent piece of shrimp, making every bite a delightful experience.

Now, let’s talk about the vegetables that elevate this dish from simple to extraordinary. Utilizing a variety of colorful vegetables not only enhances the visual appeal of your plate but also adds a myriad of health benefits. Each vegetable contributes its unique flavor and texture: crisp bell peppers bring a sweet crunch, vibrant broccoli florets add a satisfying bite, and tender snap peas provide a hint of sweetness that contrasts beautifully with the sauce. And don’t forget the green onions, which add a fresh, mild onion flavor that rounds out the dish perfectly.

This recipe is perfect for those busy weeknights when you’re seeking a nutritious meal that can be prepared in a flash. In under 30 minutes, you can have a restaurant-quality dish on your table, impressing not only yourself but also your family or guests. The beauty of stir-frying lies in its speed—high heat cooks the ingredients quickly, preserving their color, texture, and nutritional value. It’s a wonderful technique to master for anyone looking to whip up delicious meals without spending hours in the kitchen.

The versatility of the Honey Garlic Shrimp Stir-Fry cannot be overstated. While the classic combination of shrimp and vegetables is delectable on its own, the recipe can easily be adapted to suit your preferences or dietary needs. For those who enjoy a little heat, consider adding a pinch of red pepper flakes or a drizzle of sriracha to the sauce. If you’re looking to incorporate more greens, feel free to toss in some spinach or bok choy. Additionally, if shrimp isn’t your protein of choice, this recipe readily adapts to chicken, tofu, or even beef.

Cooking at home has never been more rewarding, yet many hesitate at the thought of preparing Asian-inspired dishes due to the perceived complexity of flavors and techniques. However, this Honey Garlic Shrimp Stir-Fry simplifies the process, providing an excellent entry point into the world of homemade Asian cuisine. The key lies in the balance—sweet, savory, and umami flavors come together in a way that is not just easy to achieve but also gratifying to create.

When you serve this dish, you’re not just offering a meal; you’re sharing an experience. The bright colors of the vegetables make it visually stunning, and the aroma will invite everyone to gather around the table. Pair your honey garlic shrimp with fluffy jasmine or brown rice, or serve it over a bed of noodles. The choice is yours! As an added bonus, it’s a fantastic option for meal prep. Make a double batch to enjoy throughout the week, keeping your lunches exciting and nutrient-dense.

But what truly sets this recipe apart is the rich and aromatic sauce that glazes the shrimp and vegetables. The honey brings a natural sweetness that enhances the dish without overpowering it, while the garlic provides an earthy depth of flavor that lingers on the palate. Soy sauce injects that signature umami element that is so coveted in Asian cuisine. It’s this impeccable balance that ensures every bite is full of flavor, leaving you utterly satisfied yet yearning for just one more piece.

This dish is also a fantastic opportunity to involve family or friends in the cooking process. Assign different tasks, and before you know it, you’ll be creating a delightful meal together. Encourage everyone to share their ideas for customizations, toppings, or sides that could elevate this stir-fry even further. Cooking is a wonderful way to build lasting memories, and this lively and delicious dish serves as a perfect backdrop for those moments.

As the seasons change, so do our cravings. In warmer months, this dish feels light and fresh, making it ideal for al fresco dining. Yet, in the cooler months, the warm, caramelized flavors wrapped around the shrimp and crisp vegetables provide the comfort that home-cooked meals can bring. It’s adaptable, fitting seamlessly into any season of the year, making it a timeless addition to your culinary repertoire.

Finally, let’s not forget to consider the environmental aspect of our food choices. Shrimp can be enjoyed responsibly by choosing sustainably sourced options, supporting fisheries that prioritize the health of our oceans. This dish is not only a celebration of flavors but also an opportunity to engage in mindful consumption that respects our planet while nourishing our bodies.

In conclusion, our Honey Garlic Shrimp Stir-Fry is more than a recipe—it’s a celebration of flavor, nutrition, and the joy of cooking. It invites you to explore the dynamic world of stir-frying while providing a quick, healthy solution for busy weeknight dinners. Whether you’re cooking for yourself, your family, or entertaining guests, this dish is bound to impress and satisfy. So gather your ingredients, heat up that wok, and indulge in a meal that’s sure to become a beloved favorite in your home!

Ingredients

  • Pasta
  • 1 pound shrimp peeled and deveined
  • 2 tablespoons honey
  • 3 cloves garlic minced
  • 1 tablespoon soy sauce low-sodium
  • 1 tablespoon olive oil
  • 1 bell pepper sliced
  • 1 cup broccoli florets
  • 1 carrot thinly sliced
  • 1/2 cup snap peas
  • 1 tablespoon ginger grated
  • Salt and pepper to taste
  • Green onions chopped for garnish
  • Sesame seeds for garnish

Instructions

  • Cook the pasta according to package instructions. Drain and set aside.
  • In a large skillet or wok, heat the olive oil over medium-high heat.
  • Add the minced garlic and grated ginger to the skillet, stirring for about 30 seconds until fragrant.
  • Add the shrimp to the skillet and cook for 2-3 minutes, or until they turn pink and opaque.
  • While the shrimp are cooking, in a small bowl, mix together the honey and low-sodium soy sauce.
  • Pour the honey-soy mixture over the shrimp and stir to coat evenly.
  • Add the sliced bell pepper, broccoli florets, thinly sliced carrot, and snap peas to the skillet. Stir-fry for an additional 3-4 minutes, until the vegetables are tender-crisp.
  • Season with salt and pepper to taste.
  • Add the cooked pasta to the skillet, tossing everything together until well combined and heated through.
  • Remove from heat and transfer to serving dishes.
  • Garnish with chopped green onions and sesame seeds before serving.

Notes

These Honey Garlic Shrimp Stir-Fry is a quick and delicious weeknight meal that packs a punch of flavor and nutrients. The shrimp cook quickly and soak up the sweet and savory honey garlic sauce, while the colorful vegetables add crunch and vibrancy to the dish. Feel free to customize the stir-fry by swapping in your favorite vegetables or adding a splash of chili sauce for some heat. Serve over cooked pasta for a filling meal, and enjoy the added benefits of lean protein and fresh vegetables. This dish is not only satisfying but also a breeze to prepare, making it perfect for busy evenings.

Faq

What ingredients do I need for Honey Garlic Shrimp Stir-Fry?

To make Honey Garlic Shrimp Stir-Fry, you will need shrimp, honey, garlic, soy sauce, vegetables (such as bell peppers, broccoli, and snap peas), olive oil, salt, and pepper.

How long does it take to prepare Honey Garlic Shrimp Stir-Fry?

The preparation time for Honey Garlic Shrimp Stir-Fry is approximately 10 minutes, and the cooking time is around 10-15 minutes, making it a quick dish to prepare.

Can I use frozen shrimp for this recipe?

Yes, you can use frozen shrimp. Just make sure to thaw them properly before cooking. You can do this by placing them in the refrigerator overnight or by running them under cold water for a few minutes.

What can I serve with Honey Garlic Shrimp Stir-Fry?

Honey Garlic Shrimp Stir-Fry pairs well with steamed rice, quinoa, or noodles. You can also serve it alongside a fresh salad or spring rolls for a complete meal.

How spicy is Honey Garlic Shrimp Stir-Fry?

This dish is not inherently spicy, but you can add heat by incorporating ingredients such as red pepper flakes, Sriracha, or chopped fresh chili peppers to suit your taste.

Can I make Honey Garlic Shrimp Stir-Fry ahead of time?

While this dish is best enjoyed fresh, you can prepare the sauce and chop the vegetables ahead of time. Store them separately in the refrigerator and combine everything right before cooking.

Is Honey Garlic Shrimp Stir-Fry healthy?

Yes, Honey Garlic Shrimp Stir-Fry can be considered a healthy option as it is packed with protein from shrimp and various nutrients from the vegetables. You can also adjust the honey and oil to make it lighter if desired.

What can I substitute for shrimp in this recipe?

If you prefer a different protein, you can substitute shrimp with chicken, tofu, or a variety of other seafood such as scallops or fish. Adjust the cooking time based on the protein you choose.