Author

Ocean Nightleaf

Browsing

Indulge in the Creamy Delight of Banana Nice Cream

Imagine a treat that embodies the essence of summer while being incredibly nutritious and guilt-free. Welcome to the world of Banana Nice Cream—a scoop of pure bliss that redefines what ice cream can be. This delightful dessert not only satisfies your sweet tooth but also embraces a wholesome, health-conscious approach to indulgence. If you’re looking for a creamy, dreamy, and deliciously easy-to-make frozen dessert, you’ve landed in the right place! This vibrant, banana-based creation offers a velvety texture and a rich flavor profile that will have you coming back for more, season after season.

What makes Banana Nice Cream particularly special is its simplicity. With just a few ripe bananas as the main ingredient, you unlock a world of flavor and creativity. No need for dairy or added sugars; this dessert harnesses the natural sweetness and creaminess of the bananas themselves. Plus, it’s incredibly versatile. You can enjoy it plain or jazz it up with a plethora of mix-ins and toppings, transforming it into a personalized treat that reflects your unique taste preferences.

As you embark on this delectable journey, you might be surprised to learn about the nutrition packed into each serving of Banana Nice Cream. Bananas are rich in potassium, fiber, and vitamins C and B6, making them a fantastic choice for those wanting to indulge without the guilt. The high fiber content not only ensures digestive health but also helps keep you feeling fuller for longer. Moreover, the natural sugars found in bananas provide a quick energy boost, making this treat a perfect post-workout snack or an afternoon pick-me-up.

The beauty of Banana Nice Cream lies in its ease of preparation. All you need are a handful of ripe bananas! Just peel, slice, and freeze them—then blend them into a silky smooth puree. The magic happens when these frozen banana slices become creamy goodness right before your eyes. You can enjoy the texture as is or add in ingredients like nut butters, cocoa powder, or vanilla extract to elevate the flavor. Moreover, it takes only a few minutes to whip up, making it an ideal last-minute dessert or a satisfying late-night snack.

But the true charm of Banana Nice Cream extends beyond its deliciousness and nutrition. It encourages creativity and allows for experimentation in the kitchen. Feeling adventurous? You can incorporate different fruits, such as strawberries, blueberries, or mangoes, during the blending process to create wonderfully unique flavor combinations. The blend of bananas with chocolate or peanut butter will leave you feeling like you’ve bitten into your favorite classic ice cream while knowing you’re eating something wholesome.

Furthermore, Banana Nice Cream is a splendid option for dietary restrictions. Whether you’re vegan, lactose intolerant, or simply looking to reduce your sugar intake, this recipe fits the bill. You can serve it to a crowd without worrying if anyone has food allergies or aversions, as it’s naturally vegan and gluten-free. It opens the door to enjoying ice cream without compromising on dietary needs or preferences—an appealing factor for many home cooks and dessert lovers alike.

Another incredible aspect of Banana Nice Cream is its potential for a joyful experience with family and friends. Imagine an afternoon spent in the kitchen, teaching kids how to create their own flavors, or hosting a fun ice cream party with mix-in stations. By offering a base of Banana Nice Cream, guests can combine their favorite toppings and flavors, resulting in a fun and interactive culinary adventure. This makes it perfect for gatherings, summer barbecues, or just a cozy night in with loved ones.

As you prepare to savor this incredibly delectable dessert, think about how you might serve it. The classic presentation might involve a simple scoop in a bowl, but why stop there? Pour some homemade chocolate sauce over it, sprinkle crushed nuts, or toss in your favorite granola for extra crunch. The beauty of Banana Nice Cream is that it’s only limited by your imagination! Serve it alongside a slice of pie, layer it with granola for a parfait, or sandwich it between two cookies for an unforgettable ice cream sandwich. The only aspect that remains consistent is the creamy, dreamy goodness that lies at the heart of this recipe.

Moreover, Banana Nice Cream is an environmentally-friendly and waste-conscious choice. Instead of allowing ripe bananas to go to waste, this recipe gives those almost-too-ripe fruits a second life. Utilizing overripe bananas not only helps you reduce food waste but also ensures you’re using fruit at its peak sweetness—perfect for creating that luxurious ice cream texture without any added sugars.

In a world filled with artificial flavors and preservatives, making your own Banana Nice Cream is a refreshing antidote. It’s not only revitalizing but also a return to the roots of wholesome food. The delicious taste of rich banana goodness, combined with your personal taste infusions, signifies a rewarding approach to dessert that your body will thank you for. With just a blender and a few ripe bananas, you’re on your way to crafting something extraordinary—not just for yourself, but for anyone you choose to share it with.

The inviting texture, the natural sweetness, and the joy of experimentation make Banana Nice Cream a staple in any kitchen that values healthiness paired with indulgence. It offers a nourishing escape from traditional sugary desserts and opens up a world filled with opportunities to taste, create, and enjoy.

So, whether you’re enjoying it on a sweltering summer day, experimenting with new flavors, or sharing the joy with friends and family, Banana Nice Cream is sure to leave a lasting impression. Get ready to dazzle your taste buds and elevate your dessert game as you explore the delightful world of Banana Nice Cream!

Ingredients

  • 4 ripe bananas sliced and frozen
  • 1/2 cup almond milk or coconut milk
  • 1 tsp vanilla extract
  • 1 tbsp cocoa powder optional
  • 1/4 cup nut butter optional
  • Chopped nuts or chocolate chips for garnish optional

Instructions

  • Start by taking the frozen banana slices out of the freezer and letting them sit at room temperature for about 5-10 minutes to soften slightly.
  • In a blender or food processor, add the softened banana slices, almond milk or coconut milk, and vanilla extract.
  • If you want a chocolate flavor, add the cocoa powder at this stage. For added creaminess and richness, include the nut butter if using.
  • Blend the mixture on high speed until smooth and creamy, scraping down the sides as needed. This may take a few minutes, so be patient.
  • Taste the nice cream and adjust the sweetness or flavors if desired, adding more cocoa powder or nut butter as preferred.
  • If you want to add mix-ins like chopped nuts or chocolate chips, fold them into the nice cream with a spatula.
  • Once the mixture reaches a soft-serve consistency, transfer it into an airtight container.
  • For a firmer texture, freeze the nice cream for an additional 1-2 hours before serving.
  • When ready to serve, scoop the banana nice cream into bowls and garnish with additional chopped nuts or chocolate chips if desired.

Notes

This Banana Nice Cream is a delicious and healthy frozen treat that’s incredibly easy to make and perfect for those hot summer days. Simply blend your frozen bananas with almond or coconut milk for a creamy texture that rivals traditional ice cream without the guilt. You can customize the flavor by adding a splash of vanilla extract and, for a chocolatey twist, a tablespoon of cocoa powder. If you want a richer taste, mix in your favorite nut butter, which adds healthy fats and protein. Garnish with chopped nuts or chocolate chips for an extra crunch or sweetness. This dessert is naturally sweet, dairy-free, and can be made vegan by ensuring your nut butter is also vegan. Feel free to experiment with other add-ins like berries or spices to make it your own. Enjoy immediately for a soft-serve texture, or freeze for a few hours for a firmer consistency.

Faq

What is Banana Nice Cream?

Banana Nice Cream is a healthy and delicious frozen dessert made primarily from ripe bananas. It’s a vegan alternative to ice cream that requires minimal ingredients and can be flavored with various additives.

How do I make Banana Nice Cream?

To make Banana Nice Cream, simply slice ripe bananas and freeze them. Once frozen, blend the banana slices until smooth and creamy. You can add ingredients like cocoa powder, vanilla extract, or fruits for extra flavors.

Do I need an ice cream maker to prepare Banana Nice Cream?

No, you do not need an ice cream maker. A regular blender or food processor works perfectly to achieve a creamy consistency for Banana Nice Cream.

Can I add other ingredients to my Banana Nice Cream?

Yes! You can add cocoa powder, peanut butter, vanilla extract, or even other frozen fruits such as strawberries or mangoes to enhance the flavor of your Banana Nice Cream.

How long can I store Banana Nice Cream?

Banana Nice Cream can be stored in an airtight container in the freezer for up to a week. However, for the best texture, it is recommended to consume it within 3-4 days.

Is Banana Nice Cream suitable for those with allergies?

Yes, Banana Nice Cream is naturally dairy-free and egg-free, making it a great option for people with lactose intolerance or egg allergies. Always check for specific ingredient allergies if you add other mix-ins.

Can I use overripe bananas for Banana Nice Cream?

Absolutely! In fact, overripe bananas work best for Banana Nice Cream as they are sweeter and more flavorful, making your nice cream even tastier.

Is Banana Nice Cream a healthy dessert option?

Yes, Banana Nice Cream is a healthy dessert option as it is made with minimal ingredients and contains no added sugars or unhealthy fats. It’s a great way to satisfy your sweet tooth with the natural sweetness of bananas.

Indulging in dessert doesn’t have to equate to guilt, and with these delightful Sweet Potato Brownies, you’re in for a treat that combines the rich, comforting flavors of traditional brownies with the wholesome goodness of sweet potatoes. Whether you’re a lover of all things sweet or a health-conscious eater seeking a delectable treat, this recipe is a revelatory crossover that’s bound to make waves at your next gathering or satisfy those late-night cravings. Imagine biting into a chewy, fudgy brownie that boasts a depth of flavor and moisture, all the while being secretly enhanced by the natural sweetness and nutrient profile of sweet potatoes. This isn’t just a dessert; it’s a guilt-free celebration of flavor that will make you rethink how you enjoy your sweets!

Sweet potatoes have earned their reputation as a superfood in recent years, thanks to their rich nutritional content. Packed with vitamins A, C, and B6, as well as dietary fiber and antioxidants, these tubers deliver health benefits that are hard to ignore. By incorporating them into brownies, not only do you sneak in some of that nutritional goodness, but you also elevate the texture and sweetness of the dessert. The natural sugars in sweet potatoes lend a lovely caramel-like flavor that complements cocoa beautifully, creating a harmonious balance that will have even the pickiest of eaters coming back for more.

But the beauty of these Sweet Potato Brownies doesn’t just stop at their delightful flavor and added nutrition. They are also incredibly versatile and can be adapted to suit different dietary needs, from gluten-free to vegan, making them an apt choice for a variety of occasions. Whether you’re hosting a birthday party, celebrating an achievement, or simply looking to treat yourself, these brownies can easily be modified with various additions such as nuts, chocolate chips, or even a swirl of peanut butter to customize the experience. There’s something deeply satisfying about baking with sweet potatoes; their earthiness brings a rustic charm to the kitchen, inviting creativity and exploration.

As you embark on this delicious journey, it’s important to embrace the fact that you are not just baking brownies; you’re crafting a wholesome dessert that nourishes both body and soul. Picture friends gathered around the table, laughter and joy resonating, as the rich aroma of freshly baked brownies wafts through the air. The anticipation builds as you cut into the pan, revealing the luscious, fudgy centers and the slight crackle of the top. Each square presents itself like a small gift, waiting to be unwrapped and savored. When you offer these brownies to your loved ones, you’re sharing a slice of happiness wrapped in health—a true testament to the power of cooking and baking as forms of love and expression.

What’s even more exciting is the process of crafting these brownies. With every step, from peeling and roasting the sweet potatoes to mixing the rich chocolate batter, you’ll find a meditative rhythm that transforms the simple act of baking into a rewarding experience. And if you have little hands eager to help, this recipe is a fantastic project to involve them in, allowing them to learn about healthy ingredients in a fun and engaging way. As they mix and mash sweet potatoes, their excitement about the flavors mixing and the anticipation of tasting the results will warm your heart. It’s not just about the end product; it’s about the memories created along the way.

In terms of preparation, these Sweet Potato Brownies are straightforward enough, which means you don’t have to be a culinary expert to whip up a batch. It’s one of those recipes that come together quite effortlessly, requiring minimal equipment and time. Roast the sweet potatoes until tender, then mash them into a smooth puree—this simple technique enhances their natural sweetness while contributing to that fudgy texture that we all adore in brownies. Mixing in the cocoa powder, flour, and your choice of sweetener creates a batter that speaks to the heart of chocolate lovers everywhere, while the sweet potato offers a surprising twist that makes these brownies uniquely luscious.

Moreover, once baked and cooled, these brownies can be stored for several days. They tend to taste even better the next day, allowing the flavors to meld beautifully, and making them a perfect make-ahead dessert option. Whether you keep them at the office for a great afternoon pick-me-up, or save them for snack time when your family needs a little something sweet, they offer convenience without compromising quality. You’ll find yourself reaching for them again and again, knowing that with each bite, you are nourishing your body with the goodness of sweet potatoes without sacrificing that richer chocolate flavor that is the hallmark of traditional brownies.

In conclusion, Sweet Potato Brownies not only redefine the dessert game by introducing a nutritious ingredient into the mix but also provide a sinfully delicious experience that everyone can enjoy. They are perfect for chocolate lovers wanting a healthier option, parents looking to sneak in some veggies into their children’s diets, or anyone interested in exploring new flavors within the realm of traditional baking. With a little creativity, you can personalize these brownies to fit your taste preferences, creating an endless variety of delightful treats that are as unique as each person who tries them. So get ready to indulge, share, and most importantly, enjoy every fudgy bite of these incredible Sweet Potato Brownies! Your journey into the sweet side of healthy eating begins here—grab your apron, and let’s get baking!

Ingredients

  • 1 cup mashed sweet potatoes
  • 1/2 cup almond butter or peanut butter
  • 1/2 cup cocoa powder unsweetened
  • 1/2 cup maple syrup or honey
  • 1/4 cup coconut sugar
  • 1 tsp vanilla extract pure
  • 1/2 tsp baking powder
  • 1/4 tsp salt
  • 1/2 cup dark chocolate chips optional

Instructions

  • Preheat your oven to 350°F (175°C) and line an 8-inch square baking dish with parchment paper or grease it well.
  • In a mixing bowl, combine the mashed sweet potatoes and almond butter (or peanut butter) until smooth and well blended.
  • Add in the cocoa powder, maple syrup (or honey), coconut sugar, vanilla extract, baking powder, and salt. Stir until all the ingredients are thoroughly combined.
  • If using, gently fold in the dark chocolate chips to the brownie batter.
  • Pour the brownie batter into the prepared baking dish and spread it evenly.
  • Bake for 25-30 minutes or until a toothpick inserted in the center comes out mostly clean.
  • Allow the brownies to cool in the baking dish for about 10 minutes, then lift them out using the parchment paper and allow to cool completely on a wire rack.
  • Once cooled, cut into squares and serve.

Notes

These sweet potato brownies are a rich and fudgy treat that is naturally sweetened and packed with nutrients. The base of mashed sweet potatoes adds moisture and a subtle sweetness, making these brownies a healthier dessert option. You can easily customize the recipe by mixing in dark chocolate chips for added richness or experimenting with different nut butters. For those looking to make the brownies more indulgent, consider topping them with a sprinkle of sea salt or a dollop of whipped coconut cream. They are gluten-free and can be made vegan if you choose maple syrup and ensure your nut butter is free from any animal products. Enjoy them warm with a scoop of your favorite ice cream for a delightful dessert experience!

Faq

What are Sweet Potato Brownies?

Sweet Potato Brownies are a moist and fudgy dessert made using sweet potatoes as a primary ingredient. They are a healthier alternative to traditional brownies, packed with vitamins and flavor.

Are Sweet Potato Brownies gluten-free?

Yes, Sweet Potato Brownies can be made gluten-free by using gluten-free flour alternatives such as almond flour or coconut flour instead of regular flour.

Can I use canned sweet potatoes for this recipe?

Yes, you can use canned sweet potatoes; however, make sure to drain them well and mash them to remove excess moisture before adding them to the brownie batter.

How do I store leftover Sweet Potato Brownies?

Store leftover Sweet Potato Brownies in an airtight container at room temperature for up to 3 days, or refrigerate them for up to a week. They can also be frozen for up to 3 months.

Can I substitute other ingredients in Sweet Potato Brownies?

Yes, you can substitute ingredients like maple syrup for sugar, coconut oil for butter, and use different types of nut butters as long as they complement the recipe.

What toppings can I add to my Sweet Potato Brownies?

Some popular toppings include chopped nuts, chocolate chips, coconut flakes, or a drizzle of nut butter for added flavor and texture.

How do I know when the Sweet Potato Brownies are done baking?

To check if the brownies are done, insert a toothpick into the center; it should come out with a few moist crumbs but not wet batter. The edges should also start to pull away from the sides of the pan.

Are Sweet Potato Brownies suitable for vegans?

Yes, Sweet Potato Brownies can be made vegan by using plant-based substitutes, such as flax eggs instead of eggs and dairy-free chocolate chips.

If you’re looking for a refreshing, delicious, and wholesome treat that’s perfect for a hot summer day, then Strawberry Frozen Yogurt is your answer! Imagine a velvety, creamy dessert that not only satisfies your sweet cravings but also offers a burst of fruity goodness and a cooler-than-cool sensation with every spoonful. Whether you’re enjoying it by the pool, at a backyard BBQ, or simply as a sweet way to end your lunch, this homemade version elevates the enjoyment of strawberries to a whole new level. What’s more, you can feel good about indulging, as frozen yogurt is often lower in calories and fat compared to traditional ice cream, making it an excellent guilt-free alternative.

Strawberry Frozen Yogurt is an exceptional treat that’s incredibly easy to prepare right in your own kitchen. The process requires minimal ingredients and equipment, turning your kitchen into a sweet-making factory without the fuss. With summer just around the corner, there’s no better time to dive into this delightful recipe. Fresh strawberries, with their vibrant red hue and natural sweetness, take center stage, while yogurt adds a tangy creaminess that perfectly complements the fruit’s flavor. The result is a dessert that’s as visually stunning as it is delicious. You’ll want to scoop this up in generous portions on the hottest days!

But let’s not forget about the health benefits! Strawberries are not just delightful in taste; they are nutritional powerhouses packed with vitamins, antioxidants, and dietary fiber. They are known to support heart health, boost immunity, and are low in calories. When combined with yogurt—which is rich in probiotics, calcium, and protein—this dessert becomes not just a tantalizing treat, but a healthful one too! This Strawberry Frozen Yogurt can be a part of a balanced diet, making it a perfect choice for families and health-conscious individuals alike.

One of the best things about making your own frozen yogurt is the freedom it offers. You can easily customize it to fit your preferences and dietary needs. Prefer it dairy-free? Simply substitute regular yogurt for coconut or almond yogurt. Want to enhance the flavor? Consider adding a splash of vanilla extract, a squeeze of lemon juice, or even a handful of other berries. The beauty of this recipe lies in its versatility; you can experiment with various twists to make each batch uniquely yours.

Moreover, the recipe accommodates different dietary preferences, allowing you to adjust sweetness levels by using less sugar or a natural sweetener like honey or agave syrup. You can also decide on the texture, whether you prefer a creamy consistency or a more frozen, sorbet-like experience. The choice is yours! Serving it can also be a fun experience – think about garnishing your Strawberry Frozen Yogurt with fresh mint leaves, sprinkles, chocolate chips, or more diced strawberries to add an element of flair to your dessert.

Preparing Strawberry Frozen Yogurt at home is not only budget-friendly, but it also guarantees freshness and quality. Store-bought frozen yogurts can sometimes include unnecessary additives and preservatives, but with your homemade version, you have full control of the ingredients. Plus, there’s something magical about enjoying a frozen treat you made yourself—it’s a special way to connect with the process, engage your culinary creativity, and add an element of joy to your kitchen adventures.

For families with kids, this recipe becomes an engaging activity; let little ones assist with washing strawberries, measuring ingredients, or operating the blender. It’s a beautiful way to teach kids the importance of healthy eating while allowing them to take part in the preparation of their own delicious treats. They won’t want to wait long to dig into their creation, and the pride that comes with making something delicious from scratch makes the experience all the more rewarding.

Another advantage is the ability to make this dessert ahead of time! Strawberry Frozen Yogurt can be prepared in large batches and kept in the freezer for whenever hunger strikes or a sweet tooth calls. Keep it in a decorated container in your freezer, and you’ve got an ice-cold treat ready to be enjoyed at a moment’s notice. Perfect for gatherings, parties, or as a special dessert after dinner, it’s an easy way to impress guests without spending hours in the kitchen.

The simple act of preparing Strawberry Frozen Yogurt can also bring families together in the kitchen. It’s a recipe that invites conversation, exploration, and the creation of delicious memories. Celebrate summer birthdays or family reunions by featuring this delicious treat at your next get-together. Not only will it cool everyone off, but it’s also a hit among both kids and adults, ensuring everyone leaves with satisfied smiles and full bellies.

In a world where healthy eating is often difficult to balance with sweet cravings, Strawberry Frozen Yogurt stands as a beacon of hope. It melds the best of both worlds: a delightful dessert experience without sacrificing nutritional value. Whether you’re following a specific diet, looking for healthier alternatives to your favorite treats, or just wanting to enjoy some fresh summer flavors, this frozen yogurt is an absolutely fantastic choice.

With welcoming flavors, an explosion of color, and the versatility to adapt to your taste, this dessert is bound to become a staple in your household. So grab some fresh strawberries, gather your ingredients, and get ready to create this delightful frozen masterpiece that the whole family will adore. Whether it’s just for you, or an easy way to spoil guests, this Strawberry Frozen Yogurt will undoubtedly take your dessert game to the next level! And remember, there’s no wrong way to enjoy it—scoop, swirl, and savor every delicious bite.

As you get started on this delightful culinary adventure, prepare yourself for laughter, enjoyment, and, most importantly, some incredible flavors that come together to create a memorable treat. Strawberry Frozen Yogurt isn’t just a dessert; it’s a celebration of summer, health, and happiness all swirled into one irresistible bowl. Dive into that soft, creamy goodness, and let it sweep you away into a world of fruity delight!

Ingredients

  • 2 cups fresh strawberries hulled and sliced
  • 2 cups plain Greek yogurt
  • 1/2 cup honey or maple syrup
  • 1 tsp vanilla extract
  • 1/4 cup fresh lemon juice
  • Pinch of salt

Instructions

  • Begin by washing the fresh strawberries thoroughly. Hull and slice them, then place them in a blender or food processor.
  • Add the plain Greek yogurt, honey or maple syrup, vanilla extract, fresh lemon juice, and a pinch of salt to the blender with the strawberries.
  • Blend the mixture on high speed until it becomes smooth and creamy. Make sure there are no large chunks of strawberries left.
  • Taste the mixture and adjust the sweetness if needed by adding more honey or maple syrup, then blend again if necessary.
  • Transfer the strawberry yogurt mixture into a freezer-safe container. Smooth the top with a spatula.
  • Cover the container with a lid or plastic wrap, then place it in the freezer for about 2-3 hours, or until it is firm but still scoopable.
  • Once frozen, remove the container from the freezer and let it sit at room temperature for about 5 minutes to make scooping easier.
  • Scoop the strawberry frozen yogurt into bowls or cones and enjoy!

Notes

This refreshing strawberry frozen yogurt is a delightful treat perfect for warm days. It’s easy to make and relies on the natural sweetness of fresh strawberries combined with creamy Greek yogurt, making it a healthier alternative to store-bought ice cream. You can adjust the sweetness by varying the amount of honey or maple syrup based on your taste preference. For a twist, consider adding a splash of coconut milk for a creamier texture or tossing in some chopped mint for a refreshing flavor boost. This dessert can be stored in an airtight container in the freezer for up to two weeks; just remember to let it sit at room temperature for a few minutes before scooping for ease. Enjoy it on its own or topped with granola for added crunch!

Faq

What ingredients do I need to make Strawberry Frozen Yogurt?

You will need fresh strawberries, yogurt (plain or Greek), sweetener (like sugar or honey), and lemon juice.

Can I use frozen strawberries instead of fresh ones?

Yes, you can use frozen strawberries. Just make sure to allow them to thaw slightly before blending.

How do I make the yogurt sweet enough?

You can adjust the sweetness by adding more or less sweetener based on your taste preference. Start with a small amount and adjust as needed.

Is it possible to make this recipe dairy-free?

Yes! You can substitute regular yogurt with dairy-free yogurt options, such as almond, coconut, or soy yogurt.

How long does Strawberry Frozen Yogurt last in the freezer?

It can last for about 1-2 weeks in the freezer, but for optimal texture and flavor, it’s best consumed within the first week.

Can I add other flavors to my Strawberry Frozen Yogurt?

Absolutely! You can add ingredients like vanilla extract, banana, or even other fruits to create your desired flavor combination.

What equipment do I need to make Strawberry Frozen Yogurt?

You will need a blender or food processor to blend the ingredients, and an ice cream maker is helpful for achieving a smoother texture, though it’s not strictly necessary.

How do I serve Strawberry Frozen Yogurt?

Serve your frozen yogurt in bowls or cones, and consider topping it with fresh strawberries, nuts, or a drizzle of chocolate syrup for added indulgence.

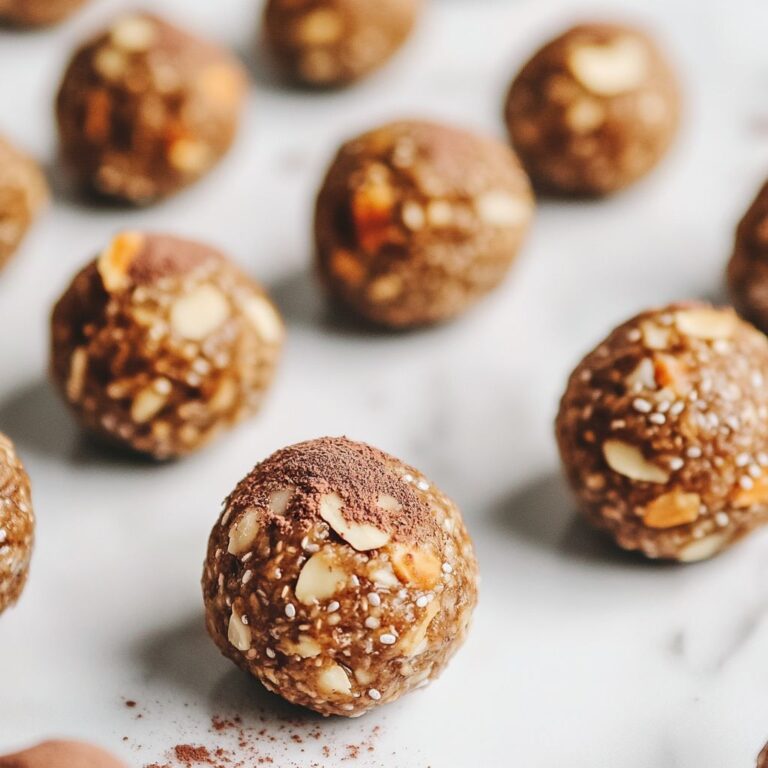
Are you on the hunt for a quick, nutritious snack that satisfies your cravings while providing a powerful energy boost? Look no further! Almond Butter Energy Balls are the ultimate solution for those busy days when you need something deliciously satisfying and healthful. Packed with wholesome ingredients and a delightful blend of flavors, these little bites are not only easy to make but also incredibly versatile. Whether you’re fueling up for a workout, seeking a midday pick-me-up, or simply indulging in a guilt-free treat, these energy balls are sure to become a staple in your kitchen.

The beauty of Almond Butter Energy Balls lies in their simplicity. With just a handful of ingredients, you can whip up a batch that tantalizes your taste buds while providing essential nutrients. The almond butter serves as a creamy, luscious base that offers a rich source of protein and healthy fats, making these energy balls both satisfying and fulfilling. When you take your first bite, you’ll be greeted with a perfect balance of sweetness and nuttiness that leaves you wanting more.

What truly sets these energy balls apart is their flexibility. You can customize them to suit your dietary needs or personal preferences by adding in different mix-ins, such as dark chocolate chips, dried fruits, seeds, or spices. Want a hint of indulgence? Toss in some mini chocolate chips for that added sweetness. Craving a tropical twist? Dried pineapple or coconut flakes can transport your taste buds on a mini getaway. The possibilities are endless, and experimenting with your favorite flavors is part of the fun!

These energy balls are not just a delicious snack; they are also brimming with health benefits. Almond butter is known for its heart-healthy oils and the presence of vitamin E, which plays a crucial role in promoting skin health and strengthening the immune system. Additionally, the oats included in the recipe provide a good source of fiber, aiding digestion and ensuring you feel fuller for longer. This combination of protein, fiber, and healthy fats makes these energy balls a perfect pre- or post-workout snack, helping you to recover or maintain your energy throughout the day.

In today’s fast-paced world, convenience is key. Almond Butter Energy Balls can easily fit into your on-the-go lifestyle. Once prepared, they can be stored in an airtight container in the refrigerator for up to a week—making them an ideal option for meal prep enthusiasts who love to have quick snacks ready at their fingertips. Just grab a couple before heading out the door, and you’ll have a nourishing treat to keep you energized throughout your busy schedule.

Beyond snacking, these energy balls can be a shared delight at gatherings or potlucks. Their bite-sized form means they are easy to serve and share, allowing everyone to enjoy a healthful treat without sacrificing flavor. Impress friends and family with these delightful creations, and watch as they disappear from the plate in no time. Whether you’re hosting a party, a casual get-together, or a busy day with kids, having a plate of Almond Butter Energy Balls on hand will surely please everyone.

When it comes to the texture, these energy balls are a dream. They’re chewy with just the right amount of firmness, making them satisfying to bite into while still being easy to chew. The combination of ingredients creates a lovely consistency that allows them to hold their shape well, ensuring you can enjoy them without any mess. The experience of eating these energy balls is as enjoyable as the delicious flavor they deliver.

As you prepare to make your own Almond Butter Energy Balls, take a moment to appreciate the goodness of each ingredient you’re using. Opt for natural almond butter to ensure you’re getting the purest flavors without added sugars or oils. You can also choose rolled oats that are certified gluten-free if you have dietary restrictions. Would you like to elevate the nutritional profile even further? Consider adding in superfoods like chia seeds or flaxseeds, which pack an additional punch of omega-3 fatty acids and fiber.

In addition to their convenient and customizable attributes, Almond Butter Energy Balls also serve as a reminder of the joy of cooking with simple, wholesome ingredients. It’s a great project that you can involve kids in, teaching them about healthy snacks while also enjoying the process of creating something delicious. Children love to help mix and roll the ingredients, and they are often more excited to enjoy healthy options when they’ve been involved in the preparation.

If you find yourself in need of some variety, be adventurous with flavor combinations! Experiment with spices like cinnamon or nutmeg for a warm, aromatic experience. You could also explore adding vanilla extract, which enhances sweetness and adds a wonderful depth of flavor. Pay attention to the amounts of sweeteners you use, and feel free to swap honey for maple syrup for a vegan alternative; both will lend a wonderful sweetness that complements the nutty almond butter.

Almond Butter Energy Balls not only deliver on flavor and nutrition but also offer a unique opportunity for creativity in the kitchen. They are a reflection of a growing trend toward mindful eating and choosing snacks that are as nourishing as they are enjoyable. By preparing your own energy balls at home, you have total control over the ingredients and the amounts, allowing you to create a delight that fits perfectly into your dietary routine.

Consider wrapping these energy balls in individual portions for an extra touch of convenience. By preparing them in snack-sized portions, they are perfect for lunchboxes, road trips, or simply as a quick bite between meals while working at your desk. Their portability means they can travel with you anywhere, ensuring you never have to compromise your snacking choices, even on the busiest days.

Ultimately, Almond Butter Energy Balls are more than just a snack—they’re a way to nourish your body and elevate your snack game. They are a delicious reminder that you don’t have to sacrifice health for taste. With a few simple ingredients and a little bit of creativity, you can create a wholesome treat that not only supports your wellness goals but also satisfies your taste buds. So, gather your ingredients, roll up your sleeves, and get ready to enjoy the healthy and delectable world of Almond Butter Energy Balls!

Ingredients

  • 1 cup almond butter
  • 1/2 cup rolled oats
  • 1/3 cup honey or maple syrup
  • 1/4 cup chia seeds
  • 1/4 cup ground flaxseed
  • 1/4 cup mini chocolate chips (optional)
  • 1 tsp vanilla extract
  • 1/2 tsp cinnamon
  • 1/4 tsp salt

Instructions

  • In a large mixing bowl, combine the almond butter, rolled oats, honey (or maple syrup), chia seeds, ground flaxseed, mini chocolate chips (if using), vanilla extract, cinnamon, and salt.
  • Mix the ingredients together until well combined, ensuring that everything is evenly distributed.
  • Once mixed, use your hands to form the mixture into small balls, approximately 1 inch in diameter.
  • Place the energy balls on a baking sheet lined with parchment paper or a plate.
  • Once all the mixture is formed into balls, refrigerate them for at least 30 minutes to firm up.
  • After chilling, your almond butter energy balls are ready to enjoy. Store any leftovers in an airtight container in the refrigerator for up to a week.

Notes

These Almond Butter Energy Balls are a delicious and nutritious snack that provides a great boost of energy, perfect for pre- or post-workout. Made with wholesome ingredients, they are rich in healthy fats, fiber, and protein. You can easily customize them by adding in your choice of mix-ins, such as dried fruits, nuts, or different types of seeds. These energy balls are also easy to store in the fridge or freezer, making them a convenient grab-and-go option. For a delightful twist, try rolling them in coconut flakes or additional chia seeds before chilling. Enjoy them as a quick snack or a healthy dessert alternative.

Faq

What are Almond Butter Energy Balls?

Almond Butter Energy Balls are no-bake snacks made with almond butter, oats, and various ingredients like nuts, seeds, or sweeteners. They are nutrient-dense, providing a quick source of energy and protein.

Are Almond Butter Energy Balls healthy?

Yes, Almond Butter Energy Balls are generally healthy. They are packed with healthy fats, protein, and fiber, making them a nutritious option for a snack or energy boost.

How do you store Almond Butter Energy Balls?

You can store Almond Butter Energy Balls in an airtight container in the refrigerator for up to a week. For longer storage, they can be frozen for up to three months.

Can I customize the ingredients in Almond Butter Energy Balls?

Absolutely! You can customize the ingredients by adding different types of nuts, seeds, dried fruits, or sweeteners to suit your taste preferences or dietary needs.

How many Almond Butter Energy Balls can I eat in one day?

It’s best to enjoy Almond Butter Energy Balls in moderation due to their calorie density. A serving size is usually 1-2 balls, depending on your dietary needs and activity level.

Can I make Almond Butter Energy Balls vegan?

Yes, Almond Butter Energy Balls are naturally vegan as long as you use plant-based sweeteners and avoid any non-vegan ingredients like honey.

What can I use instead of almond butter?

If you have a nut allergy or prefer a different flavor, you can substitute almond butter with other nut butters like peanut butter or sunflower seed butter.

How long does it take to prepare Almond Butter Energy Balls?

The preparation time for Almond Butter Energy Balls is quite short, typically around 15-20 minutes, plus chilling time if you prefer them cold.

Mango Chia Pudding: A Tropical Delight for Your Taste Buds

Imagine waking up to a vibrant bowl of creamy mango chia pudding, each spoonful bursting with juicy tropical flavors that transport you straight to a sun-kissed beach. The delightful contrast of luscious mango puree and the slightly nutty, gelatinous texture of chia seeds creates an irresistible combination that pleases both the palate and the senses. This delightful breakfast or snack option not only satisfies your sweet cravings but also provides a nutritious punch, making it the perfect choice for health-conscious foodies and anyone looking to add a splash of sunshine to their day.

Chia seeds are the star of the show in this delicious recipe. Known as a superfood, these tiny seeds are packed with essential nutrients, including omega-3 fatty acids, fiber, protein, and a myriad of vitamins and minerals. With their unique ability to absorb liquid and form a gel-like consistency, they create a pudding that is not only satisfying but also rich in texture. You’ll appreciate how these tiny seeds expand and soften, creating a dreamy base that perfectly complements the sweet, tropical essence of ripe mangoes.

But what makes this Mango Chia Pudding truly special is not just the incredible flavors but also its versatility. Whether you’re enjoying it for breakfast, a midday snack, or even dessert, this pudding adapts effortlessly to fit into your lifestyle. Imagine layering it with your favorite fruits, adding a scoop of granola for crunch, or drizzling it with a touch of honey or maple syrup. The possibilities are endless, allowing you to tailor each serving to your mood and taste preferences. This dish can easily become a family favorite, with everyone excited to customize their own bowls and explore various topping combinations!

Making Mango Chia Pudding is incredibly simple. You don’t need fancy equipment or a long list of ingredients. In fact, all it takes are just a few core ingredients: chia seeds, a ripe mango, coconut milk (or any milk of your choice), and a sweetener if desired. The secret lies in allowing the chia seeds to soak and expand in the liquid, absorbing the sweet essence of mango while also turning the mixture into a velvety pudding. This not only makes for a hassle-free preparation but also leads to a delightful texture that everyone loves.

Beyond its deliciousness and ease of preparation, this pudding also offers a wealth of health benefits that will make you feel good about indulging. Chia seeds are known to aid in digestion, support heart health, and even promote glowing skin. Coupled with the high vitamin content of mangoes, which boast impressive amounts of vitamin C and A, this bowl of goodness comes together as a powerhouse of nutrition. It’s ideal for those looking to fuel their mornings with a wholesome meal or a refreshing pick-me-up during the day.

Besides its health and taste benefits, Mango Chia Pudding also offers a feast for the eyes. The stunning golden hue of the mango paired with the dark, pudding-like chia creates a striking visual appeal that makes it a showstopper whether you’re serving it at brunch with friends or enjoying a quiet meal at home. Top your creation with colorful garnishes like sliced almonds, shredded coconut, or a sprinkle of mint, and you’ll have an Instagram-worthy dish that not only tastes divine but also looks fabulous.

Finding ripe mangoes for your pudding can elevate your recipe even further. Pick mangoes that yield slightly to gentle pressure when squeezed, as this indicates ripeness and sweetness. If your local grocery store doesn’t have fresh mangoes in stock, don’t fret! Frozen mango chunks can be a great alternative, especially when combined with coconut milk. They can be blended right into the pudding, giving a creamy texture while also ensuring you get all the tropical flavor you crave.

Another great aspect of this pudding is that it encourages you to experiment with flavors. Besides mango, you can try adding other fruits like passionfruit, pineapple, or berries to change the profile of the dish completely. Each fruit brings its own unique flavor and nutritional benefits, making it easy to switch up your chia pudding game and explore different variations while still keeping it healthy!

Let’s not forget the environmental benefits of making your own Mango Chia Pudding. By preparing this dish at home, you’re not just providing yourself with a nourishing meal; you’re also reducing your carbon footprint by avoiding pre-packaged snacks that often come with unnecessary additives and plastic waste. Embracing this simple yet effective recipe promotes a sustainable lifestyle, encourages mindfulness around food preparation, and empowers you to take control of what you consume.

As we delve into the practical side of this recipe, it’s worth noting that it lends itself seamlessly to meal prepping. You can prepare multiple servings in advance, storing them in jars or containers to grab on your way out the door. This is especially beneficial for busy mornings or those days when you need a quick and healthy snack available. The pudding can be kept in the fridge for several days, so you can make a big batch and enjoy the fruits of your labor throughout the week.

In conclusion, Mango Chia Pudding is not just a recipe—it’s an experience. From its tropical allure to its nutritional powerhouse status, every aspect of this dish invites you to savor the moment, nourish your body, and dance a little with delight as you indulge in its creamy goodness. So whether you’re serenely eating it alone with your morning coffee or enjoying it with loved ones, this chia pudding is sure to bring joy and satisfaction, making it a must-try dish in your culinary adventures. Dive into this tropical treat and let every bite transport you to a place where sunshine and flavor collide!

Ingredients

  • Mango Chia Pudding Base
    • 1/2 cup chia seeds
    • 2 cups coconut milk or almond milk
    • 2 ripe mangoes pureed
    • 2 tablespoons honey or maple syrup
    • 1 teaspoon vanilla extract
    • 1/4 teaspoon salt
  • Optional Toppings
    • Fresh mango slices
    • Shredded coconut
    • Chopped nuts
    • Mint leaves

Instructions

  • In a large mixing bowl, combine the chia seeds, coconut milk (or almond milk), pureed mangoes, honey (or maple syrup), vanilla extract, and salt.
  • Whisk the mixture thoroughly to ensure that the chia seeds are evenly distributed and not clumped together.
  • Cover the bowl with plastic wrap or a lid and refrigerate the mixture for at least 4 hours, or preferably overnight, to allow the chia seeds to absorb the liquid and thicken the pudding.
  • Once the pudding has set, give it a good stir to break up any clumps and achieve a smooth consistency.
  • To serve, spoon the chia pudding into serving glasses or bowls.
  • If desired, top each serving with fresh mango slices, shredded coconut, chopped nuts, and mint leaves for added flavor and presentation.
  • Enjoy the mango chia pudding chilled as a refreshing dessert or a healthy snack!

Notes

This refreshing mango chia pudding is a delightful vegan treat that’s perfect for breakfast or as a light dessert. The base, made from chia seeds soaked in coconut or almond milk, creates a creamy texture that’s enhanced by the sweetness of ripe mango puree. Sweeten it with honey or maple syrup to your taste, and don’t forget the hint of vanilla for added flavor. For best results, allow the pudding to set in the refrigerator for at least 4 hours or overnight; this allows the chia seeds to absorb the liquid and thicken up.

Feel free to customize your pudding with various toppings. Fresh mango slices add a burst of flavor, while shredded coconut brings a tropical flair. Chopped nuts can provide a satisfying crunch, and mint leaves add a refreshing touch. This dish is not only easy to make but also nutritious, packed with omega-3 fatty acids from chia seeds and vitamins from mangoes. Enjoy your delicious and healthy mango chia pudding!

Faq

What are the main ingredients in Mango Chia Pudding?

The main ingredients are chia seeds, mango puree, coconut milk (or any milk of choice), sweetener (like honey or maple syrup), and a pinch of salt.

How long does it take to prepare Mango Chia Pudding?

Preparation time is about 10 minutes, but it requires at least 4 hours (or overnight) to set in the refrigerator.

Can I use fresh mango instead of mango puree?

Yes, you can use fresh mango by blending it into a puree. Simply peel, chop, and blend until smooth for the best flavor.

Is Mango Chia Pudding healthy?

Yes, Mango Chia Pudding is a healthy option as chia seeds are rich in omega-3 fatty acids, fiber, and protein, while mangoes provide vitamins and antioxidants.

Can I make Mango Chia Pudding vegan?

Absolutely! Using plant-based milk like almond, soy, or coconut milk will keep the recipe completely vegan.

How long can I store leftover Mango Chia Pudding?

Leftover Mango Chia Pudding can be stored in an airtight container in the refrigerator for up to 3-5 days.

What can I top my Mango Chia Pudding with?

Popular toppings include sliced fresh mango, shredded coconut, nuts, seeds, or granola for added texture and flavor.

Can I customize the sweetness of Mango Chia Pudding?

Yes, you can adjust the sweetness by varying the amount of sweetener used or by opting for different sweeteners like agave nectar or stevia.

Indulge in the Creamy Delight of a Greek Yogurt Berry Parfait

If you’re looking for a nutritious and indulgent treat that captures the essence of summer in every spoonful, then a Greek Yogurt Berry Parfait is just what you need! Imagine a layered masterpiece of luscious Greek yogurt, vibrant, fresh berries, and a hint of crunchy granola, creating a dish that’s not only pleasing to the eye but also tantalizing to your taste buds. This parfait is absolutely perfect for breakfast, an afternoon snack, or even a delightful dessert that feels indulgent without the guilt. Its harmonious blend of flavors and textures makes it a versatile dish that can adapt to any meal of the day, and it’s a favorite among health-conscious eaters who refuse to sacrifice flavor for nutrition.

Greek yogurt is the star of this delightful recipe, celebrated not just for its rich and creamy consistency, but also for its impressive nutritional profile. Packed with protein, probiotics, and calcium, Greek yogurt is a powerhouse that supports digestion and nourishes your body from the inside out. Pairing it with a colorful selection of seasonal berries—such as strawberries, blueberries, raspberries, and blackberries—adds a burst of natural sweetness and a plethora of vitamins, antioxidants, and fiber that benefits your health in numerous ways. The combination not only promotes a feeling of fullness but also brings a delightful contrast between the smoothness of the yogurt and the juicy bites of fruit.

But we’re not done there; the addition of granola introduces an element of crunch that elevates the entire experience. Sprinkle in some homemade or store-bought granola, crafted with wholesome oats, nuts, and a hint of sweetness, and you have the perfect textural balance to complement the creamy yogurt and fresh berries. Whether you like it sweetened with honey or flavored with cinnamon, the granola adds a satisfying crunch that keeps you coming back for more. And if you want to take it a step further, consider incorporating some seeds or nuts for an extra boost of nutrition and flavor.

One of the best things about a Greek Yogurt Berry Parfait, aside from its taste and nutrition, is how incredibly easy it is to prepare. In just a matter of minutes, you can create a stunning dish that looks as good as it tastes. It’s perfect for those busy mornings when you want something quick yet healthy or for lazy weekend brunches with family and friends. You can easily customize it with your favorite fruits, toppings, and flavorings, making it a flexible dish that caters to various palates and dietary preferences.

What makes this parfait even more appealing is its aesthetic appeal. The vibrant colors of the berries against the white yogurt create a beautiful contrast, turning a simple dish into a work of art. Serve it in clear glass cups or jars to show off those gorgeous layers, and you have a stunning centerpiece for any breakfast table or brunch gathering. The sight of luscious layers encourages everyone to dig in, and the delightful textures invite more than just one taste. It’s a dish that sparks conversation and delight, making every meal feel like a special occasion.

Another bonus of the Greek Yogurt Berry Parfait is its adaptability to different dietary needs. Whether you are vegetarian, gluten-free, or looking for clean eating options, this recipe can easily be adjusted. Opt for dairy-free Greek yogurt alternatives made from almond or coconut milk for those who need to avoid dairy. You can also swap the granola for gluten-free options or even try using quinoa flakes for a unique twist. The ability to tailor each parfait to suit your personal preferences means that everyone can enjoy this delightful dish without compromise.

Beyond the basic ingredients, you can easily elevate your Greek Yogurt Berry Parfait with creative additions. A drizzle of local honey or pure maple syrup can add sweetness, while a sprinkle of fresh mint or zest from citrus fruits can infuse another level of freshness. Consider creating a parfait that reflects the seasons—using peaches in summer, pumpkin in the fall, or pomegranate in winter—to keep things exciting throughout the year. The options are genuinely endless, and every variation brings its own unique flair and flavor to the table.

In conclusion, a Greek Yogurt Berry Parfait is more than just a simple dish; it’s a canvas for your culinary creativity. Whipping up this delectable treat not only satisfies your cravings but also nourishes your body and delights your senses. With its abundance of health benefits, delicious flavors, and beautiful presentation, this parfait embodies everything we look for in wholesome and enjoyable food. So, bust out the ingredients, let your creativity flow, and indulge in the deliciousness of your very own Greek Yogurt Berry Parfait!

Gather your loved ones and make this creamy, berry-filled concoction a staple in your kitchen. It’s time to treat yourself to a delicious and nutritious indulgence that not only tastes fabulous but also makes you feel great inside and out. So, ready your spoons, and let’s dive into this delightful layers of goodness!

Ingredients

  • 1 cup Greek yogurt plain
  • 1 cup mixed berries (strawberries, blueberries, raspberries)
  • 1/4 cup granola
  • 2 tablespoons honey or maple syrup
  • 1/2 teaspoon vanilla extract
  • Fresh mint leaves for garnish (optional)

Instructions

  • In a mixing bowl, combine the Greek yogurt, honey or maple syrup, and vanilla extract. Stir until well blended and creamy.
  • In a glass or a bowl, start layering the parfait. Begin with a layer of the Greek yogurt mixture at the bottom.
  • Add a layer of mixed berries over the yogurt, ensuring an even distribution.
  • Sprinkle a layer of granola on top of the berries for added crunch.
  • Repeat the layers until you run out of ingredients, finishing with a layer of mixed berries on top.
  • If desired, garnish with fresh mint leaves for a pop of color and extra freshness.
  • Serve immediately to enjoy the crunch of the granola, or refrigerate for up to an hour before serving for a chilled parfait.

Notes

These Greek Yogurt Berry Parfaits are a delightful and nutritious way to start your day or enjoy as a refreshing snack. The creamy Greek yogurt provides a high-protein base, while the mixed berries add a burst of flavor and natural antioxidants. You can easily customize this parfait by switching up the berries based on what’s in season or your personal preference. For added texture and crunch, feel free to use different types of granola or even nuts. The honey or maple syrup adds just the right amount of sweetness without overpowering the fresh flavors. If you’re looking for a decorative touch, layer the parfaits in clear cups or jars and top with fresh mint leaves for a pop of color. This dish is also perfect for meal prep; simply layer the ingredients in advance and store them in the refrigerator for a quick, easy breakfast throughout the week.

Faq

What is a Greek Yogurt Berry Parfait?

A Greek Yogurt Berry Parfait is a layered dessert or snack made with Greek yogurt, fresh berries, and often granola or nuts, creating a delicious and nutritious treat.

What types of berries can I use in my parfait?

You can use a variety of berries such as strawberries, blueberries, raspberries, and blackberries. Feel free to mix and match according to your preference!

Is Greek yogurt healthier than regular yogurt?

Yes, Greek yogurt is typically higher in protein and lower in sugar than regular yogurt. It also contains probiotics, which are beneficial for gut health.

Can I make this parfait in advance?

Yes, you can prepare the ingredients in advance and assemble them just before serving to keep the granola crunchy and the berries fresh.

How long can I store leftovers?

Leftover parfaits should be stored in the refrigerator in an airtight container and can last for about 1-2 days. However, the granola may lose its crunch over time.

Can I use non-dairy yogurt for this recipe?

Absolutely! You can substitute Greek yogurt with non-dairy alternatives such as coconut yogurt, almond yogurt, or soy yogurt for a dairy-free option.

What can I add for sweetness?

You can add honey, maple syrup, agave nectar, or stevia to sweeten your parfait according to your taste preference.

Can I add other ingredients to my parfait?

Yes! Feel free to add nuts, seeds, shredded coconut, or even a drizzle of nut butter for extra flavor and nutrition.

Discover the Creamy, Nutritious World of Chia Seed Pudding Delight

Are you ready to embark on a culinary journey that tantalizes your taste buds and nourishes your body? Welcome to the world of Chia Seed Pudding Delight! This dish is not just a treat for your palate; it’s a celebration of health and nourishment wrapped in a silky, creamy texture. Imagine waking up to a breakfast that is not only delicious but also packed with the goodness of superfoods. This is where chia seeds come into play — tiny seeds that are often overlooked but are a powerhouse of nutrients and versatility. With just a few ingredients, you can transform these minuscule gems into a delightful pudding that can be enjoyed at any time of the day.

The allure of chia seed pudding lies in its simplicity and the magical transformation that occurs when these seeds meet liquid. In just a few short hours, chia seeds absorb the moisture and swell into a gelatinous consistency, making it a superb base for endless flavor combinations. Whether you prefer it infused with vanilla and sweetened with honey, or enriched with fresh fruits and nuts, the possibilities are as vast as your imagination. This recipe is not only a perfect breakfast option; it also serves as a delightful snack or a light dessert that you can enjoy guilt-free. It’s a canvas for creativity, inviting you to dive into your pantry and let your culinary creativity thrive.

Chia seeds, the star of our dish, are renowned for their impressive nutritional profile. Just a small serving packs a punch with omega-3 fatty acids, fiber, protein, and important minerals like calcium and magnesium. Did you know that chia seeds can absorb up to 10-12 times their weight in water? This unique property not only helps keep you hydrated but also contributes to a sense of fullness, making chia seed pudding a great ally for those on a health journey. It’s an easy way to incorporate these essential nutrients into your diet without sacrificing flavor or satisfaction.

One of the most compelling aspects of chia seed pudding is its adaptability; it can easily cater to various dietary preferences and lifestyles. Are you vegan or lactose intolerant? No problem! With coconut milk, almond milk, or any plant-based alternative, you can create a creamy base that’s perfect for your needs. Additionally, you can customize the level of sweetness based on your taste. Natural sweeteners like maple syrup, agave nectar, or even mashed bananas can elevate the flavor profile without the guilt of refined sugar. This pudding ages gracefully too — it can be prepared ahead of time and stored in the fridge, making it an ideal choice for meal prep enthusiast.

As we journey through the preparation of Chia Seed Pudding Delight, let’s not forget the toppings! The real fun begins when you consider all the delectable add-ins and toppings that can elevate your dish from ordinary to extraordinary. Fresh fruits like strawberries, blueberries, or diced mangoes add bursts of color and freshness. A sprinkle of nuts or seeds gives it a delightful crunch, while a drizzle of nut butter can introduce a decadent element that satisfies your cravings. With every bite, you get the richness of flavors, textures, and colors, making it not just a meal but a feast for the senses.

Moreover, chia seed pudding is not just a breakfast option but a versatile creation that can suit any time of day or occasion. Looking for a quick afternoon snack? Chia pudding will revive your energy without the guilt. Have guests over for a brunch? Present them with beautifully layered pudding cups adorned with fruits and nuts for an impressive and healthy dessert centerpiece. The vibrant colors and inviting textures are sure to be a conversation starter, drawing everyone in for a taste.

In addition to being delightful and versatile, chia pudding promotes mindfulness in eating. The process of combining ingredients, allowing them to set, and then serving introduces an element of anticipation and joy. It encourages you to slow down and appreciate the simplicity of whole foods. Taking time to prepare a meal for yourself or your loved ones can deepen your connection to the food you’re consuming, making it a more fulfilling experience.

Let’s not overlook the aesthetic appeal of chia seed pudding. This dish can double as a vibrant centerpiece on your breakfast table or brunch spread. Its creamy layers created by the pudding and the bright colors from fruits or toppings make it visually enticing. You can serve it in mason jars, glasses, or dessert bowls, allowing the layers to shine through, which adds a touch of sophistication to a simple dish.

If you think preparing chia pudding is complicated, you’ll be pleasantly surprised! It’s incredibly straightforward. With minimal preparation and just a bit of patience for the soaking time, you can whisk together the ingredients and let your fridge do the heavy lifting while you focus on your day. It’s the perfect dish for busy individuals or families who want to take a step towards healthier eating without slaving away in the kitchen.

Imagine your fridge stocked with pre-made chia seed pudding, ready to be enjoyed at a moment’s notice. Not only does it save you time in the morning, but it also provides you with a nutritious option that aligns with your health goals. Whether you’re rushing out the door to work or settling in for a cozy evening snack, this pudding provides a satisfying solution that takes the guesswork out of your meals.

Furthermore, the creativity doesn’t end with the base pudding; you can explore flavors galore! Are you a chocolate lover? Adding cocoa powder or melted chocolate can create a decadently rich dessert. For those who enjoy spices, incorporating cinnamon or nutmeg can add warmth and a unique twist. You can tailor recipes to suit any season or occasion, ensuring that there’s always something new and exciting to try.

As we delve deeper into the world of Chia Seed Pudding Delight, consider experimenting with the consistency. If you prefer a thicker pudding, simply increase the chia seeds, or if you enjoy a smoother texture, blend the mixture in a food processor before allowing it to set. This flexibility ensures that your pudding is always aligned with your taste preferences.

Ultimately, Chia Seed Pudding Delight is not just a trendy dish; it’s an opportunity to embrace a healthier lifestyle without sacrificing flavor or enjoyment. It’s about nourishing your body and delighting your senses at the same time. So, as you prepare to try this recipe, let your creativity flow. Infuse your pudding with your favorite flavors, adorn it with delicious toppings, and savor every creamy bite. Get ready to indulge in a delightful experience that complements your wellness journey and brings joy to your table.

Ingredients

  • 1/4 cup chia seeds
  • 1 cup almond milk or any milk of choice
  • 2 tablespoons maple syrup or honey
  • 1 teaspoon vanilla extract
  • 1/4 teaspoon salt
  • Fresh fruits for topping (e.g., berries, bananas, mango)
  • Granola or nuts for crunch (optional)

Instructions

  • In a mixing bowl, combine 1/4 cup of chia seeds with 1 cup of almond milk (or your milk of choice).
  • Add 2 tablespoons of maple syrup (or honey), 1 teaspoon of vanilla extract, and 1/4 teaspoon of salt to the bowl.
  • Whisk the mixture well until the chia seeds are evenly distributed and there are no clumps.
  • Cover the bowl with plastic wrap or a lid and place it in the refrigerator.
  • Let the mixture chill for at least 4 hours or overnight to allow the chia seeds to expand and thicken.
  • After chilling, stir the chia seed pudding to break up any clumps that may have formed.
  • Serve the pudding in individual bowls or cups, and top with fresh fruits such as berries, bananas, or mango.
  • If desired, sprinkle granola or nuts on top for added crunch.
  • Enjoy your Chia Seed Pudding Delight as a nutritious breakfast or snack!

Notes

This Chia Seed Pudding Delight is a nutritious and satisfying dish that can be enjoyed at any time of the day. The chia seeds absorb the liquid, creating a wonderfully creamy texture while being rich in omega-3 fatty acids and fiber. Feel free to experiment with different types of milk according to your preference, such as coconut or oat milk. The sweetness can be adjusted according to your taste by varying the amount of maple syrup or honey you use. Top your pudding with a vibrant mix of fresh fruits to add natural sweetness and a pop of color. Adding granola or nuts not only enhances the flavor but also provides an enjoyable crunch. This pudding can be made ahead of time and stored in the refrigerator, making it a convenient option for breakfast or a healthy snack on busy days. Enjoy it as a quick treat to satisfy your sweet tooth without the guilt!

Faq

What are Chia Seeds?

Chia seeds are tiny black seeds from the plant Salvia hispanica, native to Mexico and Guatemala. They are rich in omega-3 fatty acids, fiber, protein, and various vitamins and minerals.

How do I prepare Chia Seed Pudding?

To prepare chia seed pudding, mix chia seeds with your choice of milk (dairy or plant-based) and sweetener. Let it sit for at least 2 hours or overnight in the refrigerator until it thickens.

How long does Chia Seed Pudding last in the refrigerator?

Chia seed pudding can last in the refrigerator for up to 5 days when stored in an airtight container.

Can I use any type of milk for Chia Seed Pudding?

Yes, you can use any type of milk for chia seed pudding, including almond milk, coconut milk, soy milk, or cow’s milk, based on your dietary preferences and taste.

What are the health benefits of Chia Seed Pudding?

Chia seed pudding is high in fiber, which aids digestion, and omega-3 fatty acids, which are beneficial for heart health. It also provides a good source of protein and essential minerals.

Can I add flavors or toppings to my Chia Seed Pudding?

Absolutely! You can enhance your chia seed pudding with flavors such as vanilla, cocoa powder, fruit purees, or spices. Toppings like fresh fruits, nuts, and granola are also great additions.

Is Chia Seed Pudding vegan?

Yes, chia seed pudding is naturally vegan, especially when prepared with plant-based milk and sweeteners.

How can I make Chia Seed Pudding thicker?

To make your chia seed pudding thicker, increase the amount of chia seeds or reduce the amount of liquid. You can also let it sit longer in the refrigerator to absorb more liquid.

Indulge in the Sweetness of Honey Drizzled Yogurt Bark

Imagine a refreshing dessert that gives you all the creamy, tangy goodness of yogurt combined with the natural sweetness of honey and vibrant bursts of fresh fruit. This delightful treat, known as Honey Drizzled Yogurt Bark, is more than just a quick snack—it’s an experience that will tantalize your taste buds, nourish your body, and elevate your mood. Perfect for warm summer days, family gatherings, or even as a deliciously healthy late-night treat, yogurt bark is the answer to your craving for something sweet yet wholesome.

Yogurt bark is incredibly versatile as it allows you to get creative with various toppings, making it as classic or as adventurous as you desire. Whether drizzled with rich honey, adorned with colorful fresh berries, or sprinkled with crunchy nuts, each bite is an explosion of textures and flavors that come together effortlessly. The contrast of creamy yogurt against the sweetness of honey creates a delectable balance that will keep you reaching for more.

One of the things that makes Honey Drizzled Yogurt Bark so appealing is its simplicity. It only takes a few wholesome ingredients to create a stunning, eye-catching dessert that looks as incredible as it tastes. With minimal prep time and easy assembly, this dessert is perfect for those who are new to cooking or for those busy individuals seeking a quick project to feel accomplished in the kitchen. But don’t let its simplicity lead you to underestimate its culinary charm; this yogurt bark is sure to impress friends, family, and guests alike with its stunning presentation and delightful flavors.

Healthy eating doesn’t have to be boring. Yogurt bark serves as a guilt-free dessert, containing probiotics that support gut health while being low in added sugars—especially when you choose nutrient-dense toppings like fruits and nuts. Greek yogurt is a powerful ingredient that is not only rich in protein but also packs a punch of calcium and vitamins to support overall health. The sweetness of drizzled honey adds a touch of luxury that transforms this nourishing dessert into something truly special, a treat you can indulge in without a second thought.

In addition to being a fantastic dessert or snack, Honey Drizzled Yogurt Bark is also incredibly customizable. If you have a garden filled with seasonal fruits or leftover items in your pantry, feel free to use them! The toppings can vary from strawberries and blueberries for a classic combination to tropical alternatives like mango, kiwi, or even a sprinkle of chia seeds for an extra dose of nutrition. You can also experiment with various forms of honey—lavender, clover, or manuka—to enhance the flavor profile further and make this delightful treat your signature dish.

Making Honey Drizzled Yogurt Bark also involves a little science, particularly in the way we freeze it to create that perfect bark consistency. As the yogurt freezes, it becomes firmer and easier to break apart into decadent, shard-like pieces. The key is giving the yogurt ample time to freeze so that when you break apart the bark, each piece has the ideal blend of creamy yogurt and toppings. With just a few hours in the freezer, you can create a satisfying texture that makes every bite a delightful crunch.

Having Honey Drizzled Yogurt Bark on hand can also reduce late-night snacking temptations. Keeping a batch in your freezer ensures that you have a delicious, healthy dessert ready to go when a craving hits. When you need a little pick-me-up or an energizing treat after a workout, this yogurt bark serves as a smart choice that combines pleasure and nutrition in one neat package.

Planning a summer picnic? Honey Drizzled Yogurt Bark can double as a refreshing and visually stunning centerpiece! Just cut it into various shapes and sizes and serve it on a beautiful platter, adorned with fresh fruits and an extra drizzle of honey on top. Its festive presentation will turn heads and spark delightful conversations, satisfying both the health-conscious and those with a sweet tooth.

Think of the vibrant colors and mouthwatering aroma as you prepare to make your own Honey Drizzled Yogurt Bark. It’s a fun activity that can involve family and friends, making it an opportunity to bond while playing with flavors and textures. The joy of creating your own unique version of yogurt bark is infectious, encouraging everyone to have a hand in choosing toppings or layering the ingredients. Kids will love it for its playful nature, and adults will appreciate the healthy twist on a classic dessert.

Serving Honey Drizzled Yogurt Bark at social gatherings will also have your guests raving about this wonderful treat. Its aesthetic appeal makes it great for any occasion, from brunch to birthday parties. With minimal fuss and maximum flavor, you’ll enjoy watching friends and family dive in—and they will undoubtedly be asking for the recipe!

In conclusion, whether you’re making it for yourself, creating memories with loved ones in the kitchen, or impressing guests at your next gathering, Honey Drizzled Yogurt Bark is a dessert that embodies flavor, fun, and health. By harnessing the natural sweetness of honey combined with creamy yogurt and delightful toppings, this treat proves that you don’t need to sacrifice taste for nutrition. Dive into the world of yogurt bark, and get ready to explore an endless fun journey of flavors and creativity. So grab your ingredients, and let’s get started on this delicious adventure that promises to be enjoyable from start to finish!

Ingredients

  • 2 cups plain Greek yogurt
  • 1/4 cup honey
  • 1/2 cup mixed berries fresh or frozen (e.g., strawberries, blueberries, raspberries)
  • 1/4 cup granola
  • 1/4 cup nuts chopped (e.g., almonds, walnuts)
  • 1 tsp vanilla extract
  • Pinch of salt

Instructions

  • In a medium mixing bowl, combine the plain Greek yogurt, honey, vanilla extract, and a pinch of salt. Stir until the mixture is well combined and smooth.
  • Line a baking sheet with parchment paper, ensuring it covers the entire surface.
  • Pour the yogurt mixture onto the prepared baking sheet, spreading it out evenly with a spatula until it reaches about 1/4 inch thickness.
  • Evenly sprinkle the mixed berries over the yogurt layer, followed by the granola and chopped nuts.
  • Place the baking sheet in the freezer and freeze for about 3-4 hours or until the yogurt bark is solid.
  • Once frozen, remove the baking sheet from the freezer and allow it to sit at room temperature for a few minutes to soften slightly.
  • Using a sharp knife or your hands, break the yogurt bark into pieces of your desired size.
  • Store the yogurt bark pieces in an airtight container in the freezer until ready to serve.

Notes

Honey Drizzled Yogurt Bark is a refreshing and nutritious snack or dessert that’s incredibly easy to make. The combination of Greek yogurt and honey provides a creamy texture and natural sweetness, while the mixed berries add a burst of flavor and nutrients. You can tailor this recipe to your preference by using your favorite nuts and fruits, and even swapping in different types of granola for added crunch.

This dish is perfect for meal prep, as it can be stored in the freezer and enjoyed throughout the week. Simply break it into pieces and grab a slice whenever you need a quick and healthy treat. For added flavor, consider mixing in other extracts like almond or adding a sprinkle of cinnamon before freezing. Enjoy this yogurt bark as a midday snack or a light dessert, and feel free to experiment with different toppings each time you make it!

To maintain freshness, always use airtight storage for the yogurt bark. Keep in mind that it will lose some of its creamy texture once frozen and thawed, but it remains delicious. Ideal for warm months, this bark can be especially delightful on a hot day. Just remember to check ingredients like granola to ensure they align with your dietary needs whether they are gluten-free or nut-free.

Faq

What is Honey Drizzled Yogurt Bark?

Honey Drizzled Yogurt Bark is a delicious and healthy snack made from yogurt that is spread out and frozen, then drizzled with honey and topped with fruits or nuts.

What ingredients do I need to make Honey Drizzled Yogurt Bark?

You will need plain yogurt (Greek or regular), honey, and your choice of toppings such as fresh fruits, nuts, or granola.

How do you make Honey Drizzled Yogurt Bark?

First, spread yogurt evenly on a baking sheet. Freeze until firm, then drizzle with honey and sprinkle your chosen toppings before cutting into pieces.

How long does it take to prepare Honey Drizzled Yogurt Bark?

Preparation time is about 10 minutes, but freezing will take approximately 2-4 hours depending on your freezer.

How should I store Honey Drizzled Yogurt Bark?

Store any leftovers in an airtight container in the freezer for up to two weeks. Allow it to sit out for a few minutes to soften before eating.

Can I use flavored yogurt instead of plain yogurt?

Yes, you can use flavored yogurt for a sweeter variation, but it may change the flavor balance. Adjust the honey accordingly.

Is Honey Drizzled Yogurt Bark suitable for a vegan diet?

It can be made vegan by using dairy-free yogurt alternatives and opting for maple syrup or agave instead of honey.

What are some suggested toppings for Honey Drizzled Yogurt Bark?

Some popular toppings include sliced strawberries, blueberries, granola, chopped nuts, coconut flakes, or chocolate chips.

Indulging in a deliciously wholesome snack shouldn’t feel like a guilty pleasure, and with these Peanut Butter Oat Bars, you’re stepping into a world of flavor and nutrition that will leave you satisfied without the remorse. Imagine a chewy, nutty bar that melds the rich and creamy essence of peanut butter with the heartiness of oats—all while being simple enough to whip up in your very own kitchen. Not only are these bars a fantastic on-the-go snack option for busy days, but they also make for a wholesome companion to your morning coffee or after a workout for a quick energy boost.

As you embark on the journey of making these delightful bars, prepare to unlock a world of textures and taste profiles that marry together in magical harmony. These aren’t just your run-of-the-mill snacks; they are a culinary experience waiting to unfold. Think about it: the luscious, nutty richness of peanut butter combined with the wholesome goodness of oats creates a satisfying contrast that will tickle your taste buds. The subtle sweetness from natural sweeteners like honey or maple syrup rounds out the flavor, elevating these bars to a level that’s both indulgent and health-conscious.

Whether you’re aiming to quell mid-afternoon munchies or seeking a nutritious breakfast alternative, these Peanut Butter Oat Bars are versatile and adaptable to your lifestyle. Customize them by adding your favorite mix-ins—perhaps some dark chocolate chips for a hint of decadence, or dried fruits like cranberries or apricots for a tart twist. You might even consider tossing in some crunchy nuts or seeds for an added layer of texture that transforms each bite into a delightful medley of flavors and sensations. The best part? With every tweak and tweak of ingredients, you’re not only creating a personalized snack, but you’re also embracing healthier choices by utilizing whole ingredients that nourish your body.

Health enthusiasts and foodies alike will revel in the benefits of integrating oats into their diets. Oats are not only a fantastic source of fiber, which promotes digestive health, but they also provide a steady release of energy that keeps you fueled without crashing. With the power of peanut butter, which is packed with protein, you ensure that your snack is not only satisfying but also beneficial for muscle recovery after intense activities. This makes these bars perfect for athletes looking for a post-workout refuel or anyone navigating the robust pace of daily life.

In addition to being healthy and filling, making these bars is a simple process that allows creativity to flourish. You can involve family or friends to share the joy of crafting snacks together or even turn it into a fun activity with children, teaching them the wonders of cooking with whole foods. From selecting the best organic peanut butter—be it crunchy or smooth—to measuring out wholesome oats and choosing the right sweeteners, every step of the preparation brings the kitchen to life.

Aside from flavor and health, one of the most exciting aspects of these bars is their incredible convenience. Once prepared and cut into squares, they store beautifully! Simply wrap them in parchment paper, place them in an airtight container, and you’ll have grab-and-go snacks ready for busy mornings or lazy afternoons on your couch. Imagine unwrapping a bar and enjoying the delightful aroma of peanut butter as you take that first bite; it’s like a warm hug in a snack form. And if you’re someone who keeps an eye on portion control, these bars can easily be cut into smaller pieces, providing a delightful bite-sized treat.

The versatility of Peanut Butter Oat Bars extends beyond their ingredients and making methods. You can experiment with different flavors by adding spices like cinnamon or nutmeg, lending warmth and depth to each bite. Or perhaps a splash of vanilla extract might find its way into your mixture, inviting an aromatic element that elevates the entire experience. For those with dietary restrictions, substitutions like almond butter or sunflower seed butter can easily be used to cater to various needs while maintaining the bars’ original heartiness. The ability to adjust ratios and ingredients allows these bars to become whatever you want them to be—healthy, fulfilling, delightful, or indulgent.

As you savor the rich flavor and delightful chewiness of these bars, take a moment to appreciate the nutritional benefits, too. The combination of oats and peanut butter provides a nutrient-dense profile filled with protein, fiber, vitamins, and minerals. Not only do these bars fuel your day, they also provide lasting energy without refined sugars or artificial additives commonly found in store-bought snacks. You have the power to control what goes into your bars, ensuring that every bite is packed with goodness without compromising on taste.

Moreover, these Peanut Butter Oat Bars are perfect for those who love meal prepping! You can make a batch at the start of the week, ensuring that your healthy snacks are ready whenever you are. At times when life feels overwhelming, it’s comforting to know that you can reach for a nourishing snack that not only satisfies your cravings but also aligns with your healthy living goals. Plus, these bars make for excellent gifts! Wrapped up with a little care, they can brighten someone’s day, underscoring the love and thoughtfulness that comes from sharing homemade treats.

In a world filled with snack options that often fall short of healthy, these Peanut Butter Oat Bars stand out as a beacon of nutritional goodness, creative opportunity, and satisfying flavor. They allow you to take control of your snacking habits, offering a delicious alternative that is as enjoyable to make as it is to eat. So gather your ingredients, roll up your sleeves, and experience the joy of creating something truly special—a snack that not only nourishes your body and soul but becomes an integral part of your daily routine. Discover how a simple combination of oats and peanut butter can transform your approach to snacking. Embrace the delicious adventure that is about to unfold, and let these bars become your go-to healthy treat!

Ingredients

  • 2 cups rolled oats
  • 1 cup natural peanut butter
  • 1/2 cup honey or maple syrup
  • 1/2 cup brown sugar packed
  • 1/2 tsp vanilla extract
  • 1/4 tsp salt
  • 1/2 cup chocolate chips optional
  • 1/2 cup chopped nuts optional
  • 1/2 cup dried fruit optional

Instructions

  • Preheat your oven to 350°F (175°C) and line an 8×8 inch baking dish with parchment paper for easy removal.
  • In a large mixing bowl, combine the rolled oats, brown sugar, and salt. Mix well to ensure even distribution.
  • In a separate microwave-safe bowl, warm the natural peanut butter and honey (or maple syrup) together for about 30 seconds until they can be easily stirred; stir to combine.
  • Add the vanilla extract to the peanut butter mixture and stir until well blended.
  • Pour the wet mixture into the dry oat mixture and stir until all the ingredients are well combined. If using, fold in the optional chocolate chips, chopped nuts, and dried fruit.
  • Spread the mixture evenly into the prepared baking dish, pressing down firmly to create an even layer.
  • Bake for 20-25 minutes, or until the edges are lightly golden and the center is set.
  • Allow the bars to cool in the pan for about 10 minutes, then lift them out using the parchment paper and transfer to a wire rack to cool completely.
  • Once cooled, cut into squares or bars and store in an airtight container.

Notes

These no-bake peanut butter oat bars are a deliciously satisfying treat that you can whip up in no time. Rich in flavor and packed with energy, they make a perfect snack or breakfast on the go. The combination of rolled oats and natural peanut butter provides a wholesome base, while honey or maple syrup adds natural sweetness without the need for refined sugars. You can easily personalize these bars by adding a mix of your favorite nuts, dried fruits, or even chocolate chips for an extra indulgence.

Once prepared, let the bars chill in the refrigerator to achieve the perfect texture. They are an excellent option for meal prepping since they can be stored in an airtight container for up to a week or frozen for longer shelf life. To serve, simply slice them into squares or bars and enjoy. For an extra touch, consider drizzling them with a little more peanut butter or topping with fresh fruit.

If you prefer a bit of crunch, feel free to include various seeds such as chia or flaxseeds. Remember that the key to achieving the right balance is adjusting the sweetness to your taste; feel free to reduce or increase the amount of honey or brown sugar as desired. With these peanut butter oat bars, you can have a tasty, nutritious snack that fits seamlessly into your busy lifestyle!

Faq

What ingredients are needed to make Peanut Butter Oat Bars?

The essential ingredients for Peanut Butter Oat Bars include rolled oats, peanut butter, honey or maple syrup, vanilla extract, and a pinch of salt. Optional ingredients can include chocolate chips, nuts, or dried fruits for added flavor.

Are Peanut Butter Oat Bars gluten-free?

Yes, you can make Peanut Butter Oat Bars gluten-free by using certified gluten-free oats. Be sure to check labels on all ingredients if you’re avoiding gluten.

How long do Peanut Butter Oat Bars last?

Peanut Butter Oat Bars can last up to a week when stored in an airtight container at room temperature. For longer storage, you can refrigerate them for up to two weeks or freeze them for up to three months.

Can I substitute peanut butter with another nut butter?

Yes, you can substitute peanut butter with other nut butters like almond butter, cashew butter, or sunbutter if you have nut allergies. Keep in mind the flavor and consistency may vary slightly.

How do I customize my Peanut Butter Oat Bars?

You can customize Peanut Butter Oat Bars by adding ingredients such as shredded coconut, chia seeds, flaxseeds, dried fruits, or chocolate chips to enhance flavor and nutritional value.

Do I need to bake Peanut Butter Oat Bars?

No, Peanut Butter Oat Bars do not require baking. They are typically prepared by mixing the ingredients, pressing the mixture into a pan, and then refrigerating until set. However, some variations may involve baking.

Can I use sugar instead of honey or maple syrup?

Yes, you can use granulated sugar or brown sugar instead of honey or maple syrup. However, keep in mind that using sugar may result in a drier texture, so you might want to adjust the amount of liquid accordingly.

How do I cut the bars into squares or rectangles?

Once the mixture has set in the refrigerator, you can easily lift it out of the pan using parchment paper. Use a sharp knife to cut it into even squares or rectangles. Wipe the knife between cuts for cleaner edges.

Indulge in the Guilt-Free Decadence of Zucchini Brownies

Imagine biting into a rich, fudgy brownie that’s so decadent, you can’t believe it’s actually good for you. Welcome to the world of zucchini brownies, the dessert innovation that has taken healthy baking by storm! Combining the luscious texture of chocolate with the nutritional benefits of zucchini, these brownies offer a delightful solution for anyone looking to satisfy their sweet tooth without deviating from their wellness goals. You might be wondering, how can something that sounds so healthy taste so delicious? Let’s dive deeper into this culinary marvel that promises to revolutionize your dessert game.

With their vibrant green flecks and irresistibly moist texture, zucchini brownies are not only a feast for the eyes but also a treat for the palate. The addition of zucchini not only adds density and moisture to the brownies but also ensures that each bite is wholesome and packed with nutrients. Zucchini is a powerhouse of vitamins and minerals, making it the perfect sneaky addition to your sweet treats. By incorporating this versatile vegetable, you create a dessert that’s high in antioxidants and dietary fiber but low in calories. This means you can indulge in a few extra squares without feeling guilty, a rarity in the world of sweets!

These brownies beautifully balance flavor and nutrition, making them an excellent choice for busy families and health-conscious individuals alike. Whether you’re trying to get your kids to eat their veggies, seeking a post-workout snack, or simply craving a midnight chocolate fix, zucchini brownies can do it all. Plus, they’re incredibly simple to make! You don’t need to be a seasoned baker to whip up a batch of these delights. With a handful of pantry staples and a little bit of love, you’ll be on your way to enjoying a delicious, decadent treat.

The beauty of zucchini brownies lies in their versatility. You can stick to the classic chocolate version or get creative by incorporating nuts, chocolate chips, or even a swirl of peanut butter. For those looking to cater to different dietary preferences, these brownies can easily be adapted to be gluten-free, dairy-free, or even vegan. This means that everyone at your gathering can indulge in a sweet treat without feeling left out. Imagine the joy of serving a crowd-pleasing dessert that accommodates various dietary needs while still being utterly scrumptious!

Beyond their amazing flavor and texture, zucchini brownies also showcase the art of clever ingredient substitution. By swapping out traditional ingredients for healthier alternatives, you’re not only enhancing the nutritional profile but also experimenting with new flavors and textures. What’s more, the addition of applesauce or Greek yogurt can amp up the moisture while cutting down on sugar and fat content. The result? A brownie that rivals your favorite bakery’s offering but that you can feel good about eating — what’s not to love?

Now, let’s talk about the scent that envelops your kitchen as these brownies bake. There’s something inexplicably comforting about the smell of chocolate wafting through the air, and when you add the warm, earthy notes of zucchini, it transforms your home into a cozy bakery haven. It’s an olfactory adventure that invites family and friends to gather around, drawn in by the sweet aroma of something delightful baking. As the brownies cool, the anticipation builds, and you’ll find it hard to resist sneaking a piece (or two) before they’re fully cooled!

A batch of zucchini brownies isn’t just a quick fix; it also doubles as a great way to incorporate seasonal produce into your diet. Zucchini is often abundant in summer, and what better way to enjoy the bounty of the season than by turning them into a mouthwatering treat? When you buy fresh zucchini at your local market or farm stand, you’re not only supporting your community but also ensuring that your brownies are made with the best ingredients possible.

These zucchini brownies are ideal for various occasions. Want to impress at a potluck? Bring along a plate of these luscious treats for a guaranteed hit! Feeling like a cozy weekend activity with friends? Get together and make a batch, and then have fun customizing them with toppings and mix-ins. They’re also the perfect way to celebrate a birthday, a cozy movie night, or even just an ordinary day that deserves a little sweetness. Treat yourself or share them with loved ones — either way, these brownies are certain to bring smiles and satisfaction.

Moreover, zucchini brownies have yet another ace up their sleeve: their incredible storage quality. These treats can be made in advance, stored in an airtight container, and enjoyed over several days, making them a fantastic option for meal prepping or keeping your fridge stocked with sweet healthful snacks. No more last-minute dashes to the store for dessert; when you have these brownies on hand, you’ll always have a delicious option ready to enjoy!

So, whether you’re a chocolate lover, a health enthusiast, or just someone who enjoys exploring new culinary adventures, zucchini brownies are a must-try dish that takes traditional brownie recipes and gives them a delightful twist. They embody the spirit of wholesome comfort food while ensuring that you delight in each rich, fudgy bite. Ready to transform your perception of healthy desserts? Let’s roll up our sleeves and start baking some mouthwatering zucchini brownies that will leave everyone clamoring for the recipe!

Ingredients

  • 1 cup grated zucchini, excess moisture squeezed out
  • 1/2 cup almond flour
  • 1/4 cup unsweetened cocoa powder
  • 1/2 cup maple syrup or honey
  • 1/4 cup coconut oil, melted
  • 2 large eggs
  • 1 tsp vanilla extract
  • 1/2 tsp baking soda
  • 1/4 tsp salt
  • 1/2 cup dark chocolate chips or chopped nuts (optional)

Instructions

  • Preheat your oven to 350°F (175°C) and grease an 8×8 inch baking pan or line it with parchment paper for easy removal.
  • In a large mixing bowl, combine the grated zucchini, almond flour, cocoa powder, baking soda, and salt, mixing until well incorporated.
  • In a separate bowl, whisk together the maple syrup (or honey), melted coconut oil, eggs, and vanilla extract until smooth.
  • Pour the wet ingredients into the dry ingredients and gently fold together until just combined. Be careful not to overmix.
  • If desired, fold in the dark chocolate chips or chopped nuts.
  • Spread the batter evenly in the prepared baking pan.
  • Bake for 25-30 minutes or until a toothpick inserted in the center comes out with a few moist crumbs.
  • Allow the brownies to cool completely in the pan on a wire rack before cutting into squares and serving.

Notes

These decadent zucchini brownies are a fantastic way to sneak some vegetables into your dessert while enjoying a rich chocolate flavor. The grated zucchini keeps the brownies moist, and the almond flour adds a delightful nutty taste along with healthy fats. You can adjust the level of sweetness by choosing between maple syrup or honey, depending on your preference. For an extra indulgence, consider adding dark chocolate chips or your favorite nuts for added texture. These brownies are gluten-free and can be stored in an airtight container for several days, making them a great treat to enjoy throughout the week. Serve warm with a scoop of vanilla ice cream for a delightful dessert!

Faq

What are Zucchini Brownies?

Zucchini Brownies are a deliciously moist dessert made by incorporating grated zucchini into a traditional brownie batter, adding natural sweetness and moisture while reducing the amount of flour needed.

Are Zucchini Brownies healthy?

Yes, Zucchini Brownies can be a healthier alternative to traditional brownies, as they provide additional nutrients from zucchini and can be made with whole grain flours, natural sweeteners, and even healthier fats.

Can I taste the zucchini in the brownies?

No, when properly made, the flavor of the zucchini is subtle and often undetectable. The cocoa and other ingredients mask the zucchini’s flavor, making the brownies delicious.

How do I store Zucchini Brownies?

Zucchini Brownies can be stored in an airtight container at room temperature for up to 3 days or in the refrigerator for up to a week. They also freeze well for up to 3 months.

Can I use frozen zucchini in the recipe?

Yes, but make sure to thaw and drain the excess moisture from frozen zucchini before adding it to the batter to maintain the right consistency.

What can I substitute for sugar in Zucchini Brownies?

You can use natural sweeteners like honey, maple syrup, or even mashed bananas as substitutes for sugar. Adjust the liquid ingredients accordingly if using liquid sweeteners.

Are Zucchini Brownies suitable for gluten-free diets?

Yes, you can make Zucchini Brownies gluten-free by using a gluten-free flour blend or almond flour in place of traditional all-purpose flour.

Can I add nuts or chocolate chips to the Zucchini Brownies?

Absolutely! Adding chopped nuts or chocolate chips can enhance the flavor and texture of the brownies. Just fold them into the batter before baking.