Introduction / Hook
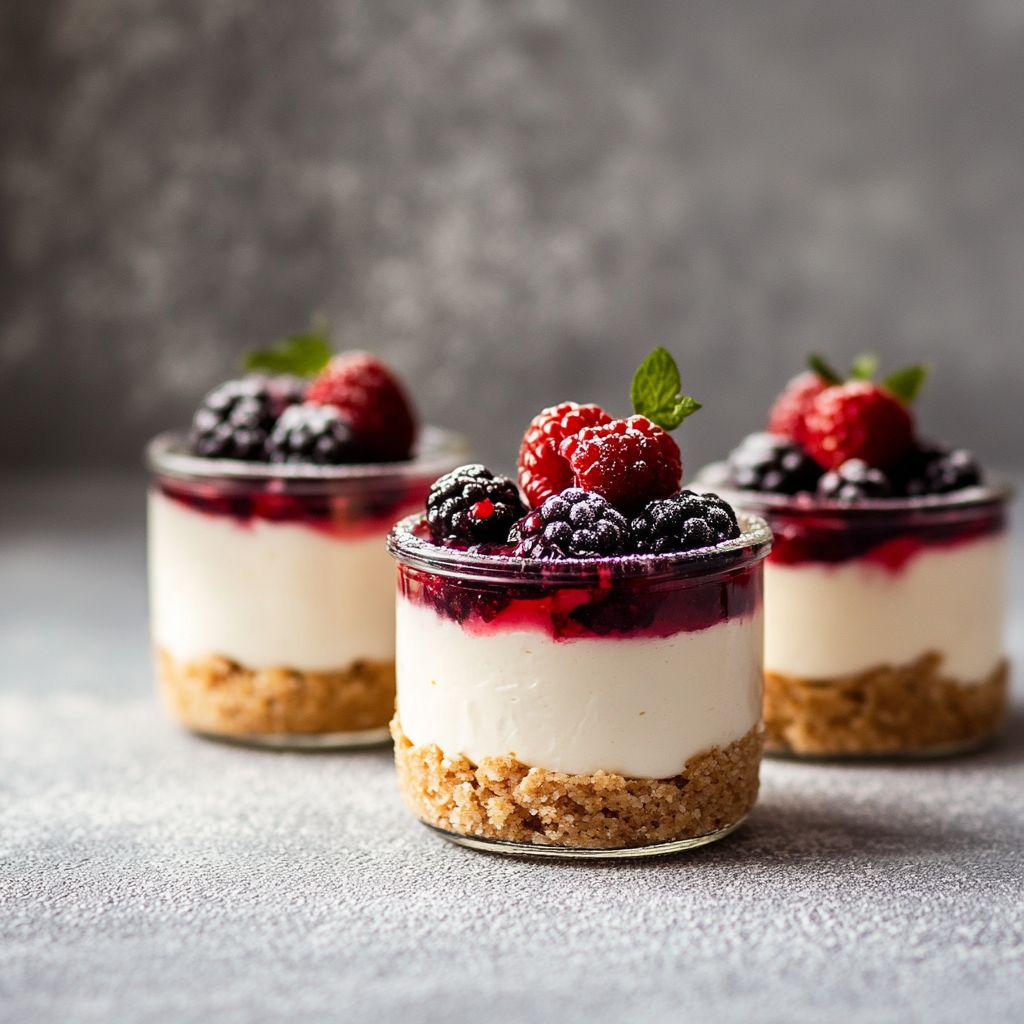
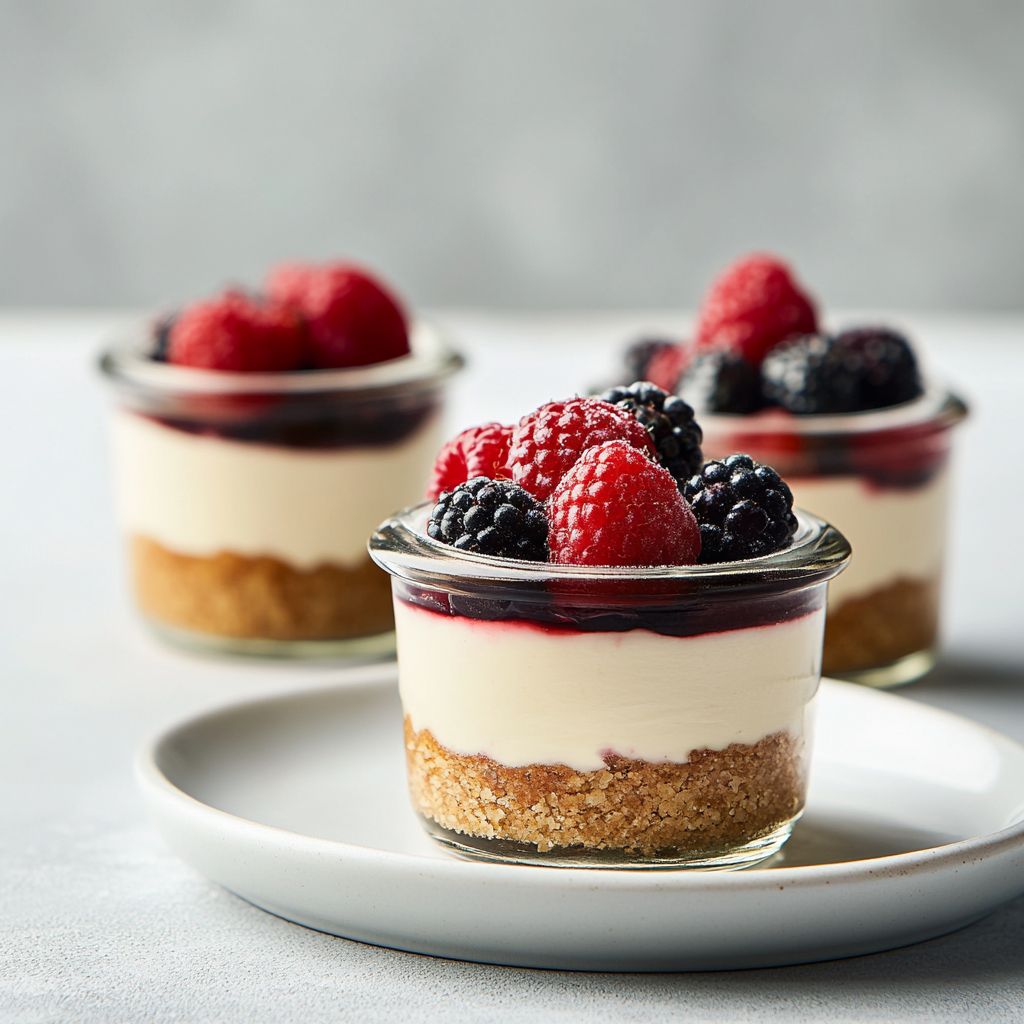
Imagine peeling back the lid of a small glass jar and revealing a cloud of silky, lemon-kissed cheesecake tucked inside, layered with a crumbly, oat-tinged crust, and a glossy ribbon of berry compote catching the light. Picture biting into it and feeling how the first spoonful dissolves on your tongue—creamy, bright, and just the right amount of tang—followed by a subtle nutty crunch from the crust. Now imagine this same indulgence, but crafted with protein-rich cottage cheese to fuel your day rather than slow you down. Protein Cottage Cheesecake Jars are the kind of dessert that fits neatly into a busy schedule: prepared in advance, portion-controlled, and satisfying enough to double as a post-workout treat, a midday pick-me-up, or a weekend brunch centerpiece. The magic lies in balance—creamy dairy, gentle sweetness, a whisper of vanilla, and a chorus of fresh fruit or a swipe of chocolate almond butter—so you get indulgence without guilt, energy without crash, and comfort without heaviness.
This dessert invites you into a world where healthful ingredients harmonize with comforting nostalgia. The cottage cheese base offers creaminess without the heaviness of traditional cheesecake, while a light touch of yogurt or cream cheese can smooth the texture even further. The jars themselves are not just cute; they are practical. They travel easily, stack neatly in the fridge, and make portion control feel effortless. In a culture that often swings between “too healthy to enjoy” and “too indulgent to feel good afterward,” these jars sit in the sweet spot: dessert-as-sensible, dessert-as-nourishment, dessert-as-a small celebration. Every element is designed to be accessible—no exotic ingredients required, but room for you to improvise and make it your own. If you’re a busy caregiver, a student, an athlete in the middle of training, or simply someone who loves a bright, satisfying finish to a meal, you’ve found a recipe that respects your schedule while rewarding your senses.
Beyond the jar: think about the aroma that fills your kitchen as you swirl in vanilla, citrus zest, or a hint of cinnamon. Consider the way you can customize textures—from a smoother, spoon-friendly cream to a more chewy, almost-fudge-like layer. And once you’ve tasted the base, you’ll discover how the topping can pivot the entire experience: citrusy brightness, seasonal berries, roasted nuts for crunch, or a swirl of dark chocolate for decadence. It’s a dessert that invites curiosity, creativity, and a little bit of play in the kitchen, without demanding advanced technique or long, costly ingredients. The result is a dessert that feels special enough for guests and practical enough to share with the ones you love most—perfect for weeknights and weekend breakfasts alike.
The Story Behind the Dish
The idea of a cheesecake that travels in a jar is rooted in the modern appetite for portable, protein-forward desserts. Cottage cheese has long been a pantry staple in many households—priced accessibly, high in protein, and pleasantly adaptable. In a world where time is precious and wellness is personal, cooks began looking for ways to preserve the creamy texture of cheesecake without the richness that weighs you down. Cottage cheese, with its curd-like bite and mild tang, became a natural hero for this mission. It’s a humble ingredient that invites transformation: whipped to silk, blended with a splash of yogurt for extra creaminess, folded with a touch of vanilla and citrus, and set not in a heavy cake pan but in individual jars that encourage mindful portions.
The jar trend itself has a backstory in the “meal prep” movement, where food that is pre-portioned, visually appealing, and easy to grab wins hearts and calendars. Layering textures became as important as layering flavors—creating a narrative you can see on the jar lid and taste with every spoonful. The approach also speaks to a wholesome philosophy: desserts don’t have to be a luxury you regret after, they can be an everyday pleasure that fits your health goals. In many ways, Protein Cottage Cheesecake Jars are a tribute to that shift—dessert as a kind of nourishment, a celebration of simple ingredients, and a flexible canvas for seasonal produce and personal preferences.
There’s a touch of nostalgia too. Cheesecake evokes birthdays, family gatherings, and late-night conversations with friends. By presenting cheesecake in small jars, this recipe preserves that sense of warmth while updating it for contemporary kitchens. The jars make it easy to share, easy to portion, and easy to rotate through flavors—from lemon-blueberry to chocolate-strawberry to a rich cocoa-nut version—so you can keep the idea fresh while staying anchored to the core concept: a protein-rich, creamy cheesecake that travels with you and still feels like a special treat.
Why You’ll Love This Recipe
- High-protein dessert: The cottage cheese base contributes a substantial protein boost, making this a more satisfying end to a meal or a post-workout treat than traditional cheesecake.
- Portable and portion-controlled: Individual jars mean no carving and no leftovers begging to be eaten later; perfect for lunch boxes or on-the-go snacking.
- Versatile and forgiving: The base works with many flavor profiles, from citrusy brightness to deep chocolate richness, and can be customized for dairy-free or gluten-free diets.
- Make-ahead convenience: These jars are ideal for meal-prep Sundays or busy weeks—set, chill, and you’re done for several days.
- Balanced sweetness: A gentle sweetness level keeps the dish accessible, while you can dial up or down with toppings and fruit choices.
- Kid-friendly and crowd-pleasing: Creamy textures and familiar flavors appeal to younger palates while still exciting adults with nuanced notes like vanilla, lemon zest, or almond.
- Visual appeal: The glass jars turn dessert into a presentation—layered textures, vibrant fruit coulis, and a glossy top layer that invites a close look and a big spoonful.
- Healthy comfort with room for indulgence: You don’t have to sacrifice comfort for health; this recipe strikes a harmonious balance between nourishment and pleasure.
Flavor Profile & Texture
The flavor of Protein Cottage Cheesecake Jars starts with a gentle tang from cottage cheese, complemented by the creamy smoothness of yogurt and a whisper of vanilla. The lemon zest or a splash of citrus offers a bright lift that cuts through the richness, leaving a clean, refreshing finish on the palate. When you bite through the crust layer—made from oats, a touch of butter or dairy-free butter alternative, and perhaps a pinch of cinnamon—you get a welcome warmth and a comforting nutty note that lingers. The contrast between a slightly chewy or crumbly crust and a velvety cheesecake center creates a satisfying textural dynamic that keeps you reaching for another jar.
Texture is everything in this dessert. The cottage cheese needs to be blended or whirred until silky, so there is no gritty mouthfeel. If a lighter texture is desired, a few tablespoons of strained yogurt or a cream cheese alternative can be folded in to smoothness. The top layer can range from a crisp gloss of berry compote to a matte, almost satin finish of pureed fruit, to a delicate drizzle of dark chocolate or almond butter. In every version, you experience a gentle balance: the tang of dairy meets mellow sweetness, the citrus fragrance awakens the senses, and the crumb provides a satisfying bite that anchors the dessert in a familiar, comforting way.
From a nutritional perspective, this dessert favors steady energy over quick spikes. The protein helps with satiety, the natural sweetness from fruit or maple syrup can be moderated to fit your macro goals, and the oats contribute fiber that supports digestion. The result is a dessert that you can savor slowly, rather than inhale in one rapid rush, which is a rare and welcome quality in today’s fast-paced food culture.
Occasions & Pairings
These jars are versatile enough to appear in several settings, transforming a simple dessert into a charming centerpiece or a practical snack. They shine as:
- Post-workout treats that help rebuild and refresh after a session, thanks to their protein content and satisfying texture.
- Meal-prep options for weekday breakfasts or afternoon cravings, offering a tasty start to the day or a mid-day energy lift.
- Party pleasers at potlucks, brunches, or kid-friendly gatherings—easy to transport, easy to serve, and easy to adapt to guest preferences.
- Vacation-friendly snacks for beach days or road trips, because they’re portable and can be kept in a cooler for hours.
Pairings can elevate the experience. Consider these ideas to complement the jars:
- Drinks: a lightly brewed coffee, an espresso, or a cold sparkler to balance the dairy richness and enhance the citrus notes.
- Side dishes: a simple almond-crusted muffin, a light fruit salad, or a handful of roasted nuts to introduce a crunchy counterpoint.
- Dessert pairings: a small square of dark chocolate, a dollop of whipped coconut cream, or a spoonful of berry compote to mirror the jar’s flavors.
- Seasonal twists: summer berries for brightness, autumn apples with cinnamon, or citrusy tang with grapefruit or mandarin segments.
Flavor Profile & Texture (Deep Dive)
In practice, you’ll often begin with a base that is both familiar and comforting: a cheesecake that feels like a reward, yet lighter in body. The cottage cheese is the star here—its texture, when blended smooth, mirrors the creaminess of traditional cheesecakes but with a personality that is a touch airy and bright. The vanilla brings warmth, while a hint of citrus—zest from lemon or orange—adds a zing that prevents the dish from feeling too rich. If you prefer a more decadent chocolatey vibe, you can fold in cocoa powder or use a chocolate-flavored protein powder to transform the flavor profile without losing the integrity of the jar format.
The crust, composed of oats, perhaps a little ground nuts, and a binding element such as a small amount of honey or maple syrup, provides a gentle crunch. This contrast is critical: a purely soft filling can feel indulgent, but the crust’s texture introduces structure and a subtle, toasty depth. When you top the jars with a berry compote, you invite sweetness that doesn’t overwhelm; the fruit’s natural acidity brightens the entire experience, and those glossy red or purple tones are visually irresistible. If you opt for a fresh fruit topping, you’ll notice the crisp bite of berries and a burst of juiciness that makes each spoonful feel like a celebration.
Texture mastery also shines in the mouthfeel of the finished product. A properly blended cottage cheese base should be luxuriously smooth, almost like a light cheesecake mousse. If you notice a slight graininess, a quick blitz in the blender or food processor can remedy it. The final structure should hold without being overly stiff, allowing a gentle melt as you scoop. The top layer, whether glossy with jam or lightly set with a fruit puree, should have a slight sheen that hints at the serenity within. In all its forms, the flavor journey is upward: from the mild tang of the dairy, through the warm vanilla and the citrus’s spark, to the fruity brightness on top, and finally to the satisfying finish of the crust’s toasty crunch.
Tips, Variations & Substitutions
- For a dairy-free version: swap regular cottage cheese for a dairy-free alternative designed for texture, such as blended silken tofu with almond milk ricotta or a plant-based cream cheese spread. Use a dairy-free yogurt and vanilla extract to maintain creaminess.
- Protein powder options: whey protein, casein, or plant-based blends all work. If the texture becomes too thick with plant-based powders, loosen with a splash of milk (or non-dairy milk) and a touch of lemon juice to maintain brightness.
- Crust variations: mix rolled oats with crushed almonds or walnuts, a spoonful of nut butter, and a pinch of salt. Use ghee, butter, or a dairy-free butter substitute to bind; you can also press in a little chopped nuts for extra crunch.
- Flavor twists: lemon zest with blueberries; orange zest with dark chocolate shavings; cocoa and raspberry; or vanilla with roasted pecans and a drizzle of maple syrup.
- Low-sugar approach: use unsweetened yogurt and berries; rely on the natural sweetness of fruit. If you need a sugar substitute, choose a mild option like monk fruit or stevia, but test to avoid an aftertaste.
- Gluten-free: ensure your crust mix uses certified gluten-free oats and check any add-ins for gluten-free labeling if you’re serving someone with celiac disease.
- Mini versions: scale down to smaller jars for precise portions or larger jars for a more indulgent dessert; the concept stays the same.
- Vary the protein density: if you want a lighter dessert, use a bit less cottage cheese and add in extra yogurt; for a denser cheesecake, add a touch more cream cheese or a small amount of cream.
Storage & Make-Ahead Ideas
The beauty of these jars lies in their make-ahead practicality. After assembling, chill them thoroughly to allow the flavors to meld and the layers to set. When stored properly, they stay fresh and tasty for several days, making them excellent for meal-prep routines or for hosting guests with minimal last-minute effort.
Storage tips:
- Refrigerate in the jars with lids tightly closed for up to 3–5 days. Keep toppings separate or add them just before serving to preserve texture and color, especially for citrus and berry toppings that may discolor over time.
- Freezing: you can freeze the base (without toppings) for up to 1 month. Thaw in the fridge overnight and reassemble with fresh toppings if desired. Note that freezing may slightly alter the texture of dairy-based fillings, so plan accordingly if you crave a perfectly smooth finish after thawing.
- Make-ahead strategy: prepare the crusts and fillings separately, then assemble the jars a day ahead. This approach ensures the crust remains crisp and the filling retains maximum creaminess.
- Transportability: for trips, use jars with tight-sealing lids and place a small, insulated bag in your tote to keep them cool during transit.
Fun Facts & Trivia
– Cottage cheese, once a humble, time-honored pantry staple, has a long history dating back to early 20th-century dairy culture, where simple, high-protein foods were valued for their versatility and minimal processing. Its resurgence in modern wellness cooking highlights a sustainable loop: a straightforward ingredient becoming a star in nutrition-forward, crave-able recipes.
– The jar dessert trend has roots in both practicality and aesthetic appeal. Mason jars and similar vessels made it easy to transport, layer, and present food in an organized, gallery-worthy way. It’s the same logic that makes parfaits and overnight oats so popular, but cheesecake in a jar adds a decadent twist that remains unmatched in convenience.
– Protein-forward desserts challenge the stereotype that sweets must be heavy or unhealthy. By balancing dairy, protein, and fruit, you can satisfy cravings while supporting muscle repair and satiety—an appealing concept for athletes, students, and busy professionals alike.
– The flexibility of this concept invites regional twists. In coastal regions, you might see coconut-lime flavors with shredded coconut and pineapple; in farm country, apples with cinnamon and a crumbly oat topping can carry a rustic charm; in urban kitchens, you might find espresso-chocolate combinations that pair perfectly with a morning cup of coffee.
Closing Thoughts
Protein Cottage Cheesecake Jars offer more than a dessert; they offer a small ritual of self-care that fits into the rhythm of daily life. They invite you to slow down just enough to savor a moment of creamy satisfaction, then jump back into your day with a pep of protein and a burst of citrus brightness. They celebrate the idea that nourishing food can also be delightful, portable, and visually appealing. Whether you’re preparing a batch for the week, sharing jars with friends, or treating yourself after a workout, these jars deliver a balanced, comforting, and irresistibly tasty experience. So gather your jars, pull out your favorite toppings, and let the creamy mornings begin—one spoonful at a time.
Ingredients
-
– Crust
– 1 cup crushed gluten-free graham crackers (about 130 g)
→ The crust forms the base for the jars, providing a gentle sweetness and a light, crumbly texture. Use fine crumbs so the layer presses evenly into the jars. If you’re avoiding gluten, ensure crackers are certified gluten-free and crush to a consistent, sand-like texture. Melted butter is mixed in to bind the crumbs, helping the crust hold together when the jars are chilled.
– 2 tablespoons unsalted butter, melted
→ Binds the crust crumbs into a cohesive, pressable base that holds its shape when filled and refrigerated. Use it warm so it blends smoothly with the crumbs, and press the mixture firmly into the bottom of each jar for an even layer. For dairy-free options, substitute with melted coconut oil in the same amount, noting it may add a subtle coconut note.
– Filling
– 1 cup well-drained cottage cheese, blended until smooth (about 240 g)
→ The star of this cheesecake, providing protein and a creamy body. Drain well to remove excess whey, then blend until silky smooth to avoid graininess. If your blender leaves tiny lumps, press the puree through a fine sieve after blending for an ultra-smooth texture that pipes or scoops easily into jars.
– 8 oz cream cheese, softened to room temperature (about 225 g)
→ Adds richness, stability, and a velvety mouthfeel that supports the lighter cottage cheese. Soften fully to prevent lumps and blend with cottage cheese until homogeneous. If dairy-free, use an equal amount of dairy-free cream cheese as a substitute with the same softening step.
– 1/2 cup plain Greek yogurt (about 120 g)
→ Contributes tang and extra creaminess while lightening the density of the filling. Use thick, strained yogurt for best results; avoid runny varieties. If you’re avoiding dairy, substitute with an equal amount of thick coconut yogurt or omit entirely and compensate with extra cottage cheese and protein powder.
– 1 scoop vanilla protein powder (about 30 g) (whey or plant-based)
→ Increases protein content and adds a pleasant vanilla note. Choose a smooth-blending powder to minimize grittiness; if your powder is unflavored or already sweet, you may adjust sugar or vanilla accordingly. If you don’t use protein powder, increase cottage cheese to maintain filling volume.
– 1/3 cup granulated sugar (adjust to taste)
→ Provides sweetness to balance tangy dairy; the exact amount can be reduced if your protein powder is sweet or if you prefer a less sweet dessert. For lower sugar, consider 2–3 tablespoons and rely on the vanilla and fruit topping for sweetness.
– 1 teaspoon vanilla extract
→ Central flavor that ties all dairy elements together. Use pure vanilla extract for the richest aroma; if desired, substitute with vanilla bean paste (increase by 1/2 teaspoon and scrape seeds from one vanilla bean).
– 1 tablespoon lemon juice
→ Brightens the filling and helps cut the richness of the dairy. Freshly squeezed lemon juice yields the freshest flavor; you can also add lemon zest (see below) for more aroma without adding extra liquid.
– 1 teaspoon lemon zest (optional but recommended)
→ Adds a fresh, citrusy aroma that complements the vanilla and dairy without overpowering the cheesecake. Grate only the yellow part of the lemon to avoid bitterness from the white pith. If you don’t have a lemon, substitute with a small drop of orange zest for a milder citrus note.
– Pinch of fine sea salt
→ Enhances sweetness and depth of flavor, balancing the richness of the dairy. If your cottage cheese is particularly salty, you may reduce or omit this pinch to taste.
– 2–3 tablespoons milk (any kind; dairy or non-dairy) as needed to loosen the filling
→ Use gradually to achieve a silky, pipe-able consistency without making the mixture runny. Add milk a little at a time and blend until you reach a thick, spoonable texture that fills the jars smoothly.
– Optional Add-ins
– 2 tablespoons mini dark chocolate chips (optional)
→ A few chocolate chips add pleasant pockets of sweetness and richness. Fold in gently at the end to distribute evenly without sinking. Use mini chips to prevent heavy areas that could cause cracking on chilling.
– 1 tablespoon chia seeds (optional)
→ For a slight crunch and a subtle thickening as the seeds hydrate. If using chia, let the filling rest for 5–10 minutes after mixing so the seeds swell before filling the jars. Note that this will thicken the filling slightly; adjust milk accordingly.
– 1/4 cup chopped almonds or walnuts (optional)
→ Adds a toasty crunch and nutty depth. Toast the nuts lightly before chopping to bring out flavor, and chop finely so they distribute evenly and don’t puncture the smooth filling.
– Toppings
– 1/2 cup fresh berries (blueberries, strawberries, raspberries, or a mix) for topping
→ Fresh fruit provides brightness, moisture, and color on top. Rinse and pat dry, then arrange on the surface just before serving. If berries are particularly juicy, you can macerate with a teaspoon of sugar and a splash of lemon juice for a glossy finish, then spoon over the jars.
– 2 tablespoons berry compote or sauce (optional)
→ A glossy layer that intensifies berry flavor and sweetness. Simmer berries with a splash of water and a touch of sweetener until saucy; cool completely before drizzling on top to avoid soggy crust.
– Fresh mint leaves for garnish (optional)
→ A hint of color and aroma to finish. Tear or finely chop just before serving to release essential oils, and place a leaf atop each jar for a clean, fresh presentation.
Instructions
- Chill the glass jars and mixing tools in the refrigerator for about 10 minutes before assembly to ensure the crust and filling set evenly and don’t warm too quickly.
→ Cold surfaces help the crust set firmly and keep the filling silky as you layer it into the jars, preventing bubbling or sliding while piping. - Crush gluten-free graham crackers to a uniform fine crumb measuring 1 cup (about 130 g) using a food processor or by sealing in a zip-top bag and crushing with a rolling pin until no large bits remain.
→ Fine crumbs press evenly into the jar bottoms for a cohesive base; coarse crumbs can create gaps and crumble later. - Melt 2 tablespoons unsalted butter gently until completely liquid, then whisk it into the 1 cup crumb mixture until the texture resembles wet sand and holds its shape when pressed.
→ The melted butter binds the crust so it maintains structure when chilled and filled; ensure the butter is warm but not hot to avoid hardening crumb pieces. - Divide the crumb-butter mixture evenly among the bottom of each jar and press firmly with the back of a spoon or a small flat-bottomed tamper to create a compact, even crust layer about 2–3 mm thick.
→ A uniform crust base yields consistent bites and prevents air pockets that could cause cracking or crumbling later. - Refrigerate the jars with the crust for 8–10 minutes to set the butter and firm the base.
→ A brief chill helps the crust lock into place so the filling can sit atop without shifting or leaking into the jar edges. - Drain 1 cup cottage cheese well in a fine-mesh sieve over a bowl, pressing with the back of a spoon to remove as much whey as possible, then let it drain for 5–10 minutes.
→ Removing excess moisture prevents a runny filling and yields a smoother, silkier texture that pipes cleanly into the jars. - Blend the drained cottage cheese until completely smooth using a blender or food processor; if any tiny lumps remain, pass the puree through a fine sieve to achieve ultra-smoothness.
→ A velvety base avoids gritty mouthfeel and ensures the filling holds its shape when chilled. - Allow the 8 oz cream cheese (about 225 g) to come to room temperature, then beat it with the cottage cheese until homogeneous and creamy, scraping the bowl as needed for even texture.
→ Room-temperature cream cheese blends more easily with cottage cheese, producing a stable, lush filling without lumps. - Add 1 cup plain Greek yogurt, 1 scoop vanilla protein powder, 1/3 cup granulated sugar, 1 teaspoon vanilla extract, 1 tablespoon lemon juice, and optional 1 teaspoon lemon zest and a pinch of fine sea salt; blend until the mixture is uniformly smooth and glossy.
→ Yogurt adds tang and creaminess; protein powder boosts nutrition and helps stiffen the filling; vanilla and citrus lift the overall aroma and balance the richness. Scrape the sides periodically to maintain even texture. - With the blender running on low or by folding with a spatula, gradually stream in 2–3 tablespoons milk, adding a little at a time until the filling reaches a thick, pipeable consistency that holds a gentle peak when tested with a spoon. Stop before the mixture becomes pourable.
→ Proper moisture yields a filling that pipes cleanly and fills the jars smoothly without slumping during chilling. - If using add-ins, fold in 2 tablespoons mini dark chocolate chips, or 1 tablespoon chia seeds (let the mixture rest 5–10 minutes to hydrate if used), or 1/4 cup chopped almonds or walnuts; distribute evenly by gentle folding to avoid deflating air bubbles.
→ Add-ins provide texture and flavor without destabilizing the filling; resting chia seeds ensures they hydrate properly for the desired bite. - Spoon or pipe a generous layer of filling over the crust in each jar, leaving about 1/4 inch (6 mm) of headspace; tap the jars lightly on the counter to release any trapped air and smooth the tops with the back of a spoon.
→ Proper portioning and air removal prevent pockets that can cause cracking and ensure a neat, uniform presentation. - Wipe rims clean and refrigerate the assembled jars, uncovered or loosely covered, for at least 2–4 hours or overnight to allow the filling to set fully and flavors to meld.
→ Chilling firming the filling improves texture and makes serving cleaner; overnight chilling intensifies vanilla and citrus notes. - Before serving, rinse and pat dry 1/2 cup fresh berries; if desired, macerate with 1 teaspoon sugar and a splash of lemon juice for 10 minutes to create a glossy topping.
→ Berries add brightness, moisture, and color; maceration enhances sweetness and juiciness for a more alluring finish. - Top each jar with fresh berries and, if using, 2 tablespoons berry compote or sauce; finish with a fresh mint leaf for aroma and a polished presentation.
→ The toppings provide contrast in texture, moisture, and color, elevating the overall dessert and giving a vibrant, restaurant-style finish. - Store any un-topped jars in the refrigerator and consume within 2–3 days for best texture and flavor.
→ Dairy-based desserts can soften or dull in flavor over time; shorter storage preserves the creamy structure and bright taste.

Notes
These Protein Cottage Cheesecake Jars are a creamy, protein-packed dessert you can customize with your favorite toppings and mix-ins. For a sturdy, even crust, crush gluten-free graham crackers to a fine sand-like texture and mix with melted butter; press firmly into the bottom of each jar and chill briefly so the base sets before filling. To achieve a ultra-smooth filling, drain the cottage cheese well and blend until silky; if any small lumps remain, push the purée through a fine sieve. Beat softened cream cheese with thick Greek yogurt, vanilla protein powder, sugar, vanilla extract, lemon juice, and optional lemon zest, plus a pinch of salt, then blend in milk a little at a time until the mixture is thick and pipeable. If you need a dairy-free version, substitute dairy-free cream cheese and yogurt and use a plant-based milk; you may also increase cottage cheese by a little to maintain creaminess. If your protein powder is sweet, reduce added sugar to 2–3 tablespoons and rely on the lemon and vanilla for balance. Fold in any optional add-ins like mini chocolate chips, chia seeds, or chopped almonds or walnuts, distributing evenly so they don’t sink or puncture the filling. To assemble, spoon or pipe the filling over the set crust in each jar, then refrigerate for at least 2–4 hours or overnight until firm. Top with fresh berries or a quick berry compote and, if desired, a mint leaf for color. These jars store well in the fridge for up to 4 days and can be frozen for longer storage; thaw in the fridge before serving. Always ensure your ingredients (crackers, cream cheese, yogurt, and protein powder) are certified gluten-free if you have gluten intolerance.
Tips
Tips for Perfect Protein Cottage Cheesecake Jars
Crust tips
- Crush crackers to a fine, sand-like texture for an even, cohesive crust. Use a food processor or place them in a resealable bag and crush with a rolling pin for uniform crumbs.
- Toast gluten-free crackers lightly if you want a deeper flavor, but avoid browning too much to prevent bitterness. Ensure gluten-free labeling if avoiding gluten.
- Mix melted butter with the crumbs until the mixture resembles damp sand. Press firmly into the bottom of each jar using the back of a spoon or a flat-bottomed glass for an even, compact base. Chill briefly before filling to help it set.
- For dairy-free options, substitute melted coconut oil in equal amounts. Note that coconut oil can add a subtle coconut note to the crust.
Filling tips
- Drain cottage cheese very well to remove whey. For a silkier texture, blend until completely smooth, then pass through a fine sieve if any small lumps remain.
- Softened cream cheese blends best when at room temperature. If using dairy-free cream cheese, ensure it’s truly soft and blends smoothly with cottage cheese.
- Choose thick, strained Greek yogurt for extra creaminess and tang without adding too much moisture. If dairy-free, use thick coconut yogurt or adjust with additional cottage cheese.
- Use a smooth-blending vanilla protein powder and fold in gradually to avoid grittiness. If you skip the powder, increase cottage cheese volume or adjust with a bit more yogurt.
- Taste and adjust sweetness before filling jars. If your protein powder is sweet, reduce sugar; if not, balance with a touch more vanilla or a hint of lemon.
- Add lemon juice to brighten the filling; lemon zest is optional but recommended for a fresh aroma. Grate only the yellow zest to avoid bitterness from the pith.
- Whisk in a pinch of fine sea salt to enhance flavors, especially if your dairy products are very mild.
- To achieve a scoopable, pipe-able texture, add milk gradually while blending. Stop as soon as the filling loosens enough to fill jars smoothly but isn’t runny.
Optional add-ins tips
- Mini chocolate chips add pockets of sweetness; fold them in at the end to prevent sinking and ensure even distribution.
- Chia seeds provide a subtle crunch and thicken the filling as they hydrate. If using chia, let the mixture rest 5–10 minutes before filling to allow hydration; you may need a touch more milk.
- Toast chopped almonds or walnuts to bring out nutty depth; chop finely so they distribute evenly and don’t puncture the smooth filling.
Topping tips
- Fresh berries add brightness and moisture. Rinse and pat dry. If berries are very juicy, macerate briefly with a pinch of sugar and a splash of lemon juice for a glossy finish, then spoon on top.
- Berry compote or sauce intensifies berry flavor; cool completely before drizzling to avoid soggy crust.
- Fresh mint leaves provide color and aroma; tear leaves just before serving to release essential oils and place on each jar.
Makes-ahead and storage
- Prepare the crust ahead and press into jars; store in the fridge until ready to fill.
- The filling can be made a day or two ahead; refrigerate, then portion into jars when ready to fill. Chill the filled jars for at least 2–4 hours or overnight for best setting.
- For longer storage, freeze filled jars un-topped; thaw in the fridge and add toppings after thawing if desired.
Equipment and technique tips
- Fill jars with a piping bag for clean, even layers, or use a sturdy spoon and smooth the top with the back of a spoon.
- Use jars of similar size to ensure even crust depth and uniform servings.
- Chill the completed jars thoroughly—2–4 hours minimum, but overnight yields the neatest slices.
- Label jars with date and flavor notes if making multiple batches or gifts.
FAQ
Protein Cottage Cheesecake Jars — FAQ
Answers to common questions about making Protein Cottage Cheesecake Jars.
What are Protein Cottage Cheesecake Jars?
They’re individual, no-bake cheesecake fillings (often layered) stored in small jars. The filling combines cottage cheese, Greek yogurt, and protein powder for a creamy, high-protein dessert or breakfast. A crust is optional for extra texture, and the jars are ready to chill and enjoy.
What ingredients do I need?
Core filling: cottage cheese, plain Greek yogurt, protein powder (vanilla works best), a sweetener of choice (maple syrup, honey, or a sugar substitute), vanilla extract, and a pinch of salt if desired. Optional crust: crushed graham crackers or rolled oats with a little melted butter or nut butter. Toppings ideas: fresh berries, cocoa powder, melted chocolate, or a drizzle of nut butter.
Do I need a crust, and what can I use?
The crust is optional. For a quick crust, mix crushed graham crackers with a little melted butter and a pinch of salt, then press into the jar bottoms. You can also use crushed oats with a bit of nut butter or almond flour for a gluten-free crust. Dairy-free or vegan options can use shredded coconut or vegan crackers as a crust substitute.
How do I assemble and set them?
1) Blend the cottage cheese, Greek yogurt, protein powder, sweetener, vanilla, and salt until smooth. 2) Taste and adjust sweetness. 3) Layer or spoon filling into jars (add crust at the bottom if using). 4) Chill in the fridge for at least 2 hours, preferably overnight, to set and thicken.
How long do they last in the fridge?
Stored in an airtight jar in the fridge, they typically keep for up to 4 days. If you added fresh fruit on top, consume within 2 days for best texture and flavor.
Can I freeze Protein Cottage Cheesecake Jars?
Freezing is possible, but may change texture. Freeze in freezer-safe jars for 1–2 months. Thaw overnight in the fridge and gently stir or re-whip before serving. Crust integrity may be affected after freezing.
What protein powder works best?
Vanilla-flavored powders typically give the most versatile flavor. You can use whey, casein, or plant-based proteins. Plant-based blends may require a touch more sweetener. Aim for about 20–25 g protein per serving; adjust sweetness if your powder is very sweet or very bland.
How can I customize flavors and toppings?
Try these ideas: swirl in cocoa powder or caramel sauce; add lemon zest or cinnamon for warmth; fold in peanut butter or almond butter; top with fresh berries, sliced banana, or a drizzle of melted dark chocolate. You can also layer fruit compote between fillings for variety.
Are these suitable for different diets?
They’re dairy-based, so not vegan unless you substitute plant-based yogurt and protein powder. They can be gluten-free if you use gluten-free crust options. Check labels if you have lactose intolerance or dairy allergies. You can tailor sweetness and ingredients to fit your needs.
Yield and how to scale the recipe?
Using standard jar sizes (about 4 oz per jar), the base recipe yields roughly 4–6 jars. To scale up or down, multiply or divide all ingredients proportionally to fit the number of jars you want to make.