Introduction / Hook
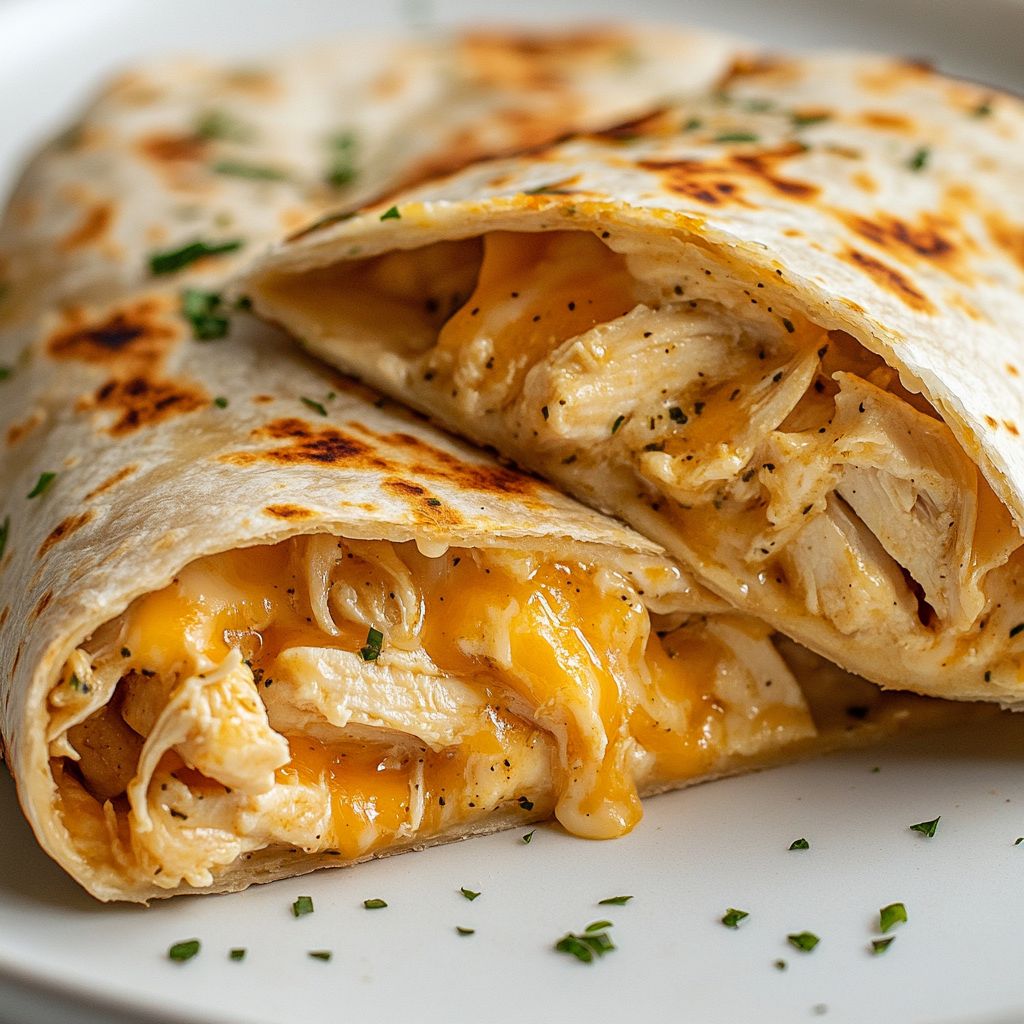
Close your eyes for a moment and imagine the warm glow of a kitchen lamp, the sizzle of a searing pan, and the irresistible scent of garlic waking up the air. You bite into something that feels like a cozy hug from the inside out—soft, chewy, and gloriously molten with cheese that stretches in delighted, gooey ribbons. Welcome to Ooey Gooey Cheesy Garlic Chicken Wraps, a recipe that takes all the comfort of a indulgent grilled sandwich and launches it into a portable, weeknight-friendly rhythm. This dish is not merely a meal; it’s an invitation to savor the moment when the wrap breaks open to reveal a treasure trove of tender chicken, garlicky richness, and melty cheese that seems to have learned how to melt with a smile. It’s the kind of dish that makes the whole house smell like a memory you want to relive again and again—crisp tortillas, savory filling, and a finish that lingers with a whisper of char and a kiss of dairy-dreamy goodness. If you’re craving something fast yet deeply satisfying, something you can assemble in minutes and eat with gusto, you’ve found your new weeknight ally, your easy crowd-pleaser, and perhaps a new favorite to tuck into the lunchbox rotation.
The Story Behind the Dish
Every great wrap has a story, and this one began in a kitchen where time was a mischievous thief. It was born from a simple truth: after a long day, there’s something magical about layers—layers of flavor, texture, and comfort—that come together in a single handheld package. A piece of chicken, a blanket of cheese, a whisper of garlic, and a tortilla that acts as both vessel and celebration. The idea grew from a family’s fondness for cozy dinners that travel well, feeding a hungry crew with little fuss and a lot of joy. It’s the kind of dish that travels easily from stovetop to lunchbox, from casual weeknights to a casual dinner party where guests arrive with stories and an appetite that needs a little something extra. The garlic in this dish carries a memory of late-night chats over sizzling skillets, the cheese pulling away in satisfyingly dramatic fashion like a small, edible celebration, and the chicken, perfectly seasoned but never overpowering, serving as a comforting anchor. The wrap itself—soft on the inside, toasty on the outside—brings a sense of completion, a neat seal that keeps the flavors inside and invites you to start again with the first bite. Over time, this combination has become a dependable go-to when you want something that feels homemade, tastes indulgent, and travels well to a crowd or a quiet night in. It’s a dish with a personality: warm, welcoming, a little indulgent, and always a little bit magical in the way it comes together without fuss.
Why You’ll Love This Recipe
- Quick and practical: This wraps up in the time it takes to heat a skillet, melt cheese, and roll up a tortilla, making it a dependable weeknight hero.
- Comforting and indulgent: The combination of garlic-infused chicken and melty cheese creates a comforting, immersive experience in every bite.
- Very forgiving and customizable: Swap proteins, experiment with different cheeses, or add vegetables to suit your mood and pantry.
- Portable and family-friendly: They’re easy to eat on the go, at picnics, or during a casual movie-night rally at home.
- Make-ahead potential: Fillings can be prepared in advance and wrapped up for quick assembly when hunger hits.
- Versatile for crowds: Scale up for a potluck or game night; the familiar flavors appeal to both kids and adults alike.
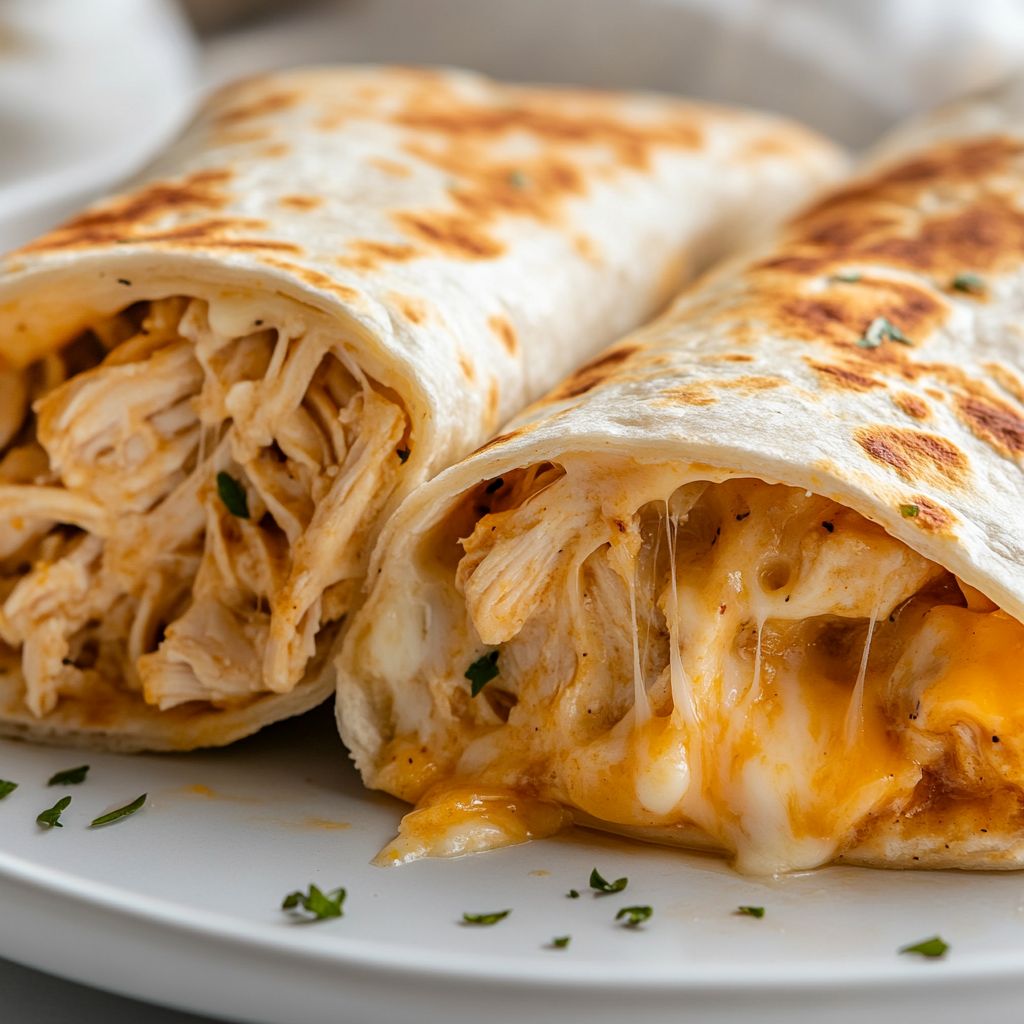
- Texture play: The contrast between a soft tortilla, a juicy interior, and a blistered, lightly crisp exterior creates an engaging bite every time.
Flavor Profile & Texture
At the heart of these wraps is an irresistible trifecta: garlicky, cheesy, and creamy with a satisfying protein foundation. The chicken offers a savory backbone, seasoned in a way that accentuates its natural tenderness without overpowering the delicate cheese pull. Garlic contributes a warm, aromatic bite that lingers in the palate, inviting another mouthful. The cheese, when melted, becomes a velvet layer—smooth, rich, and inviting—binding everything into one cohesive, luscious bite. The tortilla acts as a gentle vehicle, absorbing some of the garlic-scented oils and building a gentle, toasty exterior as it rests on the skillet’s heat. The overall texture is a delightful progression: the first bite yields a tender interior, the middle reveals a generous, oozy stretch of cheese, and the final moment gives a pleasant reminder of the tortilla’s slight crispness and the dish’s savory, almost toasted finish. You’ll notice a balance of creamy and savory notes with a hint of sweetness that might come from the natural caramelization of the chicken and the gentle browning of the tortilla edges. Each element—garlic, chicken, cheese, tortilla—plays a supporting role that allows the others to shine, resulting in a harmonious, crave-worthy experience that feels both deluxe and approachable.
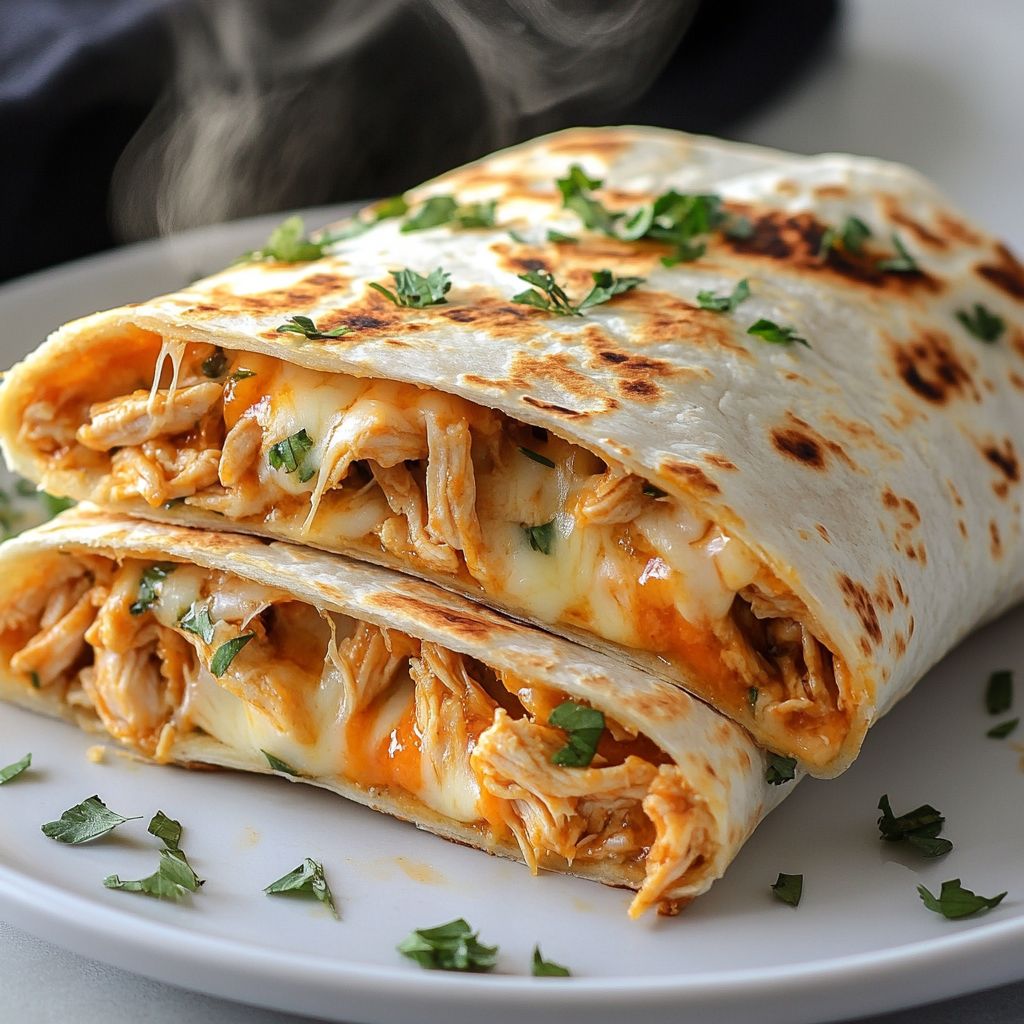
Flavor notes to expect on the palate include: a warm garlic perfume that doesn’t overwhelm, a savory depth from well-seasoned chicken, the luxurious melt of cheese that coats the filling like a silky layer, a touch of toasted tortilla on the exterior for crunch and color, and a faint, comforting saltiness that ties everything together. There’s a gentle brightness that can come from a squeeze of fresh lemon or a light herb finish, depending on your mood or pantry, which helps offset the richness without turning the dish into something tangy or tart. The result is a well-rounded, comforting wrap that exhilarates the senses from first glance to final bite, yet remains perfectly suitable for everyday dining. It’s the kind of dish that makes you smile as you bring it to the table and again as you take the first bite, knowing you’ve captured a moment of restaurant-quality comfort in a simple, handheld format.
Occasions & Pairings
These Ooey Gooey Cheesy Garlic Chicken Wraps shine across a spectrum of occasions. They’re ideal for weeknights when time is tight but you still crave something special. They’re equally at home at casual gatherings—game nights, potlucks, or a laid-back backyard party—where you want something that’s crowd-pleasing, easy to share, and not fussy to prepare. For lunch, they travel beautifully; wrap them up and take them to work, school, or a picnic, and you’ll have a satisfying, balanced meal that still feels like a treat. If you’re feeding a bigger crowd, set out a little “wrap station” with the fillings warm and the tortillas warm, and let people craft their own creations with a smile.
Pairings to consider include a crisp, refreshing slaw or a bright garden salad to contrast the warmth and richness. A simple avocado or tomato salsa adds a pop of brightness, while a light yogurt-based dip or a mild ranch can offer a creamy counterpoint that echoes the melty cheese without competing with it. For beverages, something cool and lightly sparkling—like an iced herbal tea, lemon water, or a sparkling citrus drink—can balance the garlic’s warmth and the cheese’s thickness. If you’re in the mood for a more complete spread, serve alongside roasted vegetables or a vanilla-scented corn salad that mirrors the wrap’s savory notes with a touch of sweetness. Finally, finish with something light and citrusy for dessert—a fresh fruit sorbet or a citrus-forward custard can cleanse the palate after the satisfying richness of the wraps.
Tips, Variations & Substitutions
- Wrap variations: Use different styles of tortillas (white, whole wheat, spinach, sun-dried tomato) to alter color, flavor, and nutrition profile. For a gluten-free option, choose certified gluten-free wraps made from corn or certified gluten-free alternatives.
- Protein options: While chicken is classic, you can substitute turkey, shrimp, or even plant-based substitutes if you want a vegetarian or vegan approach with dairy-free cheese and a plant-based protein.
- Cheese ideas: Mix cheeses for depth—think a mild melty base with a sharper cheese for personality, or use a string cheese for easy melting if you’re not using shredded varieties.
- Garlic intensity: For a milder garlic note, sauté the garlic briefly to mellow its bite. For a bolder flavor, let the garlic sizzle a bit longer to bring out a nutty sweetness.
- Vegetable boost: Add sautéed onions, bell peppers, or spinach for color, texture, and extra nutrients without compromising on the ooey-gooey experience.
- Spice it up: A pinch of chili flakes or a dash of hot sauce can turn the wrap into a little more heat without overwhelming the cheese-mellow balance.
- Vegan and dairy-free: Use plant-based cheese that melts well and a dairy-free butter or oil for the pan. You can also add a vegan “creaminess” with mashed avocado or a cashew cream if you’d like to enrich the filling without dairy.
- Lighten the dish: Choose a lean chicken cut, trim extra fat, and opt for a lighter cheese option or a lower-fat wrap to make the dish feel lighter while keeping the comforting vibe.
- Regional twists: Incorporate sun-dried tomatoes for a Mediterranean touch, or add a hint of smoky paprika to evoke a grilled flavor reminiscent of fajita fillings.
Storage & Make-Ahead Ideas
One of the notable strengths of this dish is how forgiving it is when it comes to planning. If you’d like to make parts ahead of time, you can prepare the chicken and cheese mixture in advance and refrigerate it for up to a day. When you’re ready to eat, warm the filling gently in a skillet or microwave, then assemble with fresh tortillas and a quick fold. If you’re cooking for a crowd, you can pre-roll a batch of wraps, wrap them snugly in parchment or foil, and refrigerate. They will reheat nicely in a hot, dry skillet or in an oven for a few minutes, returning to that beloved toasted exterior and gooey interior. Leftovers should be stored in an airtight container in the fridge and consumed within 2–3 days for best texture and flavor. For longer storage, you can freeze assembled wraps (without toasting the exterior) for up to 1 month; reheat thoroughly, then finish on the pan to restore a bit of crispness to the tortilla. When reheating, you may wish to re-toast the wrap briefly in a hot dry skillet or under a hot oven broiler to recapture that inviting, slightly blistered exterior and to help the cheese re-melt evenly throughout the filling.
Fun Facts & Trivia (Optional)
– The concept of “wraps” as a meal carrier became popular as a practical, handheld option for travelers and busy workers seeking convenience without sacrificing flavor. The portability of a wrap makes it a timeless choice for picnics, lunch breaks, and quick dinners that still feel special.
– Garlic has a long history in world cuisines, valued not only for its flavor but for its aroma, which is known to stimulate appetite and create a sense of nostalgia—perfect for a dish designed to evoke comfort and home.
– The “ooey gooey” cheese pull is more than an Instagram moment; it’s a celebration of the chemistry of melted dairy, where proteins loosen and fats spread to create a cohesive, stretchable texture that feels almost magical when you bite into it.
– Wraps have a culinary lineage that spans many cultures, reflecting a universal preference for portable, shareable meals that can be customized to personal tastes while still delivering on warmth and satisfaction.
– The beauty of a garlic-cheese combination lies in its simplicity: a few powerful ingredients, treated with care, can deliver a dish that feels indulgent without requiring a long list of components or lengthy cooking times.
Ingredients
Chicken Filling
-
– 2 cups cooked shredded chicken (skinless, boneless; about 1 lb roasted or poached)
→ Provides the protein base for the filling and a hearty texture. Shred while warm into small, even pieces so the sauce and cheese can coat each piece evenly. If using leftovers, briefly rewarm to make shredding easier and to help the filling bind.
– 8 oz cream cheese, softened
→ Creates the core gooey, creamy component that binds the filling and carries the garlic subtle sweetness. Soften at room temperature or microwave in 10-second bursts until malleable, then beat until smooth before adding to the pan.
– 1/2 cup shredded mozzarella cheese
→ Provides stretch and a mild, creamy melt that blends with the cream cheese for that signature ooey-gooey texture. For best results, shred from a block rather than pre-shredded varieties which can contain anti-caking agents that impede melting.
– 1/2 cup shredded cheddar cheese
→ Adds tangy sharpness and richer color to the filling. Use extra sharp for more flavor; if you prefer milder cheese, substitute with Monterey Jack or more mozzarella. Shred from a block for the best melt.
– 3 cloves garlic, minced
→ Delivers the garlicky backbone of the dish. Mince finely so the garlic disperses evenly; sauté gently with the butter to release aroma without burning, which can impart bitterness.
– 2 tablespoons unsalted butter
→ Sautéing fat that helps bloom the garlic and create a smooth, glossy sauce base. Keep the heat moderate to prevent browning; butter adds richness and aids in emulsification with the cream cheese.
– 1/2 cup sour cream or heavy cream
→ Adds extra creaminess and helps loosen the sauce to coat the chicken evenly. Sour cream gives a slight tang; heavy cream yields a richer, silkier texture. If using sour cream, stir in at the end over low heat to prevent curdling.
– 1/2 teaspoon onion powder (optional)
→ Deepens the savory profile without adding texture. If you don’t have onion powder, you can use half a diced small onion sautéed with the garlic, or omit entirely.
– Salt to taste
→ Essential for balancing the richness of the cheese and chicken. Add gradually, tasting as you go, since the chicken and cheeses may already contribute salt.
– Freshly ground black pepper to taste
→ Enhances the overall flavor with a gentle zing. Use a coarse grind for more aroma and bite; adjust after the sauce comes together.
– 1 tablespoon chopped fresh parsley or chives (optional)
→ Brightens the filling with a pop of color and herbal freshness. Stir in at the end or sprinkle on top of finished wraps as a garnish.
Wraps and Assembly
-
– 4 large flour tortillas (10-12 inch)
→ The wrappers that hold the molten filling. Choose soft, pliable tortillas; warming them slightly makes rolling easier and prevents tearing. If gluten-free is needed, use large gluten-free tortillas and follow their cooking instructions.
– 1-2 teaspoons olive oil or melted butter (for brushing and toasting)
→ Helps crisp the outside of the wraps and keeps the tortillas from drying out as you toast them. Lightly brush or drizzle and then toast in a skillet until golden and the cheese inside is gooey.
– 2 cups fresh spinach leaves or shredded lettuce (optional)
→ Adds crunch and a fresh contrast to the rich filling. If using, place greens directly on the tortilla before adding the filling to prevent sogginess and help roll snugly.
Optional Add-ins
-
– 1/2 cup sliced jalapeños or pickled jalapeños (optional)
→ Introduces a noticeable kick. Use seeds and membranes for more heat or remove them for milder flavor. Add to the filling or inside the wrap for a punch of brightness.
– 1/2 cup diced bell peppers (optional)
→ Adds color and a slight crunch. Sauté with the garlic for a softer texture, or add raw for more snap inside the wrap.
– 1/4 cup chopped fresh cilantro (optional)
→ Provides herbal lift and vibrant aroma. Mix into the filling or sprinkle over the finished wraps as a fresh finish.
Instructions
- Gather and prep all ingredients for the filling and wraps: ensure chicken is shredded and warm, cream cheese is softened to room temperature, and cheeses are grated and ready to melt; having everything measured ensures a smooth sauce and evenly coated chicken.
→ This mise en place prevents delays and helps the sauce emulsify evenly without lumps. - Soften the cream cheese to room temperature, or cut into cubes and microwave in short bursts until pliable, so it can be whisked smoothly into the sauce without clumping.
→ Softened cream cheese integrates evenly with butter and garlic for a glossy, cohesive filling. - Mince the garlic into very fine pieces so it distributes evenly and releases aroma quickly without burning, which can impart bitterness.
→ Fine mincing ensures uniform flavor and prevents bites of raw garlic. - Melt the butter in a heavy skillet over medium heat to create a rich base that carries the garlic’s aroma and aids in emulsifying the sauce.
→ Butter adds depth of flavor and helps carry the dairy components into a smooth sauce. - Add the minced garlic to the melted butter and sauté until fragrant, about 30 to 60 seconds, keeping the heat moderate to prevent browning which can taste bitter.
→ Blooming the garlic releases its sweetness—overcooked garlic would dull the overall flavor. - Reduce the heat to low and add the softened cream cheese to the skillet; whisk or fold until completely smooth and glossy with the butter and garlic.
→ A smooth base ensures the filling coats the chicken evenly and avoids gritty texture from unmelted cheese lumps. - Stir in the sour cream or heavy cream to loosen the base and create a luscious sauce that will cling to the chicken and melt with the cheeses.
→ Sour cream adds tang and body; heavy cream yields a richer, silkier texture for a truly ooey-gooey result. - Season the base with onion powder (if using), then salt and freshly ground black pepper to taste, tasting and adjusting gradually to balance richness with brightness.
→ Tasting as you go ensures the sauce remains balanced as the dairy components add salt and tang. - Fold in the shredded chicken and 1/2 cup mozzarella and 1/2 cup cheddar, mixing until the chicken is thoroughly coated and the cheese begins to melt into the sauce.
→ Coating the chicken evenly guarantees every bite is creamy and flavorful rather than dry or separated. - Remove the pan from heat and finish with the optional chopped parsley or chives, stirring to distribute color and a fresh finish; the herbs brighten the dish.
→ Fresh herbs lift the richness and provide a pop of color for appetizing presentation. - Taste the filling and adjust salt and pepper as needed while keeping the mixture warm but not boiling to preserve the dairy texture.
→ Balancing seasoning now prevents under- or over-salted wraps after assembly. - Warm the flour tortillas: heat them in a dry skillet over medium heat for 10–15 seconds per side or wrap in a damp paper towel and microwave for 15–20 seconds to make them pliable and easier to roll without tearing.
→ Warm tortillas bend easily around the filling and reduce cracking when wrapping. - If using greens, lay spinach leaves (or shredded lettuce) directly on the tortilla to create a fresh barrier that helps prevent sogginess and adds crunch.
→ Greens provide contrast to the creamy filling and help keep the wrap from becoming limp. - Spoon a generous line of filling along the center of each tortilla, then sprinkle optional add-ins such as jalapeños (fresh or pickled) and sliced bell peppers if desired.
→ Distributes heat and texture evenly; peppers add color and a slight crunch, while jalapeños add a kick. - Fold the sides of the tortilla over the filling and roll tightly from one end to the other, keeping the seam side down and pressing gently to seal.
→ A snug roll prevents leakage during toasting and ensures a neat presentation. - Brush the outside of each wrap with olive oil or melted butter and toast in a hot skillet over medium heat until the exterior is golden brown and crisp and the cheese inside remains molten, about 2–3 minutes per side.
→ The outer crust adds texture and helps seal the wrap while the internal cheese stays gooey. - Transfer the wraps to a cutting board, let rest for 1–2 minutes to set the melted cheese, then slice in half on a slight diagonal for a professional presentation.
→ Resting prevents oozy cheese from spilling out and makes them easier to handle when serving. - Serve immediately with your choice of dipping sauces or a light side salad for a balanced meal.
→ The contrast of crisp exterior and creamy interior is best enjoyed hot and fresh.
Notes
Tips
Tips for Perfect Ooey Gooey Cheesy Garlic Chicken Wraps
- Shred the chicken while it’s still warm. Warm shreds absorb the cheesy sauce more evenly, giving every bite that cohesive, saucy coating. If using leftovers, briefly rewarm until just warm to make shredding easier, then pat dry any excess moisture before mixing.
- Cream cheese should be thoroughly softened and beaten until completely smooth before mixing. This prevents lumps in the filling and helps the sauce emulsify with the other dairy. If your cream cheese is stubborn, microwave in 5–10 second bursts and stir between bursts.
- Use block cheeses and shred them yourself. Pre-shredded cheeses can have anti-caking agents that hinder melting. A blend of mozzarella for stretch and cheddar for tang creates that classic ooey-gooey bite.
- Mince garlic finely and sauté gently in the butter until fragrant, not browned. Overbrowning garlic can add bitterness and a harsh bite that competes with the cheese.
- Butter helps bloom the garlic and provides a glossy sauce base. Keep the heat moderate to prevent scorching, which can ruin the sauce’s texture and flavor.
- When adding sour cream or heavy cream, stir slowly to loosen the sauce. If using sour cream, add it off the heat or on very low heat to avoid curdling; heavy cream yields a silkier texture but can also thin out the sauce if overmixed.
- Onion powder (optional) deepens the savory profile without altering texture. If you don’t have it, a small amount of finely minced onion sautéed with the garlic works well.
- Season gradually. Because the chicken and cheeses bring salt, taste the filling as you go and add salt in small increments to avoid over-salting.
- Tortillas should be warmed slightly to become pliable. This prevents tearing when rolling. If gluten-free tortillas are used, follow their specific heating instructions to avoid cracking.
- Brush the outer tortillas with a little olive oil or melted butter to help crisp them as you toast. Toast in a skillet just until golden and the cheese inside is melting.
- Layer greens (spinach or shredded lettuce) on the tortilla before adding the filling to prevent sogginess and to help roll snugly. Greens add a fresh crunch that contrasts with the creamy filling.
- Optional add-ins: jalapeños add heat, peppers add color and sweetness, and cilantro adds brightness. Chop and distribute evenly so every bite has a hint of each flavor.
- Spread the filling in a long line down the center of the tortilla, leave about 1–2 cm (½ inch) of edge free, fold the sides inward, and roll tightly with the seam side down. A snug roll prevents the filling from leaking out during toasting.
- Make-ahead tips: the chicken filling can be prepared a day ahead and refrigerated. Rewarm gently before assembling. For best texture, assemble the wraps fresh and toast just before serving; dairy-based fillings don’t freeze well and can separate.
- Storage and reheating: store any leftovers covered in the fridge for up to 2 days. Reheat in a skillet over medium heat, covered, until heated through and the outside is crisp, or microwave with a damp paper towel for a quick reheat. If you want the cheese extra melty, give the wrap a quick re-toast after heating.
- Serving suggestions: pair with a dollop of sour cream or Greek yogurt, salsa, or sliced avocado for contrast and balance. A squeeze of lime over the filling just before serving can brighten flavors.
FAQ
What are the main ingredients in Ooey Gooey Cheesy Garlic Chicken Wraps?
The filling combines tender chicken, a creamy garlic-cheese base, and melty cheese wrapped in a soft tortilla. Typical ingredients include:
- Chicken (breasts or thighs), cooked and shredded
- Garlic (minced or garlic butter)
- Cream cheese or a blend of cream cheese and sour cream
- Shredded cheese (mozzarella and/or cheddar)
- Ranch or mayonnaise for extra tang
- Soft flour tortillas (or gluten-free tortillas)
- Seasonings: salt, pepper, paprika or Italian seasoning
- Optional add-ins: spinach, onions, bell peppers
What equipment do I need to make these wraps?
Keep it simple with common kitchen tools:
- Skillet or grill pan for cooking and melting
- Mixing bowls and a spatula or wooden spoon
- Knife and cutting board for prep
- Measuring spoons (optional)
- Baking sheet (if you choose to bake the wraps)
- Aluminum foil or parchment paper for baking
- Tongs or a spatula for turning and serving
How do you prepare the filling for the wraps?
Follow these steps for a creamy, cheesy filling:
- Season and cook the chicken in a skillet until fully cooked, then shred or dice.
- In the same skillet, melt a bit of garlic butter and add minced garlic; cook 30–60 seconds until fragrant.
- Stir in cream cheese (and a splash of ranch or sour cream) until smooth and creamy.
- Fold in shredded cheese and heat until melted and glossy. Adjust with salt, pepper, and seasoning to taste.
- Optional: mix in chopped spinach or sautéed onions for extra flavor and color.
How do I assemble and cook the wraps?
Assemble and cook with these steps:
- Warm tortillas briefly to make them more pliable (wrap them in a damp paper towel and microwave 15–20 seconds).
- Place a portion of filling on the lower third of each tortilla.
- Fold the sides in, then roll up tightly from bottom to top.
- To melt the cheese and seal the wrap, cook in a hot skillet seam-side down for 1–2 minutes per side, or until the tortilla is golden and cheese is melted.
- Alternatively, bake: place seam-side down on a lined baking sheet, brush with a little melted butter, and bake at 400°F (200°C) for 8–12 minutes until lightly crisp and cheese is melted.
Can I bake the wraps instead of pan-searing?
Yes. Baking is a convenient option:
- Preheat oven to 400°F (200°C).
- Assemble wraps, place seam-side down on a baking sheet lined with parchment.
- Brush lightly with melted butter or oil for extra crisp.
- Bake 8–12 minutes, or until the tortillas are lightly golden and the cheese is gooey.
How long does it take to make Ooey Gooey Cheesy Garlic Chicken Wraps?
Estimated times:
- Prep time: about 10–15 minutes
- Cook time: about 10–15 minutes (depending on whether you pan-sear or bake)
- Total time: roughly 25–30 minutes
Can I meal-prep these wraps for later?
Yes, with a few tips:
- Prepare the filling in advance and store it in an airtight container for up to 3 days in the refrigerator.
- Assemble wraps fresh when ready to eat to keep the tortilla from getting soggy.
- To reheat: warm in a skillet over medium-low heat until heated through and cheese is melty, or wrap in foil and reheat in a 350°F (175°C) oven for 8–10 minutes.
Can I make these dairy-free or gluten-free?
Absolutely, with substitutions:
- Dairy-free: use dairy-free cream cheese and dairy-free shredded cheese. Use a dairy-free ranch or mayo for added flavor.
- Gluten-free: use gluten-free tortillas and check all sauces/dressings for gluten.
- For a lighter option, reduce cheese or use a thinner layer of filling.
What are some tasty variations and add-ins?
Try these to customize your wraps:
- Spice it up with jalapeños, crushed red pepper, or hot sauce
- Add crispy bacon or diced bell peppers for texture
- Stir in sautéed mushrooms or spinach
- Swap in chipotle or smoky paprika for a different flavor profile
- Use different cheeses like pepper jack or Gouda for a new melt and taste
How do I reheat leftovers to keep them gooey?
Best methods to preserve melty cheese:
- Skillet: warm on medium-low, covered, 2–4 minutes, flip once
- Oven: wrap in foil and bake at 350°F (175°C) for 8–10 minutes
- Microwave: 20–40 seconds, though cheese may be less gooey
What should I serve with these wraps?
Pair them with easy sides for a complete meal:
- Simple garden salad or coleslaw
- Roasted vegetables or corn on the cob
- Mexican or garlic-lime rice for a heartier option
- Healthy dips like salsa, guacamole, or yogurt ranch