Introduction / Hook
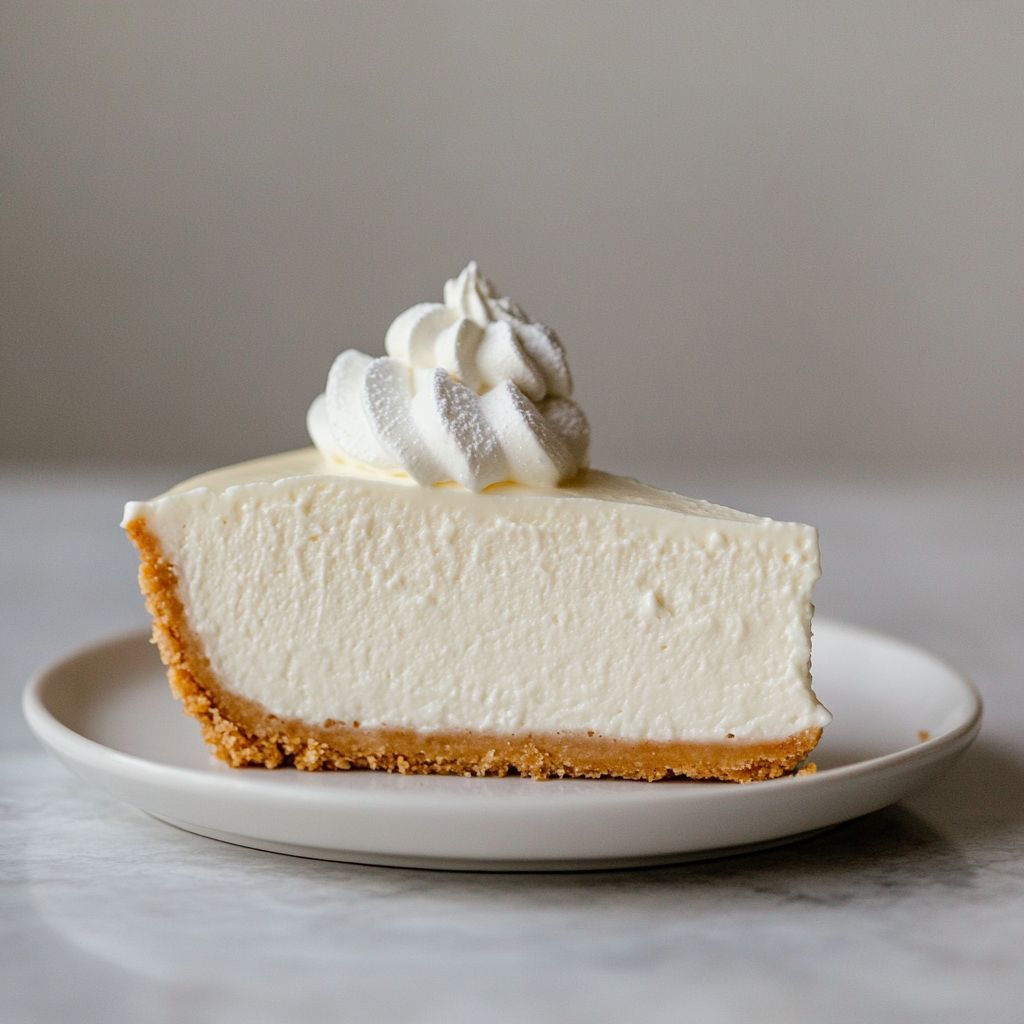
Imagine a dessert that feels like a sweet whisper from a summer campfire, folded into a silky cheesecake that glides across the palate with the ease of a dream. Marshmallow Whip Cheesecake is that dream made edible: a luscious, cloud-soft center topped with a glossy, ember-kissed finish of marshmallow whip that tastes both nostalgic and modern. The moment you lift a forkful, you’re greeted with a tender creaminess that carries the faint, toasty aroma of vanilla and caramelized sugar, as if you’ve inhaled a warm, comforting memory. It’s the kind of dessert that turns ordinary evenings into small celebrations and makes even the simplest slice feel like a special occasion. Light enough to end a meal without heaviness, yet indulgent enough to feel like a celebration, this cheesecake is the perfect bridge between childhood whimsy and adult refinement. If you’ve ever wished for a cheesecake that feels airy, yet deeply satisfying, this recipe answers the call with a gleam of marshmallow sweetness and a chorus of textures that keep you coming back for more.
The Story Behind the Dish
Marshmallow Whip Cheesecake isn’t just a recipe; it’s a love letter to contrasts. It began as a kitchen experiment in which two very different cravings—airy, fluffy sweetness and the dense, decadent temptation of cheesecake—decided to collaborate rather than compete. The idea grew from childhood memories of toasting marshmallows over a campfire, watching their edges crisp and the centers melt into gooey pockets of sugar, then contrasting that with the elegant, cool richness of a classic baked cheesecake. The result was a dessert that captures the best of both worlds: the playful melt-in-your-mouth sensation of marshmallow fluff and the refined, velvet texture of a well-made cheesecake.
Culinary roots can be traced to the universal appeal of marshmallow as a symbol of celebration and comfort. Marshmallows have a long history of appearing in festive treats—from hot chocolate swirls on winter nights to campfire s’mores that spark laughter and storytelling. When you fold that familiar sweetness into a creamy cheesecake base, you create a dessert that invites conversation—the kind that happens when friends gather around a dessert with layers of flavor you can still taste on your tongue even after the last bite. The marshmallow whip topping is the crowning kiss, a modern technique that unites the nostalgic charm of a campfire treat with the chic polish of a contemporary dessert. This dish respects the past while embracing the present, offering a versatile backdrop for celebrations big and small.
Why You’ll Love This Recipe
A dessert that feels like a hug but finishes with a refined, creamy finish that suits grown-up gatherings as well as family feasts. Marshmallow sweetness balanced by vanilla, a touch of citrus, and a hint of salt to keep every bite lively and balanced. The glossy, soft peak of marshmallow whip on top makes for a show-stopping dessert that photographs beautifully. This cheesecake is especially forgiving when it comes to planning, refrigerating into a luscious, sliceable state that rewards patience.
Flavor Profile & Texture
The flavor begins with the classic, comforting tang of well-made cheesecake—the delicate balance of creaminess and a faint lactic brightness that keeps the dessert from tipping into cloying sweetness. But the real star is the marshmallow whip topping, which introduces a feather-light texture and a toasty, caramel-tinged sweetness that lingers on the palate. You may notice hints of vanilla and a gentle buttery undernote from the crust that peeks through in every bite, providing a grounding contrast to the creamy center. The overall sensation is one of layered silk: first the cool, smooth mouthfeel of the cheesecake, then the ephemeral airiness of the marshmallow topping, followed by a subtle, satisfying finish that invites another forkful.
Textures play an equally important role. The crust—crisp at the edges and tender near the center—offers a gentle crunch and a toasty depth that anchors the dish. The filling remains luxuriously smooth, almost satin-like, with a slight, melt-in-the-mouth quality. The marshmallow whip topping introduces a light, fluffy texture with tiny pockets of air that pop on the tongue, creating moments of brightness against the denser cheesecake. When these elements converge, you experience a dessert that feels both indulgent and approachable, with a harmonious balance between dense richness and cloud-like relief. The result is a dessert that leaves you with a clean finish and a lingering, comforting sweetness that doesn’t overpower other flavors on the table.
Occasions & Pairings
Marshmallow Whip Cheesecake shines in a broad tapestry of occasions. It’s equally at home as a show-stopping centerpiece for holiday gatherings as it is a comforting conclusion to a weeknight dinner. The dessert’s approachable sweetness makes it a natural fit for family celebrations, birthdays, and potlucks, while its refined texture and striking topping lend an air of elegance to more formal occasions.
Occasions
- Holiday dinners and festive celebrations
- Birthday parties and family gatherings
- Intimate date nights at home
- Brunch finales or celebratory breakfasts
- Potlucks and dessert buffets with a touch of whimsy
Pairings
- Fruit compotes: raspberry, peach, or strawberry compote adds a bright contrast and a splash of color.
- Dark chocolate drizzle or shards: a whisper of chocolate enhances the marshmallow’s sweetness and adds depth.
- Fresh berries and citrus zest: a simple, refreshing counterpoint that brightens the palate.
- Vanilla bean ice cream or a dollop of lightly whipped cream: classic accompaniments that amplify creaminess.
- Herbal or floral teas: chamomile, vanilla rooibos, or lavender tea offer soothing balance after a rich dessert.
- Port, dessert wine, or a late-harvest Riesling: for those who enjoy a little wine to accompany dessert.
Tips, Variations & Substitutions
Every baker loves a few levers to pull when personalizing a recipe. Here are thoughtful ways to tailor Marshmallow Whip Cheesecake to your tastes, dietary needs, or available ingredients.
Tips
- Chill thoroughly: For clean slices, refrigerate the cheesecake for several hours or overnight. The marshmallow whip topping sets beautifully when cold, creating a striking contrast with the cheesecake beneath.
- Room-temperature ingredients: Allow cream cheese and any dairy to come to room temperature before mixing to achieve the smoothest filling without lumps.
- Gentle folding: When combining components, fold gently to preserve airiness. Overworking can deflate the mixture and reduce that signature cloudlike texture.
- Even slicing: Run a warm knife under hot water, then wipe clean for neat, restaurant-style slices that showcase the topping’s glossy finish.
Variations
Use a dairy-free cream cheese substitute and dairy-free whipped topping to create a vegan Marshmallow Whip Cheesecake. Opt for aquafaba-based marshmallow whip or coconut cream-based topping to achieve a similar lightness. Substitute graham crackers with gluten-free crackers or a mixture of almond flour and oats. Ensure all crust components are certified gluten-free if needed. Add a teaspoon of fresh lemon or orange zest to the filling to brighten the flavor and complement the marshmallow sweetness. Drizzle a thin line of salted caramel through the filling before setting to create ribbons of contrasting sweetness. Include finely chopped toasted nuts (pecans, almonds, or hazelnuts) in the crust or sprinkle them atop the marshmallow whip for an appealing textural contrast. Infuse the marshmallow whip with a pinch of cinnamon, nutmeg, or allspice for a warm, autumnal note that pairs beautifully with fall fruits.
Substitutions
- Low-sugar version: Use reduced-sugar marshmallow fluff and a lighter cheesecake base, paired with a fresh berry topping to keep sweetness in check.
- Low-fat option: Choose light cream cheese and a lighter whipped topping, with a crust made from crushed graham crackers with a smaller amount of butter.
- Allergen-friendly: If dairy is an issue, experiment with plant-based cream cheese alternatives and whipped toppings, noting that texture may shift slightly but the overall concept remains intact.
Storage & Make-Ahead Ideas
One of the practical pleasures of Marshmallow Whip Cheesecake is how forgiving it can be when you plan ahead. Here are strategies to maximize flavor and texture without sacrificing convenience.
Make-ahead strategies
- Prepare the crust and filling a day in advance. Assemble the cheesecake, cover, and refrigerate overnight. Top with marshmallow whip just before serving for a pristine appearance and optimal texture.
- The topping can be prepared ahead of time and chilled, then spooned or piped onto the cheesecake just before serving to preserve its airy texture.
Storage
- Refrigerator: Store leftovers, well covered, for up to 3–4 days. The marshalling effect remains best when the topping is fresh, so you may refresh with a quick re-whip if needed.
- Freezing: Cheesecake slices freeze well. Wrap individual slices tightly in plastic wrap and place in an airtight container. Freeze up to 2–3 months. Thaw in the refrigerator overnight and re-whip the topping if it has softened.
- Reheating: Cheesecake does not reheat well in the microwave if you want to preserve its texture. For best results, enjoy leftovers cold or at room temperature, or gently tease the topping back to life with a light whip after thawing.
Fun Facts & Trivia (Optional)
Did you know that marshmallows have a long lineage that predates modern confectionery? The earliest versions were made from the root of the mallow plant, used by ancient civilizations for soothing sore throats. Today’s marshmallow fluff is a far cry from those origins, but the spirit remains: a cloud-like sweetness that brings comfort and a sense of whimsy. Cheesecake, meanwhile, has a history that winds through centuries and cultures, with ancient Greek origins that evolved into the creamy, indulgent treat we crave today. Combining the two is a modern homage to the idea that the most comforting foods can come from blending tradition with playful innovation. The resulting Marshmallow Whip Cheesecake nods to nostalgia while delivering the clean, contemporary lines of a dessert that’s equally at home on a holiday table or a casual weeknight feast.
Another flight of fancy: marshmallow toppings have inspired countless pastry trends, from marshmallow peaks to speckled mini-mounds that resemble soft snowfall. In this cheesecake, the topping is more than decoration—it’s a textual and sensory moment, a kiss of sweetness that crowns the creamy center with a glossy, almost lacquered finish. The interplay between the sharpness of the crust, the smoothness of the filling, and the lightness of the marshmallow whip creates a symphony of textures that dessert lovers remember long after the last bite.
Closing Thoughts
Marshmallow Whip Cheesecake invites you into a dessert experience that’s at once familiar and unexpected. It is the comfort of a classic cheesecake, elevated by the whimsy and airiness of a marshmallow-driven topping. It’s a dish that travels well—from cozy evenings at home to celebratory gatherings with friends—because it speaks in flavors everyone recognizes while inviting them to linger on the palate a little longer. If you’re seeking a dessert that looks regal on the plate, tastes like a warm memory, and feels both celebratory and approachable, this cheesecake delivers in spades. When you finally slice into it, you’ll understand why this combination—cheesecake’s indulgence and marshmallow fluff’s playful lift—has admirers returning again and again to the table.
Ready to bring this dessert from your notebook to your table? Use the following recipe sections for a seamless crafting experience, then let the magic unfold as guests are drawn to the glossy topping, the whisper-soft filling, and the comforting, familiar fragrance that fills the room with anticipation.
Ingredients
Crust
- 1 1/2 cups graham cracker crumbs (or digestive biscuits)
→ Provides the crunchy base that supports the creamy filling. If you need a gluten-free crust, use gluten-free graham crackers or crushed gluten-free biscuits. Mix the crumbs with 3 tablespoons granulated sugar and 6 tablespoons melted unsalted butter, then press firmly into a 9-inch springform pan. Bake at 350°F (175°C) for 8–10 minutes to set the crust, then cool completely before filling. - 3 tablespoons granulated sugar
→ Adds sweetness to the crust and helps bind the crumb mixture with the melted butter. Mix with the crumbs before pressing into the pan. If you prefer a less sweet crust, reduce to 2 tablespoons or omit entirely. - 6 tablespoons unsalted butter, melted
→ Acts as the binding agent that holds the crust together and gives a rich flavor. Let the melted butter cool slightly before mixing with the crumbs so the crust maintains a crumbly yet cohesive texture when pressed into the pan.
Filling
- 24 oz cream cheese, softened to room temperature
→ The creamy, luxurious base of the cheesecake. Softening to room temperature ensures a smooth, lump-free mixture when beaten with sugar. Beat cream cheese and sugar together until fully combined and velvety, then proceed with adding eggs one by one to maintain a silky texture and minimize air pockets that could cause cracks. - 3/4 cup granulated sugar
→ Provides sweetness and helps achieve a balanced flavor with the tang of the cream cheese. Add gradually while mixing to avoid graininess and to ensure a smooth filling. If you prefer a less sweet cheesecake, reduce slightly. - 3 large eggs
→ Contribute structure and richness. Add eggs one at a time after the cream cheese is creamed with sugar to prevent curdling. Do not overbeat after adding eggs; mix just until combined to minimize air incorporation that could create cracks during baking. - 1/2 cup sour cream
→ Adds tang and extra creaminess, enhancing the cheesecake’s texture. Allow sour cream to come to room temperature before folding it in to avoid curdling and to keep the batter smooth. - 2 teaspoons pure vanilla extract
→ Depth of flavor that complements the tang of the cream cheese. Use high-quality vanilla for a noticeable aroma. If using vanilla bean, scrape the seeds for an extra layer of flavor, but adjust the liquid if necessary. - 1/4 cup all-purpose flour
→ Stabilizes the filling and helps prevent cracking during baking. If you need a gluten-free option, substitute with 2 tablespoons gluten-free all-purpose flour or 2 tablespoons cornstarch. Whisk the flour with the other dry ingredients before folding into the filling to avoid lumps. - 1/4 teaspoon fine salt
→ Balances sweetness and enhances the cheesecake’s flavors. Dissolve evenly by whisking into the filling; the small amount helps unify the flavors without making the batter taste salty.
Marshmallow Whip Topping
- 1 cup marshmallow fluff (marshmallow creme), at room temperature
→ The signature marshmallow element that will be whipped into a light, airy topping. Room temperature fluff blends more easily with the cream and/or whipped cream rather than pulling it down. If very stiff, gently warm to loosen or whisk with a splash of cream to loosen. - 1/2 cup heavy cream, cold
→ Whips into a lush, fluffy component that pairs with the marshmallow fluff. Chill the bowl and whisk before whipping to achieve stronger peaks. Stop whipping when soft to medium peaks form to avoid turning into butter; fold into marshmallow fluff to create a stable, airy whip. - 1 teaspoon vanilla extract
→ Enhances the vanilla notes in the topping and complements the marshmallow flavor. Use pure vanilla for the best aroma; omit if you prefer a purer marshmallow sweetness.
Optional Add-ins
- 1/2 cup fresh berries (strawberries, raspberries, or a mix) (optional)
→ Adds bright fruitiness and color. If you plan to swirl berries into the filling, macerate briefly with 1 teaspoon sugar for 5–10 minutes to draw out juices, then drain before adding. Use on top for a fresh finishing touch or gently swirl into the filling for a marbled effect before baking. - 1 teaspoon lemon zest (optional)
→ Brightens the overall flavor with a hint of citrus. Grate only the yellow layer of the zest, avoiding the bitter white pith. Fold into the filling or sprinkle on top of the finished cheesecake for a fresh aroma. - 1/2 cup mini chocolate chips (optional)
→ Creates little pockets of chocolate texture. Toss chips with 1–2 teaspoons of flour to prevent sinking, then fold in gently to distribute evenly without deflating the batter.
Instructions
- Preheat your oven to 350°F (175°C) and prepare a 9-inch (23 cm) springform pan by lightly greasing the bottom and sides or lining with parchment to ensure easy release of the crust and filling; this base preparation prevents sticking and helps preserve clean edges when unmolding the cheesecake.
- Combine graham cracker crumbs, 3 tablespoons granulated sugar, and 6 tablespoons melted unsalted butter in a medium bowl; mix with a fork or spatula until the mixture resembles damp, sandy soil with some cohesive clumps, which indicates even moisture distribution for a uniform crust.
- Press the crumb mixture evenly into the bottom and up the sides of the prepared springform pan using the flat bottom of a measuring cup or a sturdy spoon; apply firm, even pressure to eliminate air pockets and create a compact crust that bakes into a stable base.
- Bake the crust in the preheated oven at 350°F (175°C) for 8–10 minutes until the edges are set and the aroma is pleasant; this brief bake firms the buttered crumbs so the crust holds together when the filling is added.
- Remove the crust from the oven and cool completely on a wire rack before filling; cooling prevents the filling from sliding and helps the crust stay crisp rather than becoming soggy from residual heat.
- With a stand mixer or hand mixer on medium-low speed, beat 24 oz softened cream cheese and 3/4 cup granulated sugar in a large bowl until the mixture is smooth and velvety, about 2–3 minutes; scraping the bowl halfway ensures full incorporation of cream cheese for a uniformly creamy filling.
- With the mixer on low, add the 3 large eggs one at a time, blending just until each egg is fully incorporated before adding the next; this careful incorporation builds structure while minimizing air pockets that could cause cracks during baking.
- Beat in 1/2 cup sour cream, 2 teaspoons pure vanilla extract, 1/4 cup all-purpose flour, and 1/4 teaspoon fine salt until the mixture is just combined; avoid overmixing to maintain a tender, glossy batter, and ensure the flour is whisked in evenly to prevent lumps.
- Pour the filling over the cooled crust and use a spatula to spread it to the edges, then gently tap the pan on the counter several times to release any trapped air and create a smooth, level surface that bakes evenly.
- Wrap the outside of the springform pan tightly with two layers of heavy-duty aluminum foil and place the pan in a larger baking dish; fill the outer dish with hot water halfway up the sides to create a water bath that buffers the heat and reduces the risk of cracking for a creamier cheesecake.
- Bake the cheesecake at 325°F (165°C) for 50–60 minutes, or until the edges are set and the center still jiggles slightly; test doneness by gently rotating the pan and nudging the center—if it trembles but the edges are set, it’s ready; the water bath and gentle heat help preserve a smooth center.
- Turn off the oven, crack the door slightly, and let the cheesecake remain inside for 1 hour to cool gradually and settle without sudden temperature changes that can cause cracks or a dry texture.
- Remove the pan from the water bath and cool completely at room temperature before refrigerating; chilling for at least 4 hours or overnight allows flavors to meld and the filling to firm for clean slicing.
- In a chilled bowl, whip 1/2 cup heavy cream to soft peaks using an electric mixer on medium-high speed; chilling the bowl and whisk helps achieve stable, voluminous foam without turning the cream into butter, and soft peaks ensure easy folding later.
- In a separate bowl, whisk 1 cup marshmallow fluff with 1 teaspoon vanilla extract until smooth and slightly loosened so it folds easily into the whipped cream, distributing the vanilla evenly and removing any stiff pockets in the fluff.
- Gently fold the whipped cream into the marshmallow fluff with a silicone spatula, lifting from the bottom and turning over the top until the mixture is light, airy, and uniform in texture; folding preserves volume and prevents deflation of the whipped topping.
- Spread the marshmallow whip topping evenly over the chilled cheesecake, smoothing to the edges with a spatula and creating decorative peaks if desired; this topping provides a glossy, airy finish that contrasts nicely with the rich filling and must be chilled to set before serving.
- If using fresh berries as an optional add-in, macerate 1/2 cup berries with 1 teaspoon sugar for 5–10 minutes to draw out juices, then drain before topping to avoid a soggy crust; berries add brightness and color as a finishing touch.
- If using lemon zest, grate the zest of one lemon (avoid the white pith), and fold 1 teaspoon into the filling before baking or sprinkle a light dusting on top of the finished cheesecake for a fresh citrus aroma that complements the sweetness.
- If using mini chocolate chips, toss 1/4 cup chips with 1–2 teaspoons flour to prevent sinking, then fold into the filling during the final mixing; the chips create little pockets of chocolate that distribute evenly without weighing down the batter.
Notes
These Marshmallow Whip Cheesecake notes walk you through creating a creamy, dreamy cheesecake with a crisp crust and a light, airy marshmallow topping. For a gluten-free crust, substitute gluten-free graham crackers or crushed gluten-free biscuits and mix with 3 tablespoons granulated sugar and 6 tablespoons melted unsalted butter; bake the crust at 350°F (175°C) for 8–10 minutes to set, then cool completely before filling.
To ensure a silky filling, soften the cream cheese to room temperature and beat with the granulated sugar until velvety. Add the eggs one at a time, mixing just until blended, then fold in the sour cream and vanilla. If using, whisk in the 1/4 cup all-purpose flour and 1/4 teaspoon fine salt until incorporated. If you need a gluten-free option, substitute with 2 tablespoons gluten-free all-purpose flour or 2 tablespoons cornstarch, whisking with the dry ingredients before folding into the filling.
Bake the filled crust in a water bath to help prevent cracking and keep the texture smooth. Wrap the pan securely in heavy-duty foil and place it in a larger baking dish with hot water around the sides. Bake until the center is just set and a gentle wobble remains, then turn off the oven and let the cheesecake cool gradually to room temperature before chilling for at least 4 hours or overnight for clean slices.
For the Marshmallow Whip topping, whip the cold heavy cream to soft to medium peaks, then fold in the room-temperature marshmallow fluff and vanilla. Do not overbeat, or the topping may become dense or separate. Chill the whipped topping briefly if needed before spreading over the cooled cheesecake for a light, airy finish.
Optional add-ins offer fun variations: 1/2 cup fresh berries for brightness and color; 1 teaspoon lemon zest for a citrus lift; or 1/2 cup mini chocolate chips for chocolatey pockets. If adding berries to the topping, macerate briefly with 1 teaspoon sugar to release juice, then drain before topping. You can swirl lemon zest into the filling or swirl in some berry compote for a marbled effect before baking.
Make-ahead and storage tips: Prepare the crust and filling a day in advance and refrigerate, then assemble and bake when ready. The assembled cheesecake will keep in the refrigerator for 4–5 days; for longer storage, freeze slices wrapped well for up to 1–2 months. The topping is best added after chilling or kept separate and layered on just before serving to preserve its fluffy texture.
Tips
Tips for Marshmallow Whip Cheesecake
Crust tips
- Chill the pressed crust for 15–20 minutes before filling to help it set and prevent crumbling.
- Line the pan with parchment rounds under and up the sides for easy release and clean edges.
- If using a water bath, wrap the outside of the springform pan tightly with heavy-duty foil to prevent water seeping into the crust.
- For a crisper crust, press crumbs evenly and firmly using the flat bottom of a glass or measuring cup; avoid over-pressing to prevent cracking.
- Using gluten-free crackers? Ensure they’re truly GF and consider adding a touch more butter if your crumbs feel dry to help binding.
Filling tips
- Let cream cheese, sour cream, and eggs come to room temperature before mixing to achieve a silky, lump-free filling.
- Beat cream cheese with sugar until completely smooth, scraping the bowl periodically; add eggs one at a time on low speed to minimize air pockets that can cause cracks.
- Whisk in vanilla, salt, and flour last; whisk flour with the other dry ingredients before adding to the batter to avoid lumps. Do not overmix after adding eggs.
- If you choose a water bath, place the filled pan in a larger pan with hot water halfway up the sides, then bake; this helps prevent cracks and creates an even bake.
- Center may look slightly jiggly when you remove it from the oven; it will set as it cools. Cool gradually to avoid sudden temperature changes.
Marshmallow whip topping tips
- Let marshmallow fluff come to room temperature to blend smoothly with the whipped cream.
- Chill the mixing bowl and whisk; whip the heavy cream to soft-to-medium peaks, then fold into the marshmallow fluff gently to maintain volume.
- If the marshmallow mixture is very stiff, warm it briefly or whisk with a splash of cream to loosen before folding; add vanilla for depth of flavor.
- Fold the topping into the filling carefully to keep the texture light and airy without deflating the mixture.
Optional add-ins and finishing
- For berry toppings, macerate fresh berries with 1 teaspoon sugar for 5–10 minutes to draw out juices; drain before adding to the topping or swirl into the filling for a marbled effect.
- Brush in a little lemon zest (yellow part only) into the filling or sprinkle on top after chilling for a bright aroma.
- To add chocolate chips, toss them with 1–2 teaspoons flour before folding to prevent sinking to the bottom.
Make-ahead and storage
- Cheesecake can be baked a day ahead and refrigerated; add the marshmallow whip topping just before serving for the best texture.
- Cover tightly and refrigerate the cake for up to 4 days. Topping can be prepared ahead and added before serving.
- Cheesecake freezes well when un-topped; wrap well and freeze, then thaw overnight in the refrigerator before serving. Topping should be added after thawing for optimal texture.
FAQ
What is Marshmallow Whip Cheesecake?
Marshmallow Whip Cheesecake is a no‑bake dessert with a graham cracker crust and a light, fluffy filling. The filling is created by folding whipped cream and marshmallow fluff into softened cream cheese, then chilling until set for a creamy, sweet cheesecake texture.
What ingredients do I need to make Marshmallow Whip Cheesecake?
Crust:
- 2 cups (200 g) graham cracker crumbs
- 1/4 cup (50 g) granulated sugar
- 5 tablespoons (70 g) unsalted butter, melted
Filling:
- 16 oz (450 g) cream cheese, softened
- 1/2 cup (60 g) powdered sugar
- 1 teaspoon vanilla extract
- 1 cup (240 ml) heavy whipping cream, cold
- 7 oz (200 g) marshmallow fluff
- 1–2 teaspoons lemon juice (optional, for brightness)
- Pinch of salt (optional)
Toppings (optional):
- Fresh berries, caramel or chocolate drizzle, whipped cream
Is this cheesecake baked or no-bake?
It’s a no-bake cheesecake. The crust is pressed and chilled, and the filling sets in the refrigerator as the whipped cream and marshmallow fluff incorporate into the cream cheese. Chill time is essential for a firm slice.
Can I make this dairy-free or gluten-free?
Yes, with substitutions:
- Dairy-free: Use dairy-free cream cheese, dairy-free butter for the crust, and a dairy-free whipped topping. Look for vegan marshmallow fluff (check gelatin-free options) or ensure the marshmallow product is dairy-free.
- Gluten-free: Use gluten-free graham crackers or cookies for the crust; grind finely and press. Always check packages to ensure no hidden gluten.
Note: Some marshmallow fluff contains gelatin; vegetarian/vegan options are available, but always check labels.
What pan size should I use?
A standard 8-inch (20 cm) springform pan is ideal for a traditional cheesecake height. If you use a 9-inch pan, the filling will be thinner. For a taller cheesecake, you can use a 7-inch pan or pack the crust a bit more firmly to reduce crumb loss.
How do I make the crust?
Steps:
- Combine graham cracker crumbs, sugar, and melted butter in a bowl until evenly moistened.
- Press the mixture firmly into the bottom and slightly up the sides of the pan to form a compact crust.
- Chill in the refrigerator for 10–15 minutes to set before filling.
How do I make the filling?
Steps:
- Beat cream cheese, powdered sugar, vanilla, and a pinch of salt in a large bowl until smooth and creamy.
- In a separate bowl, whip the cold heavy cream to stiff peaks.
- Fold the marshmallow fluff into the whipped cream gently until combined.
- Fold the marshmallow–whipped cream mixture into the cream cheese until smooth and fluffy.
- Fold in lemon juice if using. Pour into the prepared crust and smooth the top.
How long does it take to chill and set the cheesecake?
Chill the cheesecake in the refrigerator for at least 4–6 hours, preferably overnight, until fully set and sliceable. Keep it covered to prevent drying and absorbing fridge odors.
How should I store leftovers?
Store leftovers in the refrigerator, covered, for up to about 4–5 days. For longer storage, you can freeze portions for 1–2 months; thaw in the refrigerator overnight before serving.
Flavor and topping ideas to customize this cheesecake
Try these modifications:
- Fold in a little citrus zest (lemon, lime, or orange) into the filling for a bright note.
- Swirl in berry compote or raspberry sauce before chilling.
- Top with fresh berries, a dusting of powdered sugar, or a chocolate drizzle.
- For a chocolate twist, add a thin layer of chocolate ganache on top after chilling.
Troubleshooting: my filling is too soft or won’t set
Tips:
- Make sure the cream cheese is fully softened to room temperature before mixing.
- Whip the cream to stiff peaks; under-whipped cream can cause a soft filling.
- Don’t overmix after adding the marshmallow fluff and whipped cream, or it can deflate the filling.
- Ensure the filling is evenly distributed and the pan is chilled; a slowly set cheesecake is often due to uneven temperature.