Introduction / Hook
Imagine a dessert that arrives at the table with a whisper of sweetness and a dramatic, cloud-like presence. Easy Karpatka Cake is that rare showstopper that looks as if you spent hours coaxing a delicate pastry from a master baker, yet it comes together with a few smart shortcuts and a few radiant ingredients. Picture a shell so light it cracks softly at the first touch, releasing a puff of steam that carries a gentle butter-and-vanilla aroma. Inside, a satin-smooth vanilla custard sits like a little secret, creamy but never heavy, balancing the crisp exterior with a velvet center. The top gleams with a pale, honeyed crust, the kind of surface you want to dust with a kiss of powdered sugar and a sigh of satisfaction. This is Karpatka—the Polish cream pastry that evokes the elegance of a patisserie and the warmth of a family kitchen, all in one elegant slice.
What makes this Easy Karpatka Cake truly special is its ability to deliver classic, refined flavors with pantry-friendly simplicity. There’s a gentle drama to its presentation, a bifurcated texture that keeps every bite interesting—the crisp shell gives way to a sirocco-soft interior, and the creamy filling whispers vanilla through the vanishingly light pastry. It’s the kind of cake that invites conversation: people lean in, spread a smile, and share a memory—perhaps of a grandmother’s birthday, a café in a European city, or a simple weekend treat that tasted like a celebration. It’s not just a dessert; it’s a small performance, a comfort, a dessert that says you care without requiring a full afternoon in the kitchen. And because it’s easy to assemble, it’s perfect for both weeknights and special occasions alike—a rare balance of practicality and indulgence.
Beyond its striking appearance, this version is forgiving and flexible, designed to satisfy both experienced bakers and curious beginners. You’ll discover that the technique hinges on a few timeless principles: a light, golden shell that holds its structure, and a luscious custard that stays glossy and smooth as it chills. The combination feels almost magical, like a gentle illusion of flawless technique, achieved with patience, good technique, and a few kitchen-tested tips. The result is a cake that slices cleanly, holds its shape when plated, and pairs beautifully with coffee, tea, or a bright berry sauce that adds a spark of color and acidity to cut through the richness. It’s a dessert that invites a second helping, a little extra slice to share with someone you love, and the kind of dish you’ll find yourself dreaming about long after the last bite has disappeared.
The Story Behind the Dish
Karpatka is a quintessential Polish pastry whose name nods to nature as much as to flavor. The word “Karpatka” is derived from the Carpathian Mountains, the sweeping range that stretches across Central and Eastern Europe, cradle to folklore, harvests, and countless stories of shared meals. The cake’s silhouette—soft, gently domed, with a lightly crinkled top—reminds many of the ridges and rolling hills that give the Carpathians their unmistakable character. The dish itself is a refined adaptation of the timeless choux pastry, the same airy web of bubbles that puffs into profiteroles, éclairs, and cream puffs. But Karpatka takes a different path: instead of filling the pastry with cream or pastry cream alone, it pairs a crisp, delicate shell with a sumptuous custard filling, producing a dessert that feels polished yet approachable.
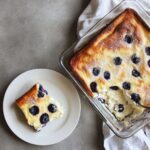
The origin of Karpatka in Polish kitchens is tied to the culinary penchant for elevating simple, honest ingredients into something that feels festive and celebratory. You’ll find it gracing the trays of bakeries and homely cafes alike, often baked in rounds or rectangular slabs, then dusted with a veil of powdered sugar. It’s a dessert that travels well, sharing the elegance of a European pastry while staying firmly rooted in the comfort of a well-loved family recipe. For many Polish families, Karpatka is the cake that marks birthdays, anniversaries, and Sunday gatherings—an emblem of hospitality and the warm ritual of breaking bread together.
In some regions, bakers put their own spin on the custard, adding a whisper of vanilla bean, a hint of lemon zest, or a dash of almond essence to mirror seasonal flavors. Yet the heart of Karpatka remains the same: crisp shell, creamy center, careful balance, and a finish that invites you to take another, slower bite. The Easy Karpatka Cake you’ll read about here honors that tradition while leaning on modern shortcuts and a streamlined approach that makes this beloved dessert accessible to home cooks who crave both elegance and ease.
Why You’ll Love This Recipe
- Impressive yet approachable: A bakery-quality dessert that looks like it took hours, but is surprisingly simple to assemble.
- Silky contrast: Crisp, delicate choux shell paired with a velvety vanilla custard for a satisfying texture contrast in every bite.
- Balanced sweetness: A gentle, not overpowering sweetness that highlights the cream and pastry rather than masking them.
- Make-ahead friendly: You can prepare components in advance and assemble closer to serving time for a fresh, just-made feel.
- Versatile for occasions: Works beautifully as a weeknight treat, a celebratory dessert, or a dessert-cod for a weekend brunch or coffee date.
- Family-friendly appeal: A dessert that appeals to both adults and kids with its comforting flavors and elegant presentation.
- Customizable texture and flavor: The filling and shell can be tuned with small tweaks to suit your taste, dietary needs, or seasonal produce.
Flavor Profile & Texture
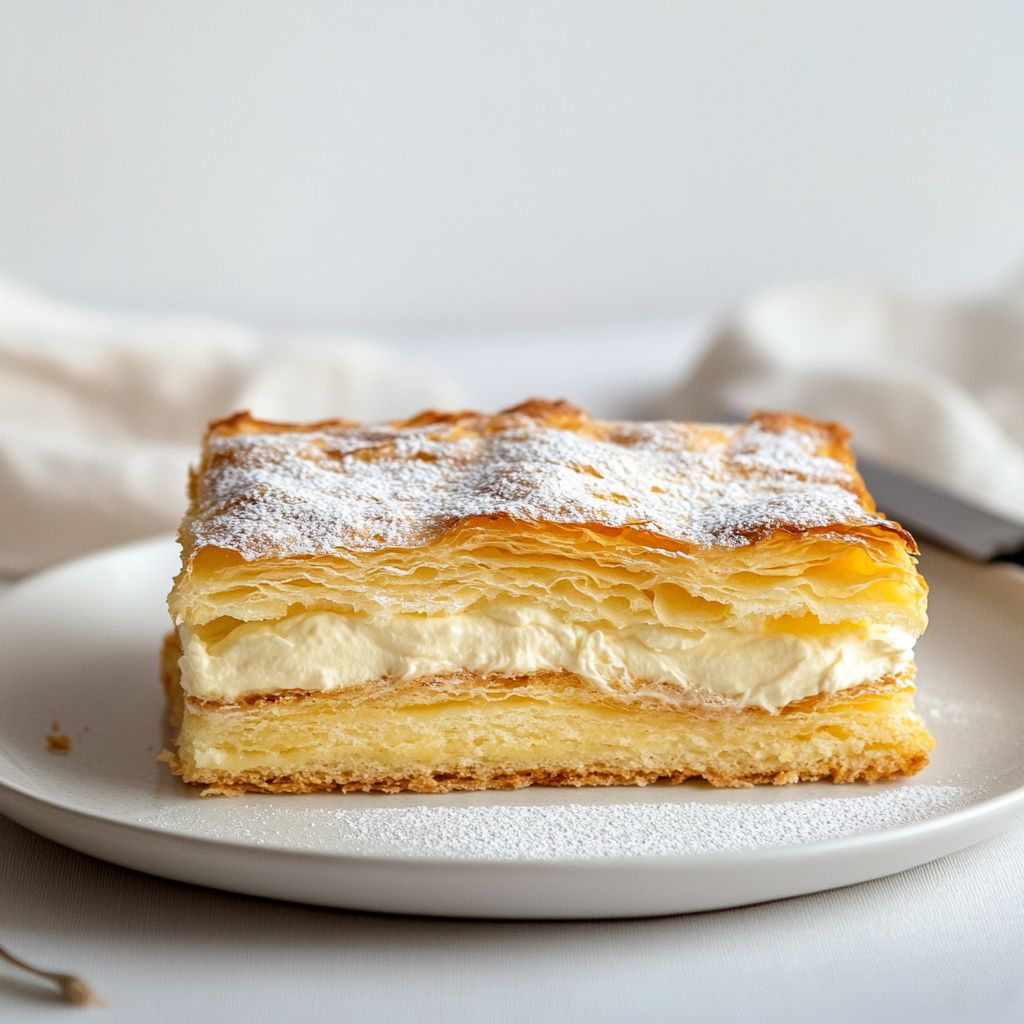
The Easy Karpatka Cake is a study in texture and aroma. The outer shell is a sunlit gold, thin and crisp yet sturdy enough to hold its shape when sliced. It offers a delicate snap with a slight crackle at the surface, followed by a soft, almost creamy interior that’s light as air. The aroma is a welcome, comforting blend of browned butter and vanilla, with a whisper of sweetness that suggests pastry elegance without cloying you with sugar. As you bite through the shell, the next layer reveals the star of the show—the velvety custard filling. This vanilla custard has a satin finish: not too thick, not too airy, a texture that glides across the palate. Its sweetness is gentle, a balancing point that never competes with the pastry; instead, it enhances and brightens the vanilla notes, a true companion to the shell’s nutty aroma.
The harmony between shell and filling is what makes Karpatka irresistible. The shell carries a toasty, caramelized edge that resonates with subtle warmth, while the custard brings a cool, creamy counterpoint that lingers on the tongue. There’s a light acidity from any dairy used if you opt for a touch of lemon zest in the custard filling, which is a wonderful way to brighten the overall experience. When served slightly chilled, the custard tightens a touch, which makes the cake slice neatly, retaining its elegant silhouette even as flavors settle and mingle in the mouth. When served a touch warmer or at room temperature, the custard becomes silkier, and the shell’s crispness is a little more forgiving, yielding a mouthfeel that feels both fresh and comforting in equal measure. The overall sensory journey—from the initial crack of the shell to the creamy, fragrant center—creates a dessert that feels as refined as it tastes. It’s not merely sweet; it’s an experience of textures and aromas that invites you to slow down and savor.
Occasions & Pairings
Karpatka makes a wonderful impression for a variety of occasions. It suits celebratory moments, weekend gatherings, and weeknight dinners when you want something a little special but not fussy. Its elegant look makes it a natural centerpiece for birthdays, anniversaries, and holiday meals, yet its approachable flavor ensures that it won’t intimidate guests who may be trying a European cream pastry for the first time. For serving ideas, consider these pairings and accompaniments:
- Beverages: A strong cup of espresso, a silky latte, or a bright black tea highlight the cake’s vanilla and butter notes. A glass of sparkling wine or a light dessert wine can elevate a festive occasion.
- Sauces & toppings: A bright berry coulis or a spoonful of tart cherry compote adds a lively contrast that cuts through the sweetness. A dollop of lightly sweetened whipped cream also pairs beautifully for a traditional presentation.
- Fruit accents: Fresh berries, sliced peaches, or orange segments can provide fresh acidity and color that complement the cake’s pale, elegant tones.
- Side bites: A few crisp almond cookies or a small plate of marcona almonds can echo the nutty notes from the pastry while offering textural variety.
In terms of occasions, this cake shines on Sunday family meals, a holiday dessert table, or a dinner party where you want something that feels refined yet not overly showy. Because it holds up well in the fridge, it’s an excellent option for meal prep or brunch buffets, where guests can help themselves to slices that retain their shape and charm across several hours.
Tips, Variations & Substitutions
Here are practical ideas to tailor Easy Karpatka Cake to your kitchen, dietary needs, and taste preferences. Each variation keeps the spirit of the dish intact while allowing you to experiment with textures and flavors.
Vegan & Dairy-Free Twist
To adapt Karpatka for a dairy-free or vegan kitchen, swap in plant-based butter and a milk alternative with a neutral flavor, such as almond or oat milk. The choux dough remains a simple science of water, fat, flour, and eggs; in vegan versions, aquafaba or a commercial egg replacer can help mimic the structure. The custard can be replaced with a thickened coconut milk custard or a vanilla-scented starch-thickened plant milk mixture. Expect a slightly different texture, but with careful balancing of fats and starch, you’ll still achieve a silky, satisfying filling and a crisp shell.
Gluten-Free Options
Choux pastry traditionally relies on gluten development for its structure, but gluten-free all-purpose flour blends can be used with some attention. Choose a blend designed for choux pastries or bread-like textures, and consider adding a touch more liquid to compensate for density. Extra eggs can help create the lift and structure you need, while a well-balanced gluten-free blend will yield a shell that remains crisp rather than soggy. If you’re unsure, test a small batch first to dial in the balance between shell stability and tenderness.
Flavor Variations
While vanilla is a classic choice for the custard, you can tailor the flavor profile to suit the season or your mood. Try adding a vanilla bean paste for visible specks and a deeper aroma, or swap a portion of the vanilla with lemon zest for a citrus brightness. A whisper of almond or pistachio essence can lend a nutty nuance that complements the pastry’s browned butter notes. For a chocolate twist, dust the top with a light cocoa powder or gently drizzle a thin chocolate glaze after the cake has cooled—keeping the glaze thin to preserve the delicate texture.
Storage & Make-Ahead Ideas
One of the delightful aspects of Easy Karpatka Cake is how well it travels through the week in flavor and texture. Planning ahead helps ensure you have the best possible slices for guests or family gatherings.
- To store leftovers: Refrigerate the cake in an airtight container. The custard will firm up a touch as it chills, becoming more slice-friendly while maintaining its creaminess.
- Make-ahead strategy: Prepare the choux shells and the custard the day before you plan to serve. Chill both components separately, then assemble shortly before serving to preserve the shell’s crispness. If you prefer a fully assembled cake, you can refrigerate after assembly, but the shell may soften slightly over time; a light re-crisping in a low oven before serving can help recover texture.
- Freezing: The choux shells can freeze well when stored in an airtight container or wrapped tightly. The custard can be frozen in a sealed container, though it may change texture slightly upon thawing. For best results, freeze the individual components and reassemble after thawing; or freeze unfilled shells, fill when ready, and chill until ready to serve.
- Reheating tips: If needed, warm the shells very briefly to restore a touch of crispness before filling, but avoid overheating the custard, which should remain cool and creamy.
Fun Facts & Trivia (Optional)
Did you know that the Carpathian Mountains have long inspired European kitchen legends and rustic tales of shared meals? The name Karpatka taps into that sense of place—the food equivalent of a scenic panorama. In Polish bakeries, Karpatka is often displayed beside other classic choux pastries, a testament to the country’s love of light, airy textures and comforting creams. The technique—creating a shell that’s crisp on the outside yet tender within, and pairing it with a rich, glossy custard—demonstrates how traditional methods meet practical home cooking. Some bakers even claim that the shell’s slight caramelization, achieved through careful heat management during baking, is what gives Karpatka its distinctive, almost toffee-like aroma. It’s a reminder that great desserts can be born from simple ingredients treated with a little patience and a lot of care. And because Karpatka is known for its elegant appearance, it has become a favorite for those who want to bring a sense of European patisserie to the home kitchen without turning the oven into a laboratory.
Whether you’re re-creating a slice of Polish bakery culture or simply exploring a dessert that feels both refined and comforting, Easy Karpatka Cake offers a delicious bridge between tradition and contemporary home cooking. It’s a cake that invites you to slow down, savor textures, and share a slice with friends and family—the kind of dessert that leaves a lingering memory of softness, warmth, and a touch of vanilla sunshine.
Ingredients
Choux Pastry (Karpatka Base)
- 1 cup water (240 ml)
→ Purpose: provides the moisture that steams the dough, enabling the choux to puff and form a hollow center. Preparation: bring water, butter, and salt (and optional sugar) to a vigorous boil, then remove from heat and immediately stir in all the flour to form a smooth, cohesive paste. Tips: use a heavy-bottom saucepan to prevent scorching, and keep stirring until the dough becomes a glossy, thick mass that pulls away from the sides of the pan. - 100 g unsalted butter (3.5 oz)
→ Purpose: fat that helps create a tender, rich dough and aids in browning. Preparation: slice butter into pieces so it melts evenly with the water; combine with water (and salt) and bring to a boil before adding flour. Tips: if using salted butter, reduce added salt in the dough to avoid over-salting. - 1/2 teaspoon fine sea salt
→ Purpose: enhances flavor and helps strengthen the dough’s structure. Preparation: dissolve in the water before heating. Tips: adjust slightly if using very salty butter or if you prefer a sweeter finish. - 1 tablespoon granulated sugar (optional)
→ Purpose: adds a touch of sweetness and contributes to browning of the choux. Preparation: whisk into the water and butter as they heat. Tips: omit if you plan a savory or less sweet finish; sugar also helps with color development in baking. - 1 cup (125 g) all-purpose flour, sifted
→ Purpose: provides the starch framework that thickens the dough and gives structure to the puffs. Preparation: add the flour all at once to the hot liquid off the heat, stirring vigorously until a smooth, cohesive dough forms that pulls away from the pan. Tips: sift to remove lumps; avoid overworking once the flour is added to keep the dough from becoming tough. - 4 large eggs, at room temperature
→ Purpose: leavening and structure; eggs trap air and steam to lift the dough and create the hollow cavity. Preparation: add eggs one at a time, beating until fully incorporated and the dough is thick, glossy, and pipeable. Tips: room-temperature eggs mix more evenly; if the dough appears split, whisk vigorously or briefly rest and rebeat to restore smoothness.
Vanilla Custard Filling (Cream Layer)
- 2 cups whole milk
→ Purpose: base liquid for the pastry cream, contributing creaminess and body. Preparation: heat gently until steaming just below simmer. Tips: use fresh whole milk for the richest texture; for extra silkiness, substitute a portion with cream or half-and-half as desired. - 4 large egg yolks
→ Purpose: thicken the custard with their proteins and provide a rich, custardy texture. Preparation: whisk yolks with sugar until pale, then temper with hot milk. Tips: ensure yolks are free of egg whites to avoid curdling; use yolks at room temperature for smoother thickening. - 1/2 cup granulated sugar
→ Purpose: sweetens the filling and helps create a glossy, smooth custard. Preparation: beat with yolks until light and creamy before tempering with hot milk. Tips: adjust to taste if you prefer a less sweet dessert; balance with vanilla for aroma. - 1/4 cup cornstarch
→ Purpose: thickener that yields a silky, sliceable custard. Preparation: whisk with a small amount of the cold milk to form a slurry before adding to the hot milk; whisk or whisk constantly as the mixture thickens. Tips: sift to remove lumps; cook until the custard is fully thickened and the starch is fully activated to avoid a starchy aftertaste. - 1–2 teaspoons vanilla extract or vanilla bean paste
→ Purpose: provides the characteristic vanilla flavor that defines Karpatka. Preparation: add to the warm milk off the heat after heating; for vanilla bean paste, scrape seeds and infuse with the milk. Tips: use pure vanilla for the best aroma; avoid boiling the vanilla after adding to the hot custard to preserve flavor. - Pinch of salt
→ Purpose: balances sweetness and enhances the custard’s flavor. Preparation: whisk into the yolk-sugar mixture or into the hot milk. Tips: a small amount goes a long way—omit only if you’re reducing other seasonings significantly.
Optional Toppings / Finish
- Powdered sugar for dusting
→ Purpose: provides a delicate, snowy finish that contrasts with the pale custard. Preparation: sift evenly over the cooled cake just before serving. Tips: dust right before serving for the cleanest look; avoid layering the sugar too thick, which can dull the appearance of the cake. - Dark chocolate for glaze (optional)
→ Purpose: creates a glossy, rich top layer that mimics Carpathian peaks and adds a luxurious finish. Preparation: melt with a small amount of butter or cream to form a smooth glaze; cool slightly before spreading evenly over the cooled pastry. Tips: temper to prevent blooming; for a thinner glaze, whisk in a teaspoon of warm milk. - Unsalted butter for glaze (optional)
→ Purpose: emulsifier and flavor carrier in chocolate glaze. Preparation: melt with chocolate to achieve a pourable glaze; adjust thickness with a splash of cream if needed. Tips: use a small amount to avoid a greasy finish; keep glaze warm but not hot to retain gloss.
Instructions
- Preheat your oven to 350°F (175°C) and line two large baking sheets with parchment paper or silicone mats to create smooth, non-stick surfaces for the choux; ensure there is room for expansion as the dough puffs.
→ A steady, even heat is essential for proper puffing and to avoid scorching; parchment or silicone prevents sticking and helps you remove the sheets cleanly after baking. - Combine 1 cup water, 100 g unsalted butter, 1/2 teaspoon fine sea salt, and 1 tablespoon granulated sugar in a heavy-bottom saucepan and bring to a vigorous boil over medium-high heat, stirring to dissolve the salt and melt the butter; once it boils, remove the pan from heat immediately.
→ This hot liquid condition hydrates the flour quickly when added, creating a smooth, cohesive dough with a glossy surface that sets properly during baking. - Add 1 cup (125 g) sifted all-purpose flour to the hot liquid all at once and stir vigorously with a wooden spoon or heatproof spatula until the mixture forms a smooth, cohesive dough that pulls away from the sides of the pan and leaves a thin film on the bottom.
→ The flour interacting with the hot liquid gelatinizes to build the starch network that will trap steam and give the choux its characteristic hollow interior. - Return the dough to the burner on low heat and cook, stirring constantly for 1–2 minutes until the dough appears dry and becomes cohesive, then remove from heat and let cool for 5–10 minutes until warm to the touch.
→ Drying the dough prevents the eggs from scrambling when added and establishes the right moisture balance for a light, airy final texture. - Beat in four large eggs at room temperature, adding them one at a time and mixing thoroughly after each addition until the dough is thick, glossy, and pipeable; if the dough seems split, whisk vigorously or briefly rest and rebeat to restore smoothness.
→ Proper emulsification of the eggs creates a stable, elastic dough that rises well and yields a uniform texture in the baked choux. - Evaluate the dough by pulling it with a spatula; it should form a thick ribbon that slowly falls back into the mass; if it is too stiff, whisk in a small extra beaten egg, 1 tablespoon at a time, until the correct consistency is achieved.
→ The correct viscosity ensures clean piping and controlled expansion in the oven without collapsing. - Divide the choux dough into two equal portions and transfer each portion into a piping bag fitted with a large round tip (or place on parchment and flatten with a spatula); pipe two evenly sized rectangles on each parchment sheet, aiming for uniform thickness about 1/2 inch (1.3 cm) and leaving space between them.
→ Even shapes and thickness promote uniform puffing and easy layering later; consistent width makes slicing straightforward and neat. - Bake both sheets in the preheated oven for 25–30 minutes, rotating the sheets if your oven heats unevenly, until the choux are deeply puffed, dry to the touch, and a rich golden color; avoid opening the oven during the first 20 minutes to prevent deflation.
→ Steam must escape to form hollow centers; opening early collapses the structure and results in dense, less sliceable layers. - Turn off the oven, crack the door open about 2 inches (5 cm), and let the choux sheets rest in the oven for 5–10 minutes to dry further; then remove to a rack and cool completely before handling.
→ A gradual drying process prevents sogginess and ensures the surfaces stay crisp and easy to trim for clean assembly. - If desired, trim the tops of the choux sheets with a serrated knife to create flat, even surfaces for easier stacking; reserve the trimmings for snacking or testing.
→ Flat surfaces yield a neater cake and prevent gaps where the custard can bulge when the layers are pressed together. - Meanwhile, prepare the vanilla custard: heat 2 cups whole milk in a heavy saucepan just to a light simmer without boiling; in a separate bowl, whisk 4 large egg yolks with 1/2 cup granulated sugar until pale and thick, then whisk in 1/4 cup cornstarch to form a smooth slurry.
→ Gently heating the milk preserves its richness; whisking the yolks with sugar creates a creamy base, and the cornstarch slurry thins evenly without lumps for a glossy custard. - Slowly temper the yolk mixture by whisking in the hot milk in a thin stream, then pour the combined mixture back into the pot and return to medium heat; cook, whisking constantly, until the custard thickens and just comes to a boil, then remove from heat.
→ Tempering prevents curdling by gradually lifting the yolk temperature; continuous whisking ensures a smooth, homogeneous custard that fully thickens. - Stir in 1–2 teaspoons vanilla extract or vanilla bean paste and a pinch of salt, then strain the custard through a fine-mesh sieve into a clean bowl; cover with plastic wrap pressed directly onto the surface and refrigerate until completely cool and set, about 2–4 hours.
→ Straining removes any lumps and seeds for a ultra-smooth texture; chilling firms the custard so it spreads neatly without oozing. - Spread a generous, even layer of the cold custard onto one choux sheet, leaving a clean margin around the edge to prevent overflow, then top with the second choux sheet to form a sandwich; press lightly to settle the filling.
→ An even layer prevents bulges and ensures a balanced slice; margins keep the filling contained and the surface uniform for neat presentation. - Refrigerate the assembled Karpatka for at least 1–2 hours to set the custard and mellow the choux so the layers fuse together into a cohesive dessert; this chilling also makes slicing cleaner.
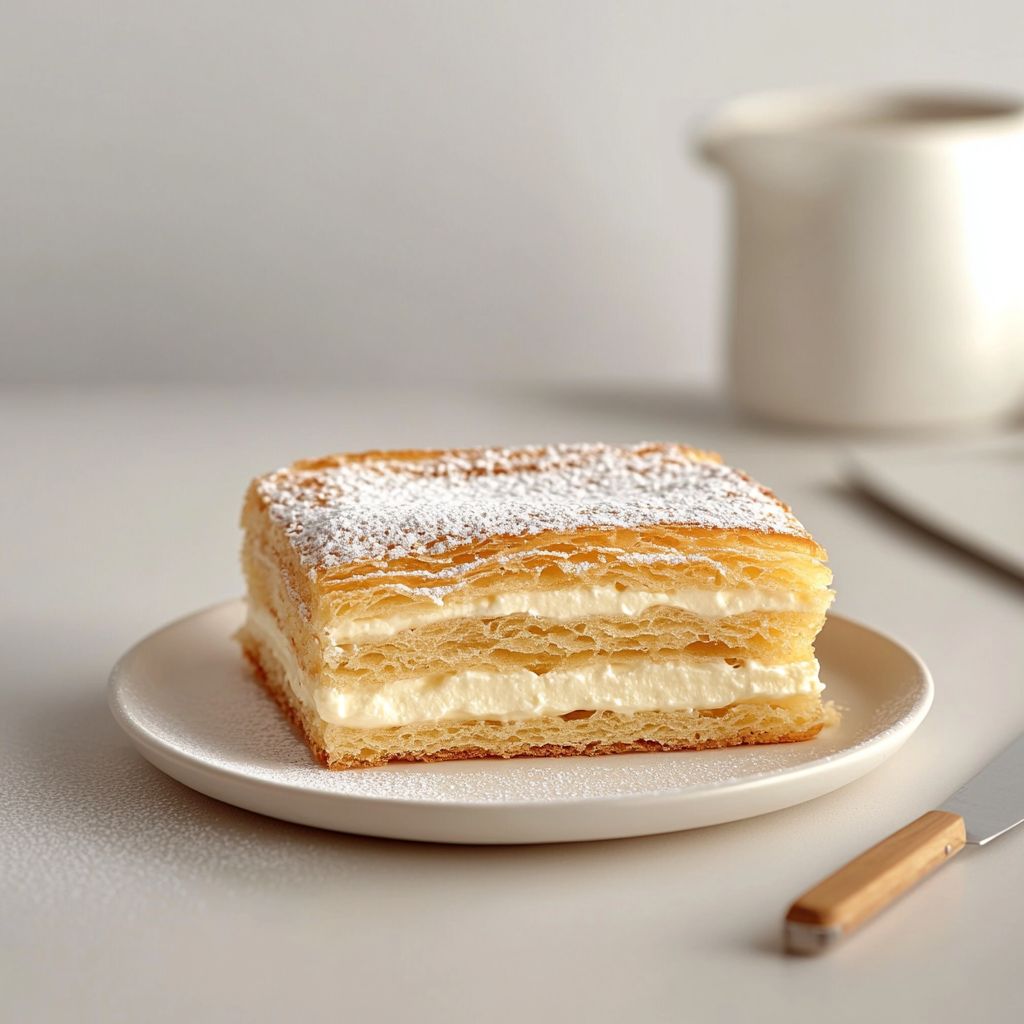
→ Chilling helps the custard firm and the choux soften just enough for a smooth bite, while ensuring clean, tidy portions when served. - If using, dust the top with powdered sugar just before serving for a delicate finish; for a glossy finish, melt dark chocolate with a small amount of butter or cream and spread a thin, even layer over the top, allowing it to set.
→ Powdered sugar provides a light, snowy contrast, while chocolate glaze adds richness and an elegant sheen that resembles Karpatka’s traditional look. - Portion with a sharp serrated knife into clean squares or rectangles and serve chilled or at room temperature; refrigerate any leftovers, tightly covered, for up to 2 days.
→ Sharp slicing minimizes crumbling; proper storage preserves the custard’s texture and prevents the choux from becoming soggy.
Notes
These Karpatka cakes are a classic Polish dessert featuring a light choux pastry base paired with a silky vanilla custard filling. The magic lies in folding air into the dough as it cooks on the stovetop so the shells soften into hollow puffs that cradle the custard when filled. Use a heavy-bottom pan and keep the dough moving to prevent scorching; once the dough forms a glossy, cohesive mass, remove from heat and cool slightly before adding the eggs to avoid scrambling.
You can customize them by infusing the custard with vanilla bean paste, adding a touch of citrus zest, or swirling in a little cocoa powder for a moka-inspired variation. For a finishing touch, dust with powdered sugar, glaze the top with a dark chocolate ganache, or serve with fresh berries to contrast the creamy interior with a bright tang.
The custard can be made ahead and refrigerated; fill the cooled choux shells just before serving to maintain their delicate texture. If you’re making the full cake, assemble and refrigerate the assembled pastry so the custard sets into a neat sliceable layer. The shells themselves are best enjoyed the day they’re baked, but they can be stored unfilled in an airtight container for up to 2 days and filled shortly before serving.
For a make-ahead dessert, bake the choux shells, cool completely, and freeze them unfilled. Thaw at room temperature, fill with cold custard, and chill before serving for a polished finish. A simple chocolate glaze brushed over the top adds a glossy Carpathian peak-like finish that looks as impressive as it tastes.
If you’d like a gluten-free version, substitute a gluten-free 1:1 all-purpose flour blend that works for choux pastry and ensure the cornstarch and any added thickeners are certified gluten-free. You may need to adjust water or egg quantities slightly to achieve a smooth, pipeable dough and a sturdy crust. Always ensure your ingredients are fresh for the best texture and flavor.

Tips
Tips for the Choux Pastry (Karpatka Base)
Tips for the Vanilla Custard Filling
Tips for Optional Toppings and Finish
FAQ
What is Karpatka cake?
Karpatka is a classic Polish cream cake made from two light choux pastry layers sandwiched with a smooth vanilla custard. The name comes from the Carpathian mountains, and the cake is known for its delicate texture and creamy filling.
What are the main components of Easy Karpatka Cake?
The cake has two parts: (1) choux pastry layers baked into flat sheets, and (2) a creamy vanilla custard filling. Optional toppings like a light dusting of powdered sugar or cocoa can be added for decoration.
What ingredients do I need for the choux pastry?
Common ingredients include:
- Water or milk, and butter
- All-purpose flour
- Eggs
- A pinch of salt
What ingredients do I need for the vanilla custard?
Typical custard ingredients are:
- Milk or dairy-free milk
- Sugar
- Egg yolks
- Cornstarch or flour as a thickener
- Vanilla extract or vanilla bean
How do I make the choux pastry?
Steps:
- In a saucepan, combine water (or milk) and butter and heat until the butter melts and the mixture boils.
- Stir in the flour and a pinch of salt all at once until a smooth dough forms and pulls away from the sides.
- Remove from heat and let cool slightly, then beat in eggs one by one until the dough is glossy and thick.
- Spoon or pipe the dough onto a lined baking sheet into two large rectangular sheets (or bake as a single sheet and cut later).
- Bake in a preheated oven until golden and firm, then cool completely with vents opened to dry out.
How do I make the vanilla custard?
Steps:
- Whisk egg yolks with sugar until pale. Stir in cornstarch/flour to form a smooth paste.
- Warm milk with a vanilla pod or vanilla extract, then gradually whisk into the yolk mixture.
- Return to the stove and cook over medium heat, whisking constantly, until thick enough to coat the back of a spoon.
- Remove from heat, whisk in a bit of butter if you like a glossier finish, and cool completely before assembling.
How do I assemble the Karpatka?
Assembly tips:
- Place one pastry sheet on a serving platter. Spread or pipe an even layer of custard on top.
- Top with the second pastry sheet. Press gently to set, then refrigerate for at least 2–3 hours (or overnight) to let the custard set and flavors meld.
- Dust with powdered sugar or cocoa before serving if desired.
What temperature and how long should I bake the choux sheets?
Bake at about 180°C (350°F) for 25–30 minutes, until the pastry is puffed, dry, and light golden. Do not open the oven door during the first 20 minutes to avoid collapsing.
How long does the whole cake take to prepare?
Active prep time is about 45–60 minutes (including making the choux and custard). Then you need a few hours of chilling time. Plan for a total of 4–6 hours, largely due to chilling, with overnight chilling being convenient.
How should I store leftovers?
Store Karpatka in the refrigerator, covered, for up to 2–3 days. For best texture, keep the custard well chilled and avoid exposing the pastry to humidity too long. You can slice before serving or portion individual pieces.
What are common problems and how can I fix them?
Troubleshooting:
- Pastry collapsed or soggy: ensure the dough is cooked long enough before eggs are added, bake at a steady temperature, and avoid opening the oven early. Let it dry completely in the oven after baking.
- Custard is runny: cook a bit longer on the stovetop, whisk constantly, and chill thoroughly. If still too loose, whisk in a small amount of extra cornstarch slurry and heat briefly until thickened, then chill again.
- Pastry tastes eggy or dense: make sure not to overbeat the dough after adding eggs; mix just until glossy and cohesive.