Introduction / Hook
Imagine a pastry that greets you with the whispered scent of vanilla and warm butter, then opens to a wakeful treasure: layers of delicate pastry, rich cream, and a vibrant chorus of berries that seem to shimmer with each bite. Berry Cream Pastry Cake is the kind of dessert that doubles as an invitation—the moment you set it on the table, conversations bloom around it the way berries plump in the sun. It’s not merely a cake; it’s a celebration of early summer markets, a serenade to morning gatherings, and a memory you can slice into and relive long after the last forkful has vanished.
There’s a quiet drama to this dessert: a golden crust that gives way to a soft, custardy interior, a cloud of whipped cream or vanilla cream hugging every layer, and berries that provide bright bursts of sweetness and tartness in every mouthful. It’s a pastry that feels both rustic and refined—perfect for a weekend brunch that begs for a candle, a fancy dinner party that doesn’t want to take itself too seriously, or a simple family treat that makes ordinary afternoons feel special.
What makes Berry Cream Pastry Cake truly irresistible is the balance. The pastry offers a crumbly, tender bite with a buttery fragrance that wraps around a lush, creamy heart. The berries contribute contrast—their acidity cuts through the richness, their color brightens the plate, and their juice slicks the palate with a glossy sheen. A hint of citrus zest or a touch of vanilla threads through the cream, tying everything together in a comforting, vibrant harmony. It’s dessert that teaches your senses to pause—observe the color, listen to the crack of the pastry, inhale the bouquet of fruit and cream, and then savor how all those elements cohere into something greater than the sum of its parts.
Whether you’re baking for a crowd or soothing a craving for a late-night indulgence, this dessert offers a versatile, no-fuss approach to an impressive finale. It’s a showpiece that doesn’t require theatrical presentation—just a well-timed slice, a scattering of glossy berries, and a dollop of cream to crown the moment. If you’ve ever wanted a recipe that feels timeless yet modern, indulgent yet approachable, Berry Cream Pastry Cake is your invitation to a sensory dessert that leaves guests smiling and asking for seconds—every time.
The Story Behind the Dish
The origin of Berry Cream Pastry Cake is as much a tale of seasons and memory as it is a culinary invention. It began in a sun-kissed kitchen where summer berries poured in from a farmers’ market, their colors like stained glass against the pale wooden counter. A home cook with a soft spot for pastries and a soft spot for creams decided to marry two classics—the lightness of a pastry cake with the indulgence of a creamy center—into something that could travel from a cozy Sunday brunch to a celebratory wedding reception without losing its charm.
Legends say that the idea crystallized during an afternoon when the oven hummed a comforting tune and the air carried the sweet scent of vanilla and fruit. The baker laid out a plan: create a structure that could balance richness and brightness, so that each bite would feel both celebratory and familiar. The pastry was chosen for its versatility—crisp edges, tender crumb, a sturdiness that could hold delicate fillings without becoming soggy. The cream was chosen for its ability to soften the tart edge of berries, to cradle the fruit without overpowering it, and to add a luxurious texture that felt almost ceremonial. And the berries—carefully selected for color, sweetness, and juice—were the final brushstroke, lending a natural sweetness that sang against the pastry’s butteriness and the cream’s smoothness.
In many homes and kitchens around the world, desserts share a language of memory: a bite can transport you to a grandmother’s oven, a seaside cottage, or a city bakery window. Berry Cream Pastry Cake carries that tradition forward by inviting you to craft something that feels both timeless and fresh. It’s a modern riff on the classic fruit-filled cake, seasoned with a touch of whimsy and grounded in the simple joy of good ingredients treated with care. If you’re lucky, you’ll pass down the story too—the one about that first bite that tasted like summer in full bloom and promised future gatherings where laughter and conversation would mingle with the sweet scent of pastry and fruit. In this way, the dish carries not just flavor, but memory, and invites you to add your own chapters to its evolving narrative.
Why You’ll Love This Recipe
- Elegant, crowd-pleasing presentation without complicated steps or a long ingredient list.
- Balanced flavor profile that pairs fruity brightness with creamy richness and a crisp pastry crust.
- Versatile enough for brunch, celebration desserts, or a refined weeknight treat.
- Make-ahead friendly: you can assemble and refrigerate components in advance for easier serving.
- Texture journey from flaky crust to silky cream to juicy berries keeps every bite interesting.
- Adaptable to seasonal fruits beyond berries, allowing you to tailor the dessert to what’s freshest at market.
- Plates up beautifully, making it a natural centerpiece for photos and sweet memories.
Flavor Profile & Texture
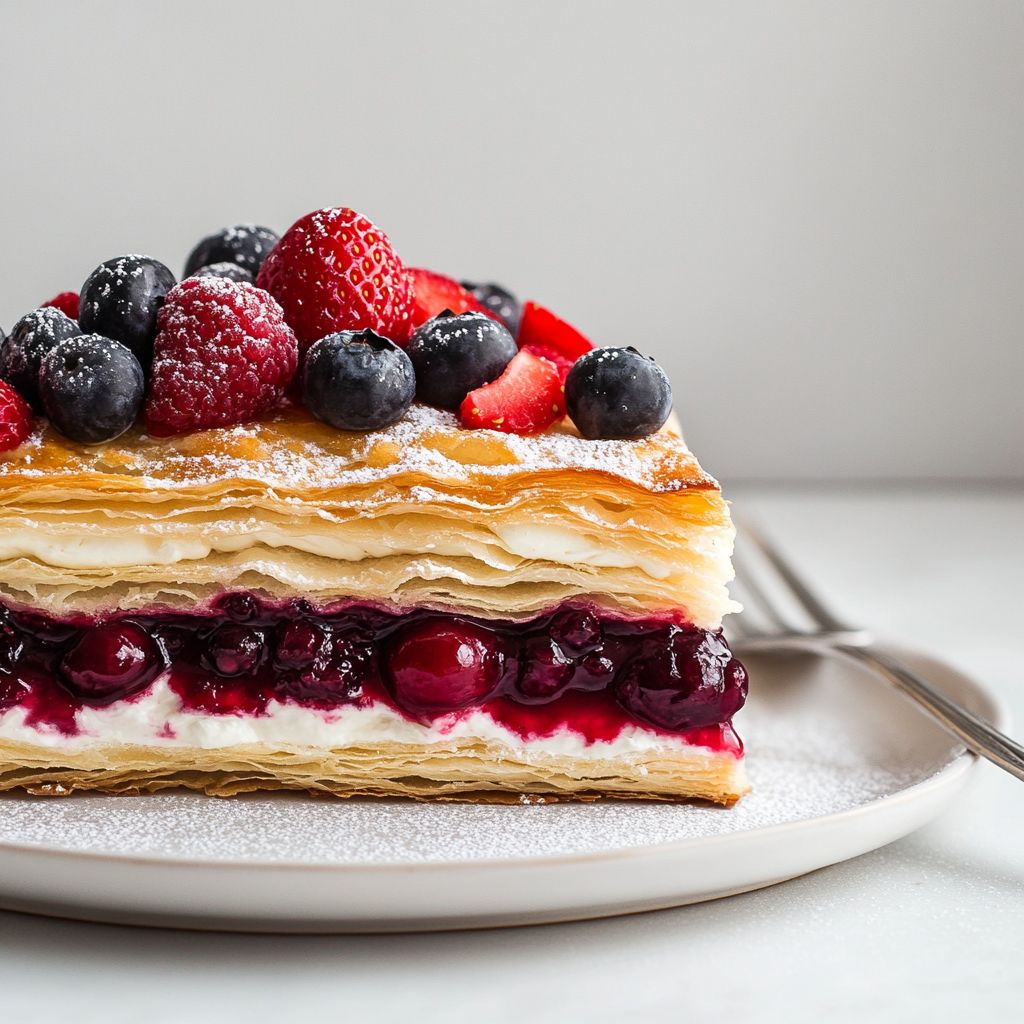
The Berry Cream Pastry Cake orchestrates a symphony of contrasts that feel both comforting and exciting. The pastry’s crust is buttery and slightly crisp at the edges, with a fragrance that recalls warm sugar and toasted almonds—an aroma that invites you to dive in. Inside, the texture softens into a tender, almost cloud-like crumb that holds its shape but yields easily to the fork. The cream or whipped cream component brings a cool, luxurious counterpoint, silky and smooth, with a delicate sweetness that glides across the palate without weigh-down. It forms a mellow sheath around each bite, ensuring that the cream never overwhelms the fruity brightness.
The berries themselves are the bright punctuation marks of the dish. When you bite through, you’ll encounter the tart pop of small berries or the lush sweetness of ripe, sun-warmed fruit. Their juices mingle with the cream, creating glossy ribbons of flavor that travel across the tongue. If a hint of vanilla or citrus zest is present, it acts as a conductor—an invisible thread that ties the components together and elevates the overall aroma and taste.
Texture-wise, the experience is dynamic: first a crisp bite from the pastry, followed by a soft, creamy melt, then a juicy burst from the berries. The interplay between the cool, airy cream and the warm, flaky crust mirrors the balance you seek in a good dessert—comfort without heaviness, sophistication without pretension. The result is a cake that feels indulgent yet accessible, something you’d be happy to share with friends yet wonderful to enjoy alone with a quiet cup of tea.
Occasions & Pairings
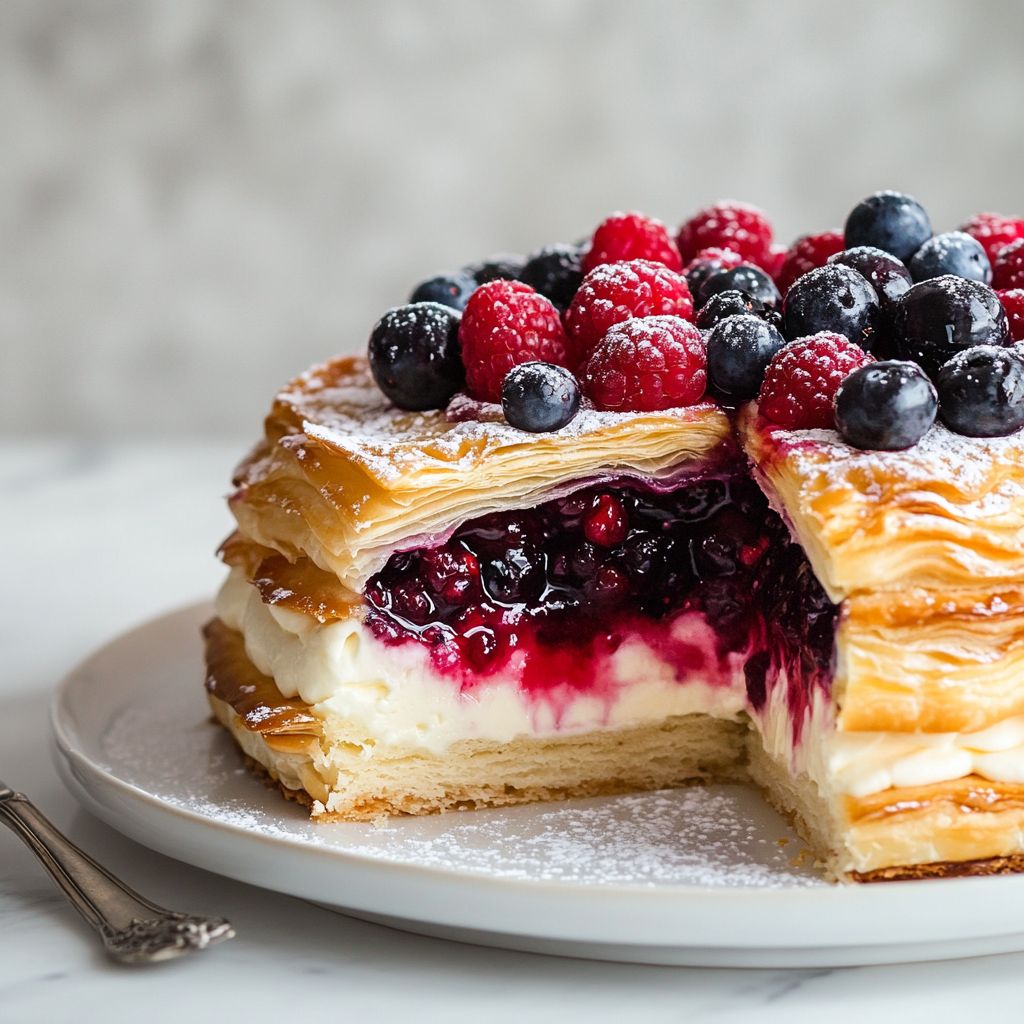
Berry Cream Pastry Cake shines at moments when dessert should feel special but not overly fussy. It’s ideal for weekend gatherings, birthday celebrations, Mother’s Day brunches, bridal showers, or a summer dinner party where the menu leans toward fresh produce and bright flavors. Its celebratory look and universally appealing taste make it a versatile finale that doesn’t demand elaborate plating or intricate timing. Serve it as a centerpiece on a cake stand, with a light dusting of powdered sugar or a delicate glaze that catches the light just so. A sprig of fresh mint or a few extra berries on top can add a note of color and scent that enhances its allure without overpowering the dish.
Pairings to consider:
– Beverages: a lightly sparkling prosecco, a crisp rosé, a gentle Earl Grey, or a vanilla-infused iced tea. For non-alcoholic options, a berry-infused shrub or a lemon-honey sparkling water echoes the fruit and cream balance.
– Sides: delicate lemon curd, a small plate of citrus segments to echo brightness, or a handful of lightly roasted nuts for a textural contrast.
– Desserts: simple vanilla yogurt or custard alongside for a lighter counterpoint, or a dollop of lightly whipped cream to echo the cake’s creaminess.
– Seasonal swaps: swap in stone fruits or orchard berries when they’re at their peak, or mix in edible flowers for a garden-fresh presentation.
This cake is inherently social. Its beauty invites a pause in conversation as guests admire the layers and the gleam of the fruit, while its comforting flavors encourage lingering, laughter, and convivial sharing. It’s the kind of dessert that makes a meal feel complete, a small, fragrant celebration tucked into a slice that travels from plate to memory.
Tips, Variations & Substitutions
- Make-ahead strategy: bake the pastry layers in advance and store them cooled. Assemble closer to serving by layering with cream and berries just before presenting.
- Gluten-free option: use a gluten-free pastry dough or a nut-based crust that remains sturdy enough to support the layers while maintaining tenderness.
- Vegan adaptation: choose a plant-based pastry, coconut or almond milk for the cream, and a dairy-free butter substitute. Ensure your berries remain fresh and juicy to maintain brightness.
- Flavor twists: add a touch of citrus zest (lemon, orange, or lime) to the cream for a zesty lift that brightens the berry flavors. A whisper of almond extract can echo the pastry’s nuttiness nicely.
- Berry variations: mix strawberries, blueberries, raspberries, and blackberries for color and a range of tartness. For a deeper berry flavor, macerate a portion of the berries with a spoon of sugar for a few minutes before layering.
- Herbal accents: a few crushed mint leaves or a tiny rosemary sprig on the plate can add an unexpected, refreshing note if used sparingly.
- Portion control: if you’re serving a crowd, consider making mini pastry cakes or tartlets so guests can sample and share easily.
Storage & Make-Ahead Ideas
To preserve the integrity of Berry Cream Pastry Cake, plan ahead with smart storage. The pastry crust benefits from cooling completely before layering, and the creamy component should be kept cool to maintain its smooth texture. If you’ve prepared this dessert ahead of time, consider these tips:
- Refrigeration: store assembled portions in an airtight container or cover with plastic wrap to prevent the pastry from drying out. The cream will stay firm and the berries will stay bright for up to 2–3 days in the fridge.
- Freezing: for a longer-term option, you can freeze assembled slices wrapped well in plastic and foil. Thaw gently in the fridge and, if needed, re-wallow with a quick cold whip of cream to revive texture before serving.
- Make-ahead strategy: you can bake the pastry layers up to 1 day in advance, wrap, and refrigerate overnight. In the morning, briefly reassemble with fresh cream and berries for a just-made impression at serving time.
- Reheating: if you prefer a warm pastry experience, gently rewarm the crust in a low oven just until it regains some of its crispness, then add cold cream and berries to restore contrast of temperatures at the moment of serving.
Fun Facts & Trivia (Optional)
Here are a few tidbits that might deepen your appreciation for this dessert as you bake or share it with others:
- Many cultures celebrate berries as symbols of abundance and vitality, often pairing them with creamy elements in desserts to symbolize harmony between earth and indulgence.
- Pastry cakes like this emerged from a tradition of layering textures—crisp crust, soft filling, and fresh fruit—meant to delight the senses and provide a satisfying finish to a meal.
- Vanilla cream (or custard) pairs especially well with berries because vanilla’s warmth helps coax out the fruit’s natural aromatics, making it a timeless combination in desserts around the world.
- In some regions, a light glaze is brushed over fruit-tilled desserts to amplify gloss and color, making the berries look even more edible and inviting on the plate.
- The practice of using fresh seasonal fruit in a cake aligns with modern culinary trends that celebrate sustainability, local ingredients, and vibrant natural flavors.
Ingredients
Berry Cream Pastry Cake
Cake Base
- 2 1/2 cups all-purpose flour (unsifted)
→ All-purpose flour provides the cake’s structure and body. When measuring, spoon the flour into the measuring cup and level with a knife to avoid packing, which can make the crumb dense. Since this recipe uses a rich batter, unsifted flour will yield a slightly heavier crumb; if you prefer a lighter cake, sift the flour with the leavening and salt, or substitute 2 tablespoons of the flour with a little cornstarch for a softer crumb. - 1 1/2 cups granulated sugar
→ Sugar sweetens the batter and, when creamed with butter, helps trap air to create a tender, fluffy crumb. Use fine granulated sugar for smooth blending; if you only have coarse sugar, process briefly in a food processor. For a moister cake, you can substitute up to 1/4 cup with light brown sugar for a hint of molasses. - 1 cup unsalted butter, softened
→ Butter provides richness and moisture, and when creamed with sugar, helps create air pockets that contribute to a tender crumb. Ensure the butter is truly softened to room temperature before mixing. If you must substitute with a dairy-free option, use a plant-based butter or oil blend and adjust by adding a little yogurt or dairy-free milk for structure. - 4 large eggs, room temperature
→ Eggs contribute structure, moisture, and richness; they also help emulsify the batter for a tender yet sturdy cake. Bring eggs to room temperature to promote even incorporation and better volume. If you only have cold eggs, warm them in warm—not hot—water for a few minutes before using. - 1 cup whole milk
→ Milk adds moisture and tenderness; using whole milk yields a richer crumb. If dairy-free, substitute with an equal amount of almond or soy milk plus a teaspoon of extra oil or melted butter to mimic fat content. Do not substitute with very low-fat milk if you want a moist cake. - 2 teaspoons baking powder
→ Leavening agent that helps the cake rise and become light and airy. Use fresh baking powder for best lift; if your powder is older, perform a quick test (a pinch in warm water should fizz). Sift it with the flour to distribute evenly and prevent dense spots. - 1/2 teaspoon salt
→ Enhances overall flavor and tightens the crumb slightly by balancing sweetness and fat. Distribute evenly by mixing with the dry ingredients so it doesn’t concentrate in any one area. - 2 teaspoons vanilla extract
→ Adds depth of flavor and aroma. Use pure vanilla extract for best results; if you have a vanilla bean, you can replace part of the extract with scraped bean seeds for a richer fragrance. Add the vanilla with the wet ingredients for even distribution.
Cream Fillings
- 2 cups whole milk
→ Base for pastry cream (crème pâtissière). Heat gently until steaming just before simmering; avoid boiling to prevent curdling. Use the milk fresh for best texture and flavor. - 1/2 cup granulated sugar
→ Sweetens the pastry cream and helps balance the slight bitterness of eggs. You can adjust by up to 1/4 cup depending on desired sweetness. For a lighter note, reduce by a couple of tablespoons. - 4 large egg yolks
→ Key thickening component and adds richness. Whisk yolks with some hot milk gradually to temper and prevent scrambling, then return to the pan with the rest of the milk to cook until thickened. If you want extra smooth pastry cream, strain after cooking to remove any lumps. - 2 tablespoons cornstarch
→ Primary thickening agent that gives pastry cream its glossy, custard-like hold. Dissolve it in a small amount of cold milk before adding, and cook the mixture gently until it boils and thickens (about 1-2 minutes after boiling). Do not overcook, or it may become rubbery. - 1 teaspoon vanilla extract (or 1 vanilla bean, scraped)
→ Flavor foundation for pastry cream. Vanilla beans give a deeper aroma and specks, while extract is convenient and reliable. If using a bean, simmer the milk with the bean pod to infuse, then remove before whisking with yolks. - Pinch of salt
→ Heightens sweetness and enhances the vanilla; a tiny amount balances the custard’s richness. Mix into the hot pastry cream off the heat for even distribution. - 1 tablespoon unsalted butter, optional (finish)
→ Finishes pastry cream with extra gloss and a silkier texture when stirred in off the heat. Add just after removing from the heat; the residual heat will melt it smoothly. If dairy-free, skip or use a dairy-free butter substitute. - 2 cups heavy whipping cream, cold
→ Used to make a light, airy whipped cream to fold into or layer with the pastry cream. Start with a cold bowl and beaters; chilling the cream ensures sturdy peaks. For stabilized whip, you can add 1-2 tablespoons of powdered sugar and a splash of vanilla, or a small amount of cream of tartar before whipping. - 1/4 cup powdered sugar
→ Sweetens and helps stabilize the whipped cream texture. Sift the sugar before adding to prevent gritty texture. If you prefer a less sweet whipped cream, reduce to 2 tablespoons. - 1 teaspoon vanilla extract
→ Flavoring for whipped cream; use pure vanilla for best aroma. If you used vanilla bean in the pastry cream, you can match flavors by using a simple vanilla in the whipped cream as well.
Berry Layer
- 2 cups mixed berries (strawberries, blueberries, raspberries)
→ The berry layer provides brightness, tartness, and juiciness. Choose ripe, fragrant berries for the best flavor; hulled and halved or left whole depending on berry type. If using frozen, thaw completely and drain excess liquid to avoid a soggy cake. - 2 tablespoons granulated sugar
→ Macerates the berries to draw out juices and concentrate flavor, creating a natural glaze. Taste and adjust sweetness based on berry tartness. For stronger berry flavor, let them macerate 15-20 minutes, stirring occasionally. - 1 tablespoon lemon juice
→ Brightens the berry flavor and helps balance sweetness. Use fresh lemon juice for maximum brightness; adjust by taste, especially if your berries are very sweet. If you prefer a subtler taste, omit. - 1 teaspoon lemon zest, optional
→ Adds fragrant citrus aroma and complexity; zest finely to avoid large chunks. For a more intense lemon note, include zest in the macerating step with the sugar. - 1 teaspoon cornstarch, optional
→ If you want a thicker berry layer or a light compote to stand between layers, this will help set the juices into a cohesive filling. Dissolve in a small amount of water or berry juice before adding and cook until glossy. Do not overcook to prevent a gummy texture.
Glaze/Finish
- 1 cup powdered sugar
→ Creates a smooth, glossy glaze to finish the cake. Sift to remove any lumps and whisk in small amounts of liquid to achieve a pourable consistency. The glaze adds a light sweetness and a polished appearance to the finished cake. - 2-3 tablespoons milk
→ Adjusts glaze consistency; start with 2 tablespoons and add more as needed. For a dairy-free option, use almond or oat milk. A touch of lemon juice can brighten the glaze if desired. - 1/2 teaspoon vanilla extract
→ Flavor partner to the cake and fillings; optional but recommended for a cohesive vanilla-forward profile. If you used vanilla bean in the fillings, you can keep vanilla in the glaze for consistency. - Optional: 1 teaspoon lemon juice
→ Adds brightness to the glaze, especially nice with berry flavors. Increase only if you enjoy a tangy finish; you can also grate a little lemon zest for color and aroma.
Optional Add-ins
- 1/2 cup sliced almonds (optional)
→ Almonds add a toasty crunch and nutty flavor that contrasts with the soft cake and creamy fillings. Toast the almonds lightly in a dry pan or in the oven until fragrant, then fold into the batter or sprinkle on top before glazing for extra texture. - 1/2 cup freeze-dried berries (optional)
→ Intensify berry flavor and color in the batter or filling without releasing extra juice that can soggy the layers. Crush slightly and fold into the pastry cream or dust over the top for a speckled look.
Instructions
- Step 1: Preheat your oven to 350°F (175°C) and prepare two 9-inch round cake pans by lining the bottoms with parchment rounds and greasing the sides thoroughly.
→ This ensures the cakes rise evenly, prevent sticking, and allow clean removal of layers for a smooth finish. - Step 2: In a medium bowl, whisk 2 1/2 cups all-purpose flour, 2 teaspoons baking powder, and 1/2 teaspoon salt until evenly distributed.
→ Sifting or whisking the dry ingredients together guarantees uniform leavening and prevents dense pockets in the crumb. - Step 3: In a large mixer bowl, beat 1 cup unsalted butter, softened, with 1 1/2 cups granulated sugar on medium speed until the mixture is pale, fluffy, and light, about 3 to 5 minutes.
→ Creaming builds air pockets that contribute to a tender, cake-like crumb; scrape the bowl occasionally to incorporate all fat and sugar evenly. - Step 4: Add 4 large eggs, one at a time, beating well after each addition until fully incorporated and the batter looks smooth and homogenous.
→ Room-temperature eggs emulsify better with the fat and sugar, improving volume and crumb texture. - Step 5: Mix in 2 teaspoons vanilla extract, ensuring it is evenly dispersed through the batter.
→ Vanilla enhances depth of flavor and aroma; adding with the wet ingredients promotes even distribution. - Step 6: With the mixer on low, alternate adding the dry ingredients in three portions and the milk in two portions, beginning and ending with the dry mixture, and mix just until combined between additions.
→ This gentle, intermittent mixing prevents gluten overdevelopment, yields a tender crumb, and avoids rough, gummy textures from overworking the batter. - Step 7: Divide the batter evenly between the prepared pans and smooth the tops with a small offset spatula to ensure even rising.
→ An even surface prevents lopsided layers and ensures uniform layer height after baking. - Step 8: Bake the cakes in the preheated oven for 25 to 30 minutes, or until the centers are set and a toothpick inserted into the middle comes out with only a few moist crumbs; rotate the pans halfway for even heat distribution.
→ Proper doneness prevents a dense center and ensures the layers are level for stacking; rotating halves avoids hot spots. - Step 9: Let the cakes cool in their pans on a rack for 10 minutes, then run a knife around the edges and invert onto a rack to cool completely before filling.
→ Cooling in air stops continuing bake from residual heat and helps prevent compression or soggy layers when assembled. - Step 10: Make pastry cream (crème pâtissière) by whisking 4 large egg yolks with 1/2 cup granulated sugar until pale and thick.
→ This creates a smooth, rich base that will set properly when heated with starch, providing the cake’s luxurious filling. - Step 11: In a separate small bowl, dissolve 2 tablespoons cornstarch in a few tablespoons of cold milk to make a slurry.
→ The slurry prevents lumps and ensures a glossy, evenly thickened custard. - Step 12: In a saucepan, bring 2 cups whole milk with a pinch of salt lightly to a simmer, then remove from heat.
→ Heating the milk gently preserves its flavor and prevents scorching while preparing the custard base. - Step 13: Temper the yolks by whisking a small amount of the hot milk into the yolk mixture, then pour the yolk mixture back into the pot with the remaining hot milk and the cornstarch slurry; return to medium heat and cook, whisking constantly, until the mixture thickens and becomes glossy, about 1 to 2 minutes after it begins to boil. Do not boil.
→ Tempering prevents scrambling the eggs; continuous whisking yields a smooth, cohesive pastry cream. - Step 14: Remove from heat, whisk in 1 teaspoon vanilla extract and a pinch of salt; if using, stir in 1 tablespoon unsalted butter until glossy; strain through a fine mesh into a clean bowl, then cover surface with plastic wrap and refrigerate until cold and set.
→ Straining removes any residual lumps and the plastic wrap keeps a skin from forming; chilling helps it firm for layering. - Step 15: In a chilled bowl, whip 2 cups cold heavy whipping cream with 1/4 cup powdered sugar and 1 teaspoon vanilla until soft peaks form, then continue beating to medium-stiff or stiff peaks as desired; refrigerate until needed.
→ A well-chilled bowl and cream ensure stable peaks that hold layers and fillings without weeping. - Step 16: Prepare the berry layer by combining 2 cups mixed berries with 2 tablespoons granulated sugar, 1 tablespoon lemon juice, and optional lemon zest; macerate 15 to 20 minutes, then if using cornstarch, dissolve 1 teaspoon cornstarch in 1 tablespoon water and gently simmer with the berries until glossy; cool completely.
→ Maceration unlocks berry juices for a bright glaze and intensifies flavor; thickening keeps the layer from making the cake soggy. - Step 17: Level each cake layer with a serrated knife or cake leveler to create flat, even surfaces; if domed, trim the tops to achieve uniform layers.
→ Flat layers stack cleanly, prevent slumping, and create a neat, professional glaze and finish. - Step 18: Place the first cake layer on a serving plate; spread a thin, even layer of pastry cream over the surface and fold 1/4 of the whipped cream into the pastry cream to lighten its texture, then spread this lightened filling evenly.
→ The pastry cream provides structure and richness while lightened filling prevents heaviness and ensures smooth spreading. - Step 19: Evenly distribute the macerated berry layer atop the filling, creating a bright, juicy middle that contrasts with the creamy filling and the soft cake crumb.
→ The berry layer adds tartness and color, balancing the sweetness and providing moisture and shine. - Step 20: Top with the second cake layer, press gently to secure, and spread a thin coat of pastry cream on the top to anchor the final layer; place a final cake layer if you are making a three-layer cake, then cover with more whipped cream to form a smooth exterior.
→ A cohesive, sealed surface prevents sliding fillings and prepares the cake for the glaze; pressing ensures alignment and stability. - Step 21: Frost the cake with the remaining whipped cream, smoothing the sides with a spatula or a cake scraper for a clean finish; you may pipe decorative borders if desired.
→ A generous, even coating hides the layers and creates an elegant, uniform appearance; cold, steady hands help achieve pristine edges. - Step 22: Prepare the glaze by whisking 1 cup powdered sugar with 2–3 tablespoons milk and 1/2 teaspoon vanilla until smooth and pourable; Add up to 1 teaspoon lemon juice for a brighter finish if desired.
→ The glaze provides a glossy, polished top and a delicate sweetness that complements the berries without overpowering them. - Step 23: Drizzle the glaze over the top and allow it to run down the sides in a controlled manner; let the glaze set for about 15 to 20 minutes before slicing.
→ A set glaze locks in moisture and creates a professional, finished look while keeping the interior layers intact during cutting. - Step 24: If desired, garnish with toasted almond slices or crushed freeze-dried berries for additional texture and color; chill the cake briefly to help the garnish set.
→ Garnishes add contrasting texture and visual appeal, and chilling helps them adhere to the surface. - Step 25: Slice the Berry Cream Pastry Cake with a warm knife (dip the blade in hot water and wipe clean) for clean cuts, and serve promptly to enjoy the contrast of creamy filling, bright berries, and tender cake.
→ A hot knife reduces dragging and squashing delicate layers, ensuring neat presentation and optimal texture with each bite.
Notes
These Berry Cream Pastry Cake notes provide practical tips for achieving a bakery-worthy, multi-layer dessert with a tender vanilla cake, silky pastry cream, light whipped cream, and bright berry filling. Gather all ingredients and bring cold components to room temperature before mixing, then cream the butter and sugar until pale and fluffy; beat in eggs one at a time, then alternate adding dry ingredients and milk to keep batter smooth and minimize tunnels; do not overmix. Bake until a toothpick comes out with a few moist crumbs and cool completely on a rack. For the pastry cream, heat milk with half the sugar and vanilla just to steaming, whisk yolks with remaining sugar and cornstarch, then temper the yolks with hot milk, return to the pan and cook until thickened, whisking constantly; strain if desired and stir in butter off the heat for extra gloss. Chill until cold. For the whipped cream, whip cold cream with powdered sugar and vanilla to stiff peaks; fold a portion into the pastry cream to lighten if you like, then reserve some to pipe or layer. Berry layer: macerate berries with sugar and lemon juice (and zest if using) for 15-20 minutes to draw out juices and intensify flavor; if you want a glossy finish, dissolve a little more cornstarch in water and cook briefly with the berries to slightly thicken. Glaze: whisk powdered sugar with milk and vanilla to a pourable glaze, adjusting with more sugar or milk; add lemon juice for brightness if desired. Assembly: level cake layers, spread a layer of pastry cream, pipe or dollop whipped cream, scatter berries, then top with the next cake layer; finish with more whipped cream, berries, and a thin glaze over the top. Make-ahead and storage: the components can be prepared a day ahead; keep pastry cream and whipped cream refrigerated and assemble within a day for best texture; the cake will keep chilled for 2-3 days; avoid freezing whipped cream-heavy components. Optional add-ins: toast sliced almonds for crunch and dust with extra berries, or fold in freeze-dried berries for concentrated color and flavor without extra juice.
Tips
Tips for Berry Cream Pastry Cake
Cake Base tips
- Always bring butter and eggs to room temperature before mixing. This improves emulsification and helps the batter trap air for a light crumb.
- Measure flour correctly: scoop into the cup and level with a knife to avoid packing, which can make the crumb dense.
- For a lighter crumb, sift the flour with the baking powder and salt, or replace 2 tablespoons of flour with a little cornstarch.
- Cream the butter and sugar until pale and fluffy (3–5 minutes). This forms air pockets that help the cake rise and stay tender.
- Mix eggs in one at a time, fully incorporating each addition to maintain a stable emulsion.
- Alternate adding dry and wet ingredients in 2–3 additions to keep the batter smooth and uniform.
- Have pans prepared (greased and parchment-lined) and the oven preheated before mixing to ensure even rise.
- When testing doneness, insert a toothpick; it should come out with a few moist crumbs, not wet batter.
- Cool layers completely on a rack before assembling to prevent cream from melting or glazing from becoming runny.
Cream Fillings tips
- Pastry cream: heat milk and sugar gently and temper egg yolks with hot milk to prevent scrambling. Cook until thickened but not boiling; a gentle simmer is ideal.
- Strain the pastry cream after cooking to remove any lumps for a silky texture.
- Cover the surface with plastic wrap directly on the cream and chill promptly to prevent a skin from forming.
- If the pastry cream is too thick, whisk in a bit more warm milk until you reach a spreadable consistency.
- To lighten the pastry cream, fold in whipped cream once the pastry cream has cooled to near room temperature.
- Whipped cream should be cold and thickened to stiff peaks. Stabilize with a small amount of powdered sugar or a touch of cream of tartar if you plan to assemble ahead.
- For dairy-free options, use coconut or almond milk-based pastry cream and a dairy-free whipped cream substitute, keeping in mind the texture may vary slightly.
- Assemble layers when fillings are fully cooled to avoid sliding or runny borders.
Berry Layer tips
- Choose ripe, fragrant berries and hull/halve according to variety to ensure even distribution and texture.
- Macerate berries with sugar and lemon juice for 15–20 minutes to draw out juices and intensify flavor; taste and adjust sweetness as needed.
- Drain excess liquid after maceration to prevent a soggy cake. You can reduce the collected juice in a small saucepan to a glossy syrup and brush it on the cake if desired.
- Thaw frozen berries completely and pat dry to avoid extra moisture that can weaken the crumb.
- If using cornstarch in the berry layer, dissolve it in a little water or berry juice before heating; cook until the mixture is glossy and thickened, then cool before layering.
- Reserve some whole berries for a decorative top or for variation in texture within the layers.
Glaze/Finish tips
- Whisk powdered sugar with a little milk and vanilla to a pourable but thick consistency. Add lemon juice for brightness if desired.
- Sift the sugar first to avoid lumps; start with 2 tablespoons milk and add more as needed to reach the desired drizzle consistency.
- Apply the glaze to a cooled cake for a smooth, glossy finish. A thin layer that sets quickly can help seal in moisture.
- For a dairy-free glaze, use almond or oat milk and a neutral oil or dairy-free butter substitute to achieve shine.
- Let the glaze set for a few minutes before slicing to maintain clean edges in your servings.
Optional Add-ins tips
- Toast sliced almonds in a dry skillet or oven until fragrant; cool completely to maintain crunch in the final cake.
- Fold crushed freeze-dried berries into the pastry cream or sprinkle on top for bursts of concentrated color and berry flavor without extra juice.
- If adding nuts or add-ins to the batter, fold them in gently at the end to avoid breaking the emulsion and overworking the batter.
FAQ
Berry Cream Pastry Cake – Frequently Asked Questions
What is Berry Cream Pastry Cake?
A layered dessert with a crisp pastry crust, a velvety vanilla pastry cream, and layers of fresh berries, finished with a light berry glaze or a dusting of sugar. It combines a classic pastry with creamy filling and bright fruit for a balanced treat.
What components make up the cake?
The usual components are:
- Crust (shortcrust or puff pastry)
- Pastry cream (vanilla)
- Berry filling (fresh or lightly cooked)
- Glaze or dusting (optional)
- Optional garnish (mint leaves, powdered sugar)
What ingredients do I need?
Common ingredients and approximate amounts (adjust to pan size and taste):
- Crust: 1 1/4 cups all-purpose flour, 1/4 cup granulated sugar, 1/2 cup cold unsalted butter, 1 large egg yolk, 1–2 Tbsp cold water, pinch of salt
- Pastry cream: 2 cups milk, 3/4 cup sugar, 1/4 cup cornstarch, 4 egg yolks, 2 tsp vanilla, 2 Tbsp butter
- Berries: about 2 cups mixed berries (fresh or thawed if using frozen)
- Glaze: 1/2 cup berry juice or purée, 2 Tbsp sugar, optional 1 tsp lemon juice
- Optional toppings: mint leaves, powdered sugar
How do I bake the crust (blind bake) for Berry Cream Pastry Cake?
Roll the dough to about 1/8 inch thick and fit it into a 9-inch pan. Chill for 30 minutes. Line with parchment and add pie weights or dried beans. Bake at 375°F (190°C) for 15 minutes. Remove weights and parchment, bake 8–12 minutes more until lightly golden. Cool completely before filling.
How do I prepare the pastry cream?
Warm the milk until steaming. In a bowl, whisk together sugar, cornstarch, and egg yolks until smooth. Gradually whisk in hot milk to temper, then return to a pot and cook over medium heat, whisking constantly until thick and glossy. Remove from heat, whisk in vanilla and butter. Strain if needed, then cover with plastic wrap to prevent a skin and chill until cold.
How do I assemble Berry Cream Pastry Cake?
Spread a thin layer of pastry cream over the cooled crust. Layer with berries, then add another layer of pastry cream over the berries. Top with remaining berries. If desired, glaze the berries with warmed berry juice or diluted jam and chill 1–2 hours to set. Slice and serve chilled.
How can I prevent a soggy crust?
Prevent moisture from soaking into the crust by blind baking until just set and cooling completely. Apply a thin barrier (a light layer of jam or lemon curd) before the pastry cream. Drain berries well and pat them dry to minimize extra moisture. Chill the assembled cake briefly to help the layers set before slicing.
Can I use frozen berries?
Yes. Thaw and drain berries well. Pat dry to remove excess moisture before layering. Frozen berries can be juicier, so adjust the glaze or reduce additional liquid accordingly.
How should I store Berry Cream Pastry Cake and how long does it keep?
Store refrigerated in an airtight container for 2–3 days. The crust may soften slightly over time, but the pastry cream helps hold the layers together. Do not leave at room temperature for more than 2 hours. The cake is best eaten fresh or within a couple of days; freezing is not recommended due to the dairy filling.