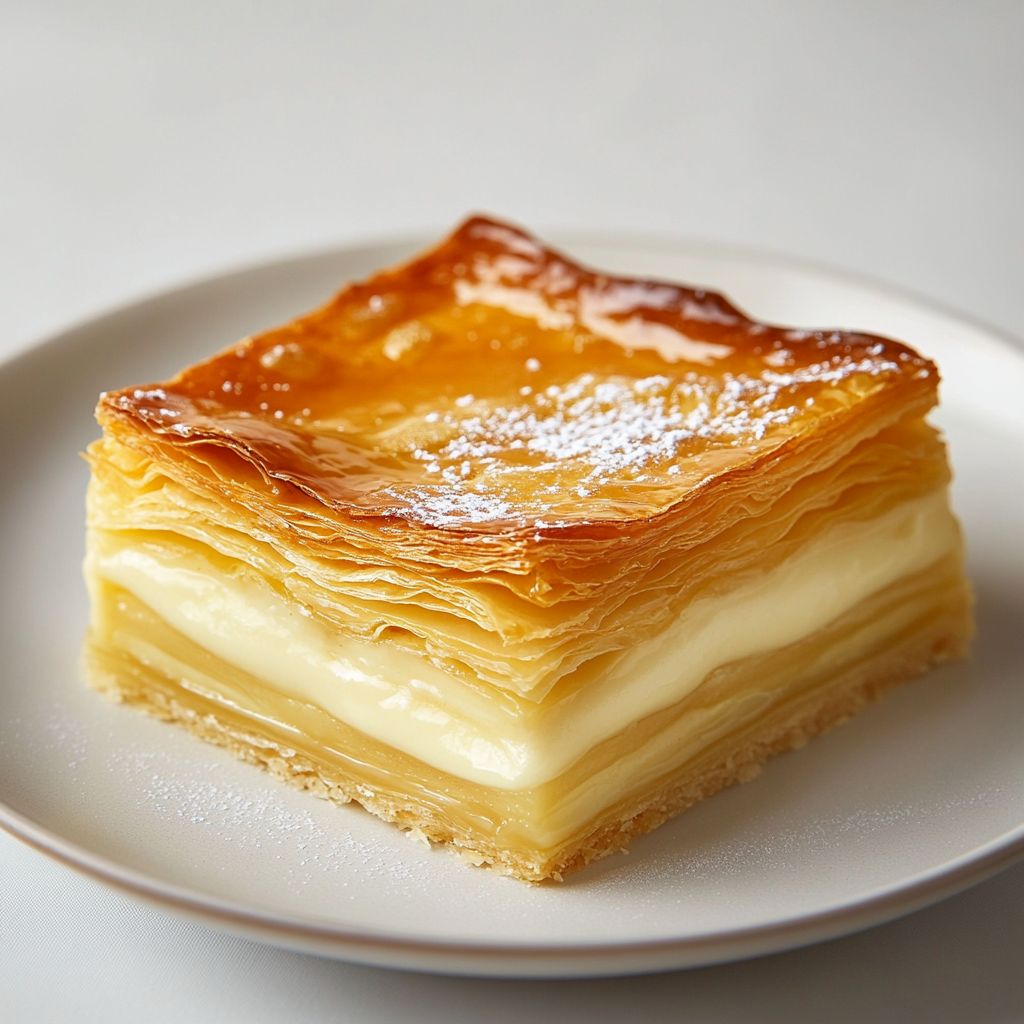
– looks like a sweet, layered, baked dessert with a glossy top")
Introduction / Hook
When you first glimpse this dessert, your eye is drawn to a flawless, honeyed gloss that gleams like a coin fresh from the mint. It sits there, elegant and unassuming, a golden promise tucked beneath a lacquered surface. This is not just a dessert; it is a celebration of restraint and indulgence, a few precise layers that come together with the quiet confidence of a well-told story. The surface gleams, yes, but it is what lies beneath that invites you to lean in—velvety, custardy between ribbons of softness, with a whisper of caramel and vanilla that lingers long after the last bite. It’s a dish that looks like a treasure, tastes like a memory, and feels like a warm reception after a long day. The color, the sheen, the delicate strata—everything about it says you’ve cooked with intention, and you’ve plated with a touch of theater that hides nothing but delights everything it reveals.
Imagine a kitchen filled with the soft aroma of browned butter, vanilla, and a hint of citrus zest, a fragrance that feels both nostalgic and modern. The top glistens with an almost mirror-like finish, a testament to careful technique and patience. The dessert presents a surface so glossy it could pass for a glaze on a jewel box, yet in the first cut you’ll discover softly layered depths—creamy, airy, and luxurious enough to deserve a slow savor. This is the kind of dessert that makes a weeknight feel like a celebration and a special occasion feel wonderfully approachable. It’s the gold standard you reach for when you want to impress without fuss, to show you care without shouting it from the rooftops.
What truly marks this dessert as a standout is the balance it strikes. It isn’t overly rich; it doesn’t demand a large portion to satisfy. The layers offer a quiet architecture: a delicate crispness at the edge giving way to satin-smooth filling, with whispers of caramel that echo through the bite. Every forkful is a small ceremony—textures that contrast and harmonize, flavors that mingle and linger. It invites conversation, curiosity, and a shared moment of delight at the table. And because it’s baked, it carries a warmth that feels comforting and intimate—like a favorite cardigan you reach for on a chilly evening, only for the palate instead of the shoulders.
The Story Behind the Dish
Every treasured dessert has a companion story, and this one is no different. It began as a family secret, tucked away in a weathered notebook that bears the marks of years living in a sunlit kitchen. The original version was a humble, pantry-friendly treat—the kind of dish that used simple ingredients, transformed through gentle technique into something more radiant than its components. The old method called for patient layering, a careful bake, and a glaze that required restraint rather than brute force. It traveled from kitchen to kitchen, mutating with the seasons, picking up little touches from grandmothers and aunts who understood that the best dessert is often the one that whispers rather than shouts.
Over time, the recipe settled into a form that emphasizes texture as much as taste. The custard-like interior remains light and airy, but it is supported by subtle structural layers that provide a sense of architecture—soft, creamy center with delicate boundaries, all crowned by a top that gleams with the confidence of a gilded finish. Some families added a hint of citrus zest to wake the palate; others preferred a touch of almond or vanilla bean to deepen the aroma. Though the particulars vary by kitchen and tradition, the essence remains the same: a treasure that feels timeless, yet refreshingly contemporary, and a dessert that encourages sharing and storytelling as much as savoring.
In many regions, similar desserts appear under different names, each reflecting local ingredients and cultural preferences. You might encounter variations that lean into a custard-pudding hybrid, or versions that incorporate a light cake-like layer beneath the glossy top. The unifying thread across these incarnations is a reverence for technique: temperature control, patience with the bake, and a glaze that gleams with the patience of sugar meeting time. This particular rendition is a celebration of that lineage—an homage to the old-world craft of layered baking, presented with a modern, approachable sensibility that makes it possible for home cooks to achieve restaurant-quality elegance in their own kitchens.
Why You’ll Love This Recipe
- Elegant simplicity: A refined dessert that looks sophisticated but comes together with practical, approachable steps and a forgiving bake that yields stunning results.
- Gorgeous presentation: A glossy top and smooth, layered interior create a visual centerpiece that earns compliments before the first bite.
- Balanced richness: Creamy, lightly sweet with a hint of caramel and vanilla; rich enough to feel special, light enough to enjoy in generous portions.
- Texture contrast: A crisp, glossy crown that gives way to a luscious, custard-like center and delicate between-layer airiness.
- Comforting aroma: The fragrance of browned butter, warm vanilla, and citrus zest fills the room and creates anticipation before you even cut into it.
- Versatile for occasions: Perfect for holidays, birthdays, anniversaries, or as an elevated weeknight treat when you want to make an impression without a complicated plan.
- Make-ahead potential: The flavors settle and deepen with time, making it a strong candidate for dinner-party prep or holiday staging.
- Customizable: Easily adaptable for vegan, gluten-free, or dairy-free needs with thoughtful substitutions, so more guests can enjoy it.
Flavor Profile & Texture
The first sensation is the gleaming surface, a mirror-like veneer that hints at the caramelized sugar beneath. As your fork meets the top and sinks into the layers, you encounter a delicate, almost satin-like richness. The top-to-center gradient is soft rather than heavy—the kind of richness that wraps around the tongue without clinging. The flavor journey begins with a gentle caramel sweetness—finite and refined—followed by the warm, comforting aroma of vanilla and browned butter. A subtle citrus note—often lemon or orange zest—sways in the background, providing brightness that keeps the dessert from tipping into cloying territory.
The interior reveals layered depth. Imagine thin, airy strata that resemble a finely whipped custard folded with a light cake crumb or delicate pastry layers, depending on the exact interpretation. Each bite offers a whisper of texture: a cool, creamy center supported by the faintly chewy, tender edges where the glaze has formed its glossy finish. The glaze itself is a glossy lacquer, achieved by a careful reduction of sugar and tiny amounts of cream to create a smooth, glassy top that crackles gently when you press it and shimmers under candlelight or a plated presentation. The overall mouthfeel is luxurious yet approachable, not heavy, and with a lingering sweetness that hints at honeyed notes more than outright sugar. It’s the kind of dessert that invites slow savoring and conversation, because you want to notice every layer and the subtle way they harmonize with one another.
In terms of flavor balance, the dish plays with contrast: the top glaze offers a crisp, clean gloss that contrasts with the soft, satin interior; the caramel sweetness is tempered by vanilla’s warmth and a touch of citrus zest’s mineral brightness; and the overall finish carries just a hint of butter’s toasty fragrance. It’s a flavor orchestra where each element tunes the others, never overpowering but always present, like a well-written chorus where every singer knows their cue. The result is a dessert that feels classy and timeless, yet remains deeply comforting—something you might imagine served in a sun-drenched patisserie in a seaside town, or at a cozy family gathering where stories are shared as much as slices are passed around the table.
Occasions & Pairings
This dessert shines in moments that call for a little something extra without demanding a complicated execution. It is equally at home during festive gatherings and as a signature finale for a quiet dinner at the end of a long week. Its universal appeal makes it a reliable showstopper for celebrations, but its elegance is matched by its accessibility, meaning you can slip it into a weeknight dinner party without making anyone feel overwhelmed.
Occasions to consider:
- Holiday gatherings and family celebrations where a “golden” dessert echoes the warmth of the season.
- Anniversaries or birthdays where a refined, not-too-sweet treat steals the spotlight.
- Elegant dinner parties where you want a dessert that photographs beautifully and travels well to the table.
- Weekend cooking projects—an opportunity to slow down and savor the process as much as the final plate.
- Special-occasion brunches, where a dessert with a glossy top feels like a gilded touch among morning dishes.
Pairings can elevate the experience even further. Consider these ideas:
- Drinks: A lightly sparkling dessert wine or a well-chilled Moscato can enhance the vanilla-caramel profile; for a non-alcoholic option, a vanilla-ginger tea or a citrus-y sparkling water works beautifully.
- Fruit accents: A tart berry compote or citrus segments can provide a bright contrast and a pop of color on the plate.
- Textural accompaniments: A dollop of whipped cream or a light crème fraîche can balance the sweetness; a few toasted almond slivers add a nutty dimension and crunch.
- Side dishes: Keep sides simple—perhaps a delicate lemon shortbread or a faintly salted butter cookie—to echo the dessert’s glaze without competing with it.
Tips, Variations & Substitutions
Whether you’re a purist or a culinary explorer, this dessert accommodates a spectrum of preferences. Here are ideas to tailor it to your kitchen, ingredients, and dietary needs, while preserving its core elegance.
- Vegan option: Use a plant-based milk (almond, oat, or coconut) and a neutral oil-based butter substitute. Replace dairy cream with coconut cream or a cashew-based cream. For the glaze, use a vegan sugar glaze that mirrors the shine with aquafaba as a binder if needed.
- Gluten-free approach: If a layer resembles cake, choose a gluten-free flour blend that produces a tender crumb. Ensure any thickening agents used in the filling are gluten-free.
- Lactose-free approach: Substitute regular dairy with lactose-free cream and butter. Ensure the top glaze uses lactose-free ingredients if you’re serving lactose-intolerant guests.
- Flavor twists: Introduce a hint of almond extract, saffron, or citrus zest (orange or lemon) to intensify the aroma. A splash of rum or cognac can add depth for adult gatherings; reduce the amount to maintain balance so it does not overpower the other flavors.
- Nutty accents: Toasted almonds, pistachios, or hazelnuts can be sprinkled on the top or pressed into the sides for a textural and visual lift.
- Low-sugar adaptation: Use a sugar alternative that caramelizes well and adjust the glaze proportion to maintain the glossy top without excessive sweetness. Pair with fresh fruit to provide natural sweetness and tartness.
- Mini versions: Bake in individual molds or small loaf pans to create elegant, personal desserts suitable for plating and gifting.
- Make-ahead rendering: The dessert often benefits from a rest in the refrigerator overnight, which helps the layers set and the flavors to meld. Bring to room temperature and re-glaze lightly before serving if desired.
- Glaze technique: For a flawless glossy top, finish with a warm glaze applied evenly and allowed to set undisturbed. A small pastry brush can help you achieve a perfectly smooth surface.
Storage & Make-Ahead Ideas
One of the virtues of this dessert is its adaptability to advance preparation. When you want to plan ahead or host without the stress of last-minute assembly, consider the following methods.
- Make-ahead: Prepare the layers a day in advance if your recipe allows, then finish with the glaze right before serving. This ensures the top remains pristine and the interior stays luxuriously soft.
- Refrigeration: Store covered in the refrigerator for up to 2–3 days. The flavors will continue to mellow, but be mindful of the glaze—if you notice a dulling, a quick light re-glaze can restore the shine just before serving.
- Freezing: Some versions of this dessert tolerate freezing before glazing; if you freeze, wrap tightly and thaw slowly in the fridge, then apply the glaze and chill briefly to regain gloss. If the layers are delicate, ensure they are well-supported to prevent cracking during defrosting.
- Reheating: If the dessert has any custard-like interior, avoid overheating. A gentle warm-up in a low oven just until the center softens is best, followed by a fresh glaze to restore the lacquered top.
- Portioning: For a dinner party, portion into individual servings ahead of time and store (un-glazed) in the fridge. Just before serving, apply the glaze and decorate for a flawless presentation.
Fun Facts & Trivia (Optional)
Did you know that glossy, mirror-like tops are a hallmark of many classic custard desserts and modern pâtisserie alike? The technique of achieving a satin-smooth surface often involves tempering the glaze and applying it at a precise temperature to prevent cracking as it cools. The name “mirror glaze” itself evokes a sense of refinement and artistry, a culinary surface that reflects both the cook’s patience and the guests’ delighted faces. The golden hue of this dessert—its signature visual cue—can be enhanced by a careful reduction of sugar to achieve deeper caramel tones without tipping the balance into sweetness overload. In many kitchens, the color and shine are as important as the flavor, signaling a dessert that has been treated with care, respect for technique, and an eye for presentation. This reverence for form and flavor is part of what makes the dish feel timeless and suitable for generations of cooks to claim as their own.
Beyond the kitchen, the concept of layered, baked desserts with a glossy top appears in various culinary traditions around the world. From delicate custards in European patisseries to layered puddings in Asian-influenced cuisines, the idea of layering to create texture and narrative within a single dish is universal. The golden finish evokes a sense of warmth, abundance, and hospitality—an invitation to gather, to share stories, and to savor the moment as time slows down just enough for everyone at the table to notice the beauty of a well-made dessert.
Ingredients
- Gold Dessert Base
- 1 1/2 cups graham cracker crumbs (or gluten-free digestive biscuits)
→ The crust forms the crunchy foundation of this layered dessert, providing texture and a slight caramel note. For gluten-free versions, use certified gluten-free cookies and crush to a very fine texture for even pressing. Press firmly into the pan and refrigerate or bake as your recipe dictates to set the base. - 1/4 cup unsalted butter, melted
→ Binds the crumbs into a cohesive crust that holds its shape when sliced. Allow the melted butter to cool slightly before mixing so the crumbs don’t become greasy; press into an even layer and chill or bake according to the recipe. - 2 tablespoons light brown sugar
→ Adds a subtle caramel sweetness that complements the buttery crust. If you prefer a crisper, lighter crust, substitute with granulated sugar. - Pinch fine sea salt
→ Enhances the crust flavor, balancing sweetness and helping the buttered crumbs come alive in taste and aroma. - Vanilla Custard Layer
- 2 cups whole milk
→ The main liquid for the vanilla custard; for extra richness, you can substitute up to 1 cup with heavy cream, though plain milk yields a lighter custard that slices well. - 3/4 cup granulated sugar
→ Sweetens the custard; adjust to taste. If you want a firmer texture, you can increase by a few tablespoons. - 4 large egg yolks
→ Thickens and enriches the custard, contributing silkiness and a rich mouthfeel. Make sure yolks are well whisked to emulsify with the milk mixture; keep mixture over medium heat to avoid scrambling. - 3 tablespoons cornstarch
→ Primary thickener to achieve a smooth, sliceable custard that holds layers together. Create a slurry with a few tablespoons of the milk before heating to prevent lumps. - 2 teaspoons vanilla extract or vanilla bean paste
→ Delivers classic vanilla aroma and depth; paste provides more intense flavor and visible specks for a traditional custard look. - 1 tablespoon unsalted butter, optional
→ Off the heat, whisk in for extra gloss and richness; do not boil after adding butter to avoid breaking the custard’s sheen. - Pinch salt
→ Brightens and balances sweetness, enhancing the custard’s flavor depth. - A pinch saffron threads, steeped in 1 tablespoon hot milk (optional)
→ Imparts a warm golden hue and delicate aroma; strain threads before assembly if you prefer a cleaner appearance. - Gold Mirror Glaze (Glossy Top)
- 1 cup white chocolate chips or chopped white chocolate
→ The base of a glossy glaze that cures to a mirror-like finish; white chocolate keeps the color pale so the gold hue of the glaze can shine through. - 1/2 cup heavy cream
→ Provides richness and helps achieve a smooth, glossy glaze; heat just until steaming before pouring over the chocolate to melt evenly. - 3 tablespoons light corn syrup
→ Prevents crystallization and aids in achieving a flawless, reflective surface; contributes to a silky pour. - 2 teaspoons gelatin powder, bloomed in 1/4 cup cold water (or 2 gelatin sheets)
→ Sets the glaze to a firm yet pliable consistency that can hold its shape when chilled; bloom first, then melt into the warm glaze base. - 1/2 teaspoon vanilla extract
→ Adds warmth to the glaze; vanilla pairs nicely with the custard beneath and the gold hues on top. - 2–3 drops yellow gel food coloring (or 1/4 teaspoon turmeric)
→ Provides the signature golden tone of the top glaze; add gradually to reach the desired intensity. For a richer metallic gleam, dust with edible gold luster after the glaze sets. - Edible gold leaf sheets or gold luster dust (optional)
→ Elevates the presentation with a luxe, gold-on-gold finish; handle carefully with clean tools and apply just before serving for best adhesion and impact. - Pinch fine sea salt (optional)
→ A tiny amount can sharpen the glaze’s sweetness and enhance overall flavor; use sparingly. - Optional Add-ins
- 1/4 cup finely chopped pistachios or toasted almond slivers (optional)
→ Adds a contrasting crunch and color to the edges or top; toast nuts lightly to deepen flavor and chop finely for even distribution. - 1/4 cup extra pistachios or almond slices (optional)
→ Visual appeal and texture; sprinkle around the edge of the dessert before chilling for a decorative finish. - Edible gold leaf sheets (optional)
→ A dramatic luxurious finish; apply only to fully set glaze and with clean, dry tweezers for precision.
Instructions
- Preheat your oven to 350°F (175°C) and line a 9-inch pan with parchment paper or grease it well.
→ This ensures even baking of the crust and prevents sticking, making it easy to lift slices out of the pan without tearing. - Process graham crackers (or gluten-free digestive biscuits) into a uniform, fine crumb using a food processor; if you do not have one, place crackers in a resealable bag and crush with a rolling pin until no large pieces remain.
→ A fine crumb yields a smooth, cohesive crust that presses evenly and holds together when sliced. - In a bowl, whisk together the graham cracker crumbs, 2 tablespoons light brown sugar, and a pinch of fine sea salt until the mixture is evenly distributed.
→ Even distribution of sugar and salt ensures balanced flavor across the crust and prevents salty pockets or overly sweet spots. - Pour the melted butter into the crumb mixture and mix with a fork or spatula until all crumbs are moistened and begin to clump slightly.
→ Moist crumbs press into a compact layer that bakes or sets firmly, forming a stable base for the dessert. - Press the crumb mixture into the bottom of the prepared pan in an even, compact layer using the flat bottom of a glass or measuring cup; avoid gaps by applying steady, even pressure along the surface and up the sides if desired.
→ A uniformly pressed crust bakes or chills evenly and slices cleanly without crumbling. - If you plan to bake the crust, bake for 8–10 minutes at 350°F (175°C) until the crust is fragrant and lightly golden; otherwise refrigerate or freeze the pressed crust to set it firmly for a no-bake finish.
→ Baking creates a toasted, aromatic crust with a slight firmness; chilling preserves the crumb structure for no-bake preparations. - For optional saffron, steep a pinch of saffron threads in 1 tablespoon hot milk for 5–8 minutes, then strain and reserve the infused milk.
→ Saffron adds a warm golden hue and delicate aroma without gritty particles; straining avoids specks in the custard. - Whisk 4 large egg yolks with 3/4 cup granulated sugar in a medium bowl until the mixture is pale and thick, about 2–3 minutes; ensure the sugar has dissolved completely and the yolks are glossy before proceeding.
→ This creates a smooth custard base that emulsifies with the milk to deliver a rich, silky texture. - In a separate small bowl, whisk 3 tablespoons cornstarch with 2–3 tablespoons milk to form a smooth slurry; set aside.
→ The slurry prevents lumps and yields a custard that sets evenly and remains sliceable. - In a medium saucepan, heat 2 cups whole milk with a pinch of salt and 2 teaspoons vanilla extract (and the saffron infusion, if prepared) just to a gentle simmer; do not boil and stir occasionally to prevent scorching.
→ Gentle heating dissolves sugars and extracts vanilla, providing a creamy, evenly flavored custard. - Gradually whisk a thin stream of the hot milk into the yolk mixture to temper, then whisk in the remaining hot milk; return the mixture to the saucepan and whisk to combine.
→ Tempering prevents scrambling the yolks and creates a smooth, cohesive custard base. - Cook the custard over medium-low heat, stirring constantly with a silicone spatula until it thickens to a nappe that coats the back of the spoon (do not boil); then remove from heat.
→ Continuous stirring ensures a lump-free, glossy custard; the nappe stage indicates proper thickening without curdling. - Whisk in 1 tablespoon unsalted butter (optional) off the heat to add gloss and richness, then beat in the remaining 2 teaspoons vanilla extract and a pinch more salt; keep stirring until the custard is smooth and glossy.
→ Butter adds a luxurious mouthfeel and a mirror-like sheen when cooled; don’t return to heat after adding butter to prevent breaking the emulsion. - Pour the hot custard through a fine-mesh sieve into a clean bowl to remove any cooked bits, then cover the surface with plastic wrap to prevent a skin from forming and let cool to room temperature before chilling.
→ Straining yields an ultra-smooth custard; cooling prevents condensation and skin formation that can mar texture. - Chill the custard until completely cold and set, at least 4 hours or overnight, so it slices neatly and maintains distinct layers with the crust.
→ A fully cold custard holds its shape under the glaze and contributes clean, defined layers when plated. - Bloom the gelatin in 1/4 cup cold water (or soften 2 gelatin sheets) until expanded and hydrated, about 5–10 minutes; this ensures the glaze will set firmly and evenly.
→ Proper blooming prevents grainy texture and ensures the glaze sets with a flawless finish. - In a heatproof bowl, place white chocolate chips; bring 1/2 cup heavy cream and 3 tablespoons light corn syrup to a simmer, then pour over the chocolate and let sit 2 minutes before whisking until smooth and glossy.
→ The hot cream gently melts chocolate, creating a cohesive glaze with a mirror-like gloss and balanced sweetness. - Warm the bloomed gelatin to dissolve (or microwave for a few seconds if using powder), then whisk it into the warm glaze until fully incorporated; stir in 1/2 teaspoon vanilla extract.
→ Gelatin provides structure to the glaze so it remains glossy yet sliceable once set. - Add 2–3 drops yellow gel coloring (or 1/4 teaspoon turmeric) to the glaze and mix until the color is a rich gold; taste and adjust with a tiny pinch of salt to balance sweetness.
→ The golden hue is the signature look of the dessert and turmeric or coloring brings depth without overpowering flavor. - Pour the glaze over the chilled custard in an even, continuous motion, tilt the pan gently to cover the surface completely, and let it rest at room temperature for a few minutes before refrigerating to fully set the glaze.
→ A level, glossy top requires careful pouring and a brief rest to release air bubbles and minimize drips, ensuring a flawless mirror finish. - Garnish with edible gold leaf sheets or a light dusting of edible gold luster dust if desired, applying with clean tweezers or a brush just before serving for a dramatic finish; ensure the glaze is fully set before adding decoration.
→ The gilded accents enhance the dessert’s luxe appearance and catch the light beautifully on the glossy top. - Slice the dessert with a sharp, warmed knife (wipe blade between cuts) and serve chilled to preserve the layers and the shiny top; refrigerate leftovers promptly.
→ A warmed blade yields cleaner cuts through the glaze and custard, while chilling preserves the dessert’s structure and finish. - Store any leftovers in a tightly covered container in the refrigerator for up to 3–4 days; avoid leaving at room temperature for extended periods to keep the glaze from softening.
Notes
These gold-dusted dessert layers a crunchy crust, a silky vanilla custard, and a mirror glaze that gleams with a golden glow. For gluten-free versions, use certified gluten-free graham crackers or digestive biscuits; crush to a very fine texture, press firmly into the pan, and chill or bake as your recipe dictates to set the base. If the crust seems crumbly, mix in a bit more melted butter and press again for a cohesive, even layer. The vanilla custard should be thick and sliceable, so temper the egg yolks with hot milk, then cook on medium heat until it coats the back of a spoon; avoid boiling after adding the yolks to preserve a smooth texture. A pinch of salt brightens the flavor, and a pinch of saffron steeped in a tablespoon of hot milk (optional) yields a warm golden hue and gentle aroma—strain if you prefer a cleaner finish. For the glossy top, melt white chocolate with heavy cream and light corn syrup to a smooth glaze; bloom the gelatin in cold water, melt it into the warm glaze with vanilla, then color gradually with yellow gel or a touch of turmeric to achieve the signature gold tone. If using edible gold leaf or luster dust (optional), apply only after the glaze has set for maximum shine and adhesion. Optional add-ins like finely chopped pistachios or toasted almond slivers add crunch and color; toast nuts lightly and scatter around the edge or on the top for visual contrast. To assemble, chill the crust until set, pour over the cooled custard and refrigerate until firm, then pour and set the glaze for a mirror finish. This dessert keeps well when refrigerated for several days and can be prepared up to the glaze stage in advance for easier assembly. Always ensure your ingredients are fresh and, if needed, gluten-free, and handle gelatin with care to achieve a clean, sliceable finish.
Tips
Crust and Base Tips
- For best texture, grind graham crackers or gluten-free biscuits until ultra-fine. This helps the crust press evenly and slice cleanly later.
- When using gluten-free cookies, confirm they are certified gluten-free and blend until powdery to avoid chunky crumbs that show through the crust.
- Mix crumbs with melted butter, brown sugar, and a pinch of fine sea salt until the mixture looks evenly moistened. Press firmly into the pan bottom with a flat tool (the bottom of a glass works well) for an even, compact crust.
- Chill the crust for 30–60 minutes to set before adding the custard. If you prefer a crisper crust, bake the crust briefly according to your recipe notes and let it cool completely before filling.
- Line the pan bottom with parchment if you worry about sticking; this makes removing the set dessert neater for slicing and presentation.
Vanilla Custard Layer Tips
- Whisk yolks with granulated sugar until light and creamy, then gradually temper with warm milk to prevent scrambling the yolks.
- Cook the custard over medium heat, whisking constantly, until it thickens to a smooth, spoonable consistency. Keep it just thick enough to hold its shape when sliced.
- Stir in the cornstarch slurry (dissolved in a few tablespoons of milk) to ensure a firm, sliceable set. Cook a bit longer after adding slurry to fully activate the starch.
- Remove from heat and whisk in vanilla extract or vanilla bean paste, plus a pinch of salt. If using saffron, infuse in 1 tablespoon hot milk, strain, and whisk in for color and aroma.
- Off the heat, whisk in a tablespoon of butter for extra gloss and richness, but don’t boil after adding butter to preserve the sheen.
- Cool the custard slightly and strain to remove any lumps or cooked eggs before layering to ensure a silky finish.
Gold Mirror Glaze Tips
- Bloom gelatin in cold water as directed (or hydrate sheets), then melt into the warm glaze base so the glaze sets firm but pliable.
- Stir white chocolate with hot cream until completely smooth, then whisk in light corn syrup to prevent crystallization and to achieve a glossy, mirror finish.
- Whisk in vanilla extract and the melted, bloomed gelatin until fully incorporated. If you’re using color, add yellow gel coloring gradually to reach the desired gold hue.
- Pour the glaze over a well-chilled dessert in a single, steady motion. Tap the pan gently to release any air bubbles and create a smooth surface.
- If the glaze isn’t glossy enough, slightly rewarm it and re-stir before pouring. Strain the glaze to remove any undissolved bits for a flawless shine.
Color, Shine and Decoration Tips
- 2–3 drops of yellow gel color yield a vibrant gold; you can also use 1/4 teaspoon turmeric for a warmer tone, but add sparingly to avoid changing the flavor.
- For a premium look, dust edible gold luster powder or lightly place edible gold leaf sheets on the set glaze right before serving. Use clean tools and tweezers for precision.
- To maximize the gold contrast, keep the custard layer pale and the glaze bright. Avoid over-coloring so the gold hue remains the star.
Make-Ahead, Storage and Handling
- The crust can be prepared and chilled a day ahead; the custard can be made a day in advance and refrigerated until ready to assemble. Pour and set the glaze just before serving for best shine.
- Store the finished dessert covered in the refrigerator. Slice with a warmed knife (dip the blade in hot water and wipe clean between cuts) for clean, neat wedges.
- If you need to transport, chill the dessert thoroughly, then cover and transport on a rigid tray to prevent any tilt or slide.
Optional Add-Ins and Presentation
- Finely chopped pistachios or toasted almond slivers add color and a contrasting crunch; sprinkle around the edges or on top before chilling.
- Edible gold leaf sheets are best applied after the glaze has fully set; handle with clean tweezers for a luxe finish.
Troubleshooting and Quick Fixes
- If the glaze is streaky or dull, gently rewarm and whisk until smooth, then strain before pouring. Avoid letting the glaze solidify before you finish pouring.
- If the custard is too soft or not sliceable, reheat gently with a touch more cornstarch slurry or chill longer before assembling.
- If the crust splits from the custard, ensure the crust is fully chilled and not too thick; give the dessert a longer chilling time between crust and custard layers for a clean separation.
FAQ
What is “The Best Dessert (Not a Pie, But Gold!)”?
It’s a visually striking, layered baked dessert with a crisp base, a creamy middle, and a glossy gold top. It looks like a pie-like treasure but is built as layered bars or squares, making it easy to slice and serve.
What are the main components or layers?
The dessert typically has three layers: 1) a buttery shortbread-style base, 2) a silky vanilla custard or pastry cream center, and 3) a shiny, gold-toned glaze on top (caramel or mirror glaze) with optional edible gold accents for extra shine.
How do I make the base layer?
Beat butter and sugar until light, add flour and a pinch of salt, mix to a crumbly dough, press evenly into a lined pan, dock lightly with a fork, and bake at 350°F (175°C) for about 18–22 minutes until lightly golden. Let cool completely before adding the filling.
What about the middle filling? How is it prepared?
Whisk egg yolks (or whole eggs) with sugar and a bit of cornstarch, heat milk and vanilla until just simmering, then temper the eggs and cook until the mixture thickens into a custard. Strain if desired, then cool slightly before pouring over the base. Chill until set, usually several hours or overnight.
How do I achieve the glossy top?
You have two popular options:
– Caramel glaze: cook sugar with a splash of water until amber, whisk in warm cream, simmer briefly, and pour over the set custard. It creates a warm, glossy gold finish.
– Mirror glaze: bloom gelatin in water, melt white chocolate with cream, then whisk in the gelatin and a bit of color (gold or warm amber). Pour over the chilled dessert for a mirror-like shine. Finish with edible gold dust or small gold leaf if desired.
Can I customize flavors or add-ins?
Absolutely. Try lemon or orange zest in the custard for brightness, swirl in melted chocolate, add finely chopped pistachios for texture, or layer with a berry compote. For a chocolate version, swap some of the custard with a cocoa-infused mixture and pair with a chocolate glaze.
Are there dietary substitutions I can use?
Yes, with some tweaks:
– Gluten-free: replace the base with a gluten-free shortbread (gluten-free flour blend) and ensure the glaze is gluten-free.
– Dairy-free: use almond or coconut milk for the custard and dairy-free butter; use a dairy-free caramel or mirror glaze.
– Vegan: use a plant-based custard (aquafaba or cornstarch-thickened) and a vegan glaze, though the texture will differ from the traditional version.
How long does it take from start to finish?
Planning timeline (approximate): base dough mixing and bake 30–45 minutes total, custard filling and set time 2–4 hours (often overnight for best texture), glaze application 5–15 minutes. Overall, most of the work is hands-off chilling time, so plan ahead.
How should I store and serve this dessert?
Store refrigerated, covered, for up to 3–4 days. Keep it chilled until just before serving; slice with a warm knife for clean cuts. If you used edible gold leaf, apply it right before serving for best shine. Serve as squares or bars, optionally with a dollop of whipped cream or a berry compote on the side.
What are common mistakes to avoid?
Key tips: don’t overbake the base (it should be just golden), don’t rush the custard cooling (it must firm before glazing), ensure the glaze is warm enough to pour but not so hot it melts the custard, and handle the glaze gently to avoid air bubbles or cracking on the surface.
What serving ideas pair well with this dessert?
Pair it with a light sparkling beverage, a cup of strong coffee, or dessert wines like late-harvest or sparkling Moscato. A fresh berry garnish or a light dusting of powdered sugar can enhance presentation without overpowering the glaze.