Introduction: Decadence in Every Bite
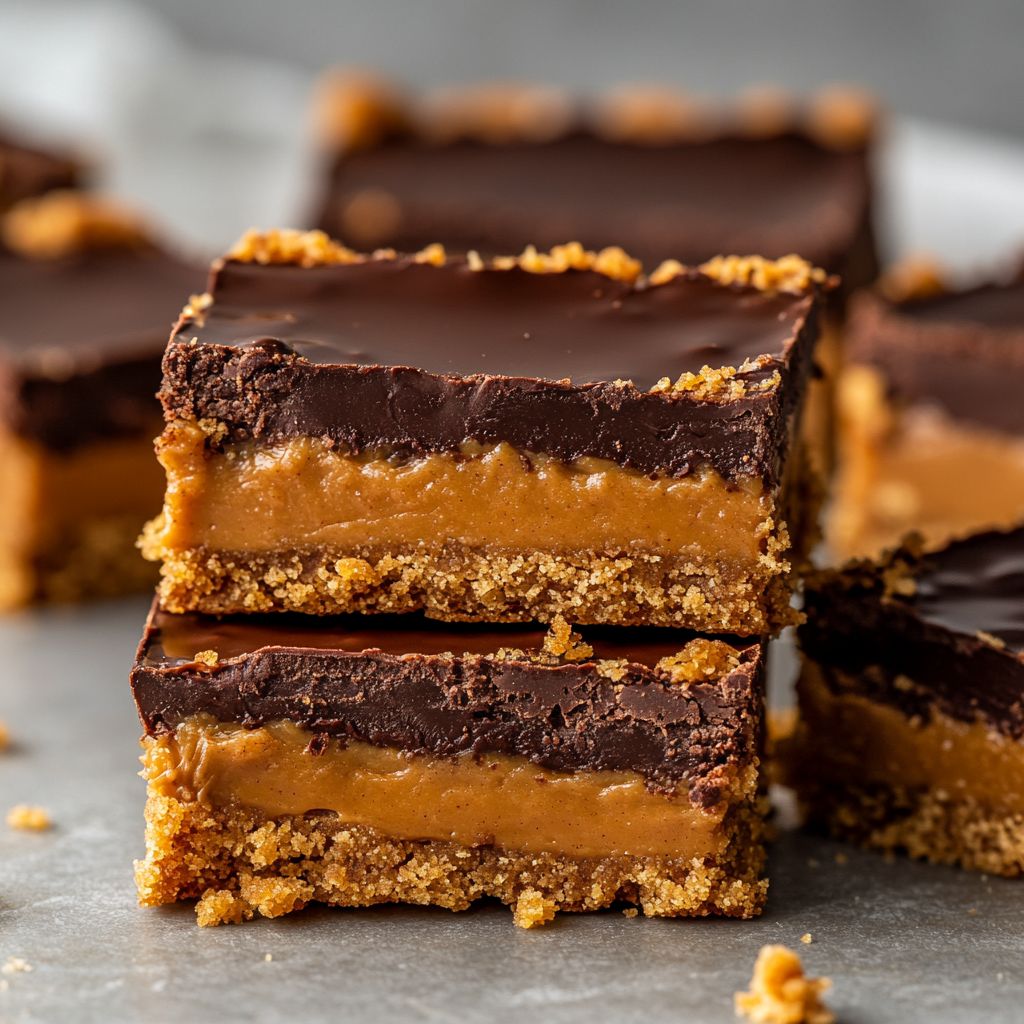
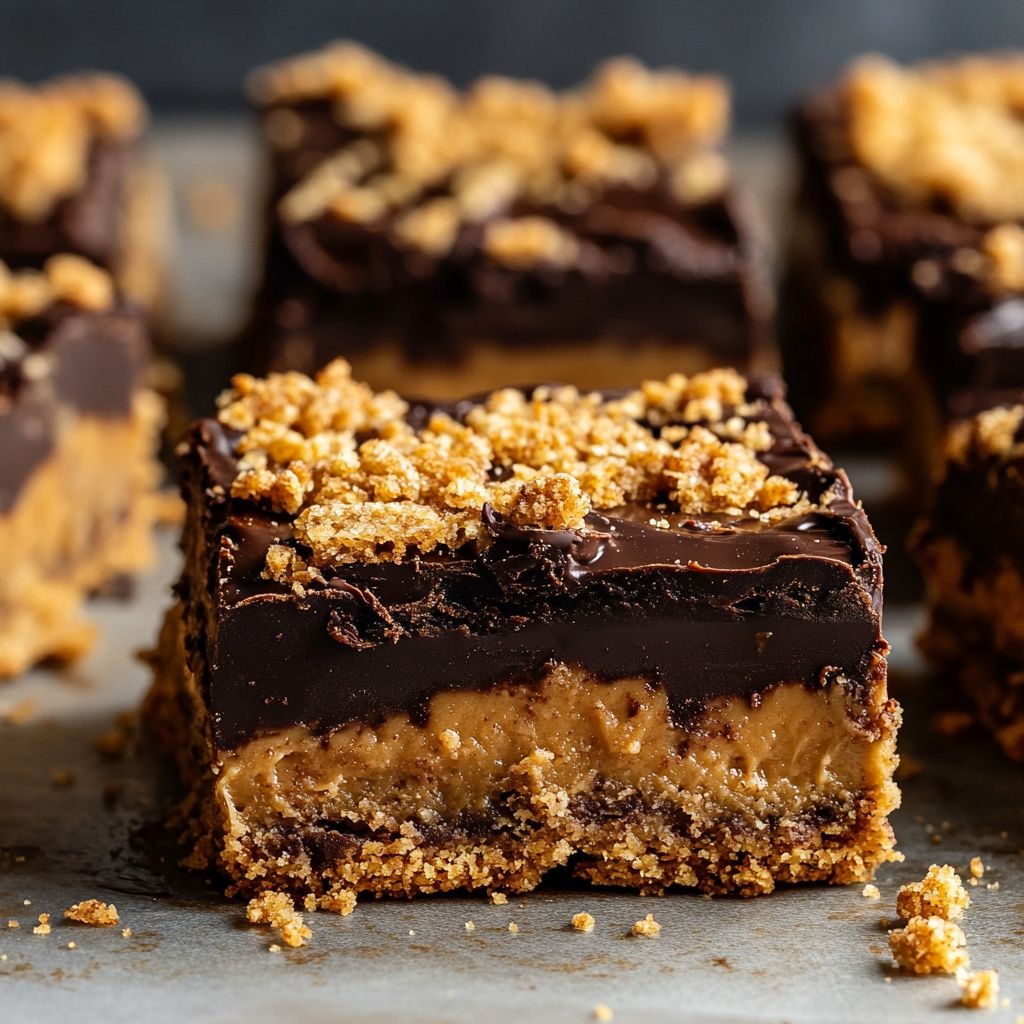
Imagine a snack or a dessert that captures the perfect harmony of rich chocolate and creamy peanut butter, all tied together with a buttery crumb topping that crumbles at the touch of your fork. This isn’t just a treat; it’s an experience that tantalizes the taste buds and leaves you yearning for more. Enter the world of Chocolate Peanut Butter Crumb Bars—a delectable concoction combining classic flavors with textures that will make you swoon. Each bite provides that much-sought-after balance between sweet and savory, soft and crunchy, making it worth every whimsical moment spent in the kitchen. Whether you’re satisfying a sugar craving or looking for that wow factor for your next gathering, these bars are the answer. Let the aroma of freshly baked dough and melted chocolate guide you through this delightful culinary journey.
The Story Behind the Dish
The pairing of chocolate and peanut butter is a union celebrated across cultures and cuisines, finding its roots surprisingly in history’s annals over a century ago. Originating from the United States, where peanuts were both prolific and loved, peanut butter found its perfect match in chocolate as early as the 1920s with candy innovations. Over the years, bakers and chefs have continued to perfect this sublime blend, incorporating it into various desserts to create iconic treats, including our star—Chocolate Peanut Butter Crumb Bars. The bars draw inspiration from both classic crumb cakes and modern confectionary trends, embodying the evolution of dessert-making where creativity meets nostalgia.
Why You’ll Love This Recipe
- Effortless Elegance: Despite sounding gourmet, these bars are surprisingly easy to make, requiring minimal baking skills or tools. Perfect for both novice bakers and seasoned pastry chefs.
- Indulgent Yet Balanced: Experience the richness of chocolate and peanut butter without overwhelming your palate. The crumb topping adds texture and enhances the overall flavor profile.
- Perfect for Any Occasion: Ideal for potlucks, birthday parties, or simply a weekend indulgence at home. These bars are sure to be a hit wherever they’re served.
- Customizable: Whether you want to add nuts, a hint of sea salt, or even a layer of caramel, these bars can easily be tailored to suit any craving.
Flavor Profile & Texture
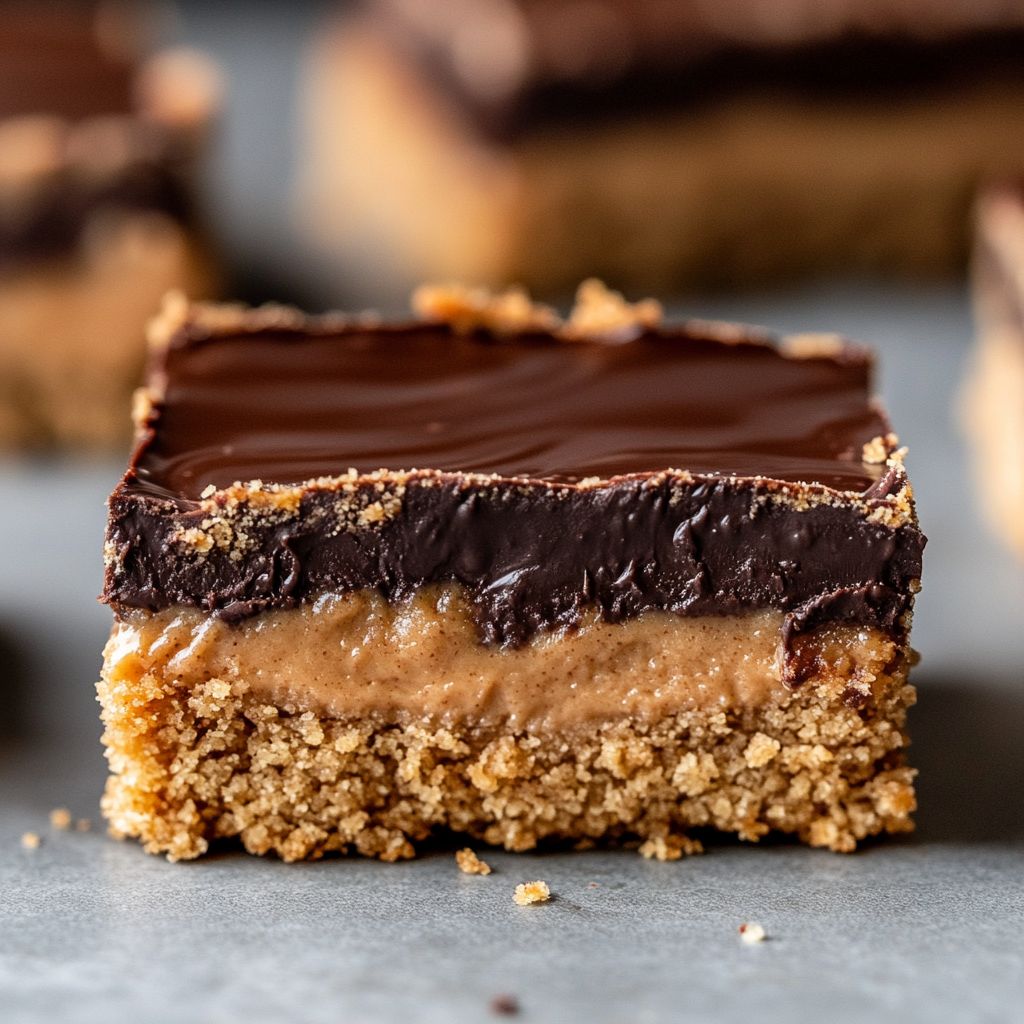
The flavor profile of Chocolate Peanut Butter Crumb Bars is a harmonious blend of familiar comforts. The chocolate layer offers a deep, rich sweetness with undertones of cocoa, perfectly complemented by the creamy, nutty flavor of peanut butter. Together, they create a decadent duo that feels both indulgent and sophisticated. Meanwhile, the crumb topping provides a buttery, slightly sweet contrast that adds complexity to each bite. The textures between layers are delightful: soft, chewy chocolate and peanut butter filling give way to a delicate, crispy topping, making this an indulgent sensory experience from start to finish.
Occasions & Pairings
These bars are as versatile as they are delicious, making them a go-to option for a variety of occasions. Serve them:
- Holidays: A welcome addition to any festive table, whether it’s Christmas, Thanksgiving, or Easter.
- Casual Gatherings: Ideal for picnics, barbeques, or potlucks—easy to grab and guaranteed to please a crowd.
- Everyday Indulgence: Perfect for satisfying mid-week cravings or as a sweet ending to a comforting dinner.
For the best pairings, consider a tall glass of cold milk, hot coffee, or a scoop of vanilla ice cream to complement the bar’s rich flavors. The creamy textures and complementary temperatures create a balanced dessert experience that takes it up a notch.
Tips, Variations & Substitutions
There’s no limit to customizing these bars to fit your preferences or dietary needs:
- Nuts & Additions: Consider adding chopped nuts such as almonds or pecans to the crumb for added texture and flavor.
- Vegan Options: Substitute dairy ingredients with plant-based alternatives like almond milk and vegan butter to create a vegan-friendly dessert.
- Low-Carb Adaptations: Use almond flour in place of regular flour and consider a sugar substitute to make a lower carb version.
- International Twists: Introducing a pinch of spice like cinnamon or cardamom can add an exotic twist to these traditional flavors.
Storage & Make-Ahead Ideas
To keep your Chocolate Peanut Butter Crumb Bars fresh and tasty:
- Storage: Once cooled, place the bars in an airtight container at room temperature for up to five days. This will keep the crumb topping from getting soggy while maintaining the chewy texture of the layers beneath.
- Freezing: Individually wrap bars in plastic wrap and place in a freezer-safe bag or container. They can be stored in the freezer for up to two months. Thaw at room temperature for an hour before serving.
- Make-Ahead: Prepare the bars up to two days in advance. Bake, cool, and store as recommended, making them perfect for pre-planned gatherings or busy weeks.
Fun Facts & Trivia
Did you know that the idea of pairing chocolate with nuts or nut butters is a staple in many cultures’ confectionaries? Although the chocolate-peanut butter combo is perhaps most famously American, it enjoys popularity far beyond the country’s borders. Moreover, peanut butter itself has a fascinating history—it was supposedly conceived as early as the Aztec era, though widespread popularity in the states came in the 20th century with advancements by visionaries such as Dr. John Harvey Kellogg. This innovation was driven by the idea of providing nourishing protein in an accessible form, creating a beloved pantry staple that ties so well with its chocolate counterpart today.
Indulge in the rich history and flavor of these Chocolate Peanut Butter Crumb Bars, where each bite not only speaks of contemporary creativity but pays homage to culinary ingenuity of the past.
Ingredients
- Crust Base
- 1 cup rolled oats
→ Rolled oats are the foundation of the crust, providing texture and a wholesome taste. Use old-fashioned oats for a more robust structure. Ensure they are whole and dry for better binding with the other ingredients. - 1/2 cup almond flour
→ Almond flour adds a rich, nutty flavor while making the crust tender and crumbly. For the best texture, make sure to use finely ground almond flour, as coarser flour may result in a grainy texture. - 1/4 cup coconut oil (melted)
→ Coconut oil serves as the primary fat, providing moisture and richness to the crust. Melt it before using to ensure even blending with the dry ingredients. Opt for refined coconut oil if you prefer a neutral flavor. - 1/4 cup maple syrup or honey
→ This natural sweetener binds the ingredients together and adds sweetness to the crust. If using honey, choose a light-colored variety for a milder flavor. Heat slightly if too thick to drizzle easily. - 1/4 teaspoon salt
→ Salt enhances the flavors of the other ingredients and balances the sweetness. Use fine sea salt for a smoother incorporation into the crust mixture.
- 1 cup rolled oats
- Peanut Butter Layer
- 1 cup creamy peanut butter
→ Peanut butter provides flavor and richness while also helping to bind the layers together. Choose a natural, unsweetened variety for cleaner flavor. It should be at room temperature for easier spreading. - 1/4 cup maple syrup
→ Used to sweeten the peanut butter layer, adding a touch of natural sweetness without overpowering it. Feel free to adjust based on your sweetness preference. If the mixture becomes too thick, warm it slightly. - 1/4 teaspoon vanilla extract
→ Pure vanilla extract enhances the flavor profile and adds depth to the peanut butter layer. Choose high-quality extract for the best results, as imitation vanilla can lack complexity.
- 1 cup creamy peanut butter
- Chocolate Drizzle
- 1/2 cup dark chocolate chips
→ Dark chocolate chips create a rich, indulgent topping that adds a nice contrast to the creamy peanut butter layer. Melt the chips gently over a double boiler or in short bursts in the microwave to avoid scorching. - 1 tablespoon coconut oil
→ Coconut oil helps to thin the chocolate, making it easier to drizzle over the bars and adds a subtle flavor. Use refined coconut oil for a neutral taste, and ensure it is melted before mixing with the chocolate.
- 1/2 cup dark chocolate chips
- Optional Toppings
- Chopped nuts (e.g., peanuts or walnuts)
→ Chopped nuts can add a crunchy finish to the bars, enhancing both flavor and texture. Toast them lightly before chopping to bring out their natural oils and flavors. Sprinkle them on top of the chocolate drizzle for a decorative touch. - Sea salt flakes
→ A sprinkle of sea salt flakes can enhance the sweetness and add a delightful contrast to the richness of the bars. Use a light hand, as a little goes a long way in elevating the flavors.
- Chopped nuts (e.g., peanuts or walnuts)
Instructions
- Preheat your oven to 350°F (175°C) and line an 8×8-inch baking pan with parchment paper, leaving some overhang on the sides for easy removal later.
→ Preheating the oven ensures that the crust bakes evenly and develops a nice, golden color. Lining the pan with parchment paper prevents sticking, allowing for a smooth extraction of the bars post-baking. - In a mixing bowl, combine 1 cup of rolled oats, 1/2 cup of almond flour, 1/4 cup of melted coconut oil, 1/4 cup of maple syrup or honey, and 1/4 teaspoon of salt.
→ Start by adding the dry ingredients (oats, almond flour, and salt) first and mix them together to ensure even distribution. Then add the melted coconut oil and maple syrup or honey. The melted oil should be combined thoroughly to avoid clumps. Use a spatula or wooden spoon to mix until the mixture resembles a coarse crumb. - Press the oat mixture firmly into the bottom of the prepared baking pan to form an even crust layer.
→ Use the back of measuring cup or your fingers to press the mixture down firmly, ensuring it is tightly packed. This will help your crust hold together after baking; it should be compact but not overly compressed. - Bake the crust in the preheated oven for 10-12 minutes or until it becomes lightly golden around the edges.
→ Baking allows the oats to toast and the fats to stabilize, creating a crunchy base. Keep an eye on it towards the end to prevent burning; it should smell fragrant and look golden, indicating it’s nearly done. - While the crust is baking, prepare the peanut butter layer by mixing together 1 cup of creamy peanut butter, 1/4 cup of maple syrup, and 1/4 teaspoon of vanilla extract in a bowl.
→ Ensure the peanut butter is at room temperature for easier mixing. Stir the ingredients together until smooth and well-combined. You can use a whisk or spatula; this mixture should be creamy and spreadable for easy layering. - Once the crust has finished baking, remove it from the oven and let it cool for about 10 minutes before spreading the peanut butter mixture evenly over the crust.
→ Allowing the crust to cool slightly prevents the peanut butter from melting too much; it keeps the layers distinct. Spread the mixture using an offset spatula for a smooth top, making sure to reach the edges. - In a microwave-safe bowl, combine 1/2 cup of dark chocolate chips and 1 tablespoon of coconut oil. Melt them together in 20-second intervals, stirring in between until fully melted and smooth.
→ This method prevents the chocolate from scorching. The addition of coconut oil thins out the chocolate for an easier drizzle. Make sure to stir thoroughly to combine the chocolate and oil seamlessly. - Drizzle the melted chocolate over the peanut butter layer, creating a decorative pattern.
→ Use a spoon or a piping bag to create fine, artistic lines with the chocolate, ensuring even coverage. This not only enhances visual appeal but also balances the flavors of the creamy peanut butter with the richness of dark chocolate. - If desired, sprinkle with chopped nuts and sea salt flakes immediately after drizzling the chocolate, while the chocolate is still warm.
→ This step allows the toppings to adhere well to the chocolate. Toast the nuts beforehand for added depth of flavor; a light crunch contrasts beautifully with the creamy layers. - Refrigerate the bars for at least 2 hours until the chocolate is set completely.
→ Chilling firmens the bars and makes cutting easier. It allows the chocolate to harden, creating a crisp texture on top that complements the creamy peanut butter layer. - Once set, lift the bars from the pan using the parchment overhang and cut them into squares or rectangles using a sharp knife.
→ For clean cuts, you can warm the knife slightly under hot water and dry it. This technique ensures your bars have a neat appearance and prevents the chocolate from cracking. - Enjoy your homemade chocolate peanut butter crumb bars, storing any leftovers in an airtight container in the refrigerator for up to a week.
→ Storing them in the fridge helps maintain their freshness and texture. These bars make an excellent snack or dessert that can be enjoyed chilled or at room temperature!
Notes
These Chocolate Peanut Butter Crumb Bars are a delicious treat that perfectly balances the richness of peanut butter with the sweetness of chocolate. The base is made from wholesome ingredients like oats and almond flour, giving it a hearty texture and making it a more nutritious option. You can customize the bars further by adding your favorite nuts or seeds on top for added crunch and nutrition.
When preparing the crust, be sure to mix the dry ingredients well before adding in the melted coconut oil and sweetener, ensuring an even distribution of flavors. If the crust feels too crumbly, a little extra melted coconut oil can help bind it better. Spread the peanut butter layer evenly over the crust, and take care to let it set slightly before drizzling with the melted chocolate to get a clean finish.
For the chocolate drizzle, melt the dark chocolate chips slowly to avoid overheating, as burnt chocolate can become clumpy. Adding coconut oil not only makes the chocolate easier to drizzle but also gives a nice sheen to the topping. If you’re feeling adventurous, you can also mix in a pinch of sea salt into the melted chocolate for an extra burst of flavor.
After assembling the bars, allow them to cool and set fully before cutting into squares. This helps the layers firm up, making them easier to handle. The bars can be stored in an airtight container in the fridge for a week, or they can be frozen for a longer shelf life. They make a great snack or dessert and are sure to be a hit with both kids and adults!
Enjoy these delicious bars packed with flavor and texture, perfect for satisfying your sweet tooth while also enjoying wholesome ingredients!
Tips
- Preparing the Crust: Ensure your oats are properly measured and packed into the cup without excess air to avoid a crumbly crust. If possible, pulse the rolled oats a few times in a food processor for a finer texture that blends well with the almond flour.
- Mixing the Crust Base: When combining the crust ingredients, use a fork or a pastry blender for an even texture. Mix until the ingredients are just combined; overmixing can lead to a dense crust.
- Pressing the Crust: When pressing the crust mixture into the baking dish, use a flat-bottomed measuring cup to ensure an even and compact layer. This will help the crust hold together better when baked.
- Baking Time: Keep an eye on the crust as it bakes. It should turn golden brown around the edges while remaining slightly soft in the center. Allow it to cool completely before adding the peanut butter layer to prevent it from melting.
- Peanut Butter Layer Tips: Stir the peanut butter well before measuring to ensure a smooth consistency. If your peanut butter is too thick, warming it slightly in the microwave (10-15 seconds) can make it easier to spread.
- Incorporating Sweeteners: When adding maple syrup to the peanut butter, do so gradually, tasting as you go to achieve your desired sweetness level. Be cautious not to overly sweeten the mixture.
- Chocolate Drizzle Technique: When melting the chocolate chips, do it in 15-20 second intervals in the microwave, stirring in between to avoid seizing. A double boiler is preferable for more control over the heat.
- Optional Toppings: For the chopped nuts, consider mixing various types (like peanuts, almonds, or walnuts) for added flavor and texture. Toasting them in a dry skillet for a few minutes can intensify their flavor.
- Cool and Cut: Allow the chocolate drizzle to set before cutting the bars. Refrigerating them for about an hour will help achieve cleaner cuts. Use a sharp knife to slice into squares or rectangles for neat servings.
- Storing Leftovers: Store any leftover bars in an airtight container in the refrigerator for up to a week. They can also be frozen for longer storage; cut them into squares first and layer with parchment paper for easy separation.
FAQ
What are Chocolate Peanut Butter Crumb Bars?
Chocolate Peanut Butter Crumb Bars are delicious dessert bars made with a crumbly crust, a creamy peanut butter filling, and a rich layer of chocolate on top. They combine crunchy and creamy textures with chocolate and peanut butter flavors.
What ingredients do I need to make these bars?
The basic ingredients include flour, oats, brown sugar, butter, peanut butter, chocolate chips, and salt. You may also need vanilla extract for added flavor.
Can I use natural peanut butter in this recipe?
Yes, you can use natural peanut butter. Just be sure it is well-stirred before measuring, as natural peanut butter tends to separate.
How do I store Chocolate Peanut Butter Crumb Bars?
Store the bars in an airtight container at room temperature for up to a week. For longer storage, you can refrigerate them or freeze them for up to 3 months.
Can I make these bars gluten-free?
Yes, you can make them gluten-free by using a gluten-free flour blend and ensuring that the oats you use are certified gluten-free.
What if I don’t like chocolate?
If you don’t like chocolate, you can omit the chocolate layer and replace it with a different topping, such as a layer of drizzled white chocolate or simply top with crushed nuts or toffee bits.
How long do these bars take to prepare and bake?
The preparation time is typically around 20 minutes, and the baking time is about 25 to 30 minutes. Allow additional time for cooling before slicing.
Can I add other toppings or mix-ins?
Absolutely! You can add toppings like mini marshmallows, chopped nuts, or even dried fruit. Feel free to customize based on your preferences.