Introduction: A Sweet Adventure Awaits
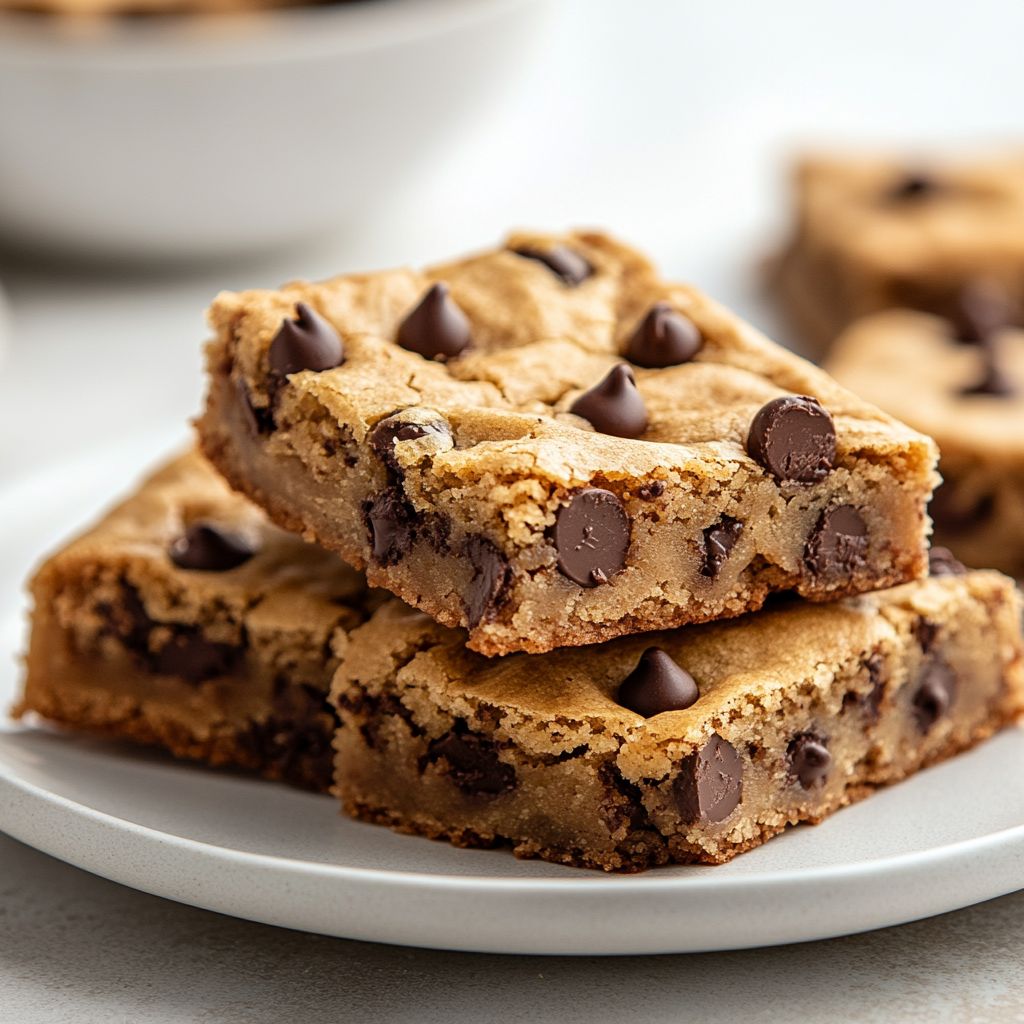
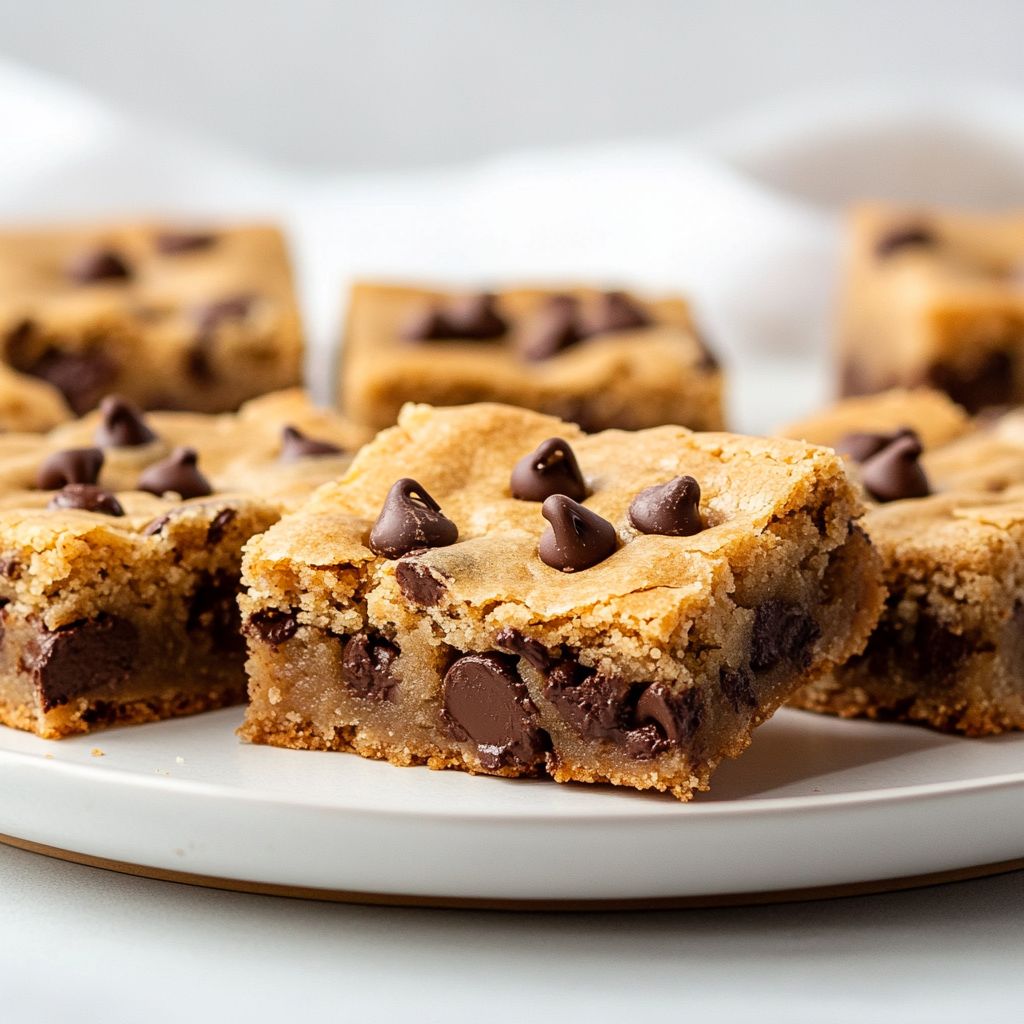
Imagine biting into a warm chocolate chip cookie that’s fresh from the oven — the divine blend of crispy edges and a chewy center, with gooey chocolate in every bite. Now, picture that same indulgent experience only amplified, in the form of a Chocolate Chip Cookie Bar. These bars are a spectacular transformation of the classic cookie, offering a symphony of flavors and textures that captivate the senses from the first bite. They are wonderfully dense yet soft, with each square promising a perfect balance of sweet chocolate and buttery dough. If you’re ready for a journey of taste that is both comforting and exhilarating, then Chocolate Chip Cookie Bars are exactly what you need.
The Story Behind the Dish
Chocolate chip cookies have been a staple in the dessert world since their serendipitous creation in the 1930s by Ruth Wakefield of the Toll House Inn. The original version was an accidental marvel, borne of a simple substitution in ingredients. Over time, this classic treat has evolved into numerous variations, each bringing its own charm to the table. The Chocolate Chip Cookie Bar is one such delightful evolution, taking inspiration from the universal love of the traditional cookie and adding a twist in presentation and texture.
This variation likely emerged from the desire for a quicker, less labor-intensive way to enjoy the beloved chocolate chip cookie. Instead of placing individual dollops of dough onto a baking sheet, the dough is spread uniformly in a pan, baked to perfection, and then cut into bars. This approach not only saves time but also enriches the flavor, as the dough bakes more evenly and the chocolate is distributed across more surface area. These cookie bars have since become a beloved treat in many households, perfect for everything from casual gatherings to midnight snacks.
Why You’ll Love This Recipe
- Effortlessly Simple: Prepare your cookie dough, spread it in a pan, and let your oven do the rest.
- Celebrated Flavor: Enjoy the classic taste you love, enhanced with a new texture.
- Great for Groups: Perfect for potlucks, parties, or cozy family nights.
- Customizable: Adapt the recipe to suit your dietary needs or culinary creativity.
- Satisfying Texture: Delight in the combination of a soft center with slightly crispy edges.
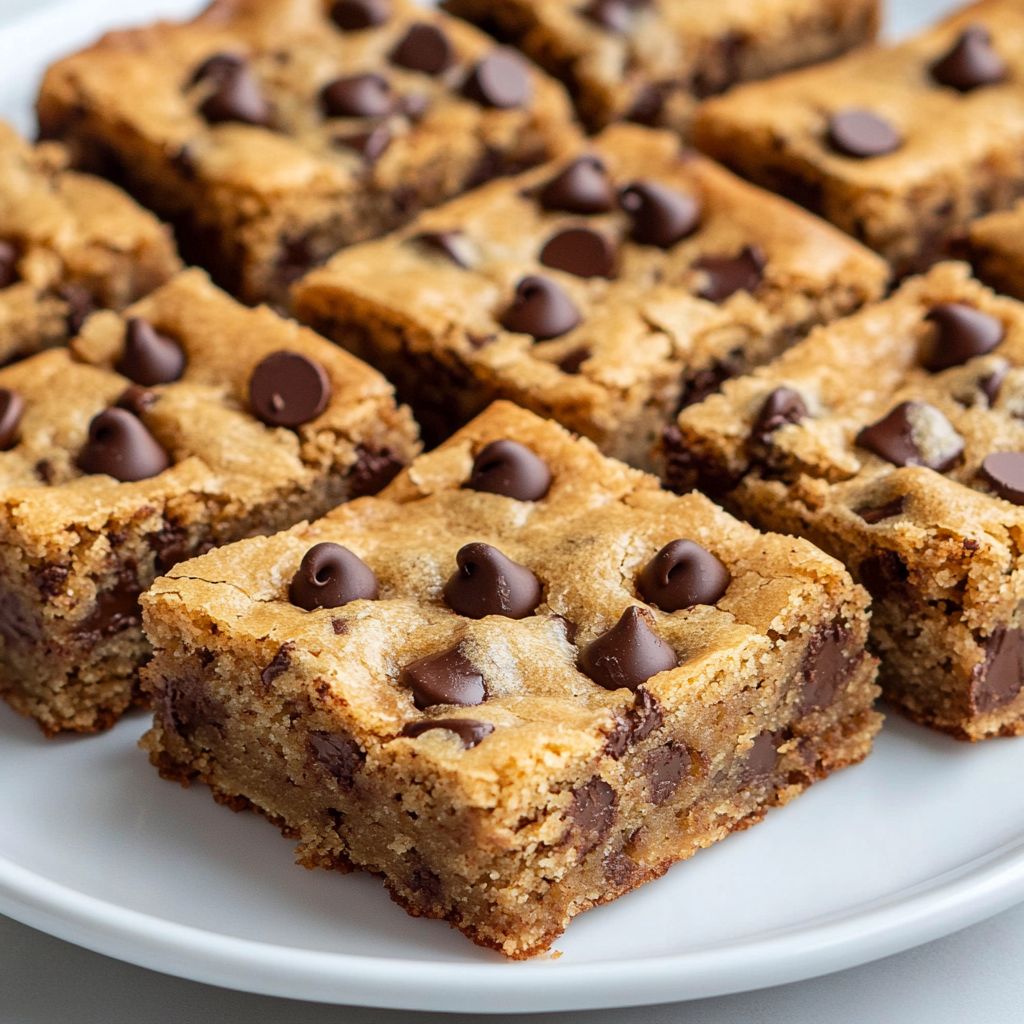
Flavor Profile & Texture
The Chocolate Chip Cookie Bar captures the quintessence of its cookie counterpart; each bite is a harmonious blend of brown sugar, butter, and vanilla. The chocolate chips are not merely an accent but a full-fledged partner in flavor, melting just enough to integrate subtly yet unsurely with the dough. As you bite into one, you’ll notice the bar’s soft and chewy heart, which is beautifully offset by the slightly crisp, golden-brown edge.
The bar’s texture is a noteworthy aspect — while cookies can sometimes be uniform in their chewiness, the bars offer a layered experience. The top is slightly firm, giving way to a dense, luxuriously soft interior that results in a mouthfeel that will have you reaching for another piece.
Occasions & Pairings
These bars are versatile treats that can elevate any occasion, be it a casual family gathering or a sophisticated evening soirée. Here are some ideas for when and how to enjoy them:
- Everyday Treat: Perfect for an after-school snack or a lunchbox surprise.
- Festive Celebrations: Add them to dessert tables at holidays or special events as a crowd-pleaser.
- Pairings: Pair with a cold glass of milk, steaming cup of coffee, or a dollop of vanilla ice cream for an extra layer of indulgence.
Tips, Variations & Substitutions
Customize Your Cookie Bars
One of the best features of this recipe is its adaptability. Here are some creative ways to make it your own:
- Add Some Nuts: Fold in chopped walnuts or pecans for an additional crunch and depth of flavor.
- Try Different Chocolates: Swap the classic semi-sweet chips for dark, milk, or white chocolate to suit your taste.
- Experiment with Flavors: Introduce a hint of sea salt or a sprinkle of cinnamon for a surprising twist.
Dietary Alternatives
- Gluten-Free: Use a gluten-free flour blend suitable for baking.
- Vegan Version: Replace butter with coconut oil or vegan butter, and use a flax egg as a binder.
Storage & Make-Ahead Ideas
Chocolate Chip Cookie Bars are not only delicious but also convenient when it comes to storage and make-ahead options:
- Keep Fresh: Store in an airtight container at room temperature for up to a week.
- Freeze for Later: Wrap in plastic wrap and aluminum foil for freezing. They will last up to three months. Thaw at room temperature before serving.
- Make Ahead: Prepare the dough in advance and refrigerate it for up to three days before baking. This chilling time can also enhance the flavor by allowing it to fully develop.
Fun Facts & Trivia
The concept of cookie bars is thought to have gained popularity during war times when resources were scarce, and efficient baking was a necessity. This efficient method of preparing dessert was quickly embraced and has stood the test of time, much to our taste buds’ delight!
Chocolate chip cookie bars offer more than just convenience and flavor; they provide a connection to a simpler time, where resourcefulness was as essential as taste. Each bite is not only a taste of decadence but a nod to the past, a perfect blend of history and culinary artistry.
So next time you find yourself craving something sweet, why not dive into the world of Chocolate Chip Cookie Bars? It’s a culinary adventure you won’t soon forget!
Ingredients
- Cookie Base
- 2 1/4 cups all-purpose flour
→ All-purpose flour is the main structure builder for the cookie bars. It provides the necessary gluten, which helps the bars hold their shape and gives them a chewy texture. To ensure accurate measurement, spoon the flour into your measuring cup and level it off without packing it down. - 1 teaspoon baking soda
→ Baking soda acts as a leavening agent in the cookie bars, promoting rise and creating a light, airy texture. It should be mixed well with the dry ingredients to ensure even distribution, and always check the expiration date for optimal effectiveness. - 1/2 teaspoon salt
→ Salt is essential for enhancing the flavors of the cookie bars, balancing the sweetness of the sugar and chocolate. By incorporating it into the dry ingredients, you ensure an even distribution throughout the batter for enhanced flavor in every bite. - 3/4 cup unsalted butter (softened)
→ Softened unsalted butter provides richness and moisture to the cookie bars, helping to create a tender crumb. Be sure to leave it out at room temperature for about an hour before baking, or soften it in the microwave for 10-second intervals until just pliable, but not melted. - 1 cup packed brown sugar
→ Brown sugar contributes moisture, chewiness, and a rich, caramel-like flavor to the bars, thanks to its molasses content. Always pack it firmly into the measuring cup to ensure you get the right amount, which will help the bars stay soft and chewy. - 1/2 cup granulated sugar
→ Granulated sugar aids in creating a balance between sweetness and texture, promoting a slight crispness on the edges of the cookie bars. Combine it thoroughly with the brown sugar and butter to ensure proper incorporation and aeration for a fluffy base. - 2 large eggs (room temperature)
→ Eggs act as binders in the recipe, helping to combine the ingredients while also providing richness. Ensure they are at room temperature before mixing, as this helps achieve a smoother batter and improves the overall consistency of the finished product. - 2 teaspoons pure vanilla extract
→ Pure vanilla extract enhances the overall flavor profile of the cookie bars, adding a sweet and aromatic note. For the best results, use high-quality pure vanilla extract rather than imitation vanilla, which can lack depth and richness. - 1 1/2 cups semisweet chocolate chips
→ Chocolate chips provide bursts of gooey chocolate throughout the cookie bars, making them irresistible. Choose high-quality semisweet chocolate chips for a balanced sweetness, and add them to the batter gently to keep them intact for optimal melty goodness. - Optional Add-ins
- 1/2 cup chopped nuts (optional)
→ Chopped nuts, such as walnuts or pecans, add crunch and a complementary flavor texture to the soft cookie bars. Toast them lightly before chopping to enhance their flavor. Use even pieces for uniform distribution. - 1/2 cup shredded coconut (optional)
→ Shredded coconut contributes a chewy texture and subtle sweetness, beautifully complementing the chocolate. Use unsweetened coconut for a more balanced flavor, and consider toasting it lightly for a richer, nuttier taste.
Instructions
- Preheat your oven to 350°F (175°C) and line a 9×13 inch baking pan with parchment paper, leaving some overhang on the sides.
→ Preheating the oven ensures that your cookie bars bake evenly from the start. Lining the pan with parchment paper allows for easy removal of the bars once they are baked, preventing any sticking. - In a medium mixing bowl, whisk together 2 1/4 cups all-purpose flour, 1 teaspoon baking soda, and 1/2 teaspoon salt.
→ This step combines the dry ingredients, ensuring the baking soda and salt are evenly distributed throughout the flour. Whisking helps aerate the flour, preventing clumps, which is crucial for achieving a uniform texture in the baked bars. - In a large mixing bowl, cream together 3/4 cup softened unsalted butter, 1 cup packed brown sugar, and 1/2 cup granulated sugar using a hand mixer or stand mixer on medium speed until the mixture is light and fluffy.
→ Creaming the butter and sugars properly incorporates air into the mixture, which is essential for a light and fluffy cookie bar. Scrape down the sides of the bowl occasionally to ensure all ingredients are well mixed and nothing is left unmixed at the bottom. - Add 2 large room temperature eggs, one at a time, mixing well after each addition. Then add 2 teaspoons of pure vanilla extract and continue to blend until well incorporated.
→ Mixing the eggs in one at a time allows for thorough emulsification, which provides stability to the batter. Room temperature eggs mix more smoothly with the butter and sugar, ensuring a creamy texture. The vanilla extract enhances the flavor, so mix until it’s fully integrated. - Gradually add the flour mixture to the wet ingredients, mixing on low speed until just combined but still slightly streaky.
→ This technique helps to prevent overmixing, which could lead to tough cookie bars. Mixing until just combined ensures the structure remains tender by not overdeveloping the gluten in the flour. - Gently fold in 1 1/2 cups semisweet chocolate chips (and any optional add-ins like 1/2 cup chopped nuts or 1/2 cup shredded coconut, if using) using a spatula or wooden spoon until evenly distributed throughout the batter.
→ Folding keeps the batter light and fluffy while ensuring the chocolate chips and any add-ins are evenly spread throughout. Be careful not to overmix, as this could deflate the batter. - Pour the batter into the prepared baking pan and spread it evenly into the corners using a spatula.
→ Spreading the batter evenly helps ensure uniform baking, which will lead to consistent texture and doneness throughout the cookie bars. A spatula helps create a smooth surface. - Bake in the preheated oven for 25-30 minutes, or until the edges are golden brown and a toothpick inserted into the center comes out with a few moist crumbs.
→ Checking the doneness with a toothpick ensures you don’t overbake the bars, which could make them dry. The bars continue to cook slightly as they cool, so pulling them out when they are still slightly underdone allows for the ideal fudgy texture. - Remove the baking pan from the oven and allow the cookie bars to cool in the pan for about 15 minutes before lifting them out using the parchment overhang.
→ Allowing the bars to cool in the pan helps set their structure. Using the parchment to lift them out prevents breaking and makes it easier to cut them into squares. Cooling fully on a wire rack is recommended for best results. - Once fully cool, cut into squares or bars using a sharp knife.
→ A sharp knife ensures clean cuts without tearing the cookie bars. For even squares, you can score the bars with your knife in a grid pattern before cutting all the way through. - Serve and enjoy your delicious chocolate chip cookie bars, optionally drizzling melted chocolate on top for added decoration.
→ Adding a drizzle of melted chocolate can enhance visual appeal and intensify the chocolate flavor, making your bars even more irresistible.
Notes
These chocolate chip cookie bars are the perfect mix of chewy and gooey, making them an irresistible treat for any occasion. The combination of brown sugar and granulated sugar creates a nice balance of texture and sweetness, ensuring the bars are soft in the middle with a slight crispness on the edges. For best results, make sure to use room temperature eggs and softened butter, as this will help to create a perfectly smooth batter.
Feel free to customize your cookie bars further by adding in your favorite nuts or shredded coconut. Toasting nuts beforehand will enhance their flavor, while unsweetened shredded coconut can add a lovely chewiness without adding extra sweetness. If you’re feeling adventurous, you could also experiment with other types of chocolate chips, like dark or white chocolate, to cater to your taste.
These bars are also great for meal prepping; they can be stored in an airtight container for up to a week or frozen for longer storage. Just cut them into squares, and you have a delightful snack or dessert ready to go! Serve these cookie bars as-is, or for an indulgent treat, enjoy them warm with a scoop of ice cream or a drizzle of your favorite sauce.
Remember to allow the bars to cool completely before slicing to ensure clean cuts and prevent them from falling apart. Use a sharp knife for the best results. Enjoy your baking!
Tips
- Measuring Ingredients: Always use spoons and cups specifically designed for dry or liquid measurements to ensure accuracy. For flour, spoon it into the measuring cup and level it off with a knife for the best results.
- Mixing the Batter: Mix the wet ingredients together on low speed to avoid overmixing, which can lead to tougher cookie bars. Once the flour is added, mix just until you no longer see dry flour to maintain a tender texture.
- Egg Temperature: For best results, use eggs that have been at room temperature. If you forget to take them out ahead of time, you can place them in a bowl of warm water for about 10 minutes to quickly warm them.
- Chilling the Dough: If you find that the dough is too sticky, consider chilling it in the refrigerator for 30 minutes before spreading it into your pan. This can help with shaping and reduce spreading while baking.
- Baking Pan Liners: Line your baking pan with parchment paper, allowing some to hang over the edges. This makes it easier to lift the cookie bars out and cut them evenly once they are cooled.
- Baking Time: Keep a close eye on your cookie bars as they bake. The edges should look set and lightly golden while the center may still look slightly underbaked. They will continue to firm up as they cool.
- Cooling the Bars: Allow the cookie bars to cool completely in the pan before cutting. Using a sharp knife or a pizza cutter can help create clean cuts without disturbing the bars too much.
- Storing Leftovers: Store any leftover cookie bars in an airtight container at room temperature for up to a week. For longer storage, you can freeze them by wrapping individual bars in plastic wrap and then placing them in a freezer bag.
- Customization: Feel free to experiment with add-ins such as toffee bits, peanut butter chips, or different types of nuts to create variations of the classic chocolate chip cookie bars!
FAQ
What ingredients do I need to make chocolate chip cookie bars?
To make chocolate chip cookie bars, you will need the following ingredients: all-purpose flour, baking soda, salt, unsalted butter, granulated sugar, brown sugar, vanilla extract, eggs, and chocolate chips.
Can I use a different type of chocolate in the recipe?
Yes, you can use different types of chocolate chips such as dark chocolate, milk chocolate, or white chocolate. You can also mix different types for added flavor.
How long do I need to bake the cookie bars?
The baking time for chocolate chip cookie bars typically ranges from 25 to 30 minutes. It’s best to check for a golden-brown color around the edges and a slight softness in the center.
Should I chill the dough before baking?
Chilling the dough is optional, but it can help improve the flavor and texture of the cookie bars. If you have time, consider chilling for at least 30 minutes before baking.
Can I add nuts or other ingredients to the bars?
Yes, you can add chopped nuts, such as walnuts or pecans, or even other mix-ins like dried fruit or oats to customize your chocolate chip cookie bars.
How should I store leftover cookie bars?
Store leftover chocolate chip cookie bars in an airtight container at room temperature for up to one week. You can also freeze them for longer storage; just make sure to wrap them well.
Can I double the recipe to make more cookie bars?
Yes, you can double the recipe. Just ensure you use a larger baking dish and adjust the baking time as needed, checking for doneness as you near the original baking time.
How can I tell when the cookie bars are fully baked?
The cookie bars are done when the edges are golden brown and a toothpick inserted into the center comes out with a few moist crumbs. They may look slightly underbaked in the center, but they will continue to cook as they cool.